
Tutorial on Creating and Using Voice Live Streaming
I. Function Introduction
Voice live streaming is a type of live streaming that allows for the real-time transmission of a large amount of voice, text, and images, as well as the display of PPT courseware.
II. Purpose of Use
Merchants can use voice for live lectures.
III. Use Scenarios
Suitable for live streaming types that do not require a camera or real-time video interaction.
IV. Operation Path
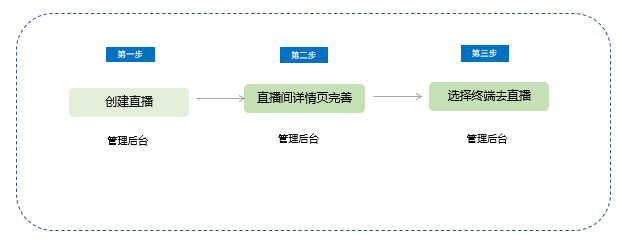
Merchant side:Create a live stream → Complete the details page of the live streaming room → Select a terminal to start the live stream
V. Usage Tutorial
Step 1: Create a voice live stream
1. Log in to the elink management console, and sequentially select [Live Streaming] - [New Live Stream]. On the live stream creation page, select the [Voice Live Streaming] type.
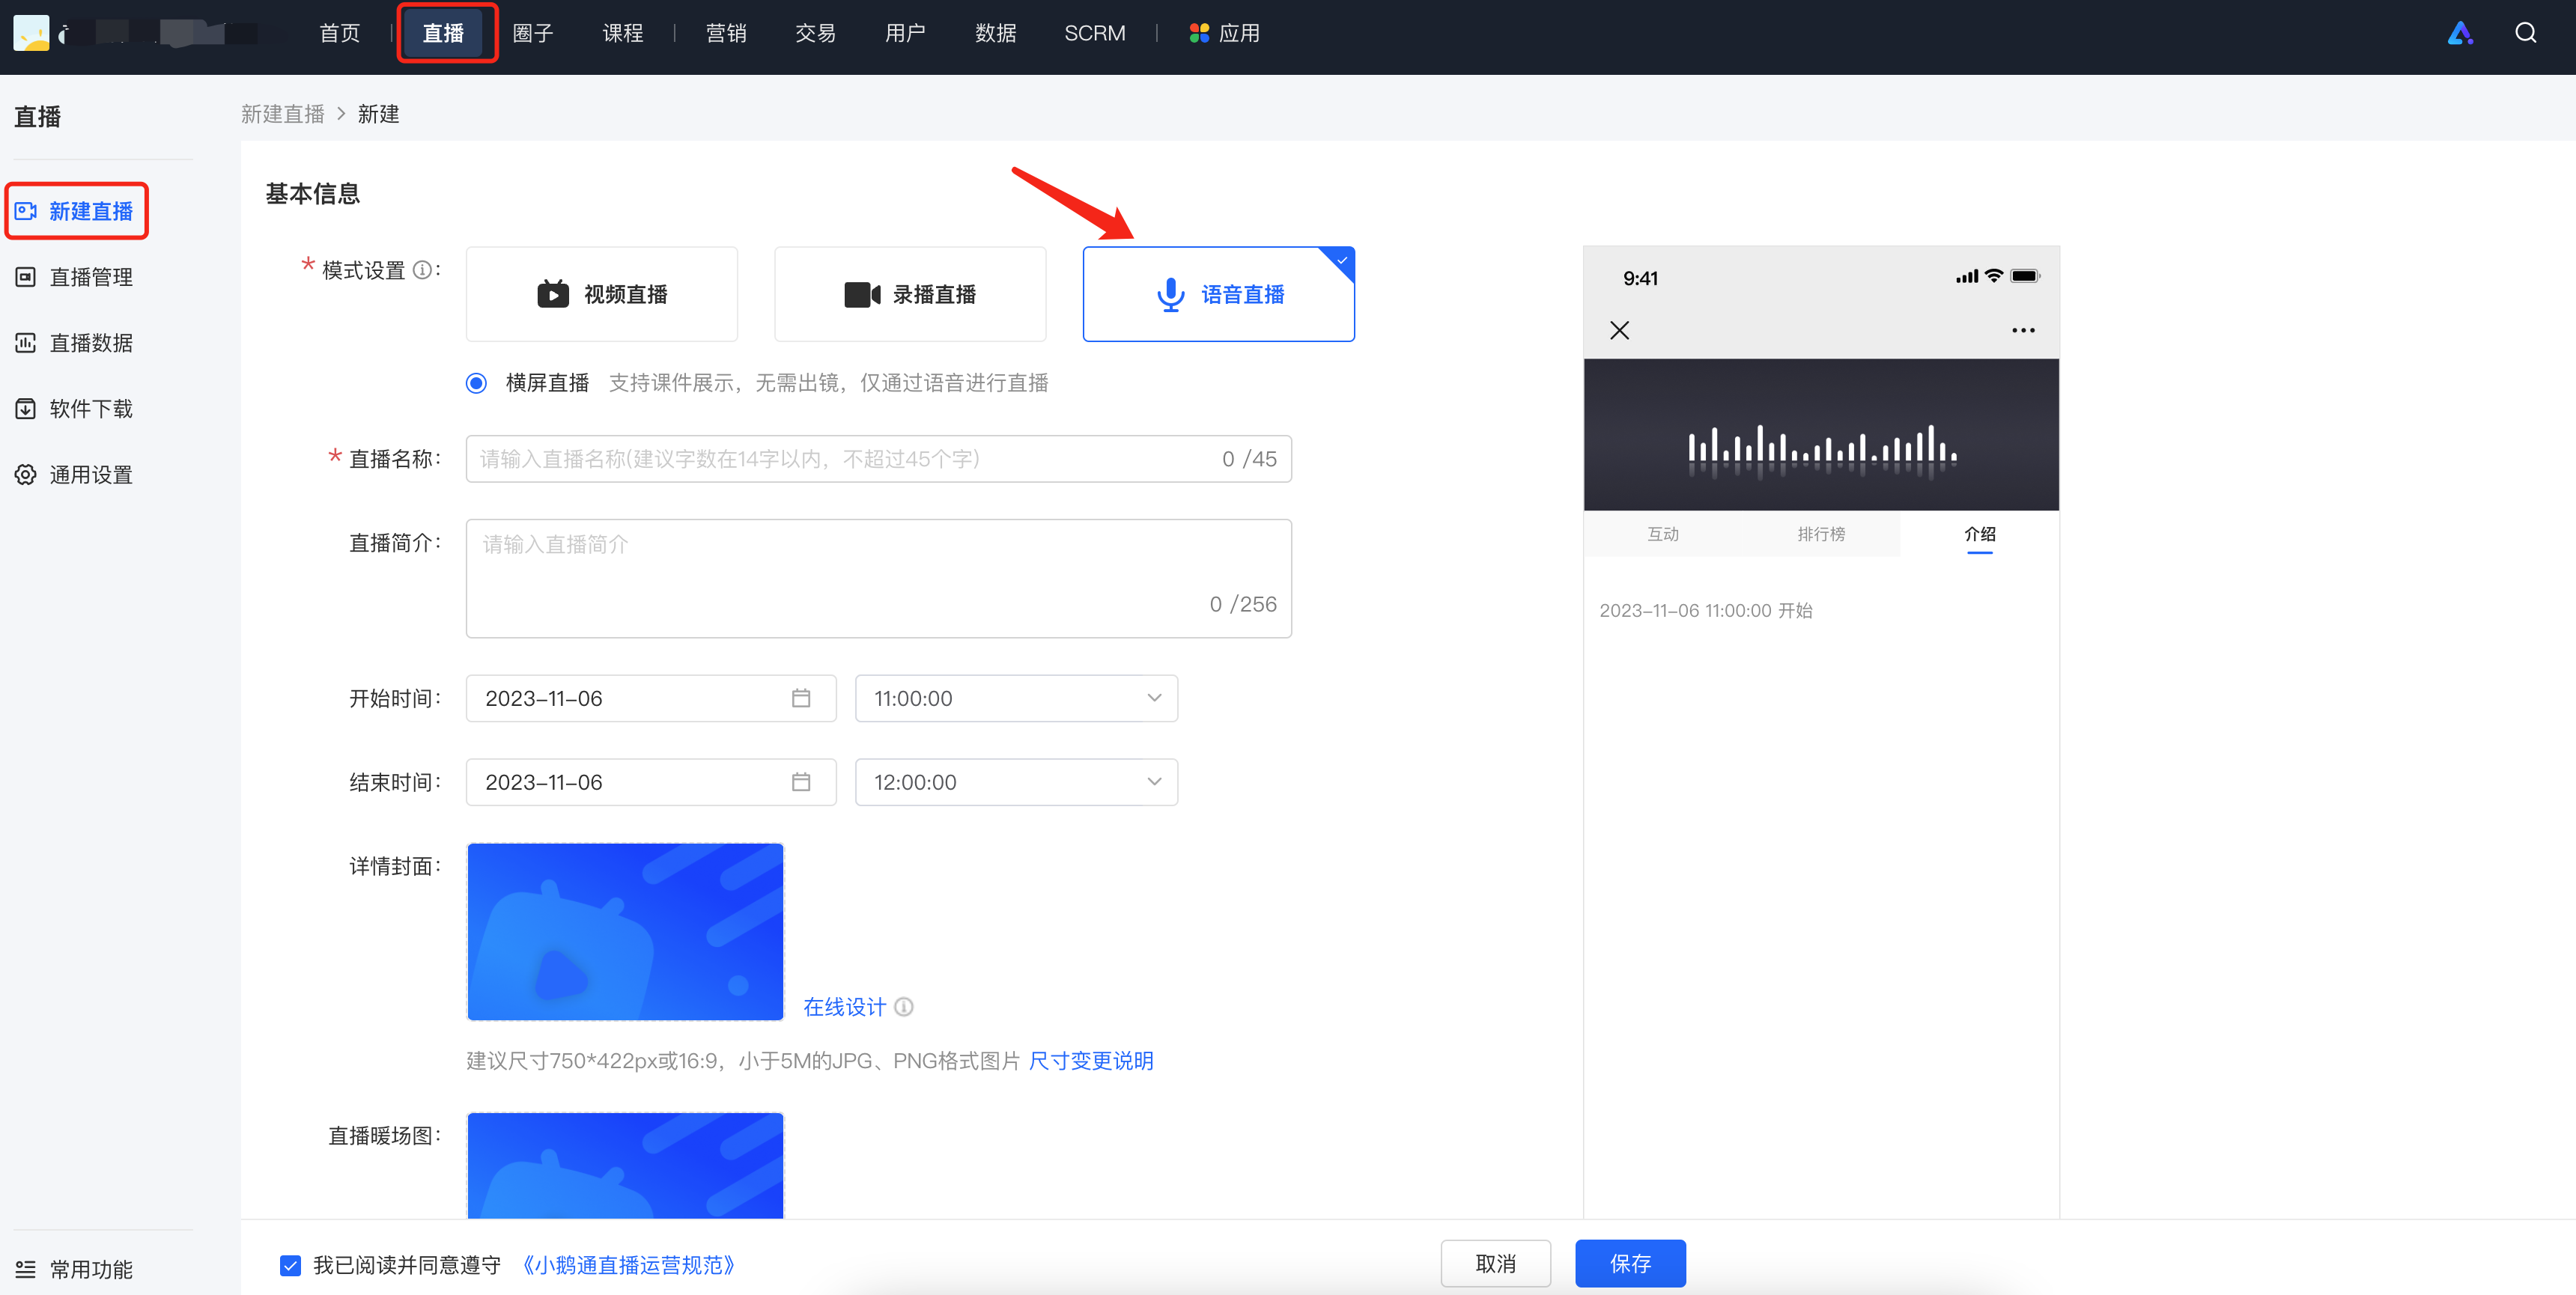
2. On the new live stream creation page, fill in the relevant information.
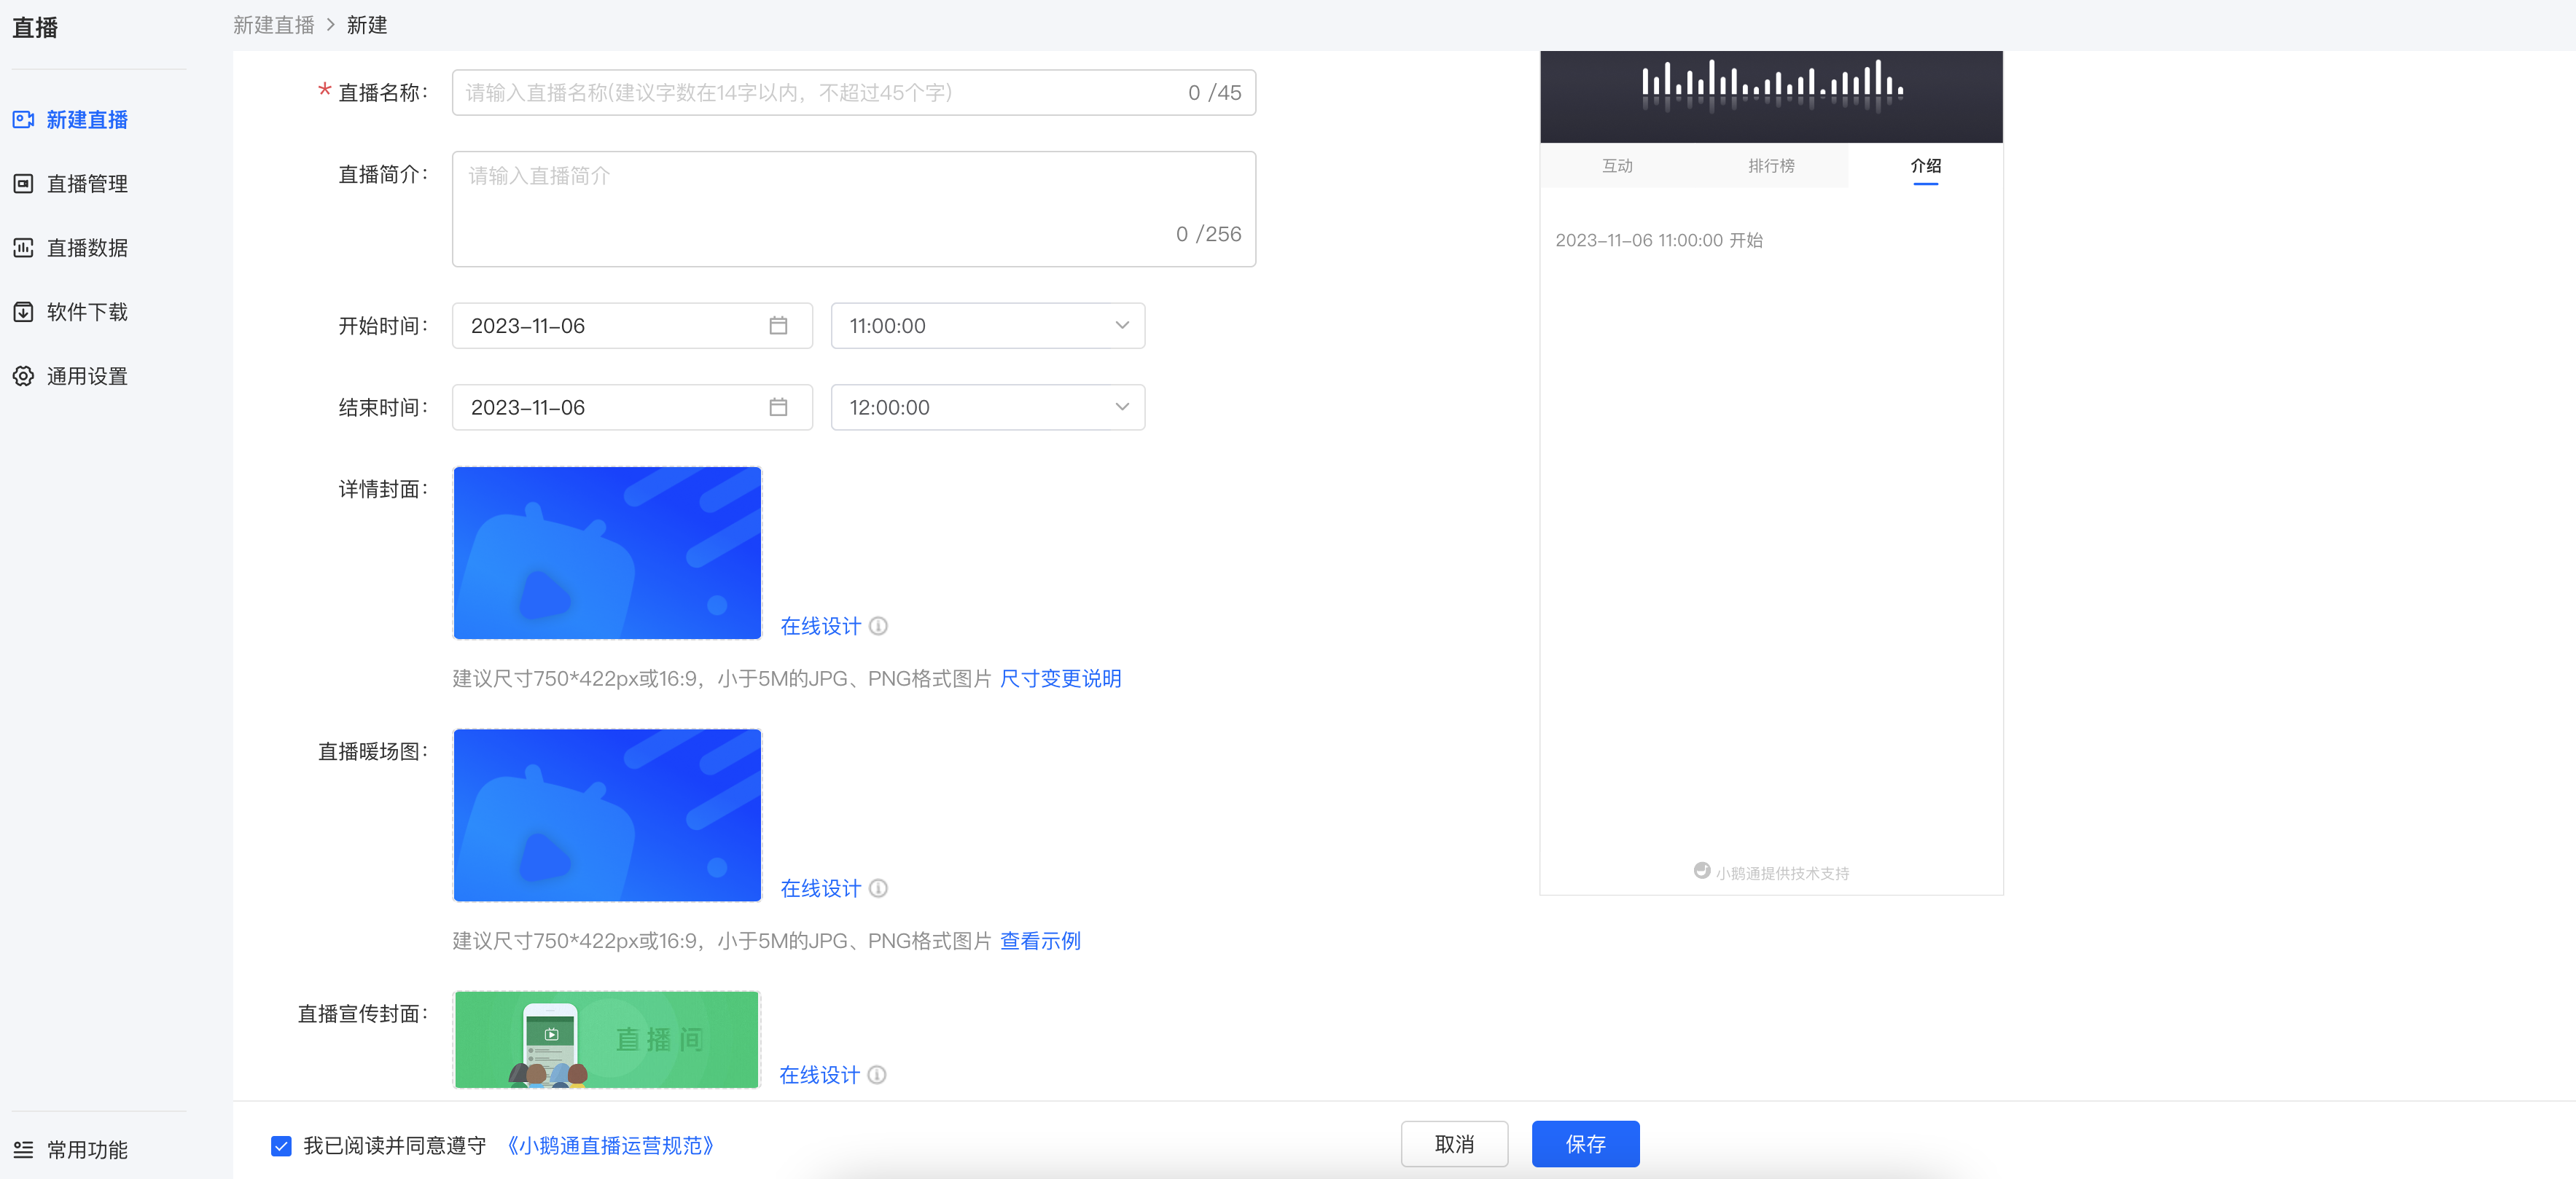
(1) Basic information:Live stream name, live stream description, live stream time, detailed cover image, pre - live warm - up image, live stream promotion cover image, live stream details, instructor settings
[Detailed cover image]It is the image displayed when users purchase the live stream course;
[Pre - live warm - up image]It is the image displayed in the video area before the live stream starts;
[Live stream promotion cover image]It is the entrance to the live stream on the home page of the online store;
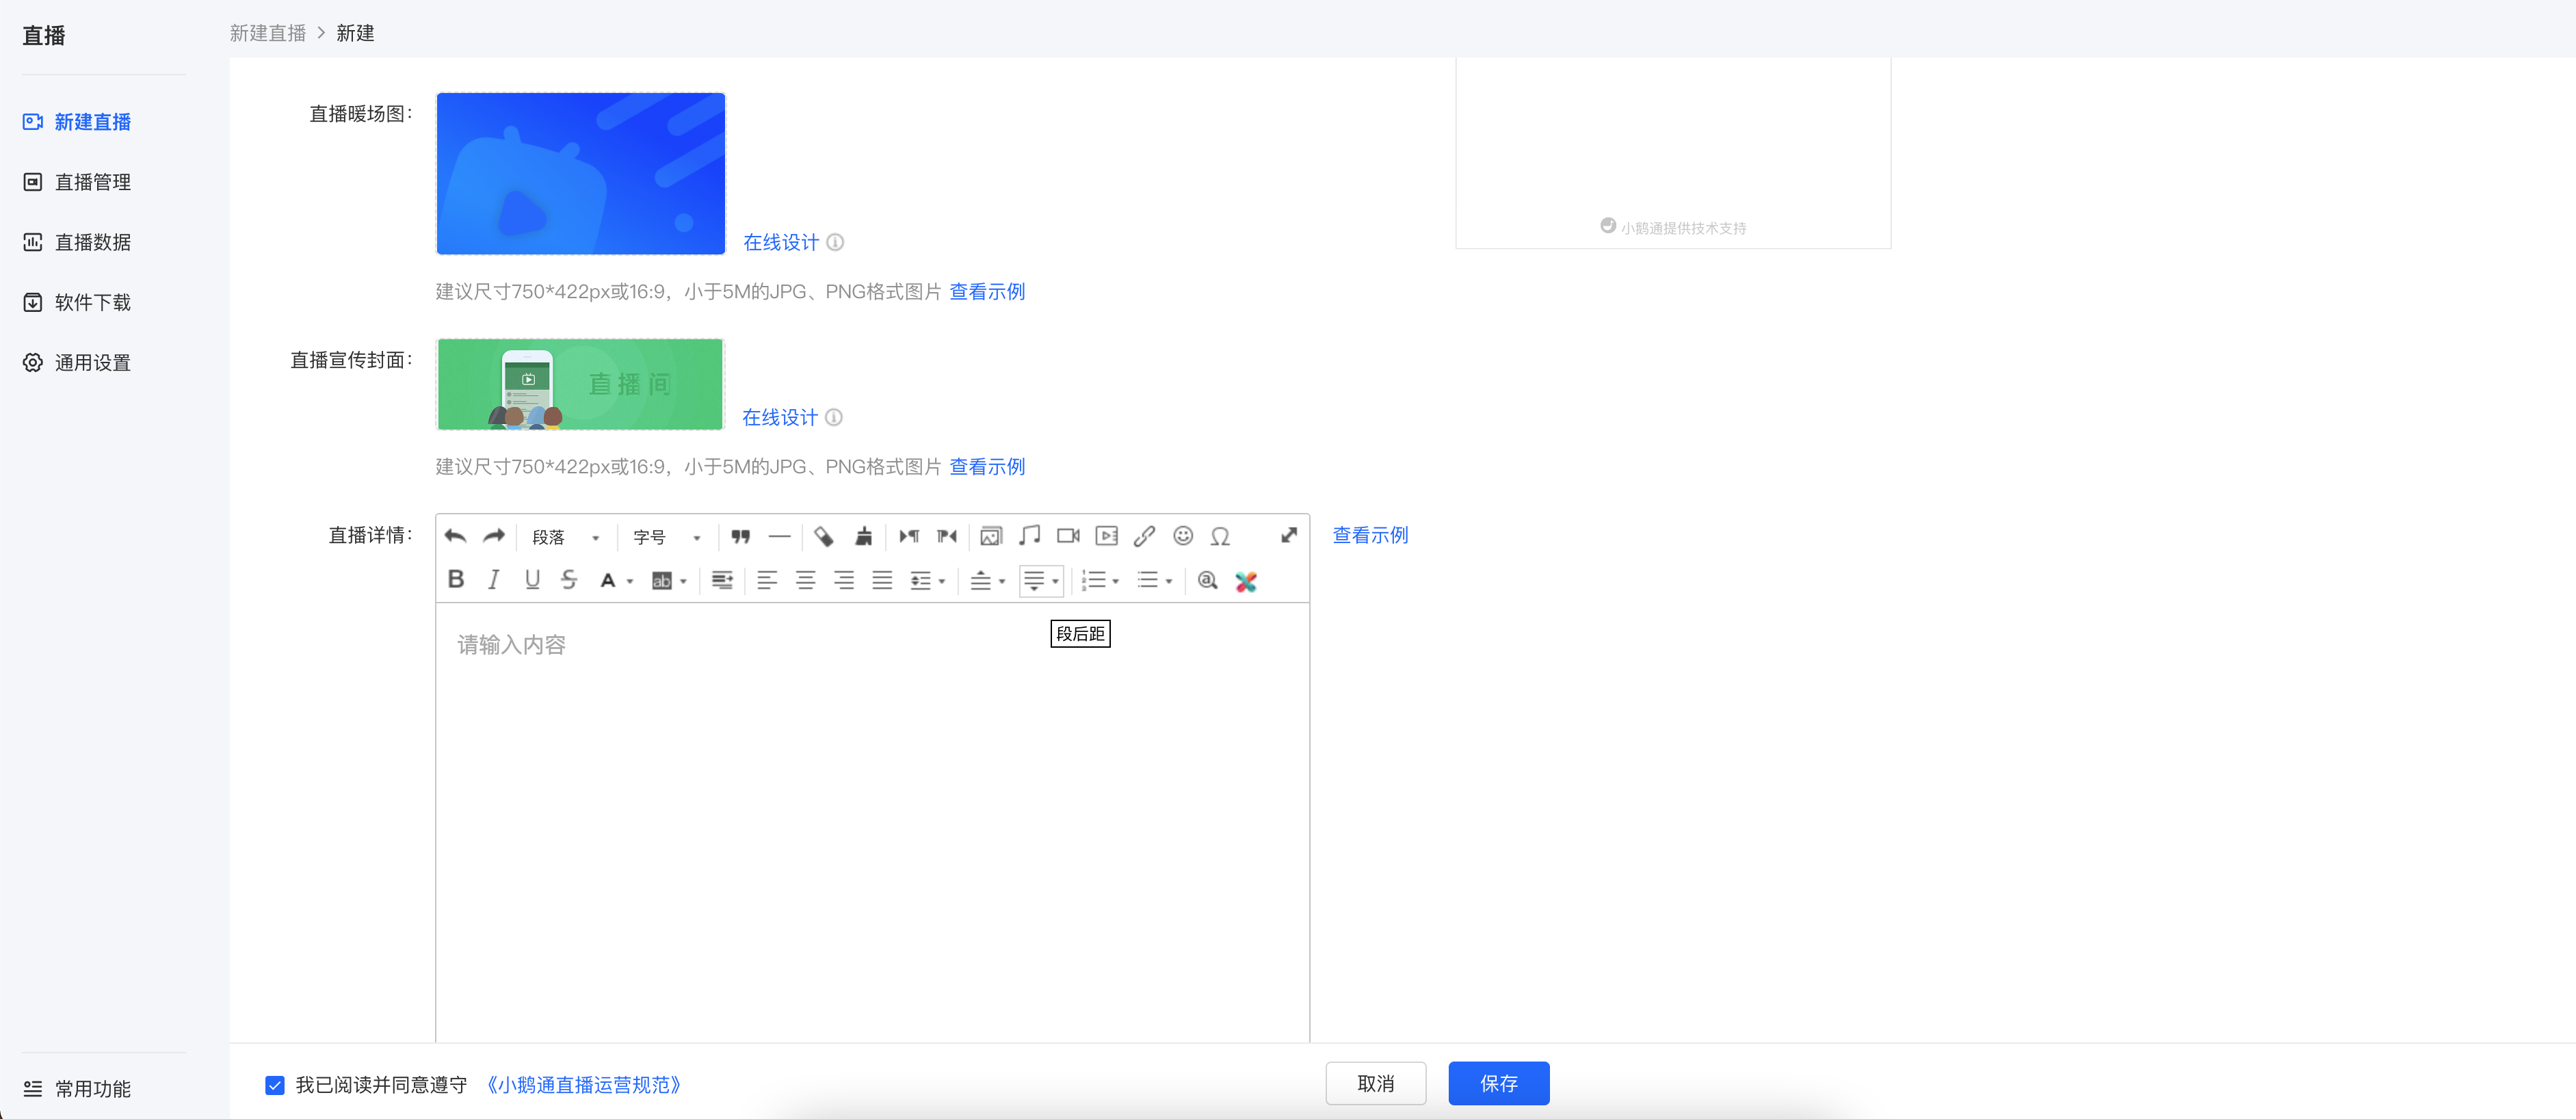
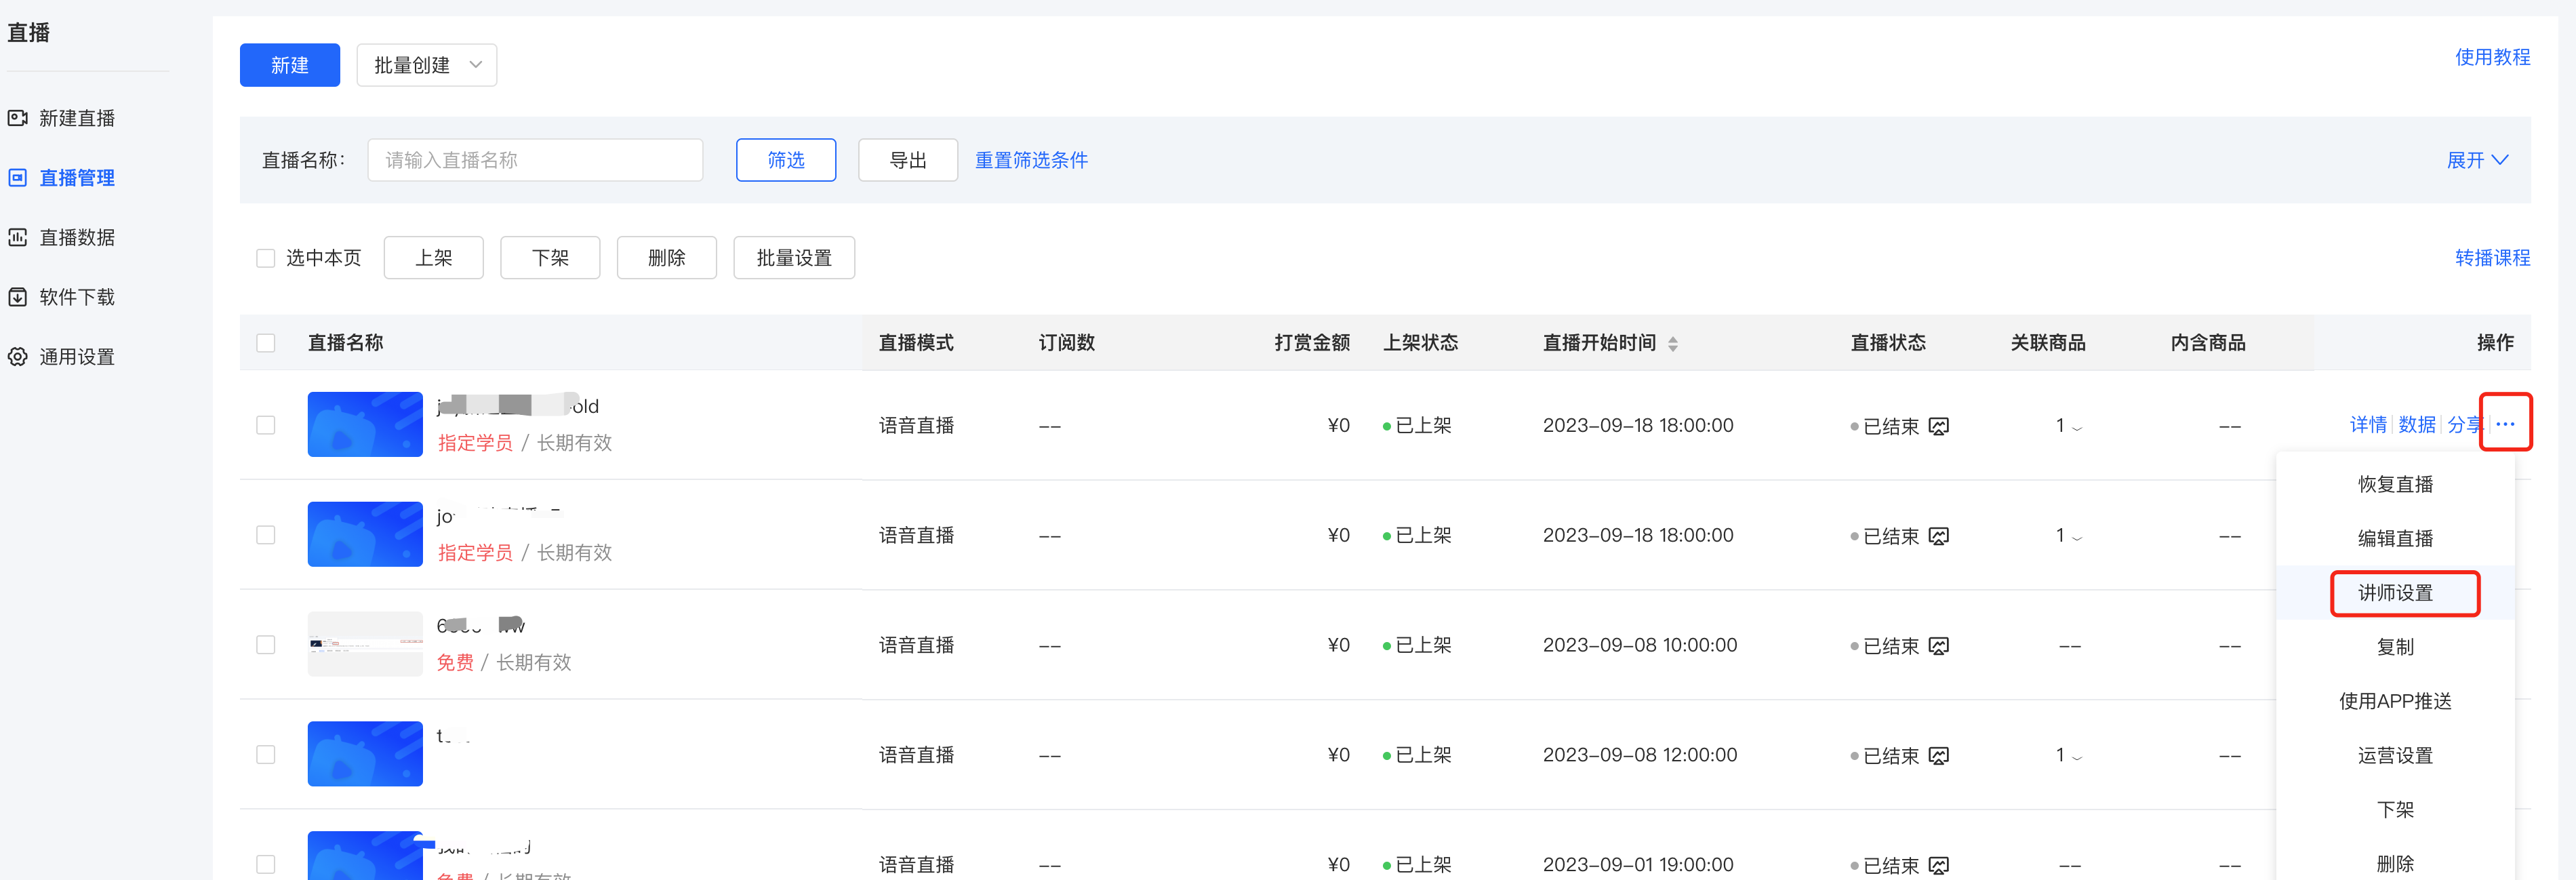
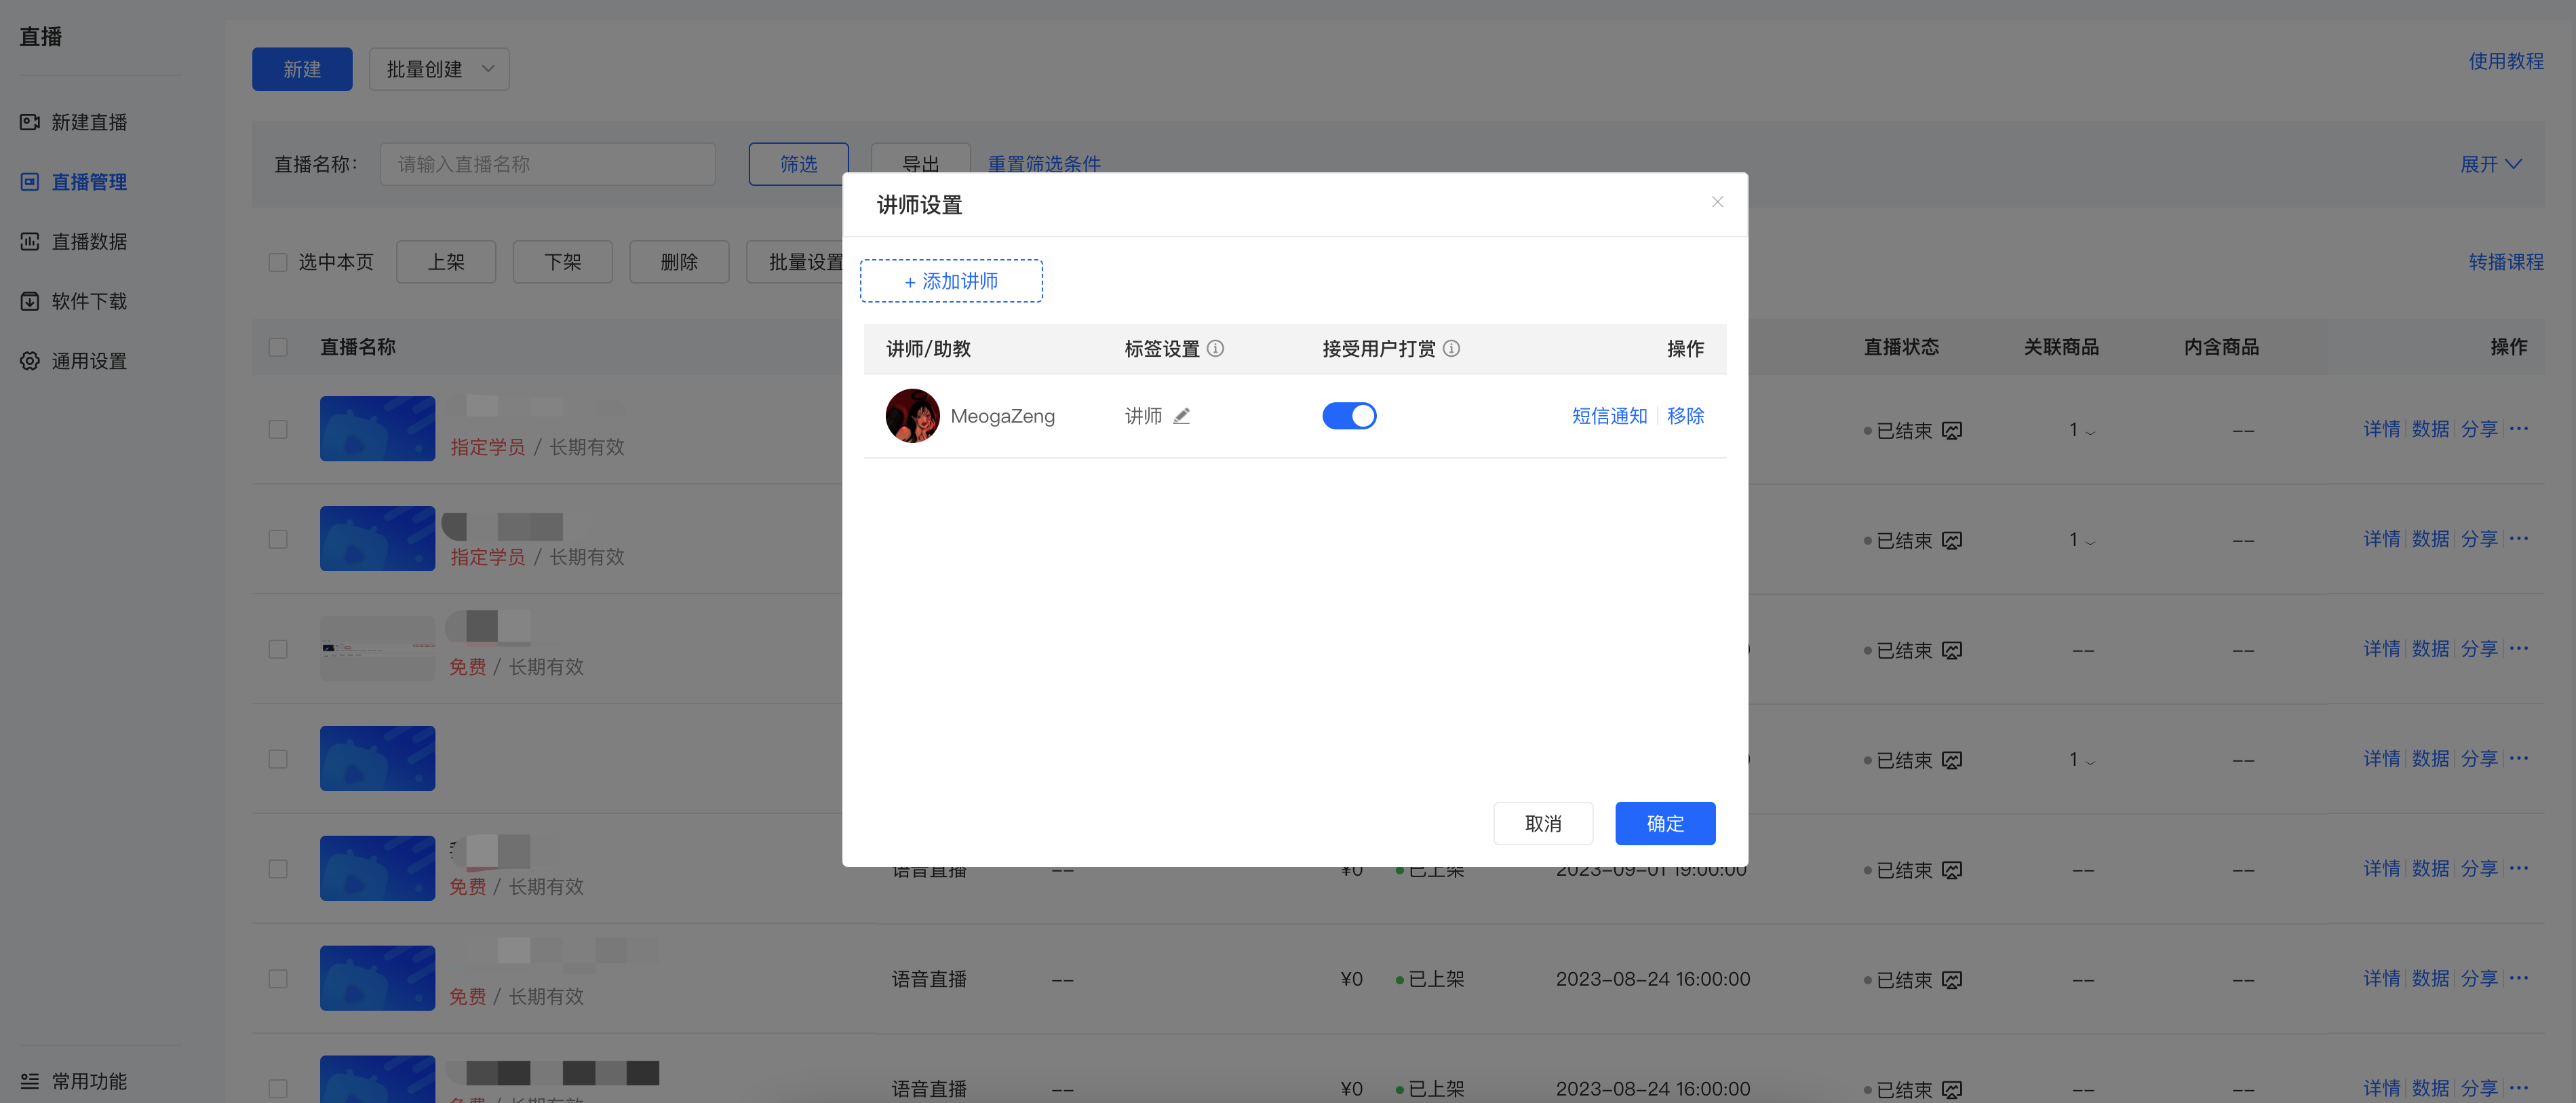
[Instructor settings]You can click to add an instructor.
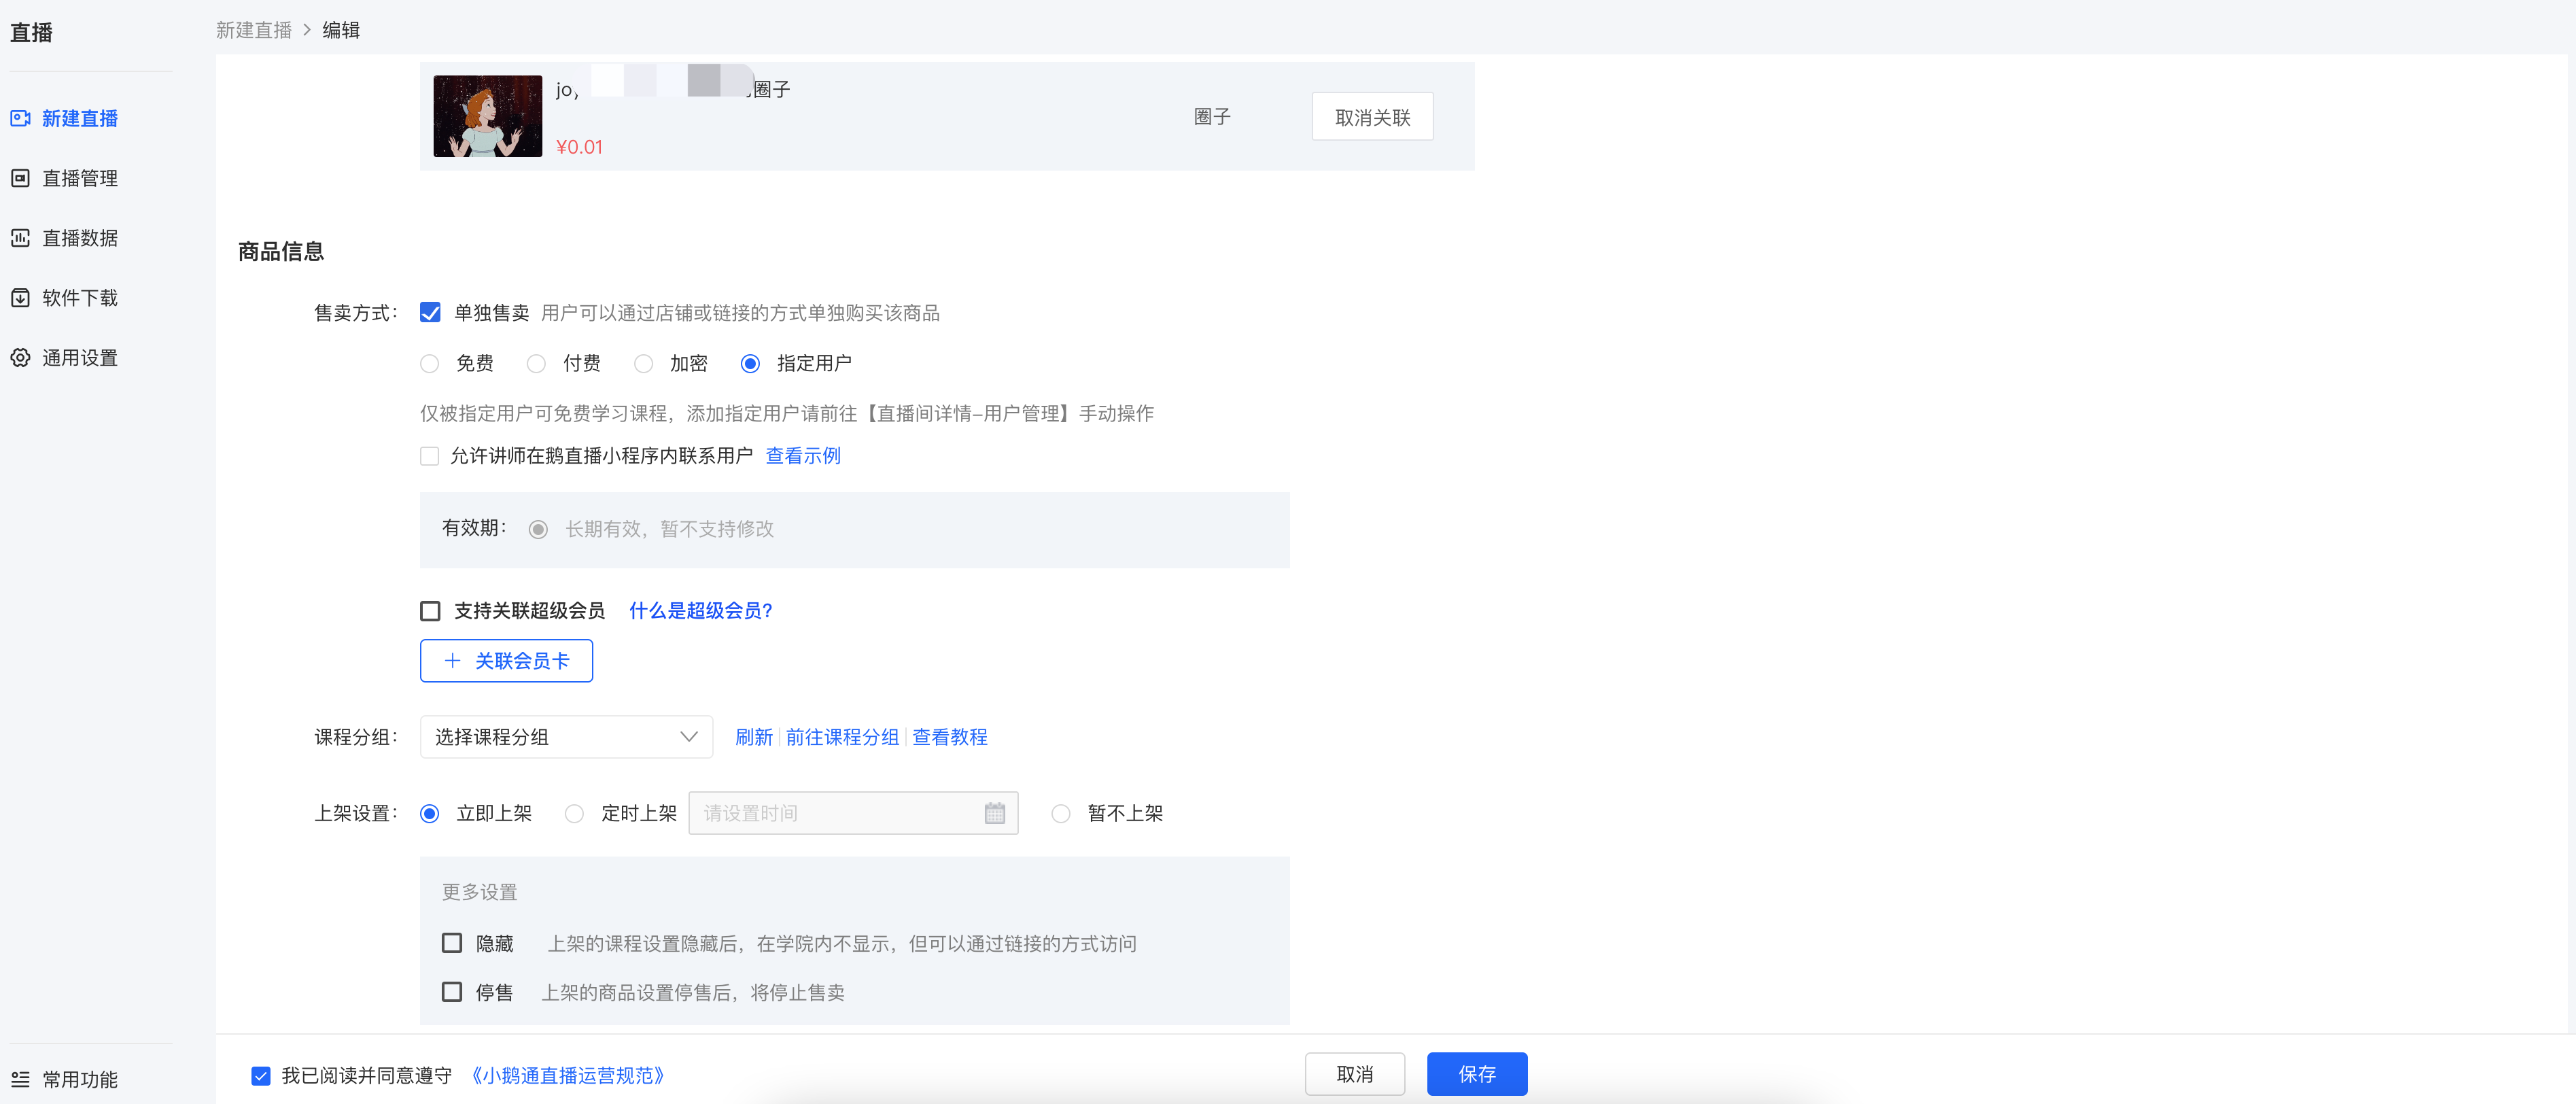
(3) Product information:Sales method, product grouping (There is no sales method setting after selecting the internal training mode)
(4) Listing settings:List immediately, list at a scheduled time, or do not list for the time being; in addition, you can also hide or stop selling the product.
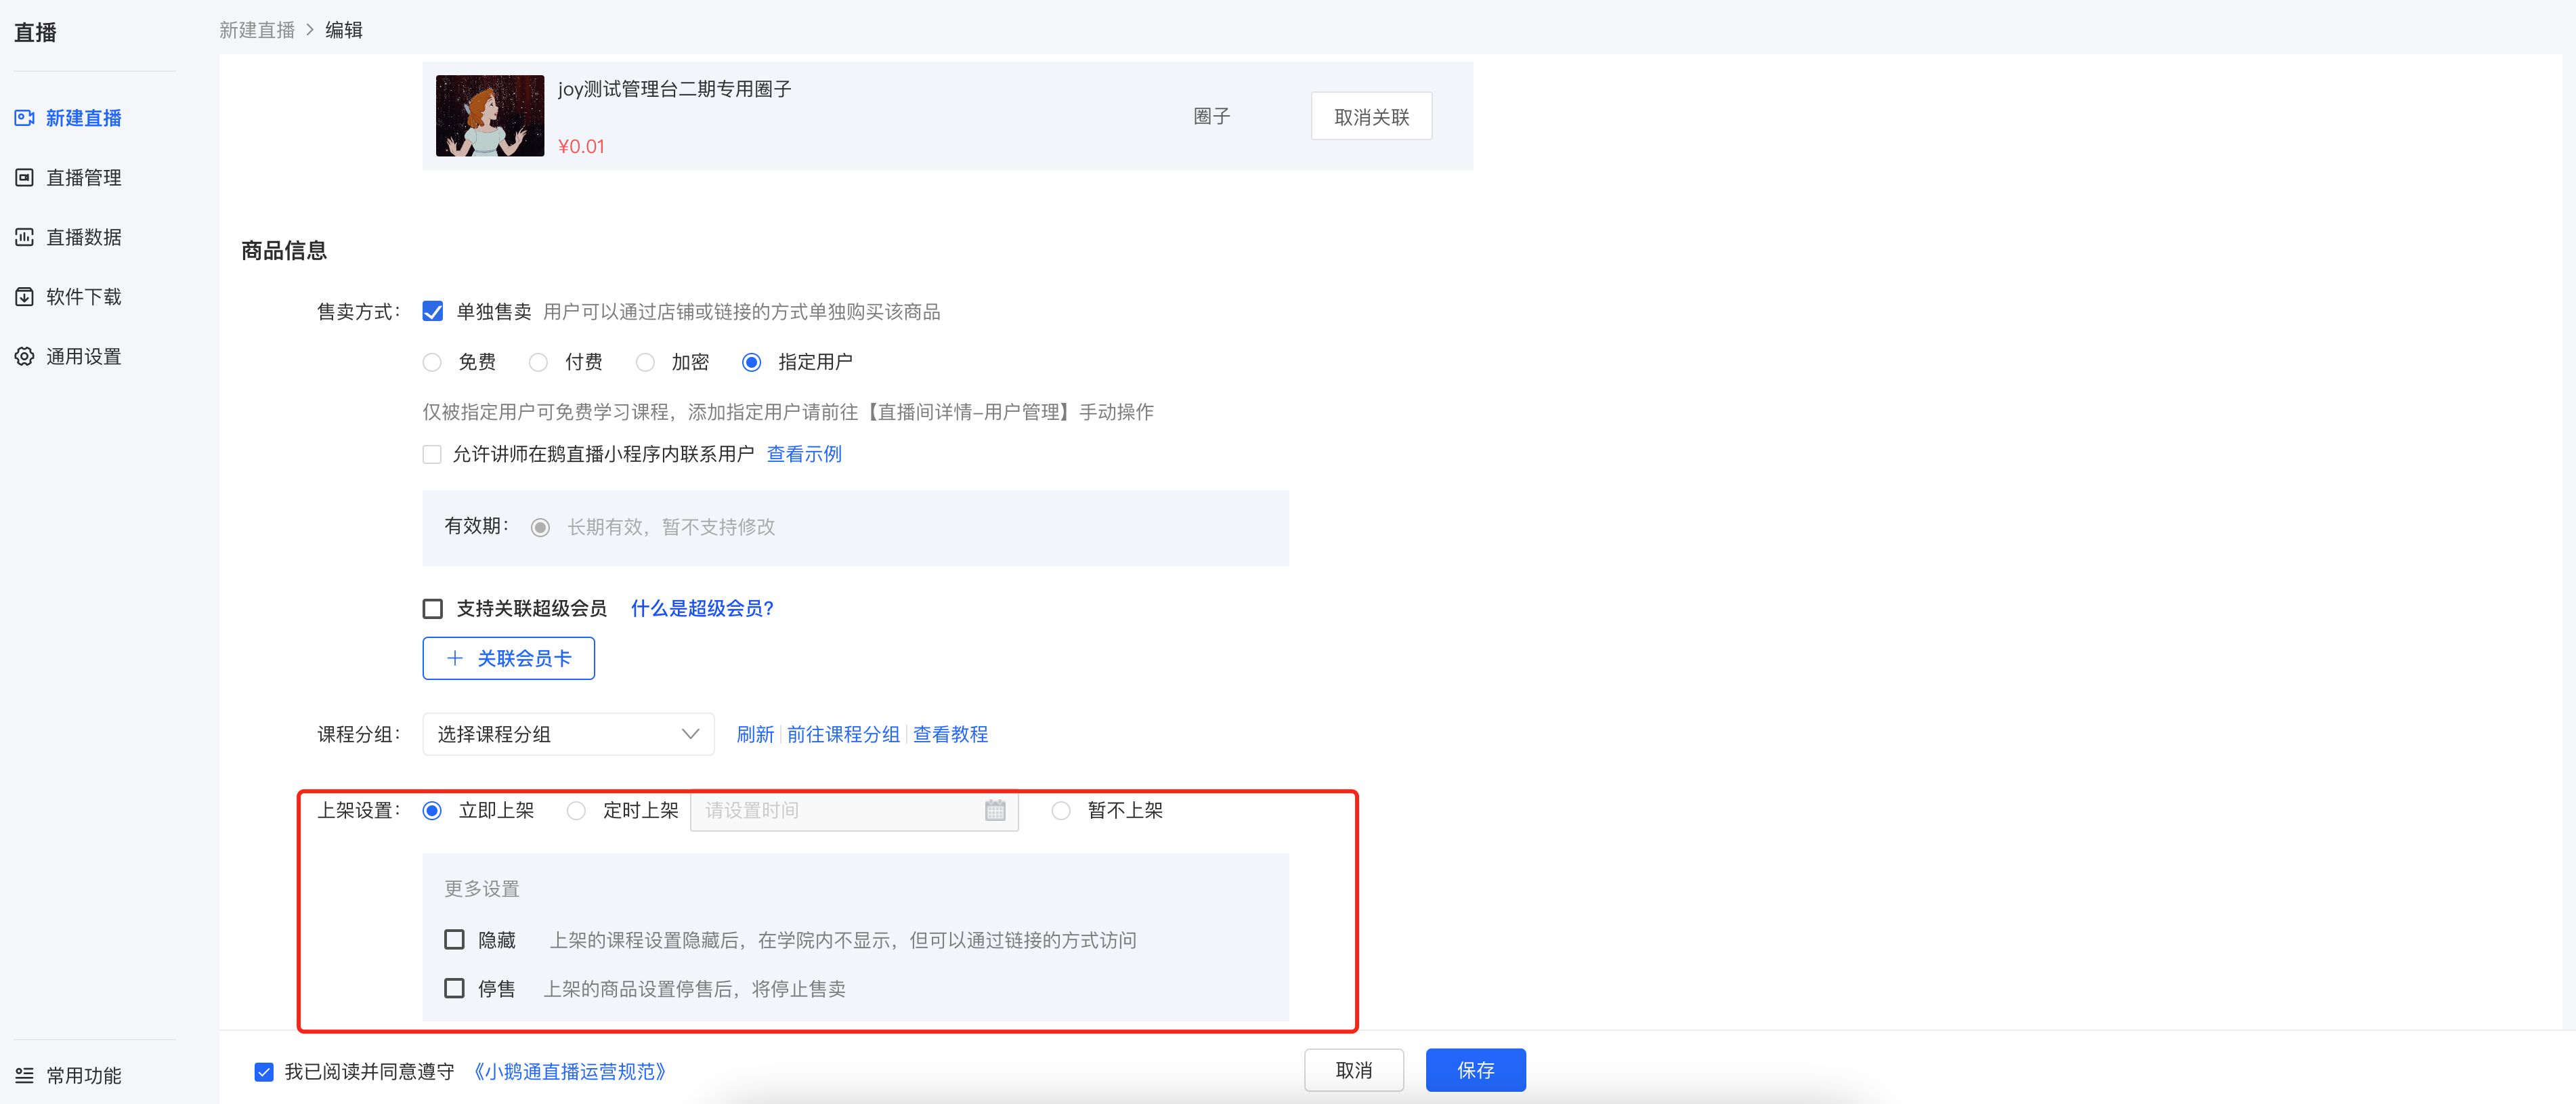
After clicking Save, you can click [More Settings] to set up live stream interaction, traffic diversion, etc.
Step 2: Complete the details page of the live streaming room
1. Live stream start settings:Live stream start method, instructor settings
(1) Instructor settings:There are 3 ways to add instructors or teaching assistants
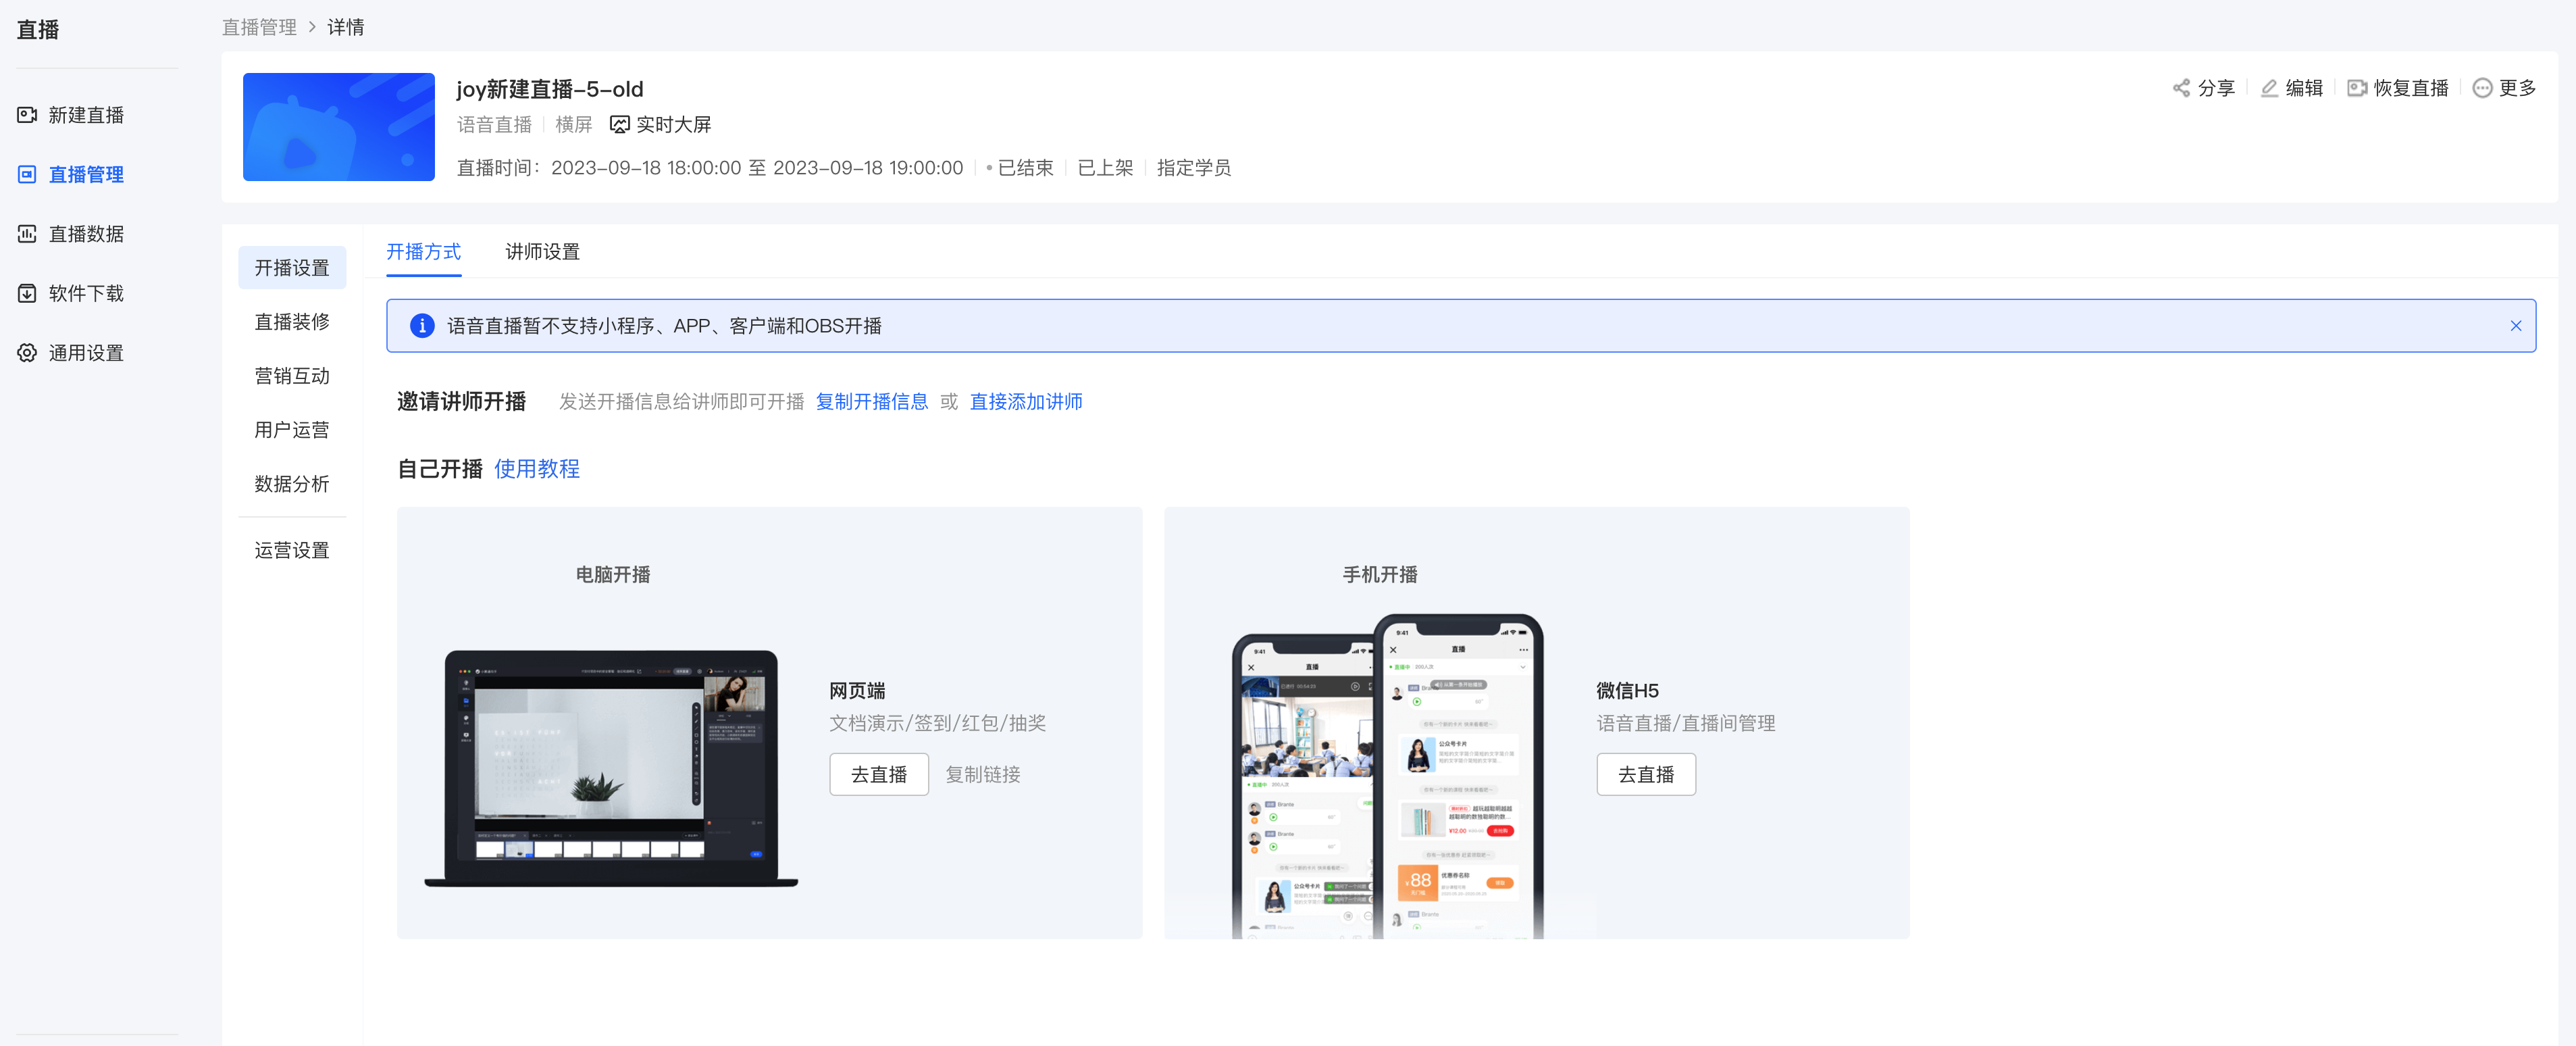
● Method 1:Search for users who have visited the store through the search box and select them to become instructors
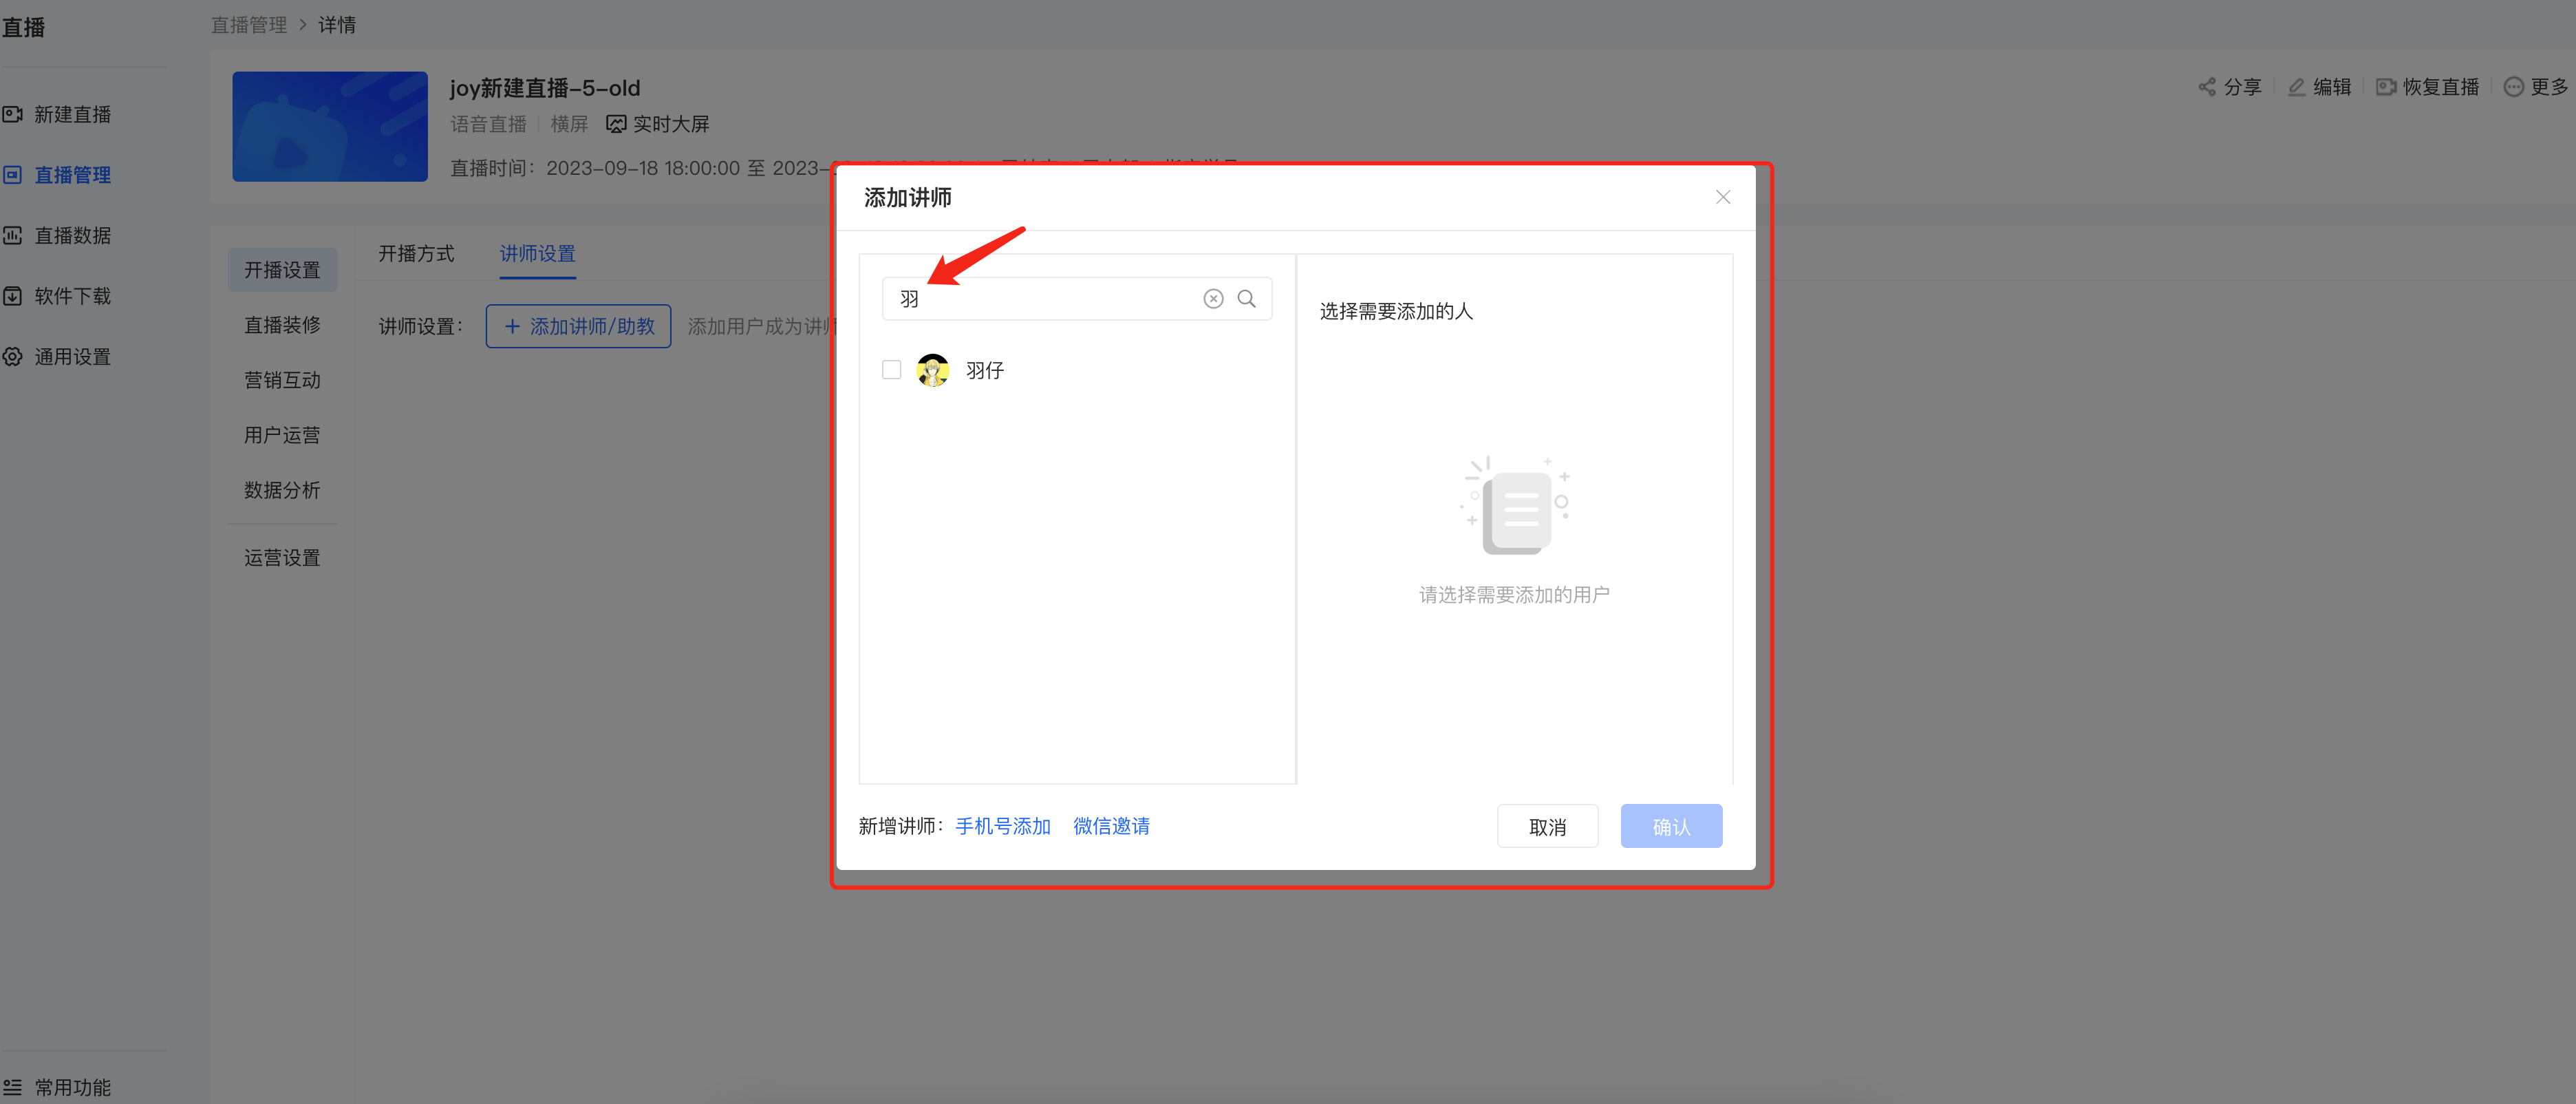
●Method 2:Invite friends to become instructors via WeChat QR code
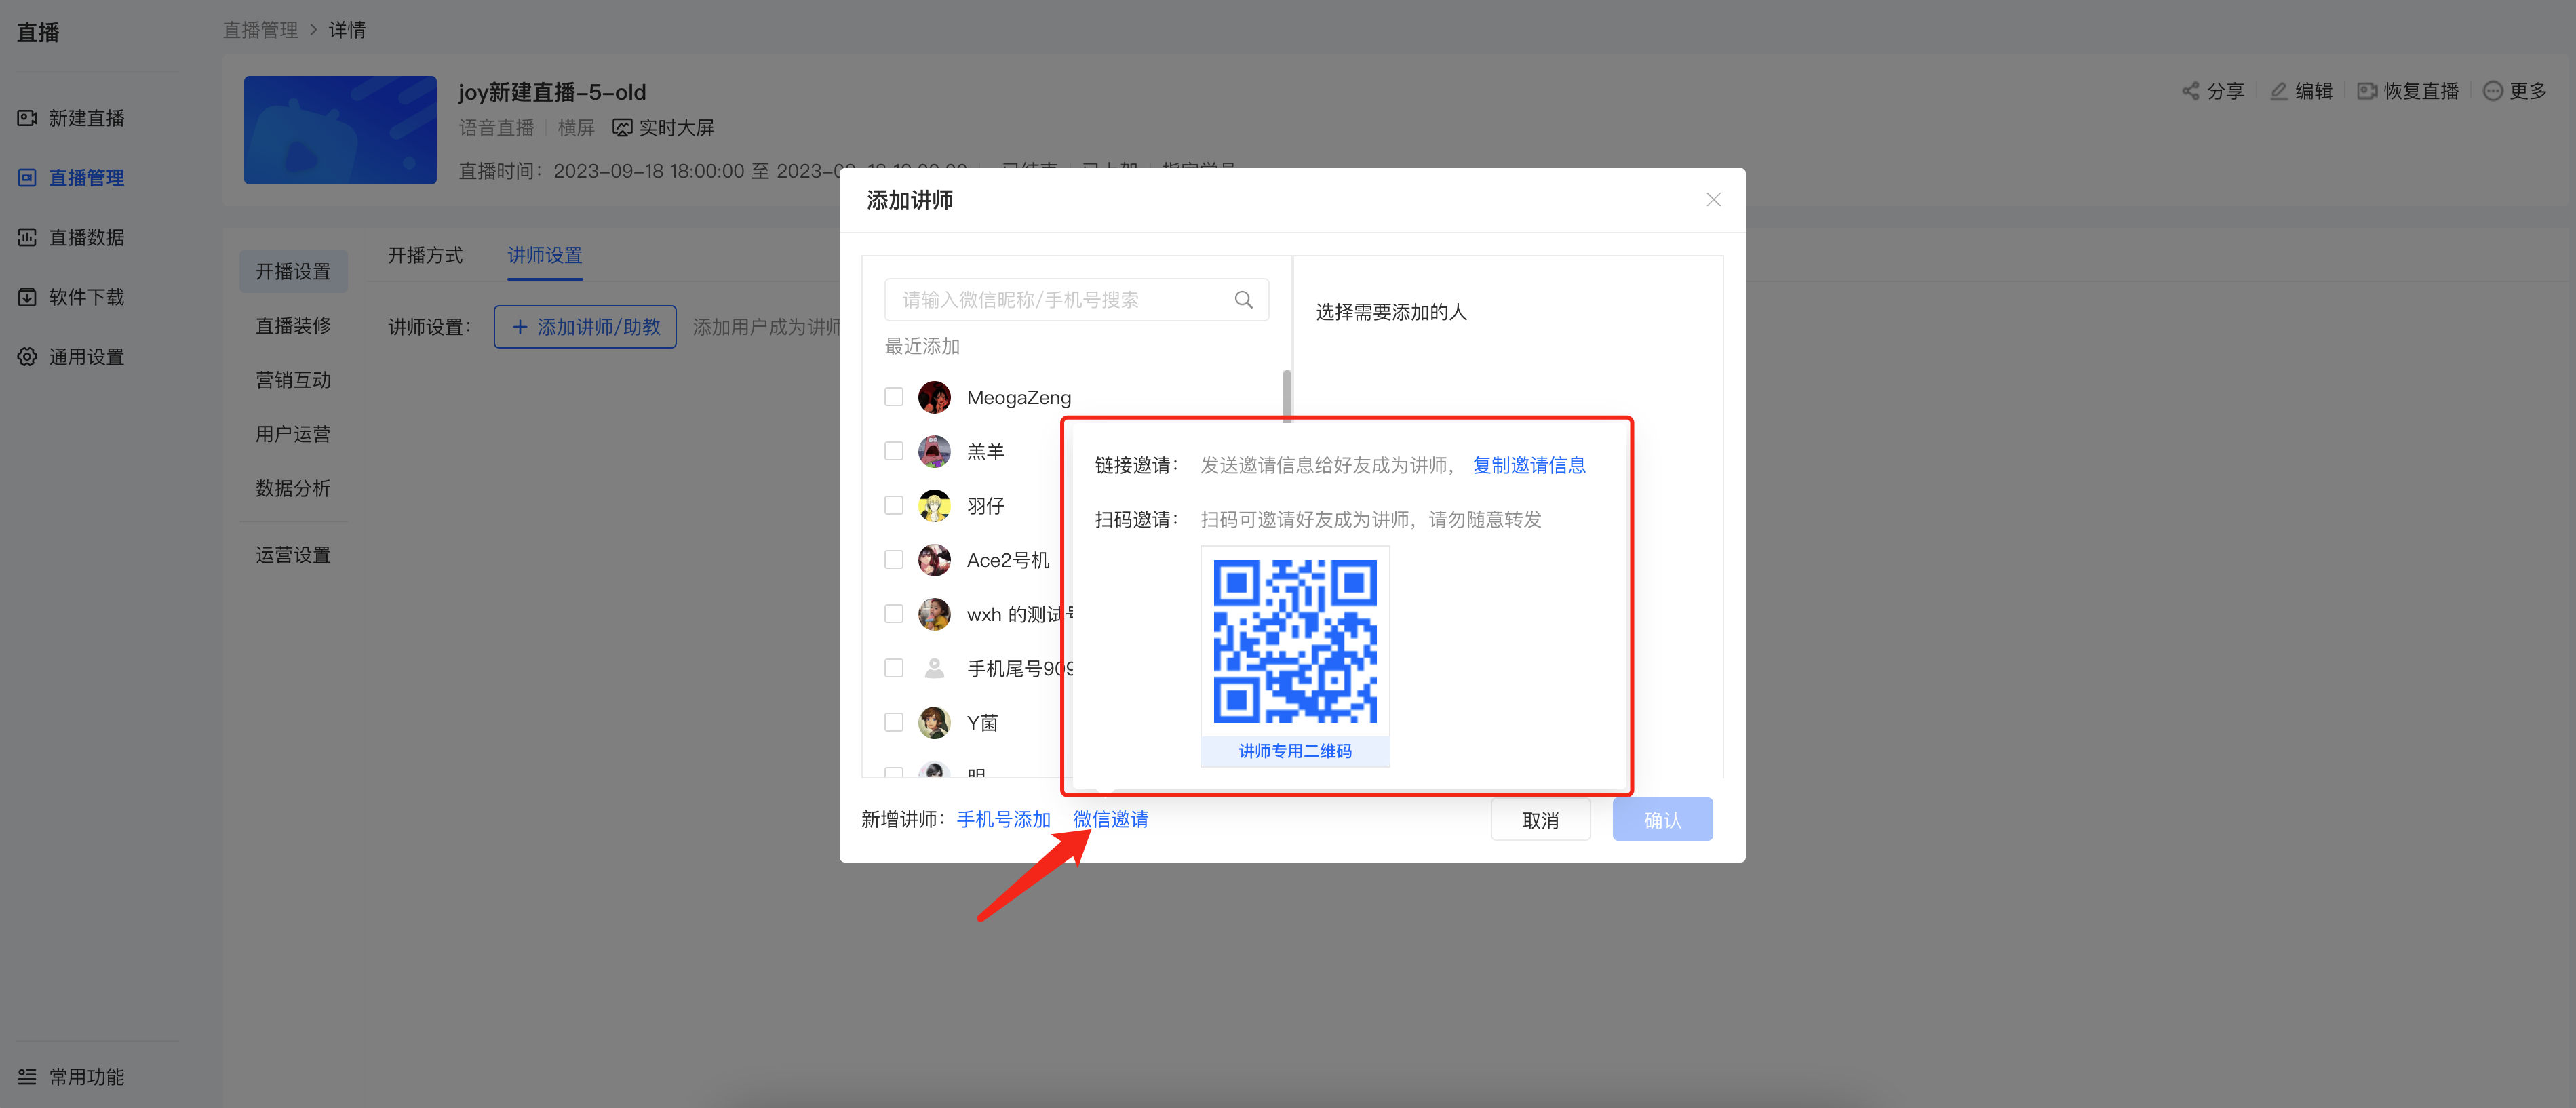
● Method 3:Add by mobile phone number
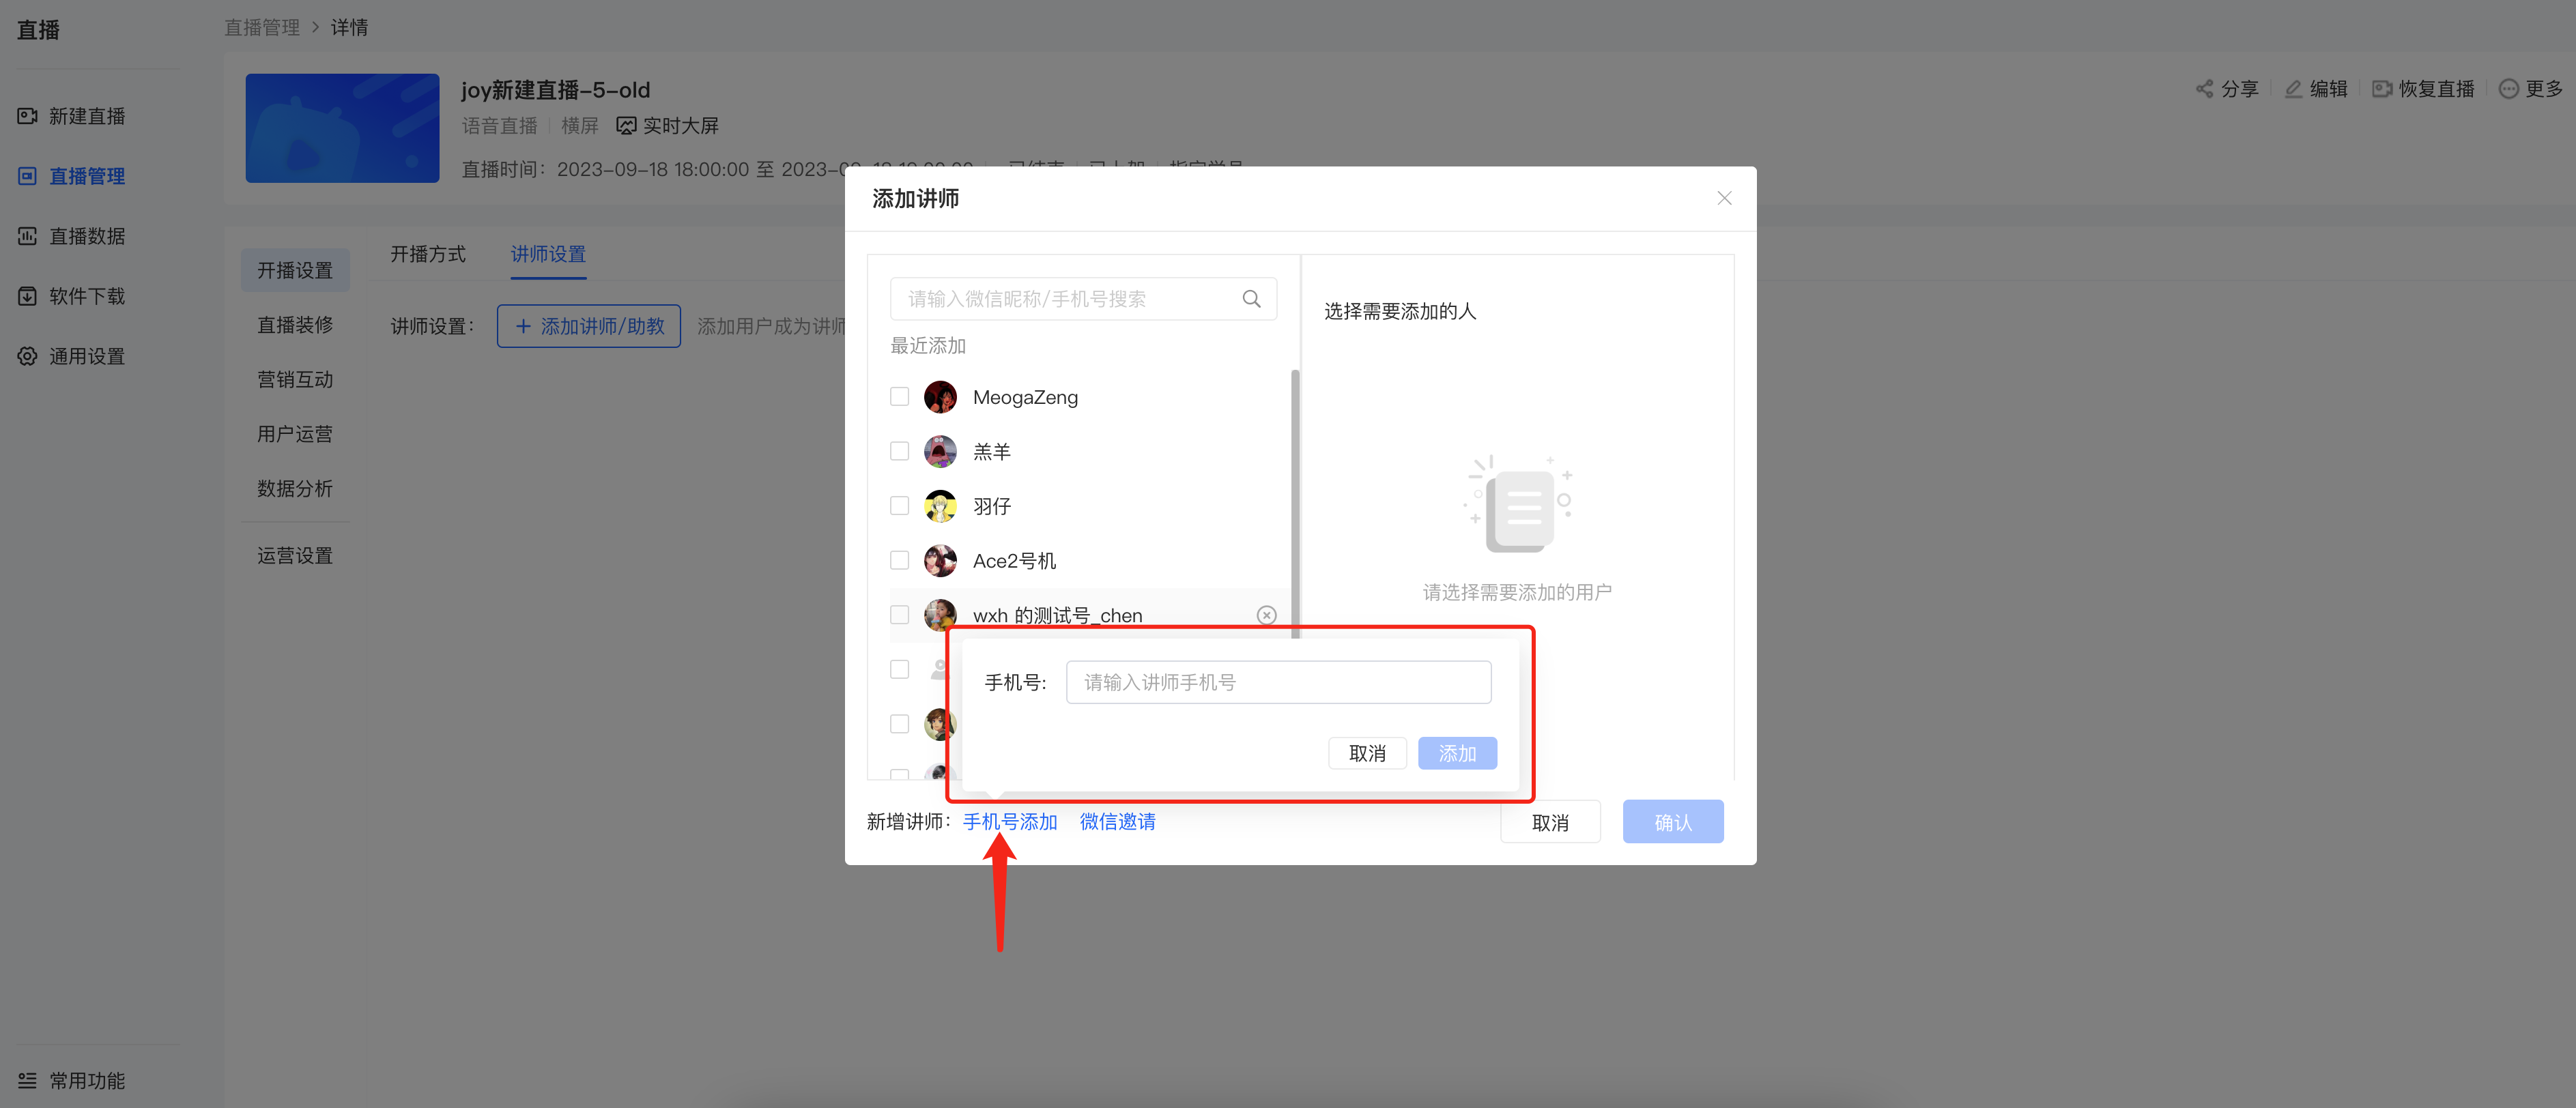
After inviting instructors, you can modify the instructor's name notes, set whether to accept user rewards, and also remove instructors.

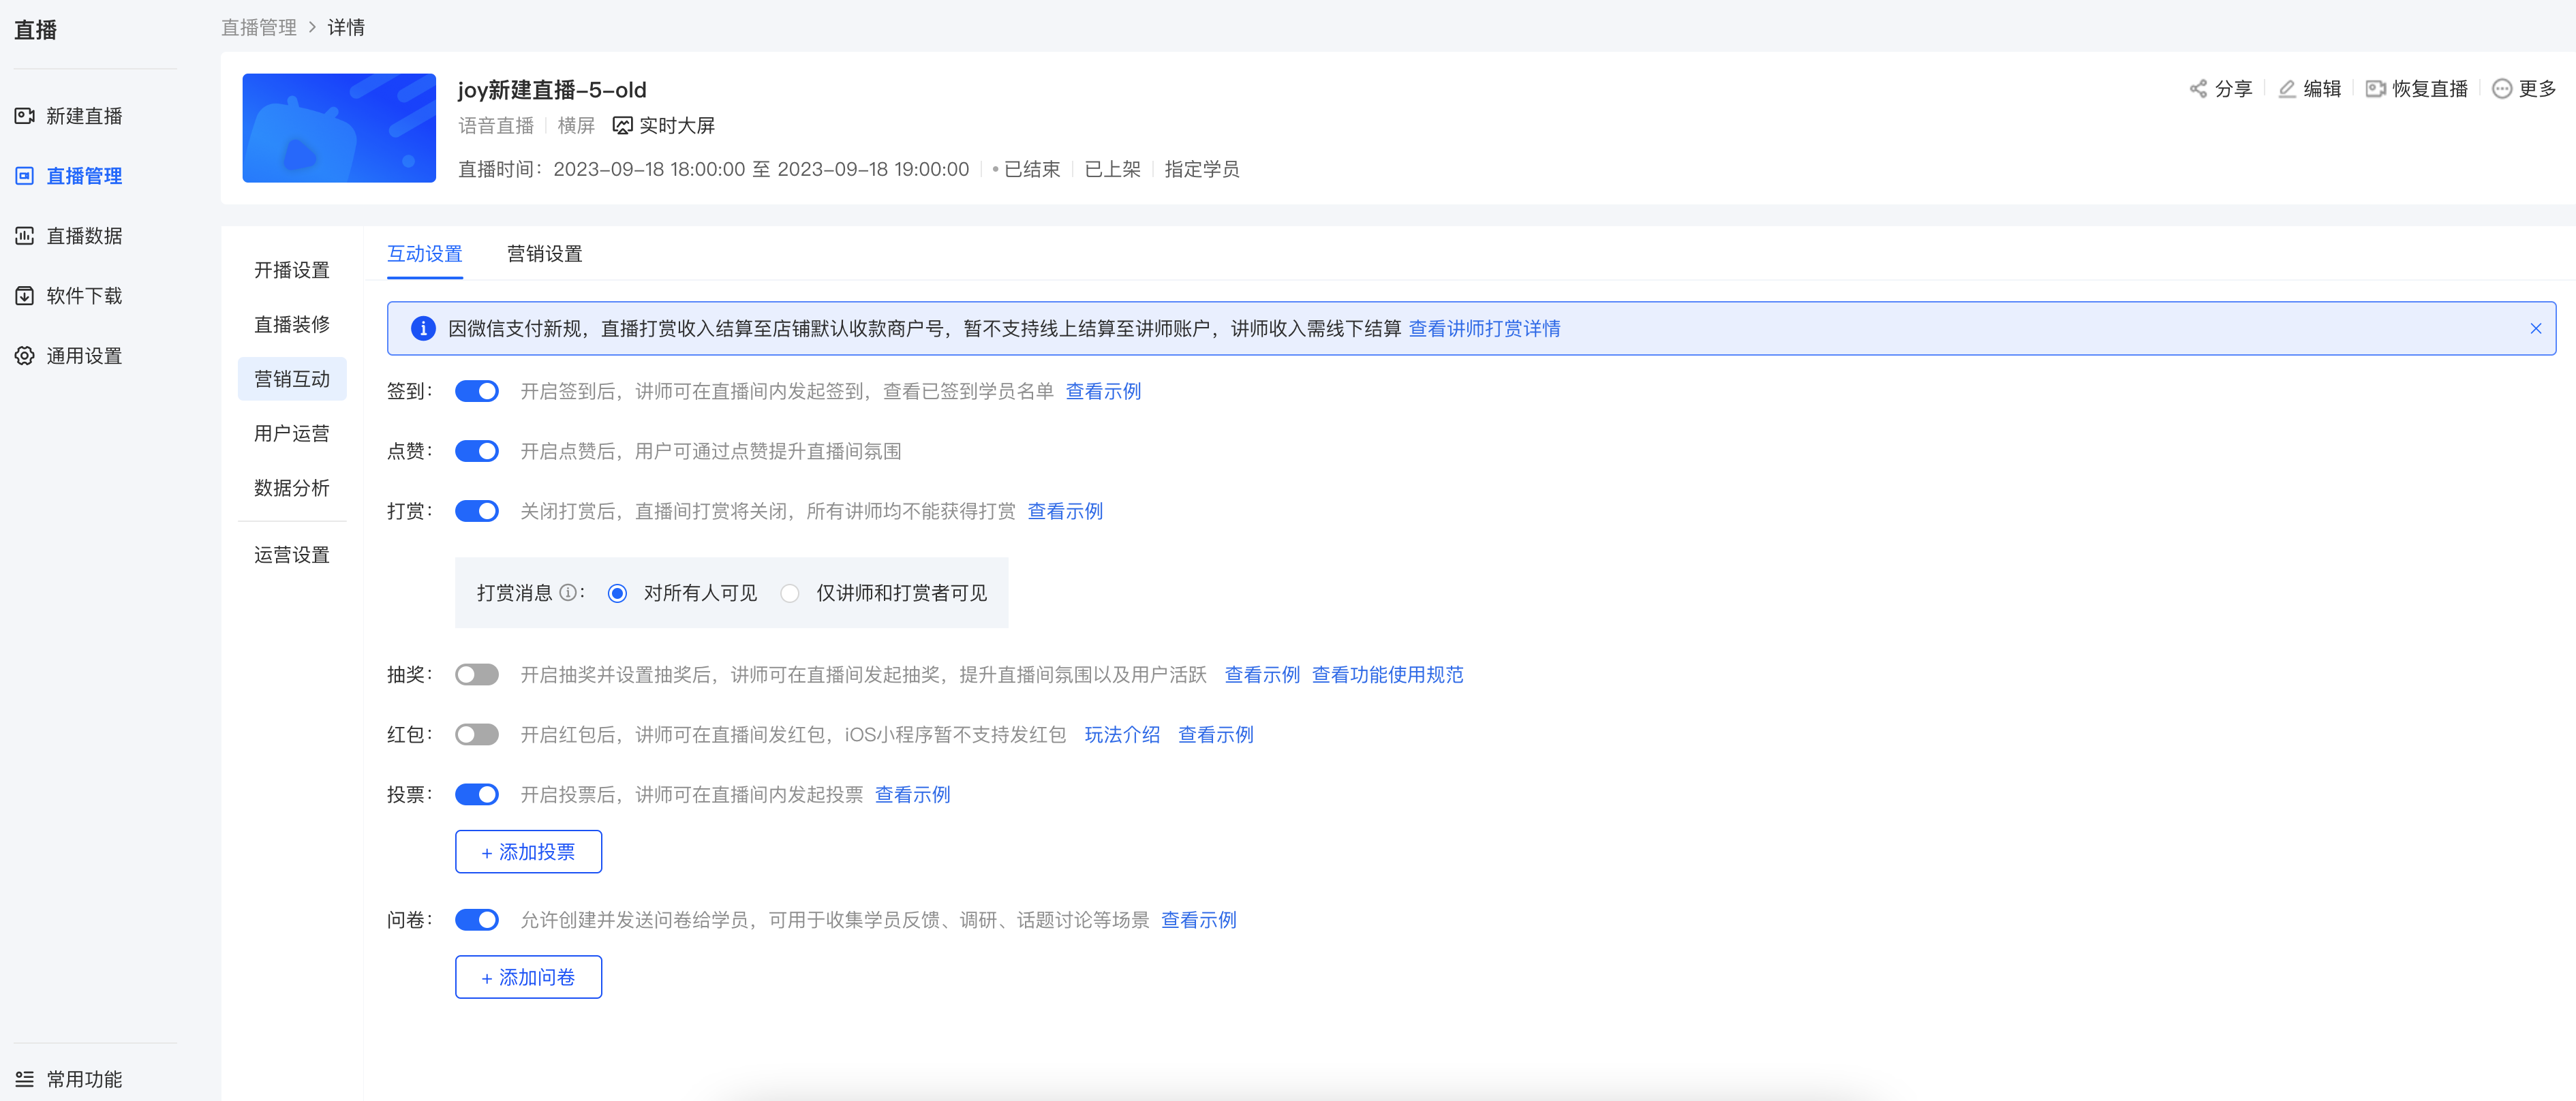
(2) Marketing interaction:Settings such as sign - in, likes, rewards, lucky draws, red envelopes, votes, and questionnaires can be set upand other settings
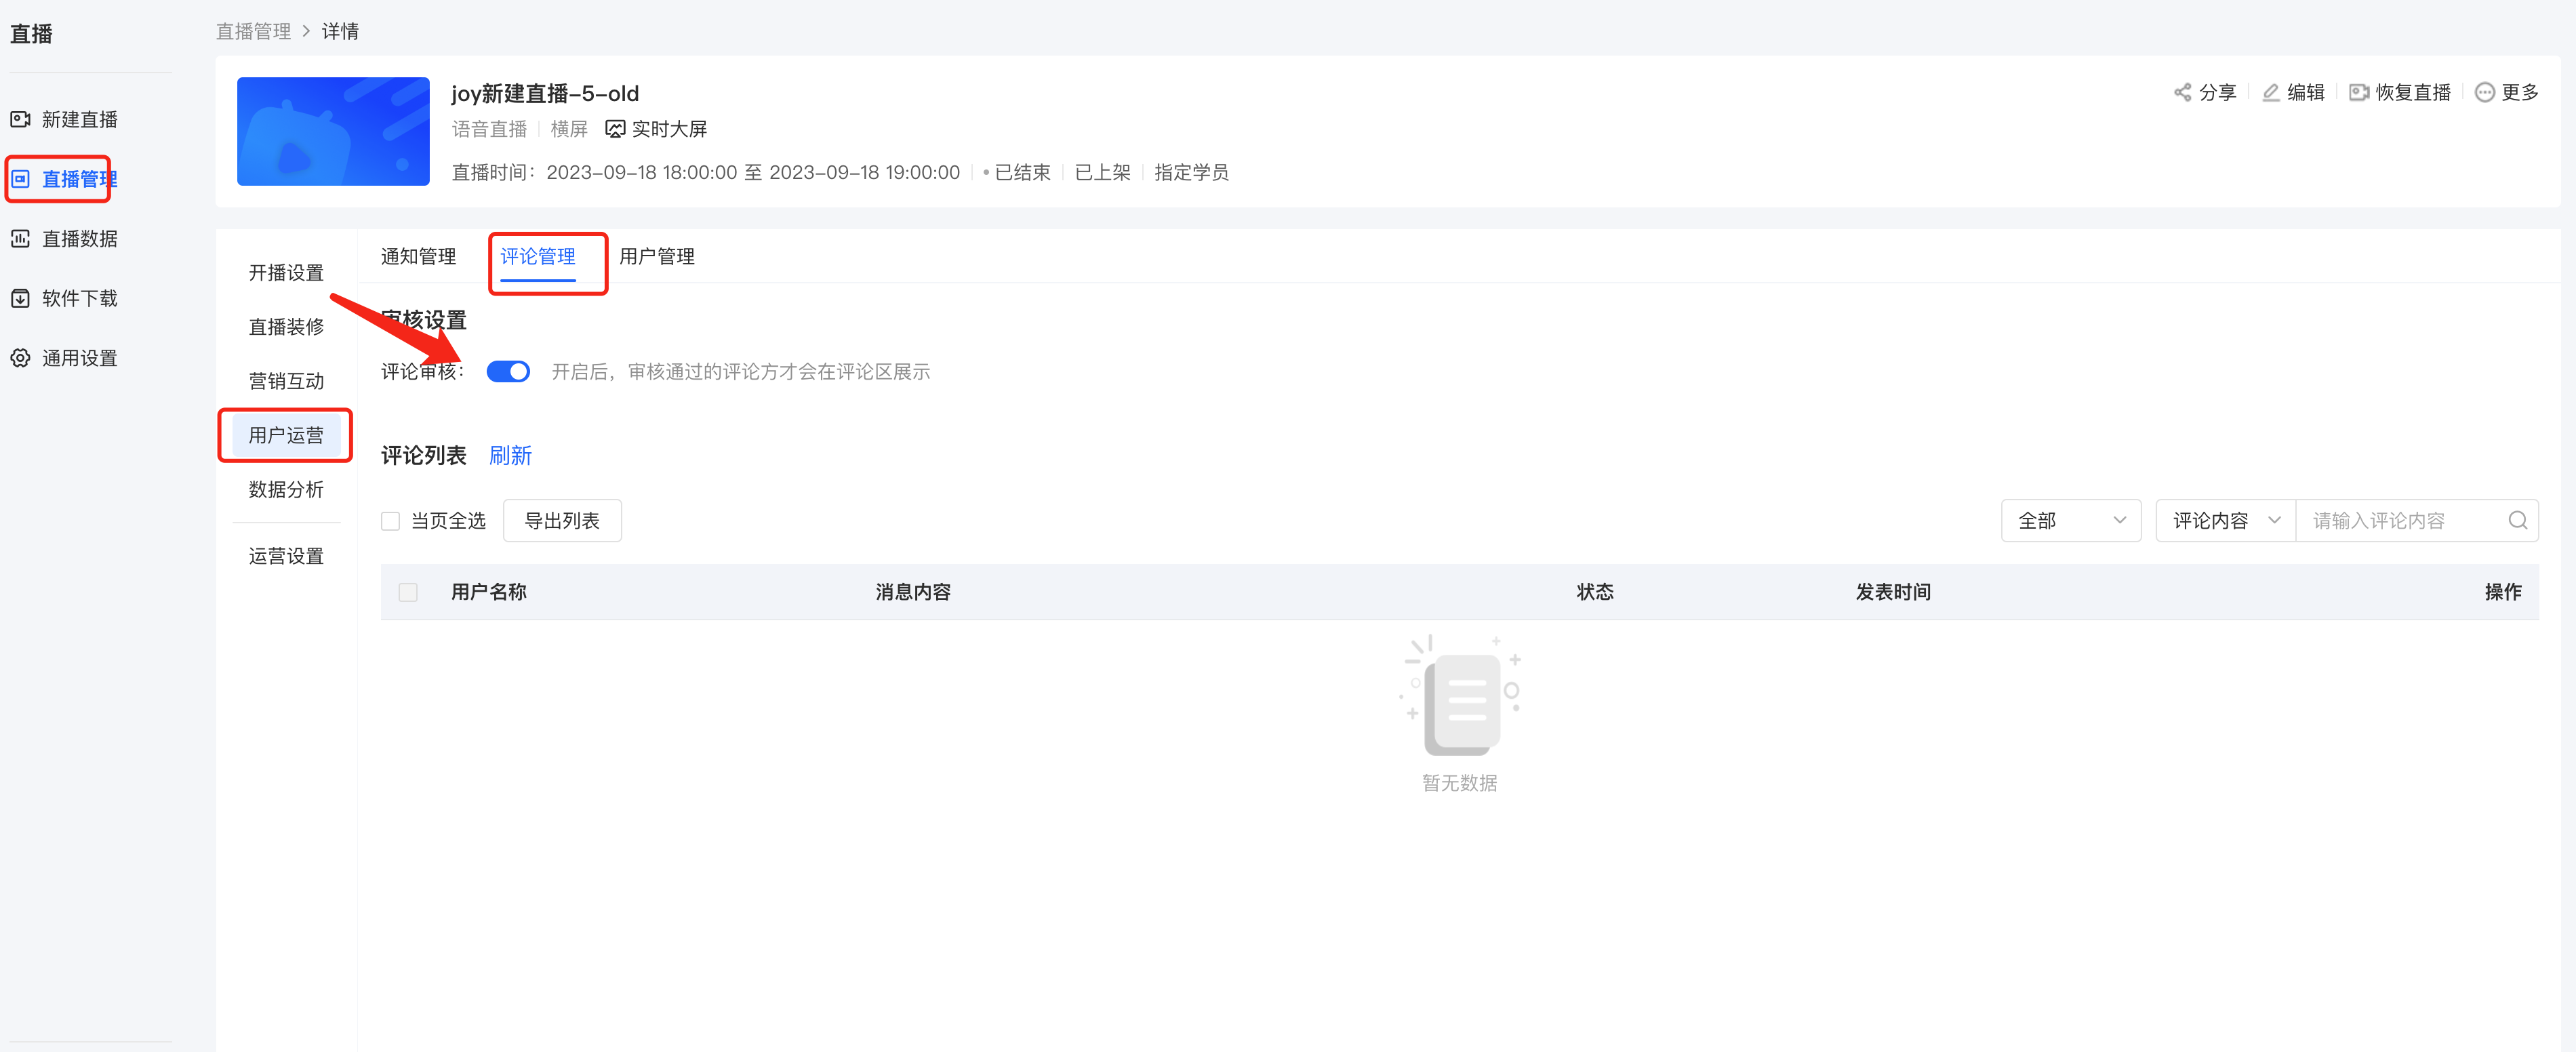
(3) Comment review:You can review user comments before publishing them
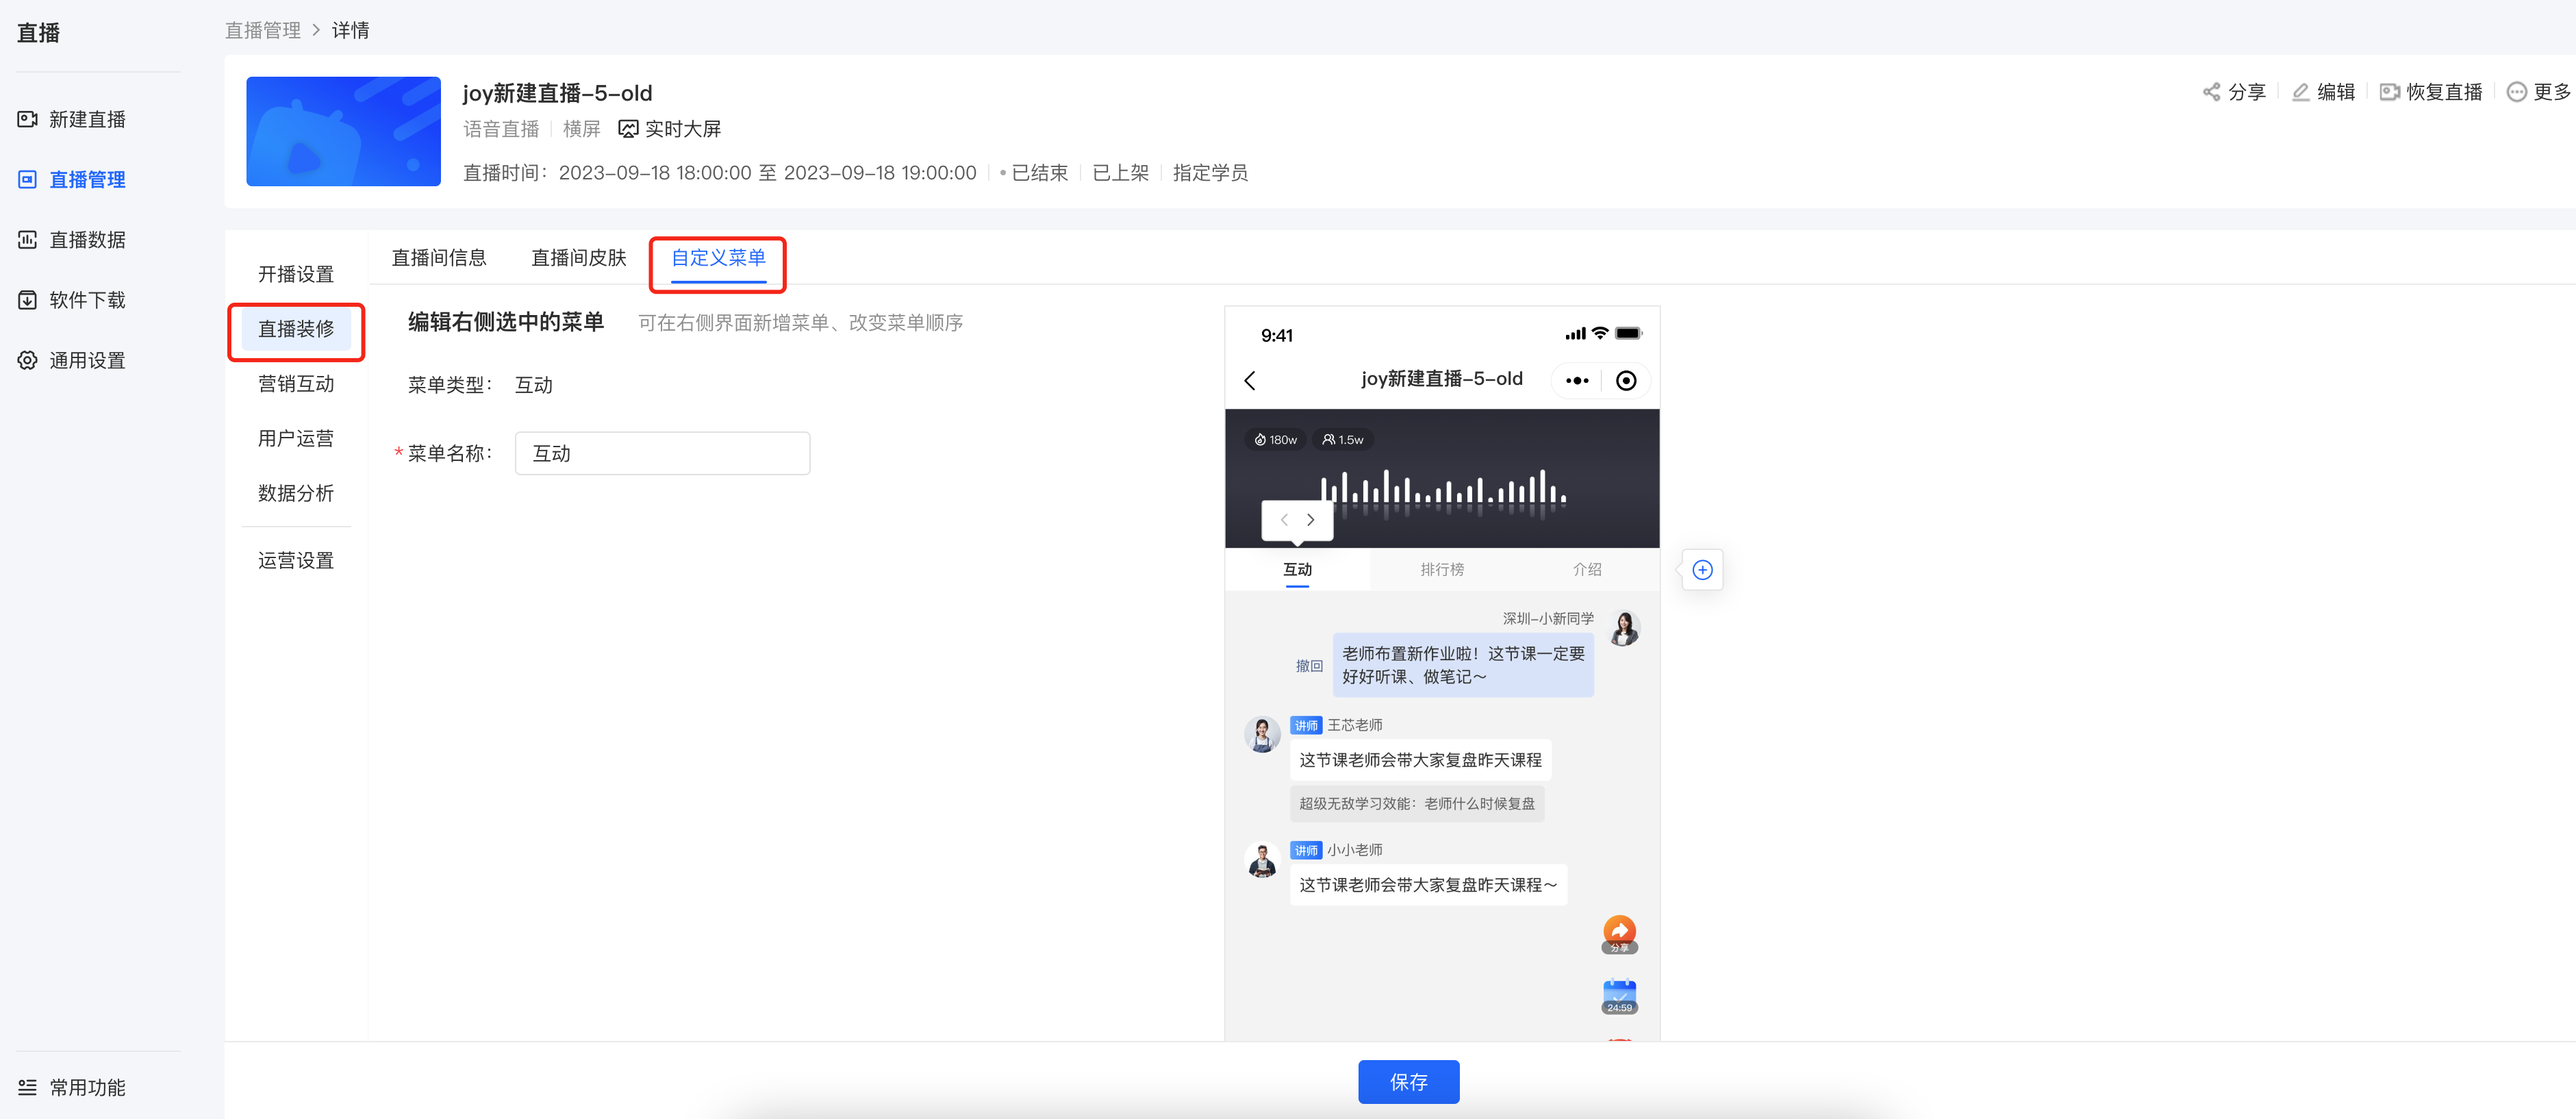
(4) Custom menu:You can rename the menu and adjust the order
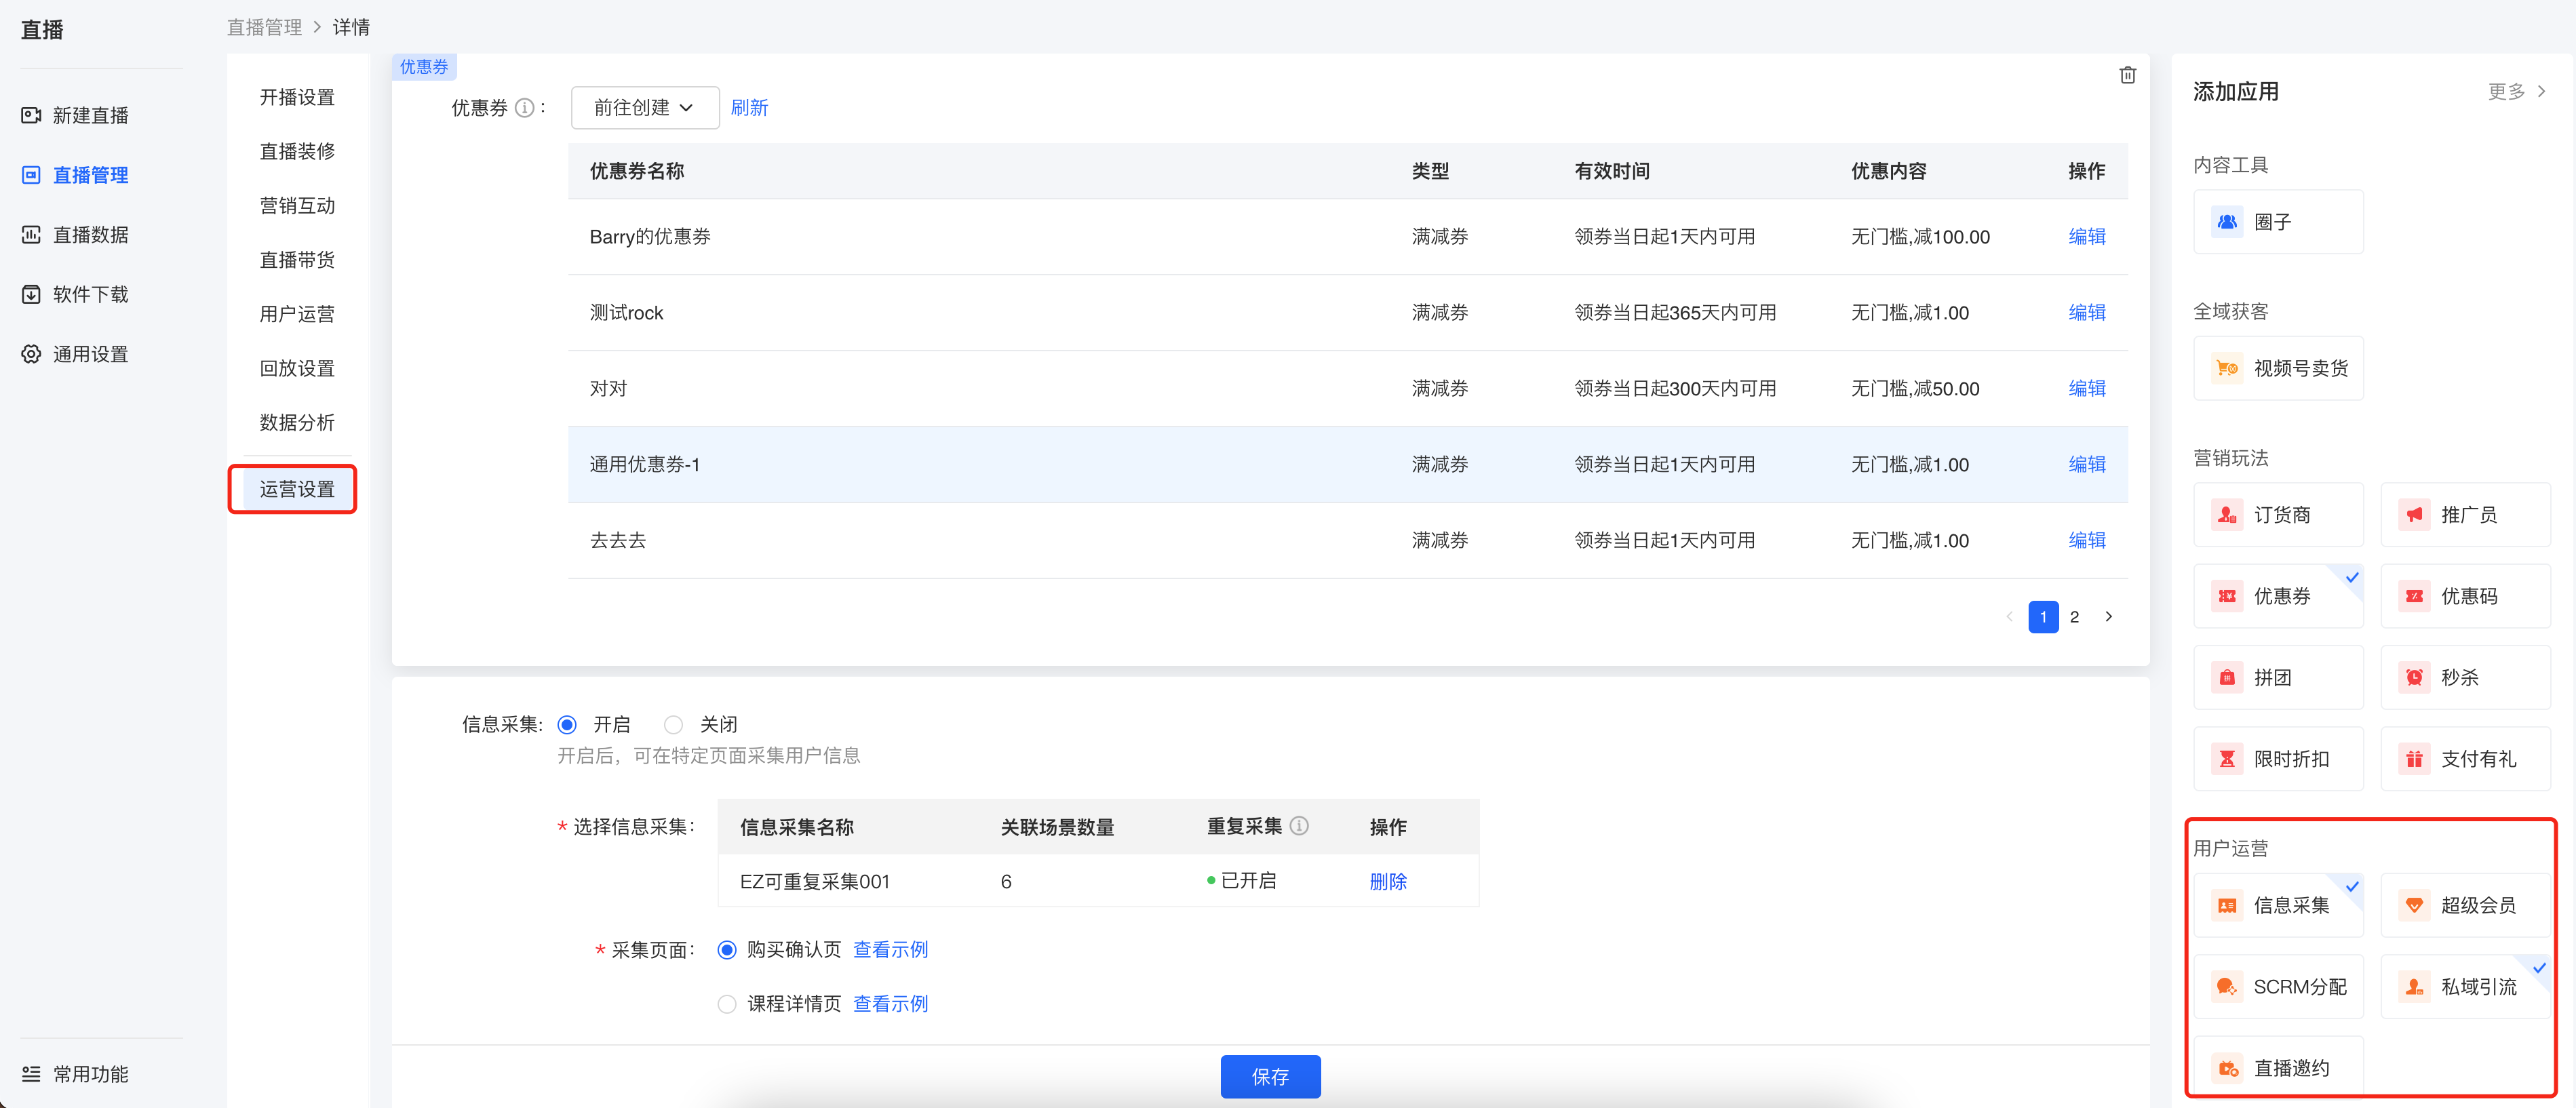
2. Operation settings:Include settings such as information collection, notification settings, and private domain traffic diversion
3. Student settings:You can manually add students or perform operational actions on existing students of the course.
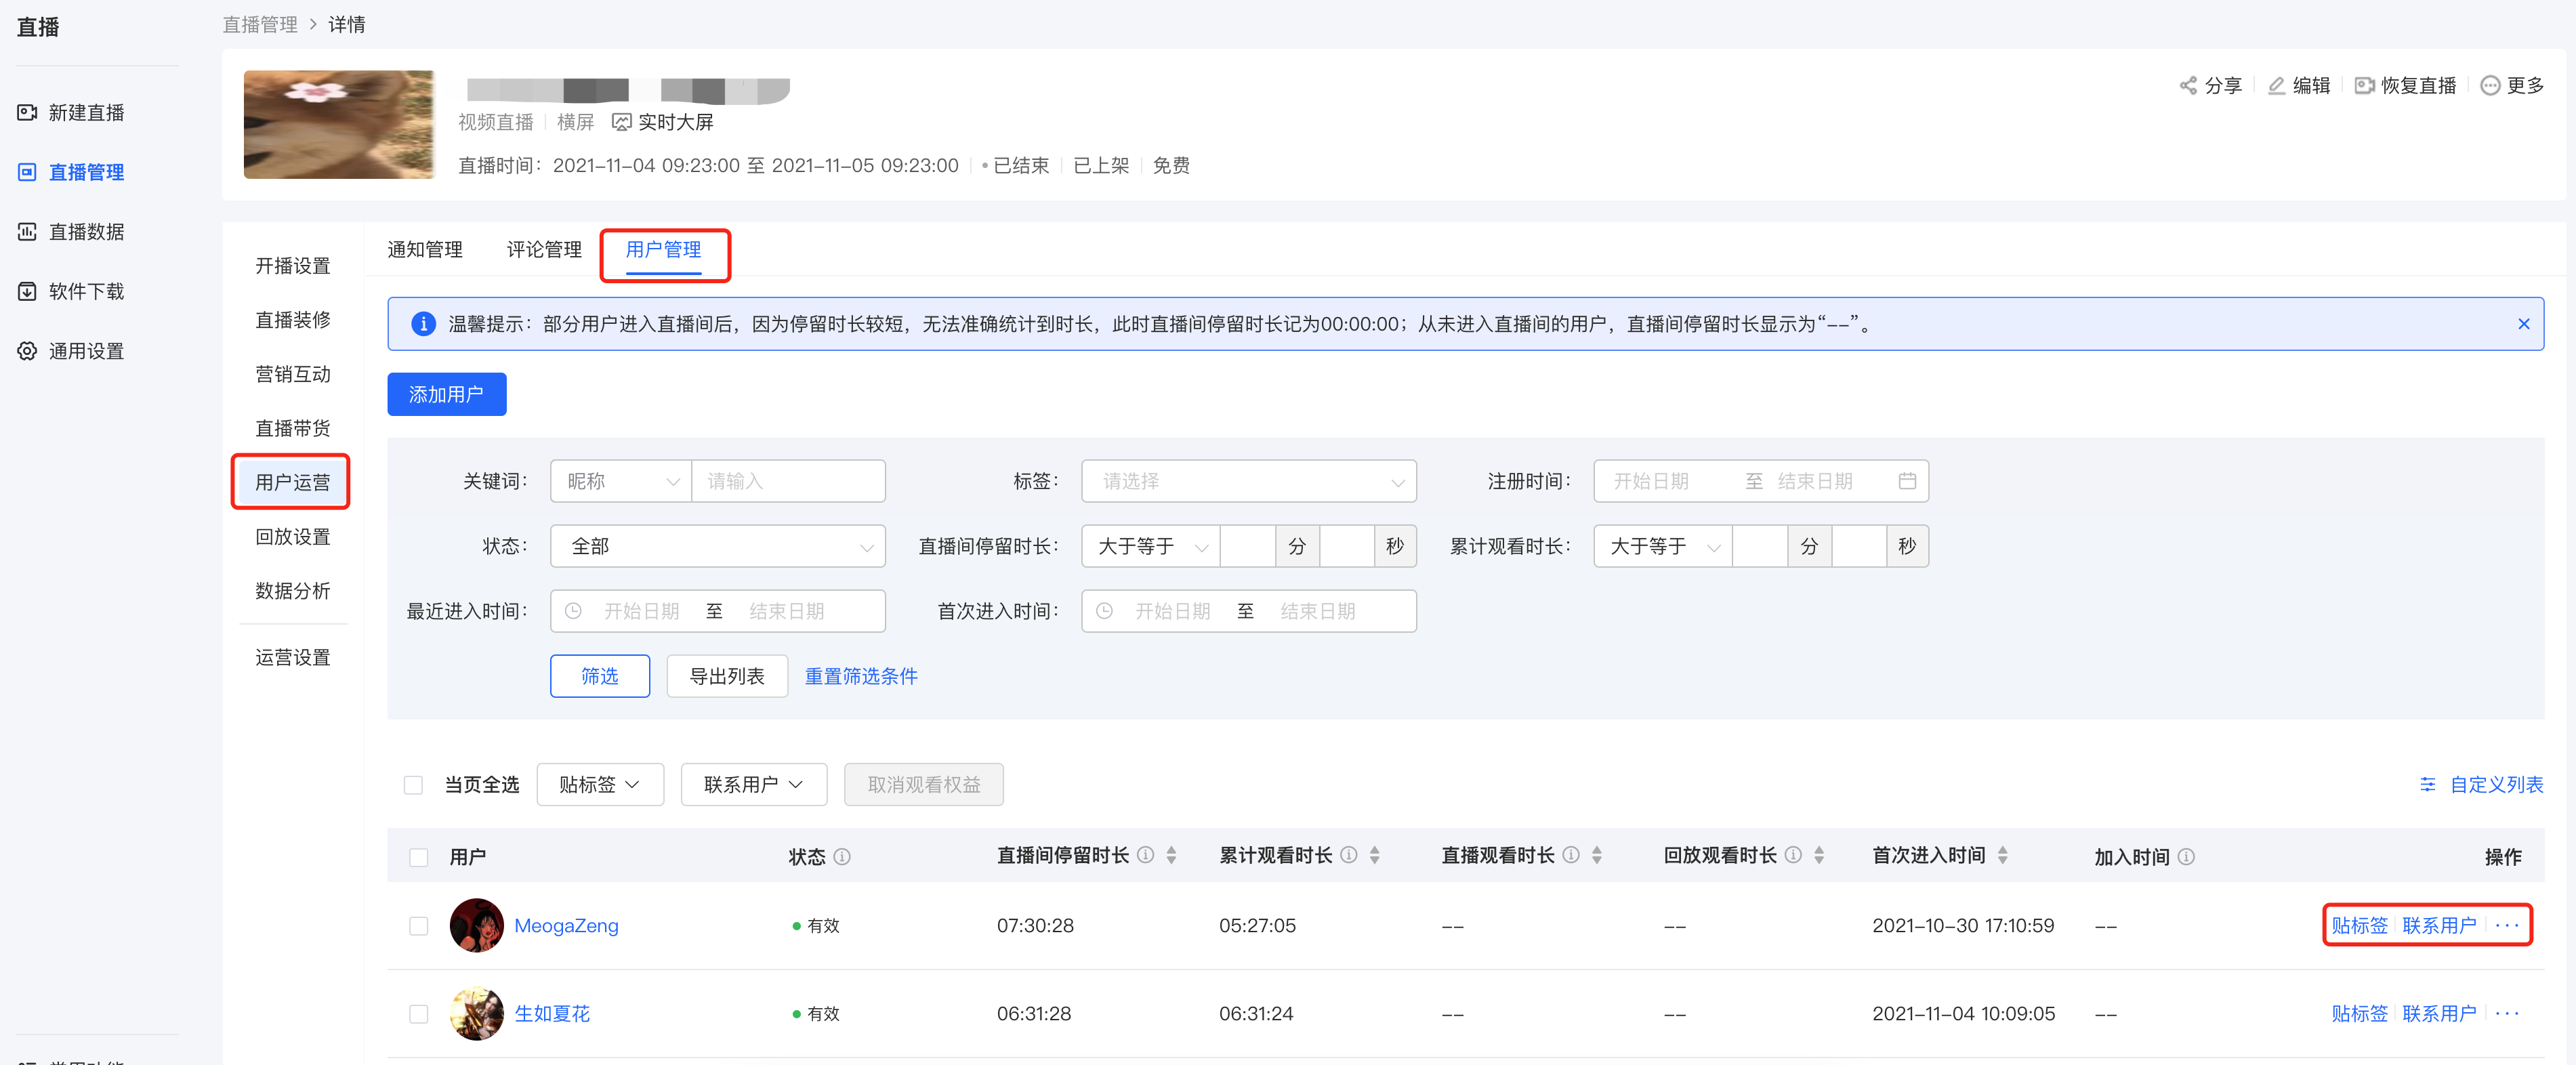
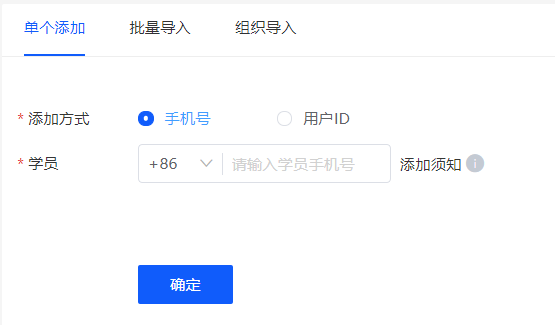
Currently, there are 3 ways to manually add students:
● Single addition:Enter the student's mobile phone number or user ID
● Batch import:Upload a file according to the template
● Organization import:Import organizational users
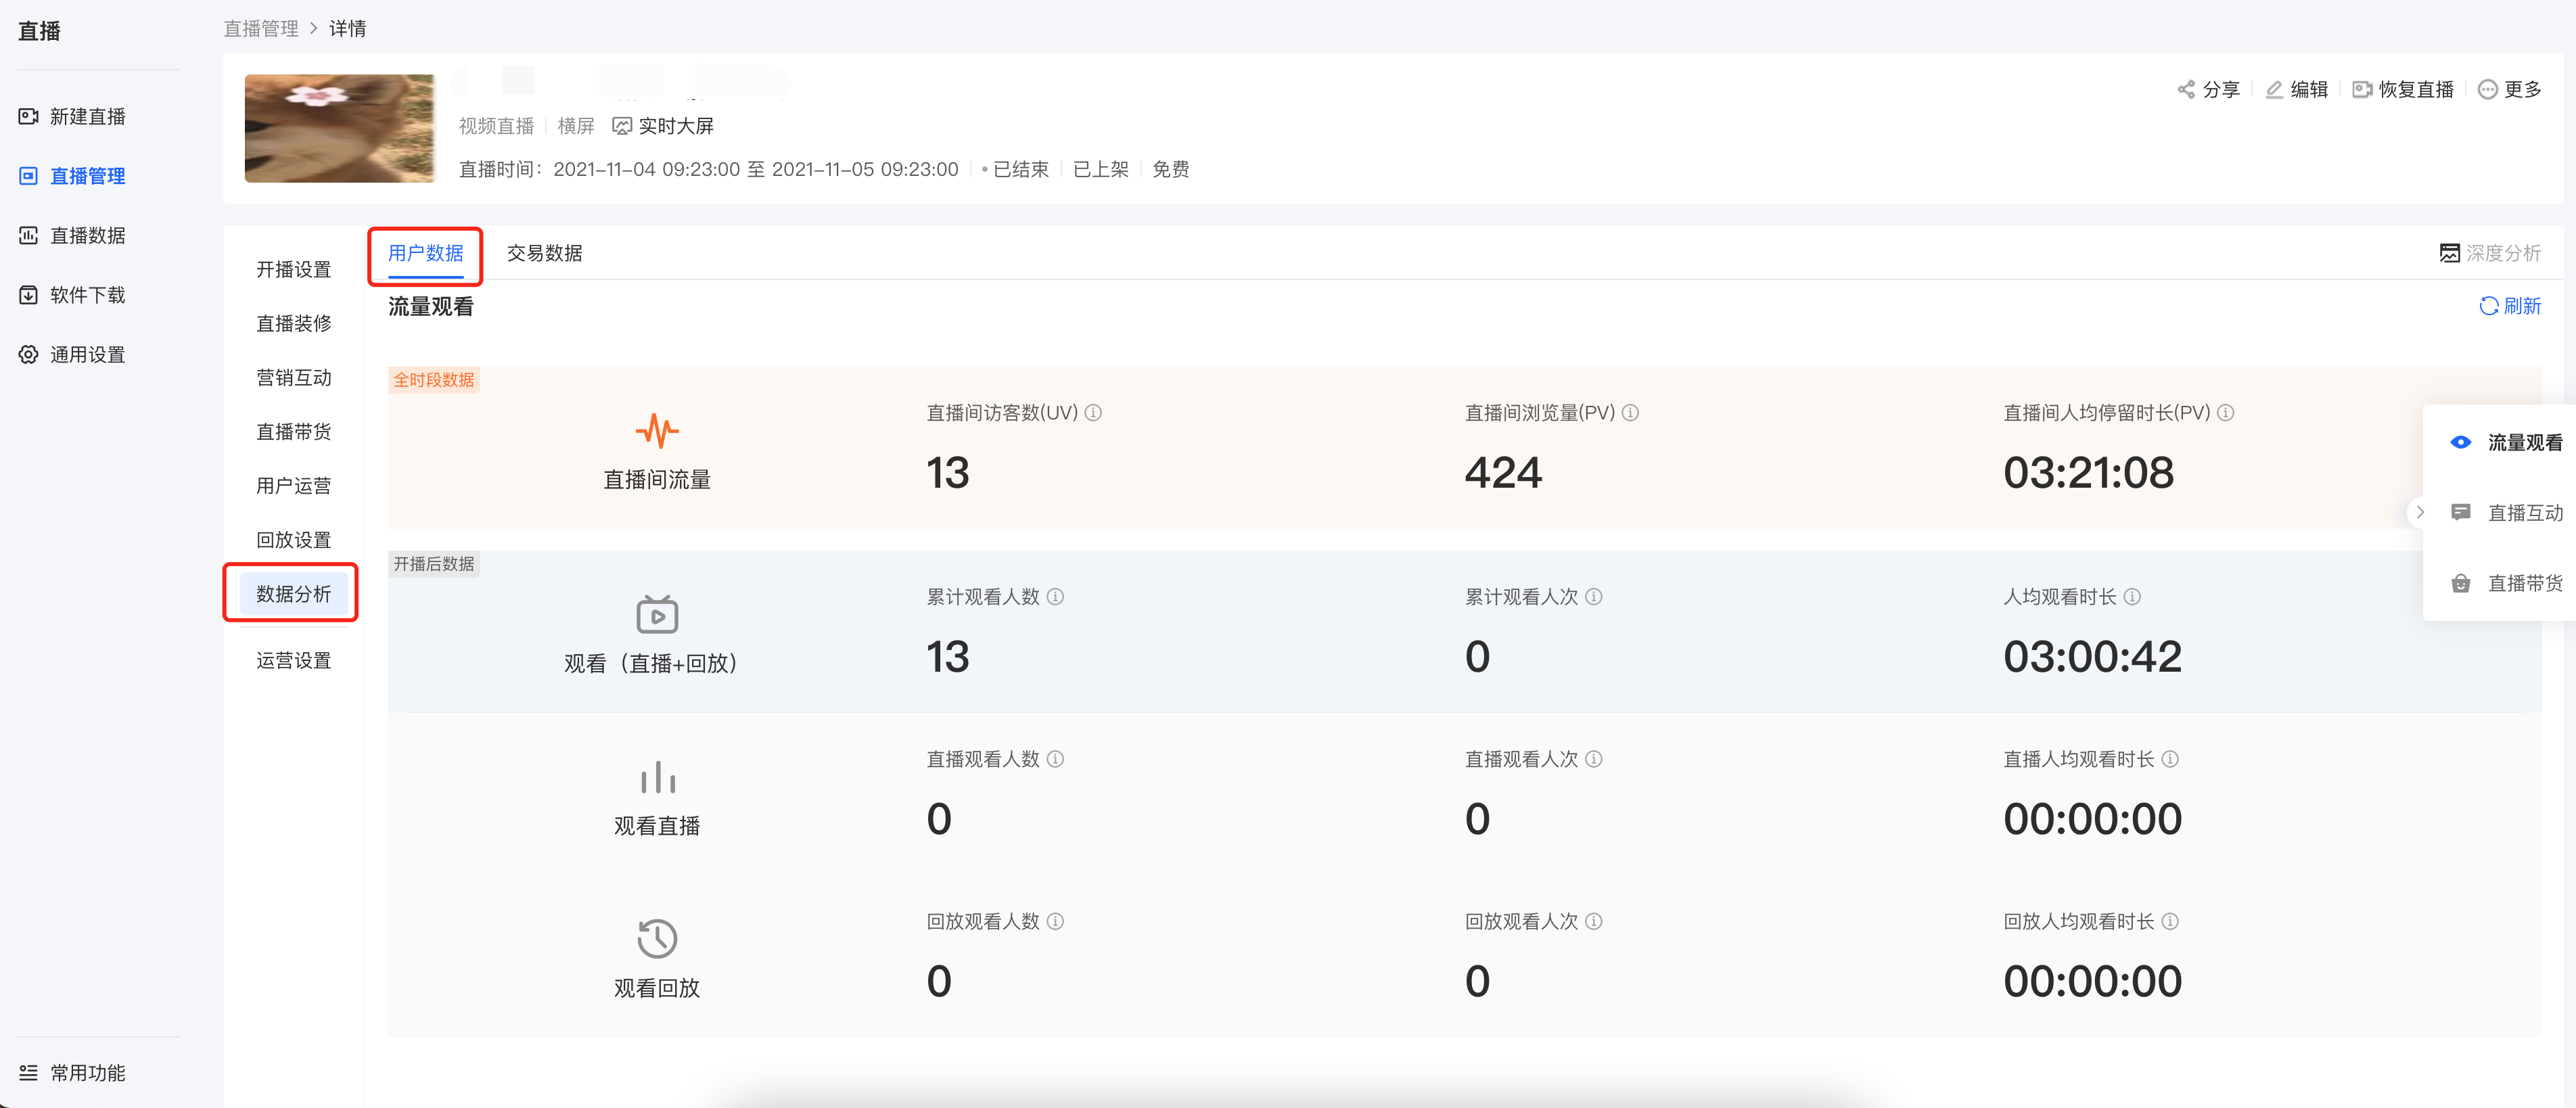
4. Data analysis:Include live stream traffic data, student learning data, and live stream interaction data
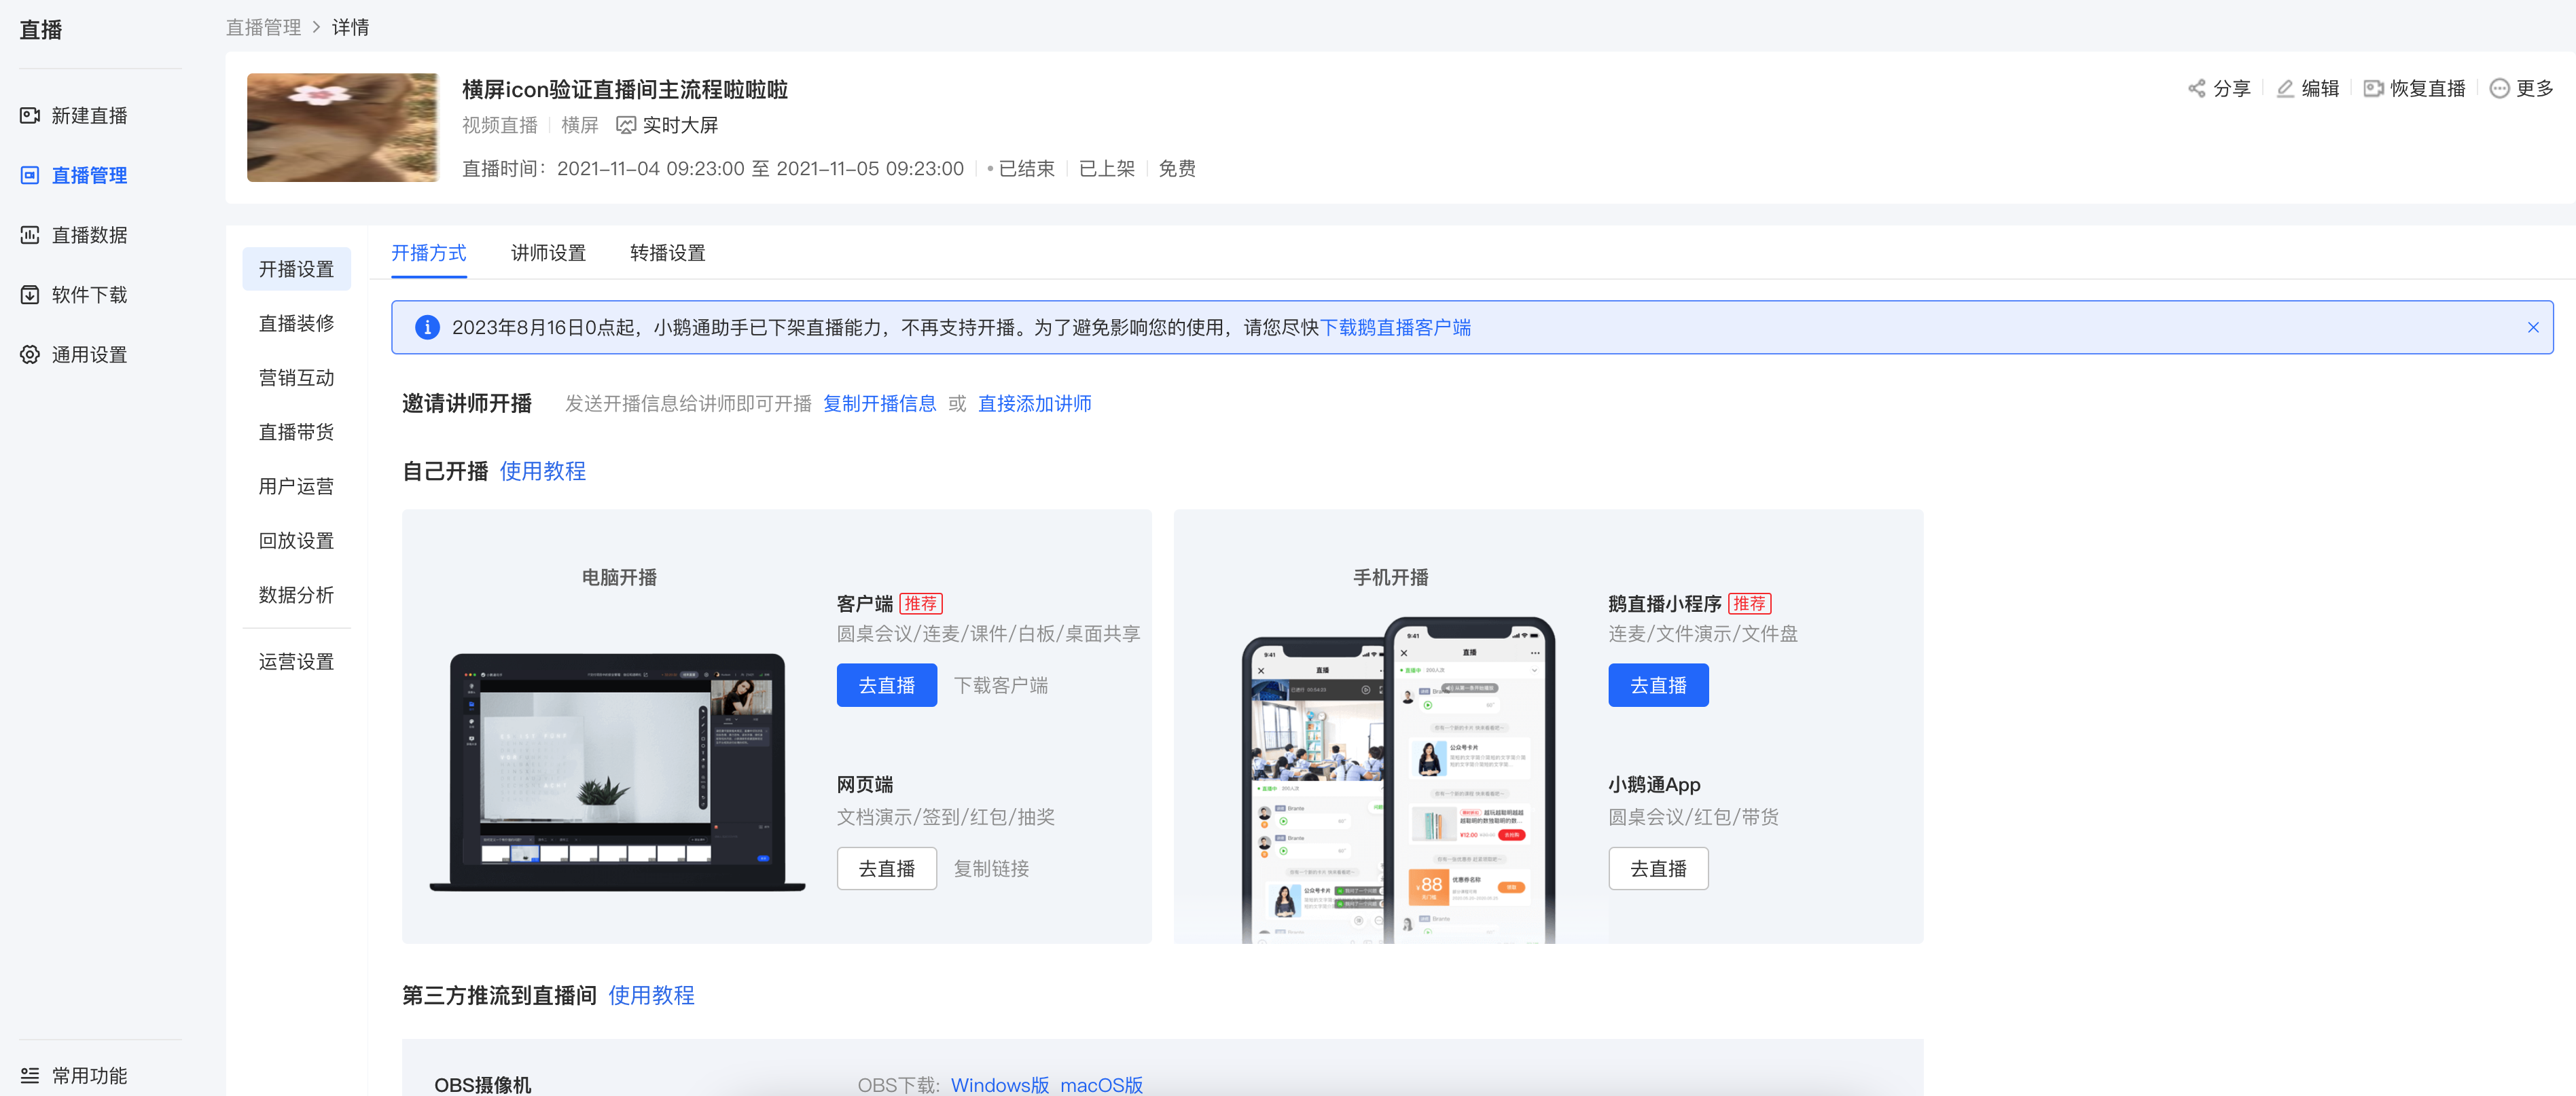
Step 3: Select a live stream terminal and start the live stream
Click[Live stream start method]and select a suitable terminal for the live stream. Currently, voice live streaming supports lectures via mobile H5 and the computer web - based platform.
No comments to display
No comments to display