
Tutorial on how to send pictures, texts, and voices for live streaming instructors
I. Feature Introduction
It supports instructors to send pictures, texts, and voices during live streaming.
II. Purpose of Use
Instructors can use pictures, texts, and voices during live streaming to assist teaching and enhance the live streaming effect.
III. Use Scenarios
It meets the scenarios where instructors need to send pictures, texts, and voices during live streaming.
IV. Operation Path
Send pictures → Send texts → Send voices
V. Usage Tutorial
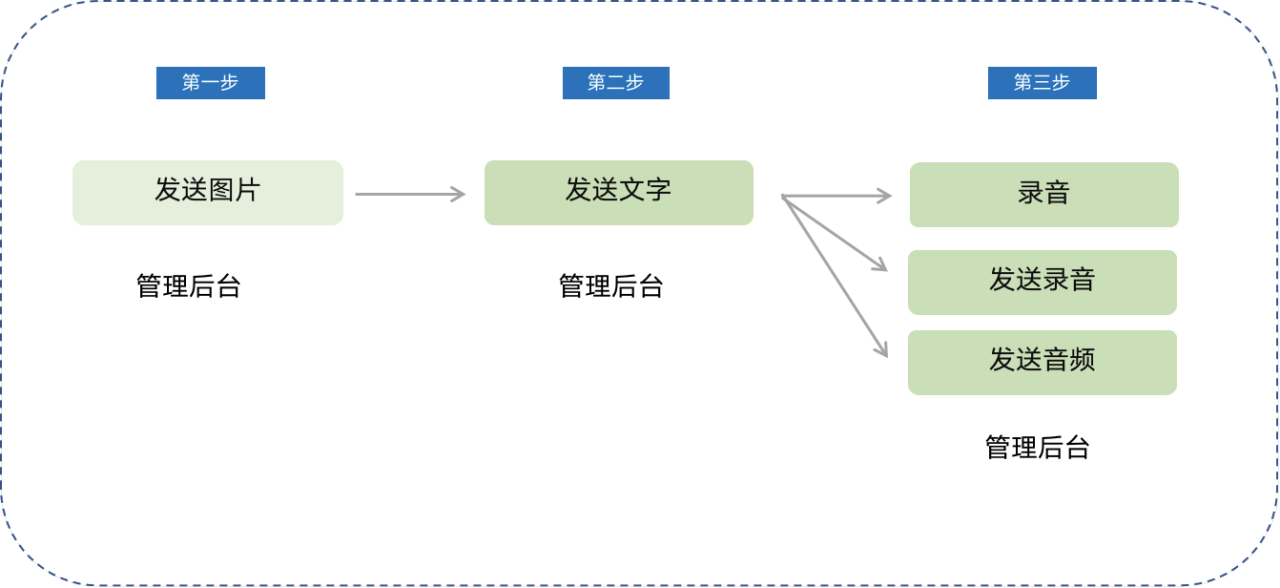
Step 1:Send pictures (Live streaming room)
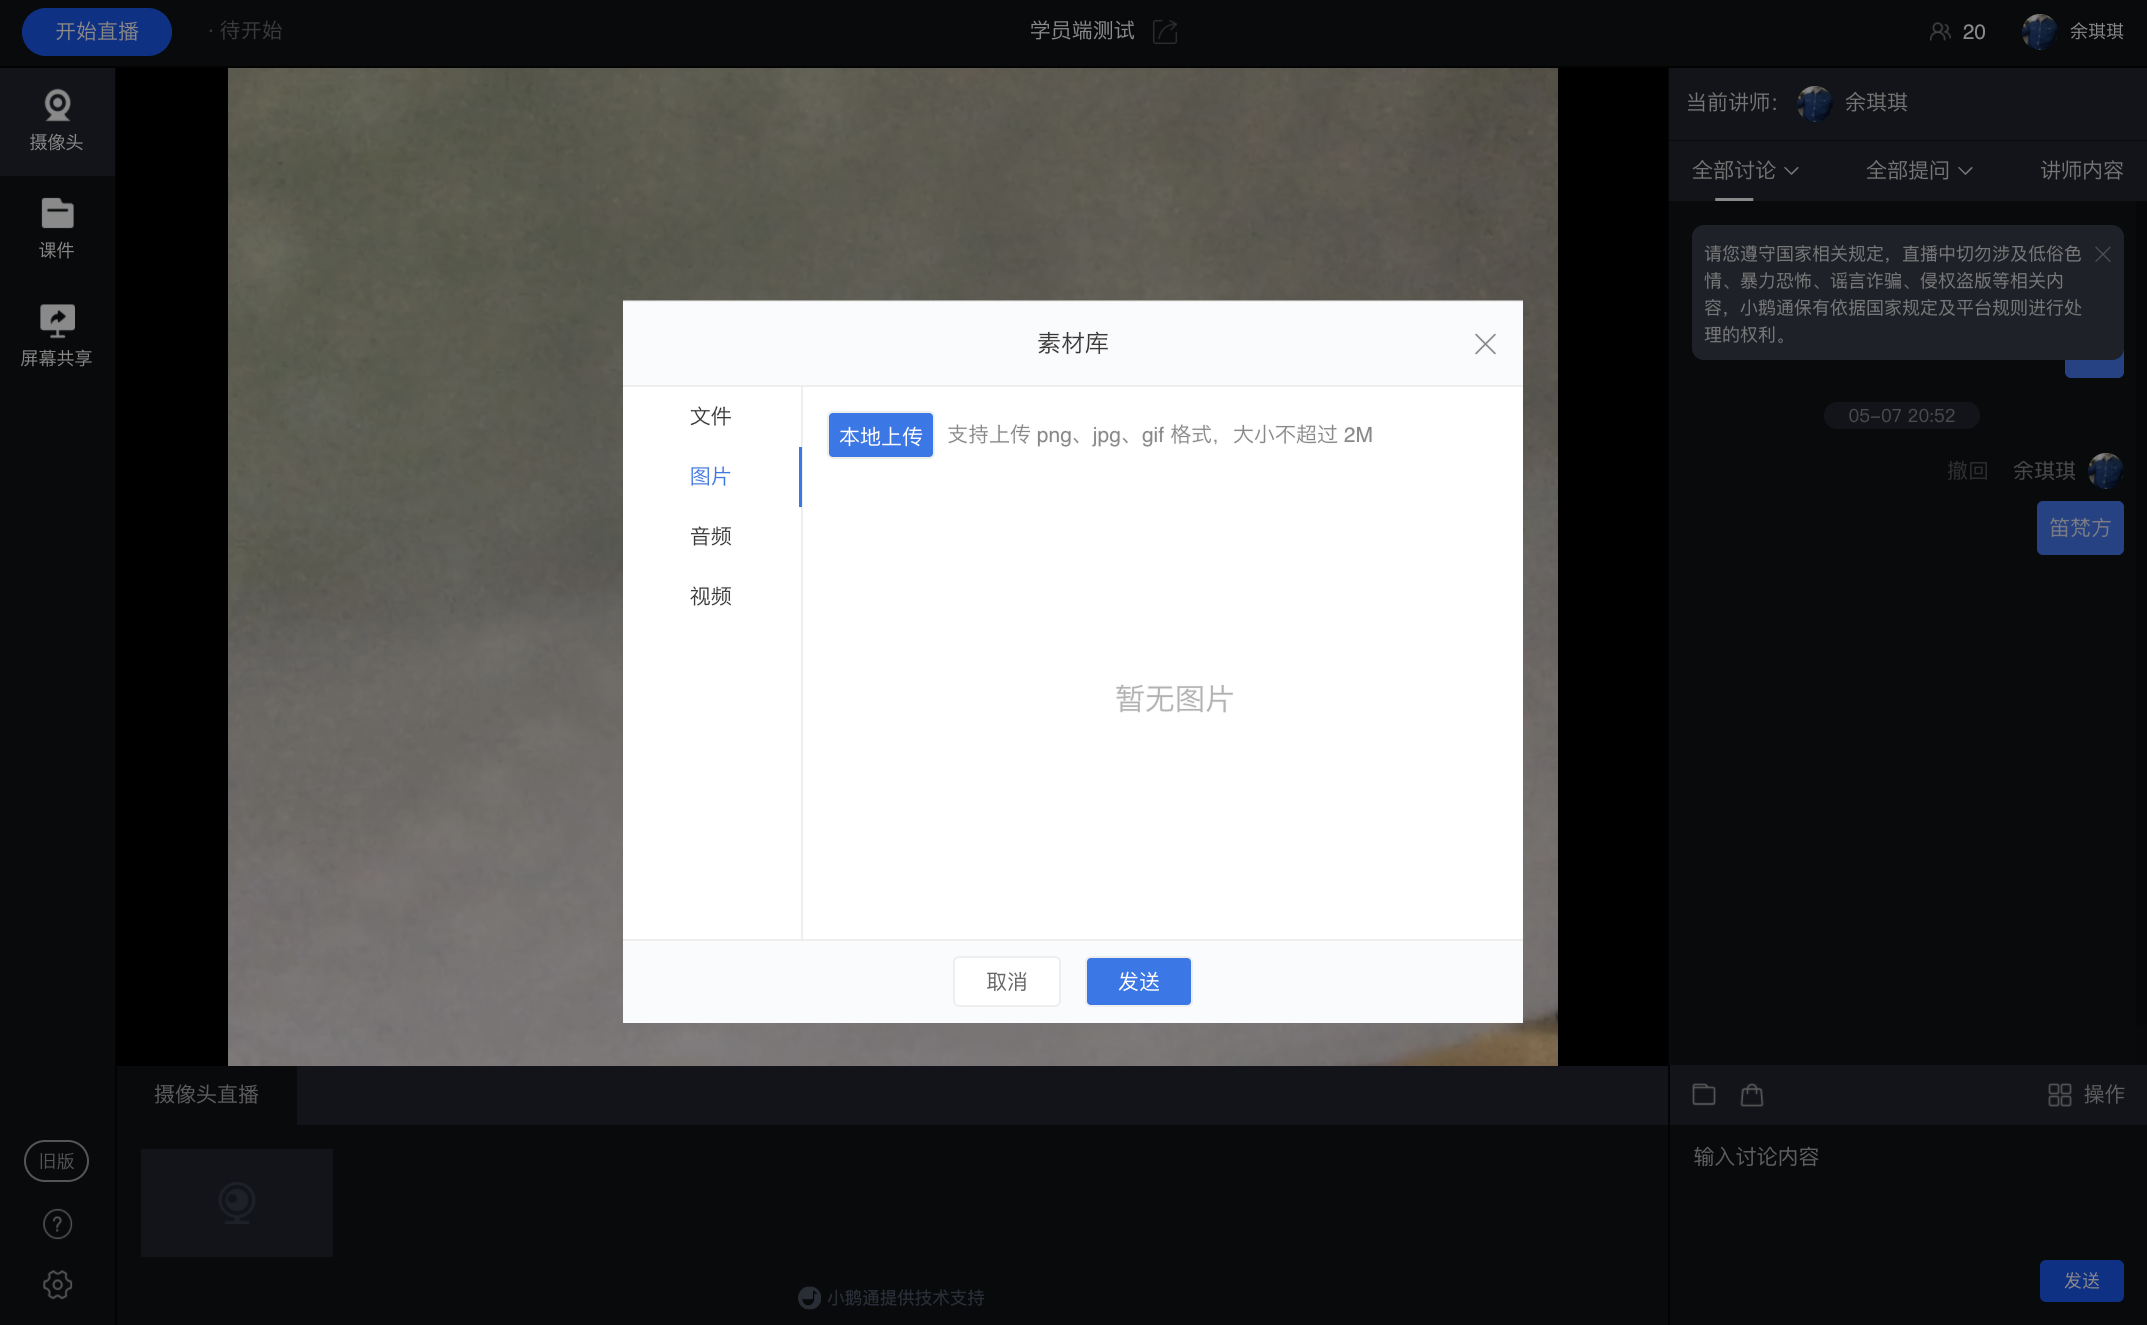
Instructors canSelect pictures from the material library in the PC live streaming room and upload them to the explanation area
(elink Assistant Client)
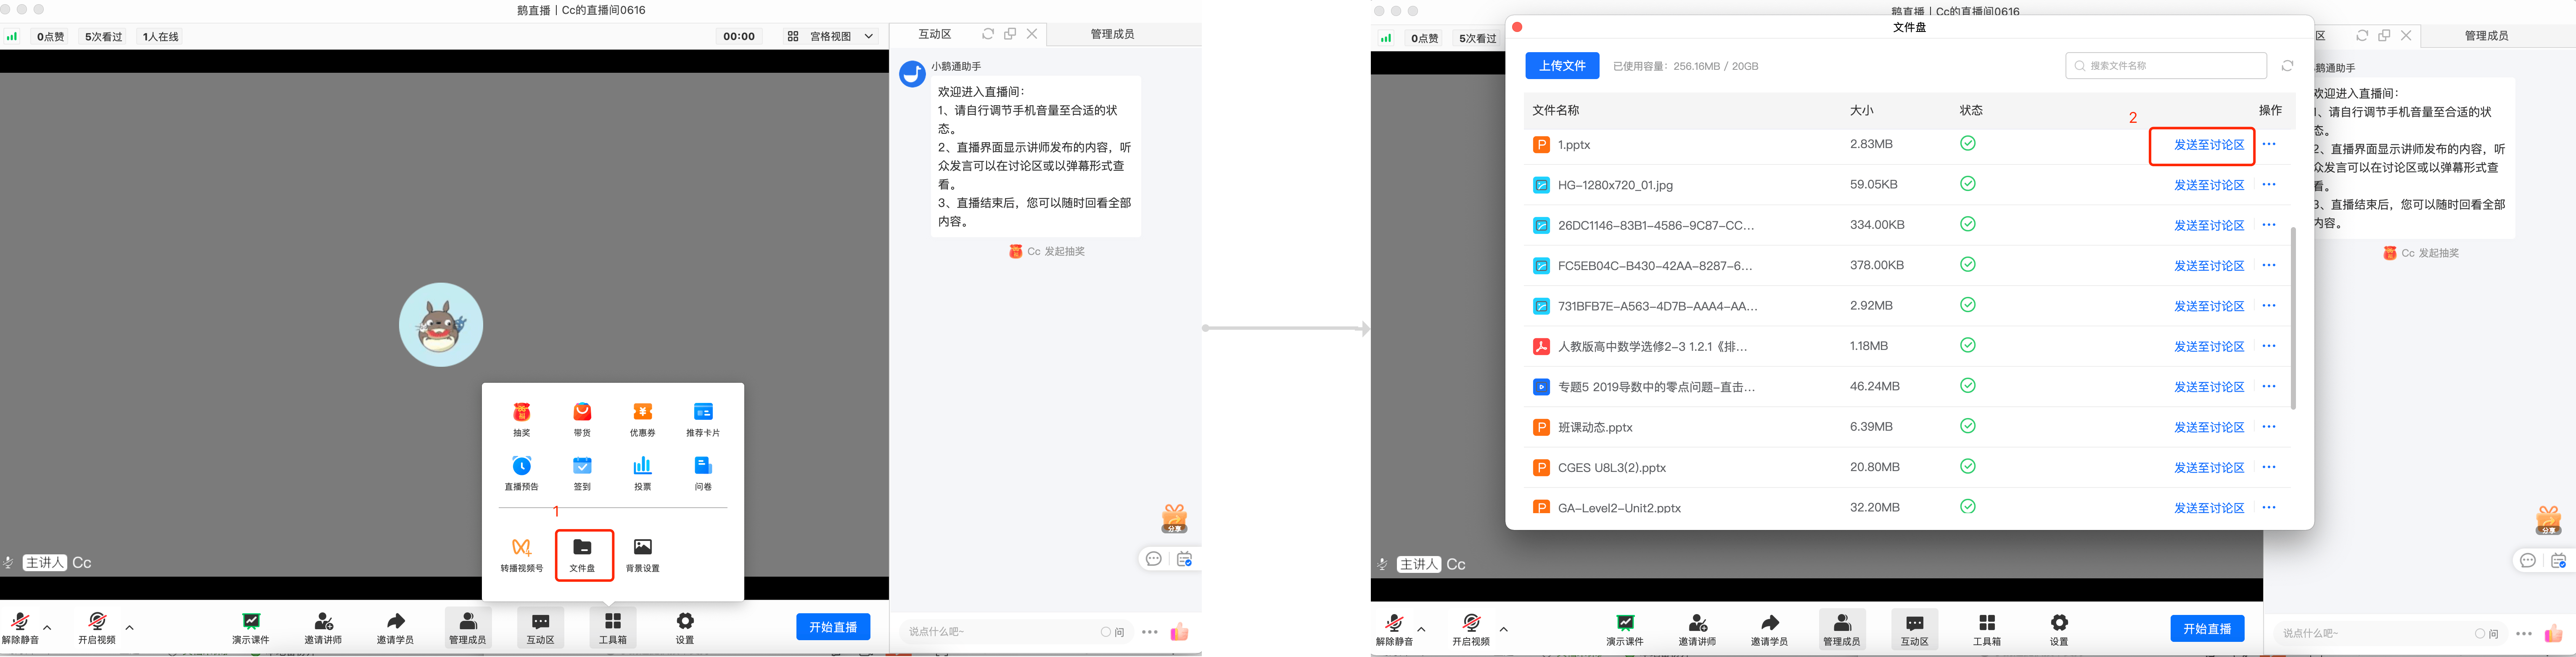
elink Live Client
Open the toolbox, select the 'File Disk', find the corresponding picture file, and click 'Send to the discussion area' to send the file to the discussion area for students to view and download
Step 2:Send texts (Store management console)
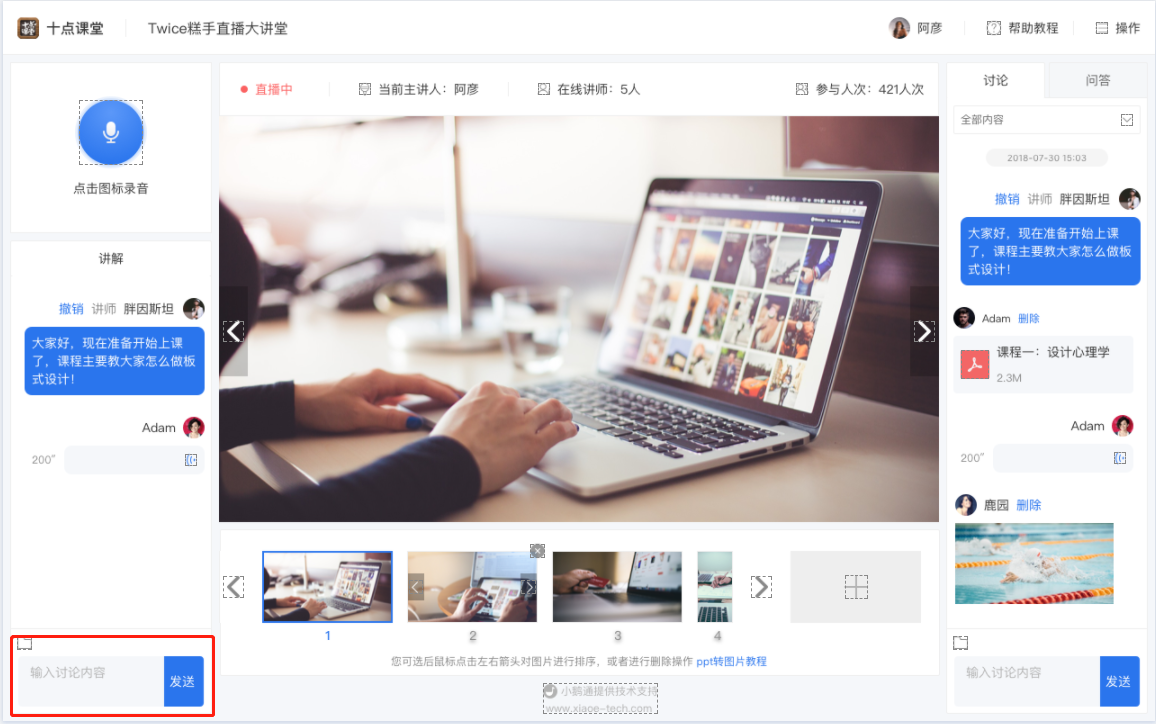
1. InYou can send content in text form below the explanation area and the discussion area on the PC
2. The explanation area is mainly used for teaching content (the sent content will be synchronized in the discussion area)
3. You can filter the content in the discussion area. If you want to interact in a timely manner, you can post texts in the discussion area
Step 3:Send audio (Store management console)
Copy the live streaming room address link and open it in the browser to enter the live streaming room, and you can see the recording area in the upper - left corner
1. Click on the blue picture to start recording
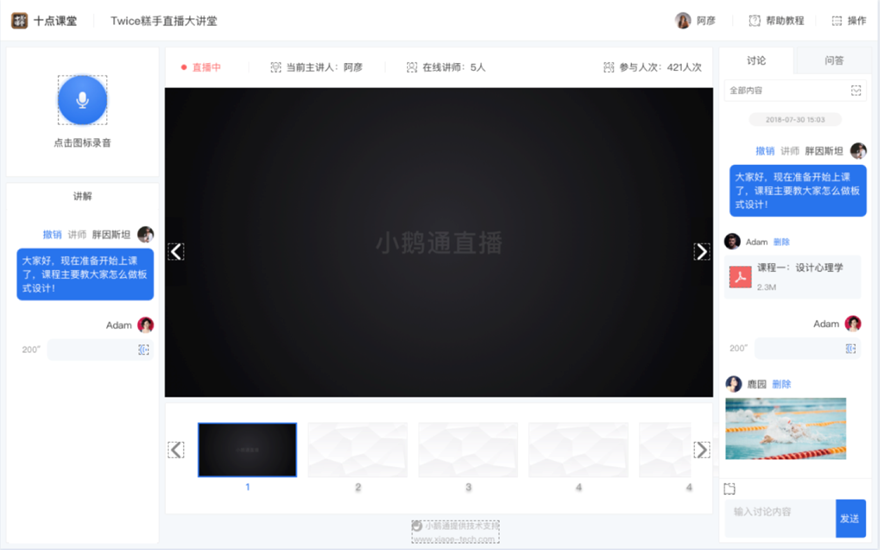
2.Only 10 - minute voice recordings are supported. After 10 minutes of recording, the voice will be automatically sent, and the next recording will start
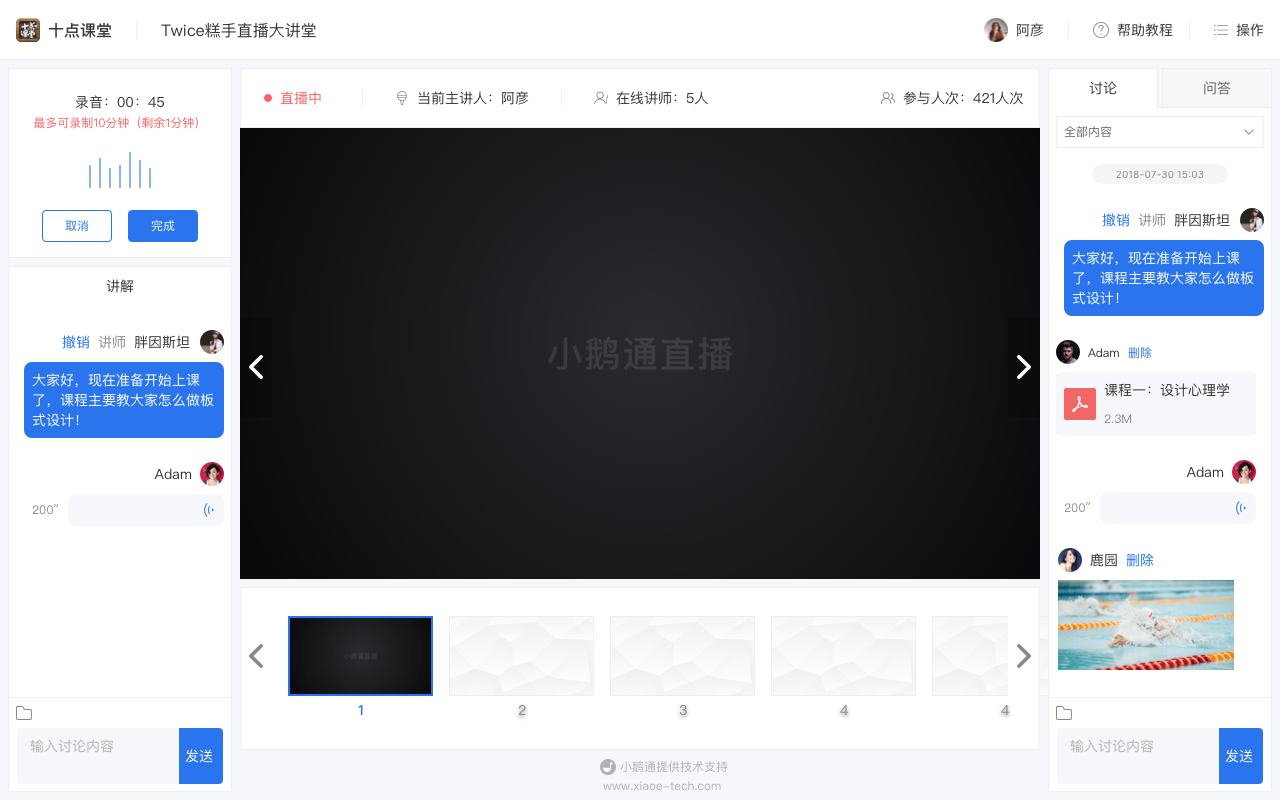
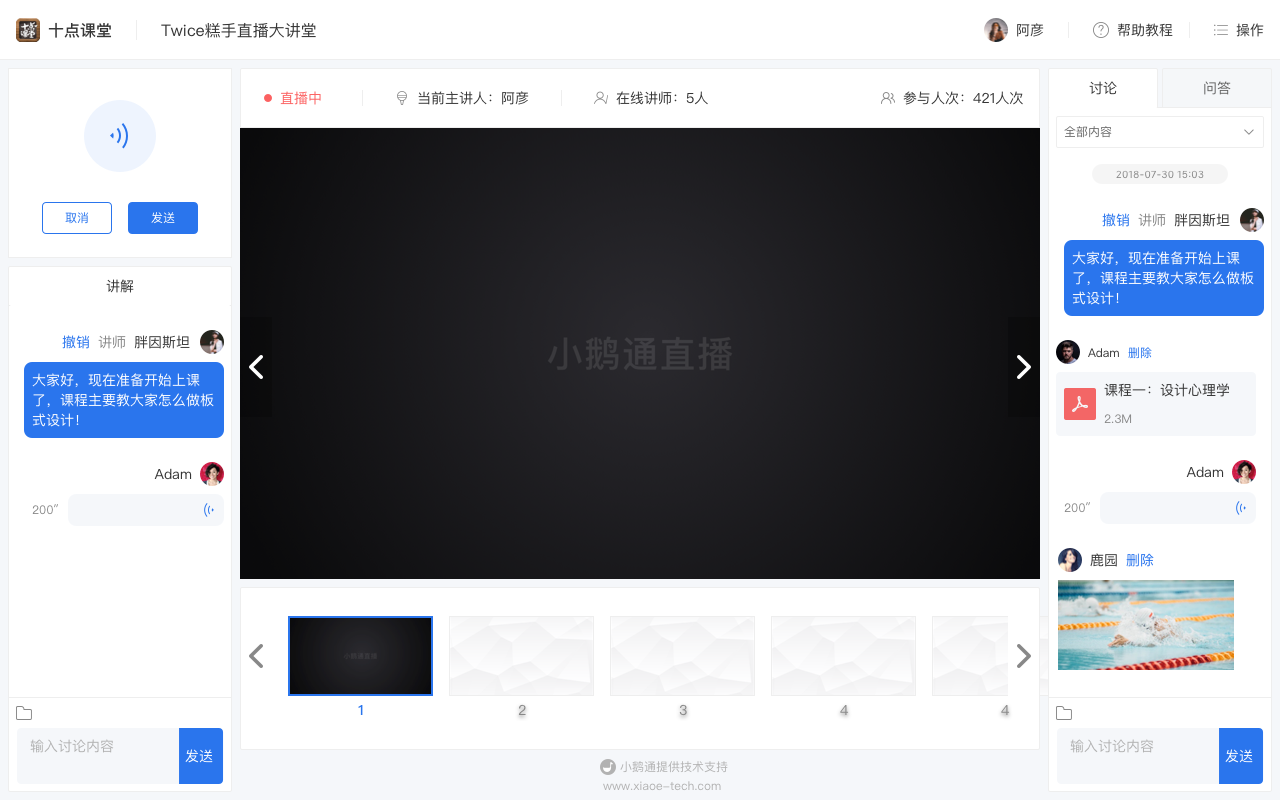
Click [Finish] and then you can choose to send it to the explanation area/Discussion area; or [Cancel] to record again
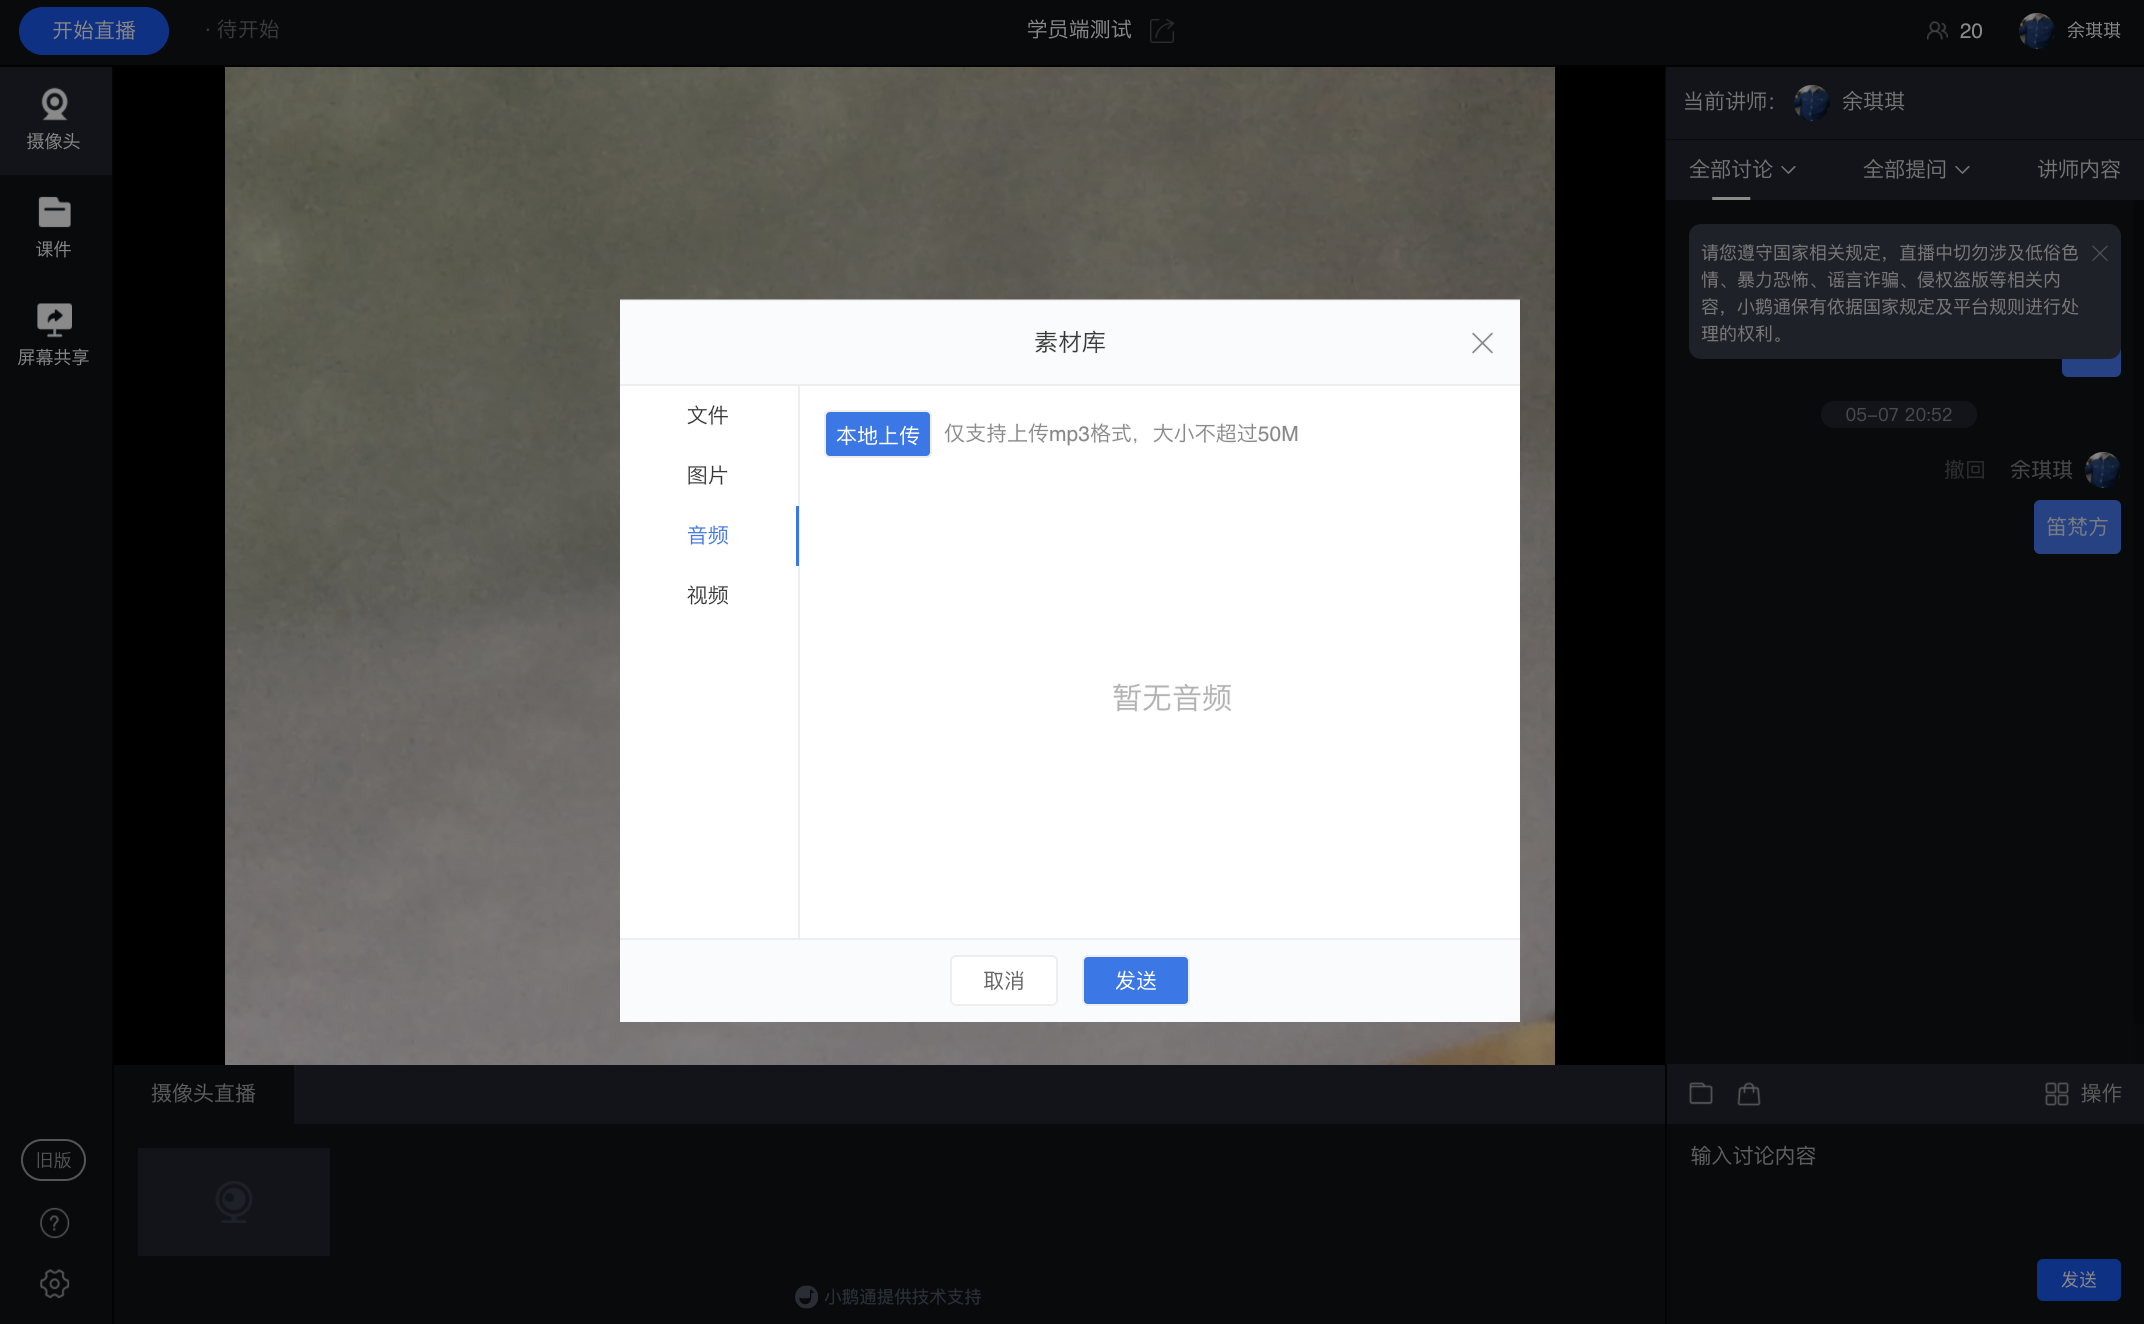
3. Instructors can also send uploaded audio through the material library
No comments to display
No comments to display