
Tutorial on Using Recorded and Live Streams
I. Function Introduction
The recorded live streaming mode is suitable for scenarios where there are videos and the live content is relatively lightweight. Merchants can upload videos to the live room. Once the live stream starts, the video will begin to play, and they can interact with students through voice and other means.
II. Use Scenarios
It is applicable to live streams where the instructor can prepare recorded videos in advance. The instructor prepares the recorded video in advance. Users can view the video uploaded by the instructor during the live stream, and the instructor can give explanations through voice.
III. Operation Path
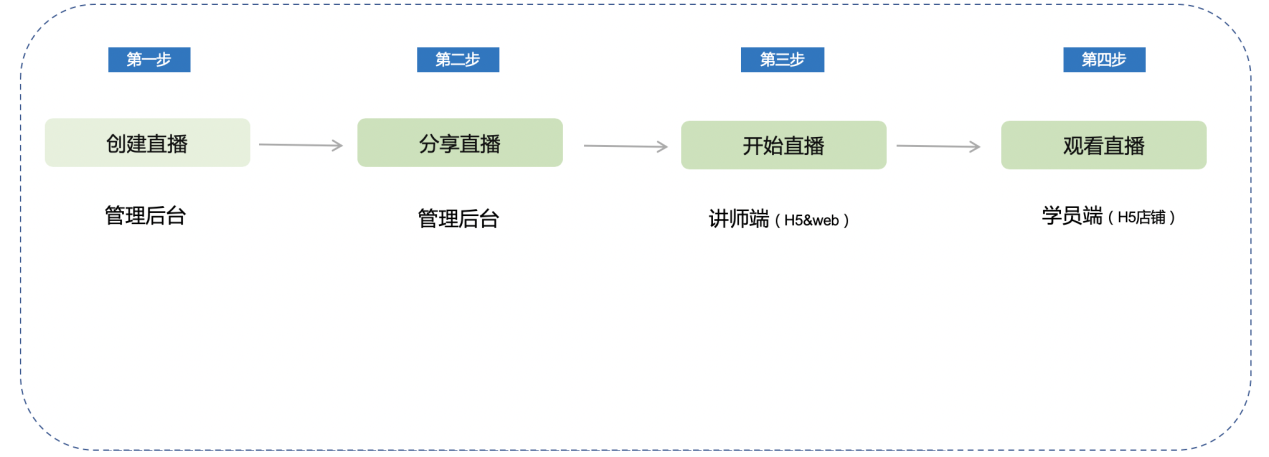
Merchant side: Merchant background → Create recorded live stream → Start live stream
IV. Usage Tutorial
Step 1: Create a live stream (Management background)
1. Enter the management background - New live stream, and select 'Recorded live stream'.
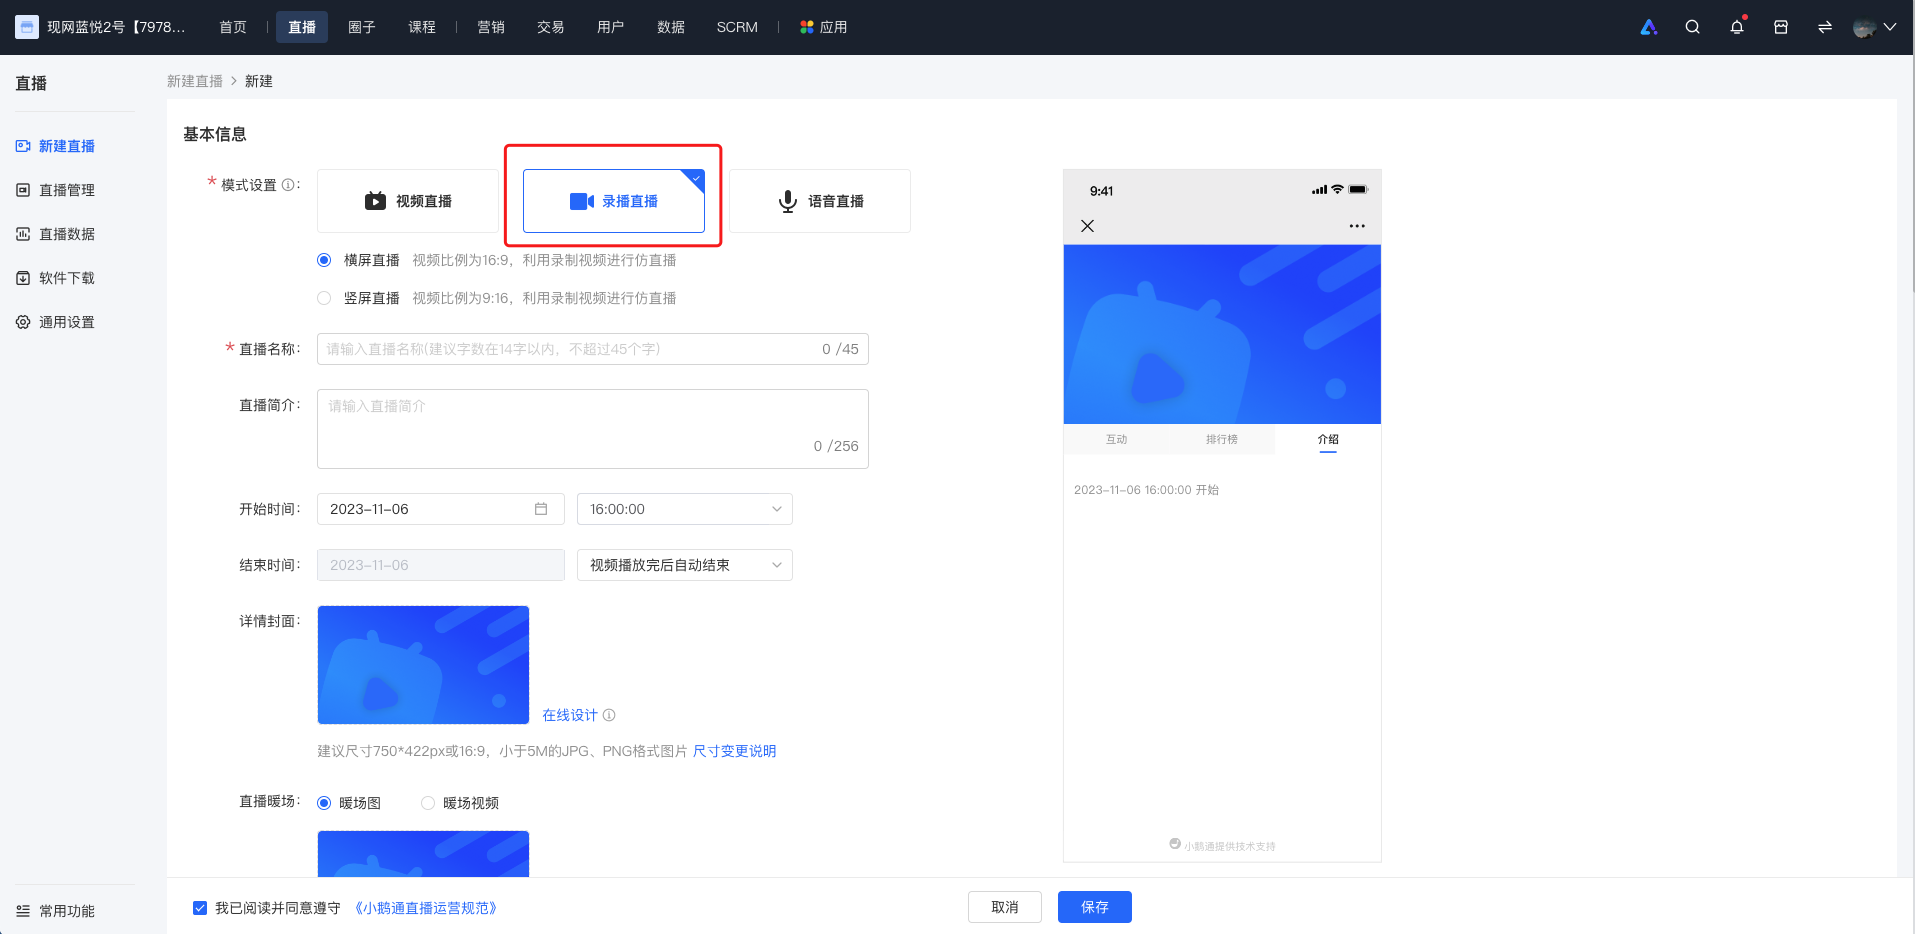
(Management background)
2. Fill in the relevant information, click 'Save' to complete the creation.
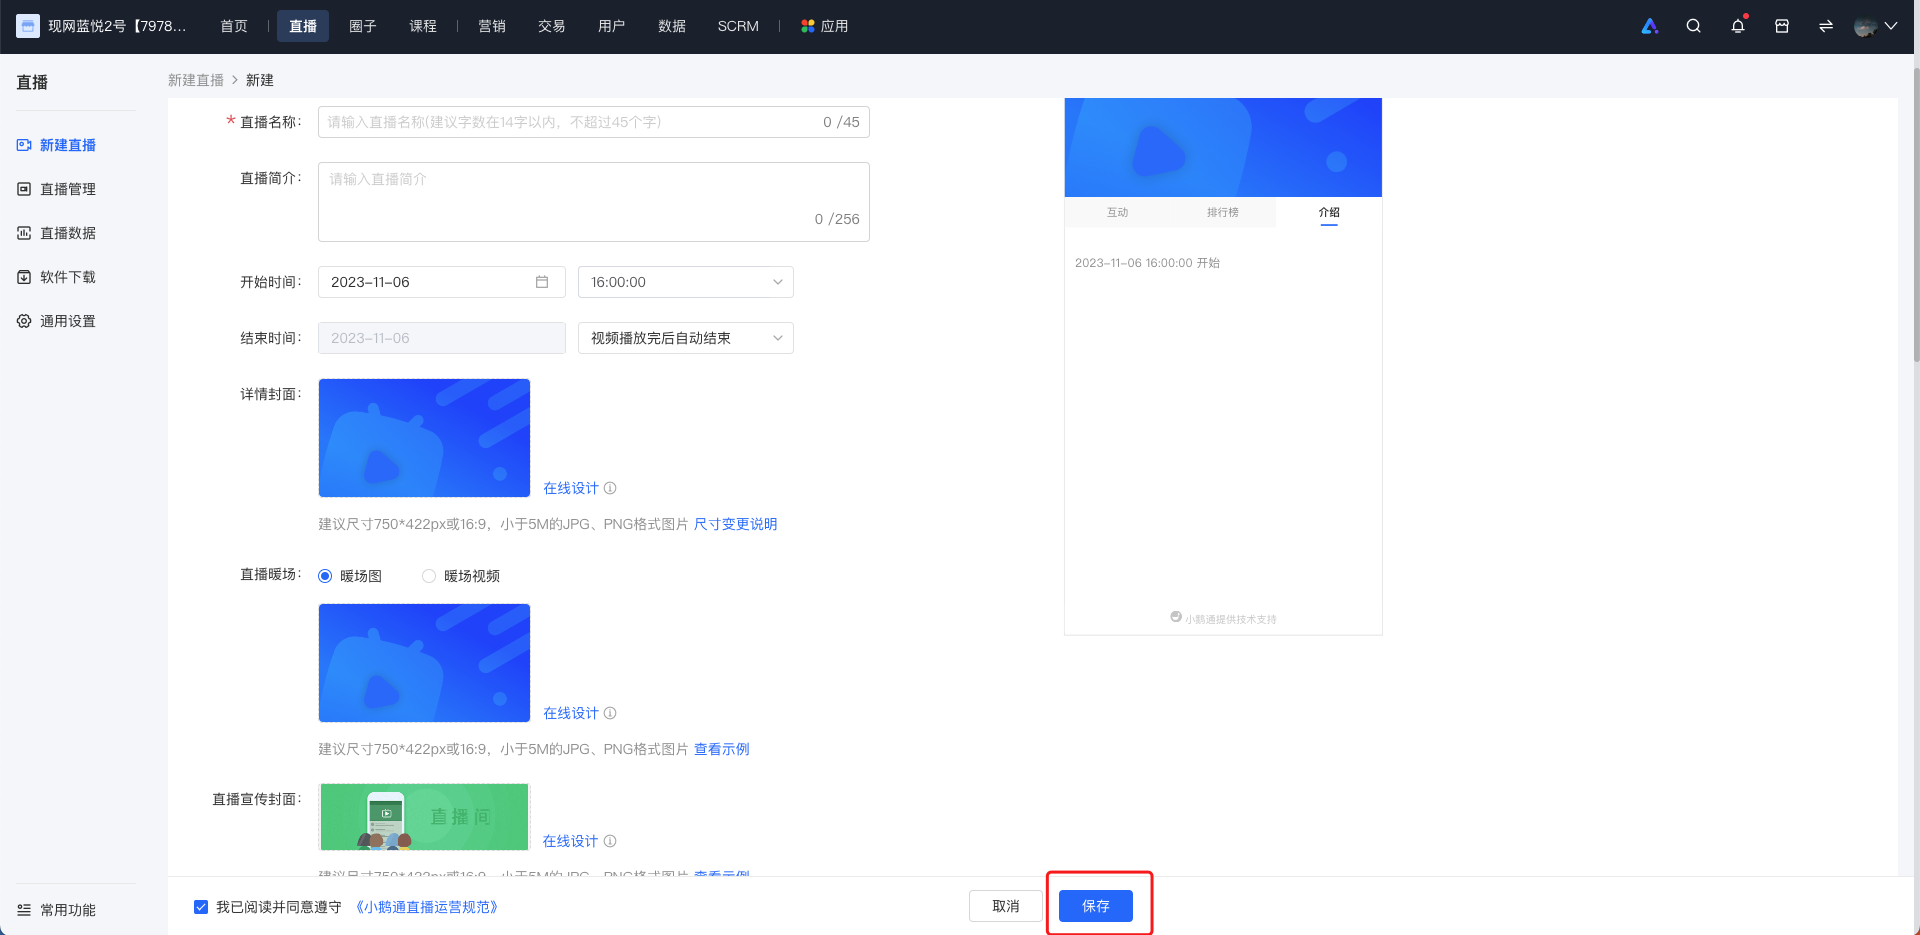
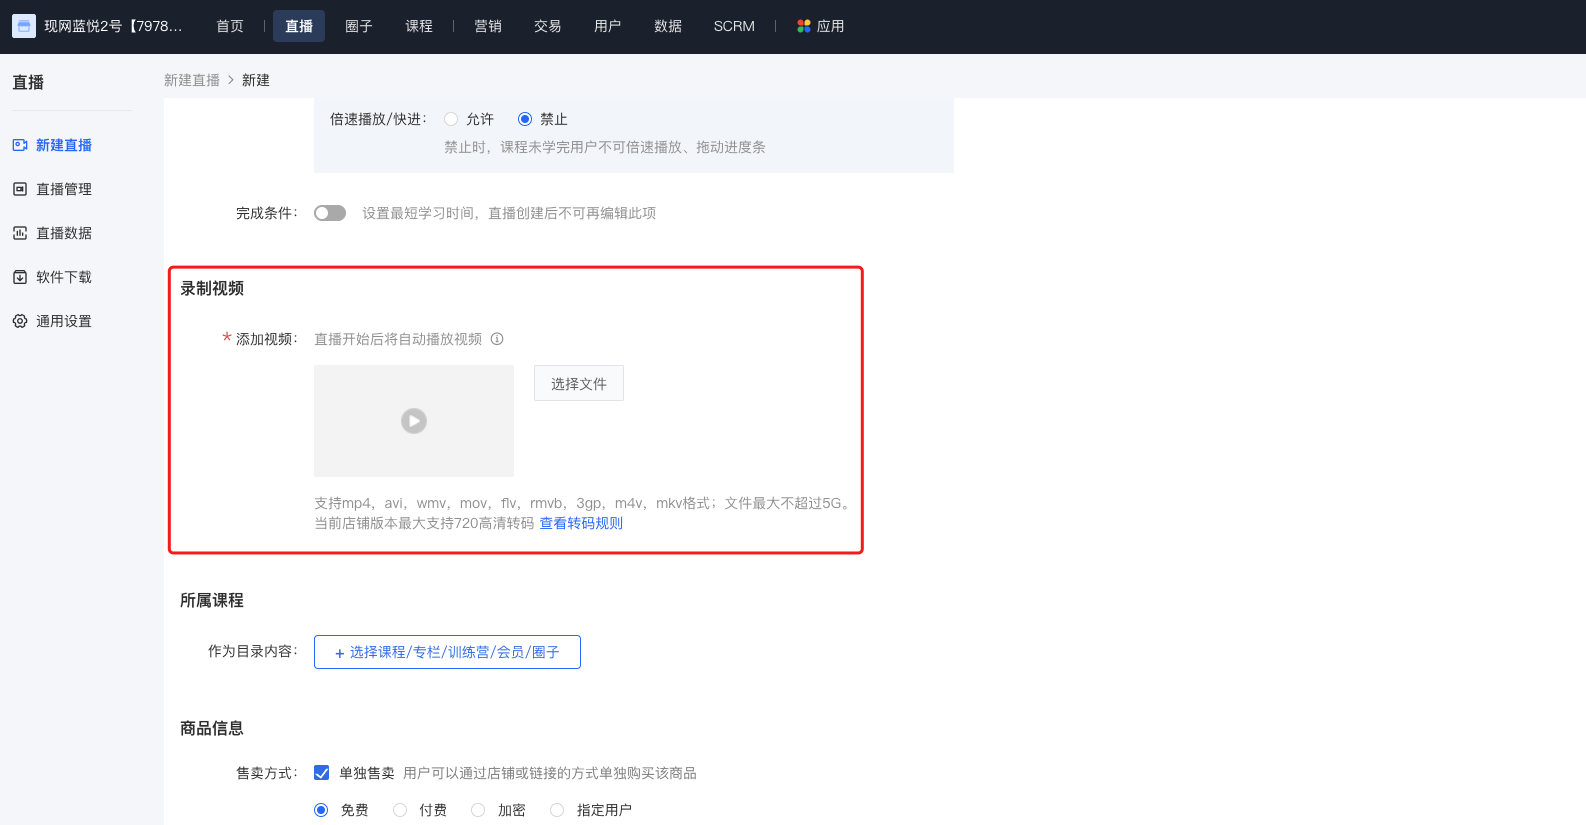
PS: Don't forget to select and upload the video at [Recorded video] - [Add video]!
(Management background)
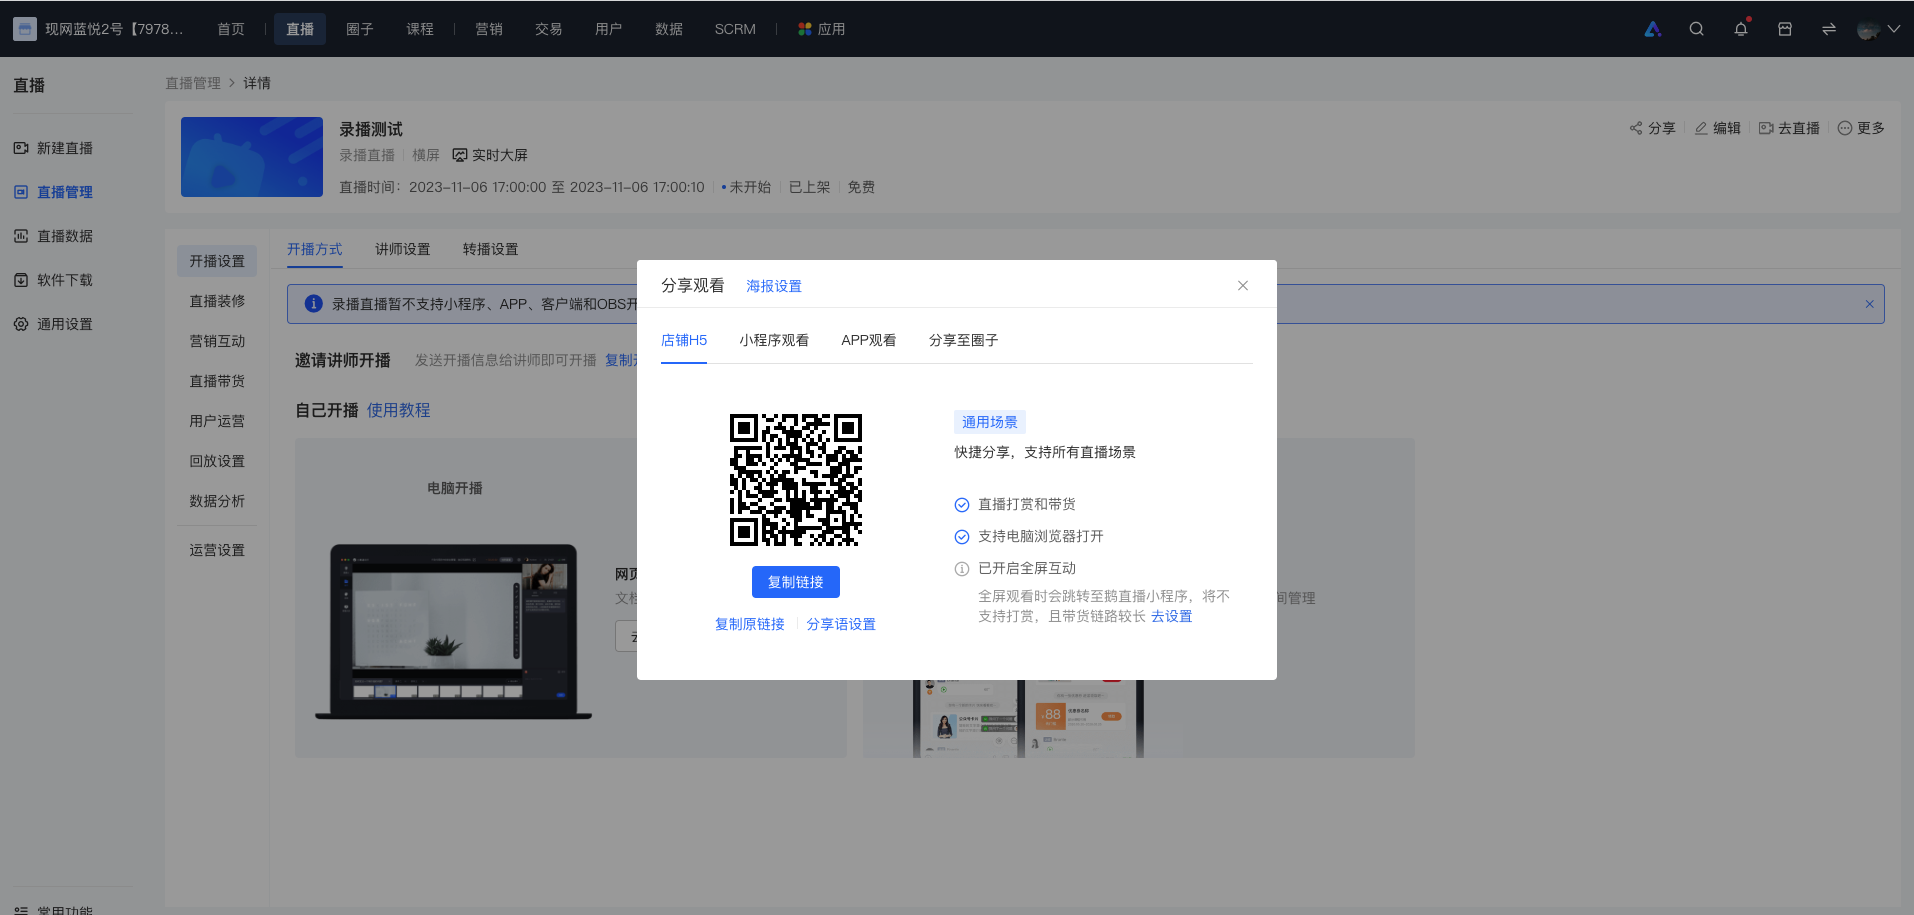
1. After the creation is completed, on the live stream list page, click the 'Share' button to get the QR code and link of the live room, and share them with students.
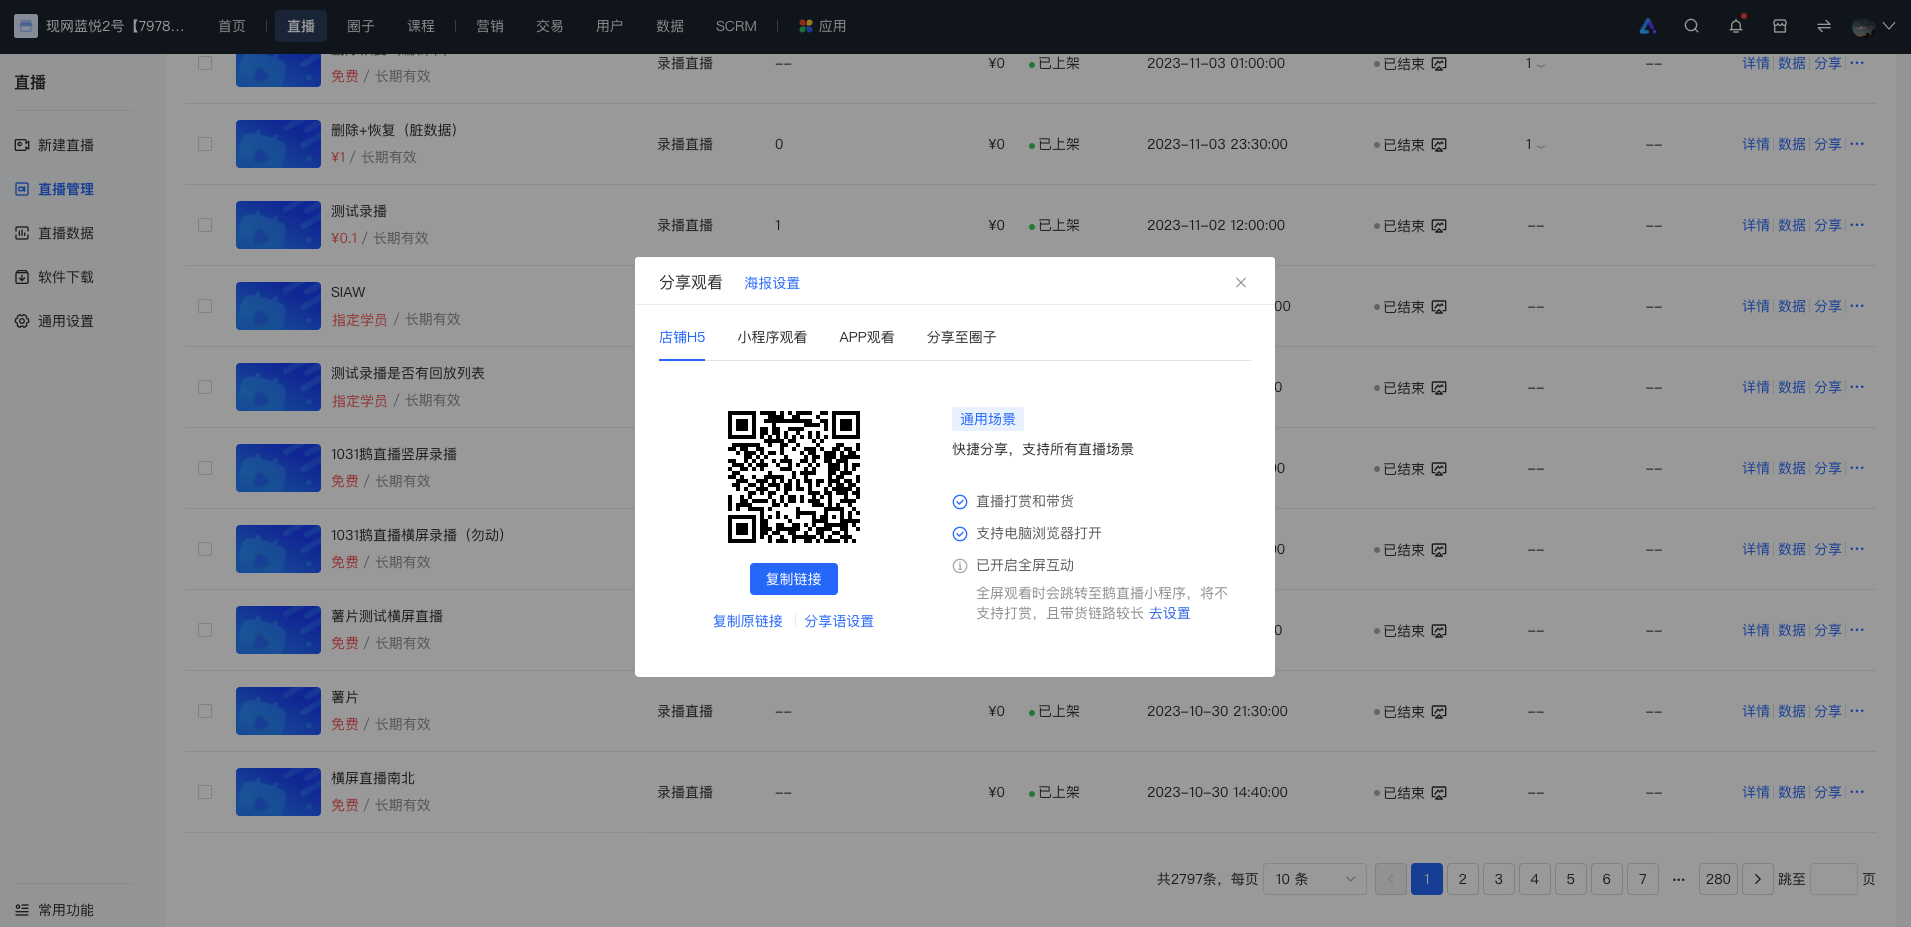
2. H5 - end sharing
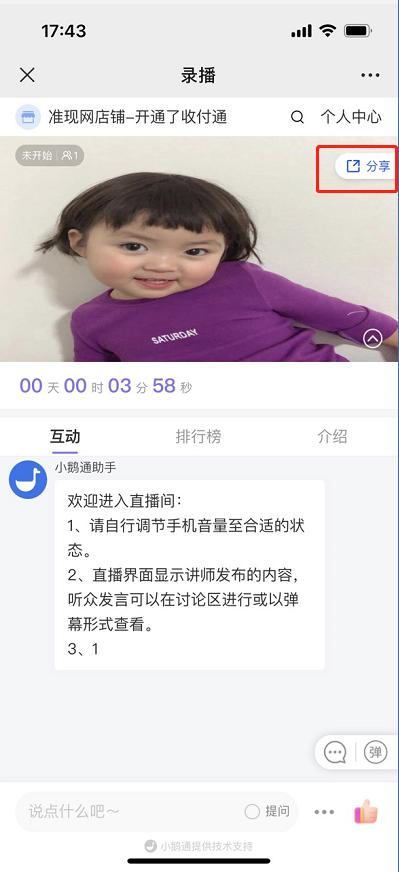
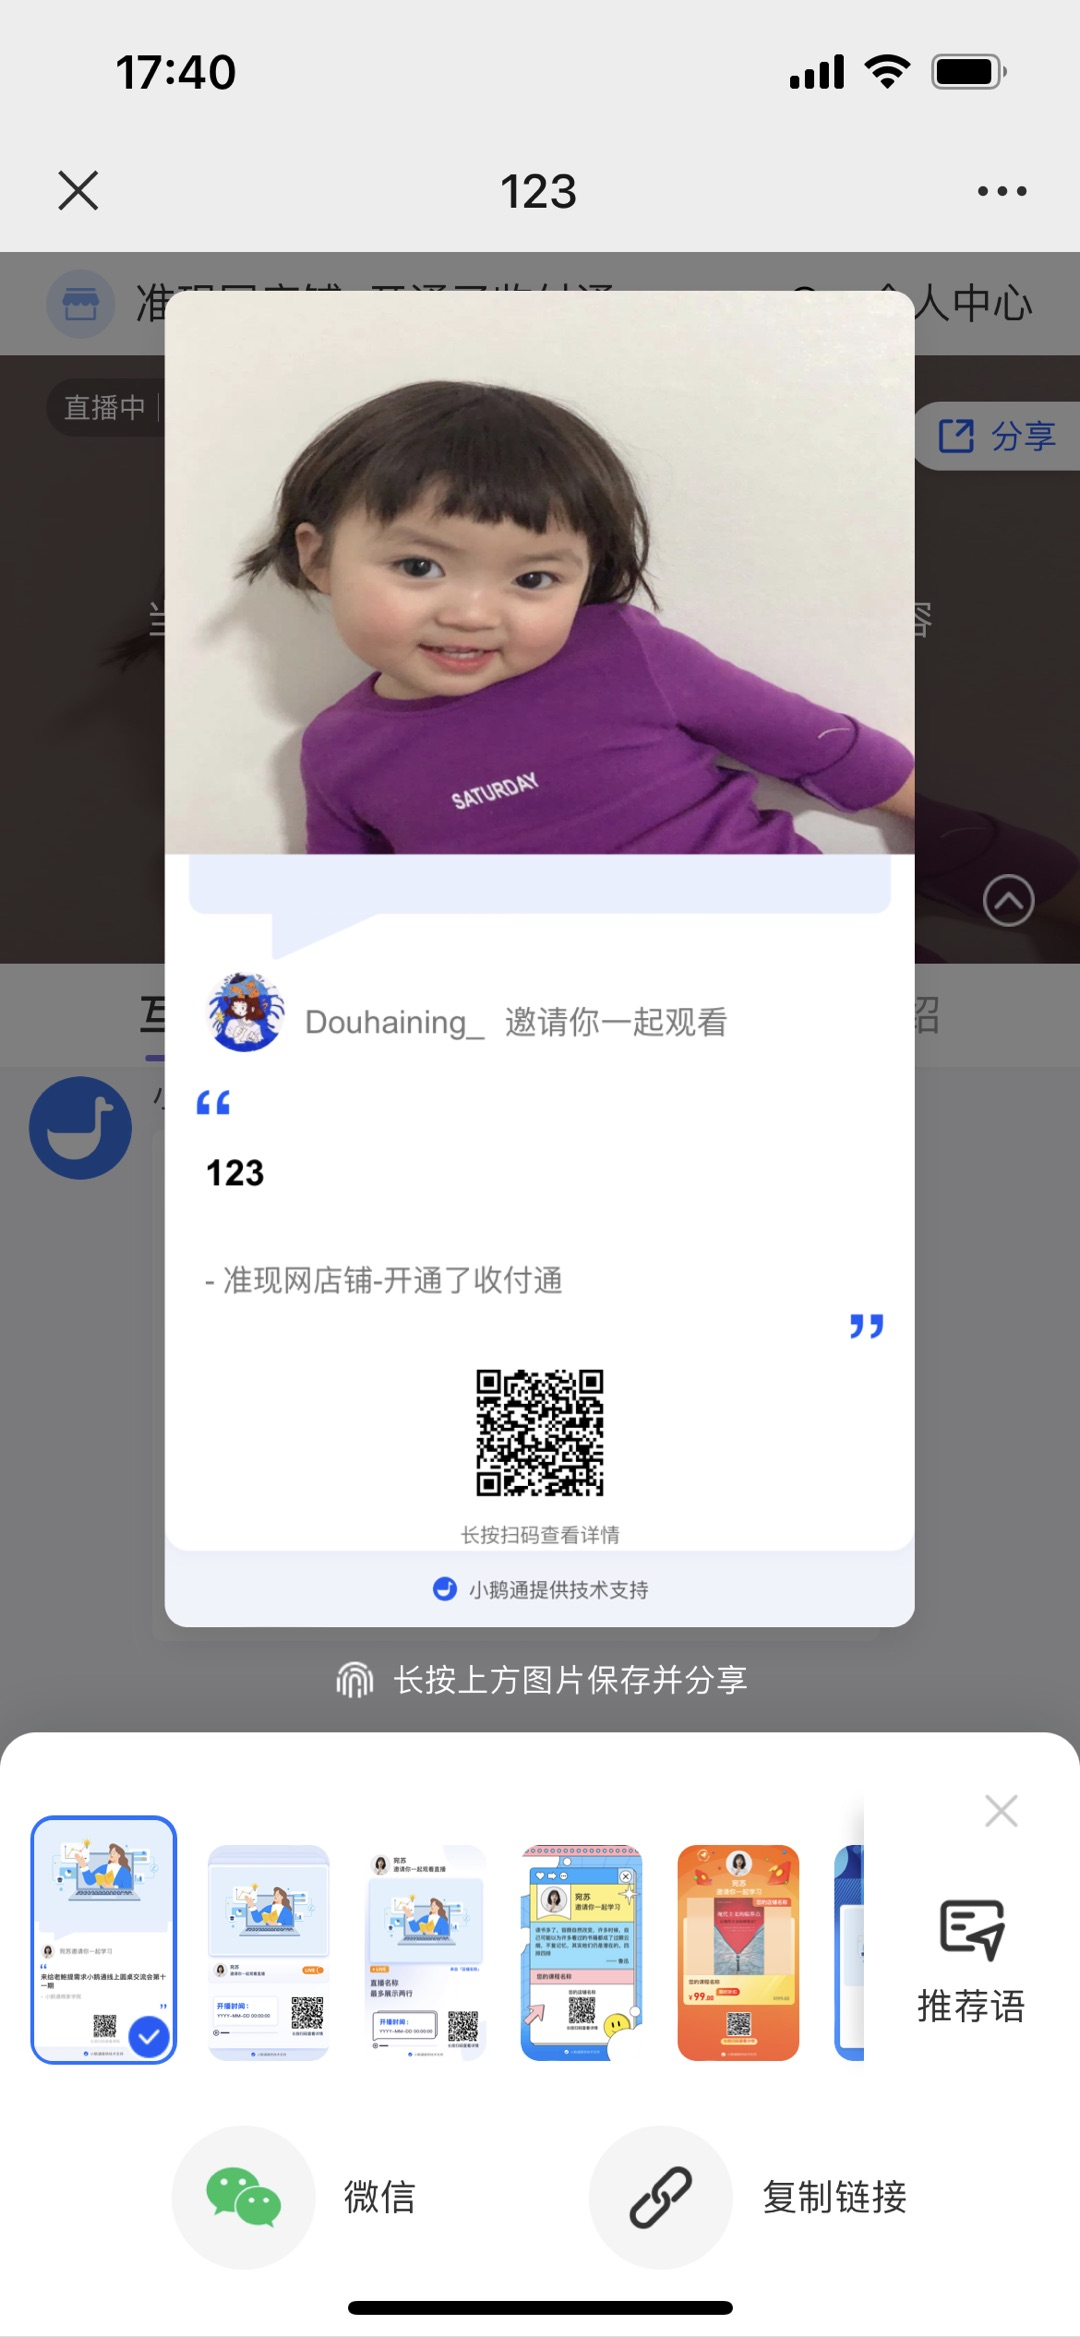
On the mobile - end, you can get the live stream invitation card and share it through channels such as Moments, WeChat groups, and Official Accounts.
Method for creating the invitation card:[Live room] → [Click the share button] → Long - press the picture to save → Send and share
Step 3: Start the live stream (WeChat H5 & Computer web instructor side)
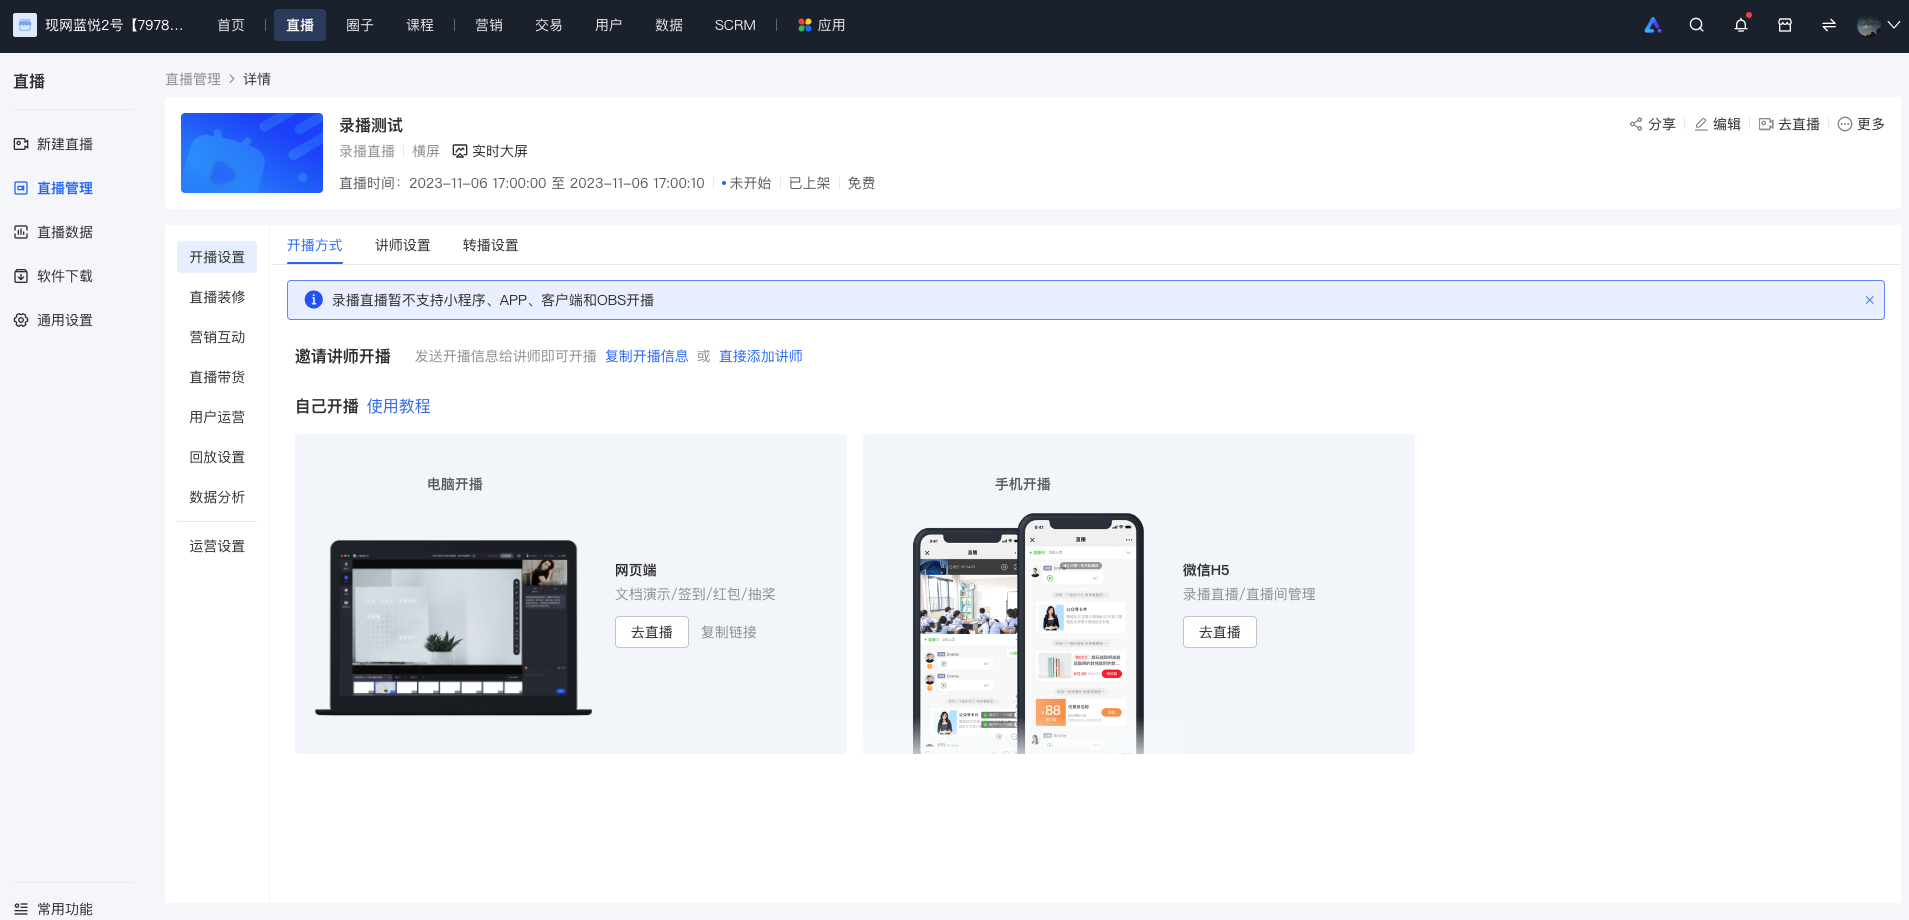
1. Web - end recorded live room
(1) Enter the web live room
After creating a recorded live stream, the instructor clicks 'Go live' and selects the web - end. Open the live room address, scan the QR code with WeChat to log in and enter the live room page. When the live stream time arrives, the live stream can start, and the uploaded video will begin to play.
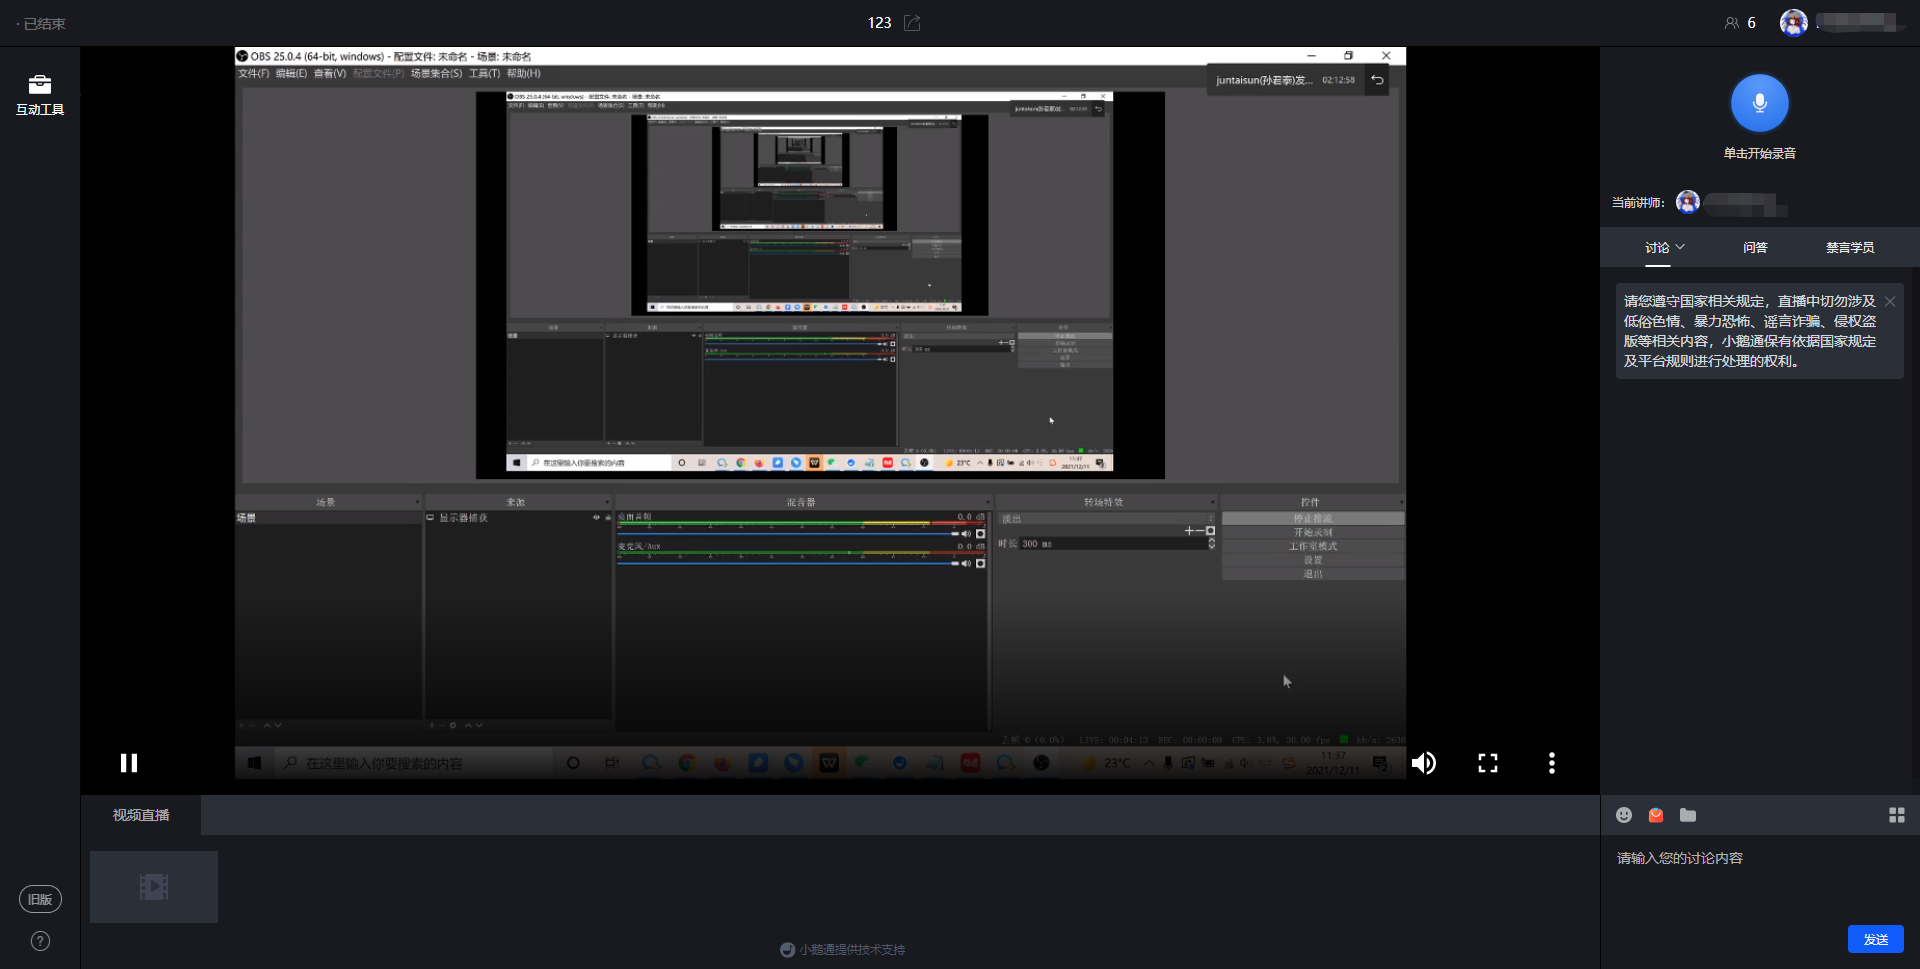
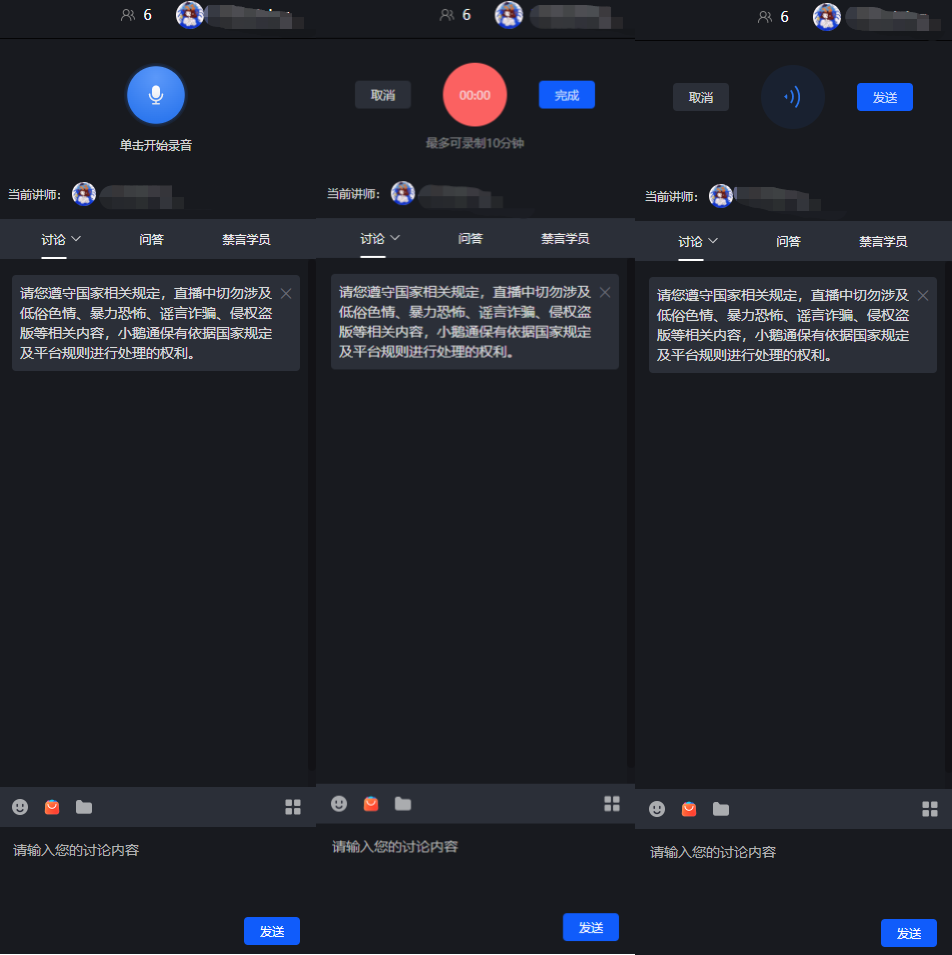
(2) Send voice
Click the microphone icon to start the voice recording time.
Click [Finish] to complete the voice recording; click [Cancel] to cancel the sending.
After the voice recording is completed, click the [Send] button to send the voice. Click 'Cancel' to cancel the sending.
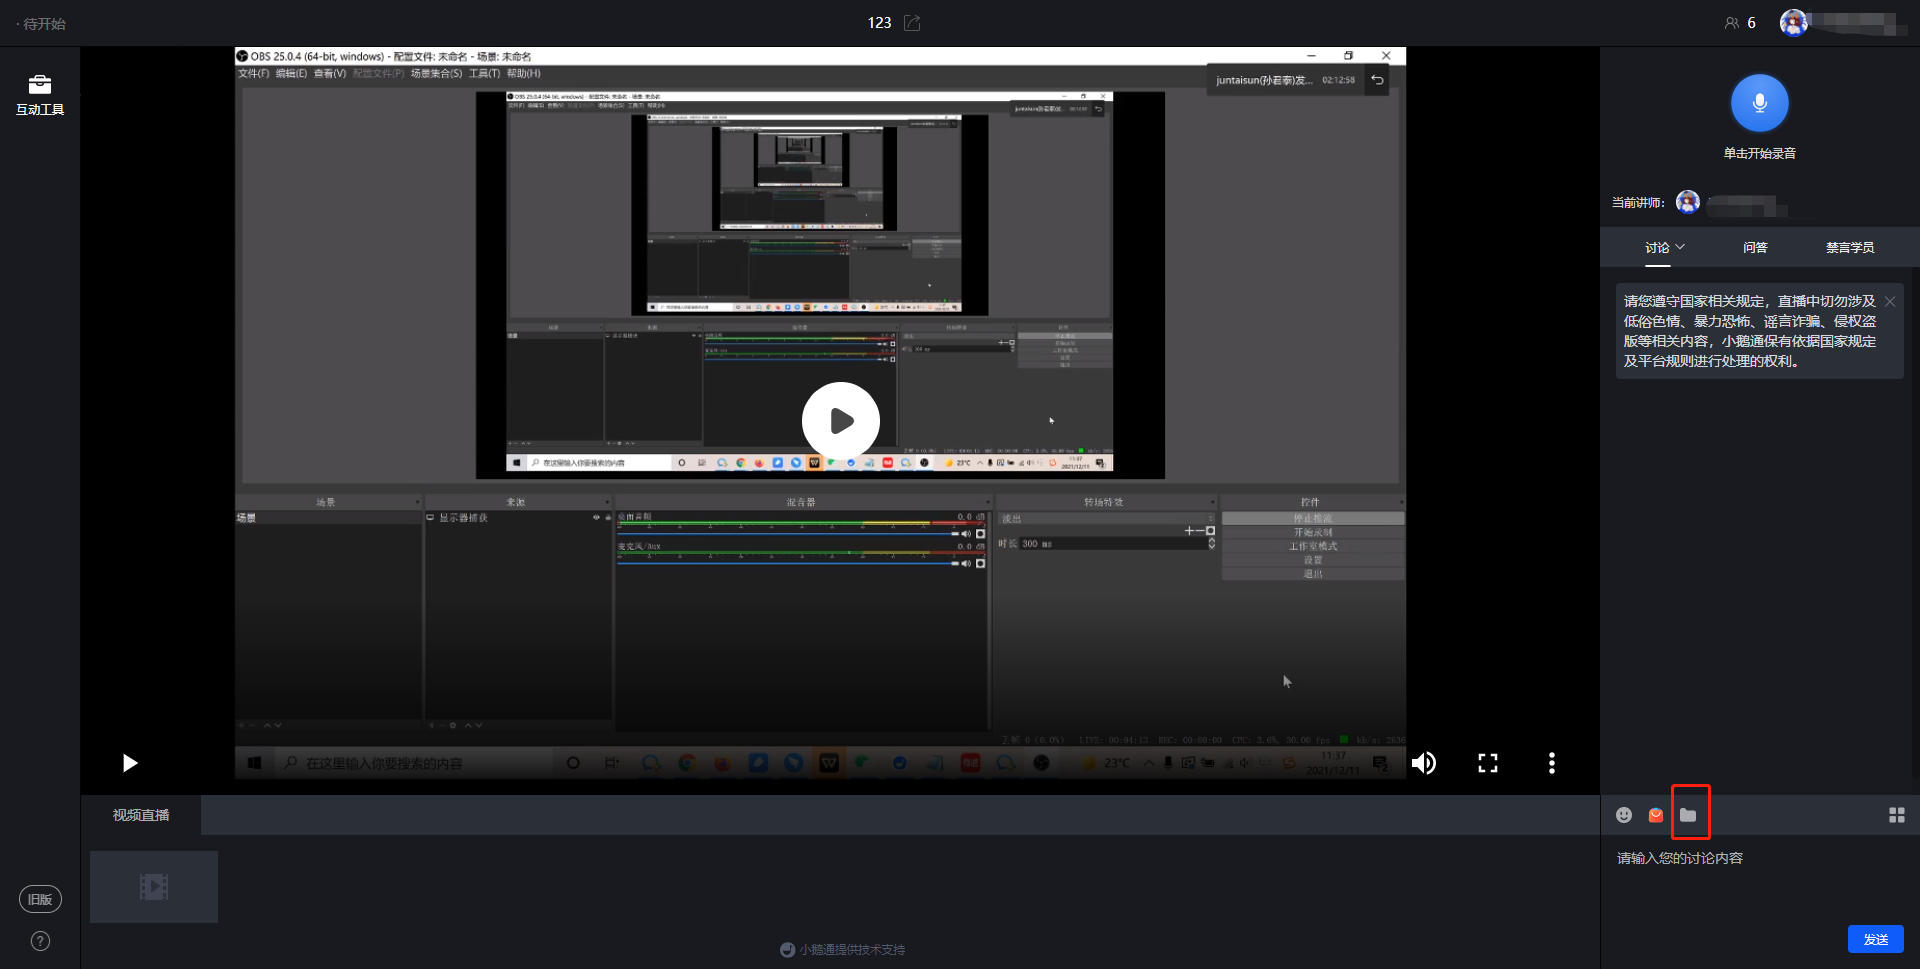
(3) Courseware display
Click the 'Folder' button in the lower - right corner to enter the material library, where you can upload and send files in other formats.
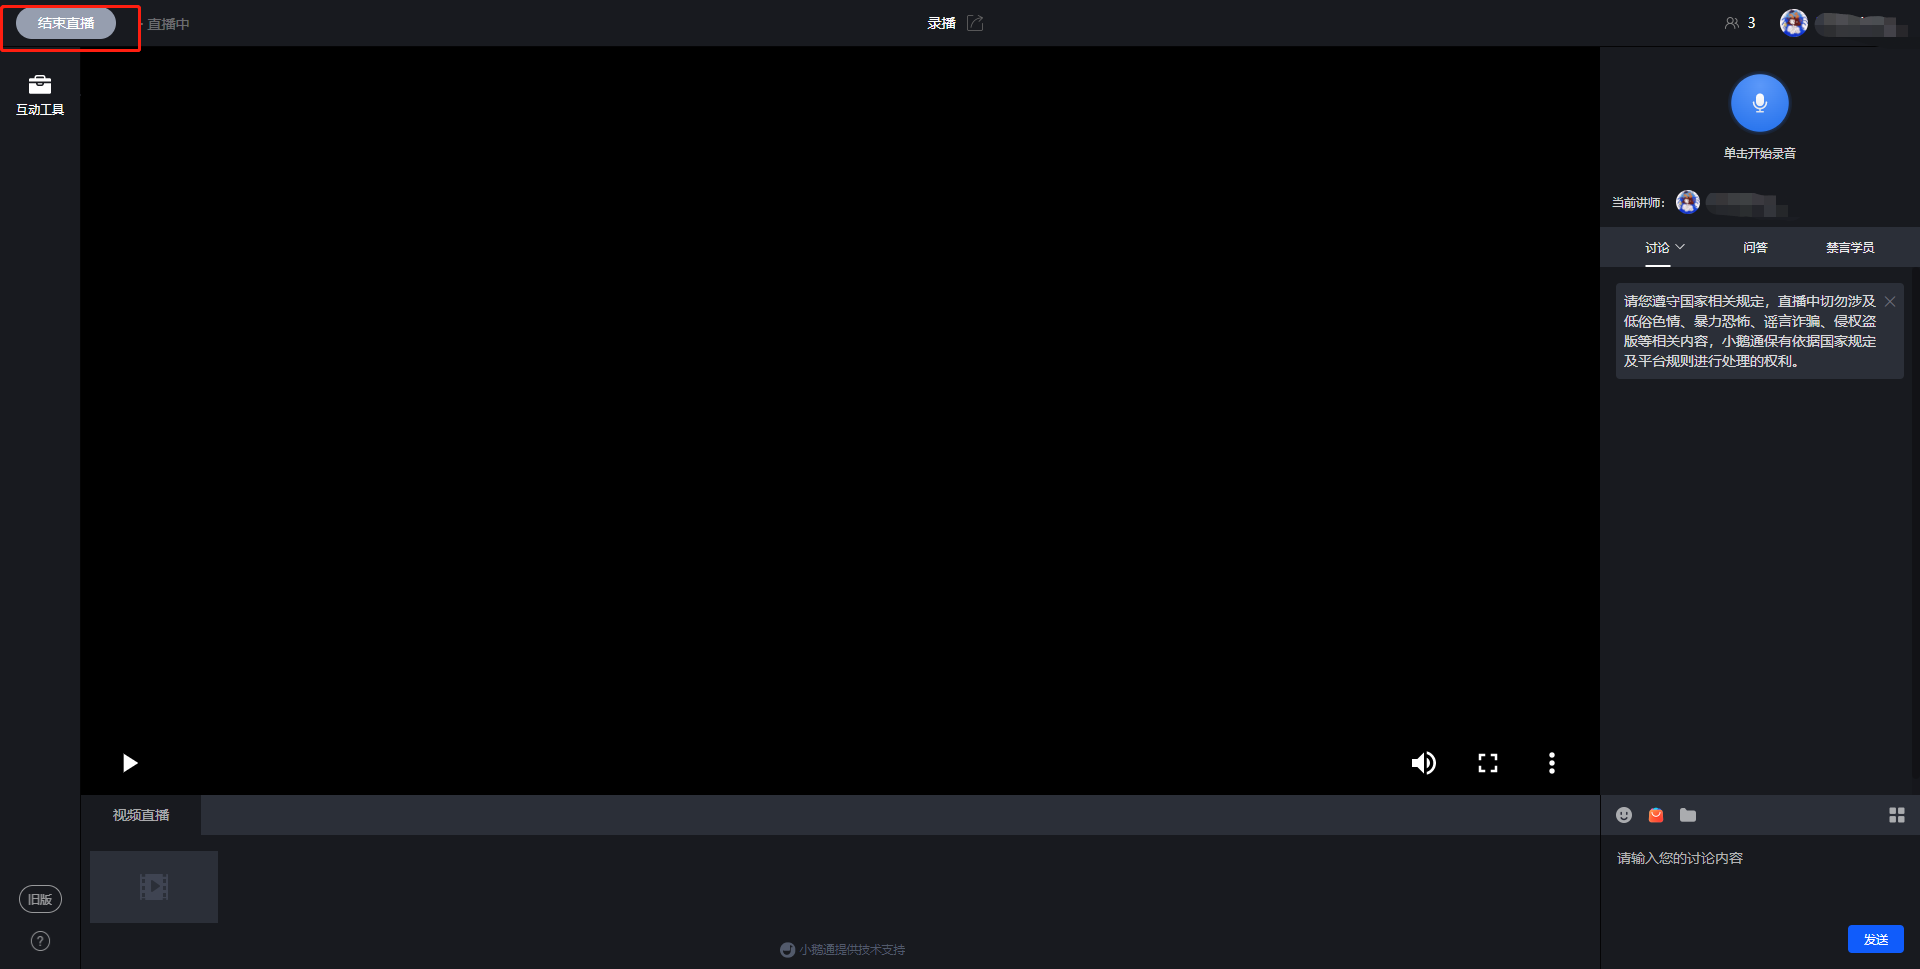
(4) End the live stream
When the instructor needs to end the live stream, click the operation button in the upper - left corner to end the live stream.
2. H5 recorded live room
(1) Enter the H5 live room
After creating a recorded live stream, a 'Share' pop - up window will appear.Scan the QR code with your mobile phone to enter the live room. When the live stream time arrives, the live stream can start, and the uploaded video will begin to play.
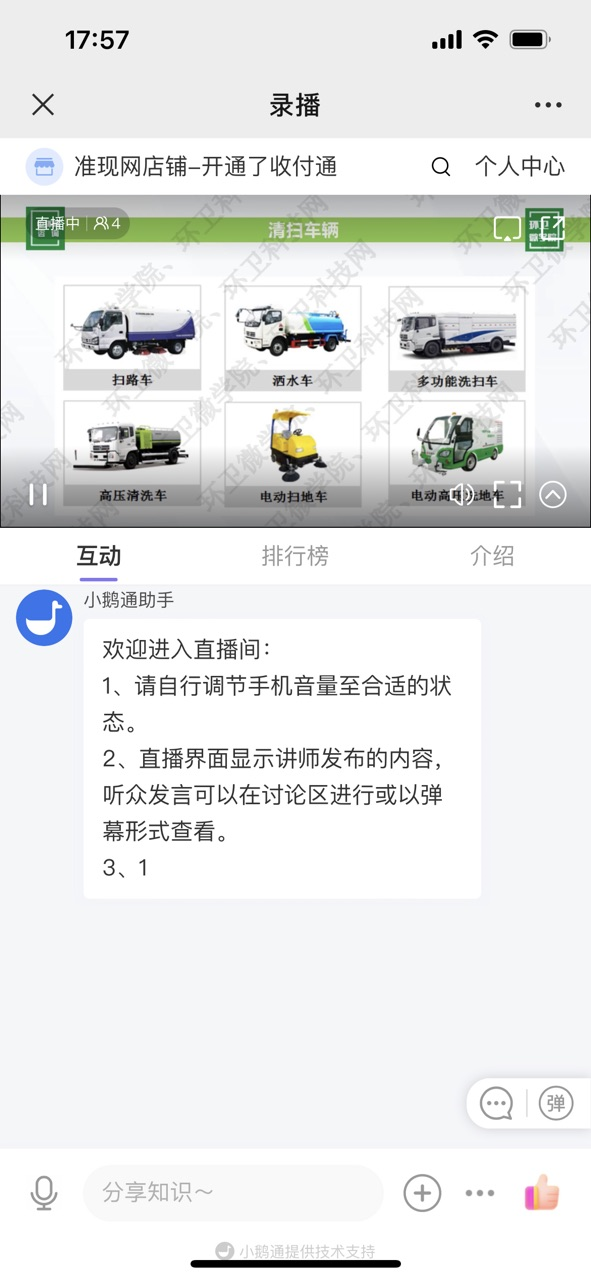
(2) Send voice
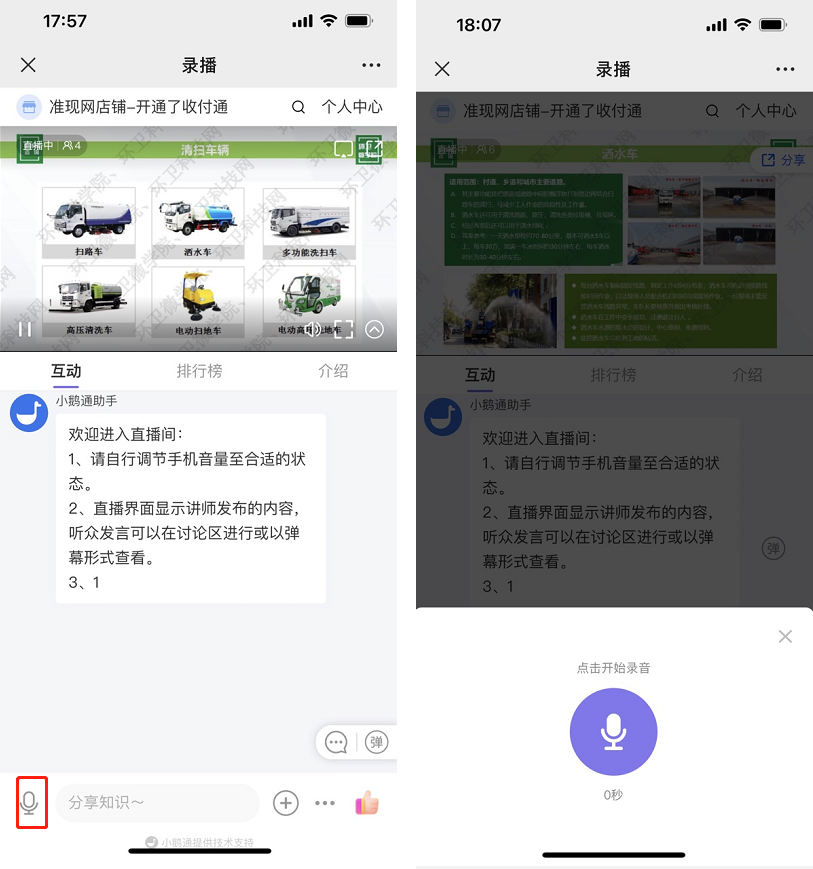
Click the microphone icon to start the voice recording time.
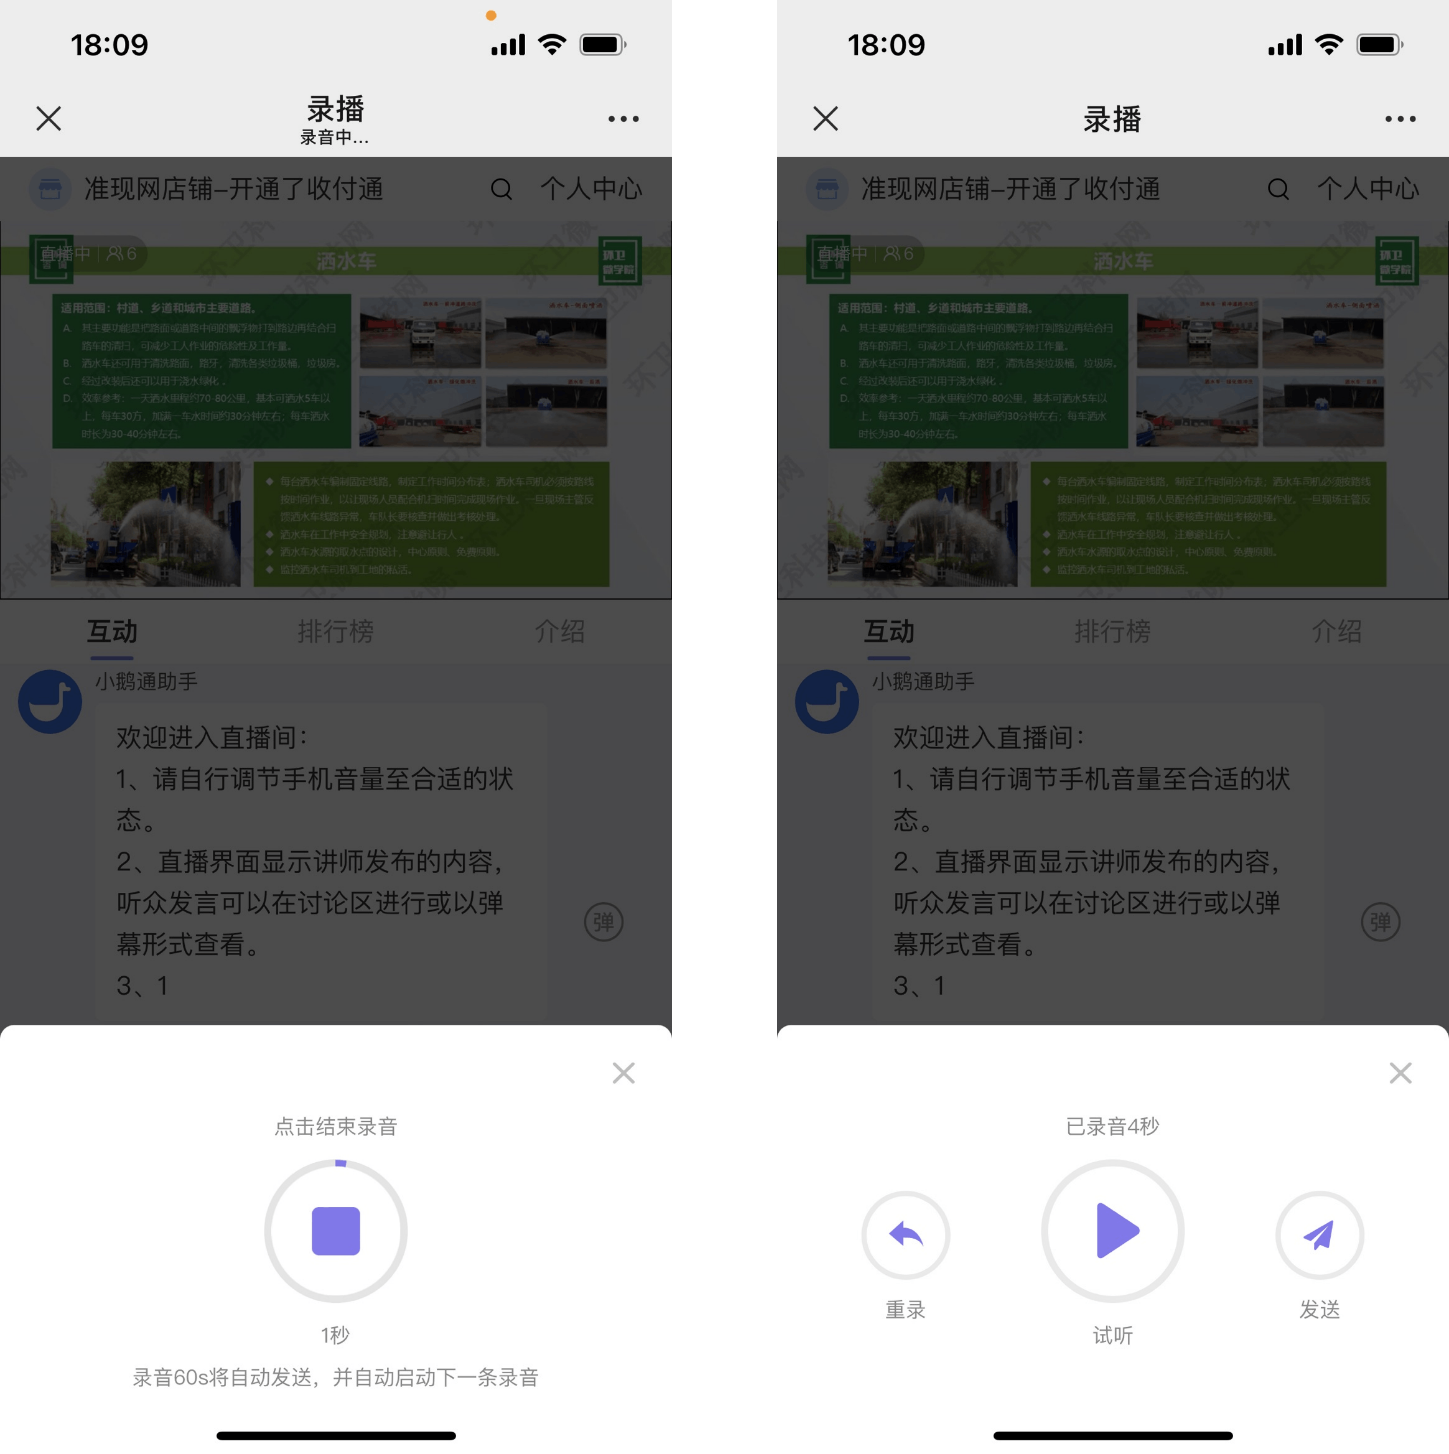
Click the [Red square] to complete the voice recording. Click 'Cancel' to cancel the sending.
After the voice recording is completed, click the send button to send the voice. Click 'Cancel' to cancel the sending.
The elink live room supports continuous voice recording by the instructor. The instructor doesn't need to manually click to send the recording. The system will automatically cut the recording into 60 - second voice messages and send them one by one.
This allows the instructor to teach at their own pace without being interrupted by the action of sending voice messages.
(3) Courseware display
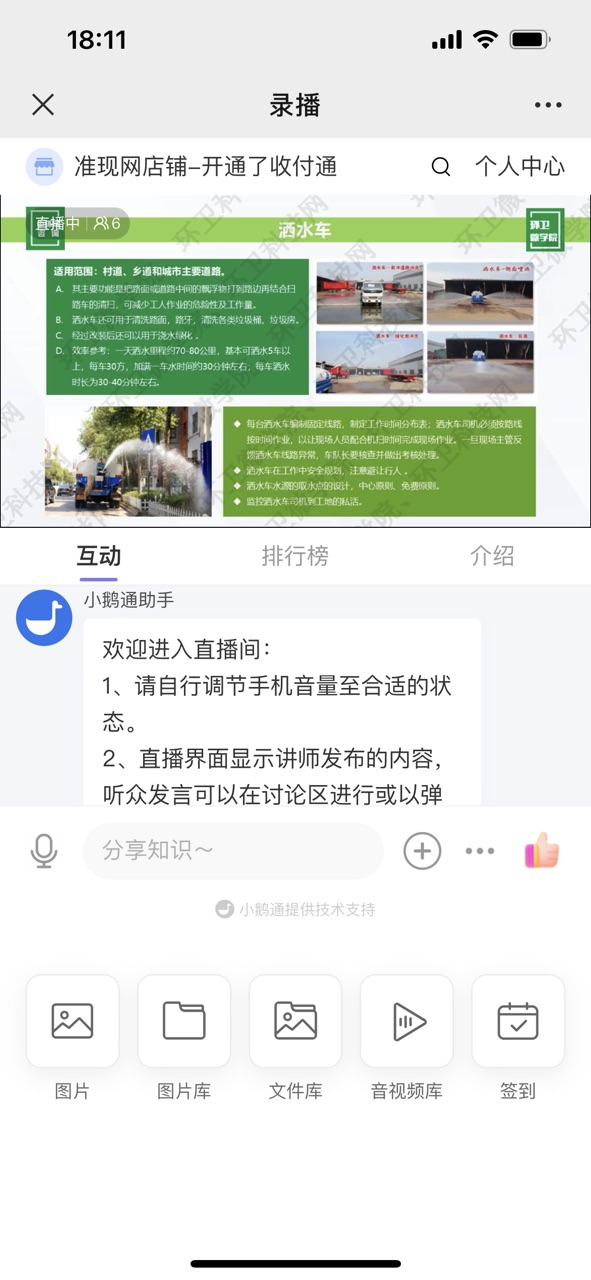
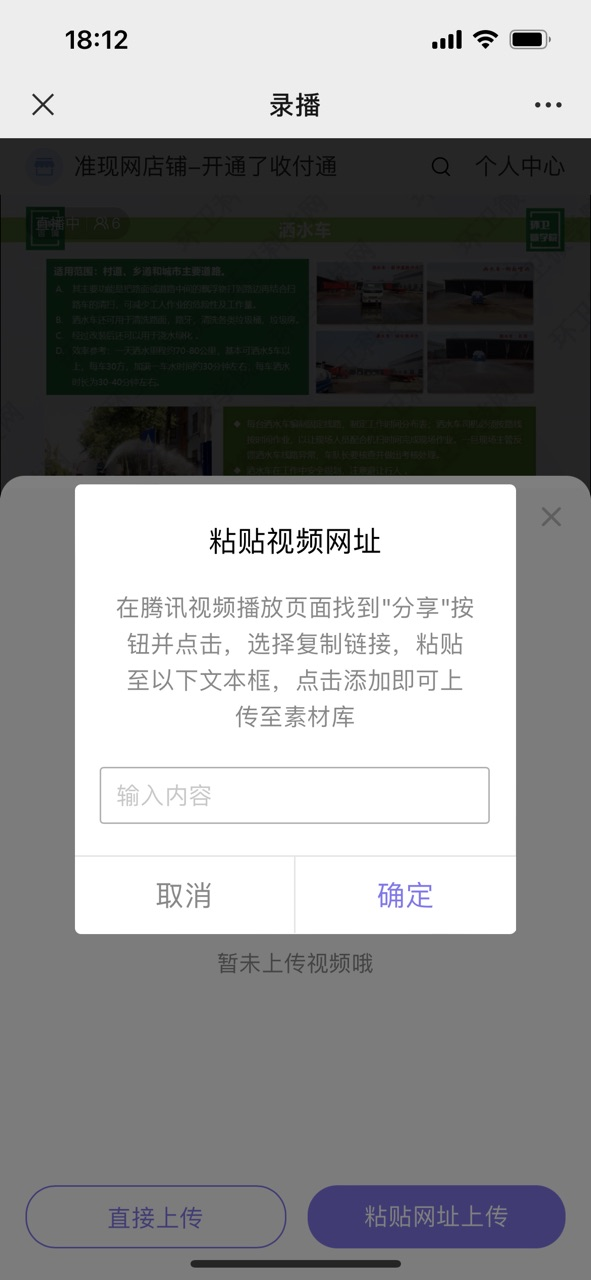
Click the '+' in the lower - left corner of the live room, then click the file library or audio - video library to share content in other formats (the upload needs to be completed in the material library on the web instructor side).
(4) End the live stream
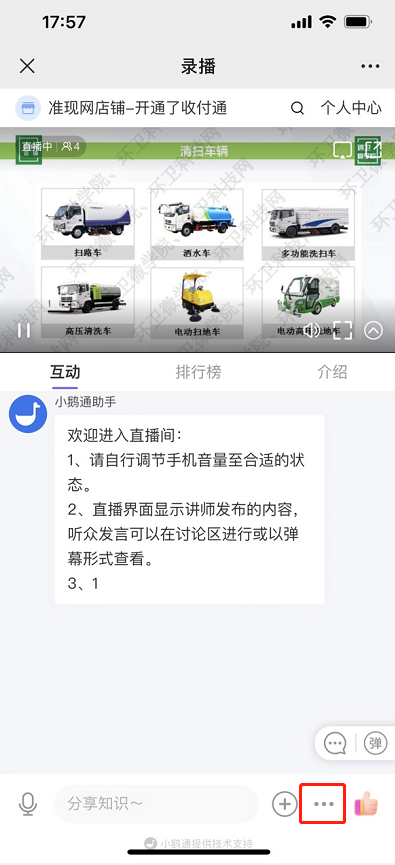
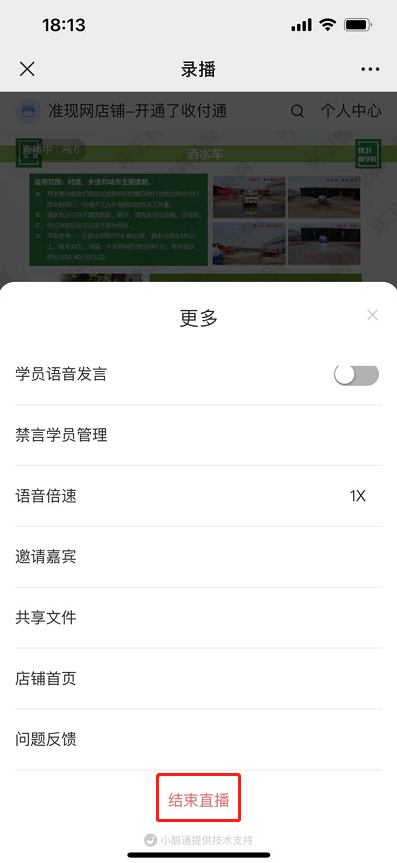
When the instructor needs to end the live stream, click the 'More' button in the lower - right corner and click 'End live stream' in the pop - up drop - down box to end the live stream.
Step 4: Watch the live stream (H5 store or elink live Mini Program)
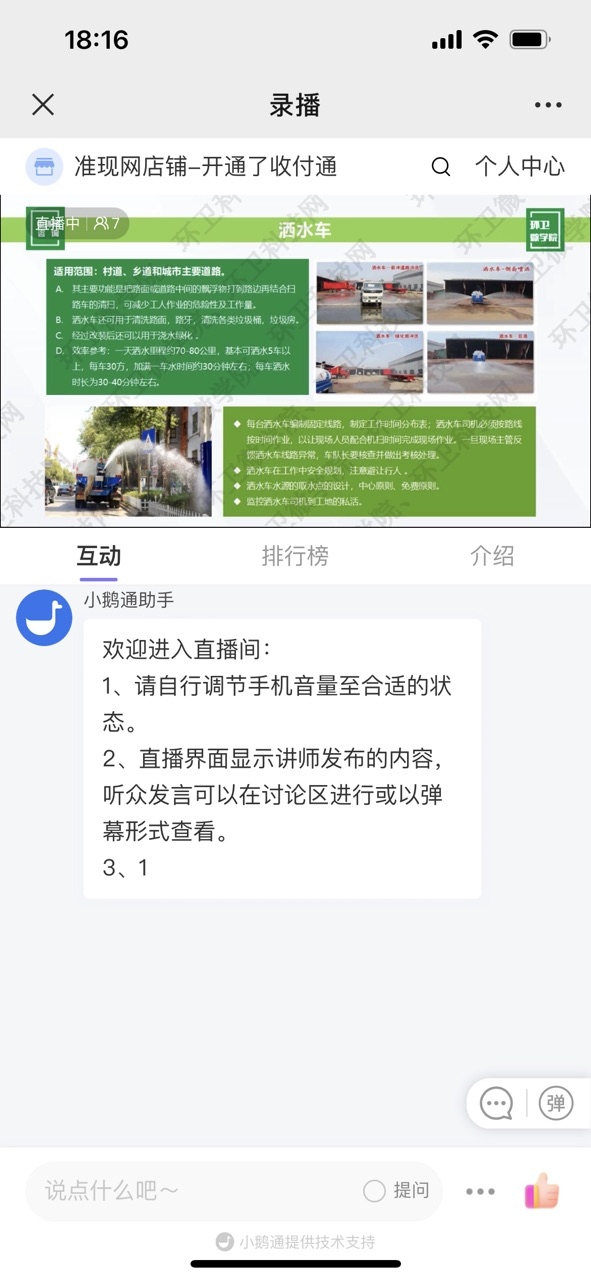
1. Users can enter the live room by scanning the QR code or opening the link.
2. After entering the live room, students can interact with the instructor by sending text content, asking questions, etc.
No comments to display
No comments to display