
How to import trainees for check-ins?
Tutorial on Importing Students for Check-ins
I. Function Introduction
The check-in function supports importing students. There are two import methods: quick import and file import. You can import existing users in the store or create new users for import. After successful import, students will directly gain check-in privileges and can directly participate in the check-in activity.
II. Purpose of Use
On the student side, the check-in import function allows users to quickly participate in check-ins, creating a good check-in experience. On the merchant side, it can reduce labor costs and improve the efficiency of student management.
III. Use Scenarios
When students purchase check-ins offline or through other channels and cannot participate in check-ins directly, and the process of obtaining privileges using invitation codes or redemption codes is complicated. Merchants need to teach and supervise students to obtain privileges for subsequent student management operations, which greatly increases labor costs and is inefficient. Merchants can import students in a unified manner to allow students to directly participate in check-ins and conduct relevant management operations independently, such as grouping.
IV. Operation Path
Merchant side: Merchant background → Courses → Interaction Management → Check-ins → Student Management → Import Students
Student side:
elink Check-in Mini Program: Check-in List
H5: Personal Center - Check-ins
V. Use Tutorial
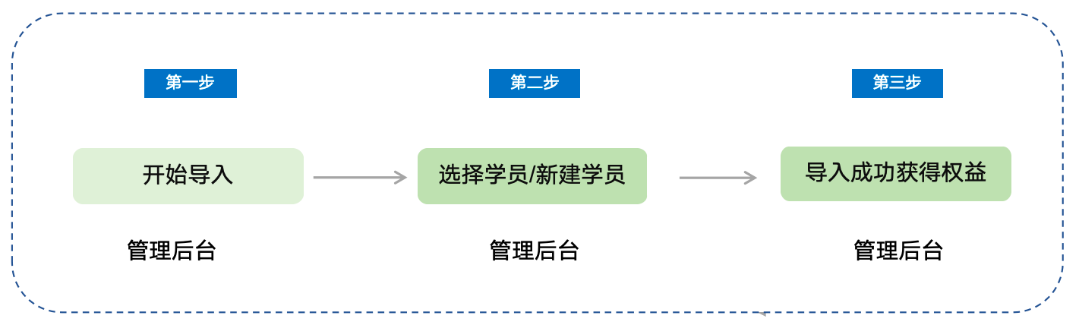
Step 1 Start Importing
1. Through the management background - Courses - Interaction Management - Check-ins, click on a specific check-in to enter the student management page, and then click [Import Students] to enter the student import page.
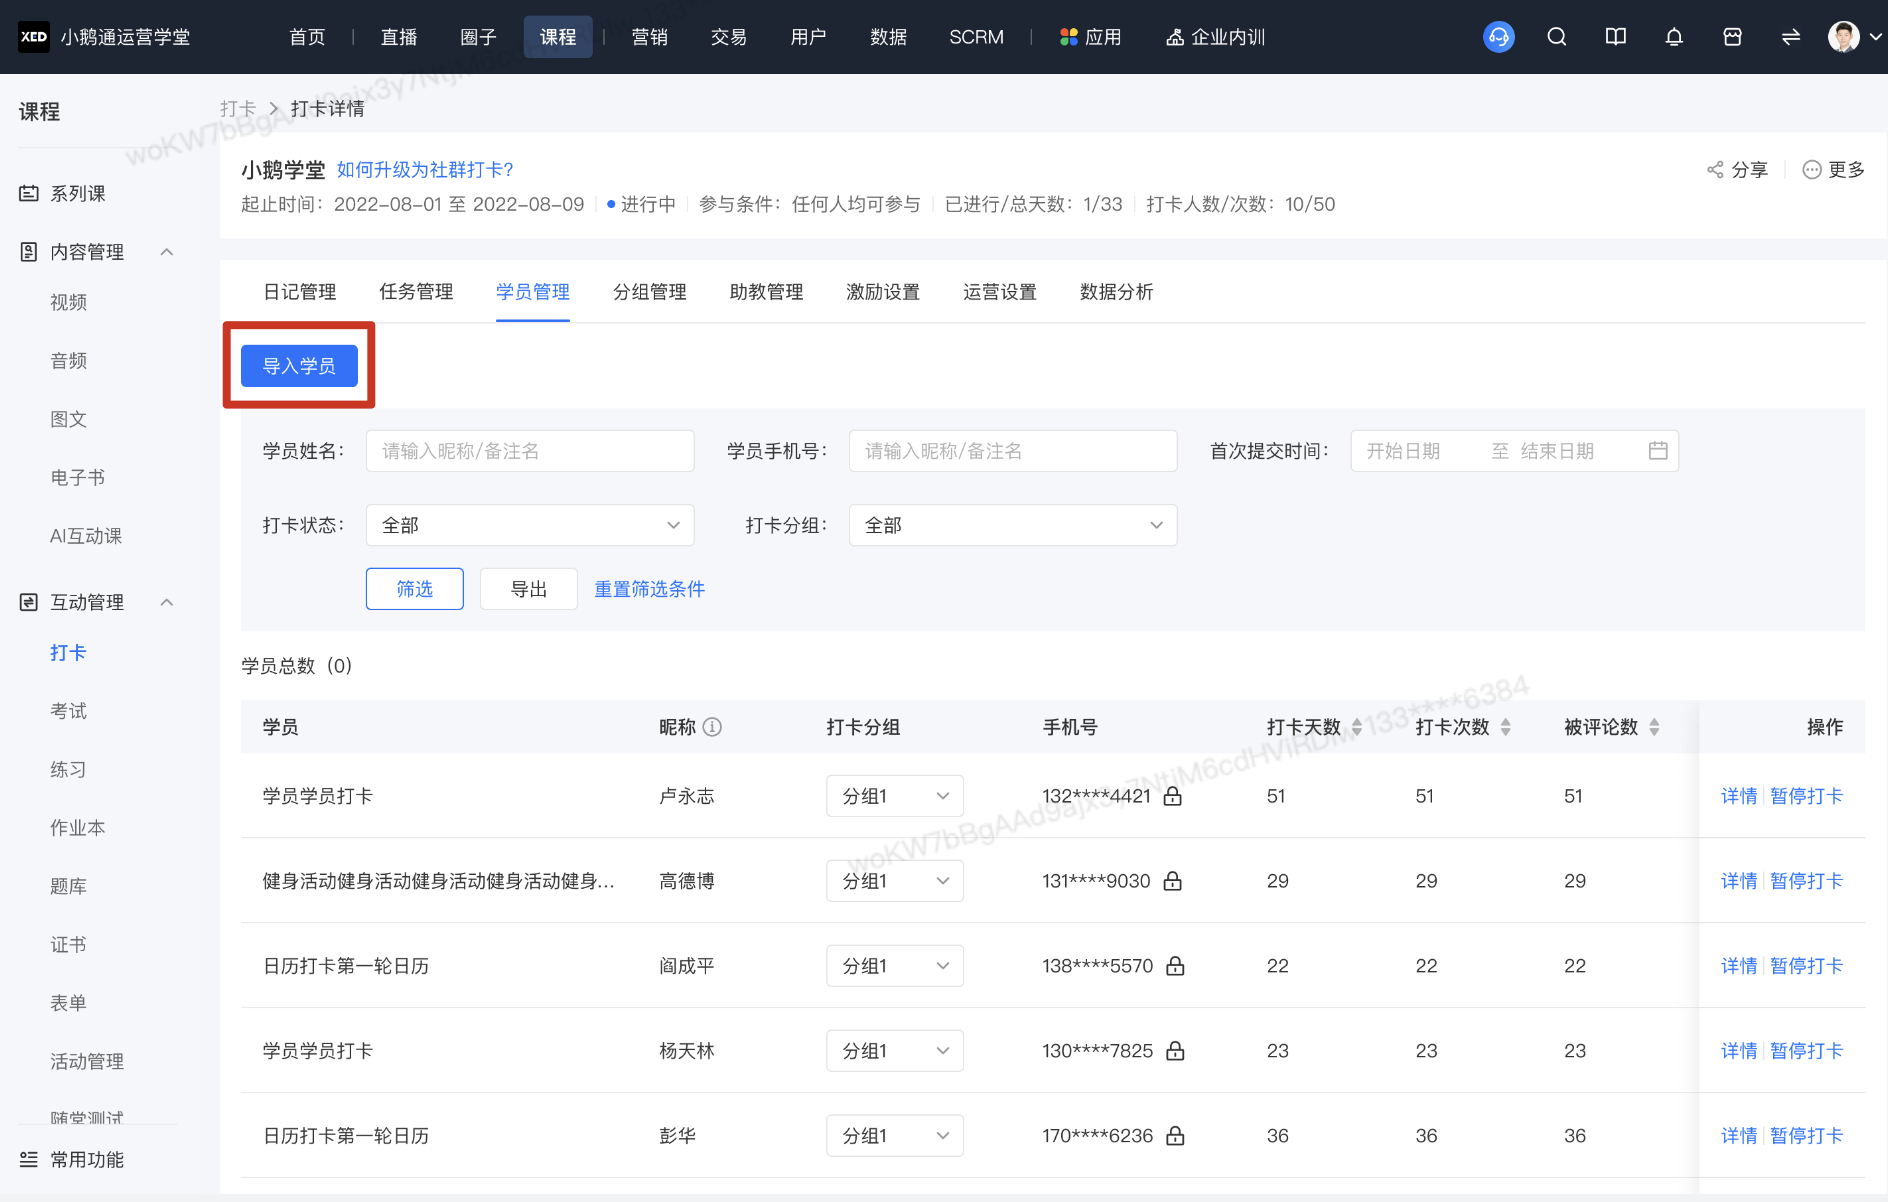
Student Import Entry
2. Student import supports two methods: quick import and file import.
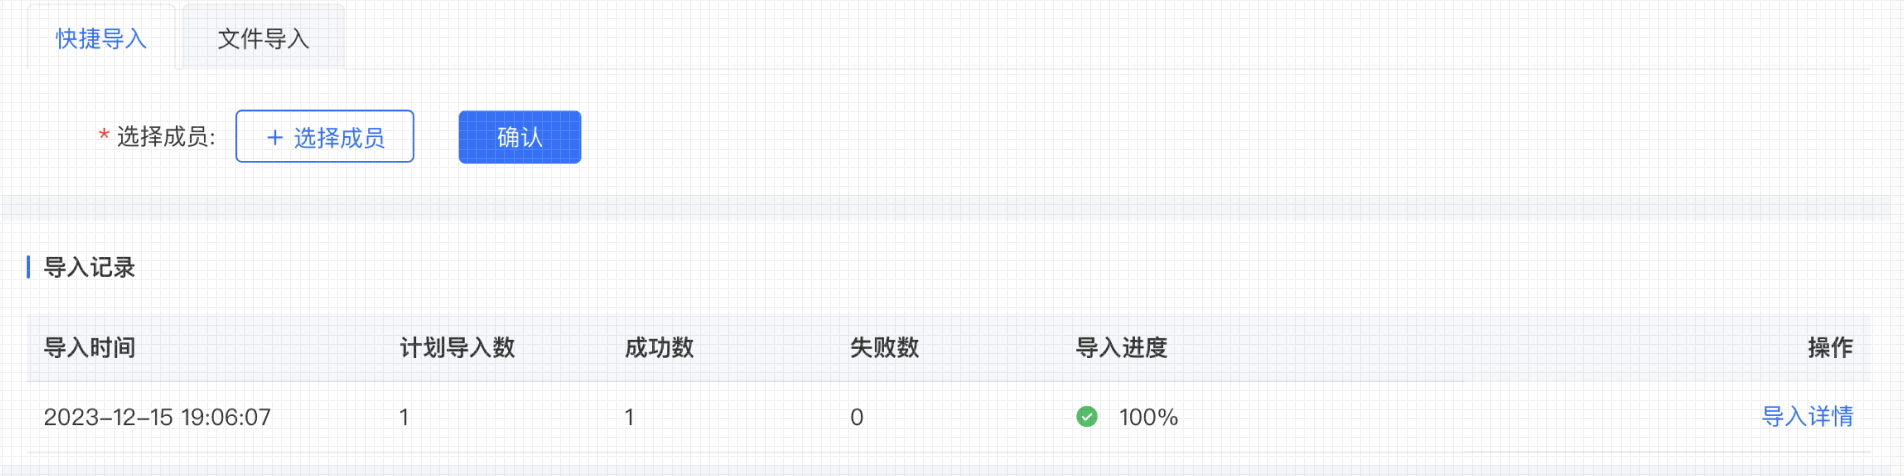
Student Import Page
Step 2 Select Students/Create New Students
Quick Import:
1. Click [Select Students] to display the pop-up window for selecting store users, and perform relevant operations to select students for import.
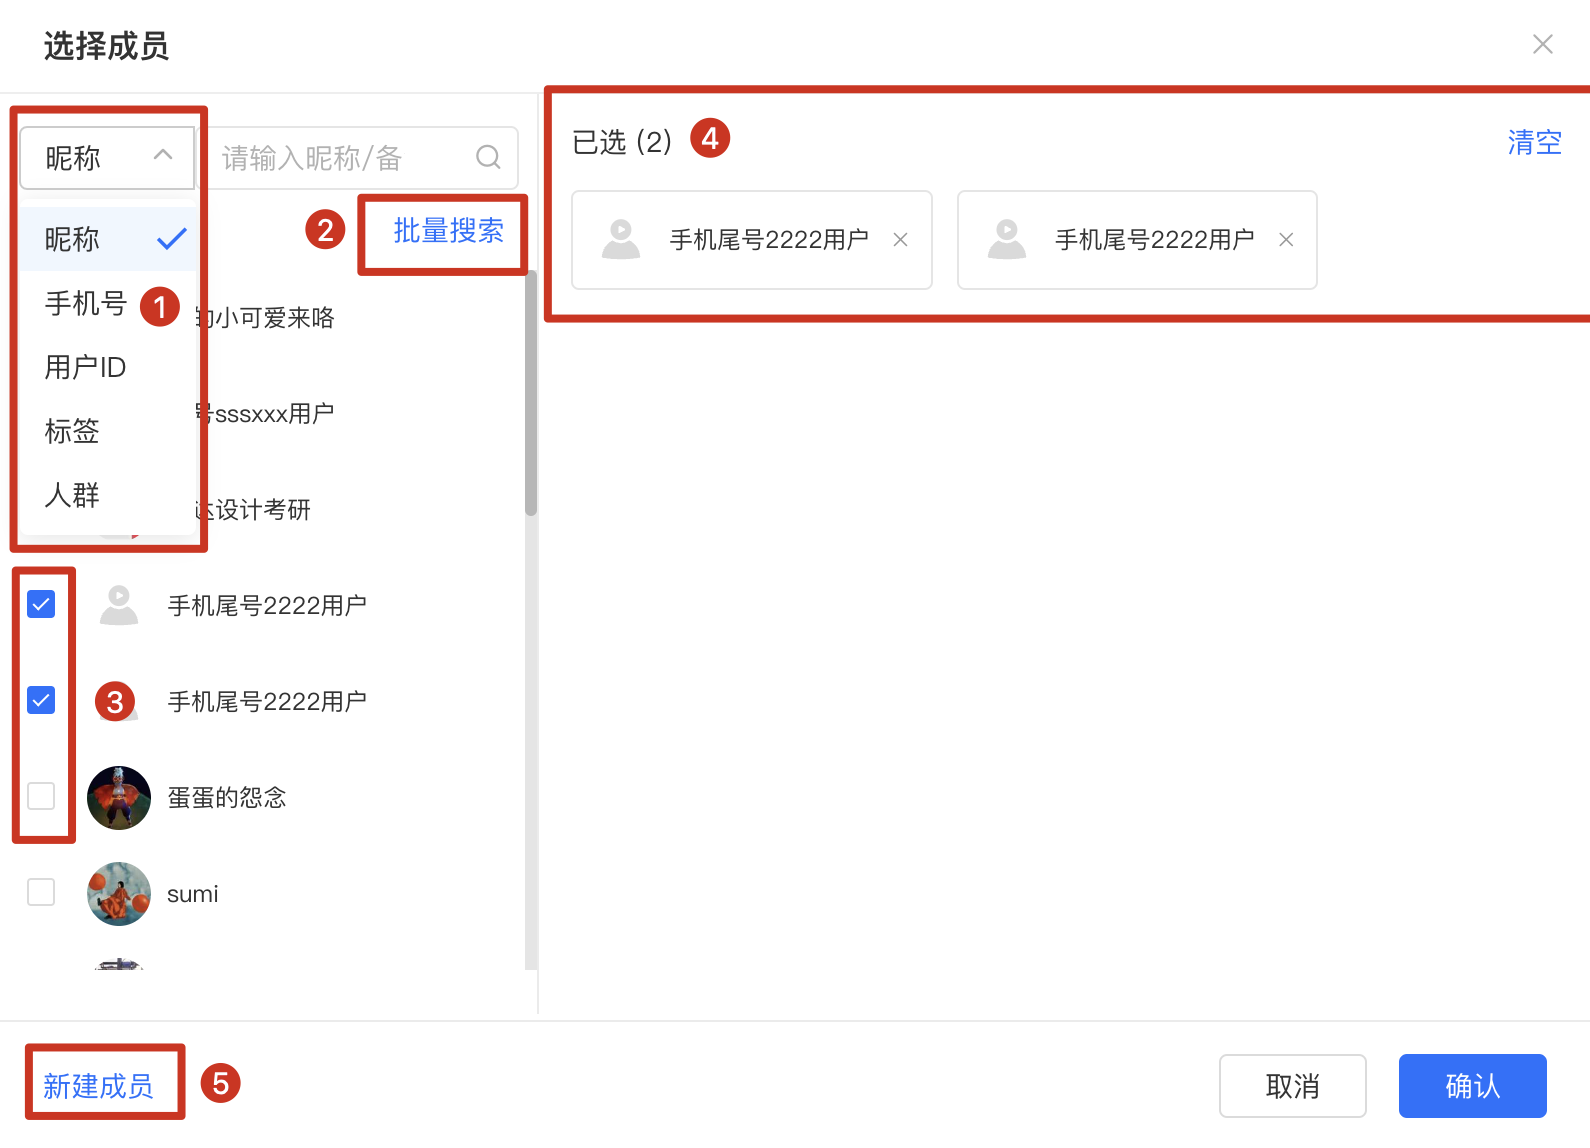
Student Selection Pop-up Window
① User search items: Support searching for store users by nickname, mobile phone number, user ID, tags, and user groups.
② Batch search: You can enter multiple nicknames/remark names to search for users in batches.
③ User selection: Check the users to be imported, and they will appear in ④
④ User list: You can clear individual selected users or clear all selected users.
⑤ Create new user: You can enter a mobile phone number to create a single new user, and the user information will be displayed in the pop-up window list after creation.
2. Click [Confirm] to start the import.
3. After importThe import record will be refreshed, and you can view the import details.

Student Import Record
File Import:
1. Click [Download Template] to download the import file and fill in the information of users to be imported.
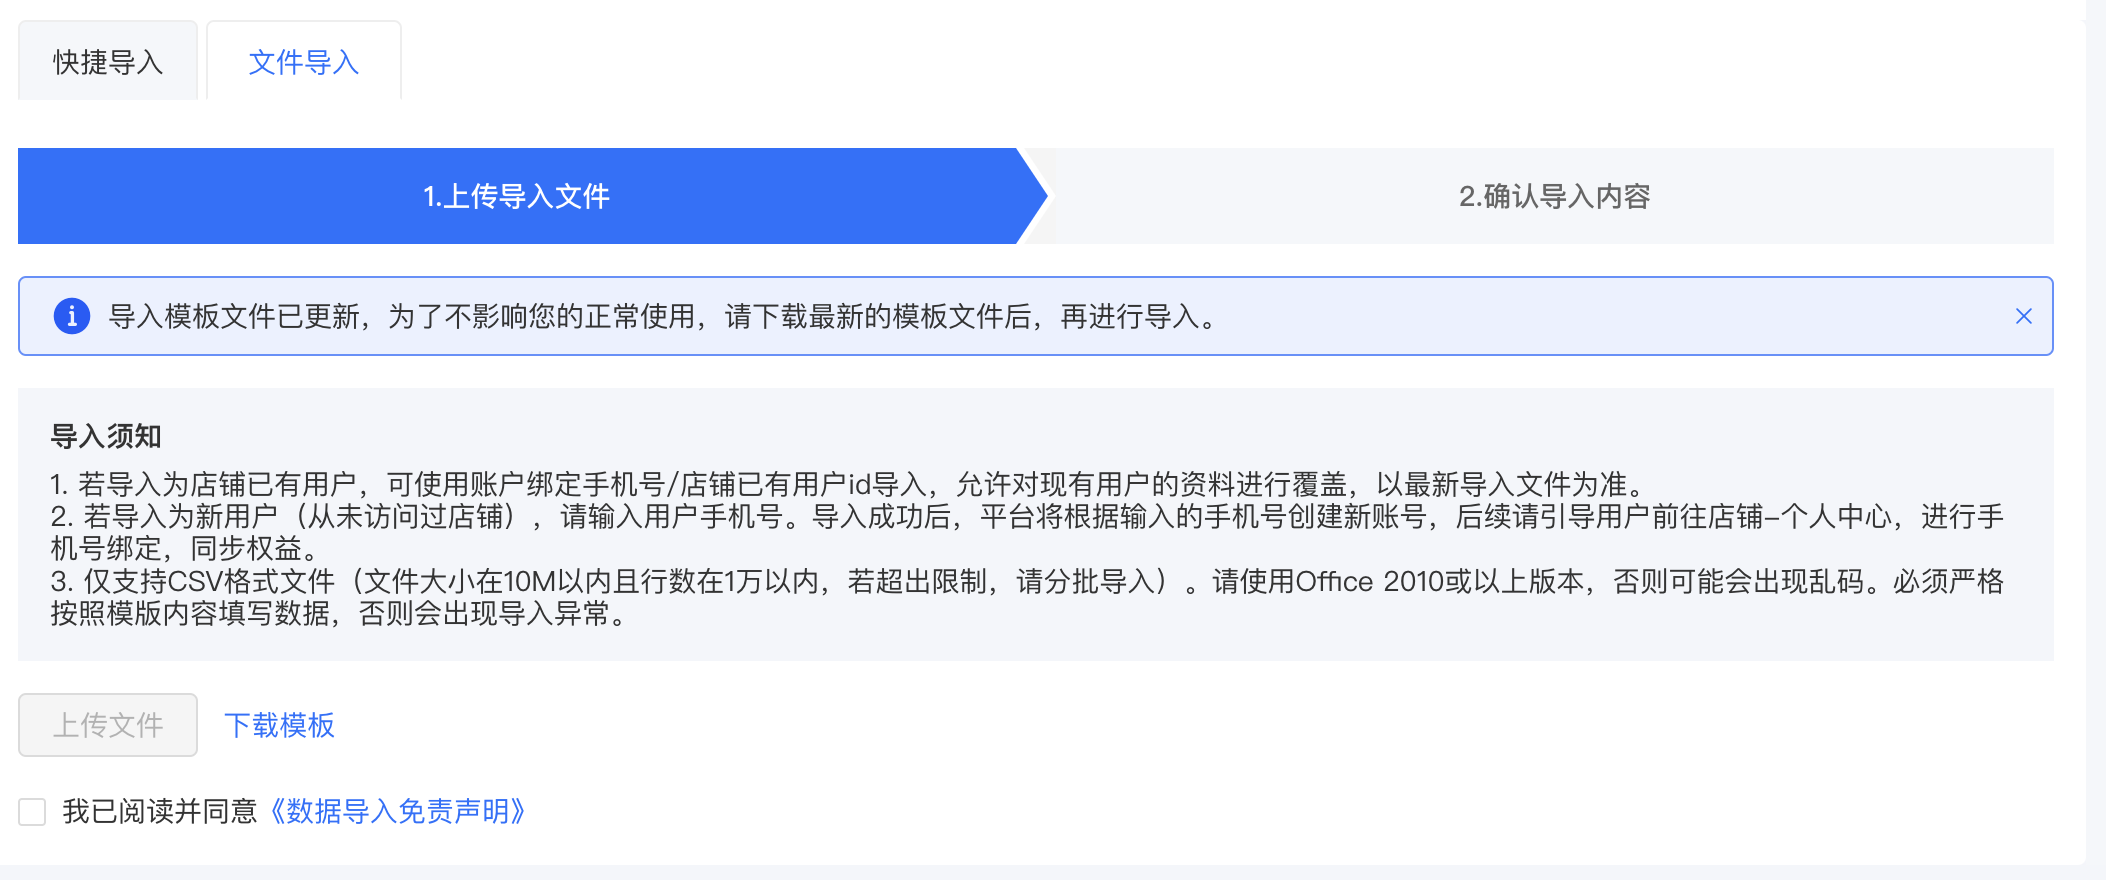
File Import Page
2. After checking the 《Data Import Disclaimer》, upload the file.
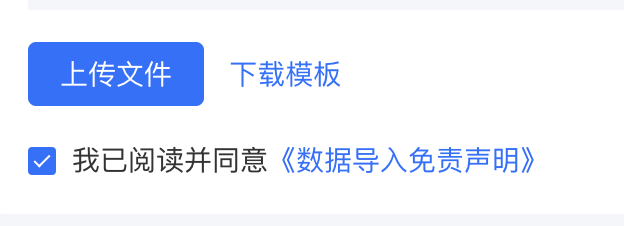
Upload File
3. Confirm the import content, and you can modify or delete error information.
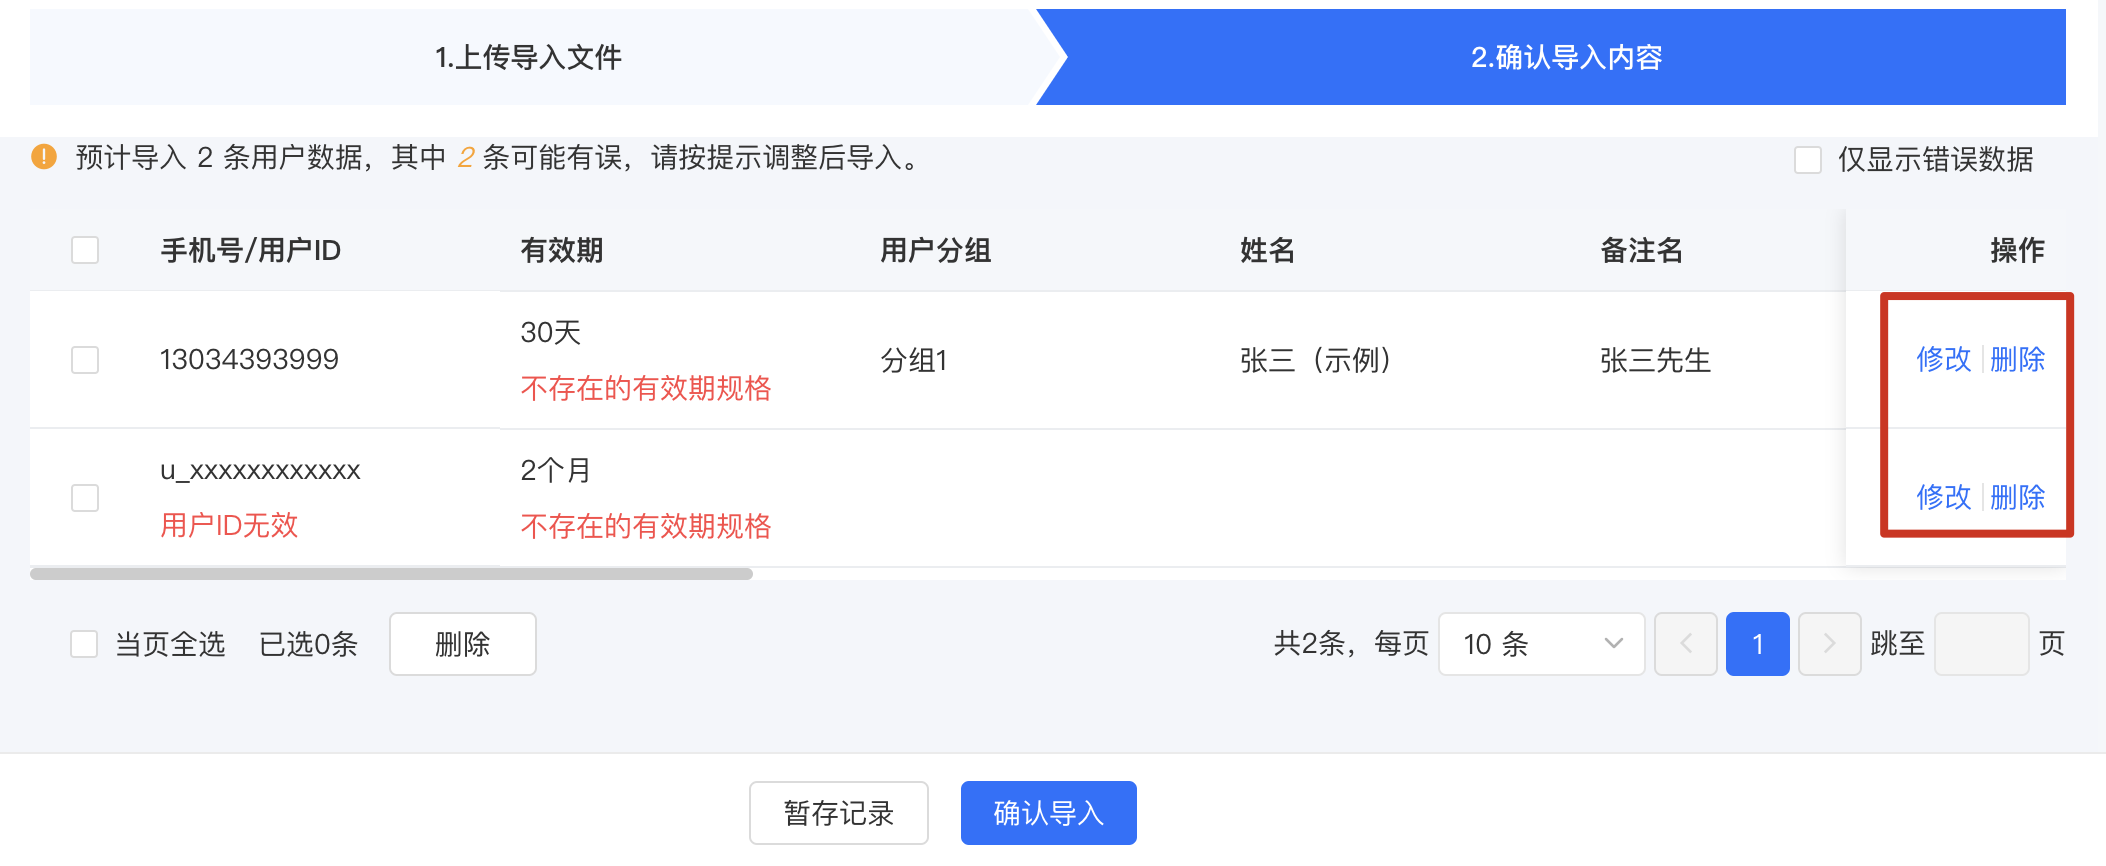
Confirm Import Content
4. You can temporarily save or immediately import the imported data. After selection, the import record will display the corresponding data accordingly.
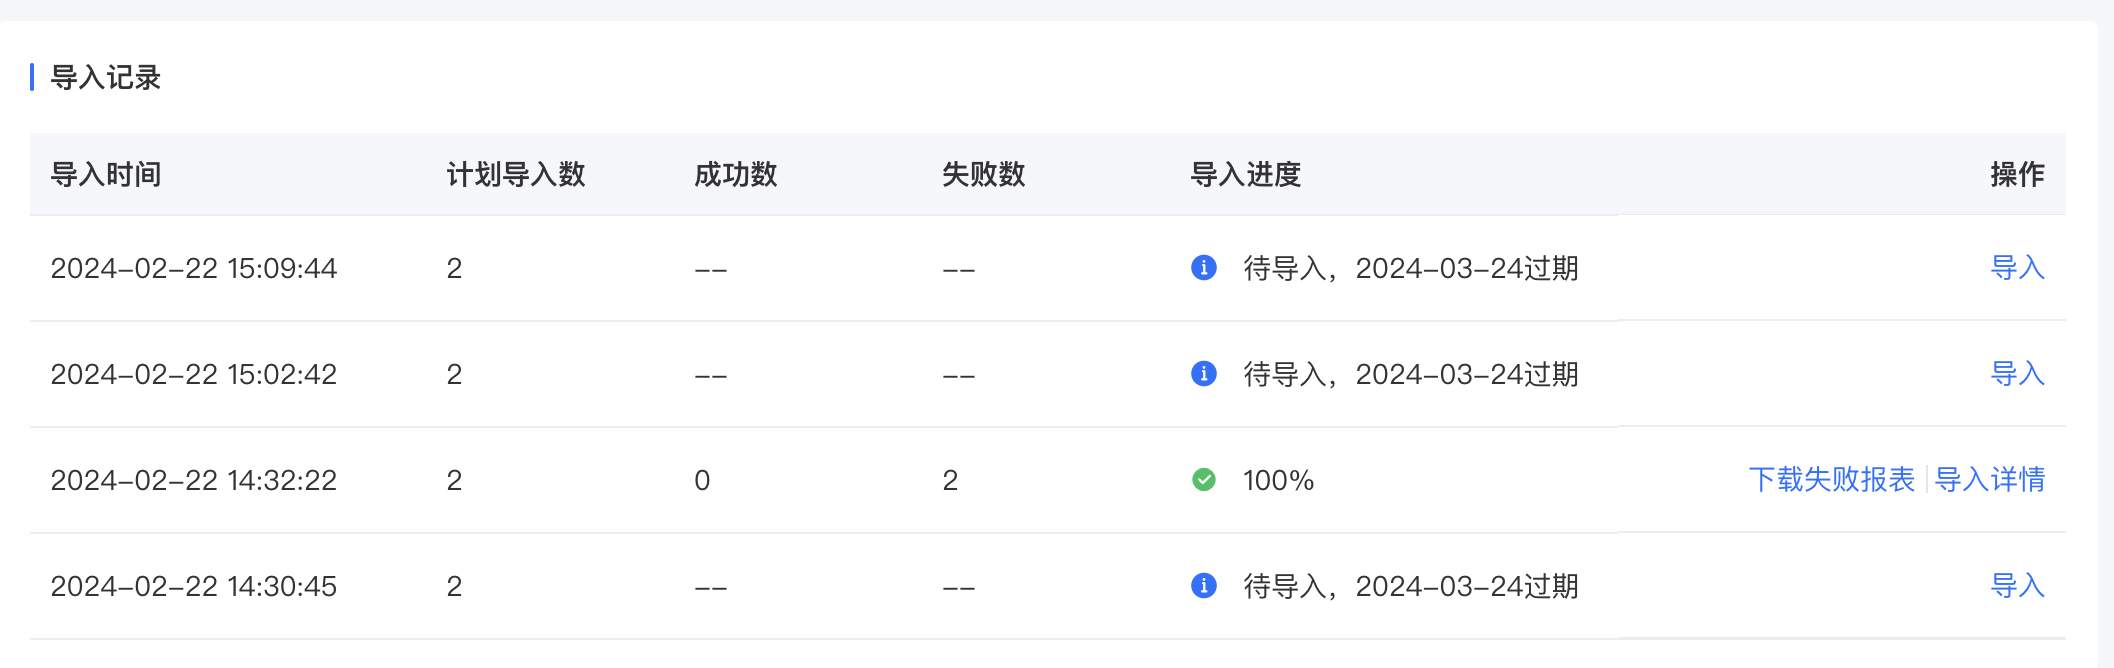
Import Record
Step 3 Obtain Privileges after Successful Import
After successful import, the imported users will be displayed in the user list on the check-in - student management page in ascending order of import time. Users have defaulted to obtain check-in privileges and can directly participate in check-ins on the elink Check-in Mini Program and H5 page.
No comments to display
No comments to display