
Tutorial on Using Certificates for Check-in Results
I. Feature Introduction
Merchants can configure certificates for check-ins, giving learners a sense of purpose in check-ins and motivating them to complete the check-in tasks. Certificates support customizing the display information and issuance rules.
II. Purpose of Use
Completion certificates can enhance learners' sense of achievement in check-ins, prompting them to share on their social media feeds for wider dissemination and helping merchants attract new learners.
III. Use Scenarios
Merchants can set up check-in certificates in advance when creating check-in tasks and inform learners in the check-in introduction that they can obtain a completion certificate by meeting certain requirements, thus motivating learners to complete the check-ins as required. When learners meet the requirements, the system will automatically issue the pre - set certificates.
IV. Operation Path
Merchant side: Desktop management console → Courses → Interactive Management →Check - in → Check - in Details → Incentive Settings → Certificates
Or
Merchant backend → Content → Certificates → Check - in → Create New Certificate
V. Usage Tutorial
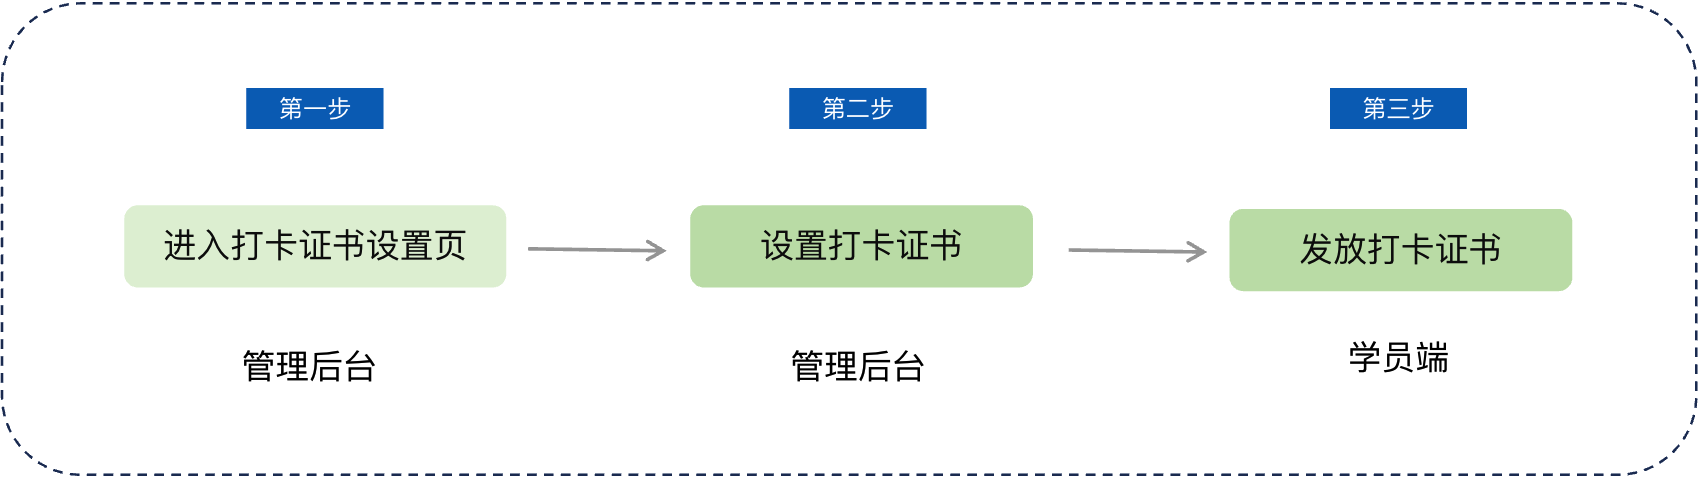
Step 1: Enter the check - in certificate settings page (Management backend)
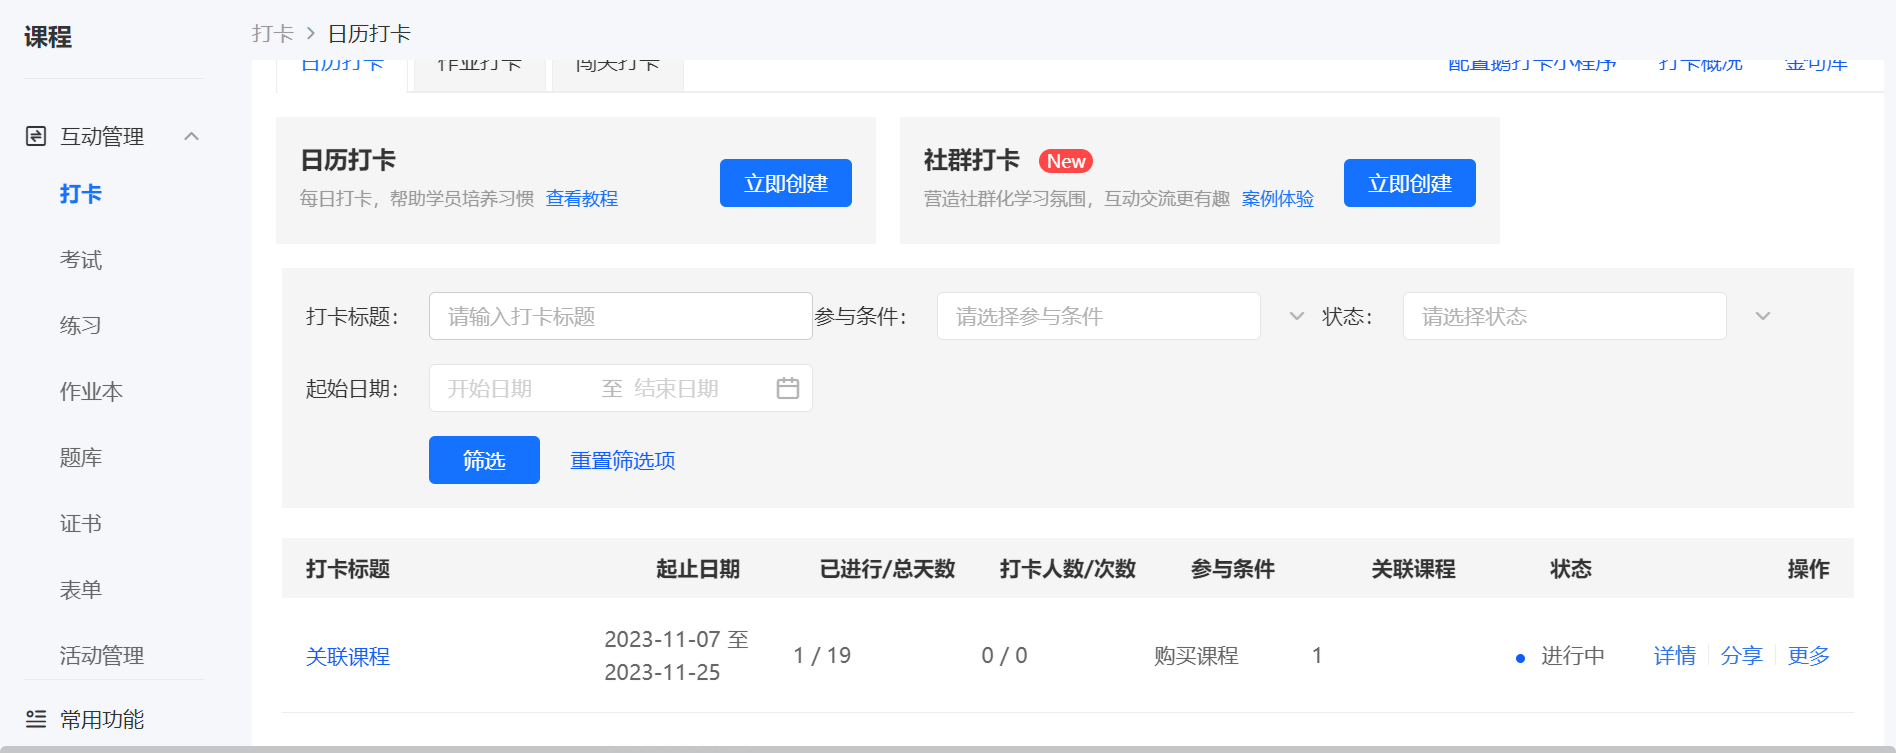
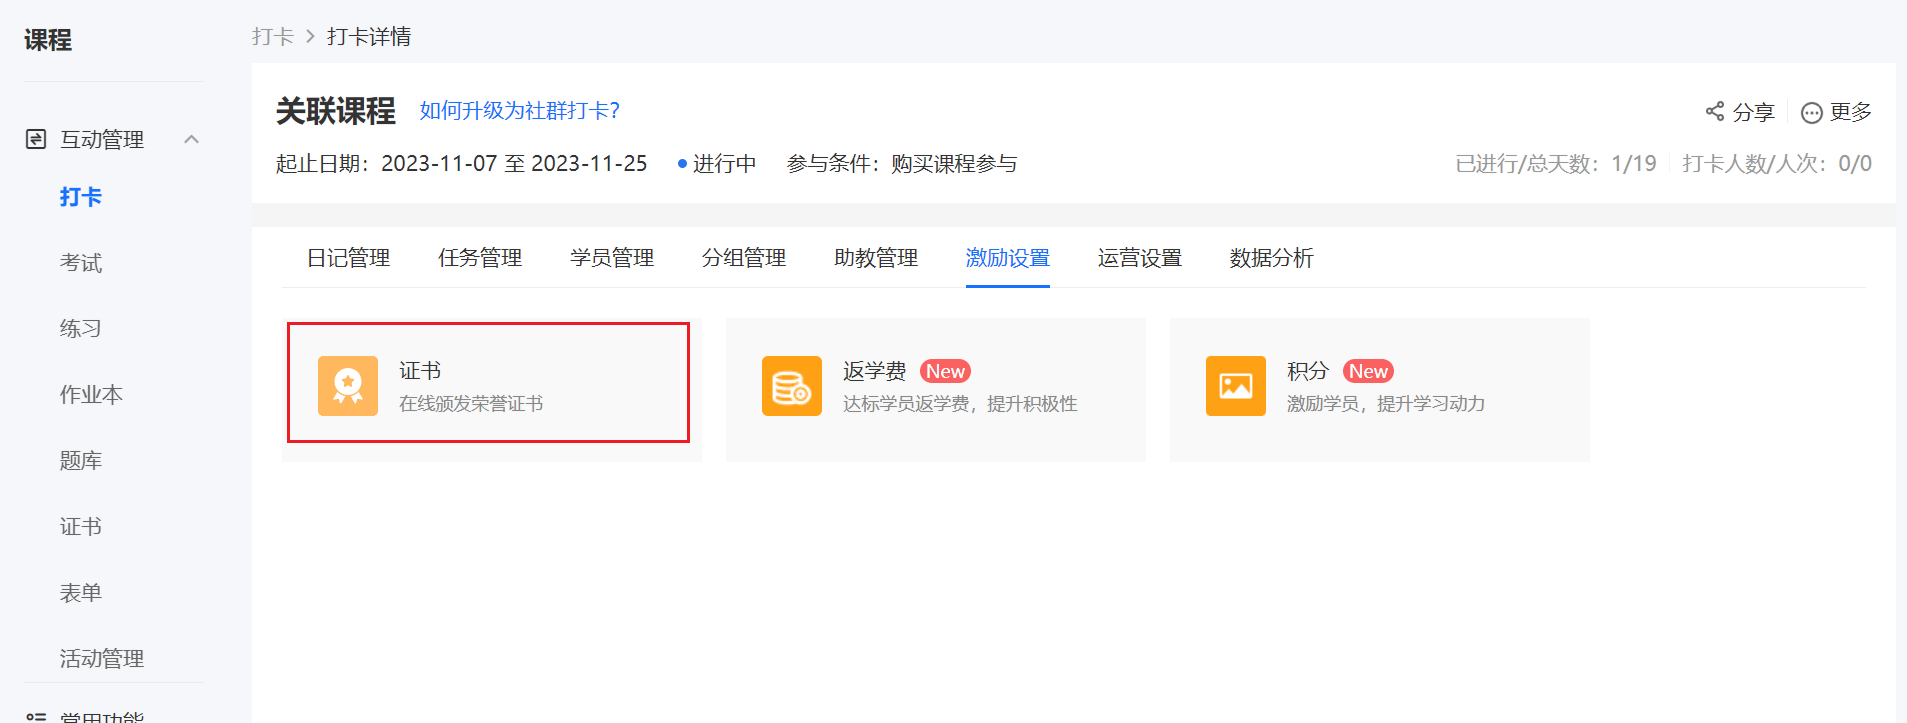
Method 1: Log in to the elink account, click [Courses] in the left sidebar, select [Check - in] under [Interactive Management], enter the check - in task for which you need to configure a certificate, click [Incentive Settings], and select [Certificates].
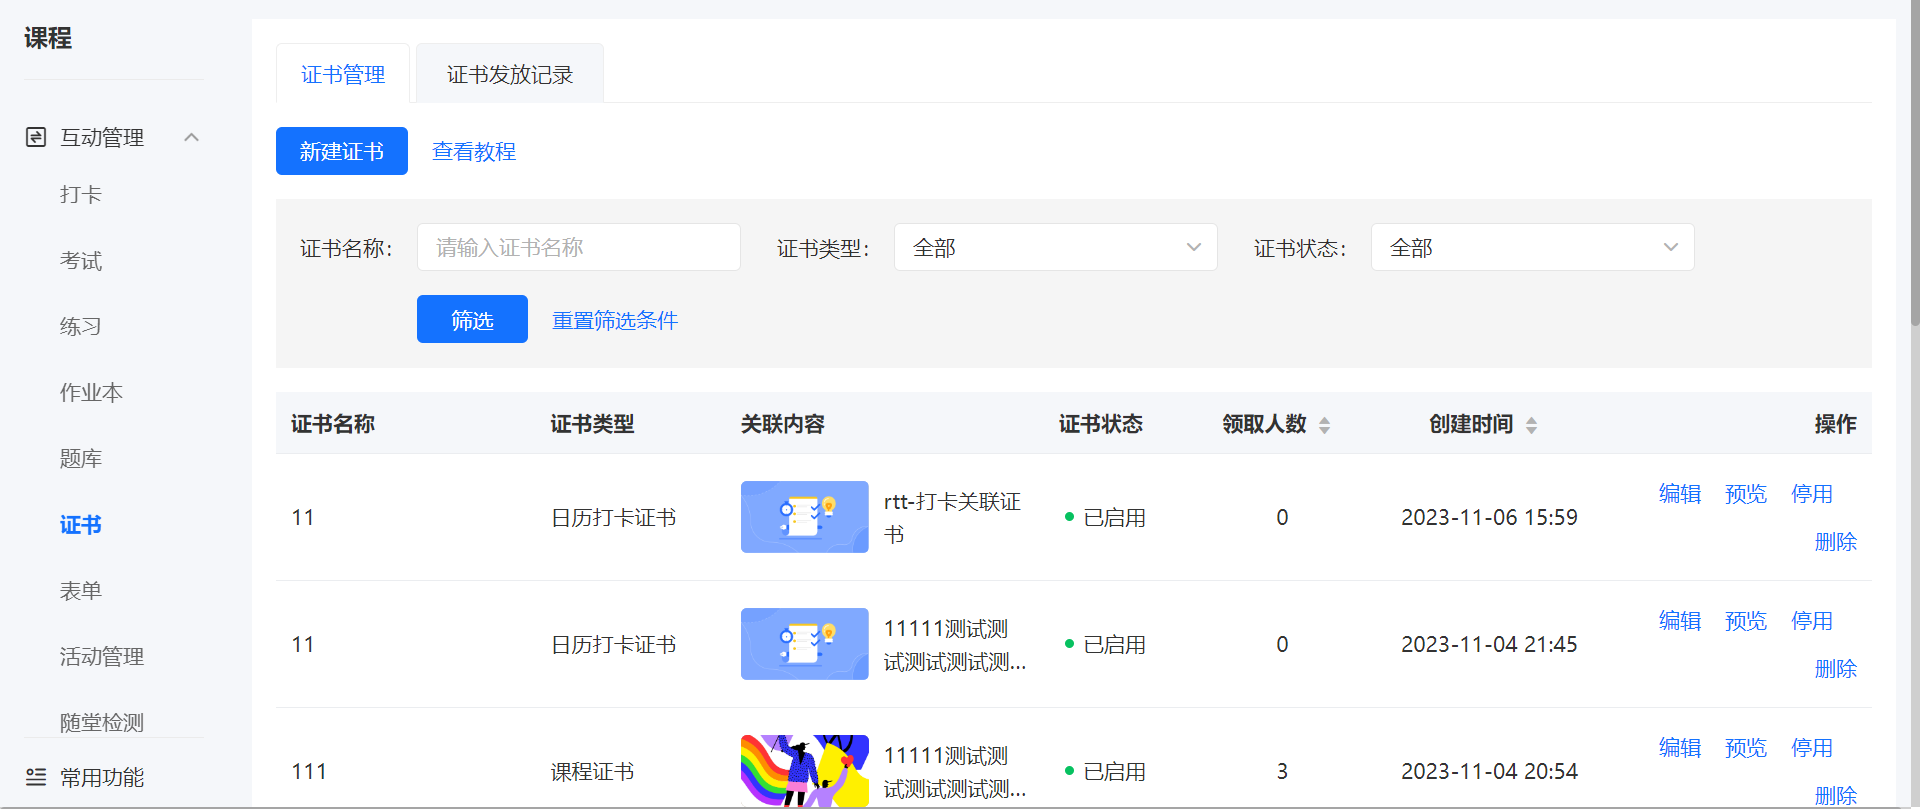
Method 2: Click [Courses] in the left sidebar, select [Certificates] under [Interactive Management], enter the certificate management list, click [Create New Certificate], enter the new check - in creation page, and select the check - in type and associated content.
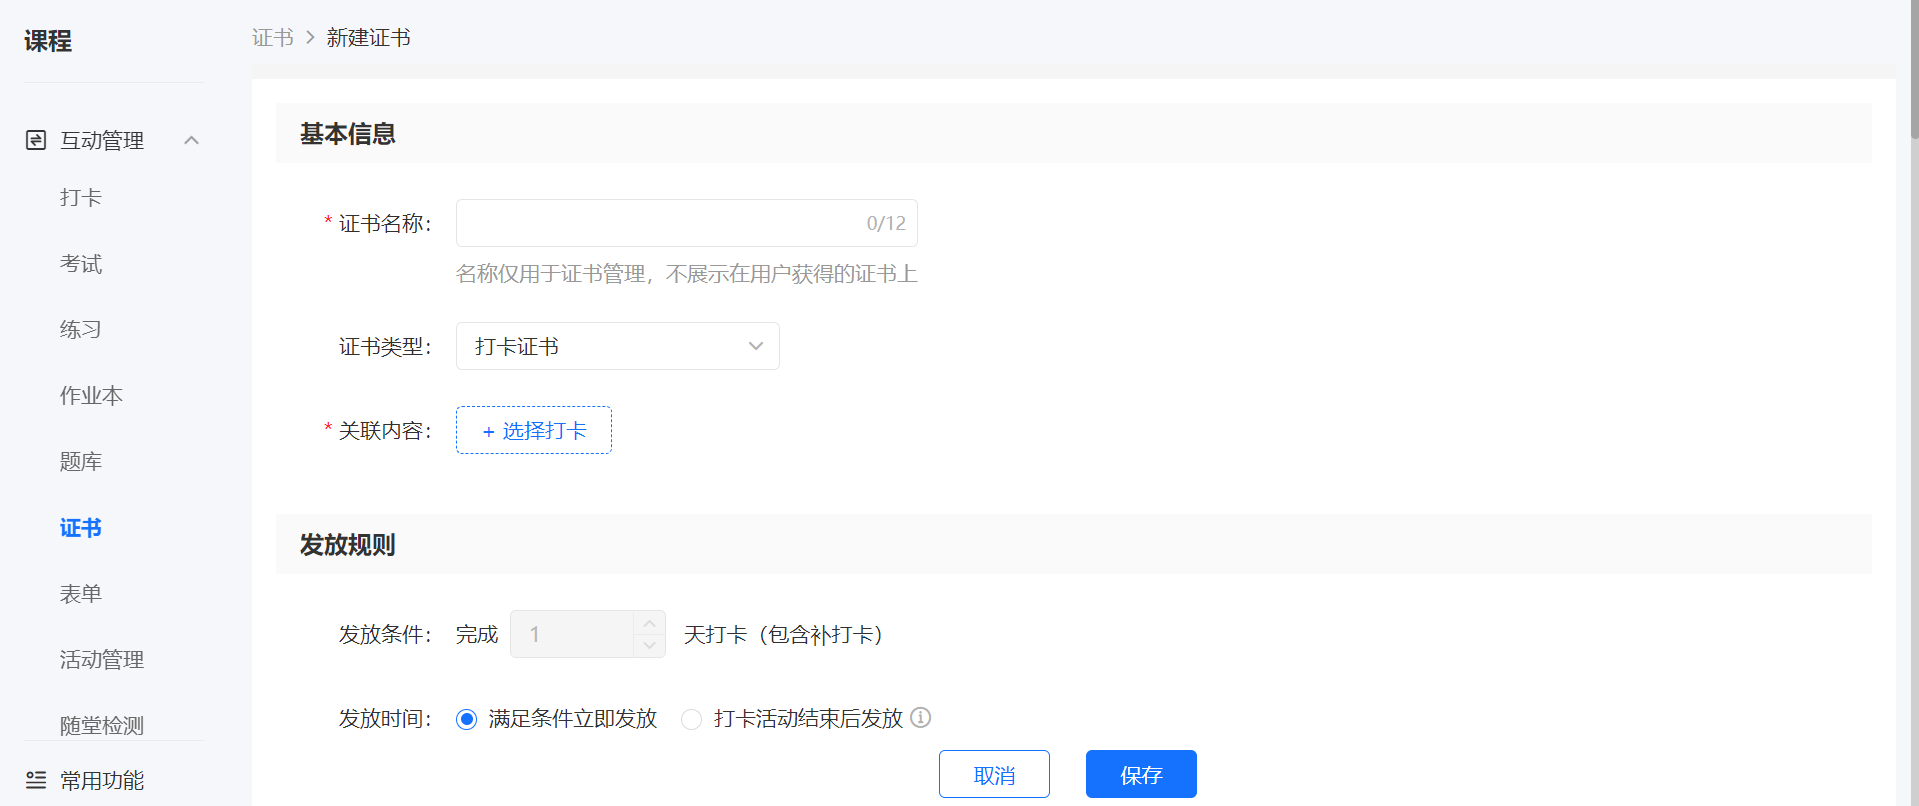
Step 2: Set certificate information (Management backend)
Certificate issuance condition settings: You can set the number of check - ins required to obtain a completion certificate.
Certificate style settings: There are two modes to choose from. One is [Use fixed - style completion certificate], which supports configuration. The other is [Upload completion certificate], which supports uploading your existing certificate images.
Next, the configuration of [Use fixed - style completion certificate] is introduced:
a. The certificate name can be modified.
b. Multiple display data items can be selected or none at all.
c. Up to 2 encouragement messages can be added.
d. The institution name defaults to the store name and can be modified.
e. You can set a QR code for a specified course or upload your own QR code.
f. You can choose a background image provided by the system or upload your own background image.
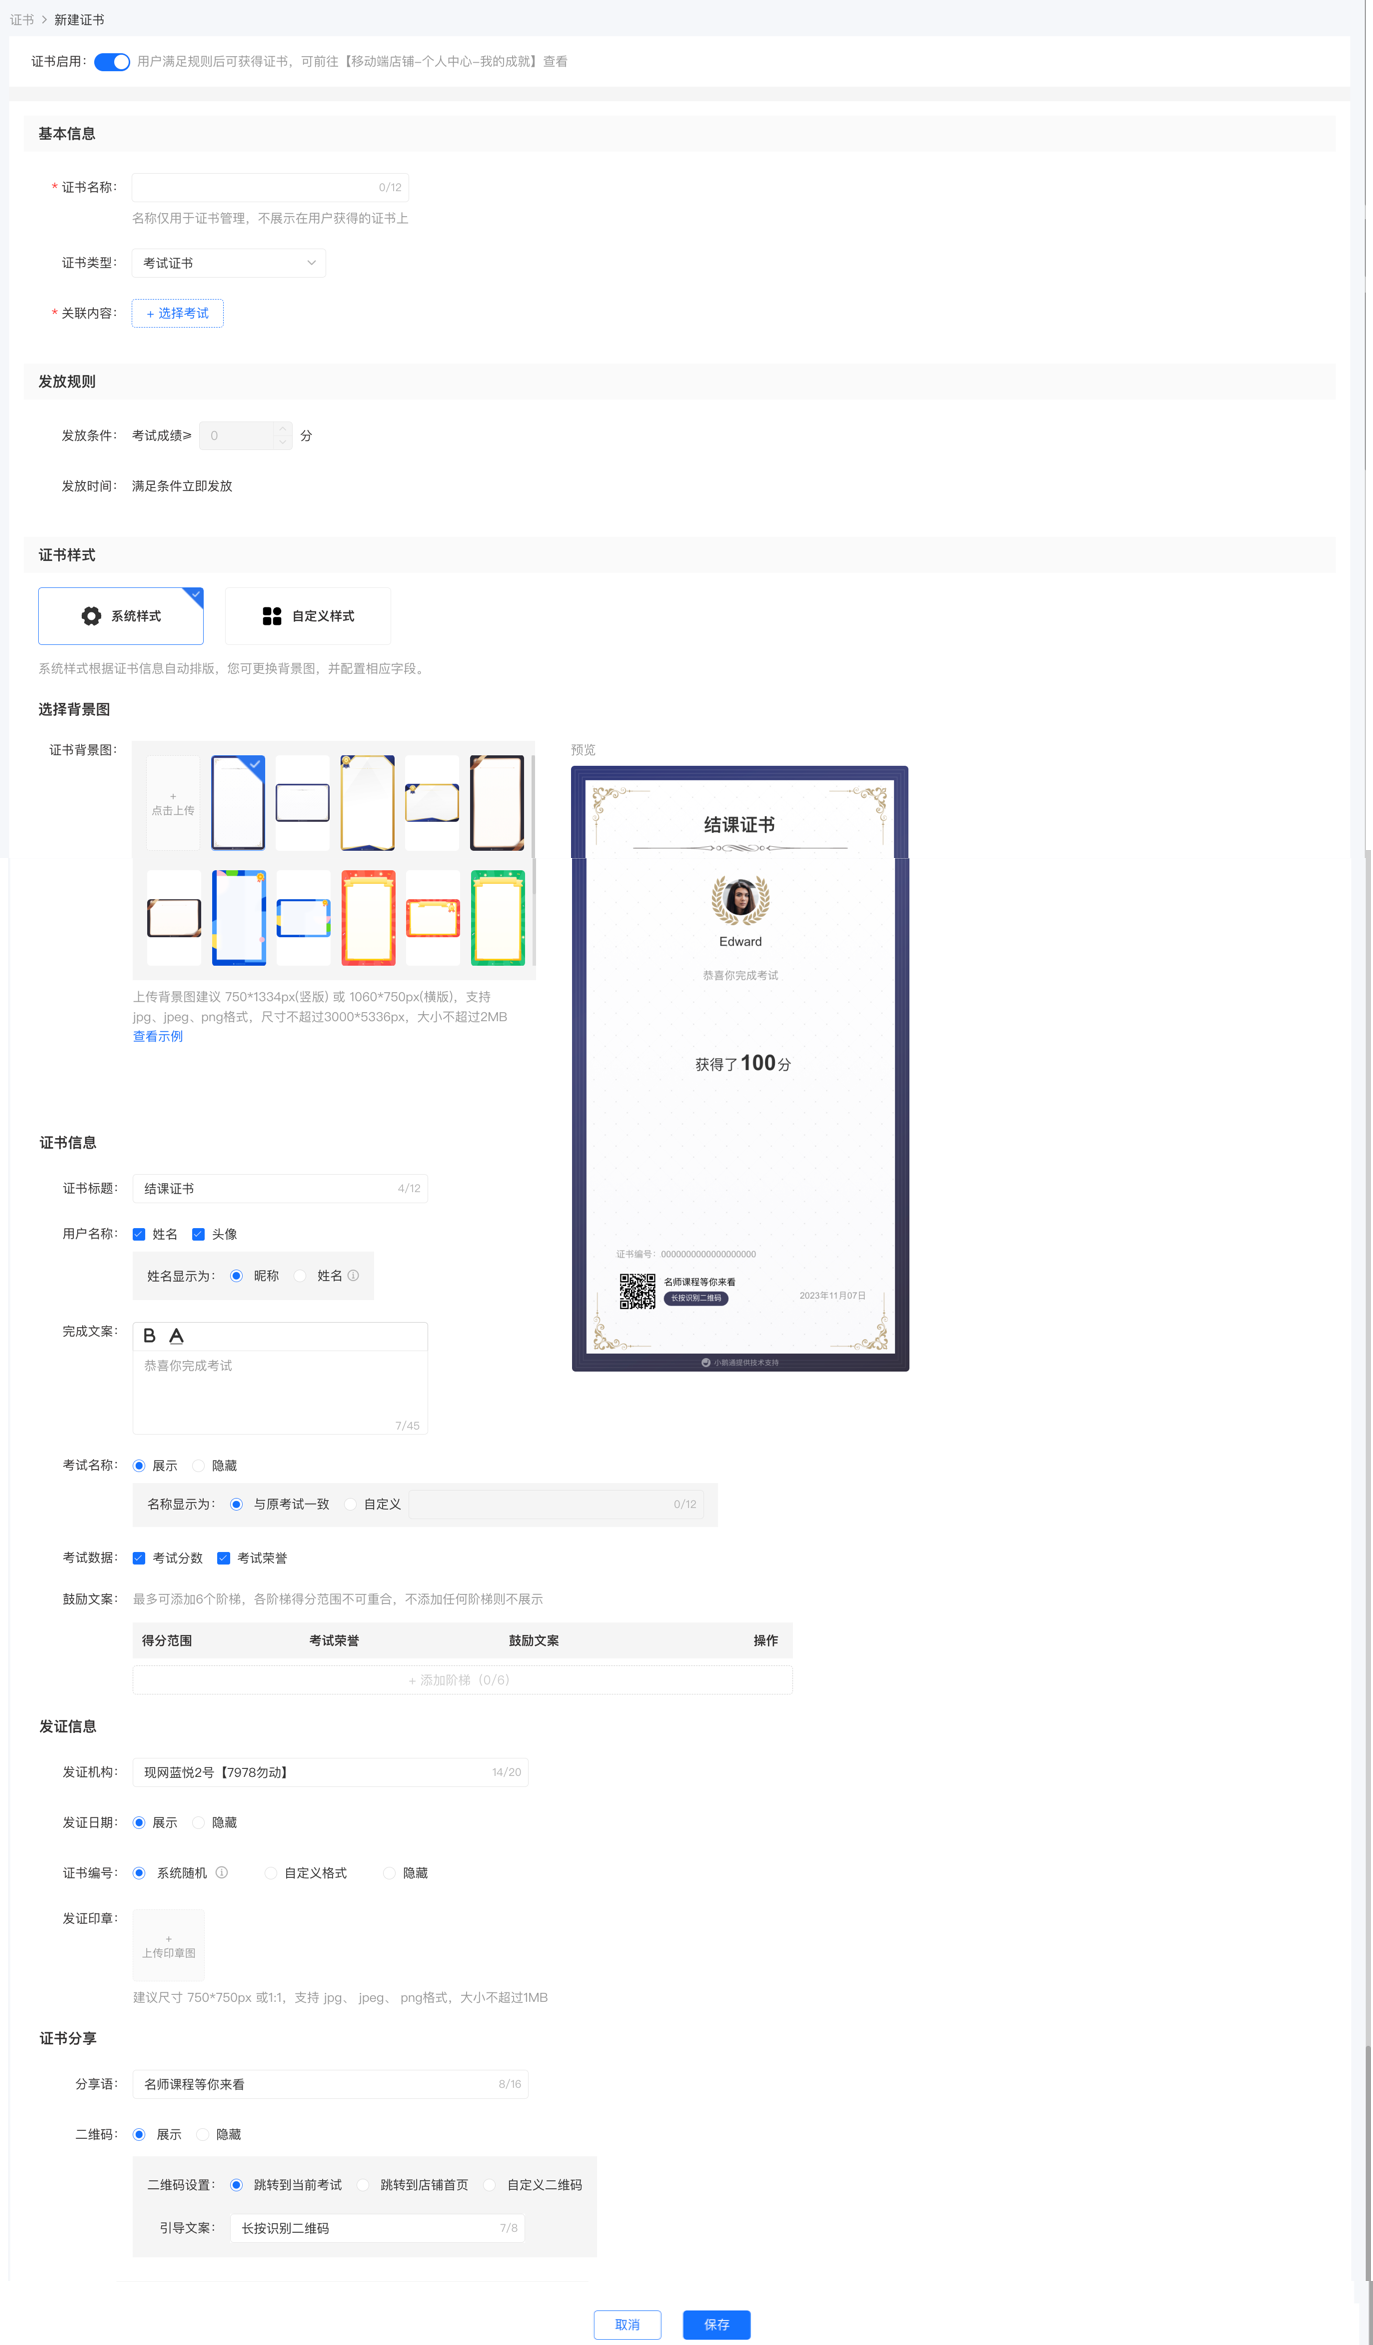
Step 3: Issue check - in certificates (Learner side)
1. Learners who meet the issuance conditions will see the following completion certificate pop - up after check - in.
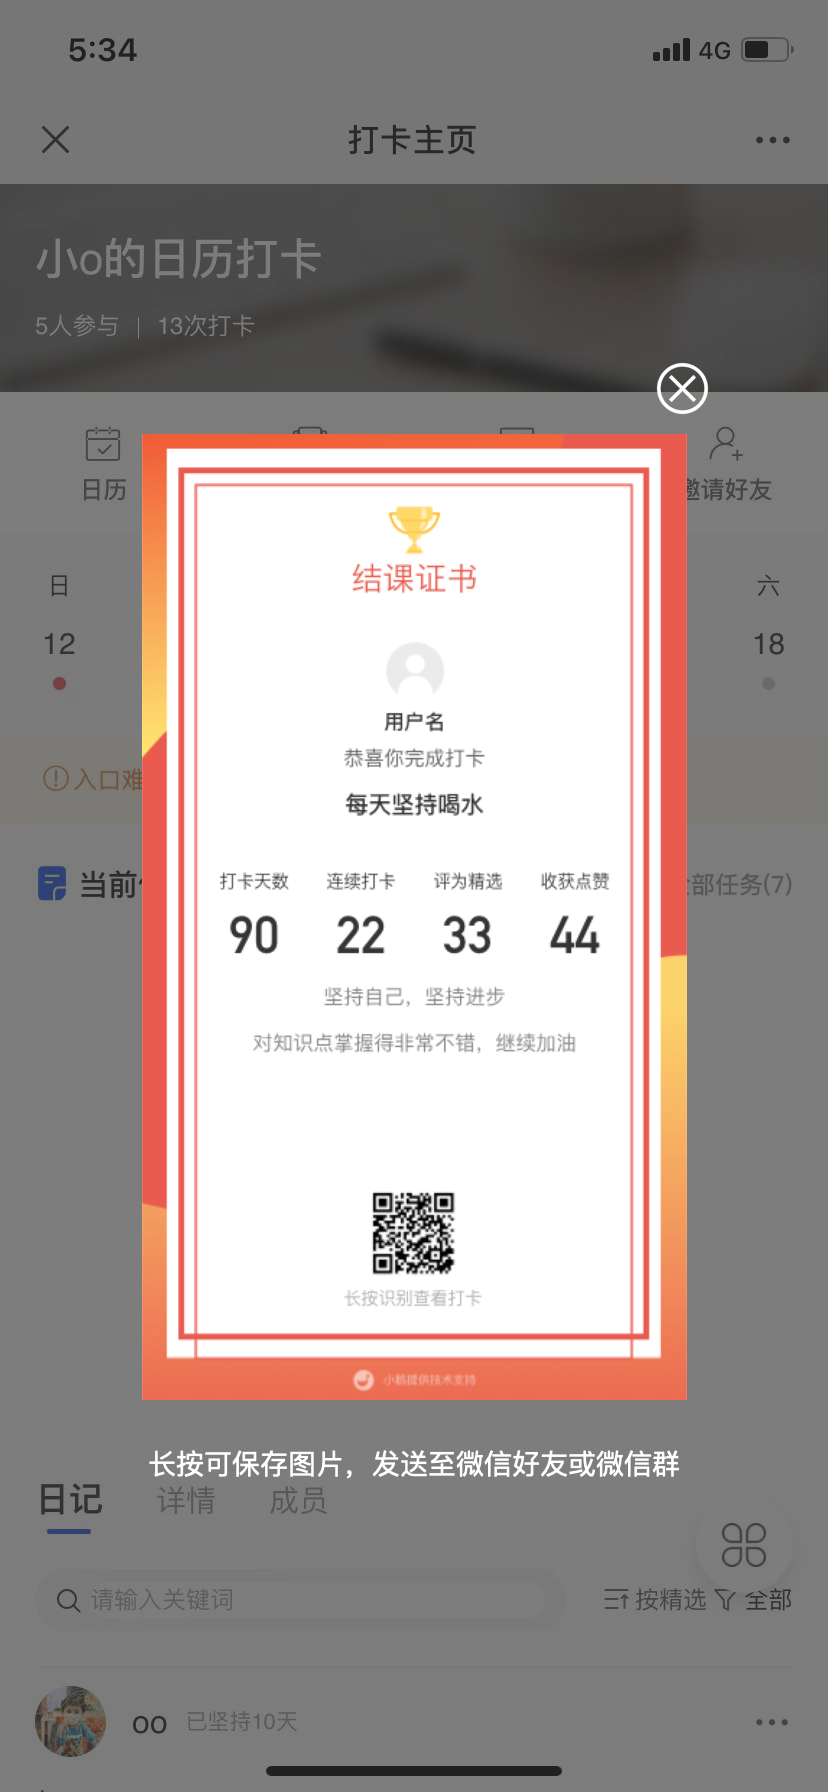
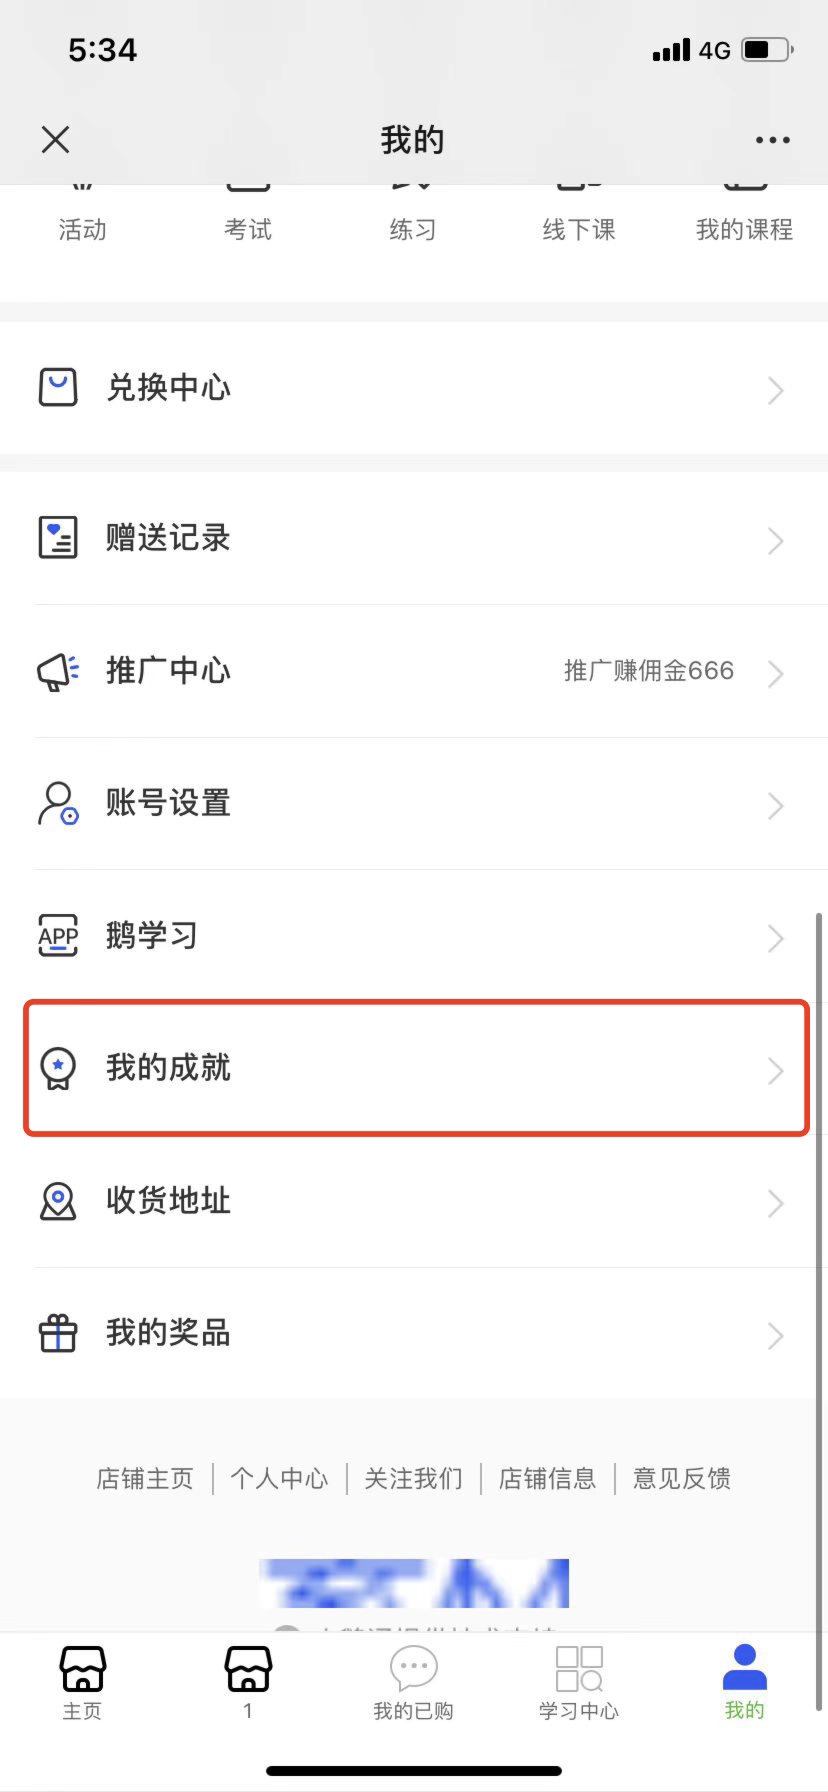
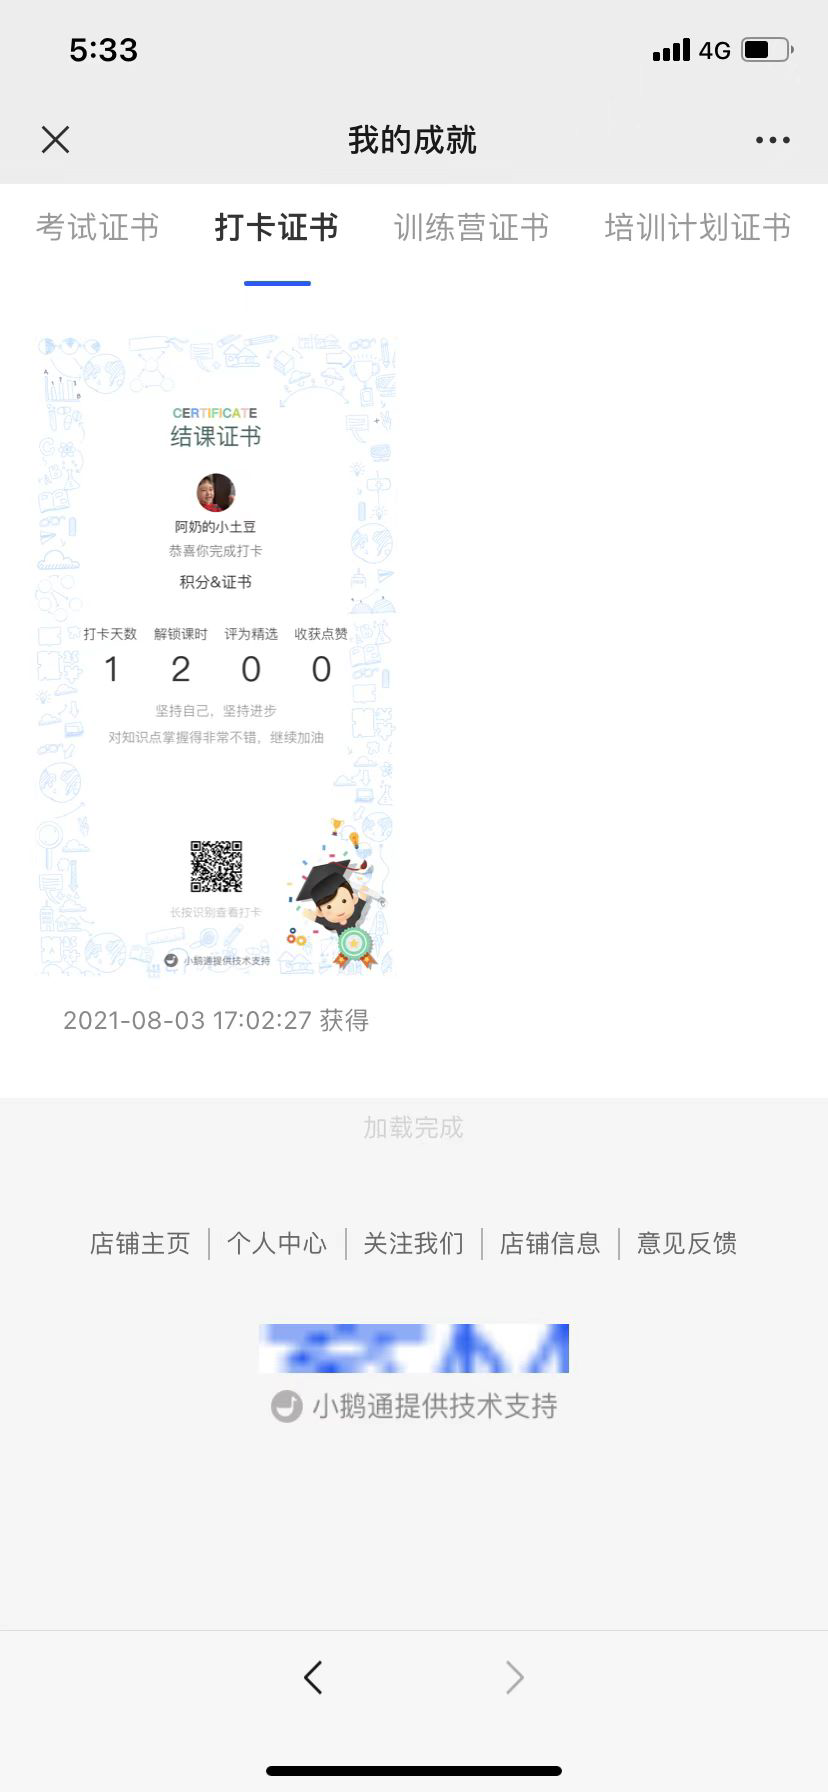
2. If you set the completion certificate after the check - in has been going on for some time or after it ends, the system will re - issue the certificates to learners who meet the requirements. Learners can view the certificates in [My - My Achievements].

No comments to display
No comments to display