
Tutorial on Role Management Usage
I. Function Introduction
The role management function allows merchants to manage the roles of store employees and customize function permission sets. For example, the permissions of modules such as 'Course Mall, Purchased Courses, and Service Orders' can be combined and named 'Purchaser'. Once the merchant assigns the 'Purchaser' role to an employee, this employee can operate the functions of the above - mentioned modules in the backend.
II. Purpose of Use
To conveniently manage employee roles, assign specific tasks to specific people, and improve the operational efficiency and security of the store.
III. Usage Scenarios
A merchant wants Employee A of the company to operate marketing functions in their elink store but does not want Employee A to interfere with the store's financial matters. In this case, the merchant can create a 'Marketing Specialist' role with only marketing - related function permissions and assign Employee A to this role.
IV. Operation Path
Merchant side: Merchant backend → Settings → Role Management
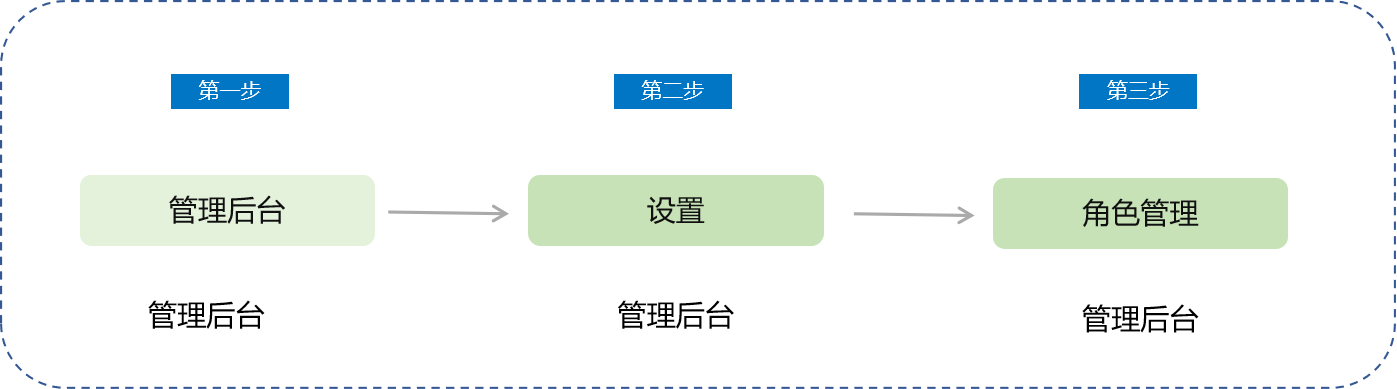
V. Usage Tutorial
Step 1:Log in to the management backend and find [Settings] - [Role Management];
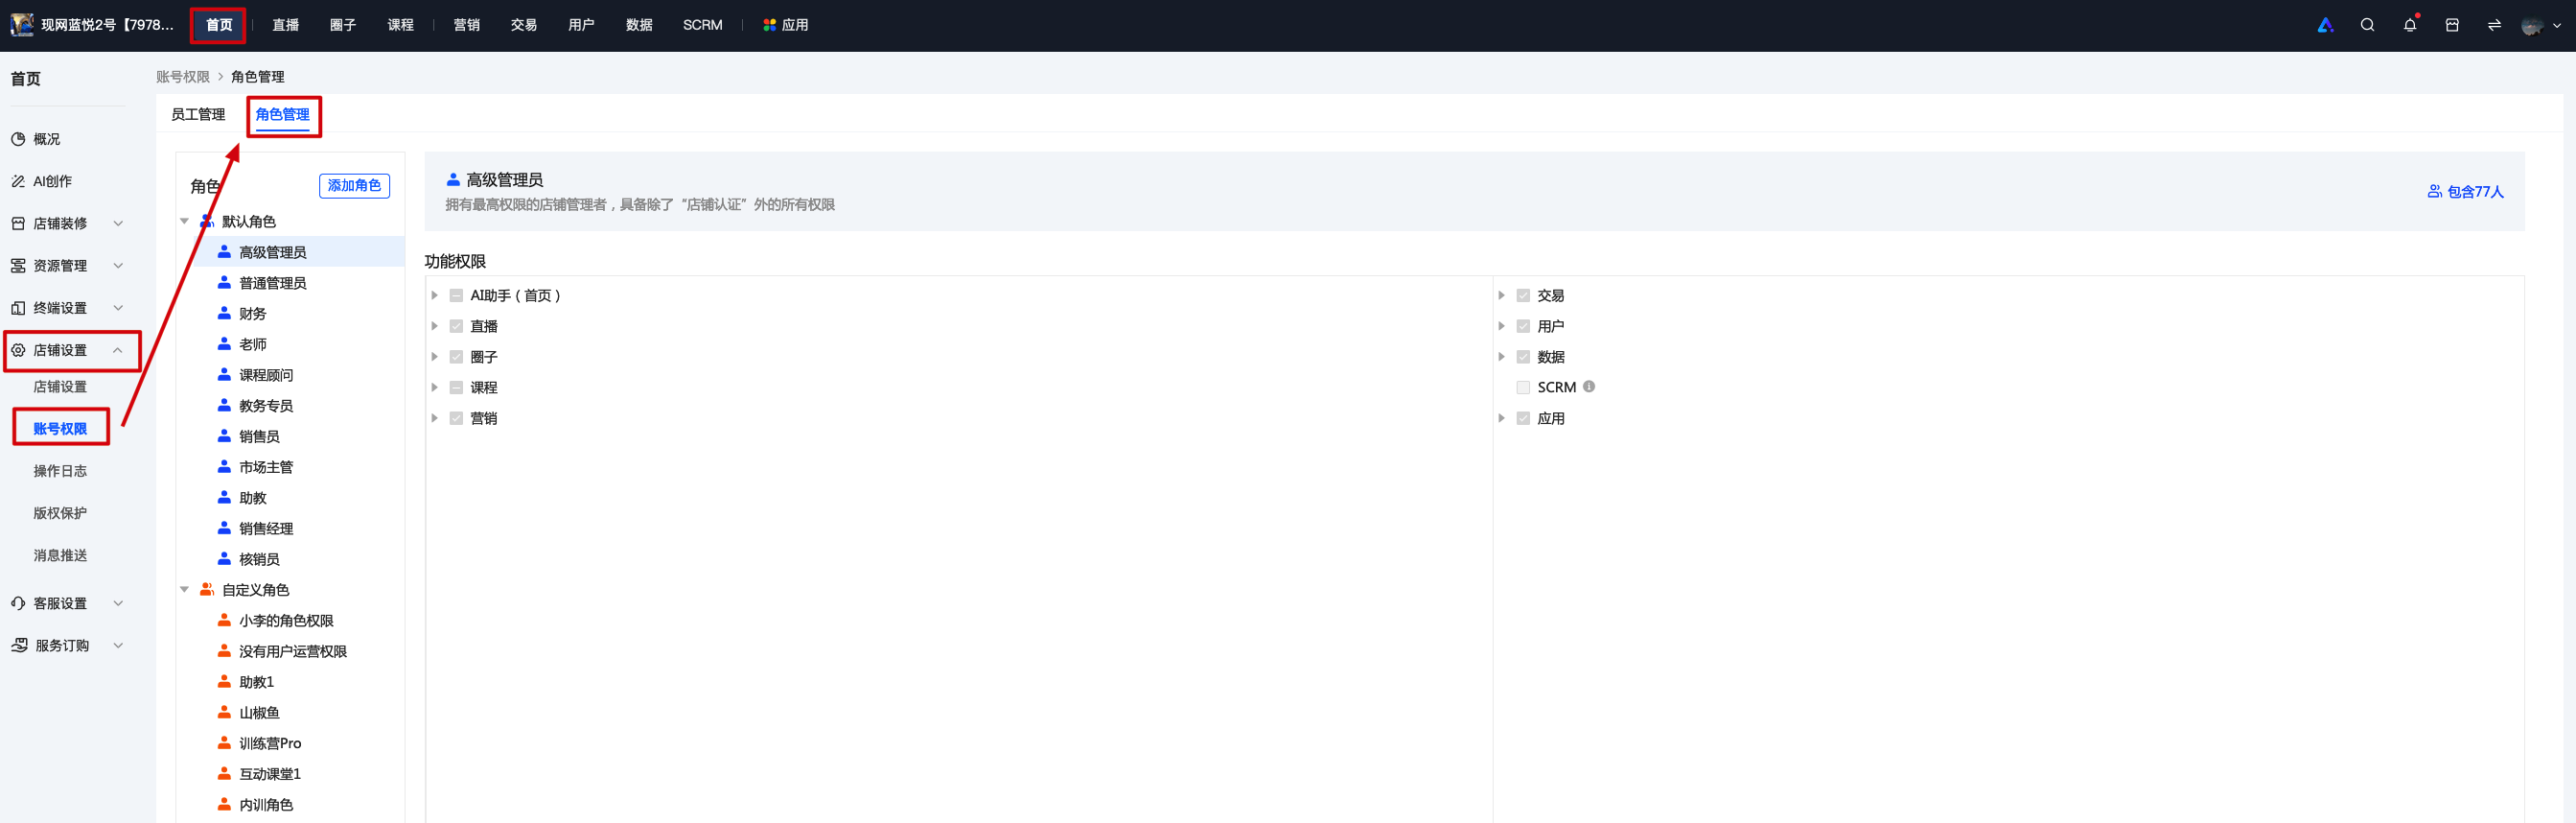
Step 2:Management backend - Role management permission configuration
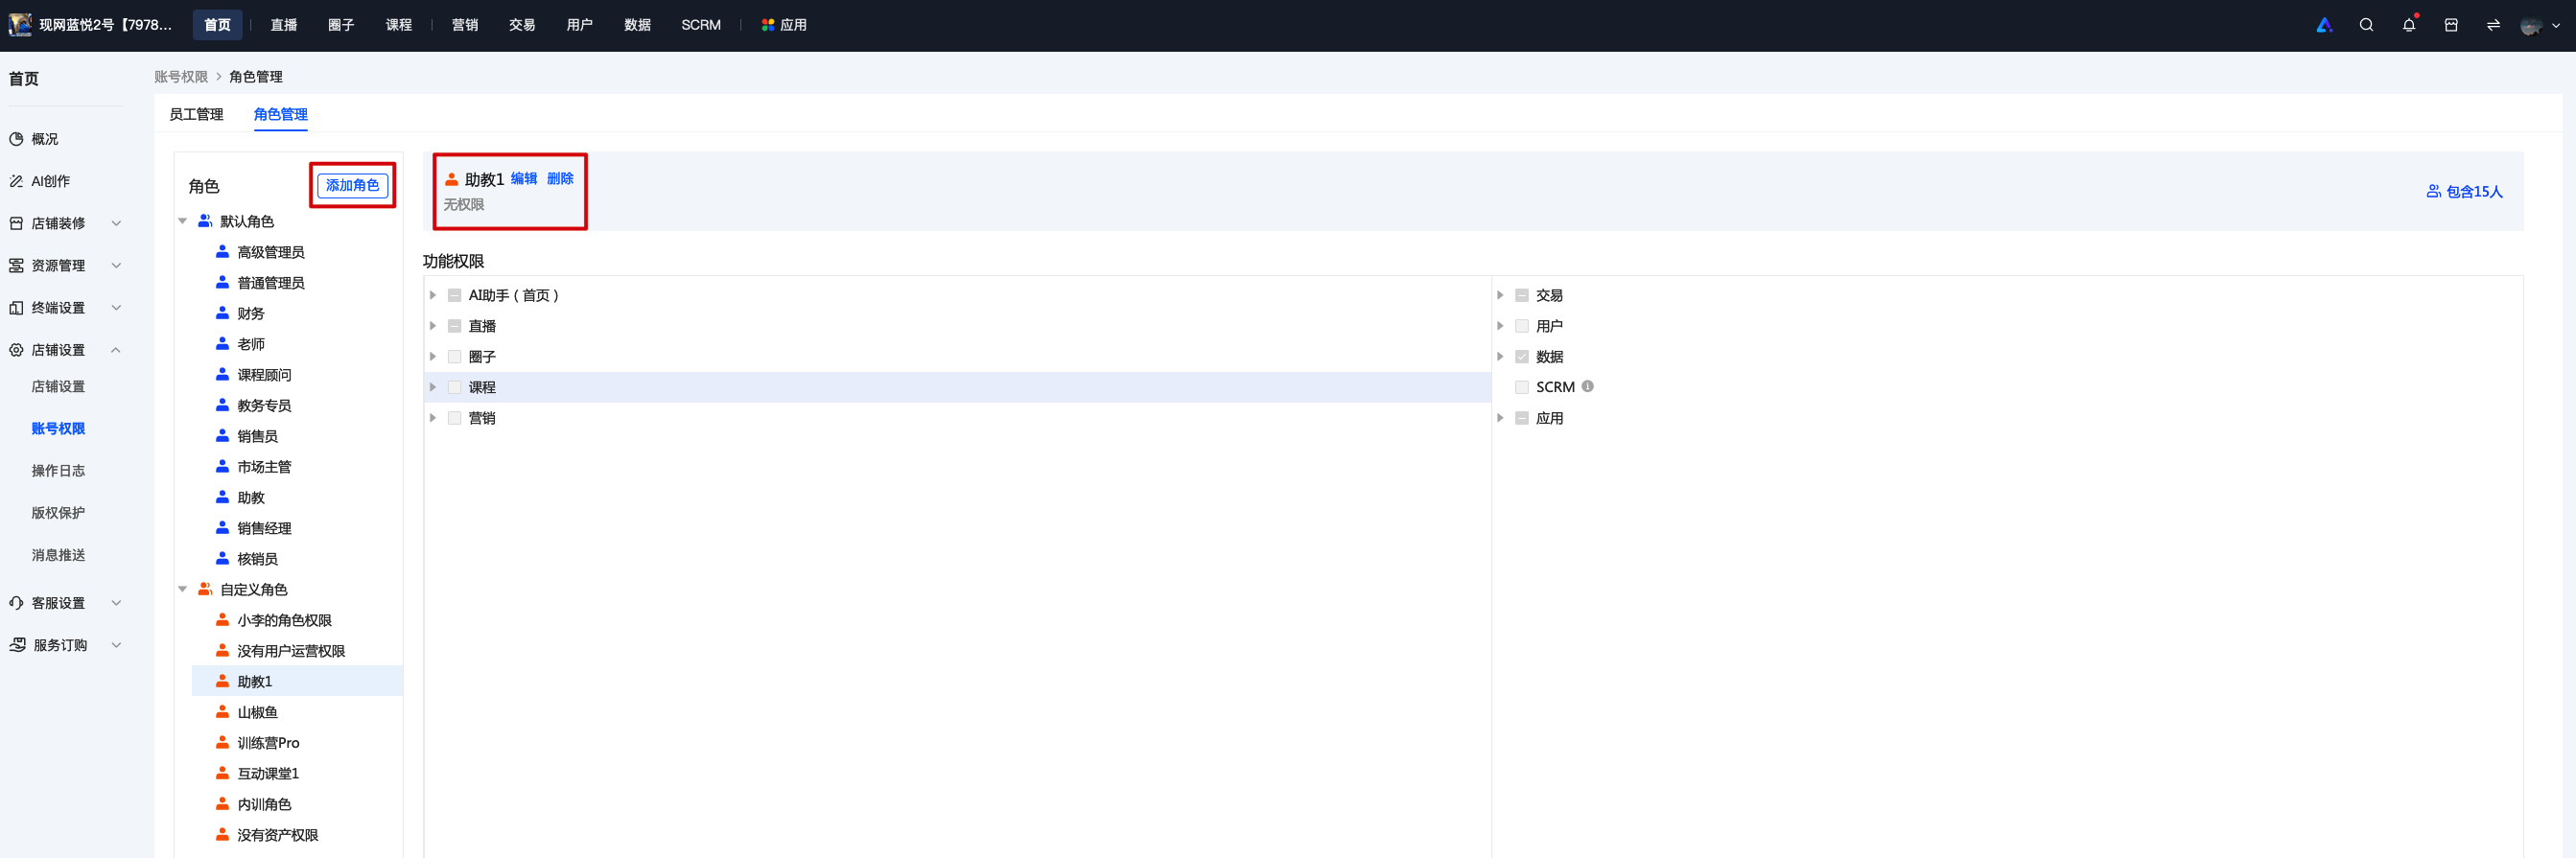
Step 3:Management backend - Add a role
1. Click 'Add Role' on the role management list page to enter the add - role page;
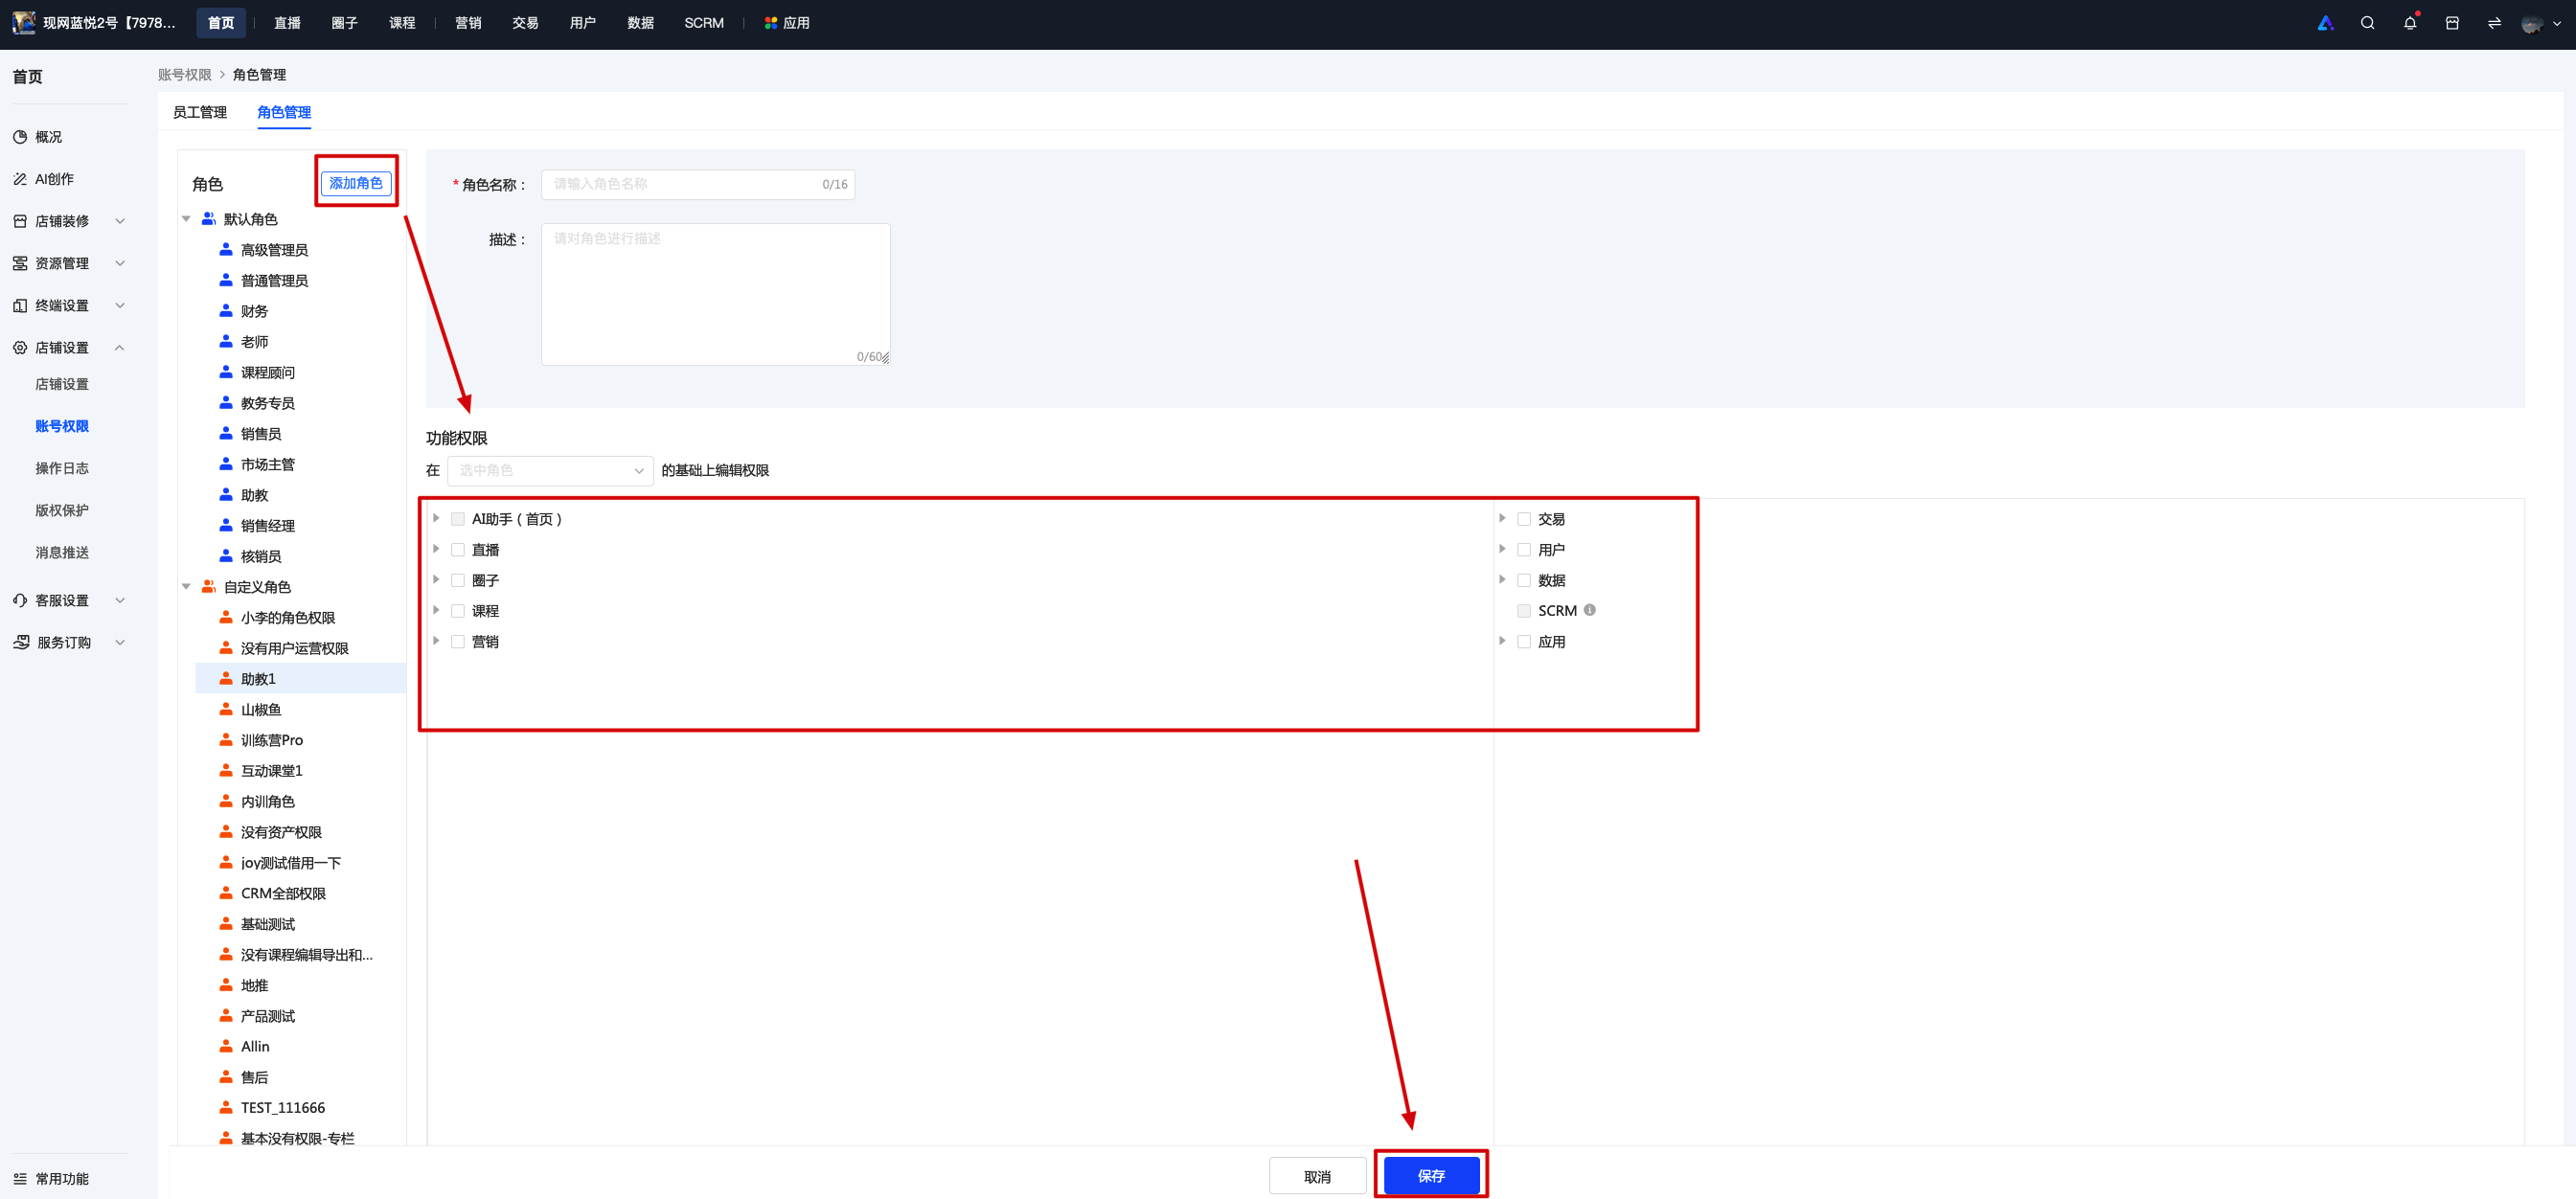
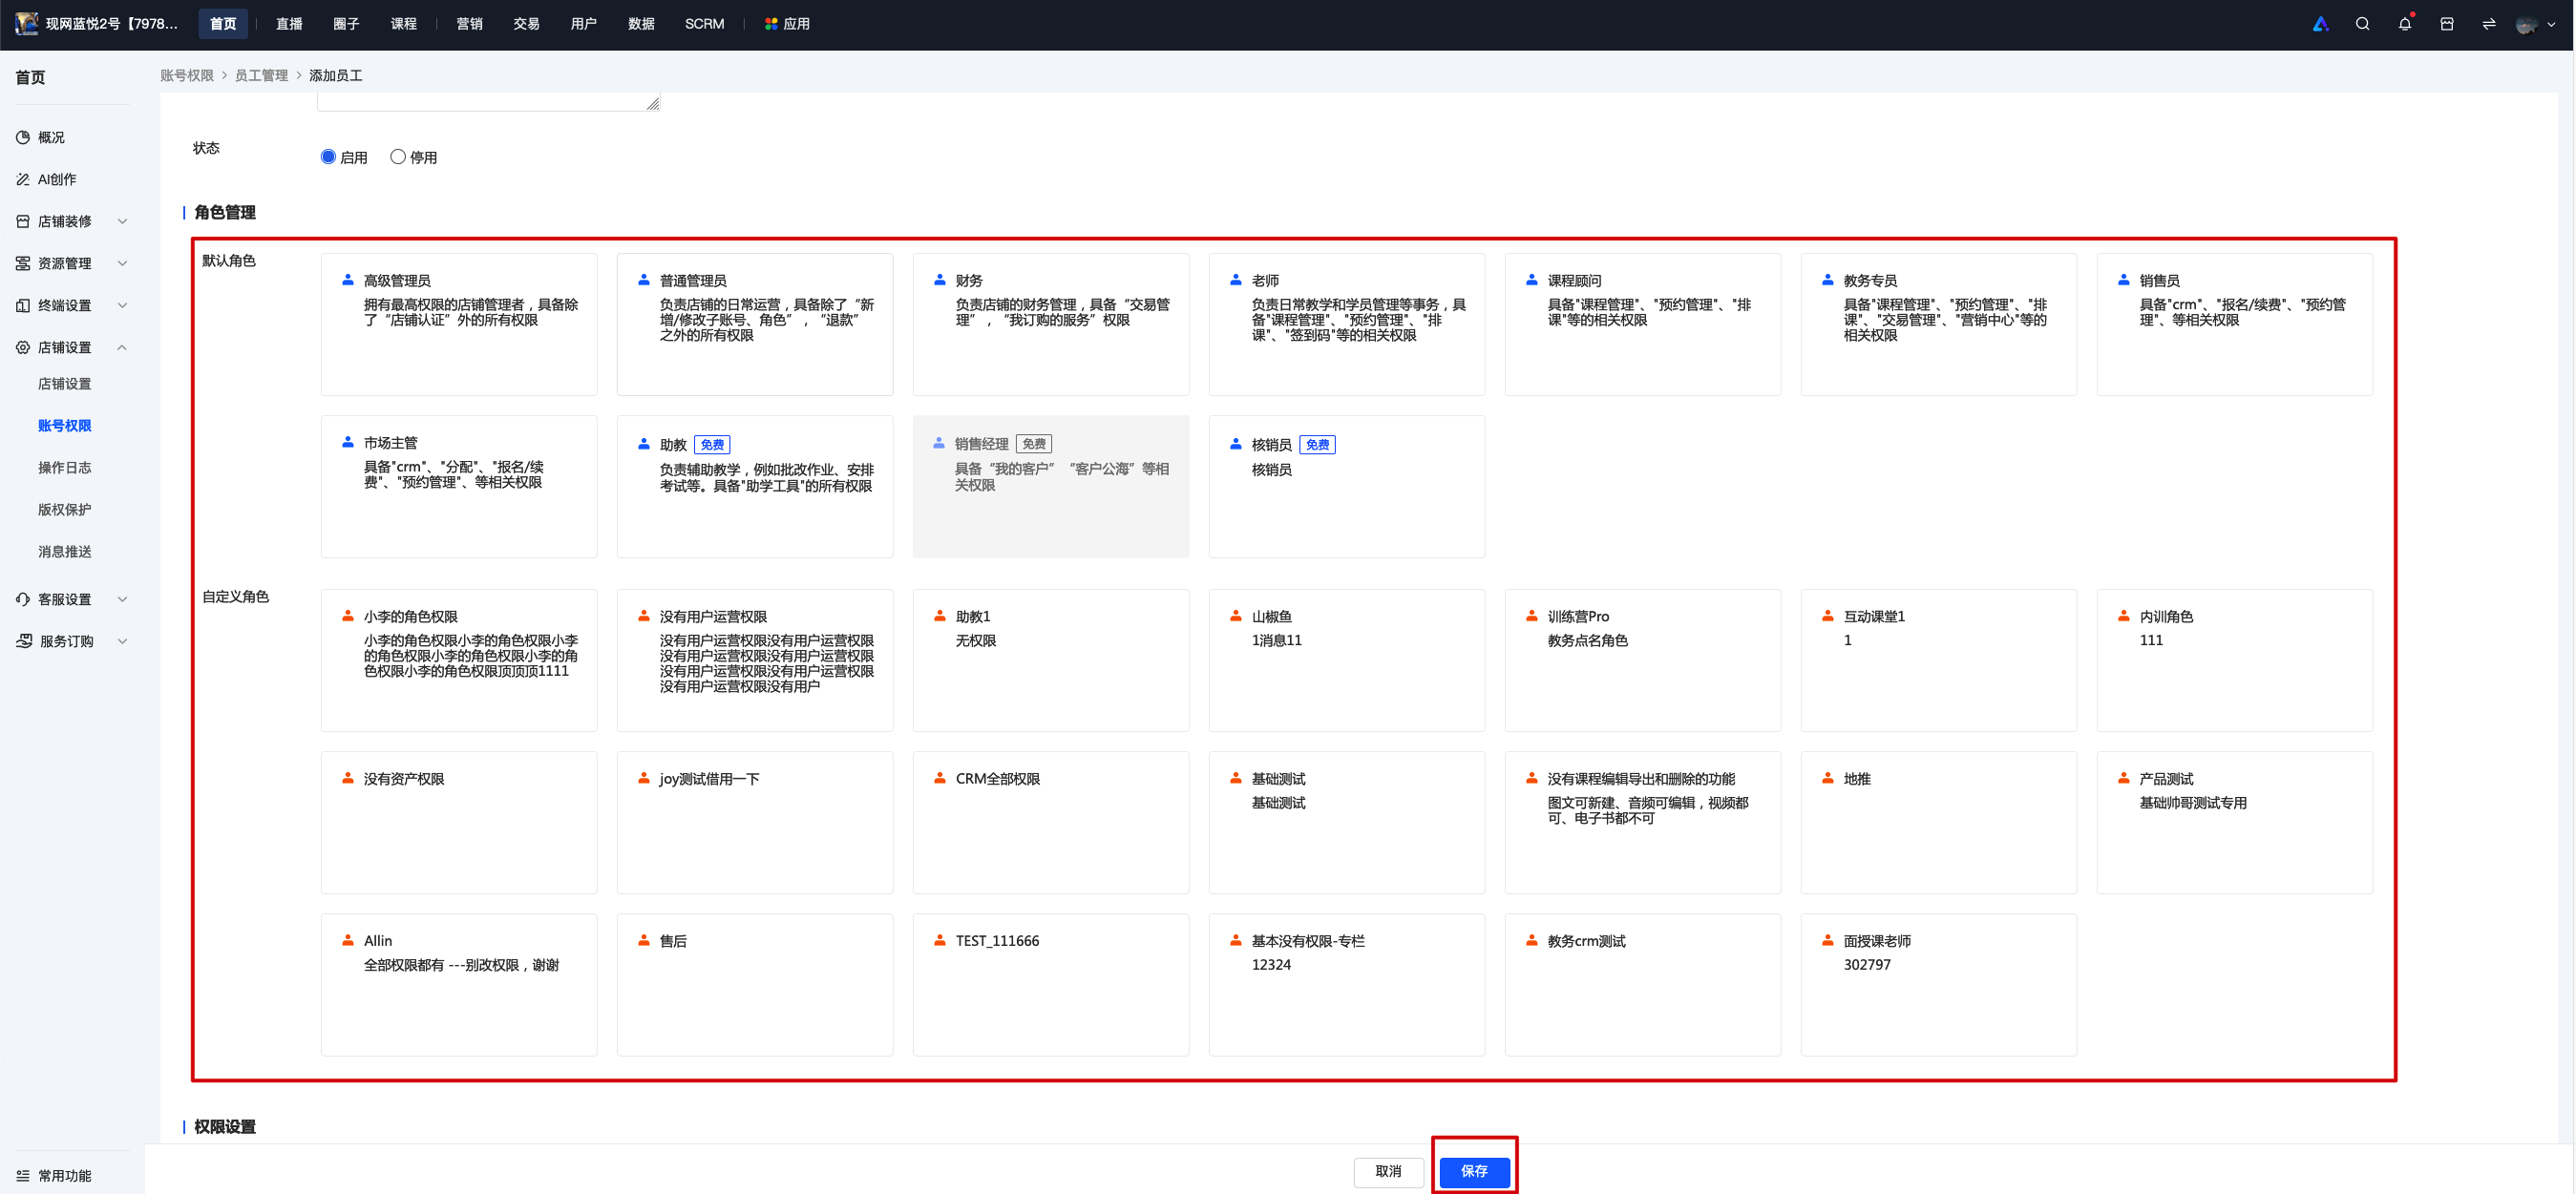
2. After setting is completed, click 'Save' to successfully create the role. Subsequently, you can bind the employee accounts you want to associate with this role;
VI. Notes
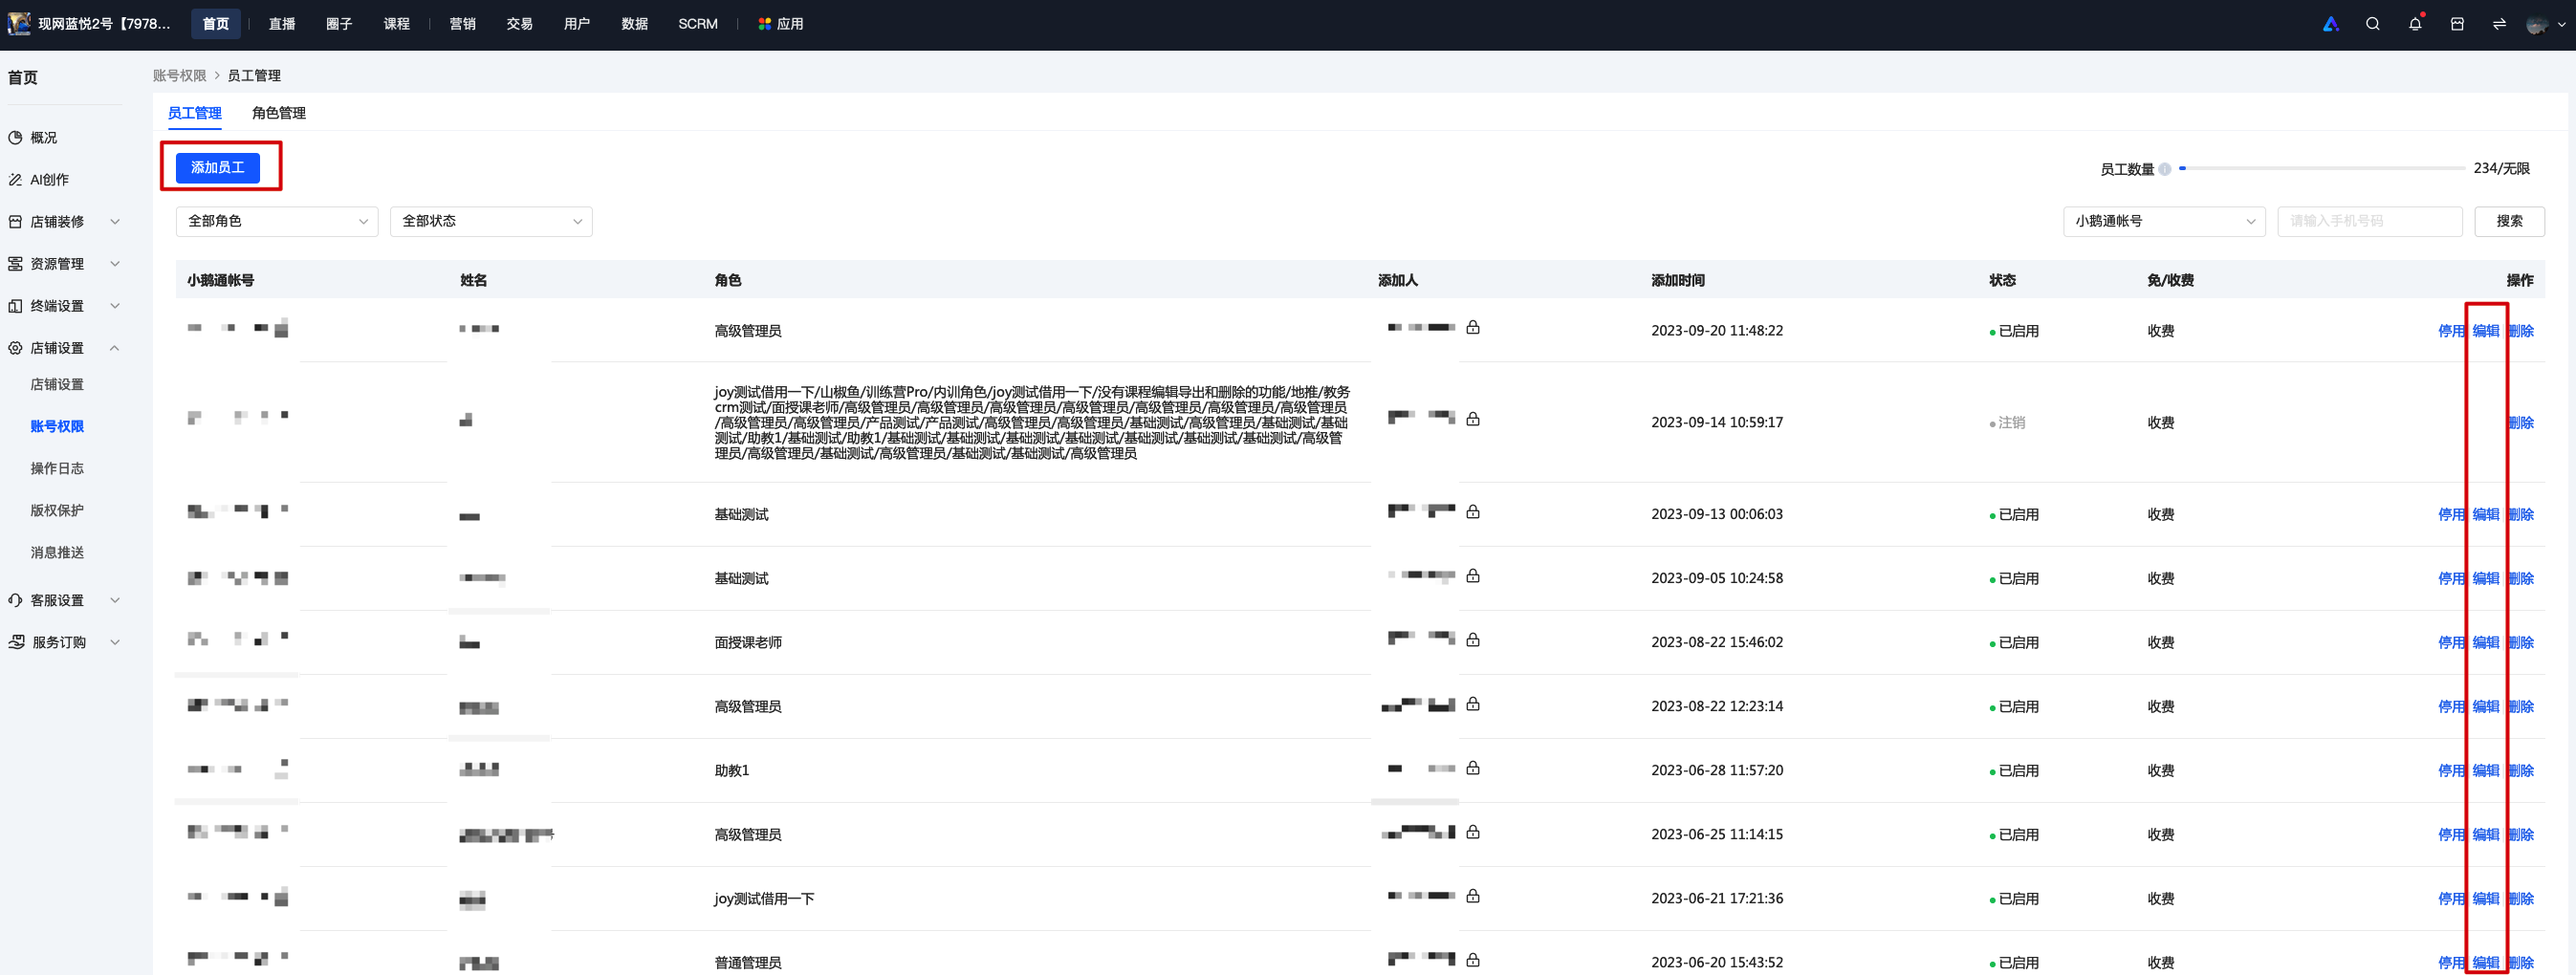
1. The employee account must be filled with a mobile phone number, and this mobile phone number must be registered with elink;
2. If you encounter sensitive permissions when adding an account role & account, the mobile phone number verification of the store administrator will be triggered. After successful verification, you can use it normally.
No comments to display
No comments to display