
Video Live Streaming - Tutorial for Web Version
I. Function Introduction
Instructors can conduct video live streaming via the web - based platform without the need to download software, and can start the live stream immediately. This is suitable for live - streaming scenarios that require desktop sharing, courseware display, and instructor on - camera. Compared with the computer client, it is easier for instructors to get started and operate when using the web - based platform for live streaming.
PS: To conduct live streaming via the web - based platform, you need to use Google Chrome. Google Chrome has better compatibility and will provide a better live - streaming effect!
II. Purpose of Use
Using the web - based platform to start a video live stream allows for convenient live streaming directly on the web without software download, enabling real - time video, courseware & desktop sharing and other live - streaming content.
III. Use Scenarios
Web - based live streaming is suitable for scenarios that require desktop sharing, courseware display, and real - time video live streaming with students.
IV. Operation Path
Instructor End: Management Backend → Live Streaming → Go Live → Teach on Computer → Web - based Platform
V. Usage Tutorial
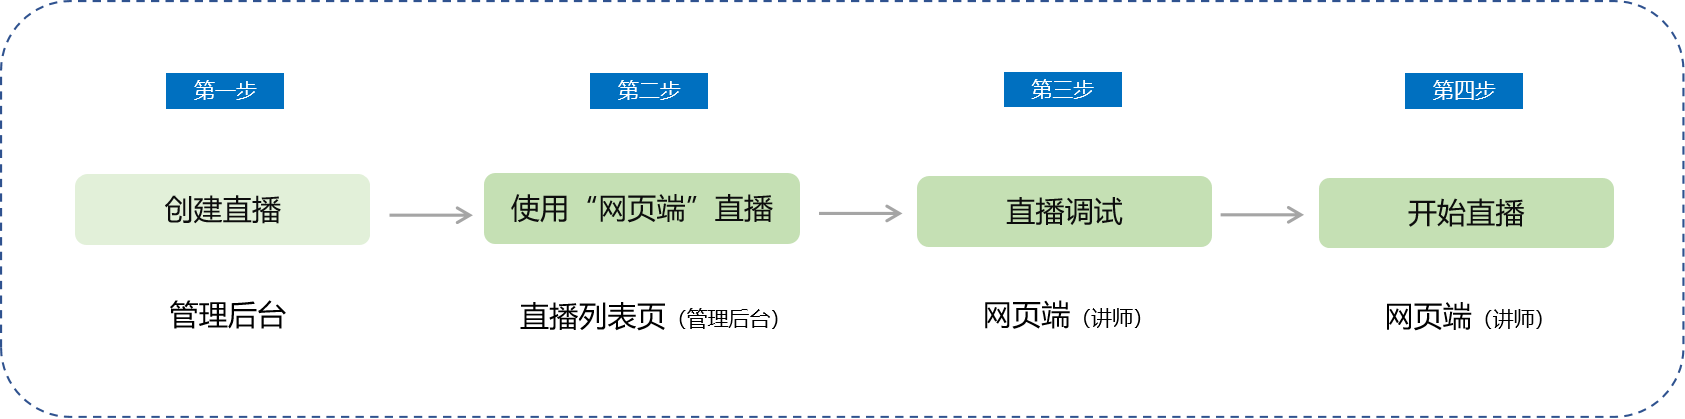
Step 1: Create a Live Stream(Management Backend)
1. Enter the Management Backend - Live Streaming and create a video live stream.
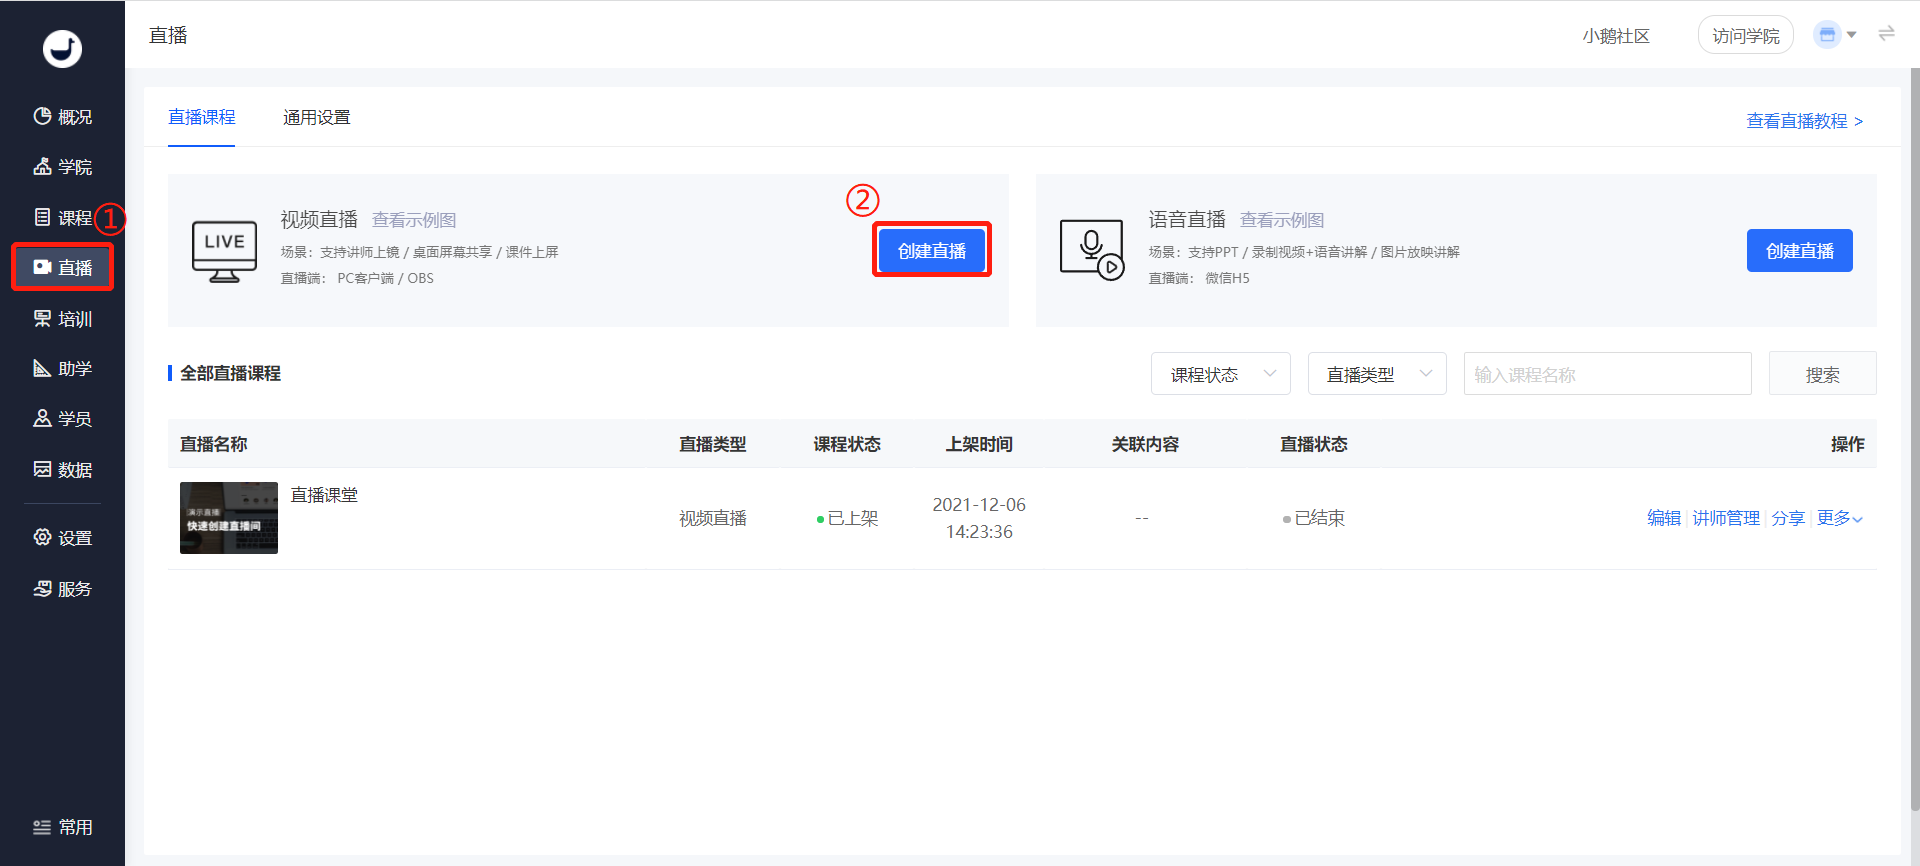
(Management Backend - Live Streaming)
2. Fill in the live - stream information and click the Save button to complete the live - stream creation.
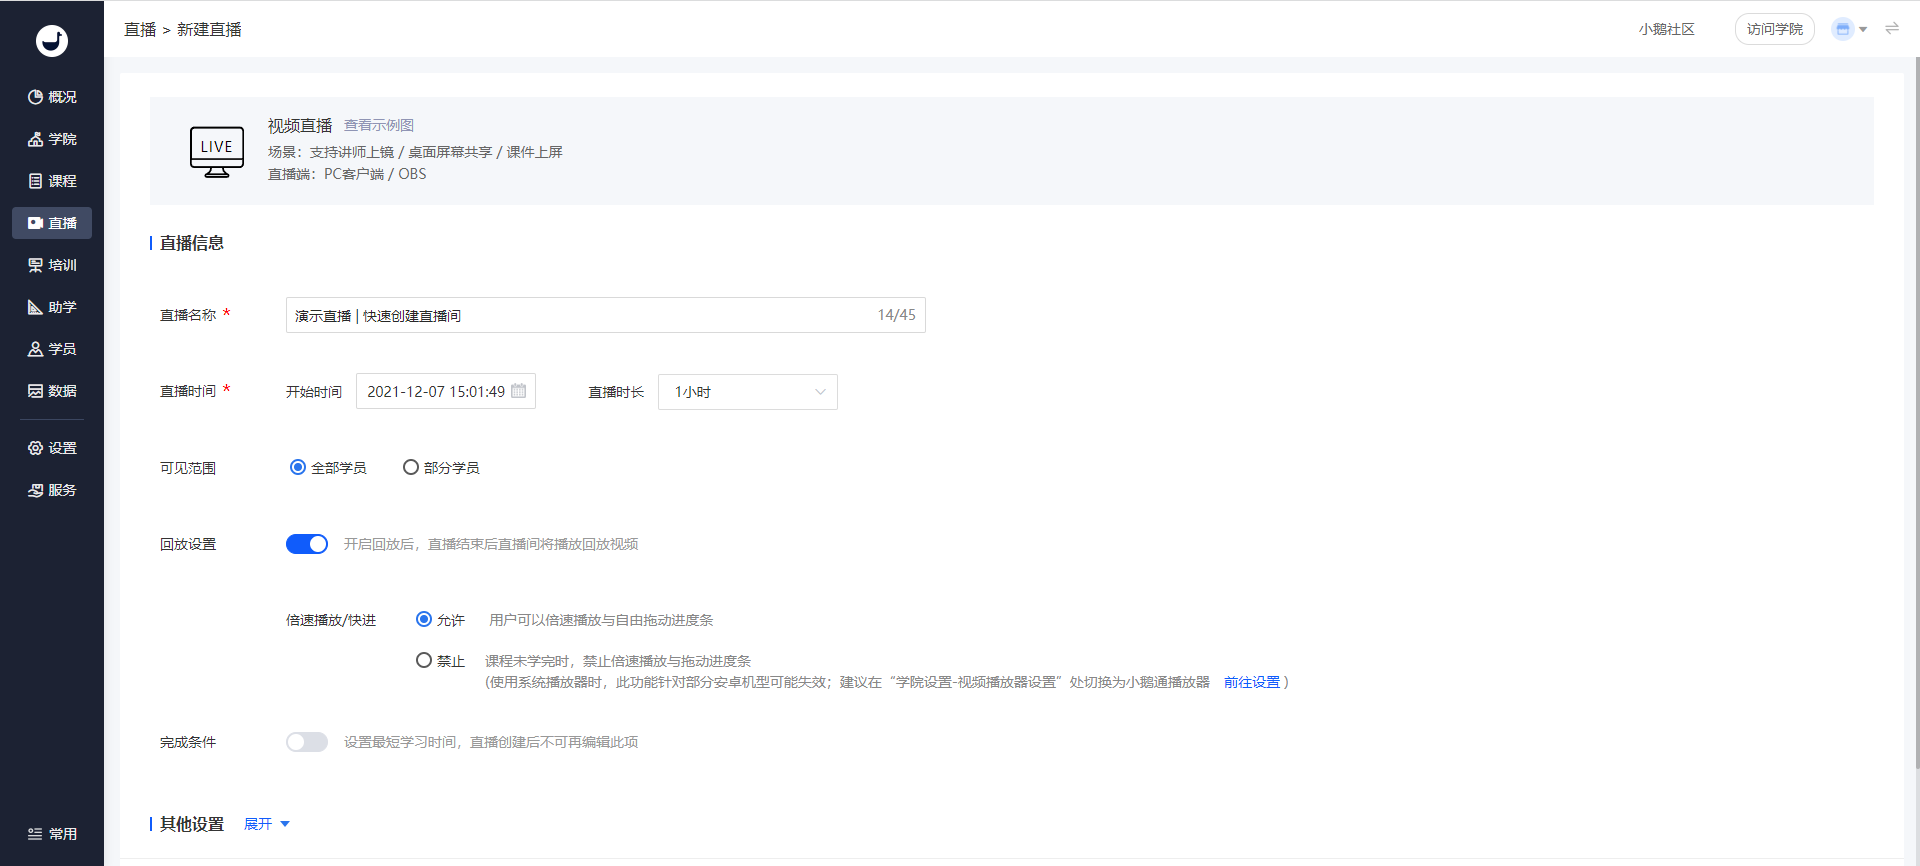
(Live - Stream Creation Page)
3. After creating the live stream, set up the instructor.
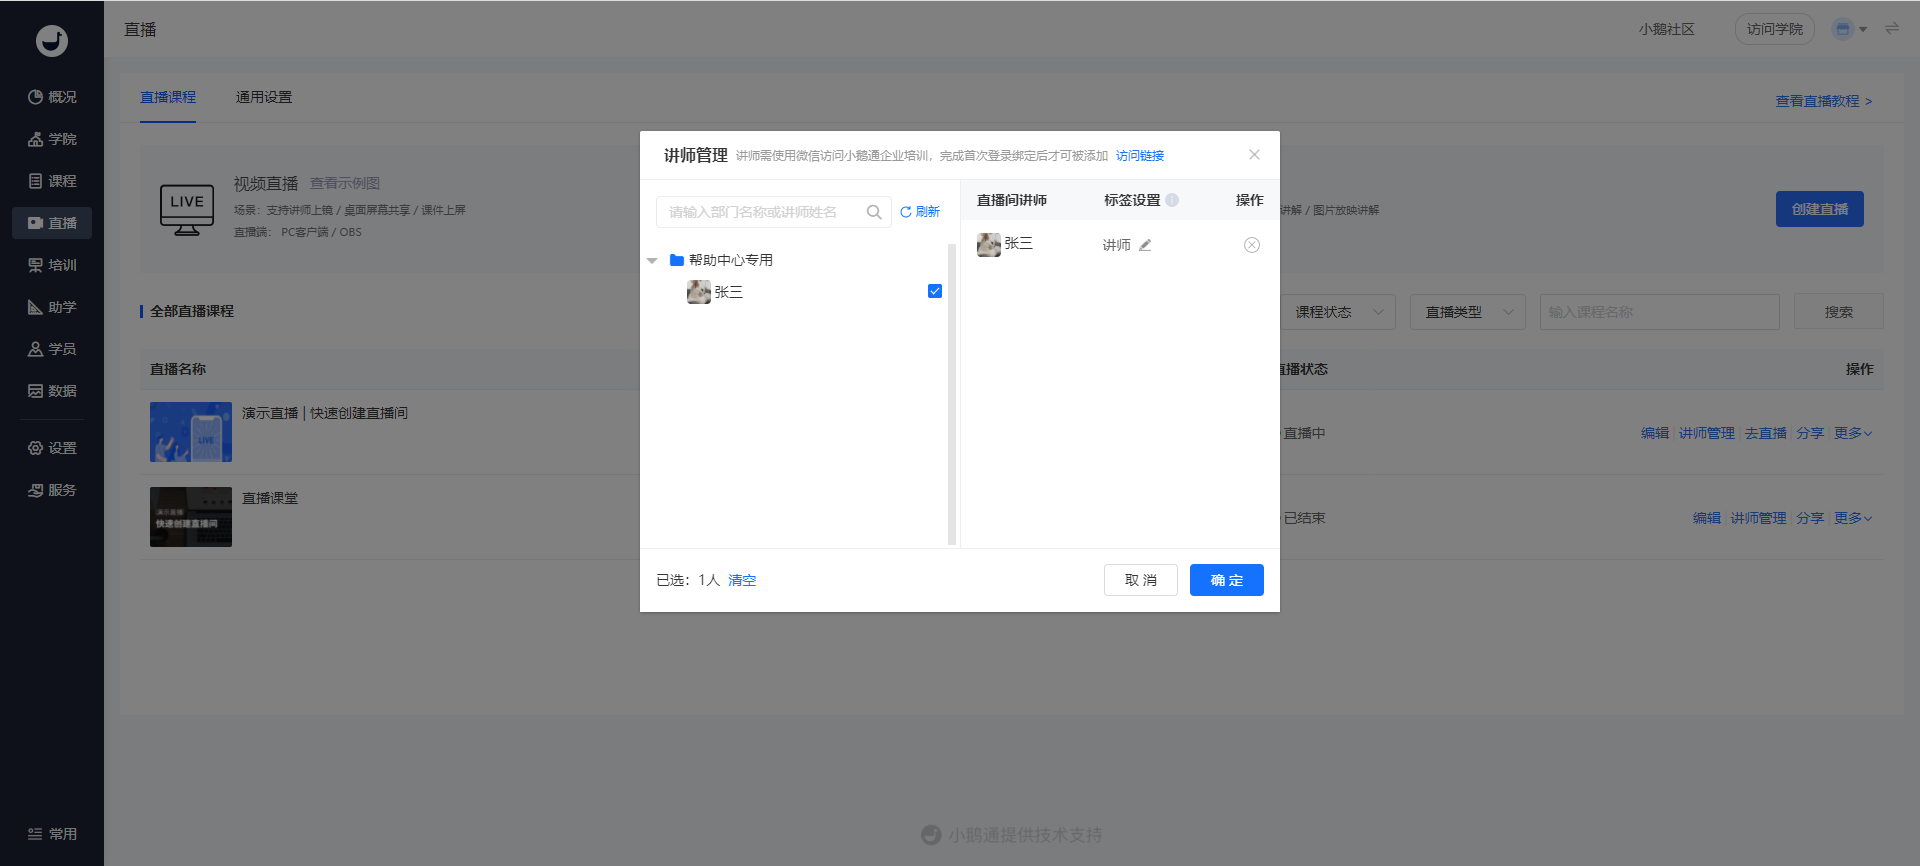
(Instructor Management Pop - up Window)
Step 2: Use the 'Web - based Platform' for Live Streaming(Management Backend)
1. After completing the live - stream creation, click the 'Go Live' button on the live - stream list page.
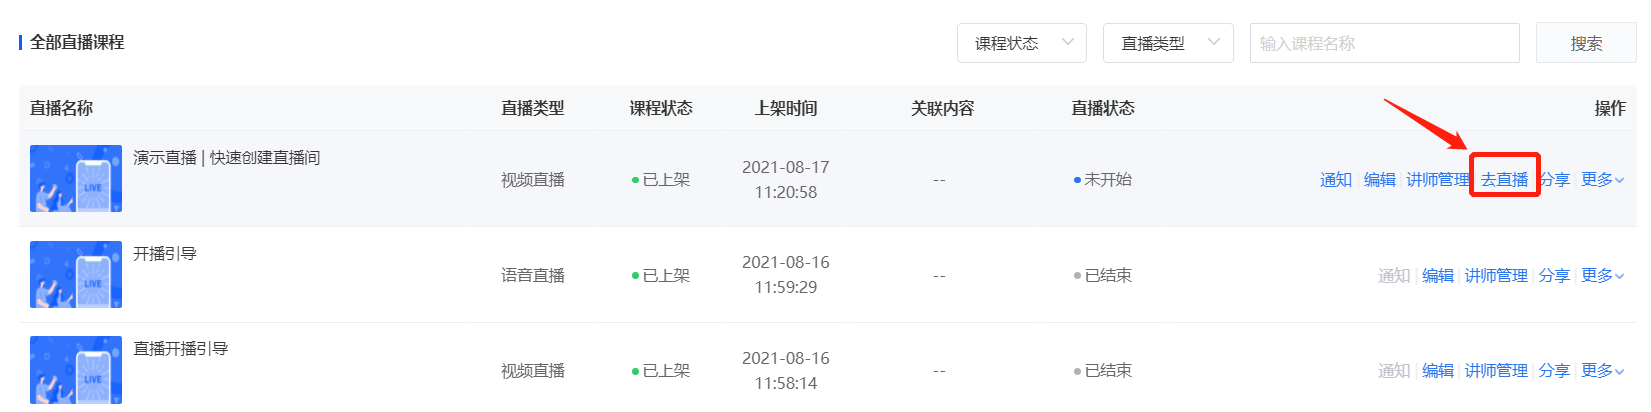
(Live - Stream Management - Live - Stream List)
2. Select the 'Web - based Platform' for live streaming.
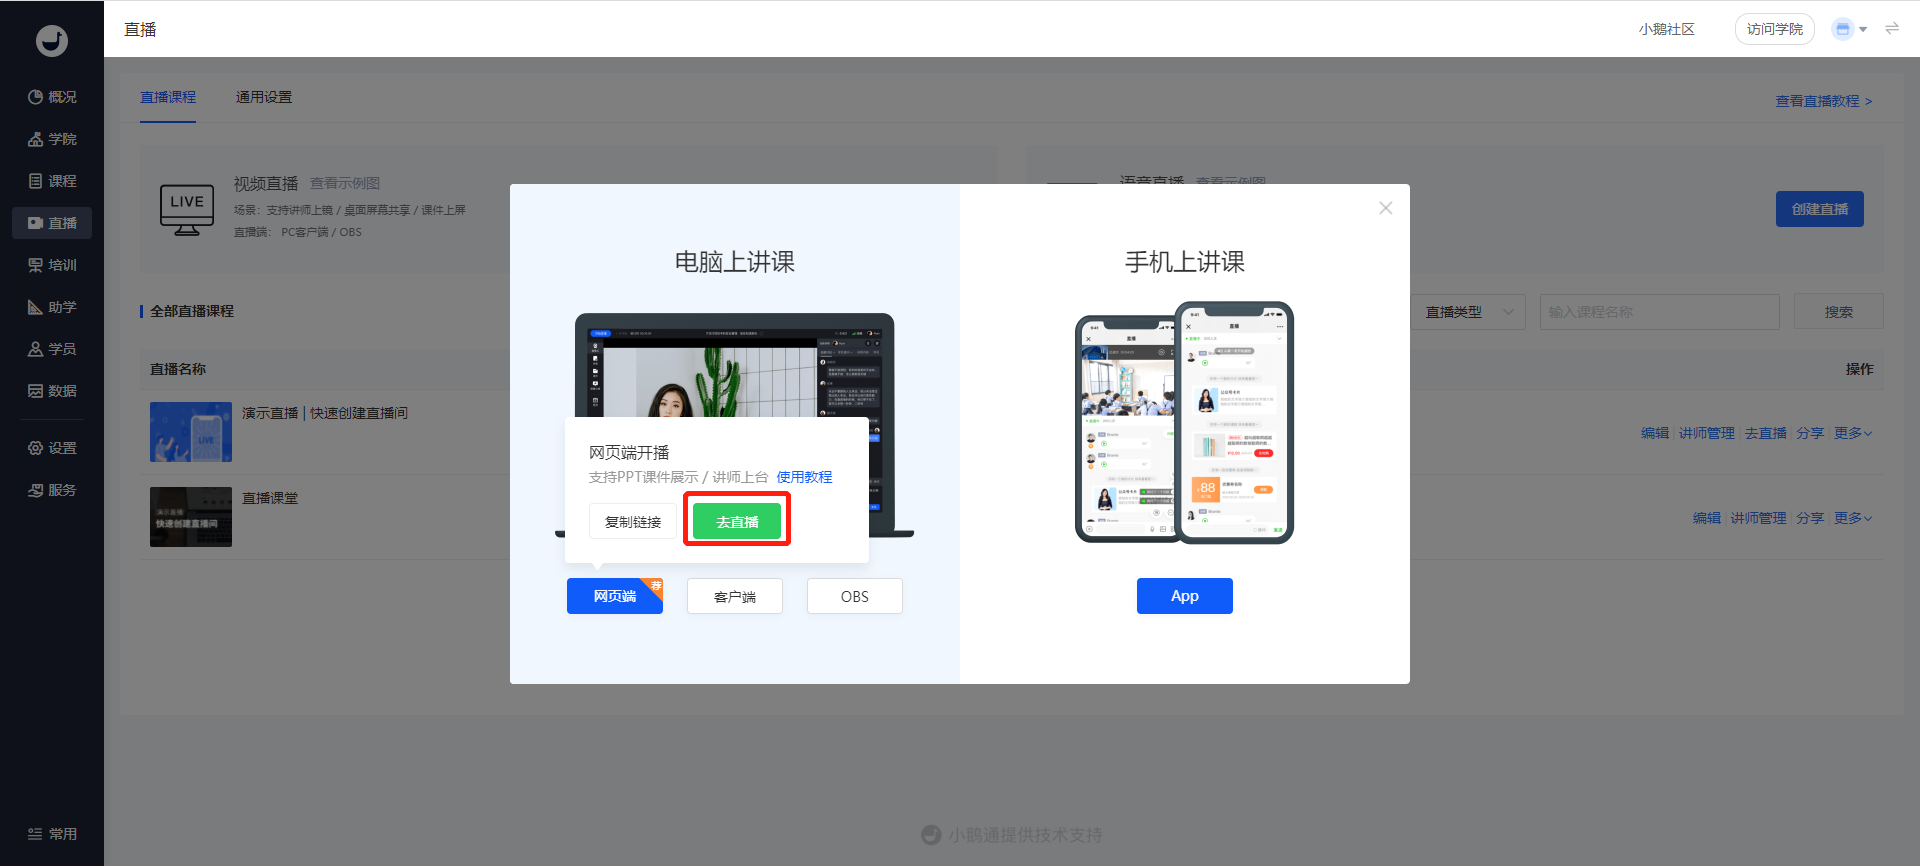
(Live - Streaming - Go Live)
Step 3: The instructor enters the web - based platform and conducts live - stream debugging.(Web - based Platform)
1. After the instructor enters the live - stream room, check whether the camera and microphone are working properly as prompted.
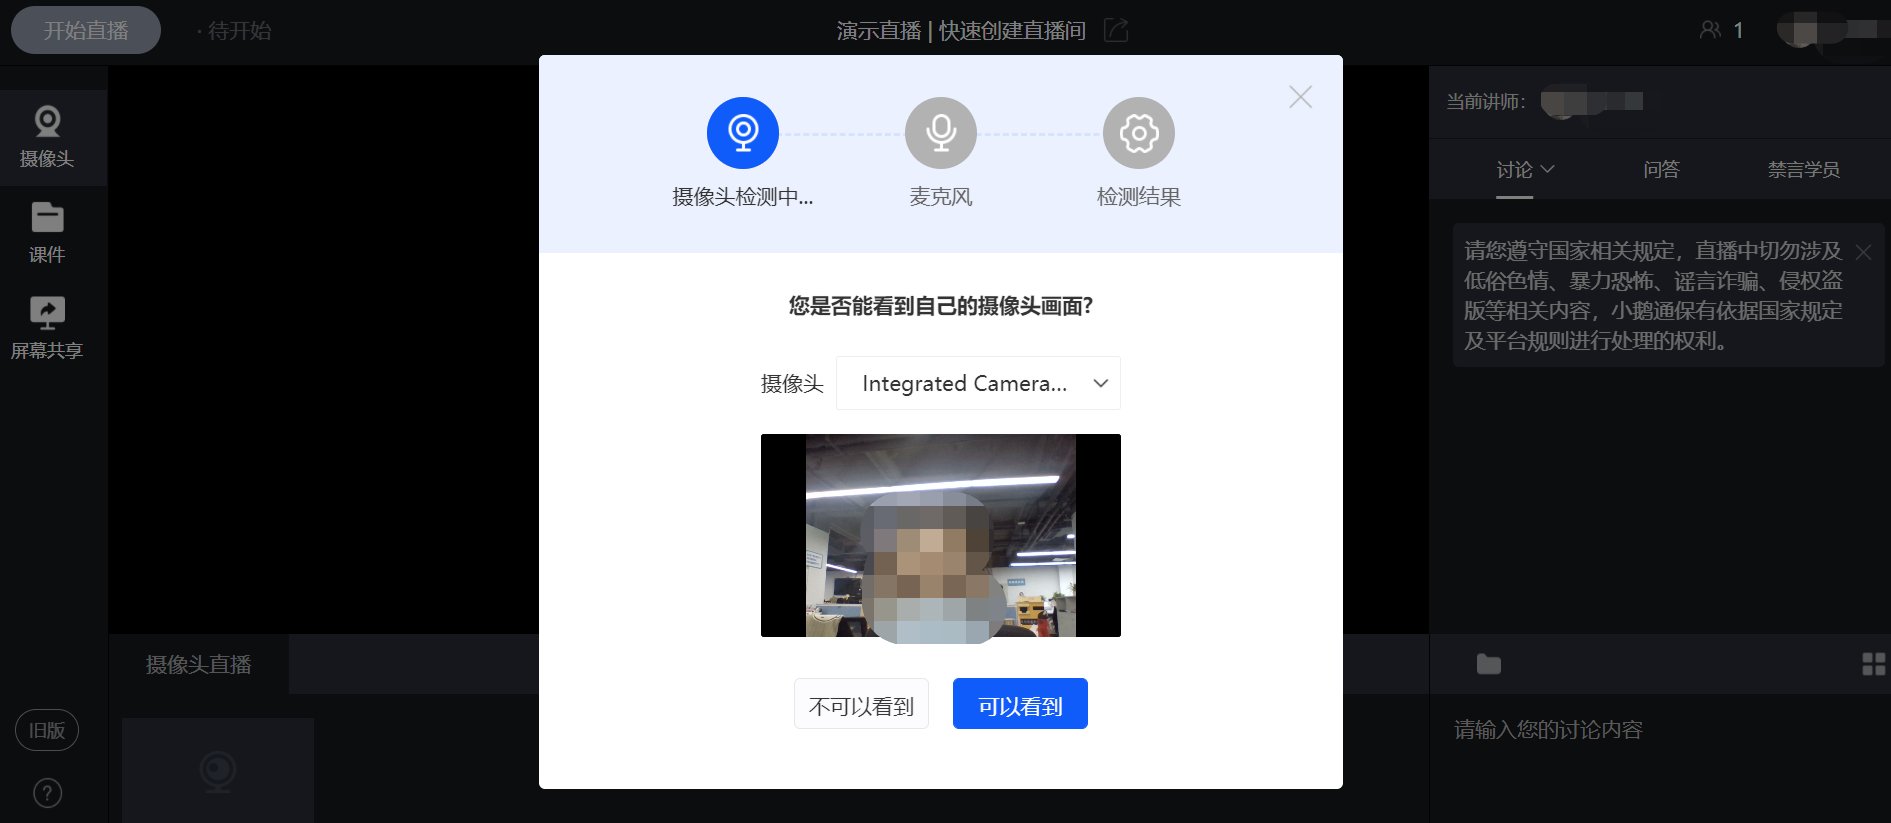
(Web - based Live - Stream Instructor End)
2. You can upload relevant courseware PDFs in advance.
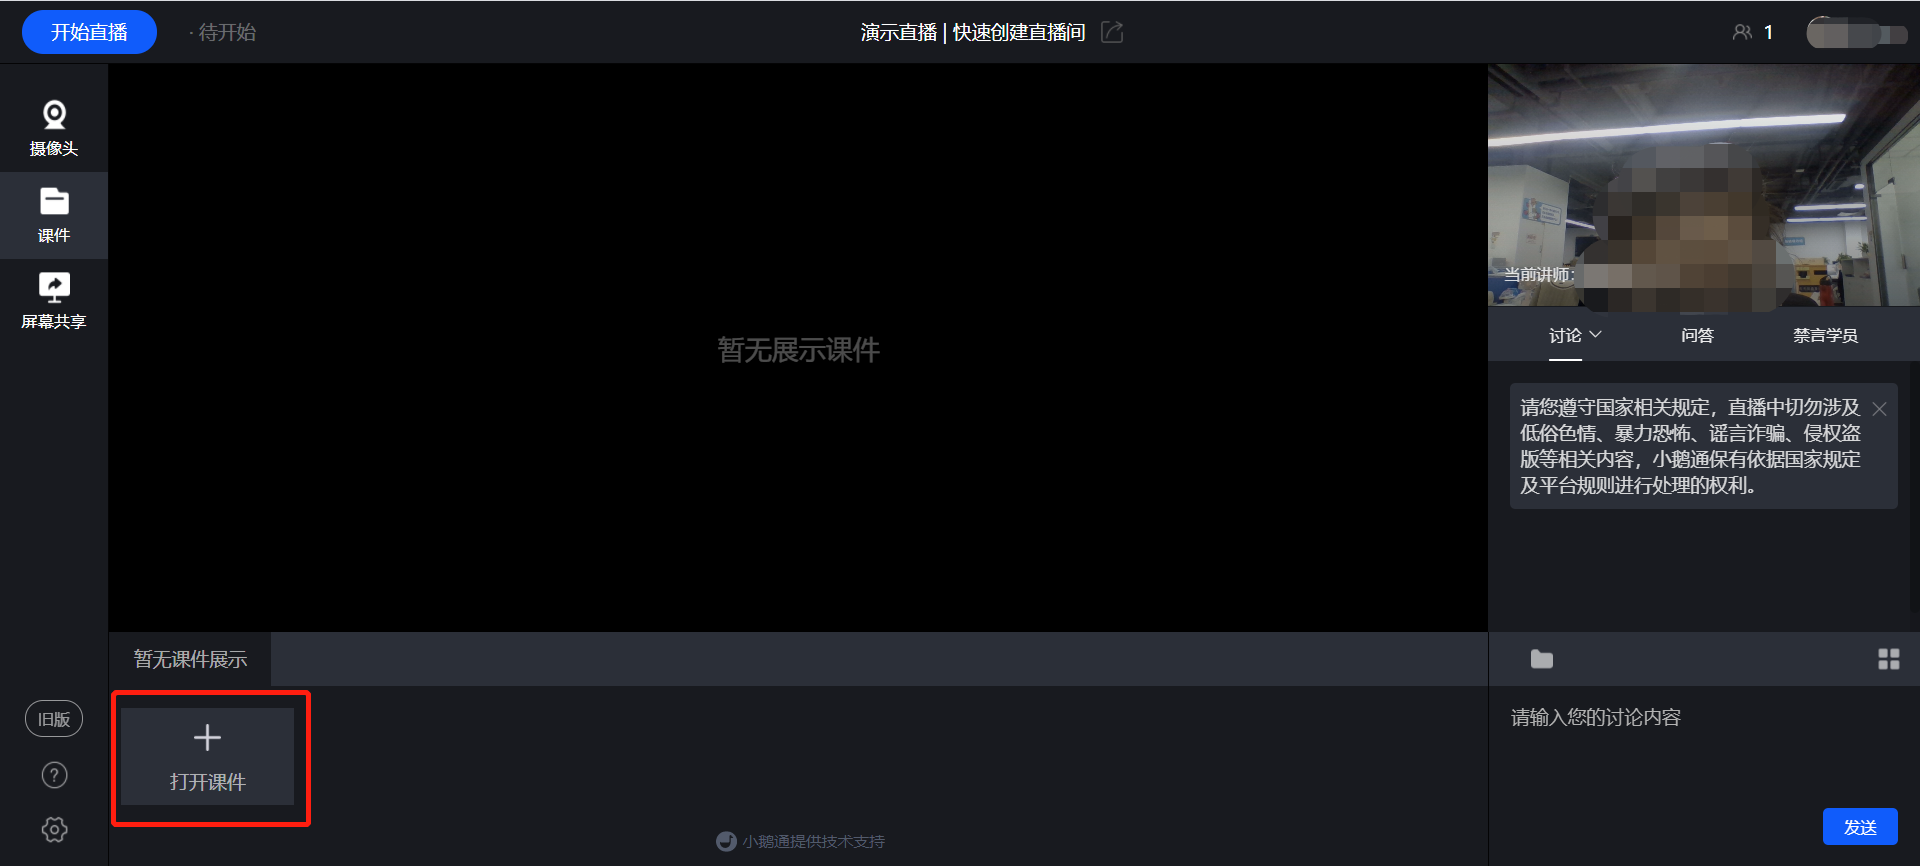
(Web - based Live - Stream Instructor End)
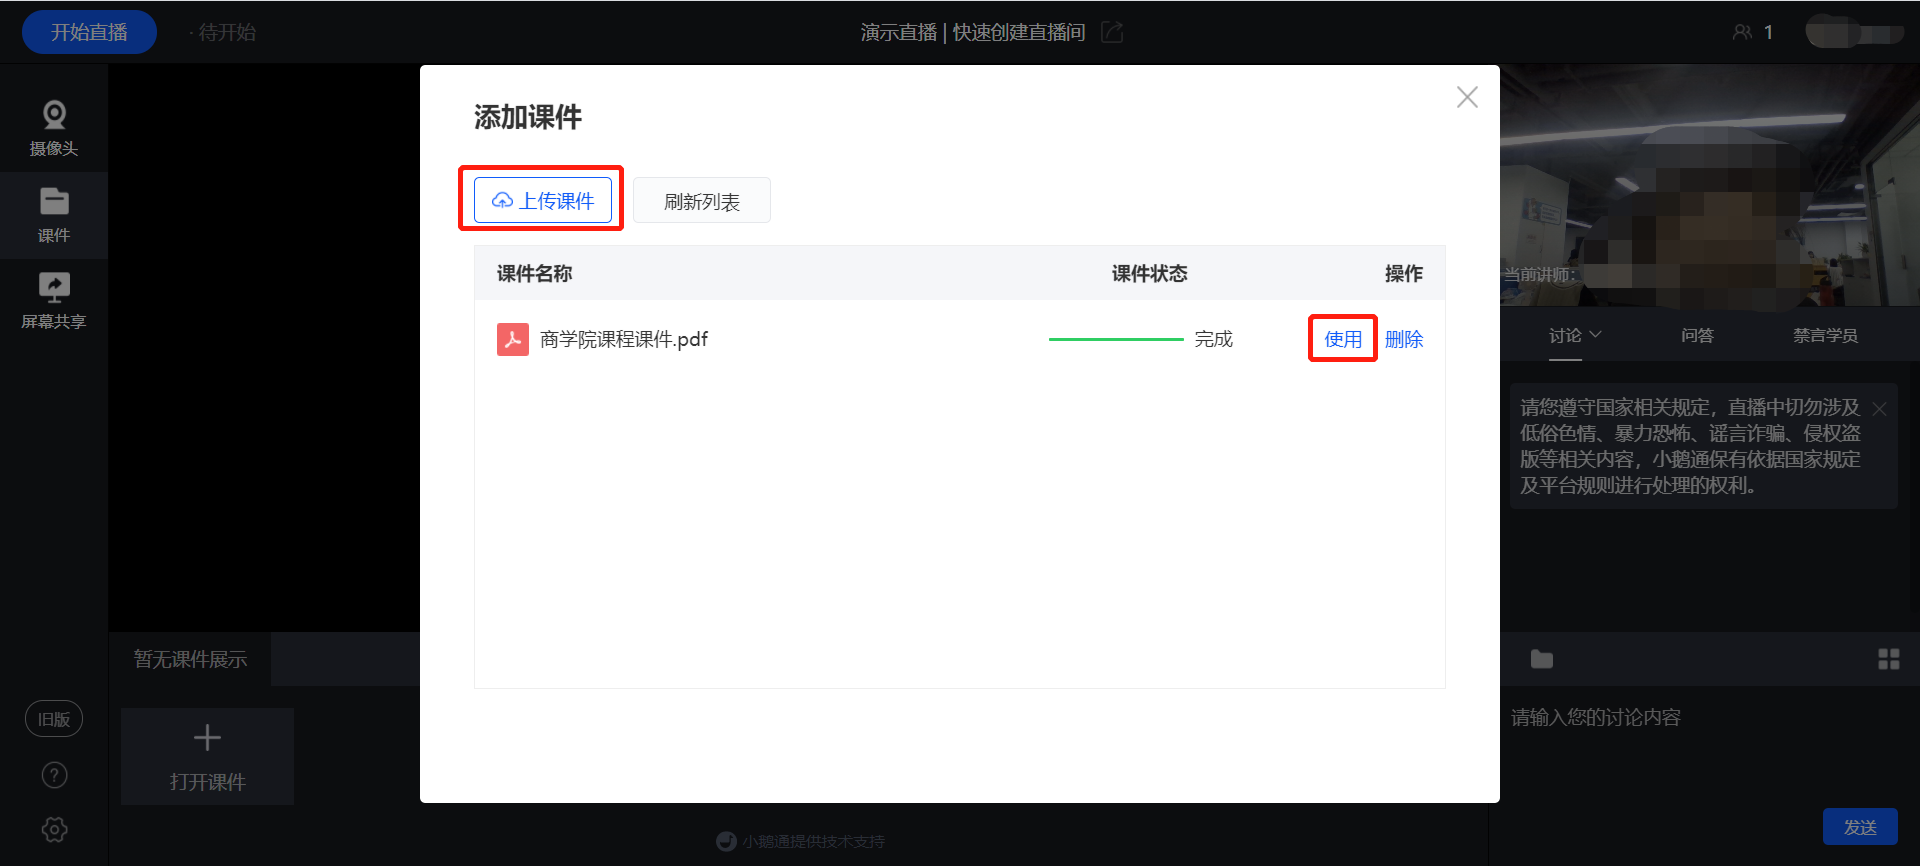
(Web - based Live - Stream Instructor End)
Step 4: Start the Live Stream(Web - based Platform)
1. After completing the live - stream debugging, click 'Start Live Streaming' in the upper - left corner to start the live stream.
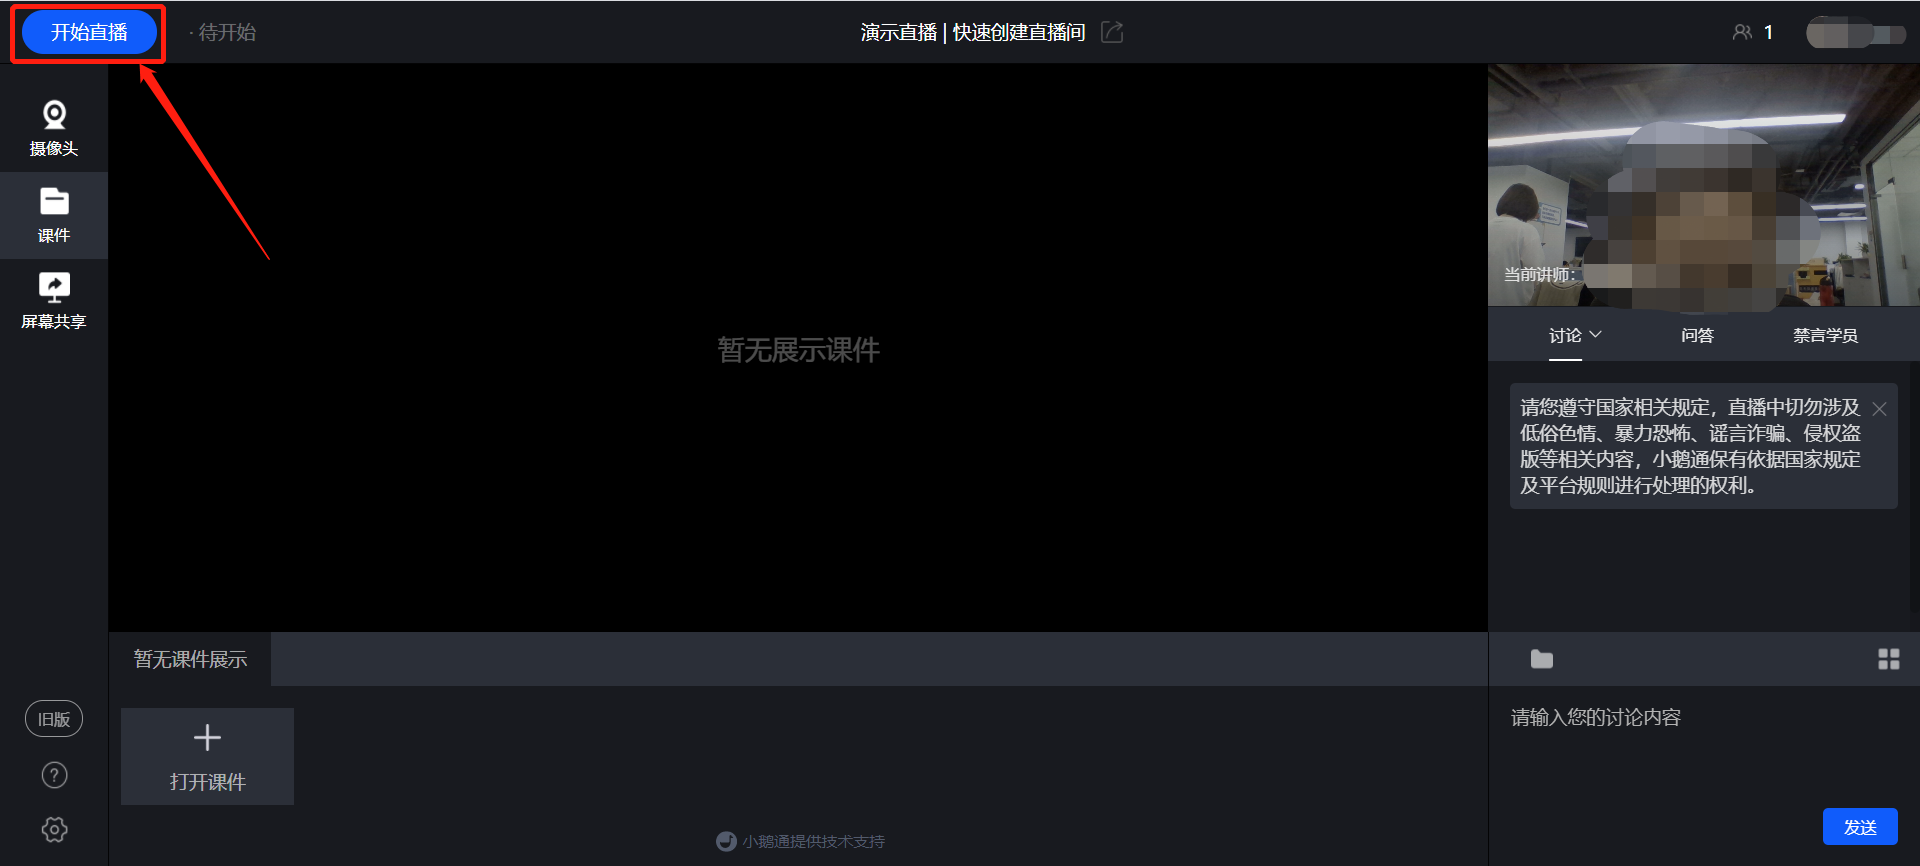
(Web - based Live - Stream Instructor End)
2. Click 'Camera', 'Courseware' & 'Screen Sharing' on the left side to switch the live - stream mode at any time.
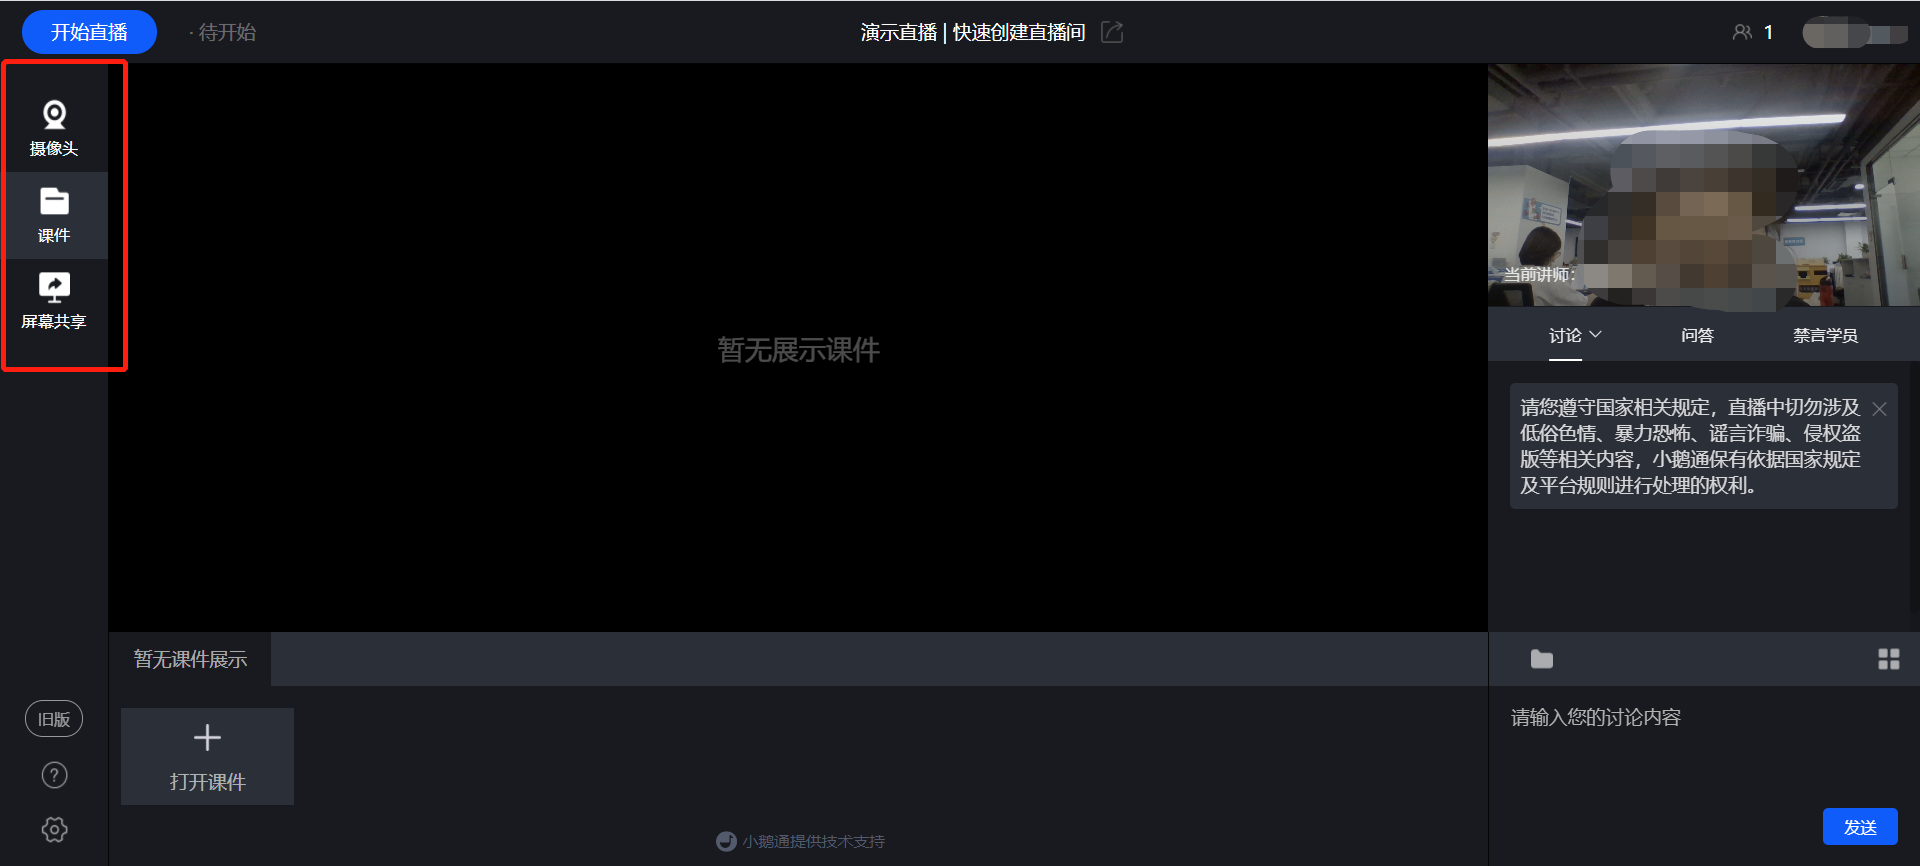
(Web - based Live - Stream Instructor End)
When the live - stream mode is 'Screen Sharing', click 'Switch Window' on the right side to switch the screen window.
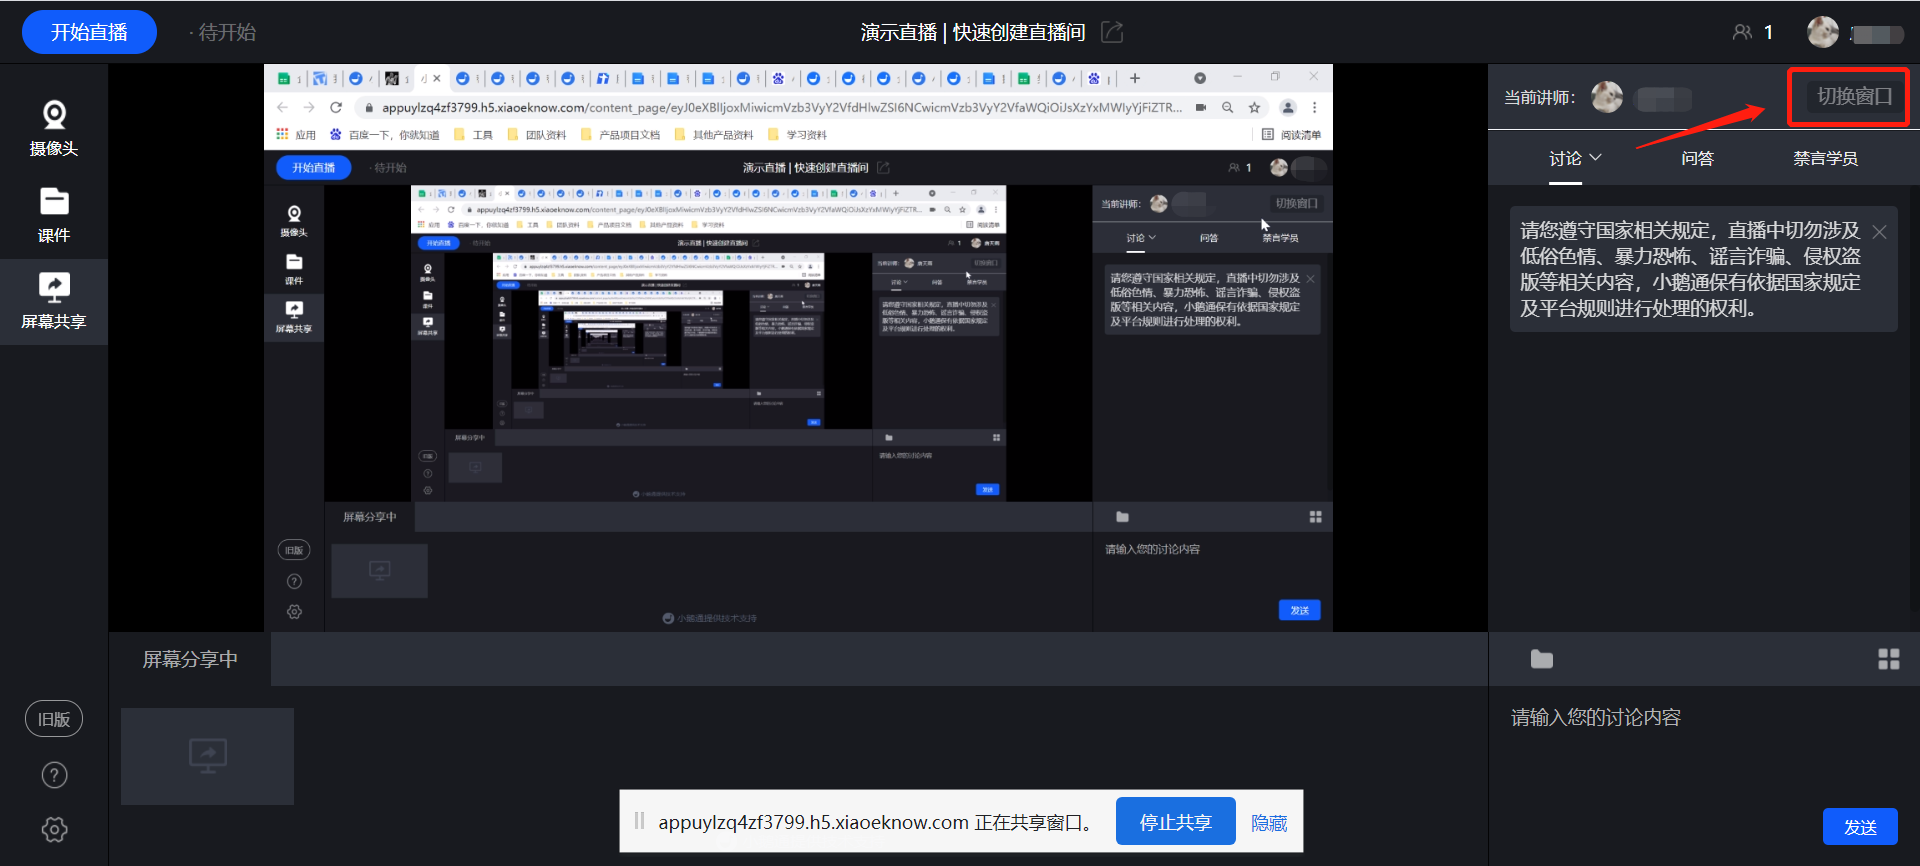
(Web - based Live - Stream Instructor End)
3. Click the folder icon in the lower - right corner to send the lecture content in the interaction area.
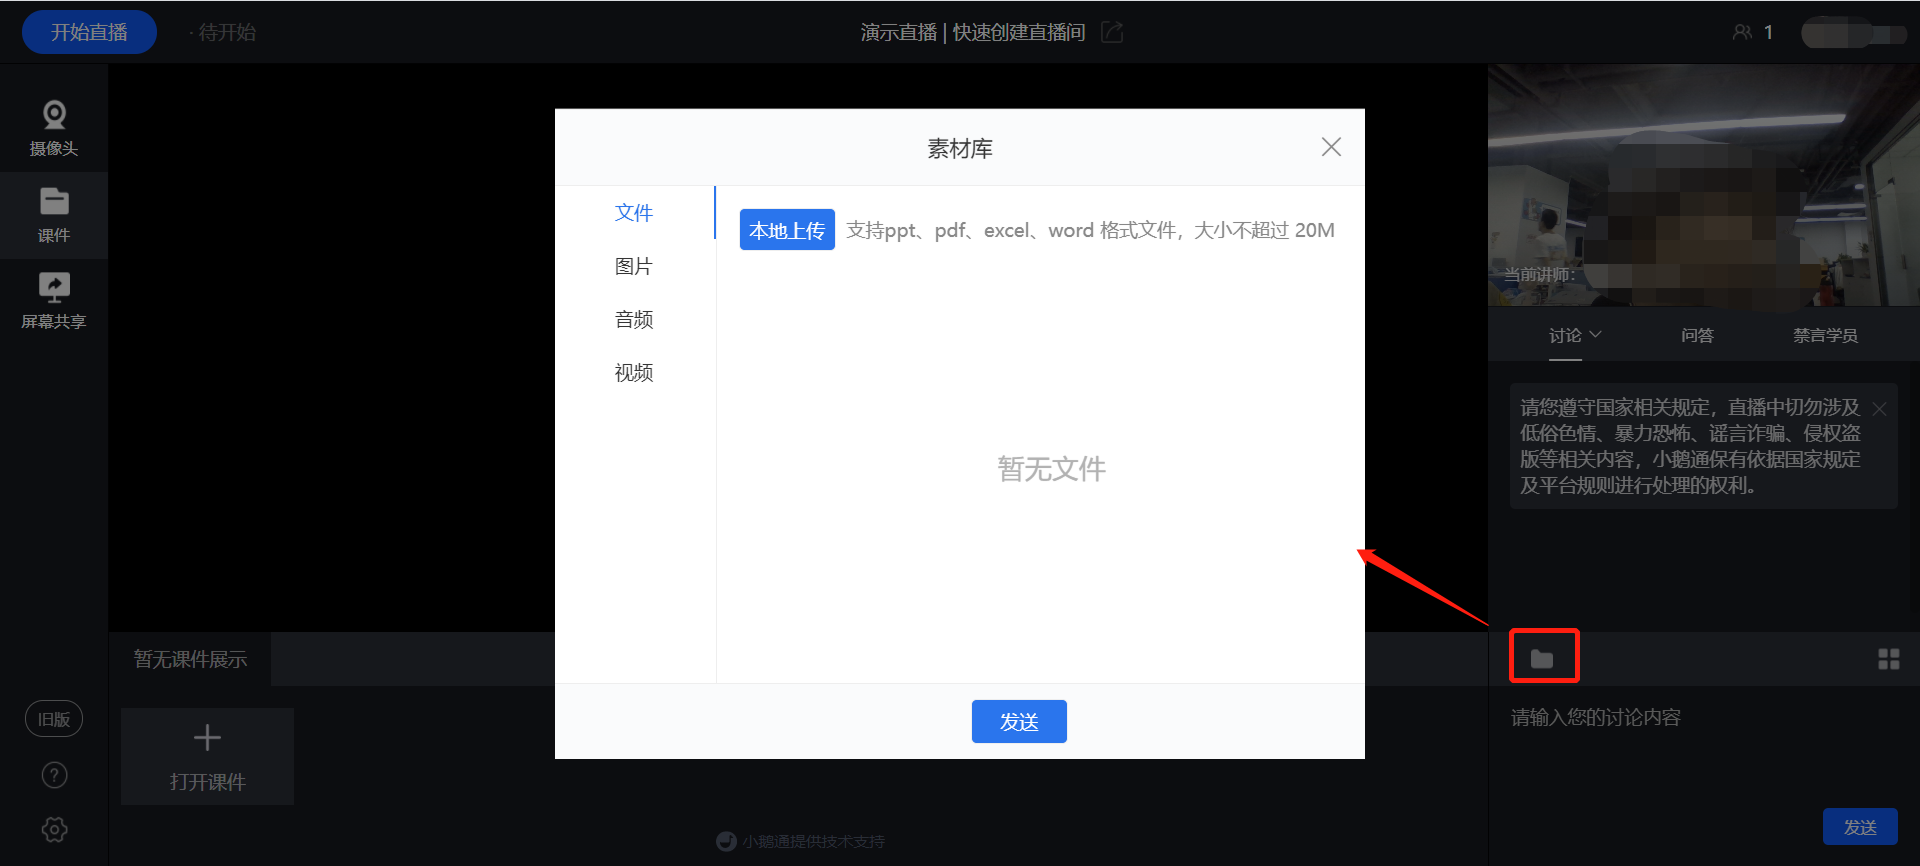
(Web - based Live - Stream Instructor End)
Click the operation icon in the lower - right corner to set user speaking permissions.
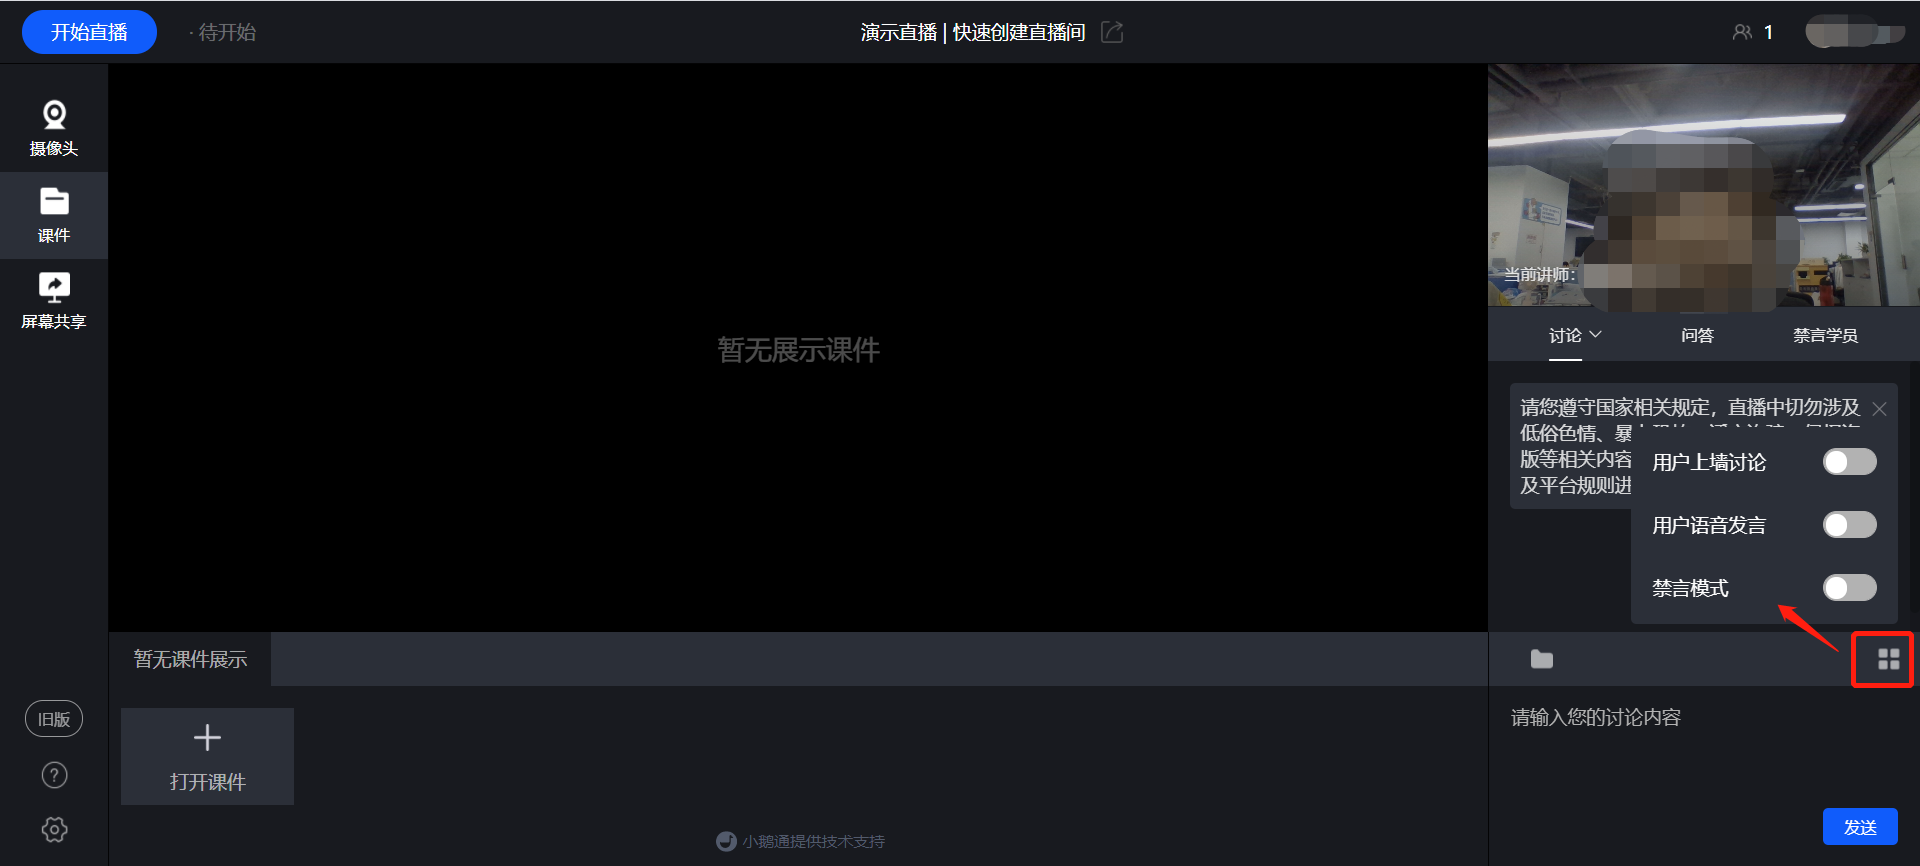
(Web - based Live - Stream Instructor End)
No comments to display
No comments to display