Tutorial on Using Assignment Check-ins
I. Function Introduction
Assignment check-in is a check-in model based on 'assignments'. The operator assigns a certain amount of assignment tasks to the students. The students need to complete them within the limited time. Meanwhile, the students can adjust the order of completing the assignments by themselves to control their learning pace independently.
II. Purpose of Use
Assignment check-in can be used to test the teaching quality. At the same time, the time limit for completing the assignments can be set to make the students feel the urgency to complete the assignments as soon as possible and urge them to study.
III. Usage Scenarios
For students, some assignments require more preparation time. For example, writing a reading note, a post-class reflection, or an article expressing opinions often takes several days to complete.
IV. Operation Path
Merchant End
Desktop Management Console → Content → Check-in → Assignment Check-in → Create New Assignment Check-in
Student End
1. H5 Store/Merchant Mini Program → My → Learning Tools → Check-in
2. eLink Check-in Mini Program → Home Page → What I'm Participating In
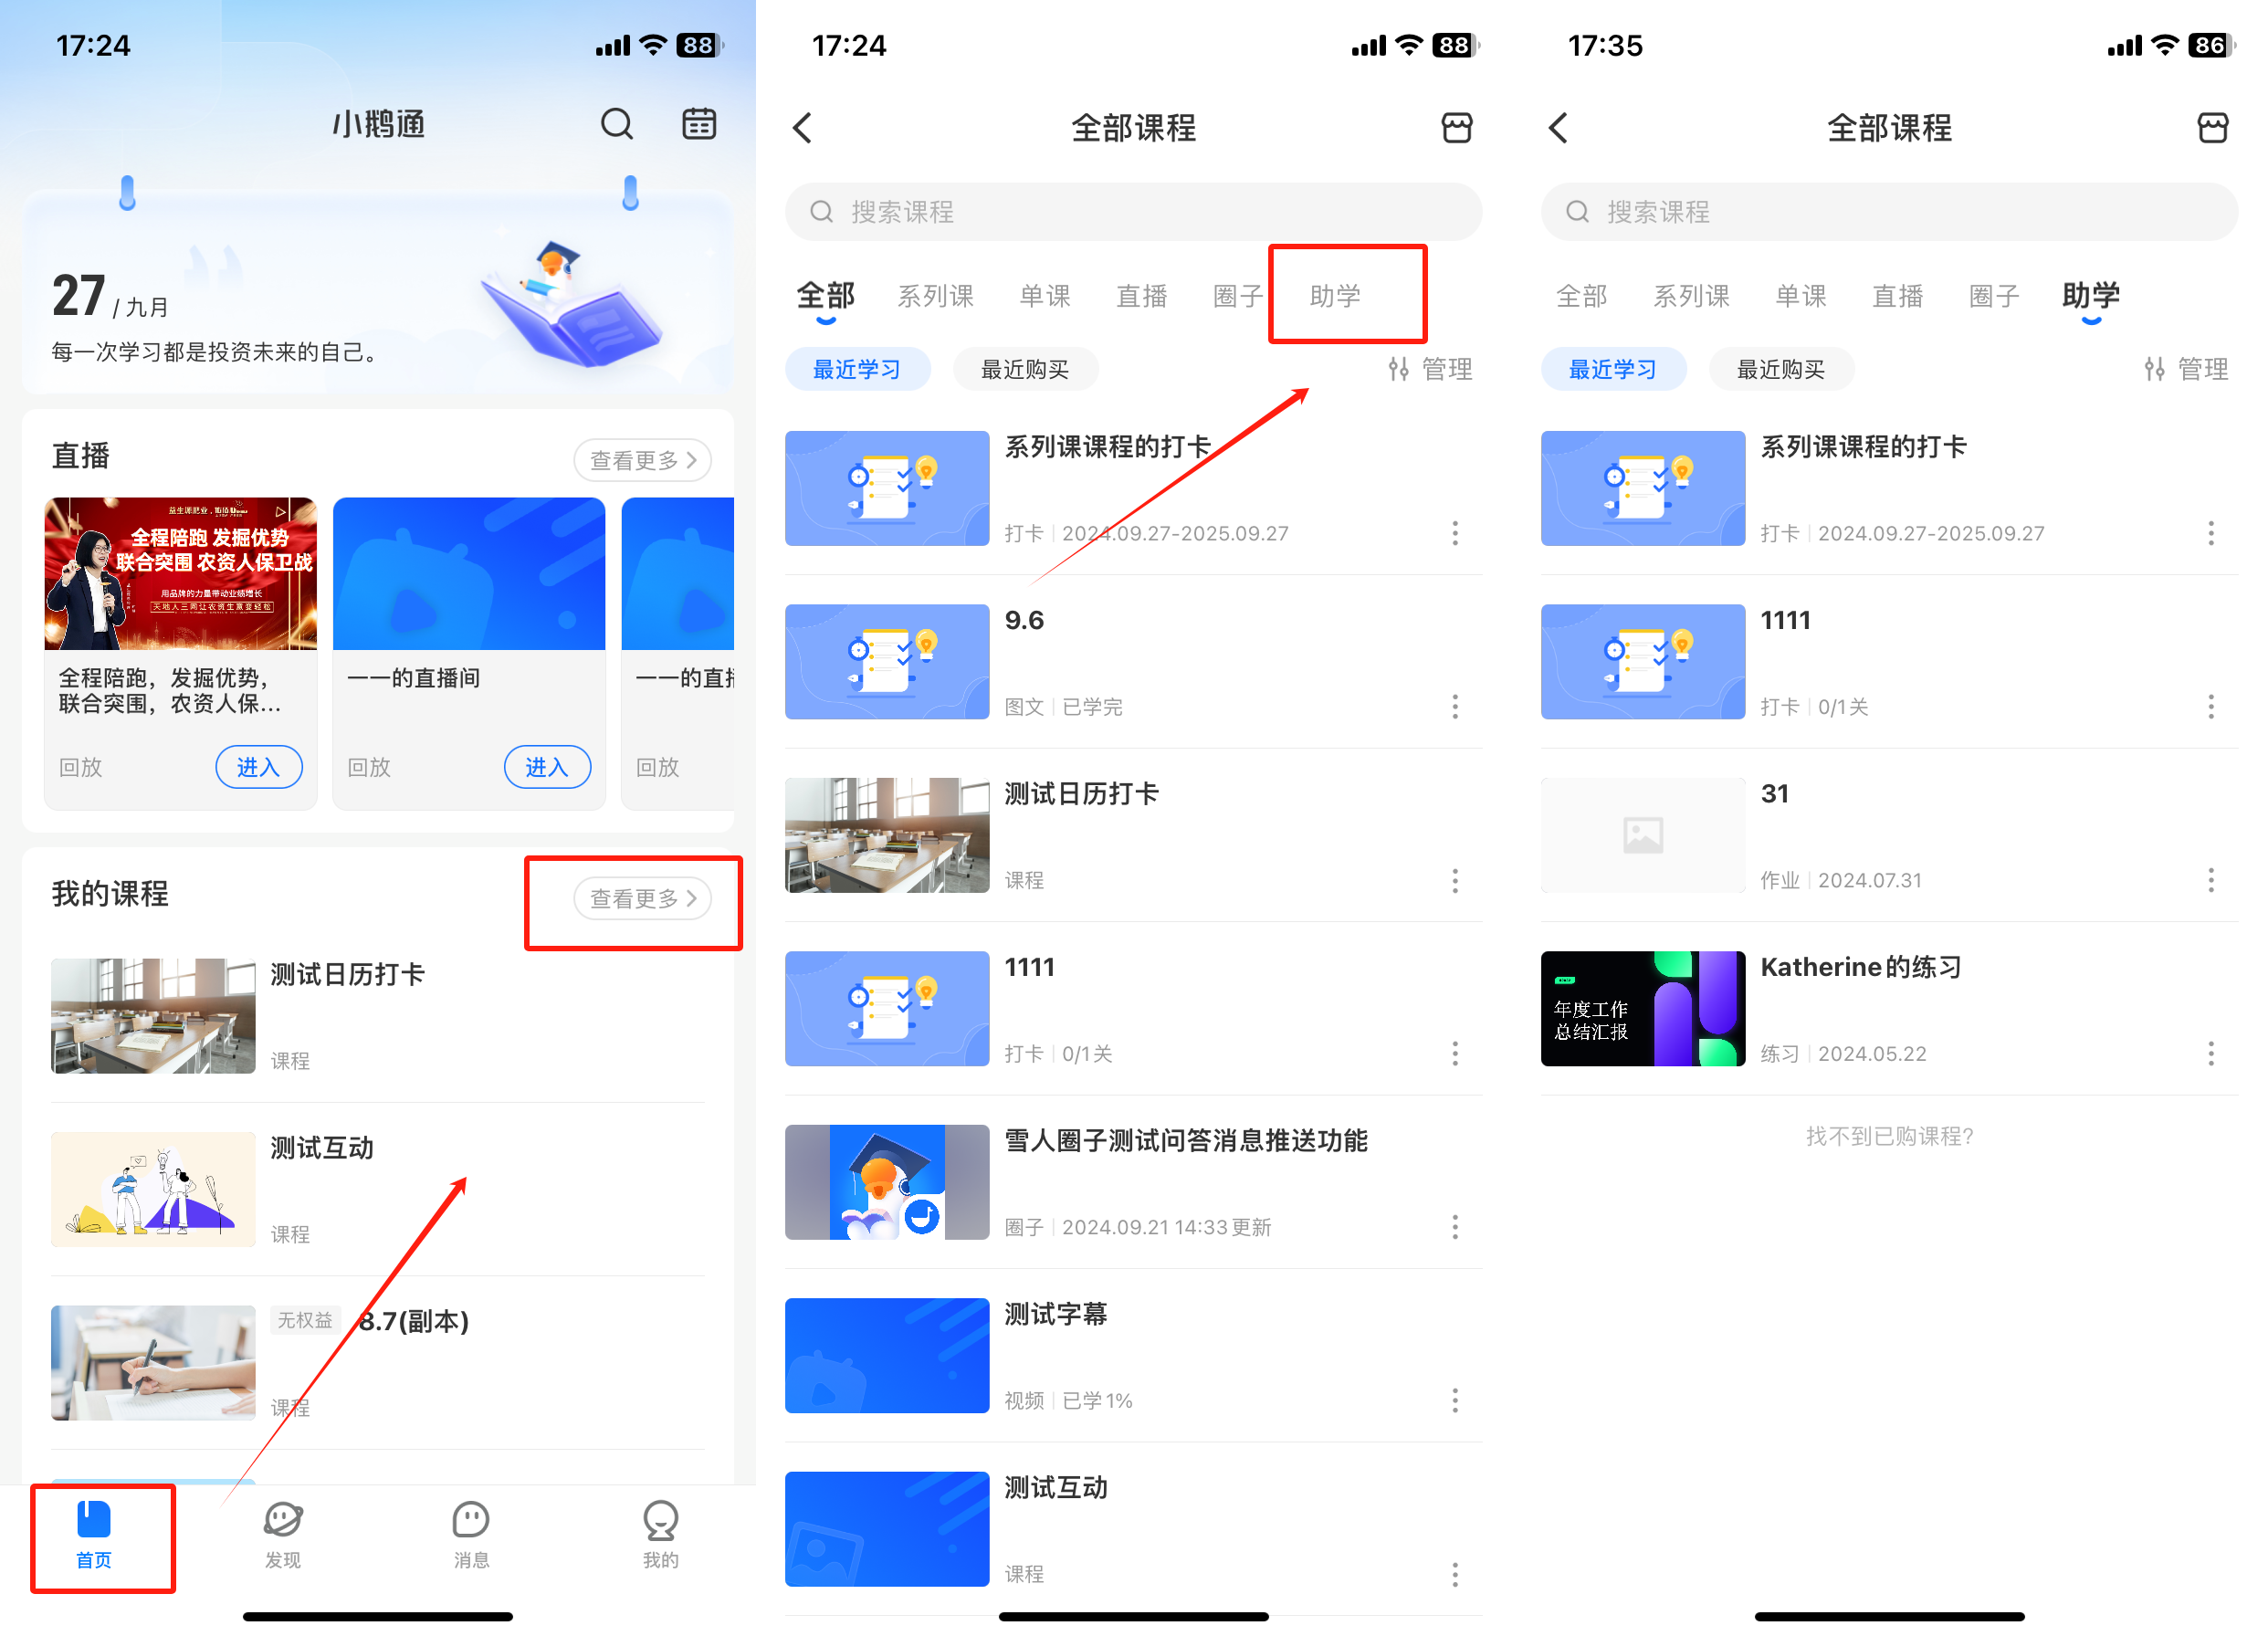
3. eLink Student Edition App →My Courses on the Home Page → View More → Navigation Bar → Learning Assistance

V. Usage Tutorial
Step 1: Create a New Assignment Check-in(Management Background)
Log in to your eLink account. Click [Content] in the left sidebar, select [Check-in], enter the page, select [Assignment Check-in], and click [Create New Assignment Check-in].

Step 2: Fill in the Check-in Information(Management Background)
1. Set the check-in information: Fill in the title of the check-in activity and configure the check-in rules.
2. The check-in can be used for independent sharing or associated with a series of courses/single courses. One check-in activity supports associating with one series of courses/single course. Currently, the types of series of courses/single courses supported by the check-in are: text and pictures, audio, video, live streaming, columns, memberships, major columns, and class courses.


3. Set the check-in introduction: Replace the cover of the check-in introduction and edit the content of the check-in introduction. Then click the [Publish Immediately] button below to generate a new assignment check-in.


When adding tasks, you can modify the template individually or directly use the template of the [Default Rules].


VI. Guide for Students to Use the Check-in
Path: H5 Store/Merchant Mini Program → My → Learning Tools → Check-in

Path: eLink Check-in Mini Program → Home Page

Path: eLink Student Edition App → My Courses on the Home Page → View More → Navigation Bar → Learning Assistance