
Live streaming supports external cameras (SLR cameras, etc.)
Function introduction:
The live streaming client supports connecting to professional camera devices, providing better video clarity.
Usage conditions:
① The latest version of the E-live client or elink Assistant
② Video source devices such as cameras, DSLRs, etc.
③ Video capture card (you can search for 'live streaming capture card' on e-commerce platforms)
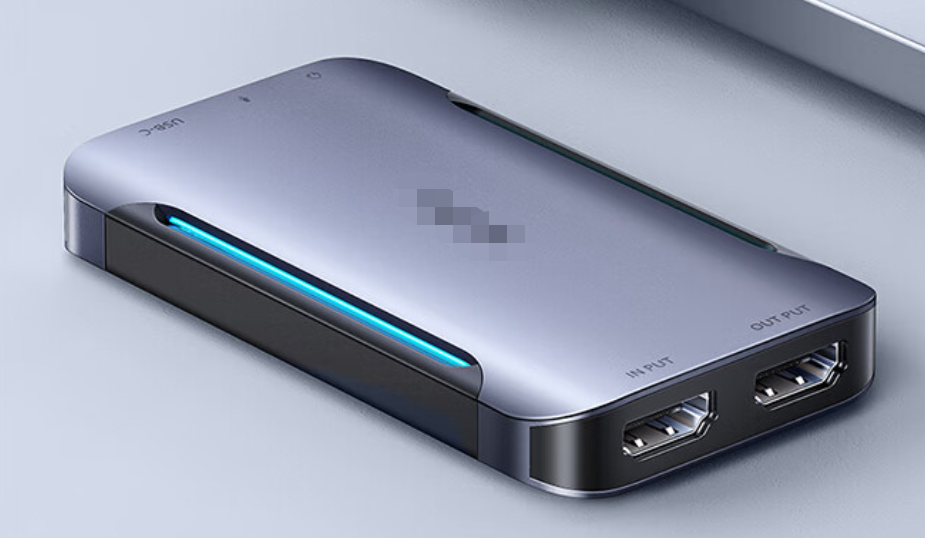
The appearance of a certain brand of capture card is as follows
You need to confirm whether the purchased capture card requires driver installation. You should communicate with the merchant selling the capture card about this. If the computer needs to install the driver, please install it in advance.
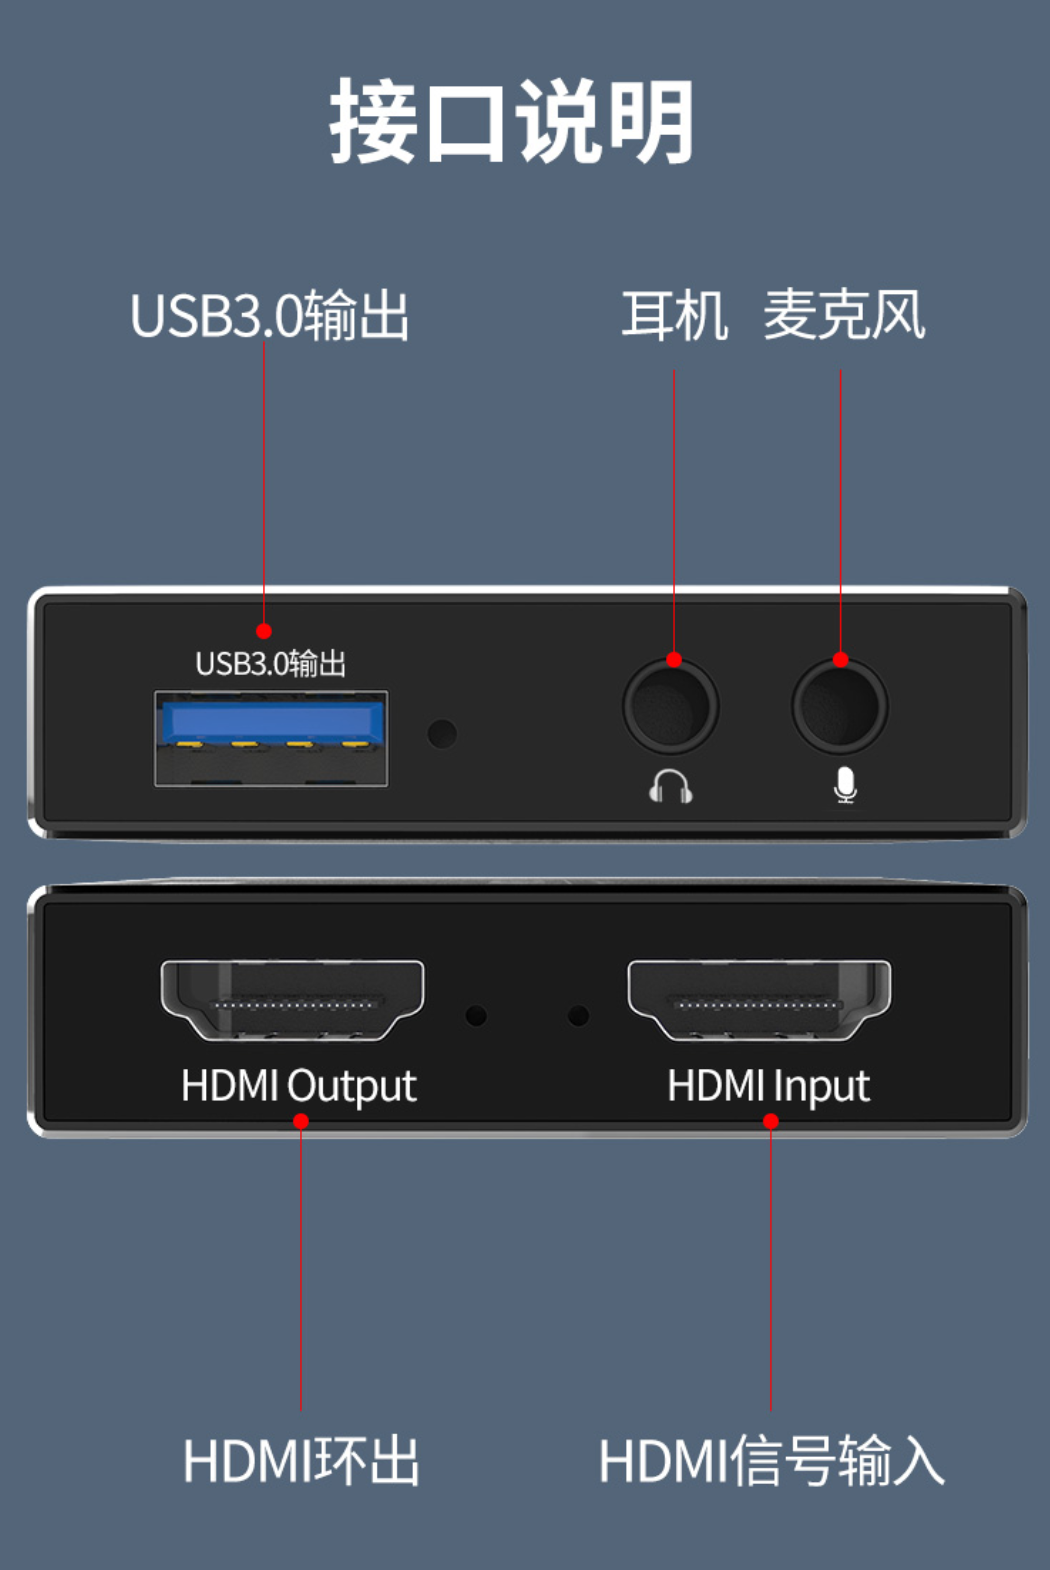
Capture card interface description:
④ Cables for connecting devices (it is recommended to use the cables that come with the capture card)
<1> To connect a camera to the capture card, you need an HDMI cable. To connect a mobile phone to the capture card, you need an adapter that matches the mobile phone and then connect it to an HDMI cable, which is then connected to the capture card.
<2> The capture card is usually connected to the computer via a Type-C to USB 3.0 cable. Most computers can support this. For Mac computers with Thunderbolt interfaces, you also need a USB 3.0 to Type-C adapter. Some capture cards of different brands usually come with some of these cables. Merchants can consult the selling merchants according to their own devices and live streaming needs to find out what types of cables and adapters are still needed and purchase them in advance to ensure normal live streaming.
How to connect an external camera:
① Open the live streaming room (E-live client/elink Assistant)
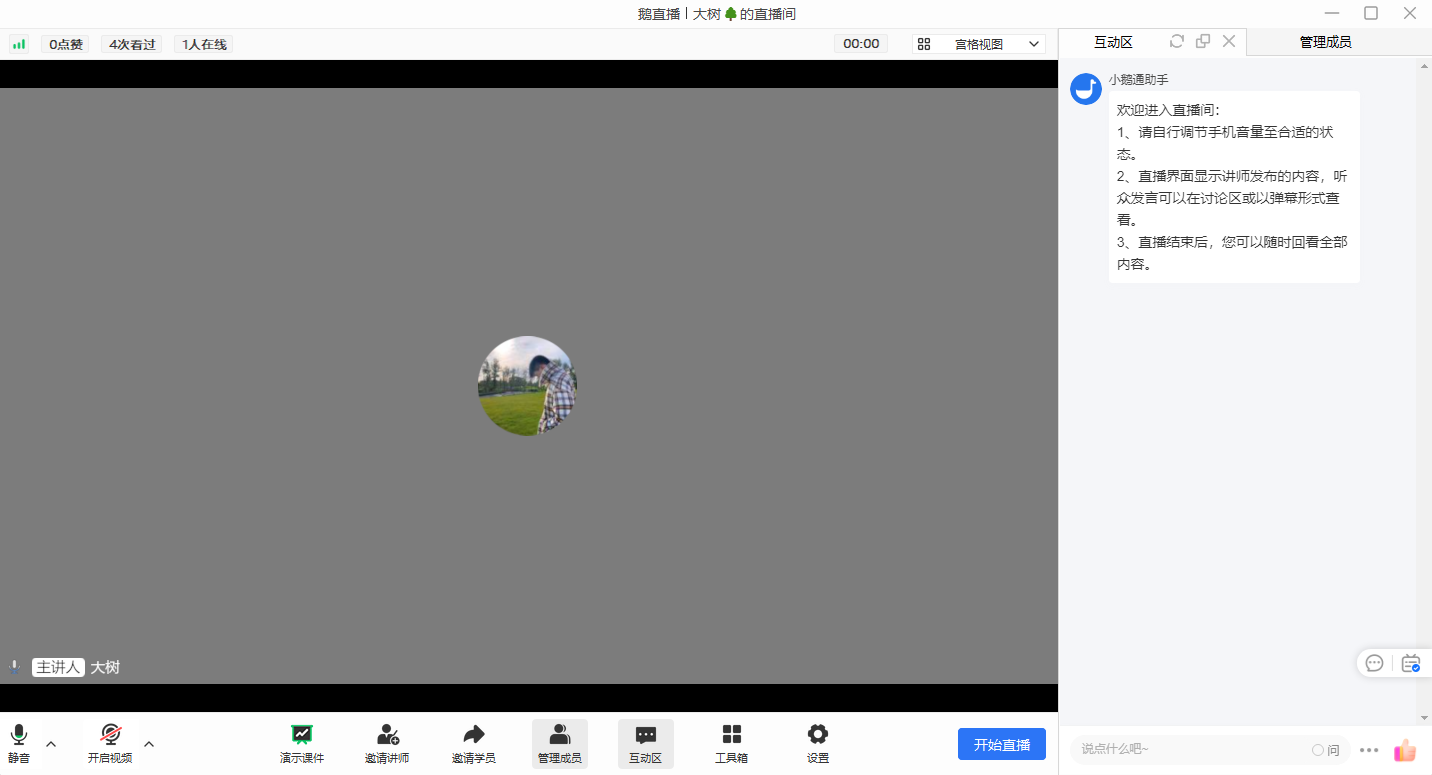
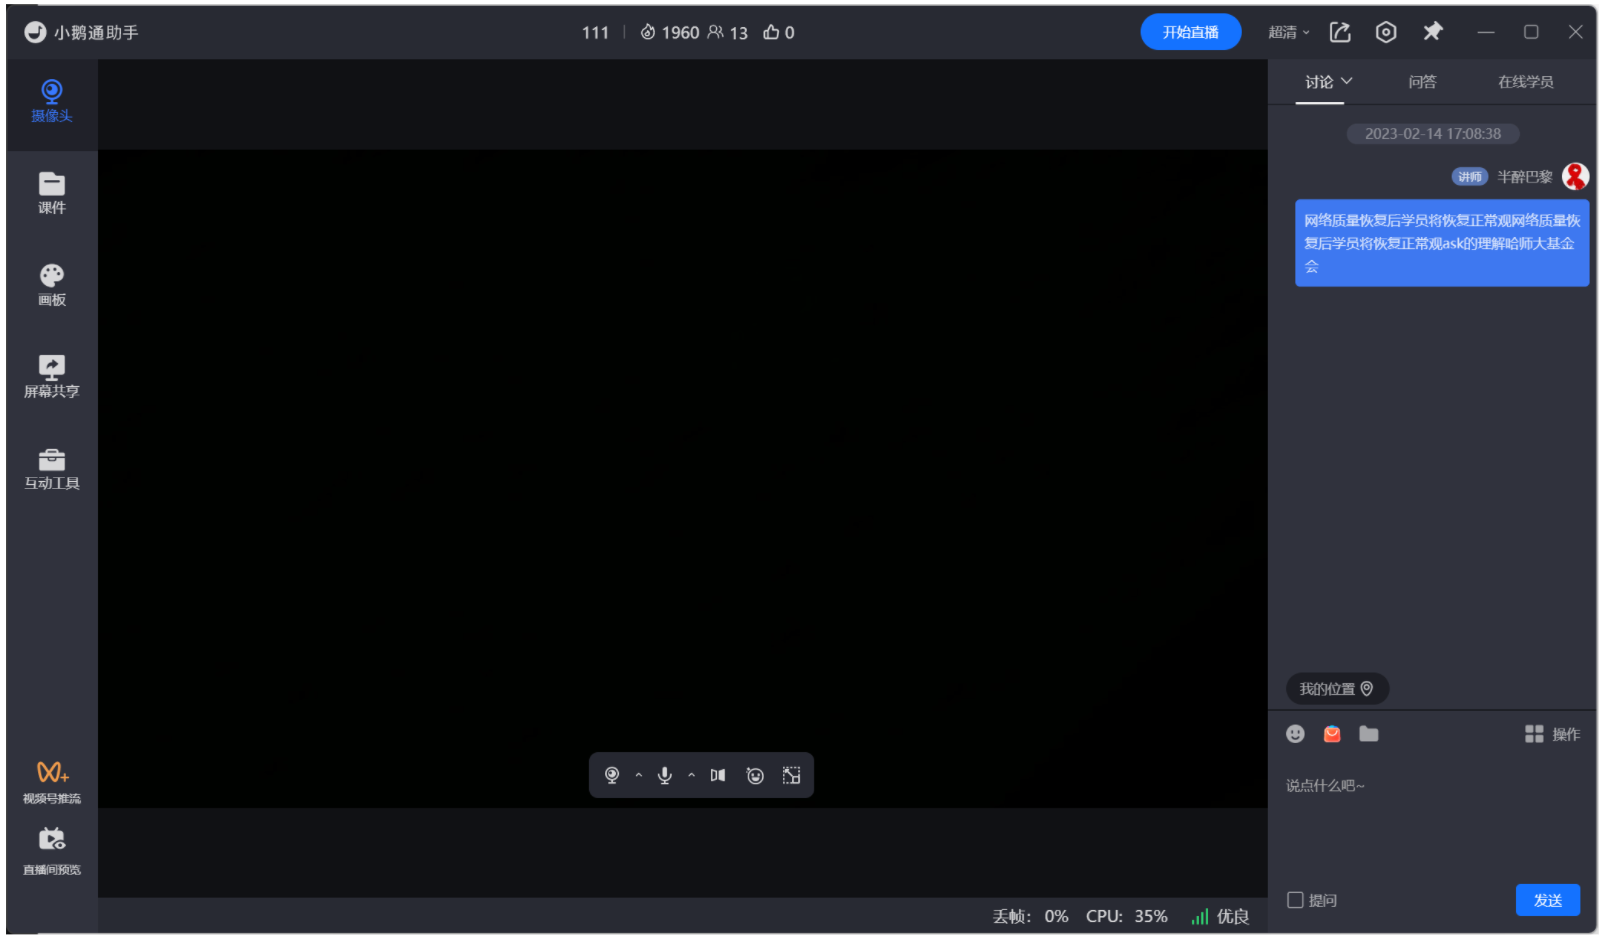
② Connect the relevant devices
An example of the device connection diagram for a certain brand of capture card is as follows:
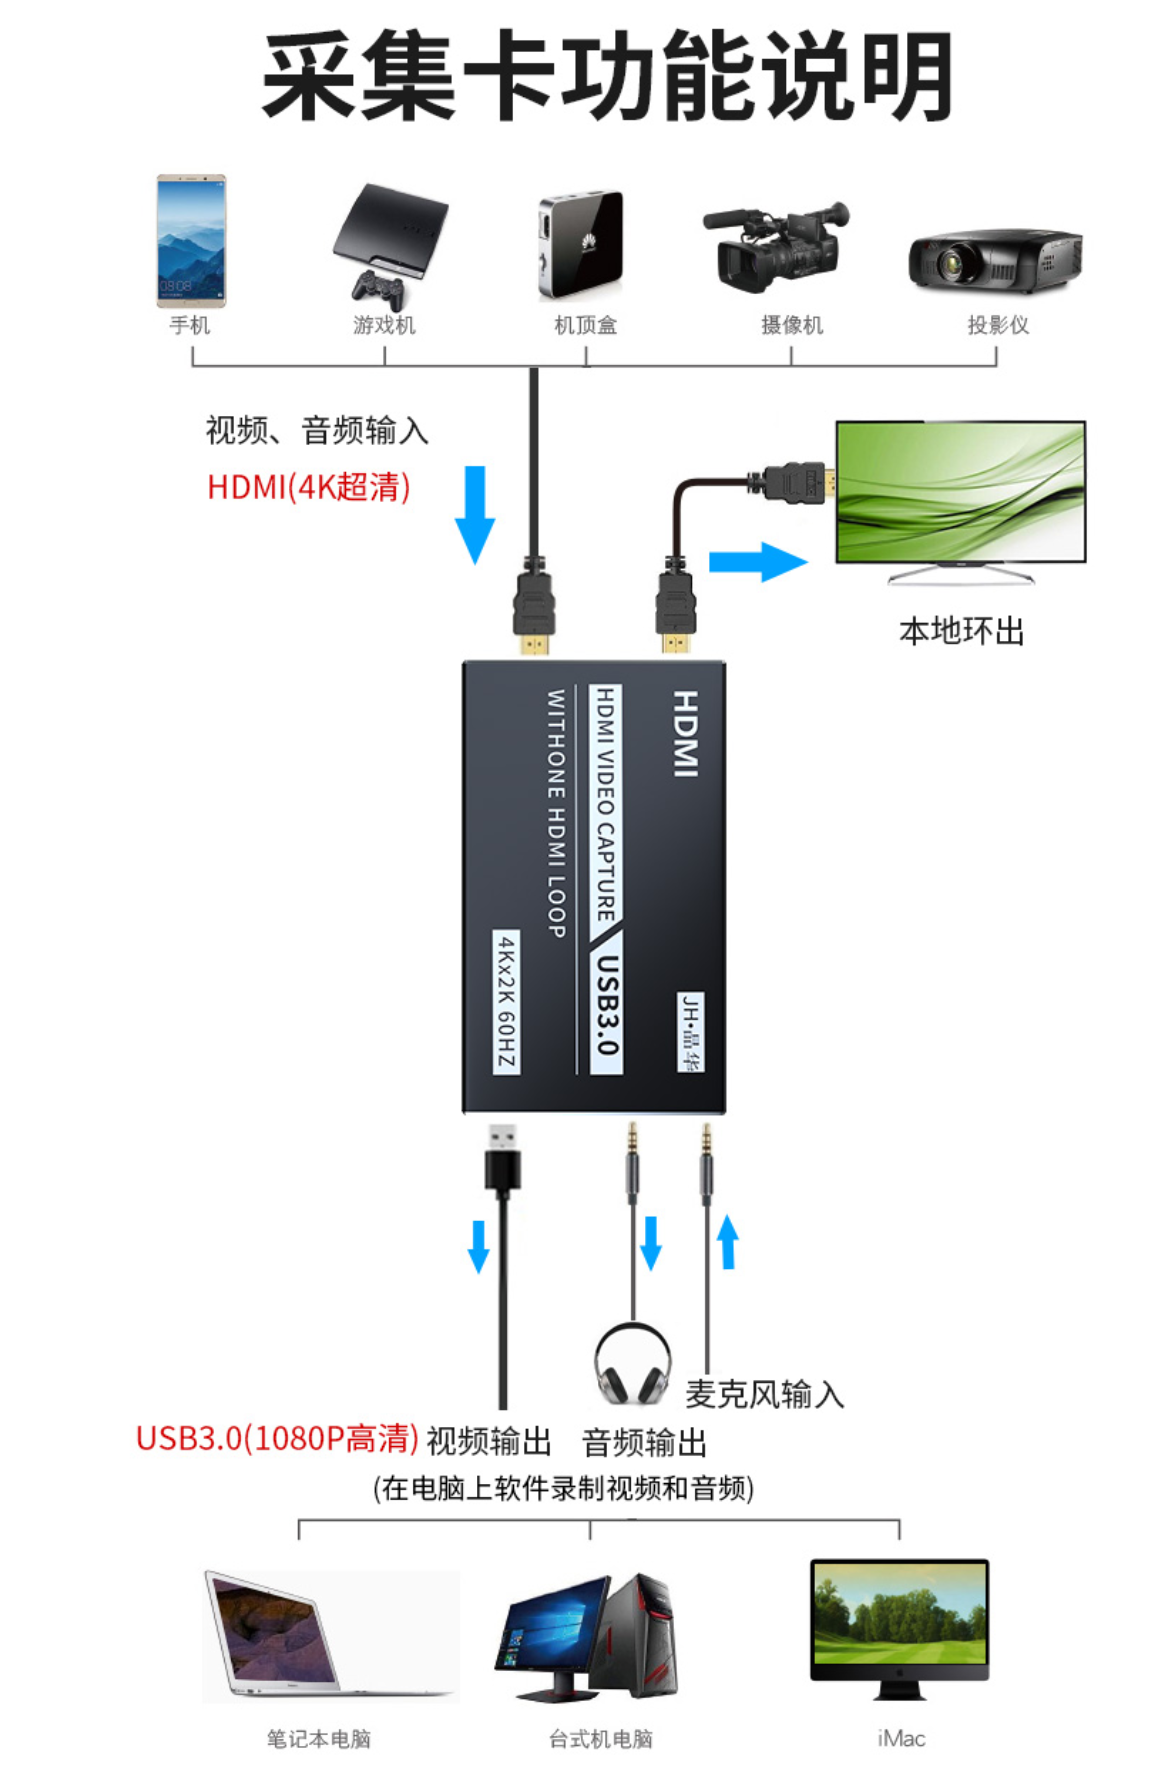
HDMI Input: Refers to the device to be live streamed, that is, external devices such as cameras and mobile phones for live streaming.
HDMI Output: Refers to the device for displaying the output image. That is, it displays the input live streaming image on the monitor. You don't need to connect this part if you don't have this requirement.
USB 3.0: The interface for outputting live streaming data, which needs to be connected to the computer.
IN: Connects to the mixer. You don't need to connect this part if you don't have this requirement.
MIC: Connects to the microphone. You don't need to connect this part if you don't have this requirement.
OUT: Connects to the monitoring headphones. You don't need to connect this part if you don't have this requirement.
③ Switch the camera
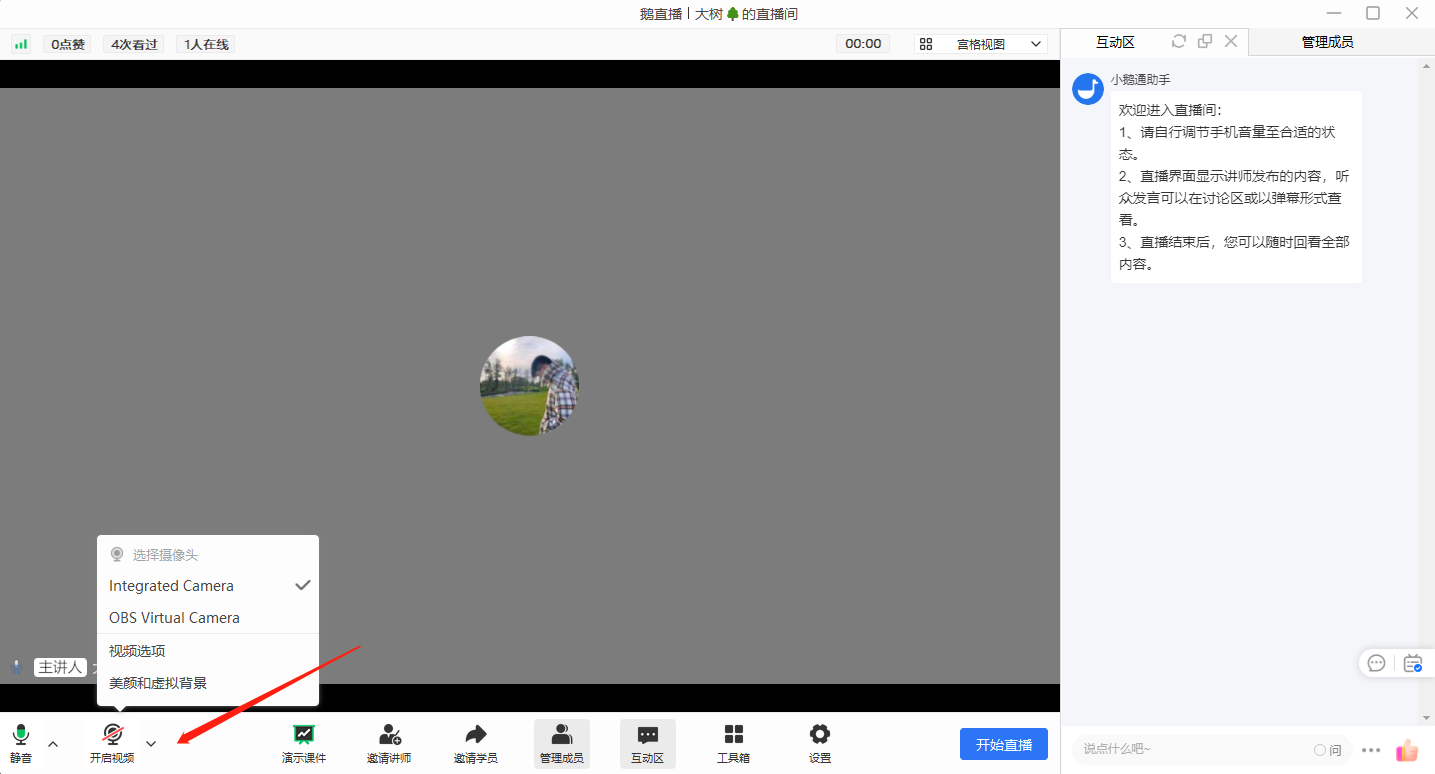
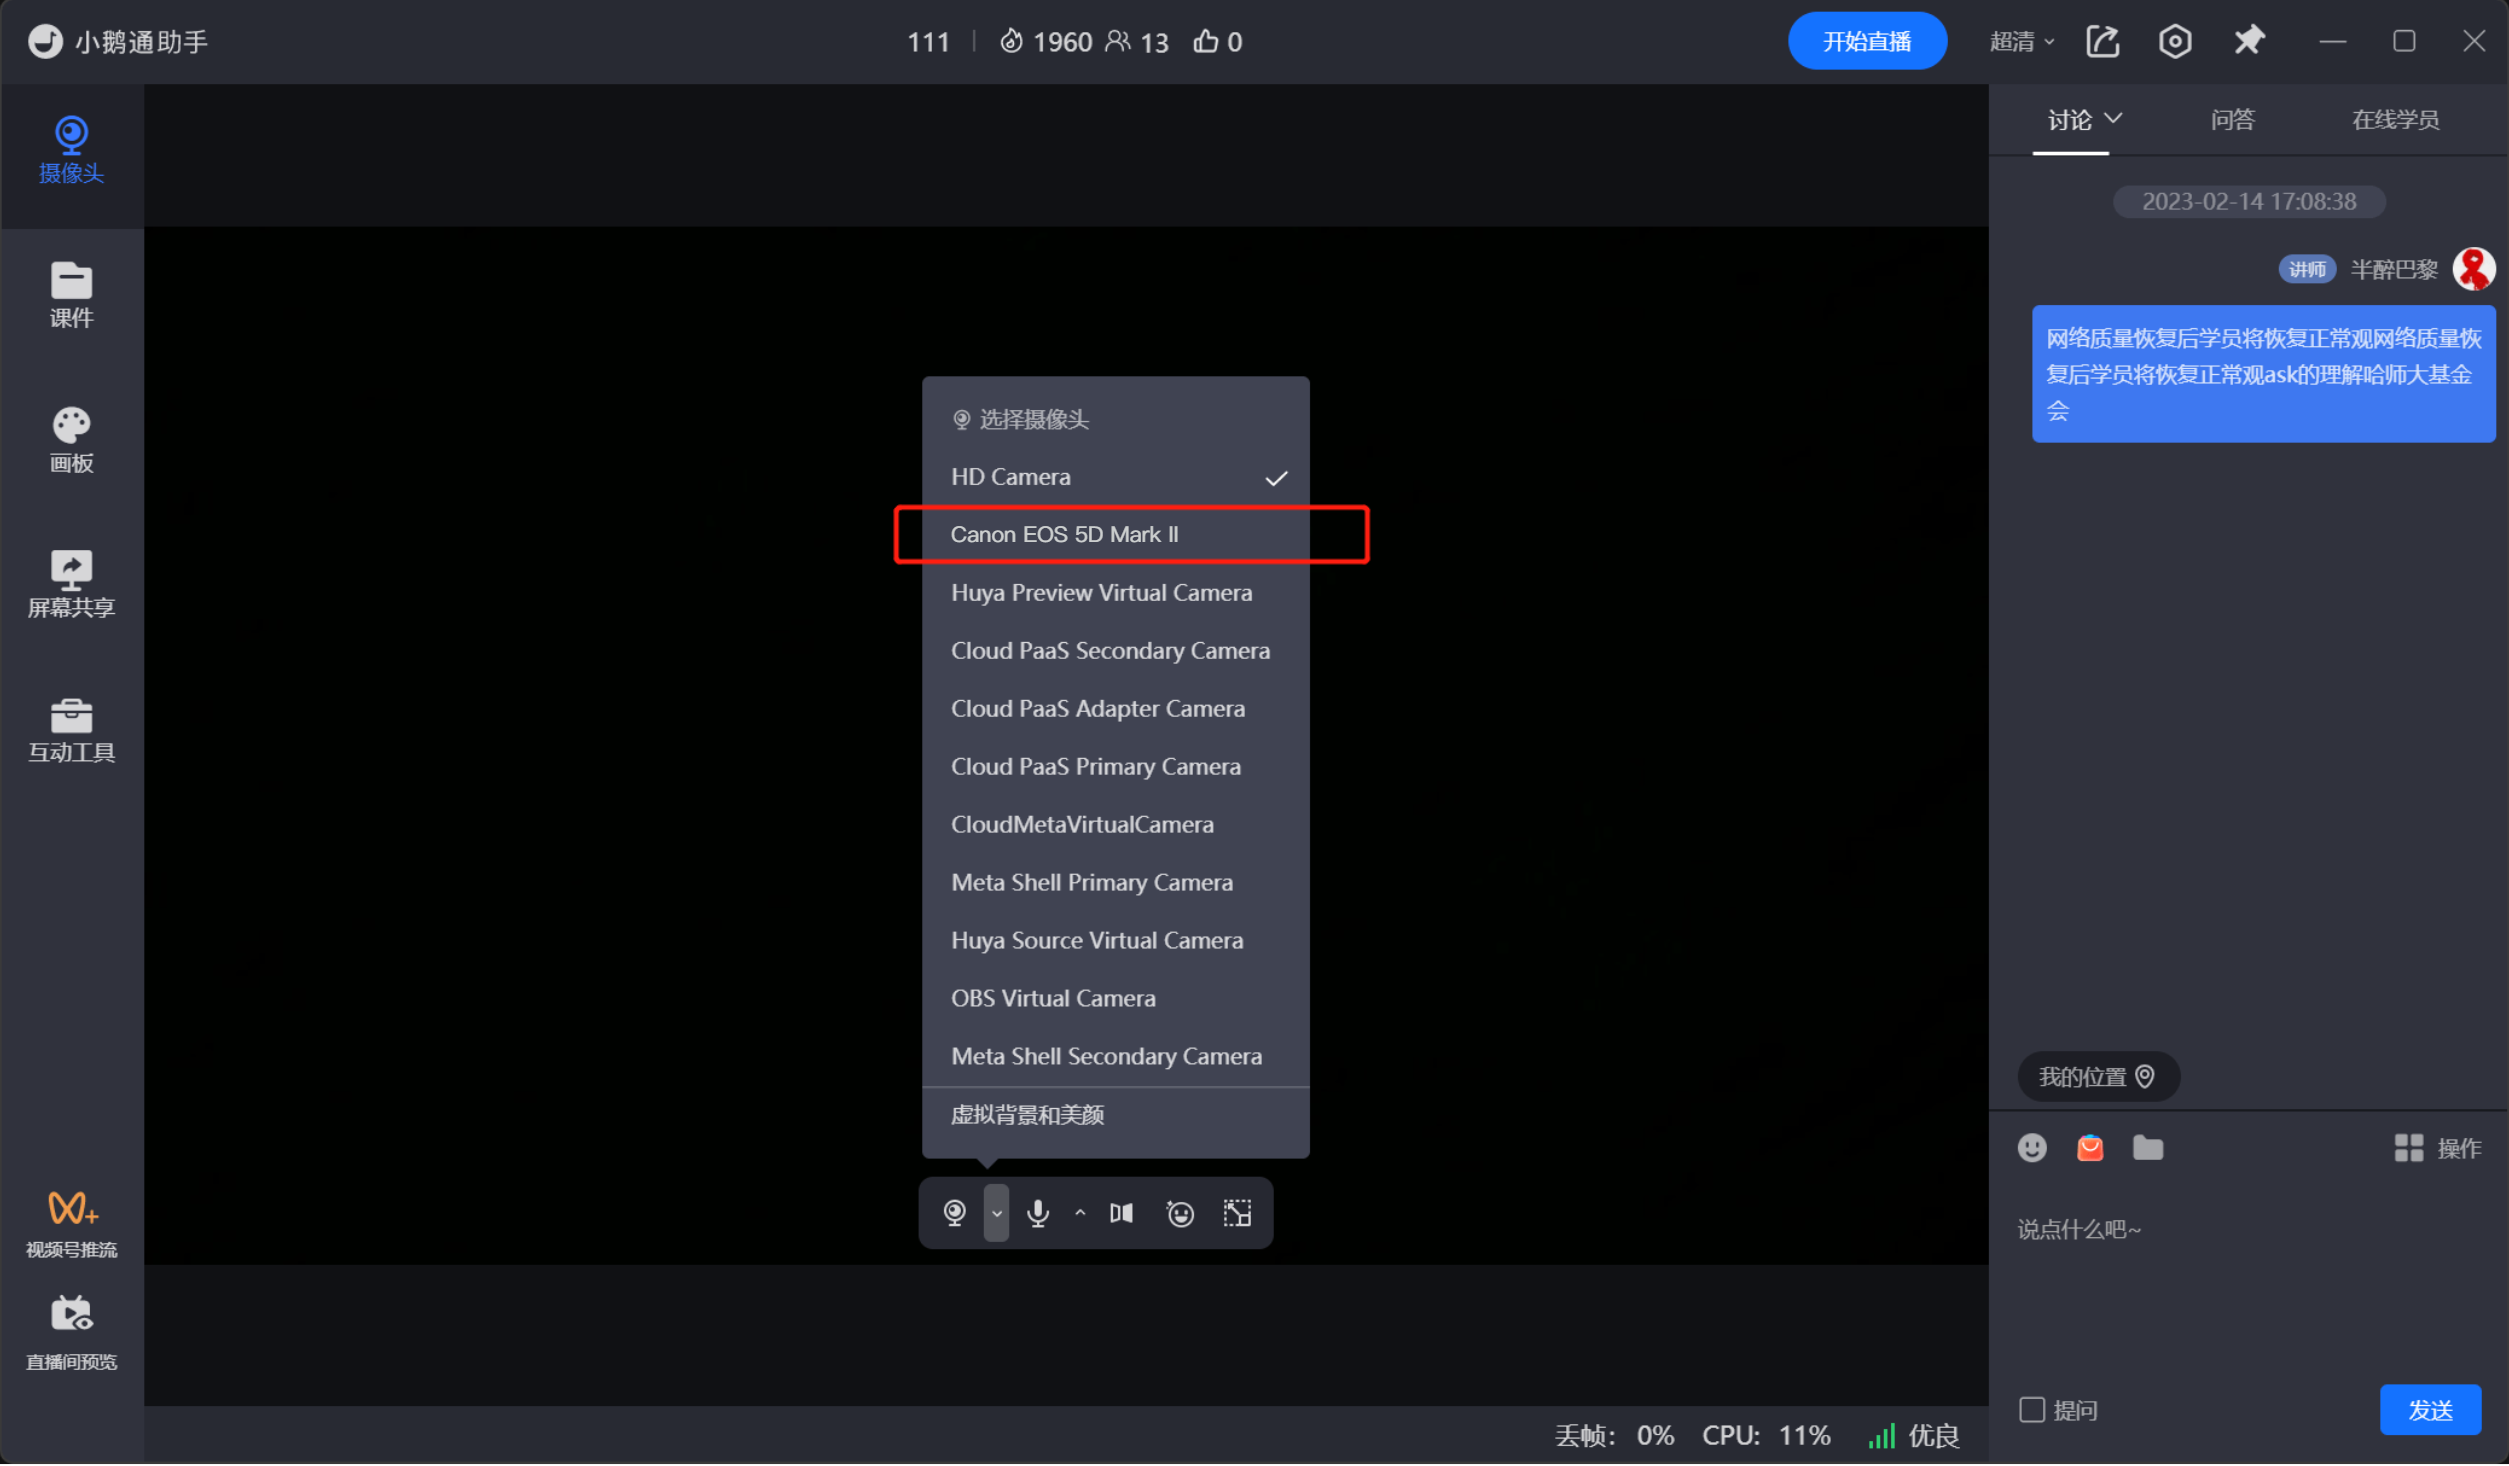
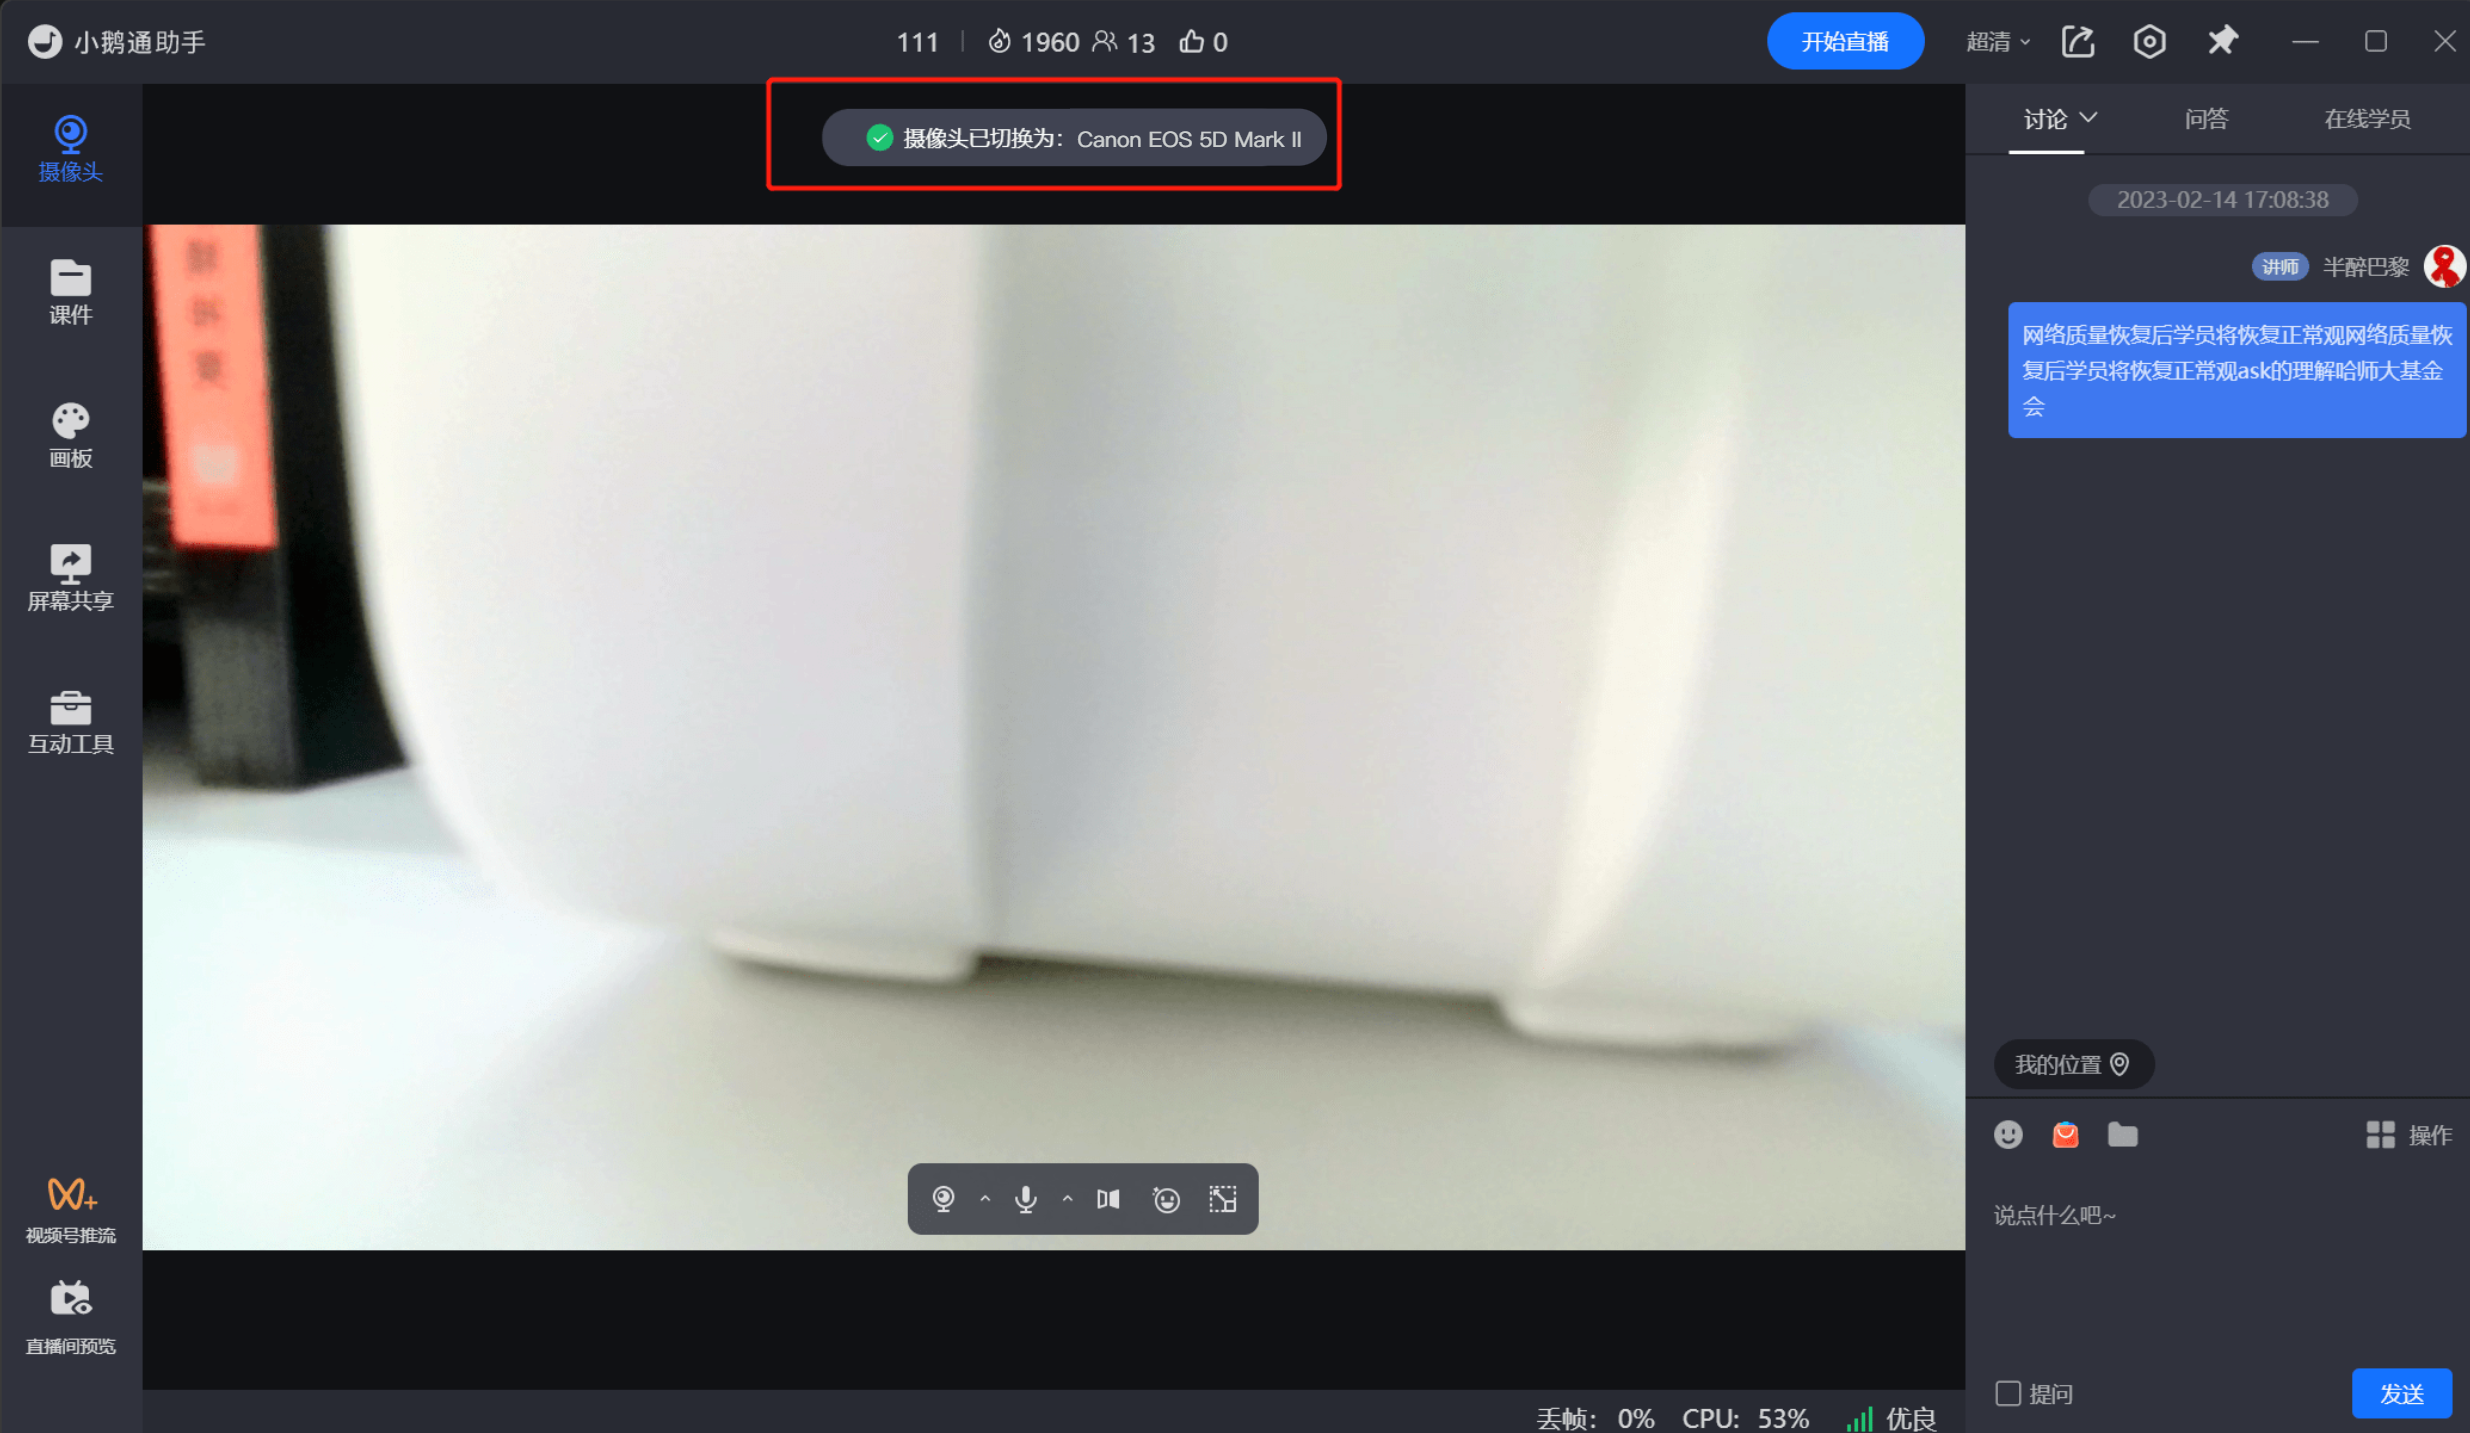
If you can see the image from the camera or mobile phone at this time, it means the configuration is successful, and you can start the live streaming normally. If there is no image or this option is not available, it means there are still some problems with the capture card configuration. Please troubleshoot according to the steps described before or contact the merchant selling the capture card for help.
Common questions:
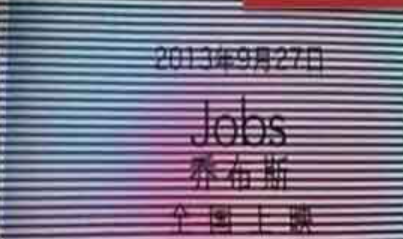
1. After connecting the camera,why are there flickering black bars when shooting a monitor or LED screen?
Answer: The flickering black bars (Moiré pattern) are caused by the mismatch between the camera shutter speed and the monitor screen refresh rate. You can adjust the camera shutter parameters to match the screen refresh rate or adjust the indoor lighting on site.
Moiré pattern effect:

2. There are black edges in the camera image when using an external camera.
Answer: This is caused by the output resolution of the camera. Please check the output resolution of the camera and ensure that it outputs in a 16:9 ratio.
No comments to display
No comments to display