Tutorial on Using the Material Center
I. Function Introduction
The Material Center is a place for merchants to manage file resources (images, audio, videos, e-books, and documents). In the Material Center, you can perform batch uploads, moves, deletions, downloads, and custom grouping of various types of resources. You can also edit and crop images online.
II. Purpose of Use
(1) Centralize and efficiently manage file resources.
(2) Quickly select the resources uploaded in the Material Center at the entry where file resources are needed.
(3) Provide a simple image cropping tool to help merchants quickly complete image design.
III. Usage Scenarios
When creating content and needing to upload images, audio, videos, e-books, or documents, it supports merchants to quickly upload and select the corresponding resources, reducing the upload waiting time and thus improving the customer's operation efficiency.
IV. Operation Path
Operation Path: Merchant Management Console → Store → Basic Tools → Material Center
V. Usage Tutorial
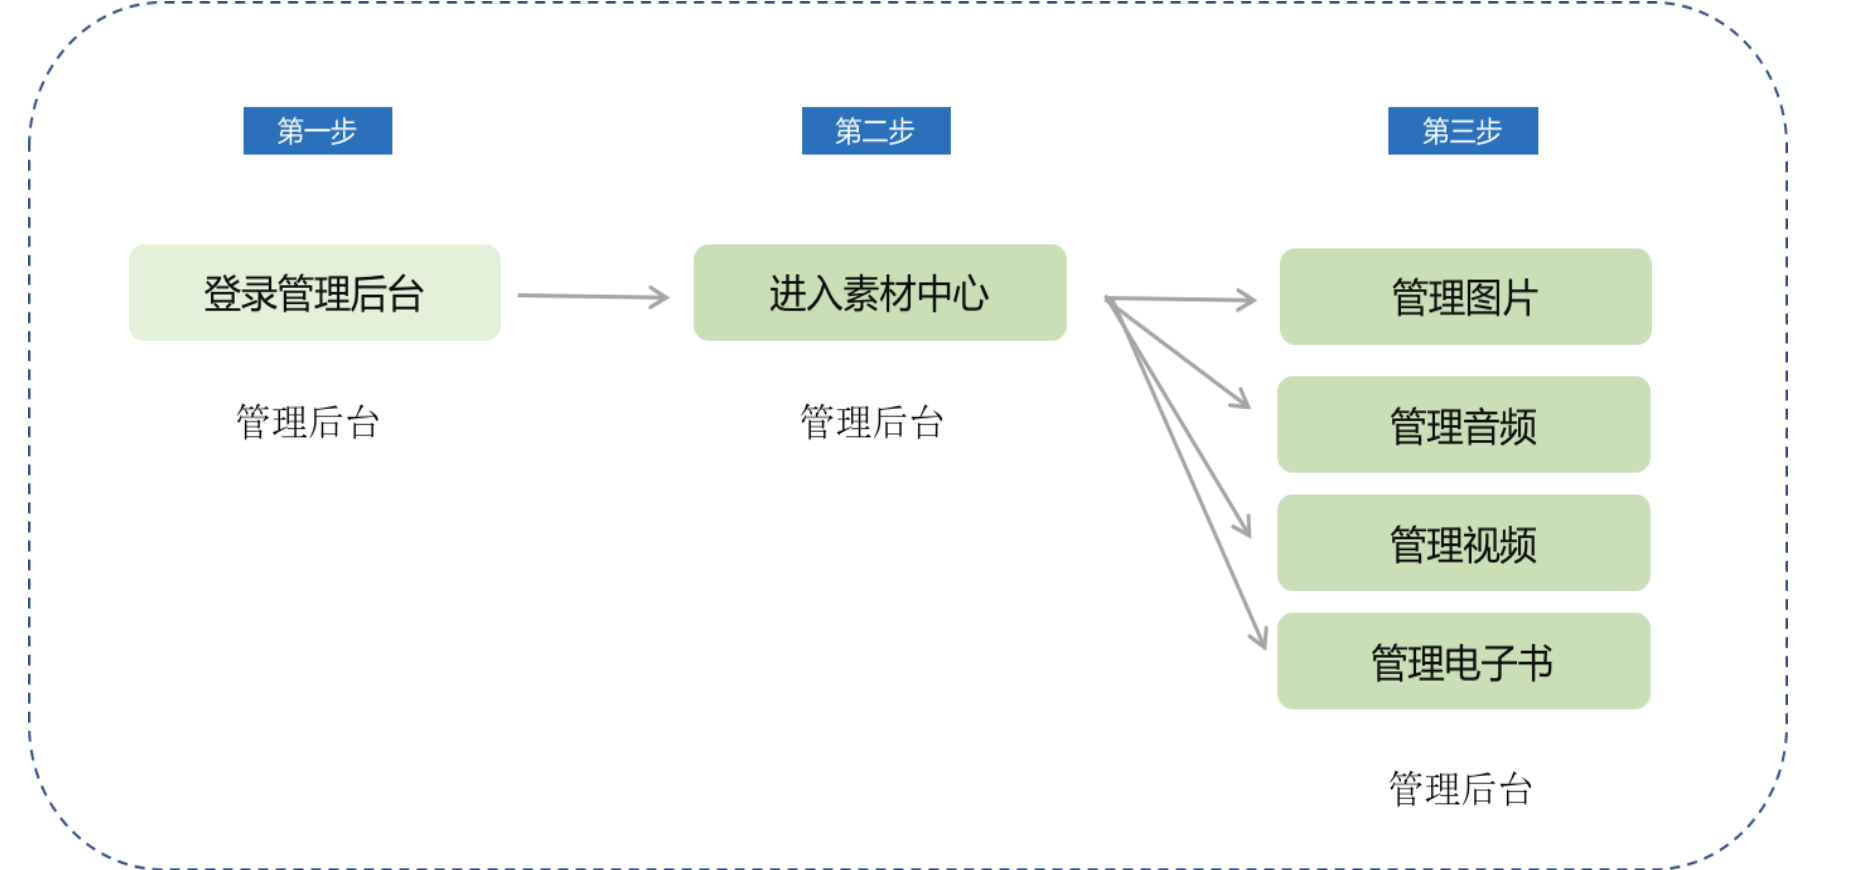
Step 1: Enter the Material Center(Management Backend)
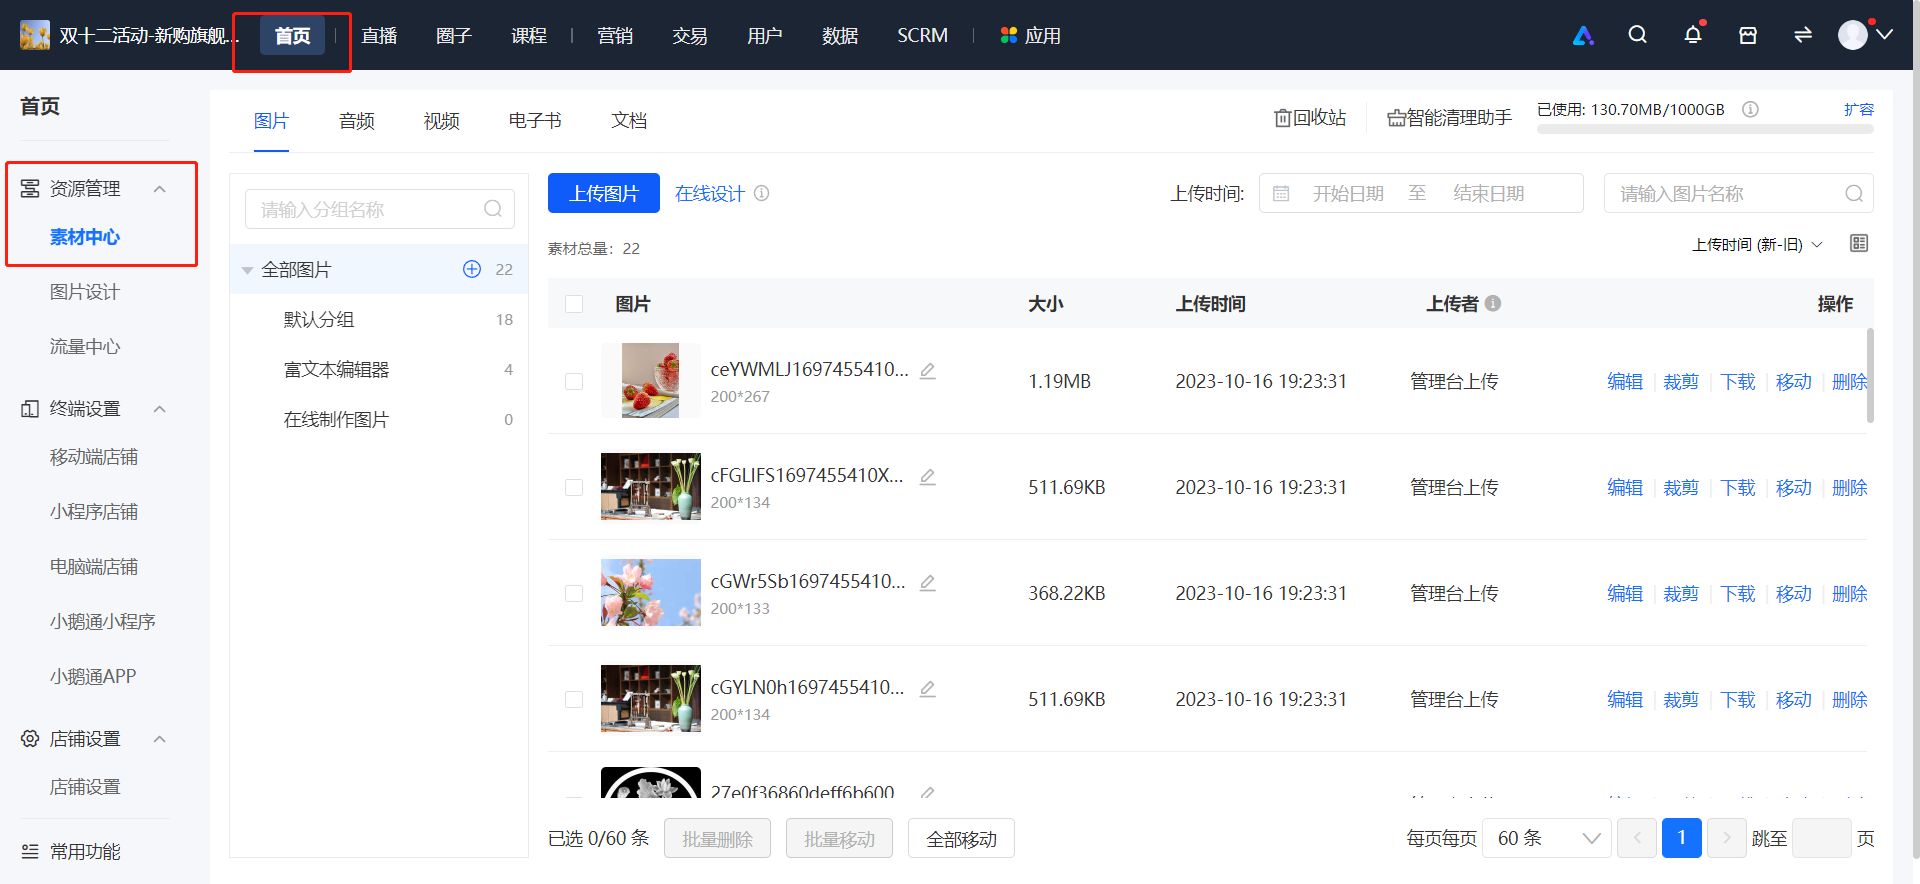
1. Enter the management backend - Store - Basic Tools - Material Center
(1) Image List Page
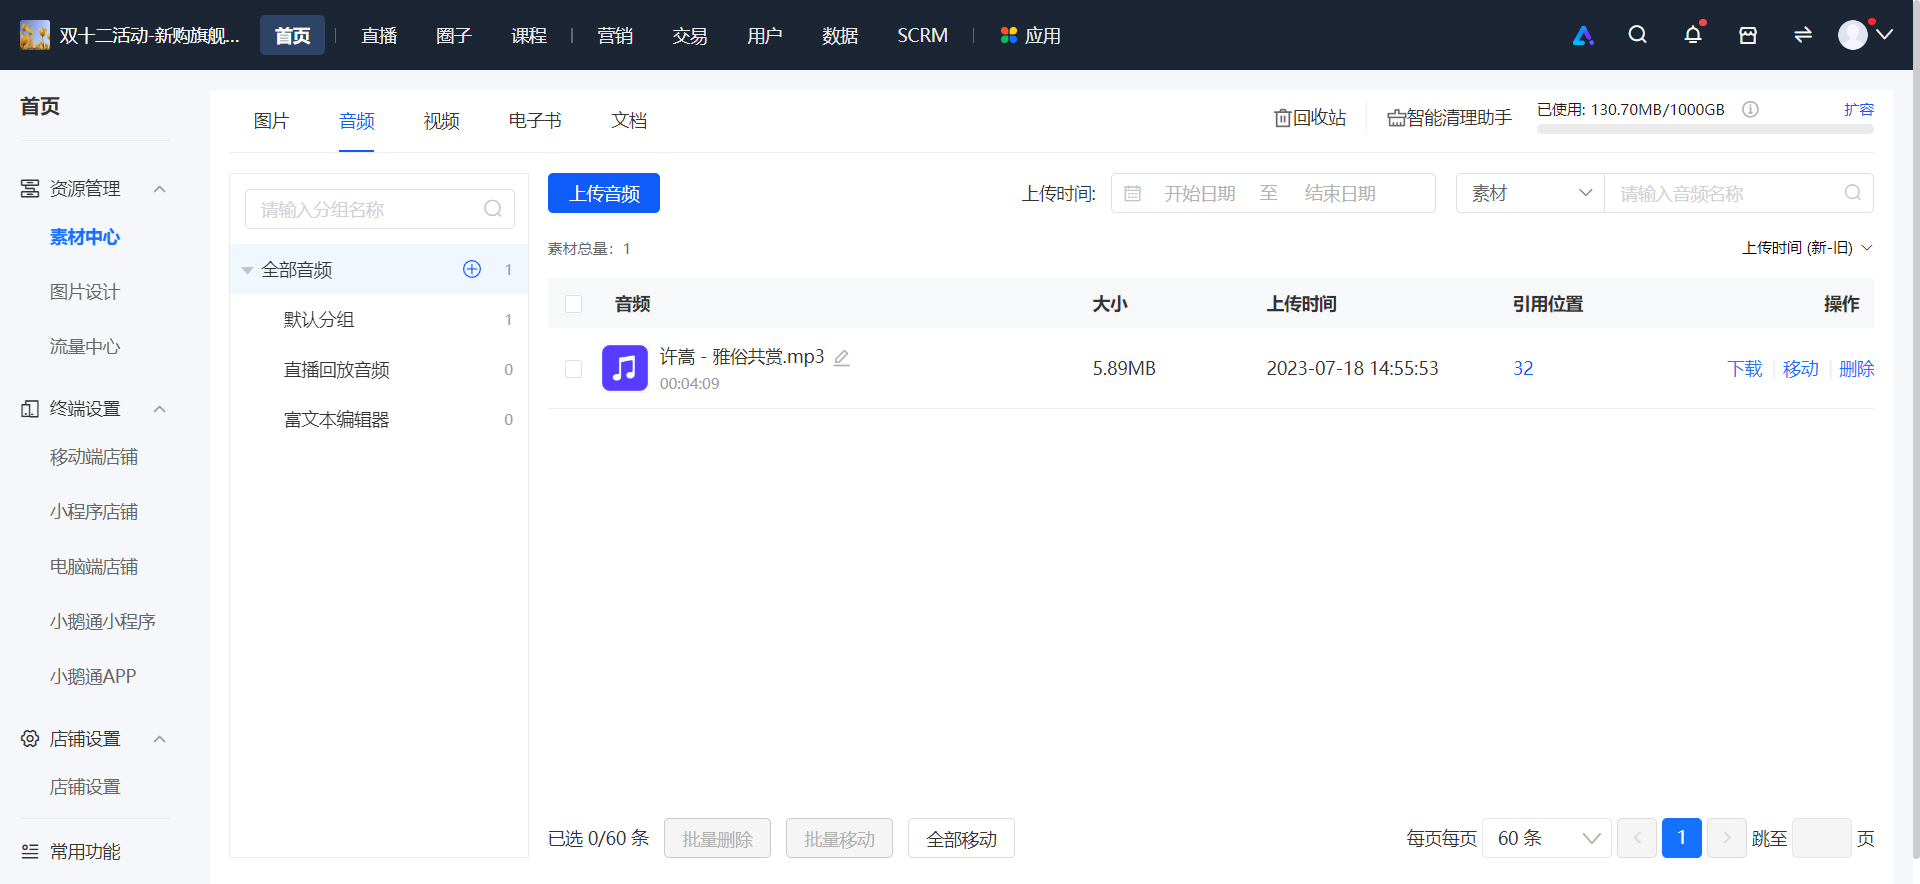
(2) Audio List Page
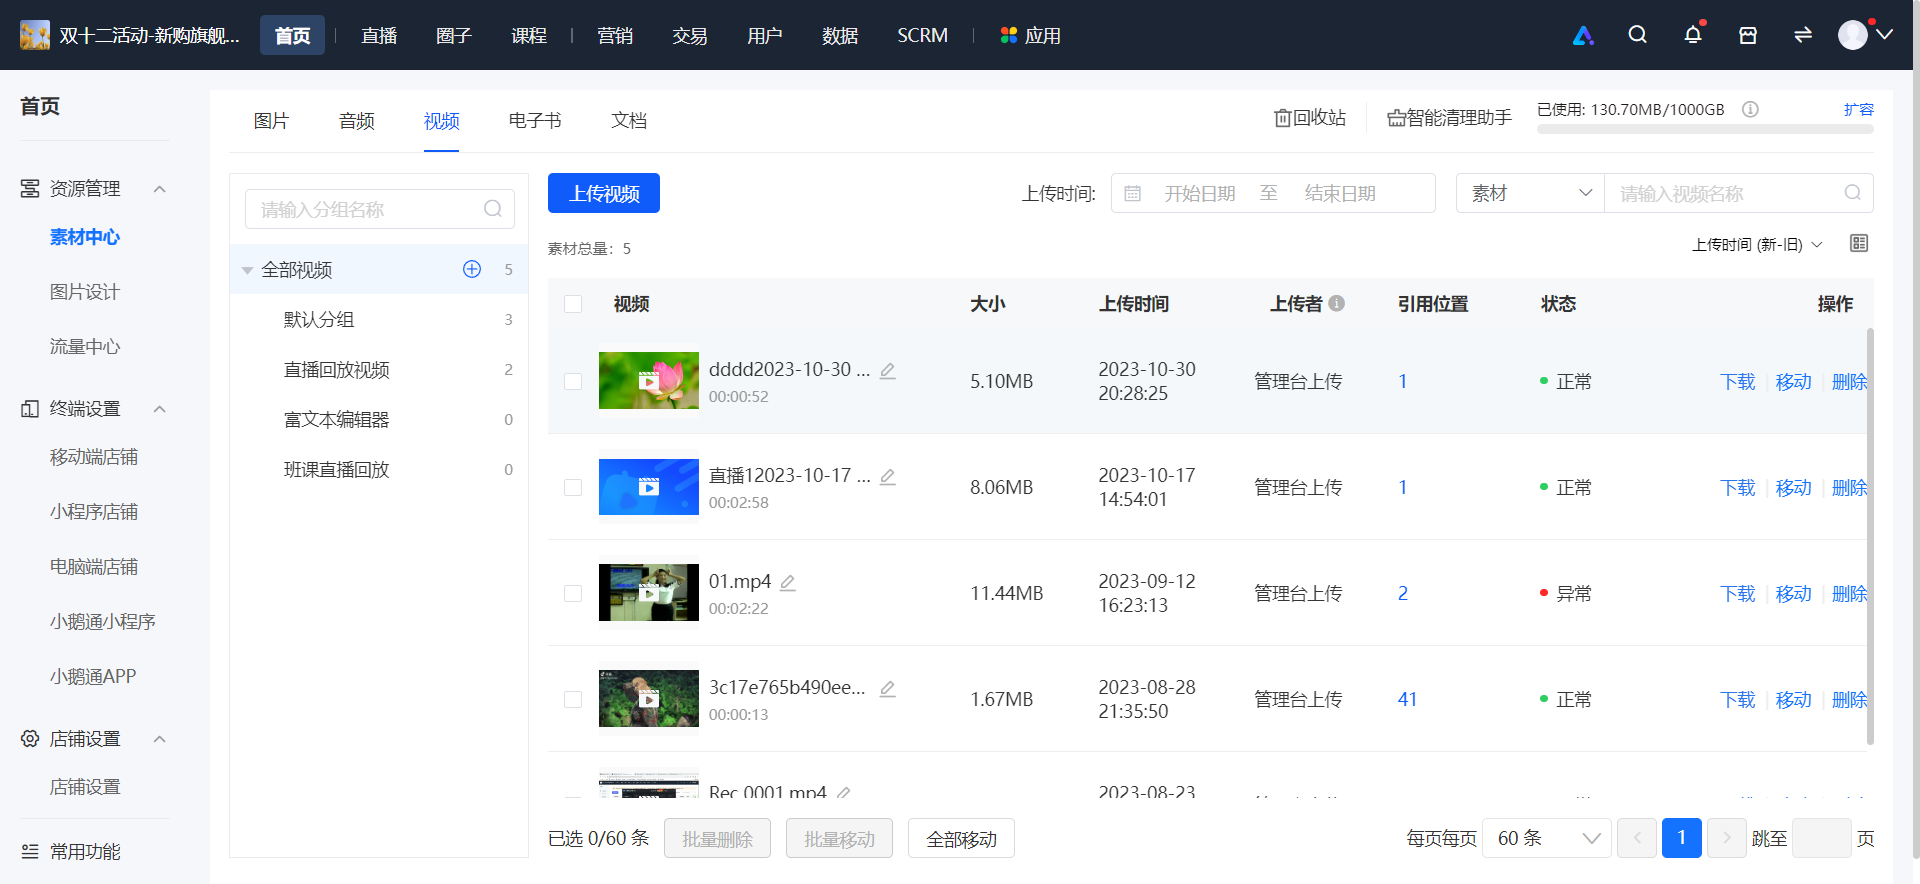
(3) Video List Page
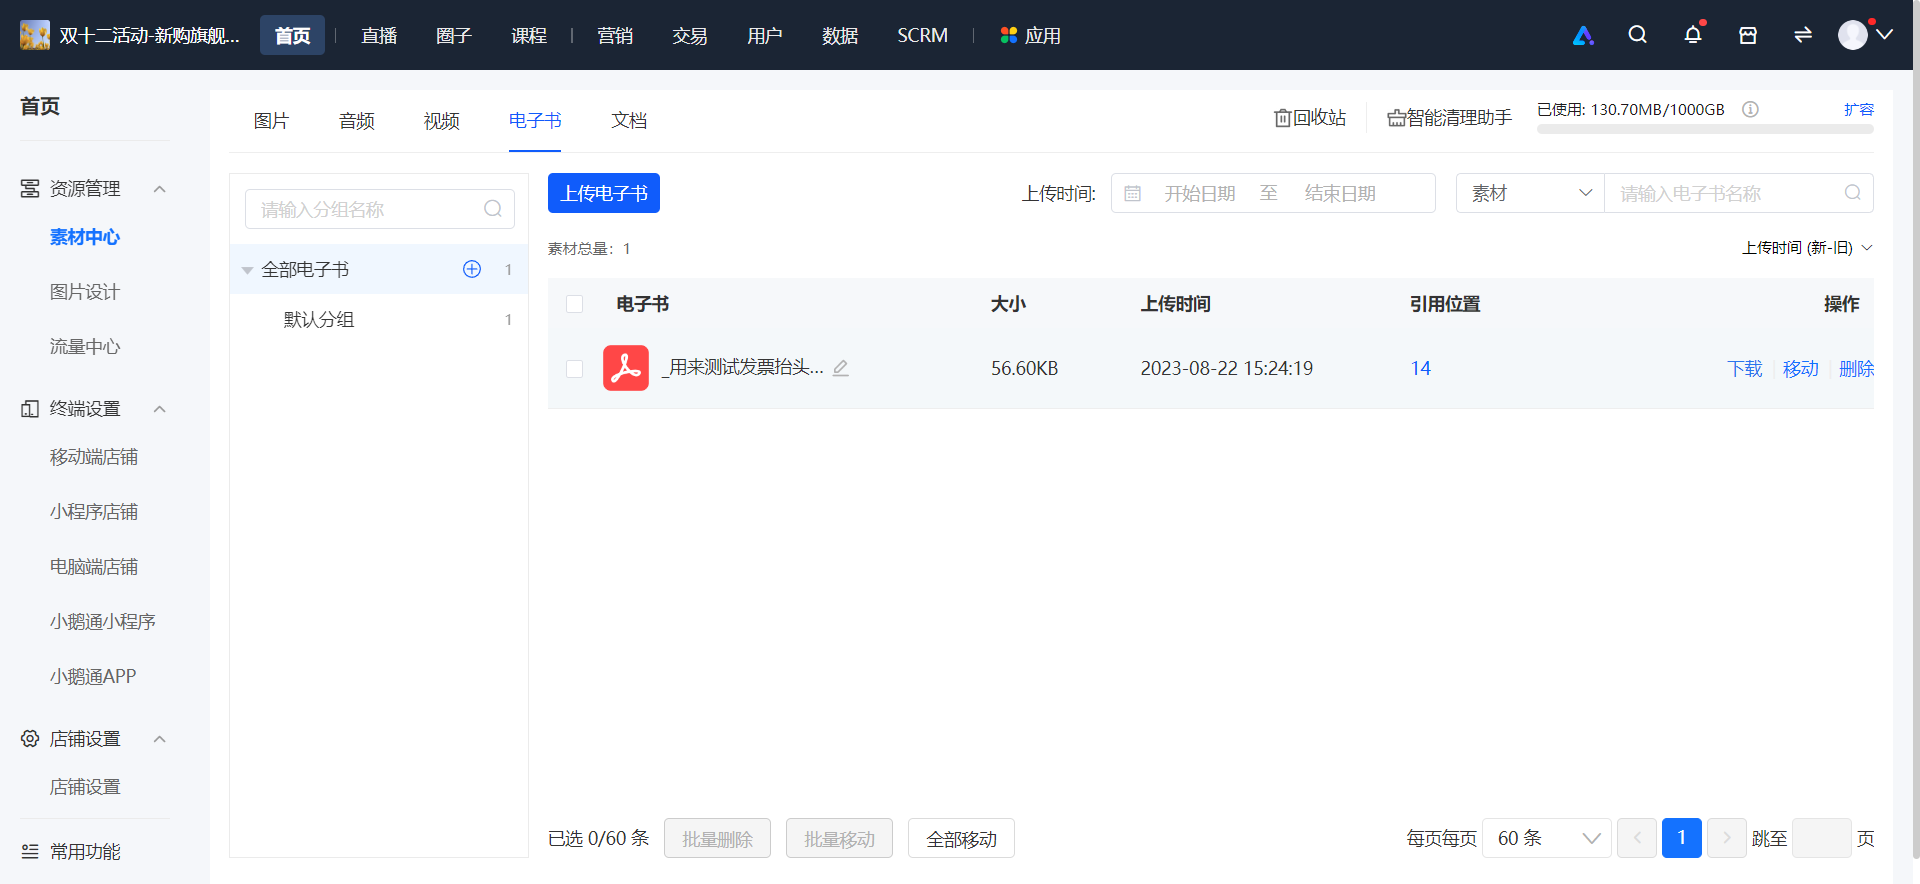
(4) E - book List Page
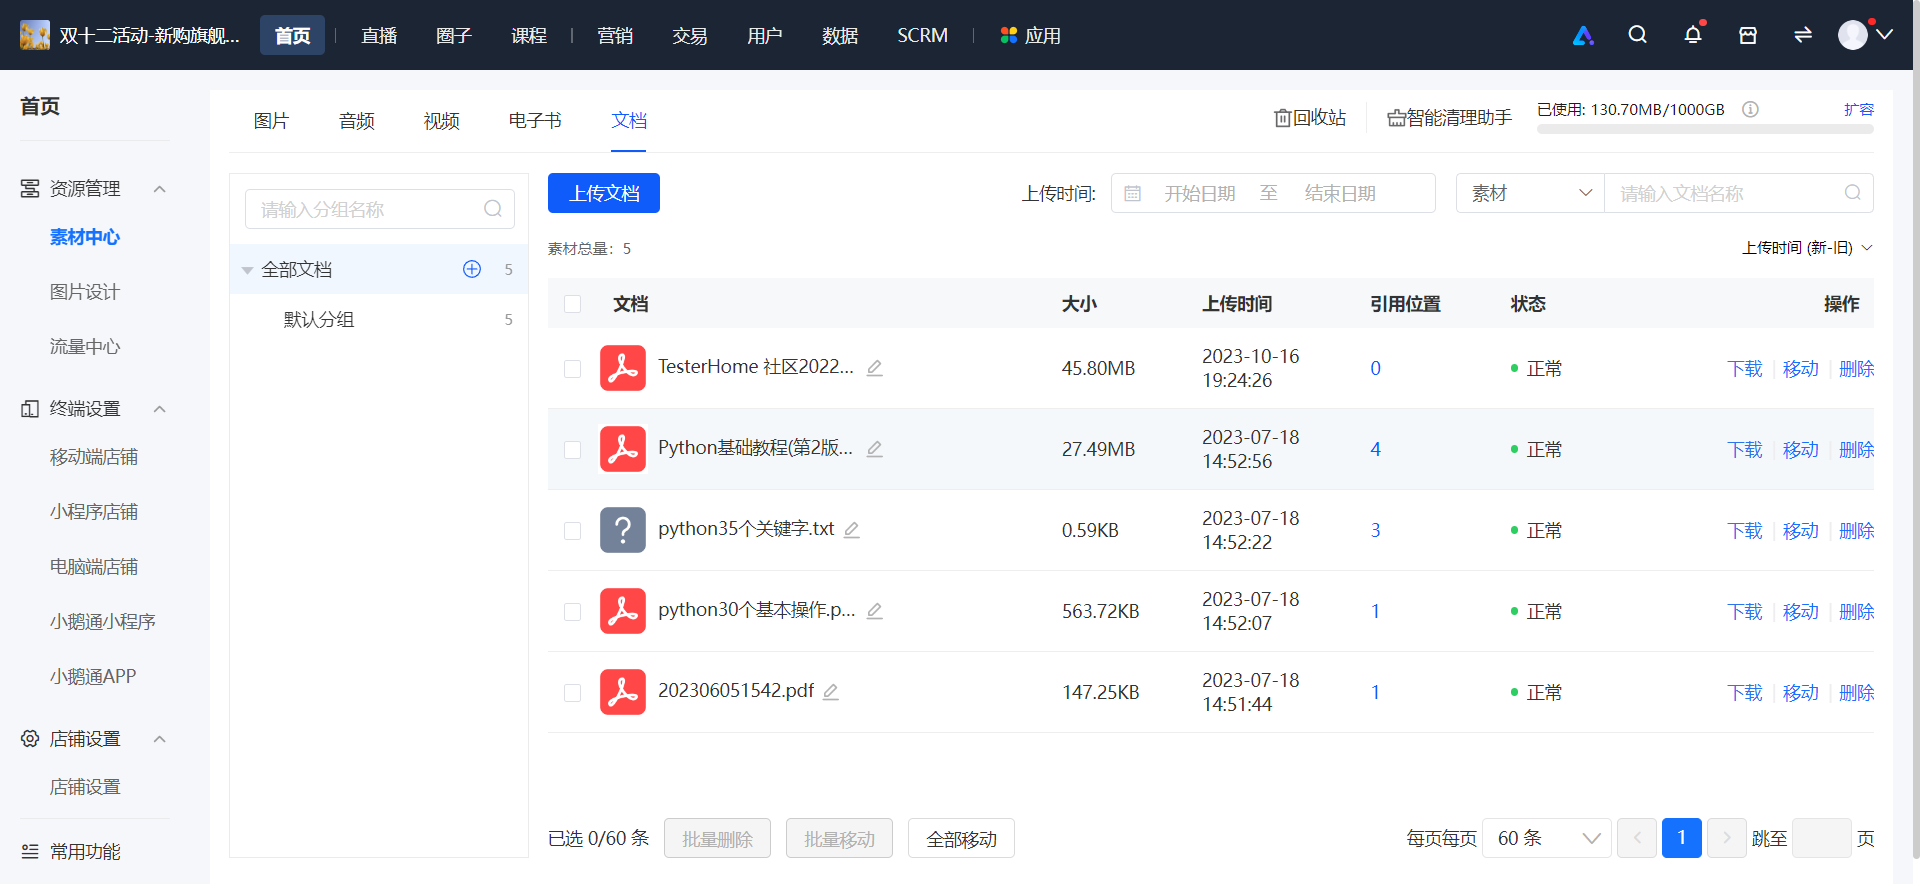
(5) Document List Page
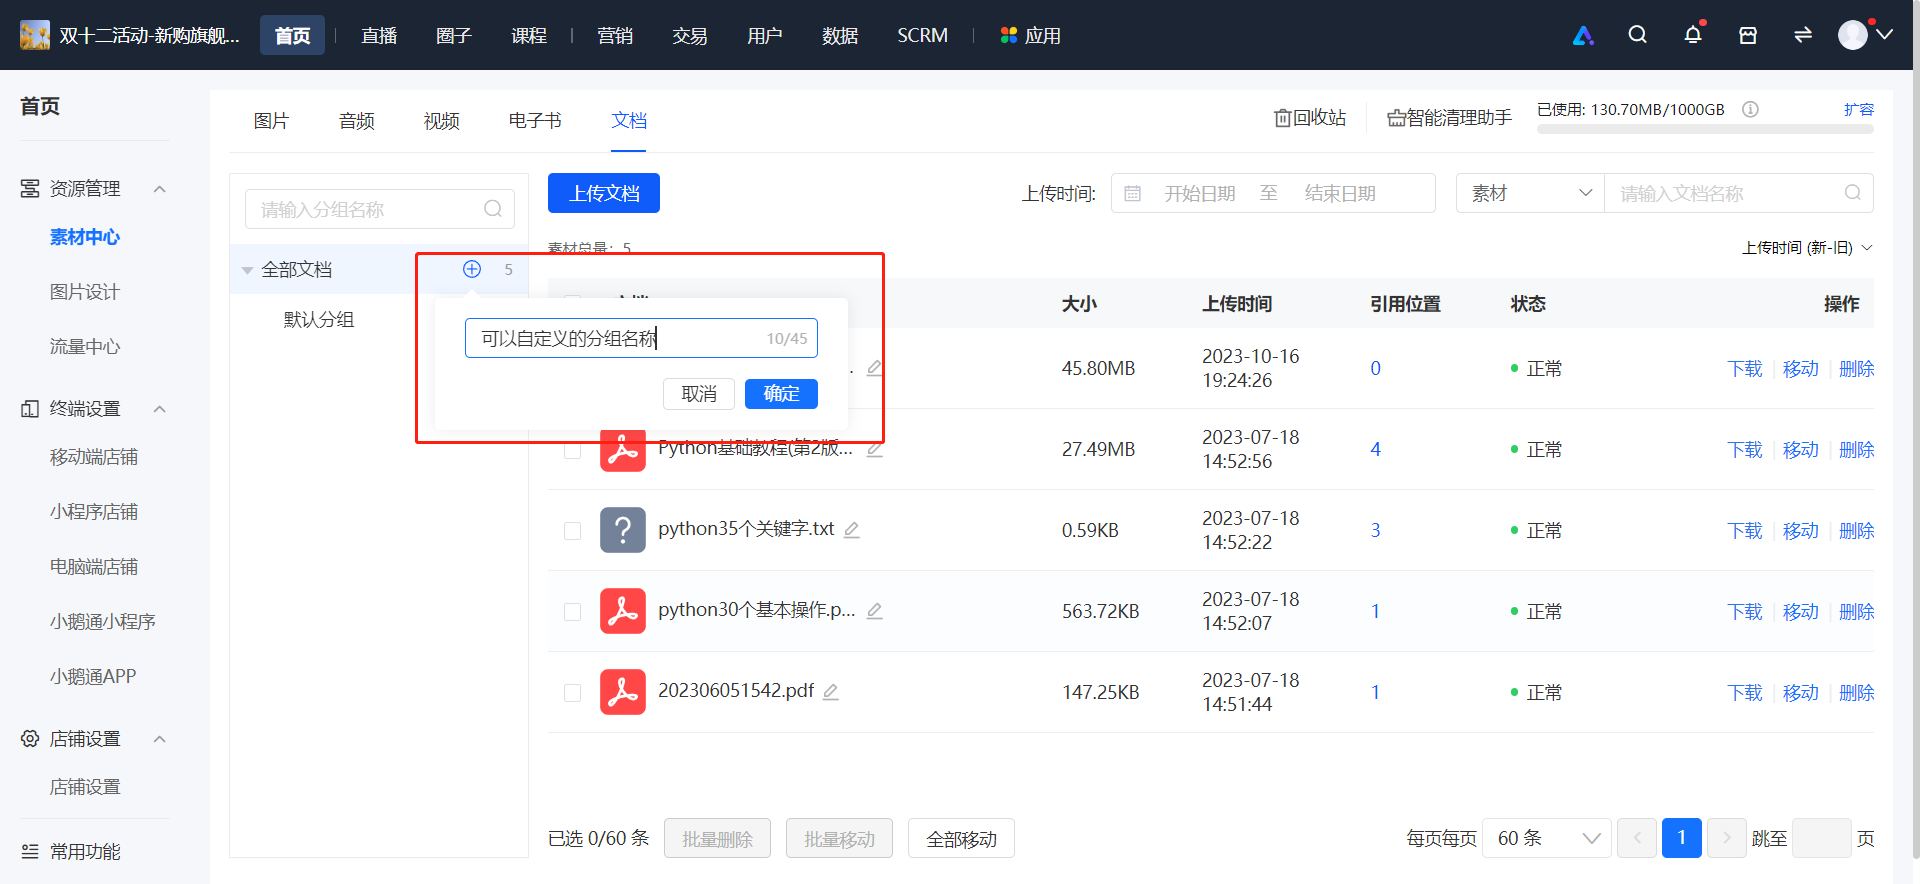
Step 2: Create a Group (Taking the Creation of an Image Group as an Example)(Management Backend)
1. Click the "+" button to add a group.
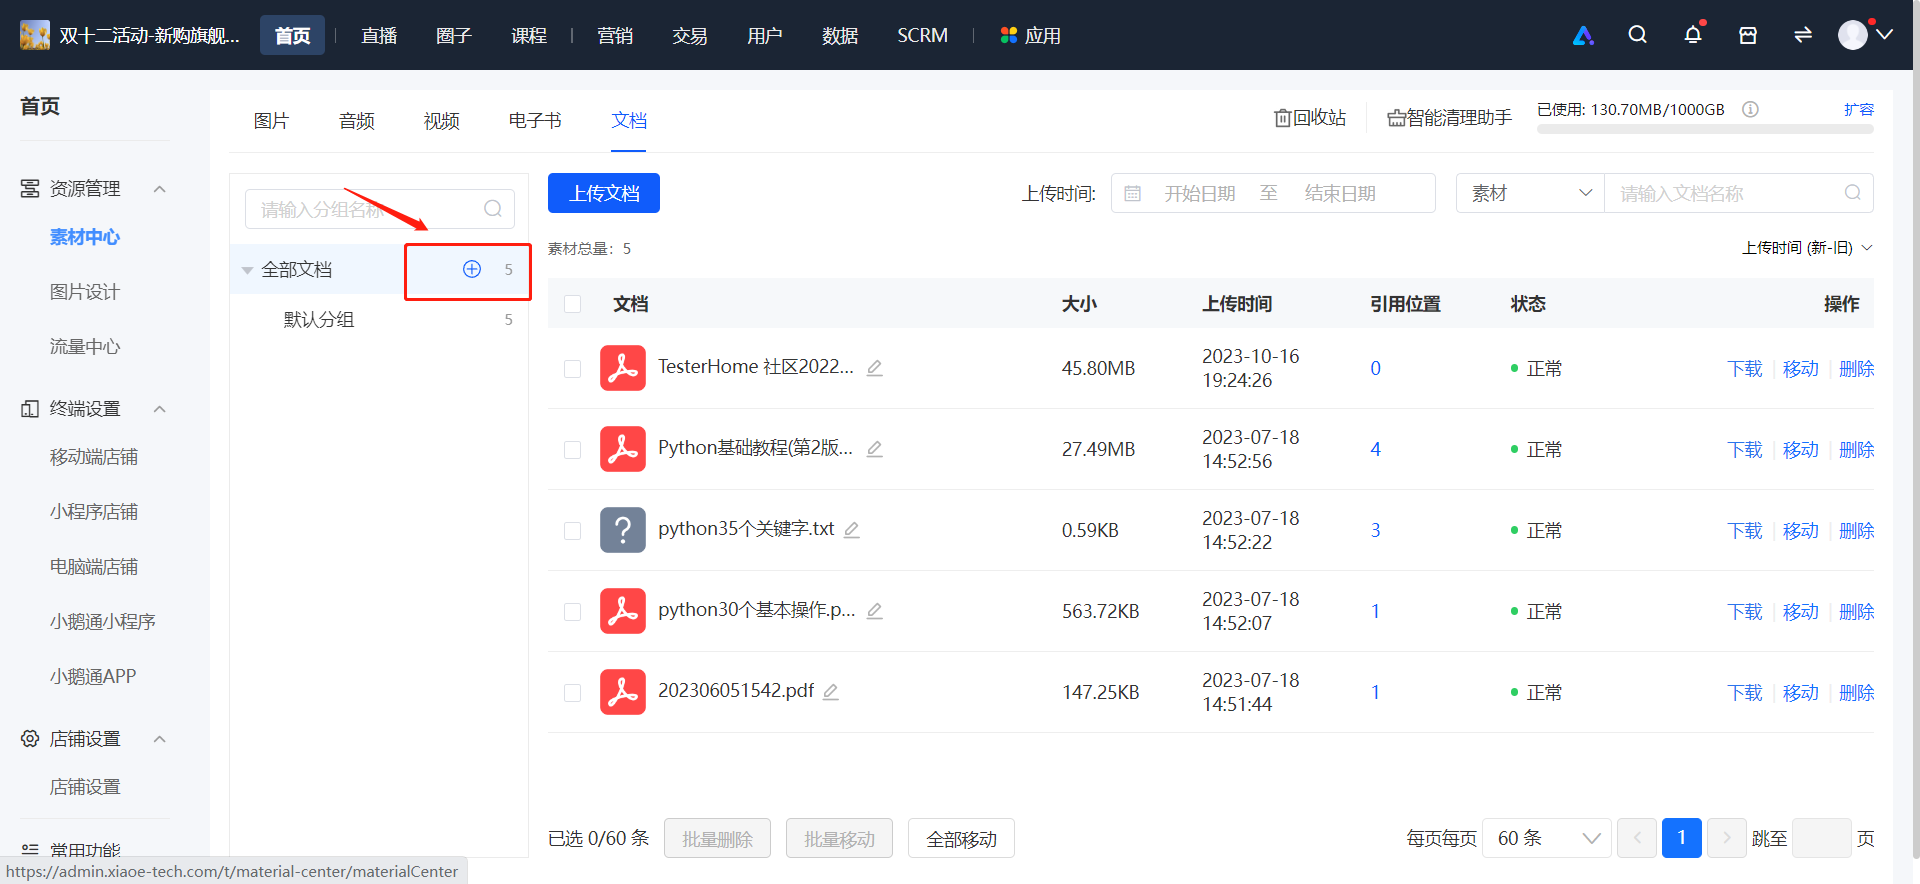
2. Enter the group name and confirm the group.
Step 3: Upload (Taking the Upload of Images as an Example)(Management Backend)
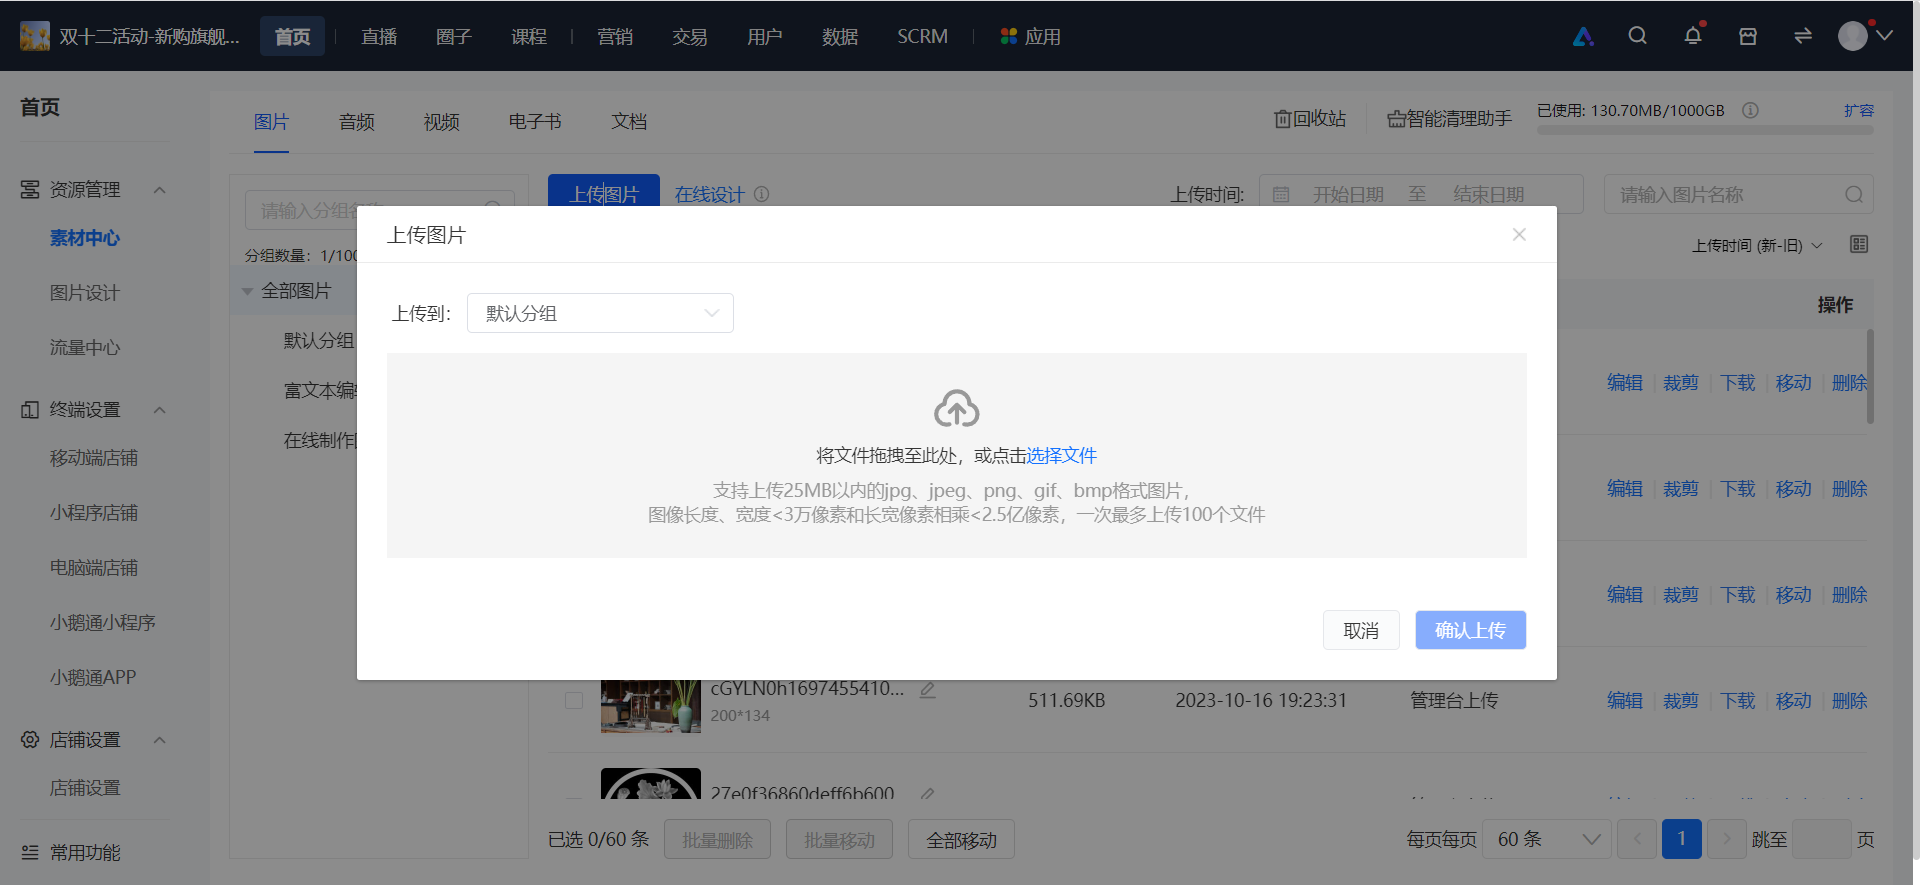
1. Click the [Upload Images] button, and a pop - up window for uploading images will appear on the page.
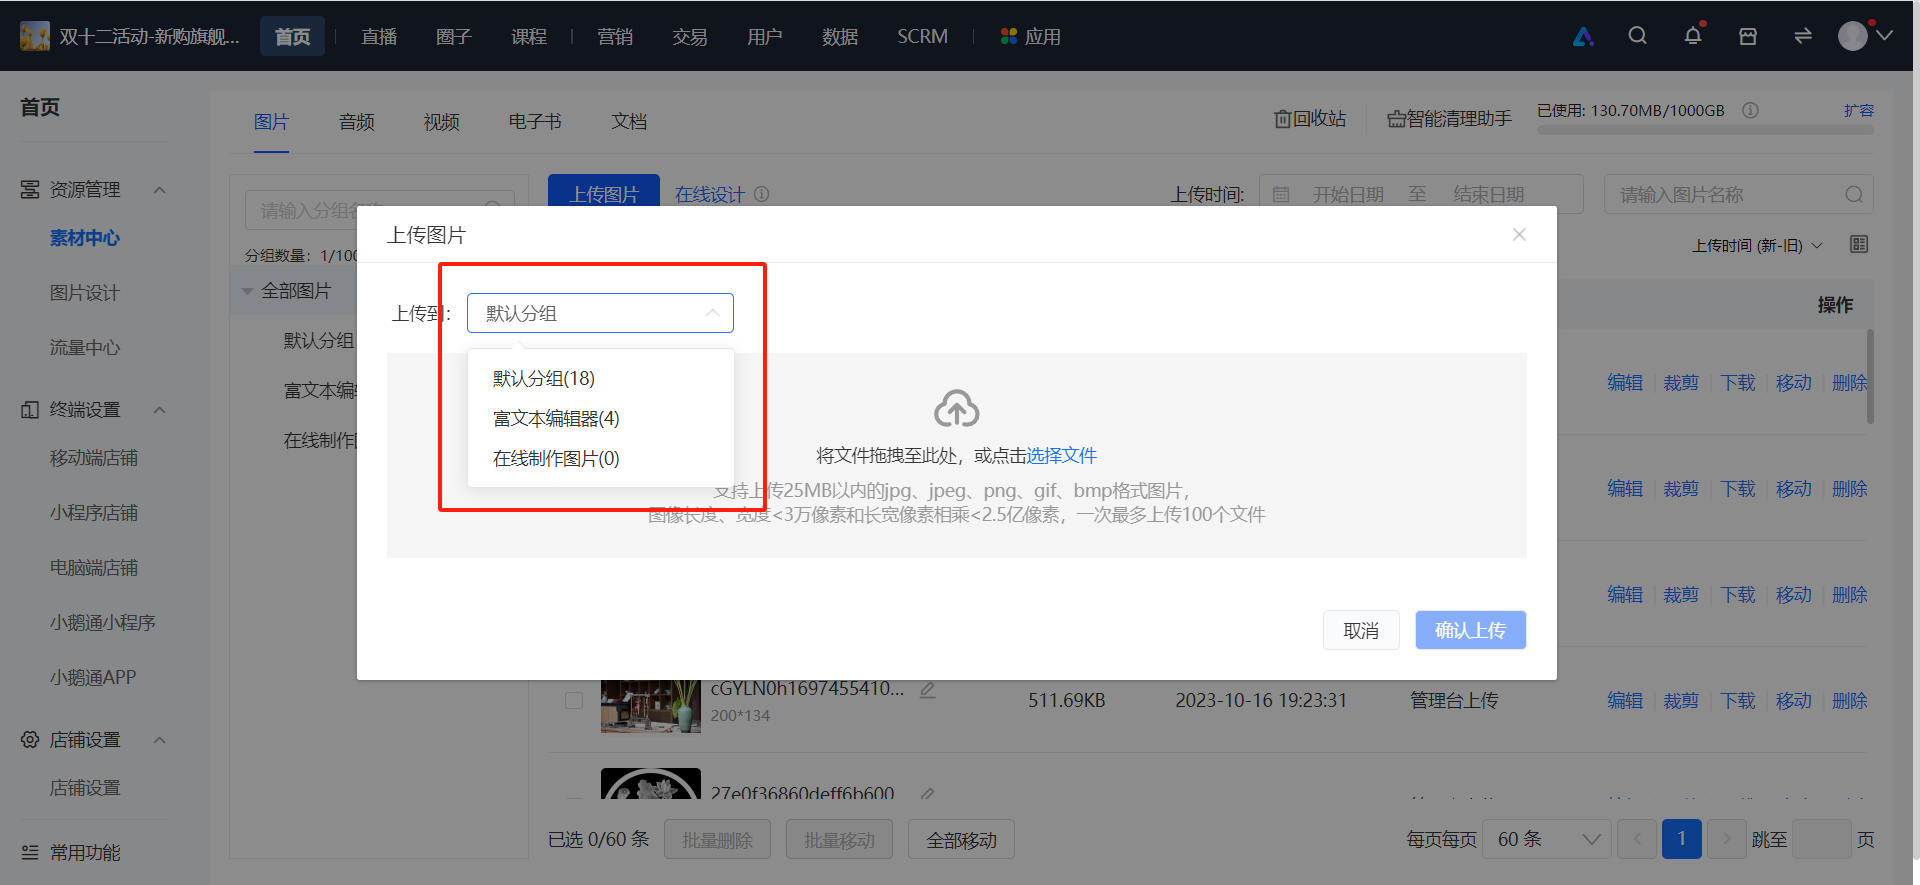
2. Select the group to which the uploaded images belong (the default group if no group has been created, or you can select a group if groups have been created).
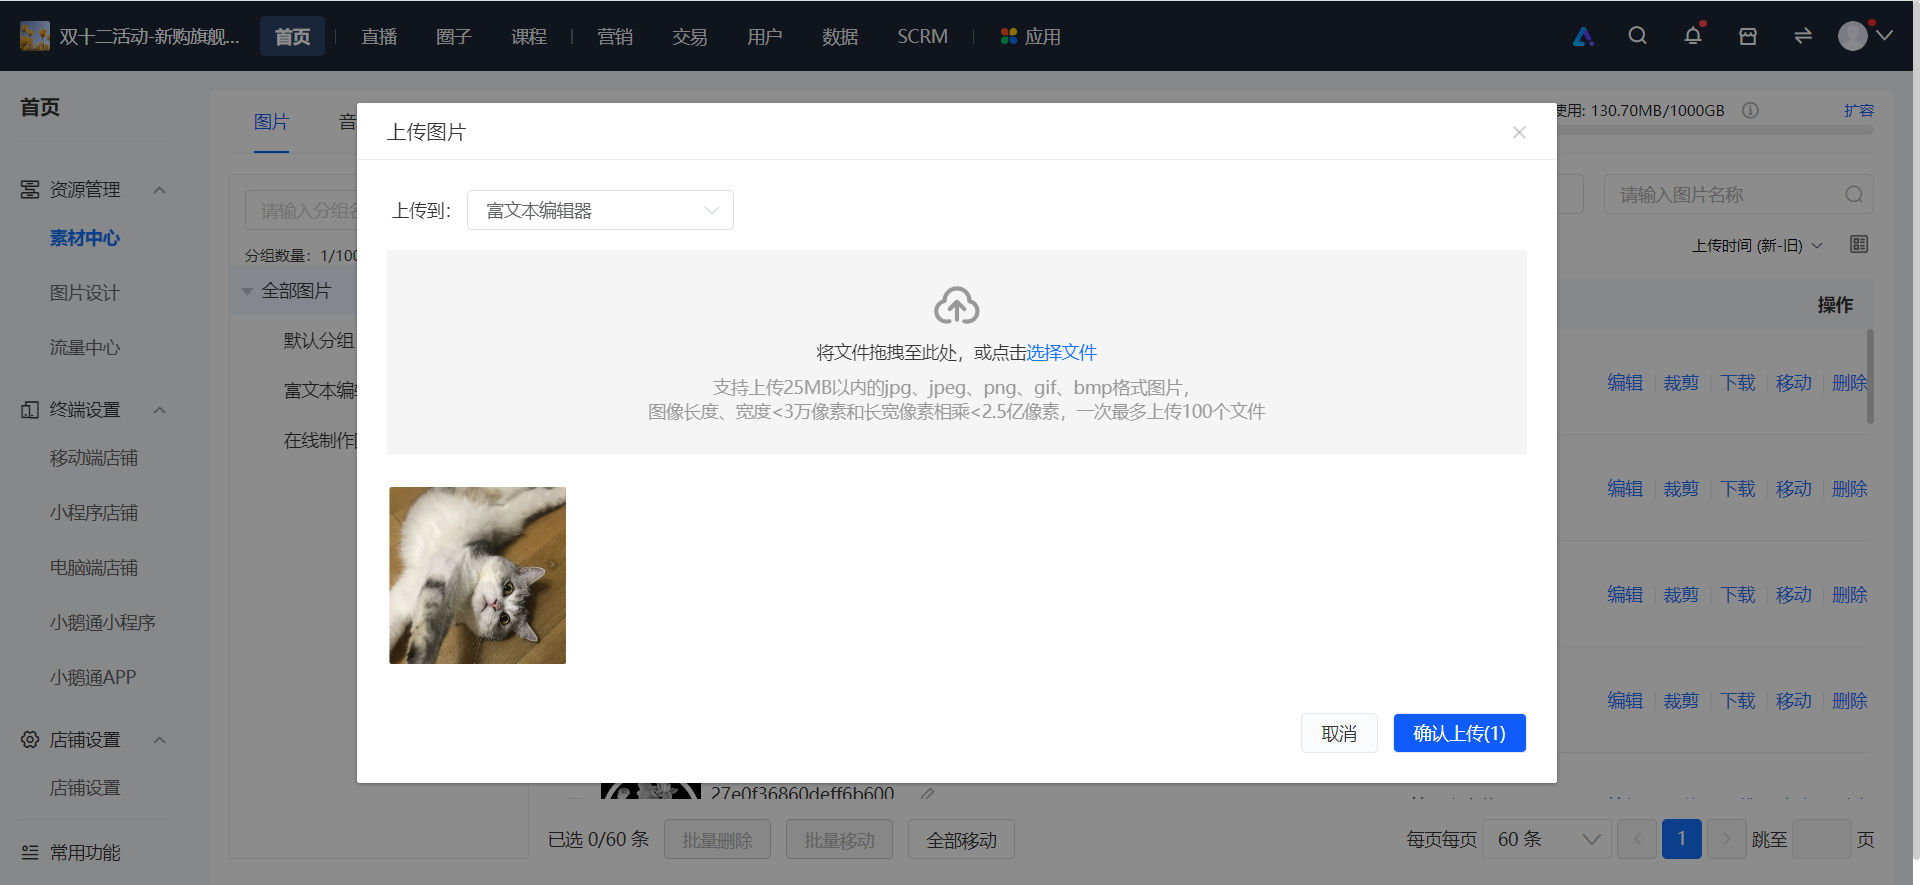
3. Click [Upload Images], select the images to be uploaded, and click [Confirm Upload].
Step 4: Edit(Management Backend)
1. Select the image to be edited and click the [Edit] button.
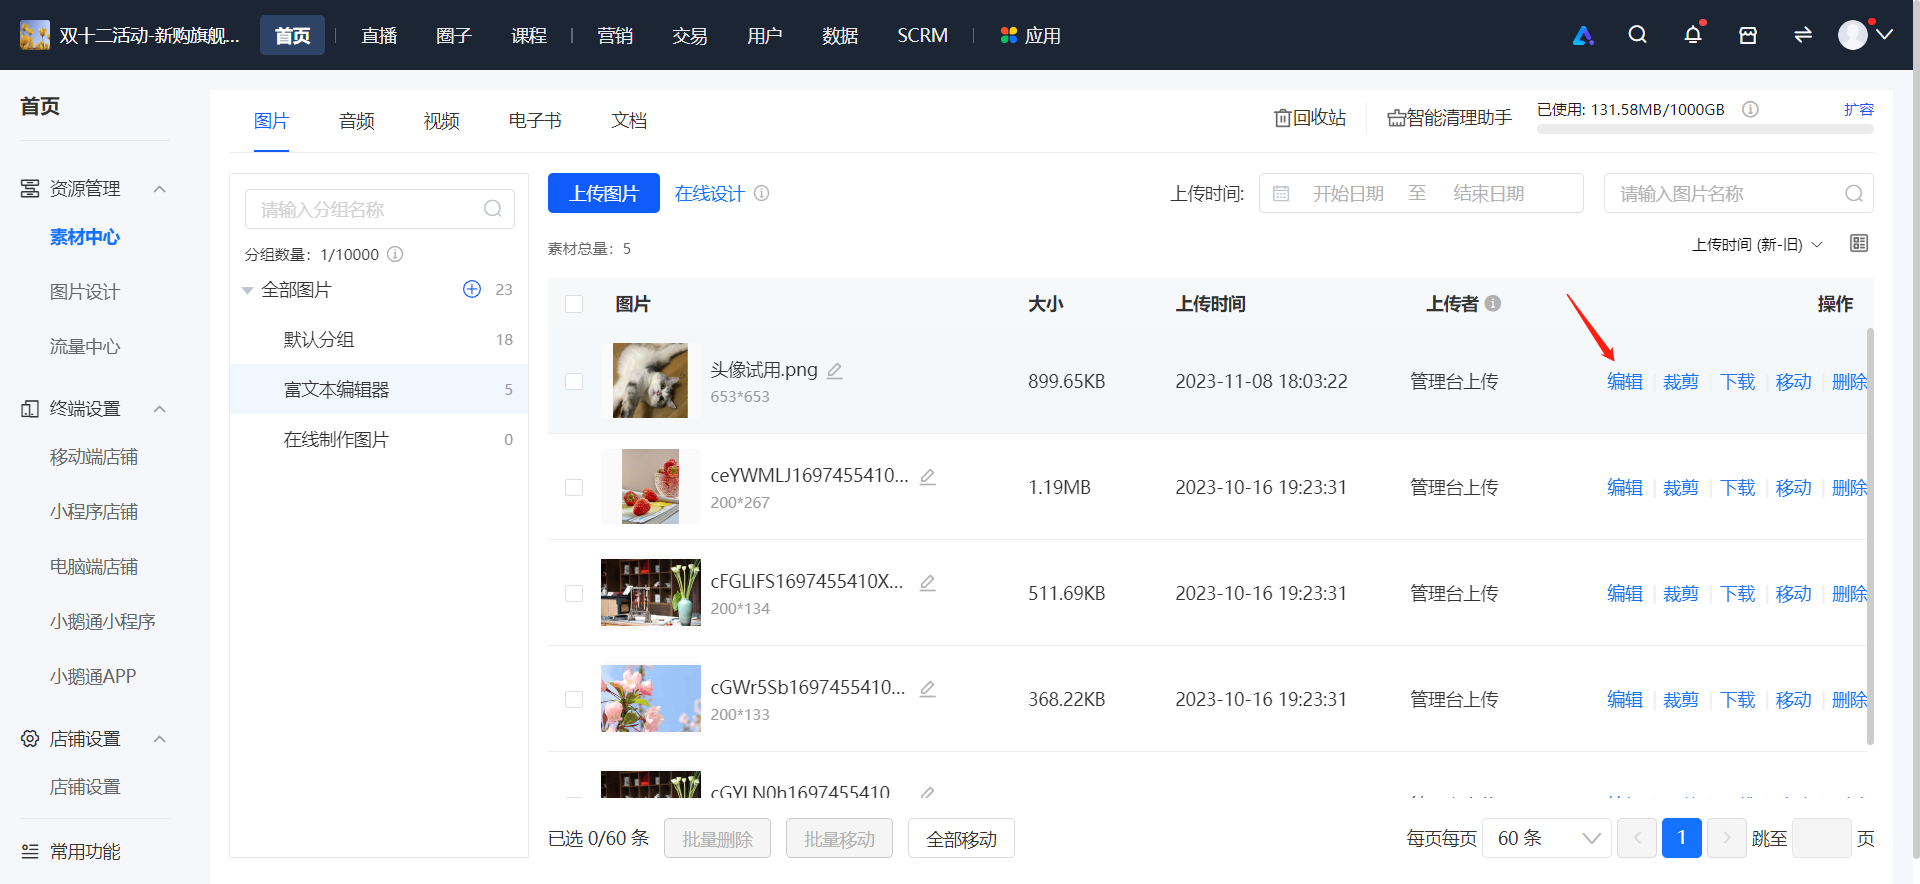
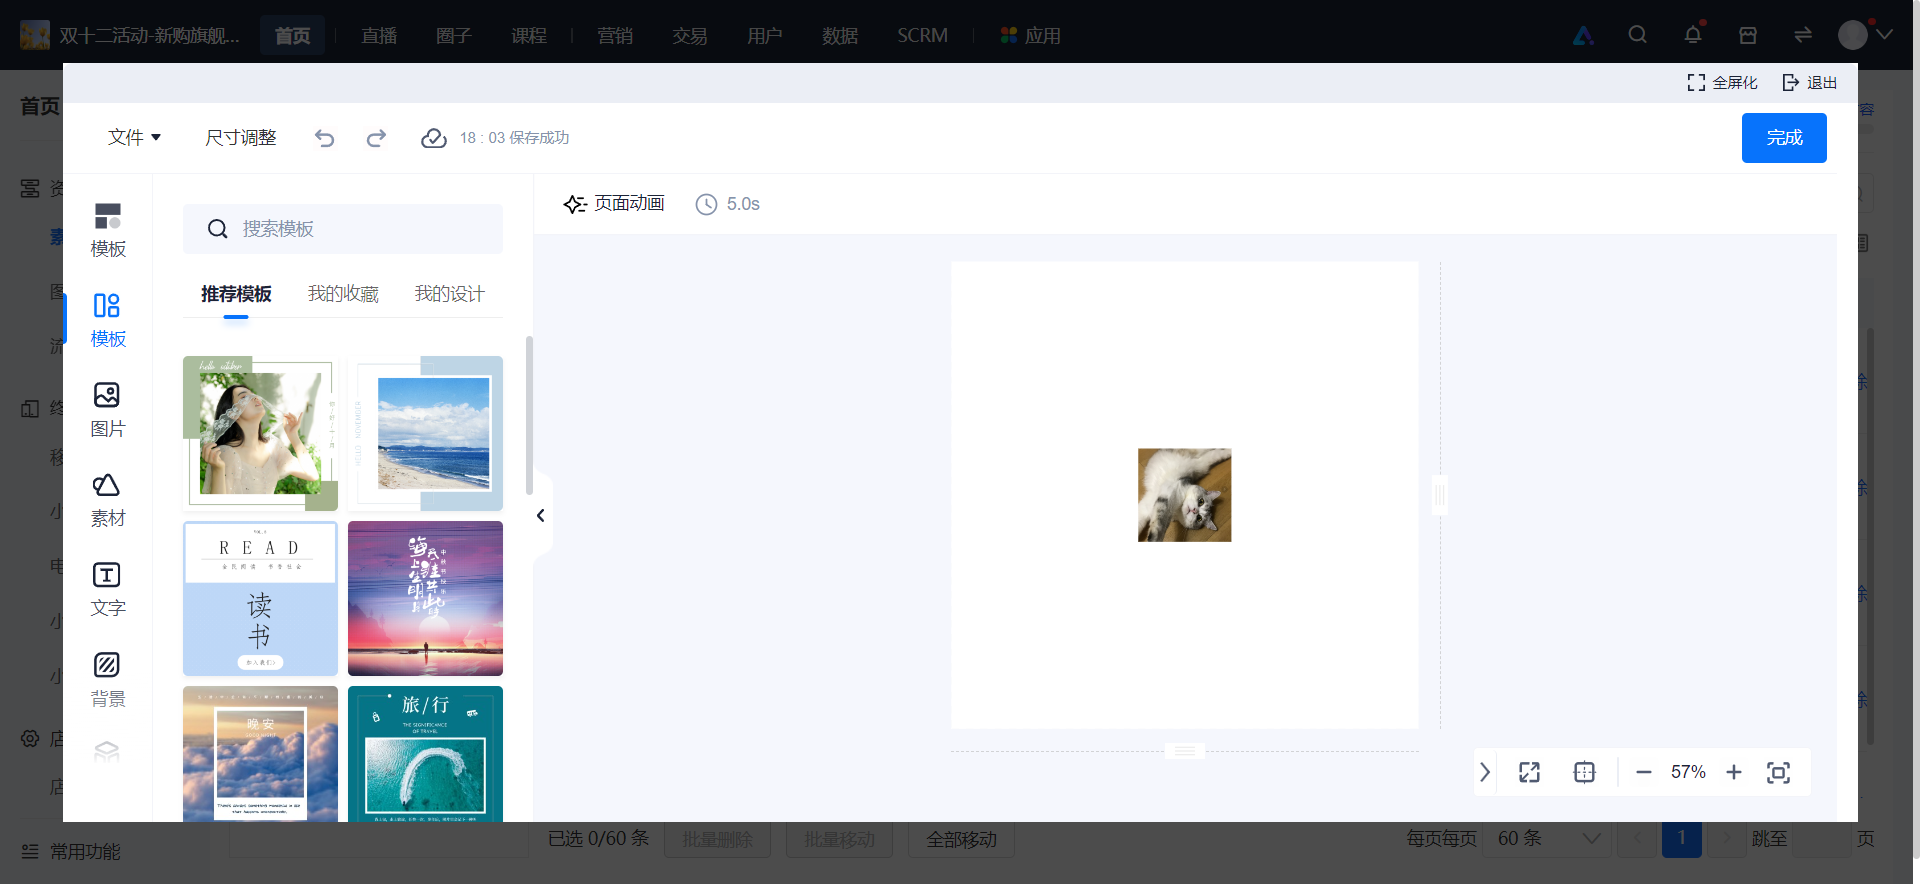
2. Automatically jump to the third - party plugin to edit and design the image style.(Only supported for the Professional Edition and the Flagship Edition)
Step 5: Crop(Management Backend)
1. Select the image to be cropped and click [Crop].
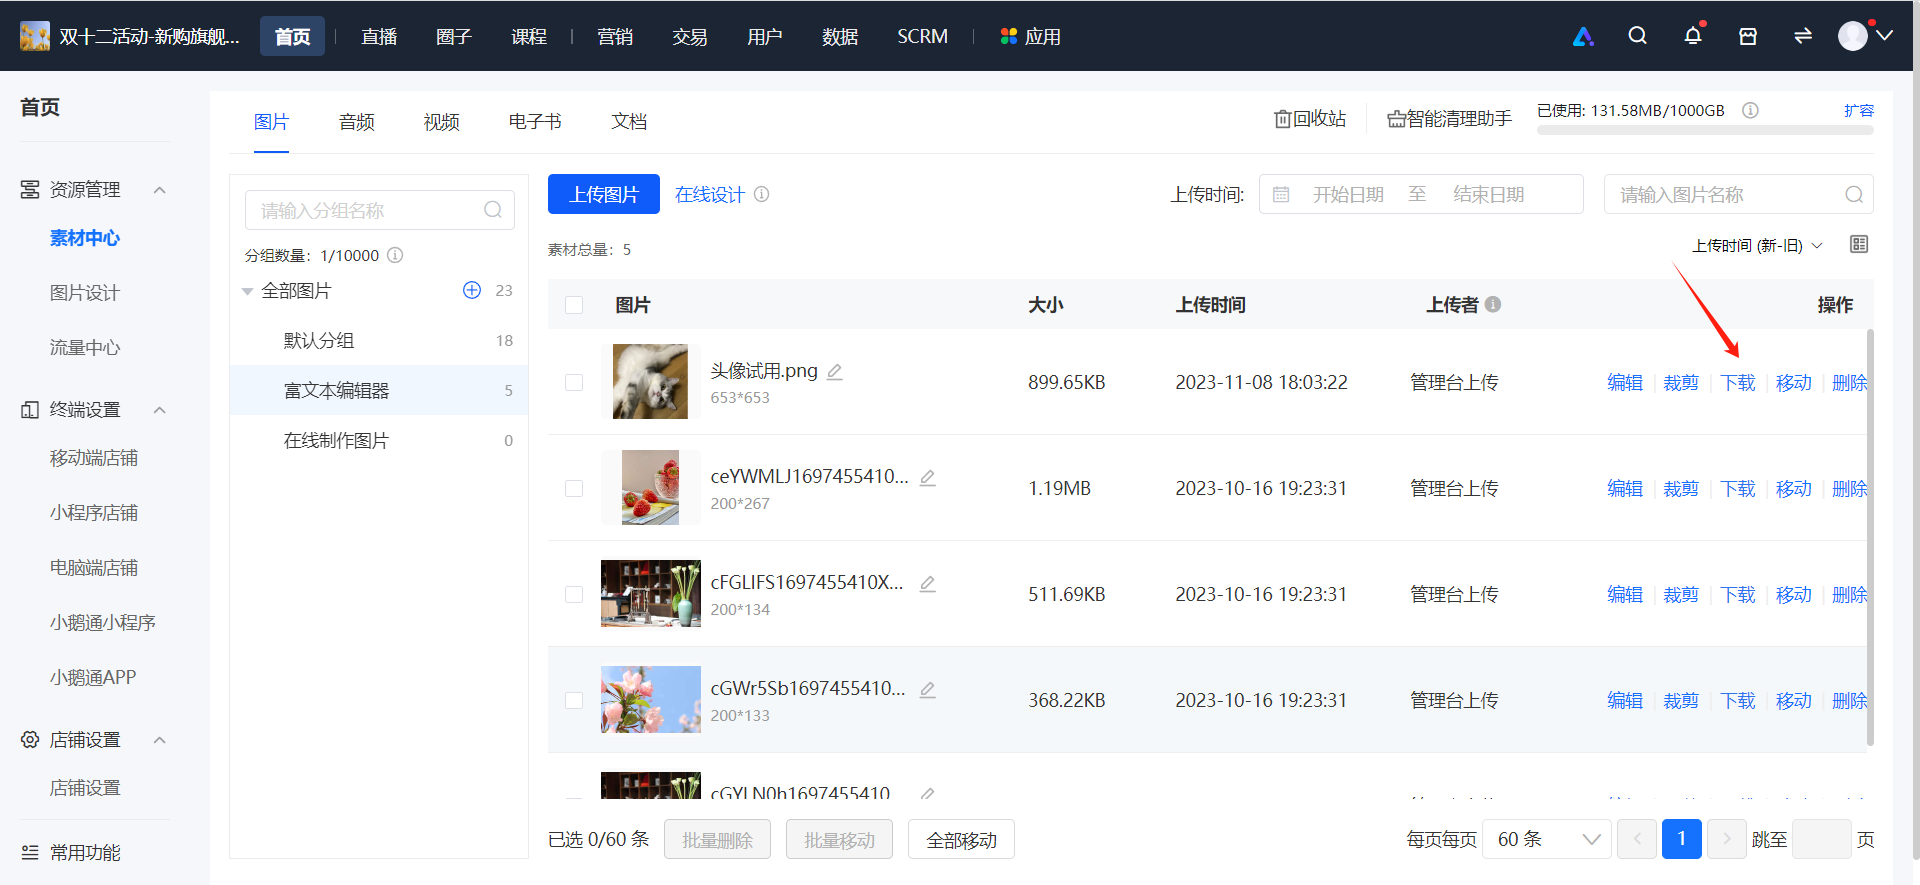
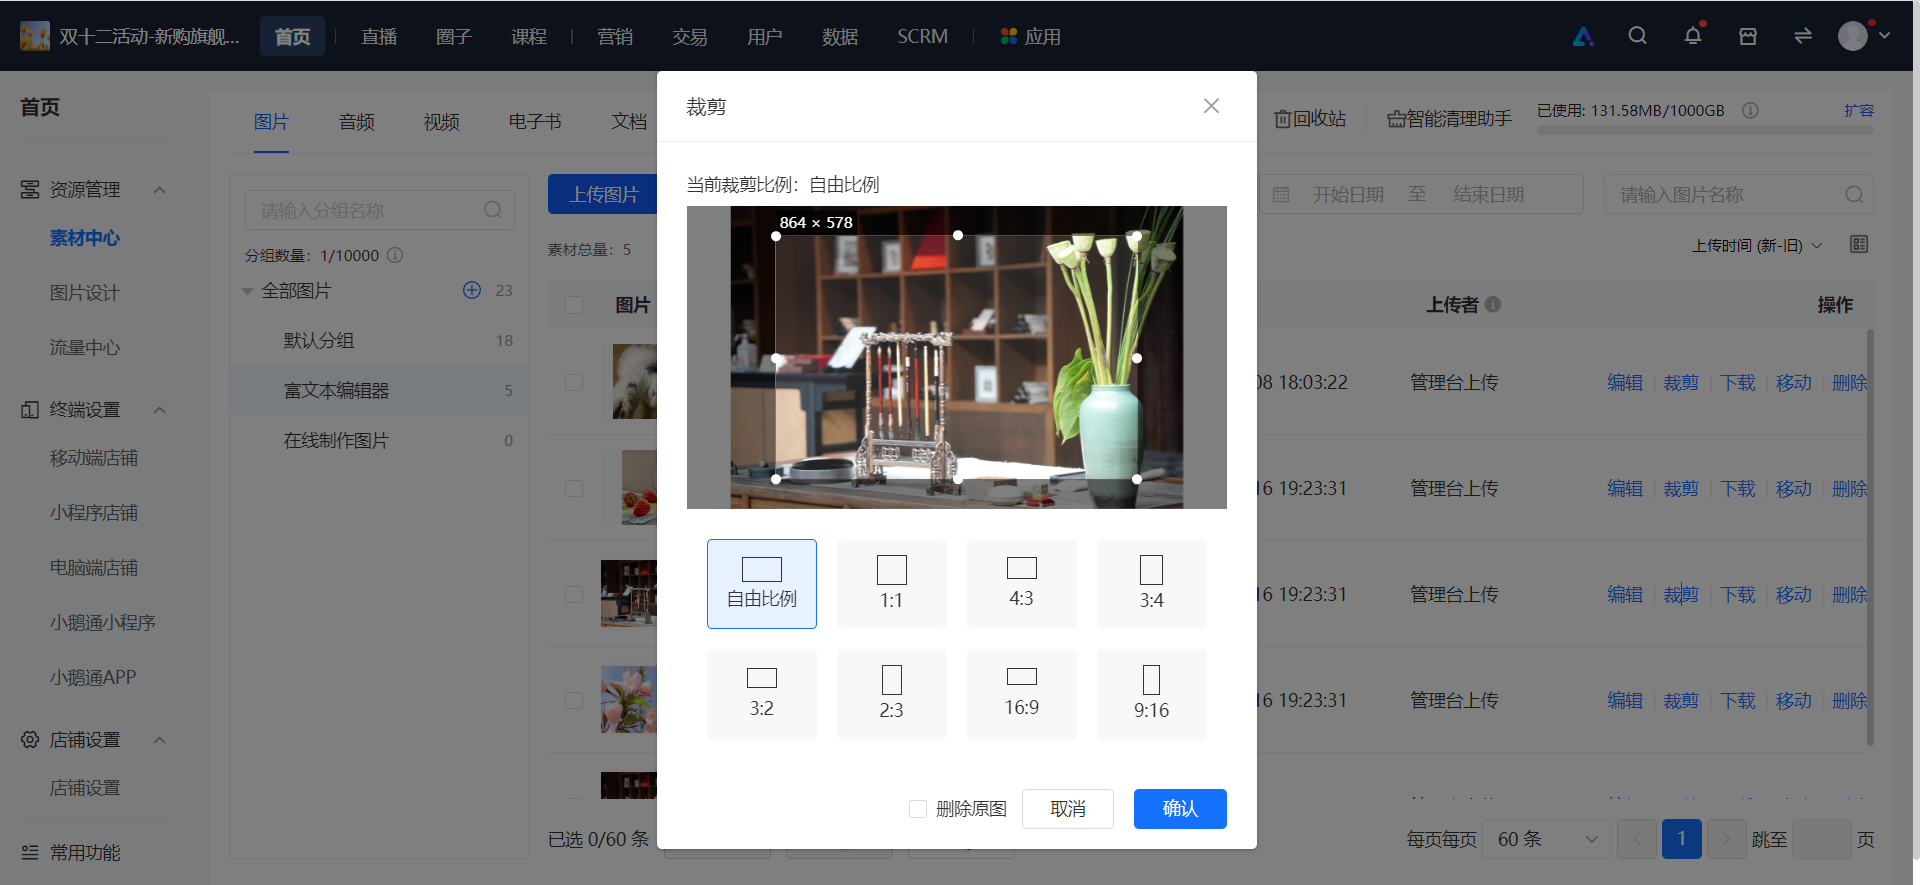
2. Select the cropping size and click Confirm to complete the cropping. The cropped image will be stored as a new file in the Material Center.
Step 6: Download(Taking the Download of Images as an Example)(Management Backend)
1. Click [Download], and the material will be downloaded through the browser.
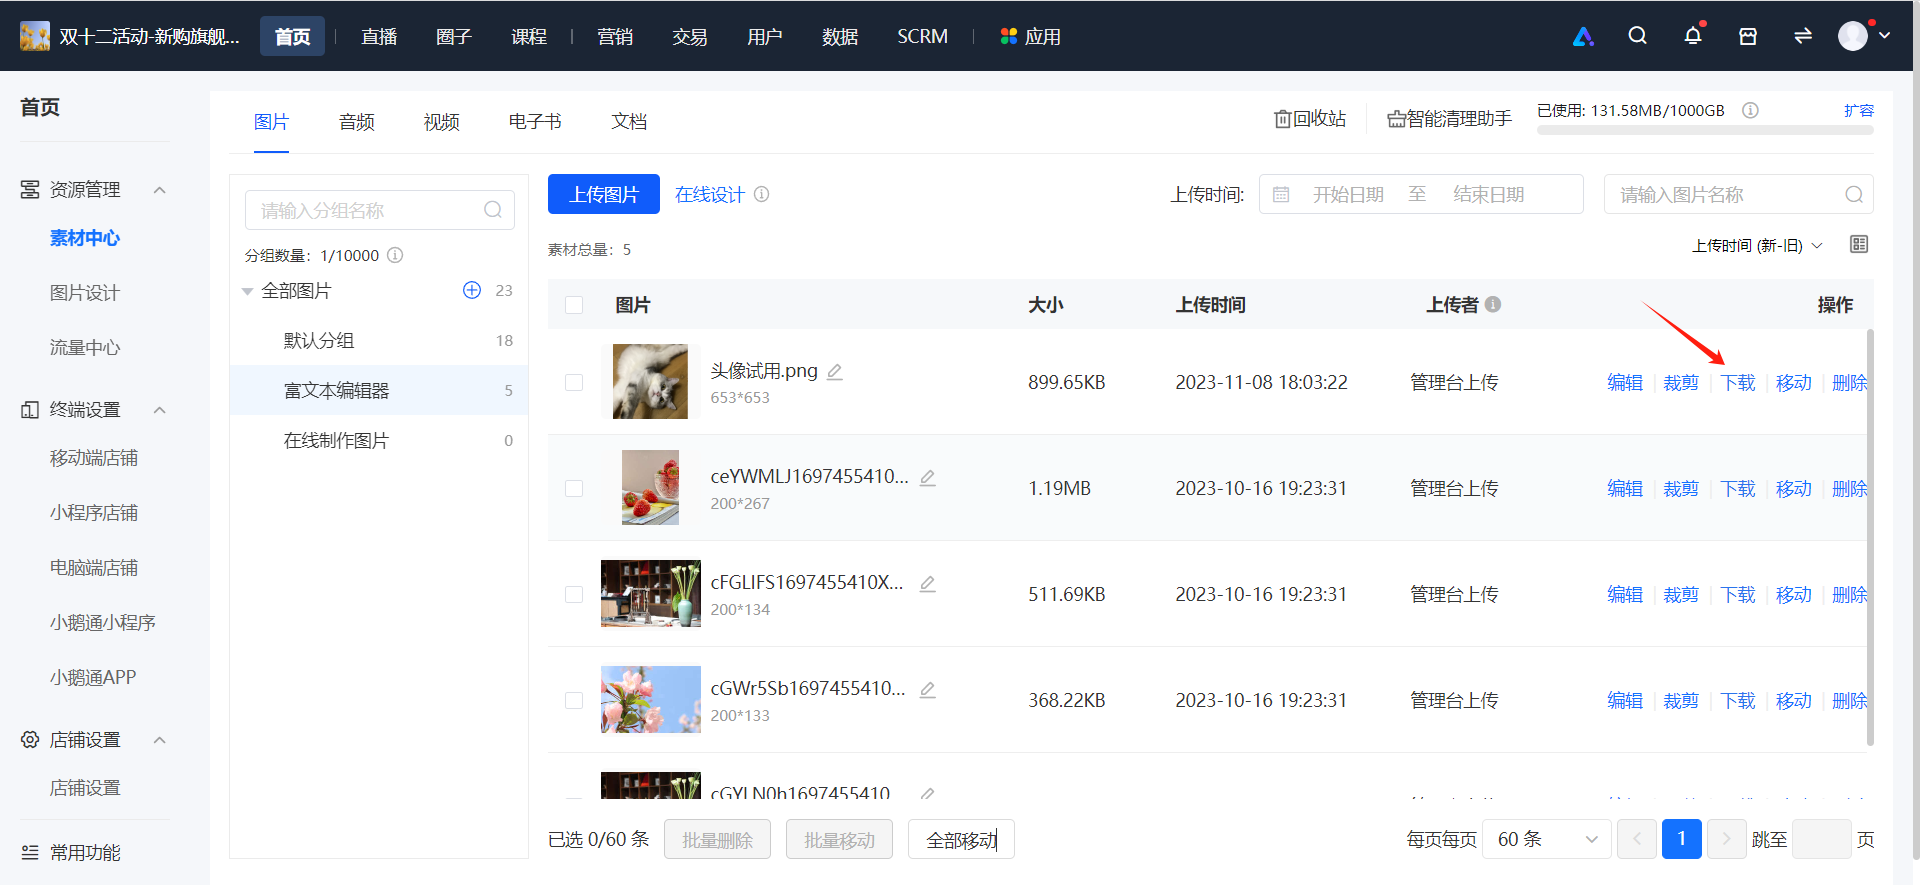
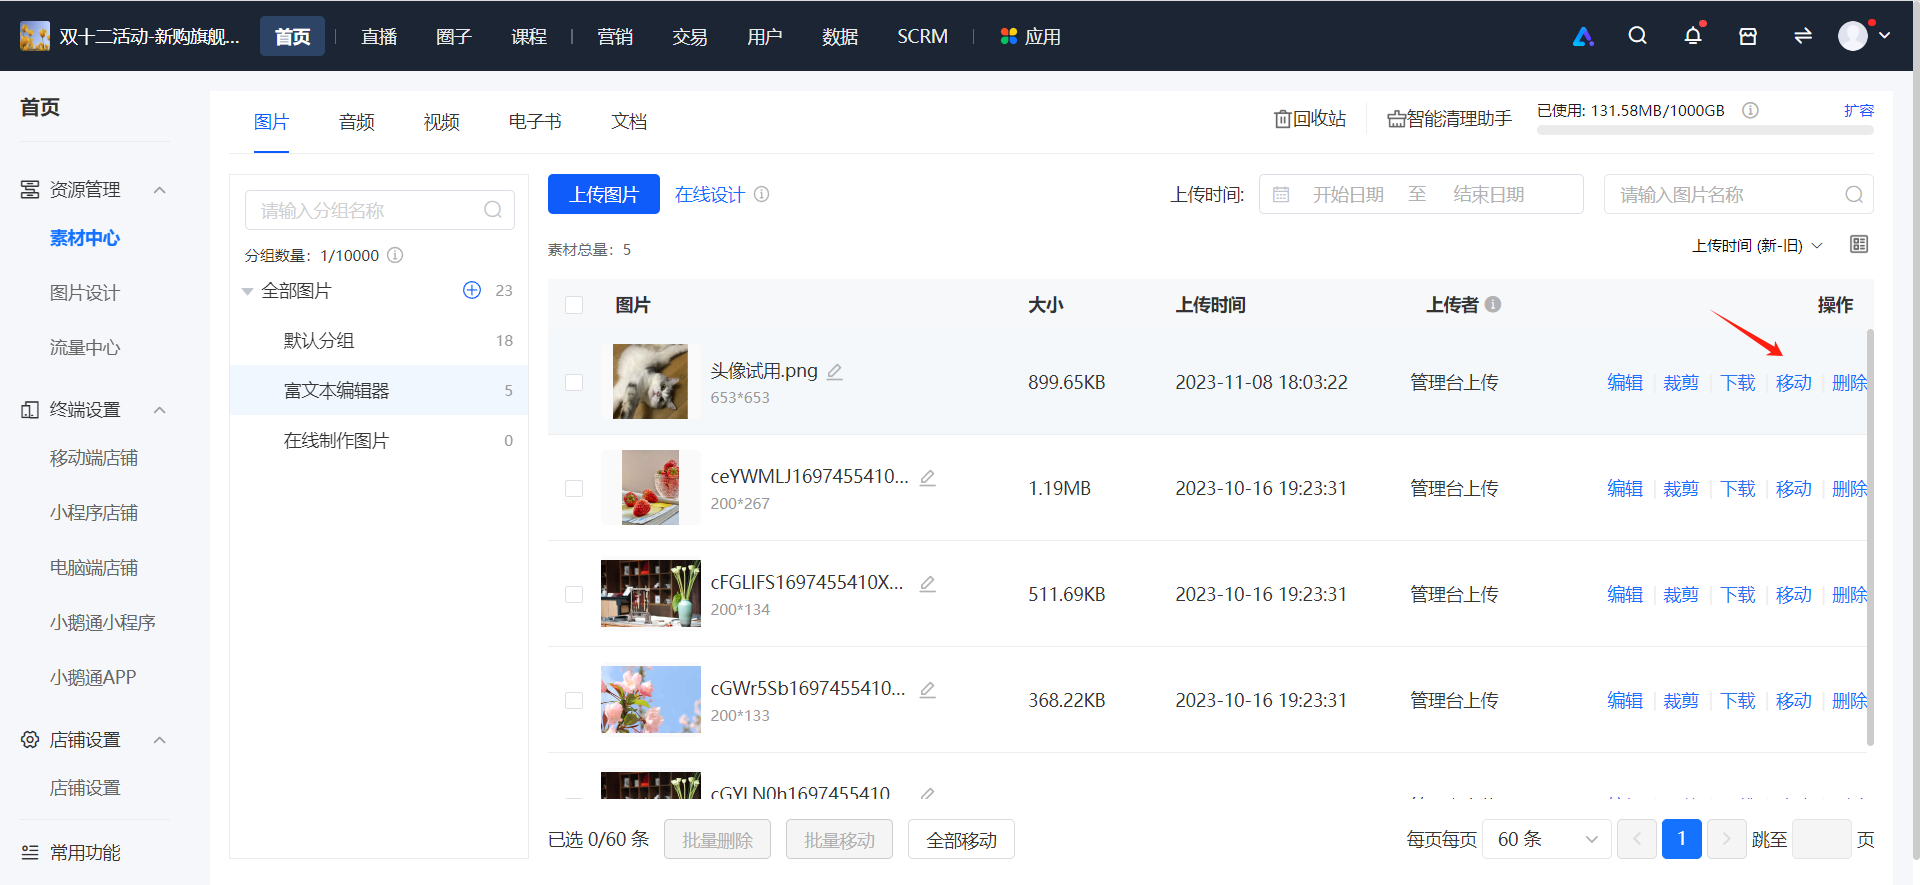
Step 7: Move Materials(Taking the Movement of a Single Image as an Example)(Management Backend)
1. Select the image to be moved.
2. Select the group to which you want to move the material and click Confirm.
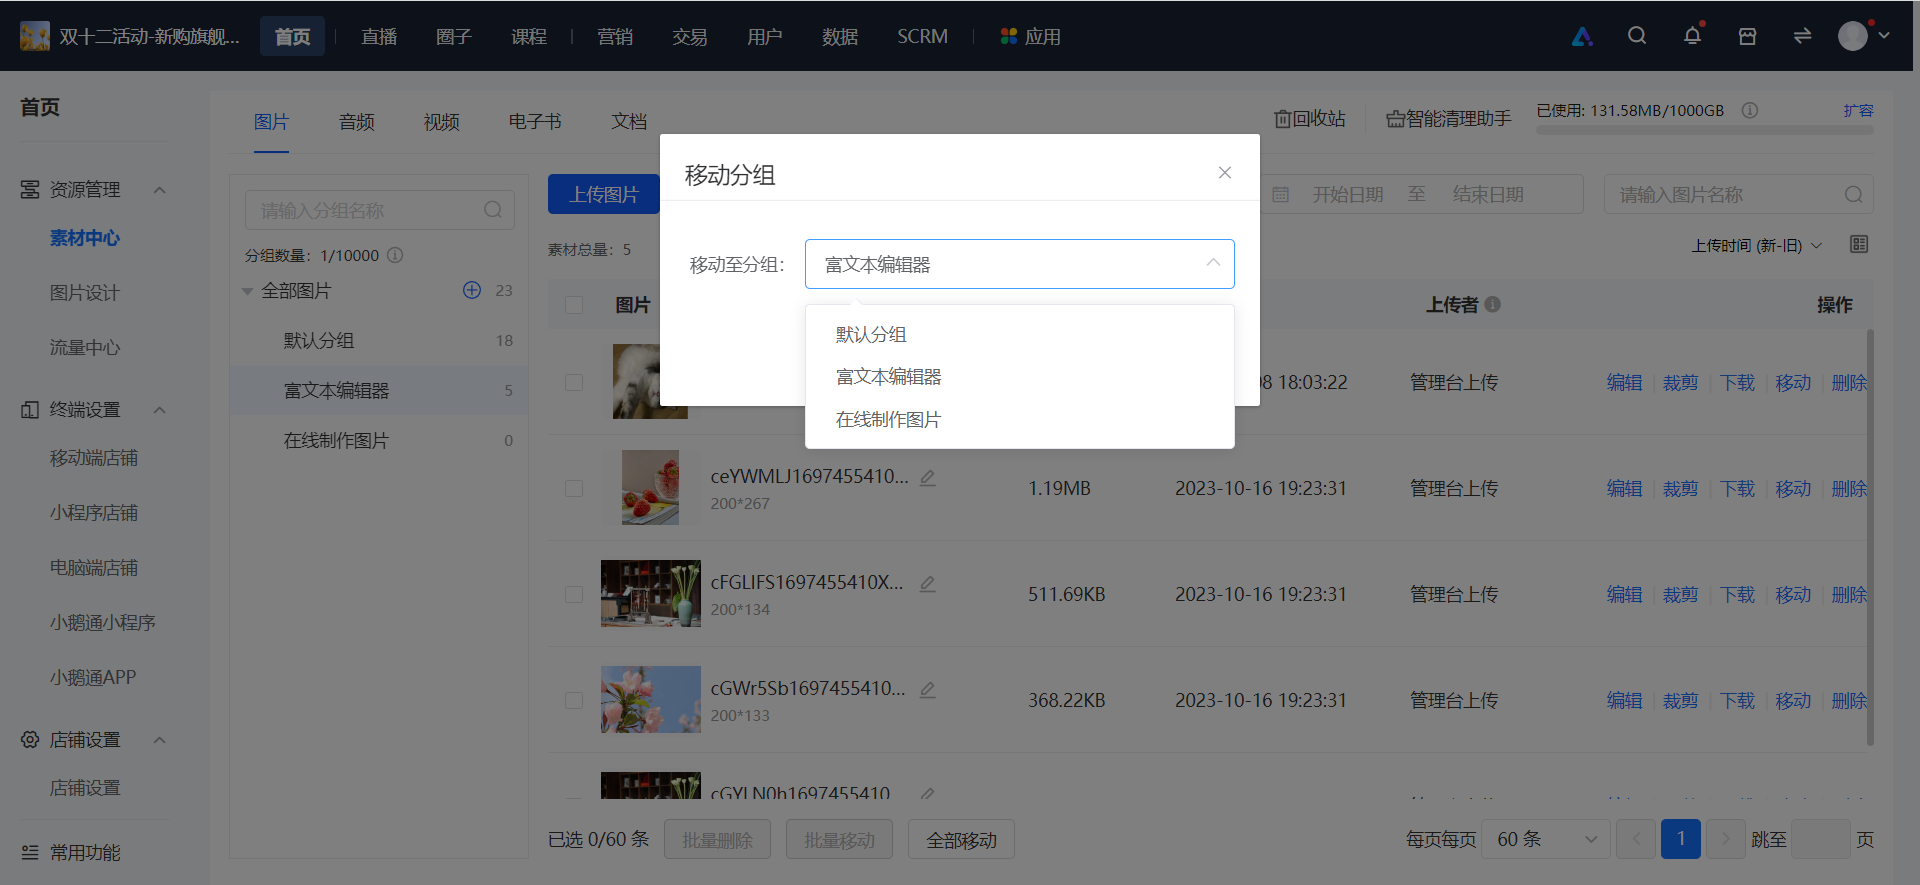
Step 8: Delete Materials(Taking the Deletion of a Single Image as an Example)(Management Backend)
1. Select the image to be deleted.
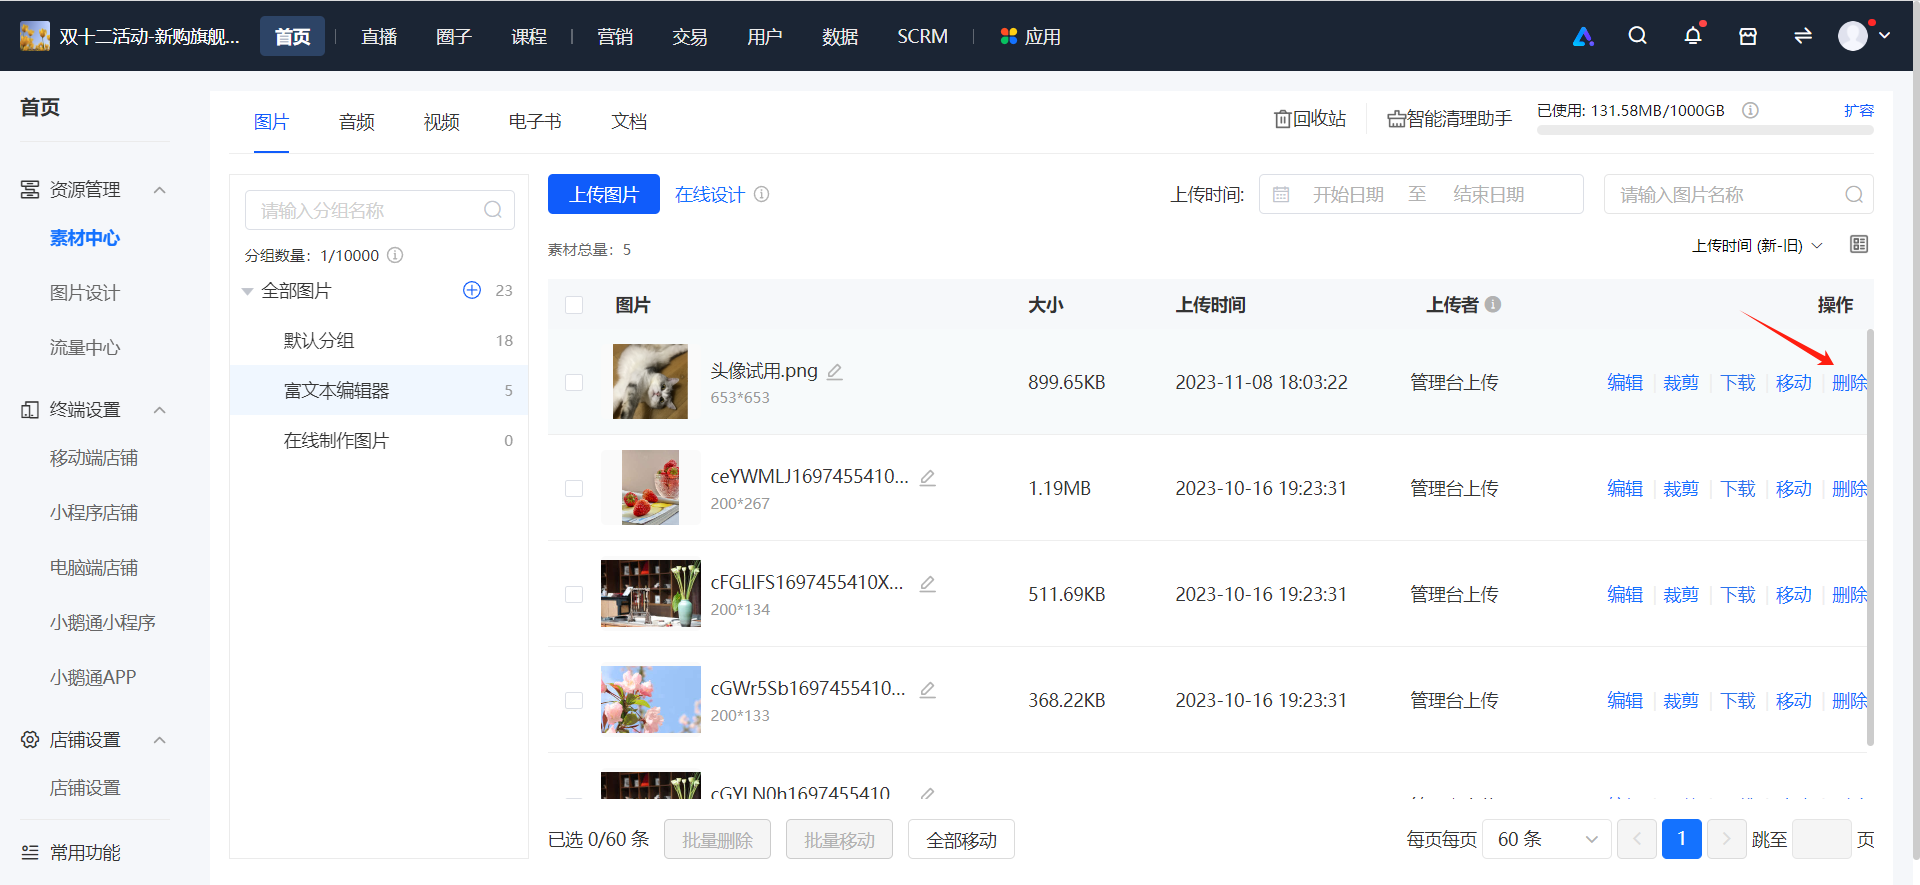
2. Confirm the deletion
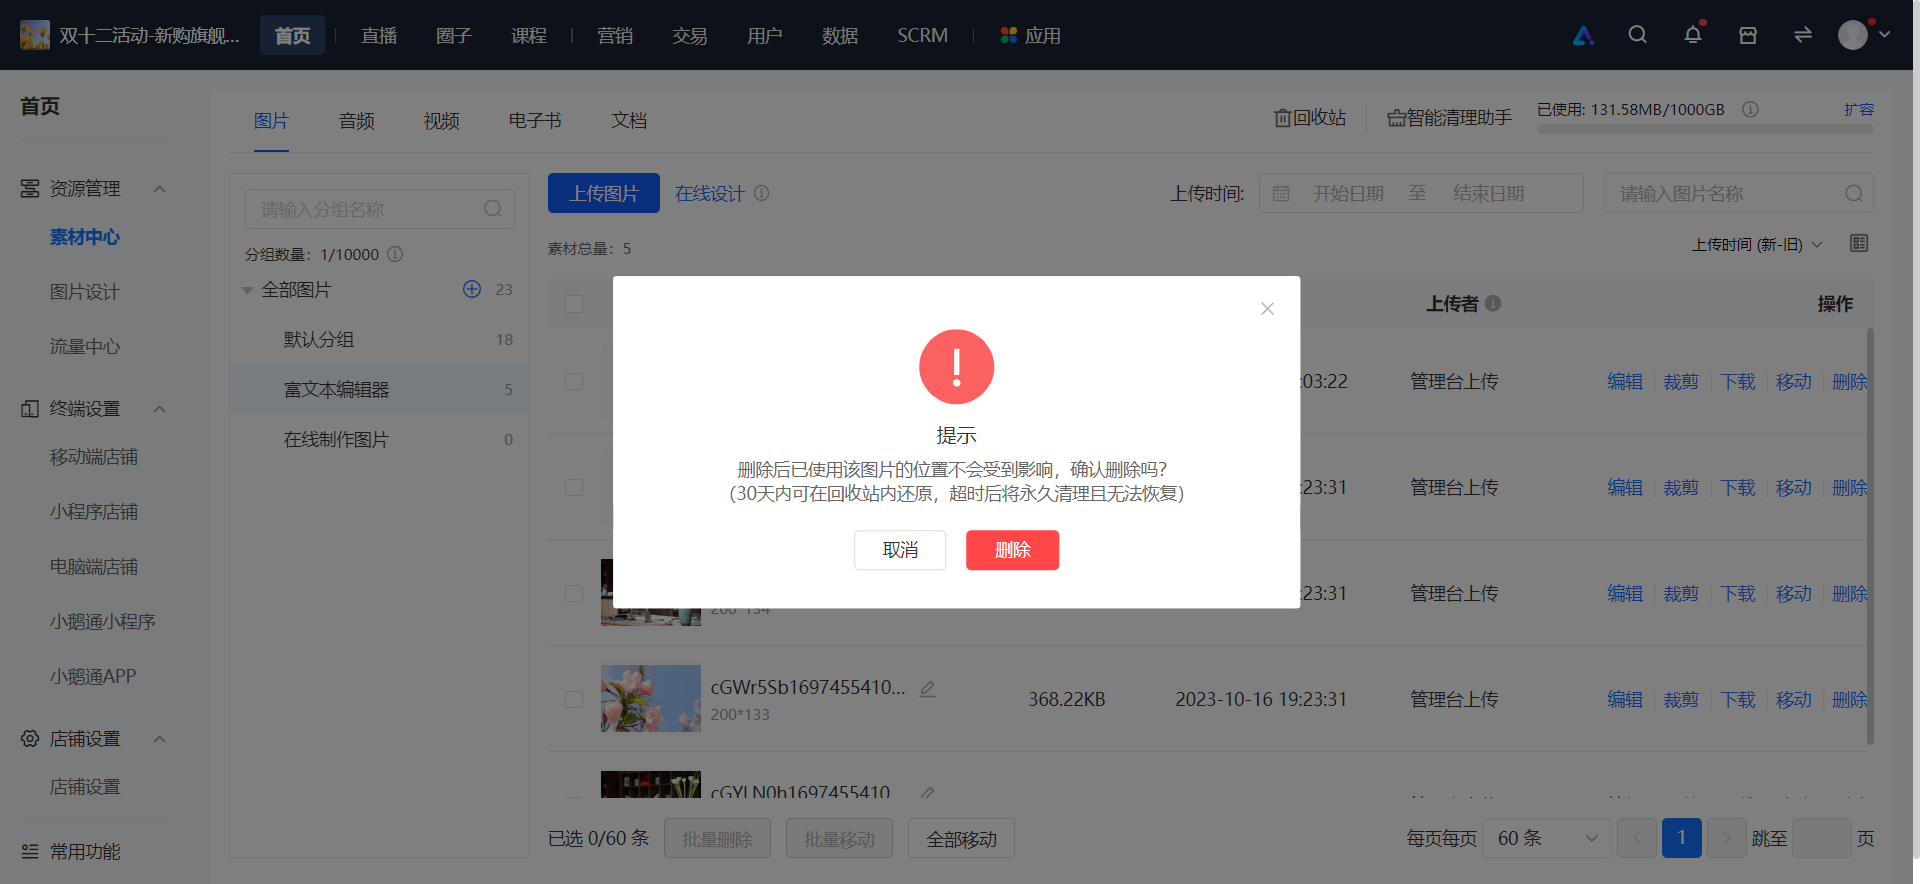
**Special Note:The deleted materials will be stored in the recycle bin for 30 days. During this period, you can restore the materials in the recycle bin. After 30 days, the system will automatically clear them, and they cannot be recovered.
Step 9: Batch Delete(Taking batch deletion of pictures as an example)(Management Backend)
1. Select the pictures you need to delete.
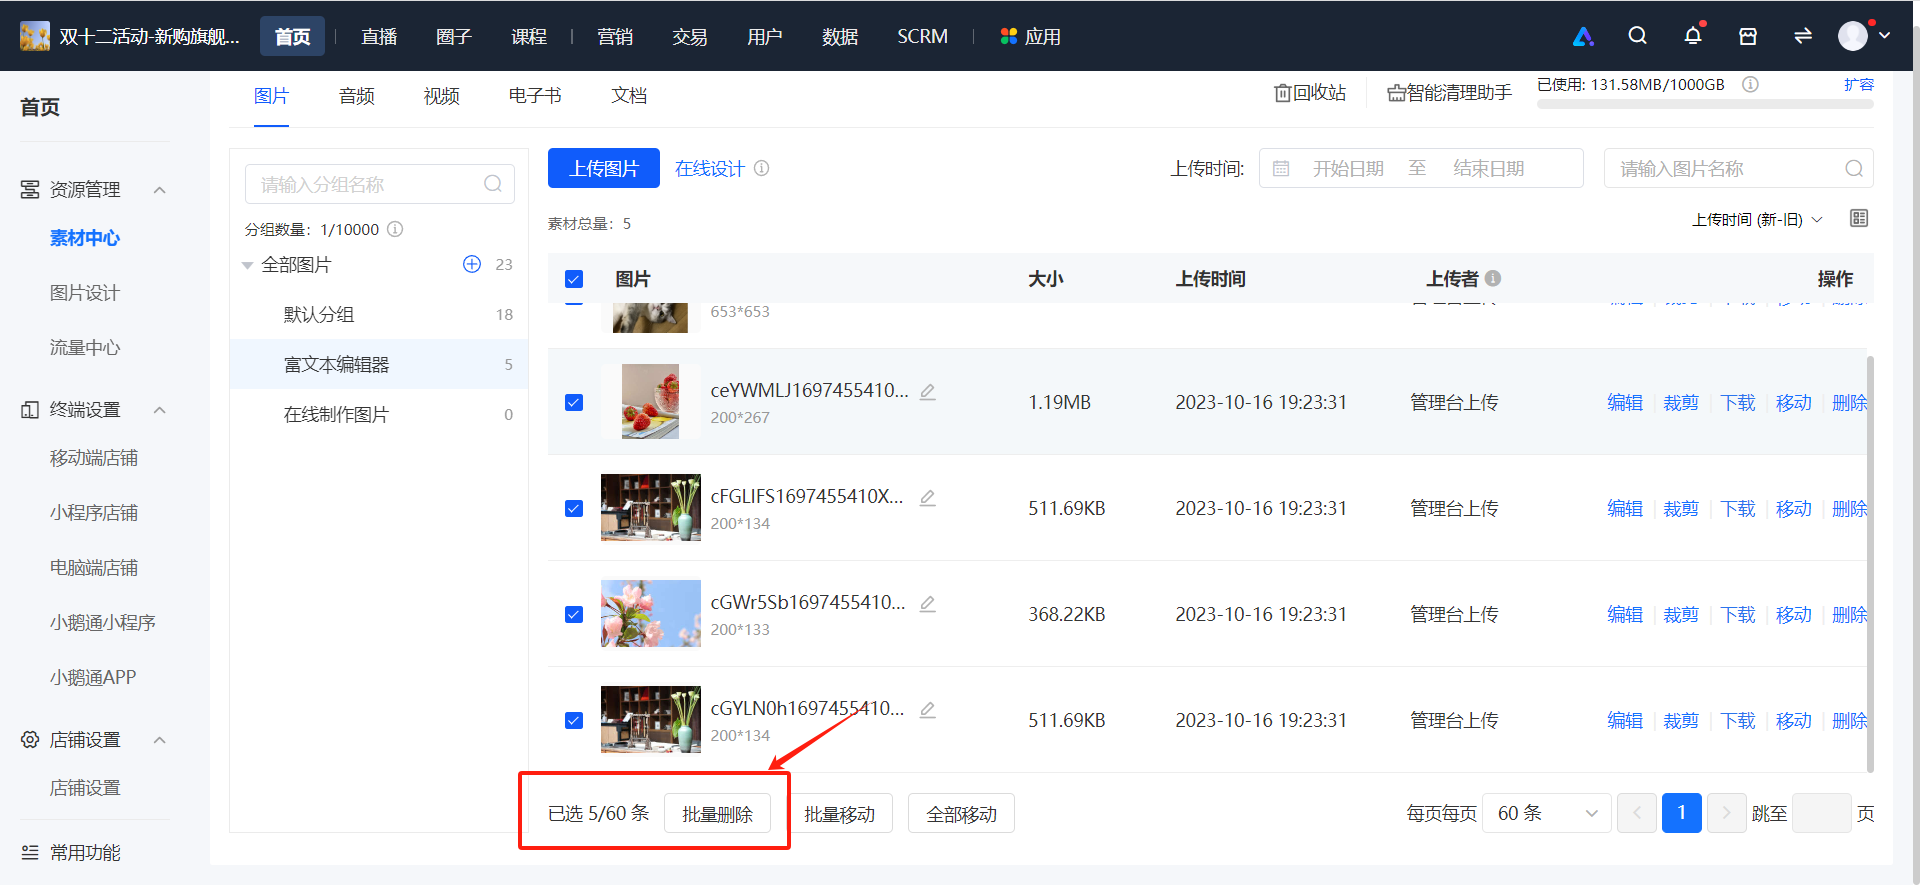
2. Click the [Batch Delete] button at the bottom of the page. After confirming the deletion, you can batch delete the selected pictures.
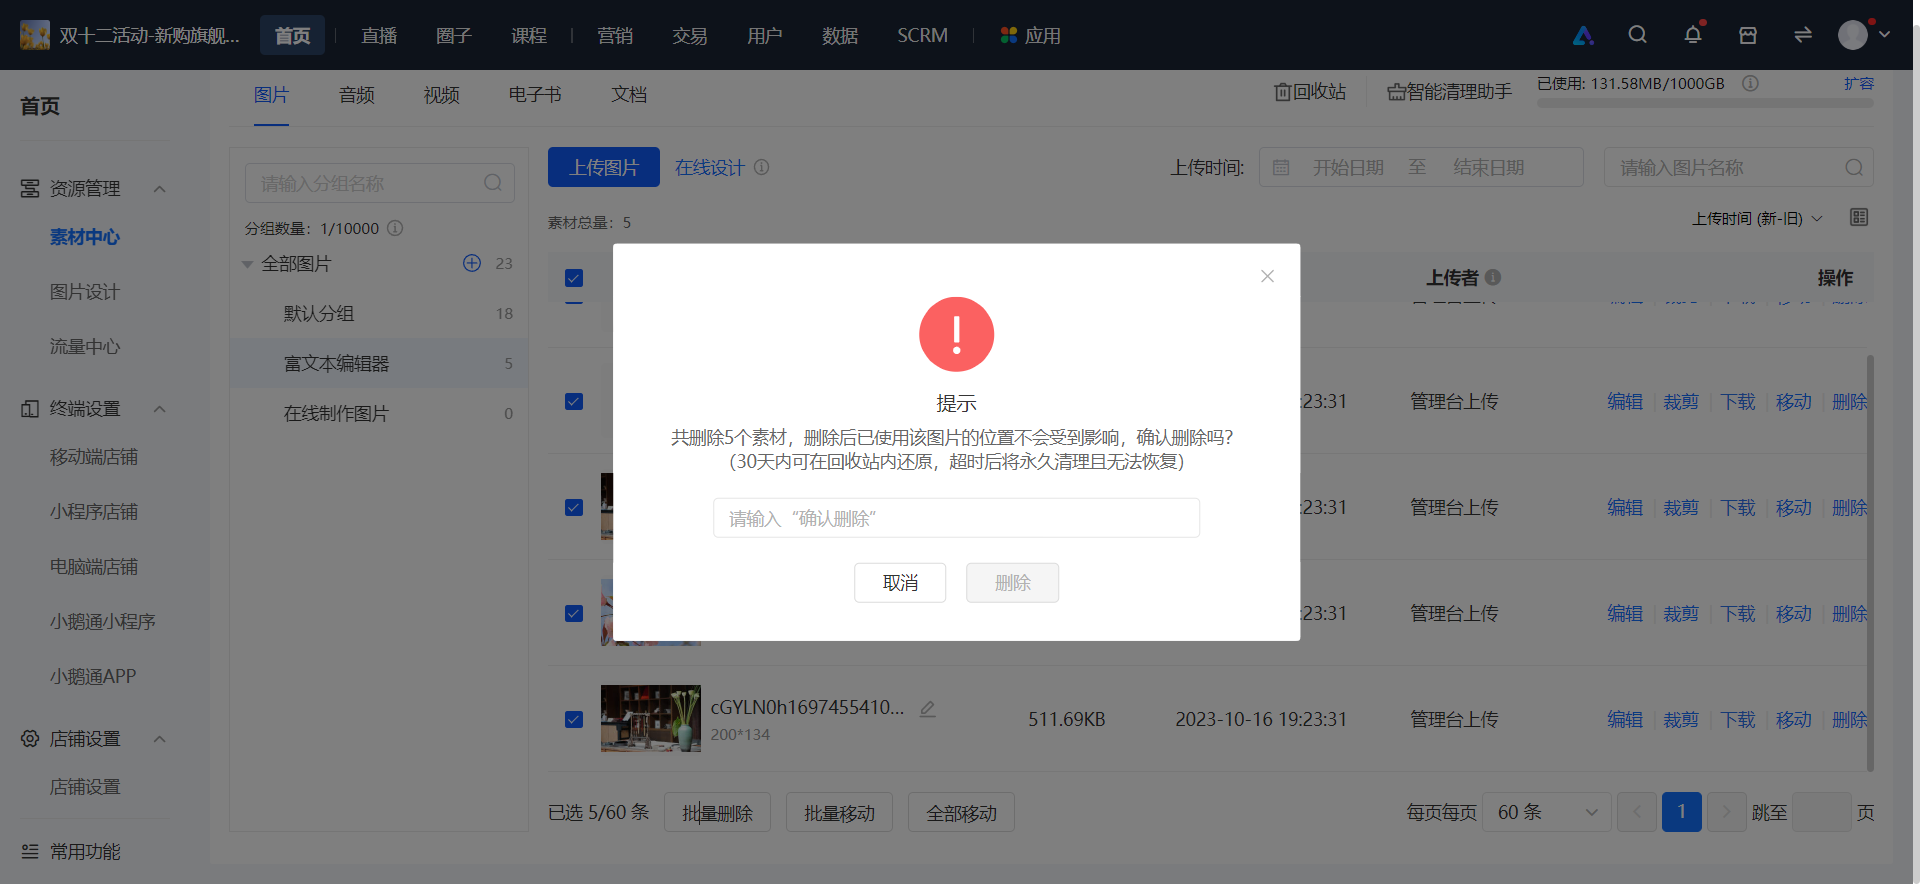
**Special Note:The materials deleted in batches will be stored in the recycle bin for 30 days. During this period, you can restore the materials in the recycle bin. After 30 days, the system will automatically clear them, and they cannot be recovered.
Step 10: Batch Move(Taking batch moving of pictures as an example)(Management Backend)
1. Select the grouped pictures you need to move in batches.
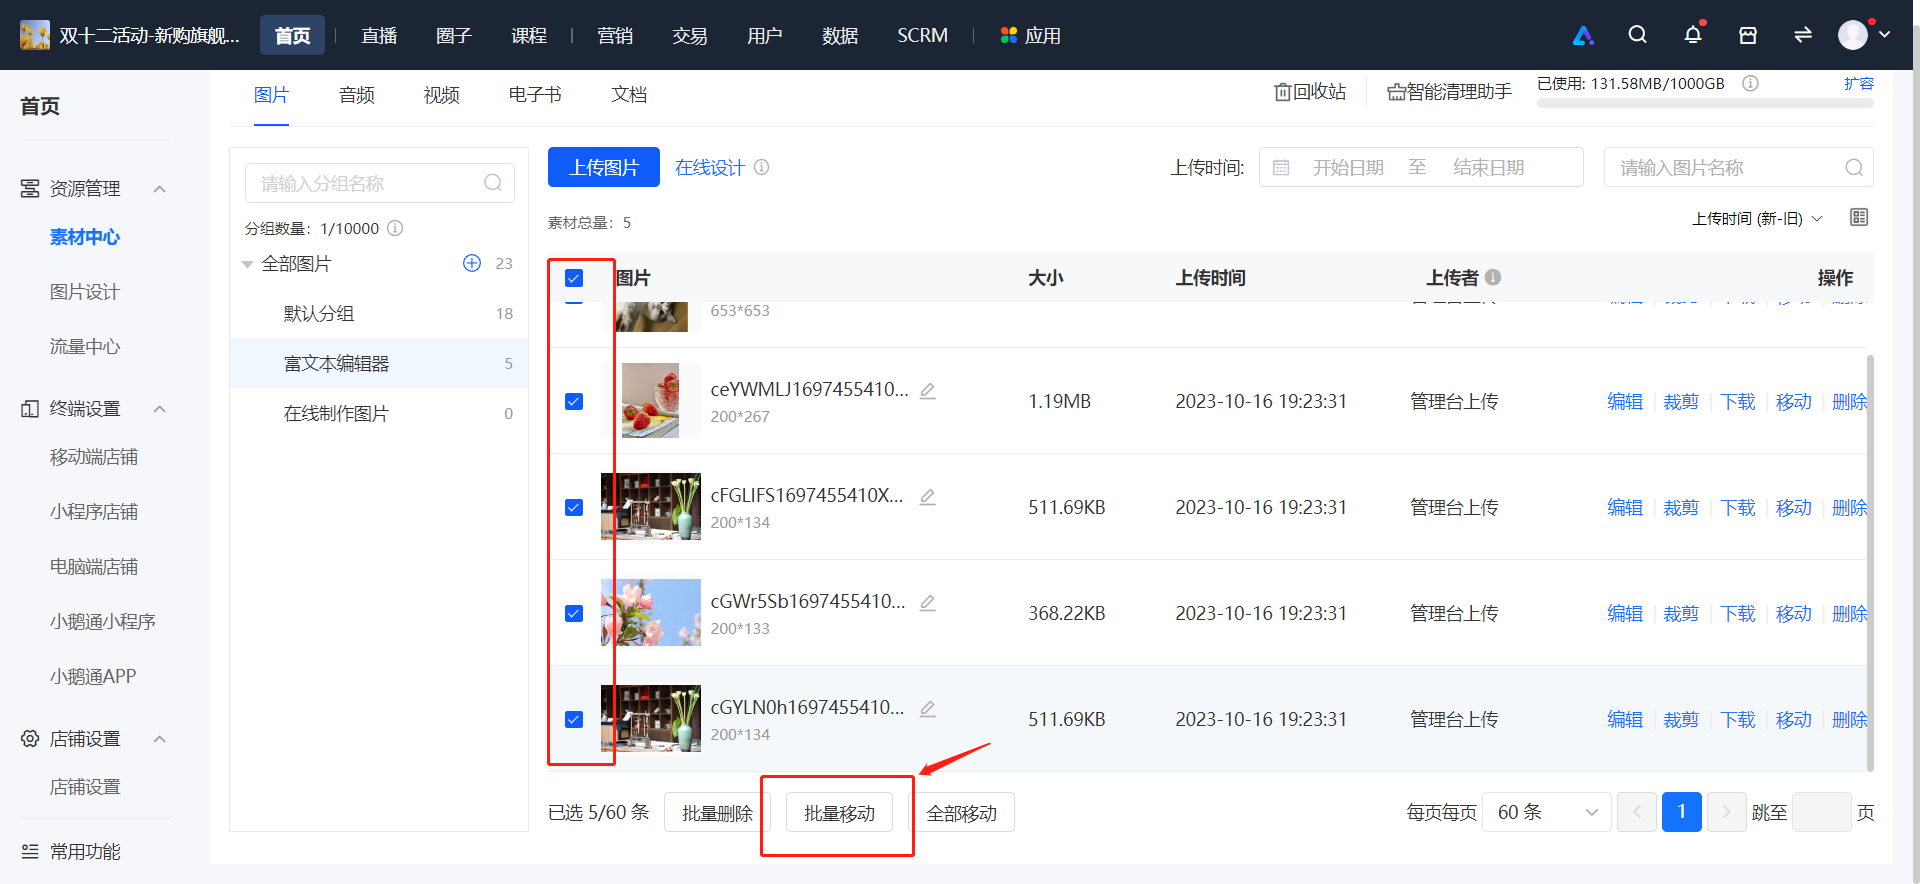
2. Select the name of the group you want to move them to and confirm the move.
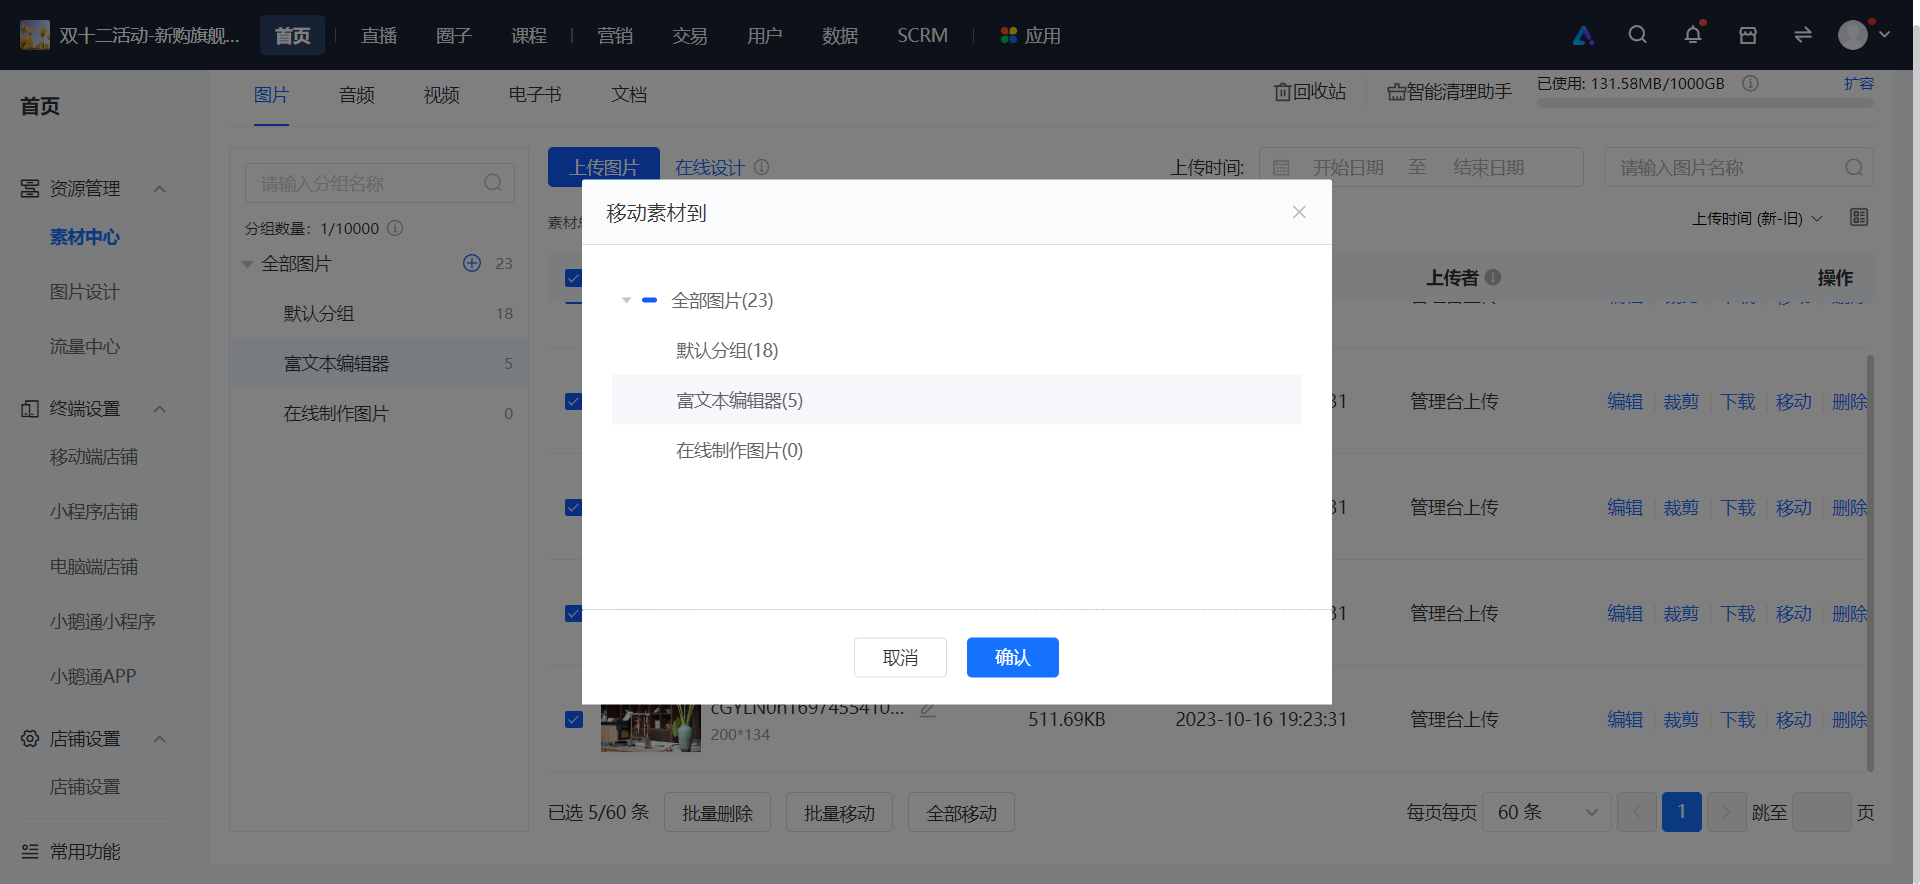
Step 10: Move All(Taking moving all pictures as an example)(Management Backend)
1. Select the group you want to move all the materials to and click Confirm.
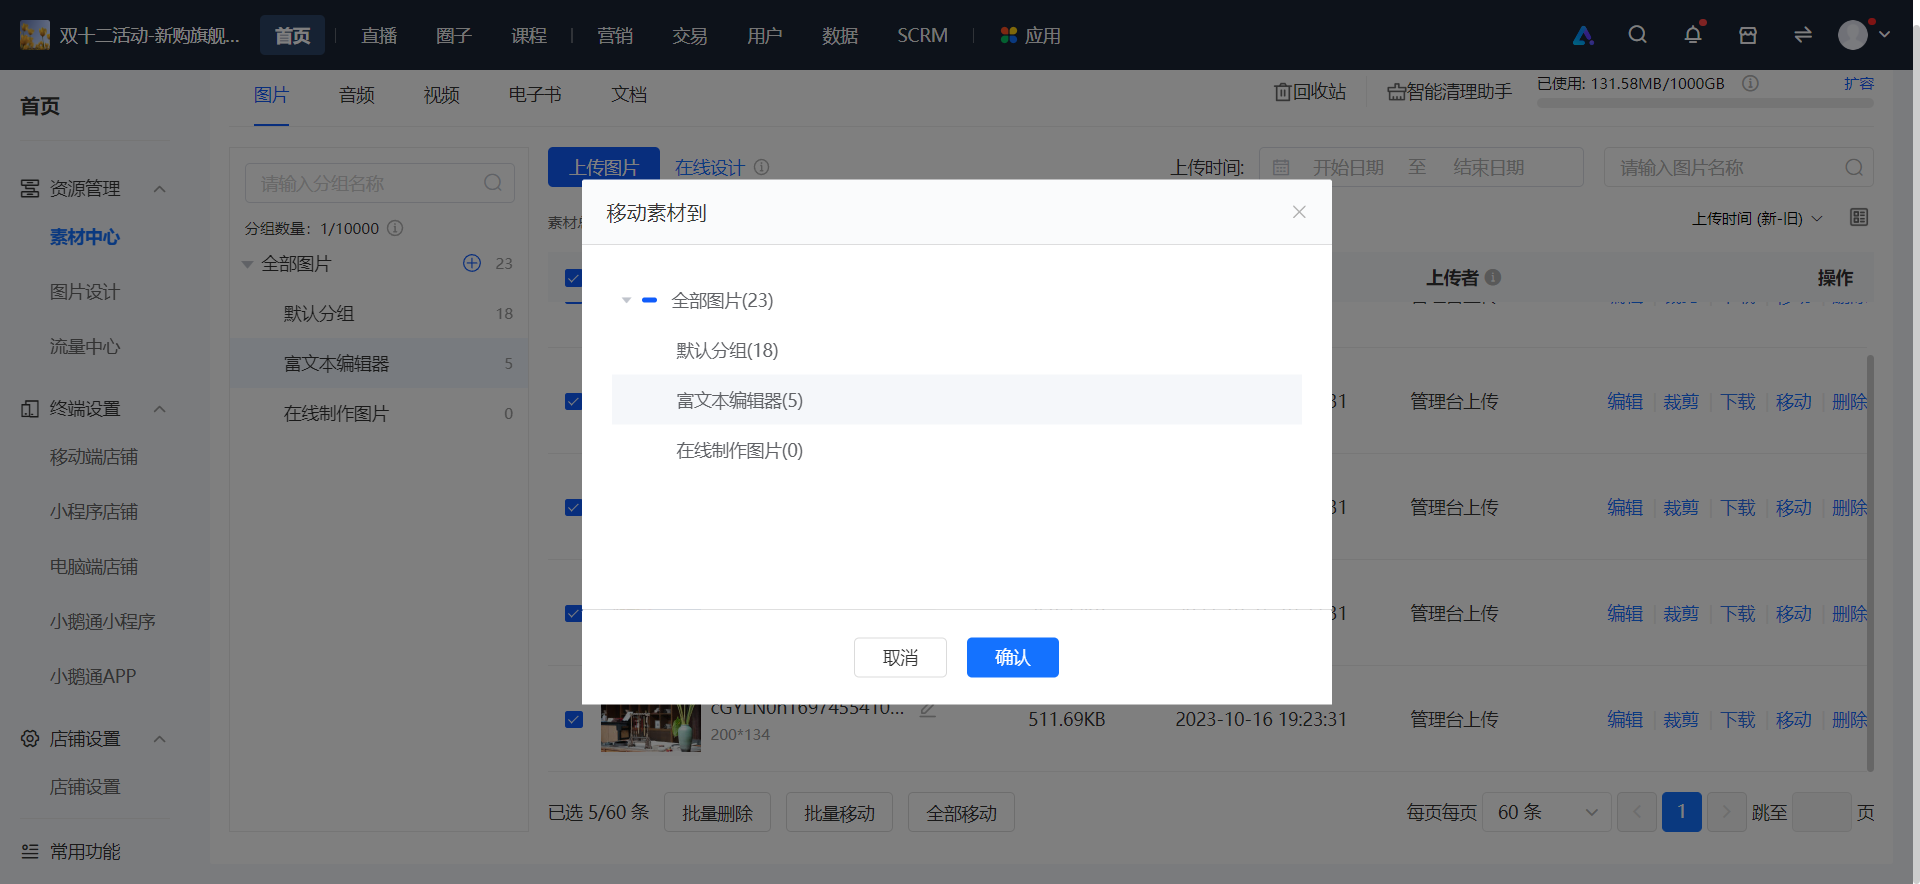
2. A confirmation prompt will pop up. If you confirm to move all the materials under this group to the target group, click Confirm.
Step 11: Violated Materials(Management Backend)
The elink platform will review the materials uploaded and used by merchants. At the same time, it also accepts complaints from C - end users about the materials. If the review fails or the violation is determined to be established, the materials will be banned and moved to the [Violated Materials] page.
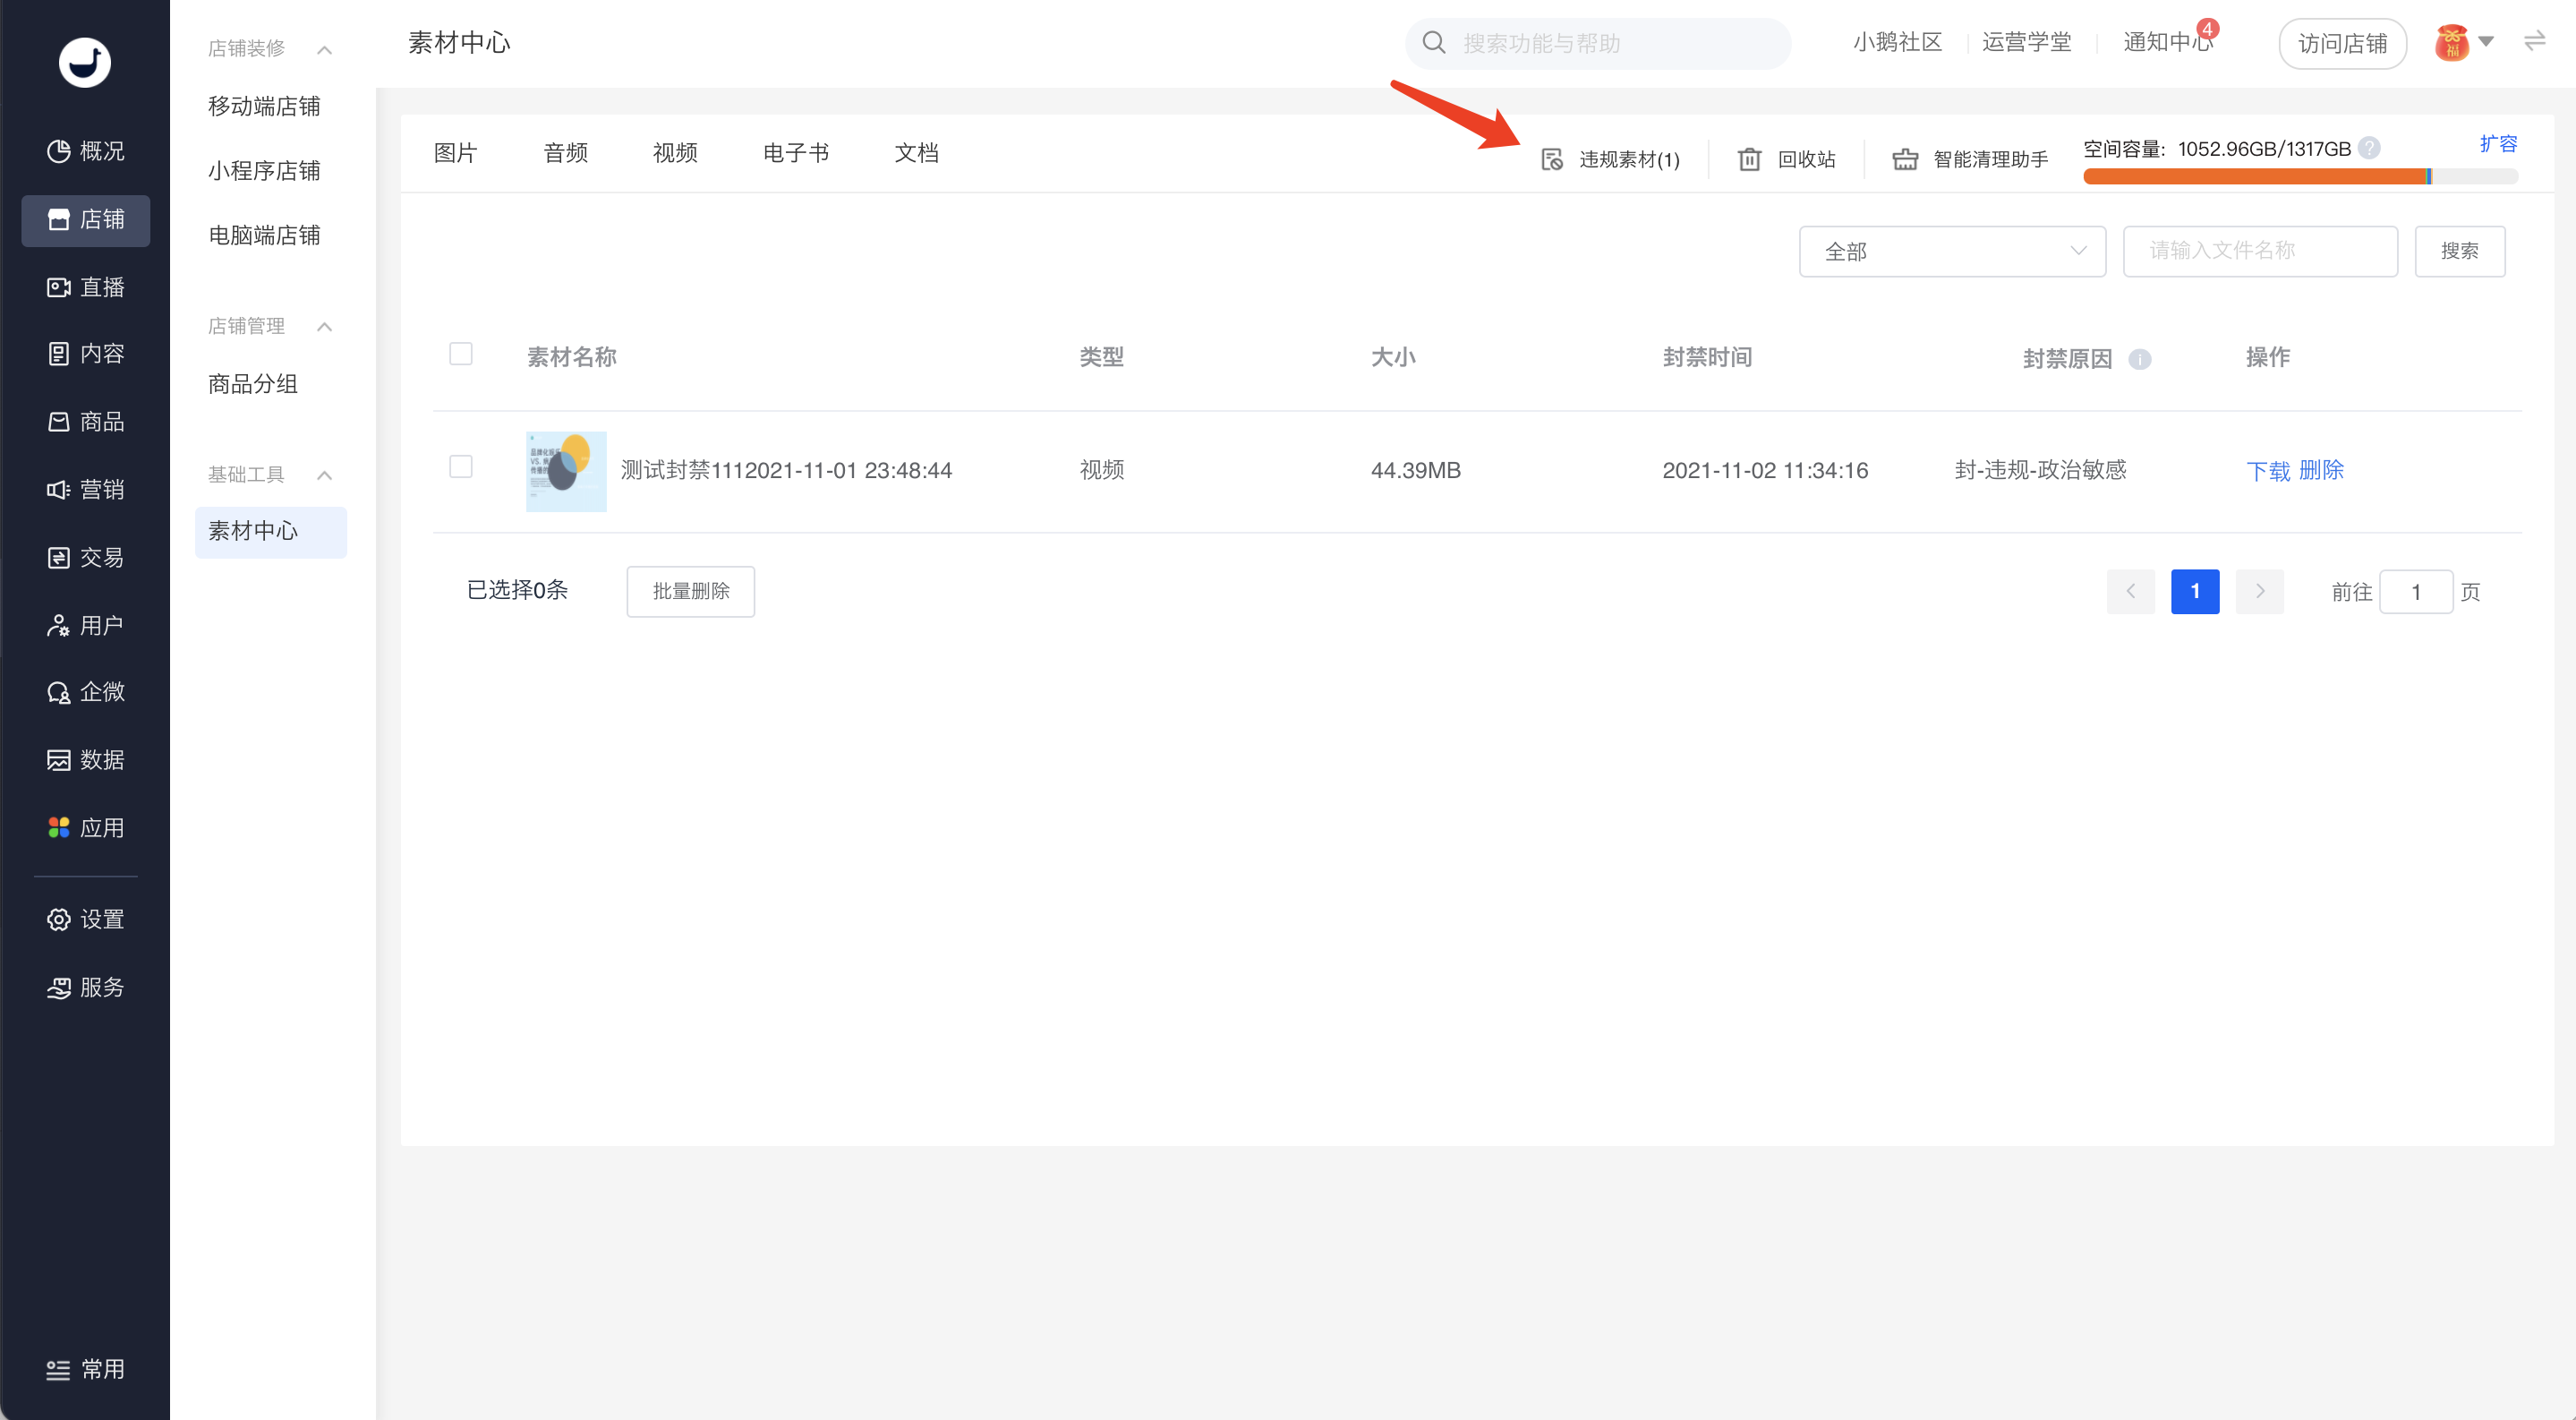
*Note:If the store violates the rules frequently or the material violations are serious, elink will further hold the store and the person - in - charge accountable according to the actual situation and relevant provisions of the elink service agreement.
Step 12: Recycle Bin(Management Backend)
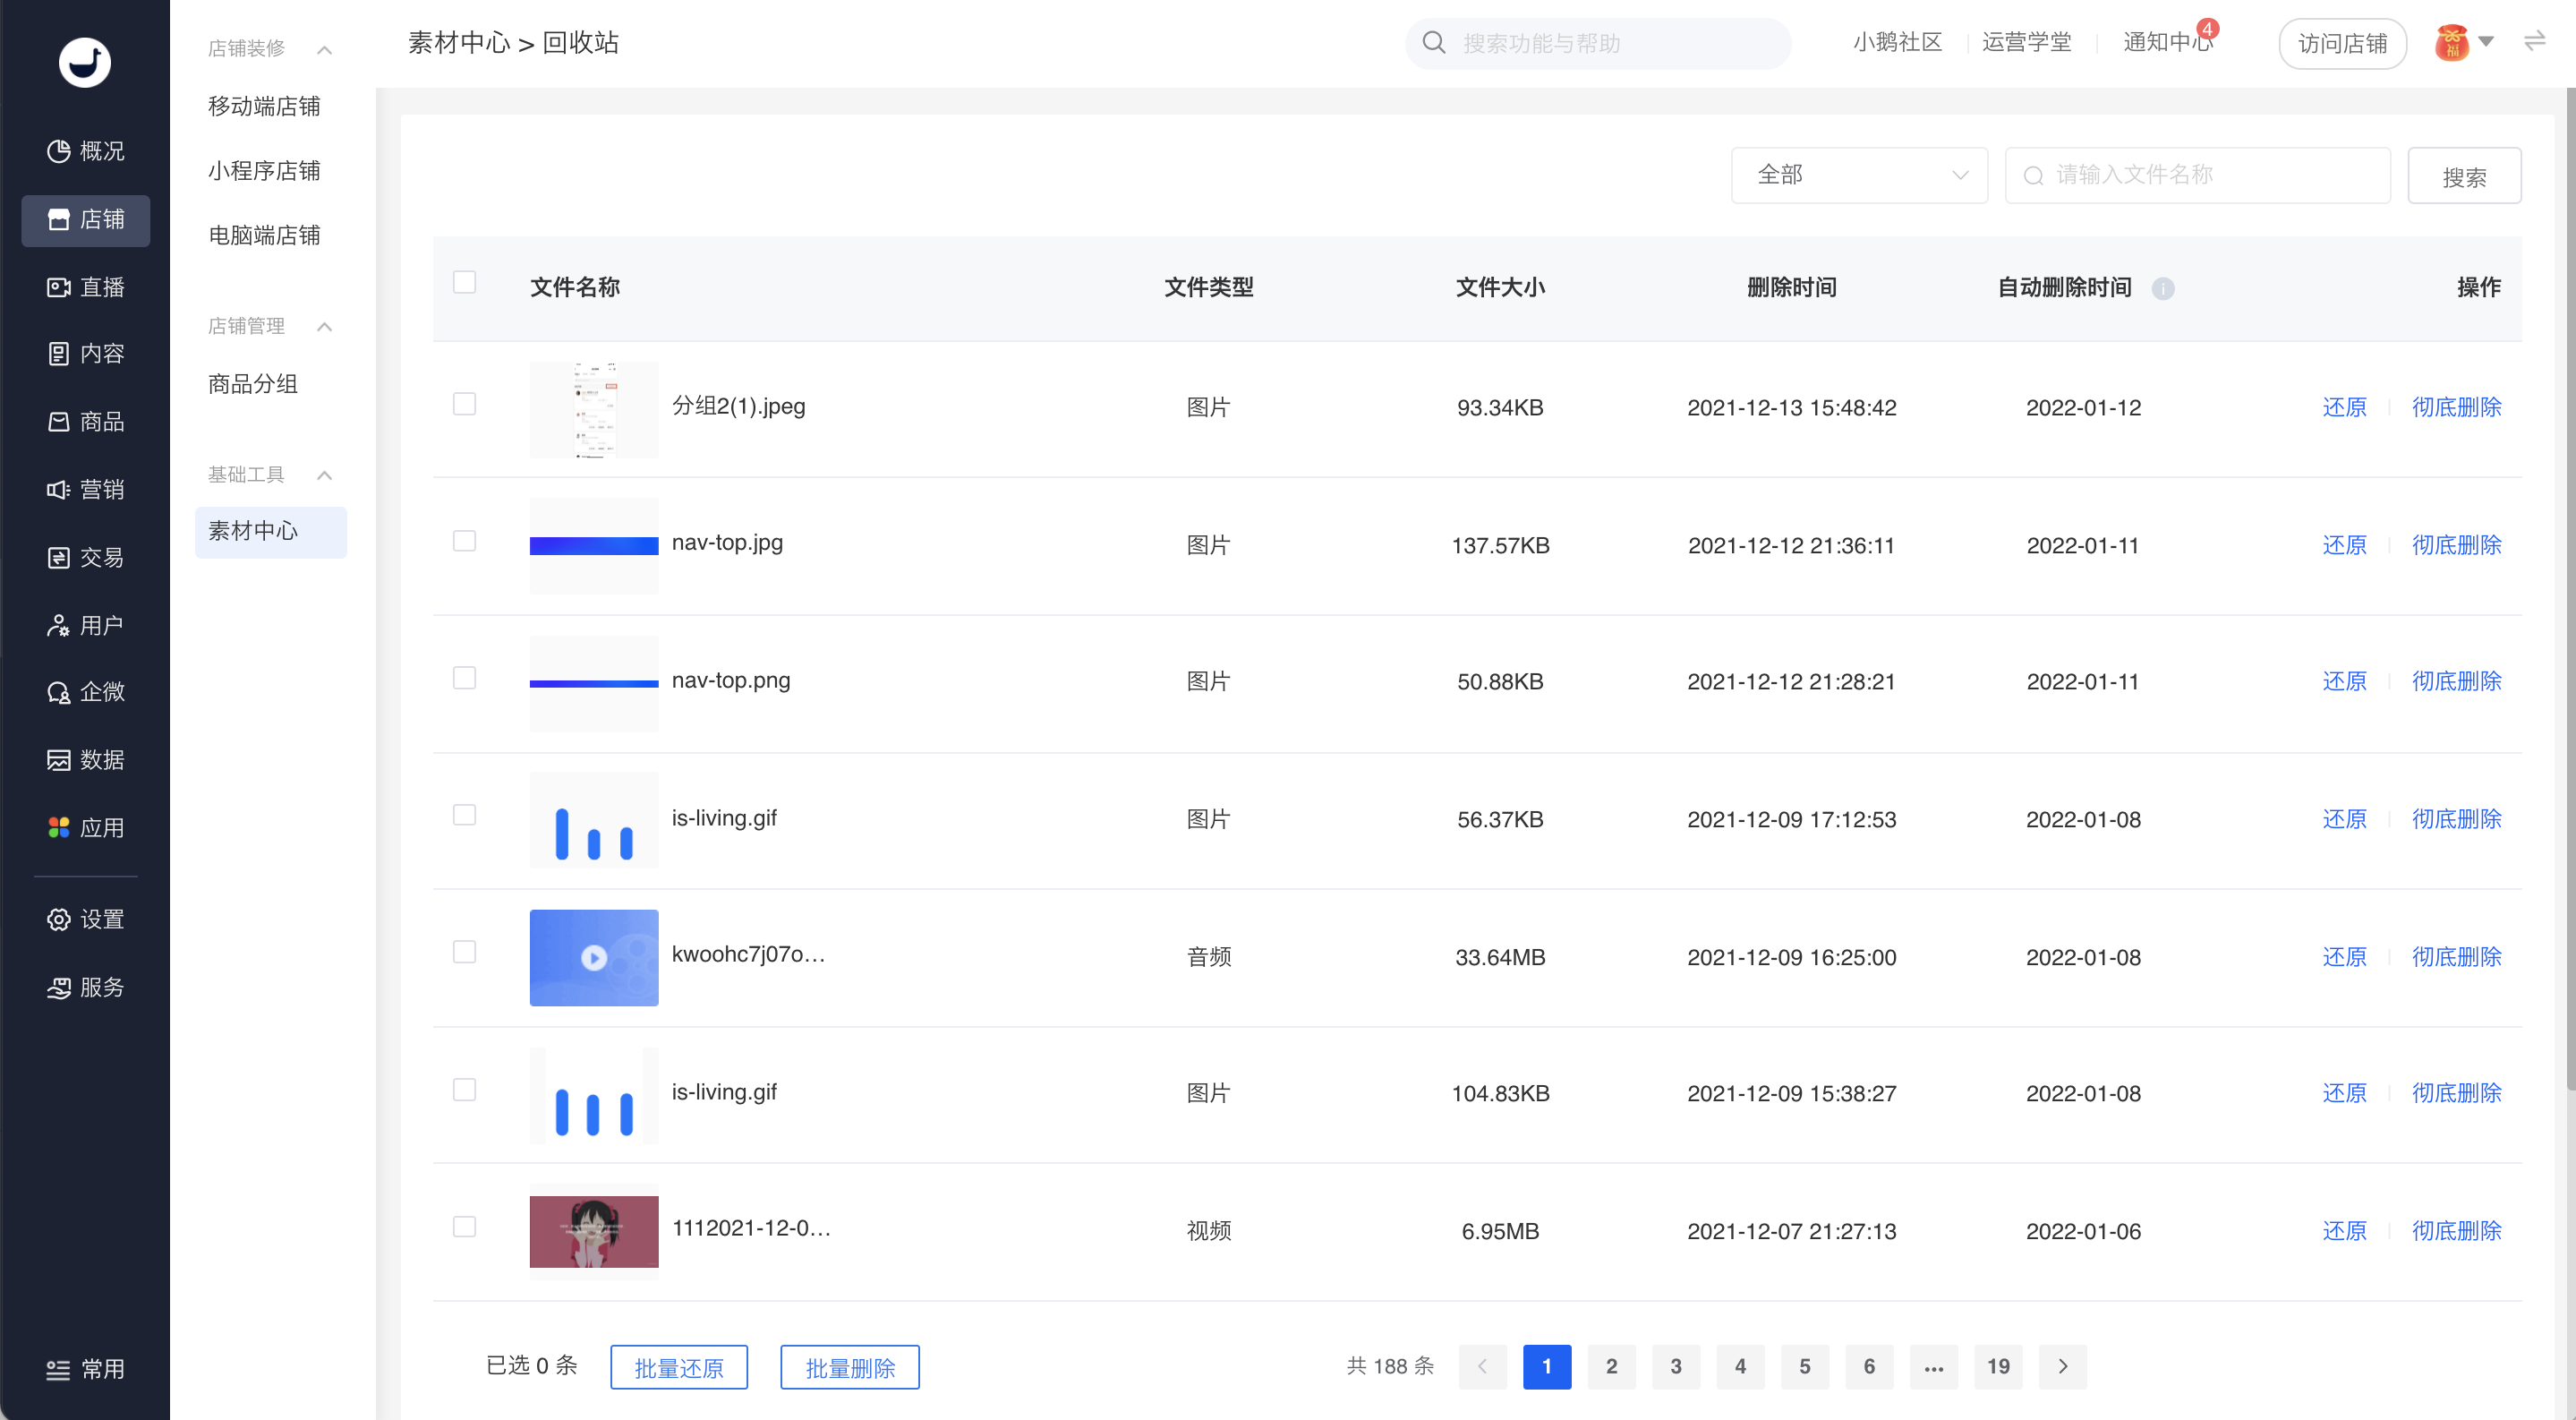
1. You can restore/permanently delete a single resource.
2. You can batch restore/batch delete resources.
Step 13: Intelligent Cleaning Assistant(Management Backend)
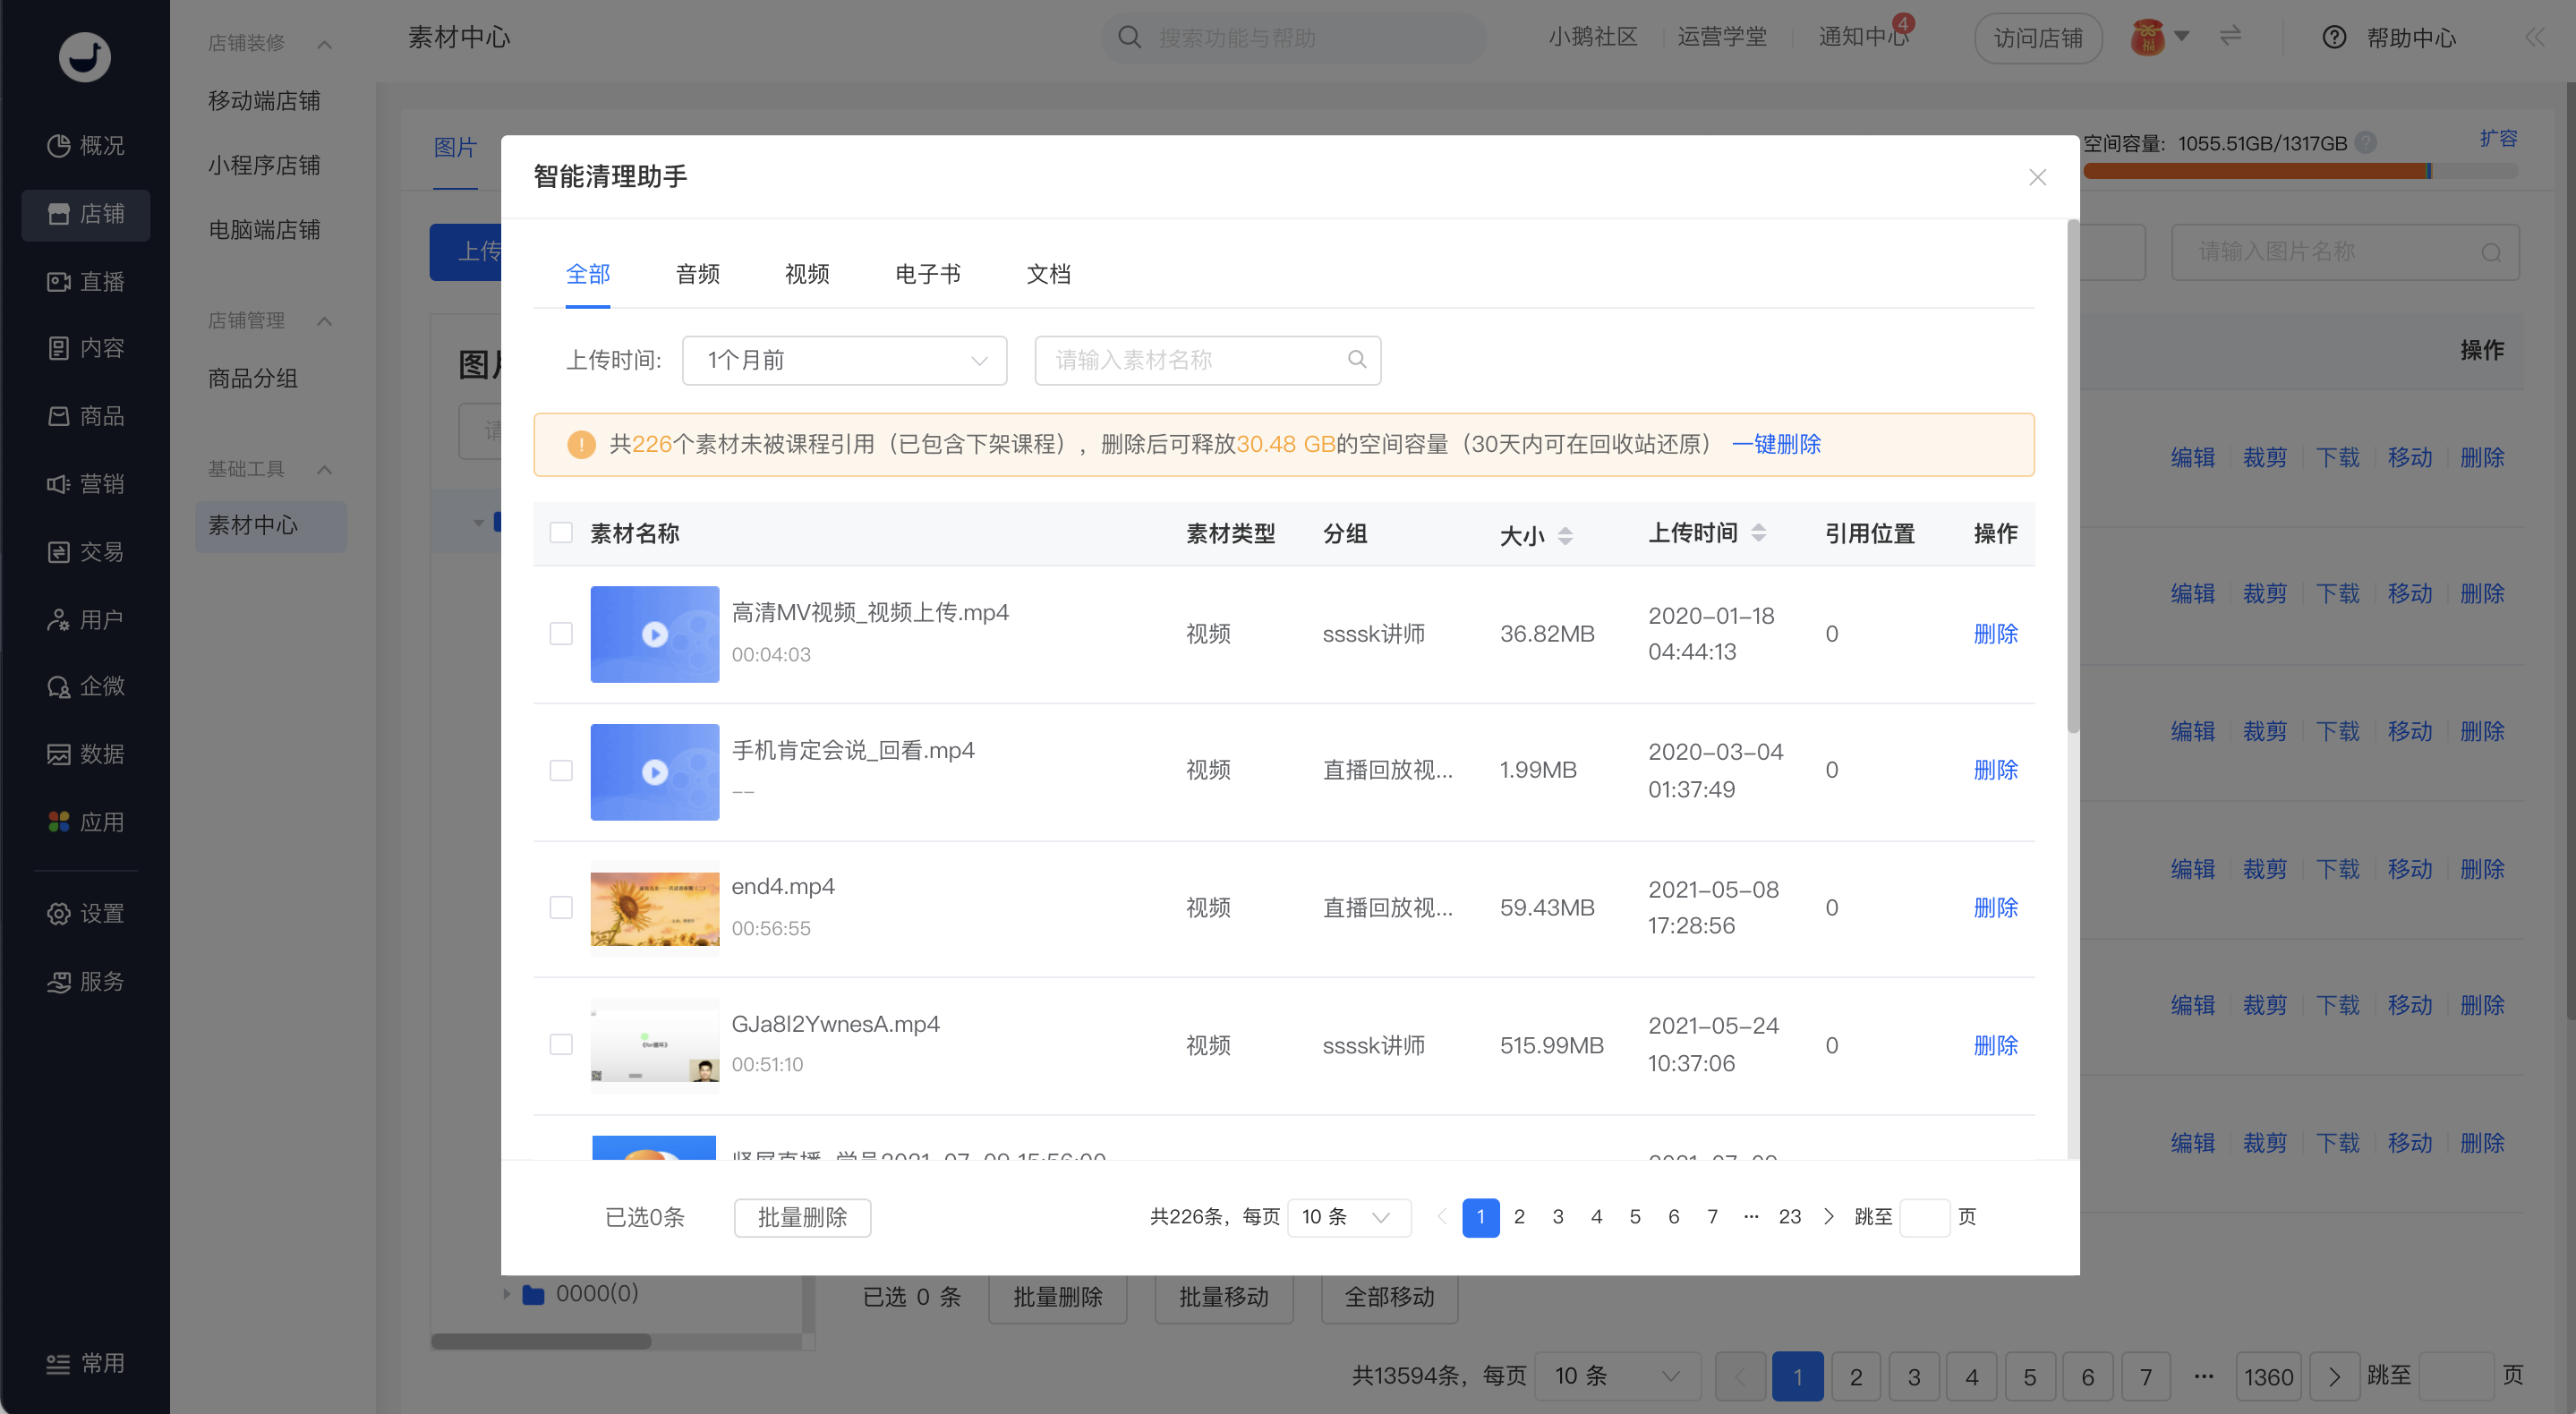
The Intelligent Cleaning Assistant automatically filters materials with a reference count of 0 for audio, video, e - books, and documents, including materials that have been taken off the shelves and have never been referenced. Merchants can perform operations such as single deletion, batch deletion, and one - click deletion of all materials on this page.
Step 14: Storage Space Expansion(Management Backend)
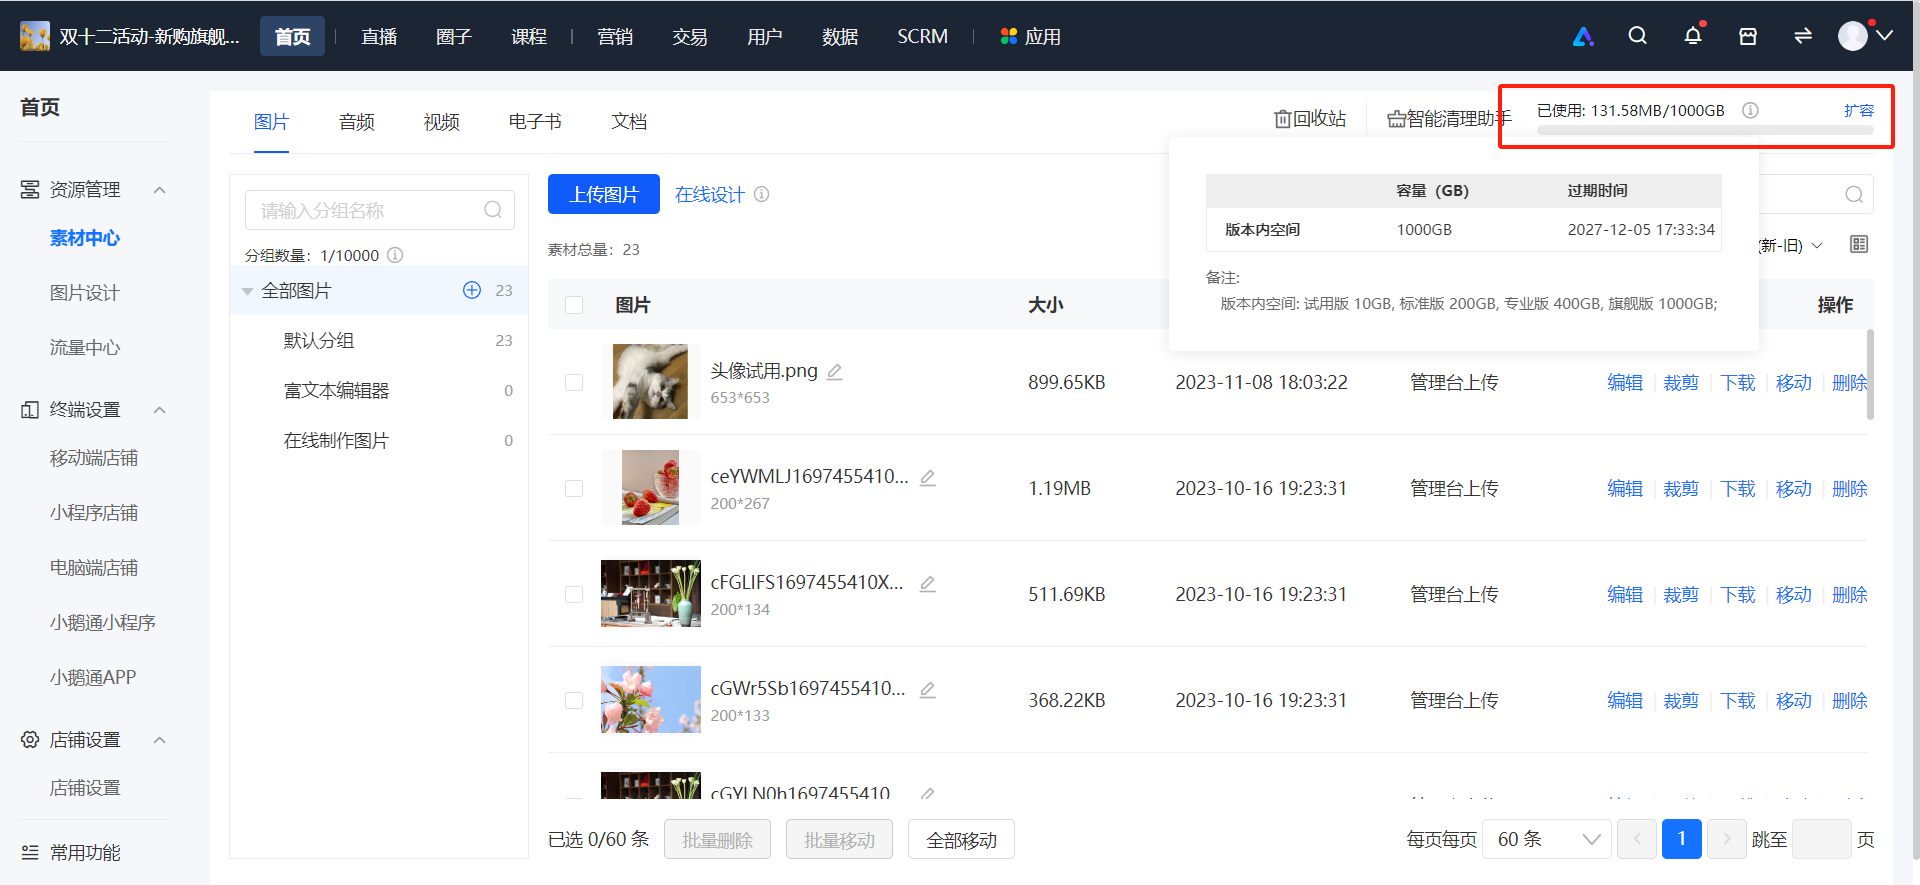
1. When you hover the mouse over the space capacity bar, you can view the detailed usage of the storage space.
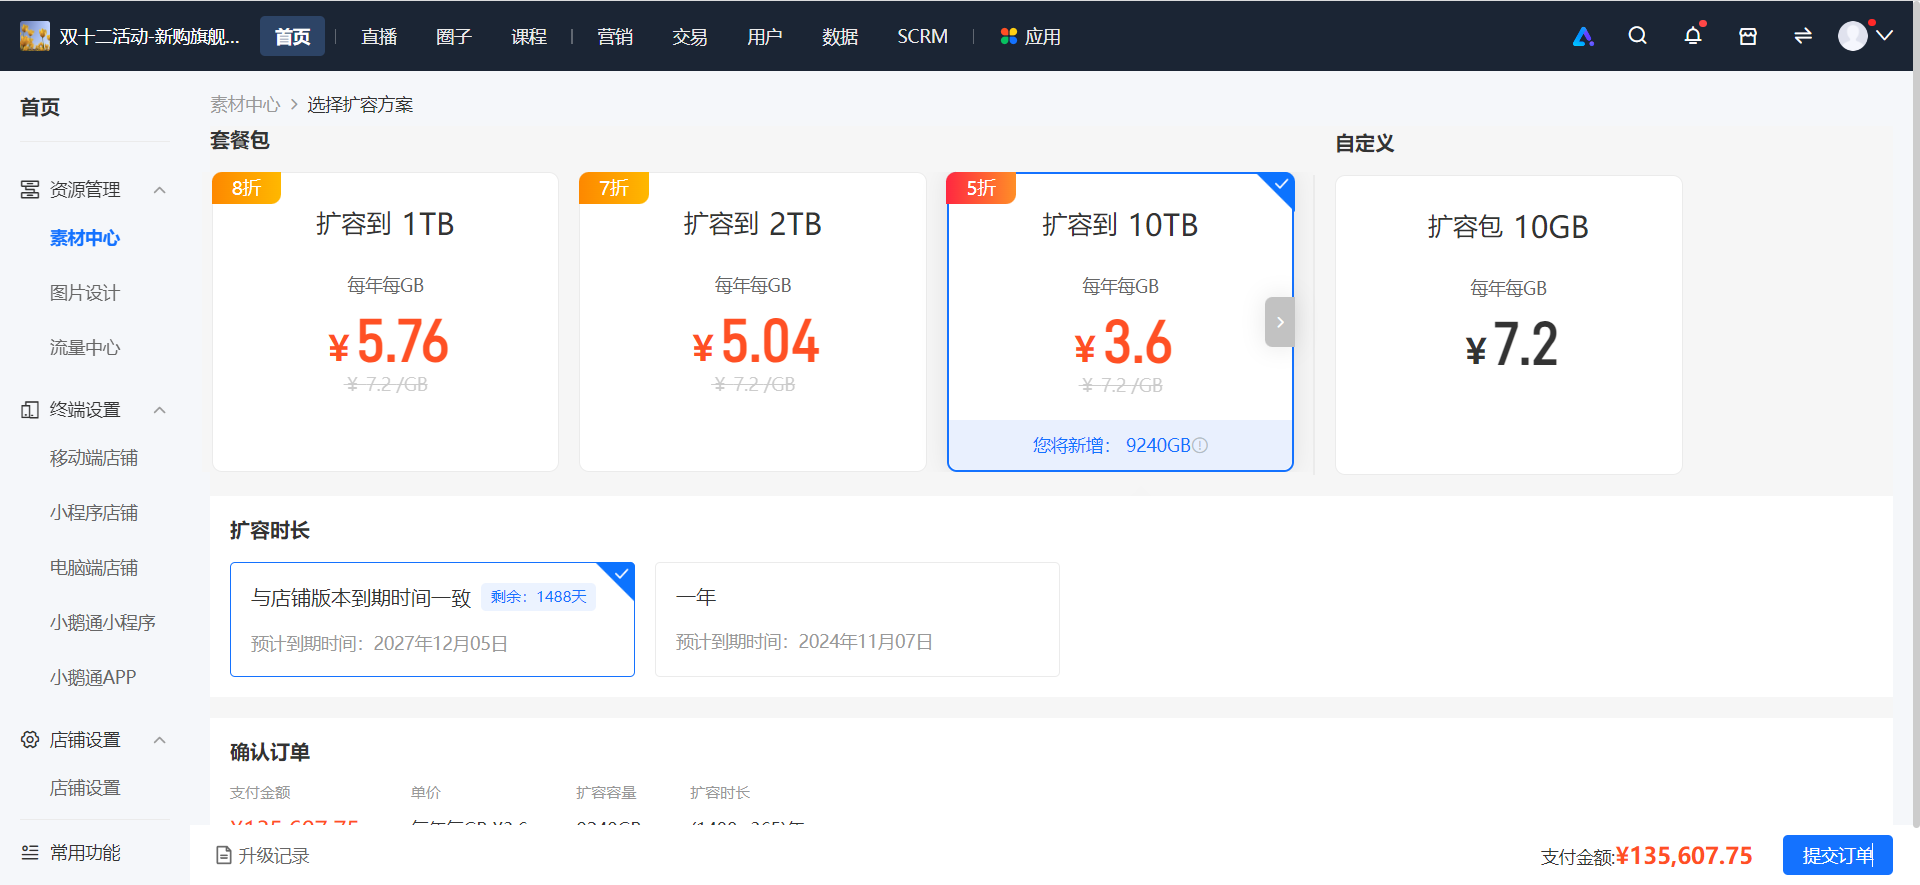
2. You can expand the storage space as needed.
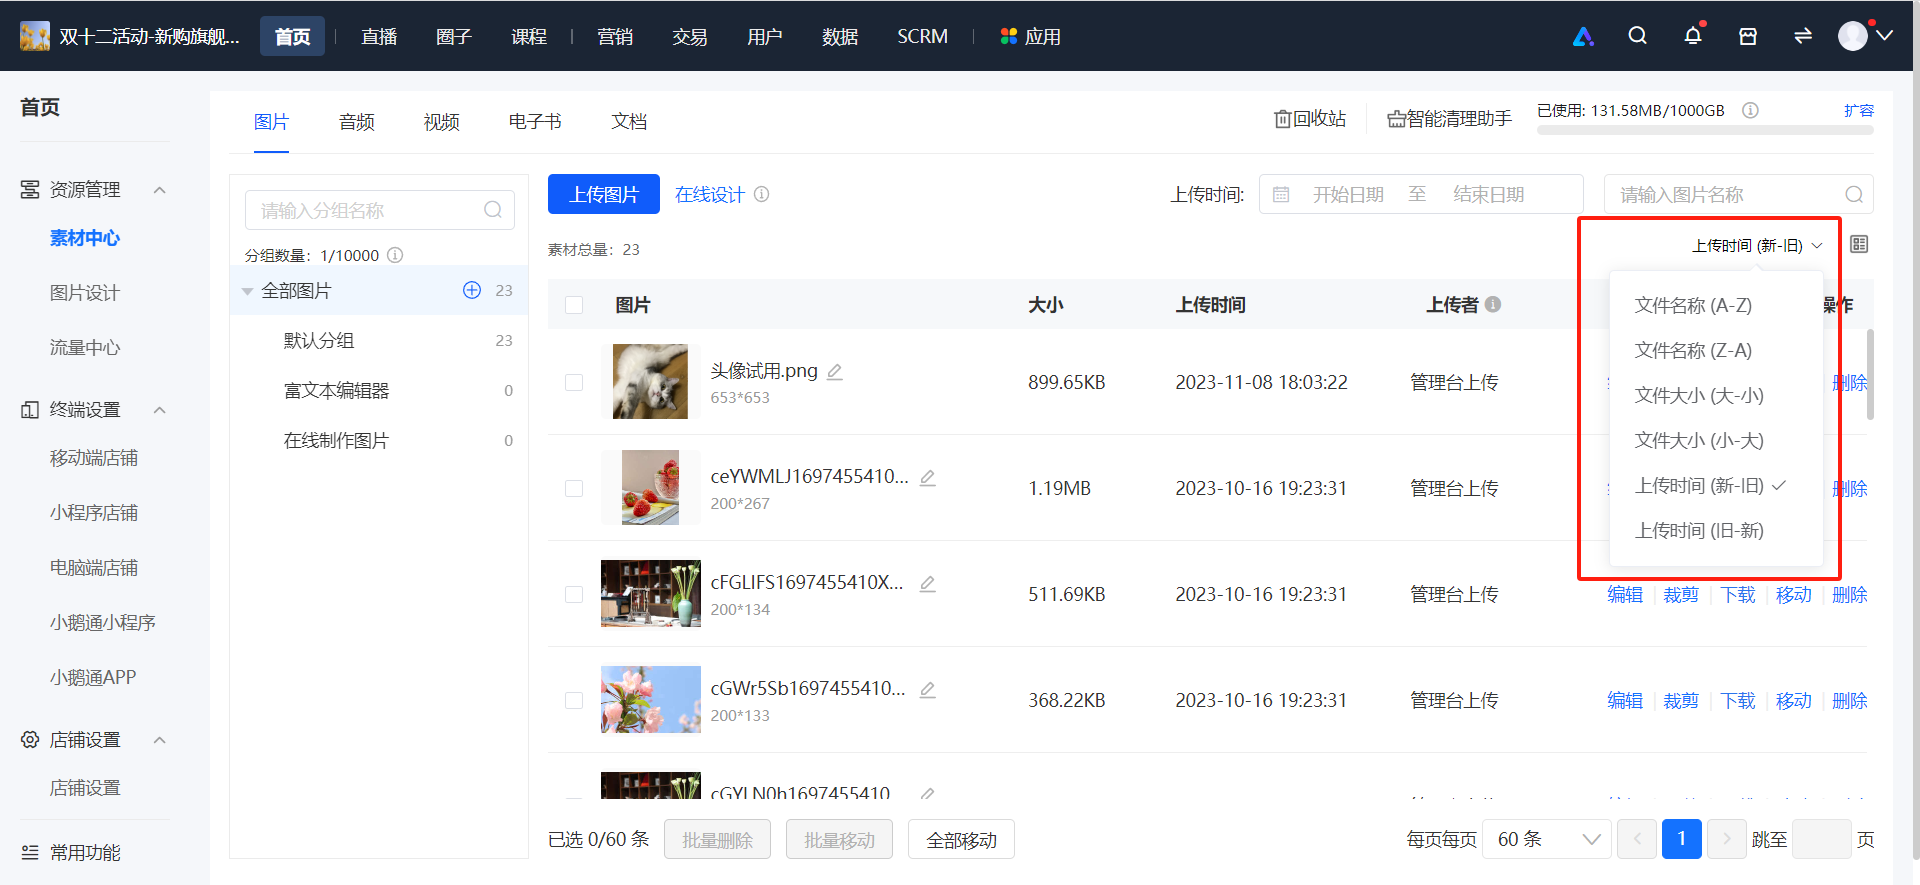
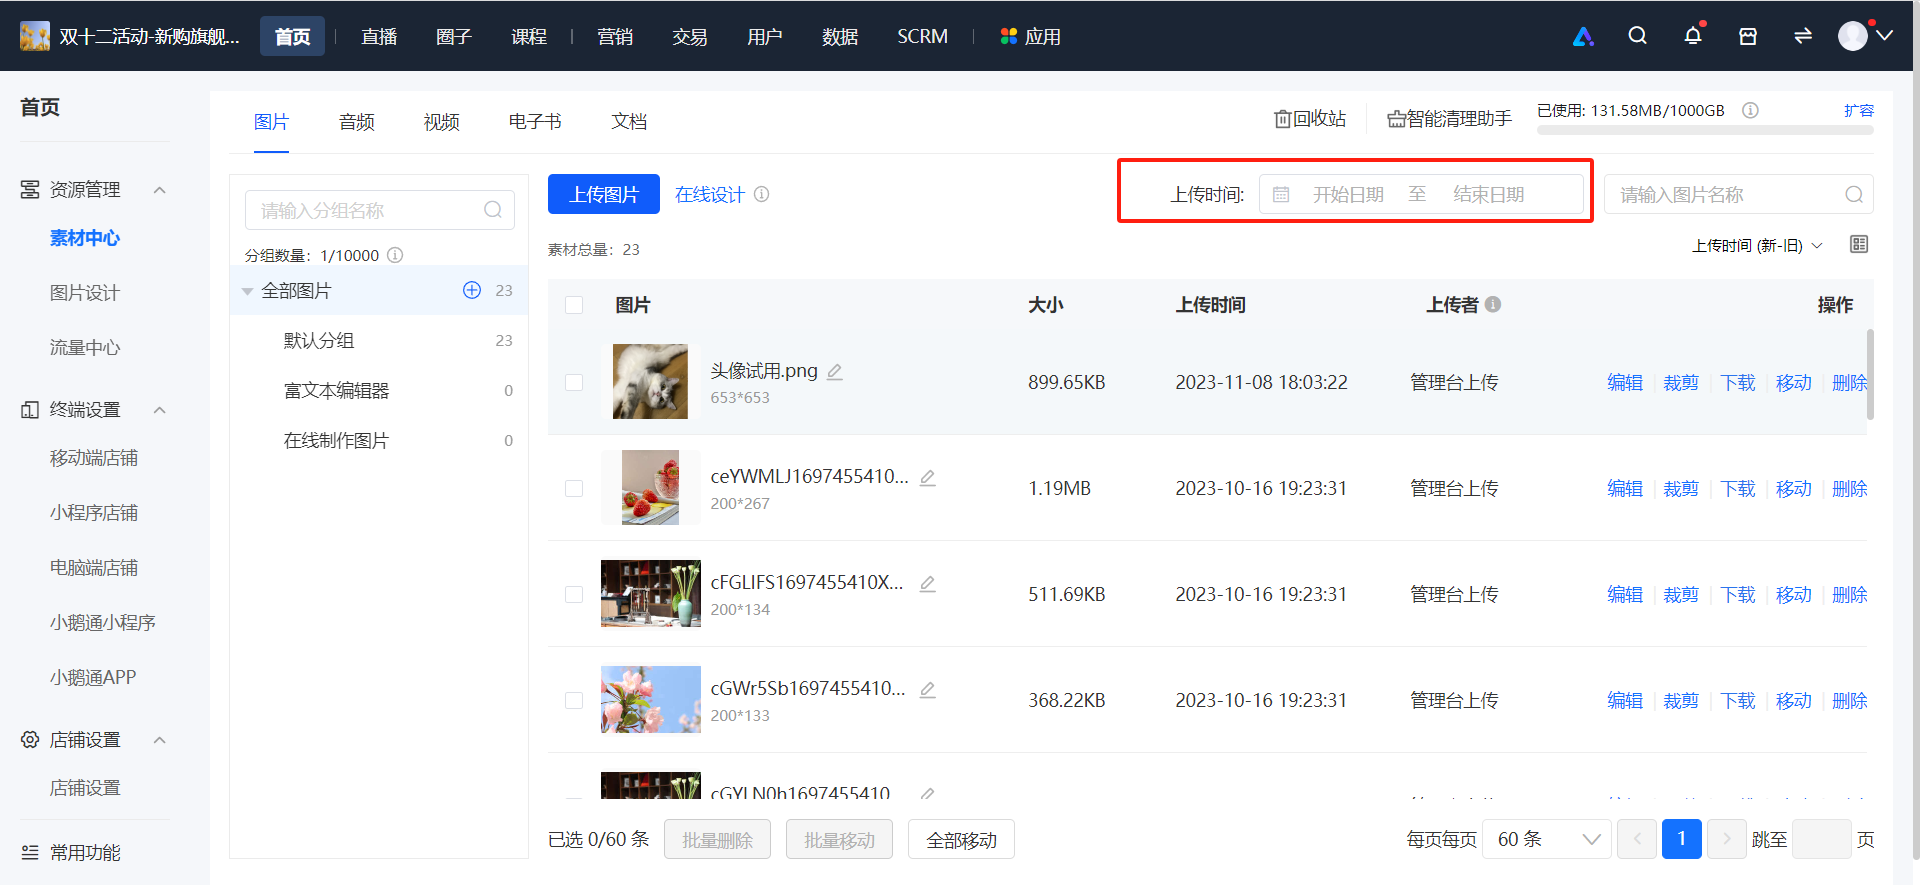
Step 15: Material Sorting and Filtering(Taking picture sorting by file name as an example)(Management Backend)
1. Support sorting by file name, file size, and file upload time.
2. Support filtering by material upload time.
Step 16: Search(Taking searching for audio as an example)(Management Backend)
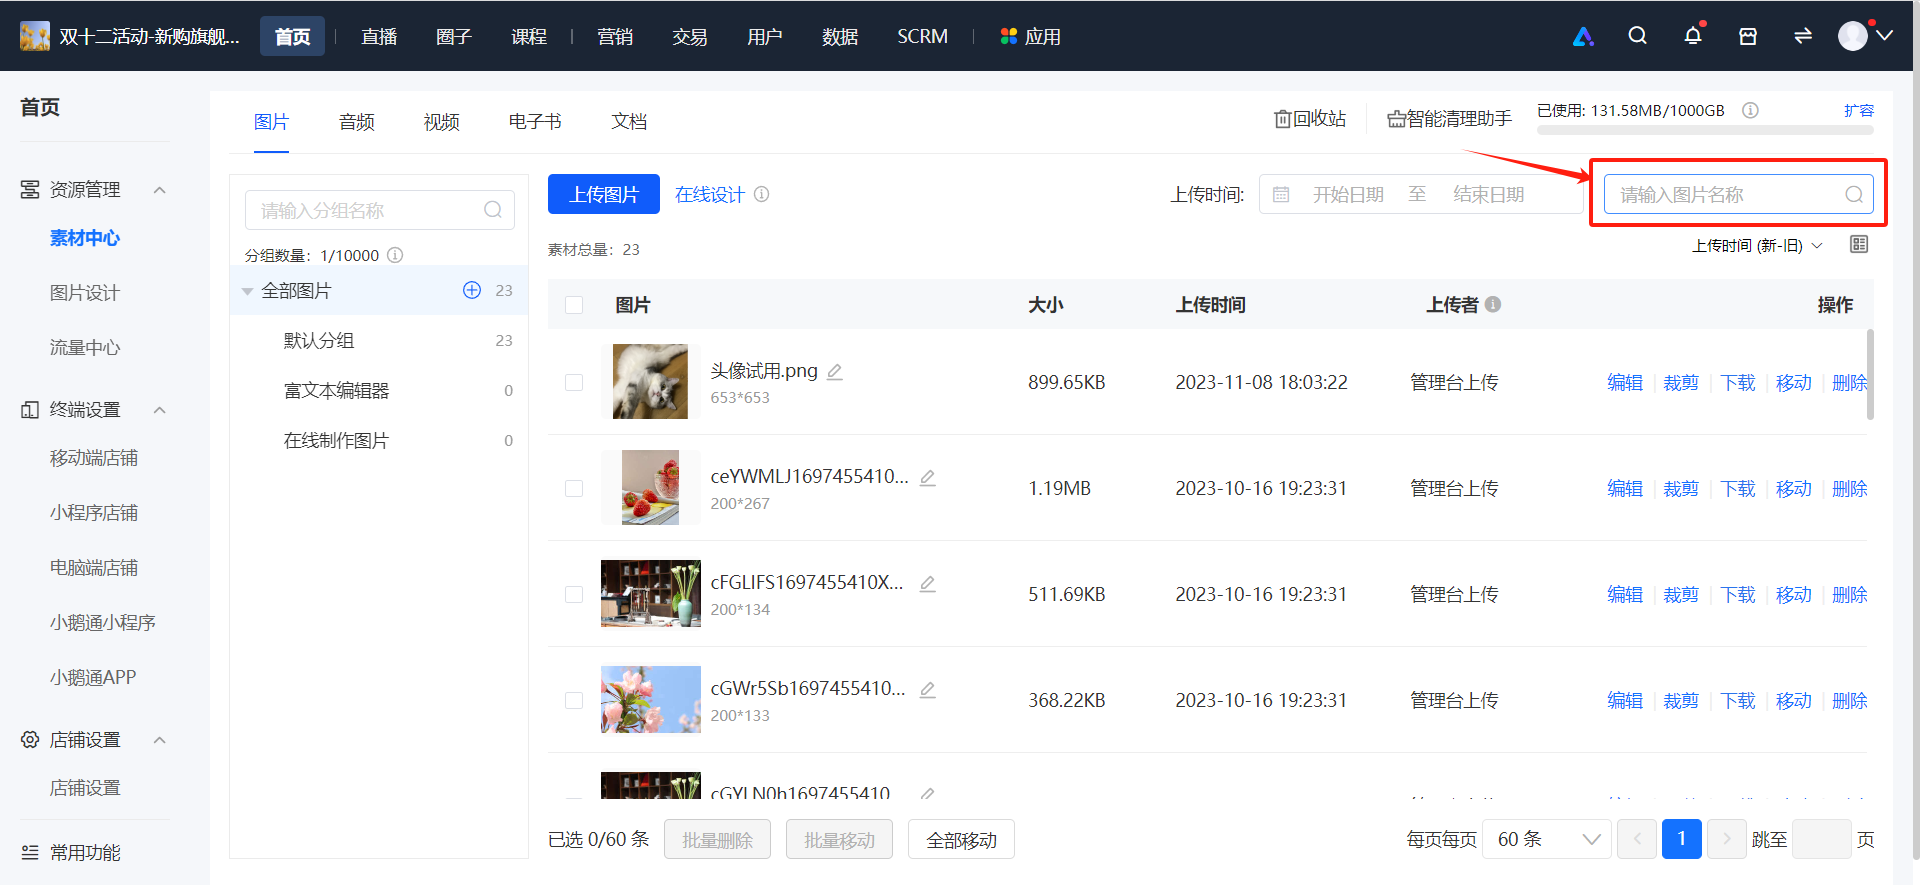
1. You can quickly search for materials under the tab bar by material name or by course name (audio, video, documents, e - books).
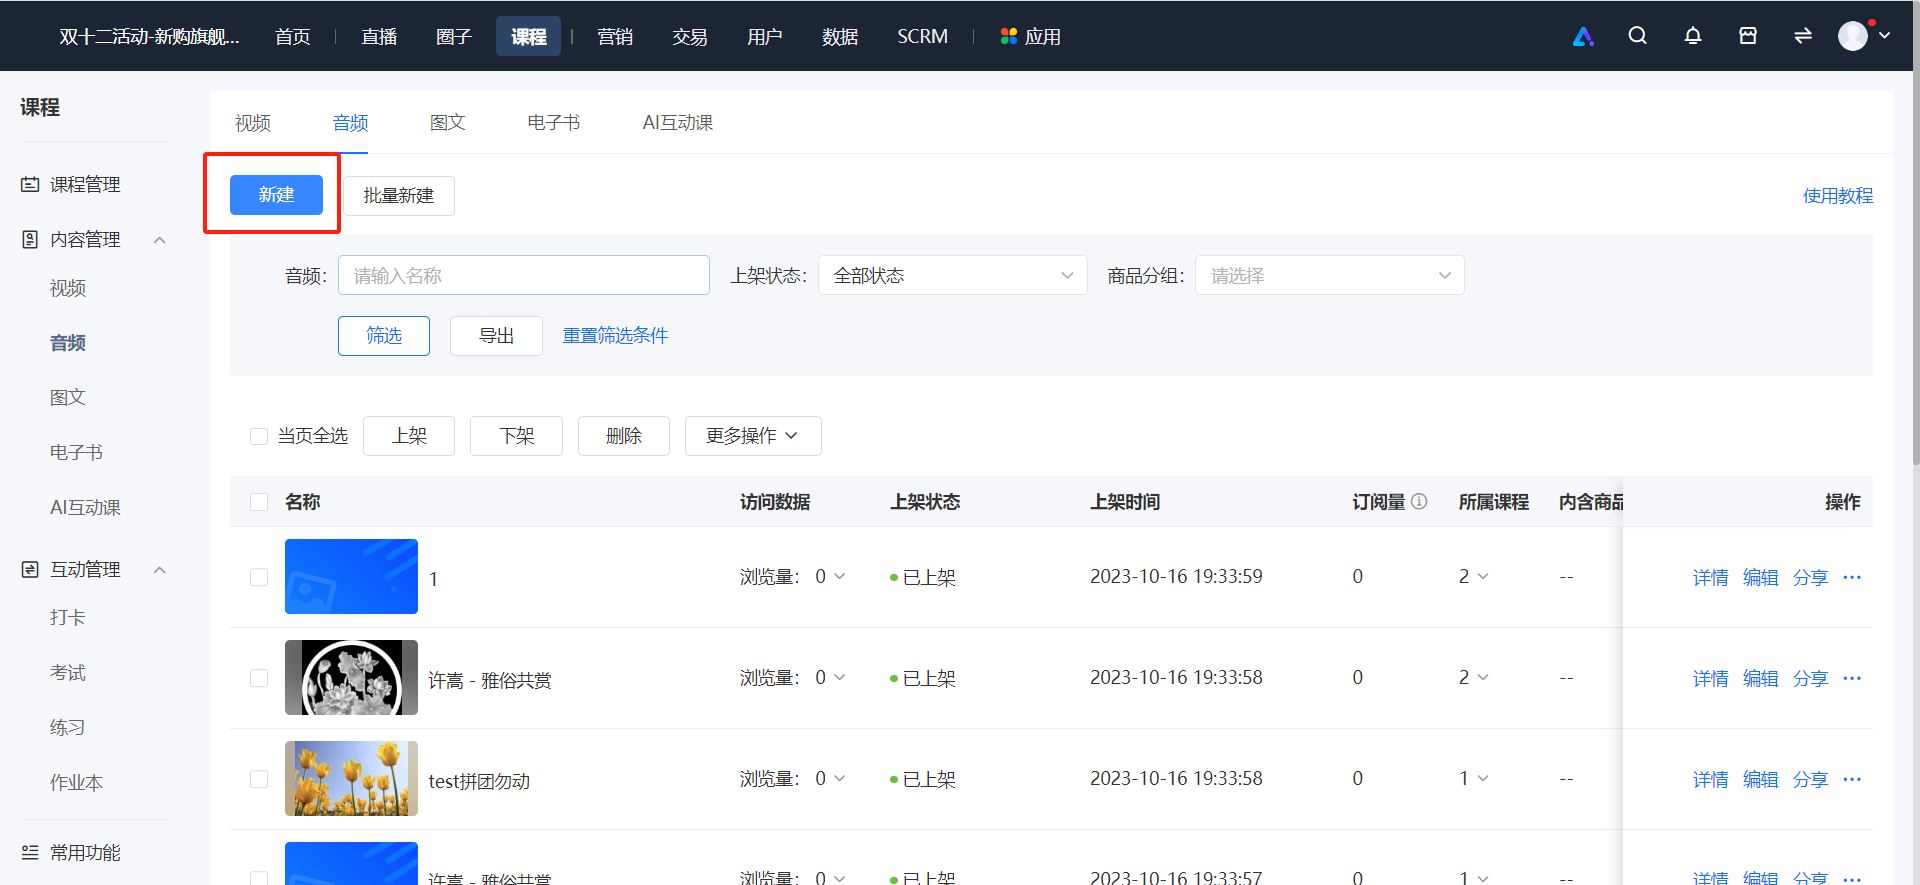
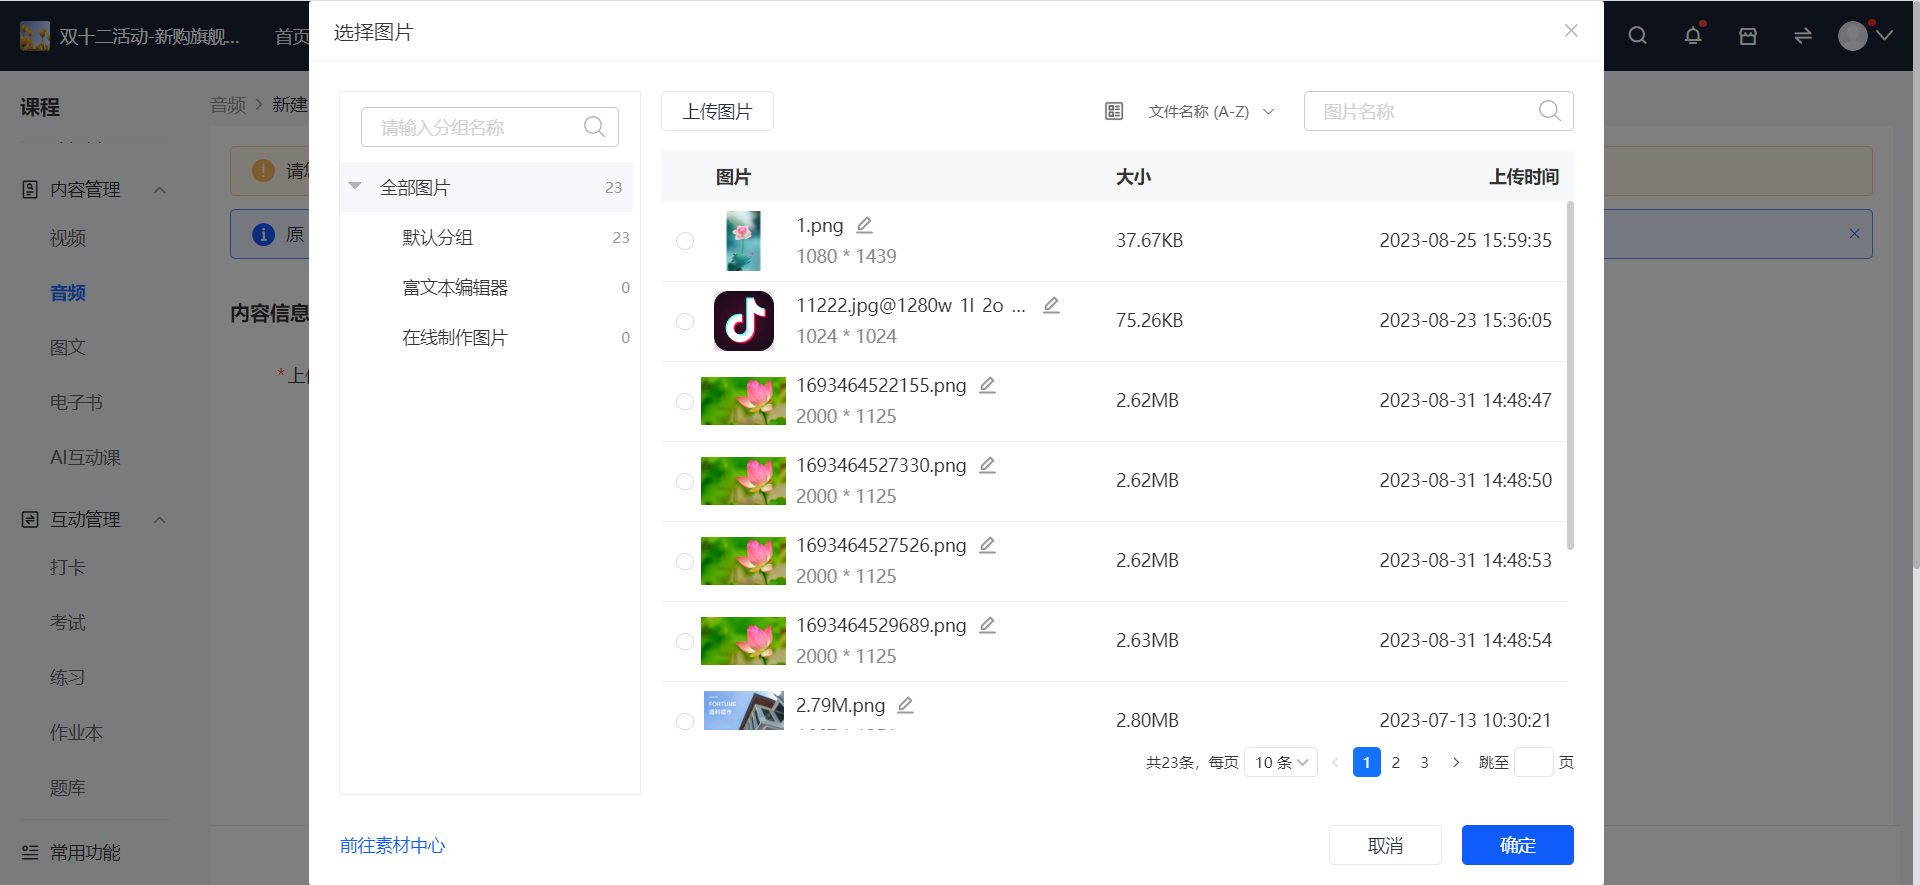
Step 17: Material Reference(Taking creating an audio course - adding audio as an example)(Management Backend)
1. Select the course you want to create/edit and enter the content page.
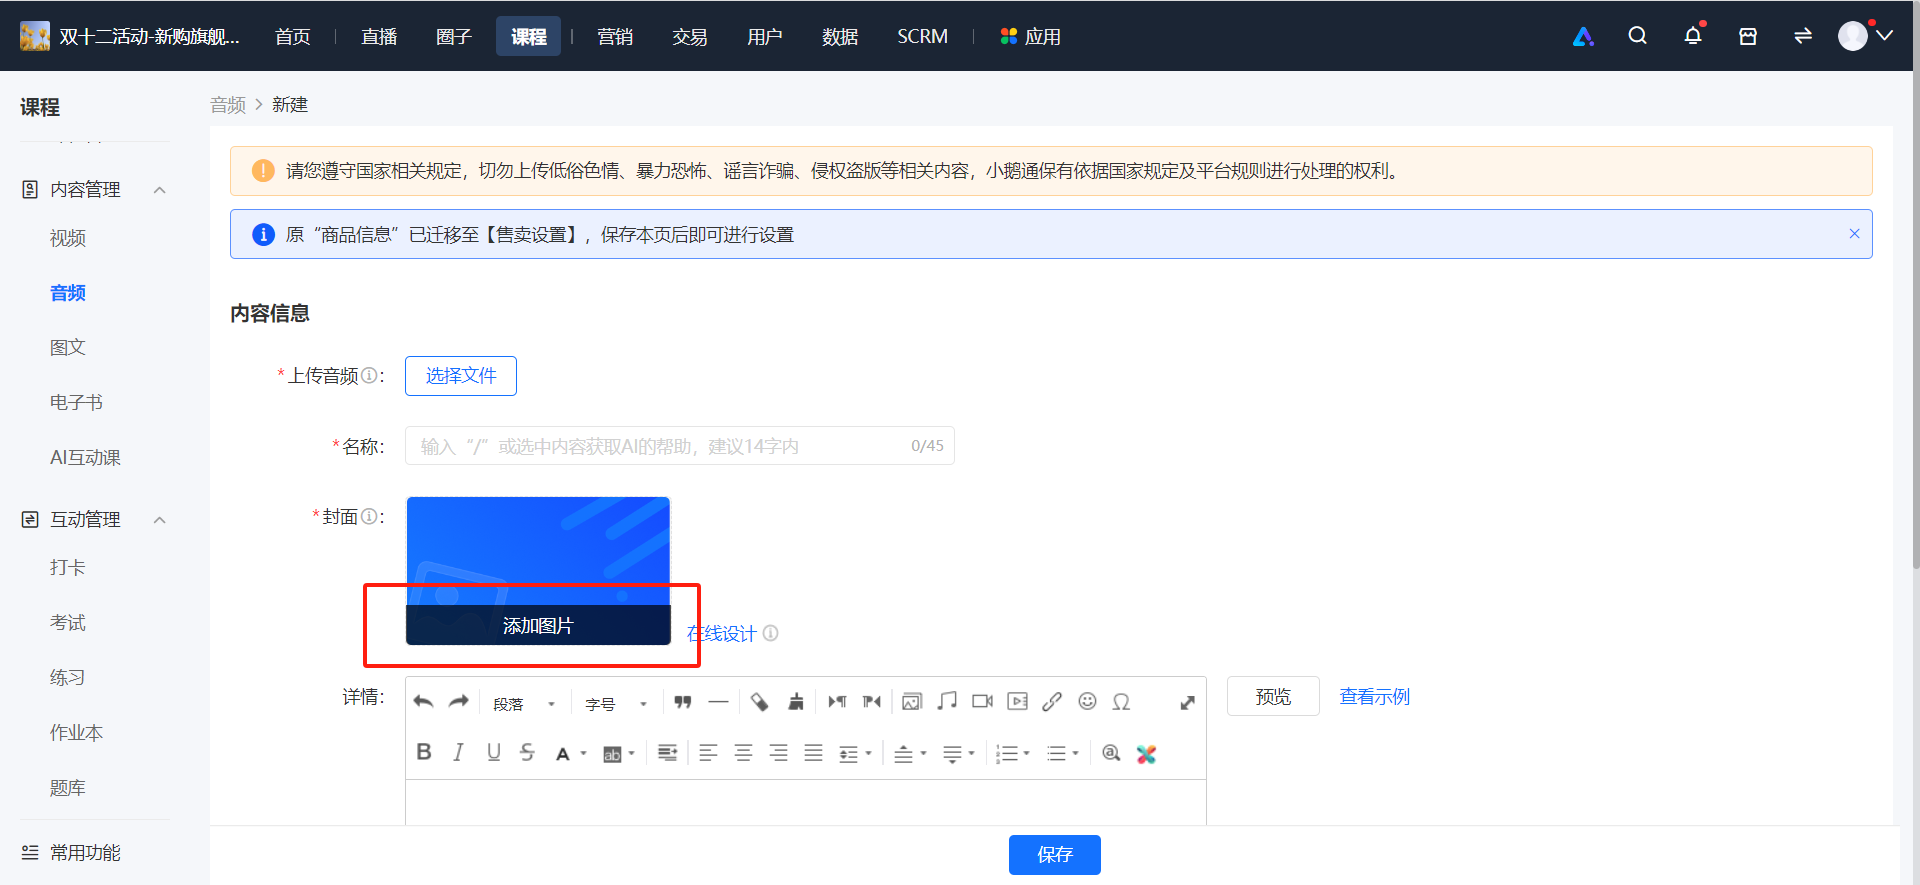
2. Select the materials you want to reference in this course and click [Save] to create/save the changes.
3. Enter the store management - material center page and search by material.
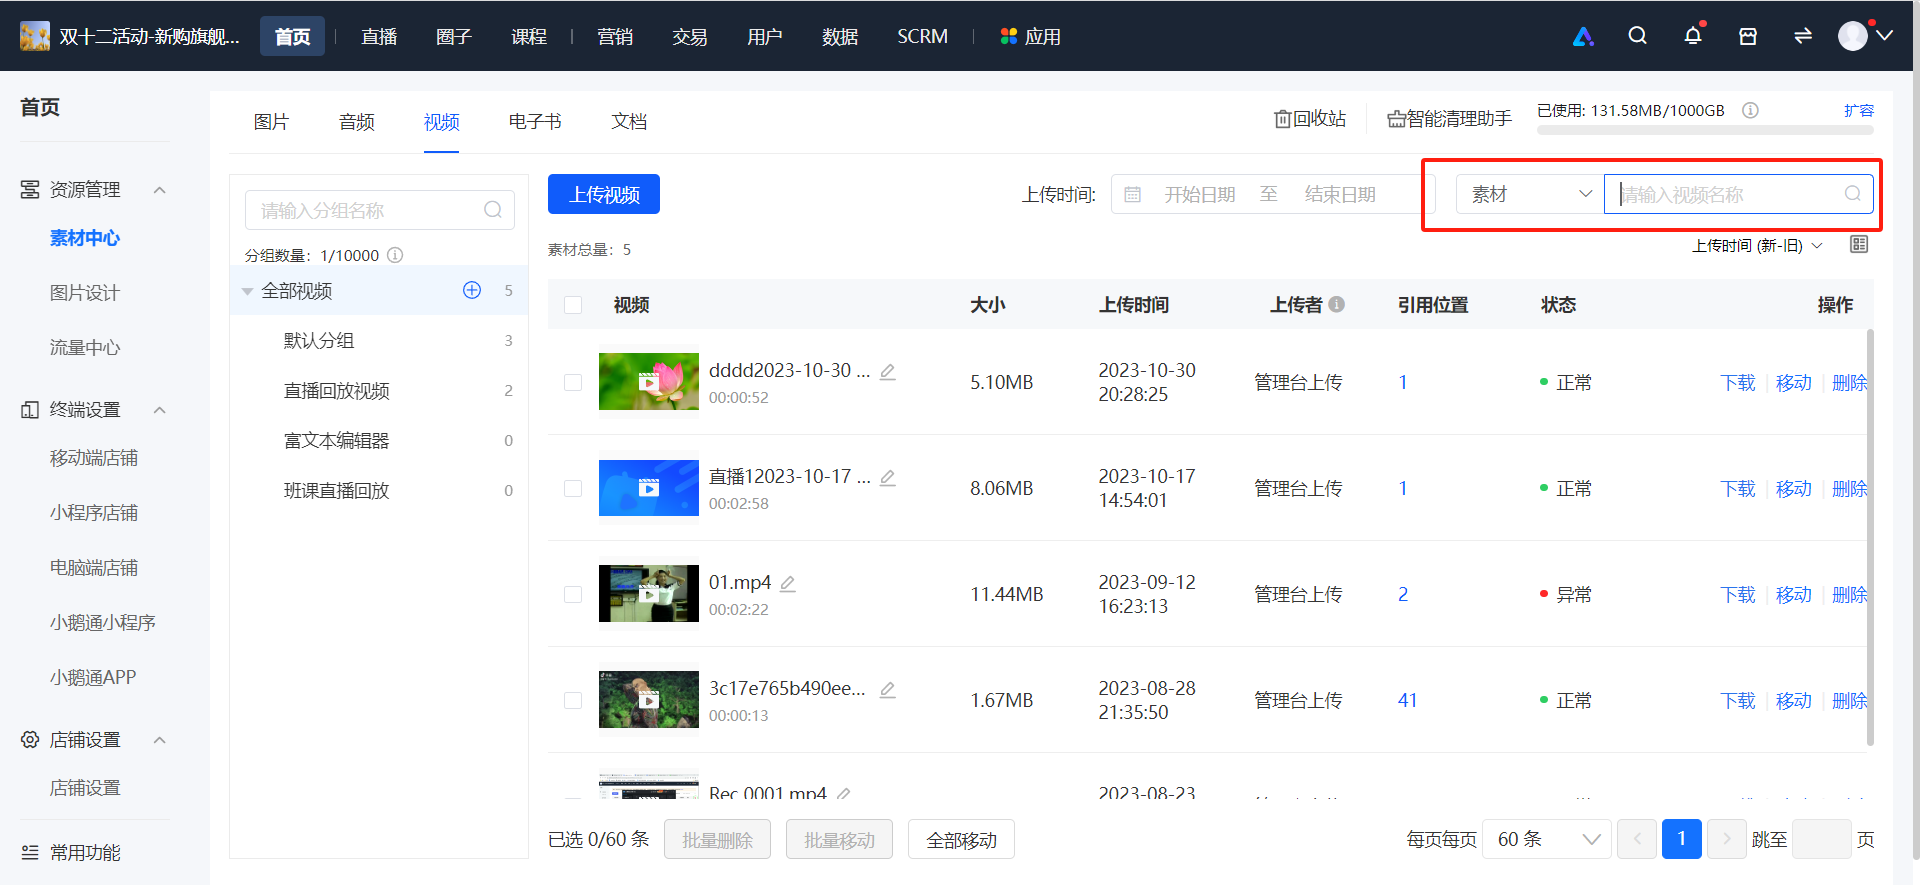
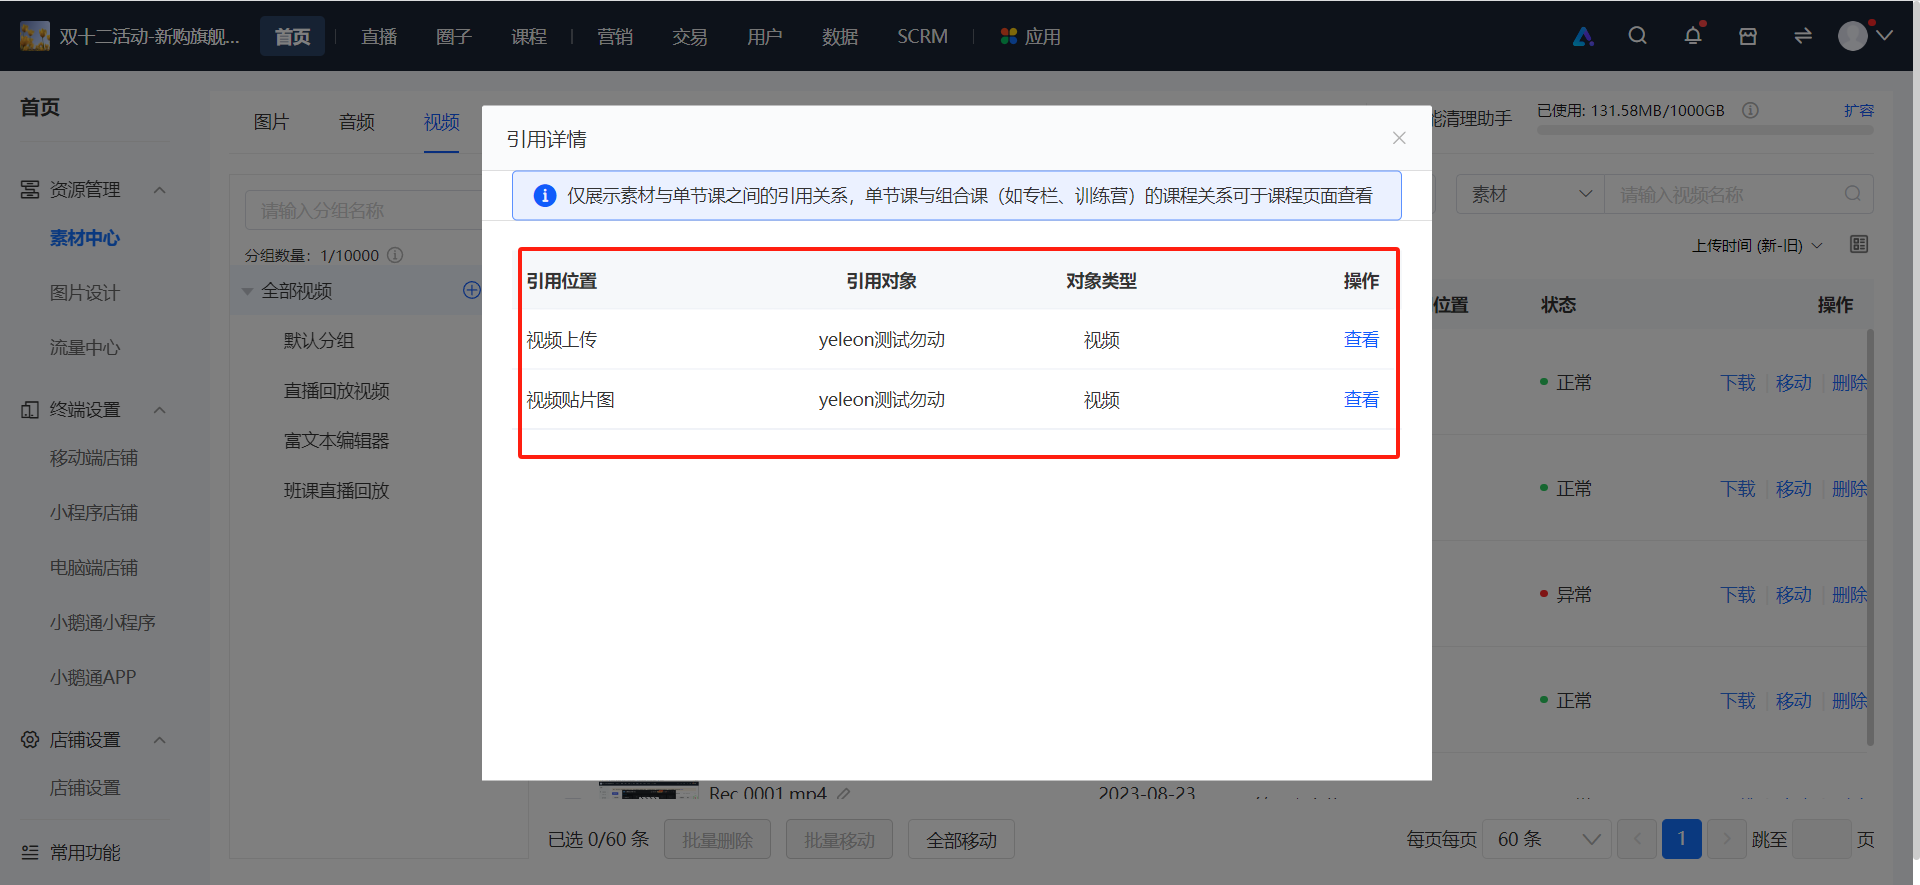
4. Click the number displayed under the reference location to view where this material is referenced.