Self-check suggestions for device abnormalities in [elink Live Client]
1. Speaker malfunction
Ensure that your speaker device is properly connected and turned on.
1.1 Check the volume settings
● Windows system:
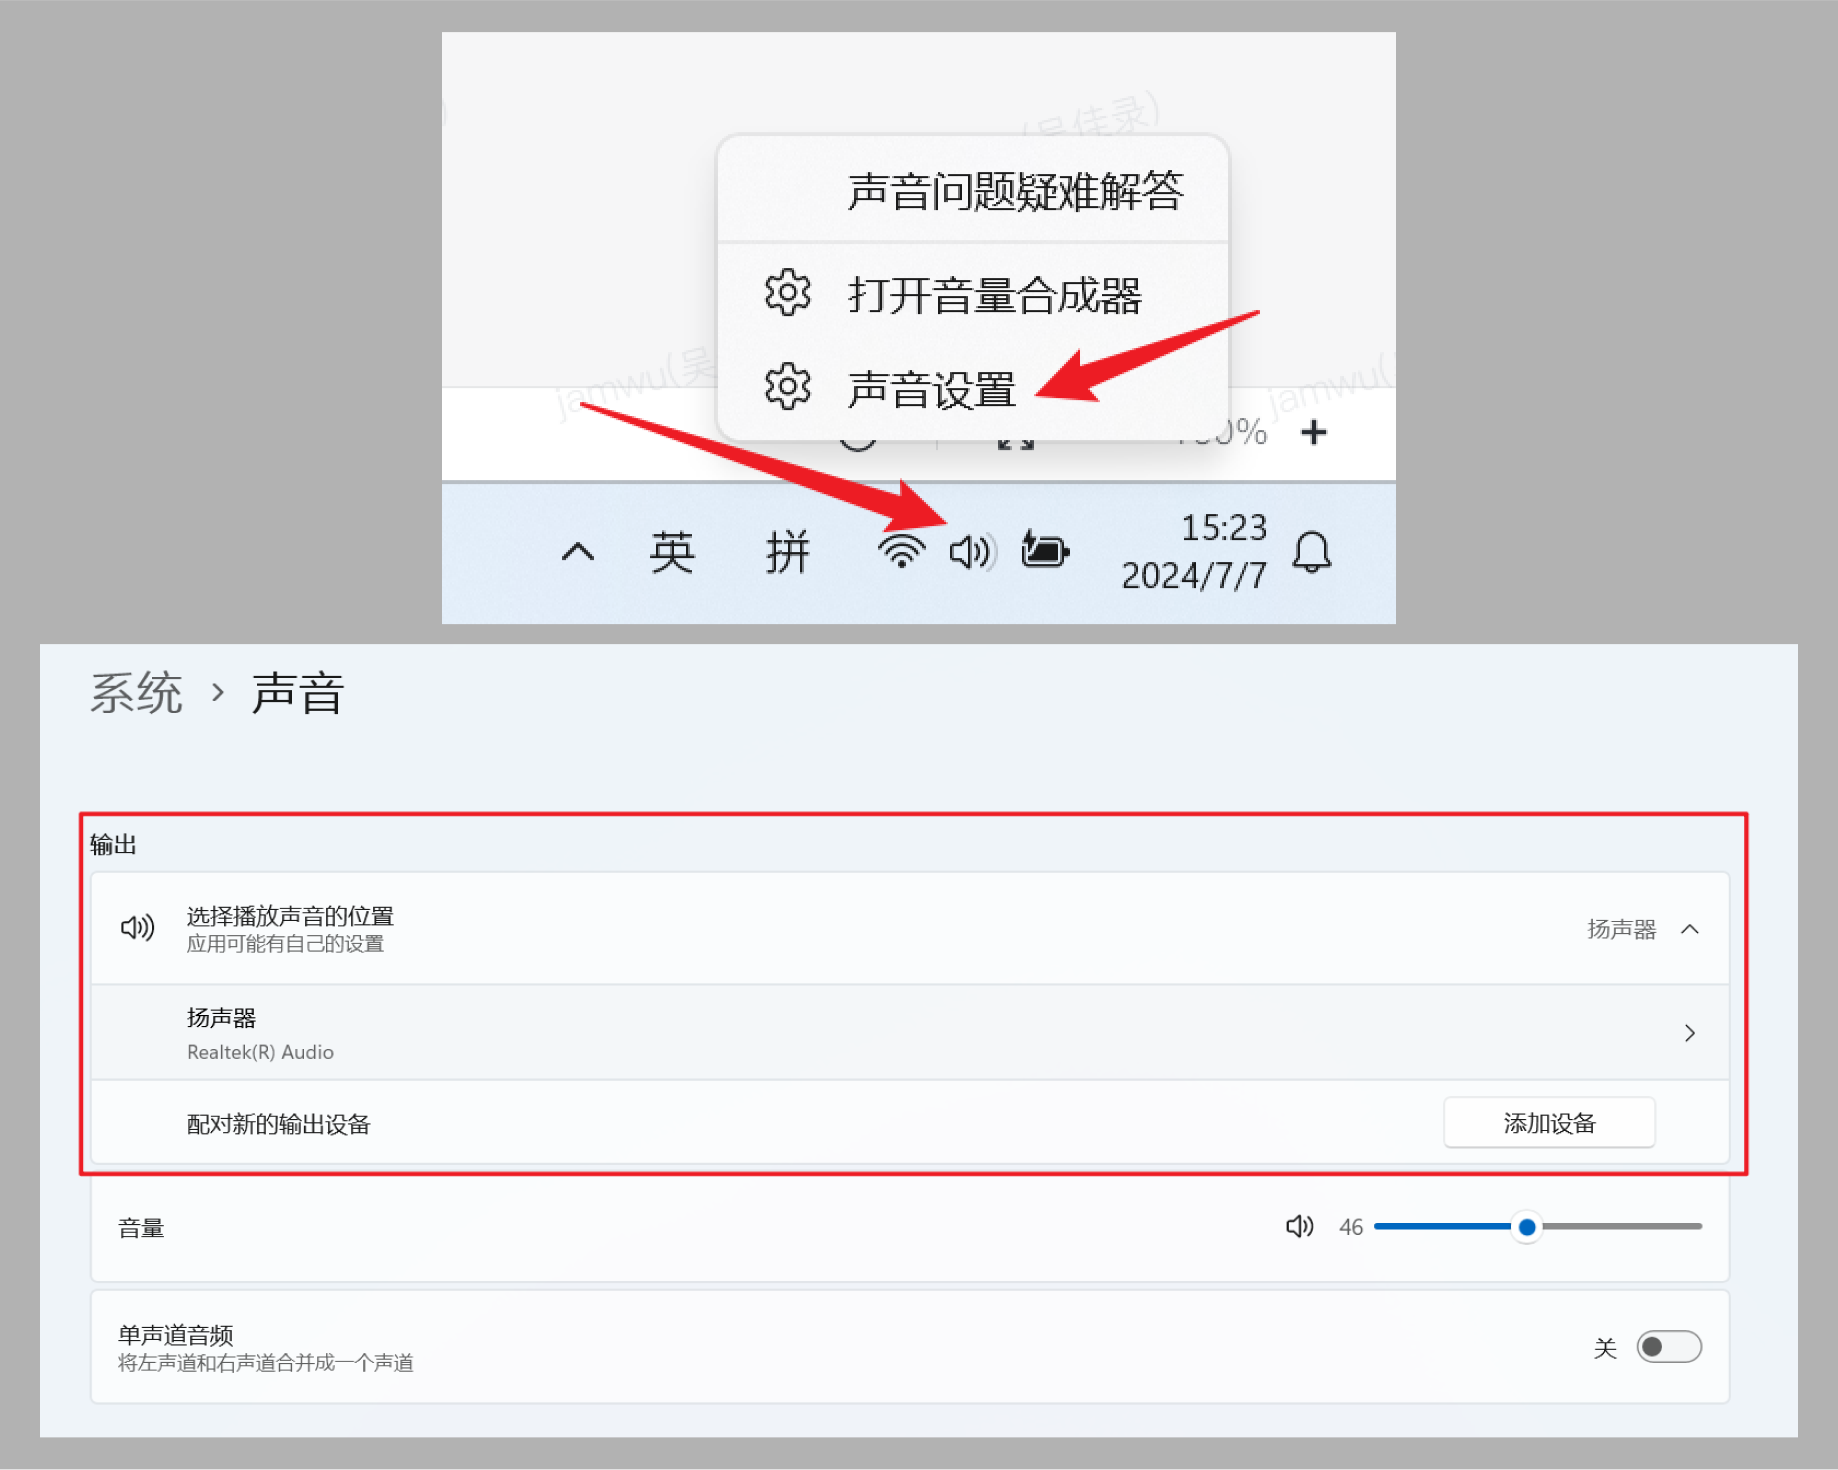
Click the volume icon in the lower - right corner of the taskbar to ensure that the volume is not muted and is set to an appropriate level.

● macOS:
Click the Control Center icon in the upper - right corner to ensure that the volume is not muted and is set to an appropriate level.

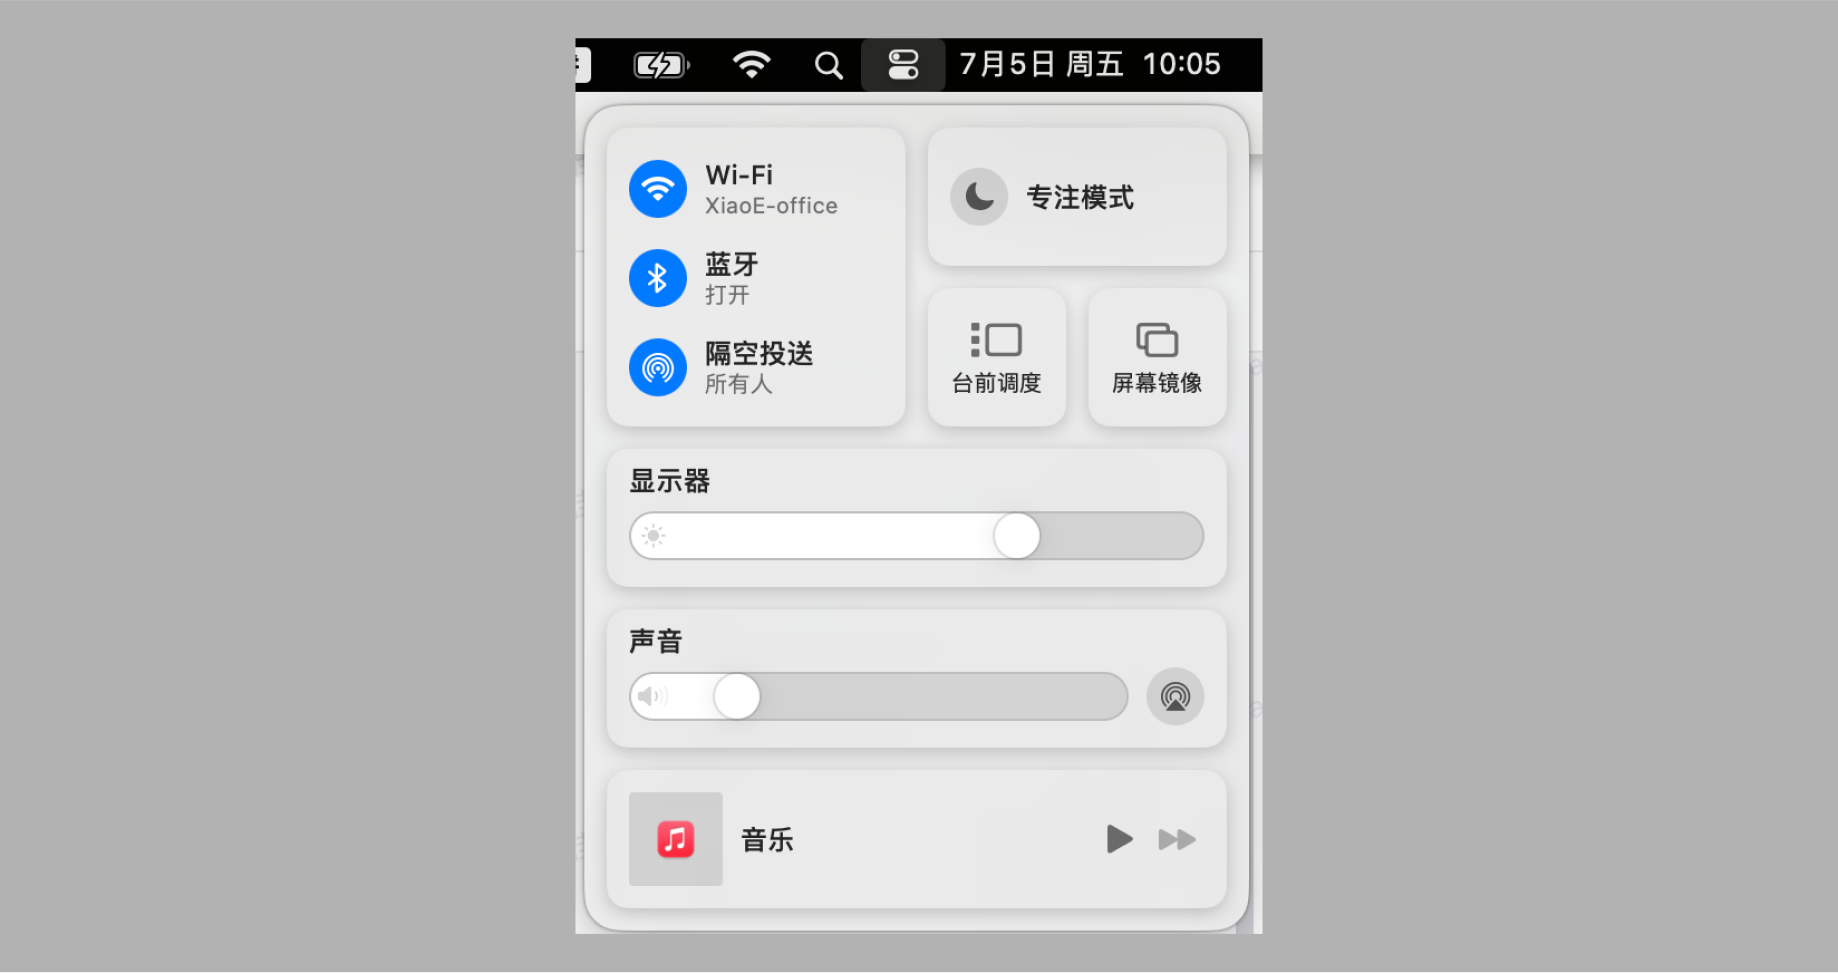
1.1.1 Check the connection and device
1. If you are using an external speaker, ensure that the speaker is powered on and the connection cable is securely plugged in. Plug and unplug the headphones to see if there is a change in sound to ensure that the speaker port is not damaged or loose.
2. Try using other speakers or headphones to determine if the problem lies with the speaker itself.
1.2 If your live - streaming device is connected to multiple speaker devices, select the correct one
If multiple speaker devices are connected, the selected device may not match the detected device, resulting in abnormal sound.
● Windows:
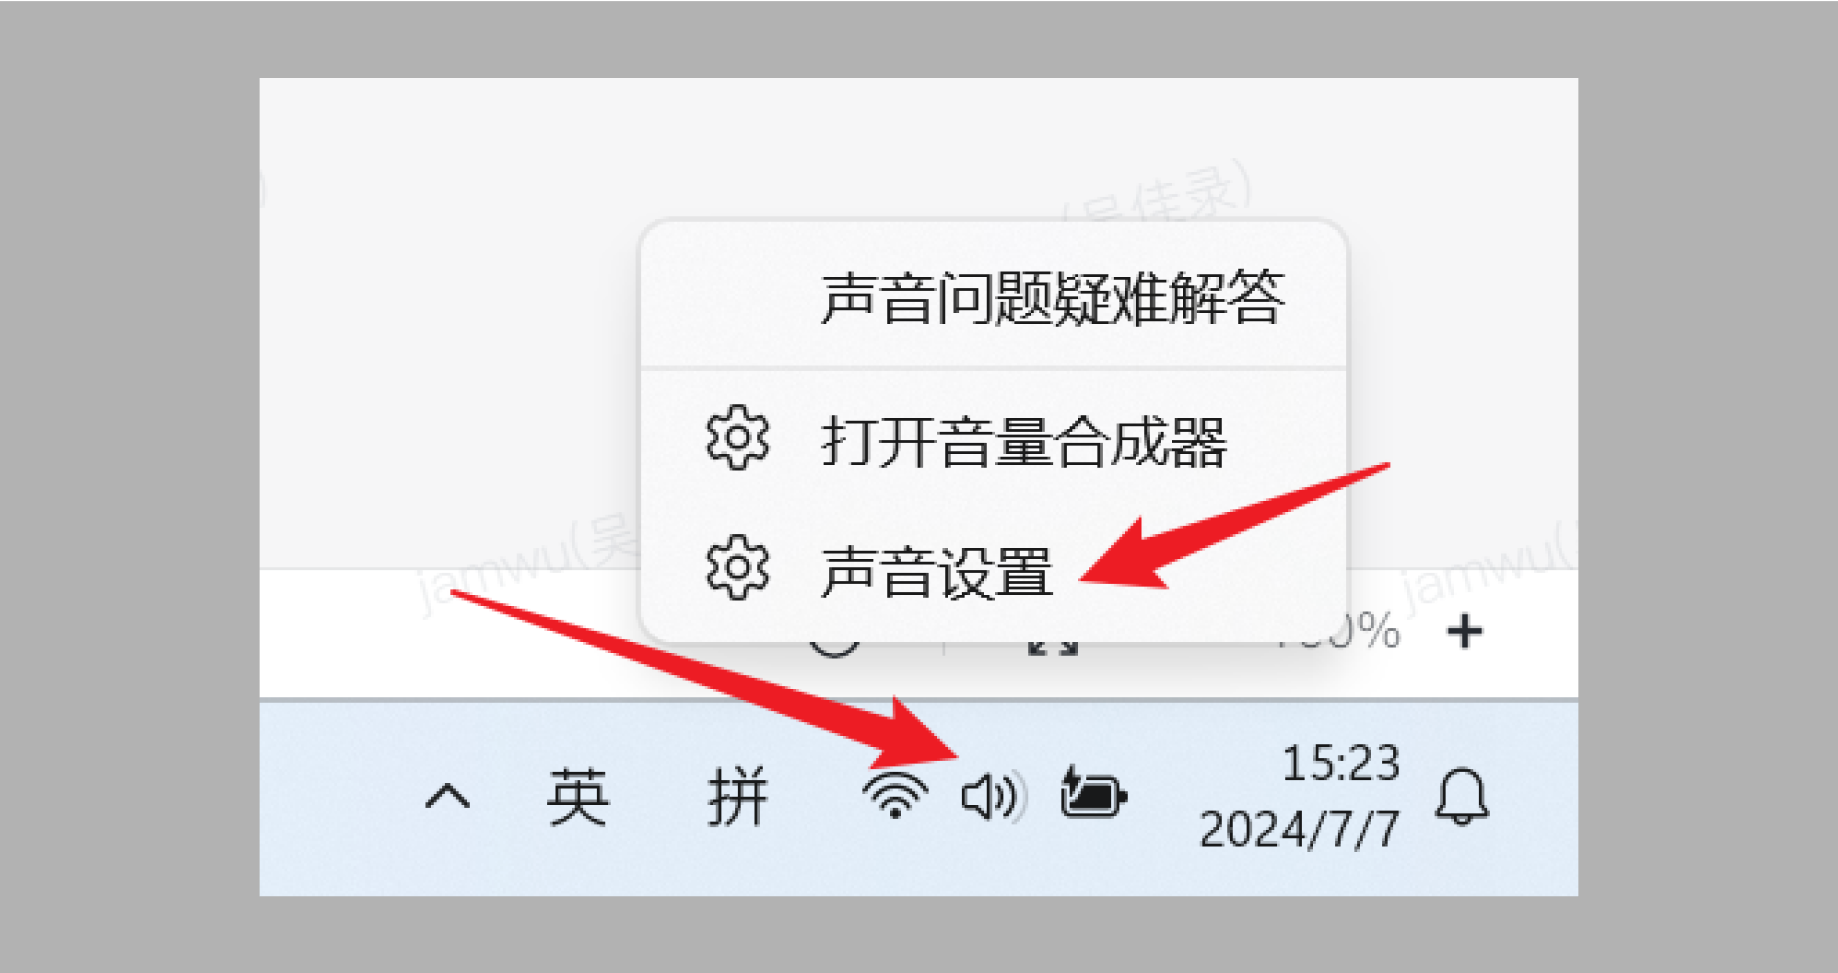
Right - click the volume icon in the lower - right corner of the taskbar and select “Sound settings”. In the “Output” section, ensure that the correct playback device (such as speakers or headphones) is selected.
● macOS:
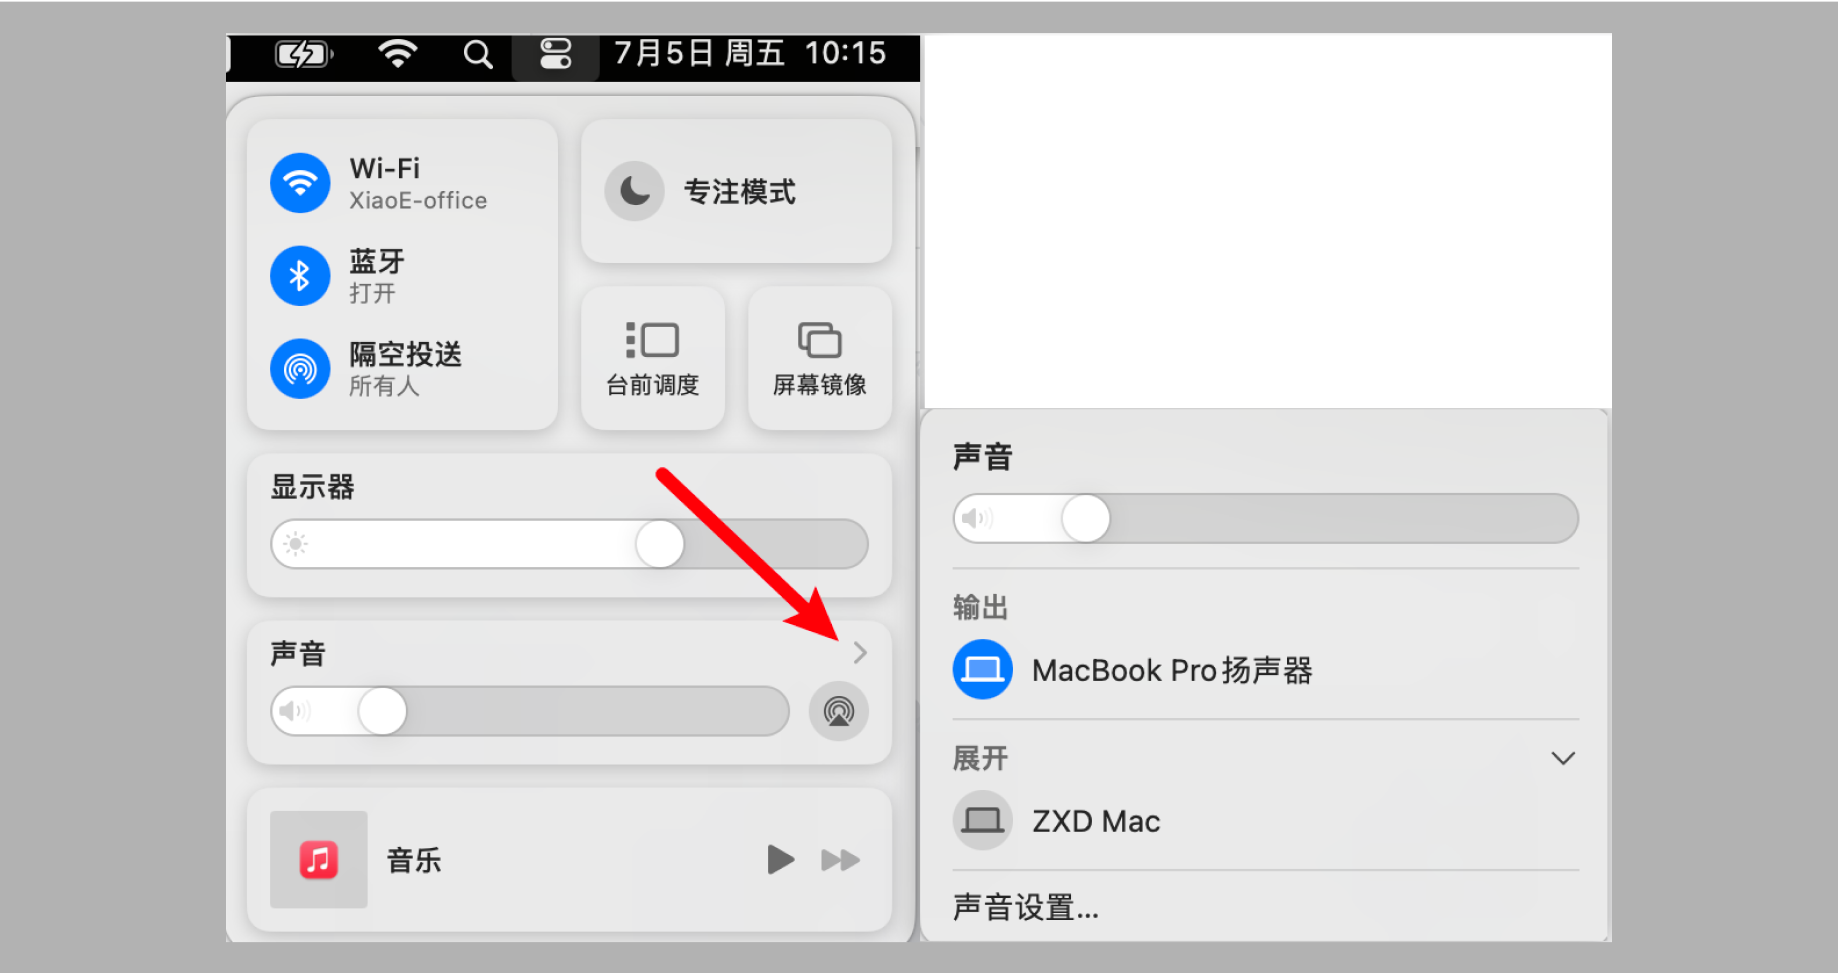
Click the Control Center icon in the upper - right corner. After the panel appears, click the arrow after the “Sound” section to ensure that the correct playback device (such as speakers or headphones) is selected.
1.3 Check if other applications can use the speaker normally
Use other software such as video players or music players to check if the speaker is working properly. If there is still no sound, the speaker device may be faulty.
2. Microphone malfunction
Please ensure that your microphone device is properly connected and turned on.
2.1 Check if the microphone permission is enabled
When using the elink Live client for live - streaming, if the device does not have the microphone permission enabled, the microphone will not work.
● Windows:
1. Click the Windows Start menu and select “Settings”.
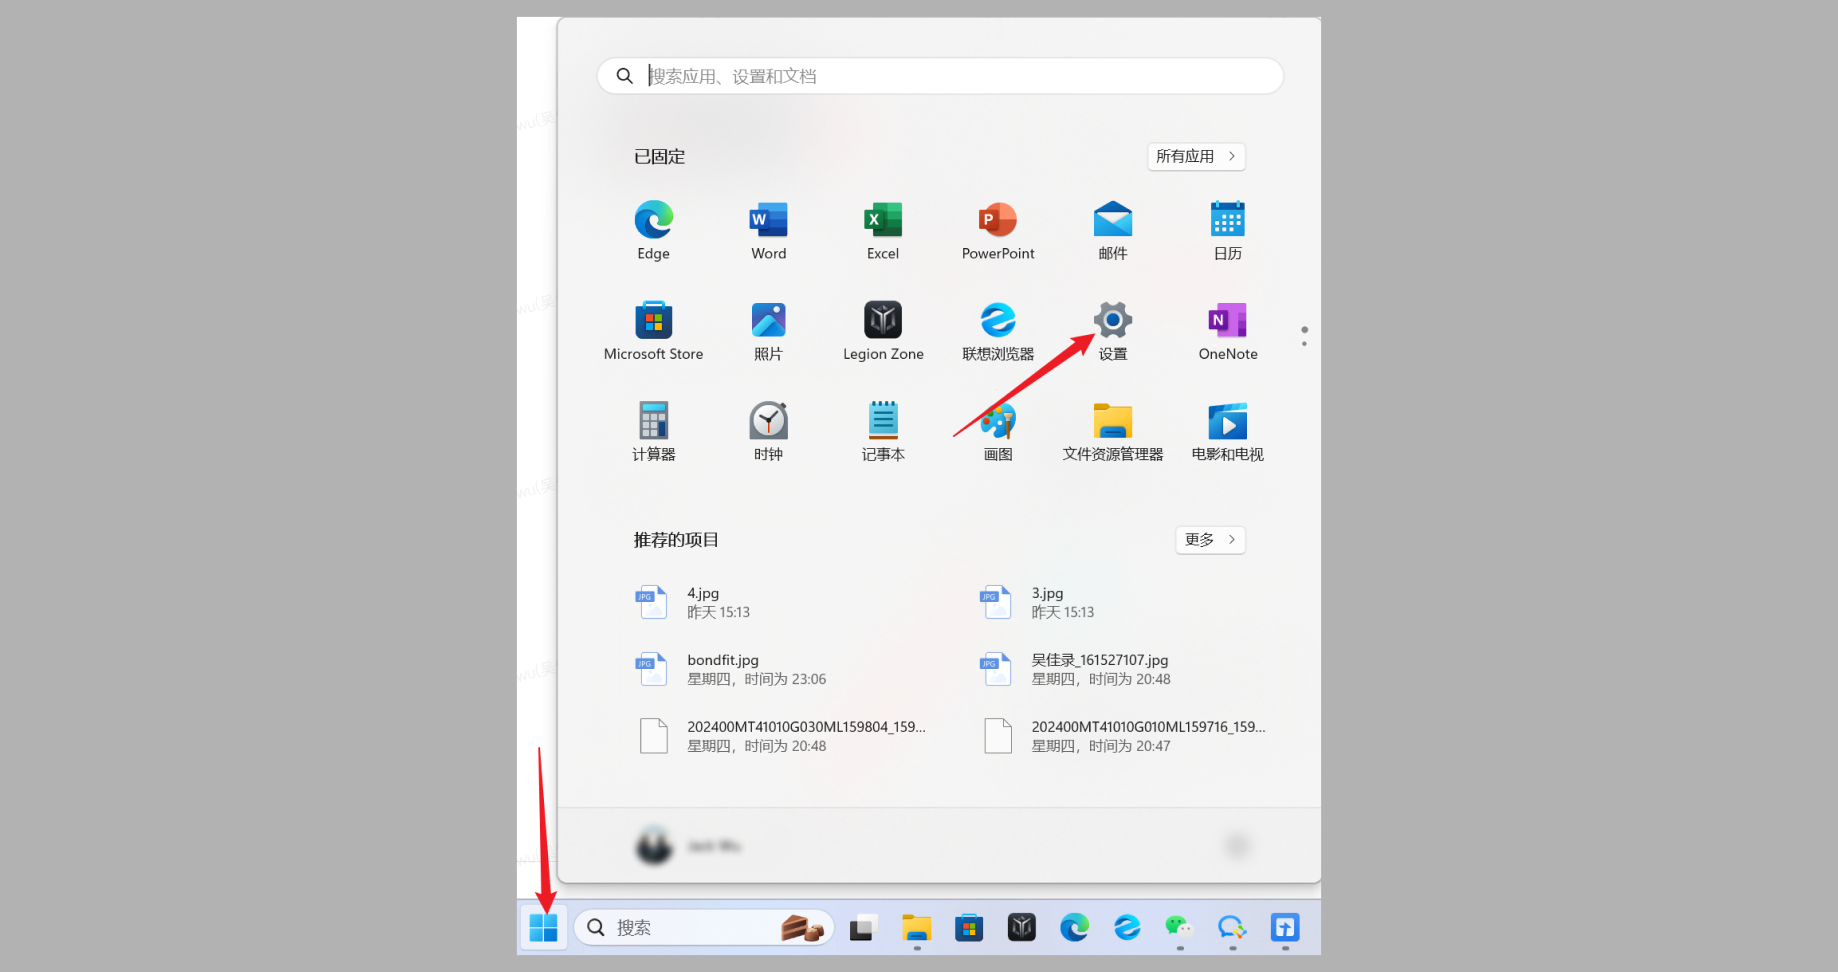
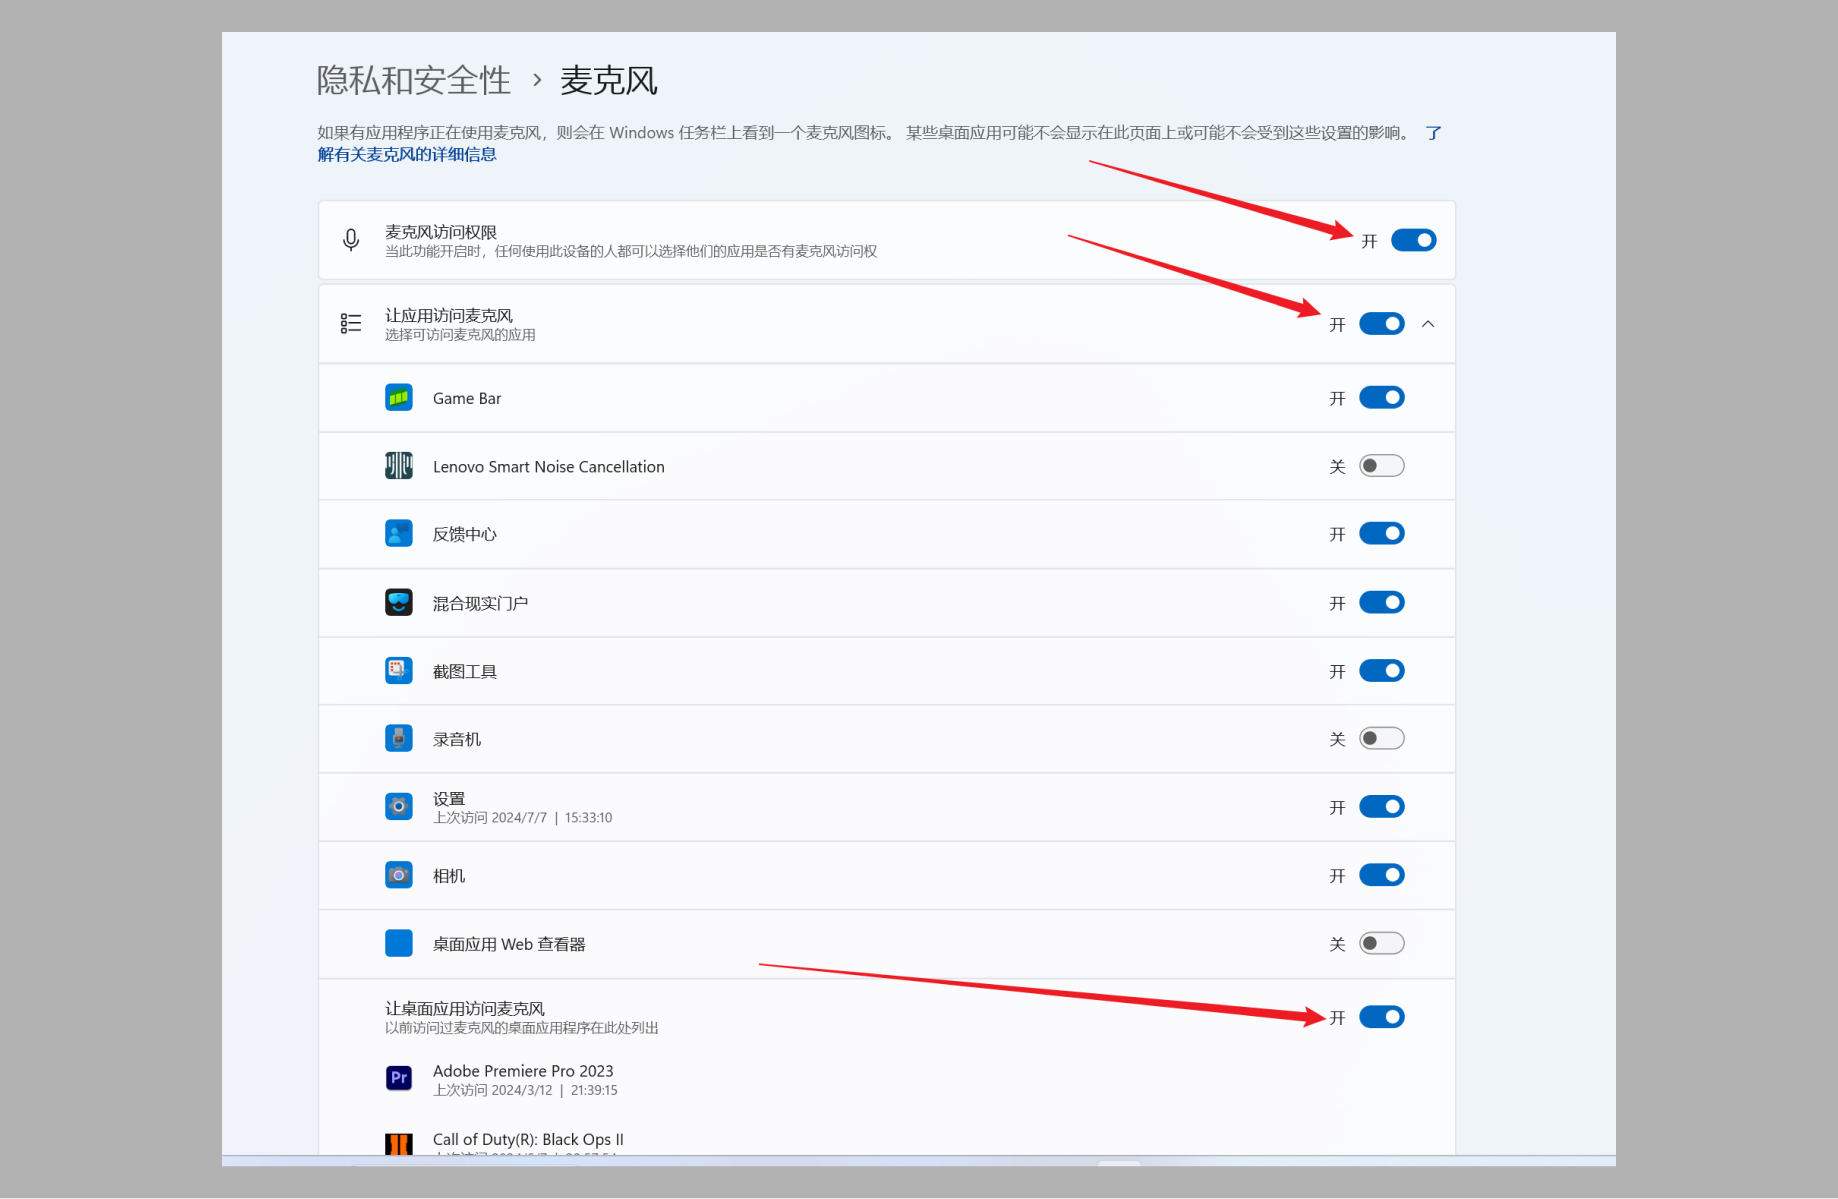
2. In the “Settings” window, select “Privacy & Security” and click on “Microphone” settings on the right.

3. Enable microphone permission: Ensure thatas shown in the following figurethe switch is turned on.
● macOS:
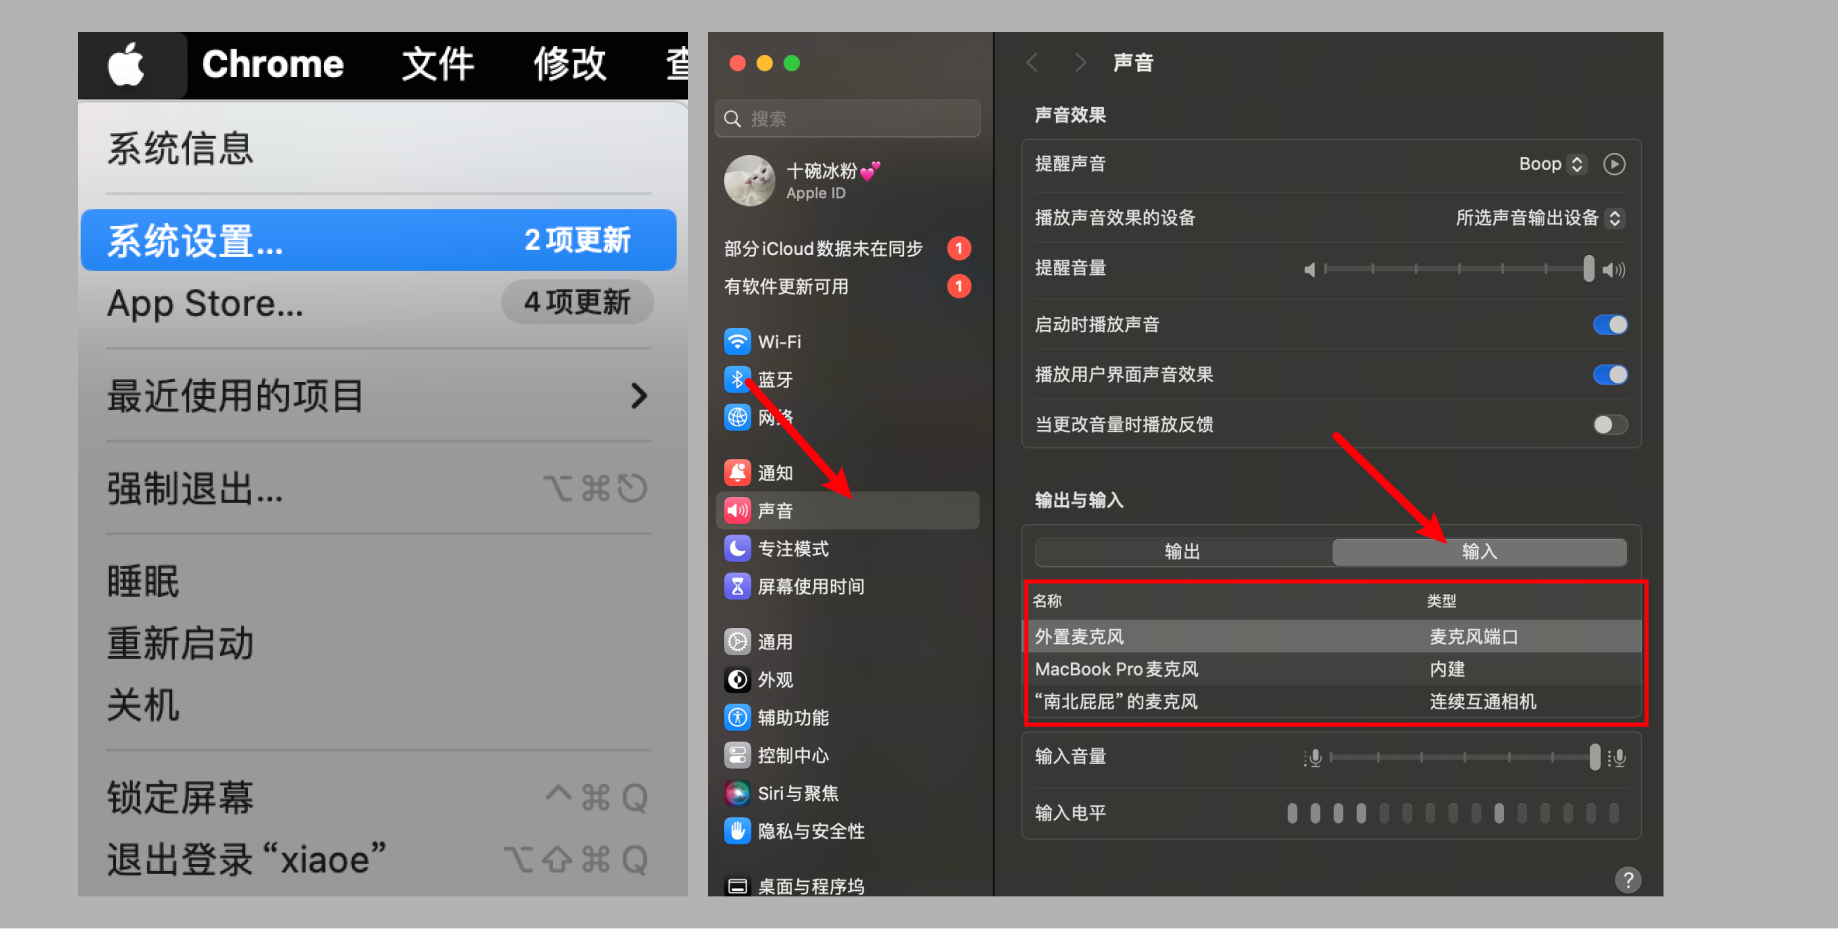
1. Click the Apple icon in the upper - left corner of the screen and select “System Settings” from the drop - down menu. Then select “Privacy & Security” and “Microphone”.
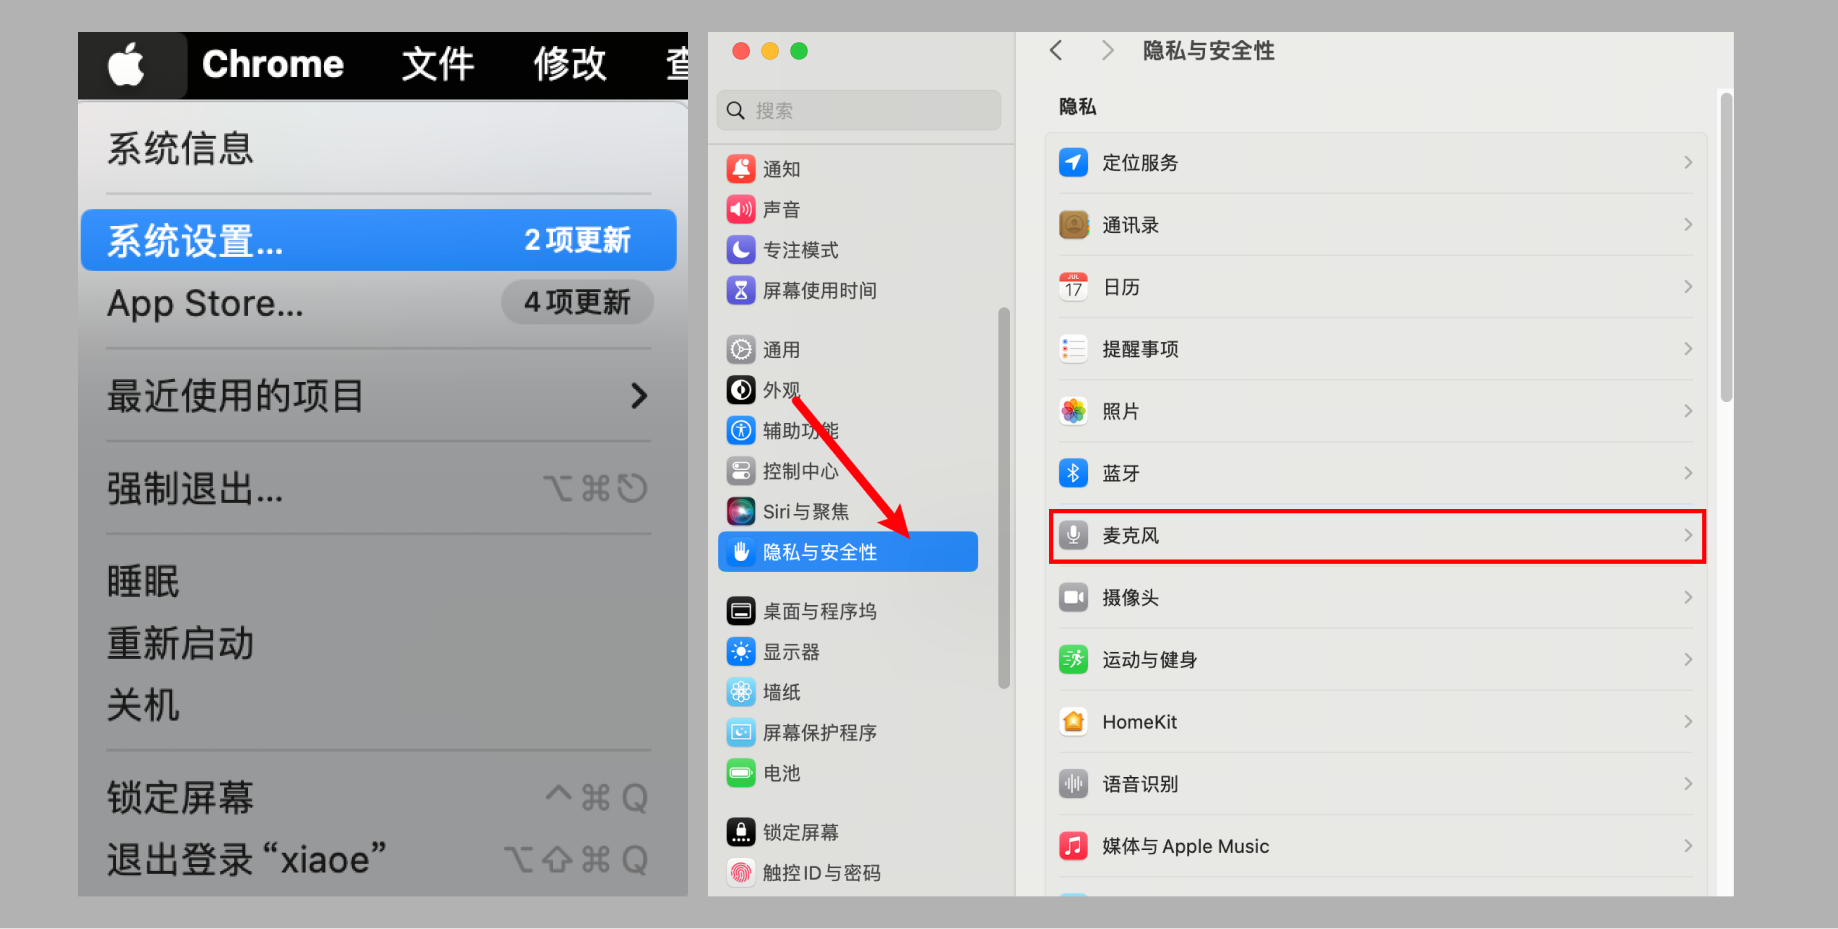
2. After entering the “Microphone” panel, turn on the microphone permission for the elink Live client.

2.2 Check if the correct microphone device is selected
If your live - streaming device is connected to multiple microphone devices, select the correct one
● Windows:
1. Right - click thelower - right sound icon, selectSound settings.
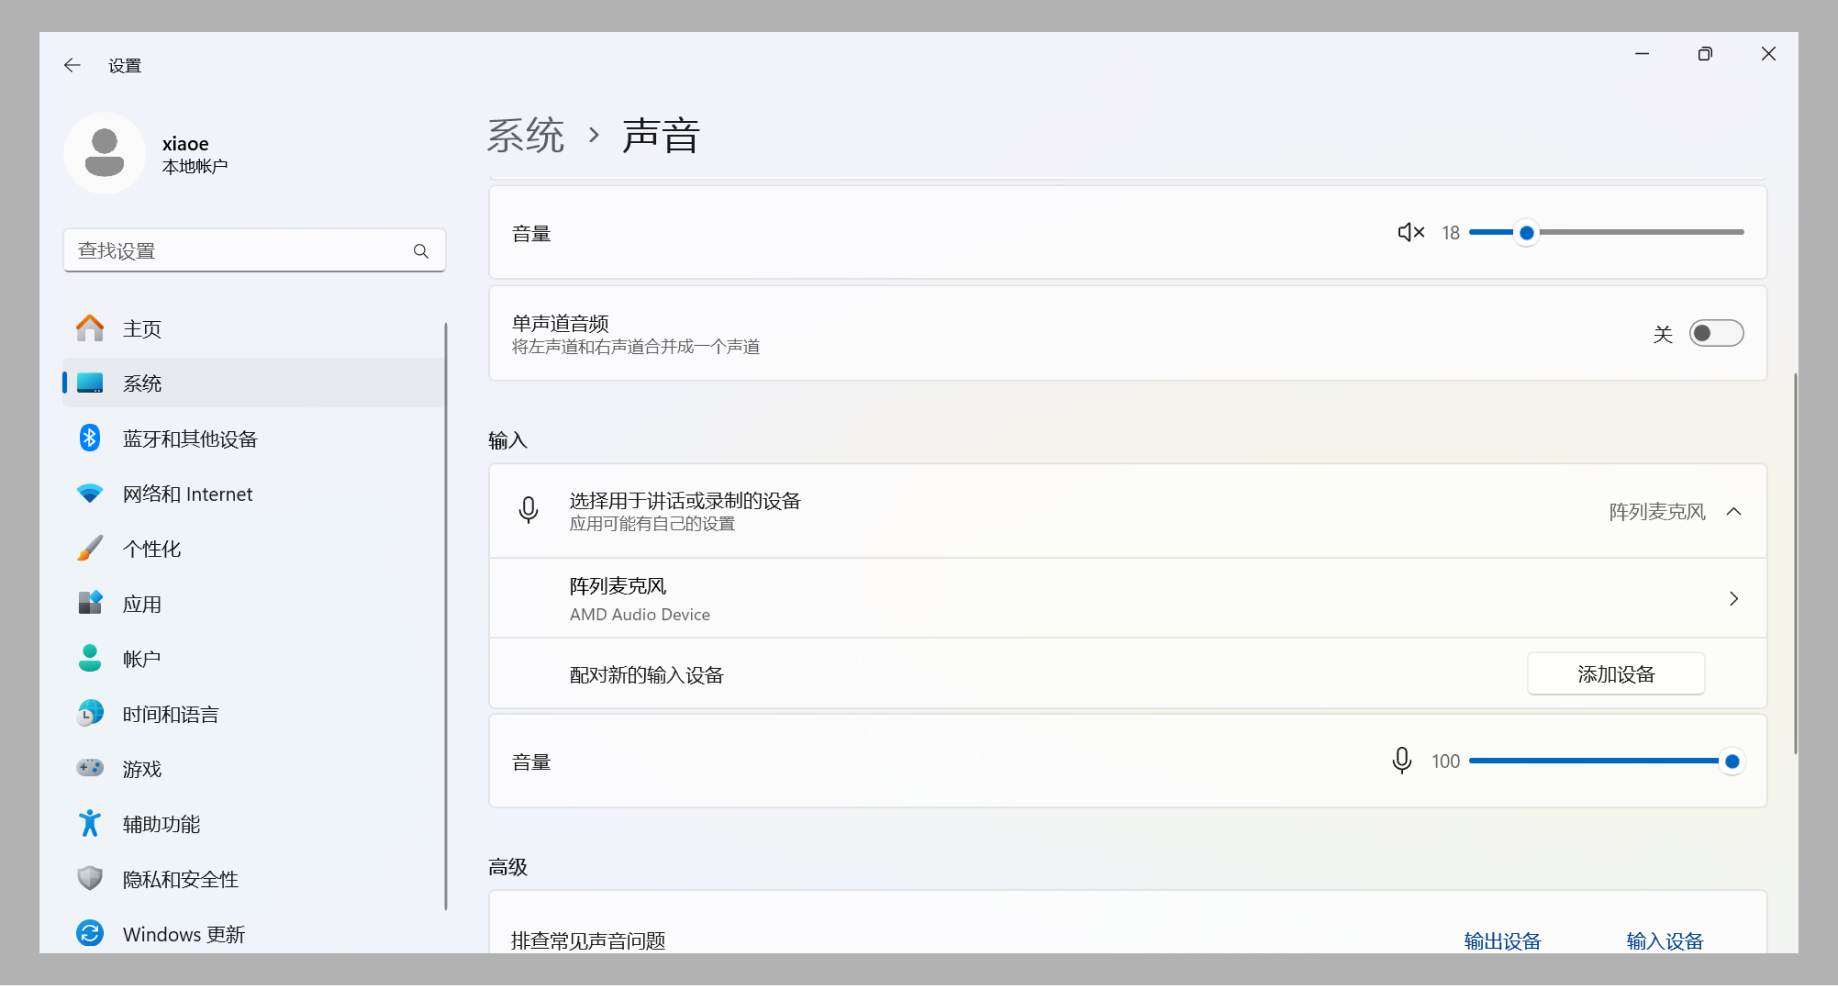
2. After opening the sound settings,in the “Input” section, select the correct microphone device(ensure that it is the same as the device selected in the elink Live client).
● macOS:
Click the Apple icon in the upper - left corner of the screen and select “System Settings” from the drop - down menu. Then select “Sound”, enter the “Sound” settings panel, select “Input”, and choose the correct microphone device.
2.3 Check if other applications can use the microphone normally
Use other software such as WeChat video calls or Tencent Meeting to check if the microphone is working properly. If not, the microphone device may be faulty.
3. Camera malfunction
Please ensure that your camera device is properly connected and turned on.
3.1 Check if the camera permission is enabled
If your computer is connected to a camera but no image is captured, it may be because the camera system access permission is not enabled.
● Windows:
1. Click the Windows Start menu and select “Settings”.
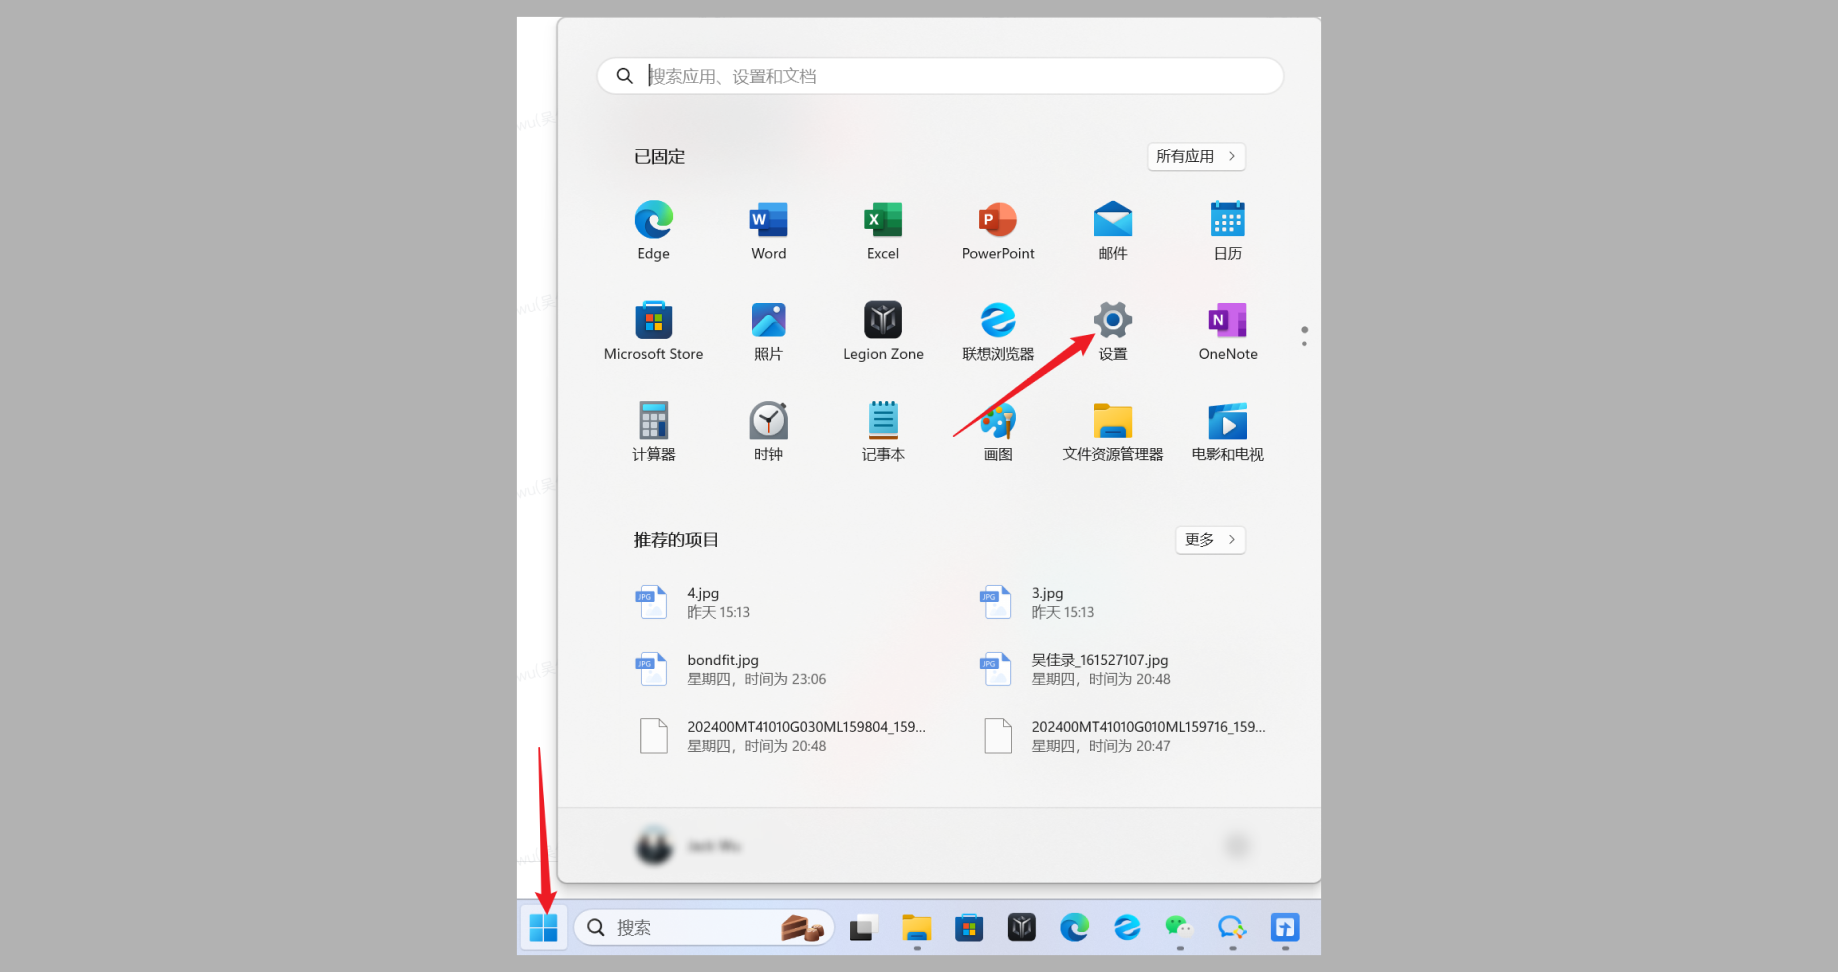
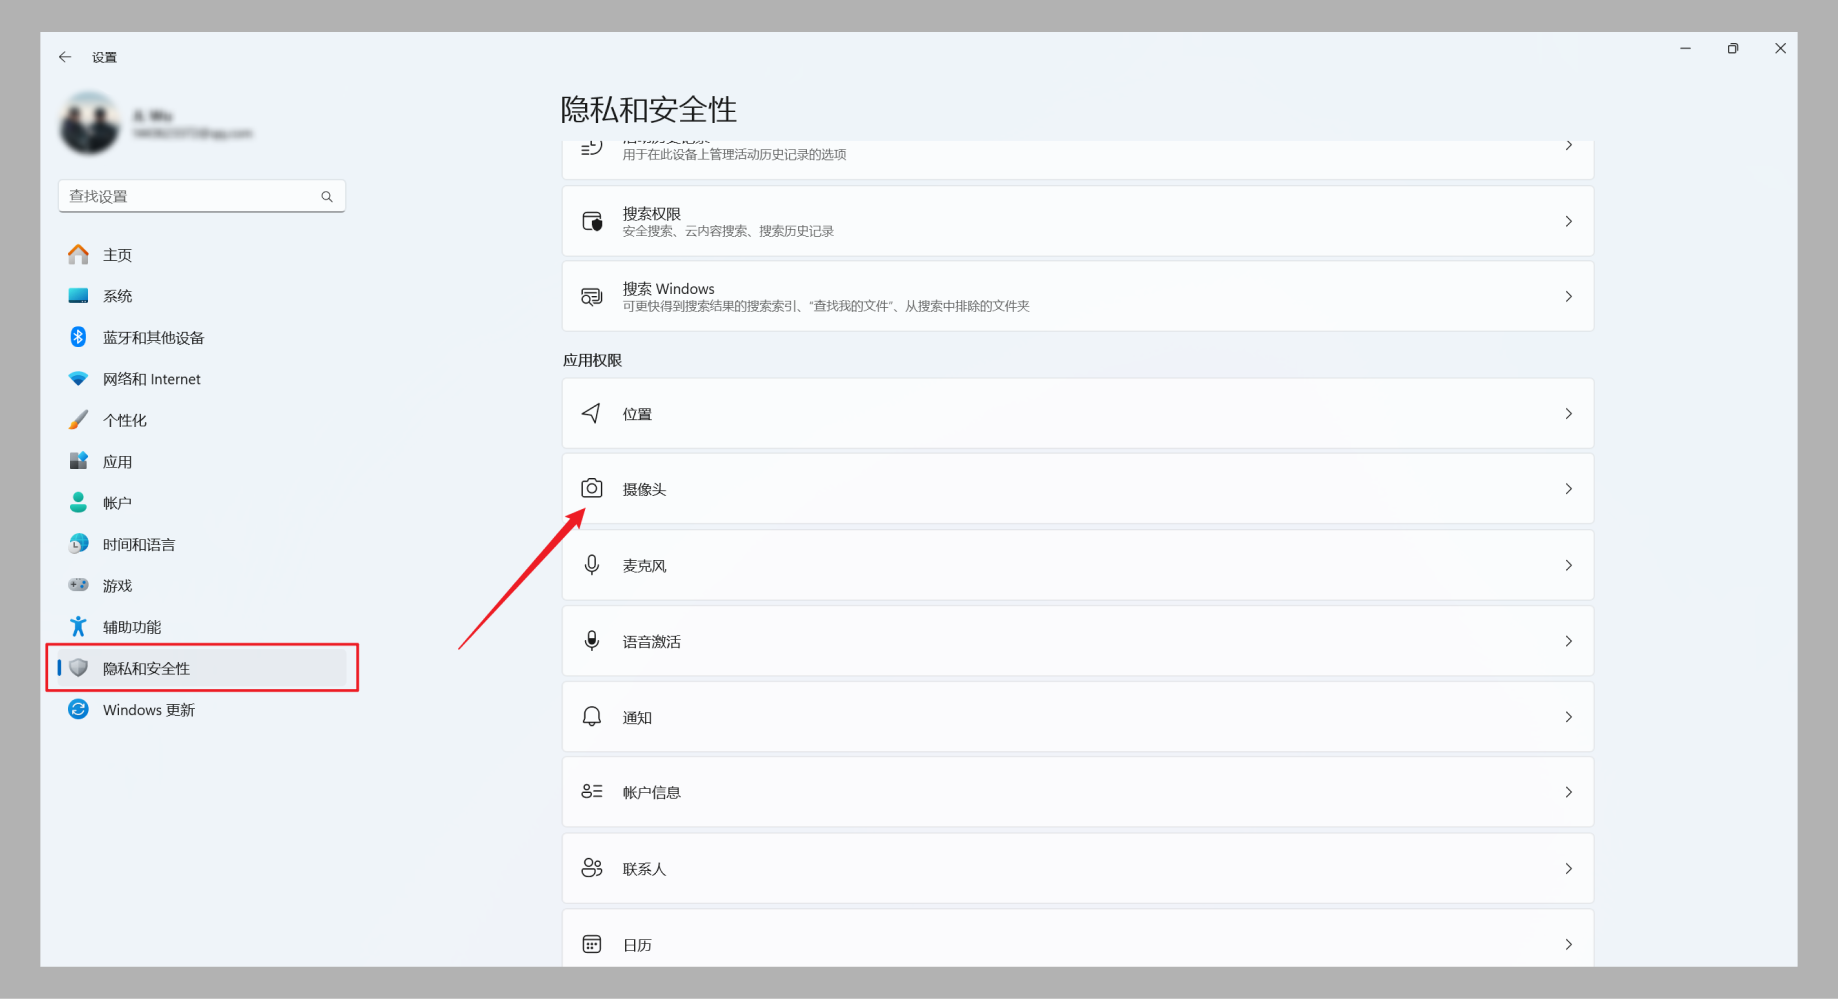
2. In the settings window, select “Privacy & Security” and click on “Camera” on the right.
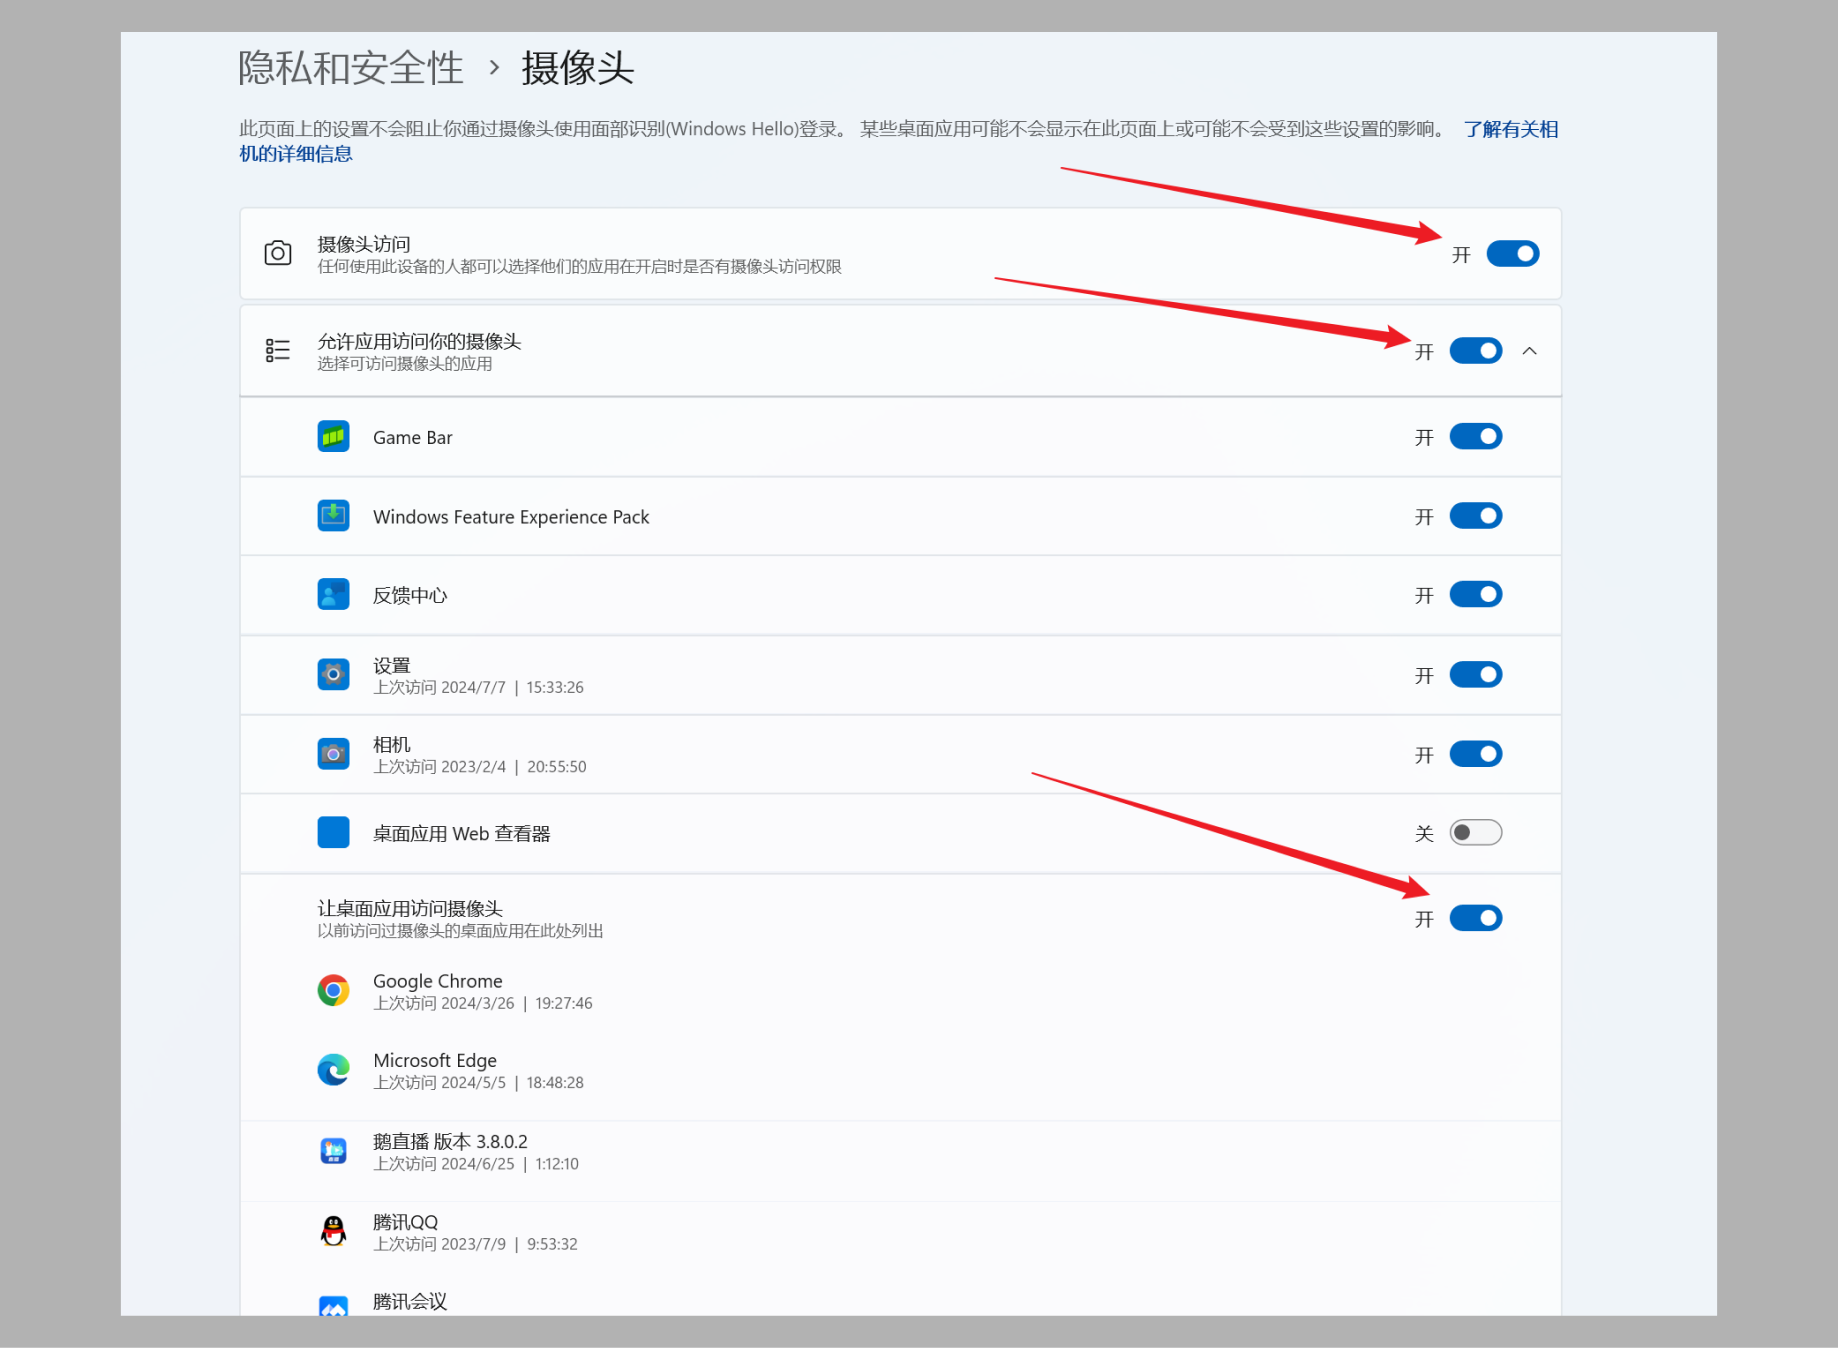
3. Enable camera permission:In the “Camera” window,ensure that the three permission switches shown in the following figure are turned on.
● macOS:
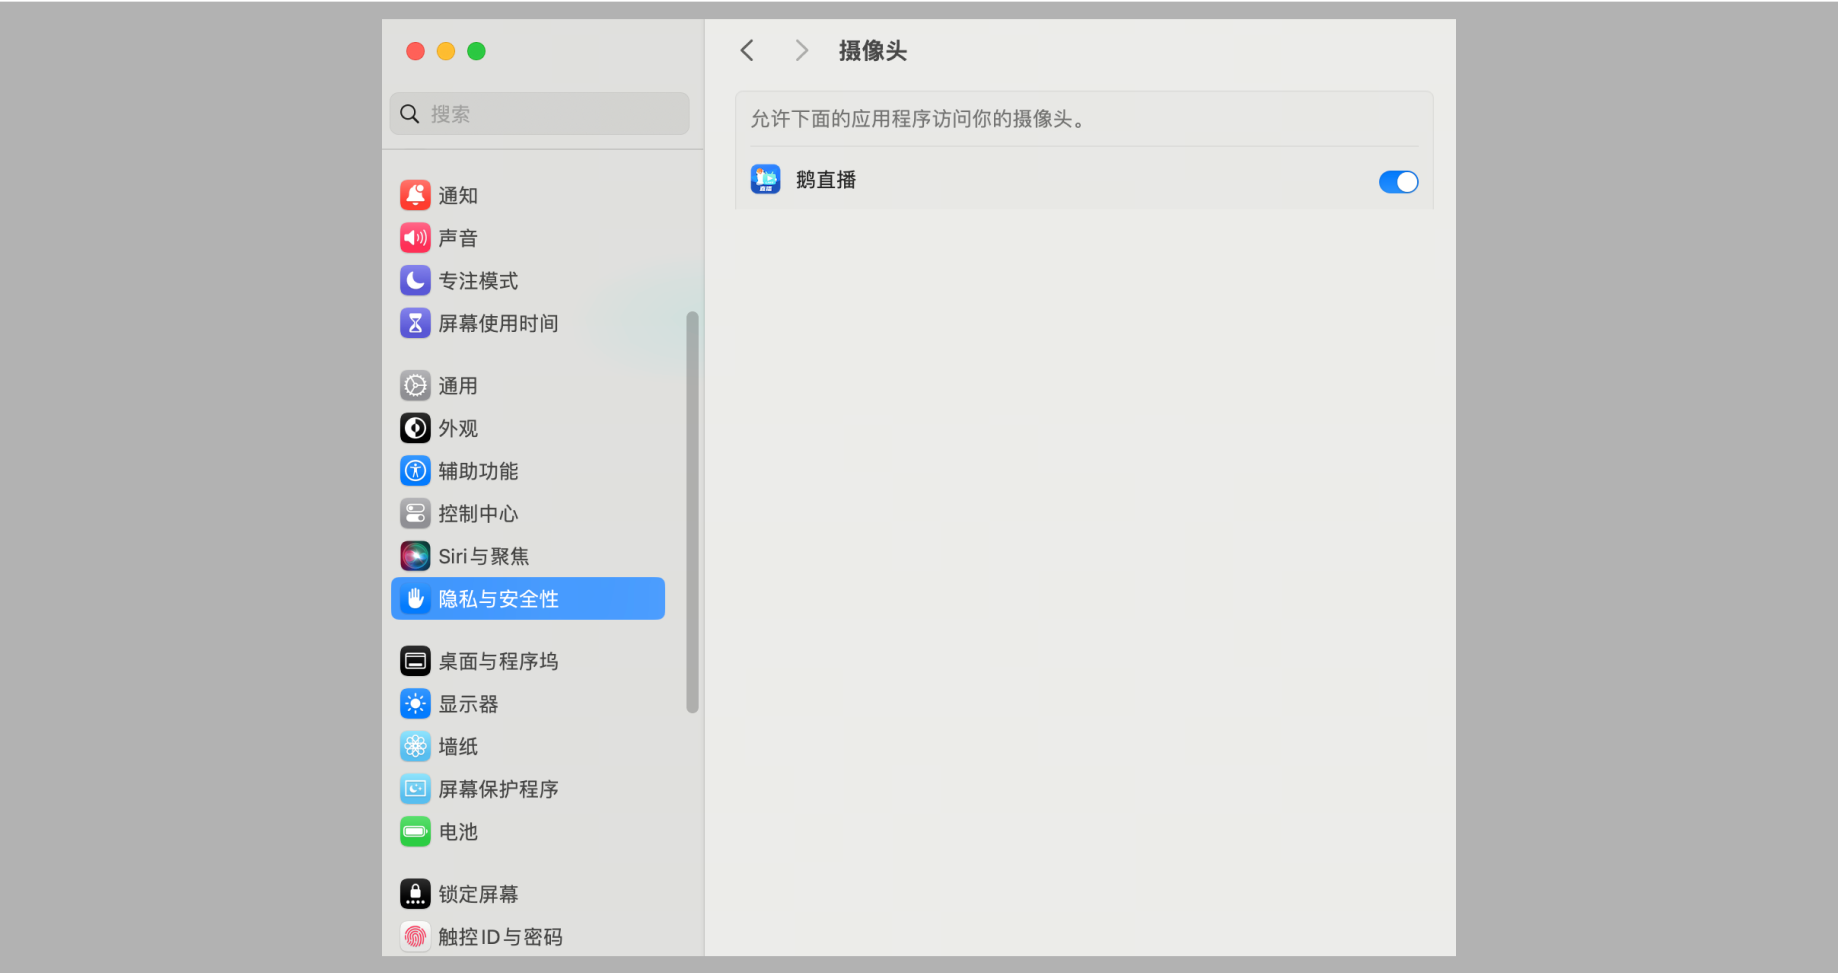
1. Click the Apple icon in the upper - left corner of the screen and select “System Settings” from the drop - down menu. Then select “Privacy & Security” and “Camera”.

2. After entering the camera settings panel, turn on the access permission for the elink Live client.
3.2 If multiple camera devices are connected, check if the correct one is selected.
● Windows:
1. Click the Windows Start menu and select “Settings”.

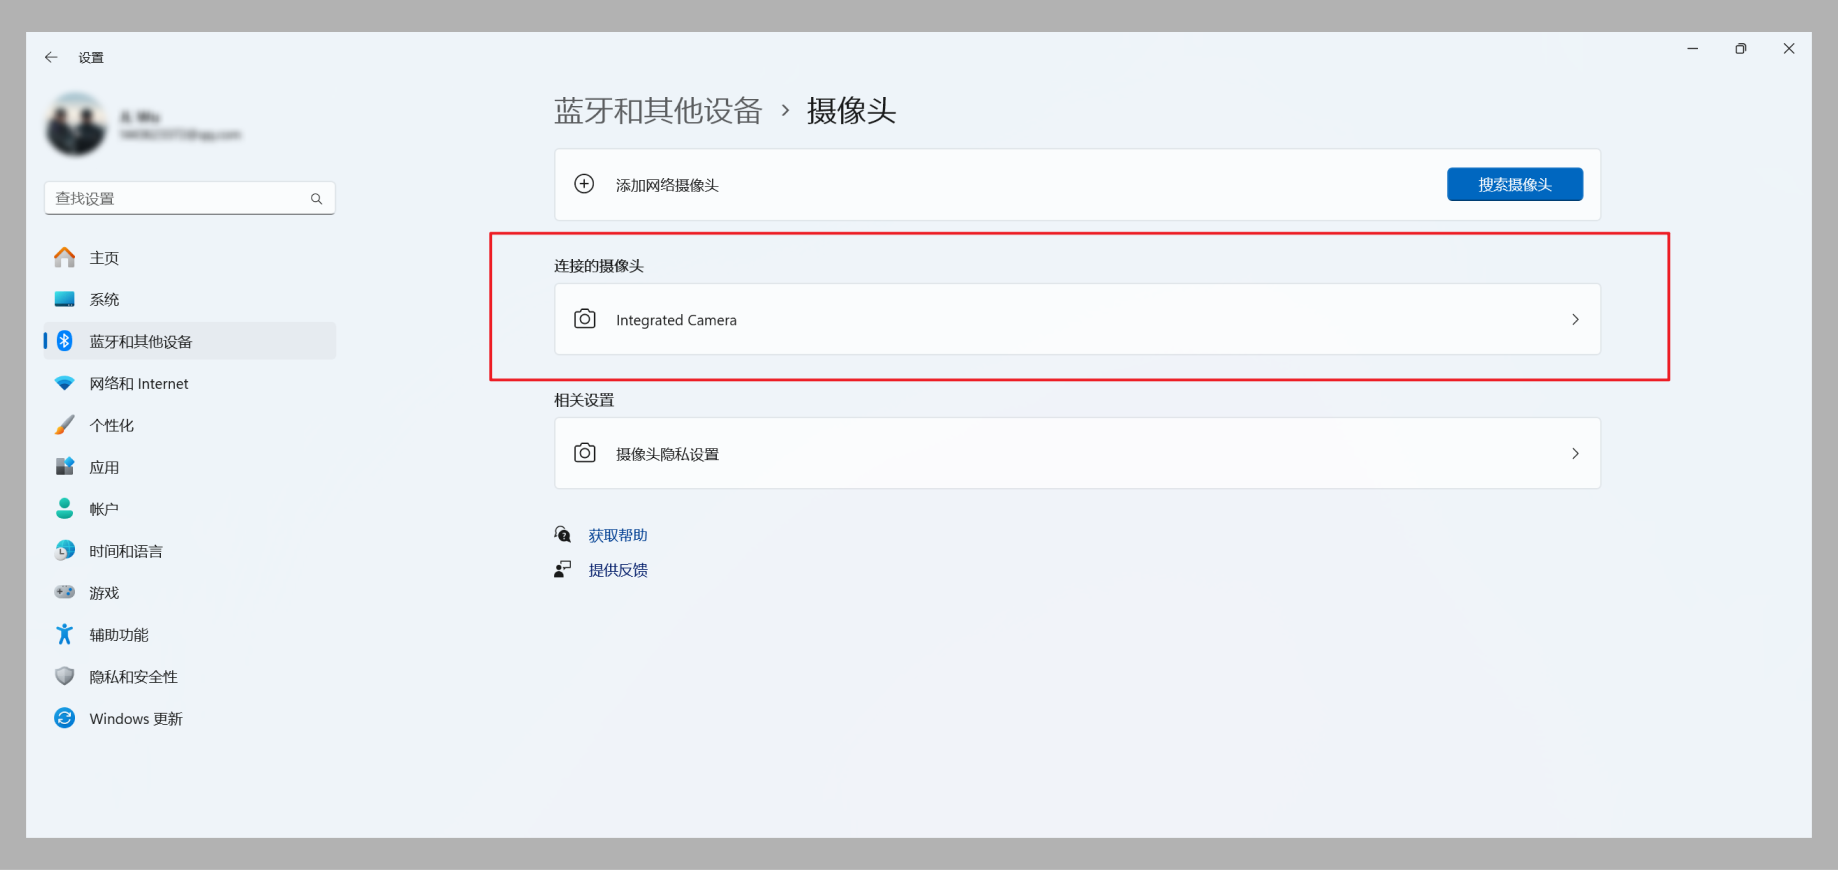
2. After entering the settings panel, click “Bluetooth & other devices”, and then select the “Camera” option on the right after opening it.
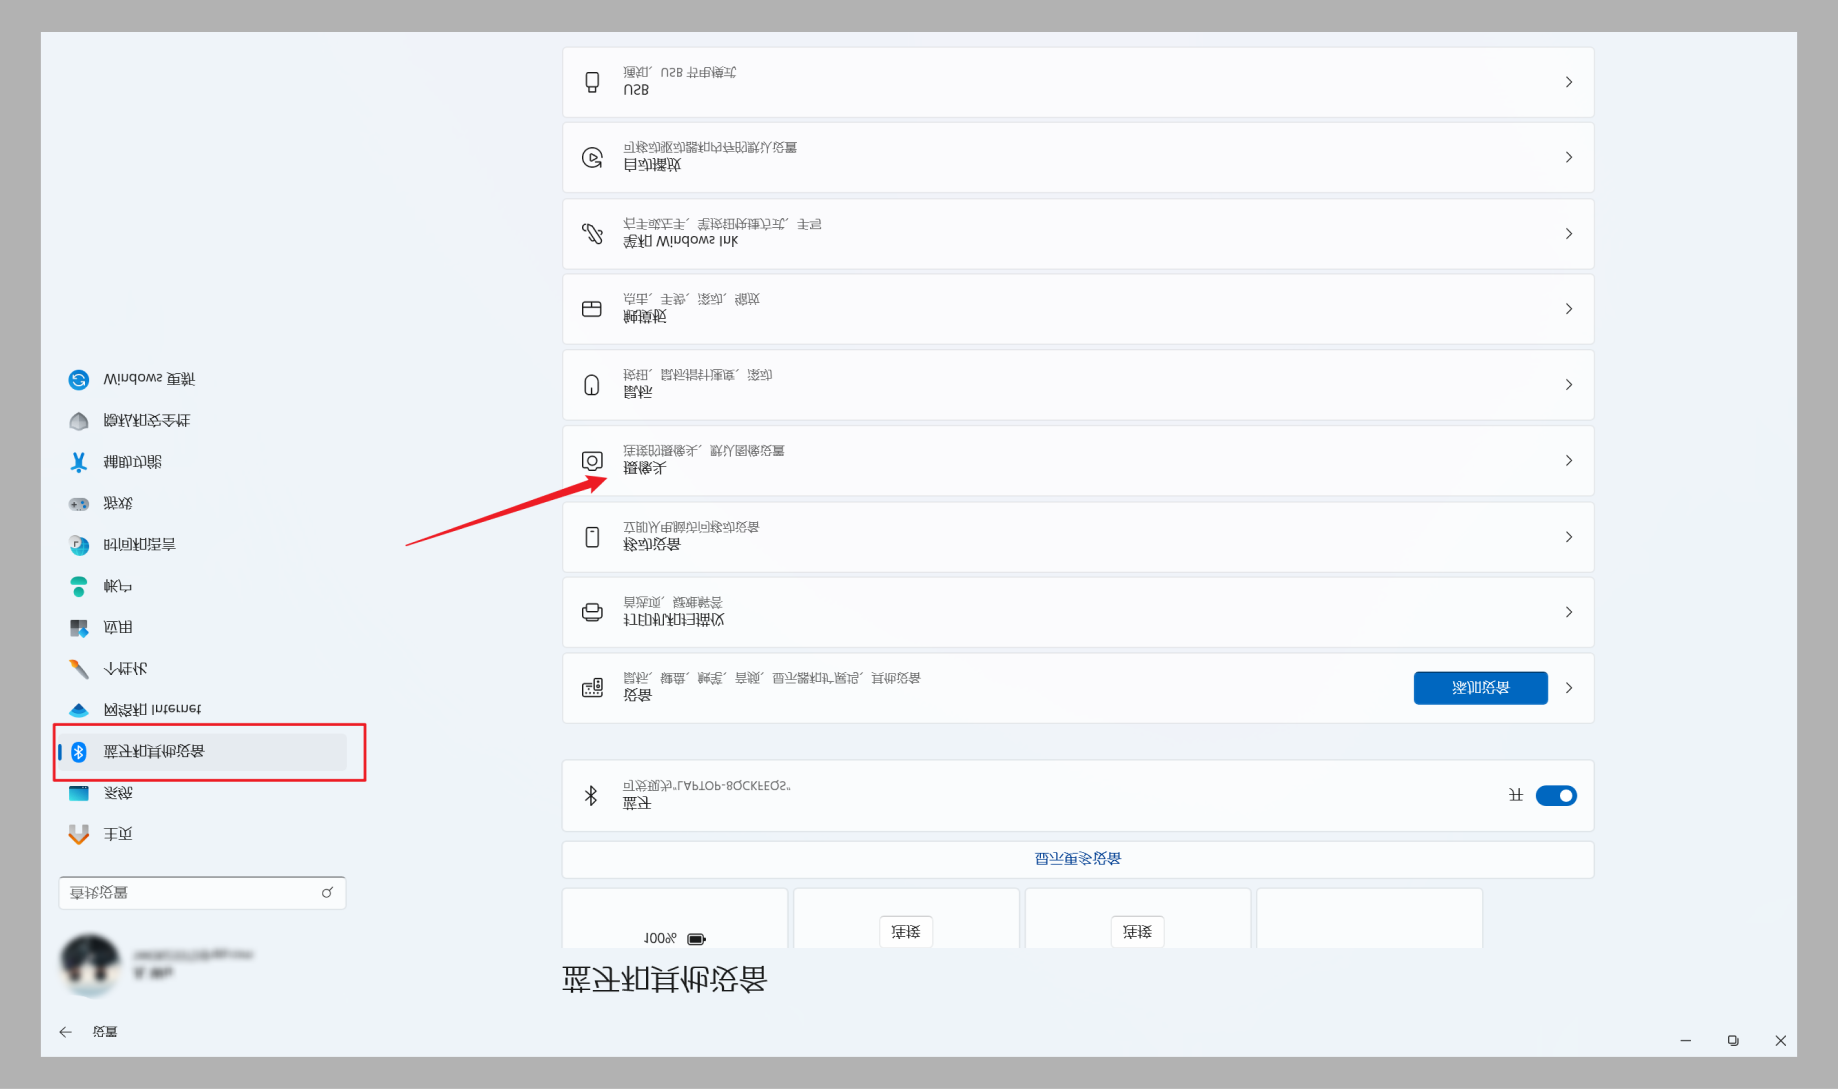
3. You can select and enable your camera device at the position shown in the following figure. (Ensure that it is the same as the device selected in the elink Live client).
● macOS:
On the Mac system, you can select the camera within the software.