Micro page
- Tutorial on Using the Bookshelf Component
- Tutorial on Using the Mobile Template Library
- What is the relationship between the Online Store homepage and the Mini Page?
- How to preview the store decoration effect?
- Can the background color of the online store be modified?
- How to share a specific Mini Page externally?
- Can the background color of the micro-page be customized?
- How to quickly set up a Product Collections for a [Manual adjustment required] 'Community Joint Orderg' Online Store?
Tutorial on Using the Bookshelf Component
I. Function Introduction
The bookshelf component is an important component for operators to customize micro - pages. By adding the bookshelf component, you can freely add pre - edited knowledge products to the micro - page and display and sell them in a bookshelf arrangement.
II. Operation Steps
1. Step One
Click “Store” - “Store Decoration” - “Mobile Store” - “Micro - page”, and then click to add the “Bookshelf” component.

2. Step Two
You can replace the cover of the knowledge products displayed on the bookshelf. Select a cover image with a ratio of 318*480 and upload it.
3. Step Three
You can also customize the component title, choose whether to display the title bar, and whether to display the “View All” entry.

III. Final Effect
After the settings are completed, the bookshelf effect will be displayed on the micro - page.

Tutorial on Using the Mobile Template Library
I. Function Introduction
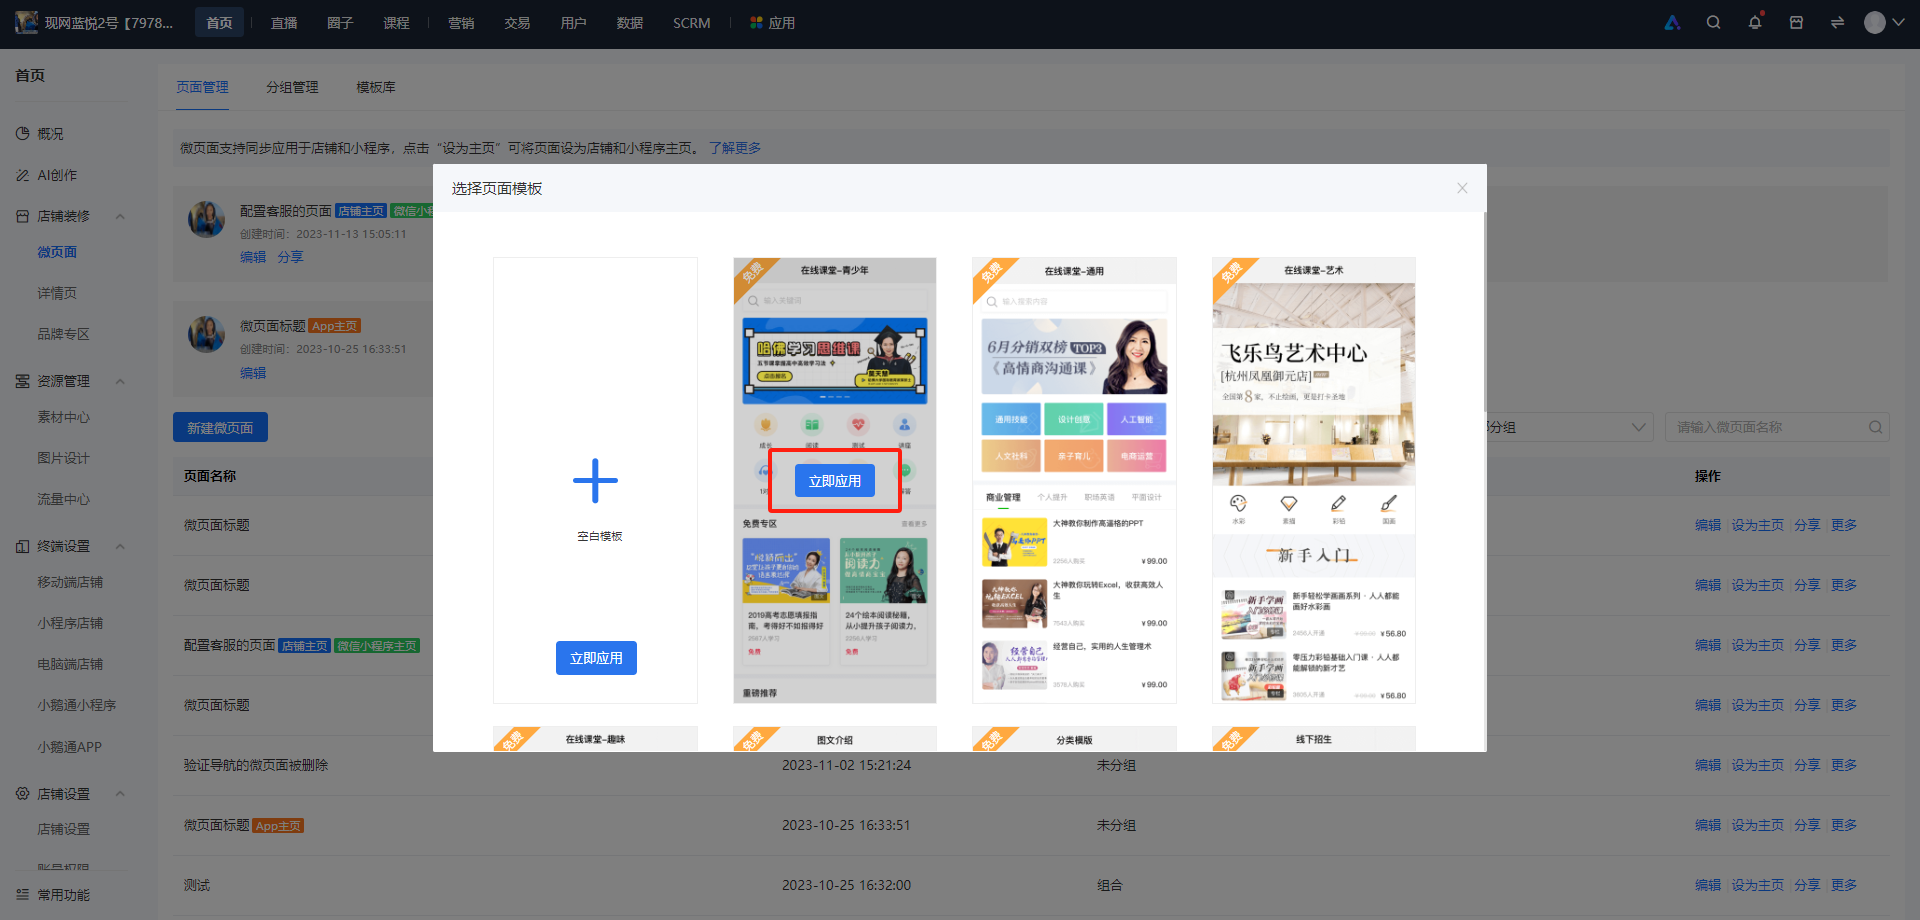
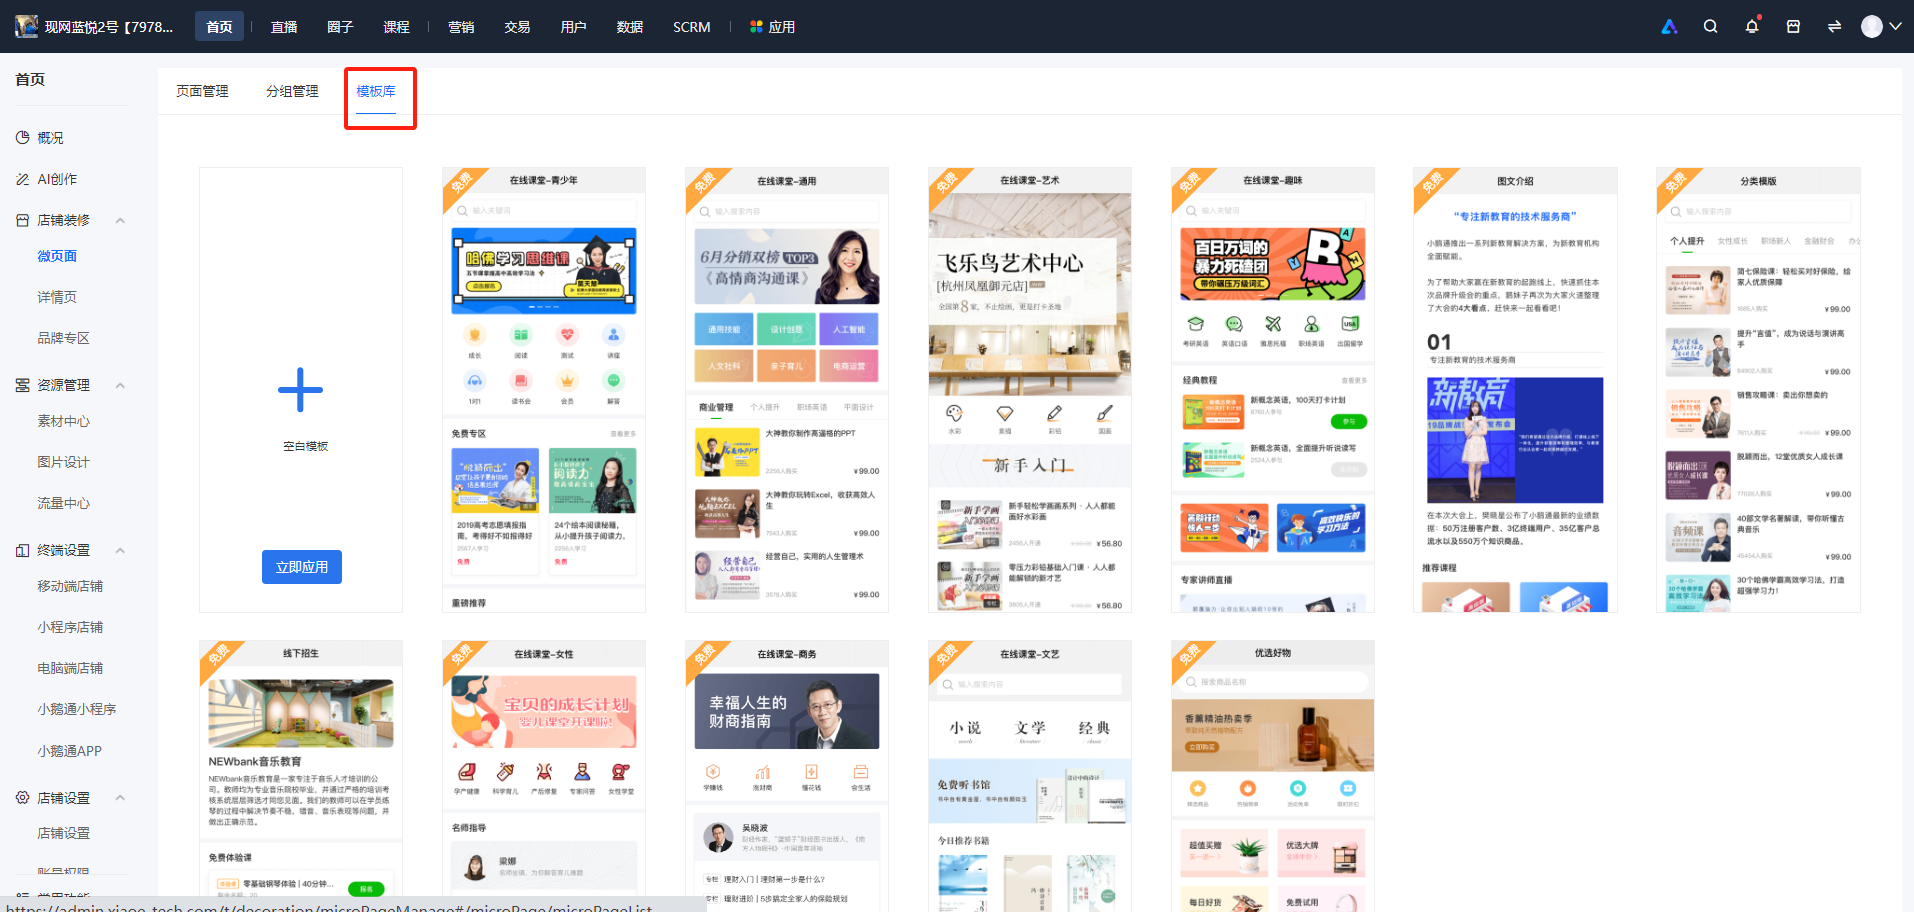
The Mini Page Template Library is a Mini Page building solution provided by elink for merchants. Merchants can choose templates that suit their store style and brand tone from 11 different types of templates.
II. Purpose of Use
Depending on the industry and usage scenarios, the Mini Page can be set as the store's homepage, or a link can be set through the bottom navigation of the store to jump to it, or it can be shared as an independent page with specific groups.
III. Usage Scenarios
When creating a new Mini Page, merchants can refer to the provided template solutions to build the page.
IV. Operation Path
Merchant side: Store -> Mobile store -> Mini Page -> Create a new Mini Page
V. Usage Tutorial
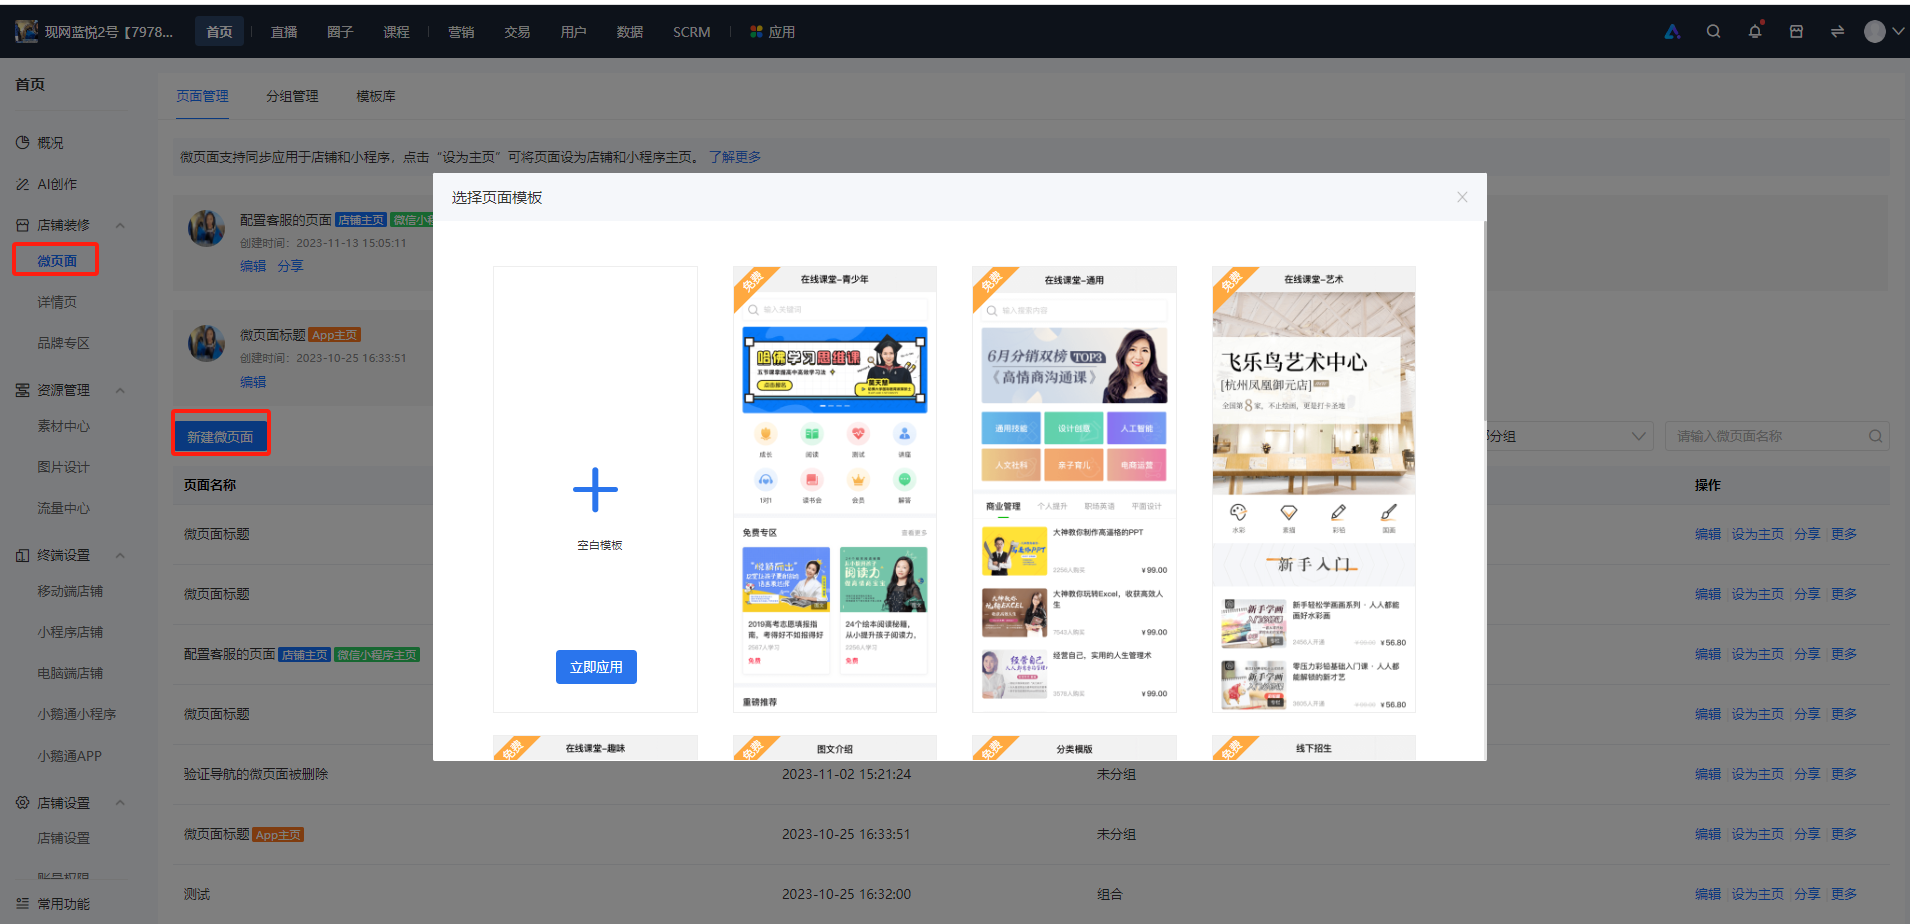
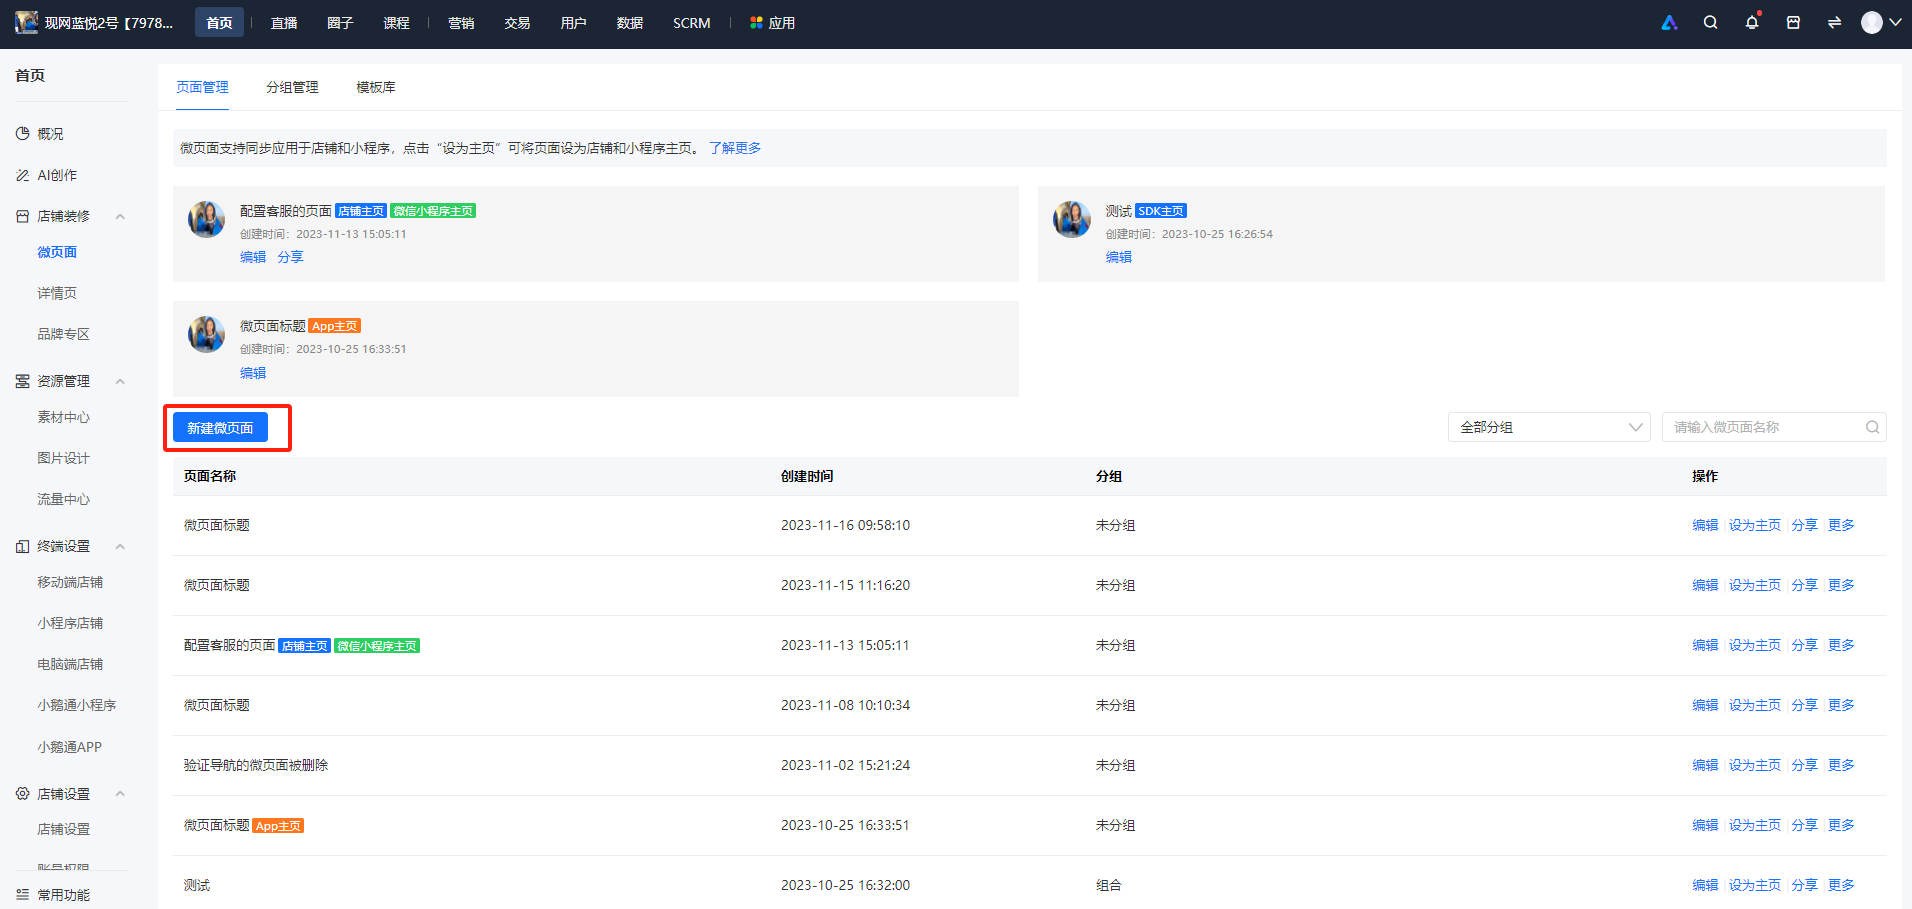
Step 1:Homepage -> Store decoration -> Mini Page -> Create a new Mini Page (Management background)
Step 2:Select a suitable template page and click [Apply now] to edit components and upload corresponding material content (Management background)
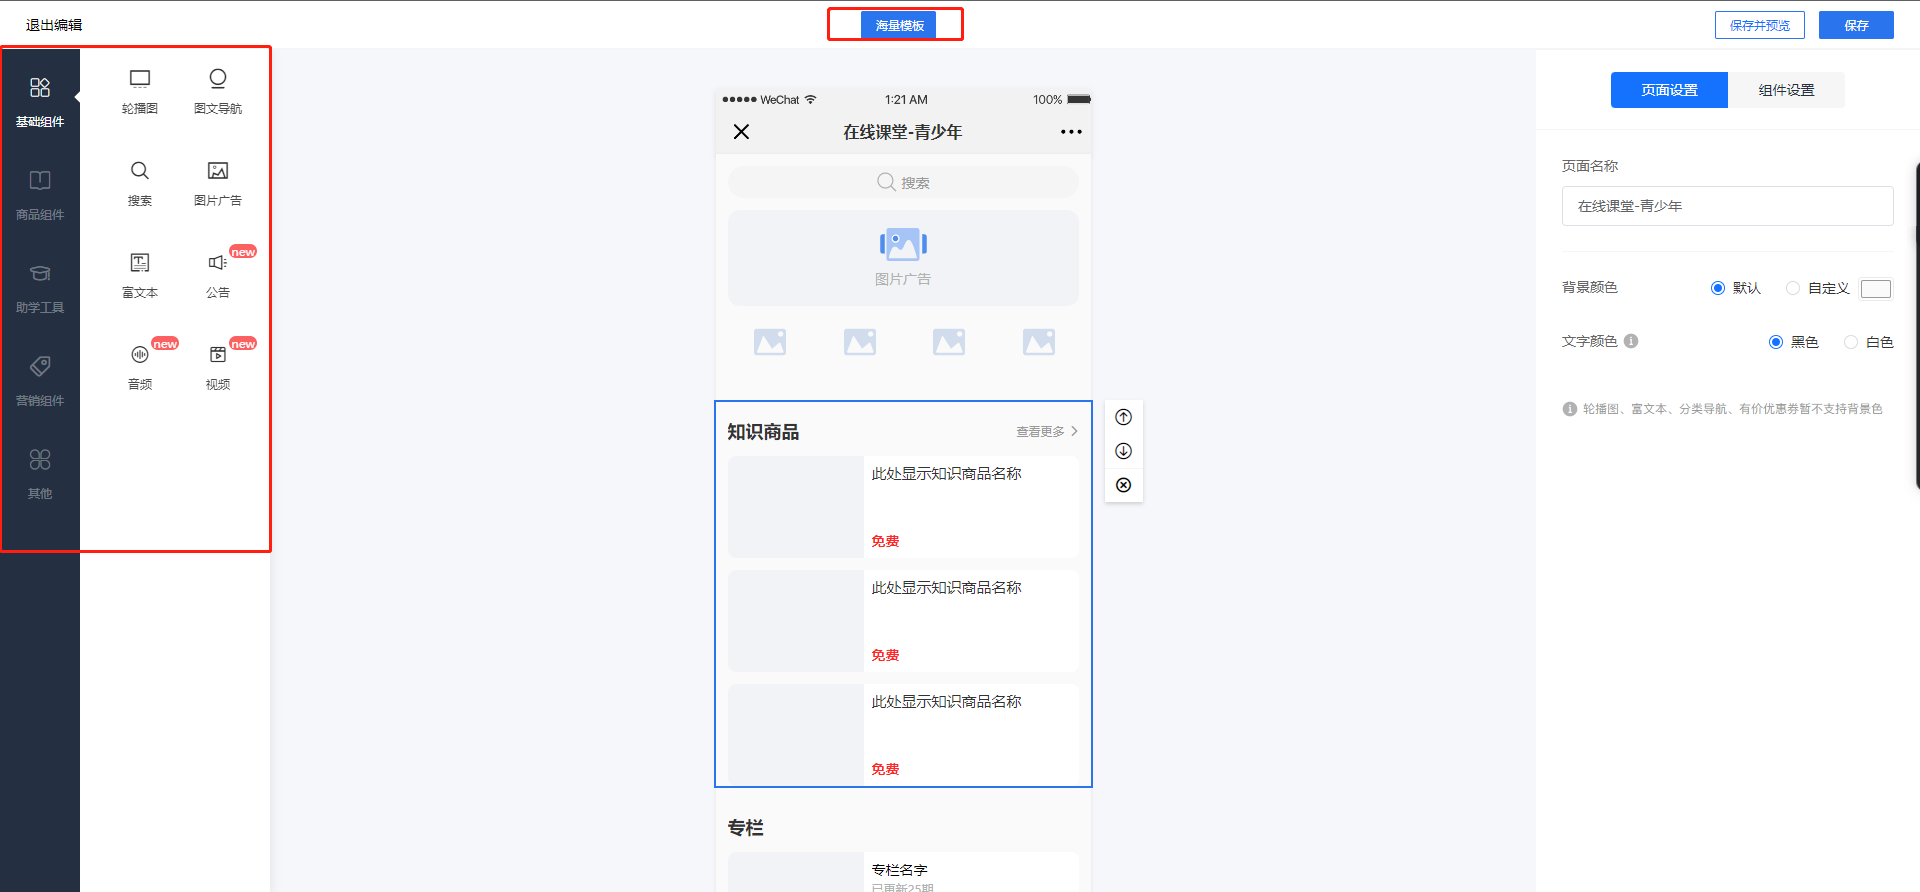
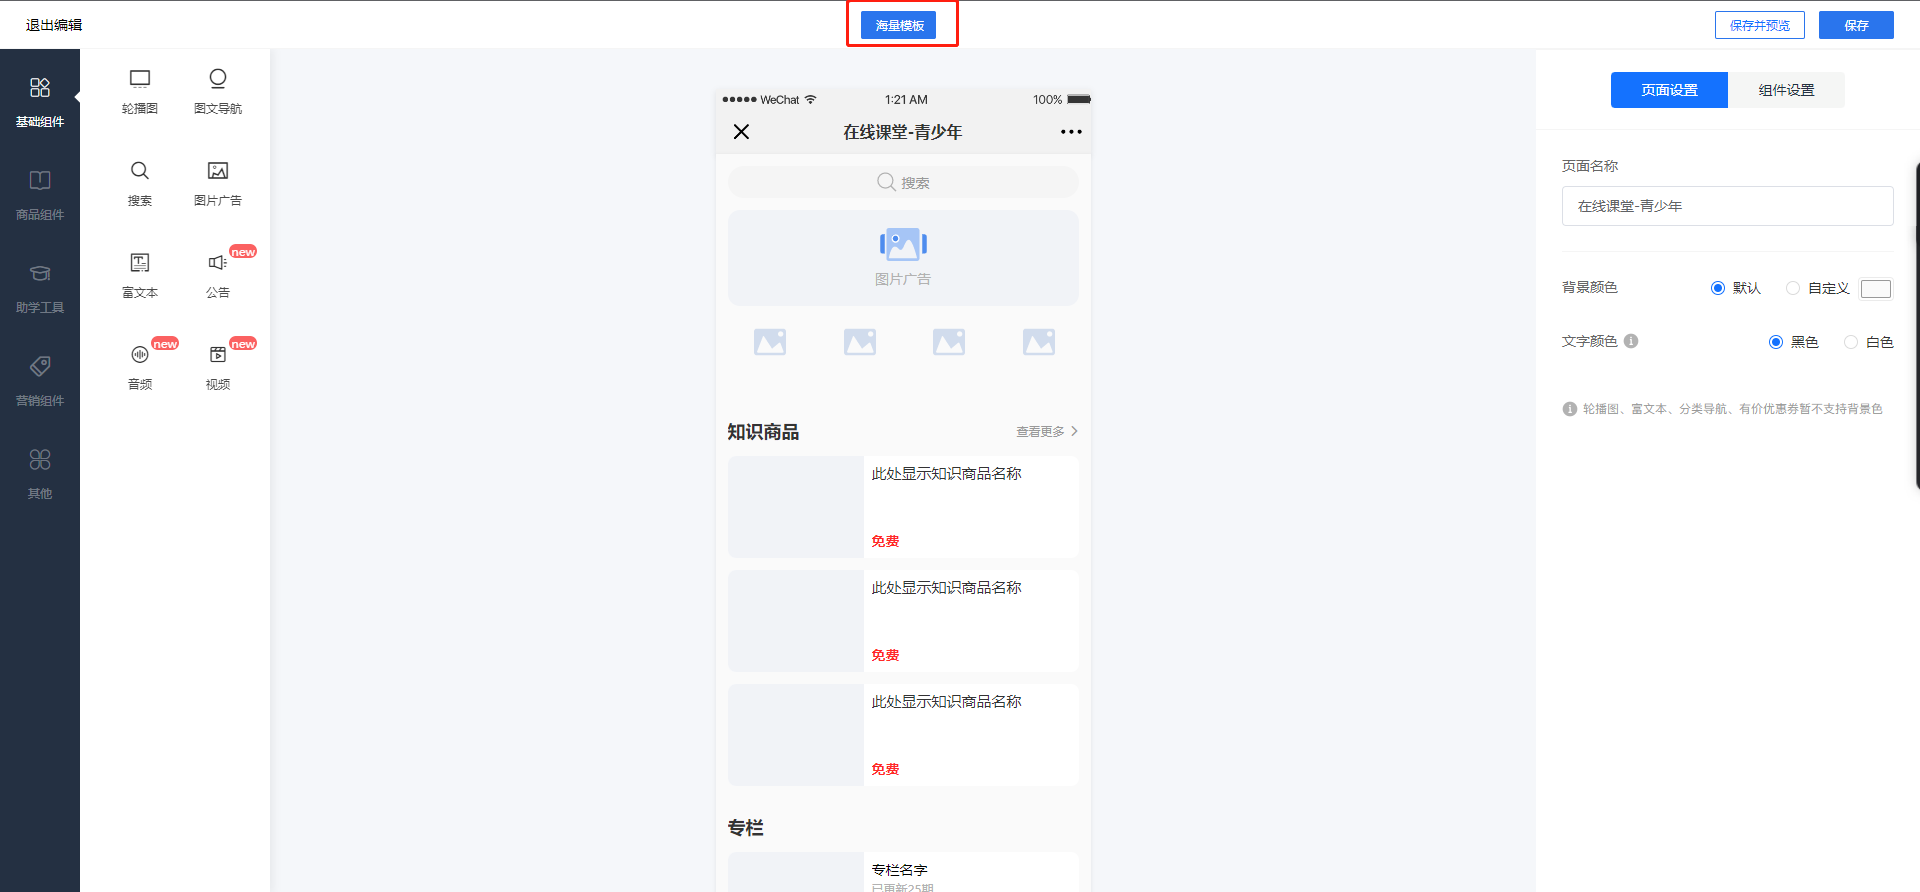
Step 3:On the left are the corresponding classified components. You can add or delete components on the basis of the original template, and users need to upload the content themselves. If you want to change the template during the editing process, click [Massive templates] to re - enter the template library and select a template for editing.
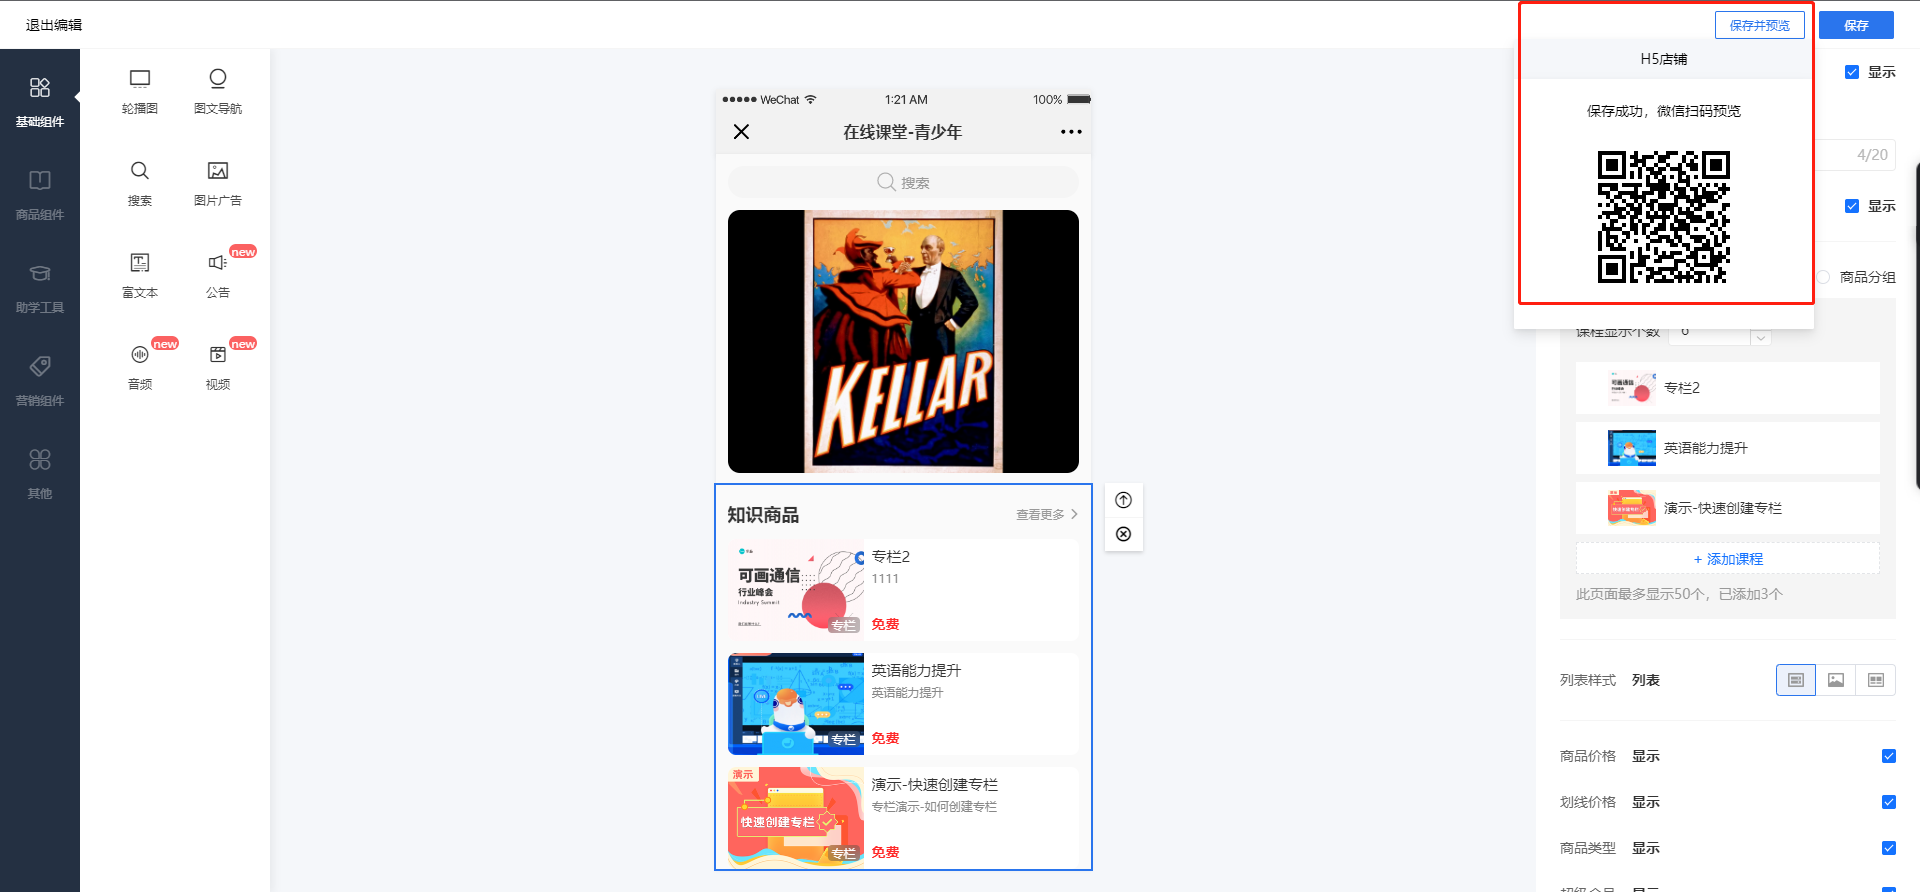
Step 4:Click [Save and preview], and you can scan the QR code in the upper right corner to preview the effect on the mobile device.
VI. Notes
You can enter the template library from the following two places:
1. On the Mini Page list, click the [Create a new Mini Page] button;
2. Click [Template Library] to enter.
You can switch templates at the top of the store decoration page.
As shown in the figure:
What is the relationship between the Online Store homepage and the Mini Page?
The store homepage is essentially a Mini Page, except that this Mini Page is set as the store homepage.
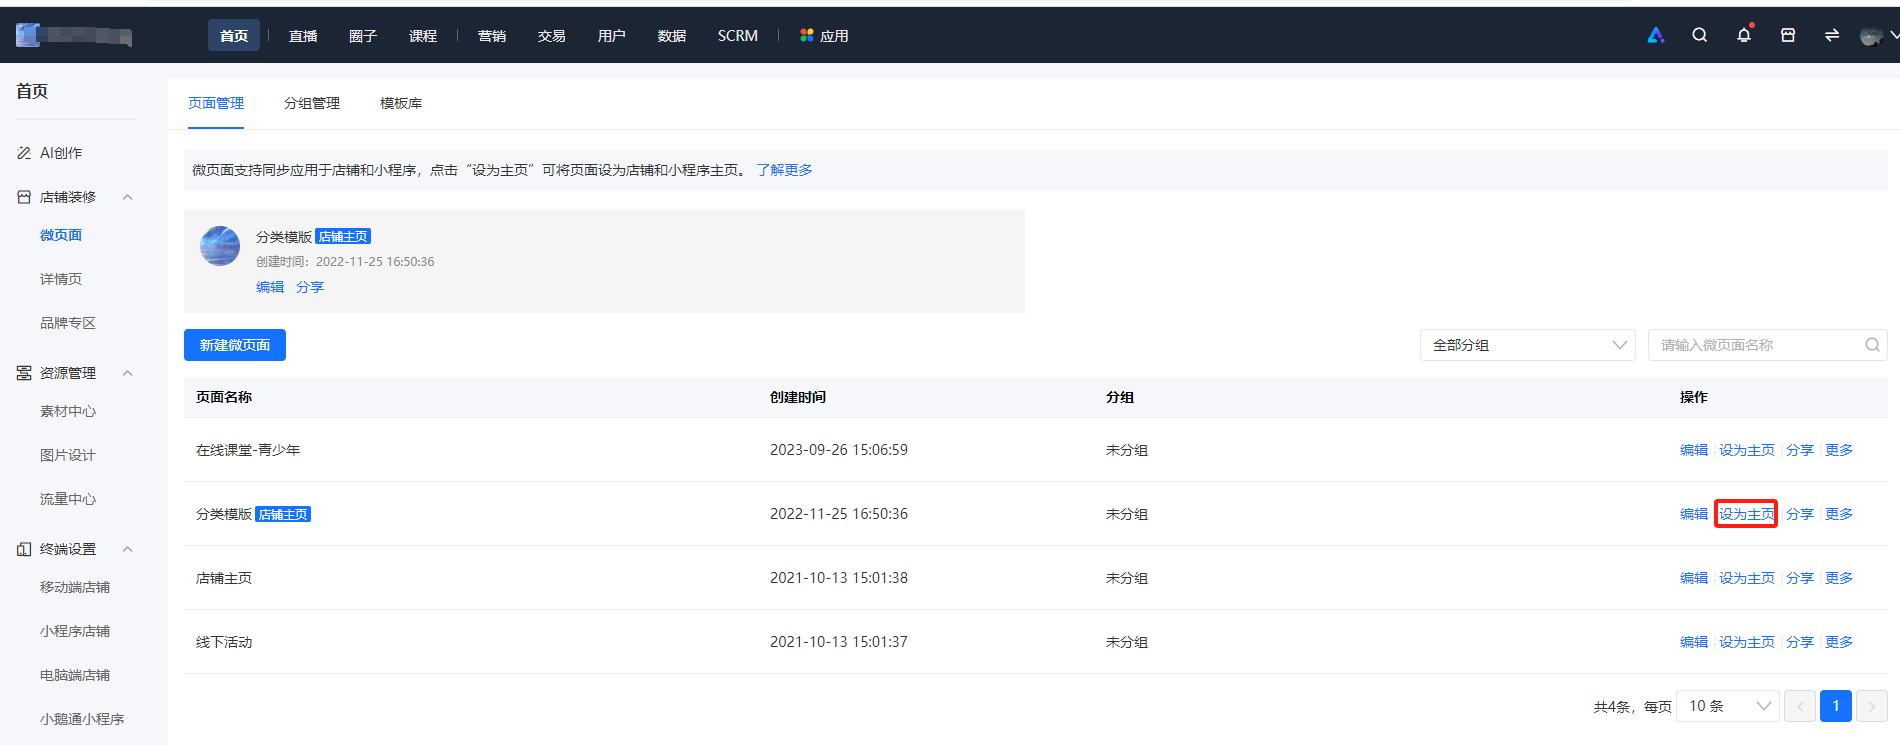
How to set the homepage?
Click to enter [Homepage] - [Store Decoration] - [Mini Page] - [Page Management]. After saving the settings, you can click [Set as Homepage].
[Mini Page] can also be shared as a separate page. For example, you can configure the corresponding Mini Page for marketing themes. You can use the Mini Page for special displays during specific periods and on specific occasions.
How to preview the store decoration effect?
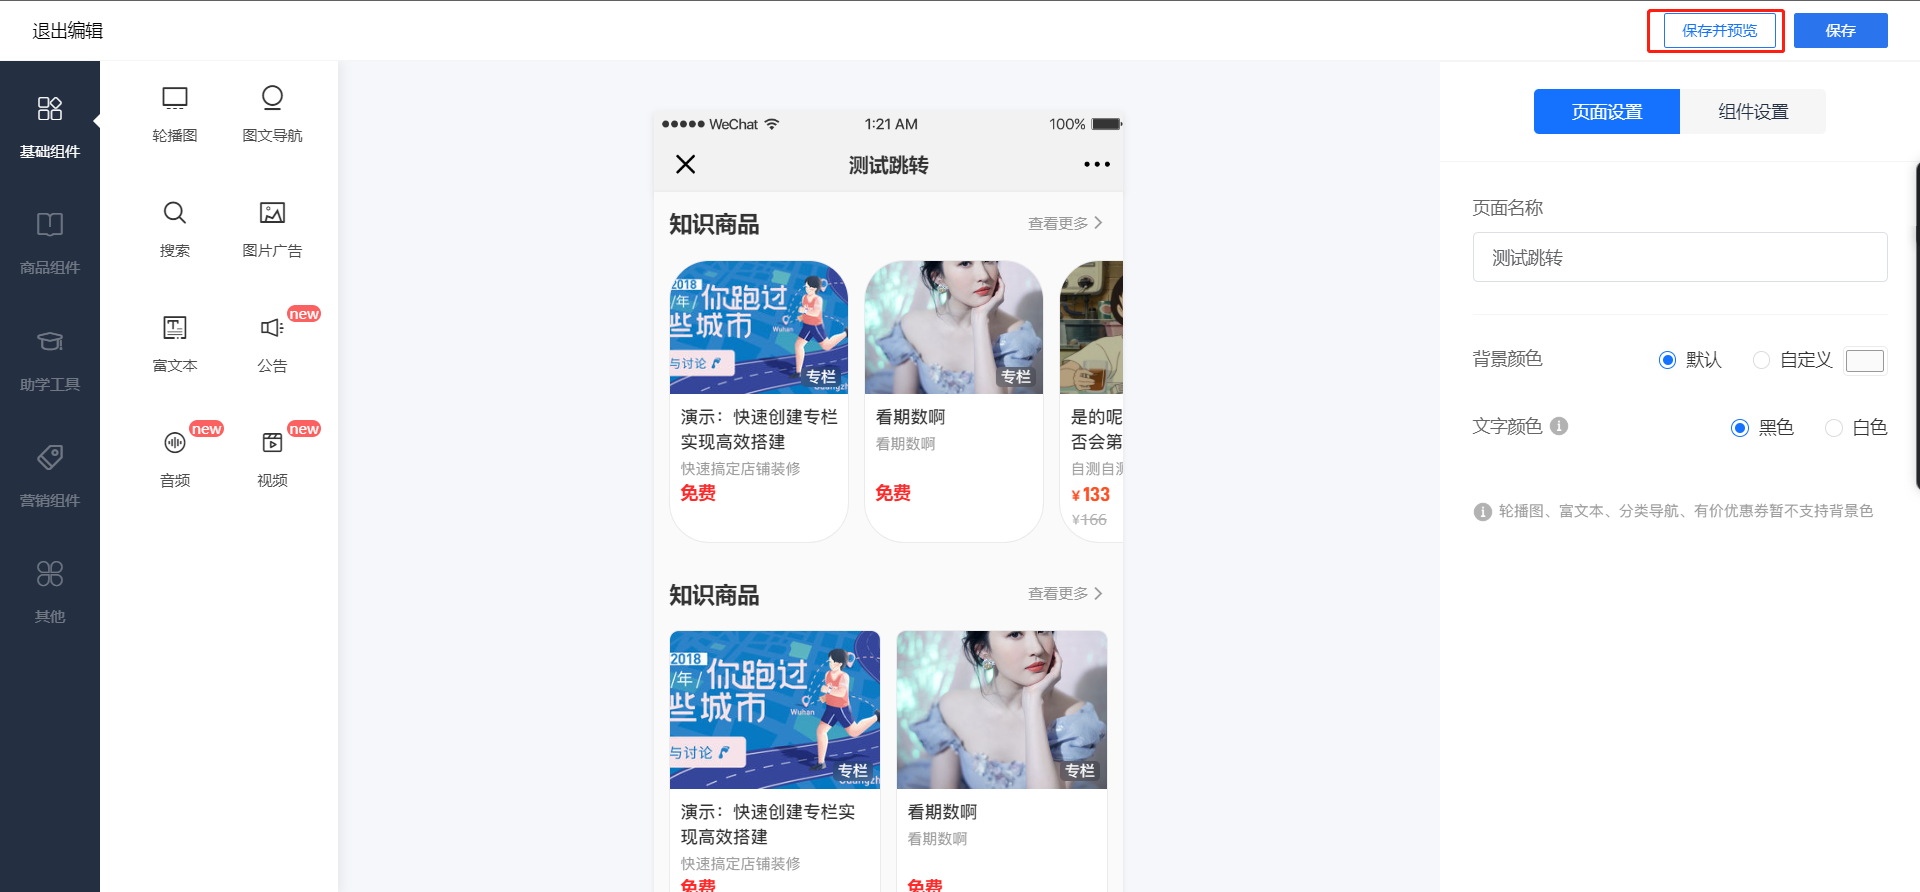
On the editing page, click [Save and Preview] in the upper right corner to preview the current page layout. Make adjustments if necessary.
For a better experience, it is recommended to view on mobile devices.
Can the background color of the online store be modified?
【Mobile Online Store】Custom background colors are now supported for micro-pages
Operation path: 【Online Store】 - 【Store Decoration】 - 【Mobile Online Store】 - 【Micro-page】 - 【Edit】 - 【Page Settings】

How to share a specific Mini Page externally?
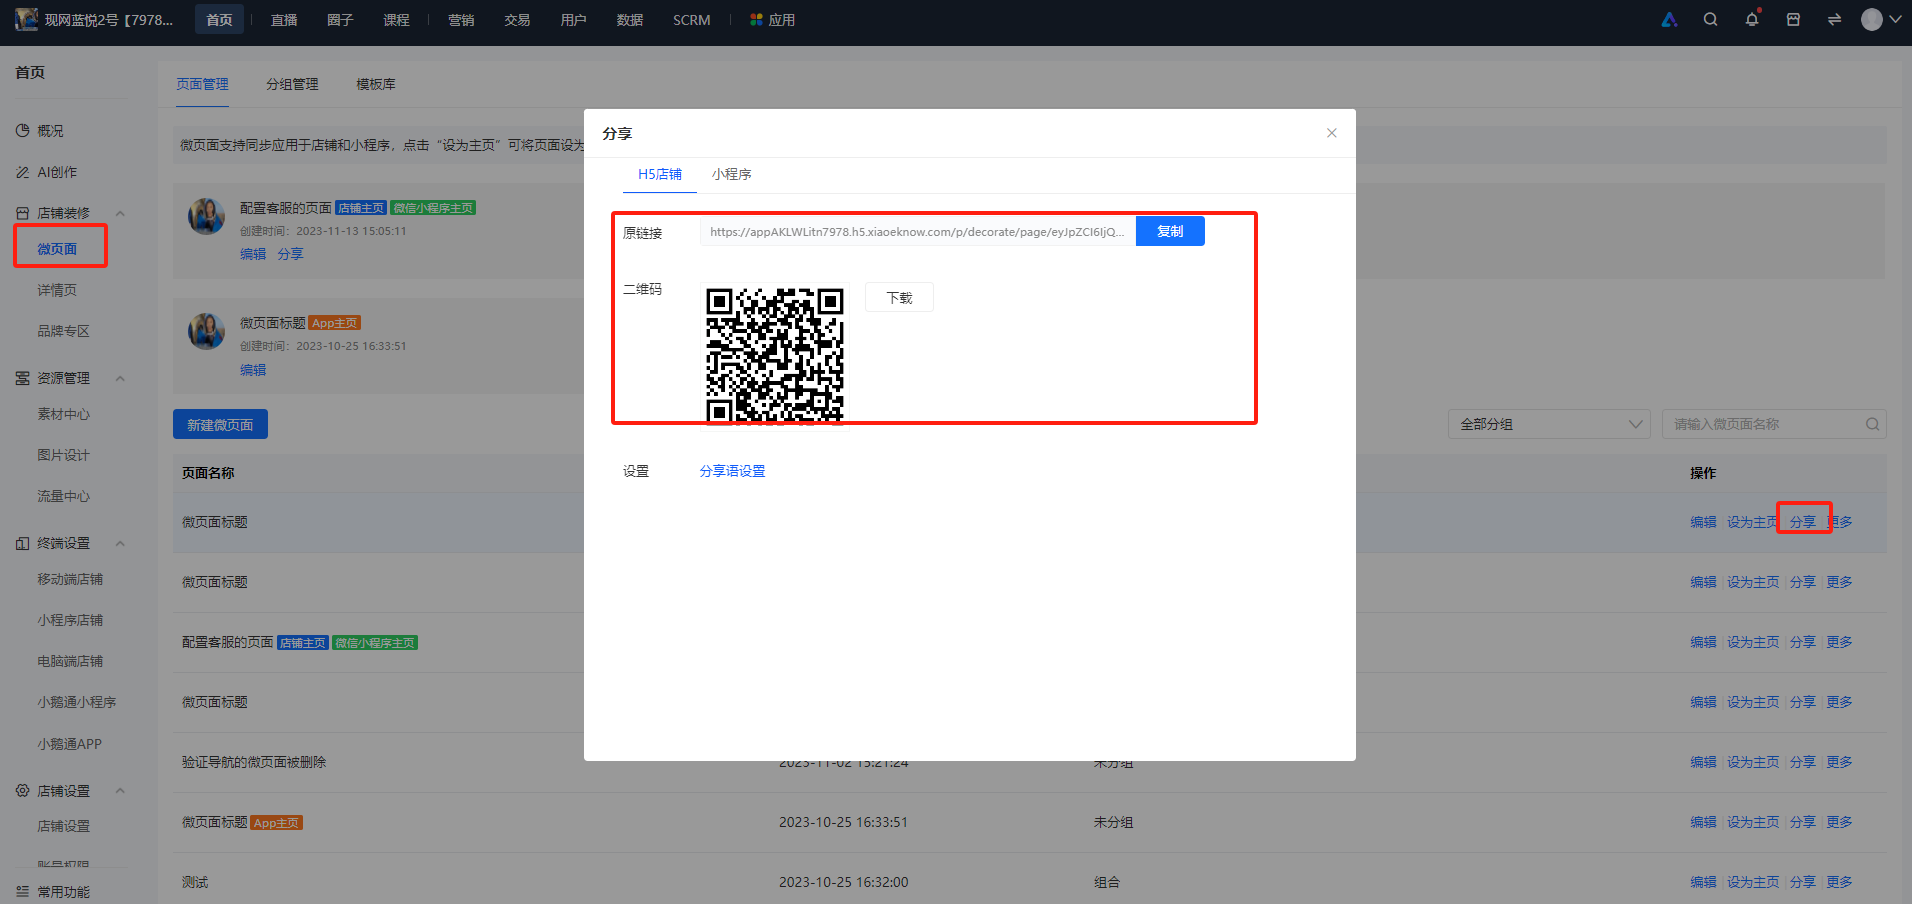
On the list page of mini pages, find the page you want to share. Click the [Share] button, then copy the [Online Store Link] or download the QR code to share the content of the mini page externally.
Can the background color of the micro-page be customized?
Supports merchants to customize colors. Merchants can set the 【Custom Background Color】 when editing the title of the Mini Page.
Operation path:Desktop managementIn the backend, click 【Store - Mobile Store】, then click 【Mini Page - Edit Mini Page】, and find the 【Custom Background Color】 on the right side.
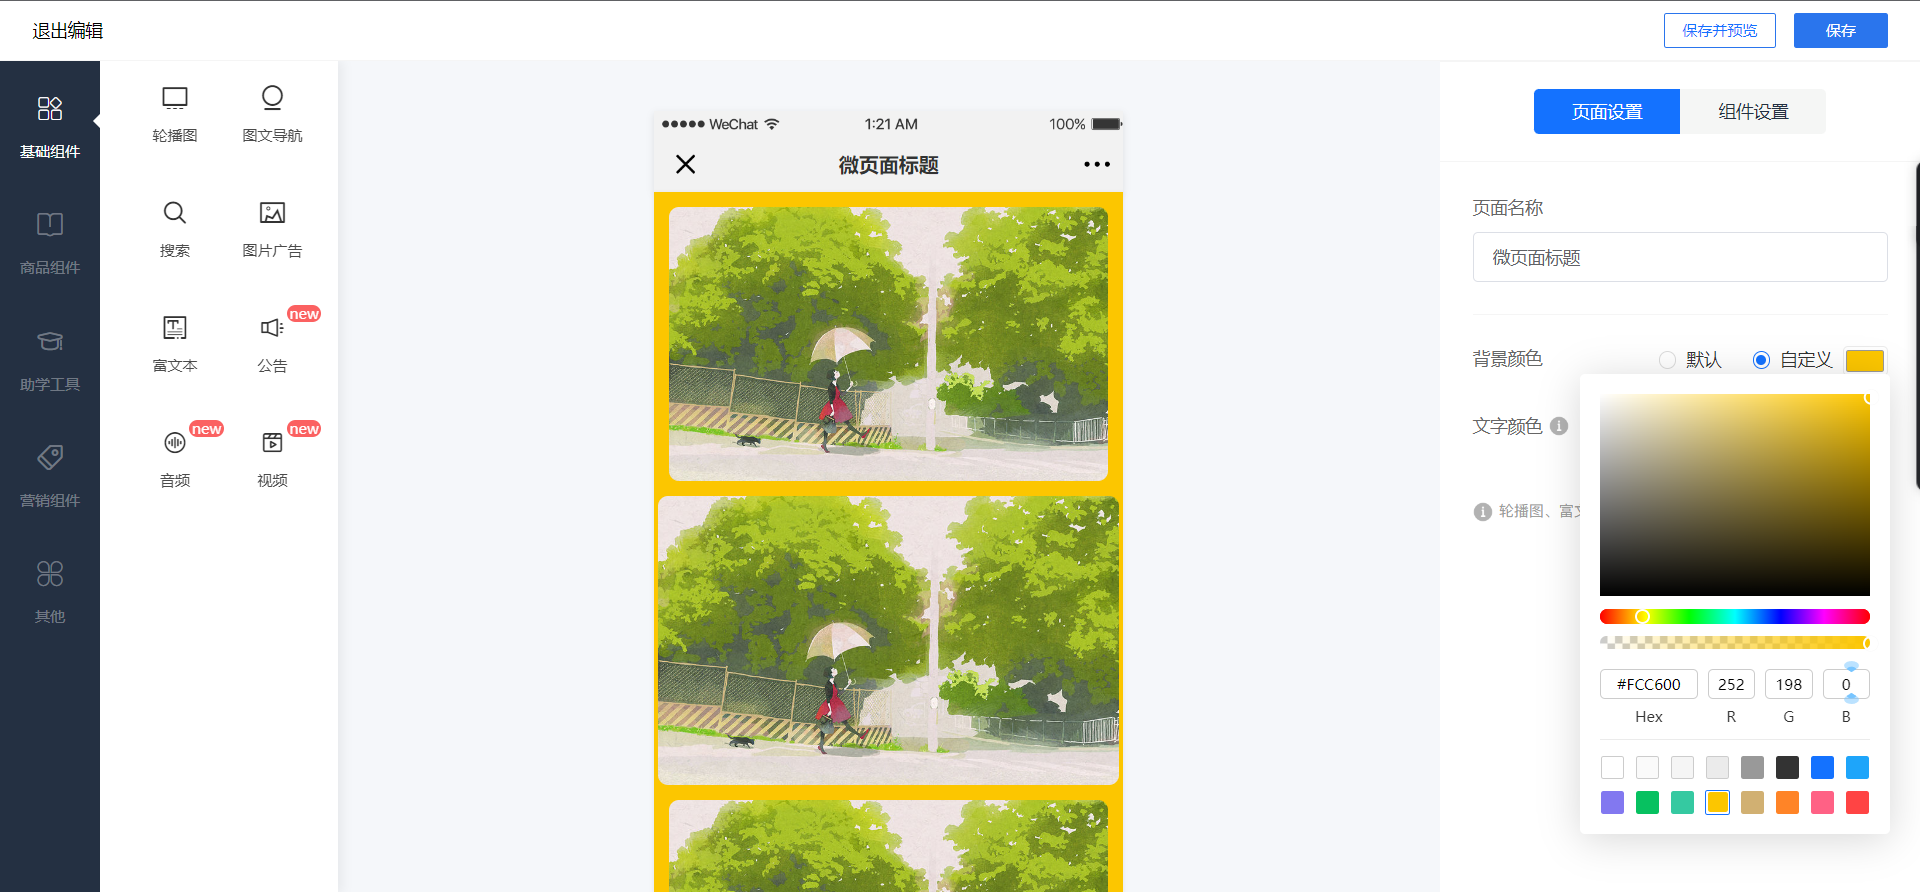
**Note: You can change the background color of the Mini Page, but you cannot set a background image.
How to quickly set up a Product Collections for a [Manual adjustment required] 'Community Joint Orderg' Online Store?


(Optional)Configure the shopping cart as the bottom navigation of the store: Enter [Settings] - [Mobile store] - [Store navigation] - [Add navigation], select [Shopping cart] for the jump link. After saving, users can quickly switch to the shopping cart for viewing in the store.


