# How to customize the live streaming room skin?

<div data-elink-language-switch="1" id="bkmrk-%E4%B8%AD%E6%96%87" style="border:1px solid #d6d9de;border-radius:6px;padding:10px 12px;margin:0 0 18px 0;background:#f8fafc;font-size:14px;">[中文](/books/68d30/page/86139)</div><span style="font-size:17px;">**Step 1**</span>

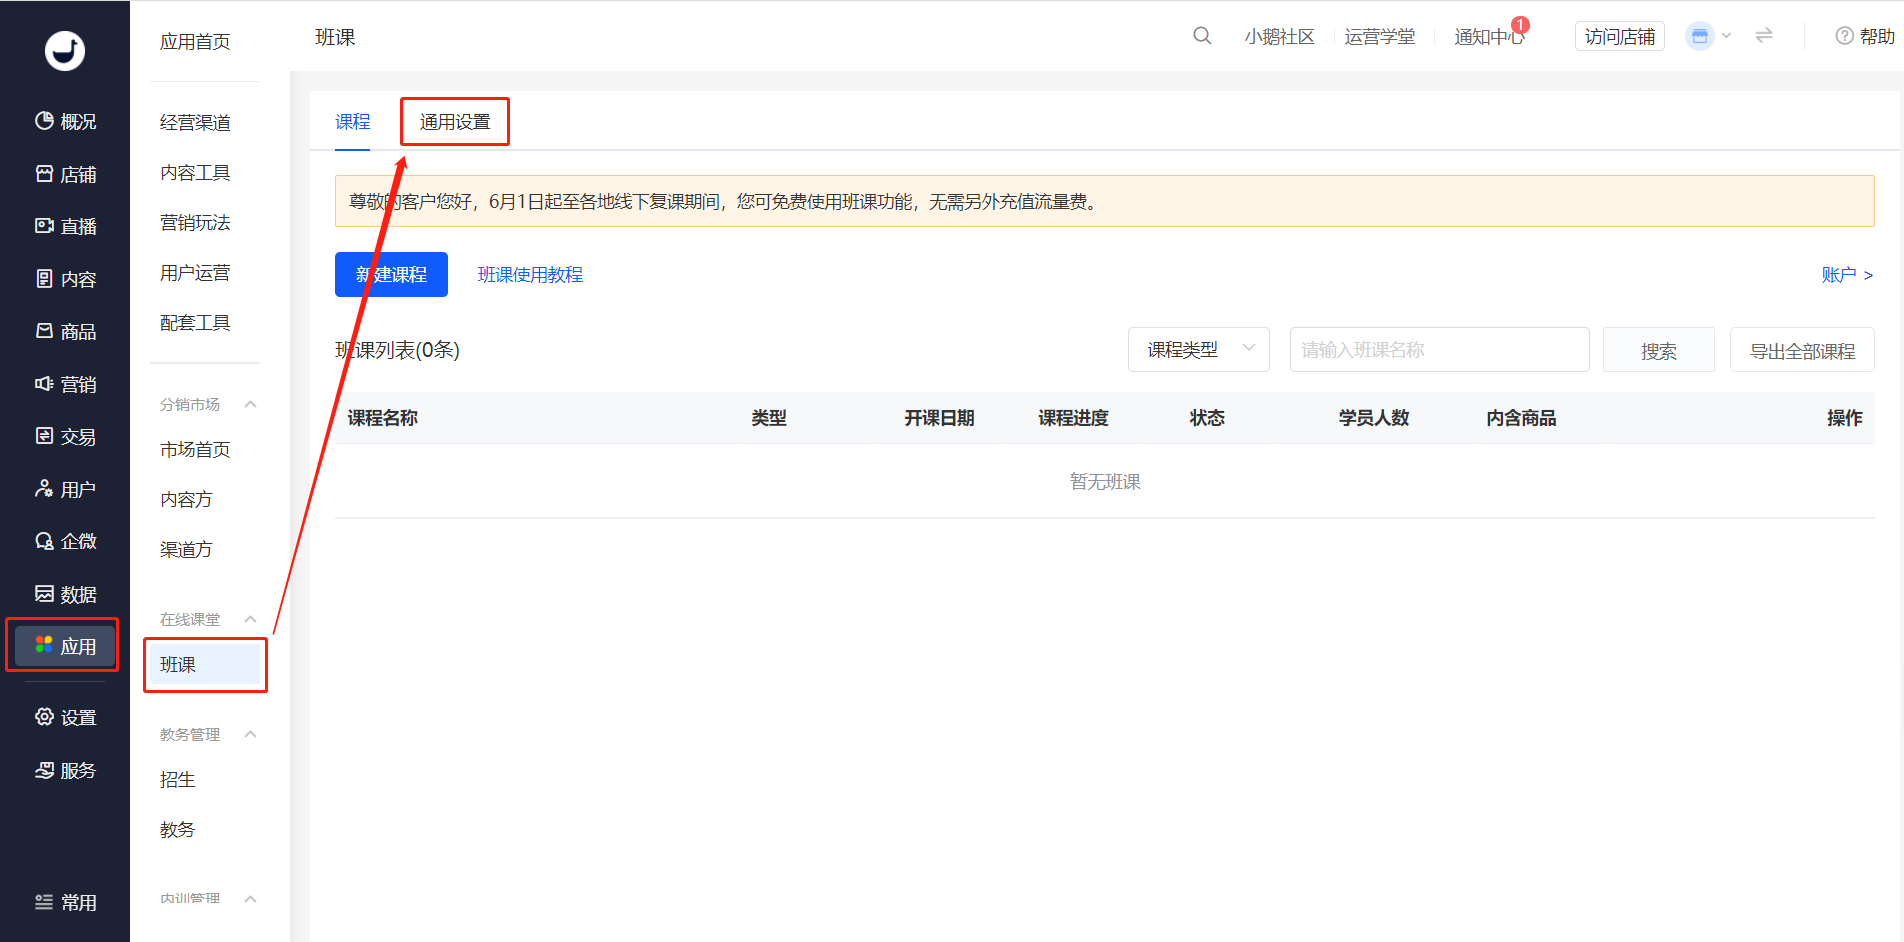
<span style="font-size:15px;">The administrator goes to \[Desktop Management Console - Applications - Online Classroom<span style="font-size:15px;text-indent:32px;">\]</span>, clicks on "Class Sessions" and selects the "General Settings" menu bar;</span>

![20.png](https://wechatapppro-1252524126.file.myqcloud.com/help_document/image/ueditor/8633000_1640576643.png ".png")

<span style="font-size:17px;">**Step 2**</span>

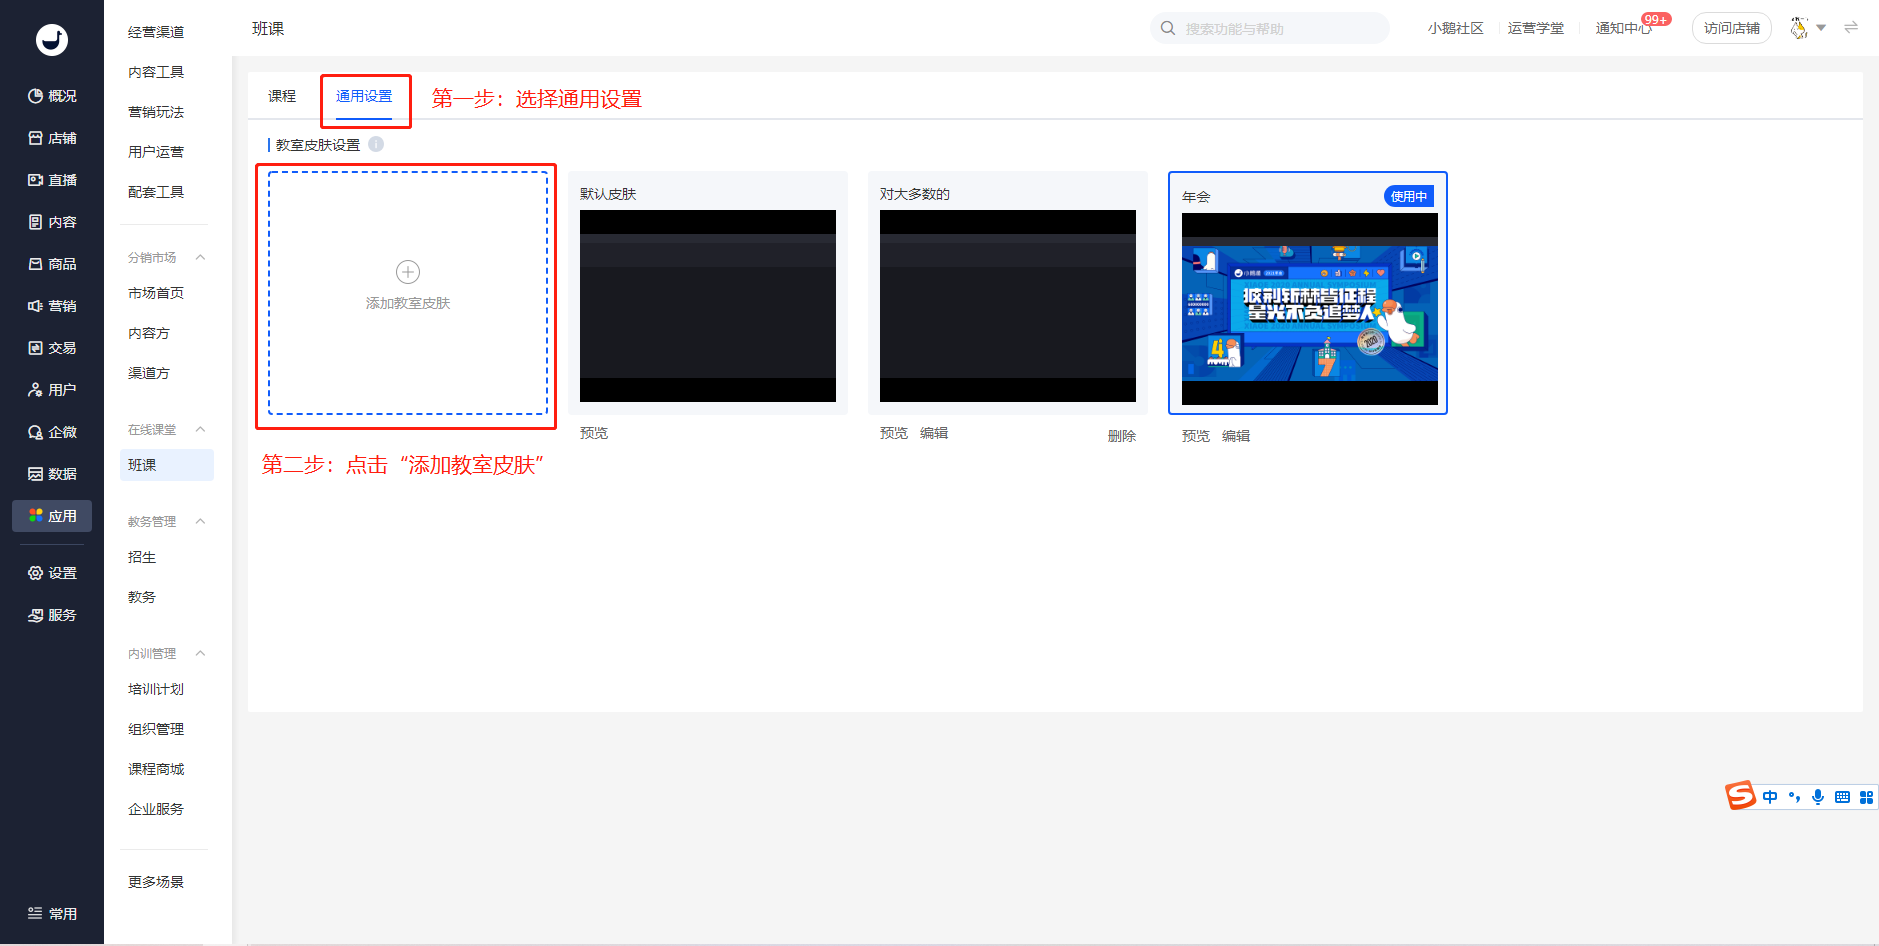
<span style="font-size:15px;">Clicks on "Add Classroom Skin" to enter the custom skin settings page;</span>

![21.png](https://wechatapppro-1252524126.file.myqcloud.com/help_document/image/ueditor/98510900_1640576665.png ".png")

<span style="font-size:17px;">**Step 3**</span>

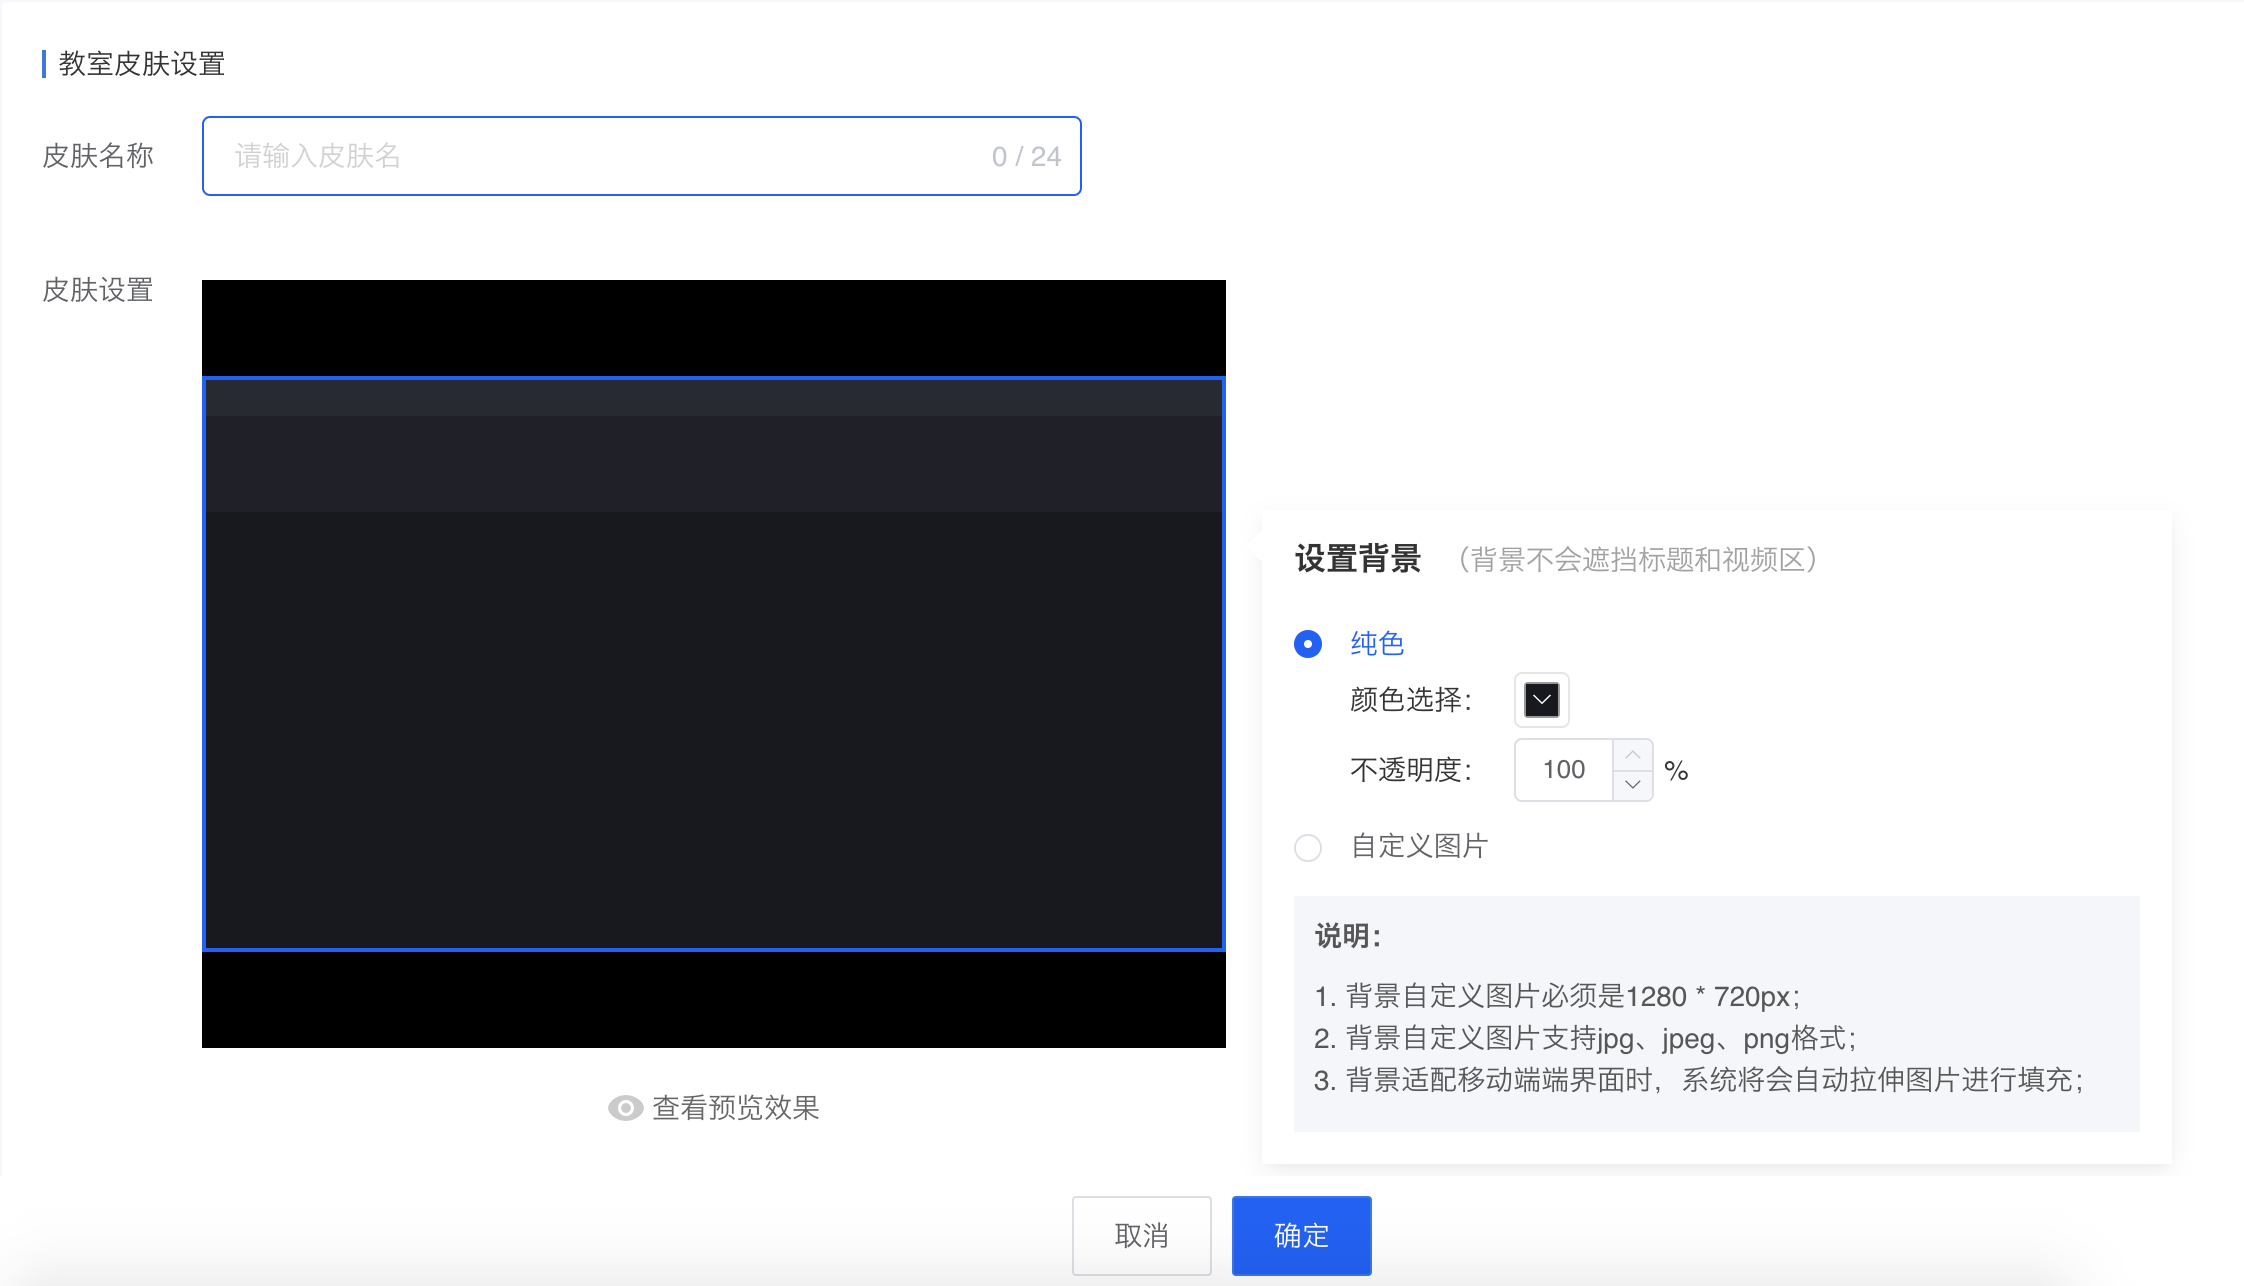
<span style="font-size:15px;">Enters the name of the custom skin, sets the color and background of the corresponding area (supports adding pictures), and clicks the "OK" button to complete the creation of the custom skin;</span>

![22.png](https://wechatapppro-1252524126.file.myqcloud.com/help_document/image/ueditor/6631100_1640576690.png ".png")

<span style="font-size:17px;">**Step 4**</span>

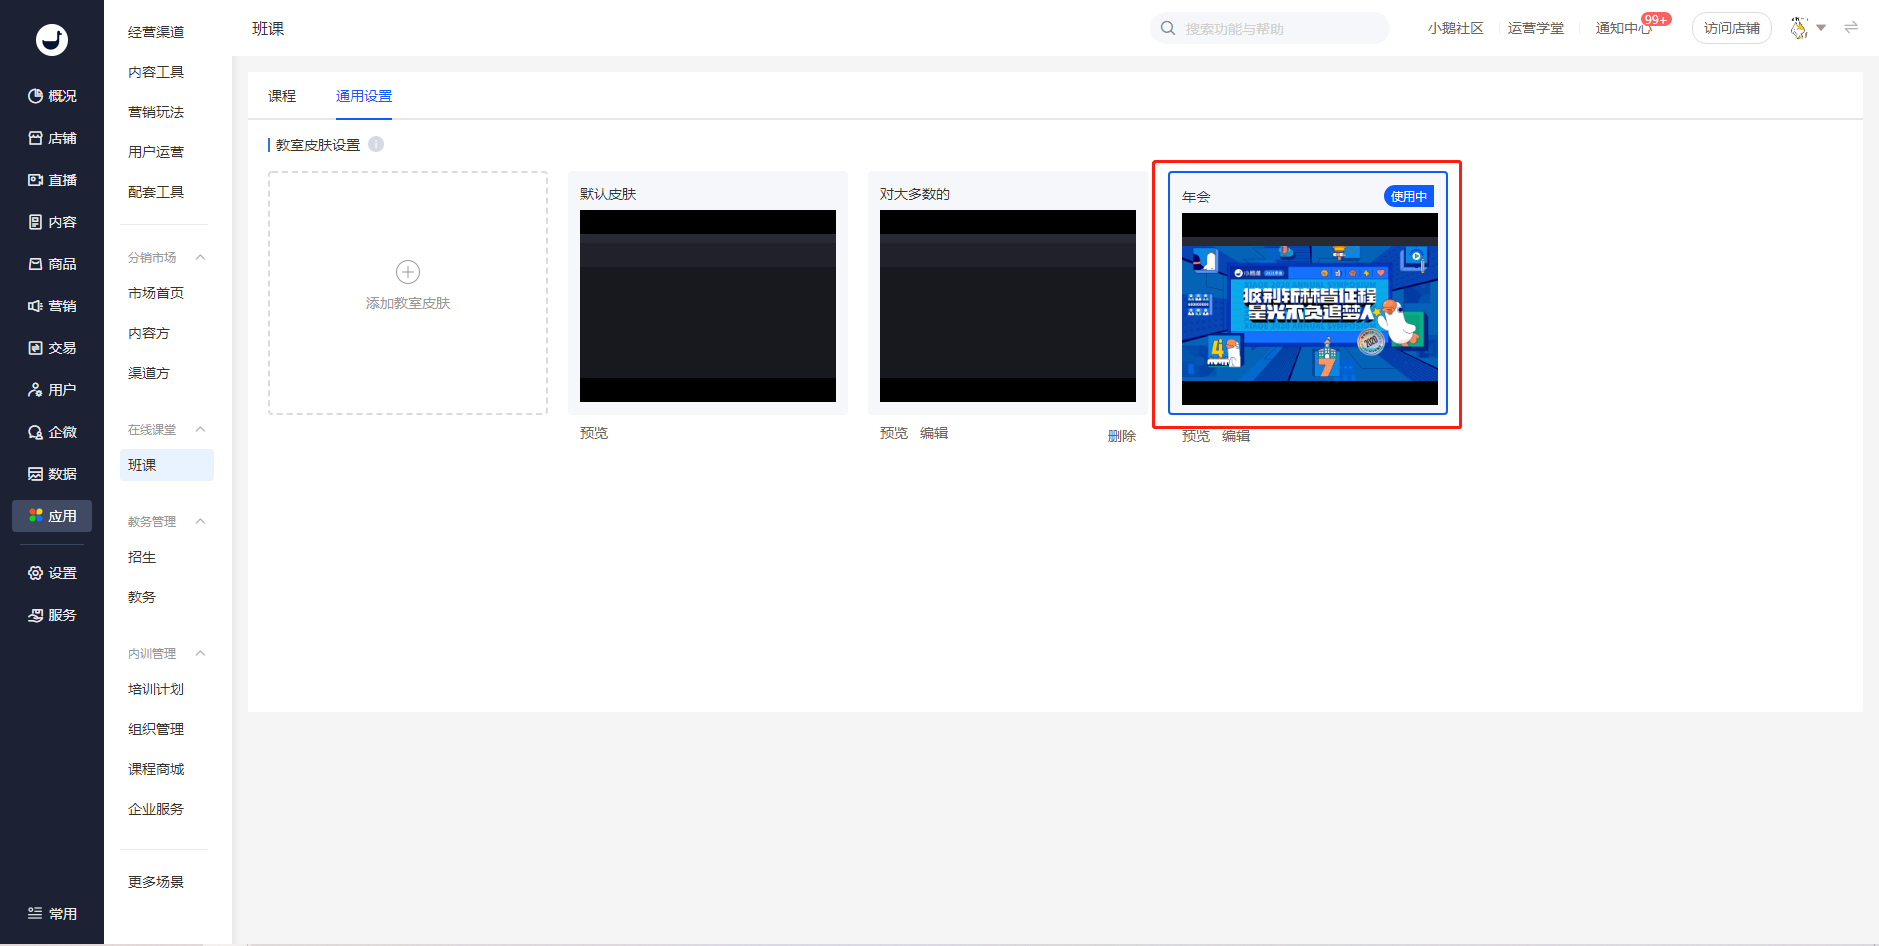
<span style="font-size:15px;">Selects the skin, clicks on "Activate". The changes will take effect after re - entering the live - streaming room.</span>

<span style="font-size:15px;">![23.png](https://wechatapppro-1252524126.file.myqcloud.com/help_document/image/ueditor/90807200_1640576720.png ".png")</span>