Class creation
- How to customize the skin of the live streaming room for courses?
- How to invite learners to enroll in courses?
- How to customize the live streaming room skin?
- How to enable automatic student take the stage?
- How to add course session access for learners?
- After parents purchase and enroll in a course, how can children log in to attend classes?
- How can students attend classes using the elink Assistant PC client?
How to customize the skin of the live streaming room for courses?
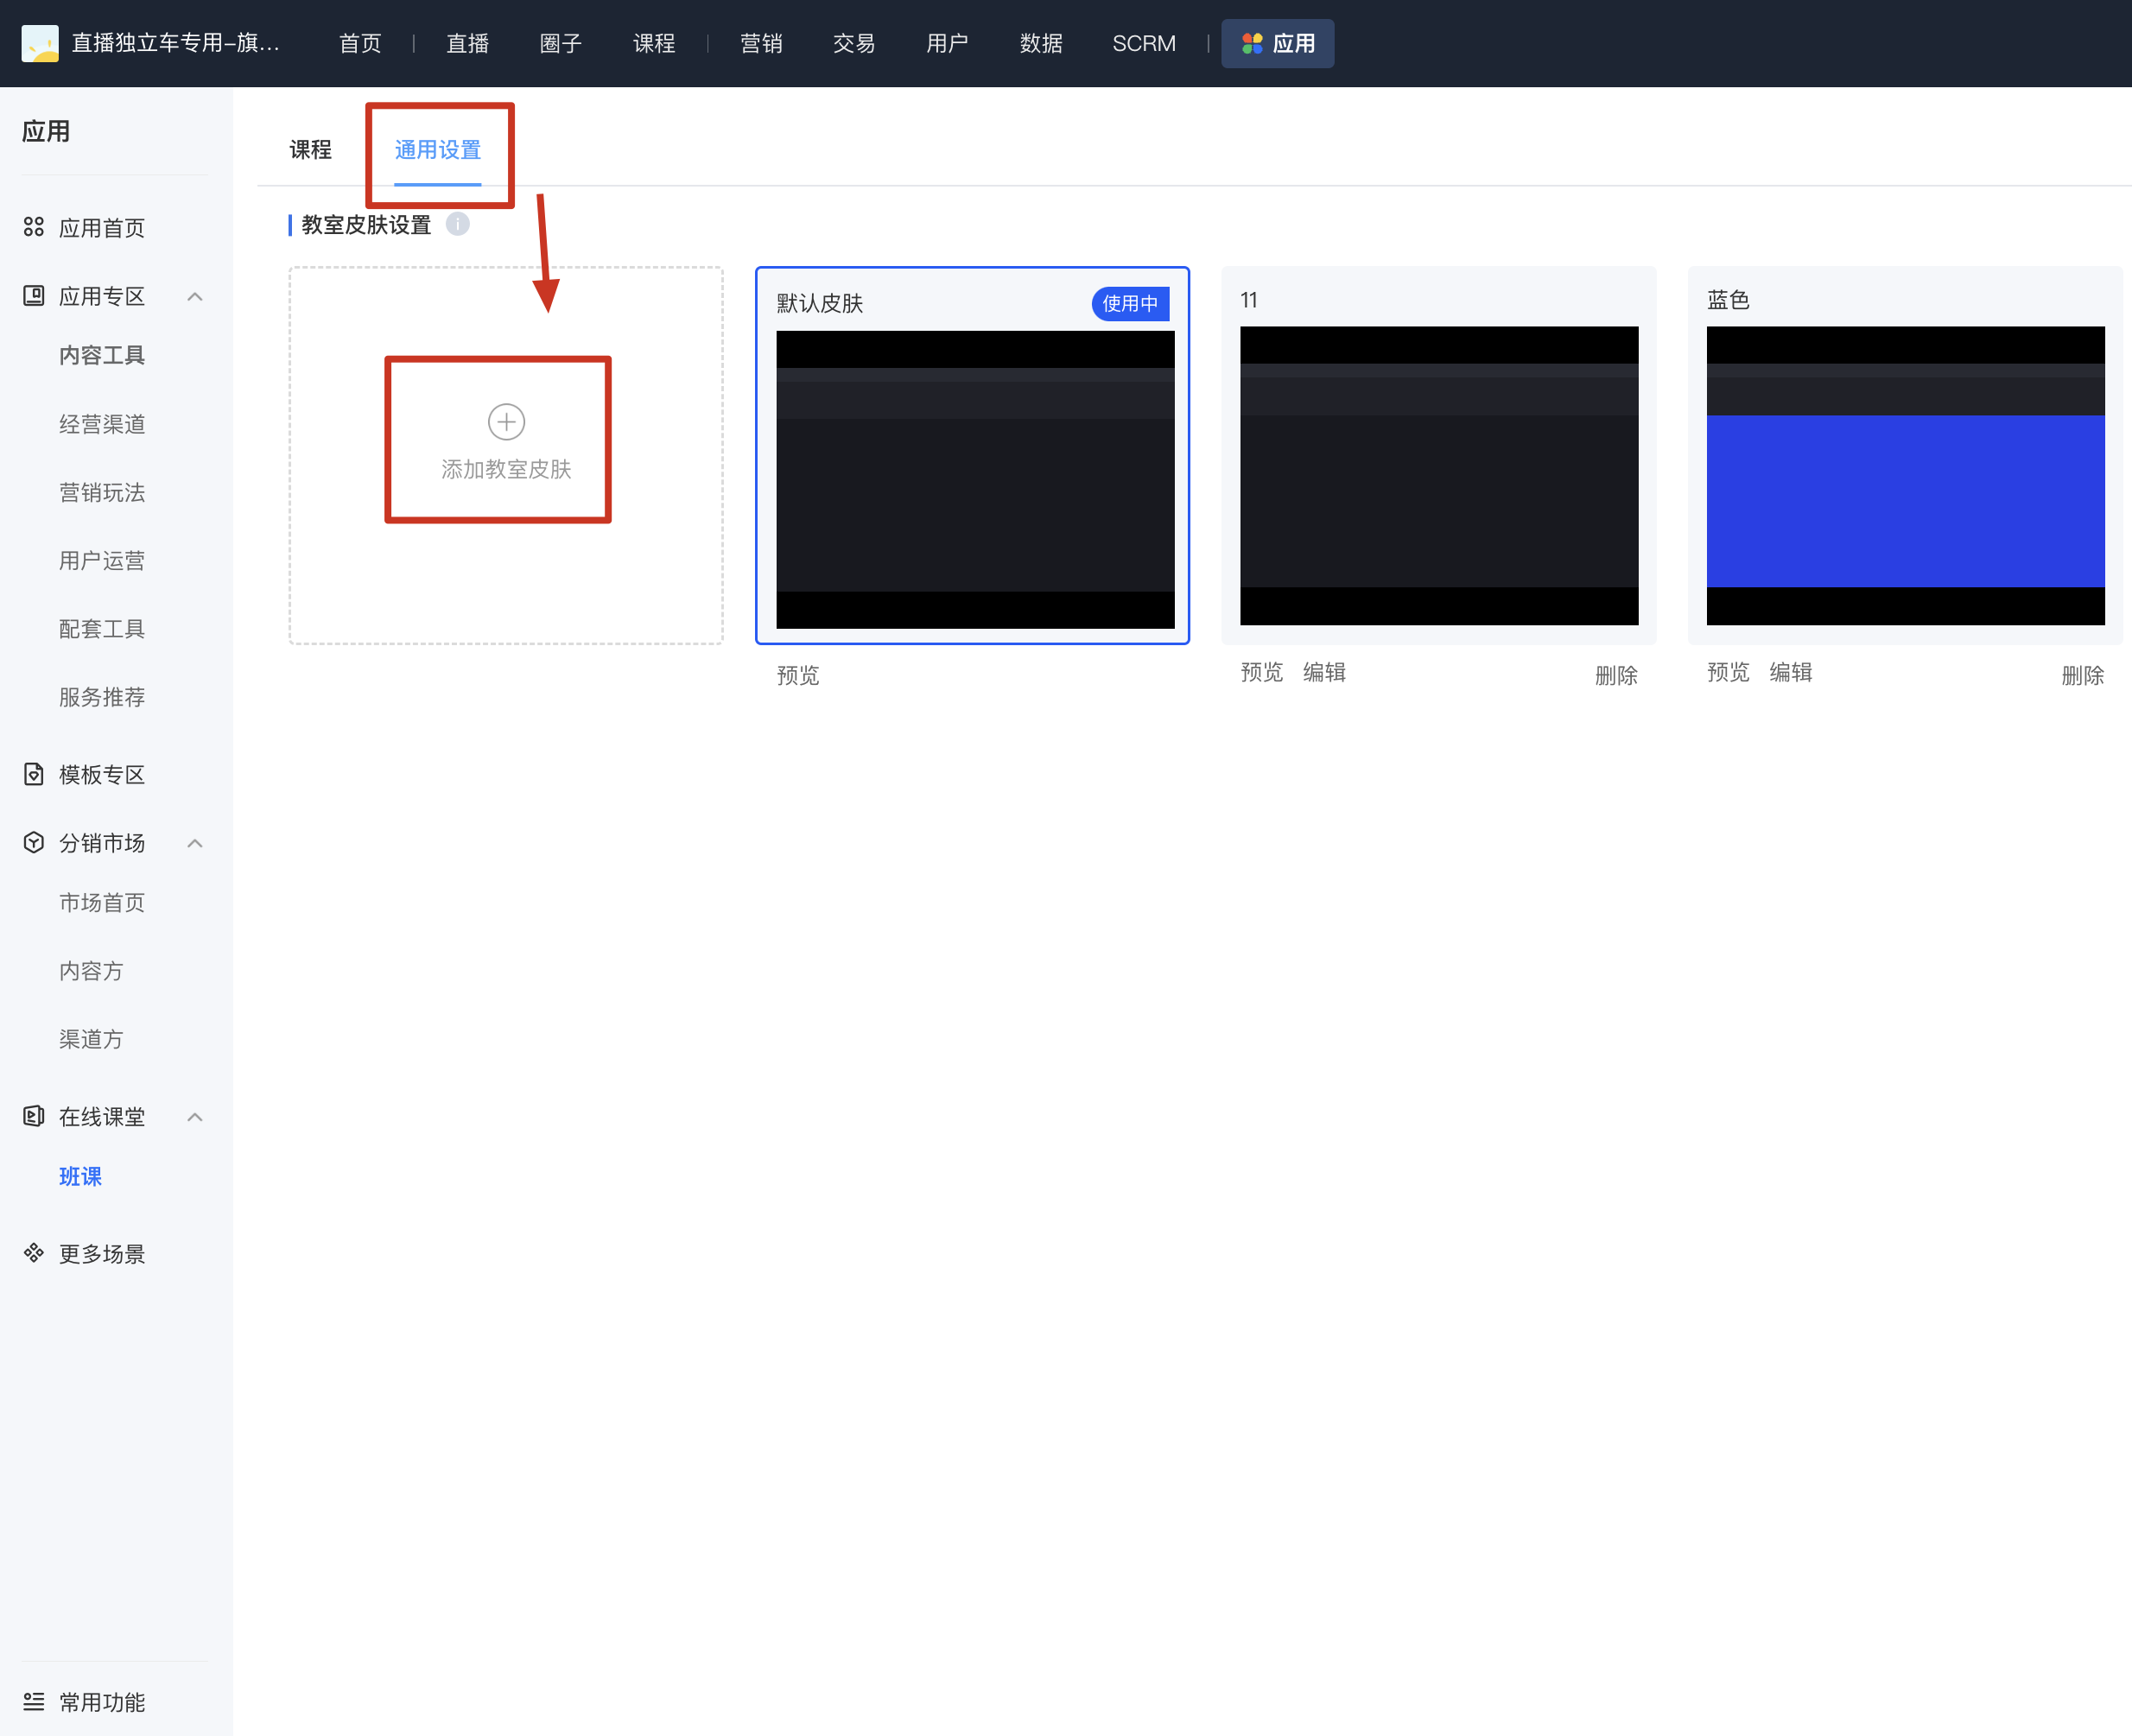
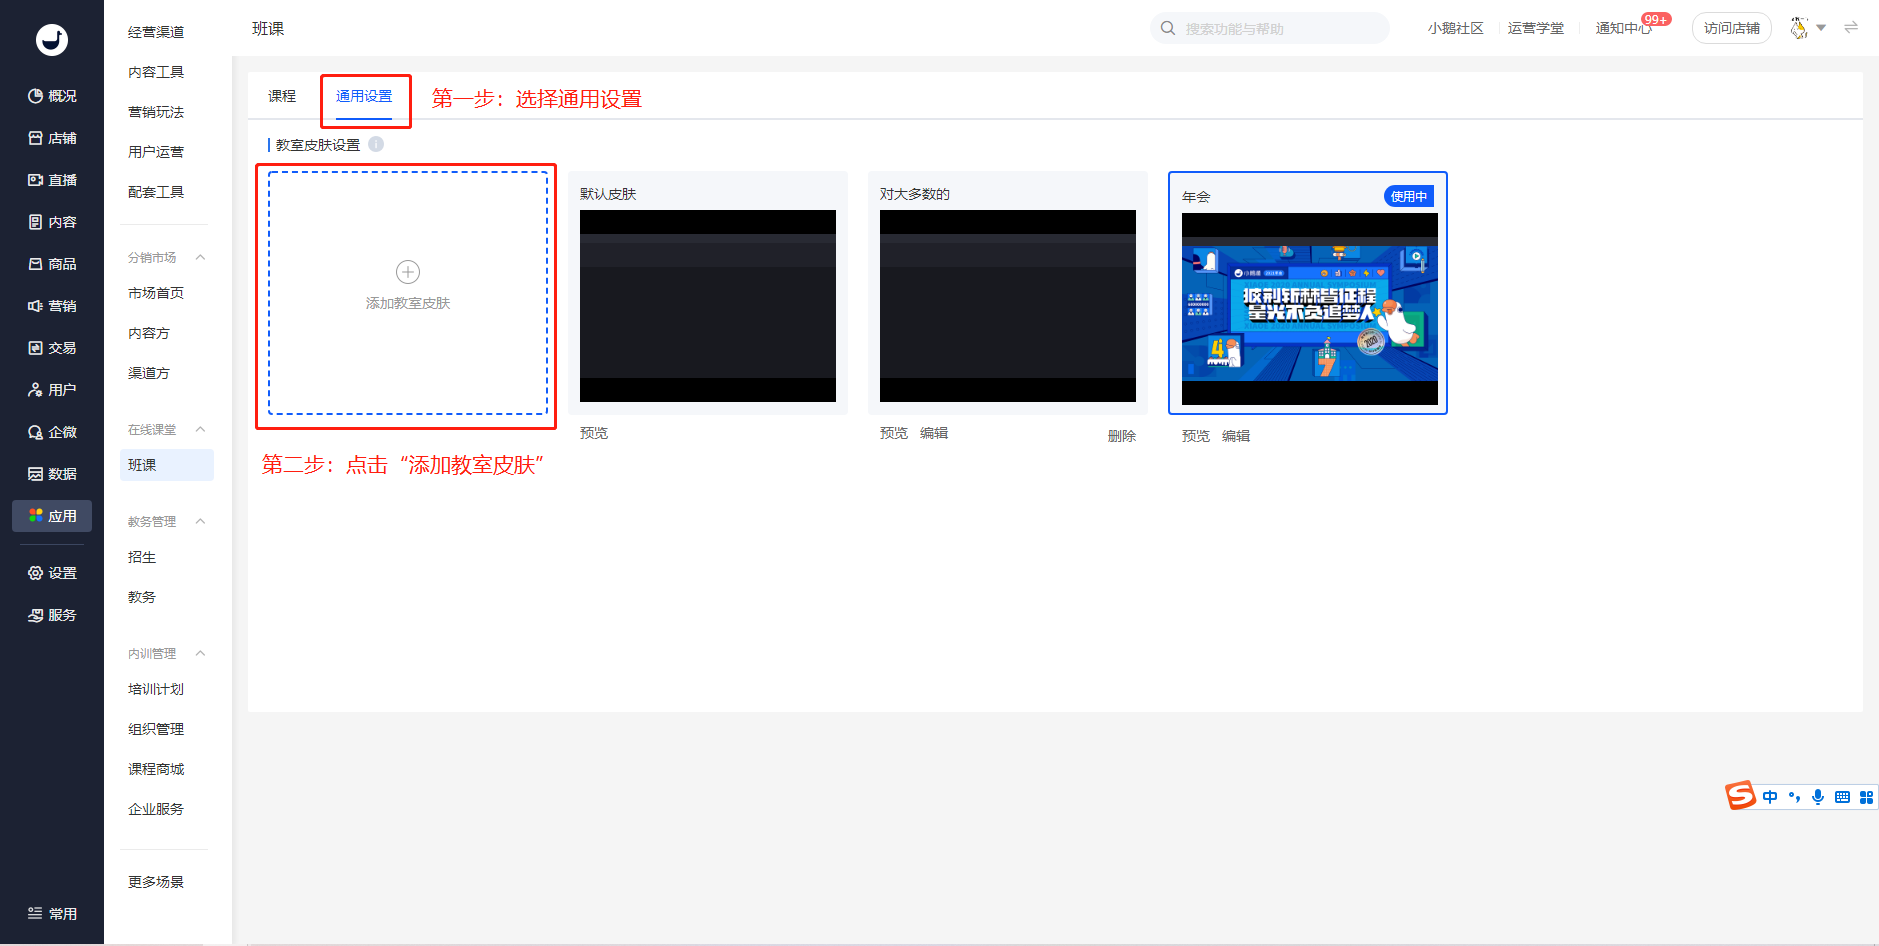
Step 1: The administrator clicks on 'Courses' in the management backend and selects the 'General Settings' menu.
Step 2: Click on 'Add Classroom Skin' to enter the custom skin settings page.
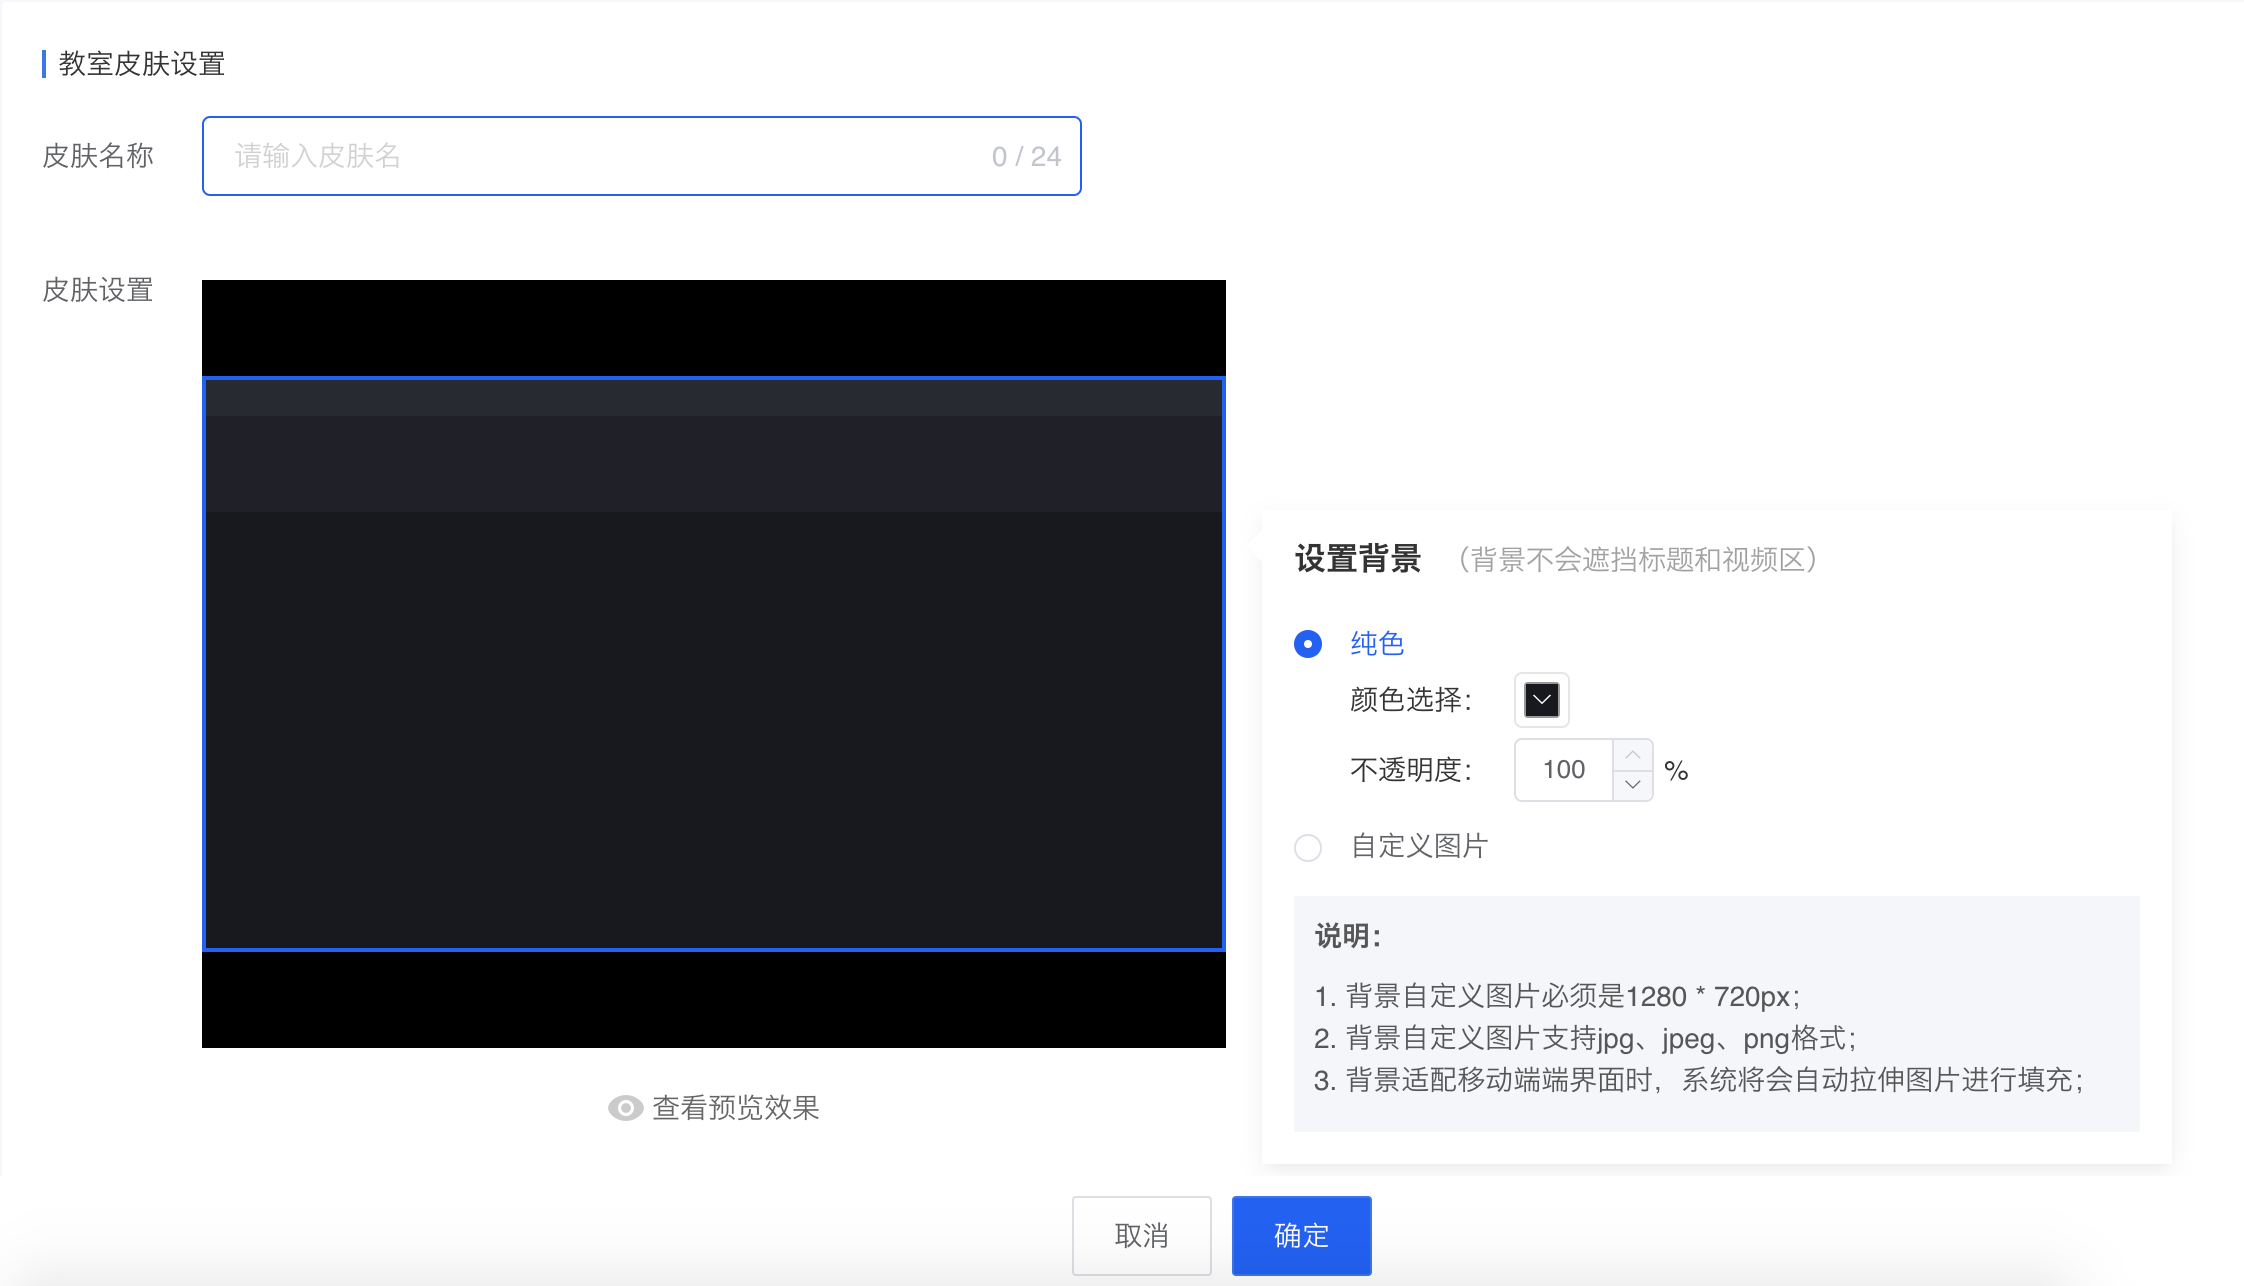
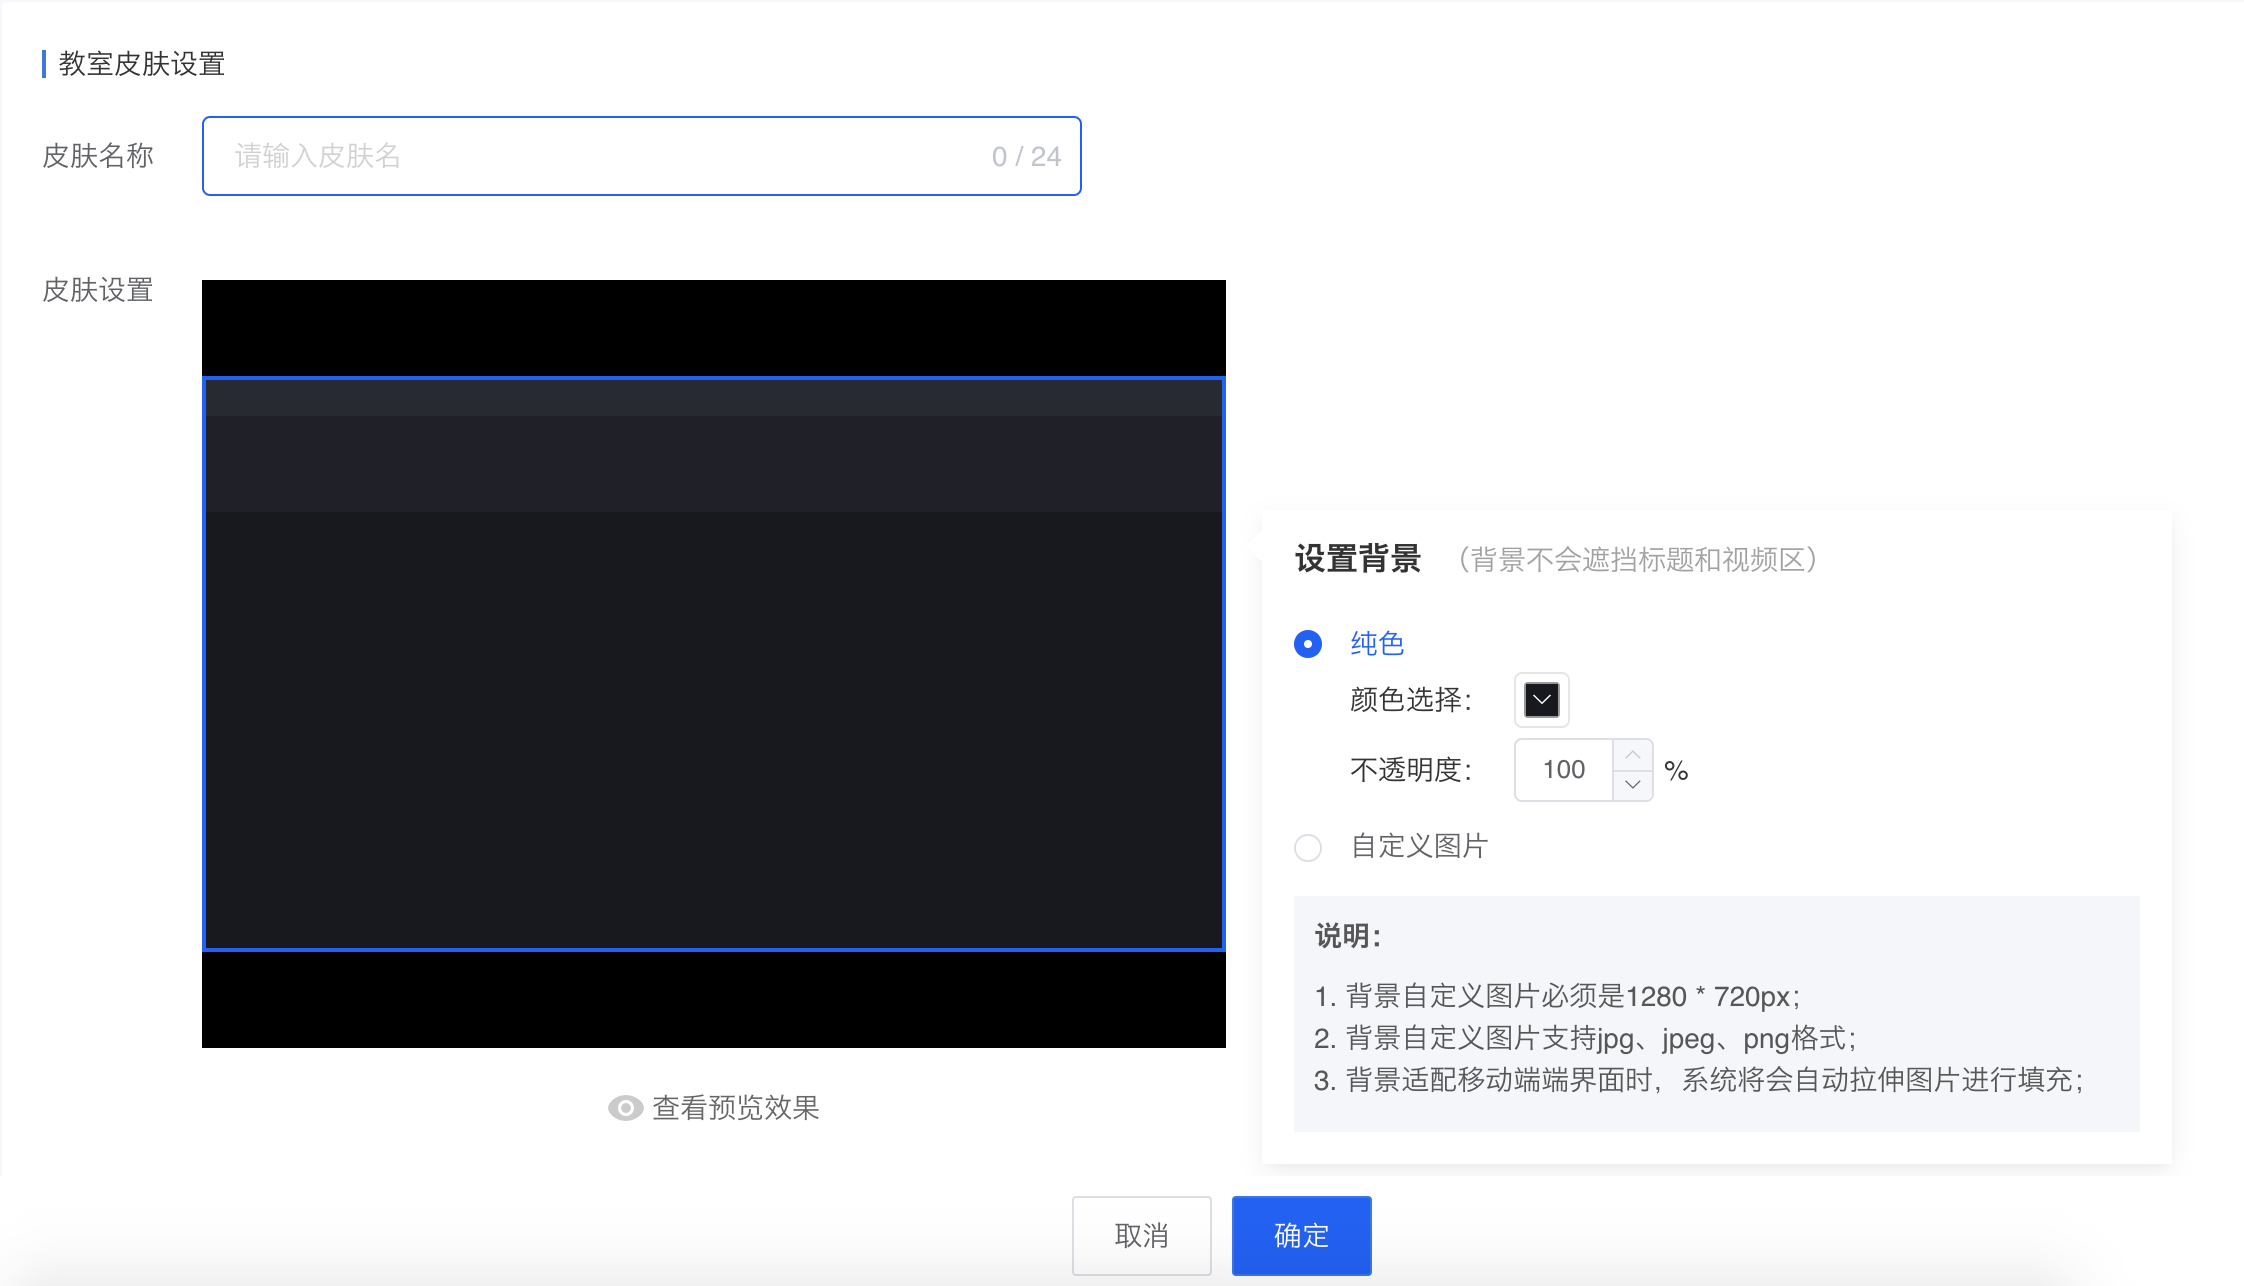
Step 3: Enter the name of the custom skin, set the colors and backgrounds of the corresponding areas (supports adding images), and click the 'OK' button to complete the creation of the custom skin.
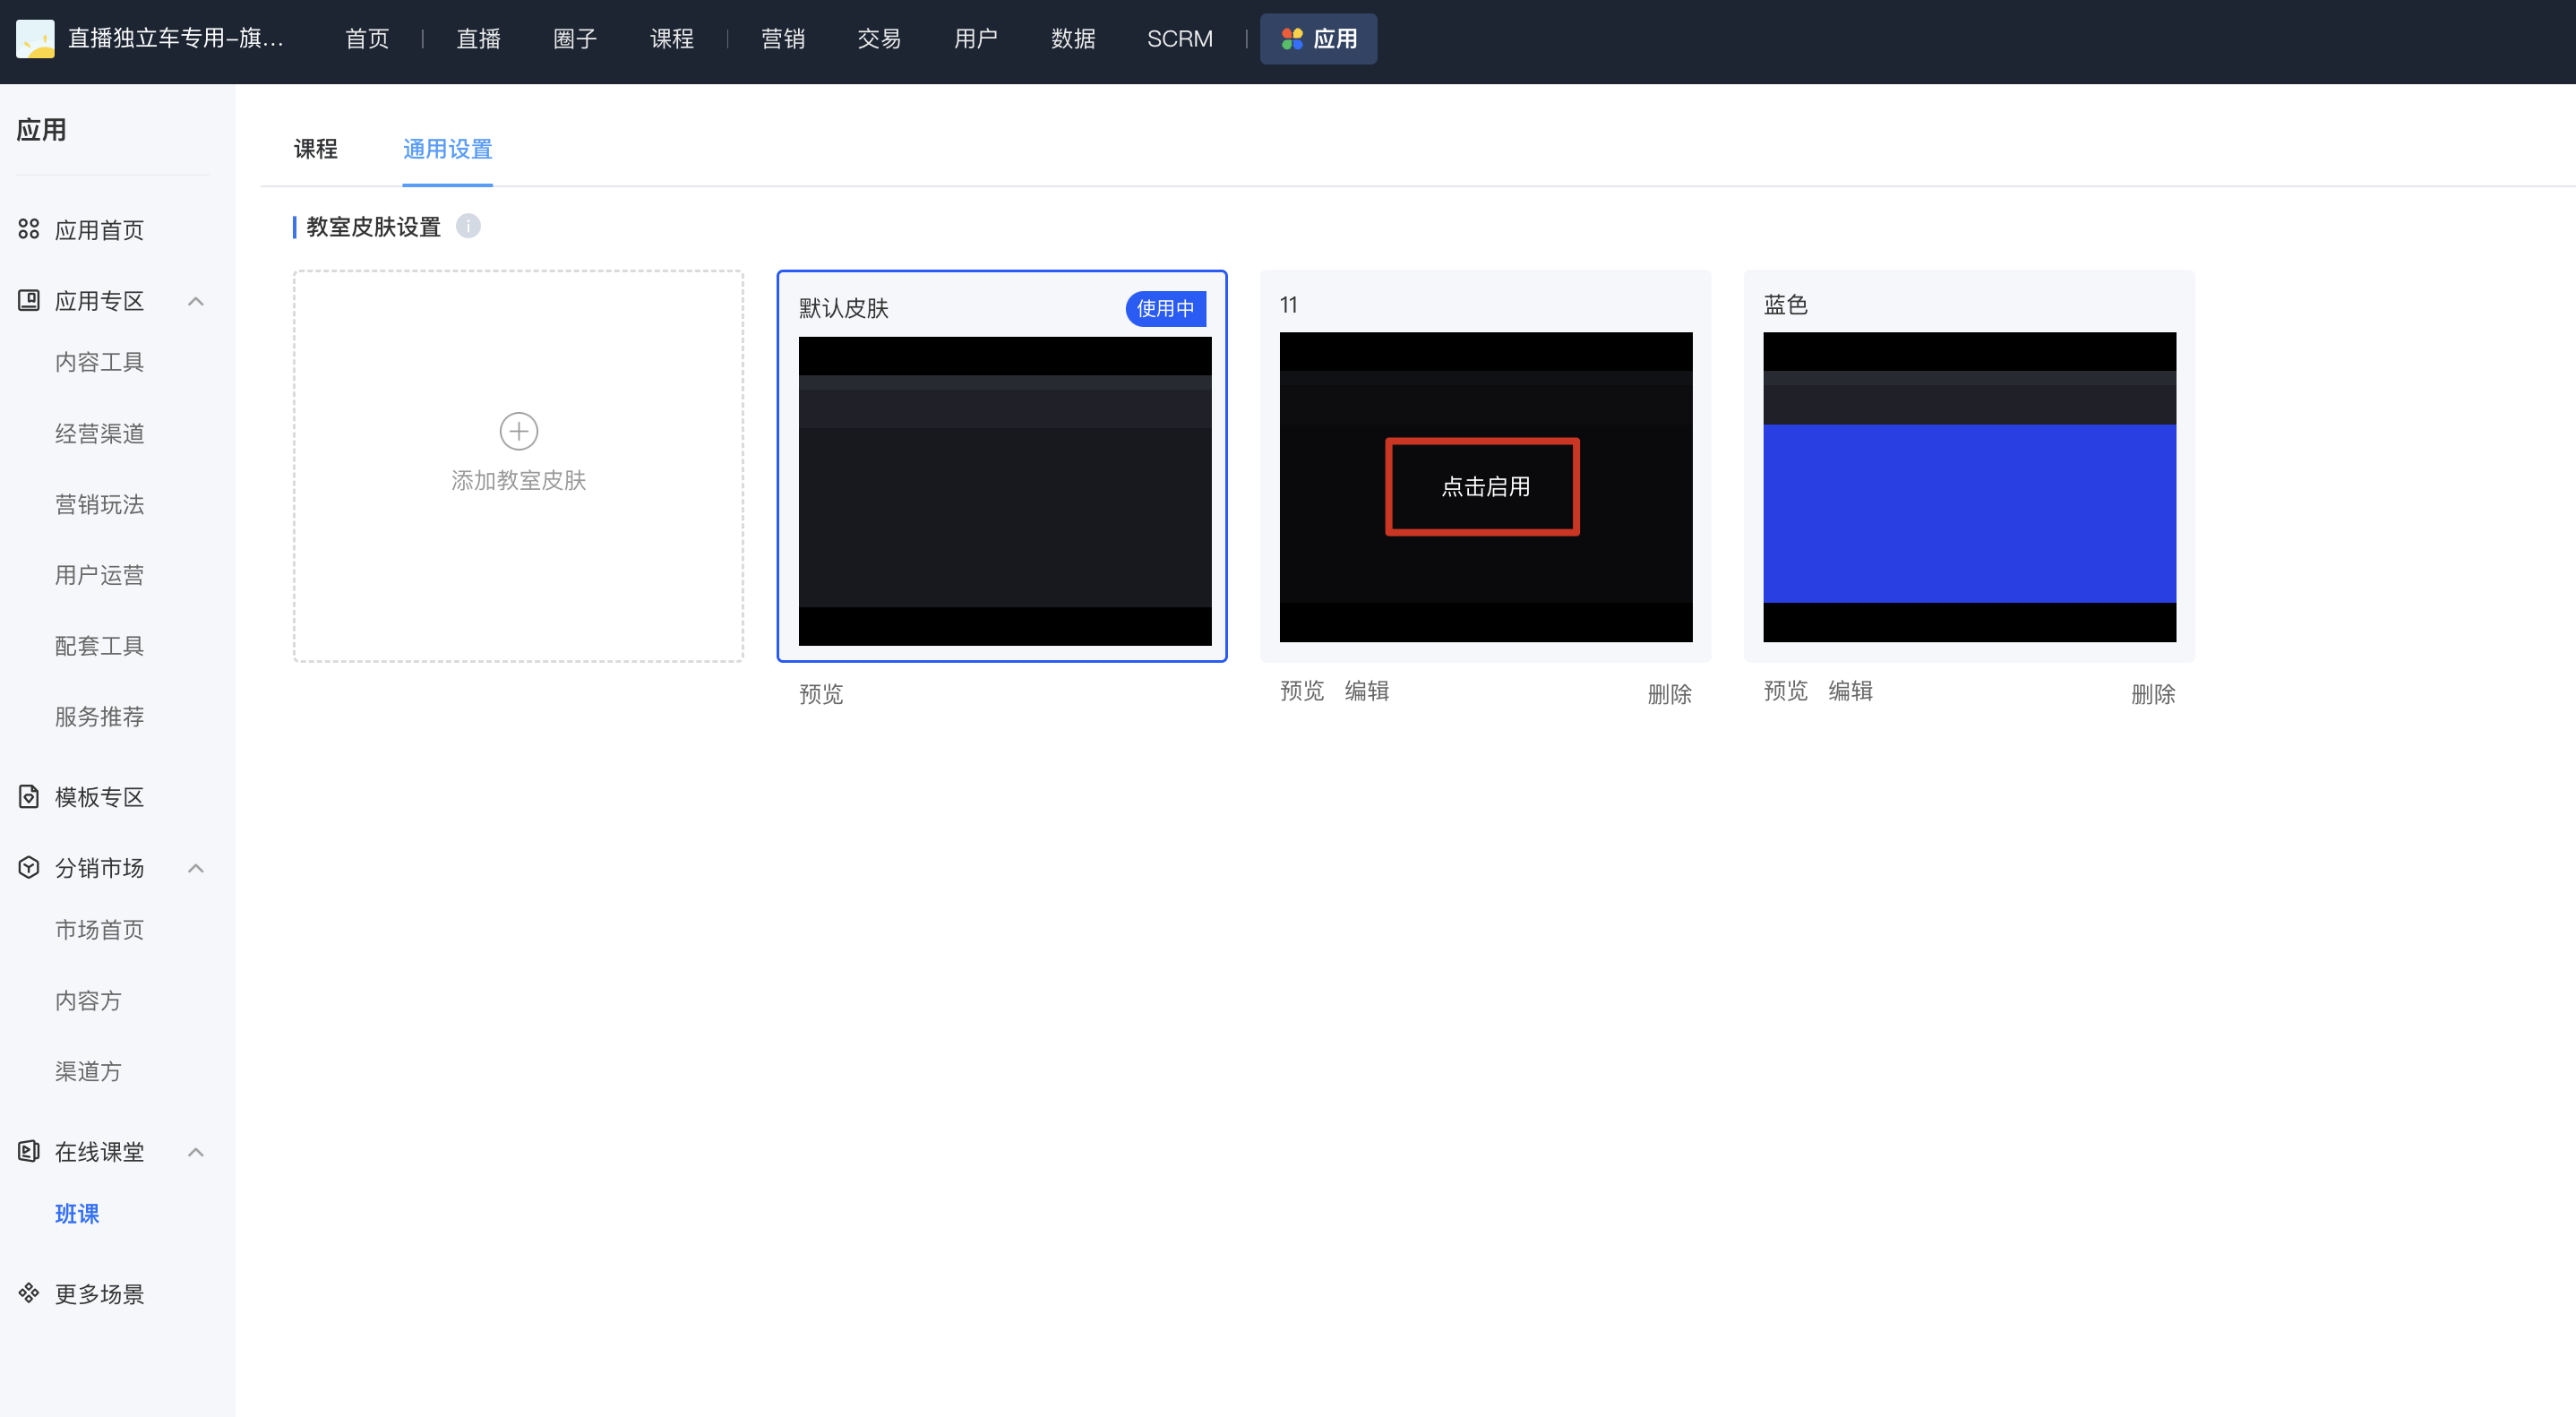
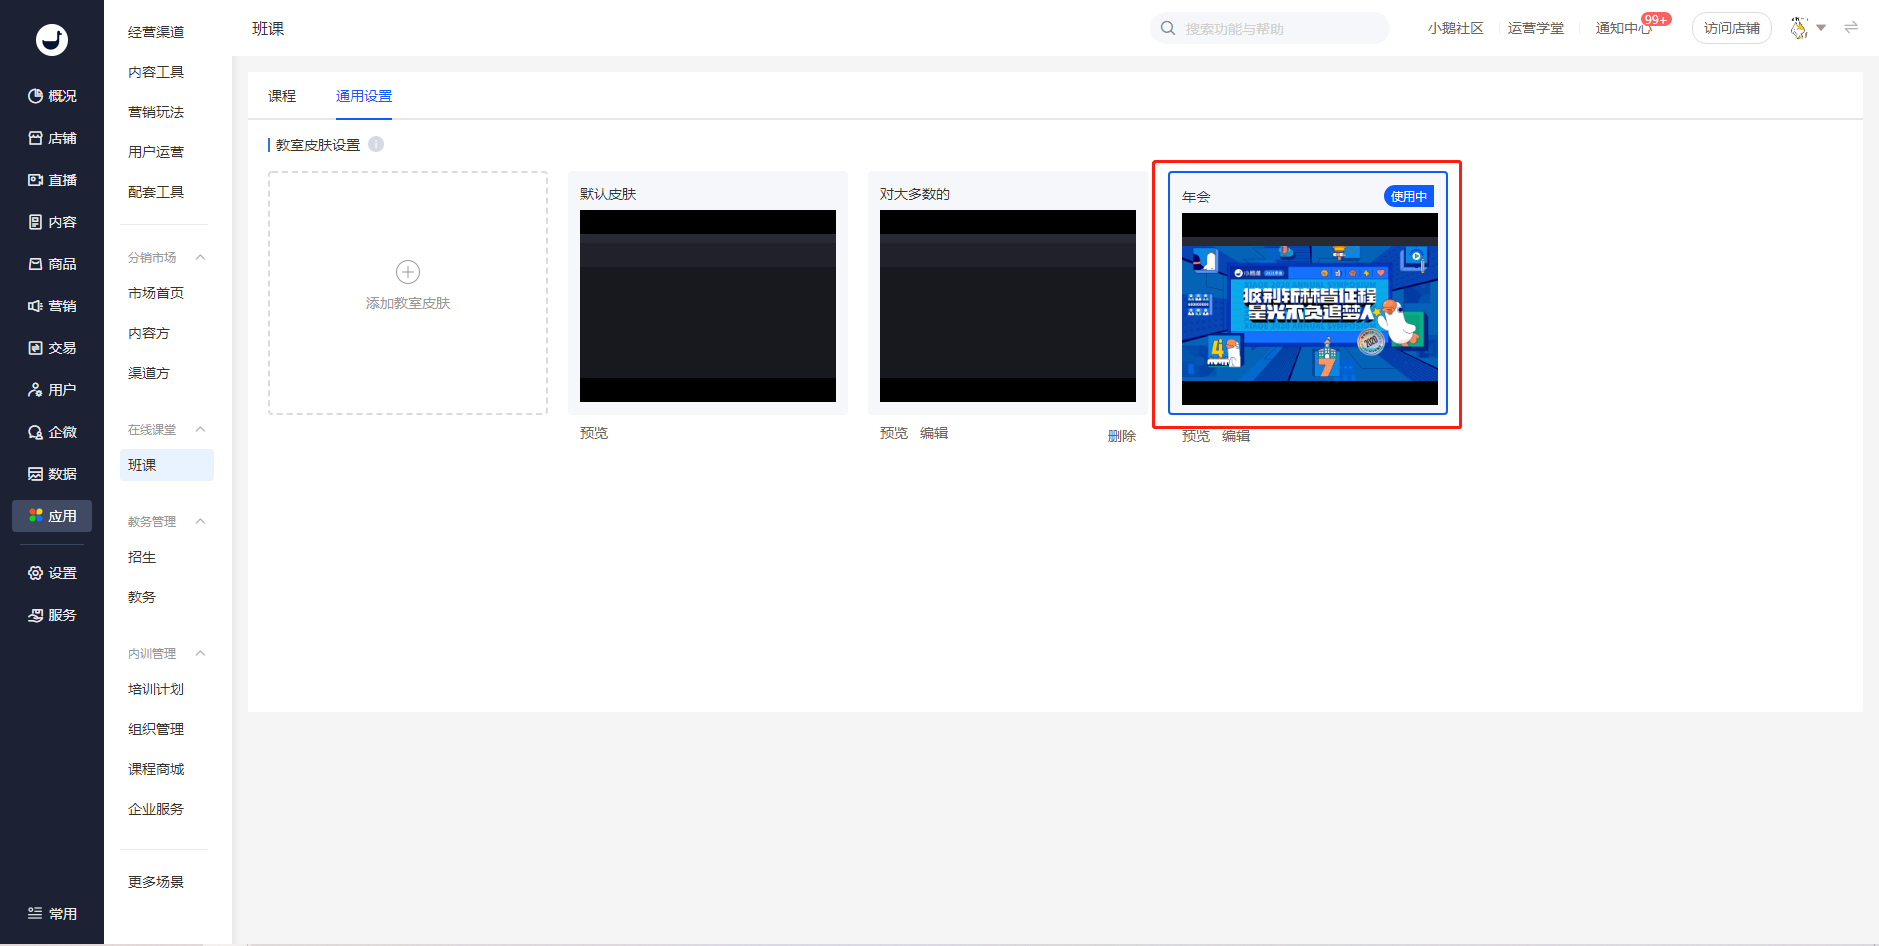
Step 4: Select the skin, click 'Activate', and re - enter the live streaming room for the changes to take effect.
How to invite learners to enroll in courses?
Step 1:On the class list page, click the "Share" button.

Step 2:In the sharing pop-up window, you can share the course with students for purchase by copying the link, using the QR code, or sharing the course poster.

How to customize the live streaming room skin?
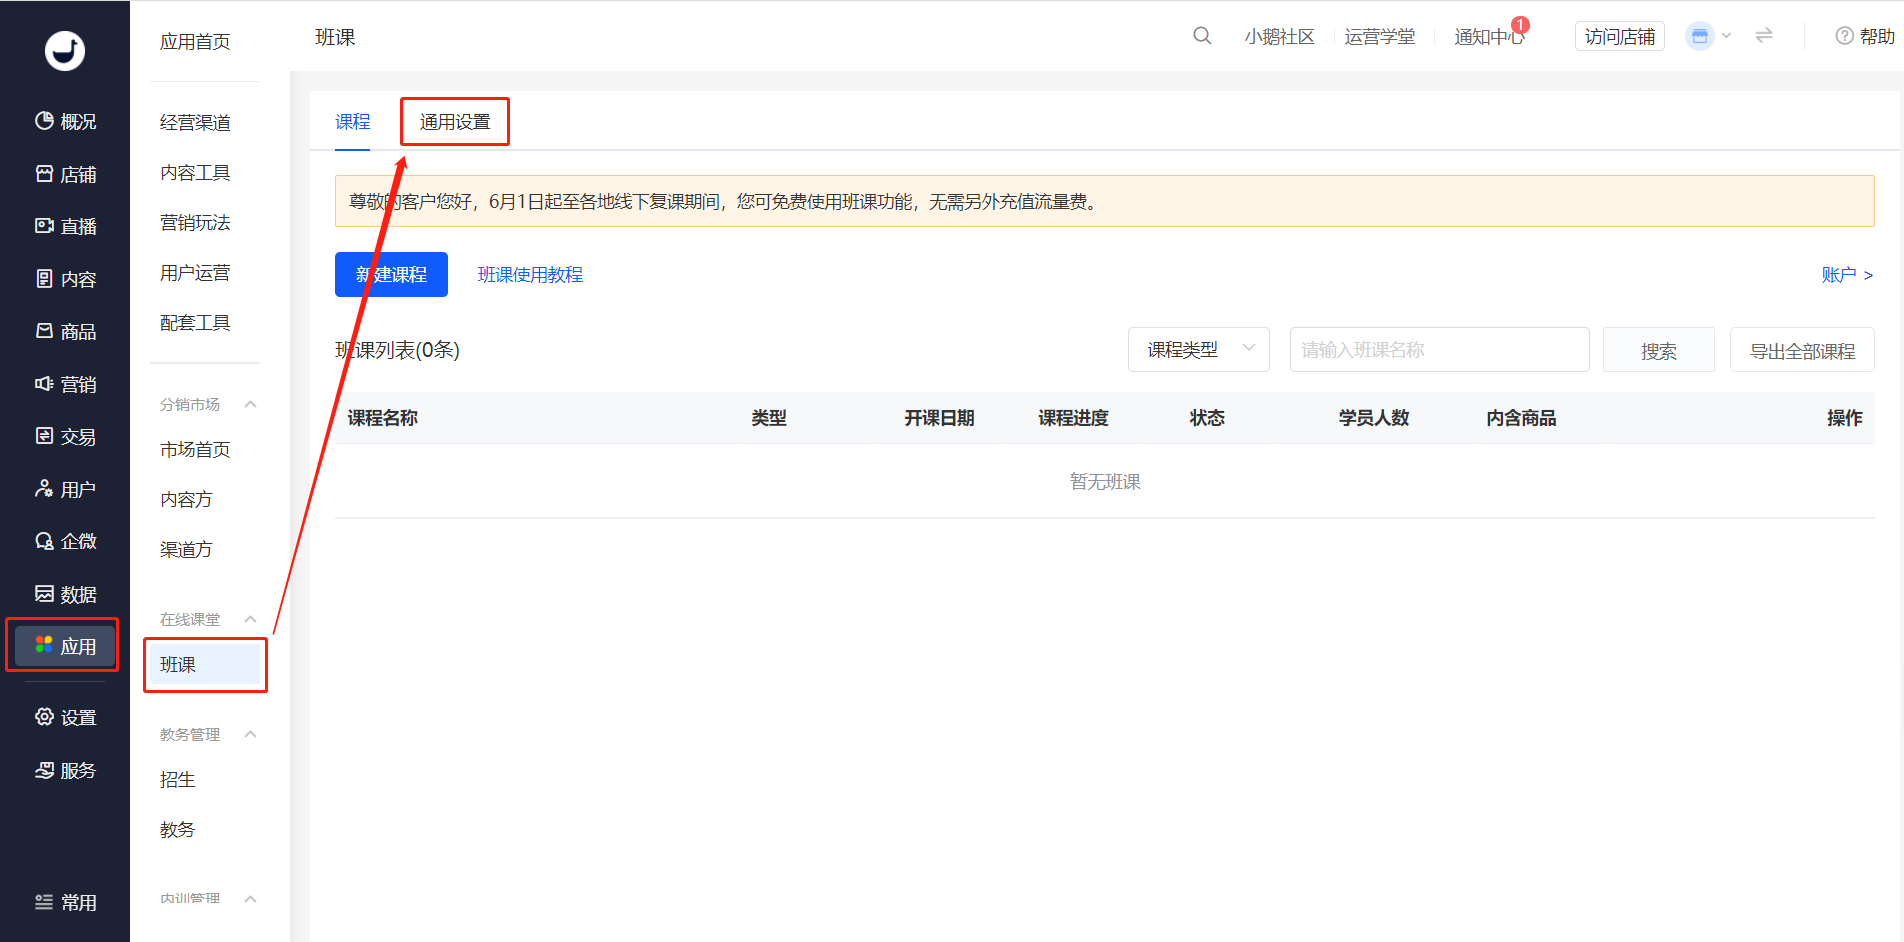
Step 1
The administrator goes to [Desktop Management Console - Applications - Online Classroom], clicks on "Class Sessions" and selects the "General Settings" menu bar;
Step 2
Clicks on "Add Classroom Skin" to enter the custom skin settings page;
Step 3
Enters the name of the custom skin, sets the color and background of the corresponding area (supports adding pictures), and clicks the "OK" button to complete the creation of the custom skin;
Step 4
Selects the skin, clicks on "Activate". The changes will take effect after re - entering the live - streaming room.
How to enable automatic student take the stage?
On the management console - New Course page, check the box for "Automatically allow students to take the stage when they enter."

How to add course session access for learners?
Step 1:Log in to the desktop management console, click [Applications - Online Classroom - Class Courses], find the corresponding course, and click [Details].

Step 2:Click [Students] - [Add Students].

There are currently three methods for adding students:Single addition,Bulk import,Organization import;

Single addition
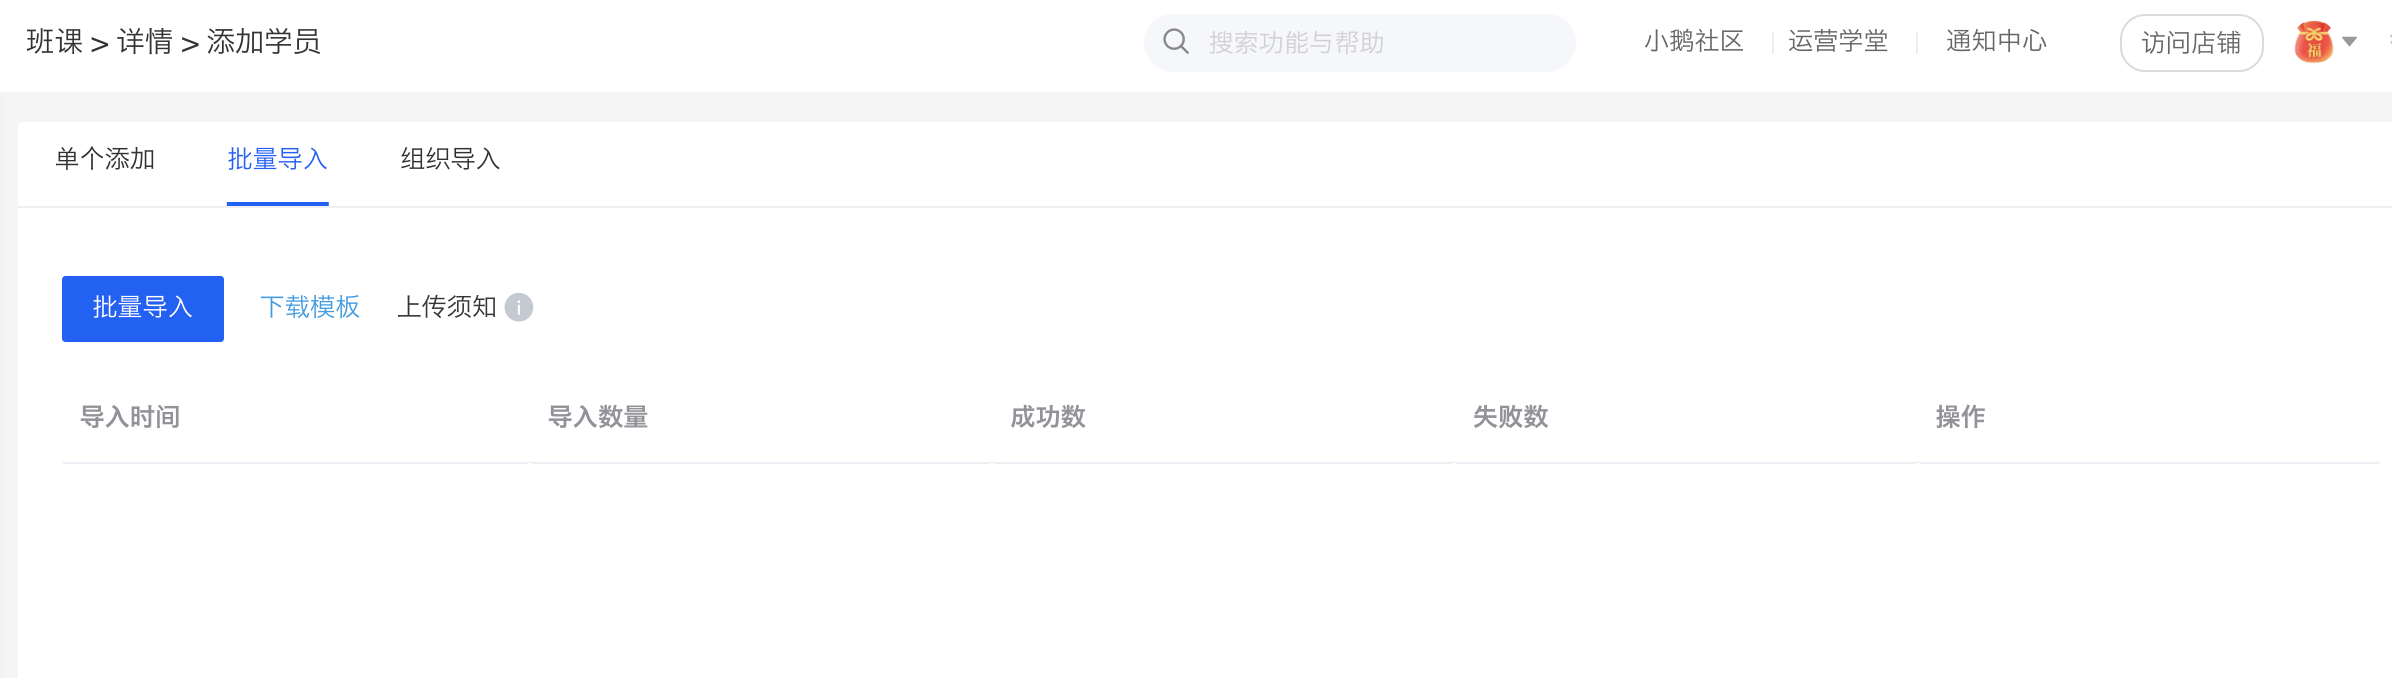
Bulk import
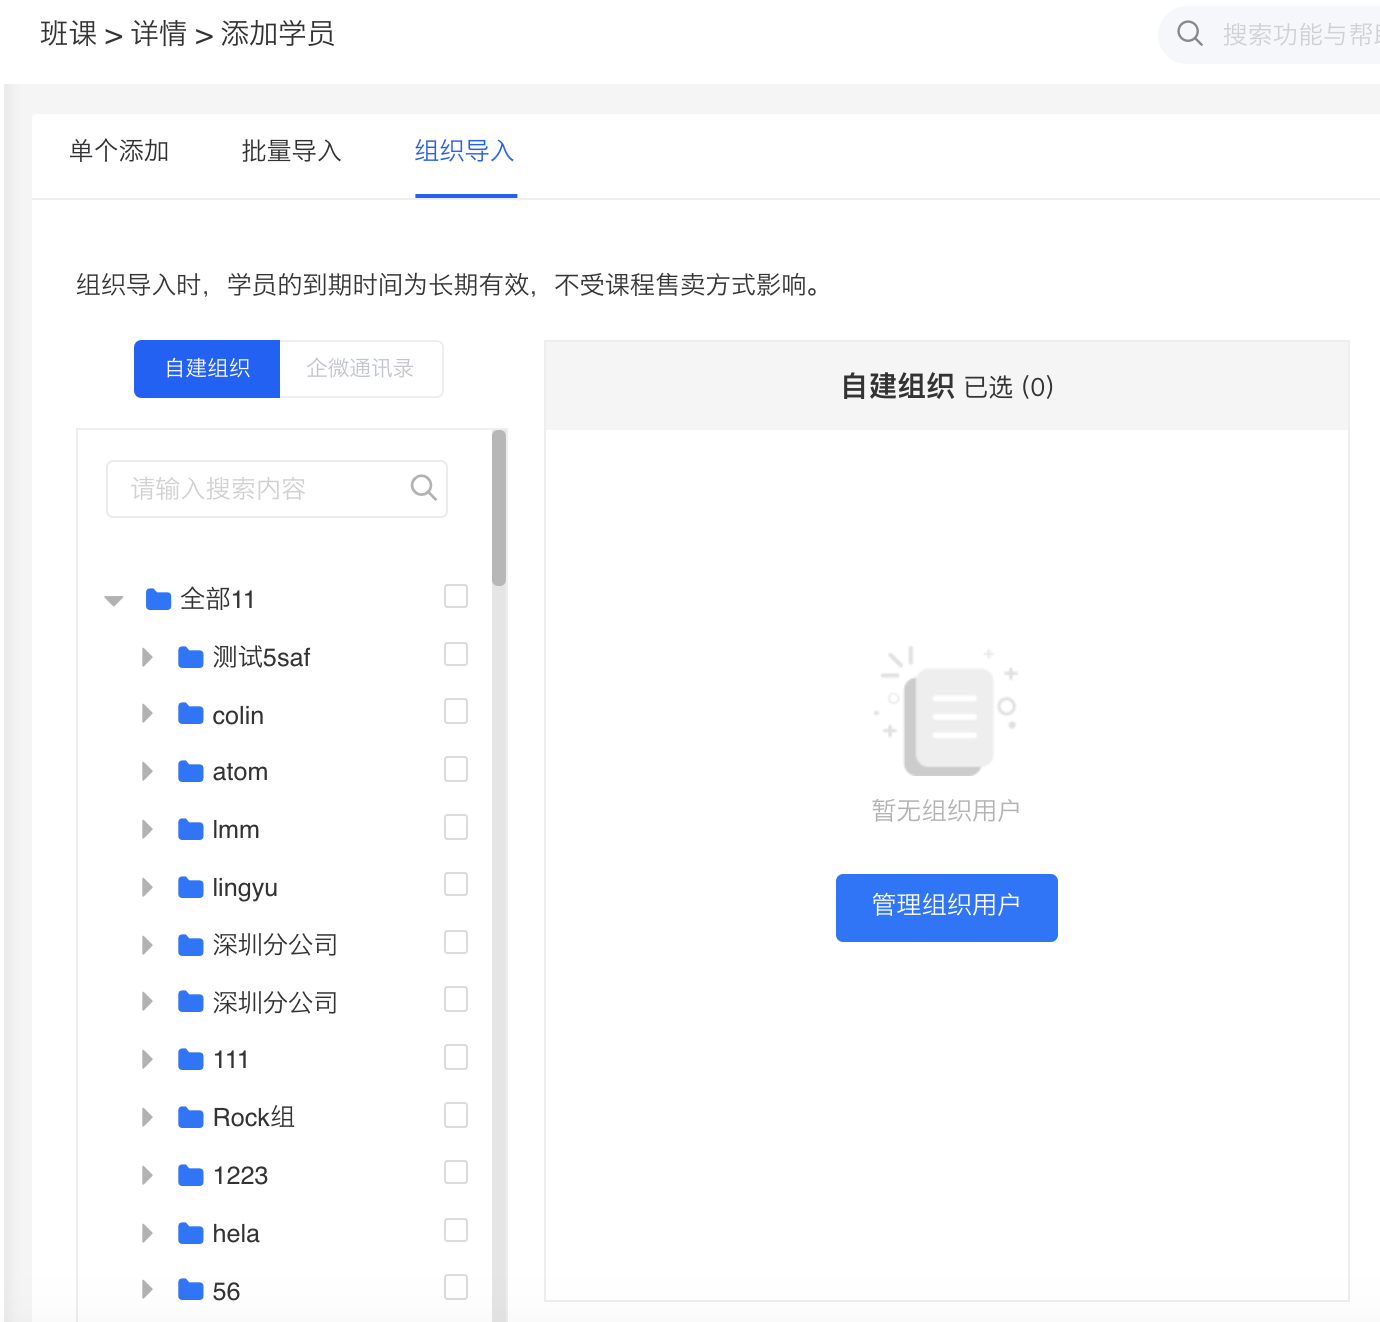
Organization import
**Notes:
1. Imported students can directly log in to theelinkAPPandelink Assistant Desktop Clientfor classes using their mobile phone numbers and verification codes.
2. If the imported students are existing users of the store, you can choose to enter the user ID or the user's mobile phone number (the mobile phone number bound to the account).
3. If the imported students are new users (who have never visited the store), please enter their mobile phone numbers. After successful import, the backend will create new accounts based on the entered mobile phone numbers. The entered mobile phone numbers will automatically be used as the mobile phone numbers bound to the user accounts.Students need to be guided to go to [Personal Center] - [Account Settings] in the store to bind their mobile phone numbers and synchronize course permissions.

After parents purchase and enroll in a course, how can children log in to attend classes?
After parents sign up via WeChat, they can log in to the APP or PC client using WeChat. They can then bind their mobile phone number and set a password in the personal information section. After setting, they can give the mobile phone number and password to their children for login and learning.


How can students attend classes using the elink Assistant PC client?
This article will introduce the usage methods from the following four different scenarios:

Scenario 1: Quickly access today's courses
Step 1: After launching the elink Assistant client, select 'Class Courses'.
Step 2: Select the corresponding course and enter the classroom to start the class.
Note:
(1) Instructors can enter the classroom at any time.
(2) Students can enter the classroom 30 minutes before the class starts. For example, if the class time is from 20:00 to 21:00, students can enter the classroom after 19:30.

Scenario 2: View courses on other dates
Select the date you want to view in the calendar selection area, and the course schedule for that date will be displayed on the right.

Scenario 3: View registered courses
1. Course list
Select the top tab 'All Class Courses' to view all registered courses, including single - session courses and series courses.

2. Search
If there are many courses, you can use the search function to quickly find courses by keywords.
Step 1: Click on the search box.
Step 2: Select the search result and enter the course details page.
Note: Course sessions can be filtered by status.

Scenario 4: View course schedules and details
Under the 'All Class Courses' tab, click on the course card to view all course sessions and course details of the course.
[Series courses] have two modules, 'Course Schedule' and 'Details', and you can switch tabs to view. In the course schedule, all course sessions of the course are displayed in three different modules: 'In - progress', 'Upcoming', and 'Completed'.
[Single - session courses] do not have a course schedule. The details page and the button to enter the classroom are directly displayed.
