eLive shares part of the screen area
I. Use Cases
Instructors can select a fixed area for screen sharing when sharing the screen, such as a part of the application window or a specific slide content area.
II. Usage Conditions
1. Version Requirements
①elink Live client version 3.6.0 or higher
2. System Requirements
①Windows/MacOS.
3. Hardware Requirements
①Windows 7 or higher operating system;
②MacOS 10.11 or higher operating system.
III. Operation Steps
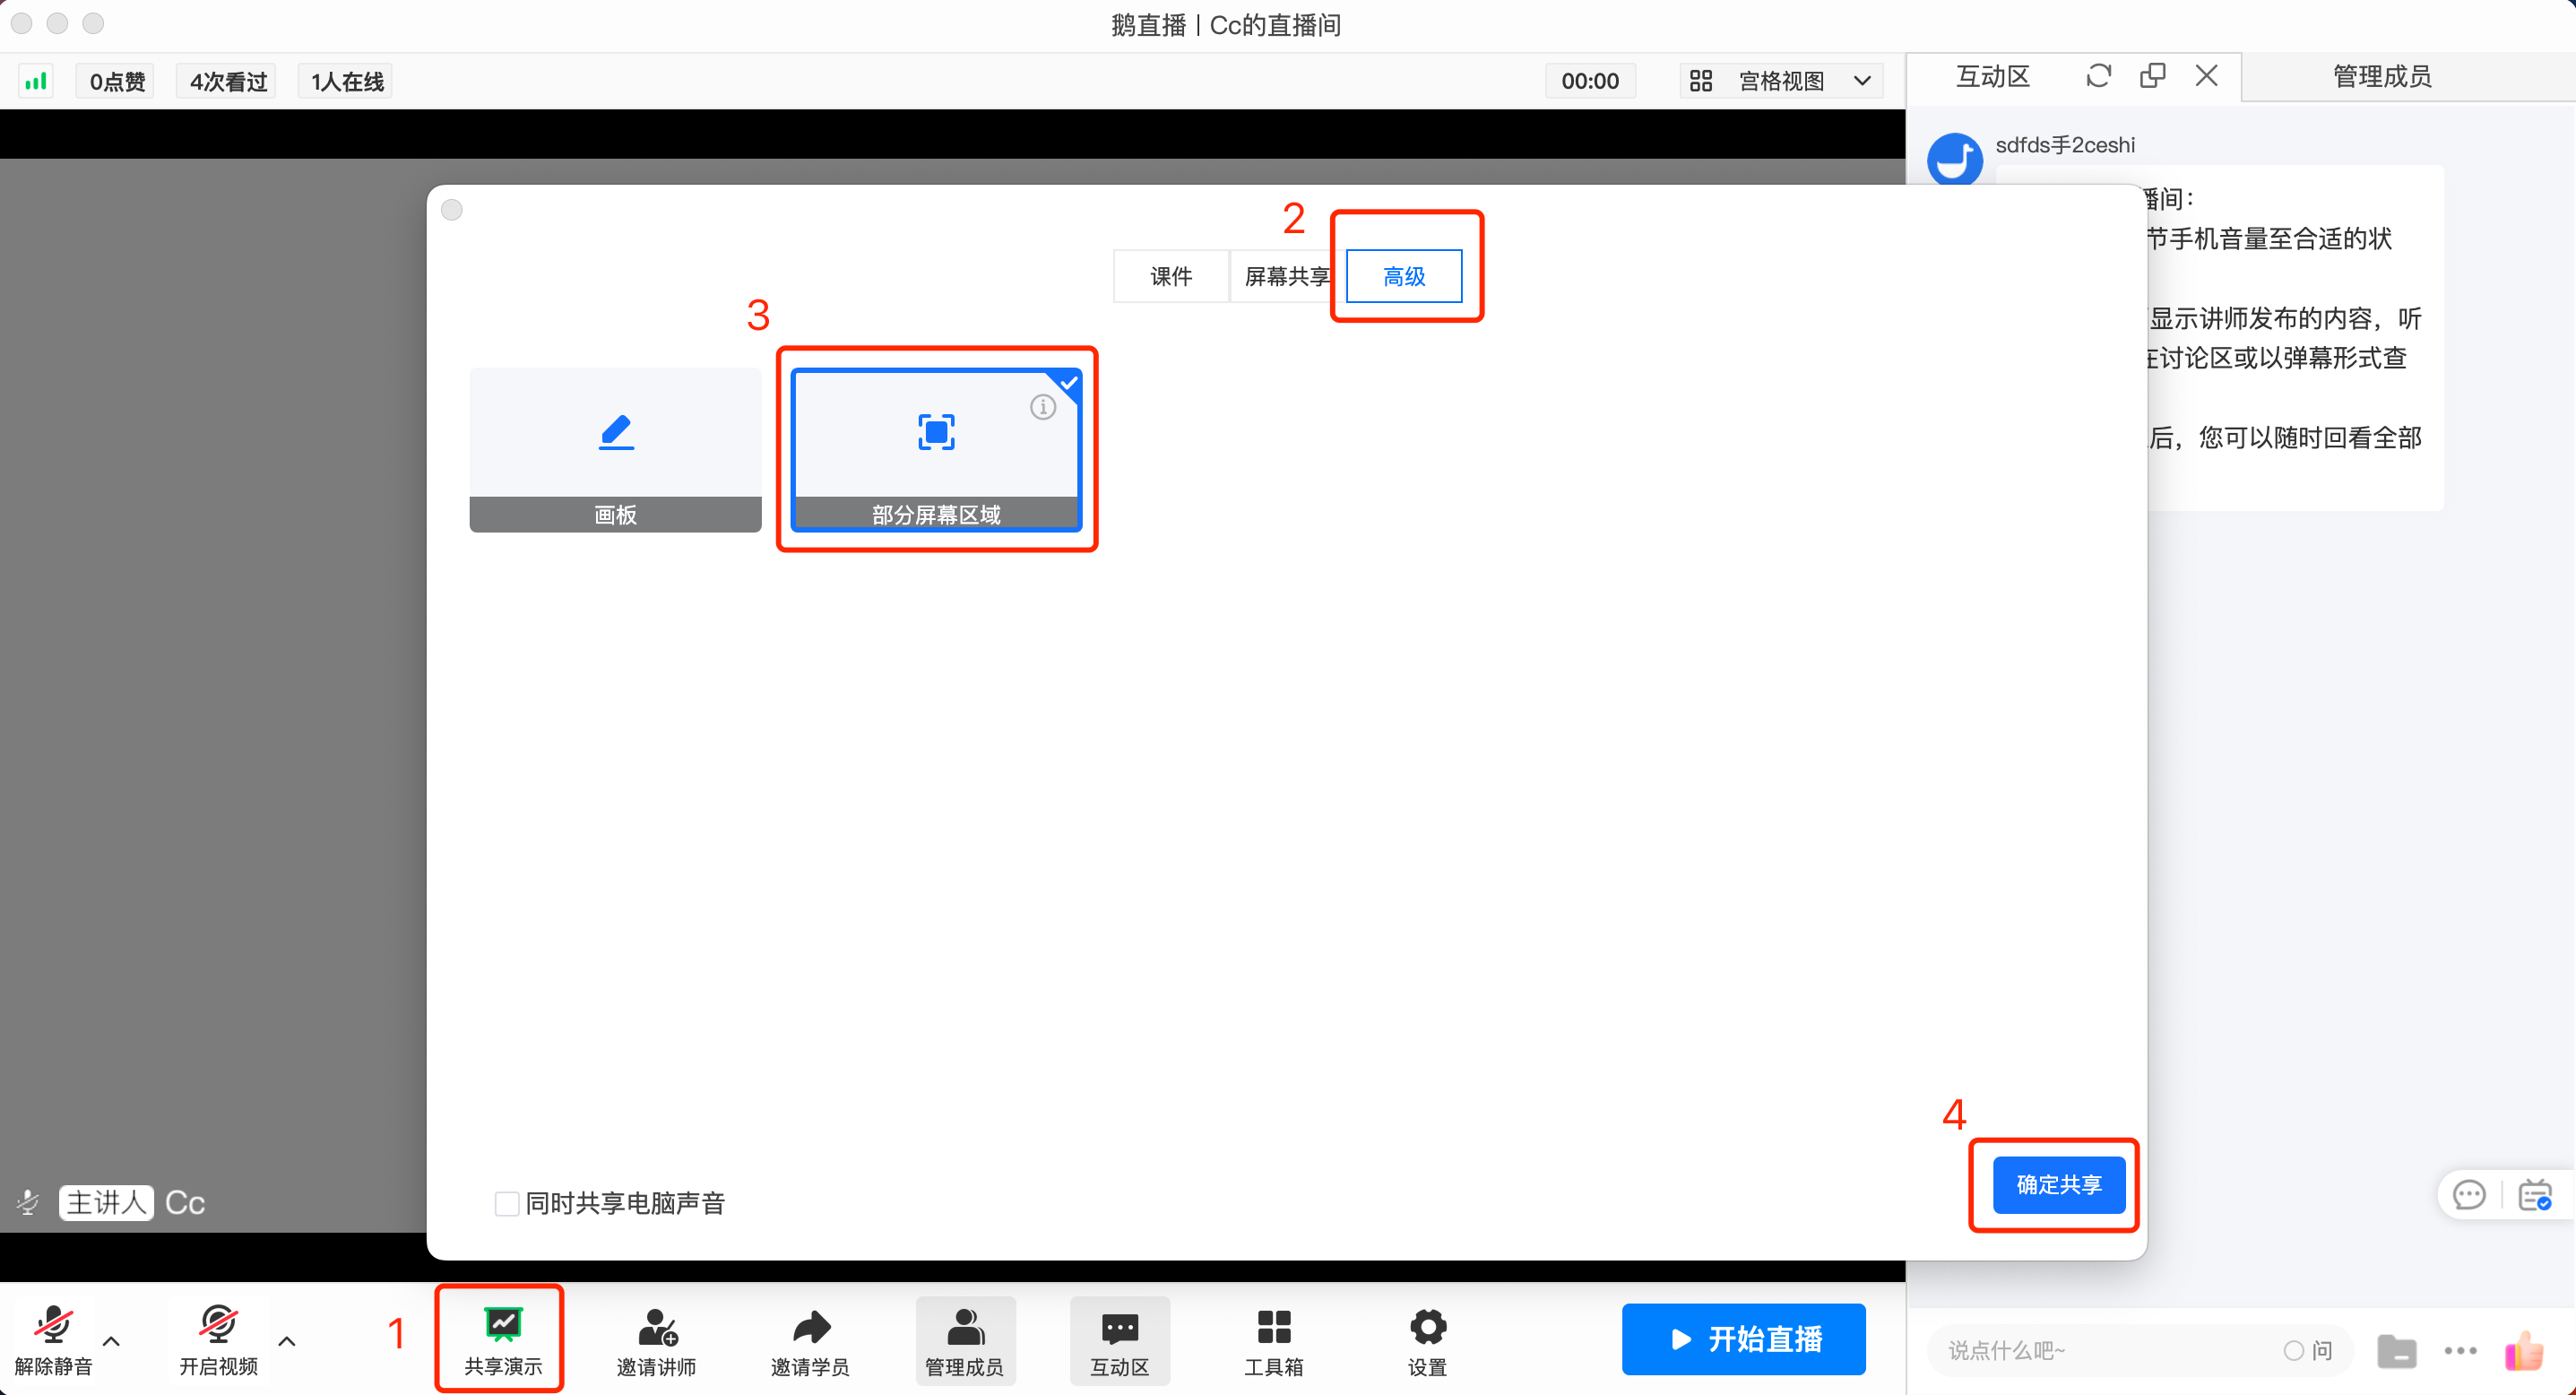
①In the live room, click [Share Screen] -> [Advanced] -> [Partial Screen Area] -> [Confirm Sharing] at the bottom toolbar, then enter the sharing area selection.
②After adjusting the sharing area, click the [Start Sharing] button to share the selected area on the screen. Click the [Cancel] button to exit the sharing.

IV. Notes
①During the instructor's selection of the screen area, elink Live will automatically detect windows as candidate areas based on the position of the mouse pointer. Instructors can also manually drag the mouse to select the screen area.
②To avoid affecting the viewing experience of other members in the live room, the selected screen area for sharing should not be smaller than 80x80 pixels.
③If the instructor uses multiple monitors, cross - screen selection is not supported when selecting a part of the screen. It is recommended to first adjust the elink Live client to the desktop to be shared.
④During the sharing process, all displayed content in the selected area will be shared. Please avoid sharing areas that contain sensitive personal information such as user input, notification messages, and personal accounts.