Live broadcast
- Create a new live broadcast
- Tutorial on Creating and Using Voice Live Streaming
- How to choose the live streaming type and terminal
- Live broadcast terminal
- 【OBS】 Black screen appears when using monitor capture?
- A lecturer is currently live streaming. What will happen if another lecturer enters the live streaming room and starts a live stream?
- How to modify the bitrate value?
- Is the live content viewed in the live stream room blurry?
- 【OBS】Tutorial on Capturing Desktop Audio without Affecting Speaker Output (for MAC Computers)
- Usage tutorial for instructors to grab live streaming slots
- 【OBS】 Keeps prompting that the connection has been disconnected?
- 【OBS】How to monitor the quality of live streaming?
- Live broadcast configuration
- How to set up live guests?
- During live streaming, can I customize the waiting screen when the instructor is away?
- How many course start reminders can be pushed during a live stream?
- Can invitation codes be used for live courses?
- How can instructors enter the live streaming room?
- Can elink's live streaming share the instructor's desktop?
- Which browser should I use for live streaming?
- If the scheduled live streaming time has not started, can the instructor start the live stream in the live room in advance?
- Can watermarks be added to live streams?
- Can multiple instructors be set up in the live streaming room?
- Where can I modify the nickname and avatar of the live stream instructor?
- Can live streams be set to not allow playback?
- Can the live stream room copywriting be modified?
- How to set up a live stream instructor and how to invite instructors (guests)?
- Tutorial on Setting the Live Streaming Room Cover
- Tutorial on Using Live Streaming Watermark Settings
- Tutorial on setting up live streaming instructors (guests)
- Tutorial on Using Ultra-Low Latency Live Streaming
- Will this feature take effect immediately after enabling ultra-low latency live streaming?
- After enabling ultra-low latency live streaming, can users enjoy ultra-low latency when watching on all devices?
- Why is the live streaming latency still high after enabling ultra-low latency live streaming?
- Tutorial on converting documents to PDF
- Specification for configuring external links in recommendation cards
- Tutorial on converting documents to PDF
- What should I do if the virtual background and beauty filter don't work?
- Tutorial on Privacy Protection Usage
- Tutorial on Using Live Commerce Comment Review
- Scope of application for trainees to pause live commerce
- Video live streaming - Real-time video mode
- Video Live Streaming - Web Version Usage Tutorial
- When conducting a live stream on the web, if one instructor has already entered the live room, how can other instructors start their live streams?
- After starting the live video streaming, do I need to click the “Start Live” button on the management console?
- Why does the content of Live Course A appear in Live Course B?
- Can trial viewing be set for real-time video live streaming?
- Can the Merchant Assistant Mini Program support live streaming?
- Do live streaming instructors need to be certified?
- Can I set a fee for the live replay after a free live commerce session ends?
- Can the replay content of real-time video live streaming be modified or deleted?
- Unable to connect to the camera during live streaming
- How to handle freezing and latency issues during real-time live streaming?
- The instructor's video is not visible during the live stream
- What are the different ways of live video streaming?
- Common Questions about Live Streaming
- What should I do if there is an error when exporting a video?
- Can the courseware be downloaded?
- Can I export the leaderboard?
- Can live streaming be implemented in a WeChat group?
- How to apply for the restoration of a deleted live stream?
- The preset end time of the live stream has passed, but the instructor is still in the live room. Will it affect the students' viewing of the replay?
- Will the audio or video uploaded to the live streaming room play automatically? Or do users need to click manually to play?
- What should I do if there is a harsh noise or the microphone howls during a live stream?
- How to solve issues such as live streaming freezing and long latency?
- Can I watch the replay and download the live stream after it ends?
- Can the live stream continue after the scheduled time?
- If I exit my live streaming room before the scheduled end time, will the live stream end and become available for replay?
- Can the avatar of the elink assistant in the live streaming room be changed?
- Can the live stream be resumed after manually ending it?
- Does the live replay support playback speed adjustment?
- During the live stream, the live broadcast area shows a black screen, and the live stream footage cannot be displayed properly
- How to handle the issue of low audio volume in live streaming content?
- What will happen and what impacts will there be if you start pushing the stream before the live streaming has begun?
- Multi-segment editing of live replay videos
- Tutorial on Using the Playback Validity Period Function
- How can live course students download course materials?
- Tutorial on Manual Transcoding for Live Streaming
- English version live streaming room usage tutorial
- 【OBS】 Frequently Asked Questions
- How to authorize the microphone on a Mac computer?
- How to authorize the microphone?
- How to authorize the camera on a Mac computer?
- How to authorize the camera?
- How to check if the microphone permission is occupied?
- How to reduce the CPU usage of a computer?
- How to check if the camera permission is occupied?
- How to check if the current microphone is working properly?
- How to check if the current camera is working properly?
- Common Questions about Kuaishou Relay
- How to reduce live streaming traffic consumption
- Black borders or incomplete display in the live streaming video
- Video clarity of each live streaming push terminal
- Problems and Solutions for Abnormal Live Room Access
- Common issues and solutions for audio-video out-of-sync in live streaming
- Suggestions for live streaming equipment and parameter settings
- Common Questions about Live Learning Data
- How to edit the recorded playback of live streams?
- Live Streaming Management and Operation
- Where is the entry for live streaming data?
- Will instructors and teaching assistants be counted in the live streaming data when they enter the live streaming room?
- What data can be collected for live courses in data analysis?
- How are the live streaming data statistics calculated after the live streaming duration is edited?
- Does the live streaming data statistics include the entry method of users through the PC?
- How is the data on the number of online viewers in the live streaming room calculated?
- Can I view the time when students first entered the live streaming room and the duration of their viewing in the live streaming data?
- How to display the newly created live stream on the homepage?
- Can I see the real number of viewers in the live streaming room?
- If a promoter shares a poster to invite users to enter the live streaming room, will it be reflected in the Invited Influencer Ranking?
- After entering the live course, why does the invitation card button sometimes appear and sometimes not?
- If a paid live stream is changed to require an encryption method to enter, do users who have already purchased need to enter a password?
- Can the replay video be replaced after the live stream ends?
- What should I do if the live streaming time exceeds the scheduled duration?
- How can users watch the live replay in the C-end live streaming room?
- Content Management
- Data description of live commerce user management
- Live marketing interaction
- What is the statistical principle of the Invitation Influencer Ranking?
- Are there any requirements for the mobile phone to download files during live streaming?
- Why can't I record voice during a live stream on the PC?
- Can external links be posted in the live streaming room?
- Can instructors only send voice messages when the live stream starts?
- Can the instructor continue the lecture after the set live streaming duration has ended?
- Can the user speak in the next live stream after being muted?
- How to prevent users from discussing during a live stream?
- How to restore the live streaming room after the instructor has enabled the mute mode?
- How to restore a muted user?
- How to delete a user's comment during a live stream?
- How to mute a specific user during a live stream?
- Is there a prompt when the instructor leaves the live streaming room?
- How can instructors share learning materials in the live streaming room?
- How to share videos during a live stream?
- Tutorial on Sharing Live Streaming Courseware
- Tutorial on Sending Audio and Video by Instructors in the Live Streaming Terminal
- Tutorial on how to send pictures, texts, and voices for live streaming instructors
- Supplementary interactive prompts for vertical screen live rooms and optimization of the product list refresh function
- Instructions for using the Influencer Invitation Leaderboard event
- Management Regulations for the Influencer Invitation Leaderboard Event
- How many rounds of lucky draws can be launched in one live stream?
- Is there a limit to the number of prizes for live interactive lucky draws?
- How can the winning students claim their prizes?
- Which platforms does the current lottery feature support?
- How can merchants obtain learner information when using course products as prizes for live interactive lotteries?
- What are the lottery rules when the number of participants is less than the number of prizes?
- Tutorial on using the Live Comment Wall and Voice Message Sending features for trainees
- Tutorial on Using the Check-in Feature in the Live Streaming Room
- How can learners view their participation records in live stream giveaways?
- How to prevent students who have already won from winning again in a live commerce lottery?
- Tutorial on Sending Products during Live Commerce
- Supplementary interactive prompts for vertical screen live rooms and optimization of the product list refresh function
- How can instructors watch the live stream from the perspective of students?
- Tutorial on Using the Live Sharing Reward Program
- Tutorial on Using Points Exchange in the Live Streaming Room
- Coupon campaigns in live streaming rooms
- Live Commerce Sold-out Strategies
- OBS Streaming
- 【OBS】How to download the video streamed by OBS?
- 【OBS】 Experiencing lag during live streaming?
- 【OBS】How to solve the live streaming latency issue?
- 【OBS】Is the streaming screen inconsistent with the actual screen?
- How to obtain the server and streaming key?
- Where can I download [OBS]?
- After successfully configuring live streaming, why can't students see the video?
- 【OBS】 How to adjust the size of the instructor's video?
- Can the stream name be used permanently after being set once?
- [OBS] Streaming shows no connection to the server (some office networks may have restrictions)
- What is a streaming key?
- What should the instructor do if they need a break during the live stream?
- Voice live broadcast
- Does voice live streaming support progress seeking?
- During a PPT live stream, will the students' PPTs follow the instructor's flipping actions?
- How to sort the uploaded PPT images?
- What is the supported size for PPT images uploaded during PPT live streaming?
- How to bind voice to PPT in PPT live streaming?
- How to handle the issue of excessively long transcoding time for recorded broadcasts?
- What should I do if the transcoding of the recorded live stream is not completed when starting a new live stream?
- Tutorial on Using Voice Live Streaming
- Recorded and live broadcasts
- Is there a size limit for the videos uploaded for recorded or live broadcasts?
- Tutorial on Using the Video Mode for Recorded and Live Streams
- If the live streaming duration is longer than the uploaded video duration, will the words [Video playback completed] appear after the video finishes playing?
- Tutorial on Using Recorded and Live Streams
- If the live streaming duration is shorter than the uploaded video duration, will the words [Video playback completed] appear after the video finishes playing?
- Relay broadcast
- Where can I obtain the streaming push address from a third-party platform?
- What should I do if adding or modifying the streaming push address during a live stream does not take effect?
- Which online stores can authorize live rebroadcasting?
- Which online stores can accept live rebroadcasting?
- Third-party streaming to the elink live streaming room
- What should I do if the live streaming push URL for Channels fails to work?
- What should I do if students can't watch the live rebroadcast on Channels?
- How to rebroadcast a live stream to Bilibili
- How to rebroadcast a live stream to Weibo
- Stream pulling
- Where can I obtain the stream pulling address?
- What should I do if there is no video after adding or modifying the streaming pull address during a live stream?
- Start a live broadcast
- Going live on a computer - Tutorial for using the web version
- 【OBS】How to Use Beauty Filters
- Live streaming supports external graphic tablets
- Live streaming supports external microphones (such as lavalier microphones)
- The audio and video are out of sync when exporting videos from the video editing software
- Does the live stream support external devices?
- Live screen sharing
Create a new live broadcast
Tutorial on Creating and Using Voice Live Streaming
I. Function Introduction
Voice live streaming is a type of live streaming that allows for the real-time transmission of a large amount of voice, text, and images, as well as the display of PPT courseware.
II. Purpose of Use
Merchants can use voice for live lectures.
III. Use Scenarios
Suitable for live streaming types that do not require a camera or real-time video interaction.
IV. Operation Path
Merchant side:Create a live stream → Complete the details page of the live streaming room → Select a terminal to start the live stream
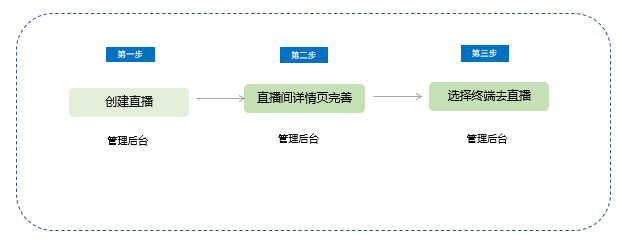
V. Usage Tutorial
Step 1: Create a voice live stream
1. Log in to the elink management console, and sequentially select [Live Streaming] - [New Live Stream]. On the live stream creation page, select the [Voice Live Streaming] type.
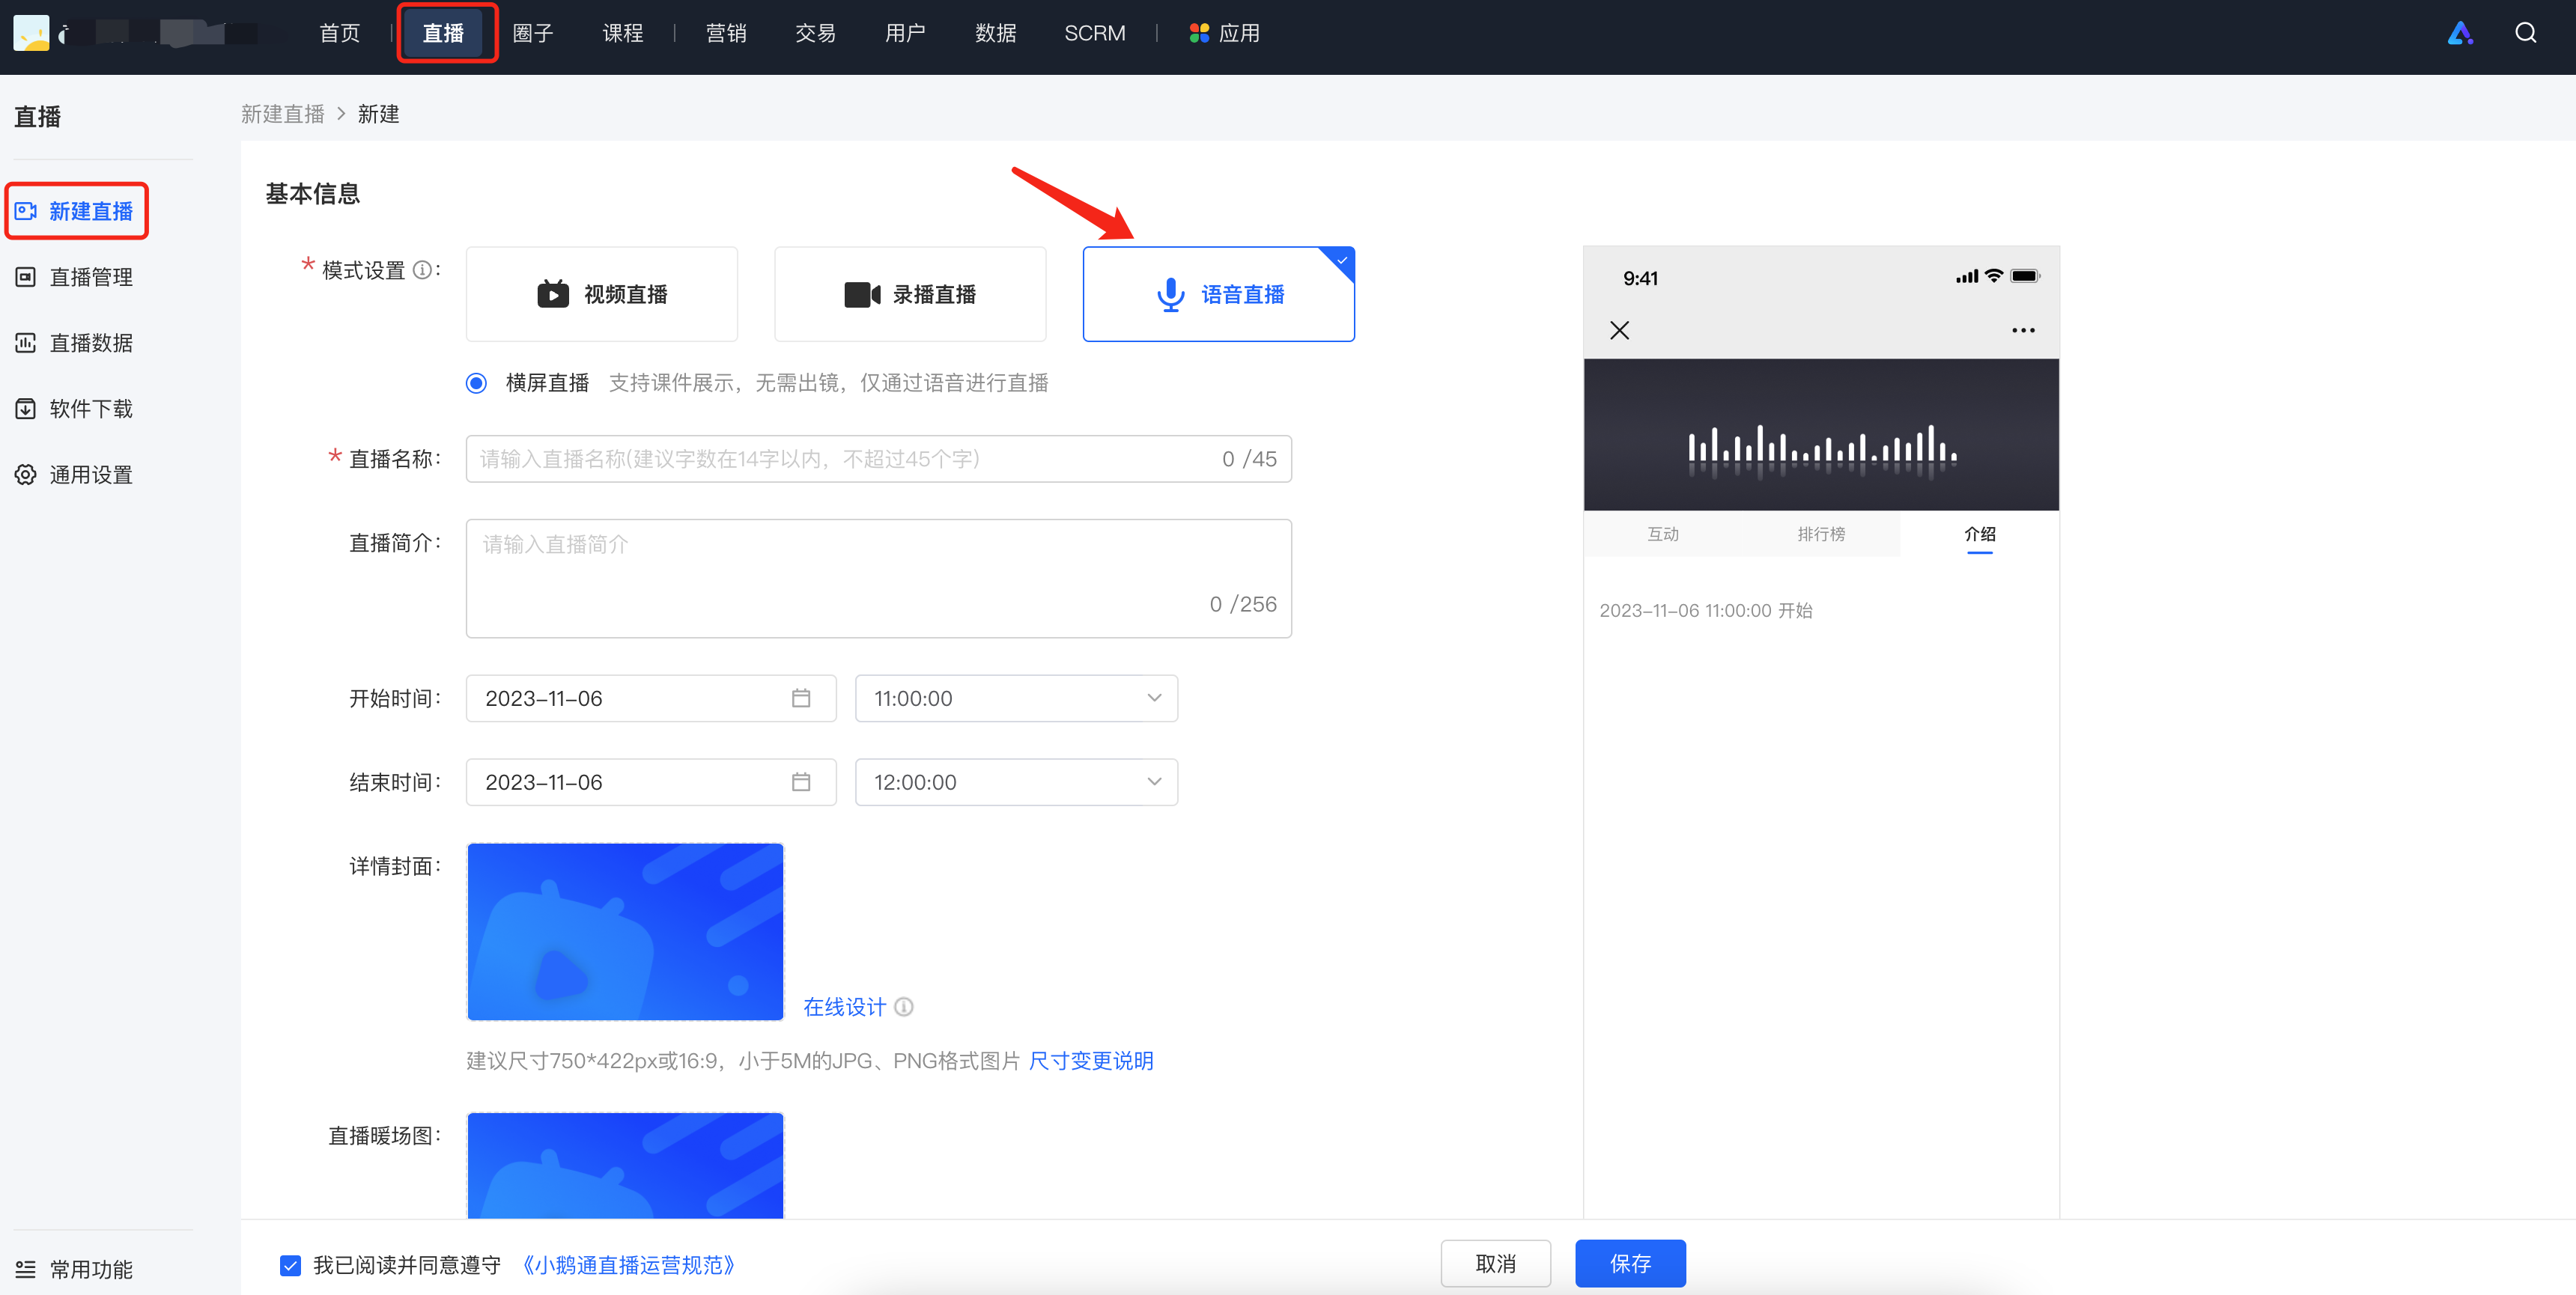
2. On the new live stream creation page, fill in the relevant information.
(1) Basic information:Live stream name, live stream description, live stream time, detailed cover image, pre - live warm - up image, live stream promotion cover image, live stream details, instructor settings
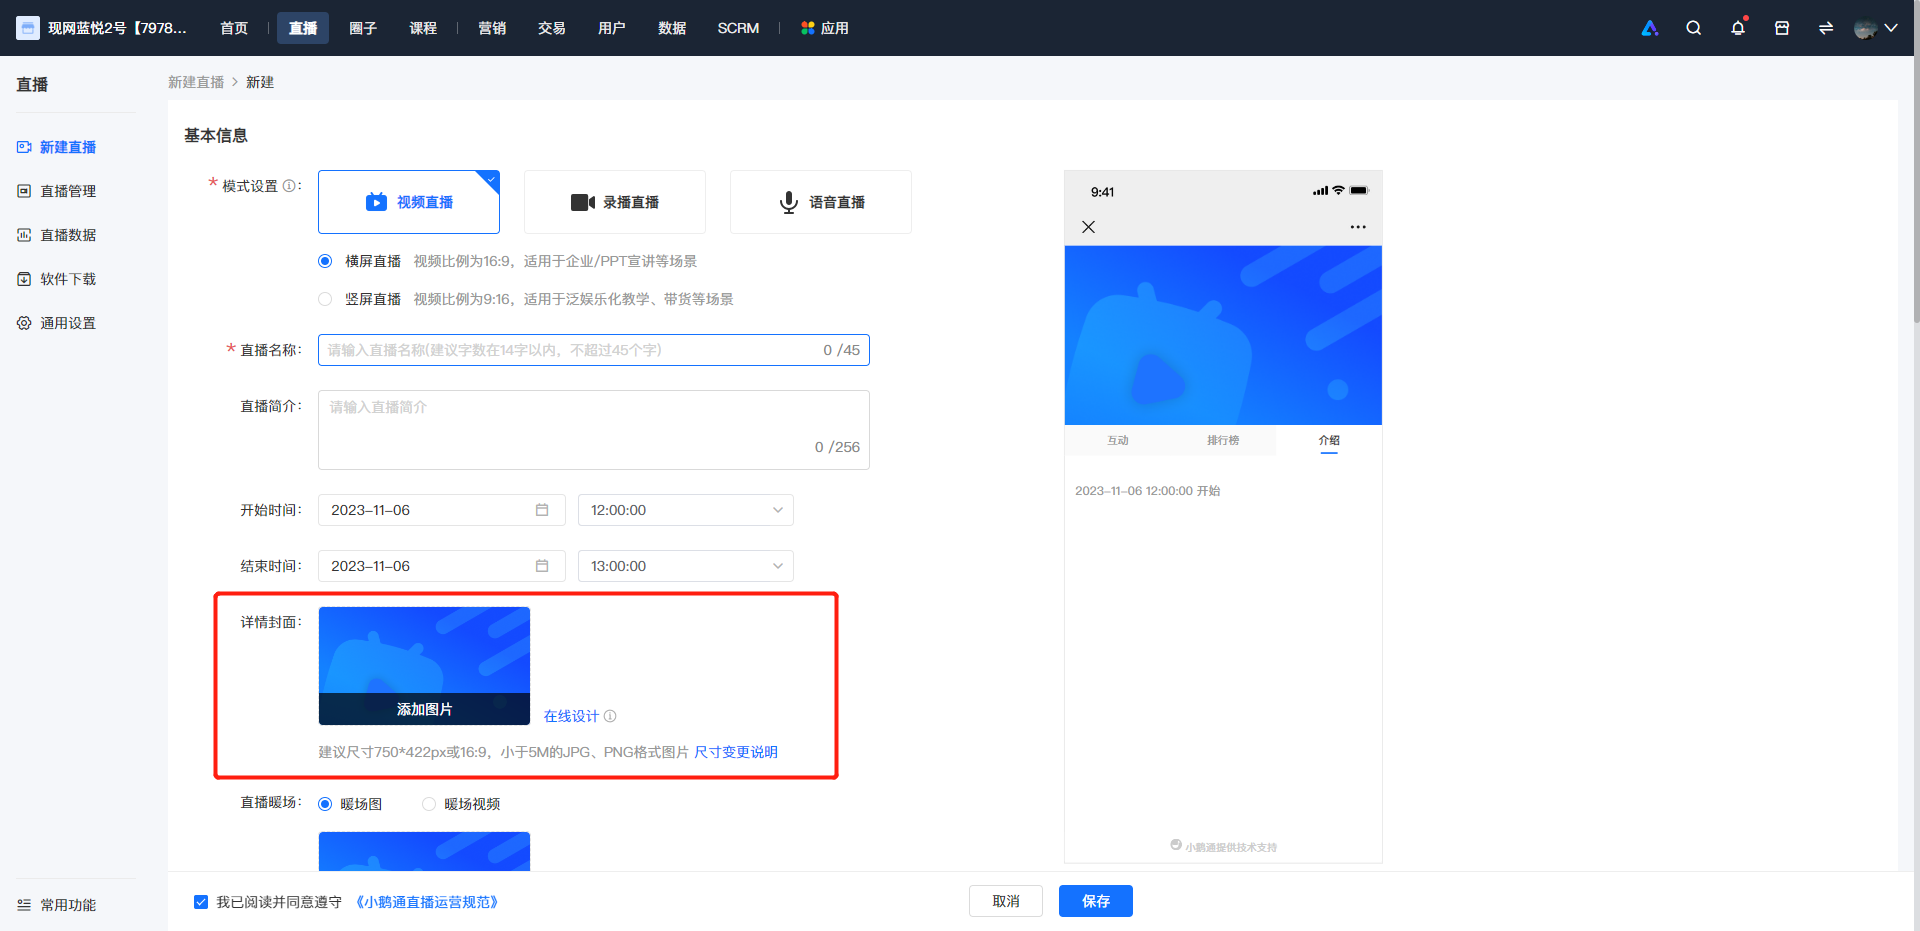
[Detailed cover image]It is the image displayed when users purchase the live stream course;
[Pre - live warm - up image]It is the image displayed in the video area before the live stream starts;
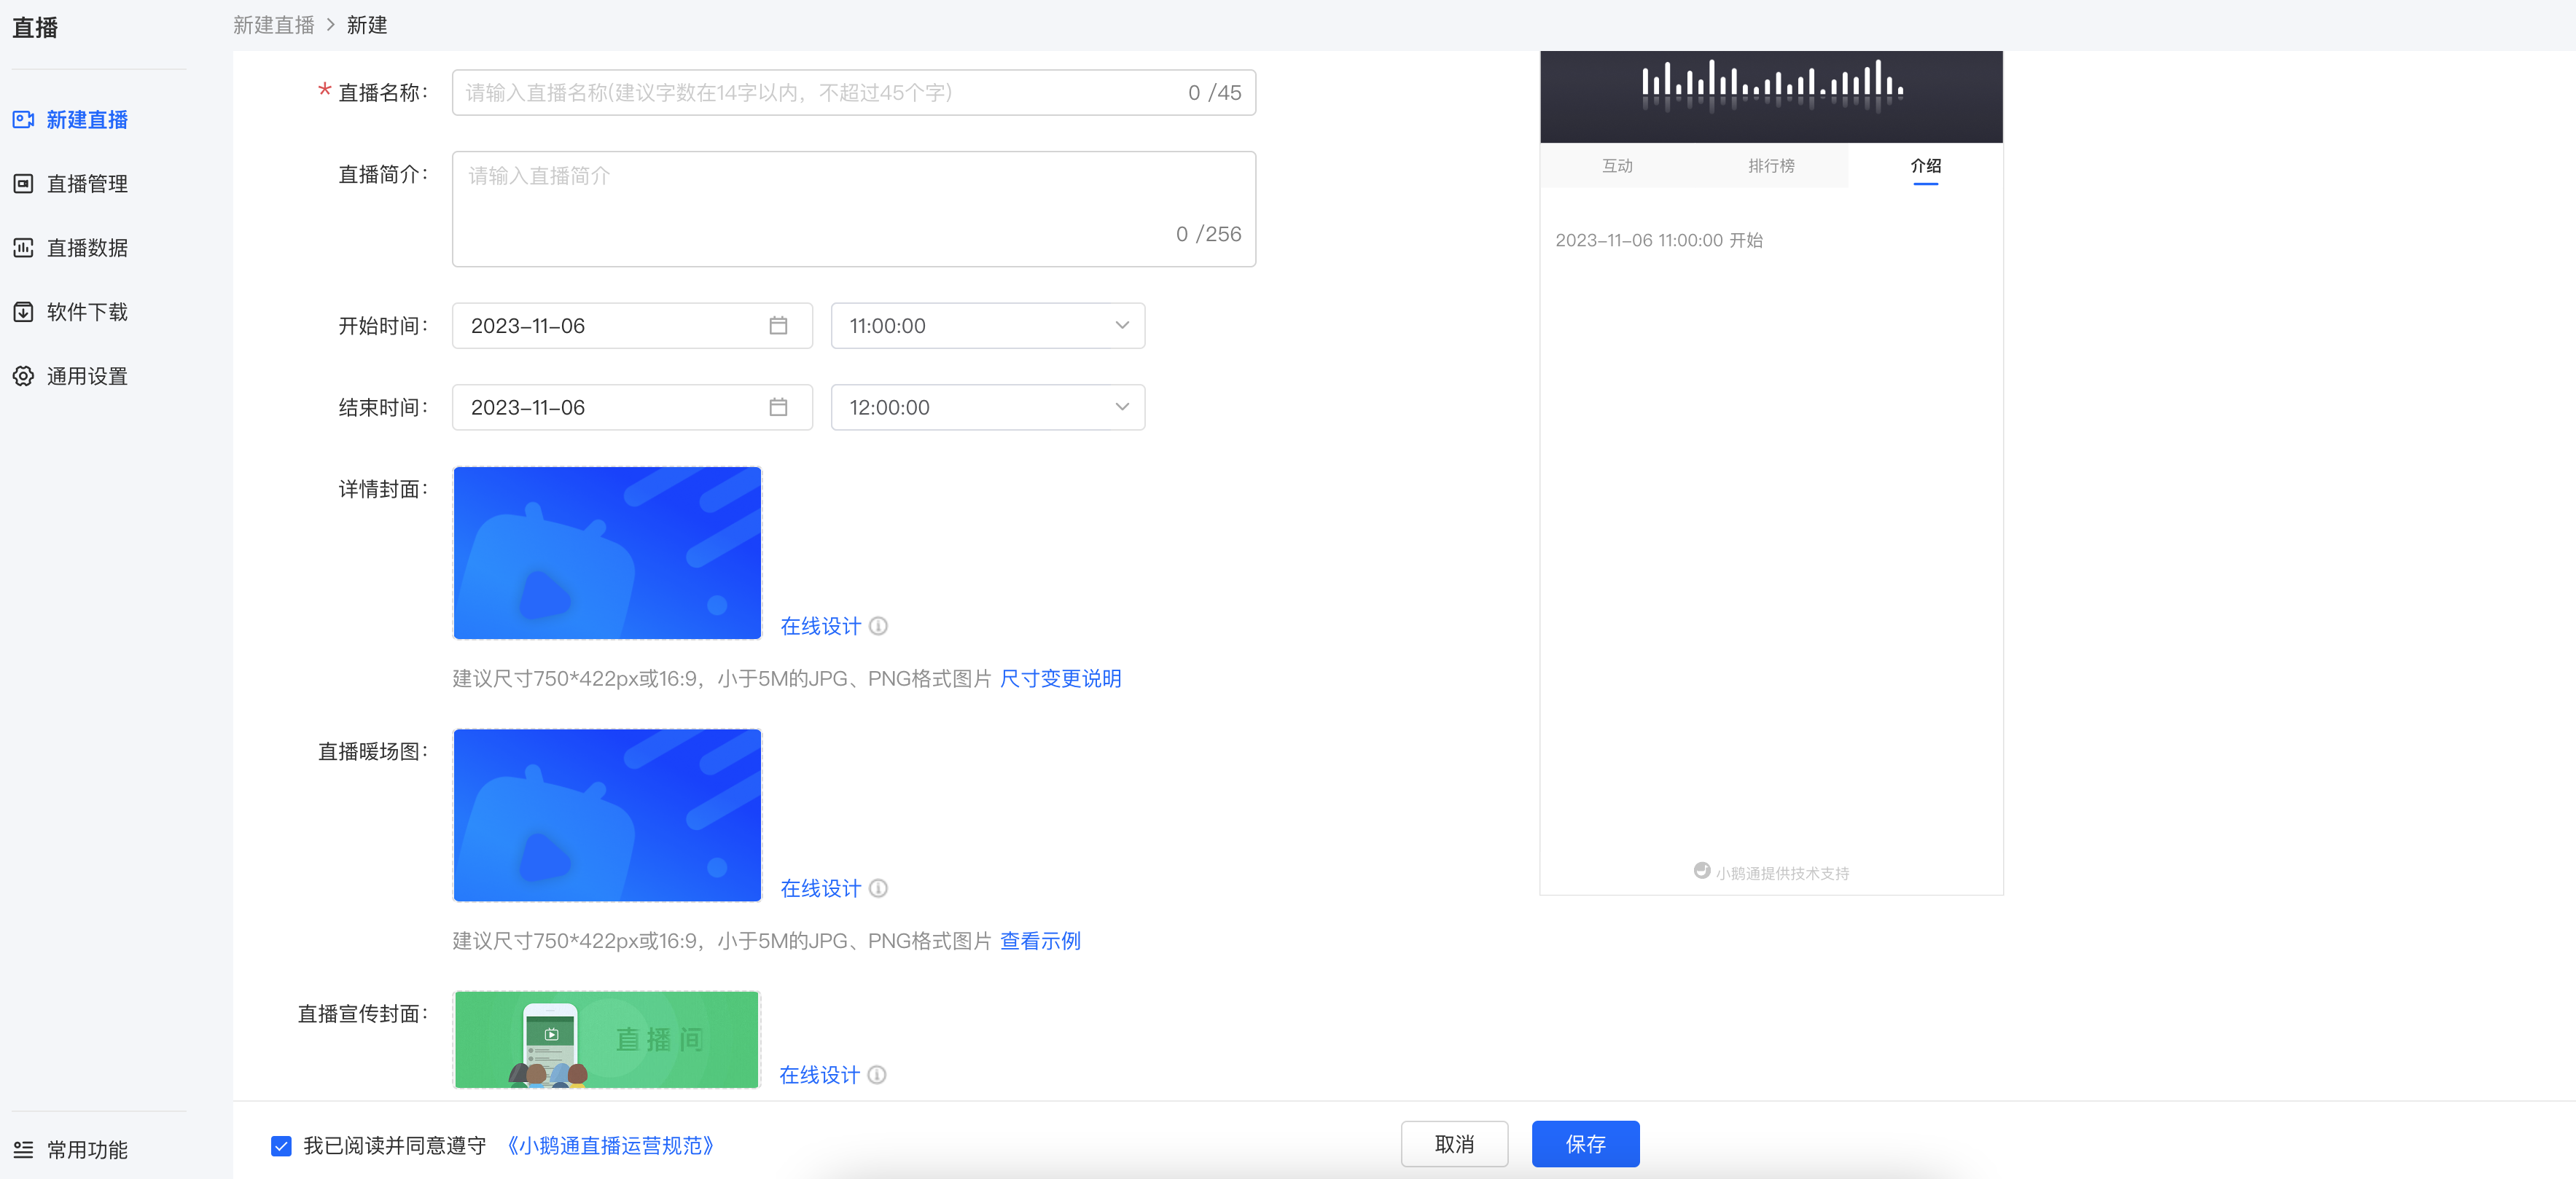
[Live stream promotion cover image]It is the entrance to the live stream on the home page of the online store;
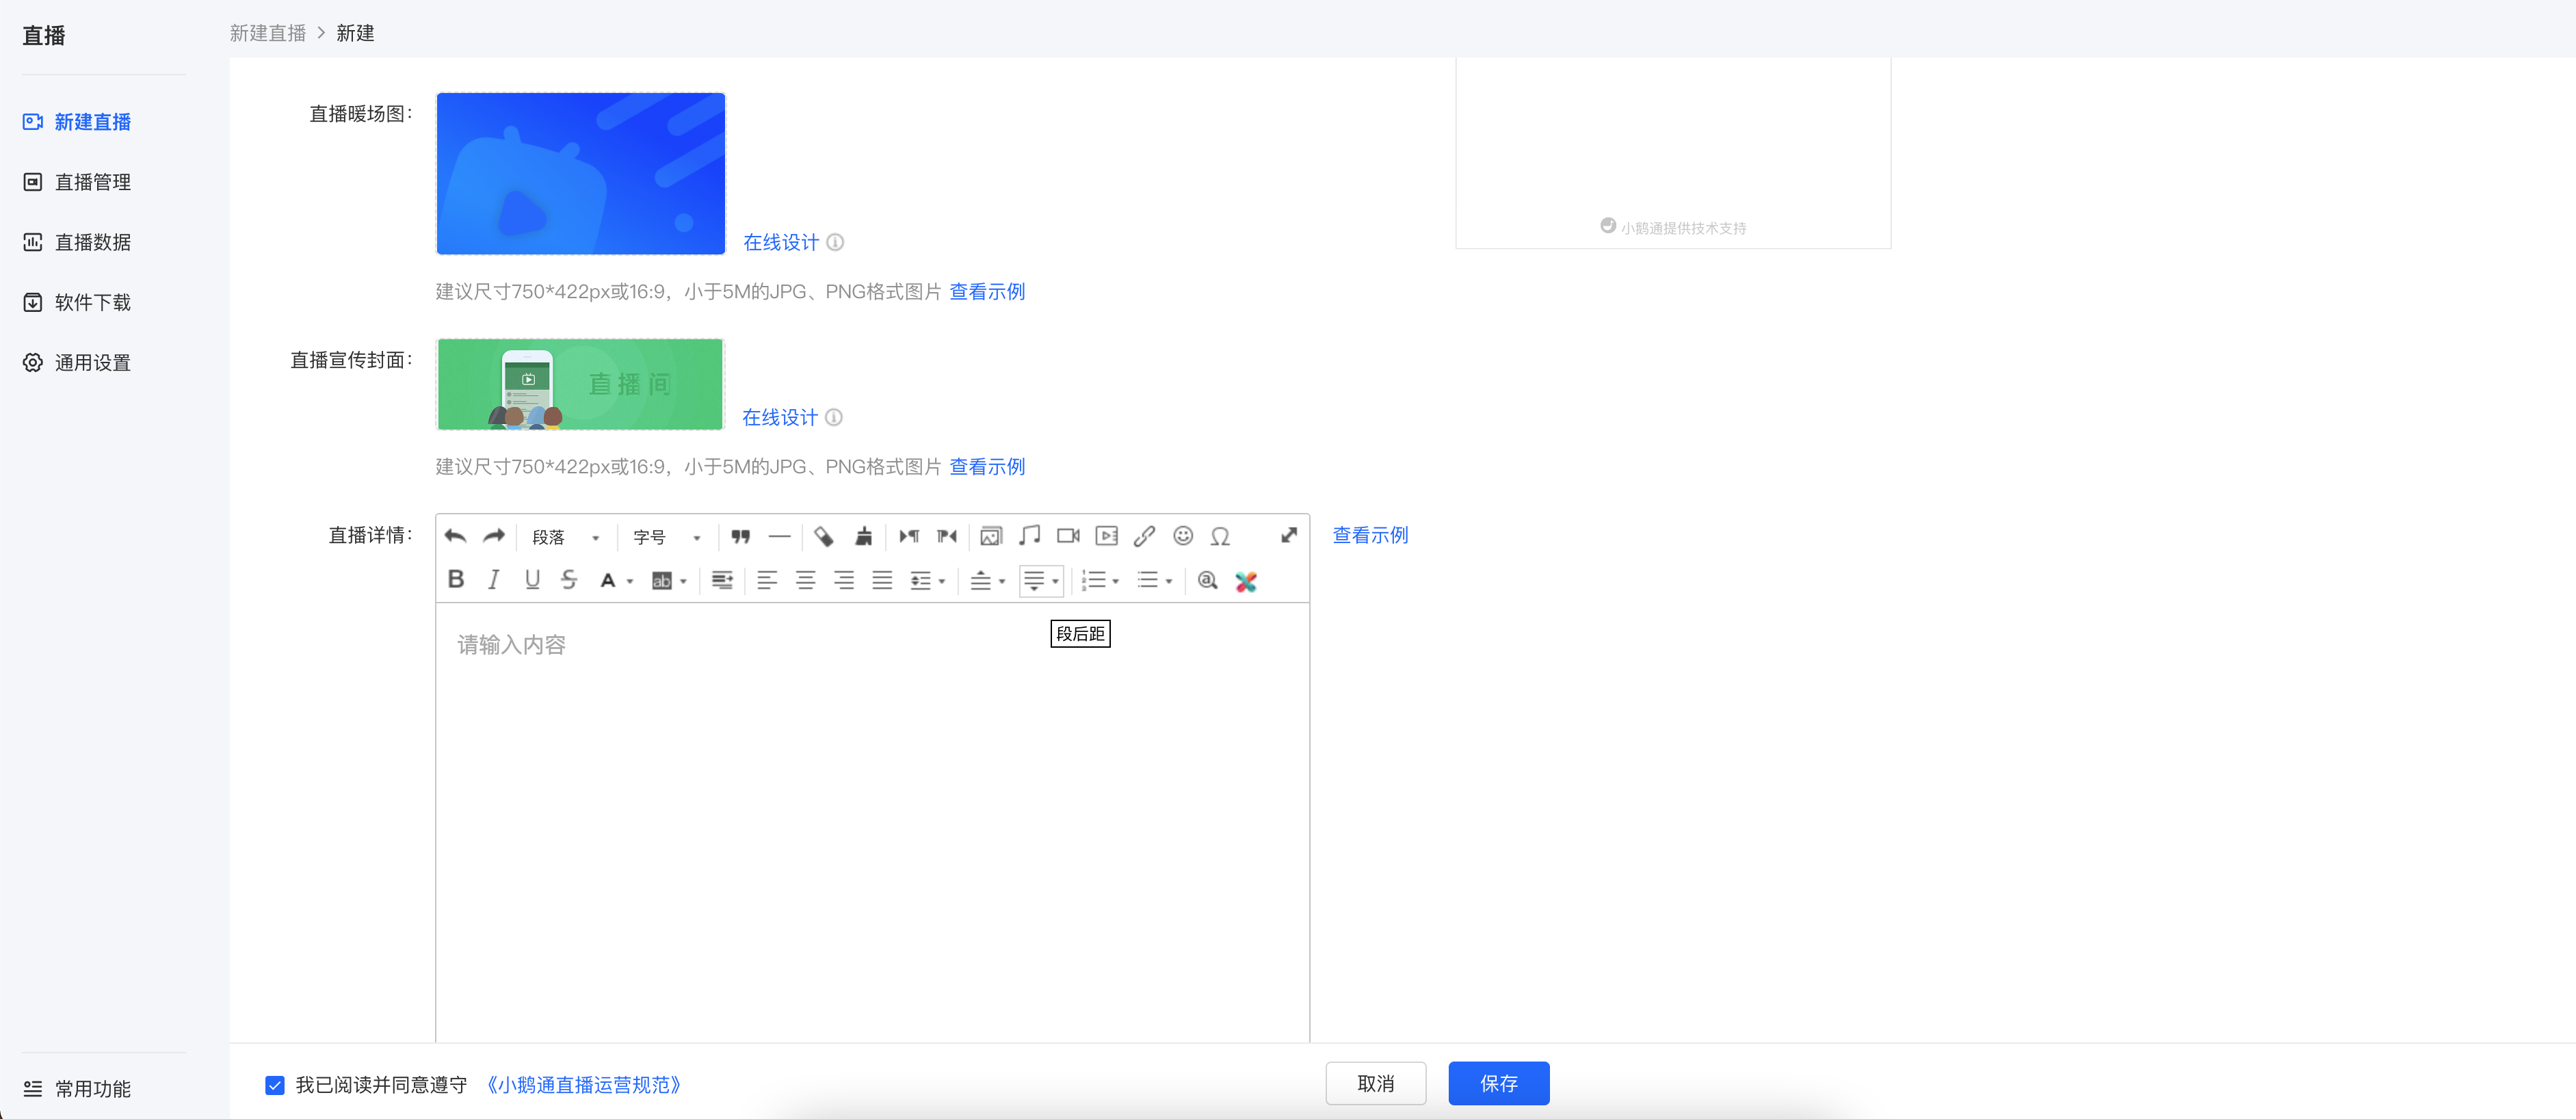
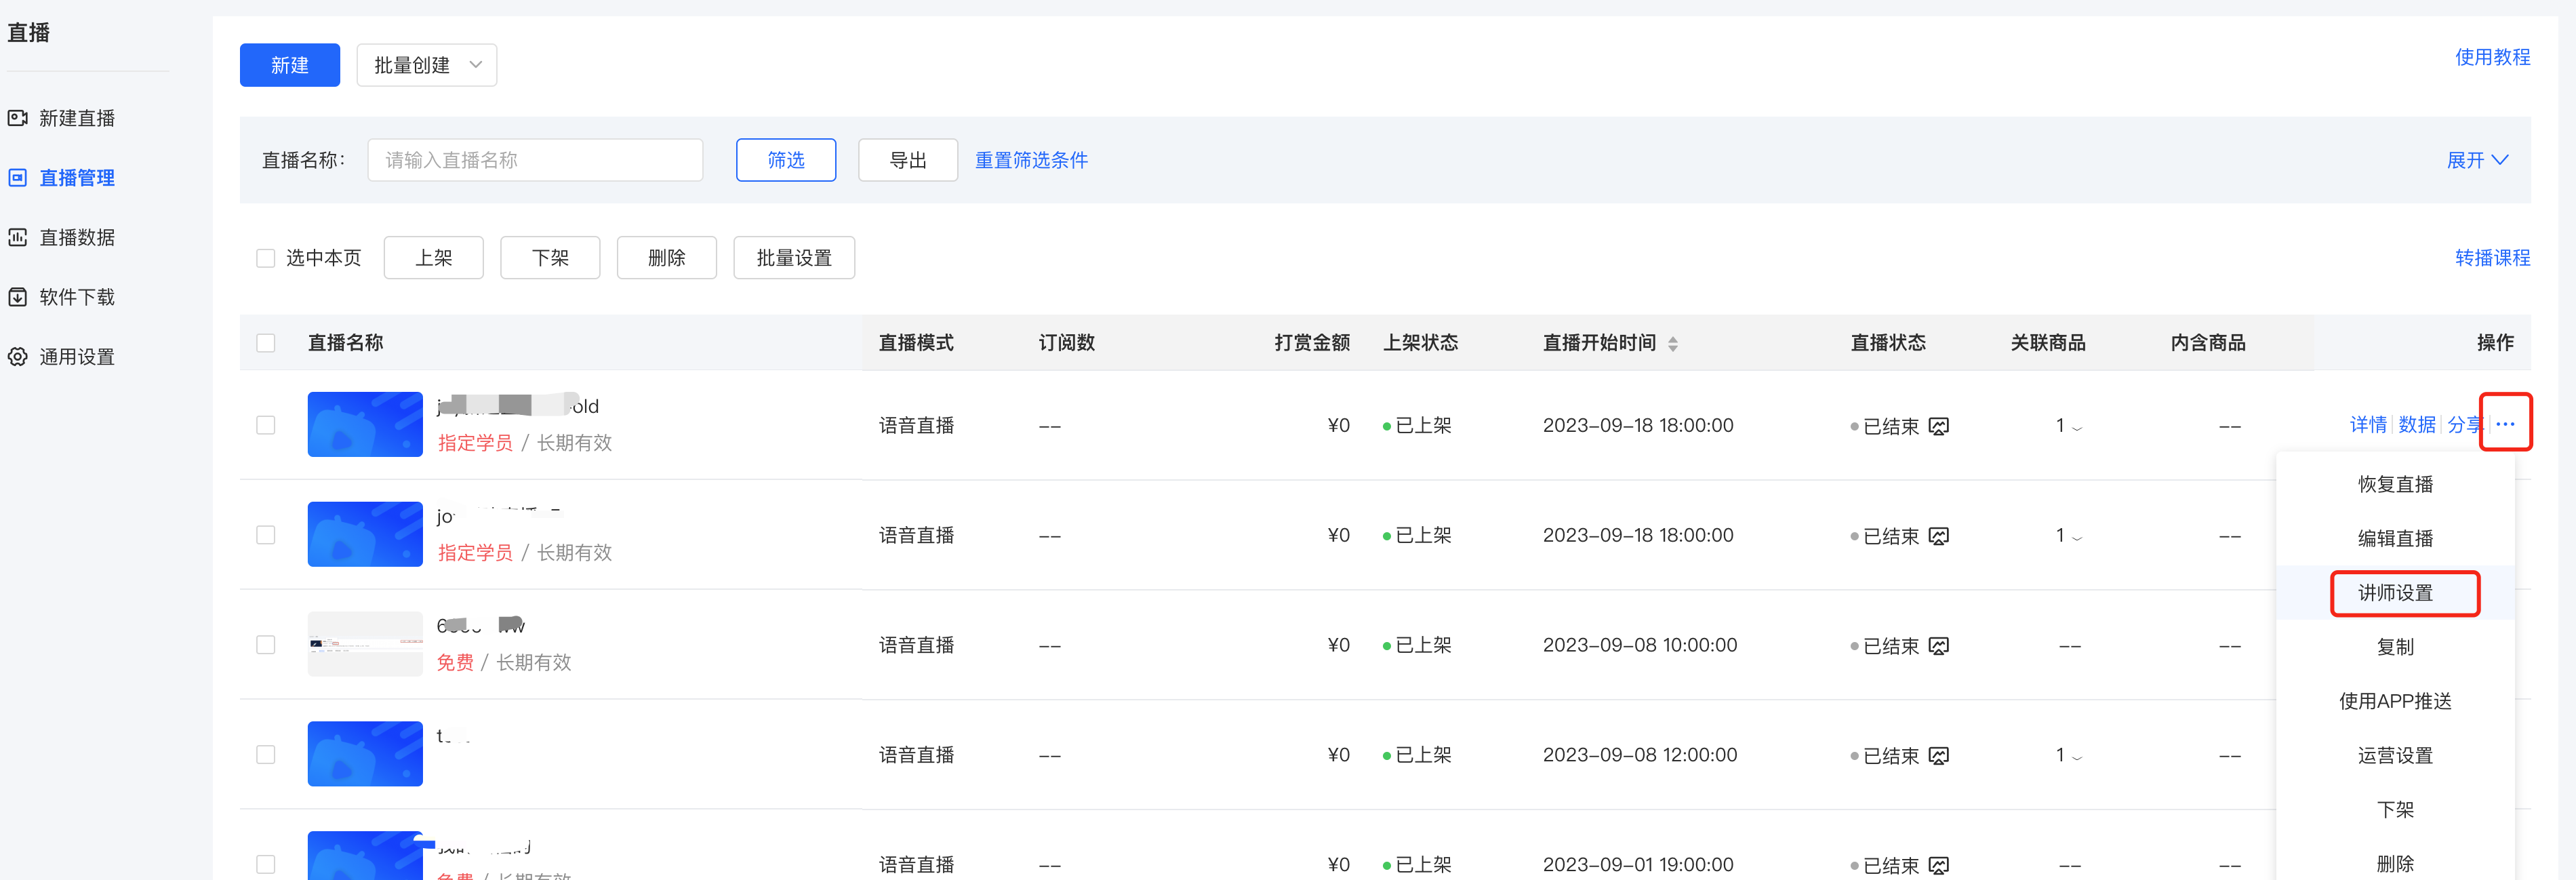
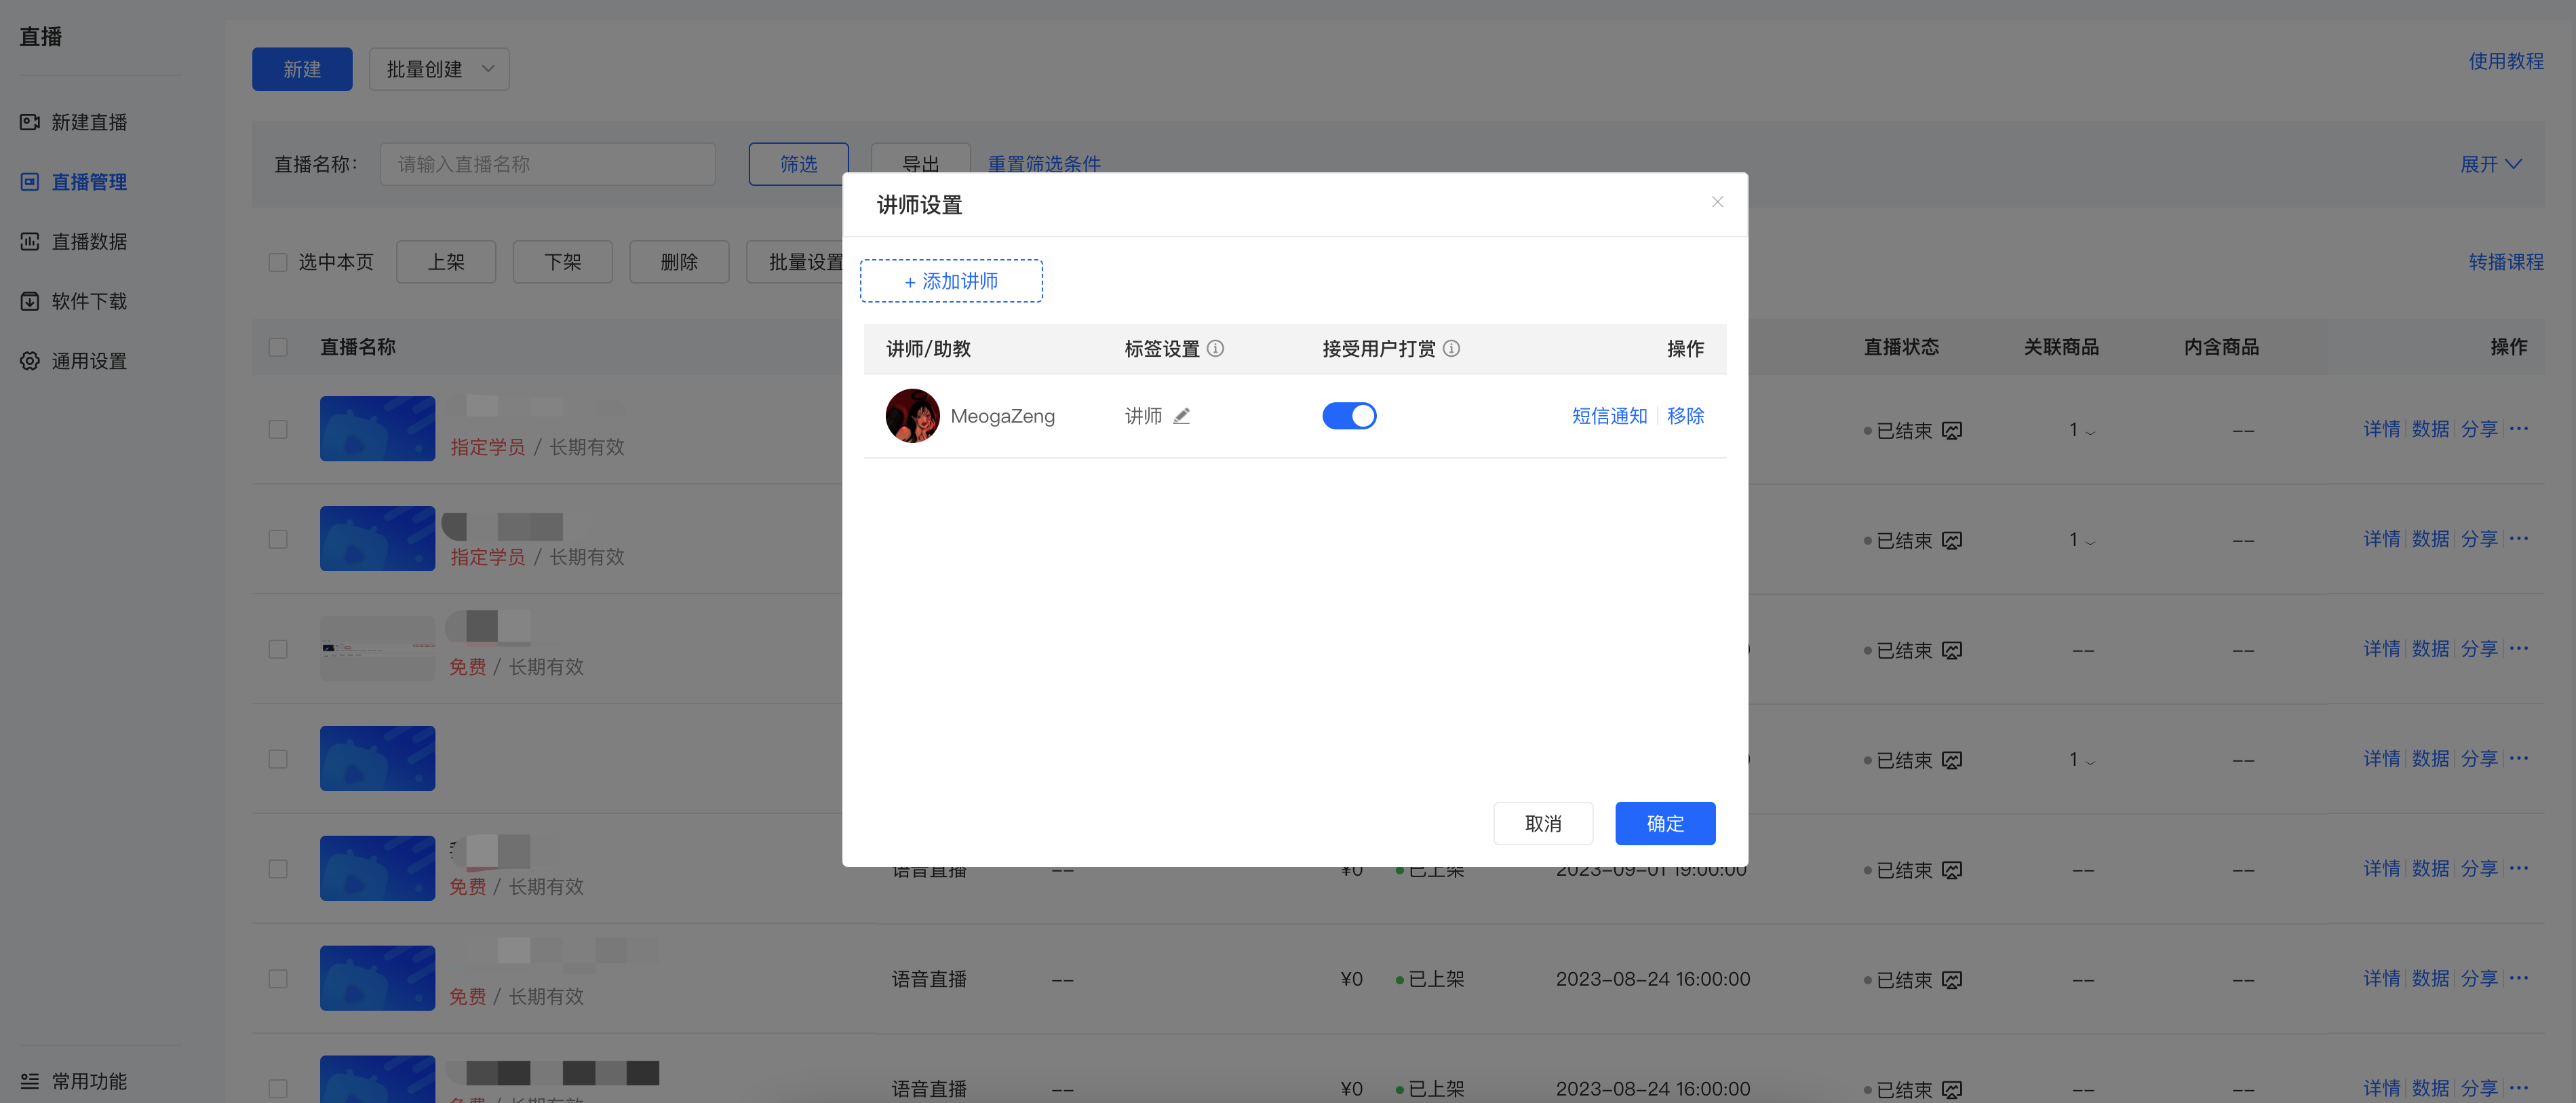
[Instructor settings]You can click to add an instructor.
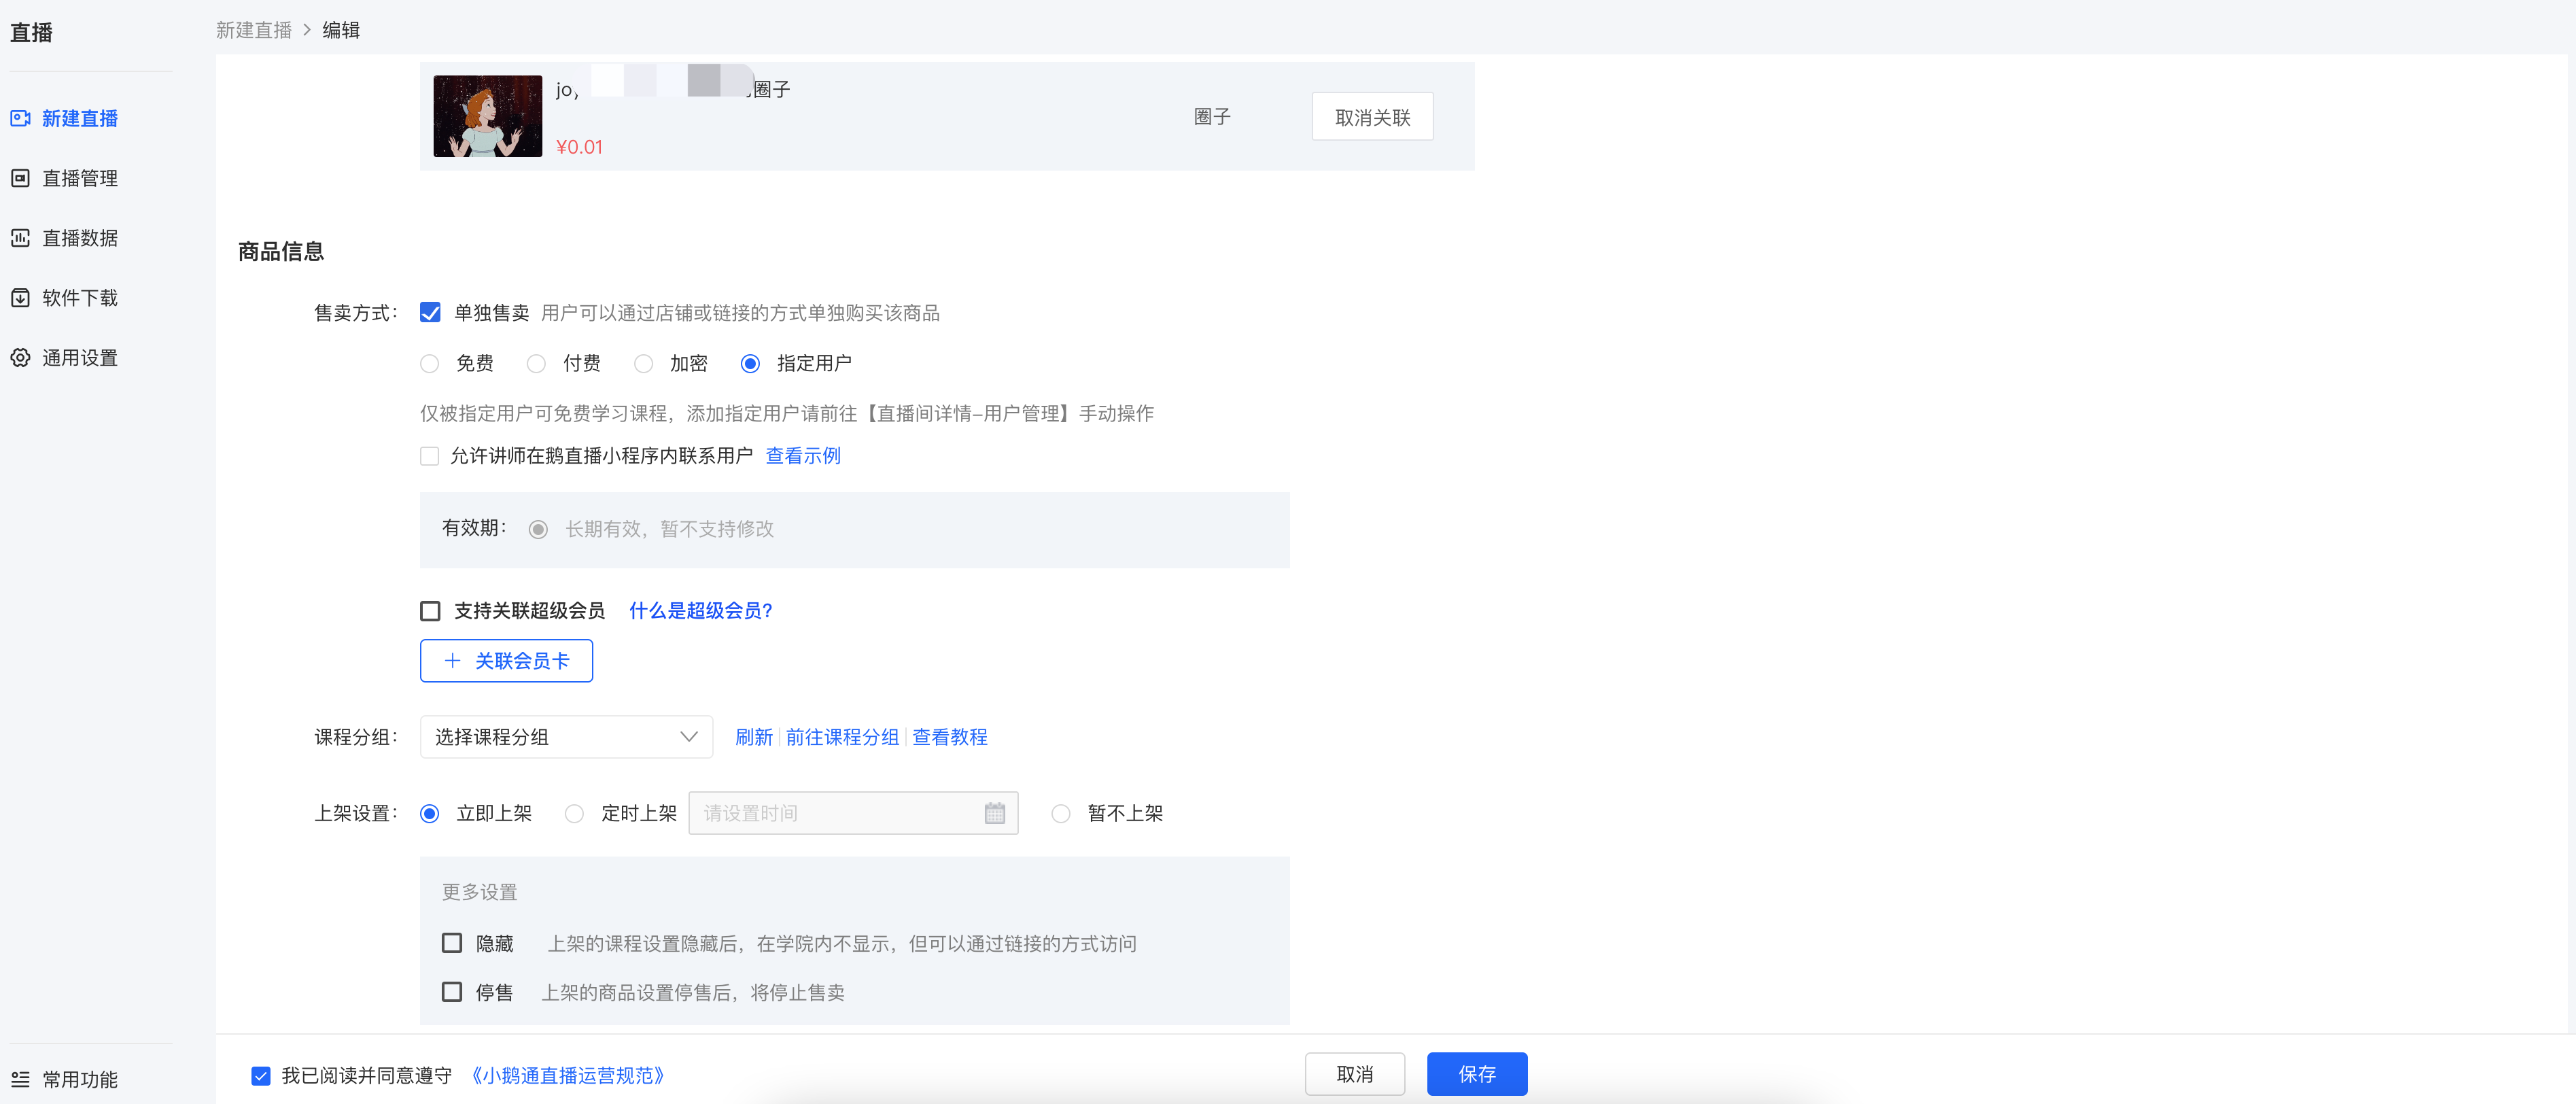
(3) Product information:Sales method, product grouping (There is no sales method setting after selecting the internal training mode)
(4) Listing settings:List immediately, list at a scheduled time, or do not list for the time being; in addition, you can also hide or stop selling the product.
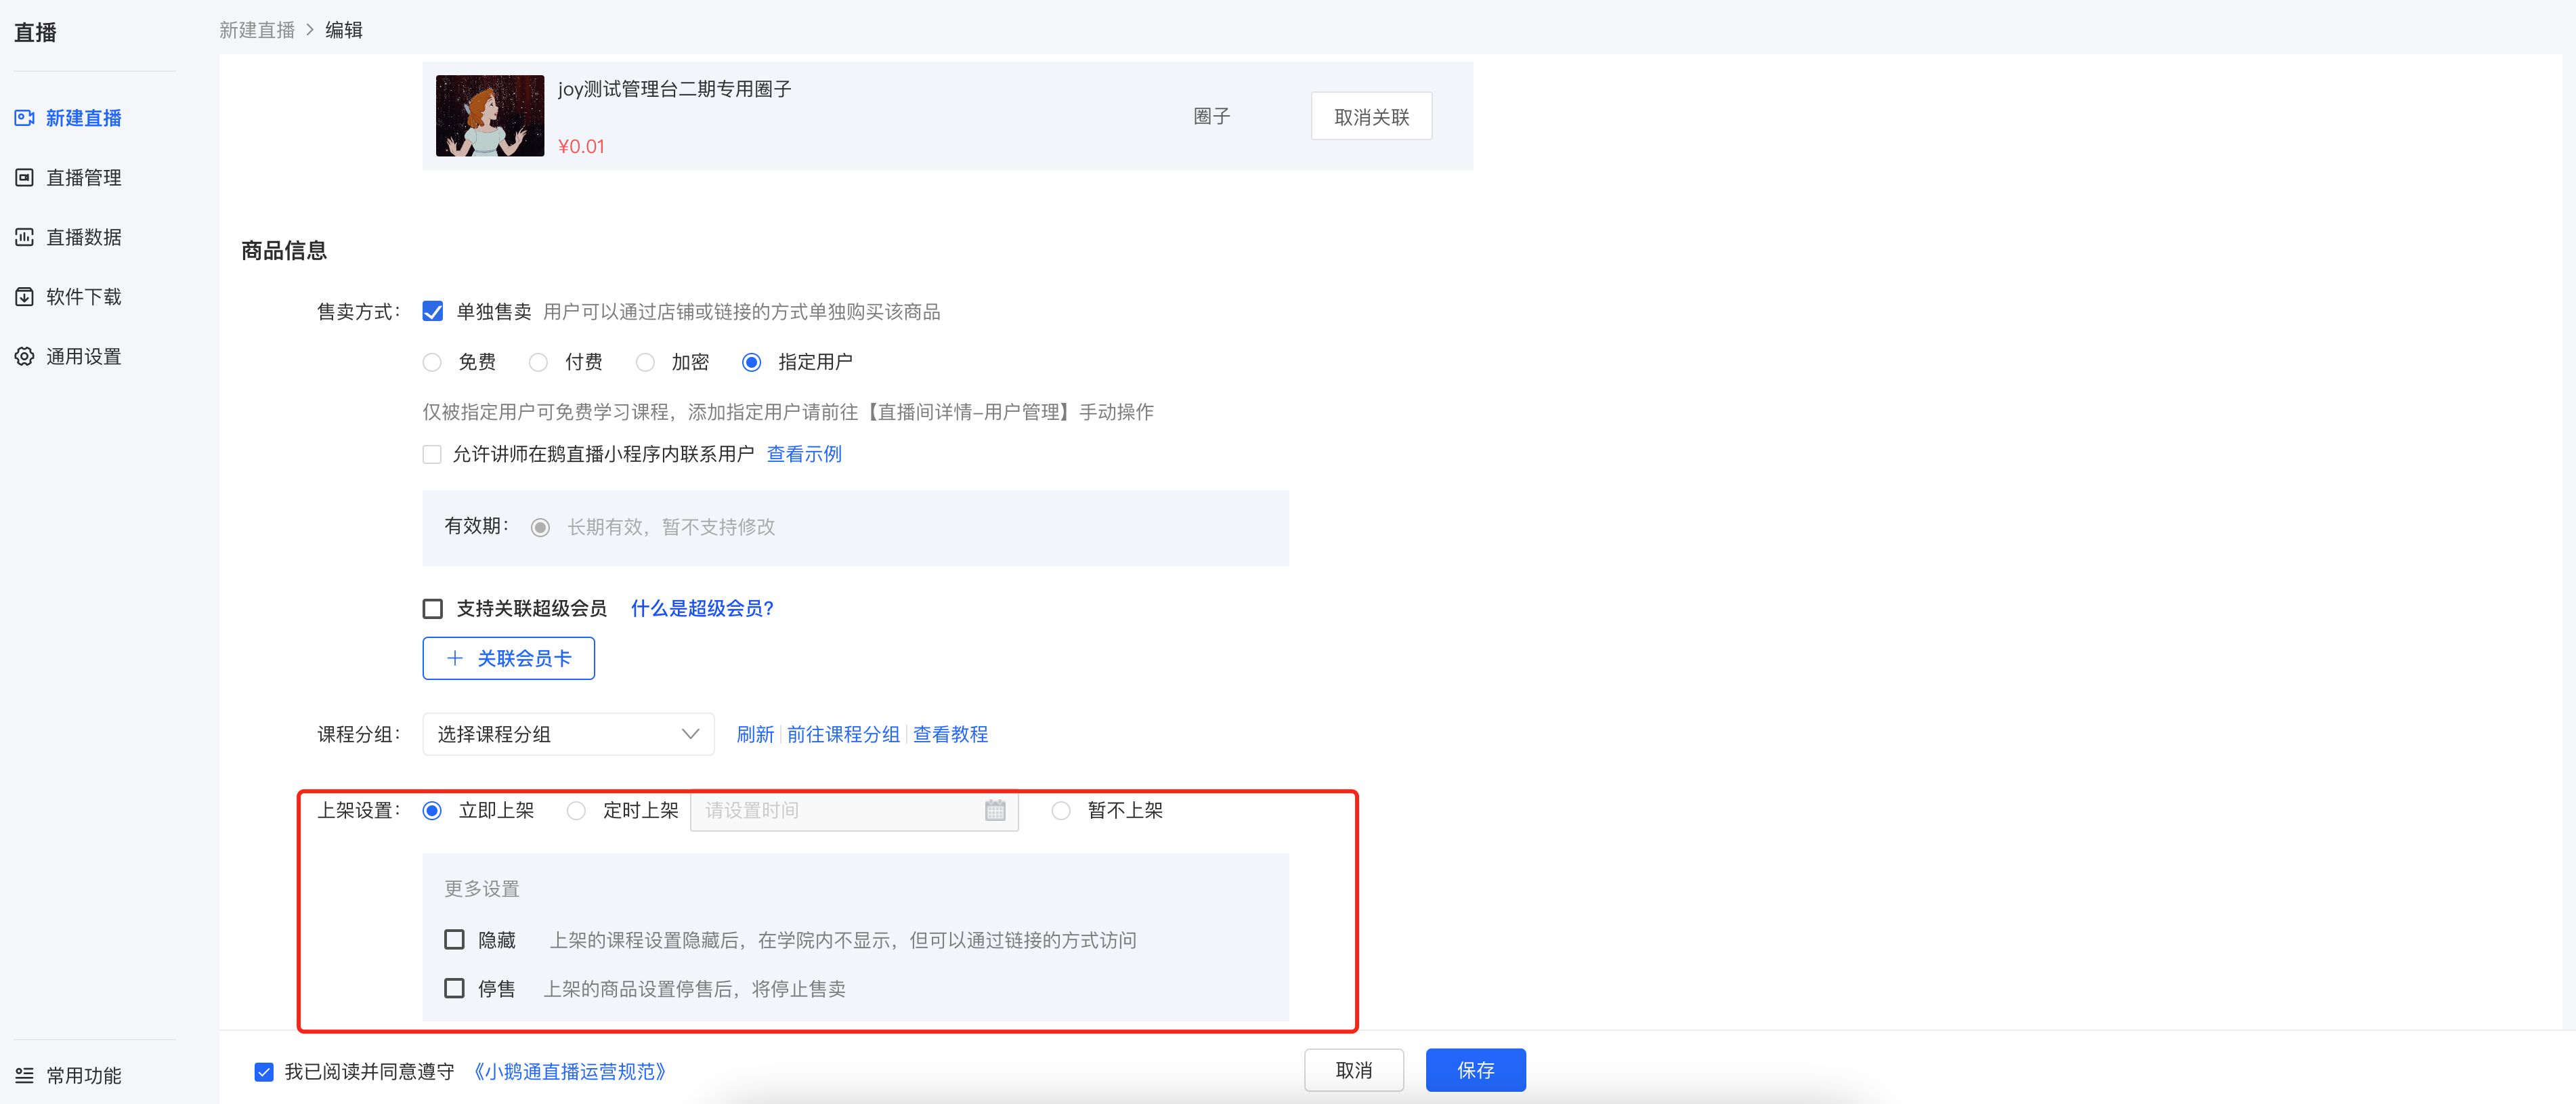
After clicking Save, you can click [More Settings] to set up live stream interaction, traffic diversion, etc.
Step 2: Complete the details page of the live streaming room
1. Live stream start settings:Live stream start method, instructor settings
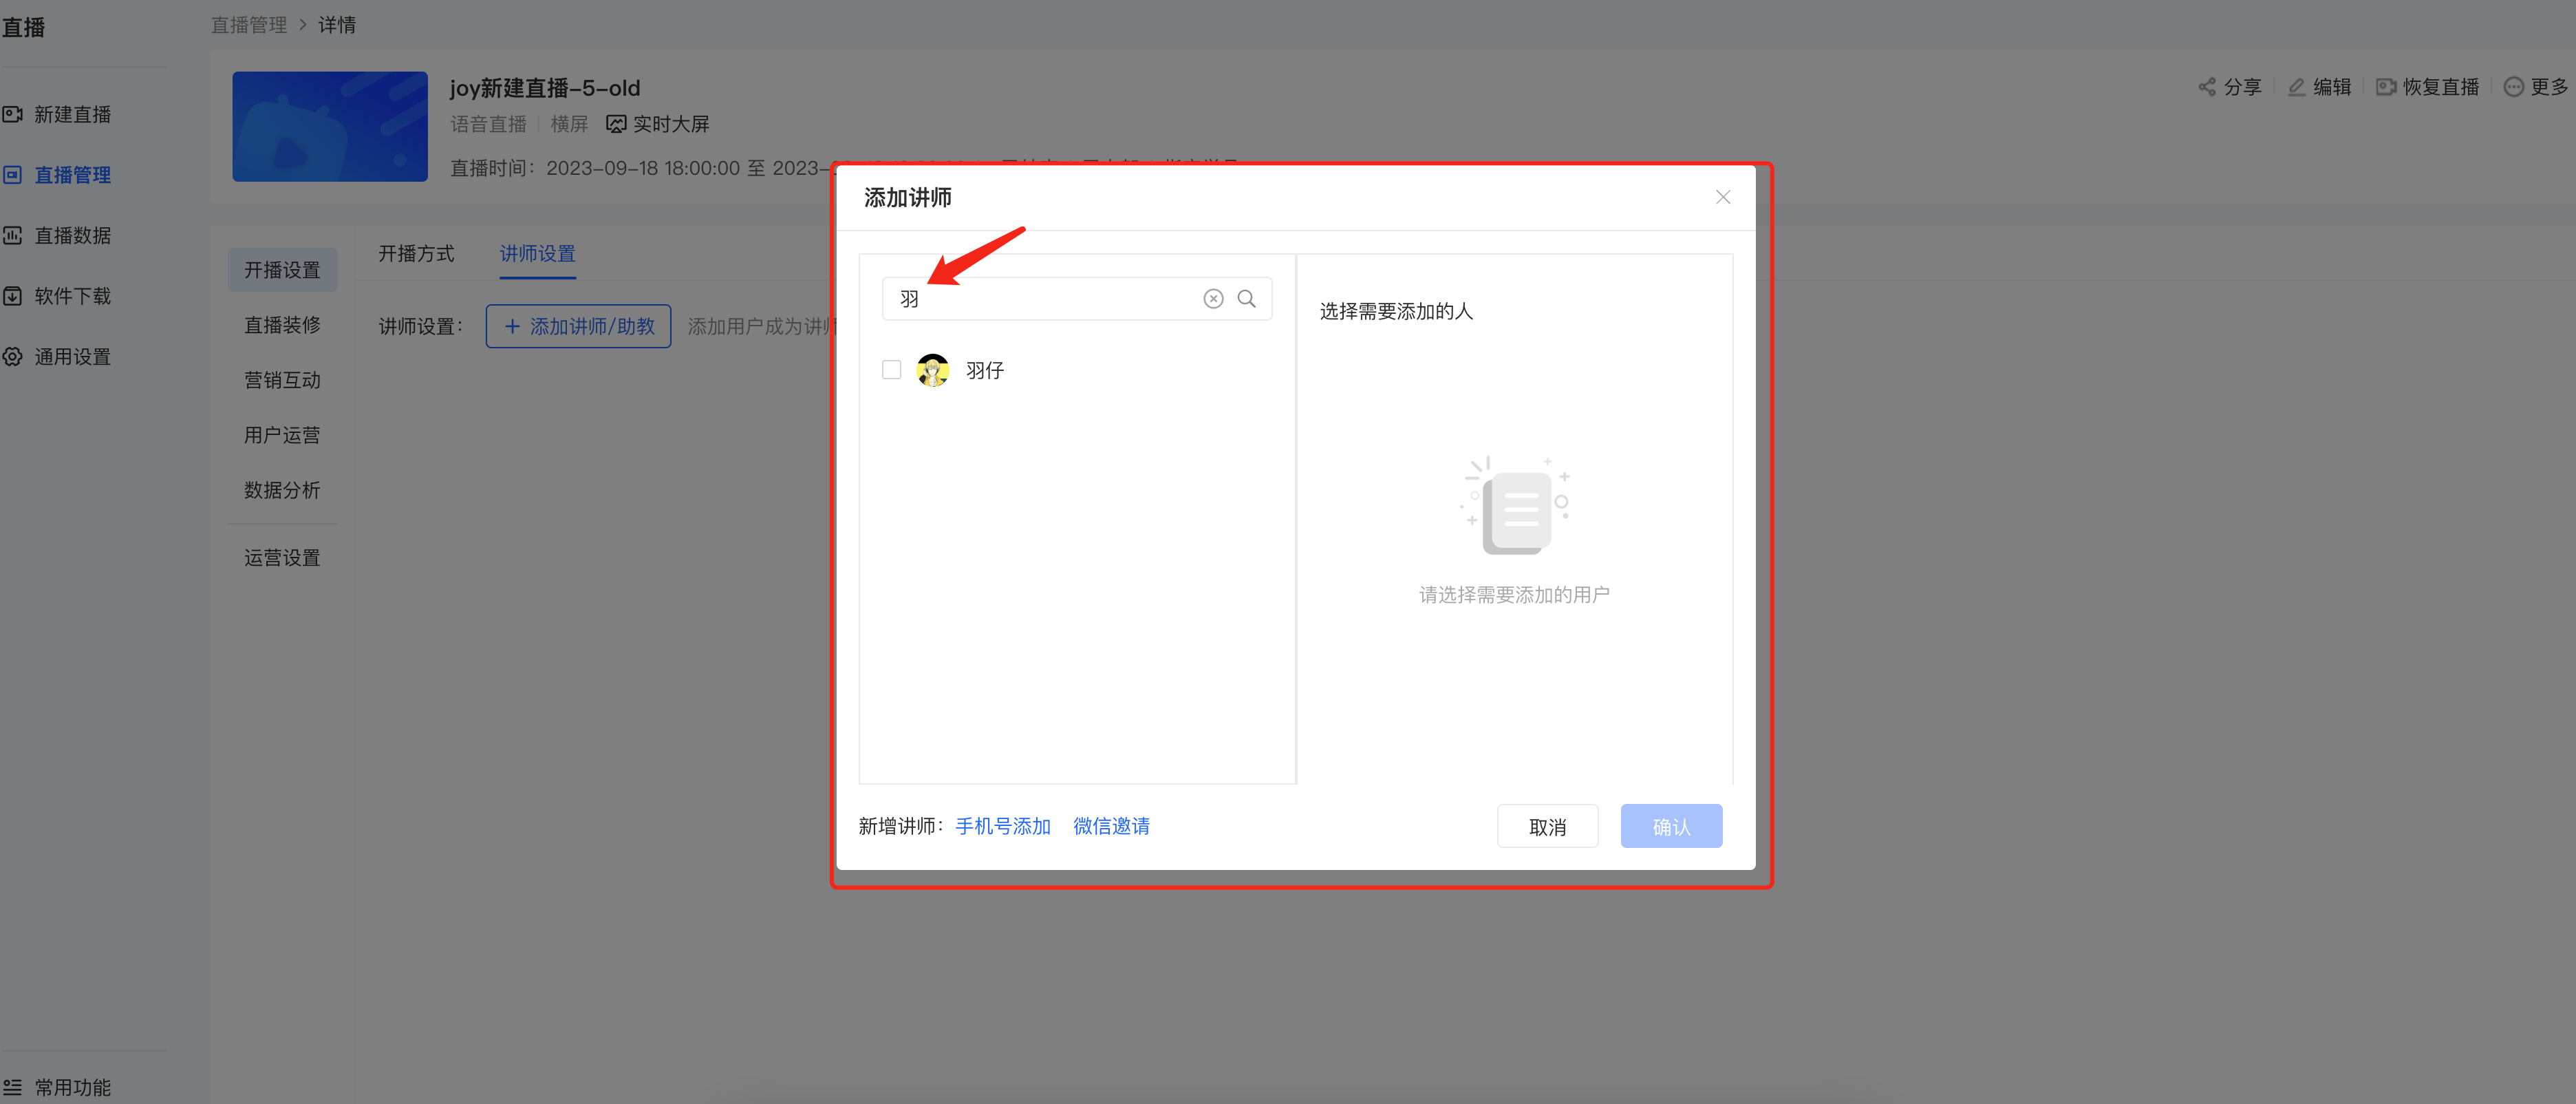
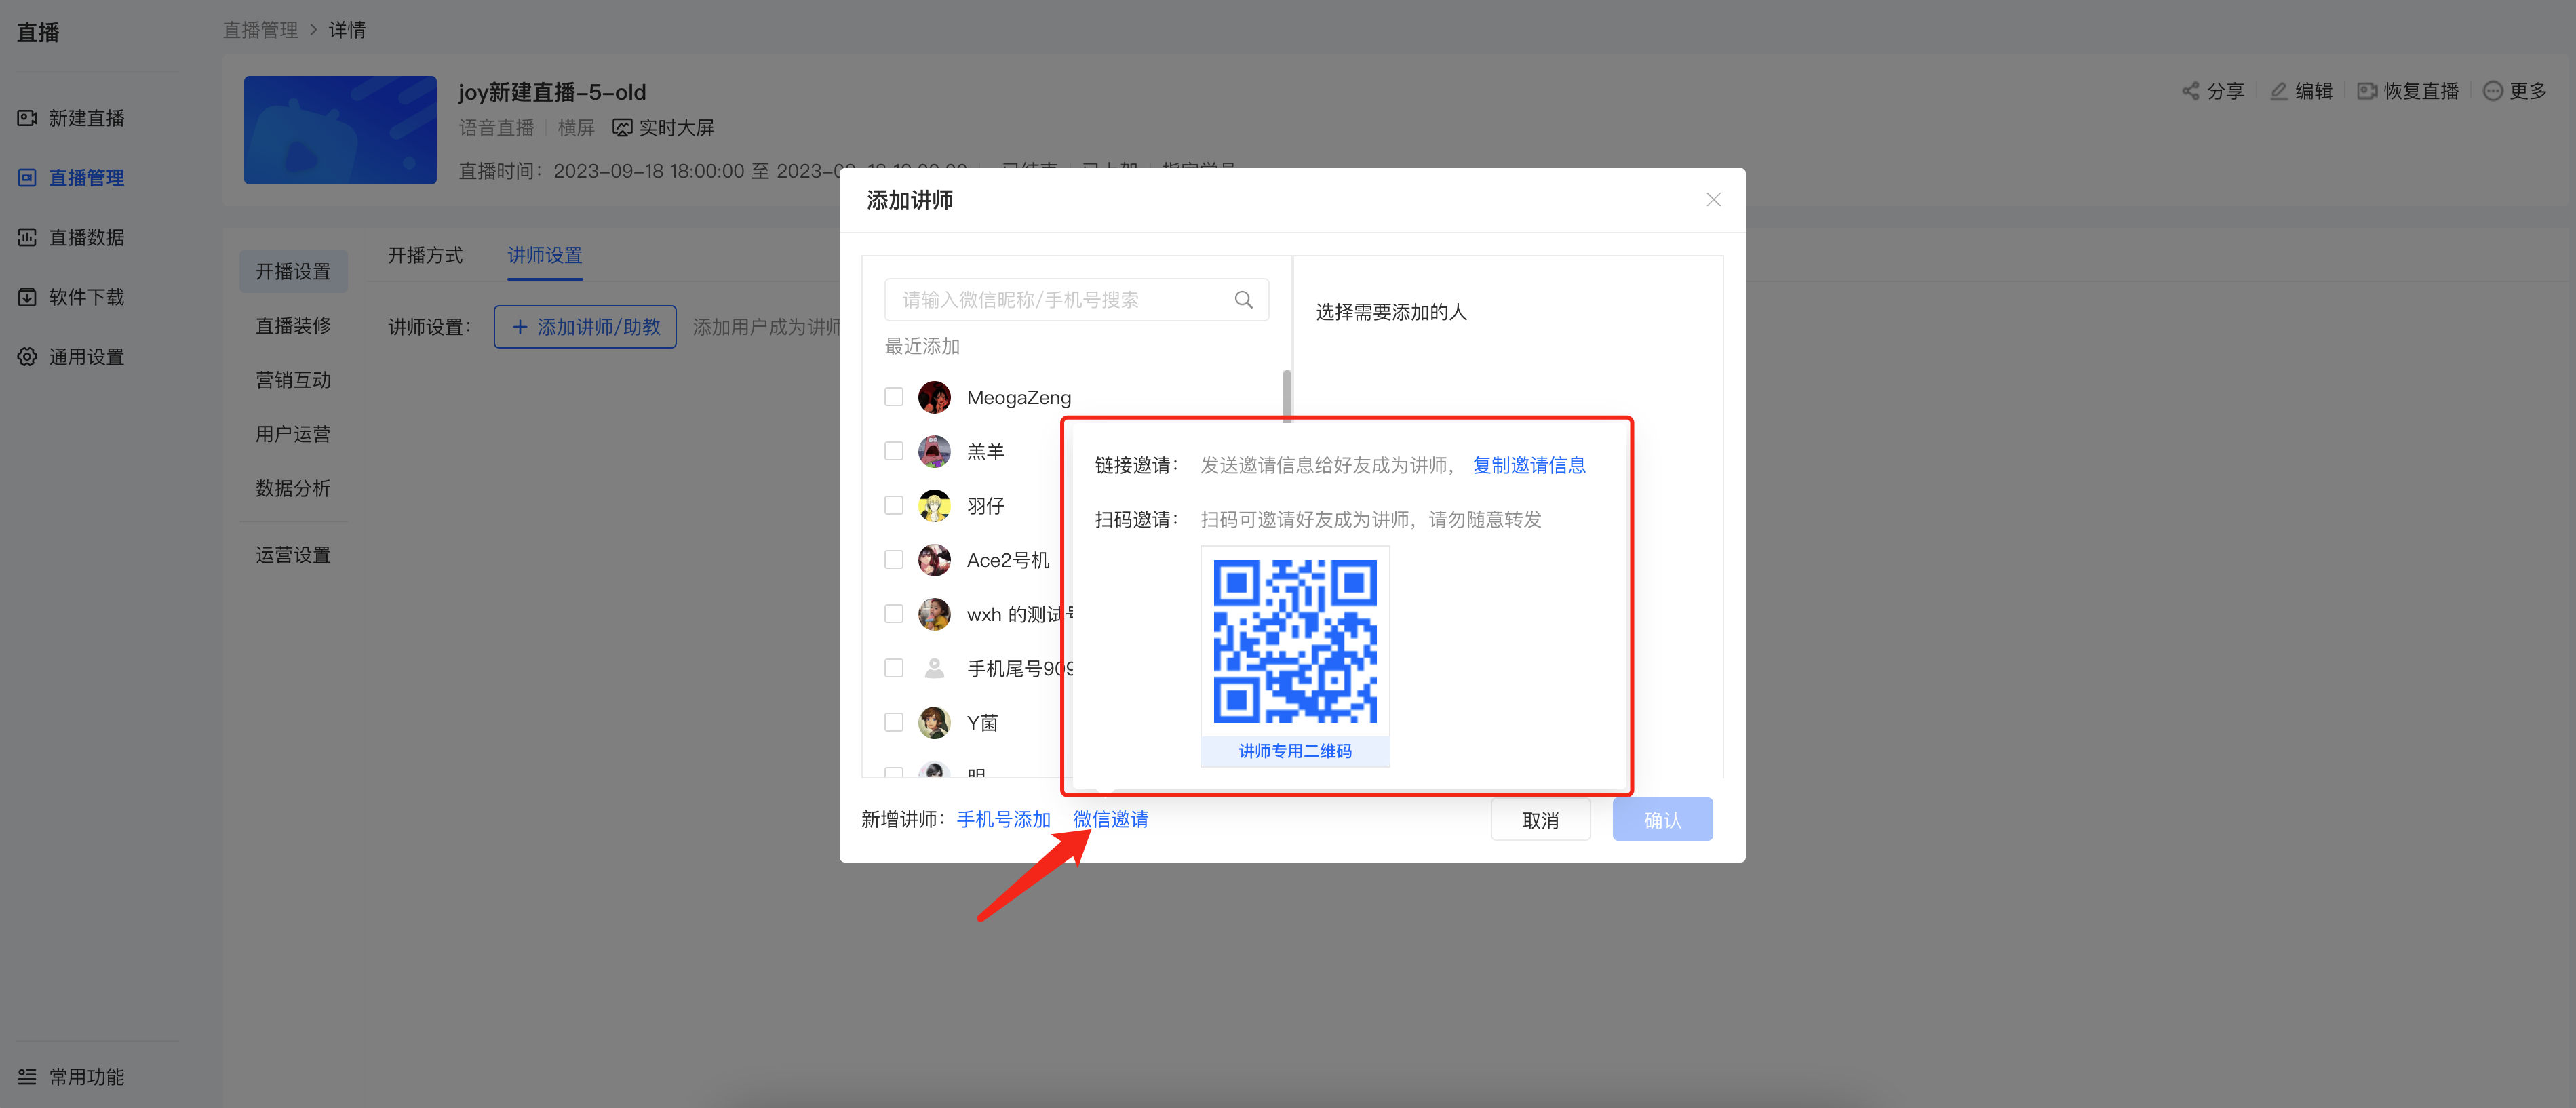
(1) Instructor settings:There are 3 ways to add instructors or teaching assistants
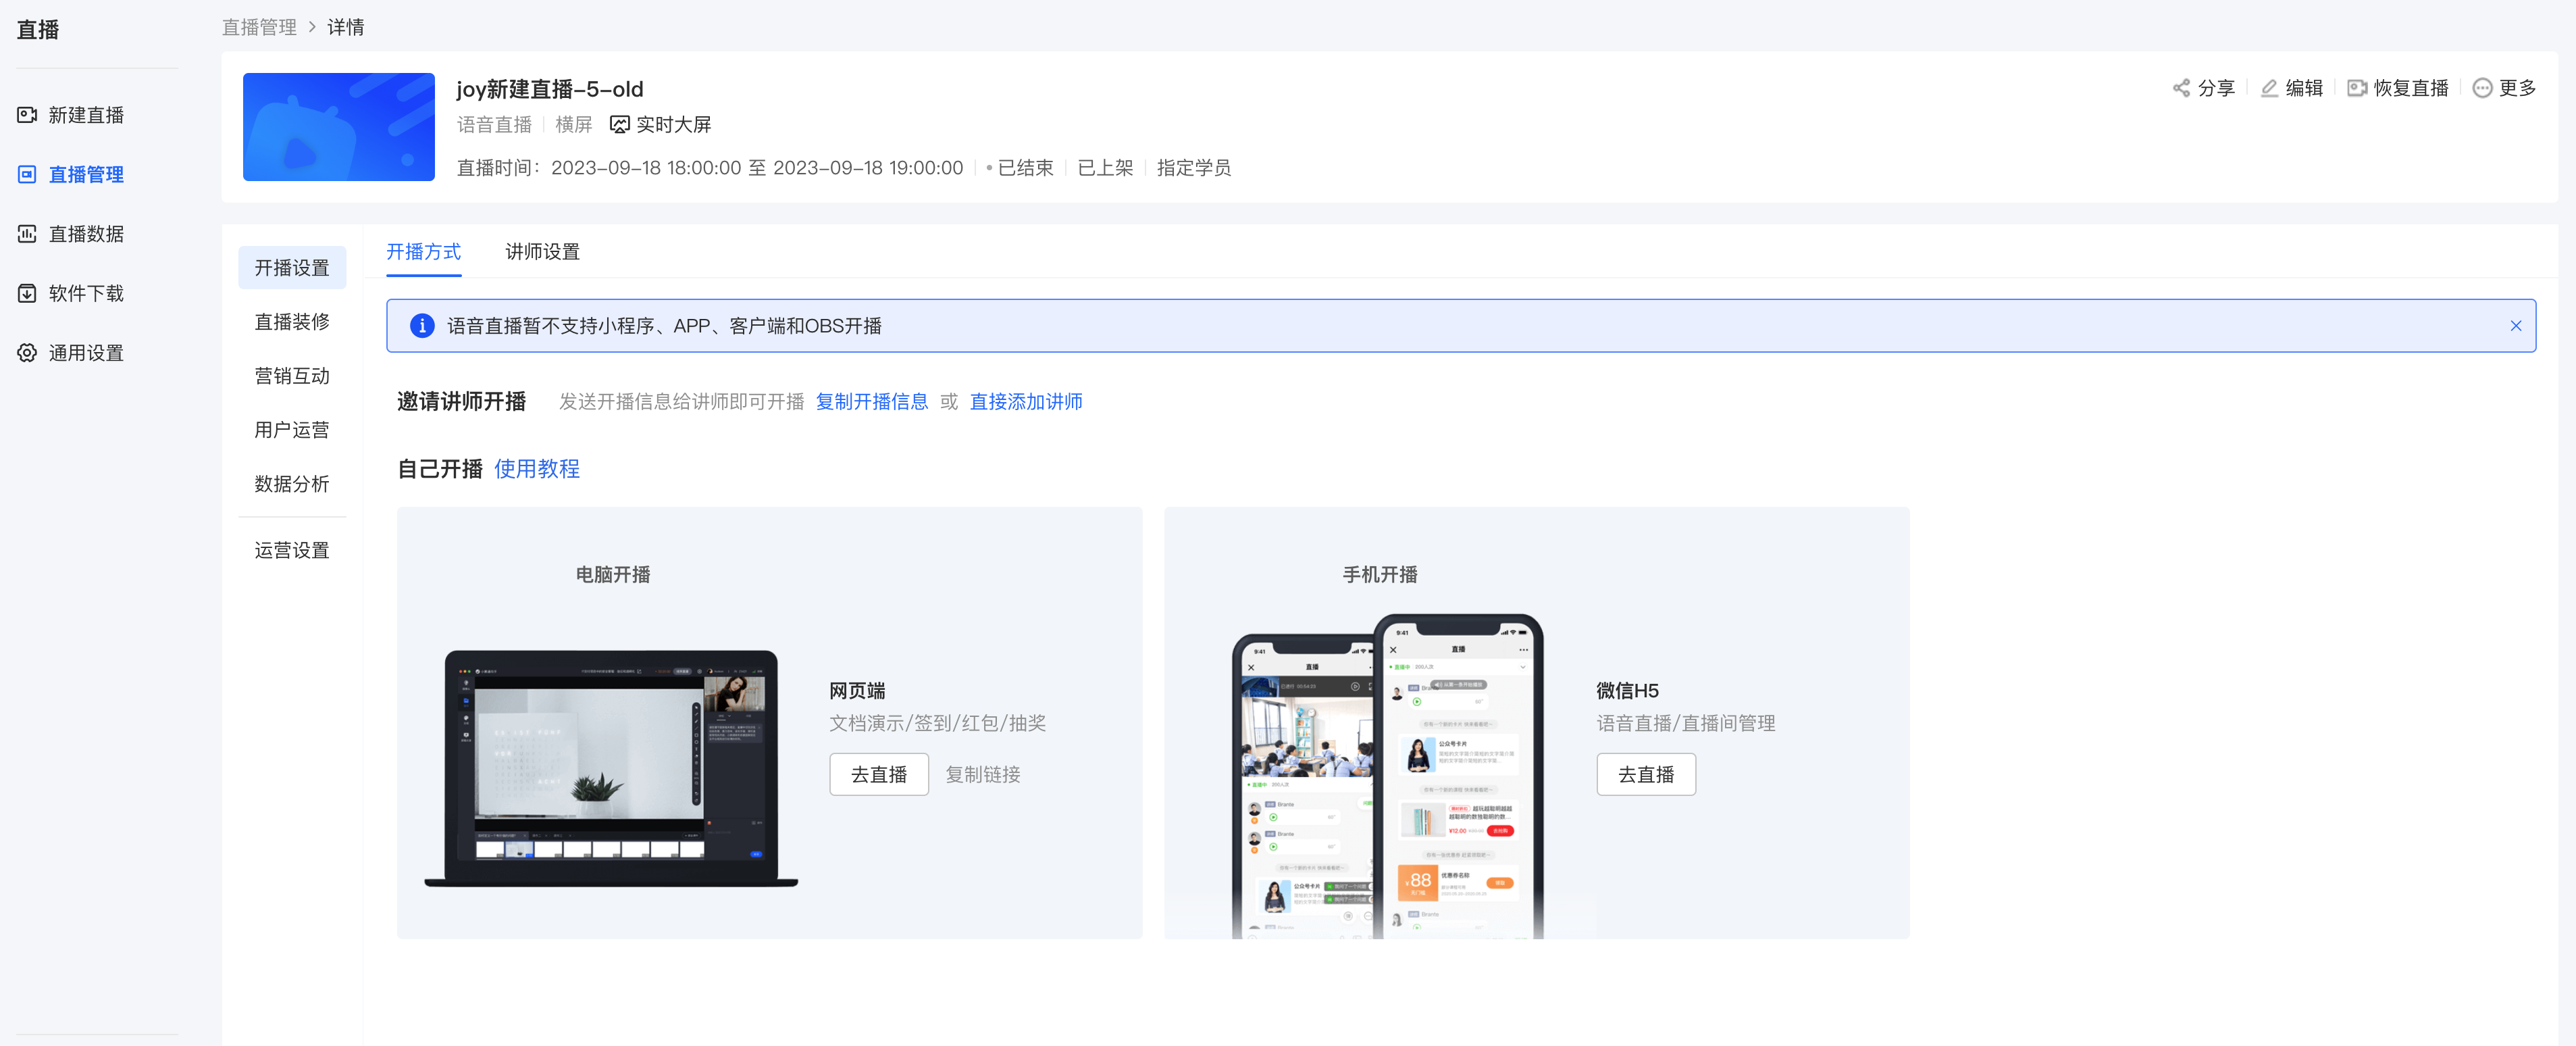
● Method 1:Search for users who have visited the store through the search box and select them to become instructors
●Method 2:Invite friends to become instructors via WeChat QR code
● Method 3:Add by mobile phone number
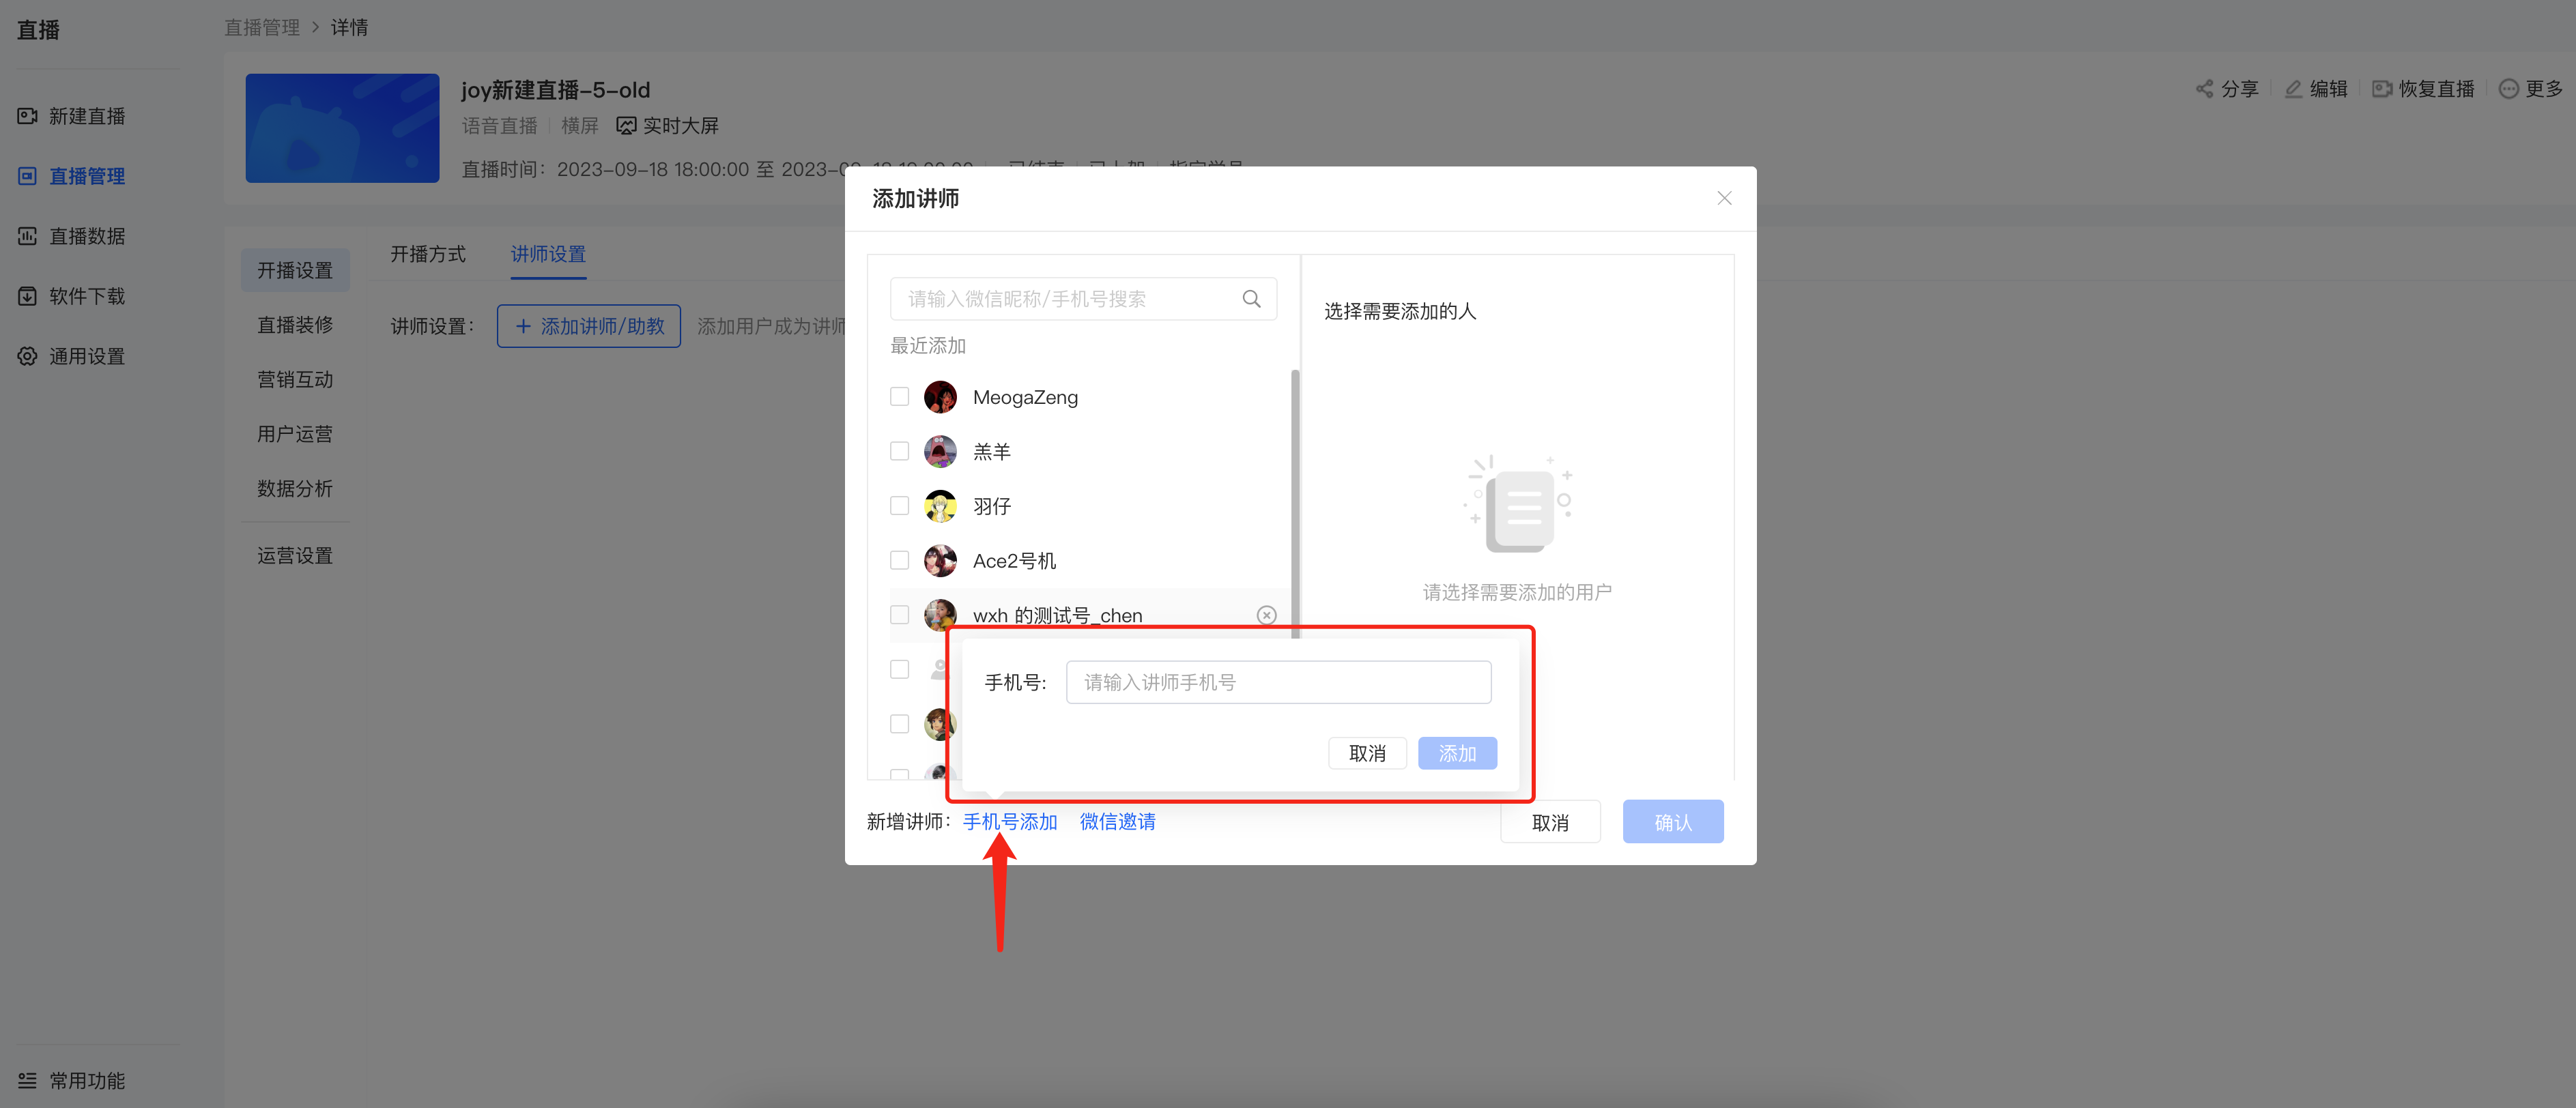
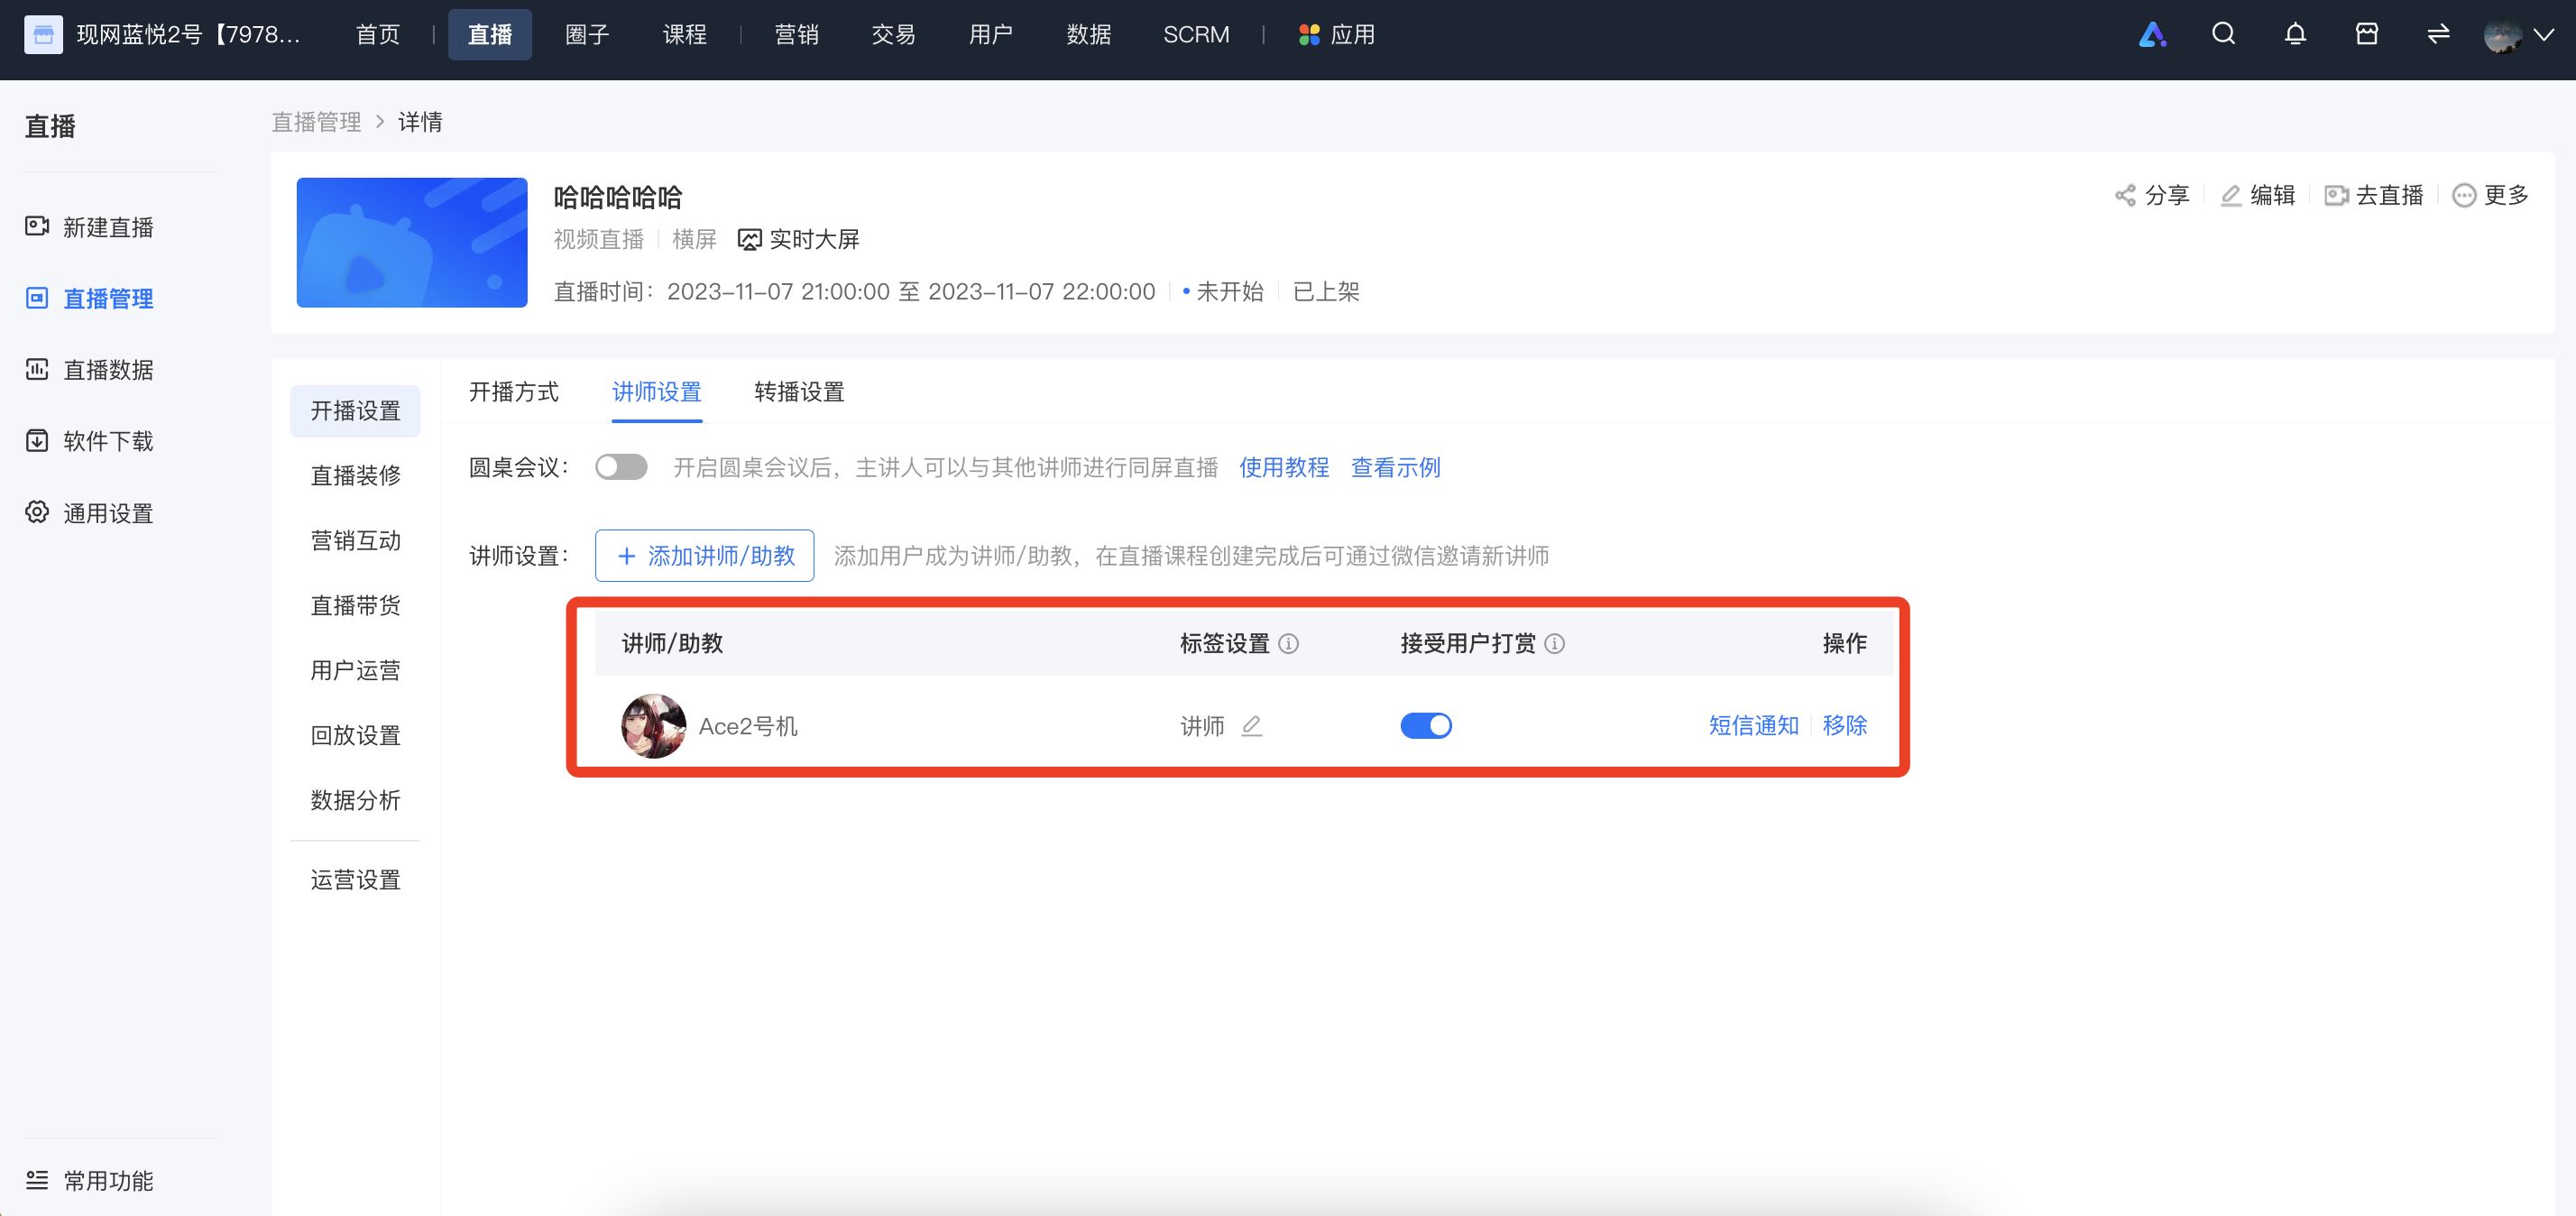
After inviting instructors, you can modify the instructor's name notes, set whether to accept user rewards, and also remove instructors.

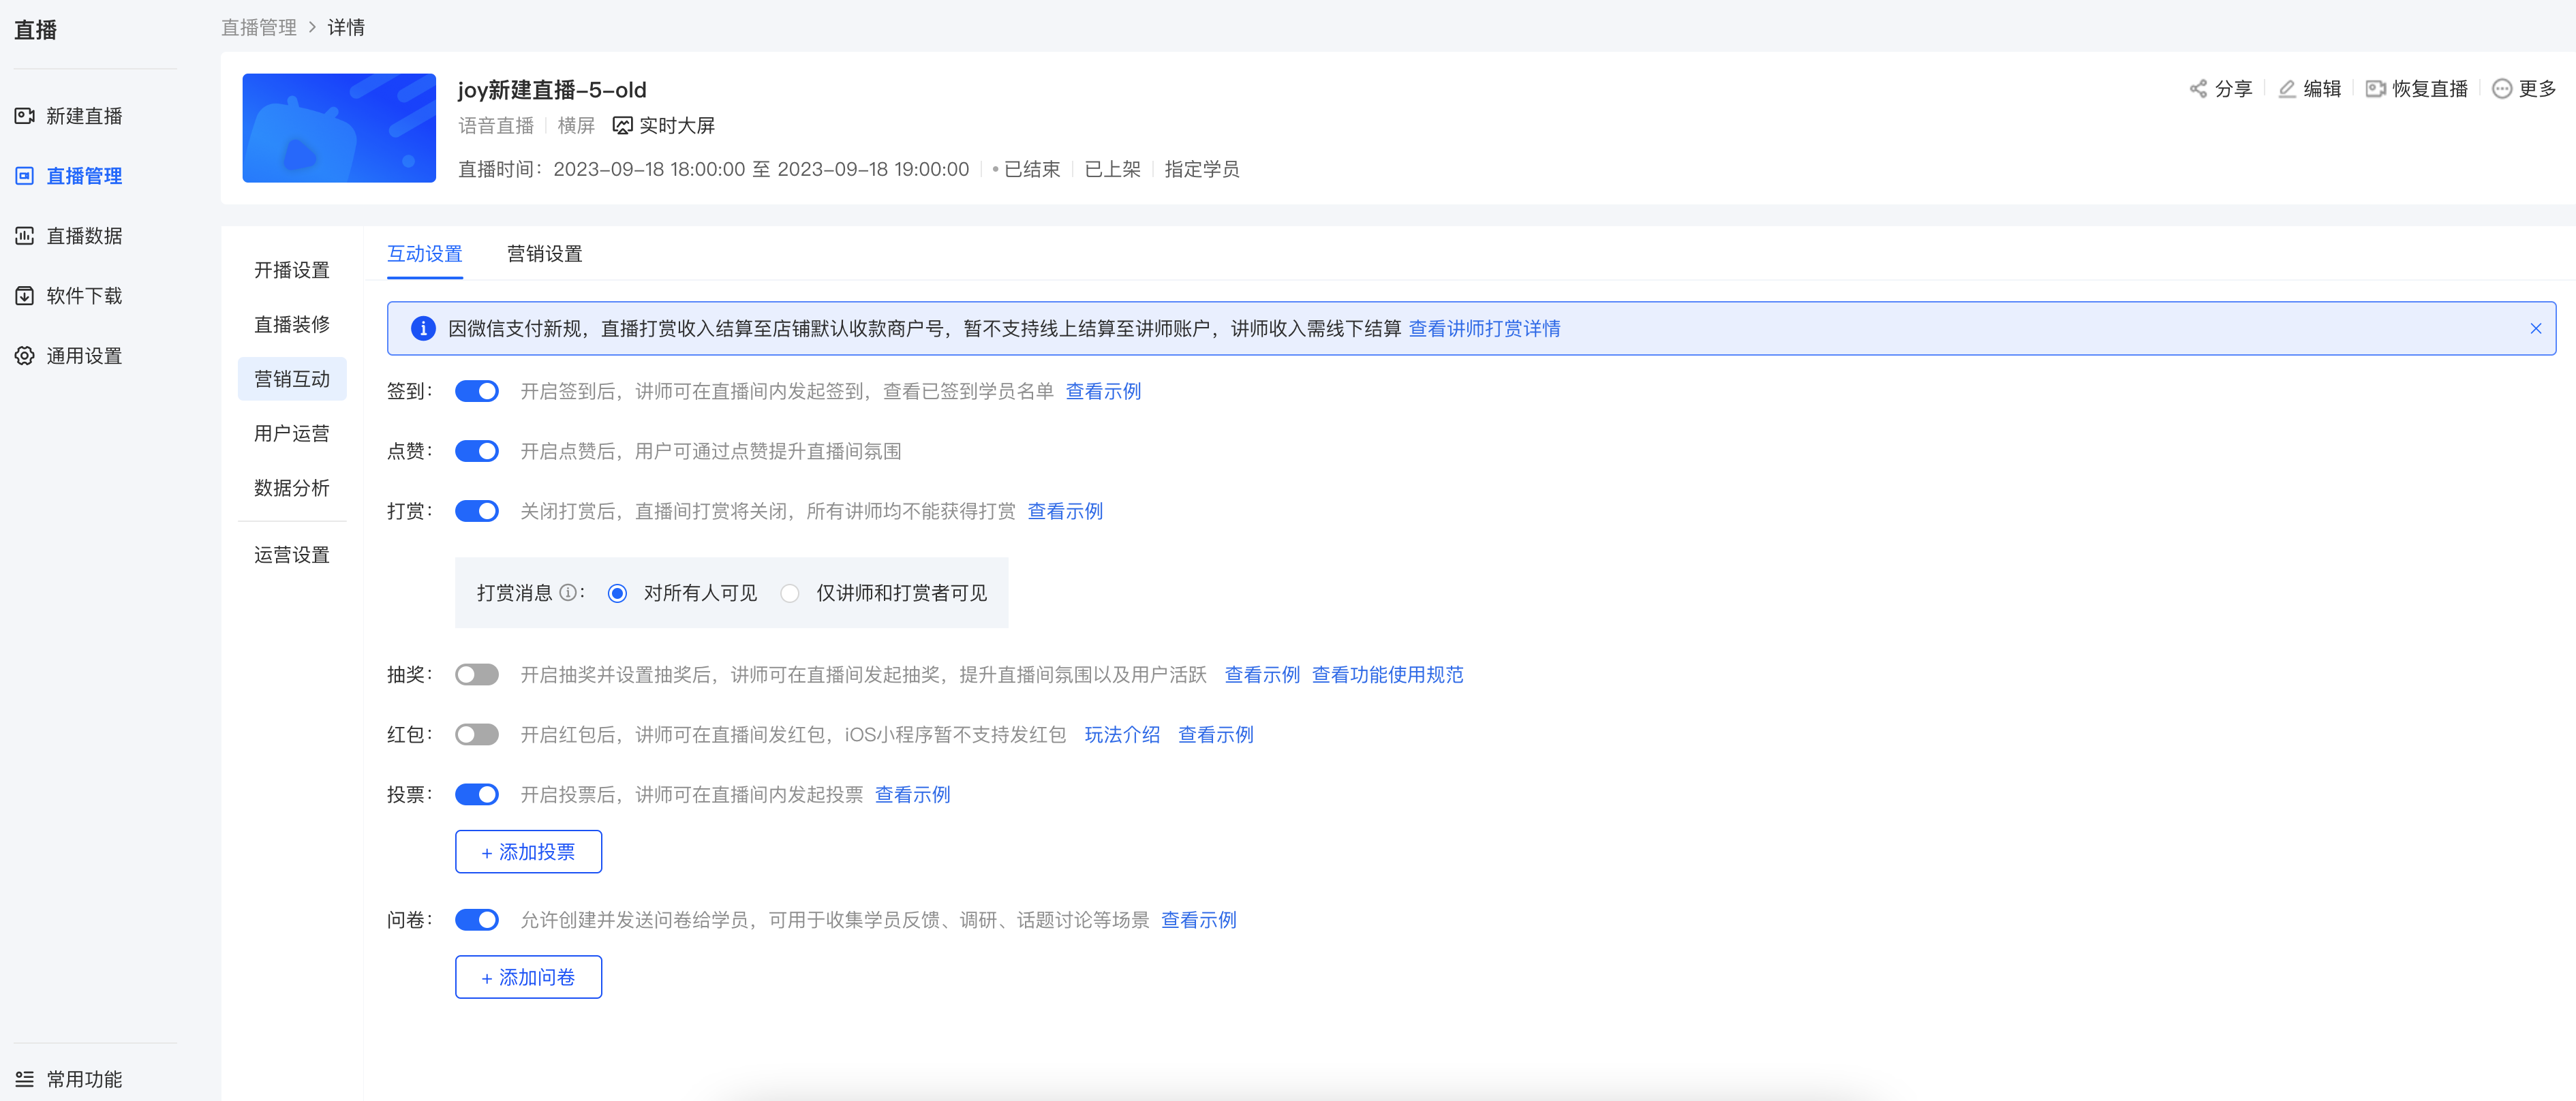
(2) Marketing interaction:Settings such as sign - in, likes, rewards, lucky draws, red envelopes, votes, and questionnaires can be set upand other settings
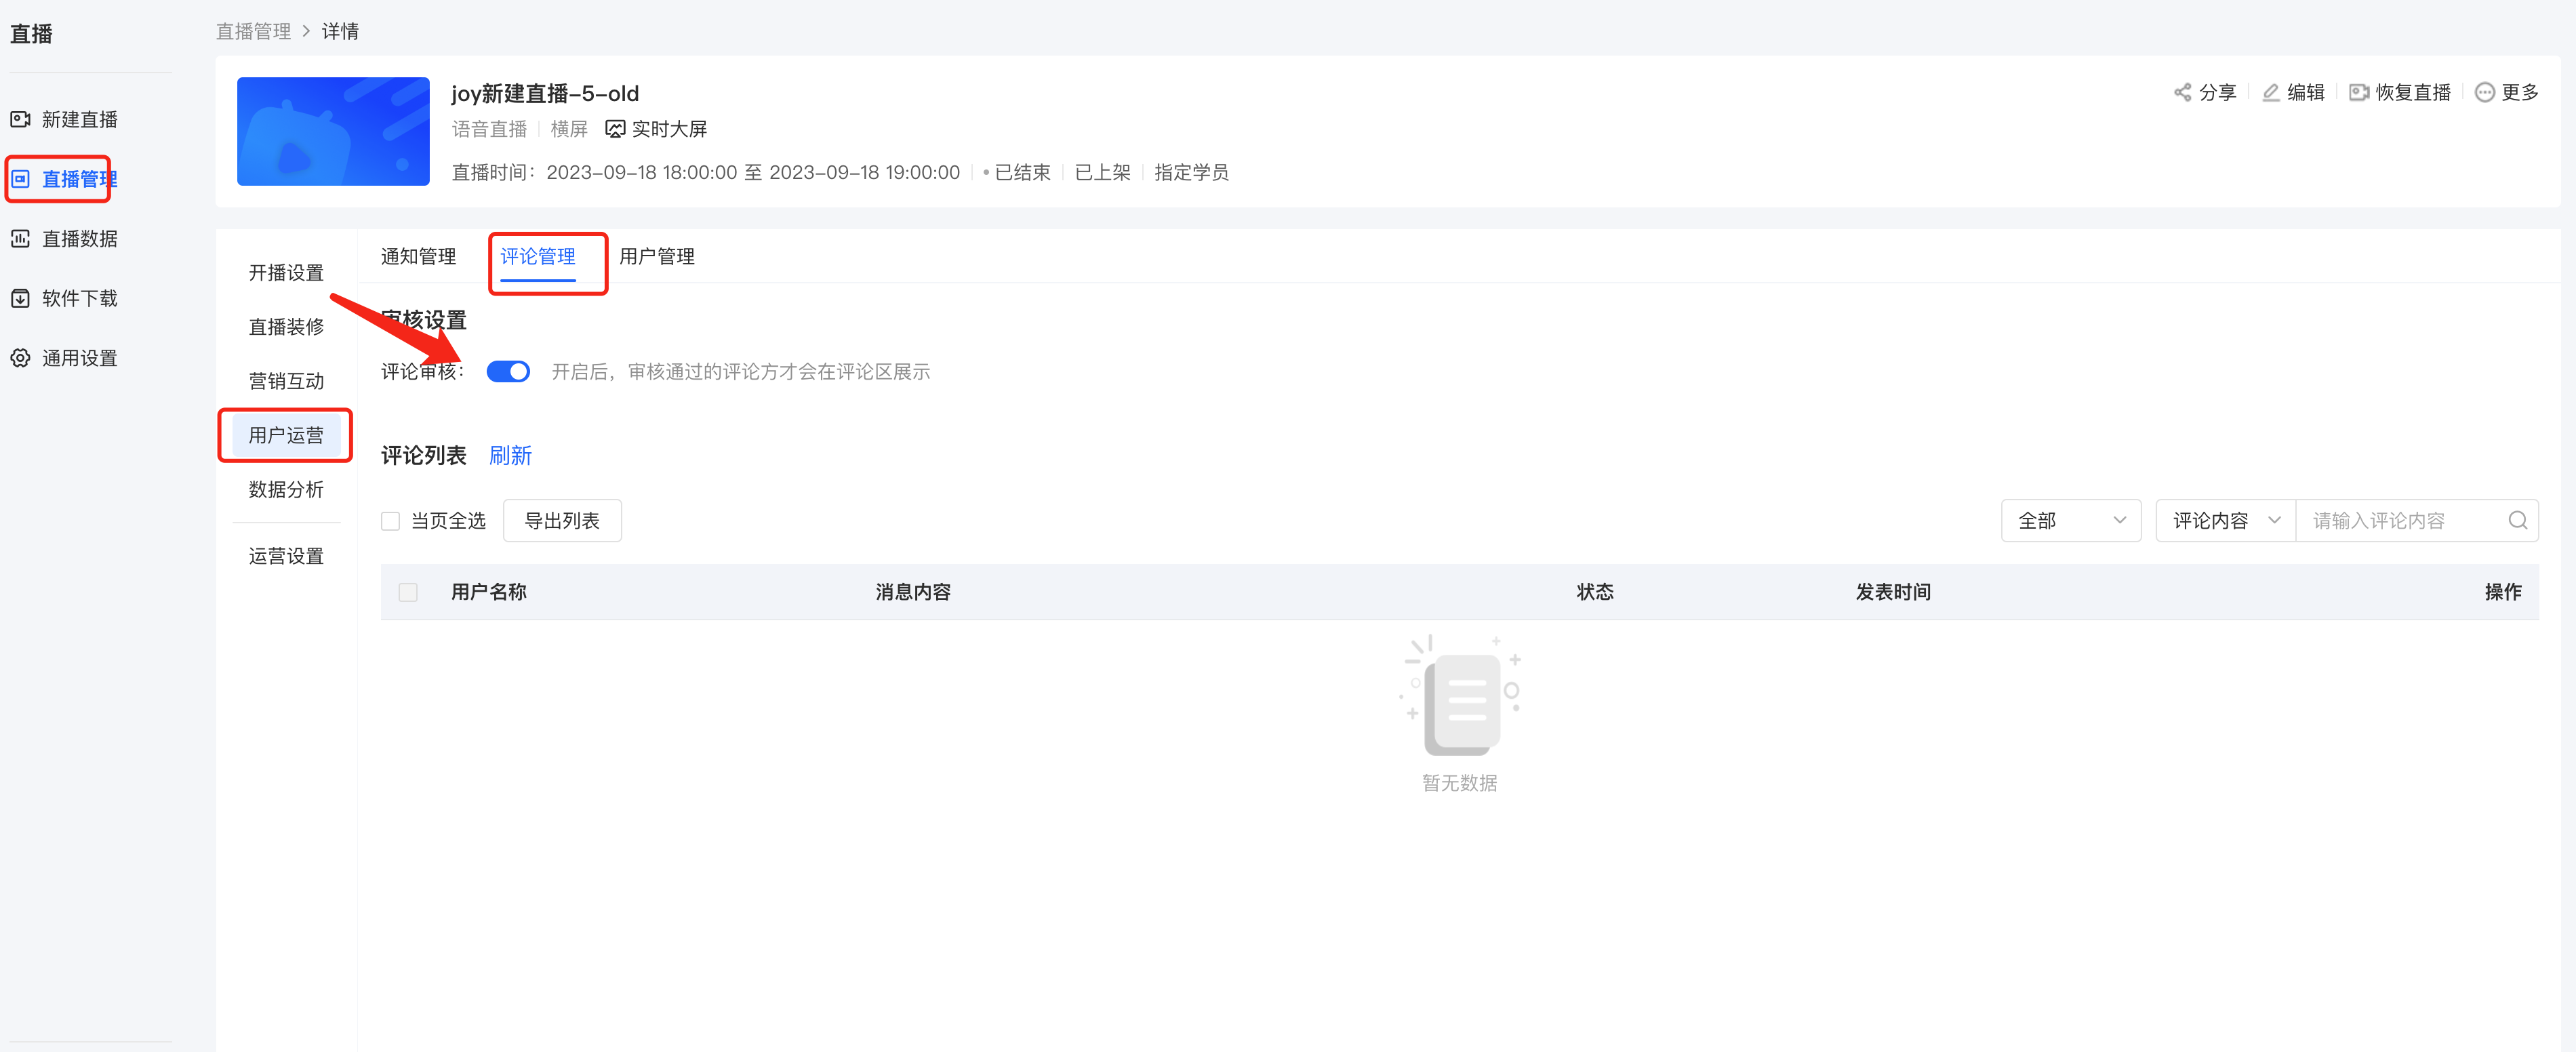
(3) Comment review:You can review user comments before publishing them
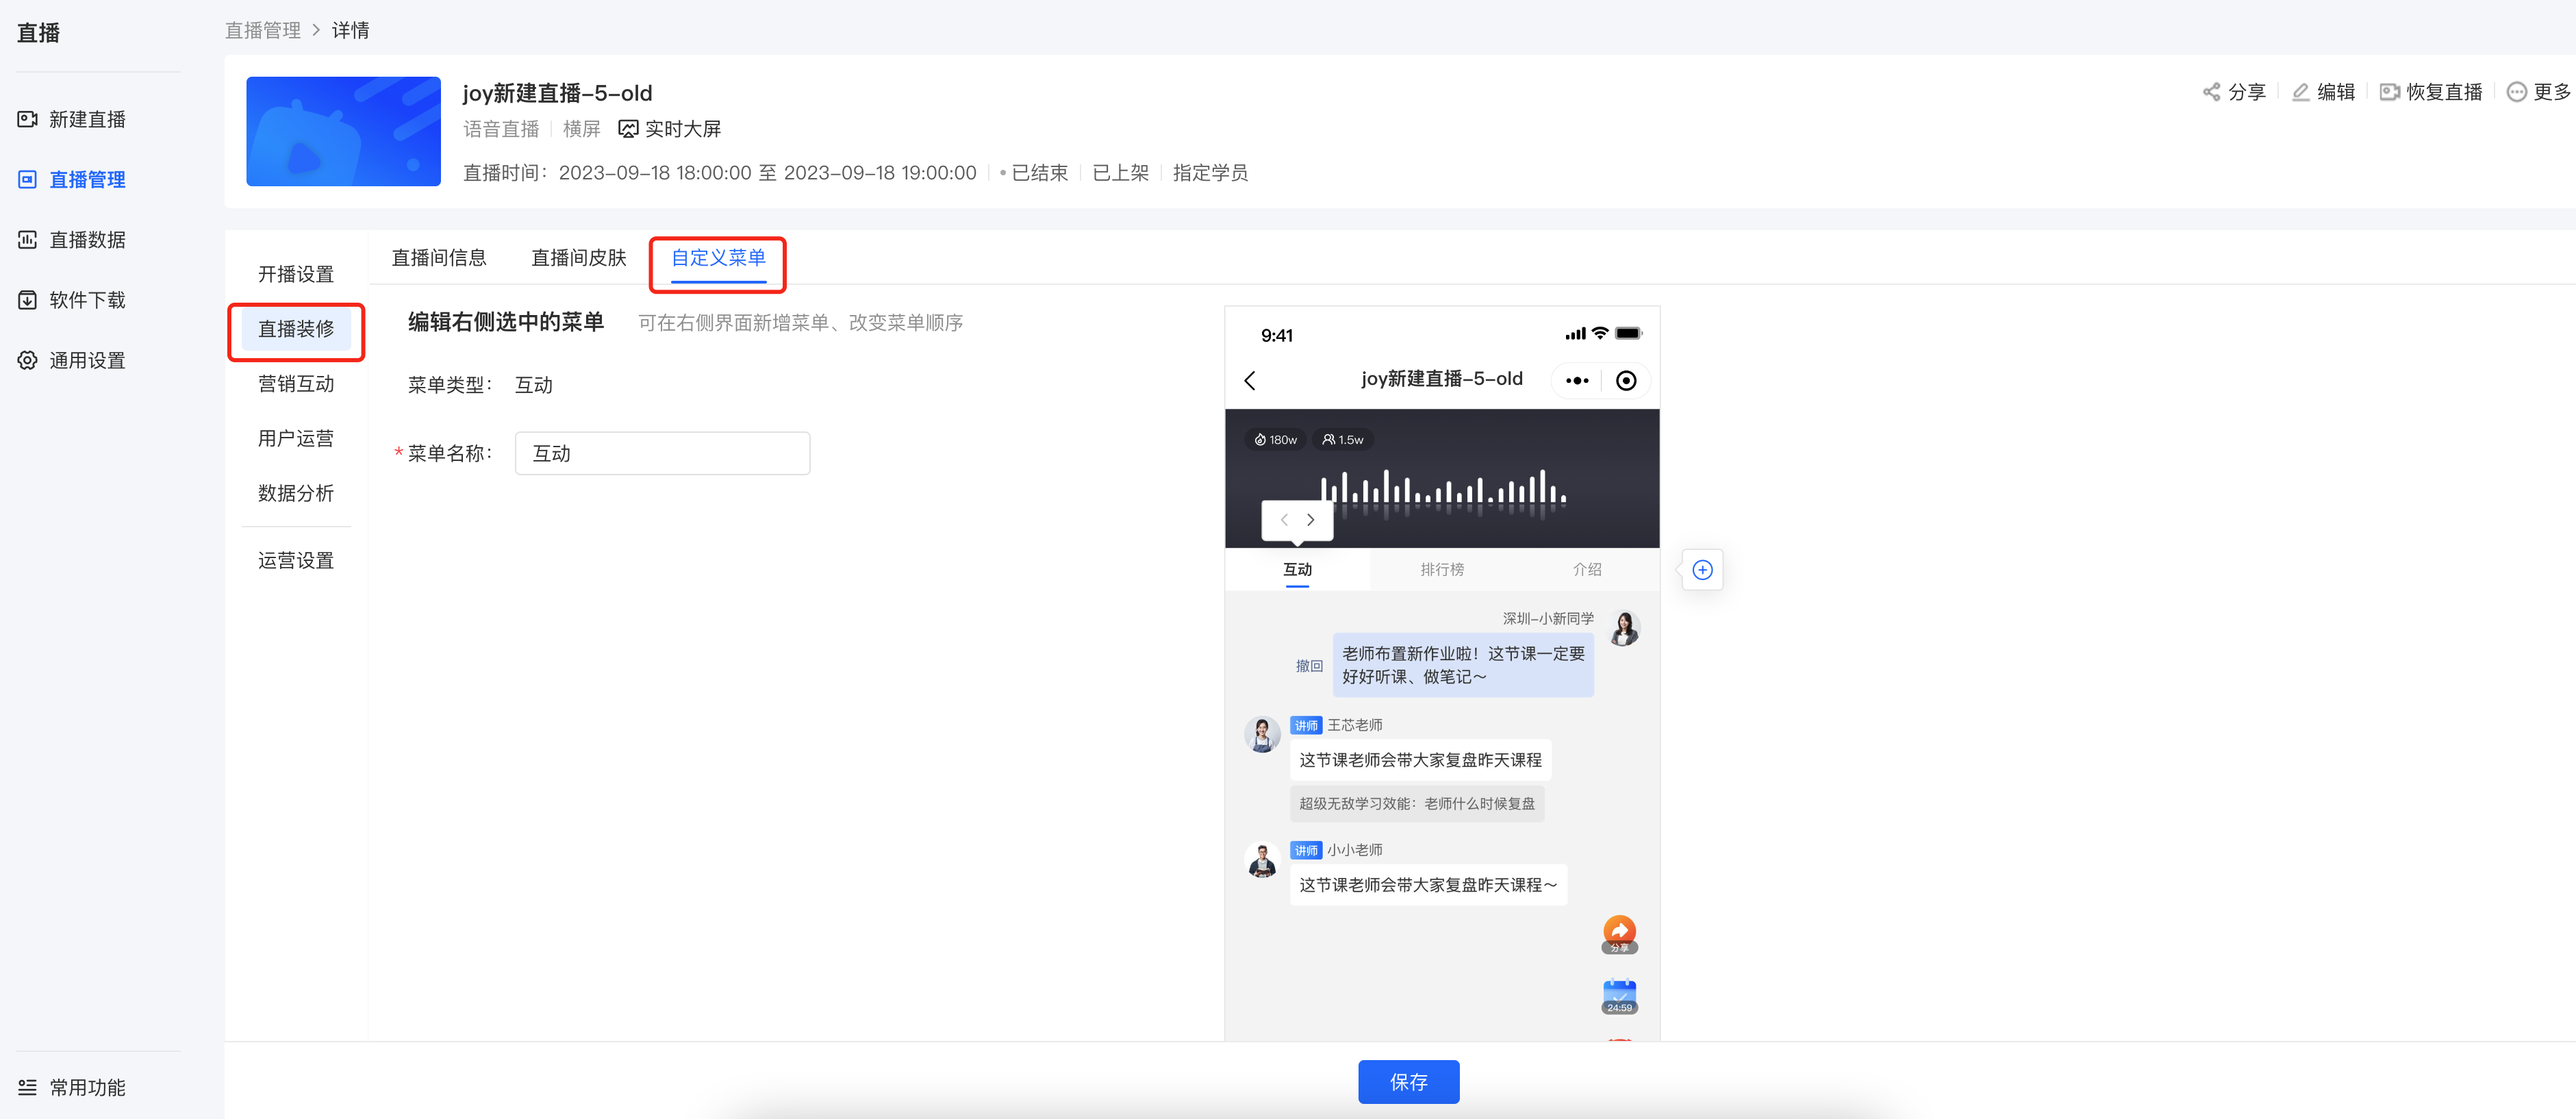
(4) Custom menu:You can rename the menu and adjust the order
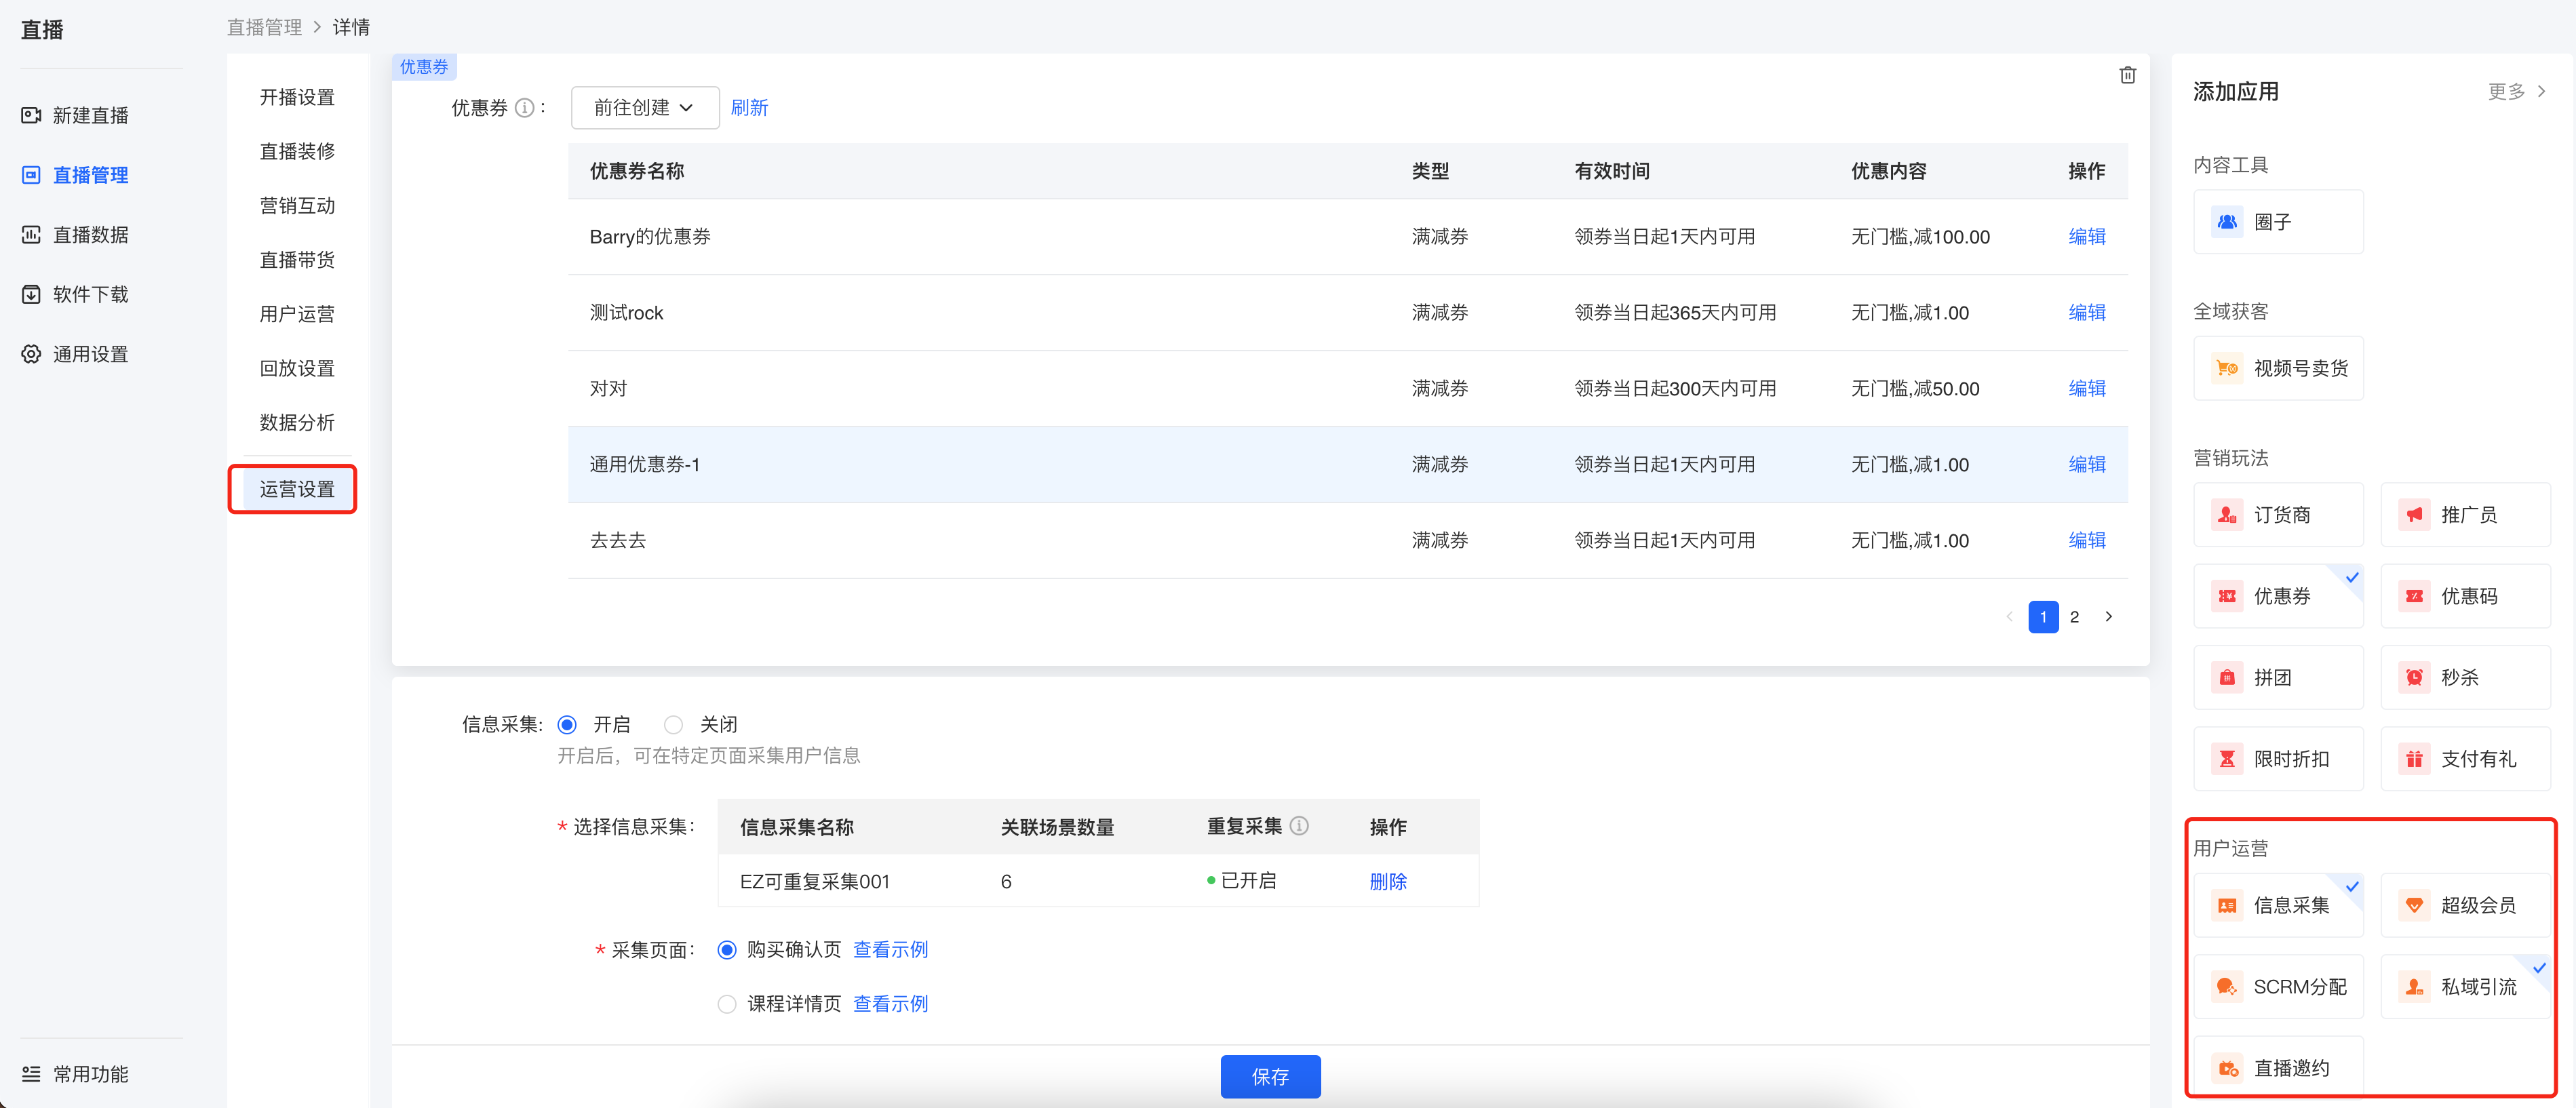
2. Operation settings:Include settings such as information collection, notification settings, and private domain traffic diversion
3. Student settings:You can manually add students or perform operational actions on existing students of the course.
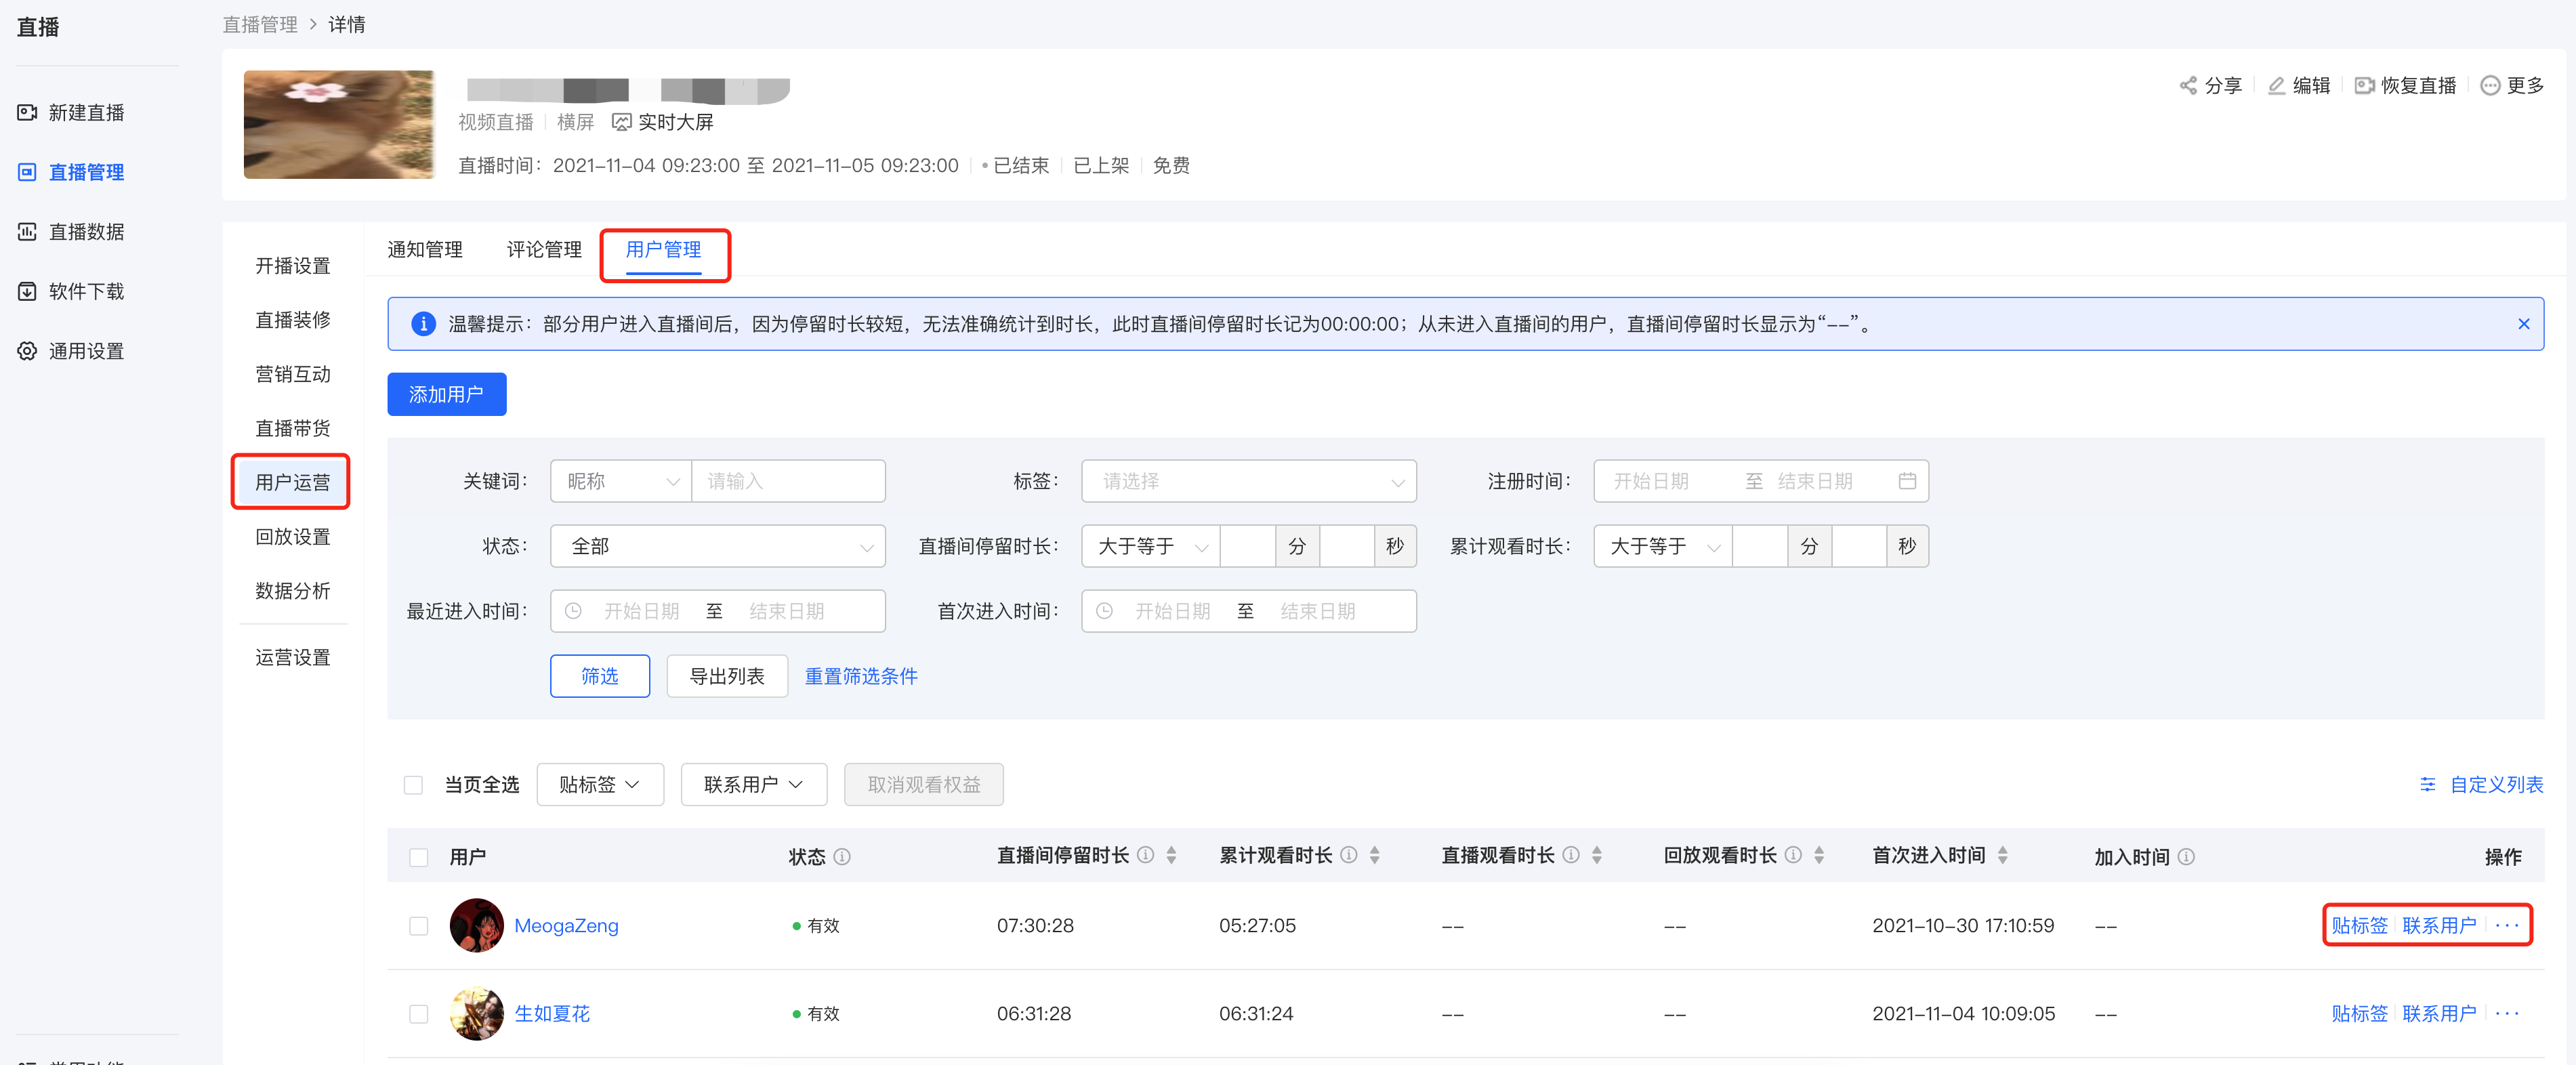
Currently, there are 3 ways to manually add students:
● Single addition:Enter the student's mobile phone number or user ID
● Batch import:Upload a file according to the template
● Organization import:Import organizational users
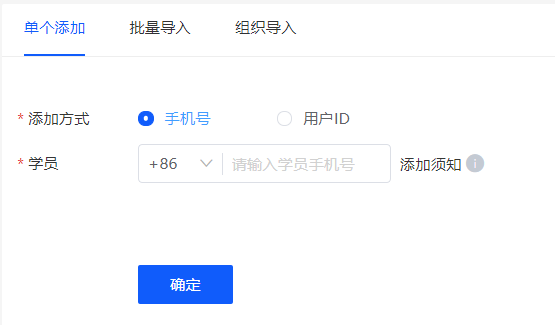
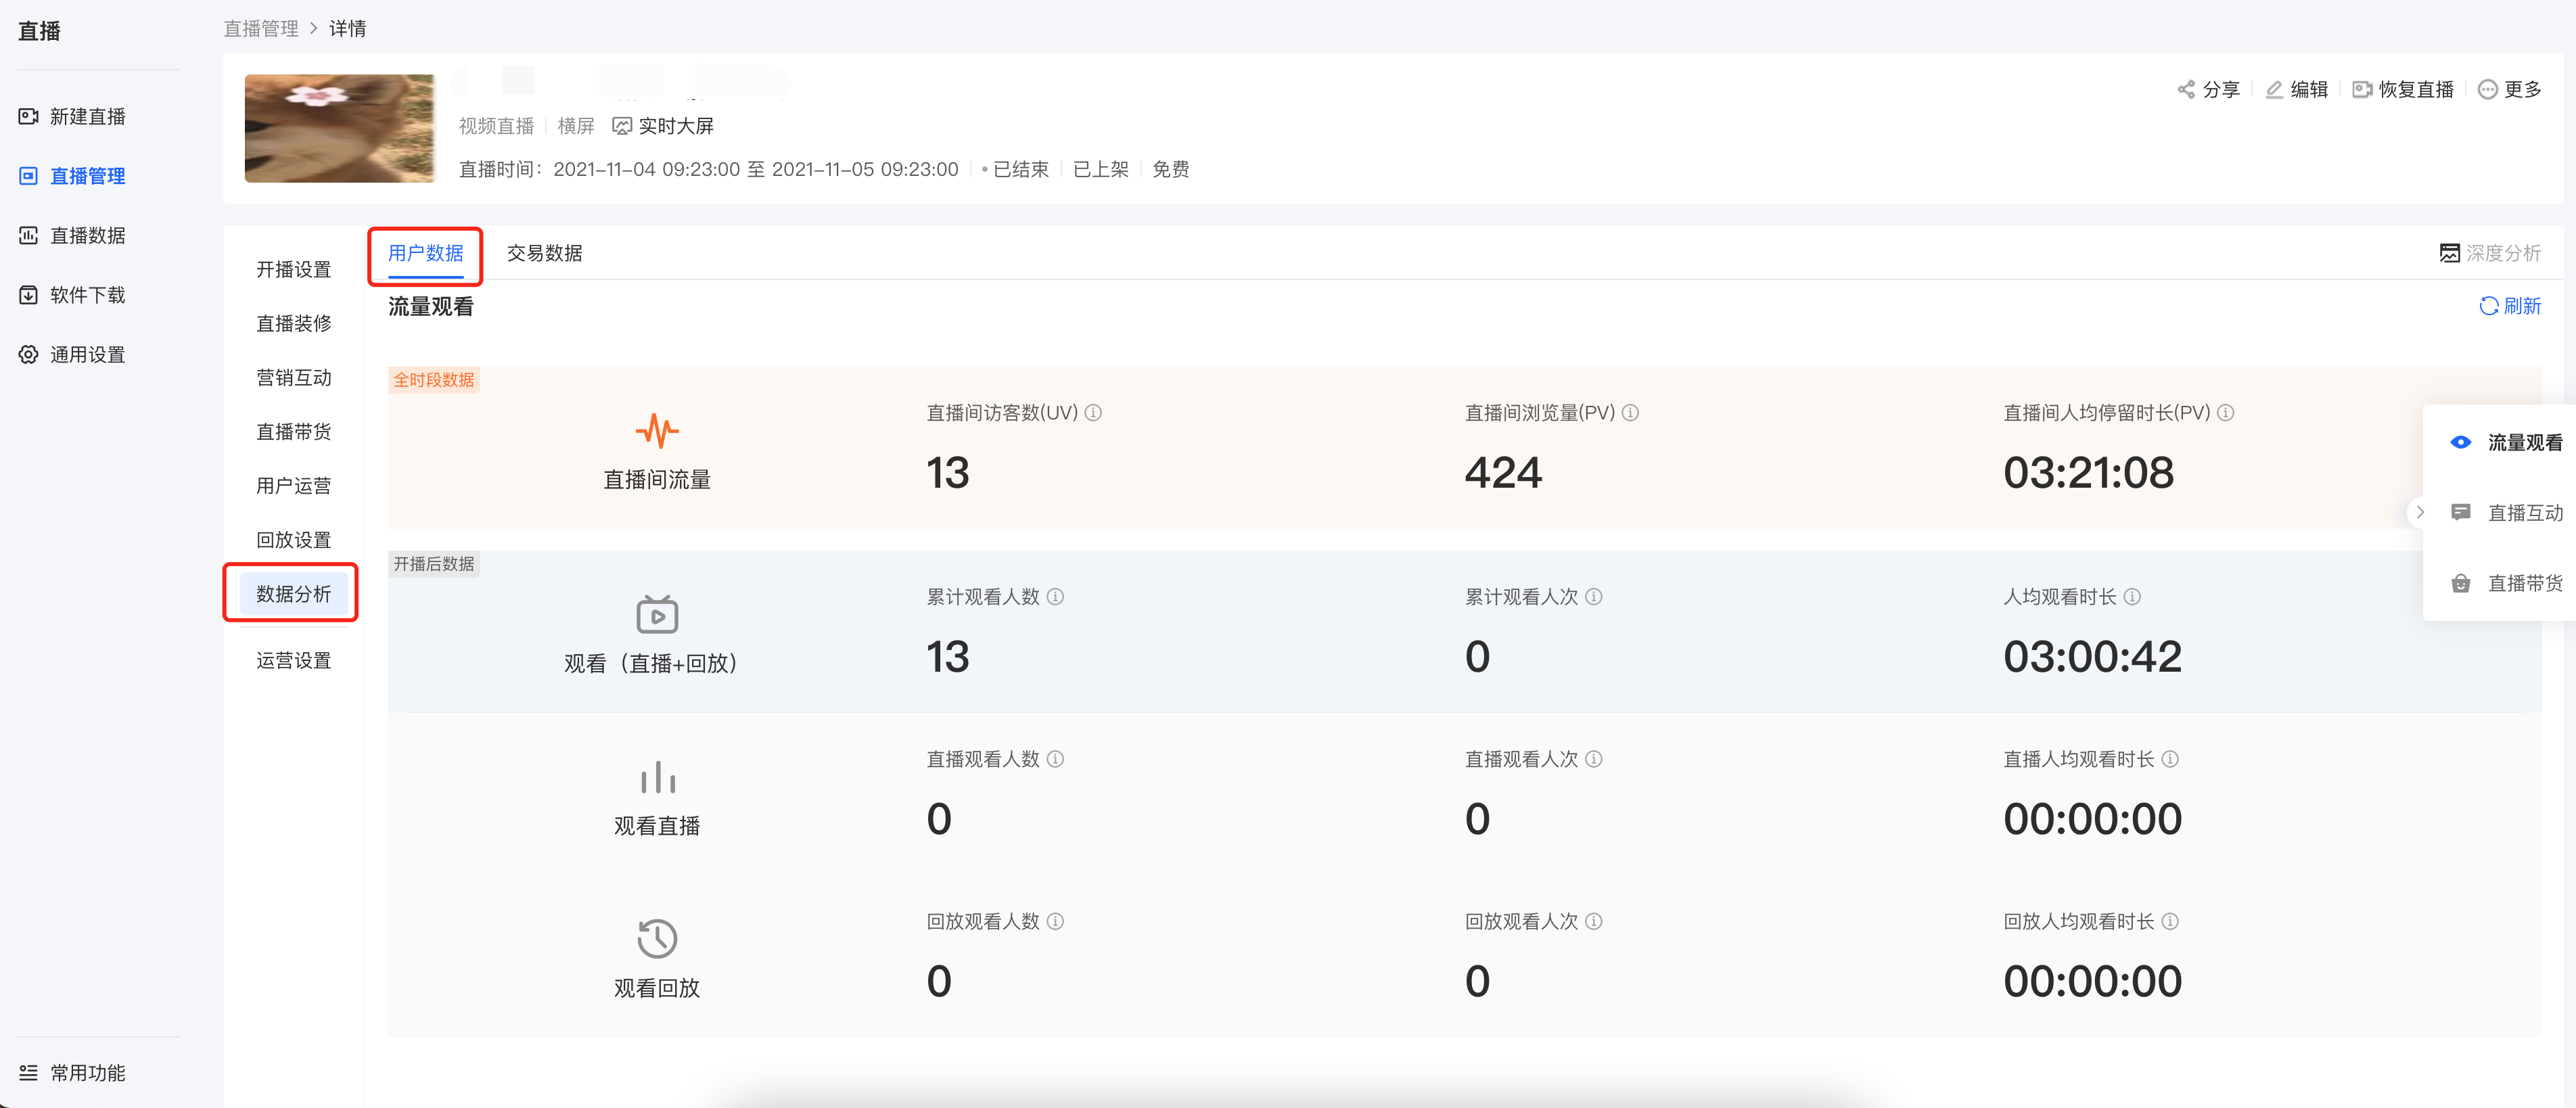
4. Data analysis:Include live stream traffic data, student learning data, and live stream interaction data
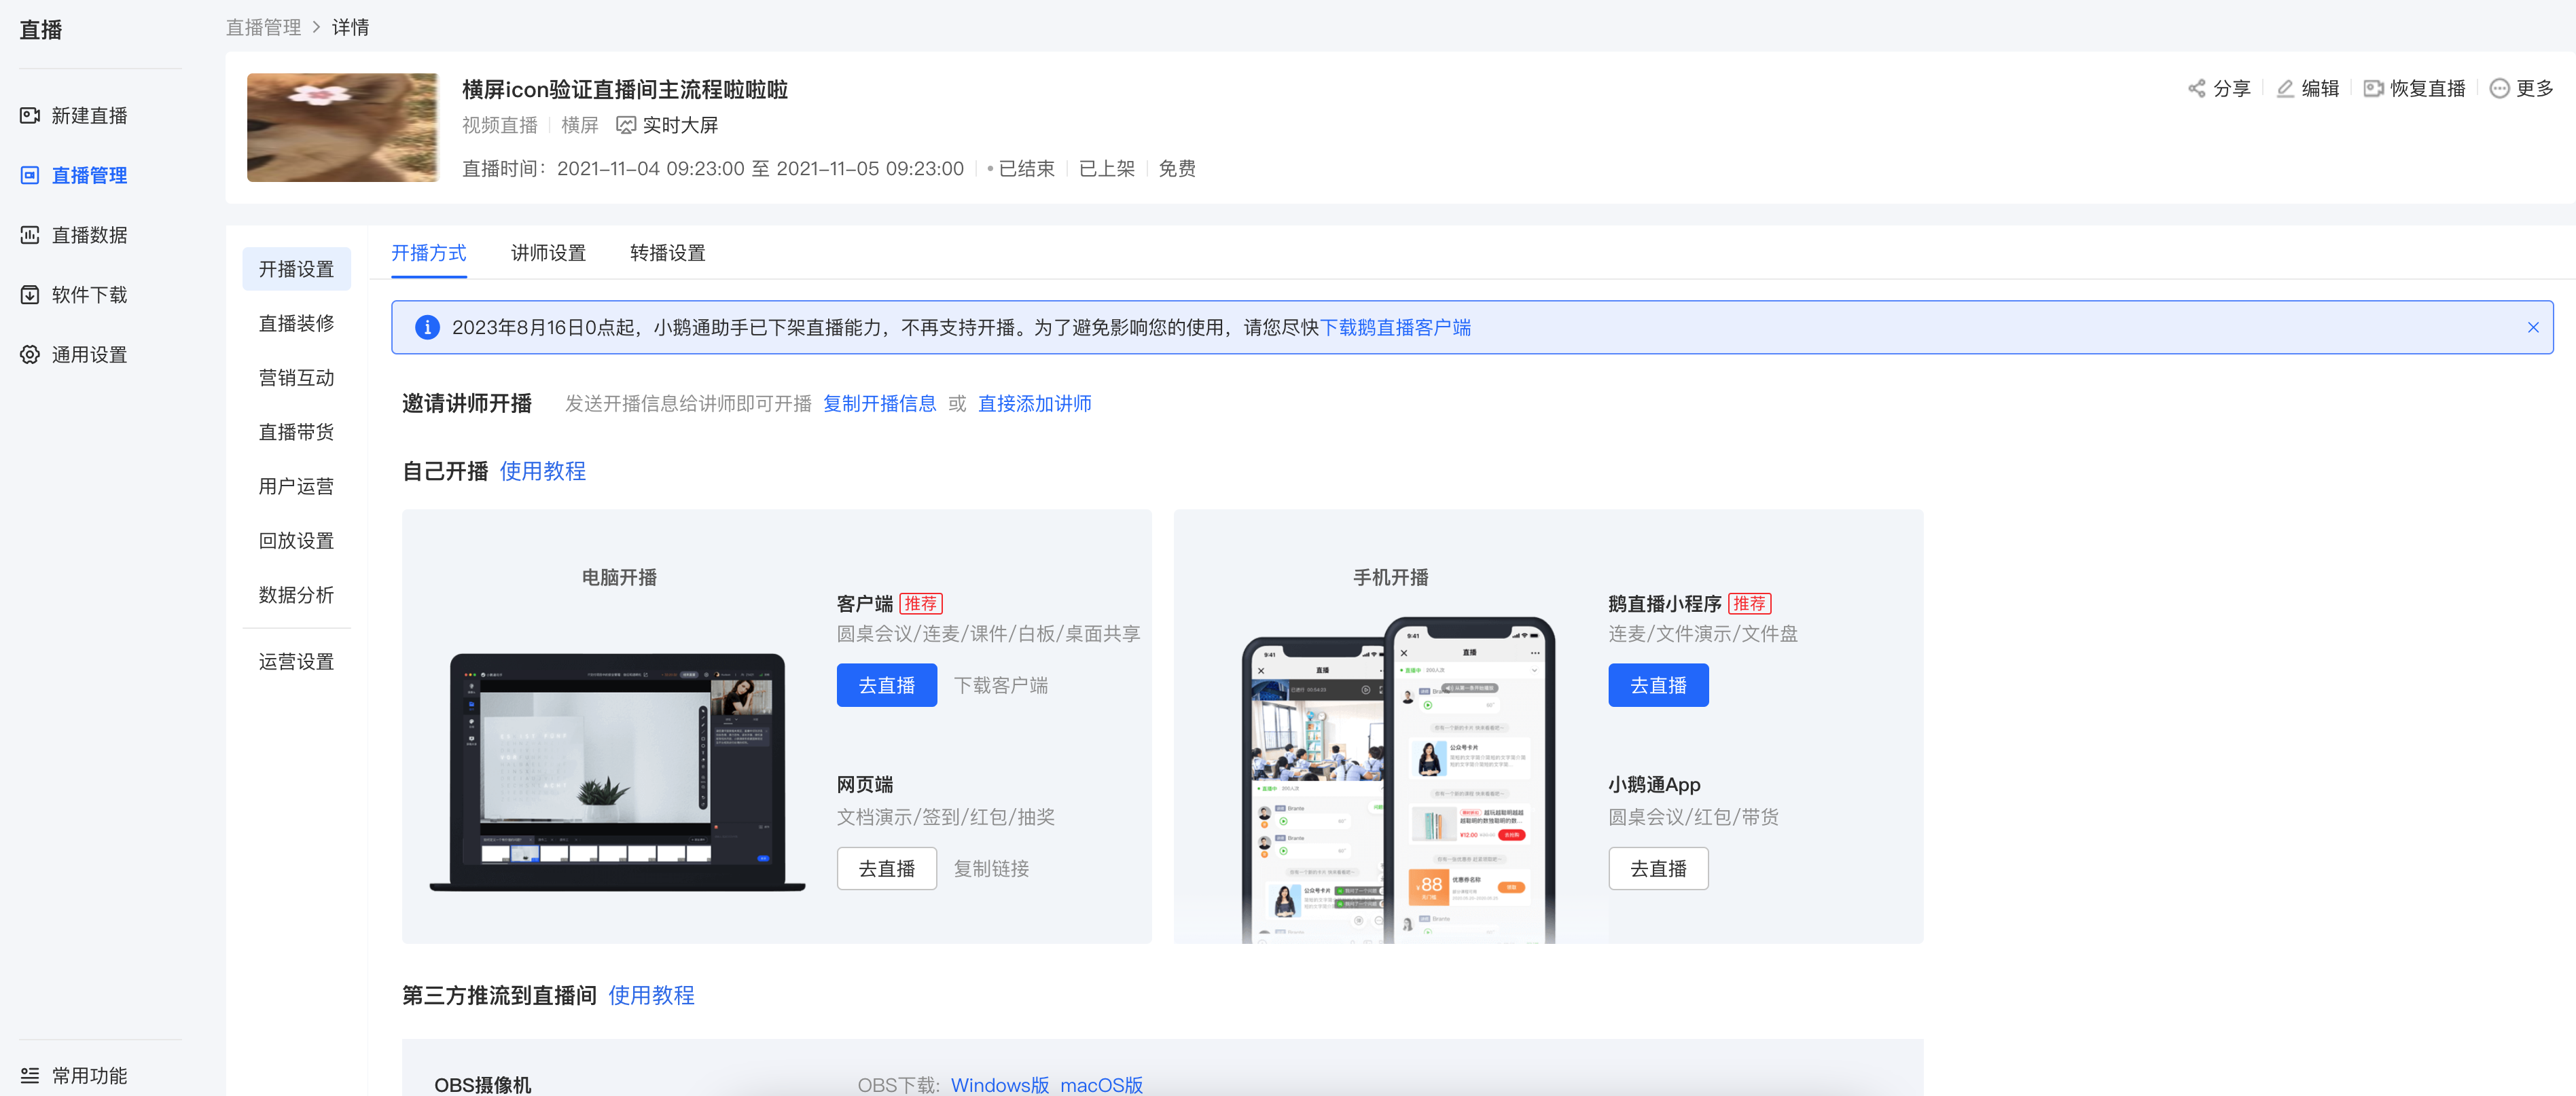
Step 3: Select a live stream terminal and start the live stream
Click[Live stream start method]and select a suitable terminal for the live stream. Currently, voice live streaming supports lectures via mobile H5 and the computer web - based platform.
How to choose the live streaming type and terminal
I. Live Streaming Introduction
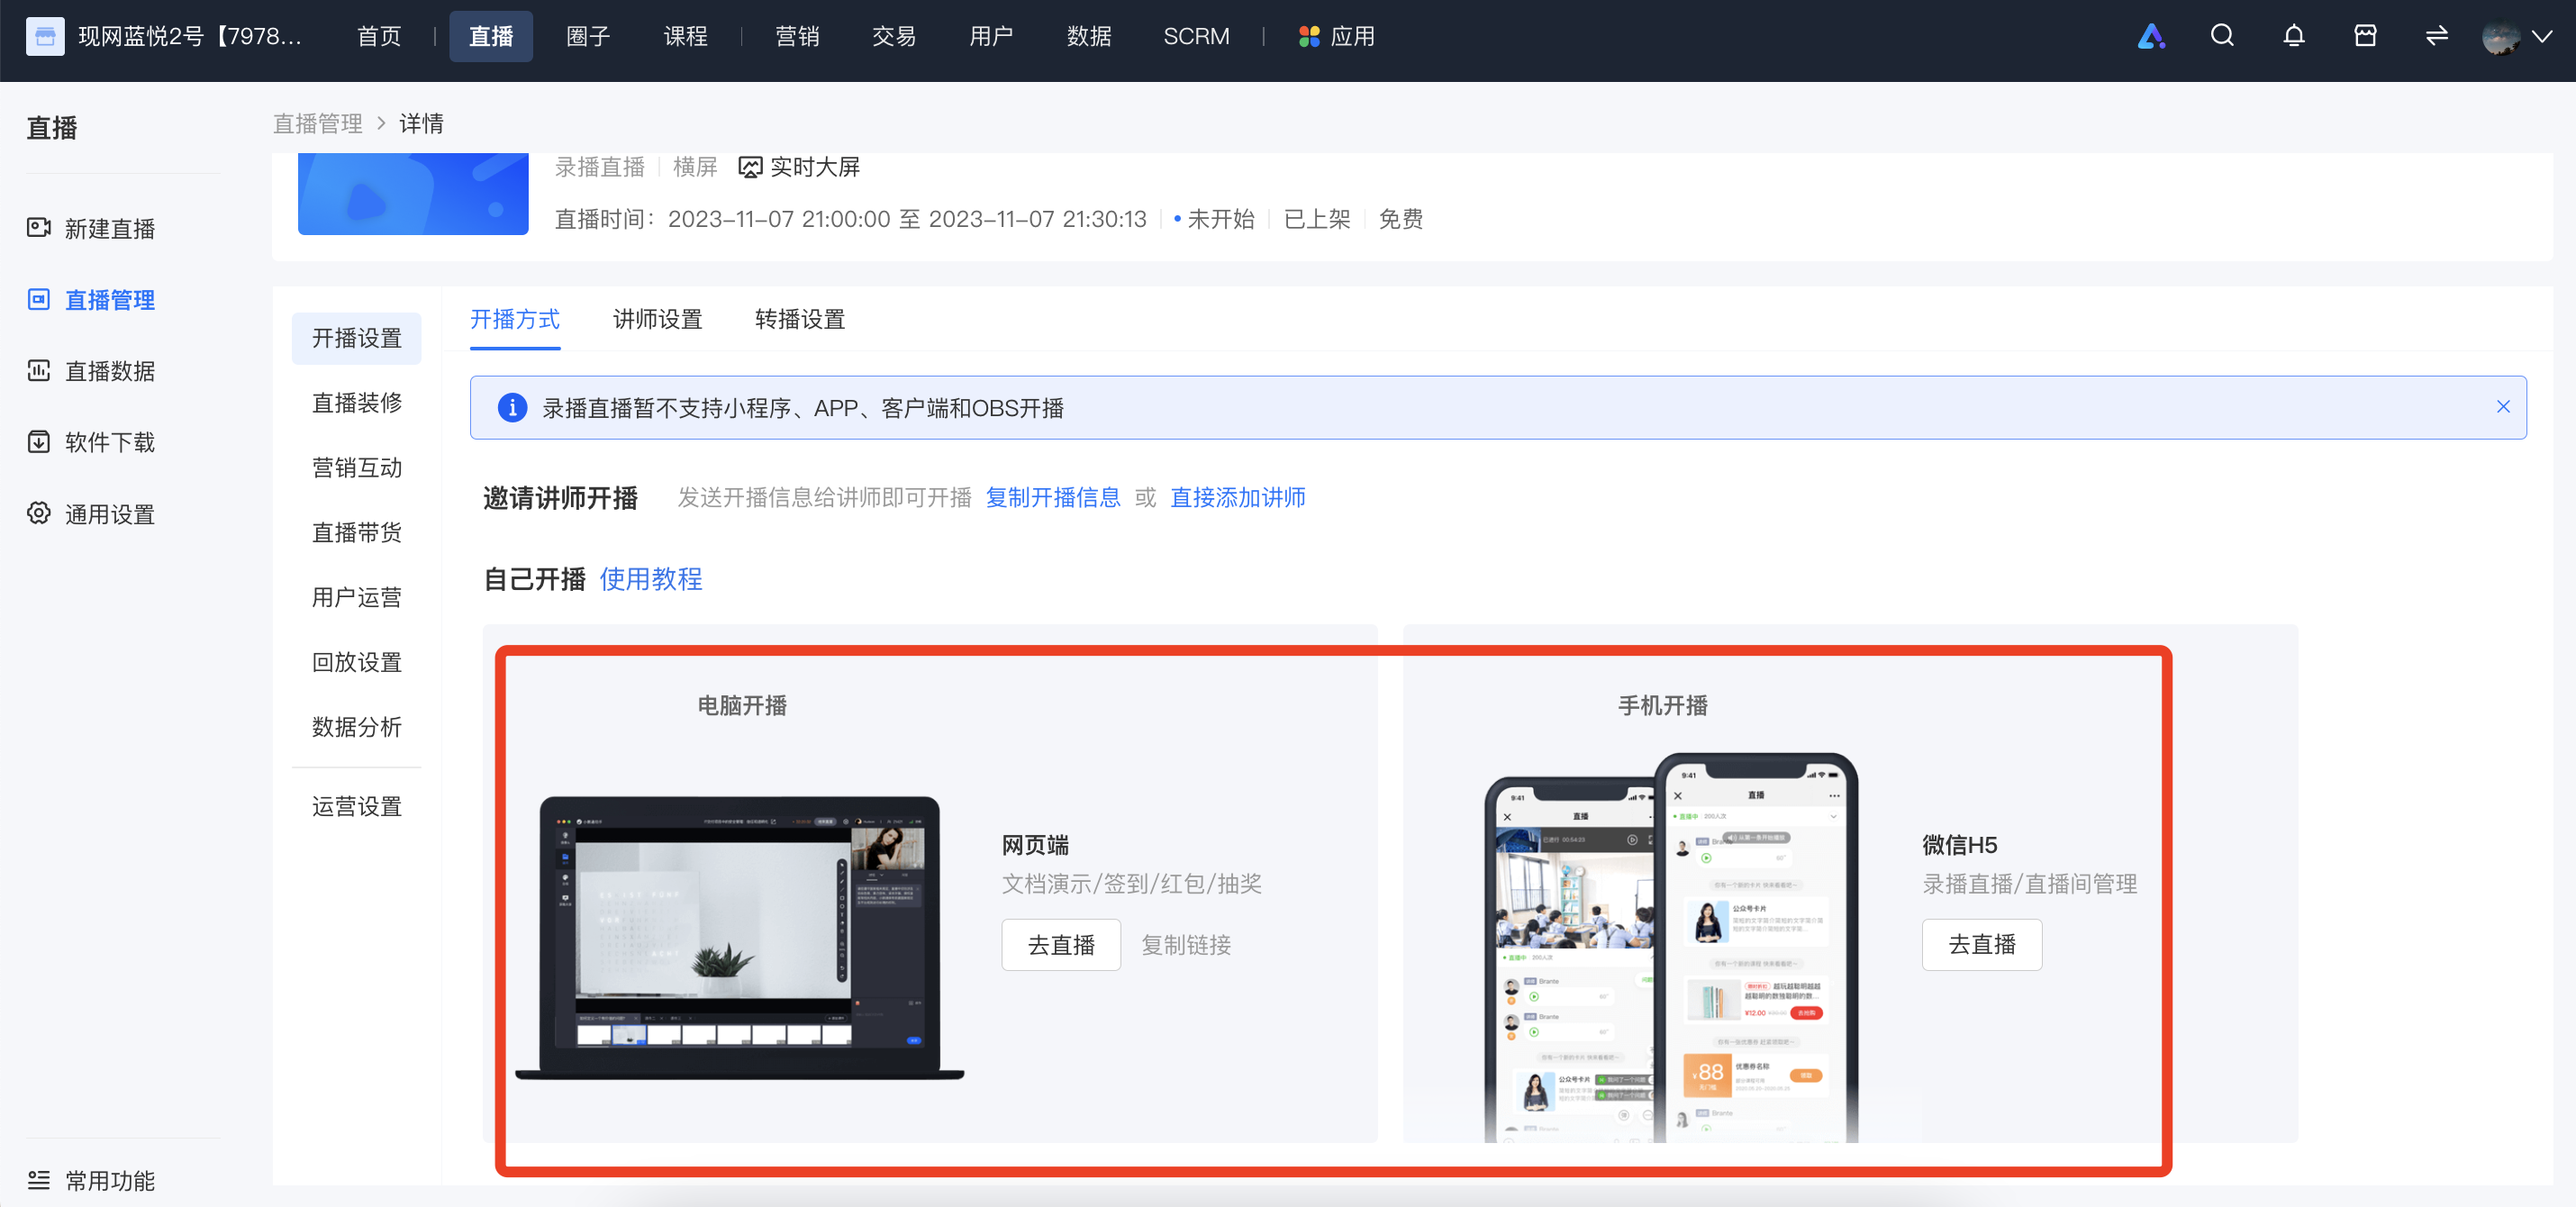
elink supports three major types of live streaming: video live streaming, audio live streaming, and pre-recorded live streaming. Among them, video live streaming is divided into two modes: [Landscape Live Streaming] and [Portrait Live Streaming].
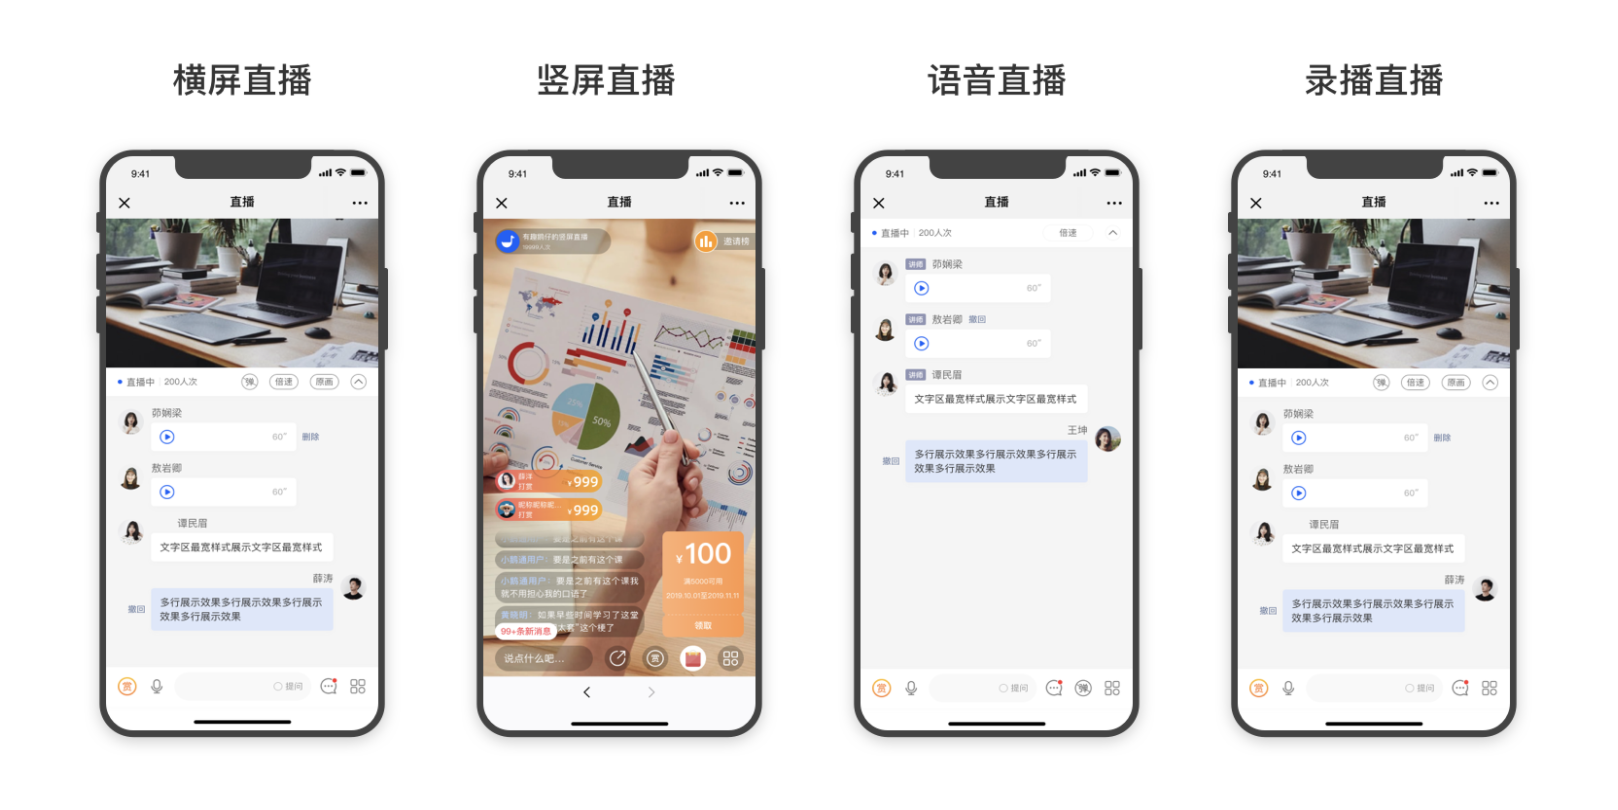
II. Video Live Streaming - Landscape Live Streaming
1. Instructor teaches on a computer
1) Computer web browser: Suitable for live streaming that requires real-time video interaction with users. It also supports teaching with videos and PPT courseware.
2) Computer client - elink Live Client, elink Assistant: Suitable for live streaming that requires displaying the computer desktop and providing real-time interactive explanations.
3) OBS: Can connect to third-party devices to deliver more professional live courses.
2. Instructor teaches on a mobile phone
elink App, elink Live Mini Program: Suitable for lightweight real-time video live streaming without the need for courseware teaching.
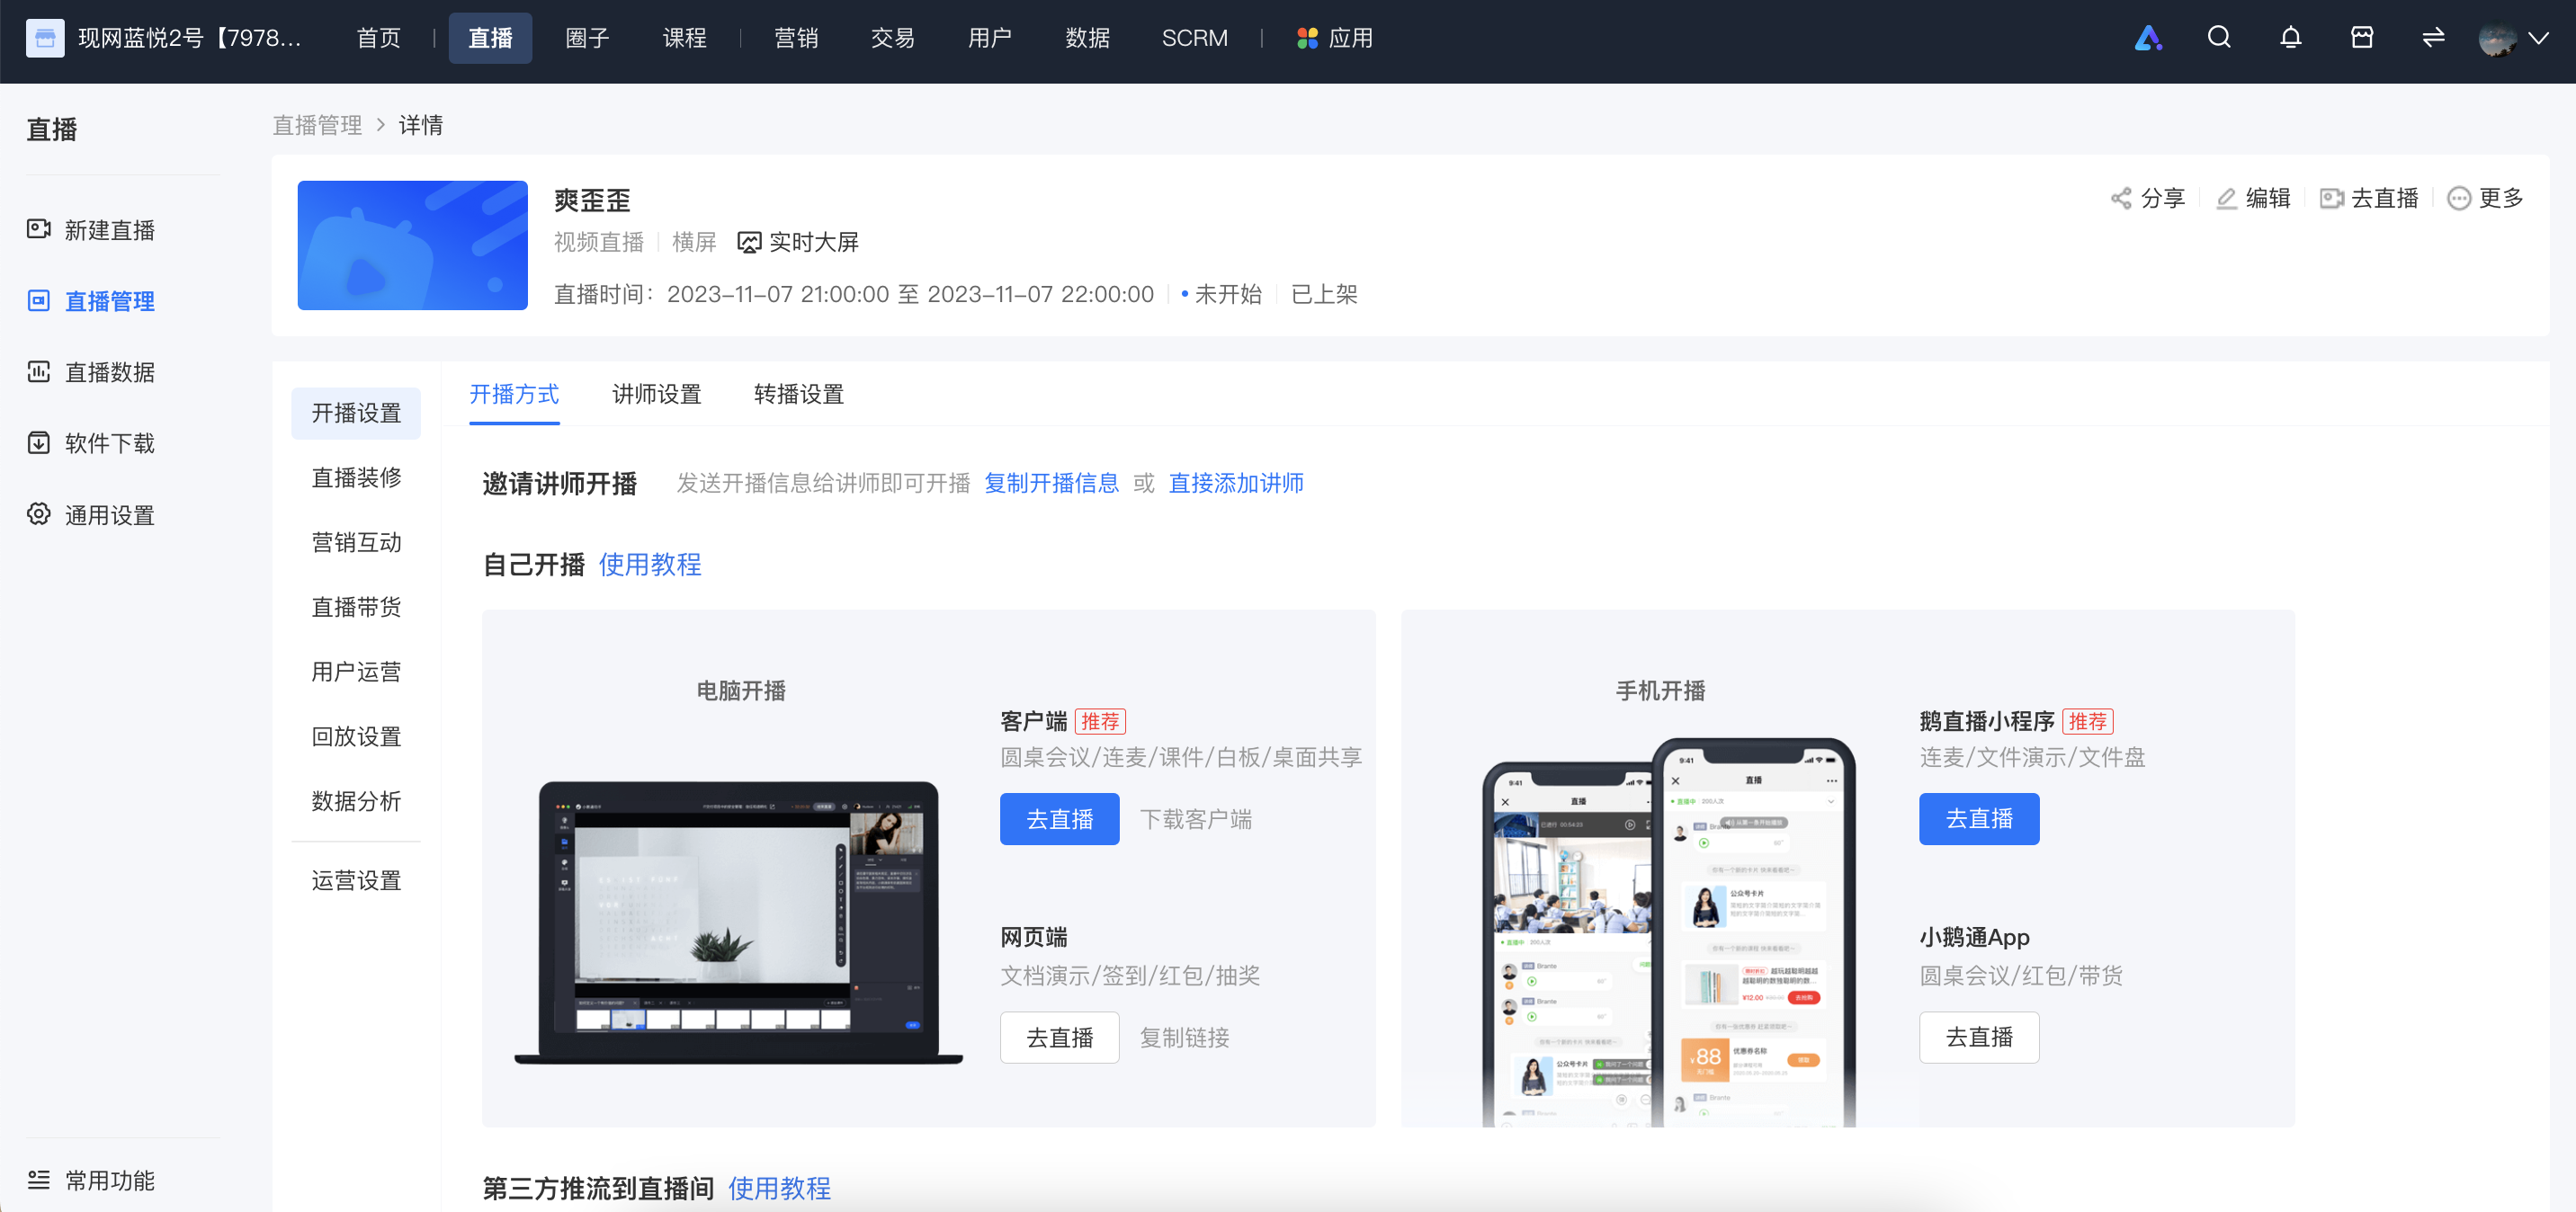
III. Video Live Streaming - Portrait Live Streaming
Portrait live streaming currently supports live streaming via the elink App, elink Live Mini Program, and third-party live streaming tools such as OBS. It is recommended to use the App for live streaming as it has more comprehensive functions, higher stability, and lower latency.
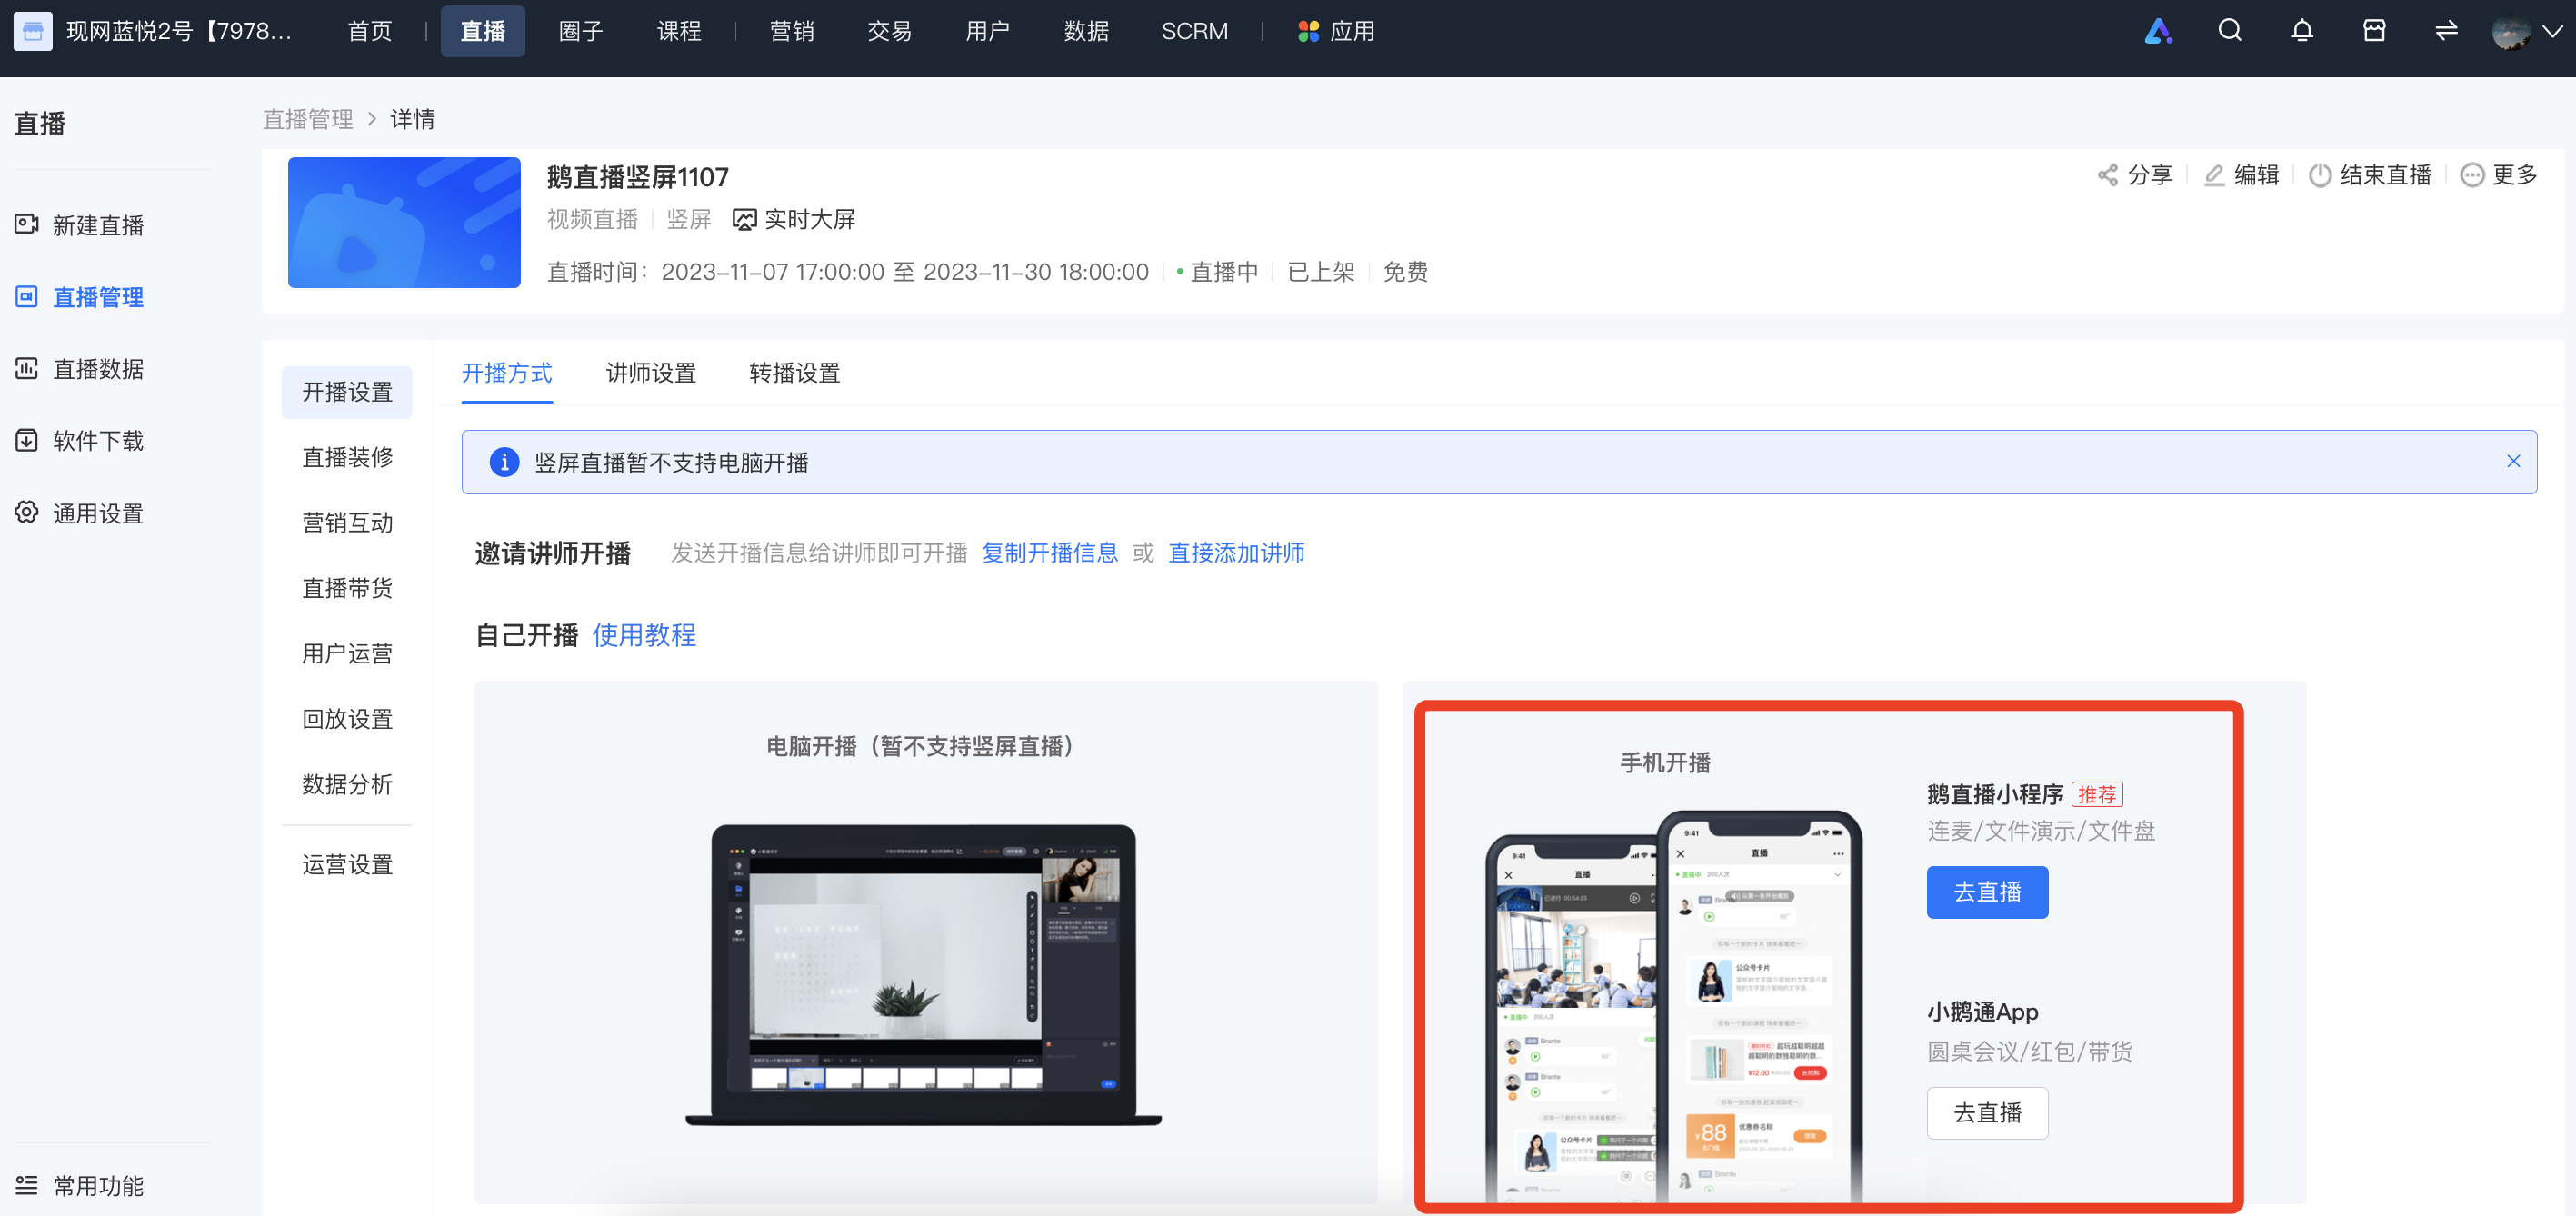
IV. Audio Live Streaming
For audio live streaming, courseware such as images, texts, and PPTs can be added. Instructors can choose to teach via the computer web browser or the mobile phone - WeChat H5 page.
1. Image/Text + Audio Live Streaming: Suitable for live streaming with a large amount of audio, text, and images.
2. PPT + Audio Live Streaming: Suitable for live streaming in the form of teaching with presentation documents and sending multiple audio messages.
*Note: Only one type of courseware can be added to a live stream.
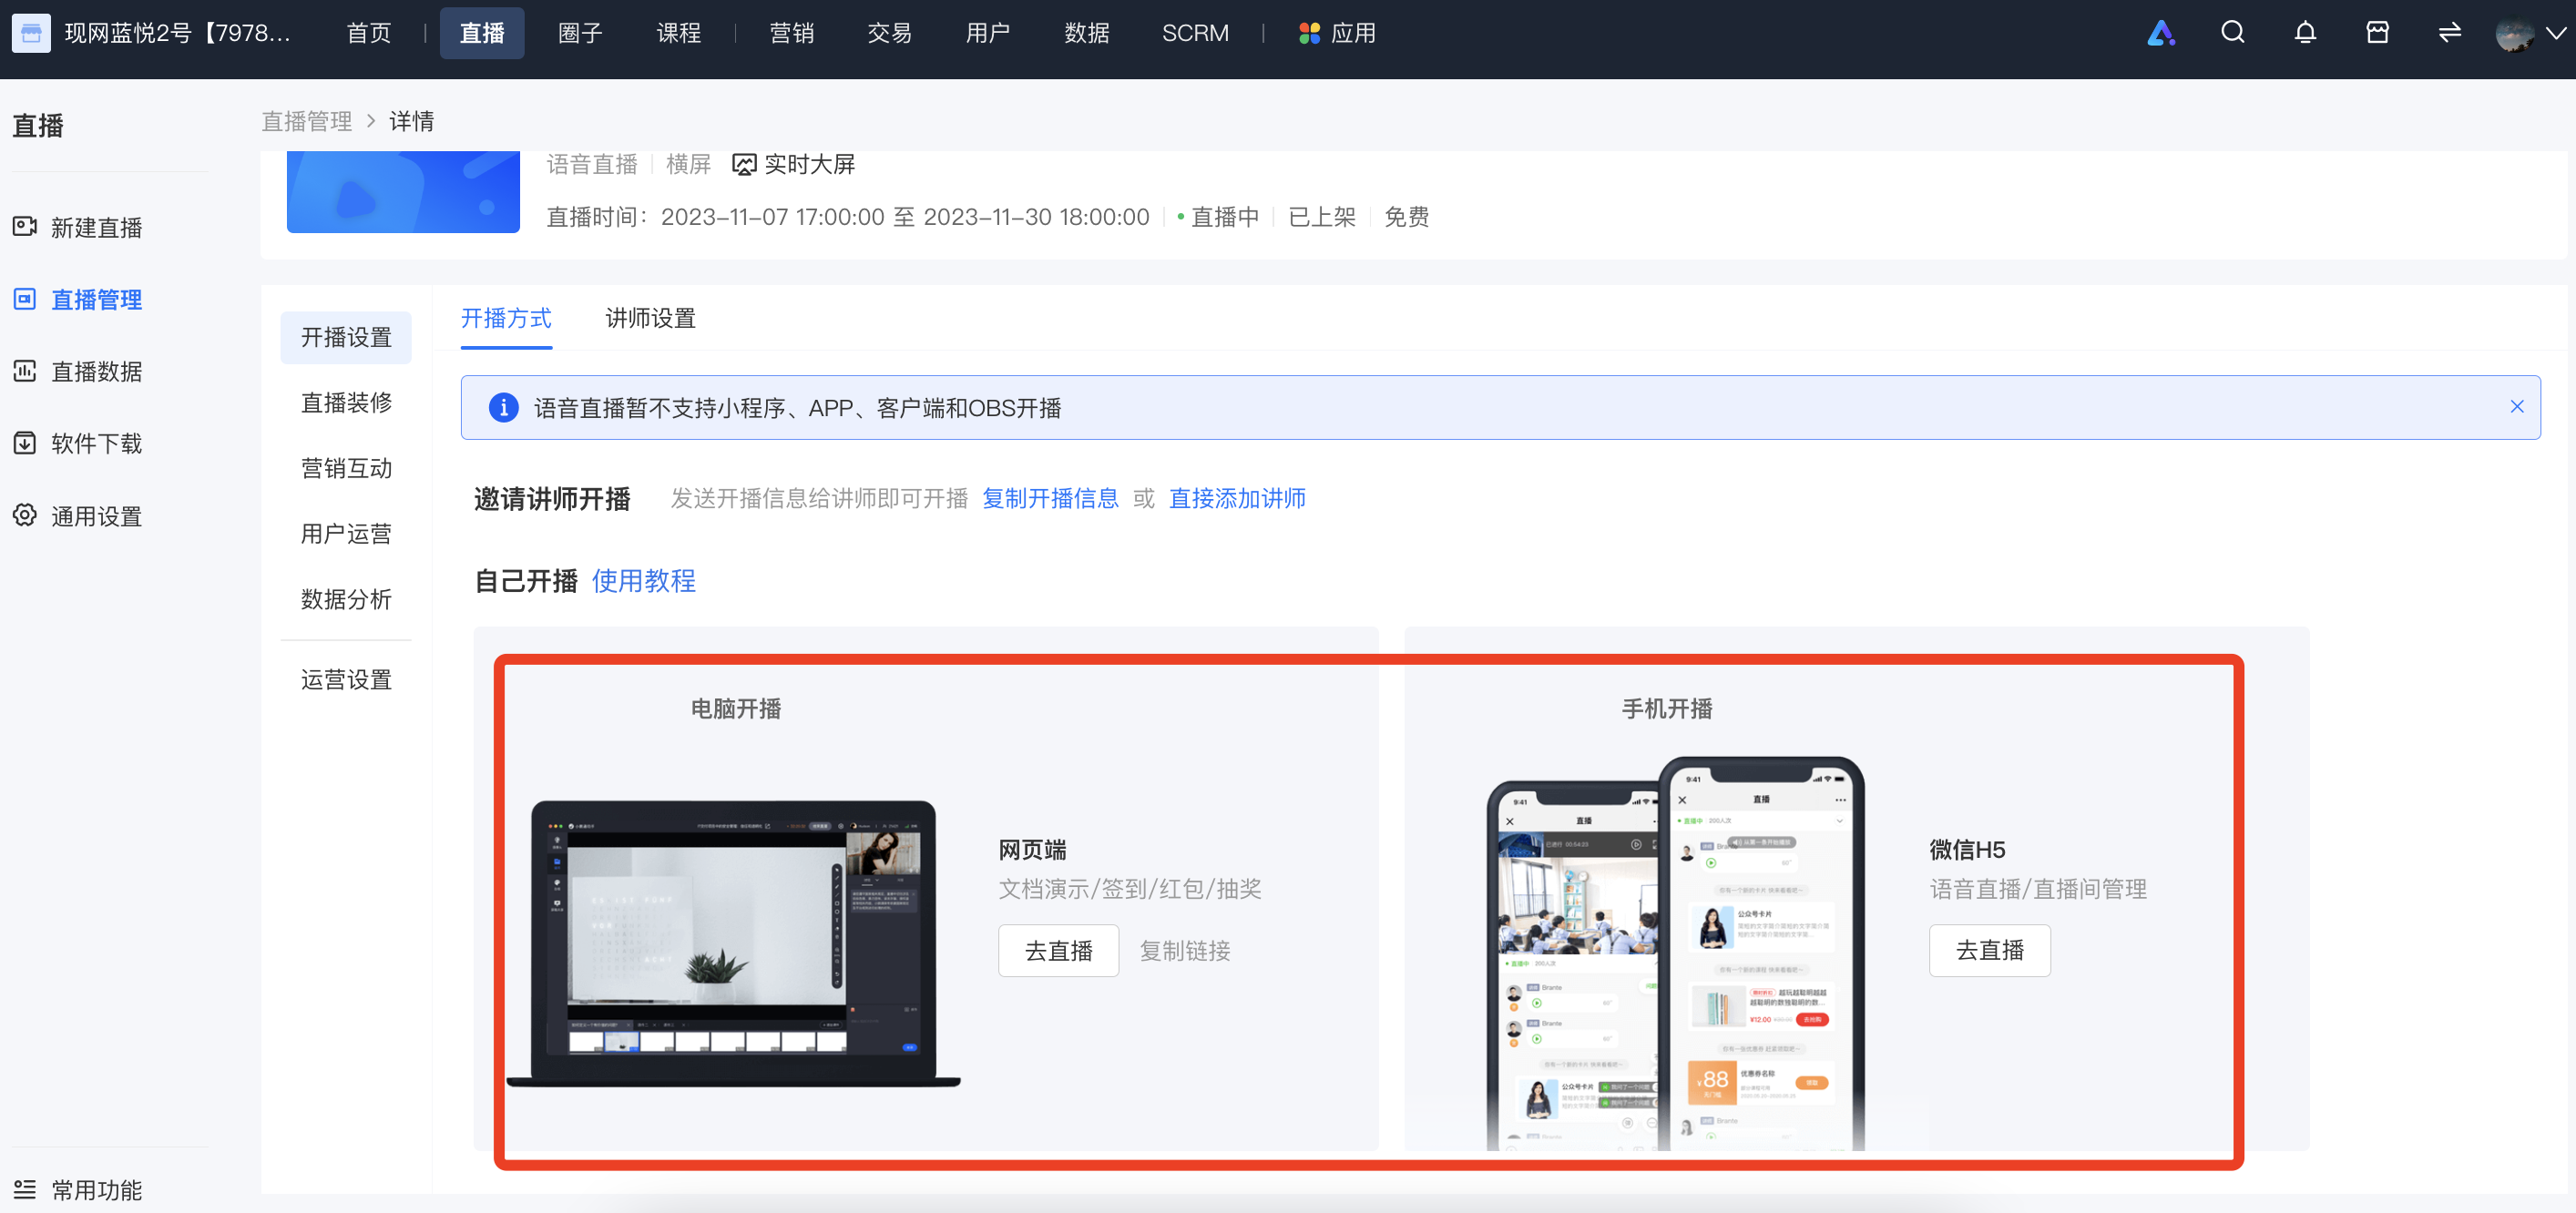
V. Pre-recorded Live Streaming
Pre-recorded live streaming supports adding videos in advance. There are the following usage scenarios:Instructors can choose to teach via the computer web browser or the mobile phone - WeChat H5 page.
Pre-recorded Video + Audio Live Streaming: Suitable for live streaming with pre-prepared recorded videos.
Live broadcast terminal
【OBS】 Black screen appears when using monitor capture?
I. Problem Examples:

II. Solutions
The first method: Switch the default graphics card.


If the user's computer uses an NVIDIA graphics card: Right - click on the blank area of the desktop and select 'NVIDIA Control Panel'.


If the user's computer uses an AMD graphics card: Right - click on the desktop and select 'Configure Switchable Graphics'.


Step 1: Open Settings -> Display -> Graphics settings;

Step 2: Click 'Browse', find the installation location of OBS, and add OBS;


Step 3: Click 'Options', select 'Power saving mode', save the settings, and restart OBS.


A lecturer is currently live streaming. What will happen if another lecturer enters the live streaming room and starts a live stream?
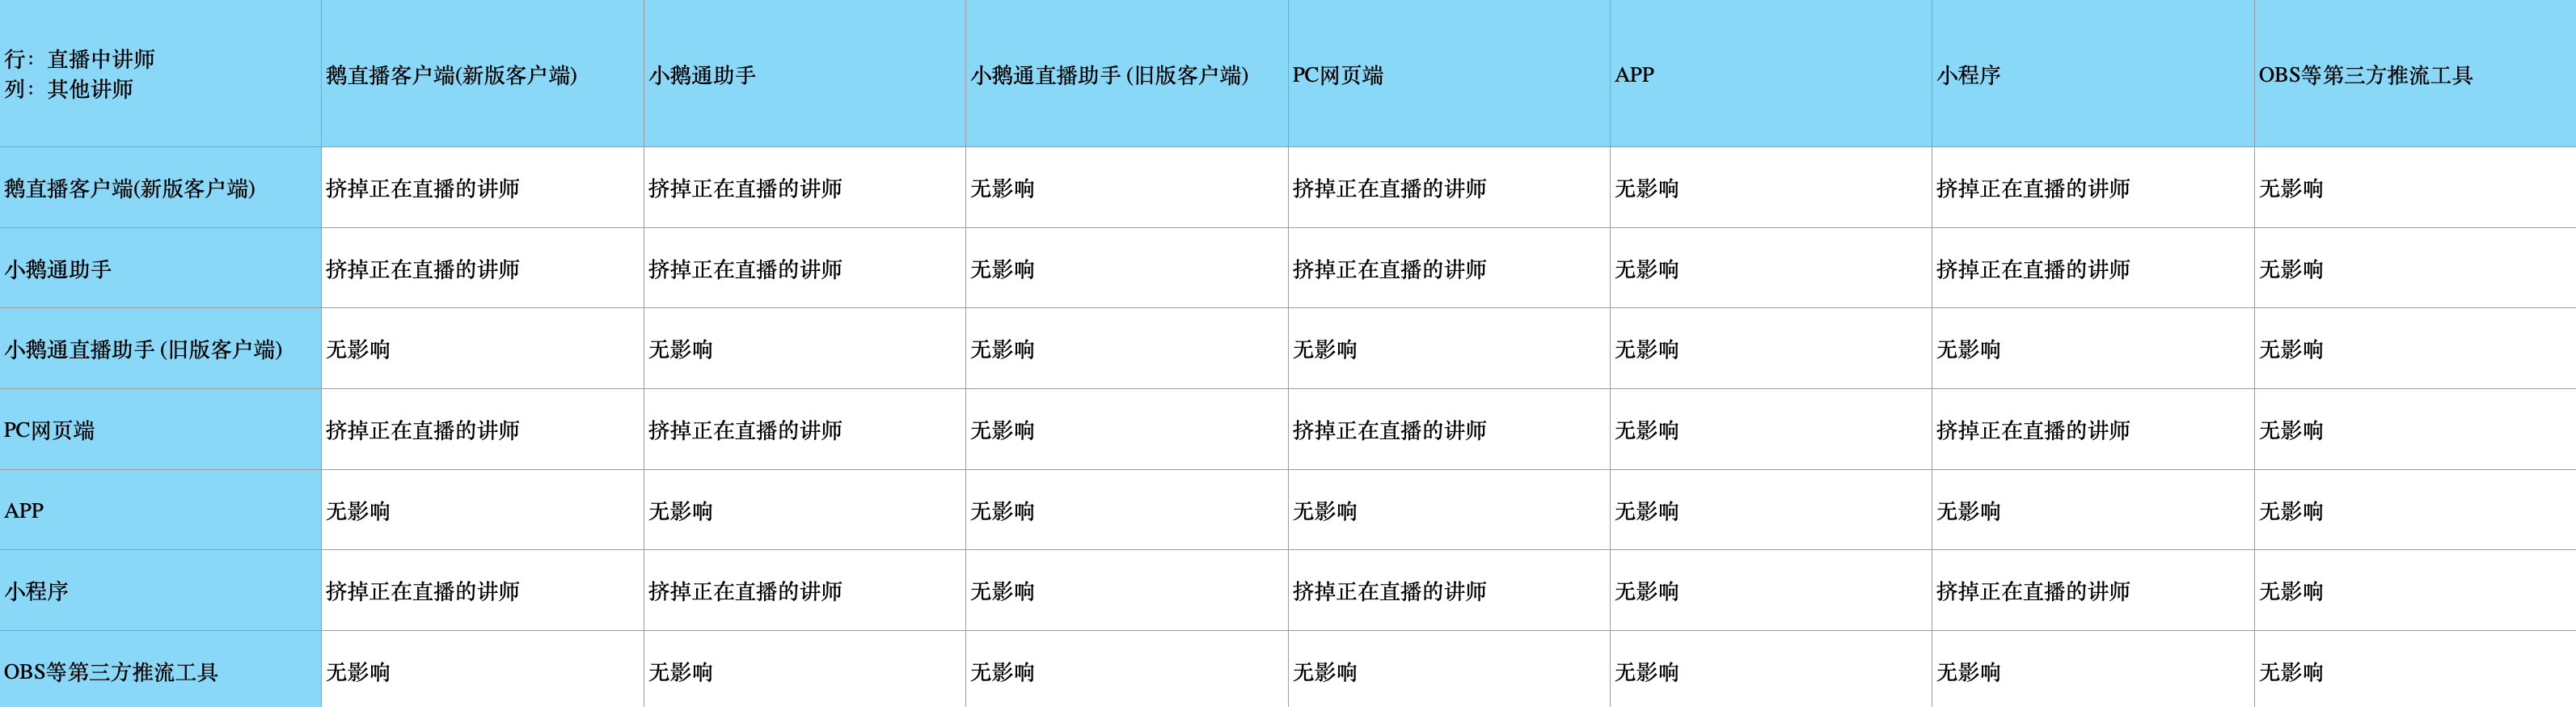
PS: If there are any discrepancies between your actual operations and the table, please contact the service steward for assistance.
How to modify the bitrate value?
On the main interface of OBS, click [Settings] in the operation bar to open the settings page. Select [Output] in the left sidebar and change the video bitrate.


Is the live content viewed in the live stream room blurry?
The output resolutions of various live streaming terminals are inconsistent. The following is the detailed content:
1. APP: The resolution is automatically adjusted according to the network speed. If it is not clear enough, it is recommended to switch to a faster and more stable network.
2. Client: The default resolution is 720p, and there are several options for you to adjust manually.
3. Web: The camera resolution is 480p, and it is 720p when sharing the screen.
4. OBS: The output resolution is not restricted for now. It is recommended to set it below 720p and the bitrate below 1000 kbps to ensure smooth live streaming.
【OBS】Tutorial on Capturing Desktop Audio without Affecting Speaker Output (for MAC Computers)
Step 1: Download the software (skip this step if you already have the software)
Download and install OBS and blackhole software (it is recommended to install the latest version of OBS. Version 27.0.1 has been tested and works normally)
1. OBS download
Official website:https://obsproject.com/
Quick download address:https://xiaoetong-1252524126.file.myqcloud.com/plugins/obs-mac-27.0.1.dmg
2. blackhole download
Official website:https://existential.audio/blackhole/
Quick download address:https://xiaoetong-1252524126.cdn.xiaoeknow.com/XEDownloader/BlackHole2ch.v0.4.0.pkg
Step 2: Configure MIDI
1. Open the audio MIDI settings on your Mac system

2. Create a new multi-output device

3. Then select and check both the MacBook Pro speakers and BlackHole 16ch in the multi-output device

Step 3: Set the system audio output
Open System Preferences -> Sound -> Output, and select the multi-output device

Step 4: Configure OBS
1. Open OBS -> Settings -> AudioModify the Desktop Audio configuration. Select the option: BlackHole 16ch, and then click OK

2. Next, open any music player on your desktop and check if there is a volume fluctuation in the desktop audio. A normal fluctuation indicates successful configuration.

Step 5: Capture an application
1. If you need to use OBS to capture individual applications for live streaming, such as Tencent Meeting, you need to add a new window capture in OBS and then select the Tencent Meeting software window.
First, click the + sign and select Window Capture

2. Then click OK

3. Then select Tencent Meeting in the opened window, and then click OK.


Usage tutorial for instructors to grab live streaming slots
I. Function Introduction
The "Live Broadcast Grab" feature is a common capability for instructors. When another instructor is currently live, it provides an entry for subsequent instructors entering the same live room to independently grab the live broadcast, thereby enhancing the live broadcast experience for instructors and the viewing experience for students. (Currently, only live broadcasts created on the computer management console are supported.)
II. Purpose of Use
1. When multiple instructors are allowed to start live broadcasts simultaneously in the same live room, subsequent instructors can independently grab the live broadcast to take over from the previous instructor and start the live broadcast.
2. When multiple instructors are vying for the live broadcast, the student - end can seamlessly switch the live - broadcast screen within seconds, reducing the student churn rate.
III. Usage Scenarios
A merchant needs multiple instructors to appear on camera in sequence during a live broadcast, and only one instructor needs to appear on camera at a time. After the first instructor finishes the presentation, there is no need to pause the live broadcast. The second instructor only needs to directly click "Start Live Broadcast" on their own live - broadcast port to achieve a "seamless switch of the live - broadcast screen".
IV. Operation Path
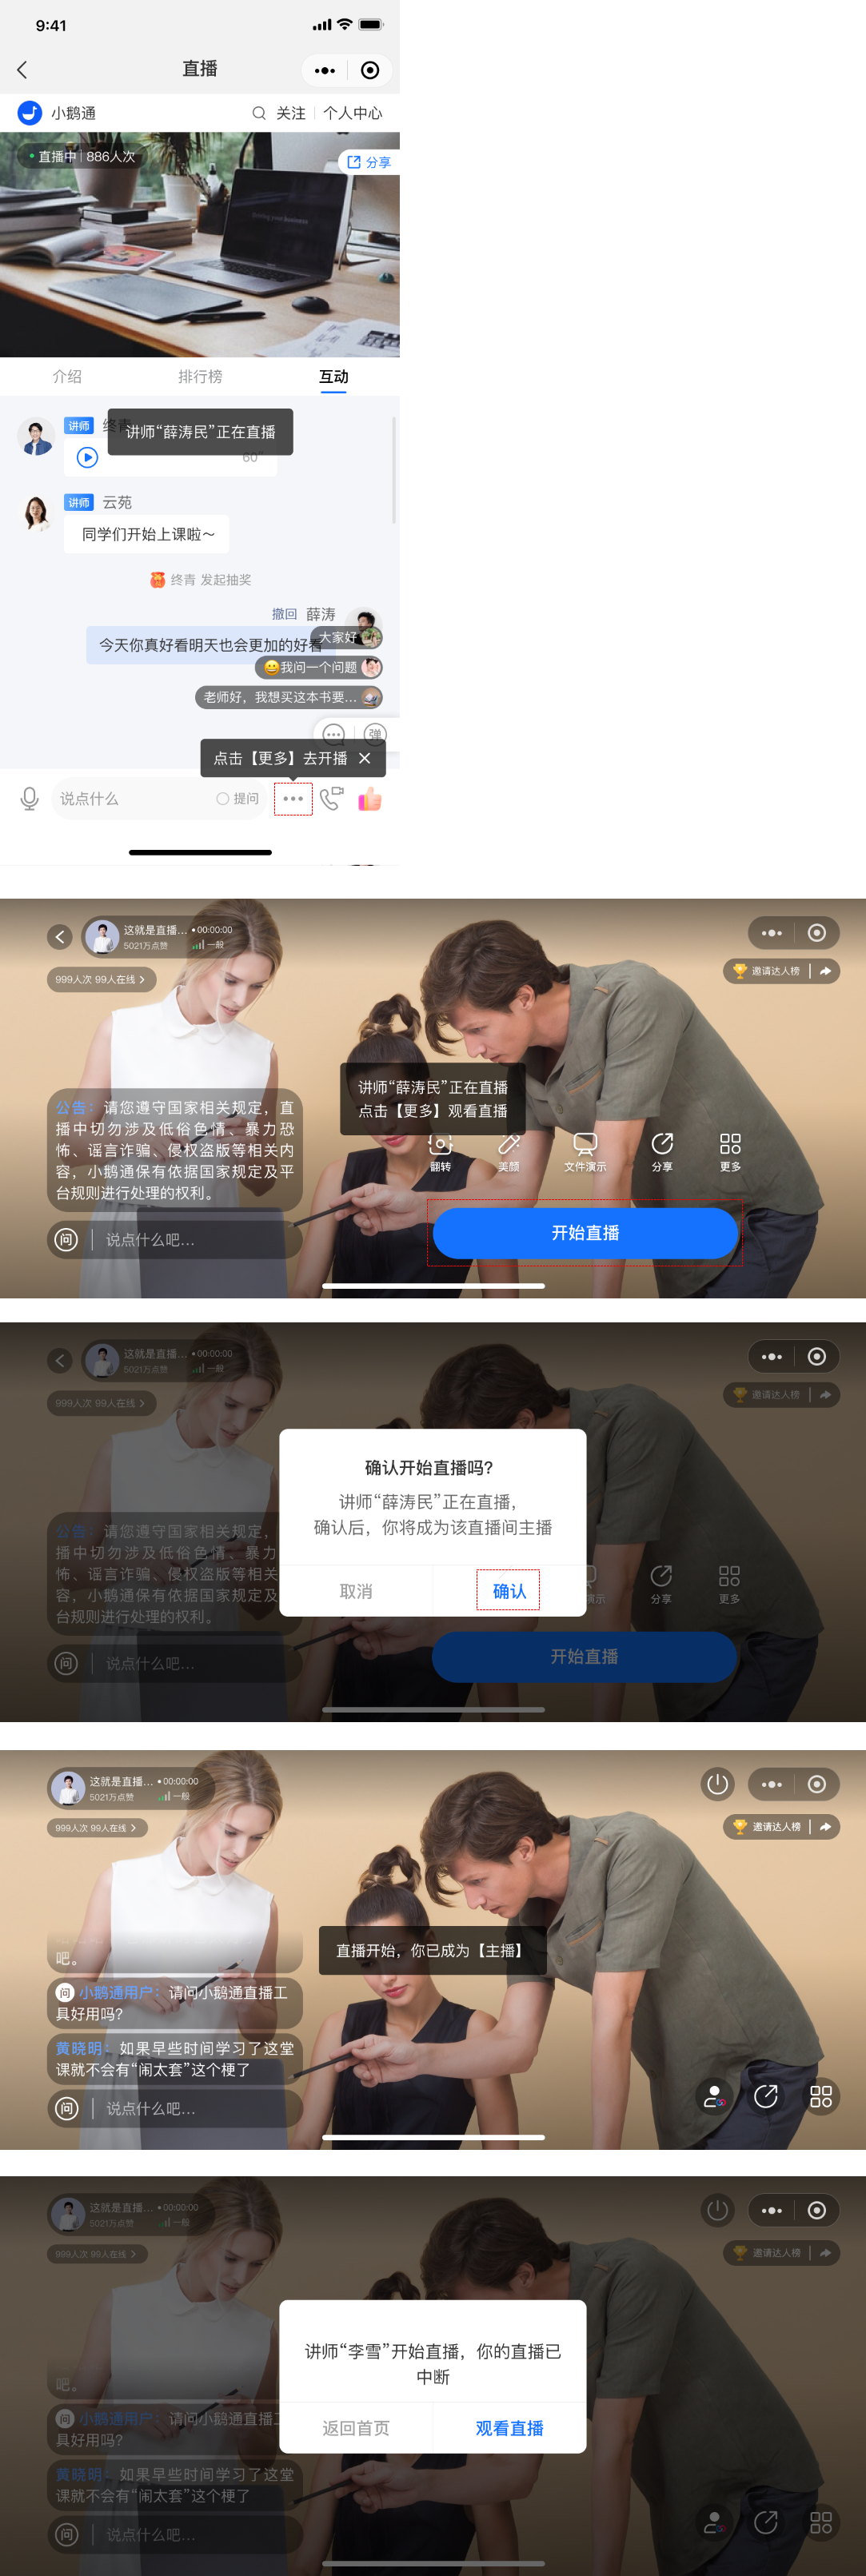
Instructor - end: Enter the live room(eLive Mini Program)> When another instructor is currently live, it will default to the viewing perspective. > Click "...". > Click "Go Live". > Click "Confirm" in the secondary confirmation pop - up window. > Successfully grab the live broadcast and start the live broadcast. (The instructor whose live broadcast is grabbed will be prompted with a pop - up window to end the live broadcast.)
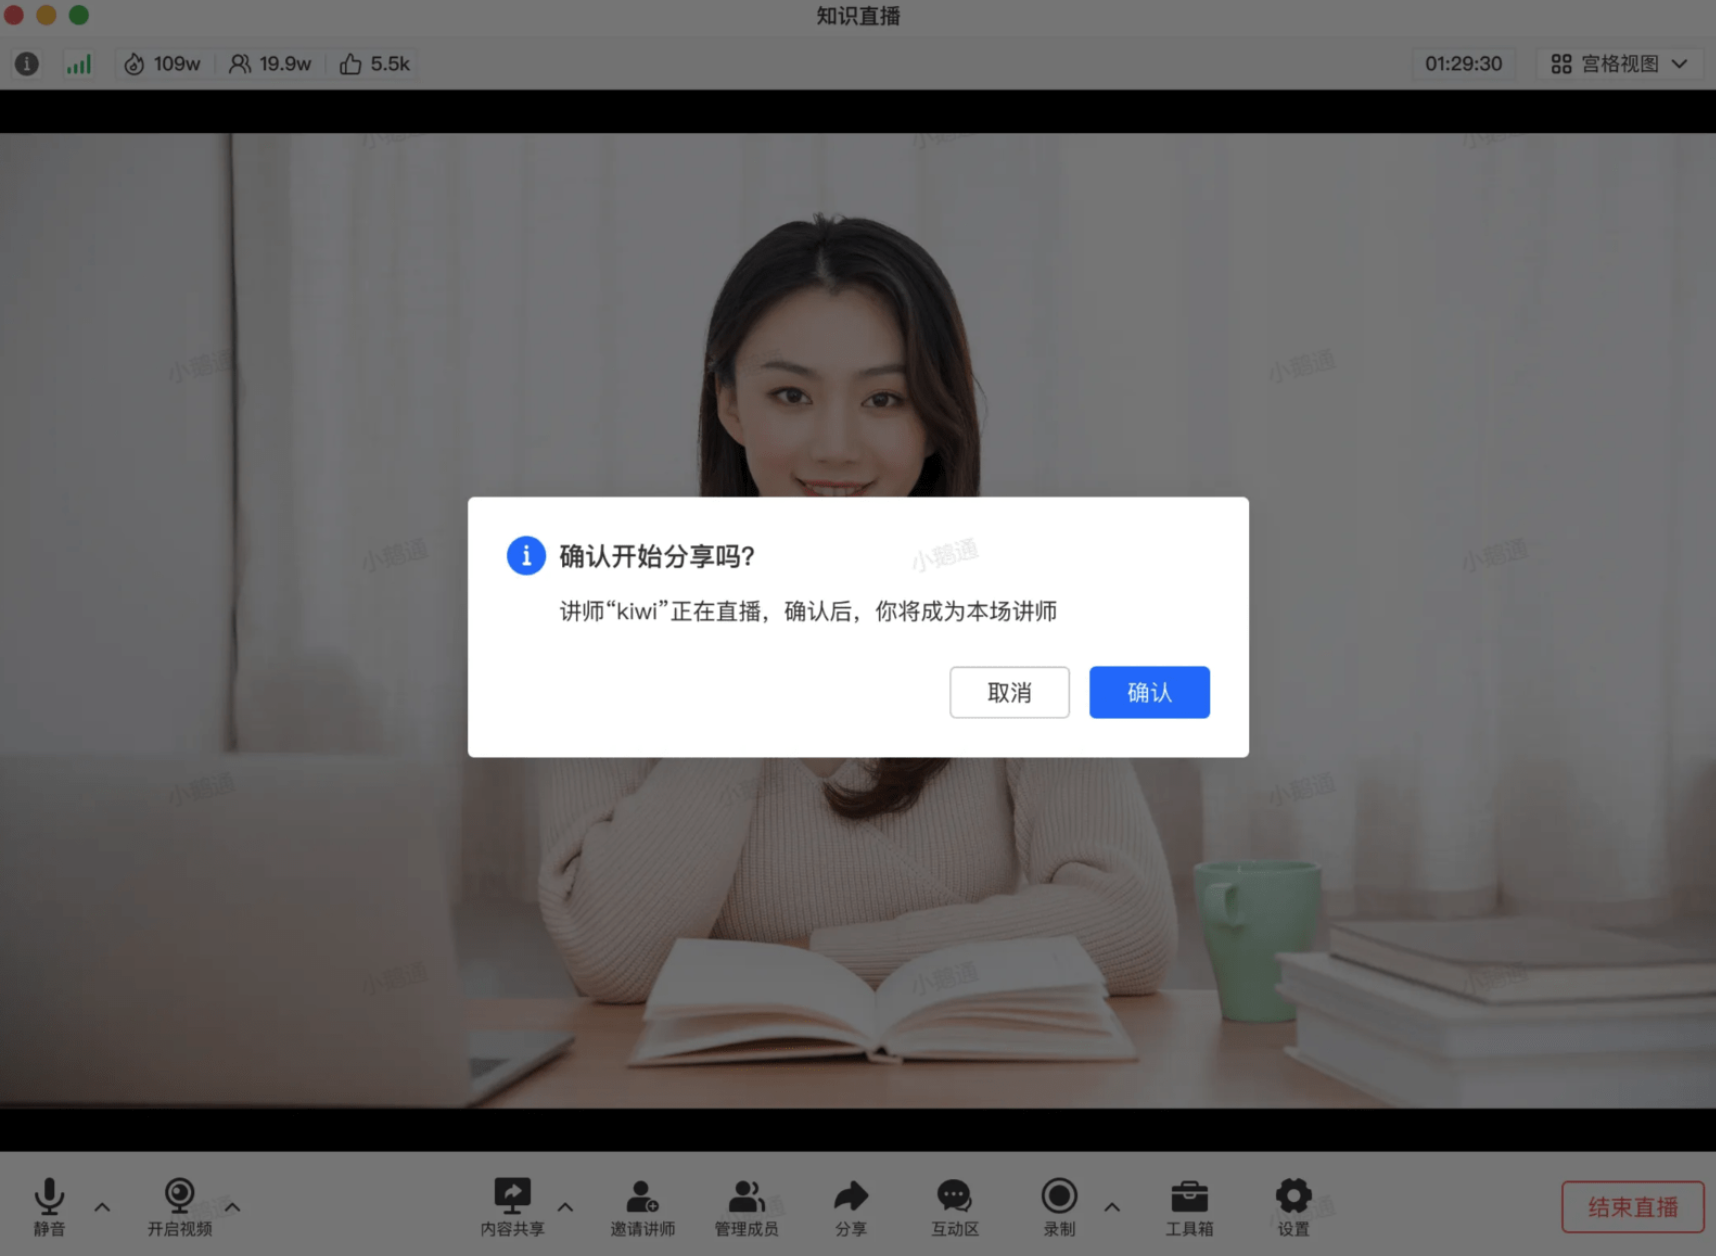
Instructor - end: Enter the live room(eLive, eLink Assistant, Web version)> When another instructor is currently live, a prompt bar will appear at the top/right side. > Click "Start Live Broadcast/Start Class". > Click "Confirm" in the secondary confirmation pop - up window. > Successfully grab the live broadcast and start the live broadcast. (The instructor whose live broadcast is grabbed will be prompted with a pop - up window to end the live broadcast.)
V. Usage Tutorial
(1) eLive Mini Program
When another instructor is currently live, it will default to the viewing perspective. > Click "...". > Click "Go Live". > Click "Confirm" in the secondary confirmation pop - up window. > Successfully grab the live broadcast and start the live broadcast. (The instructor whose live broadcast is grabbed will be prompted with a pop - up window to end the live broadcast.)
(2) eLive Client
When Instructor A is currently live, if Instructor B clicks "Start Live Broadcast" or "Present Courseware Content", a pop - up window will prompt whether to take over the live broadcast. If Instructor B confirms, it will be considered that Instructor B has successfully taken over the live broadcast. The live - broadcast screen will be based on Instructor B. At this time, Instructor A will be considered in an off - air state. According to this rule, Instructor C or Instructor A can also take over the live broadcast again.
(3) eLink Assistant
When another instructor is currently live, a prompt bar will appear at the top. > Click "Start Class". > Click "Confirm" in the secondary confirmation pop - up window. > Successfully grab the live broadcast and start the live broadcast. (The instructor whose live broadcast is grabbed will be prompted with a pop - up window to end the live broadcast.)
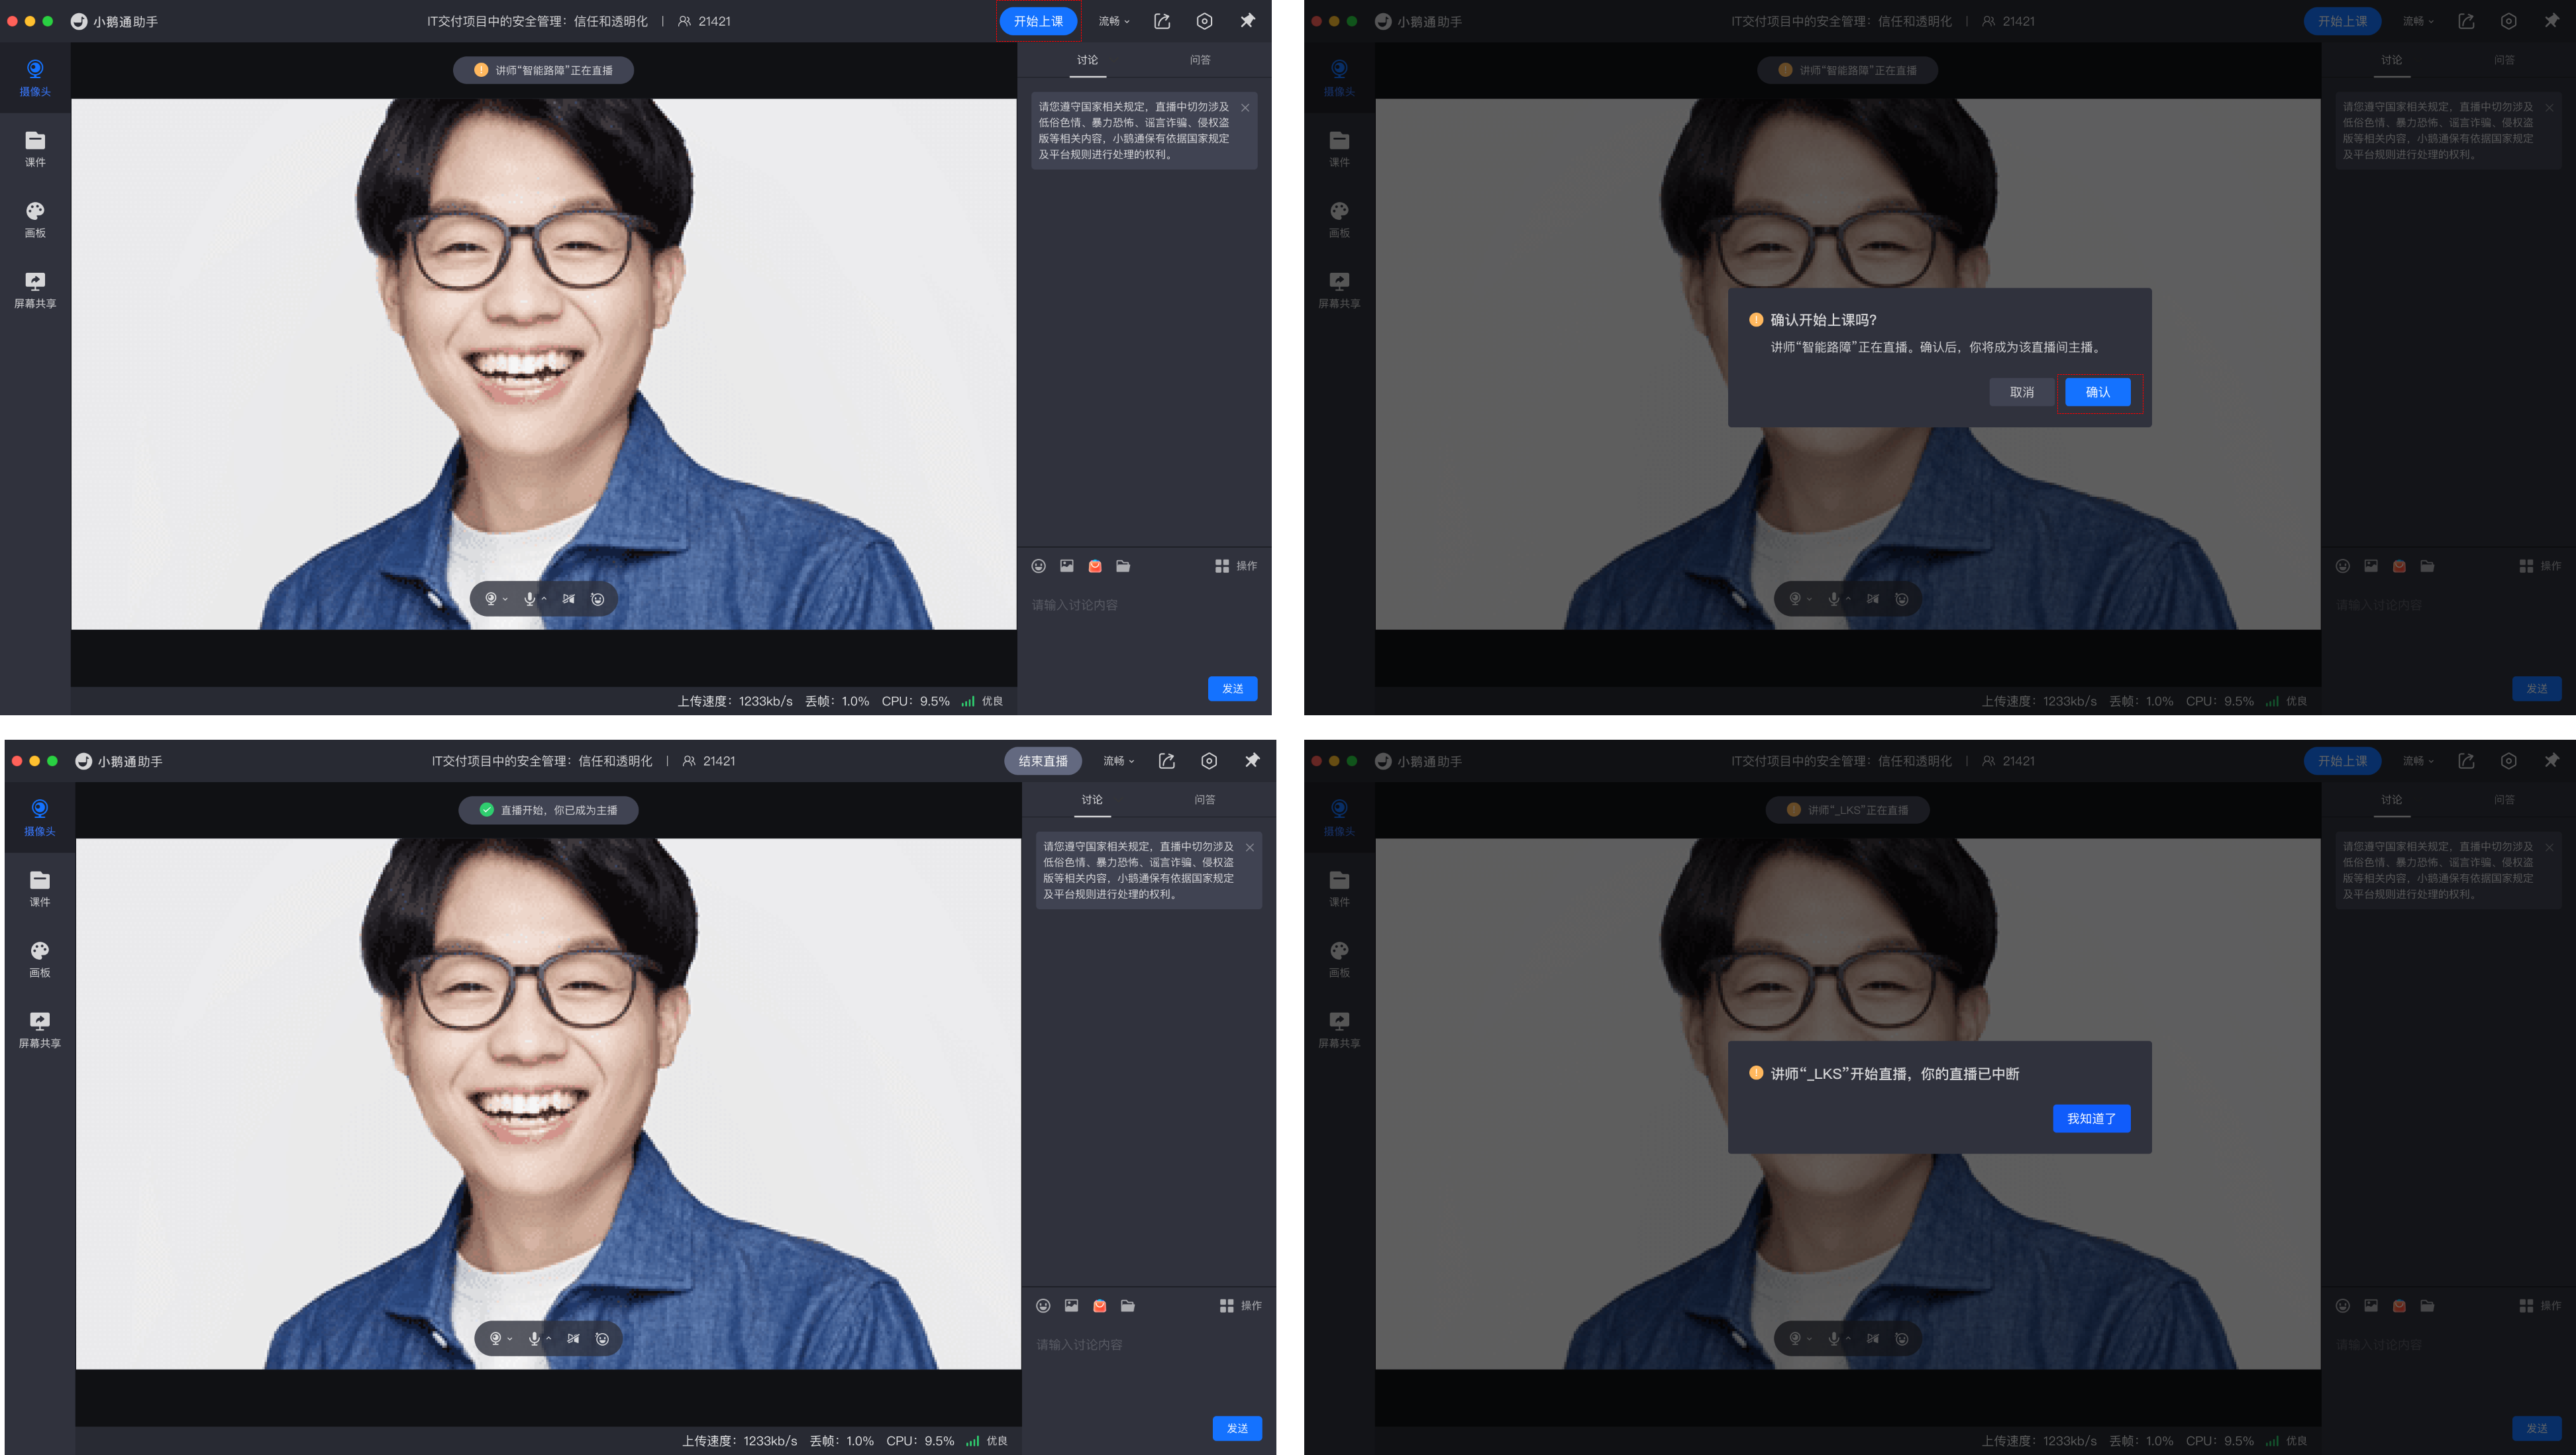
(4) Web version
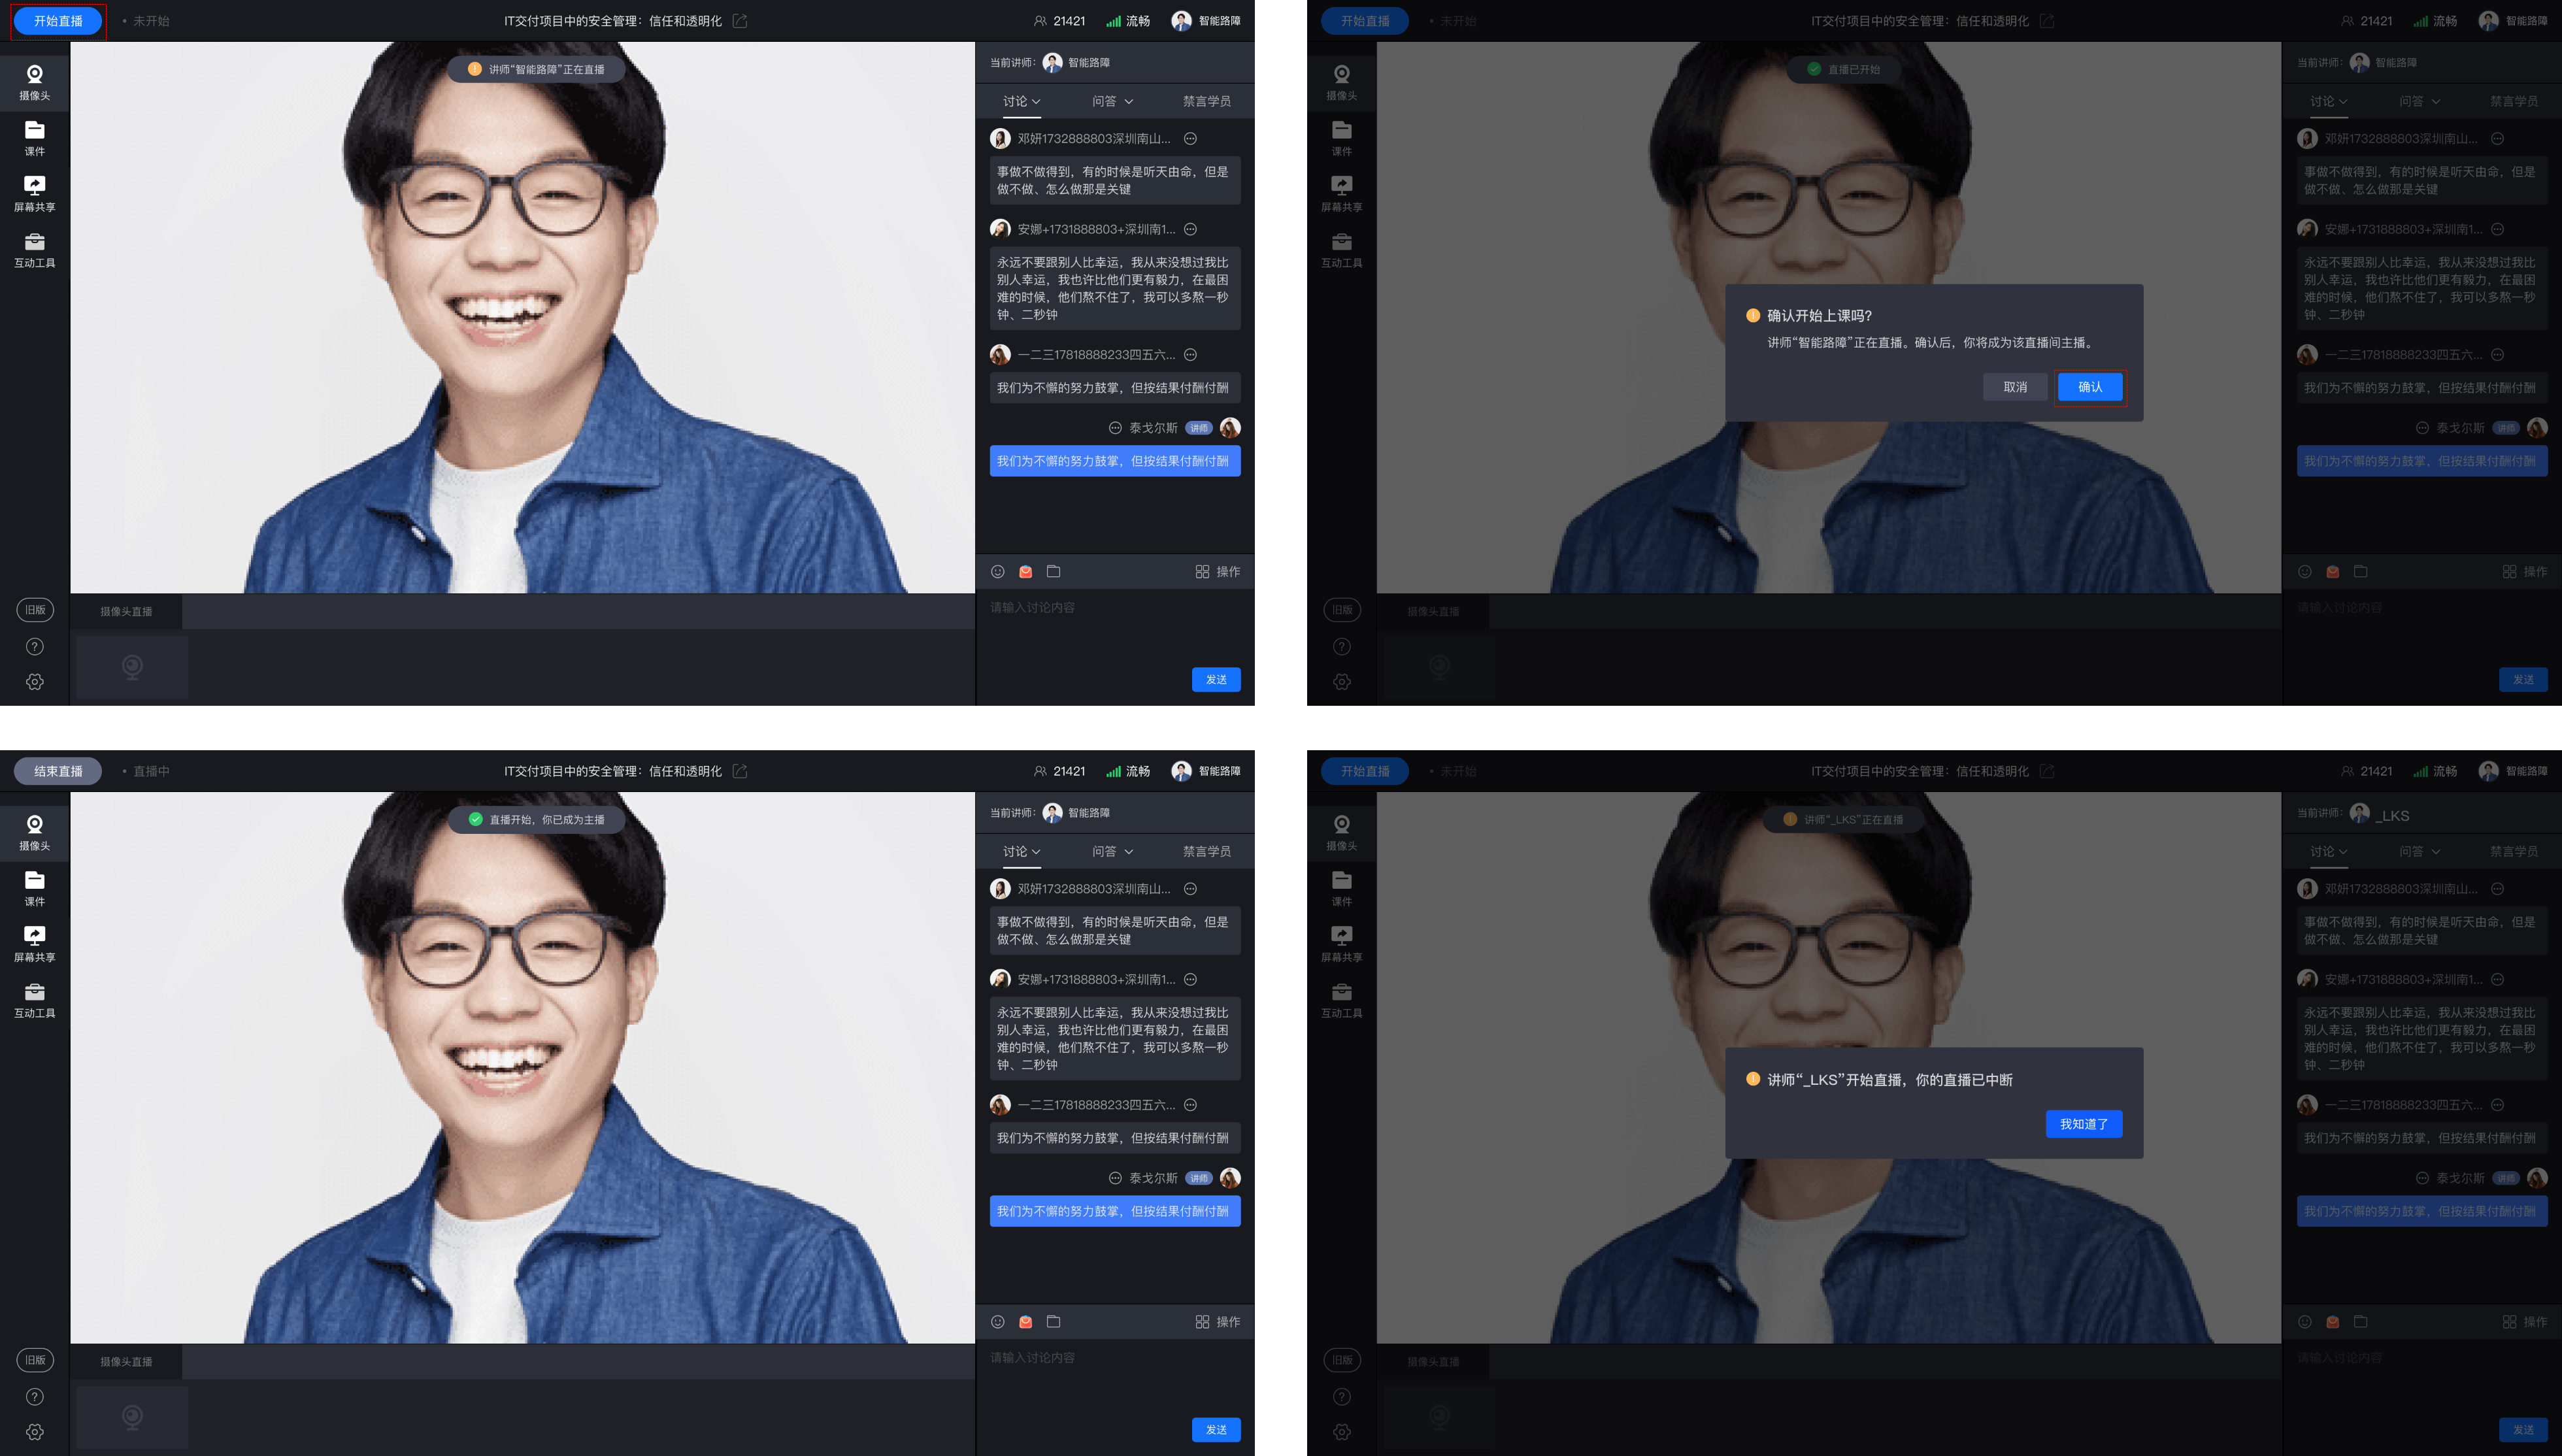
When another instructor is currently live, a prompt bar will appear on the right side. > Click "Start Live Broadcast". > Click "Confirm" in the secondary confirmation pop - up window. > Successfully grab the live broadcast and start the live broadcast. (The instructor whose live broadcast is grabbed will be prompted with a pop - up window to end the live broadcast.)
VI. Frequently Asked Questions
1. Does pushing live - stream content using third - party live - broadcast tools such as OBS support the "Live Broadcast Grab" feature?
Answer: No. OBS is a third - party live - stream pushing tool without business attributes. Therefore, when an instructor is using the OBS terminal for live broadcasting, the eLink live - broadcast tool cannot grab the live broadcast. It can only start pushing the live - stream after the OBS live - stream pushing ends.
2. After having their live broadcast grabbed, can the instructor whose live broadcast was grabbed take it back?
Answer: Yes. The "Live Broadcast Grab" is a common capability. As long as an instructor has the permission to start a live broadcast, they will automatically be granted the "right to grab the live broadcast".
【OBS】 Keeps prompting that the connection has been disconnected?
1. Confirm whether the server and streaming key in the streaming settings are filled in correctly:
2. Confirm whether the corresponding live streaming room has ended:
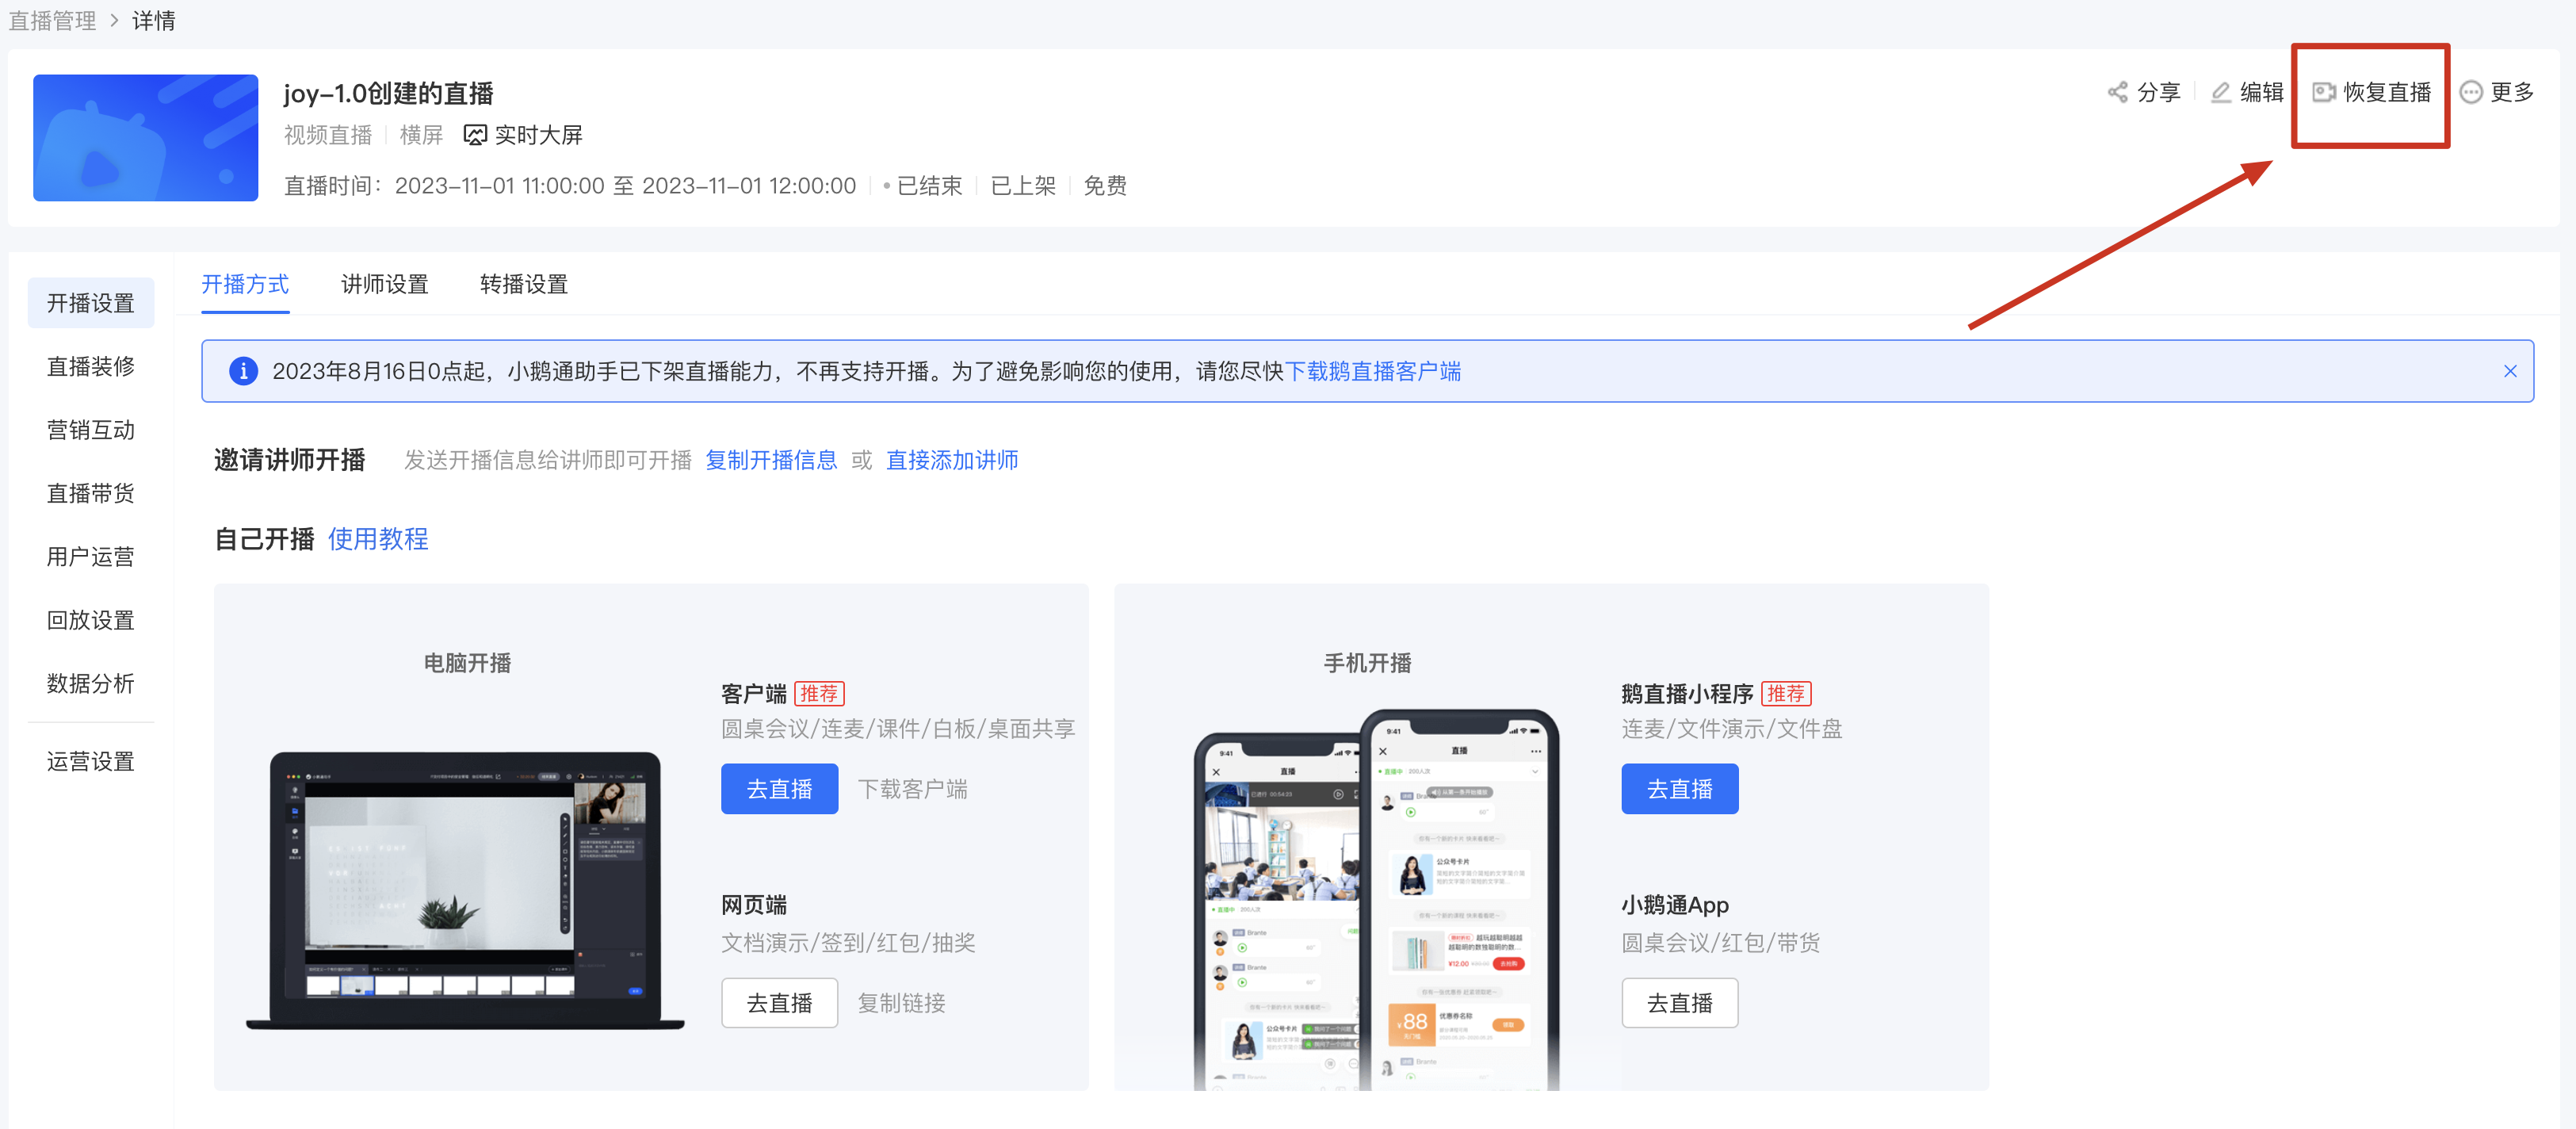
The ended live streaming room will be prohibited from streaming. You need toresume the live streambefore you can stream again.
【OBS】How to monitor the quality of live streaming?
I.Enable local recording function to back up live streaming content:
Enable recording during the live stream to back up the live content locally, preventing the generated replay from not meeting expectations due to exceptions during the live stream. 
II. Explanation of parameters affecting streaming quality:
Explanation of each parameter in the following figure:
CPU: The CPU usage rate of the machine occupied by OBS. A higher value indicates a higher load, which may lead to abnormal audio - video encoding. During the live stream, the picture may appear frozen, and the audio and video may be out of sync.
Small square: An indicator of the network status. Green represents excellent, yellow represents average, and red represents a poor current network. This may cause the live stream to freeze.
Actual streaming bitrate: The actual network upload during the live stream. When this value is less than the preset streaming bitrate, it may result in insufficient upload frame rate and bitrate. During the live stream, the picture may appear frozen, and the audio and video may be out of sync.

III. How to monitor streaming quality during a live stream:
Click 'View' in the OBS menu and select 'Statistics' to monitor the streaming quality in real - time:
1. High CPU usage:

Reducethe video bitrate (excessive reduction may affect picture clarity) or switch the encoder to the hardware encoding mode. Refer to the following figure:

Reduce the video resolution (excessive reduction may affect picture clarity) orreduce the frame rate (excessive reduction may affect picture smoothness) 
2. High values of frames missed due to rendering delay and frames missed due to encoding delay 
If the encoder selected in 'Settings' -> 'Output' is software:

Check if the CPU load of the machine is too high:
Mac (Activity Monitor):

Windows(Task Manager):

Try toreduce the video bitrate, change the encoder to hardware, and reduce the video resolutionand see if it recovers
If the encoder selected in 'Settings' -> 'Output' is hardware: 
Check if the CPU load of the machine is too high:
Mac (Activity Monitor):

Windows(Task Manager):

Try toreduce the video bitrate, change the encoder to hardware, and reduce the video resolutionand see if it recovers
If the encoder was changed from software encoding to hardware encoding due to an exception, it means that neither the CPU nor the GPU of the machine meets the current live - streaming scenario. You can try to further reduce the video bitrate and resolution or use a device with better performance for live streaming.
High value of dropped frames (network)
There is a network problem. Check if the network fluctuates. It is recommended to use a wired Ethernet cable to connect the device for live streaming.
Summary: 
Live broadcast configuration
How to set up live guests?
I. Feature Introduction
After creating a live stream, you can invite others to become instructors in the live - streaming room. Instructors can enter the live stream without purchasing the paid content and have the functions of speaking, managing the live stream, and ending the live stream.
II. Purpose of Use
Merchants can use this feature to configure live - stream instructors.
III. Use Scenarios
Video live stream, audio live stream, recorded live stream
IV. Operation Path
Merchant side:
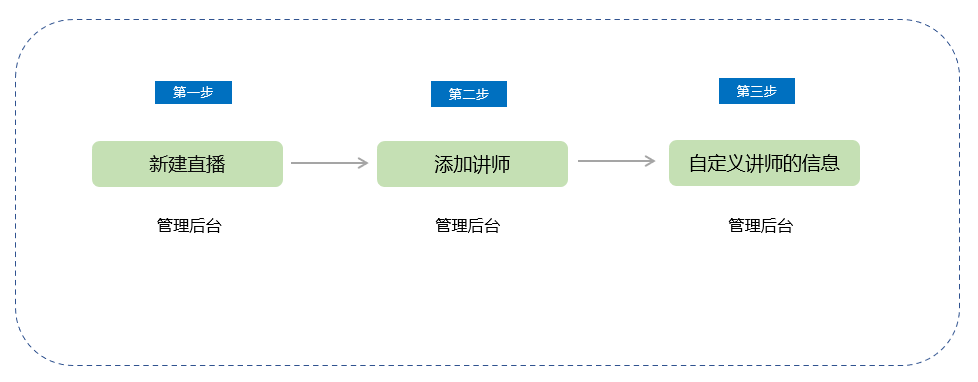
Path 1: Create a new live stream → Add an instructor → Customize the instructor's information
Path 2: Live - streaming room details/Live - stream list → Instructor settings → Customize the instructor's information
V. Usage Tutorial
Path 1:
Step 1: Create a new live stream
You can add an instructor on the new live - stream creation page.
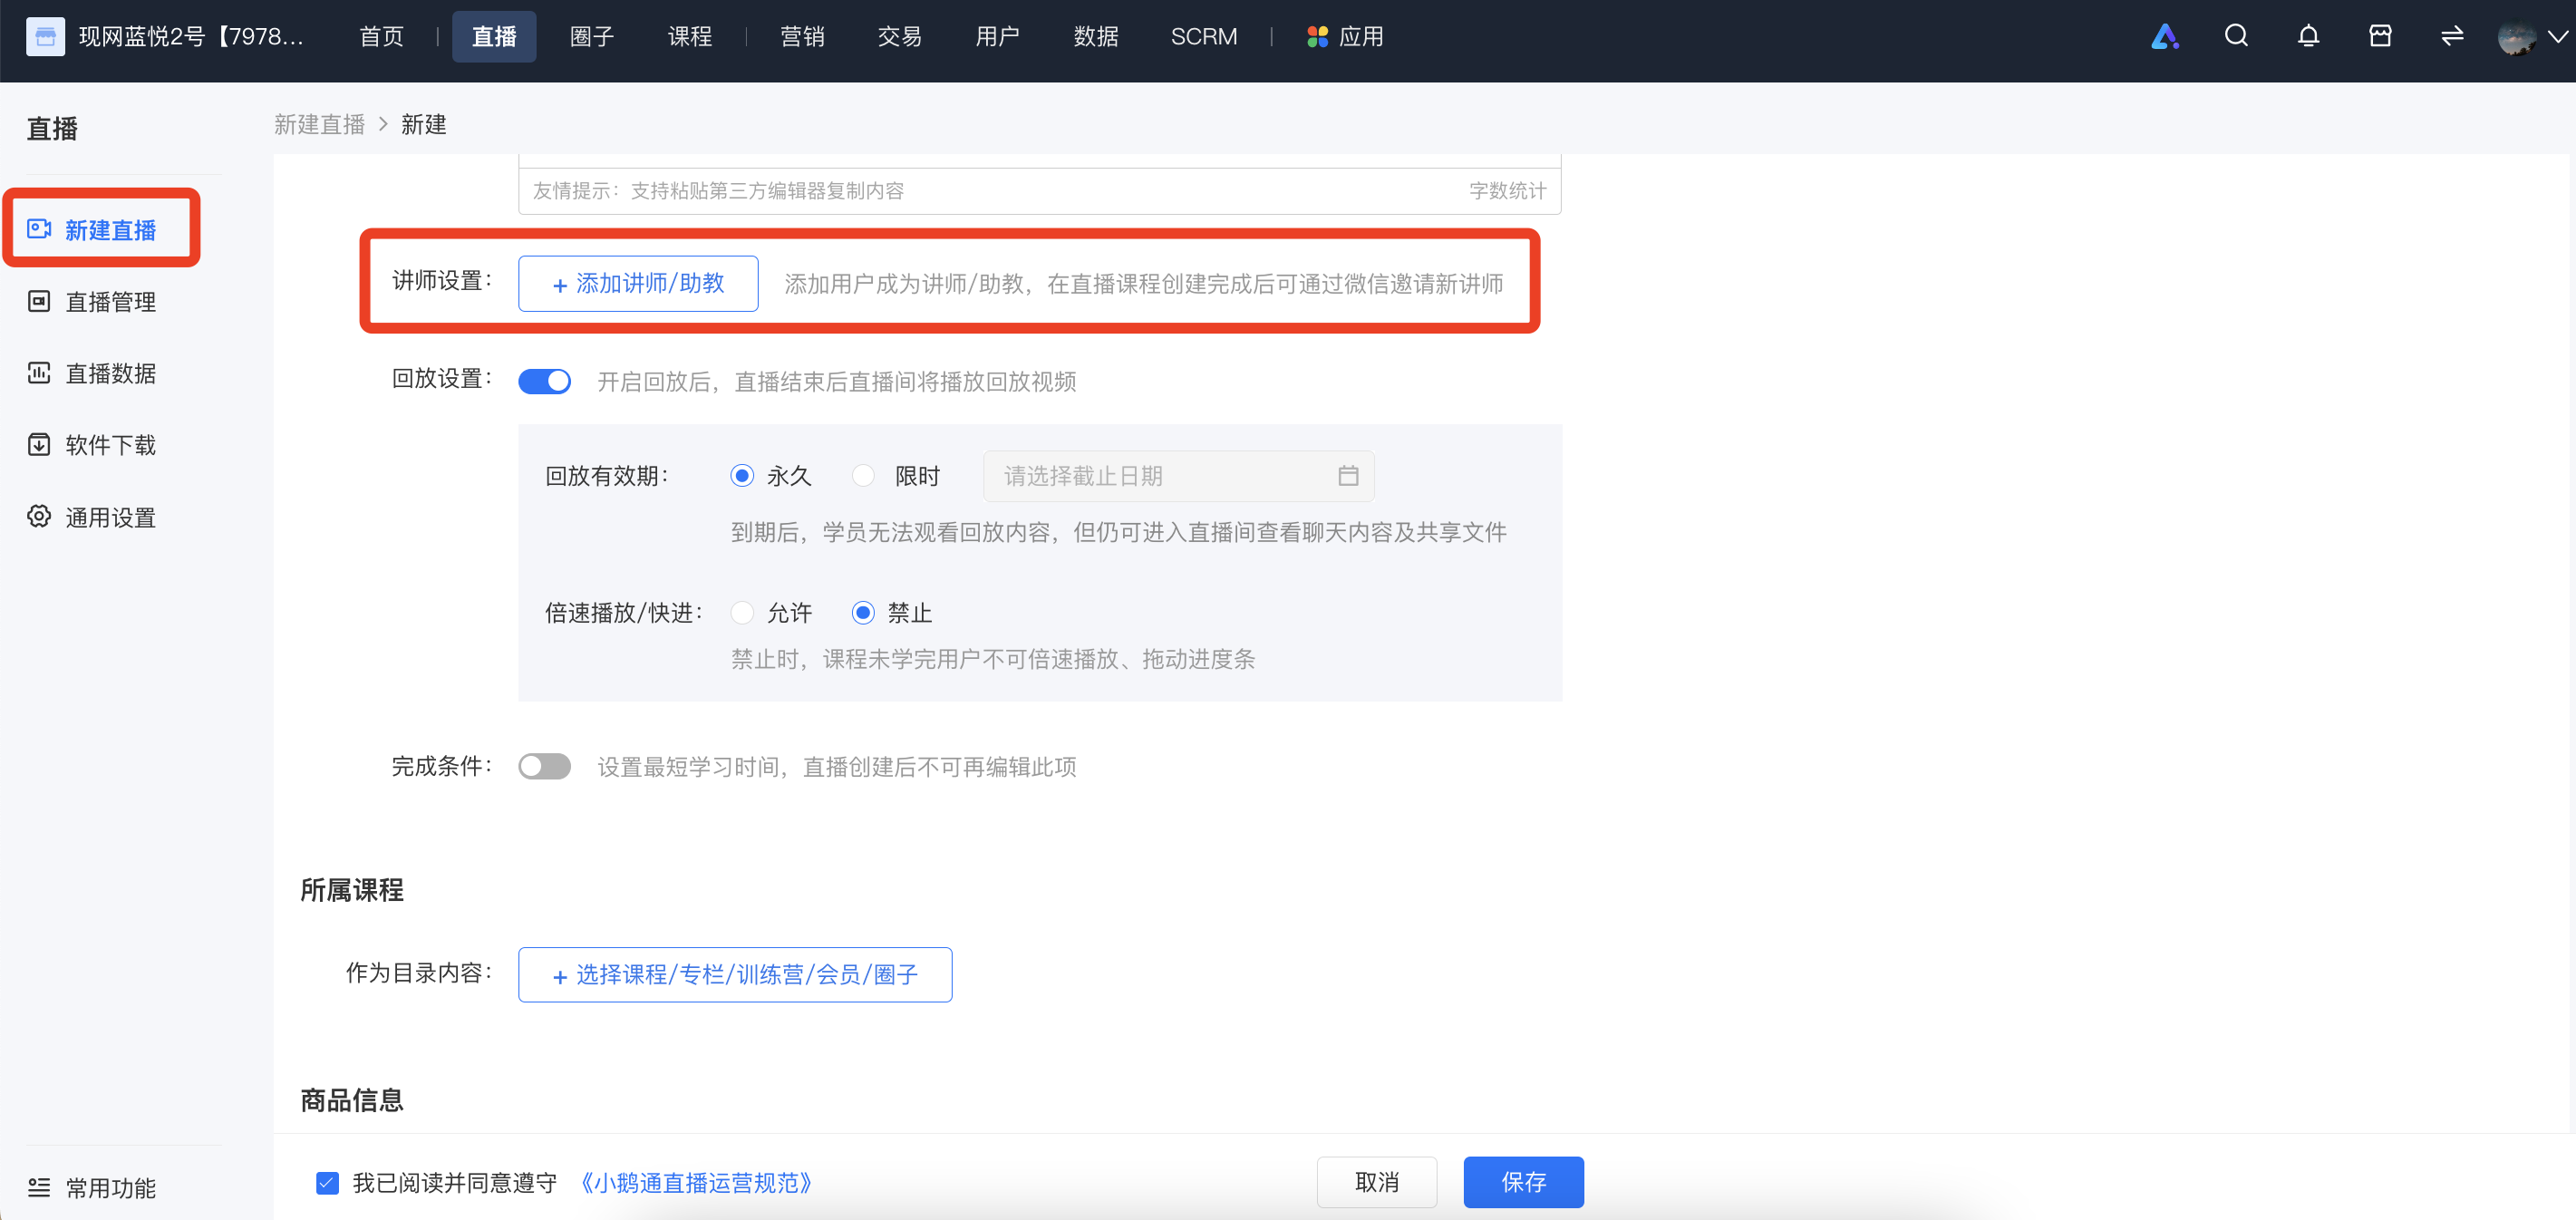
Step 2: Add an instructor
Log in to the elink management console and click 'Add an instructor' on the new live - stream creation page.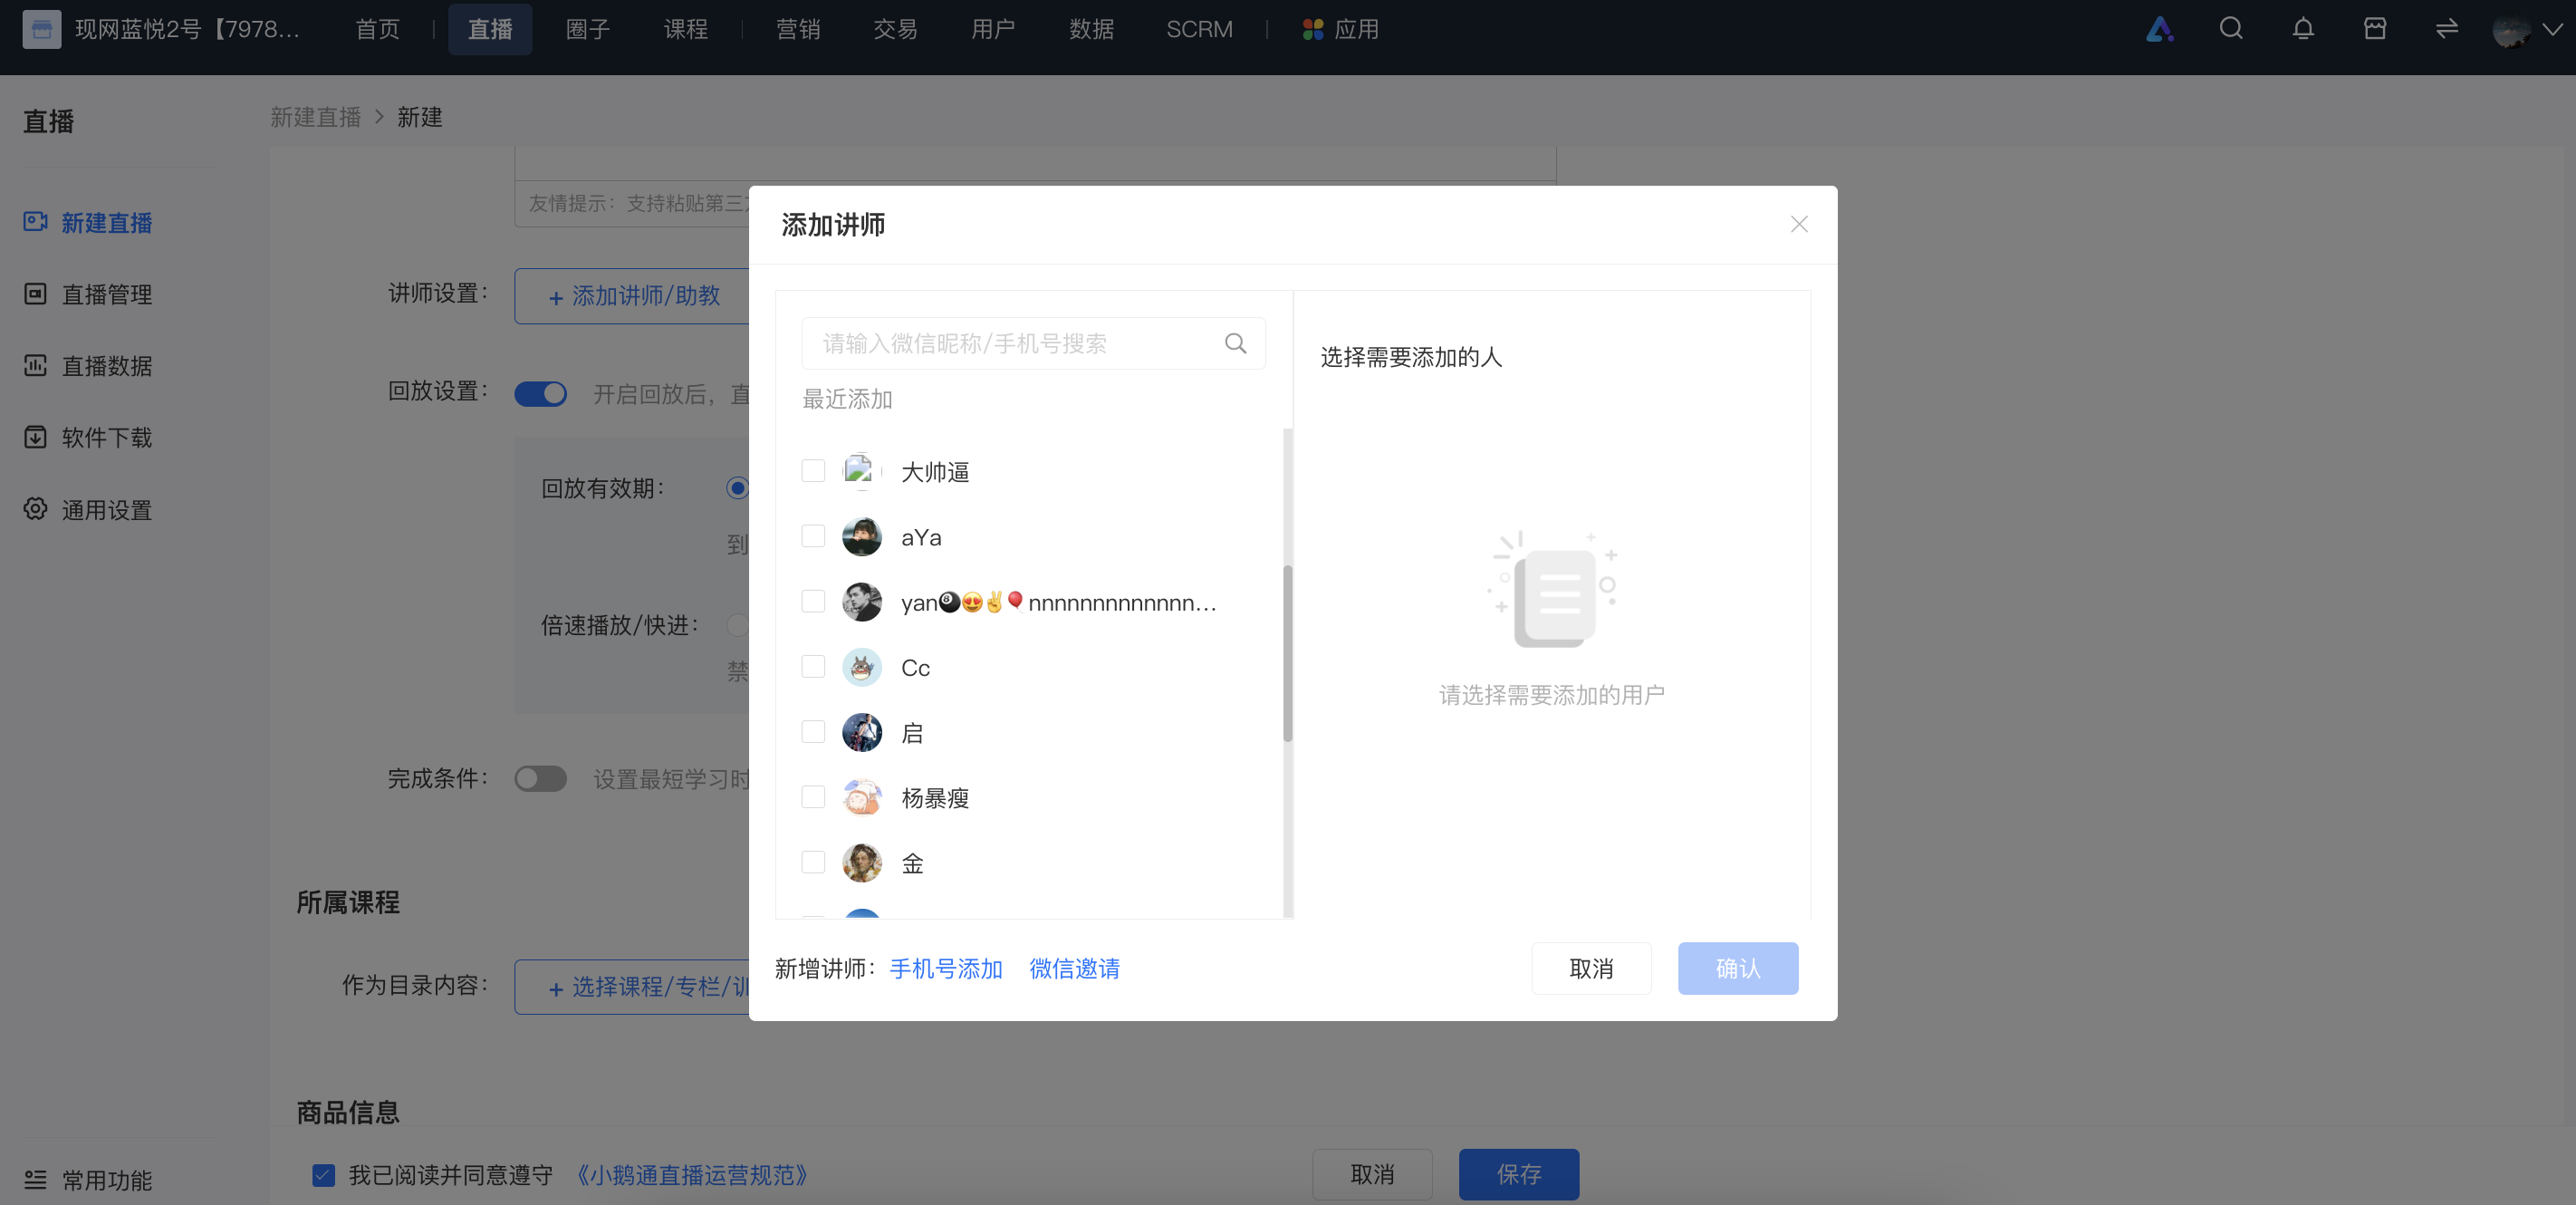
(1) You can select the recently added instructors to add as instructors.
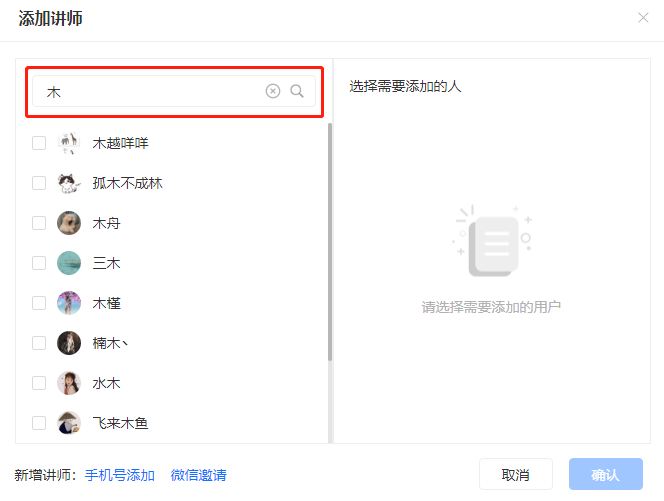
(2) Add someone as an instructor by searching the store's historical access records in the search box.
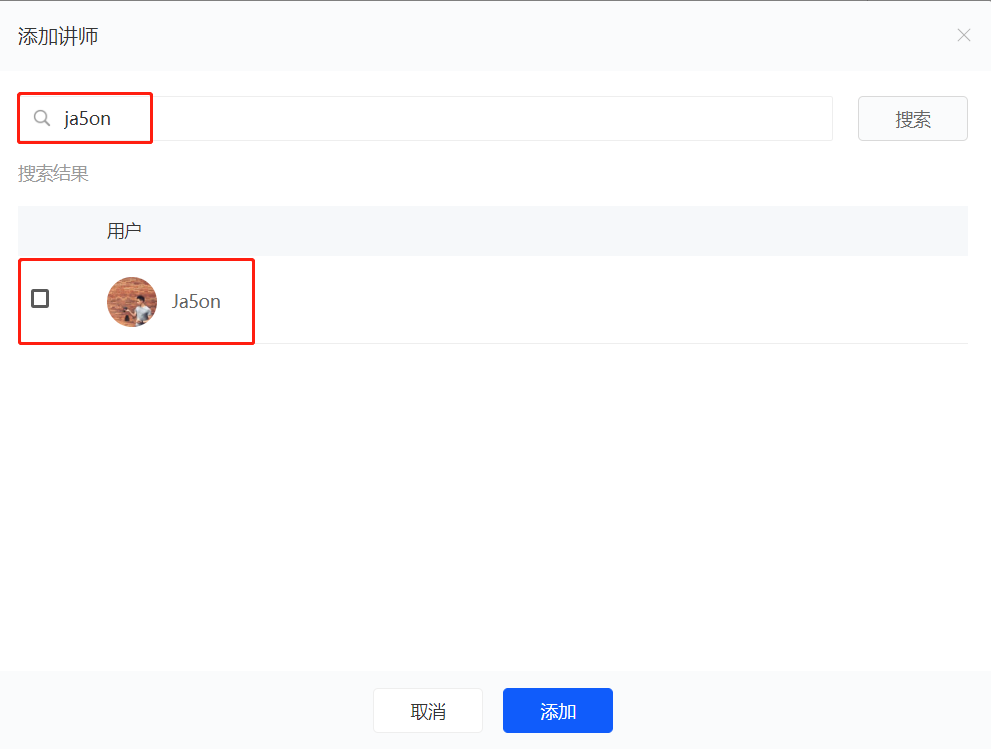
Step 3: Customize the instructor's information
1) Tag setting: After adding an instructor, you can set tags for the added instructor (titles/designations in the live - streaming room, such as 'Instructor', 'Teaching Assistant') through tags, which is convenient for distinguishing when there are multiple instructors in the live - streaming room.
2) Accept student tips: You can control the tip switch for the corresponding instructor. After the tip switch is turned off, the tip entry for this instructor in the live - streaming room will be hidden.
3) Remove: Support the operation of removing an instructor.
Path 2:
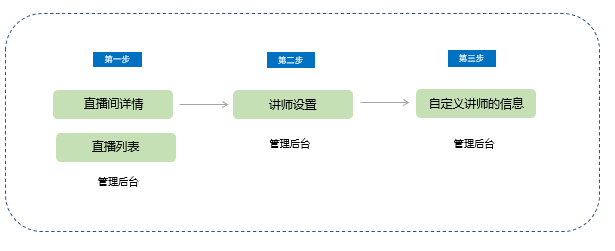
Step 1: Live - streaming room details page
On the live - stream list page, find the live stream for which you need to set an instructor, click 'Details', and enter the 'Live - streaming room details page'.
Find 'Live - streaming room settings' - 'Course settings' and locate the instructor setting function.
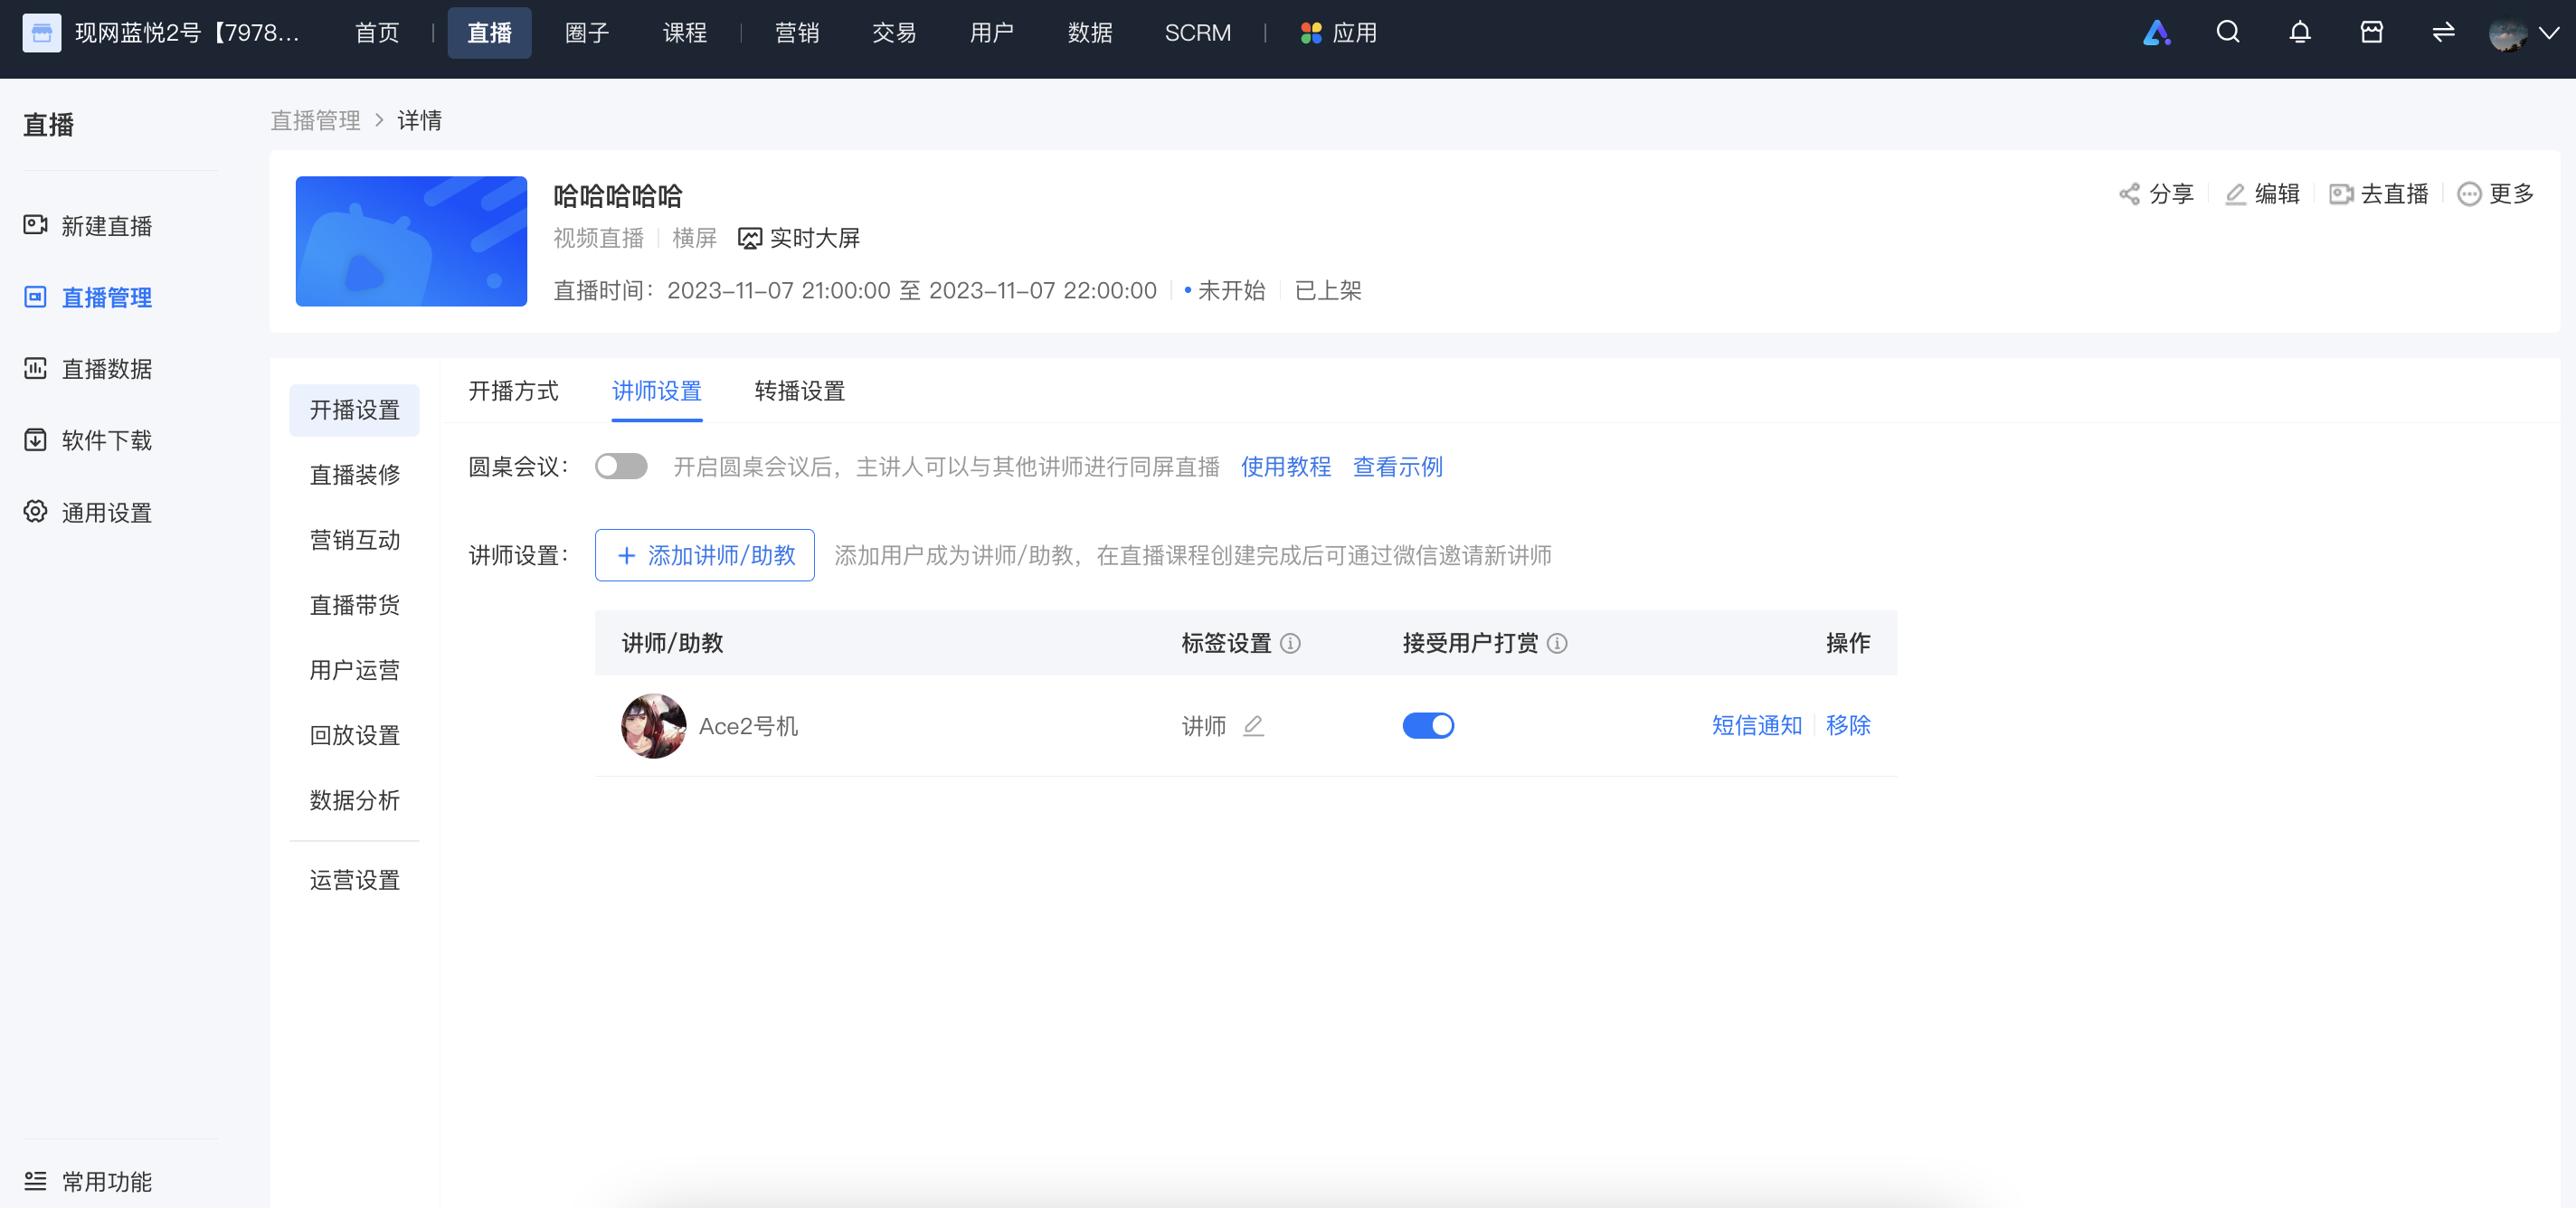
Step 2: Set an instructor
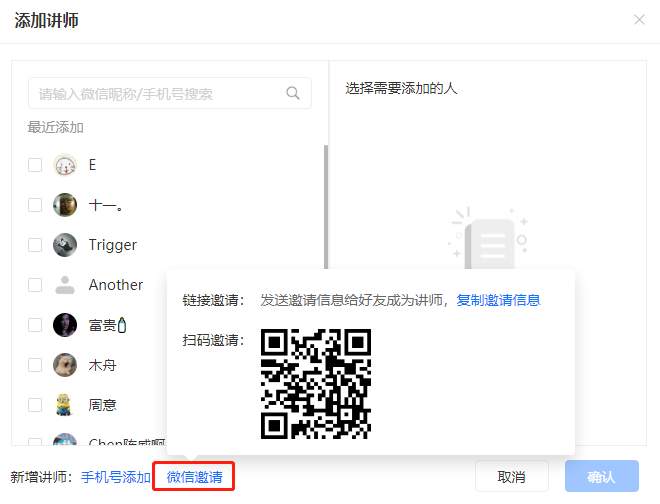
Click 'Instructor settings', and a window for instructor settings will pop up.
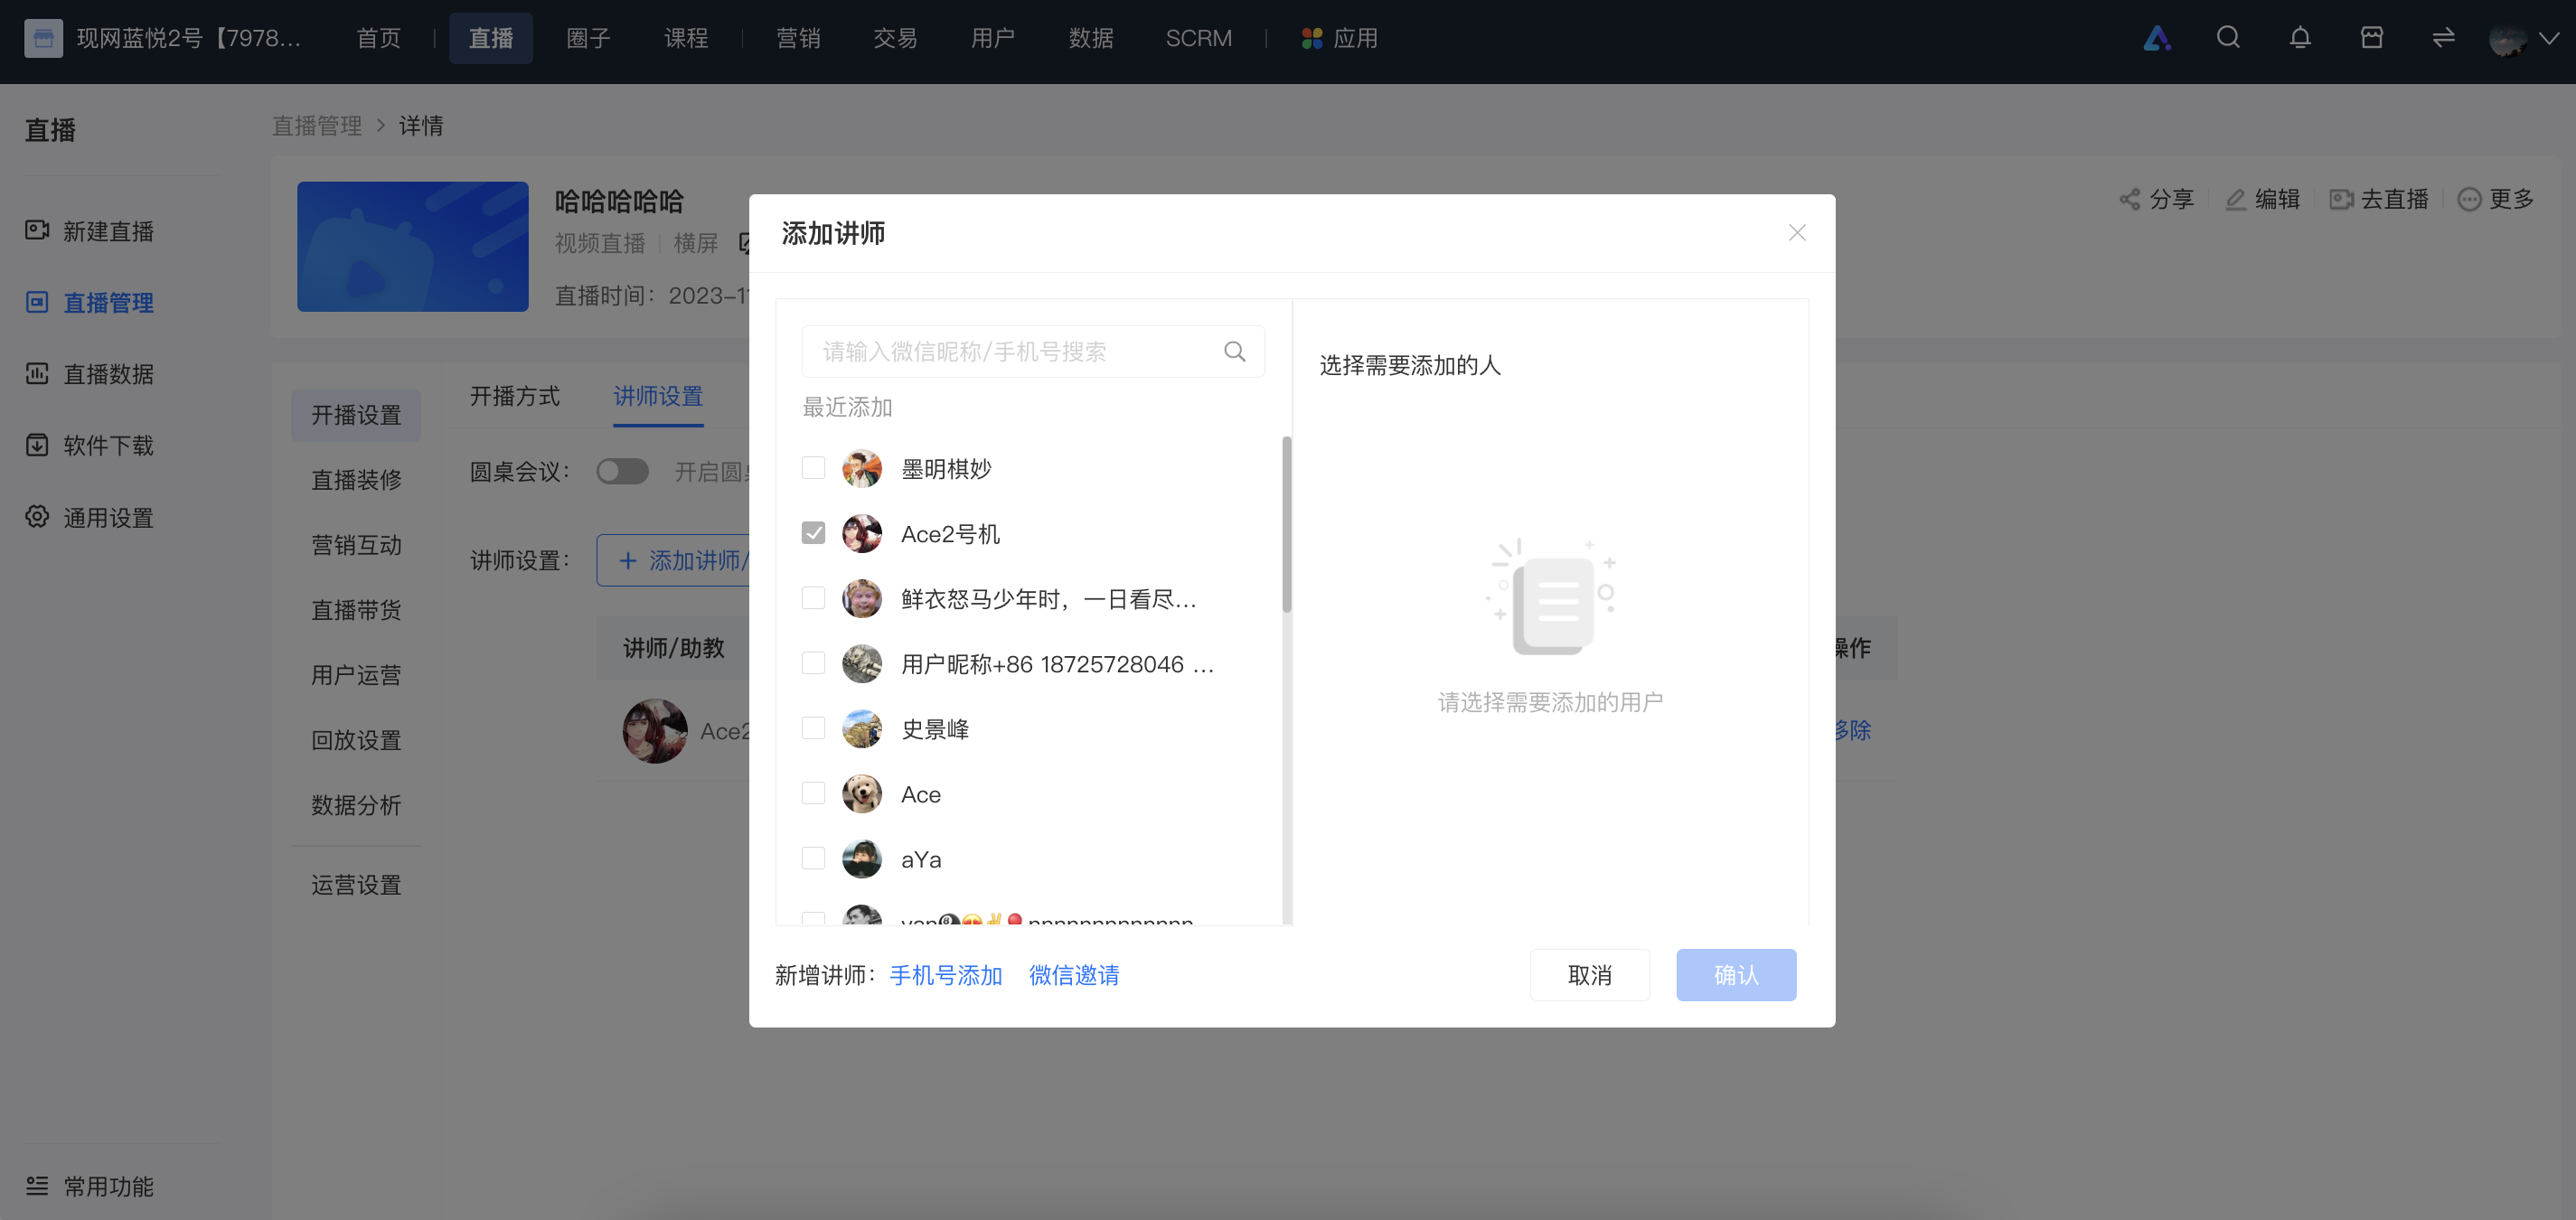
(1) Add someone as an instructor by searching the historical access records in the search box.
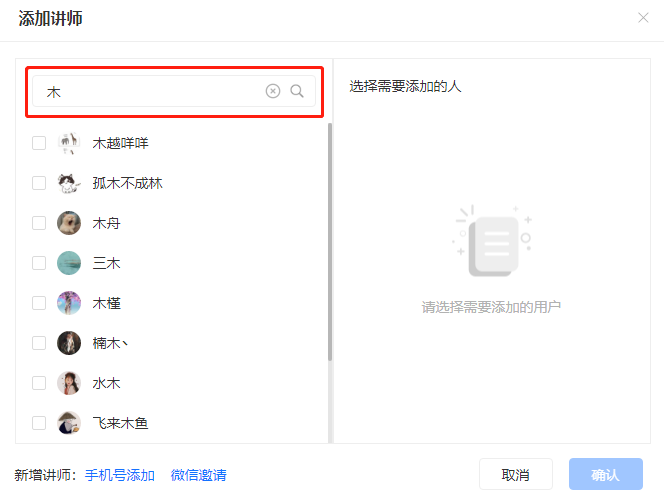
(2) Invite friends to become instructors via WeChat QR code.
Step 3: Customize the instructor's information
1) Tag setting: After adding an instructor, you can set tags for the added instructor (titles/designations in the live - streaming room, such as 'Instructor', 'Teaching Assistant') through tags, which is convenient for distinguishing when there are multiple instructors in the live - streaming room.
2) Accept student tips: You can control the tip switch for the corresponding instructor. After the tip switch is turned off, the tip entry for this instructor in the live - streaming room will be hidden.
3) Remove: Support the operation of removing an instructor.
During live streaming, can I customize the waiting screen when the instructor is away?
Temporarily does not support setting instructors.LeaveWaiting screen and copywriting.
How many course start reminders can be pushed during a live stream?
After setting the push time for the course start reminder of the corresponding live streaming course for a single live stream, it onlywillpush a course start reminder to the corresponding users once before the live stream.
Can invitation codes be used for live courses?
Yes, paid courses (including live commerce, columns, memberships, e-books, videos, audios, images & texts, premium memberships, communities, mega-columns, and Campss) can all use invitation codes.
How can instructors enter the live streaming room?
First, you need to invite the instructor to become a live-streaming guest or instructor. You can add and set the instructor through [More/Details] - [Instructor Settings] in the live stream.
Audio live stream:
1. You can send the live-streaming room sharing link to the instructor. The instructor can open the link on the WeChat H5 page to enter the mobile H5 live-streaming room for the live stream.
2. In the store management background, for the corresponding live-streaming task, select [More -> Go Live], copy the link on the web version, and send it to the instructor to open in the browser.
Video live stream:
For the corresponding live-streaming task, click [More -> Go Live], and select one of the five live-streaming tools: [Web version, Client, OBS, Mobile APP, WeChat Mini Program] to start the live stream.
Can elink's live streaming share the instructor's desktop?
Yes, after creating a video live stream, you can use the web version, elink Live client, elink Assistant client, and OBS to share the instructor's desktop for real-time live teaching.
Which browser should I use for live streaming?
It is recommended that instructors use Google Chrome when conducting live broadcasts on the computer web version. We highly recommend using the elink Live client on your computer for a more stable experience.
If the scheduled live streaming time has not started, can the instructor start the live stream in the live room in advance?
Before the live stream of the Online Store starts, the instructor can also conduct a live stream in the live room in advance. The video of the live stream before the official start can also be viewed in the live replay.
Can watermarks be added to live streams?
Yes, you can directly enable the watermark display setting at [Homepage -> Store Settings -> Feature Configuration -> Watermark Settings].Live streams created afterward will display the watermark.
Can multiple instructors be set up in the live streaming room?
Yes, in a single live stream, go to [Details/More] -> [Live Stream Settings]-> [Lecturer Settings]You can add multiple lecturers as guests in the live stream room. Alternatively, you can directly add multiple lecturers on the details page when editing the live stream.
Where can I modify the nickname and avatar of the live stream instructor?
Instructors can access the merchant's WeChat H5 store on their mobile phones to make modifications. The modification steps are as follows: Navigate to the merchant's [Store Homepage] → [My] → [Edit Personal Information] interface to make changes.
Can live streams be set to not allow playback?
For video live streaming, you can set whether to allow trainees to watch the replay in [Details] → [Replay Settings].
For audio live streaming, it is temporarily not supported to set the live stream as non - replayable. You can watch the replay after the live stream ends.
Can the live stream room copywriting be modified?
Live stream room announcements can be modified.
You can make unified settings for all live stream room announcements in [Live Streaming > General Settings > Live Stream Room Announcements]. This setting will take effect for all live stream rooms that have not had their announcements set individually (there may be a certain delay before the modified announcements take effect).
You can also set a separate live stream announcement for a single live stream room in [Live Stream Details - Live Stream Decoration - Live Stream Room Information - Live Stream Room Announcement]. This setting will only take effect for this specific live stream room.
How to set up a live stream instructor and how to invite instructors (guests)?
Setting Method 1: Add and manage guests directly on the management console
In the live broadcast list, find the live room, go to [Management -> Live broadcast settings -> Instructor settings], and click [Add instructor/teaching assistant]. You can directly select an instructor added previously, or click [Add by mobile phone number] and enter the mobile phone number to grant instructor permissions.


Setting Method 2: Invite guests on the WeChat side
In the live broadcast list, find the live room, go to [Management -> Live broadcast settings -> Instructor settings], click [Add instructor/teaching assistant], and then click [Invite via WeChat]. An invitation guide pop - up window will appear. You can add instructors through the following methods:
1. Invitation via link: You can click "Copy invitation information -> Copy all information", and then send it to the instructor via other chat tools such as WeChat on your mobile phone. The instructor can become an instructor by clicking the link in the text.
2. Invitation via QR code: You can scan the QR code with your WeChat on your mobile phone to invite yourself or others to become an instructor.
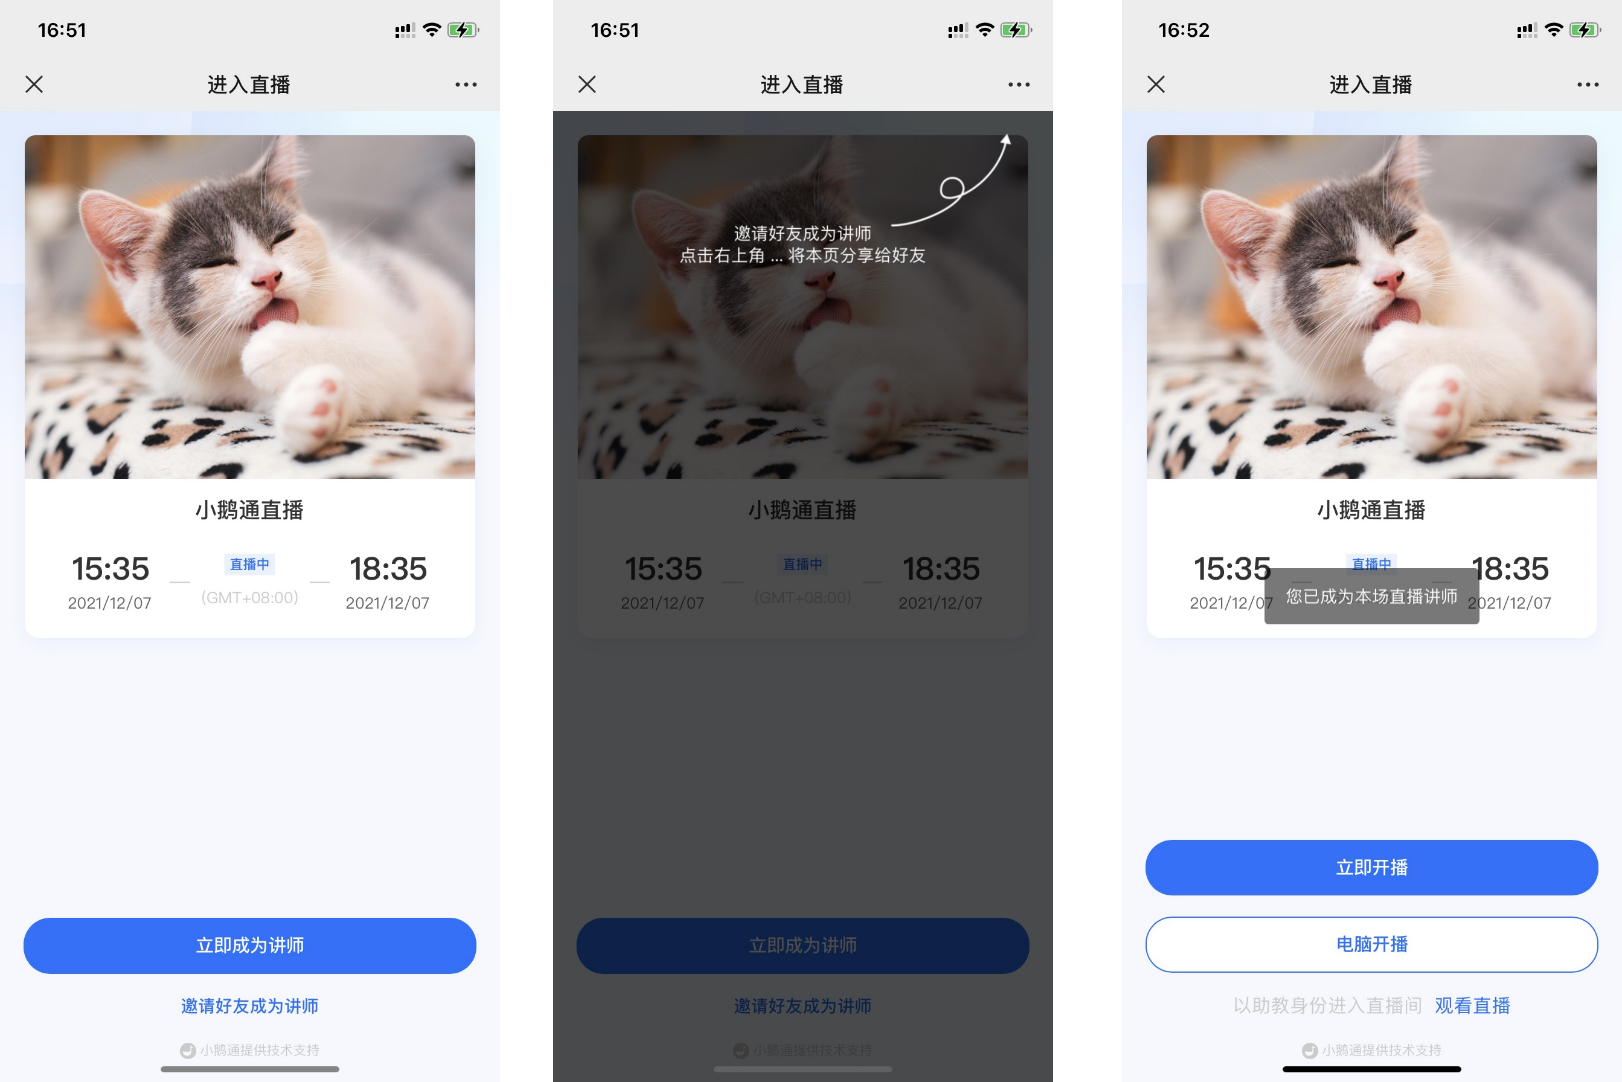
After scanning the QR code on your mobile phone
(1) You can click "Become an instructor immediately" to grant yourself instructor permissions.
(2) You can click "Invite friends to become instructors". After clicking, click the top - right corner to forward the page to your friends. Your friends can become instructors after accepting the invitation.

Tutorial on Setting the Live Streaming Room Cover
I.Function Introduction
Cover Settings for the Live Streaming Room
II.Purpose of Use
Display the page effect of the live streaming room and package the live streaming room.
III.Usage Scenarios
Cover settings for video live streaming, audio live streaming, and recorded live streaming.
IV.Usage Tutorial
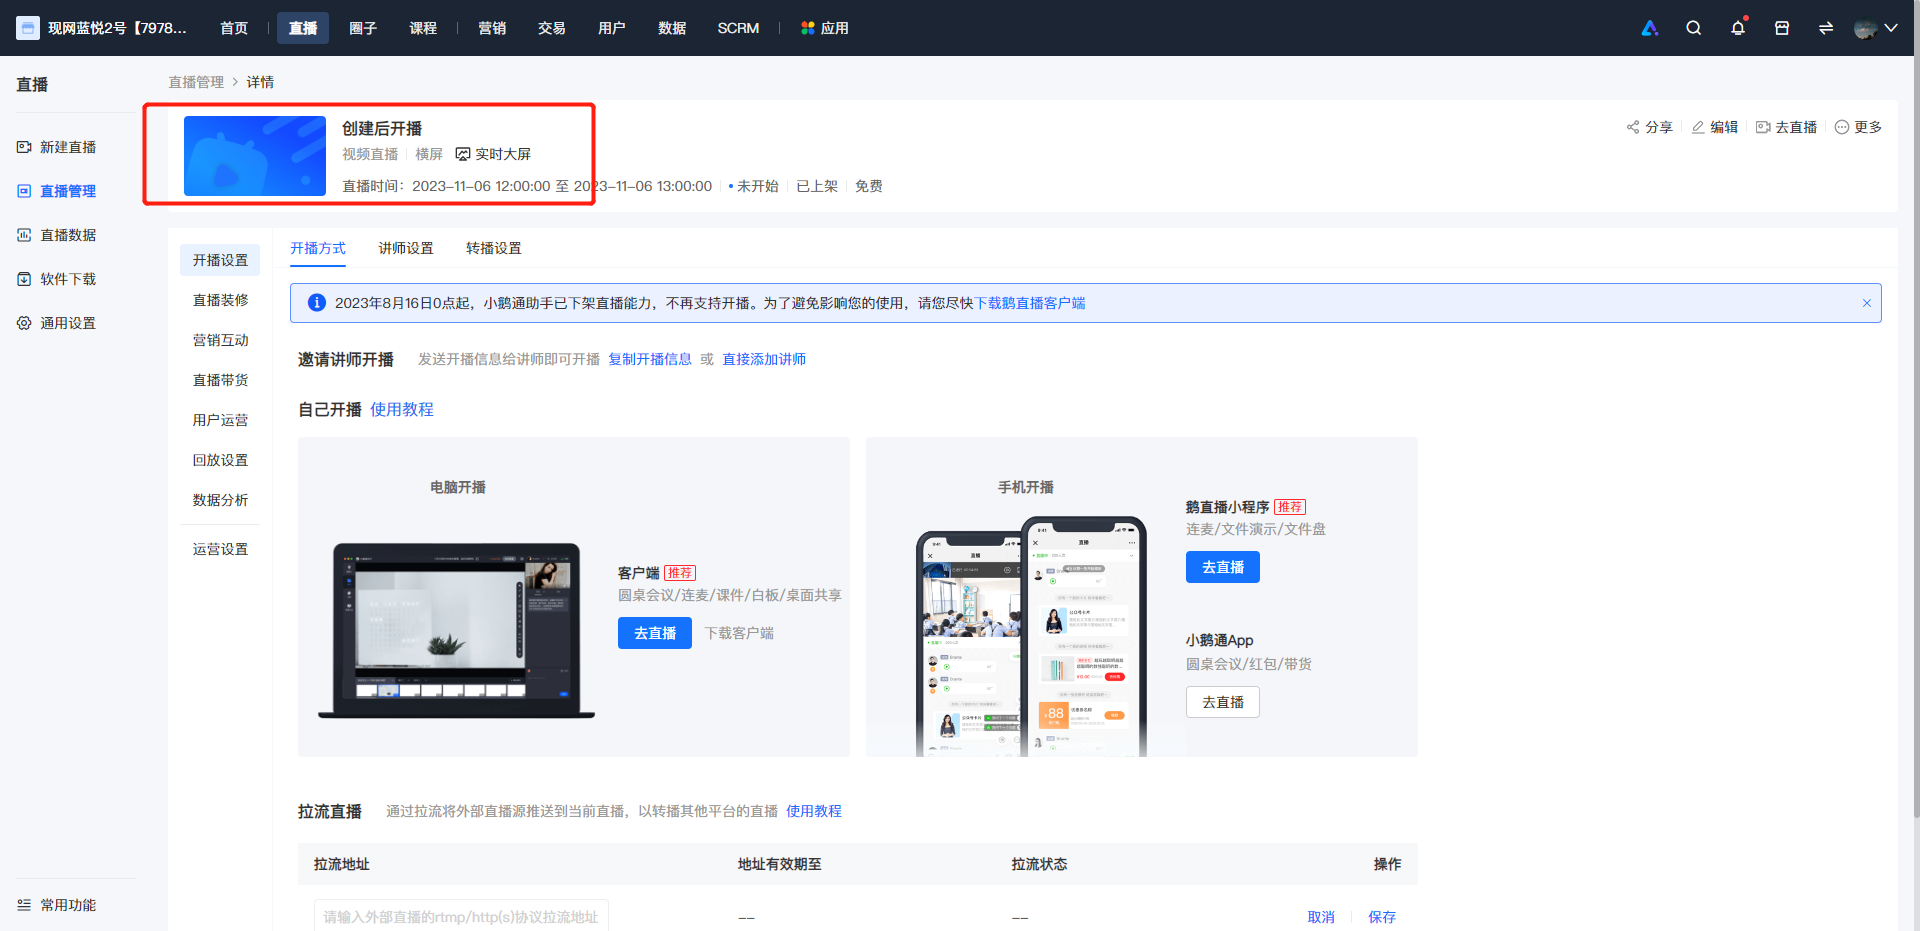
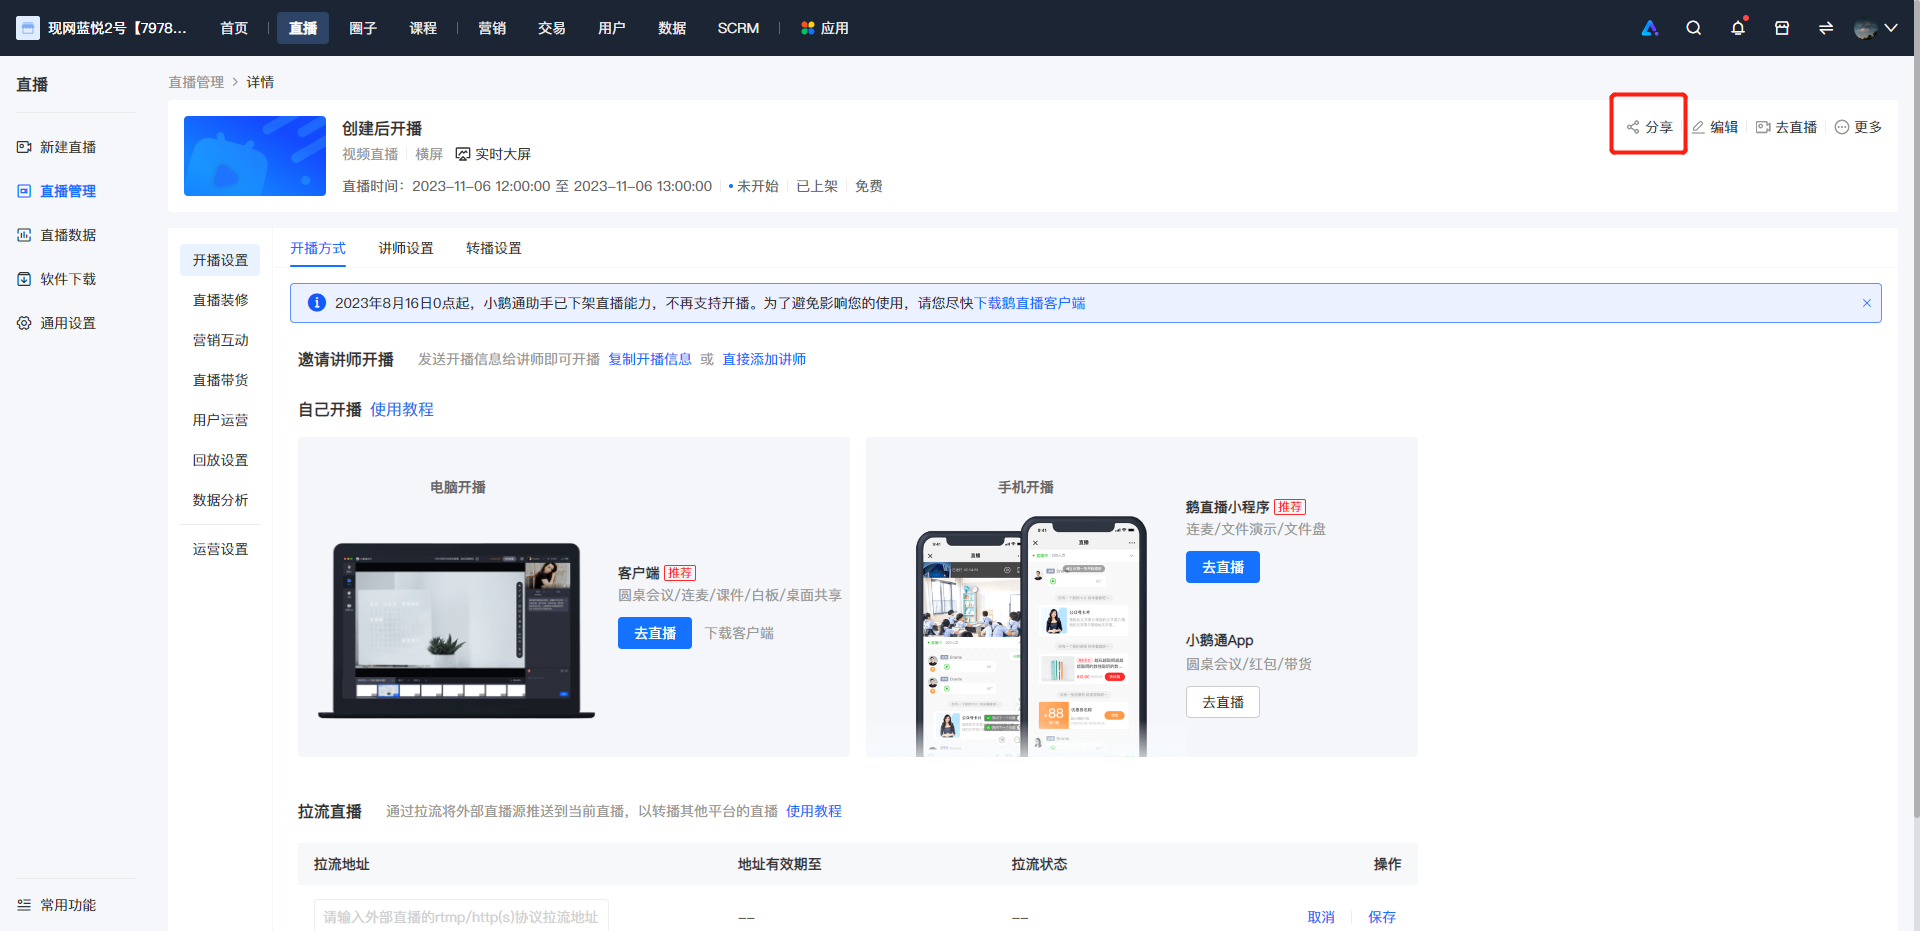
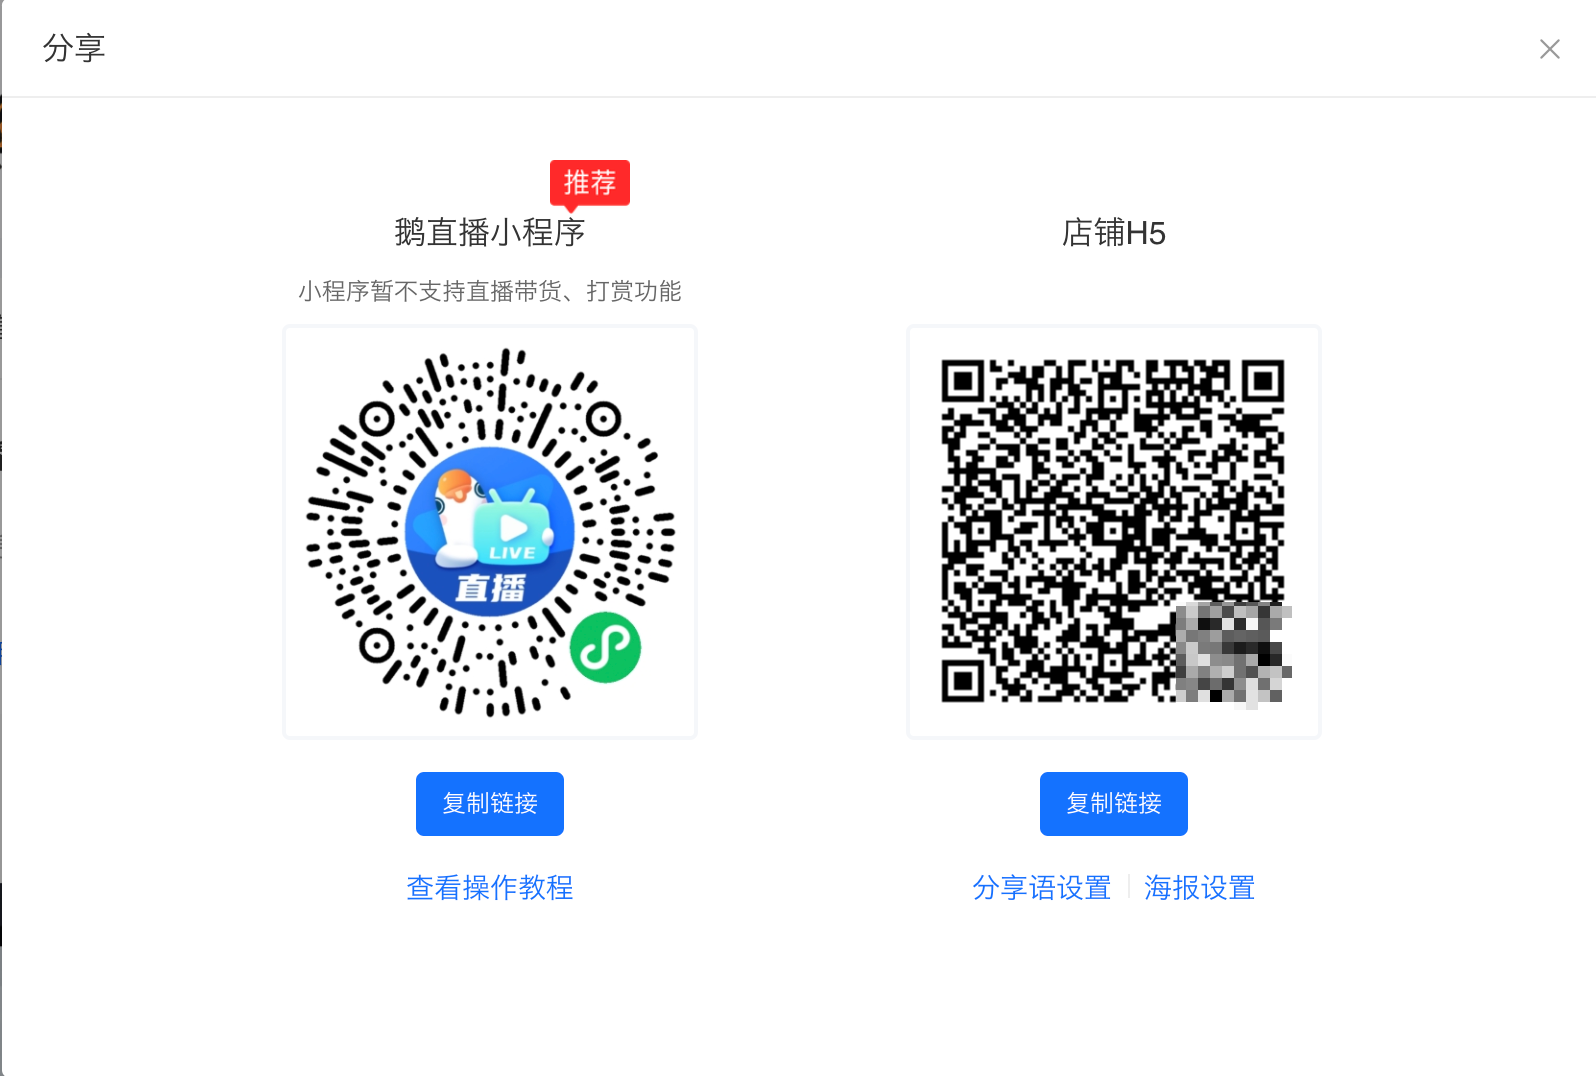
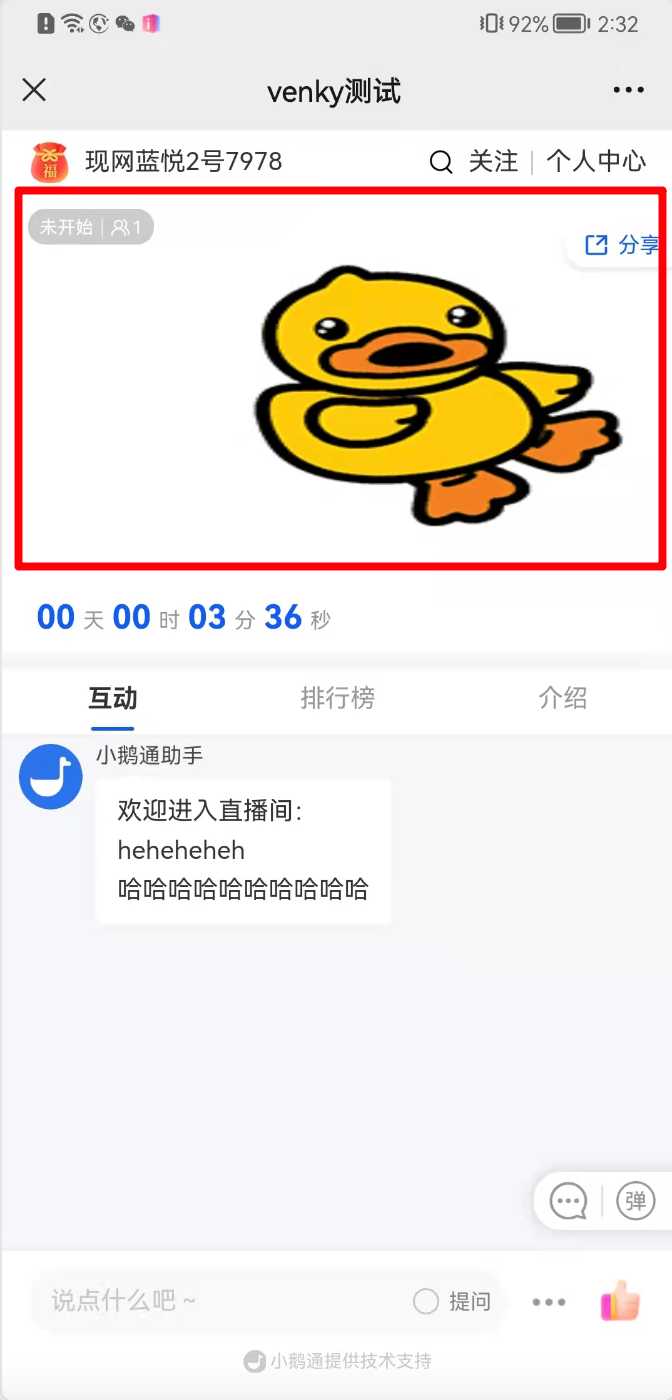
1.Upload the cover on the page for creating a new live stream.
2.Display on the live stream details page.
Tutorial on Using Live Streaming Watermark Settings
I. Feature Introduction
Add watermarks to live videos
II. Purpose of Use
Prevent merchants' live videos from being illegally recorded
III. Scope of Application
Scope of application for live watermark settings: Real-time video live streaming, Desktop sharing live streaming
IV. Operation Path
Merchant side:Live Streaming Management→General Settings→ Watermark Settings
V. Usage Tutorial
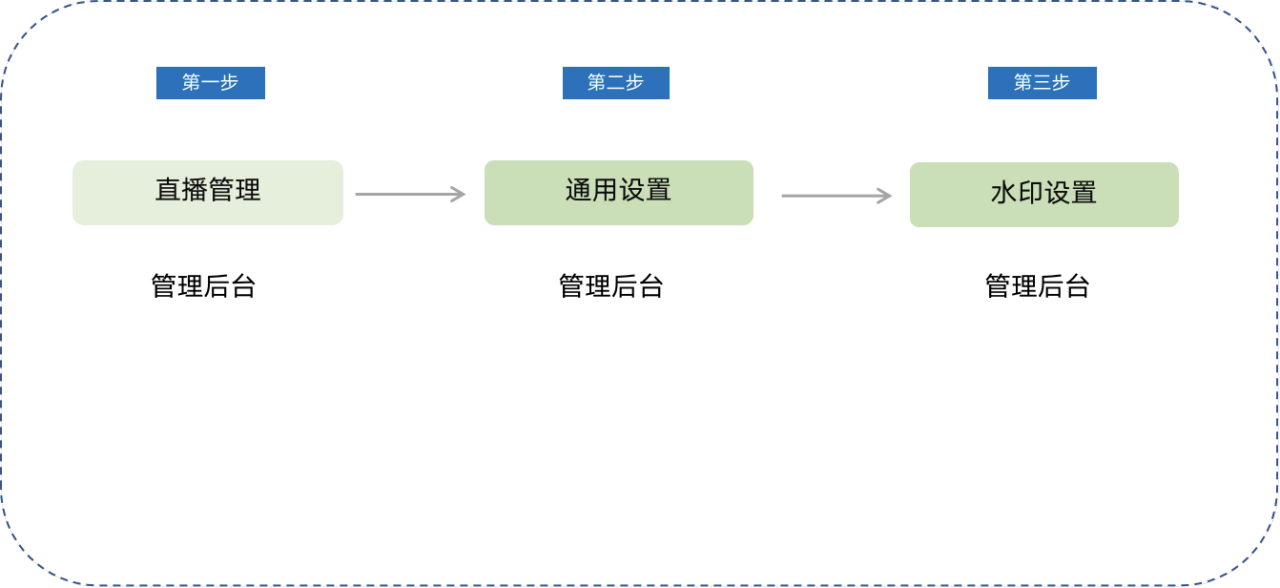
Step 1:Live Streaming Management (Store Management Console)
Enter the live streaming management page
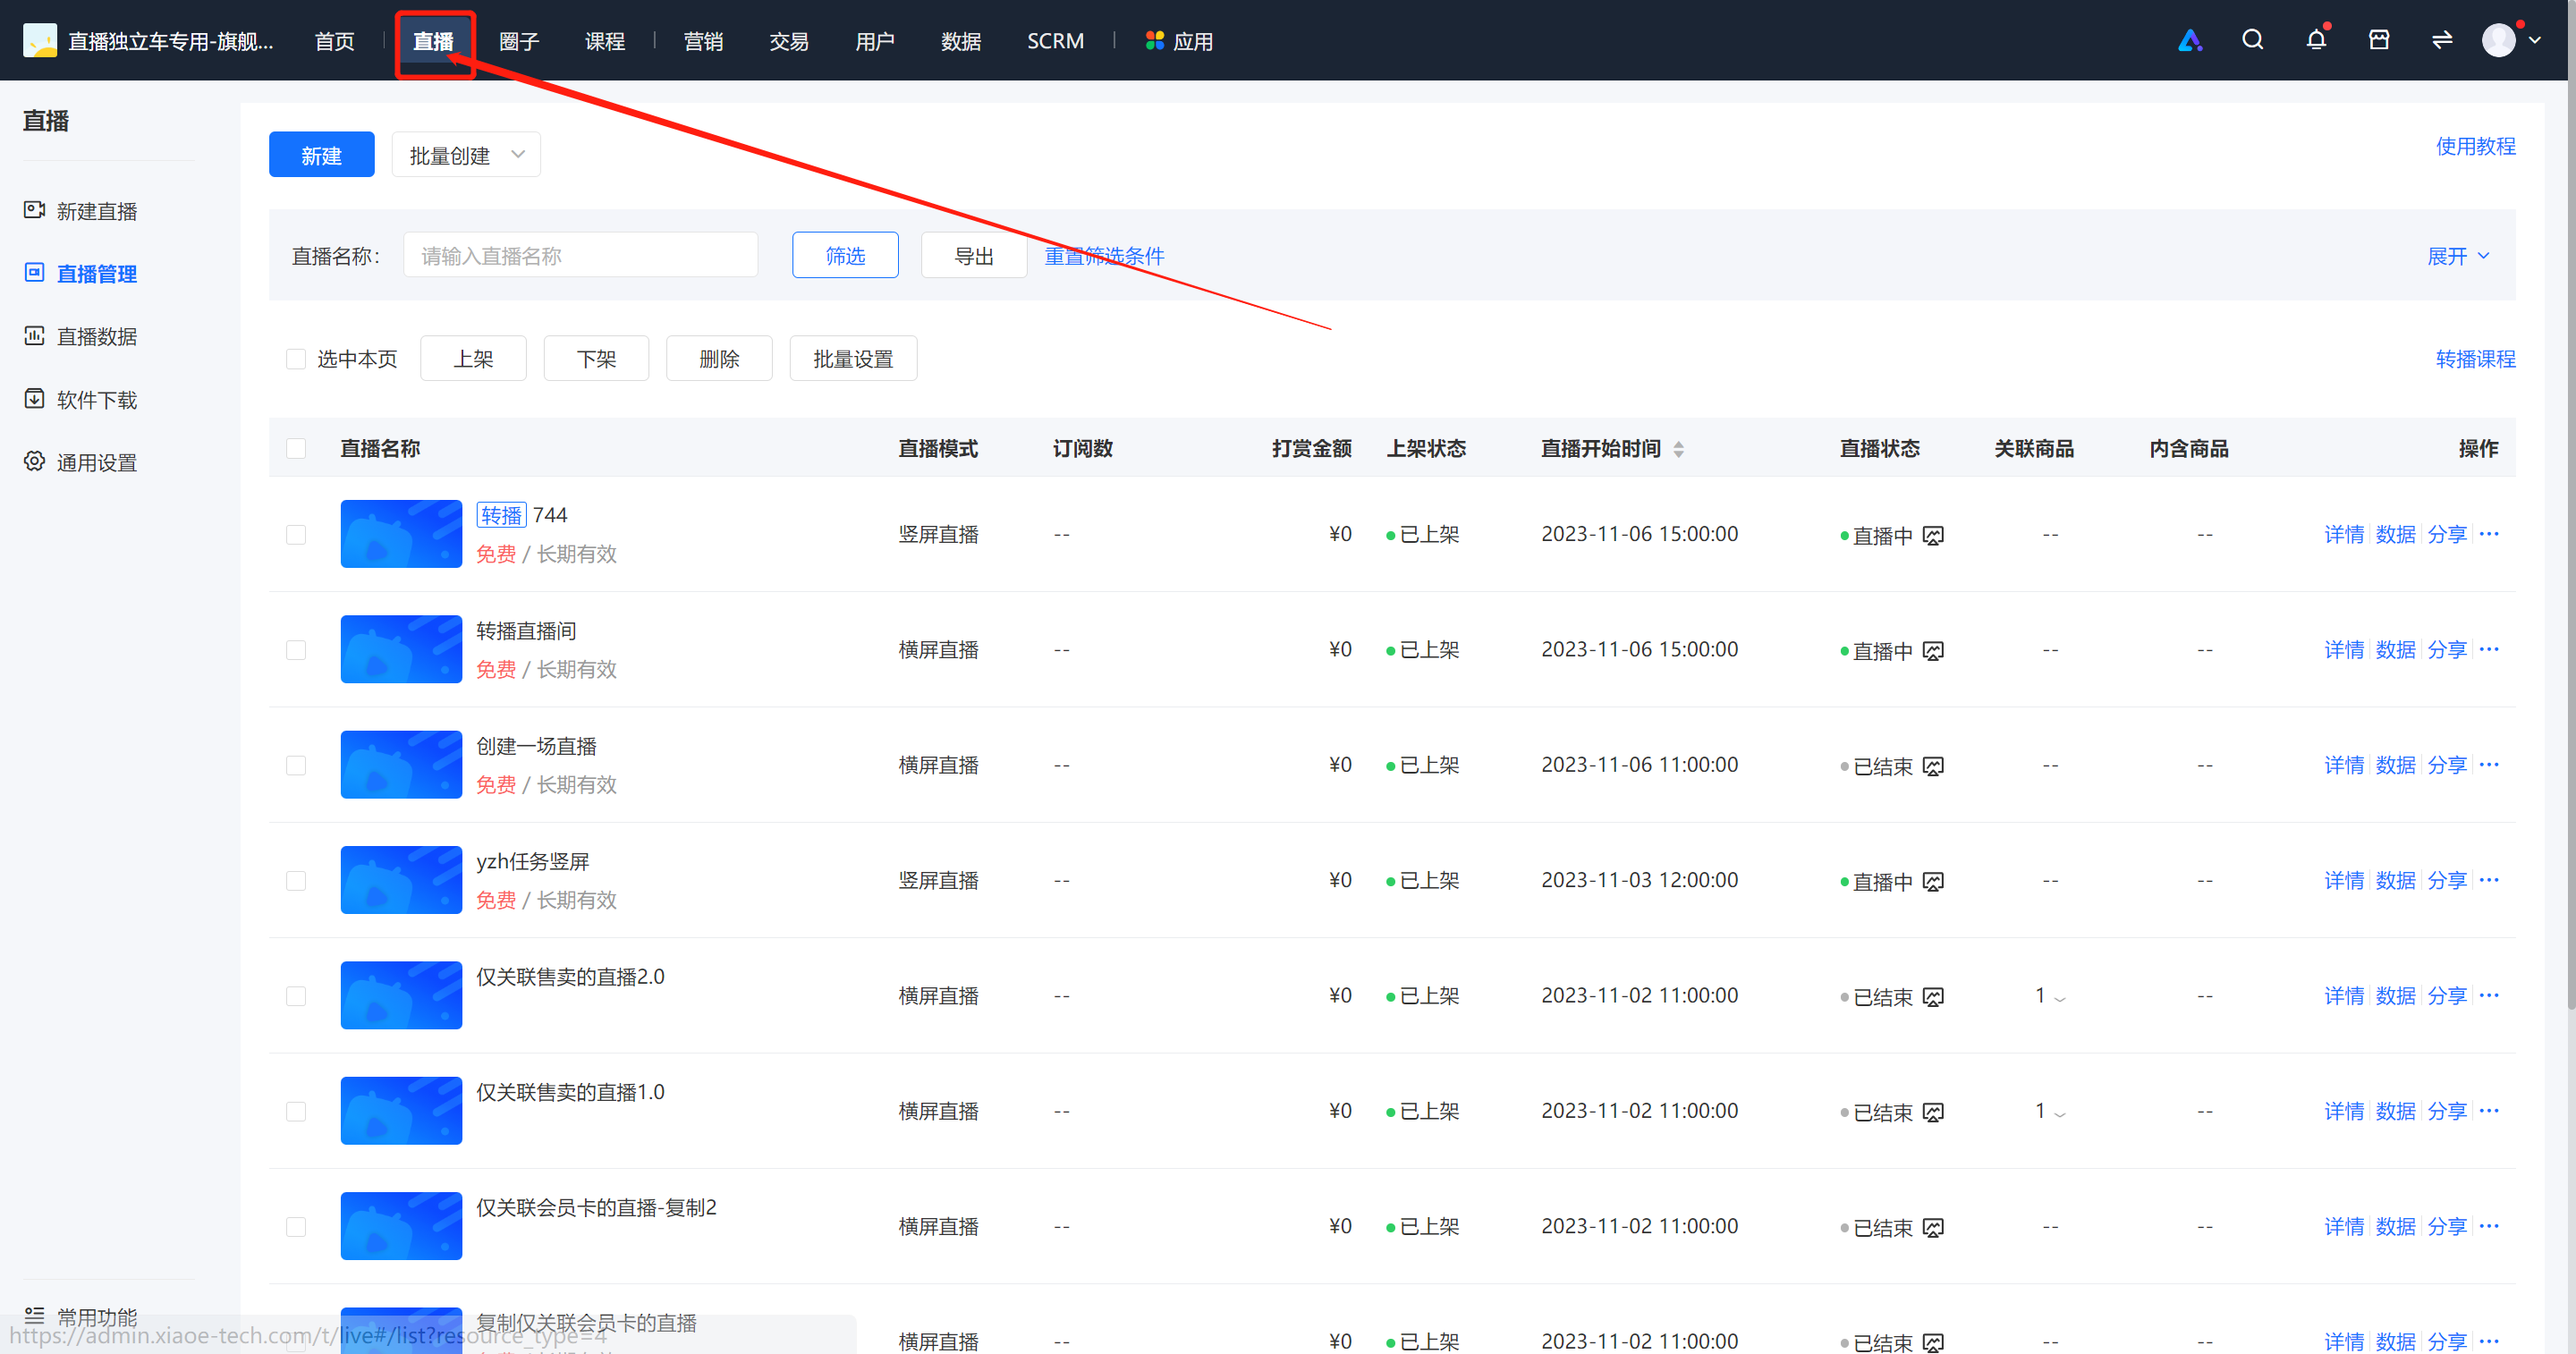
Step 2:General Settings (Store Management Console)
2Click General Settings - Global Settings - Live Room Watermark - Go to Settings
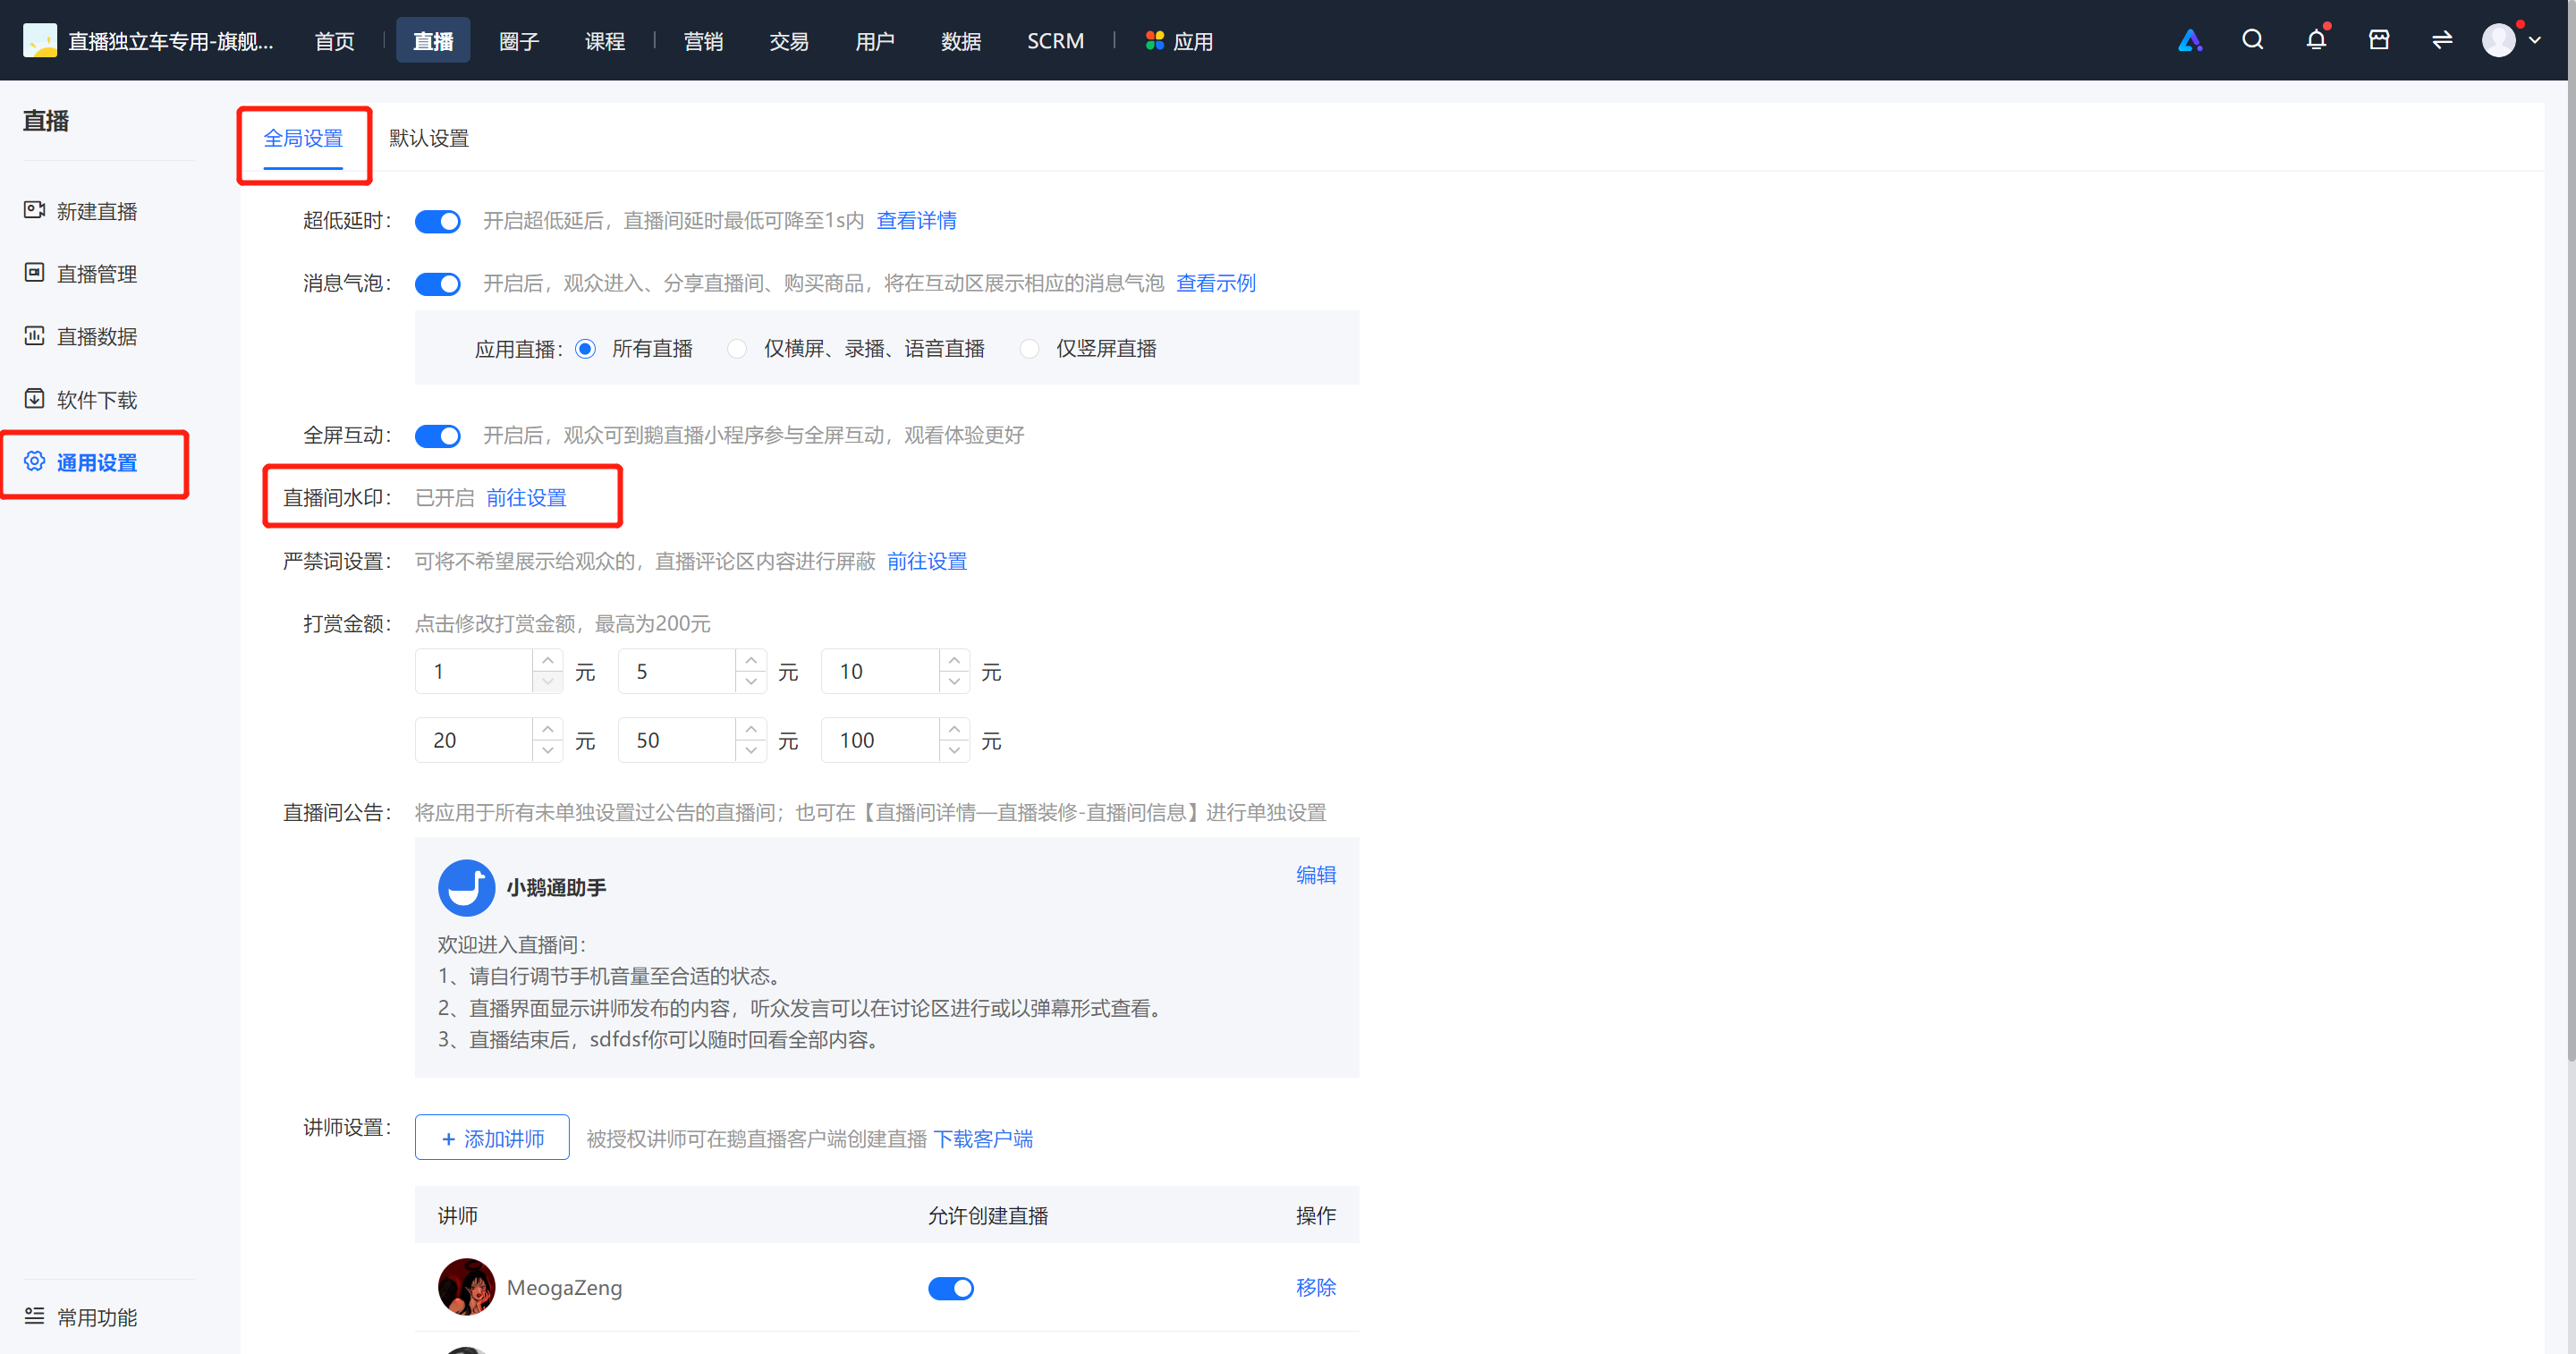
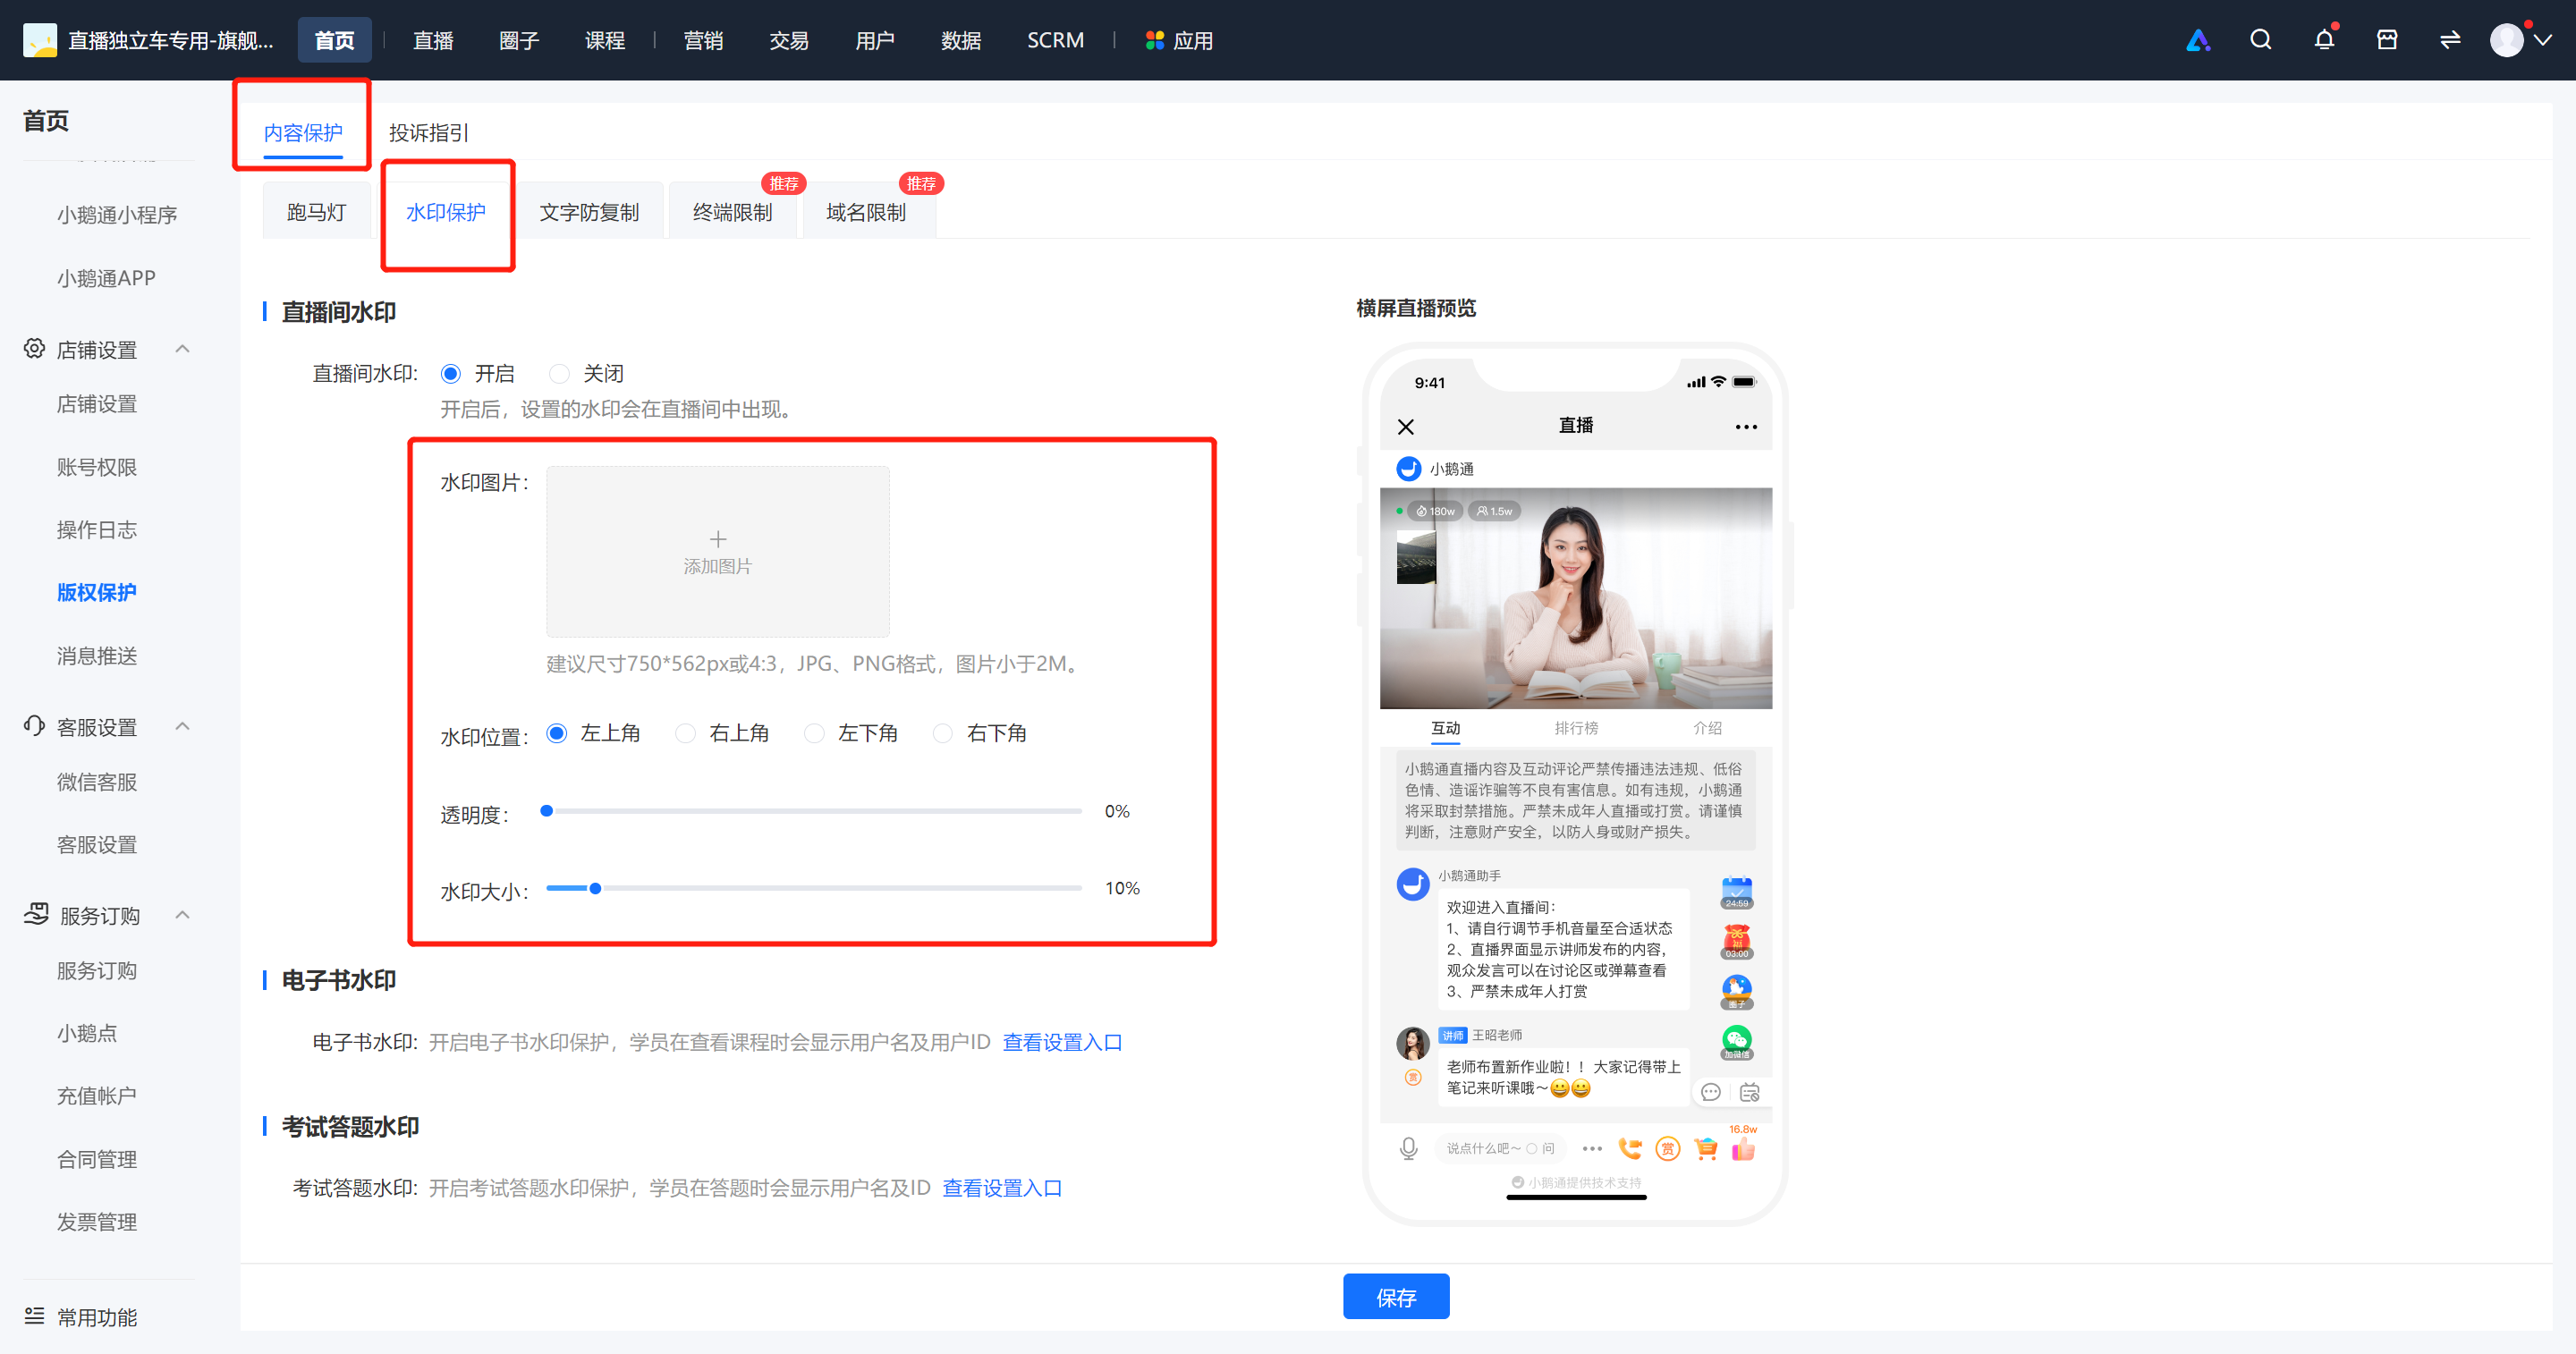
Step 3:Watermark Settings (Store Management Console)
3.Currently, watermark settings support real-time video and desktop sharing live streaming across the entire store;
Third-party streaming: After enabling watermark settings before the live stream, watermarks will appear in the live course;
elink Assistant streaming: After setting the watermark and restarting the stream, the watermark will take effect immediately.
Select to display the watermark, upload the watermark image, adjust the watermark position, transparency, and size, and click Save. For real-time video and desktop sharing live streaming, the watermark will be enabled by default when the live stream starts.
Tutorial on setting up live streaming instructors (guests)
I. Function Introduction
When creating a live stream, you need to set the corresponding instructor for your live stream. You can be the instructor yourself or invite others to be instructors. Instructors can enter the live stream without purchasing the paid content and have functions such as speaking, managing the live stream, interacting with students, and ending the live stream.
II. Purpose of Use
Merchants can use this function to configure live - stream instructors.
III. Use Scenarios
Video live streams and audio live streams.
IV. Operation Paths(Merchant side)
Currently, there are two paths to add an instructor:
Path 1: Create a new live stream → Add an instructor → Customize the instructor's information
Path 2: Live - stream room details page→ Live - stream settings→ Instructor settings
V. Usage Tutorial
(1) Path 1: Create a new live stream → Add an instructor → Customize the instructor's information
Step 1: Create a new live stream
Log in to the elink store management console, click [Create a new live stream], and add an instructor during the new live - stream creation process.
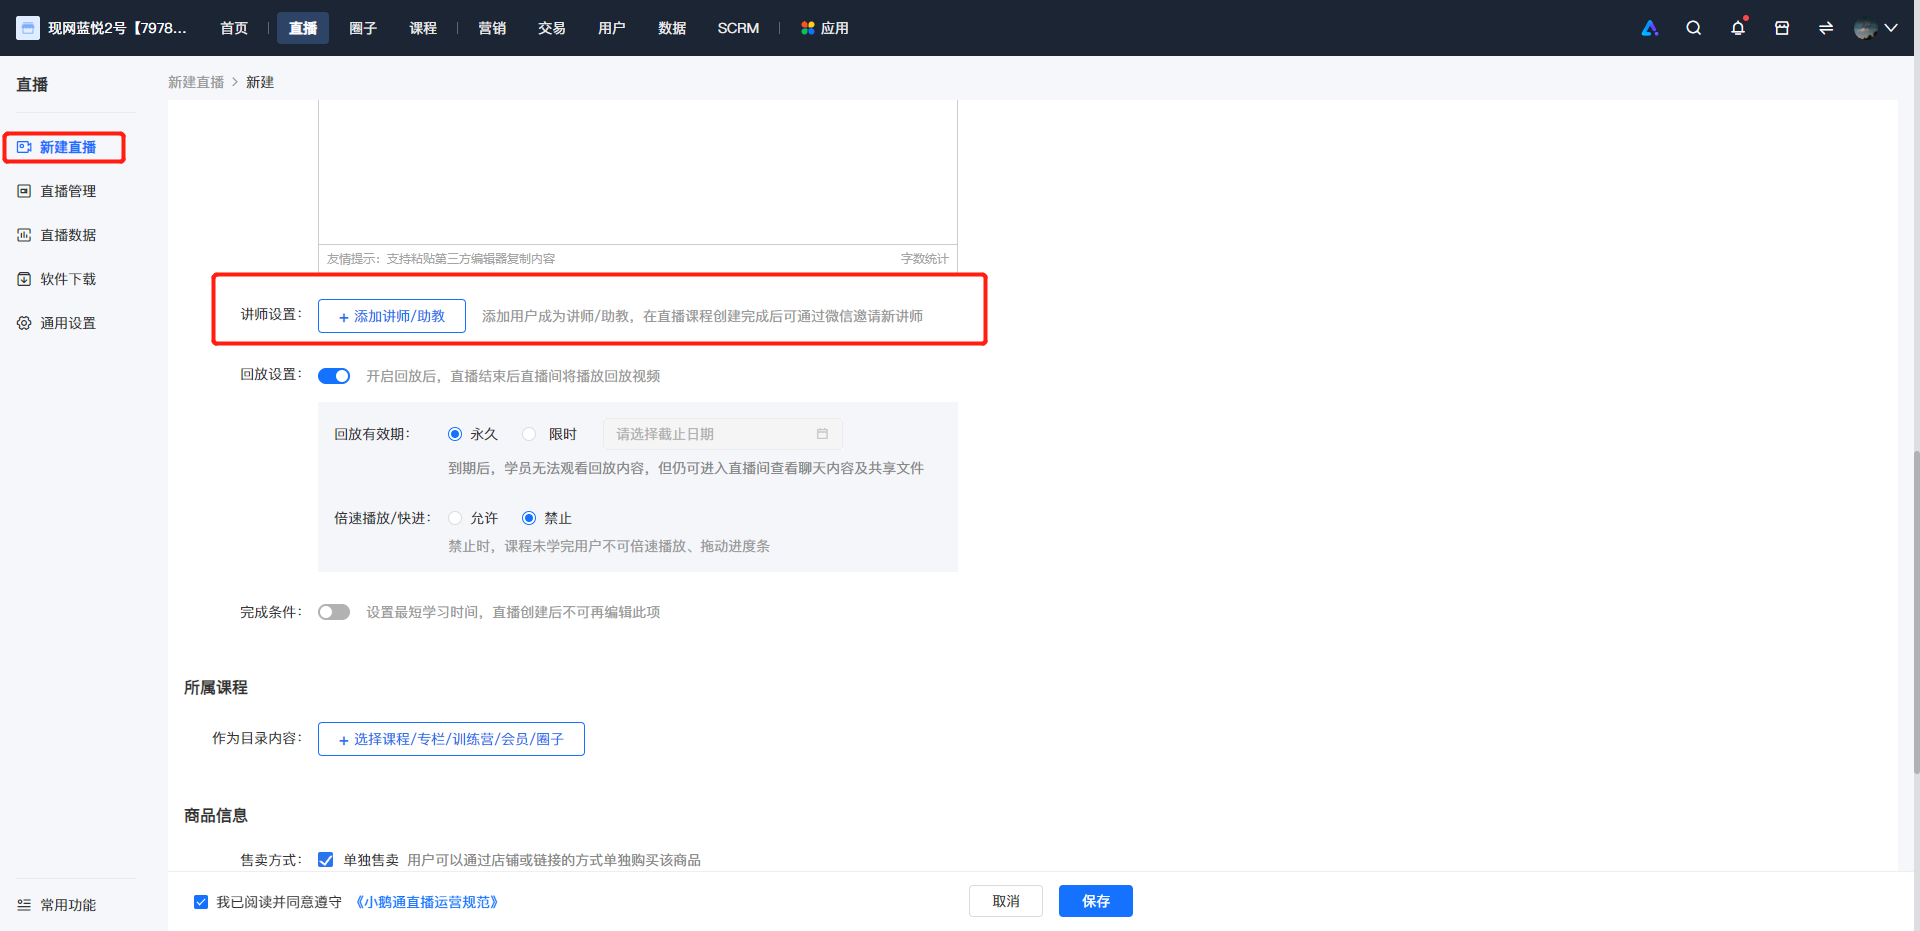
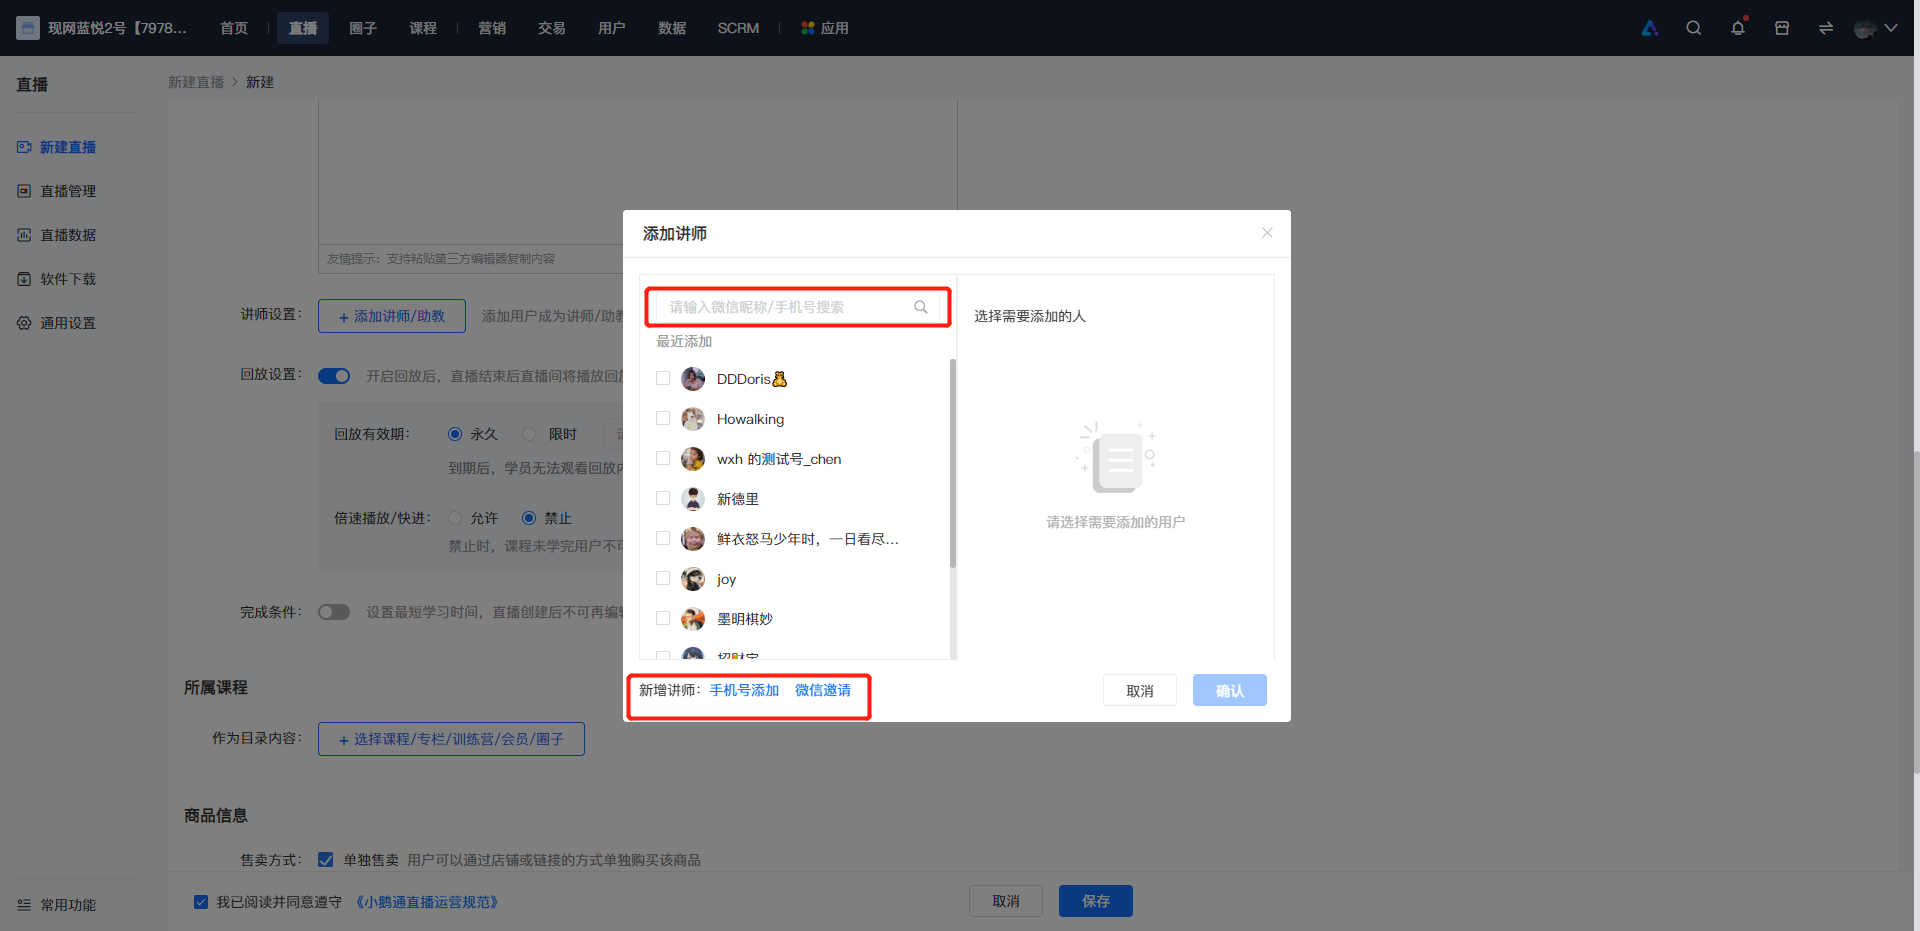
Step 2: Add an instructor
① You can search and add an instructor by WeChat nickname/phone number;**Note:You can only search for the WeChat nickname or phone number if the instructor has entered the store.
② Add an instructor by phone number. Simply enter the user's phone number to successfully add the instructor.
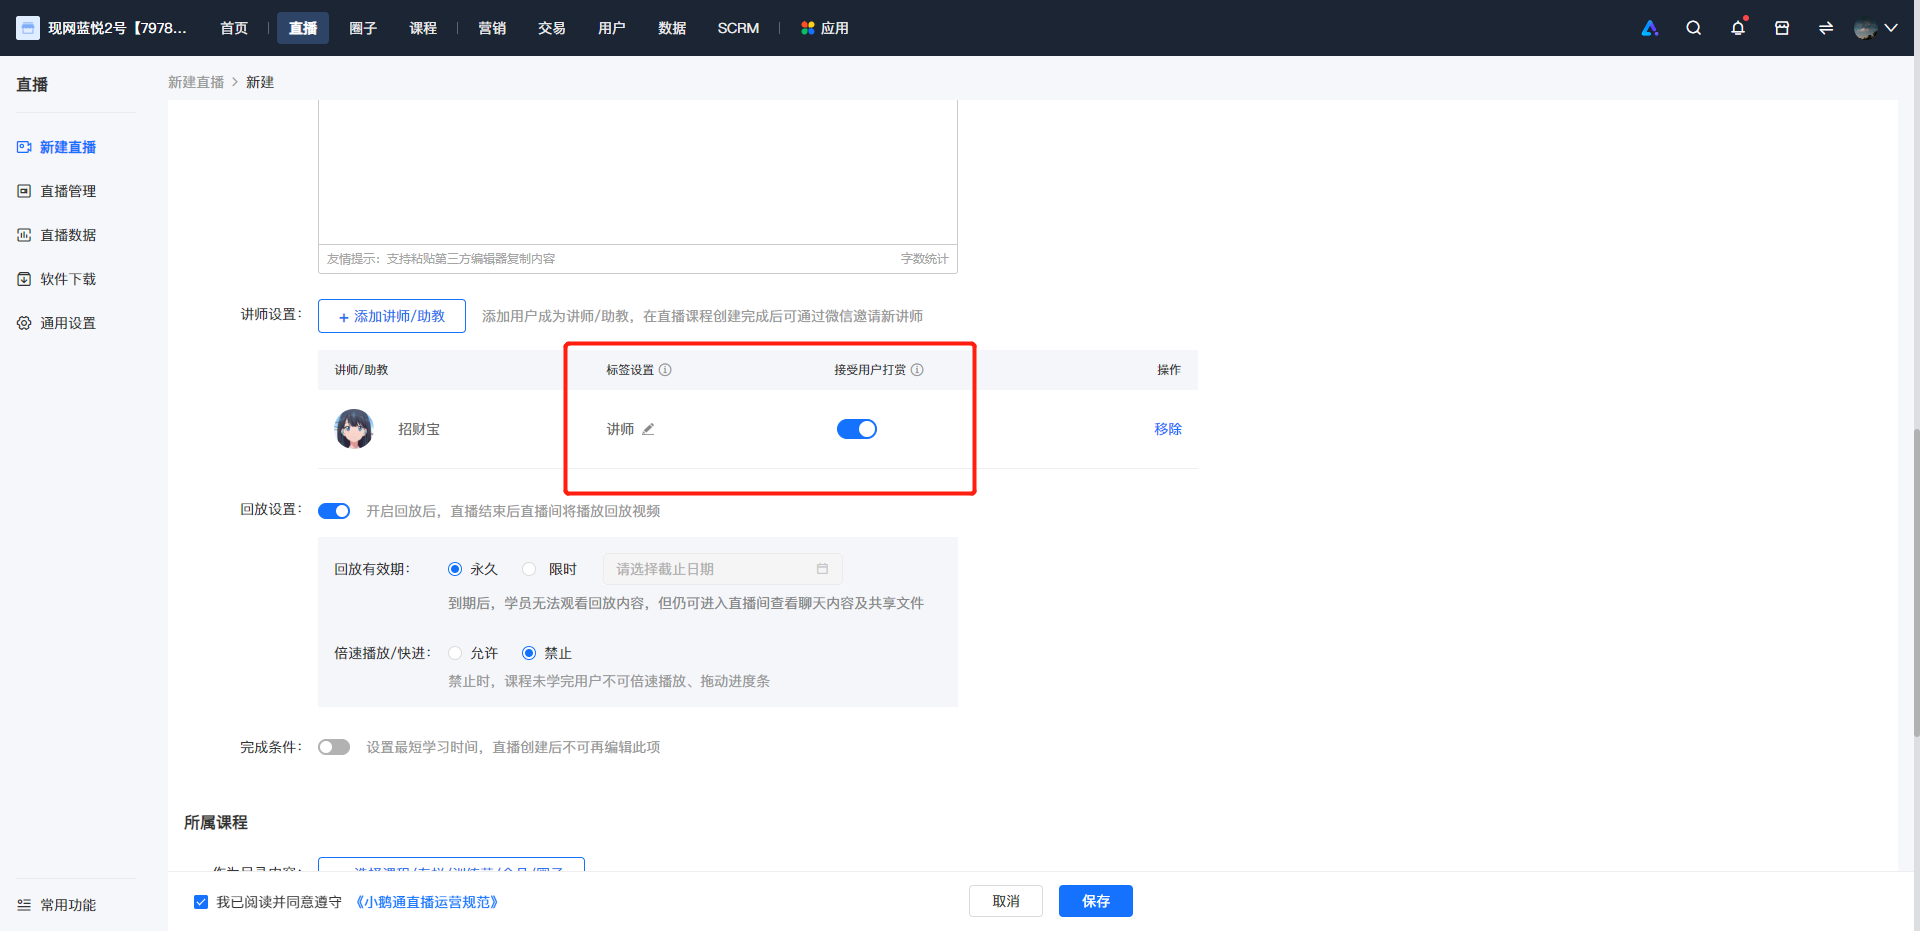
Step 3: Customize the instructor's information
After adding, you can set the instructor's label and whether to accept tips;
① Label setting: The label sets the title or honorific of the instructor in the live - stream room, such as 'Instructor' or 'Teaching Assistant', which is convenient for distinguishing when there are multiple instructors in the live - stream room.
② Tip acceptance switch: Control the tip switch for the corresponding instructor. After the tip switch is turned off, the tip entry for this instructor in the live - stream room will be hidden.
③ Removal: If you add too many instructors or add the wrong instructor, you can remove them.
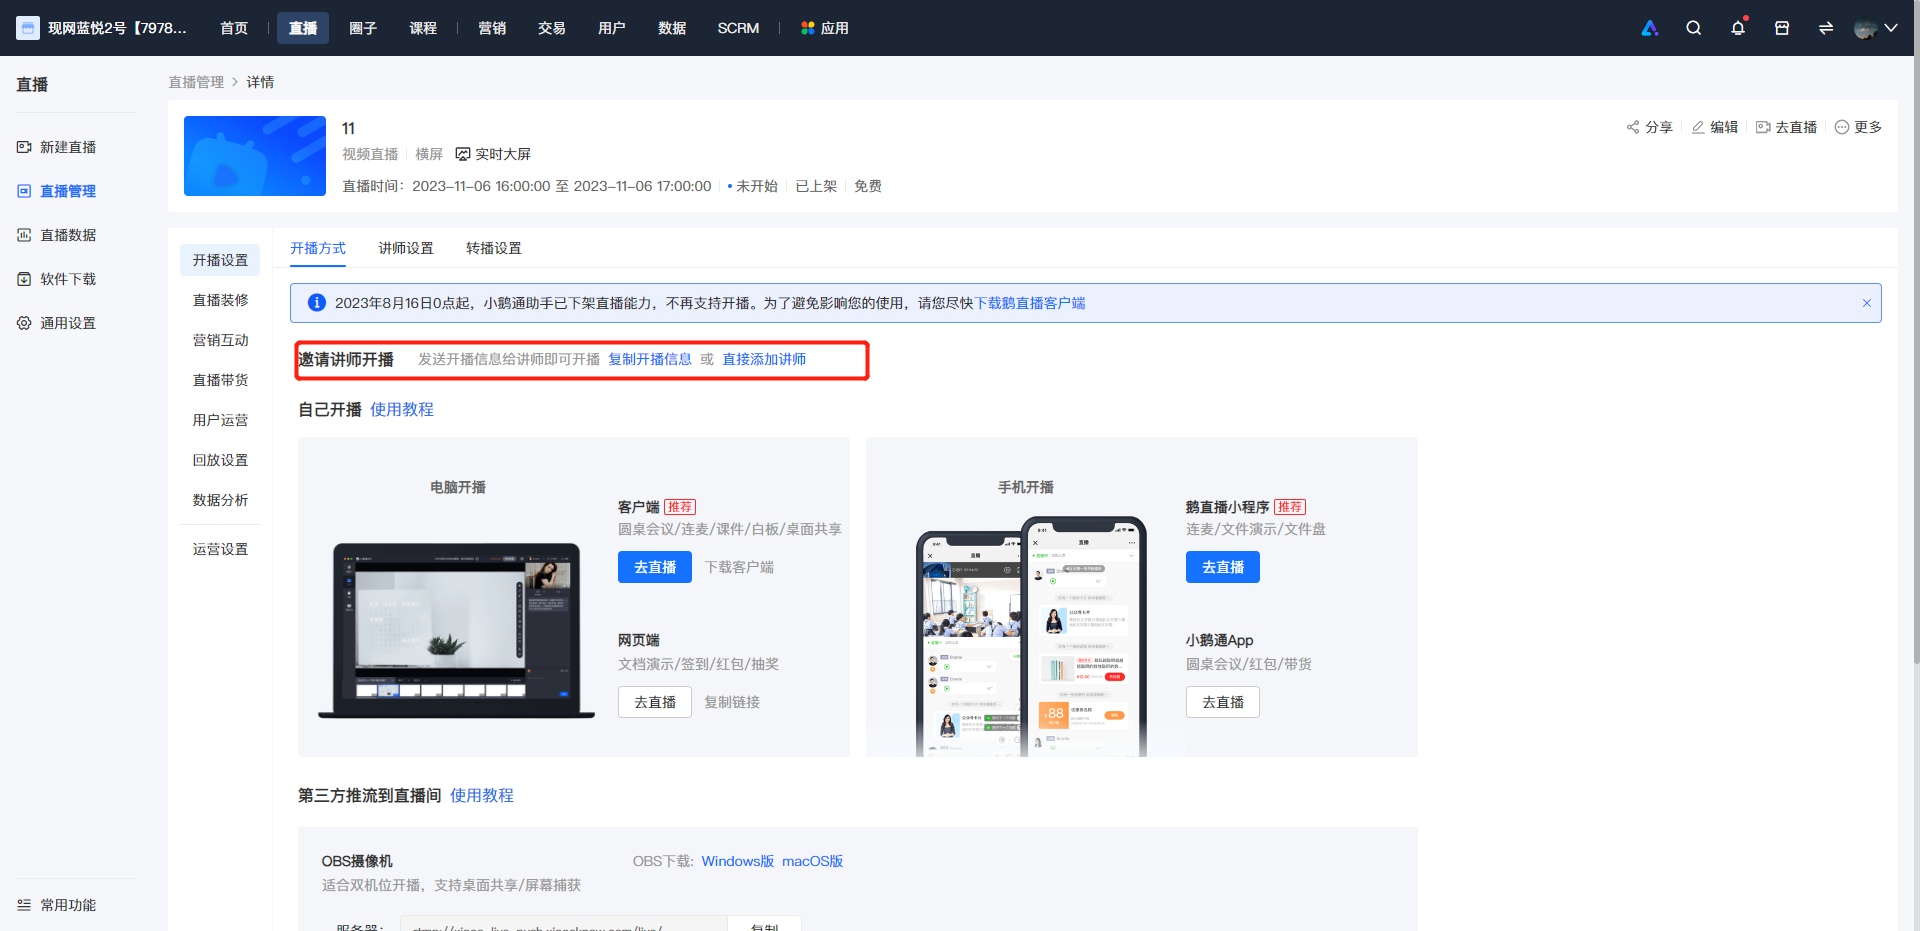
(2) Path 2: Live - stream room details page → Live - stream settings → Instructor settings
Step 1: Find the corresponding live - stream room and enter the live - stream details page - Live - stream settings
Step 2: Select the corresponding scenario to start the live stream (invite an instructor to start the live stream or start the live stream by yourself)
① Invite an instructor to start the live stream
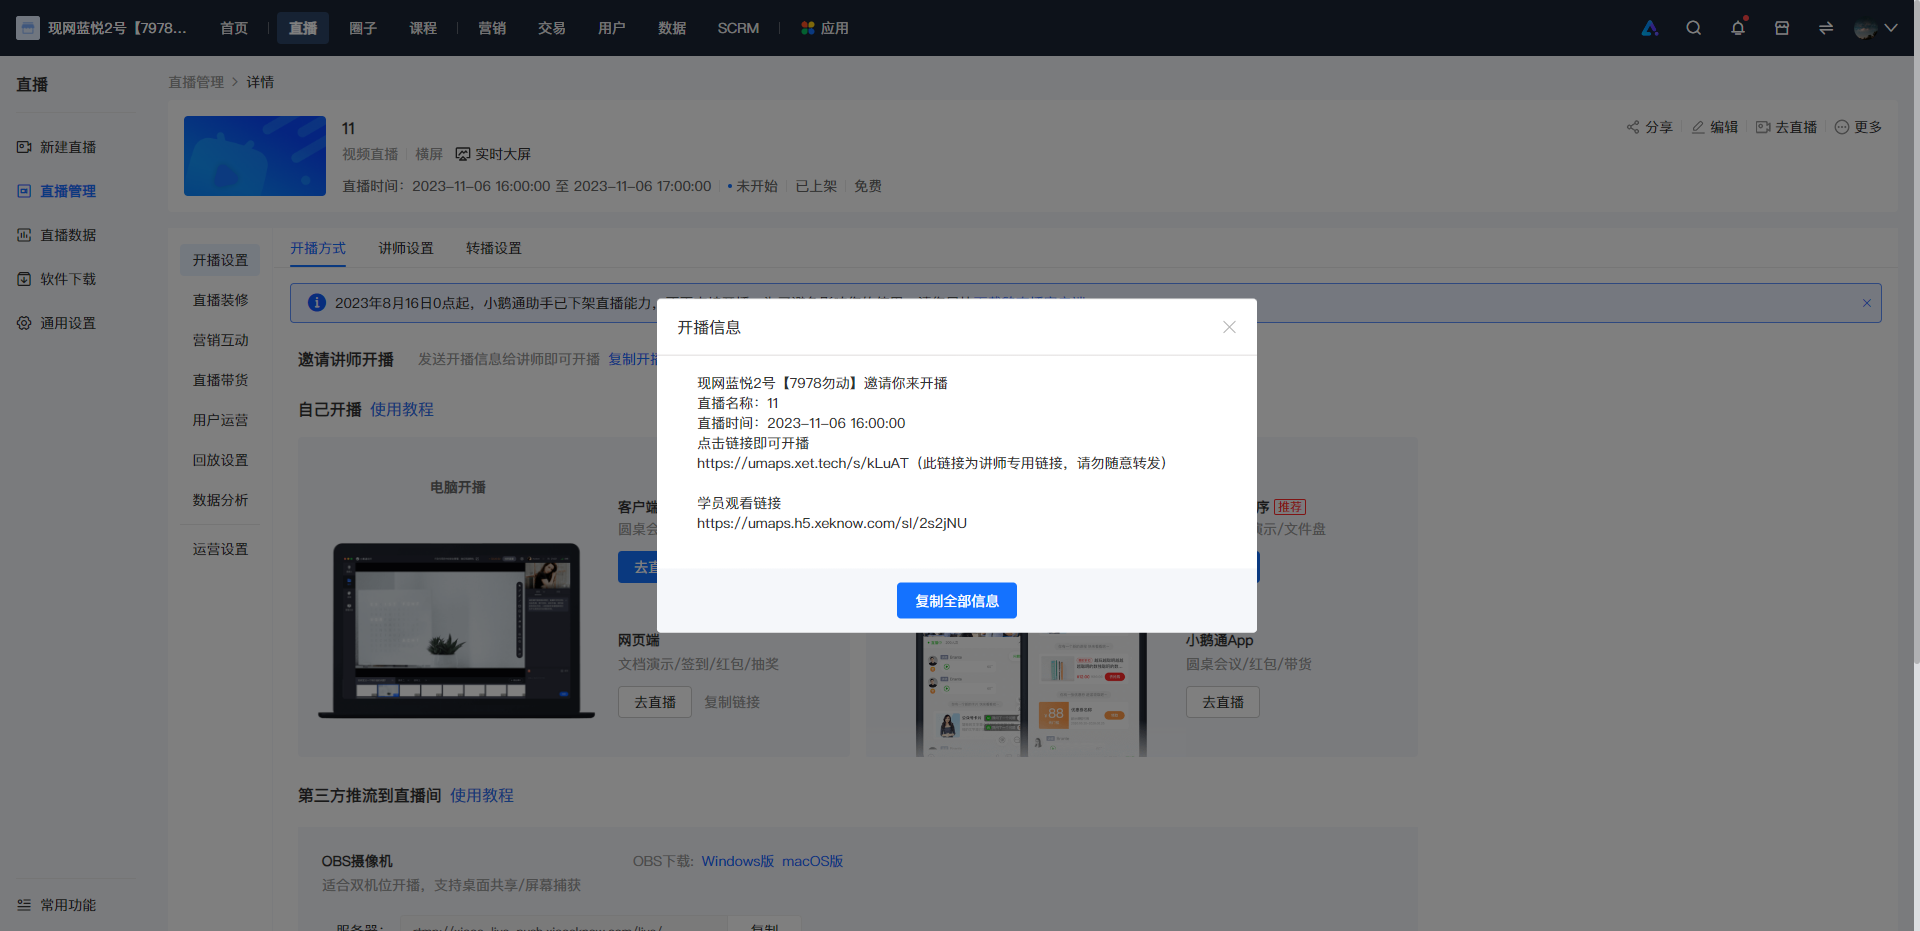
● Click 'Copy live - stream information' in the [Invite an instructor to start the live stream] module → Click 'Copy all information';
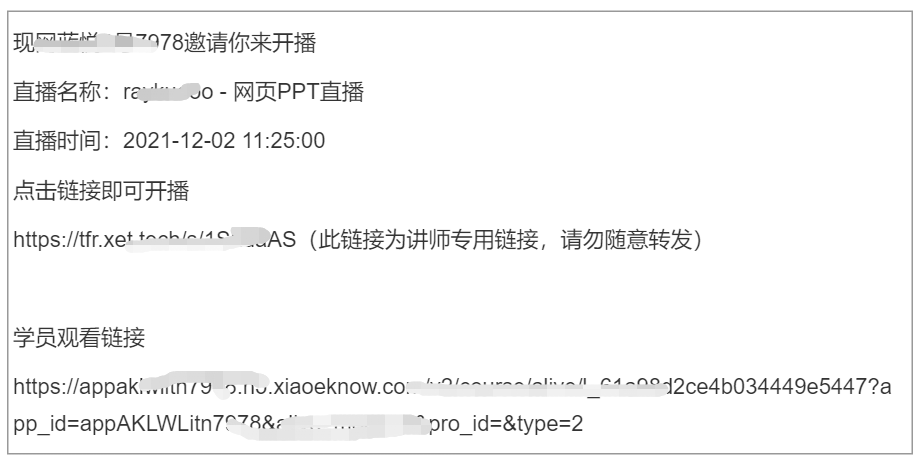
● Send the copied content directly to the instructor/teaching assistant;
● The instructor or teaching assistant can click the link to select the corresponding live - stream terminal to enter;
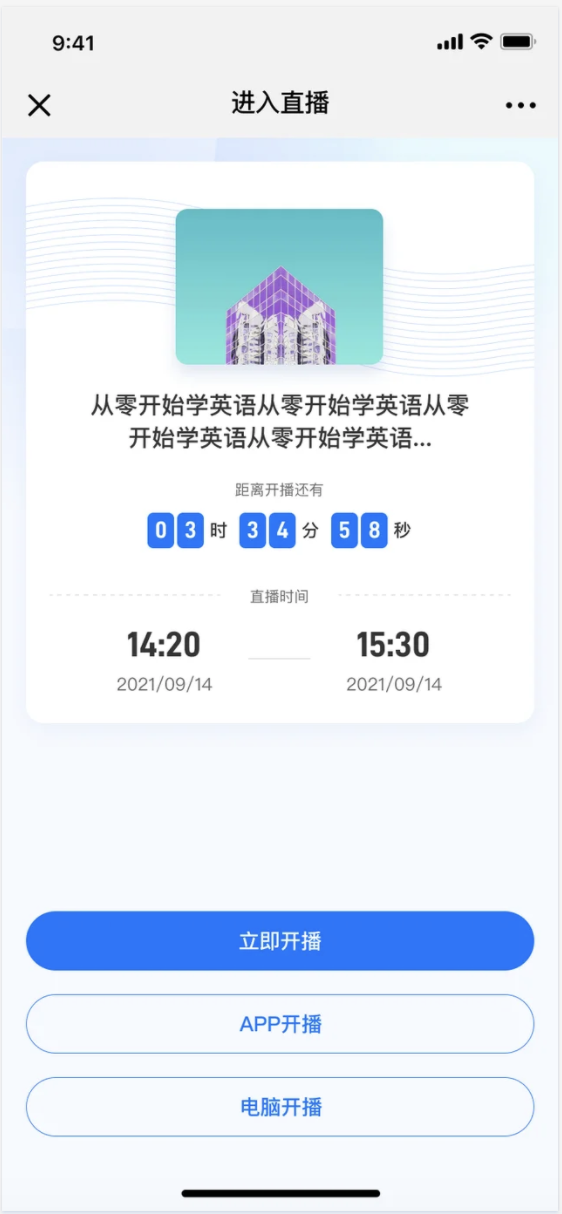
**Note:The available terminals here will vary according to the live - stream mode;
To start a live stream using the App, the version needs to be V3.2.8 or higher to directly enter the live - stream room. If you cannot enter, it is recommended to update the version first and then click 'Start live stream on the App', or search in the live - stream list by the live - stream room name.
② Start the live stream by yourself: The administrator is the live - stream instructor
In the [Start the live stream by yourself] module, select a suitable live - stream terminal. After scanning the QR code/opening the live - stream room, you will automatically become the instructor and start the live stream;
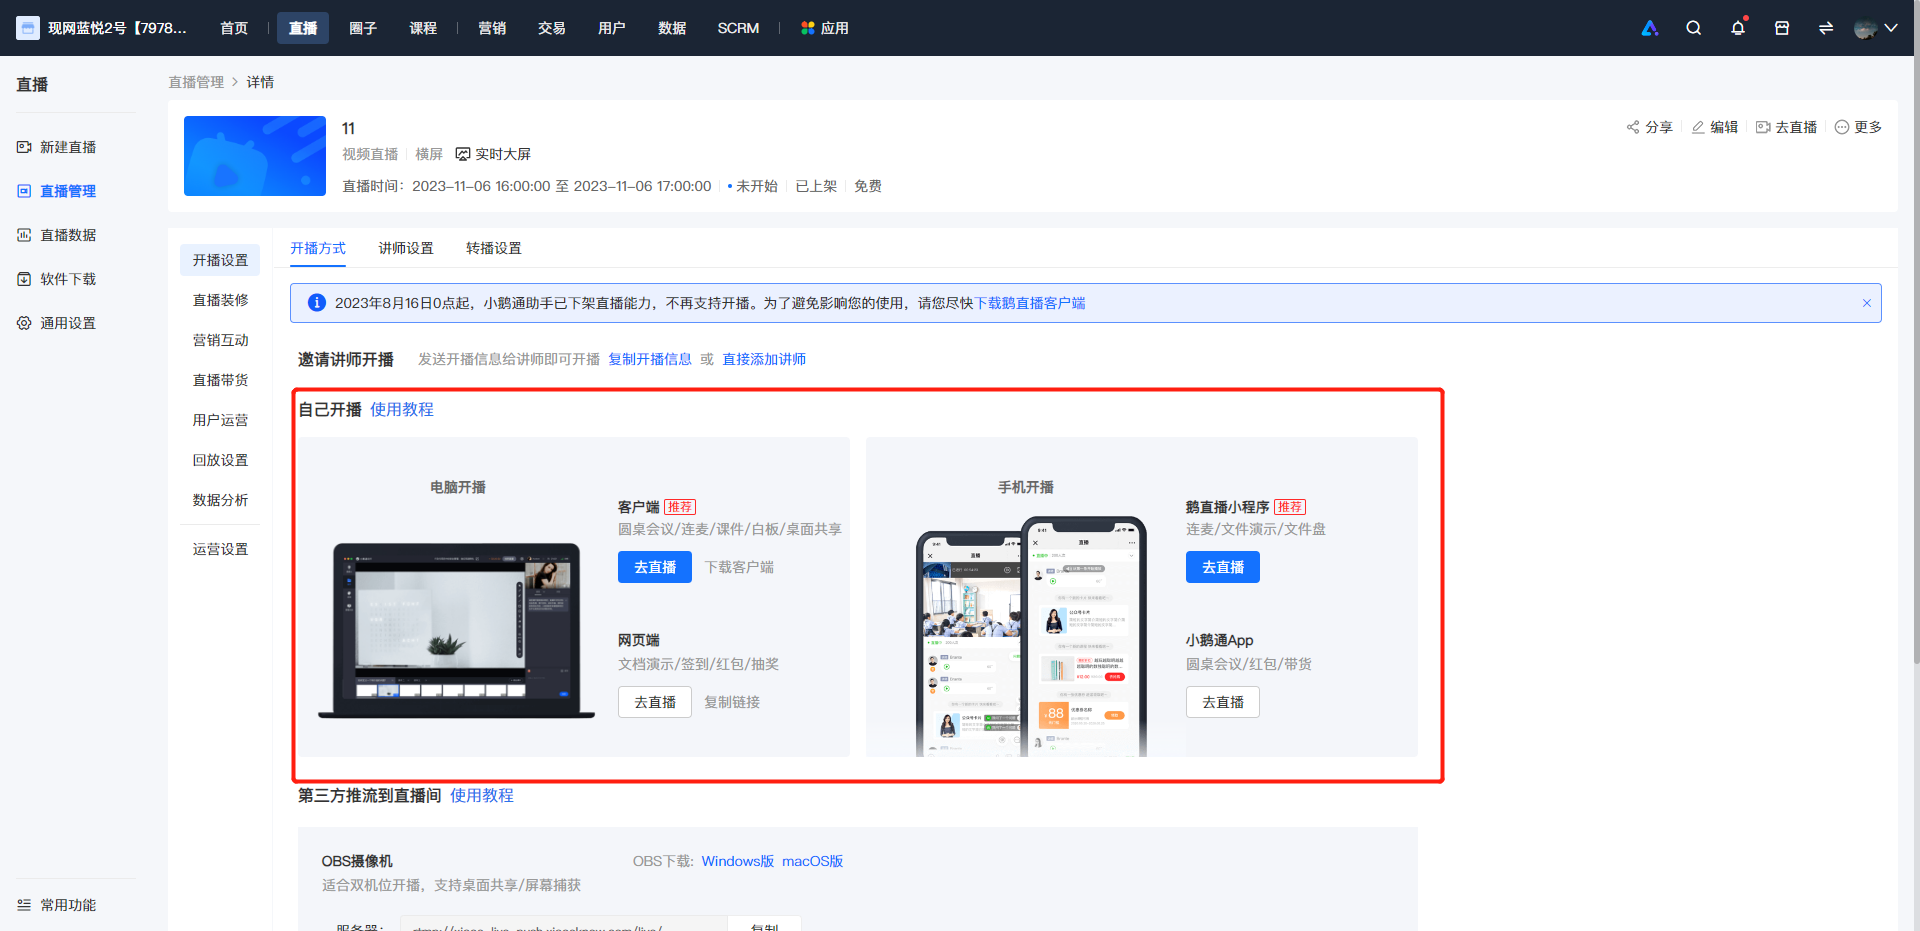
**Note:The available terminals here will vary according to the live - stream mode. To start a live stream using the App, the version needs to be V3.2.6 or higher to directly enter the live - stream room. If you cannot enter, it is recommended to update the version first and then select, or search in the live - stream list by the live - stream room name.
(3) Path 3: Live - stream room details page → Live - stream settings → Instructor settings
Step 1: Find the corresponding live - stream room and enter the live - stream room details page - Live - stream settings - Instructor settings.
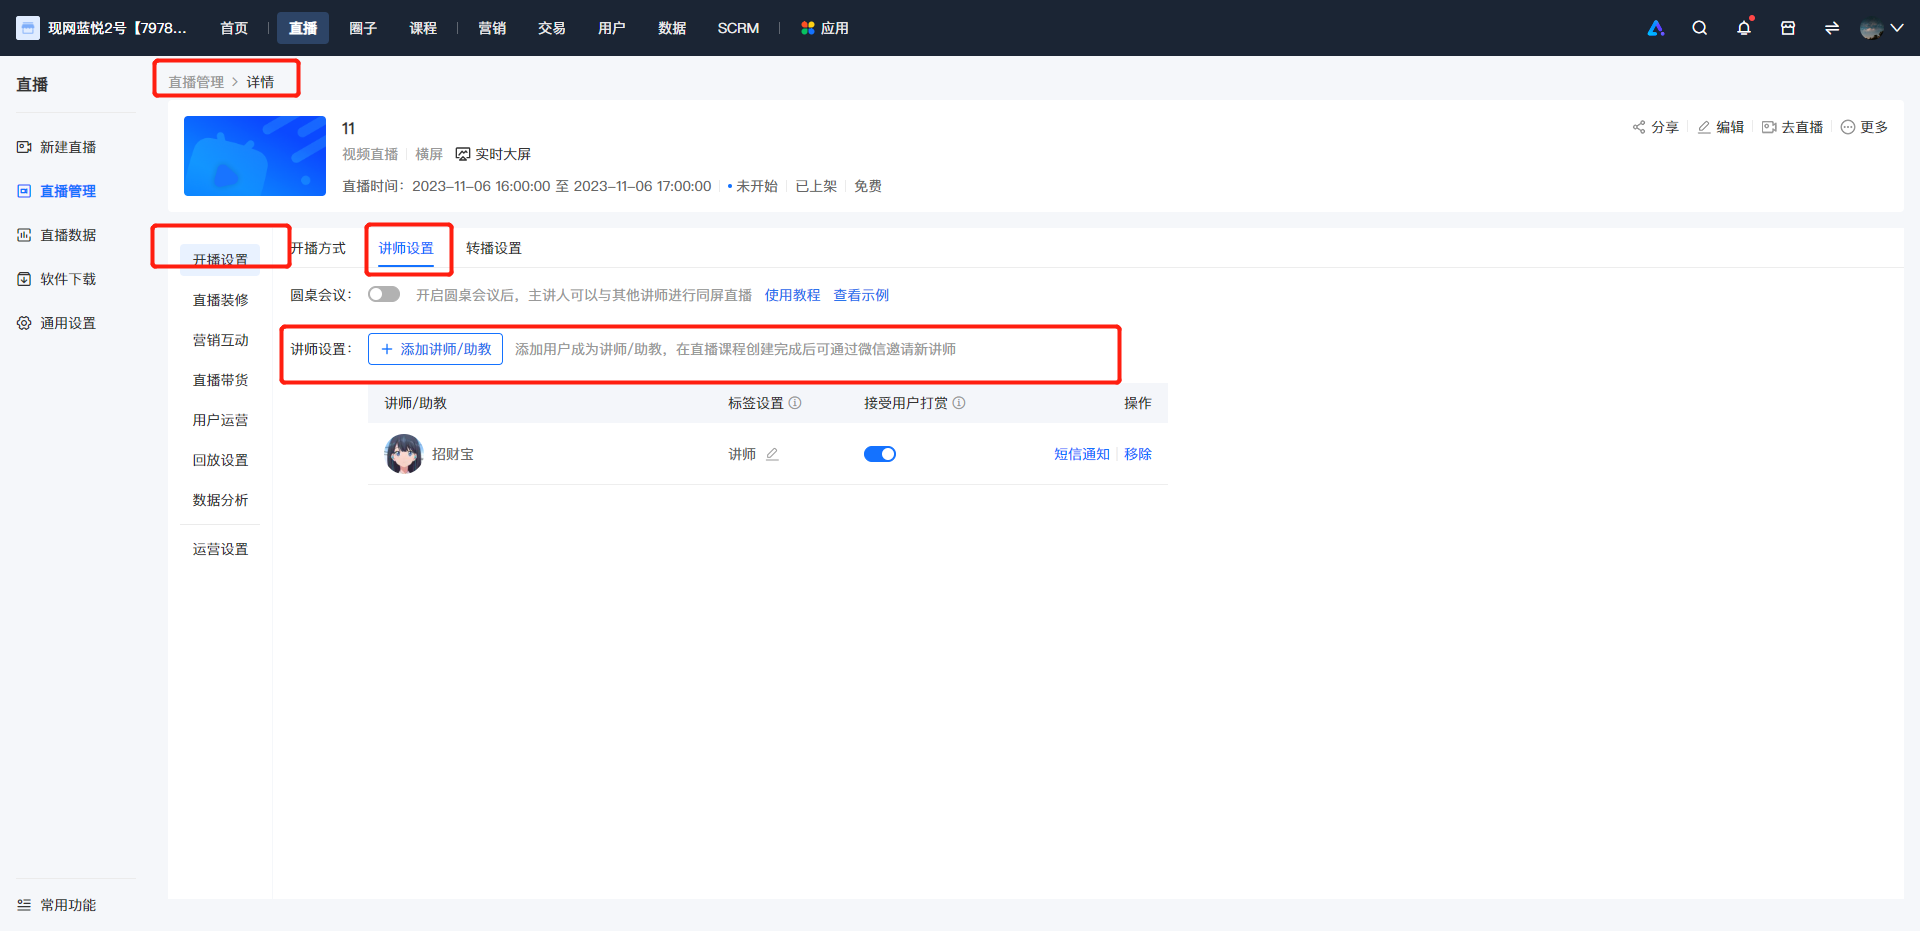
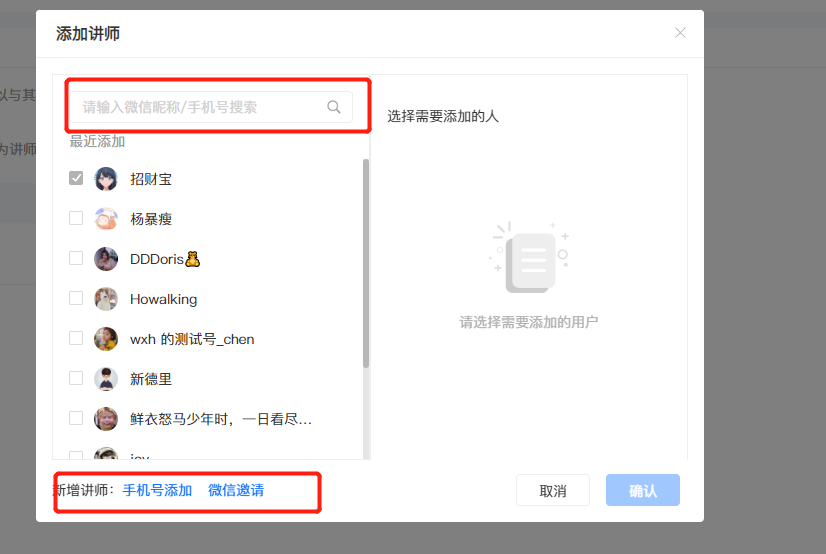
Step 2: Click 'Add an instructor/teaching assistant'
① You can search and add an instructor by WeChat nickname/phone number;**Note:You can only search for the WeChat nickname or phone number if the instructor has entered the store.
② Add an instructor by phone number. Simply enter the user's phone number to successfully add the instructor;
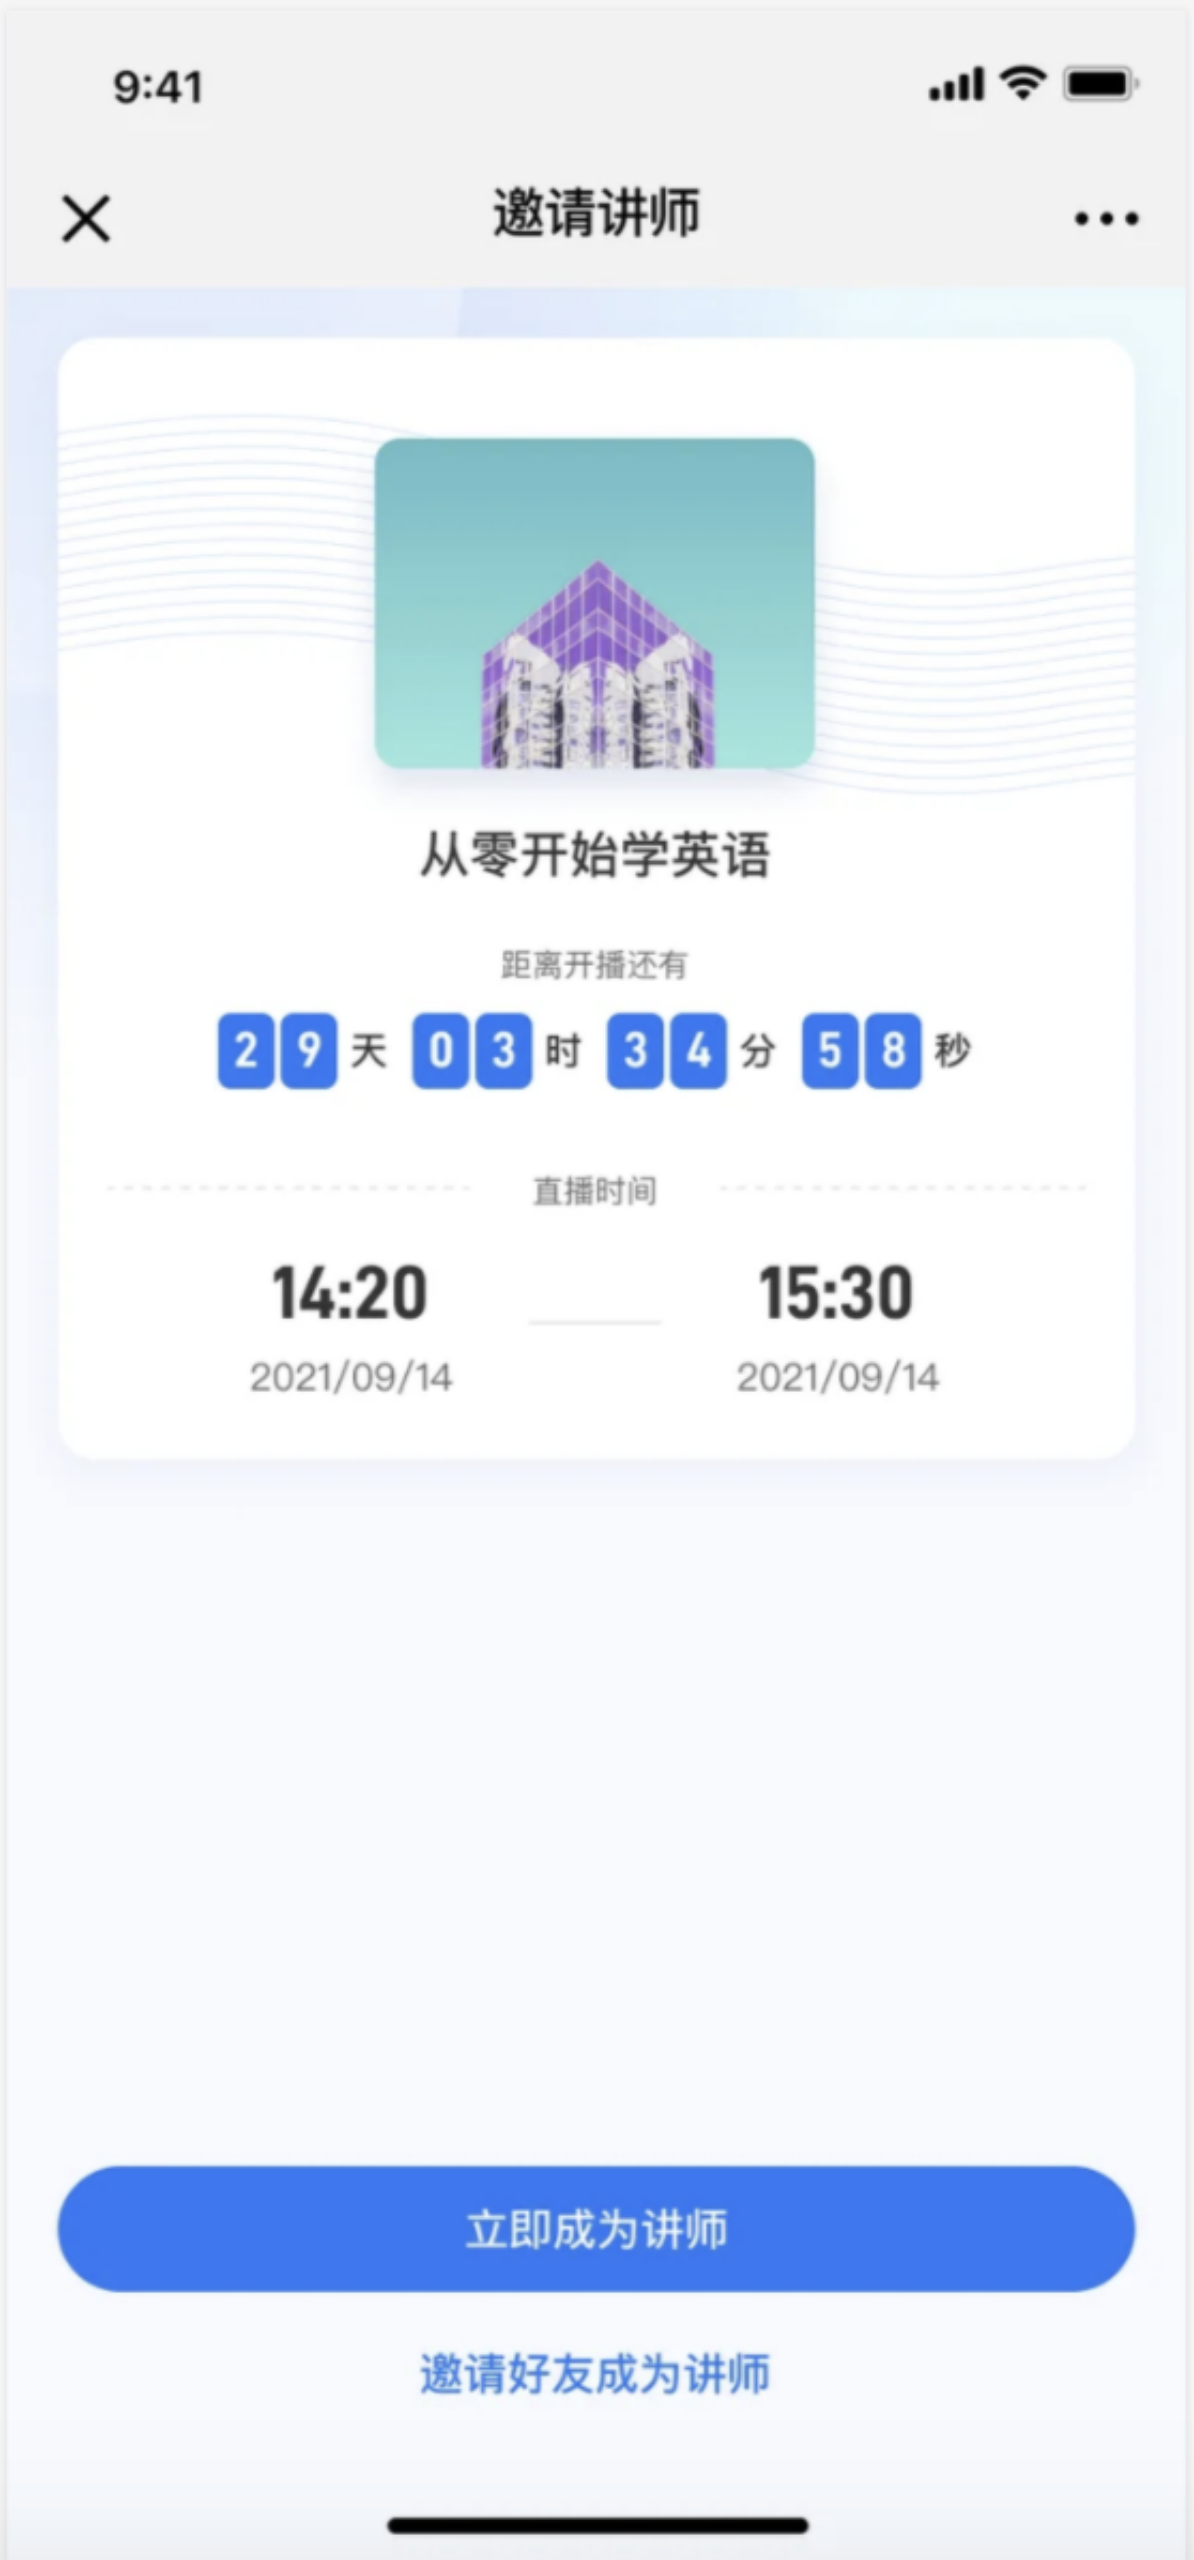
③ Invite an instructor via WeChat. Copy the invitation link or QR code to invite friends to be instructors; administrators can also scan the code and then forward the invitation;
● After the user scans the code: They can choose to be the instructor for this live stream or forward the invitation to friends to be instructors;
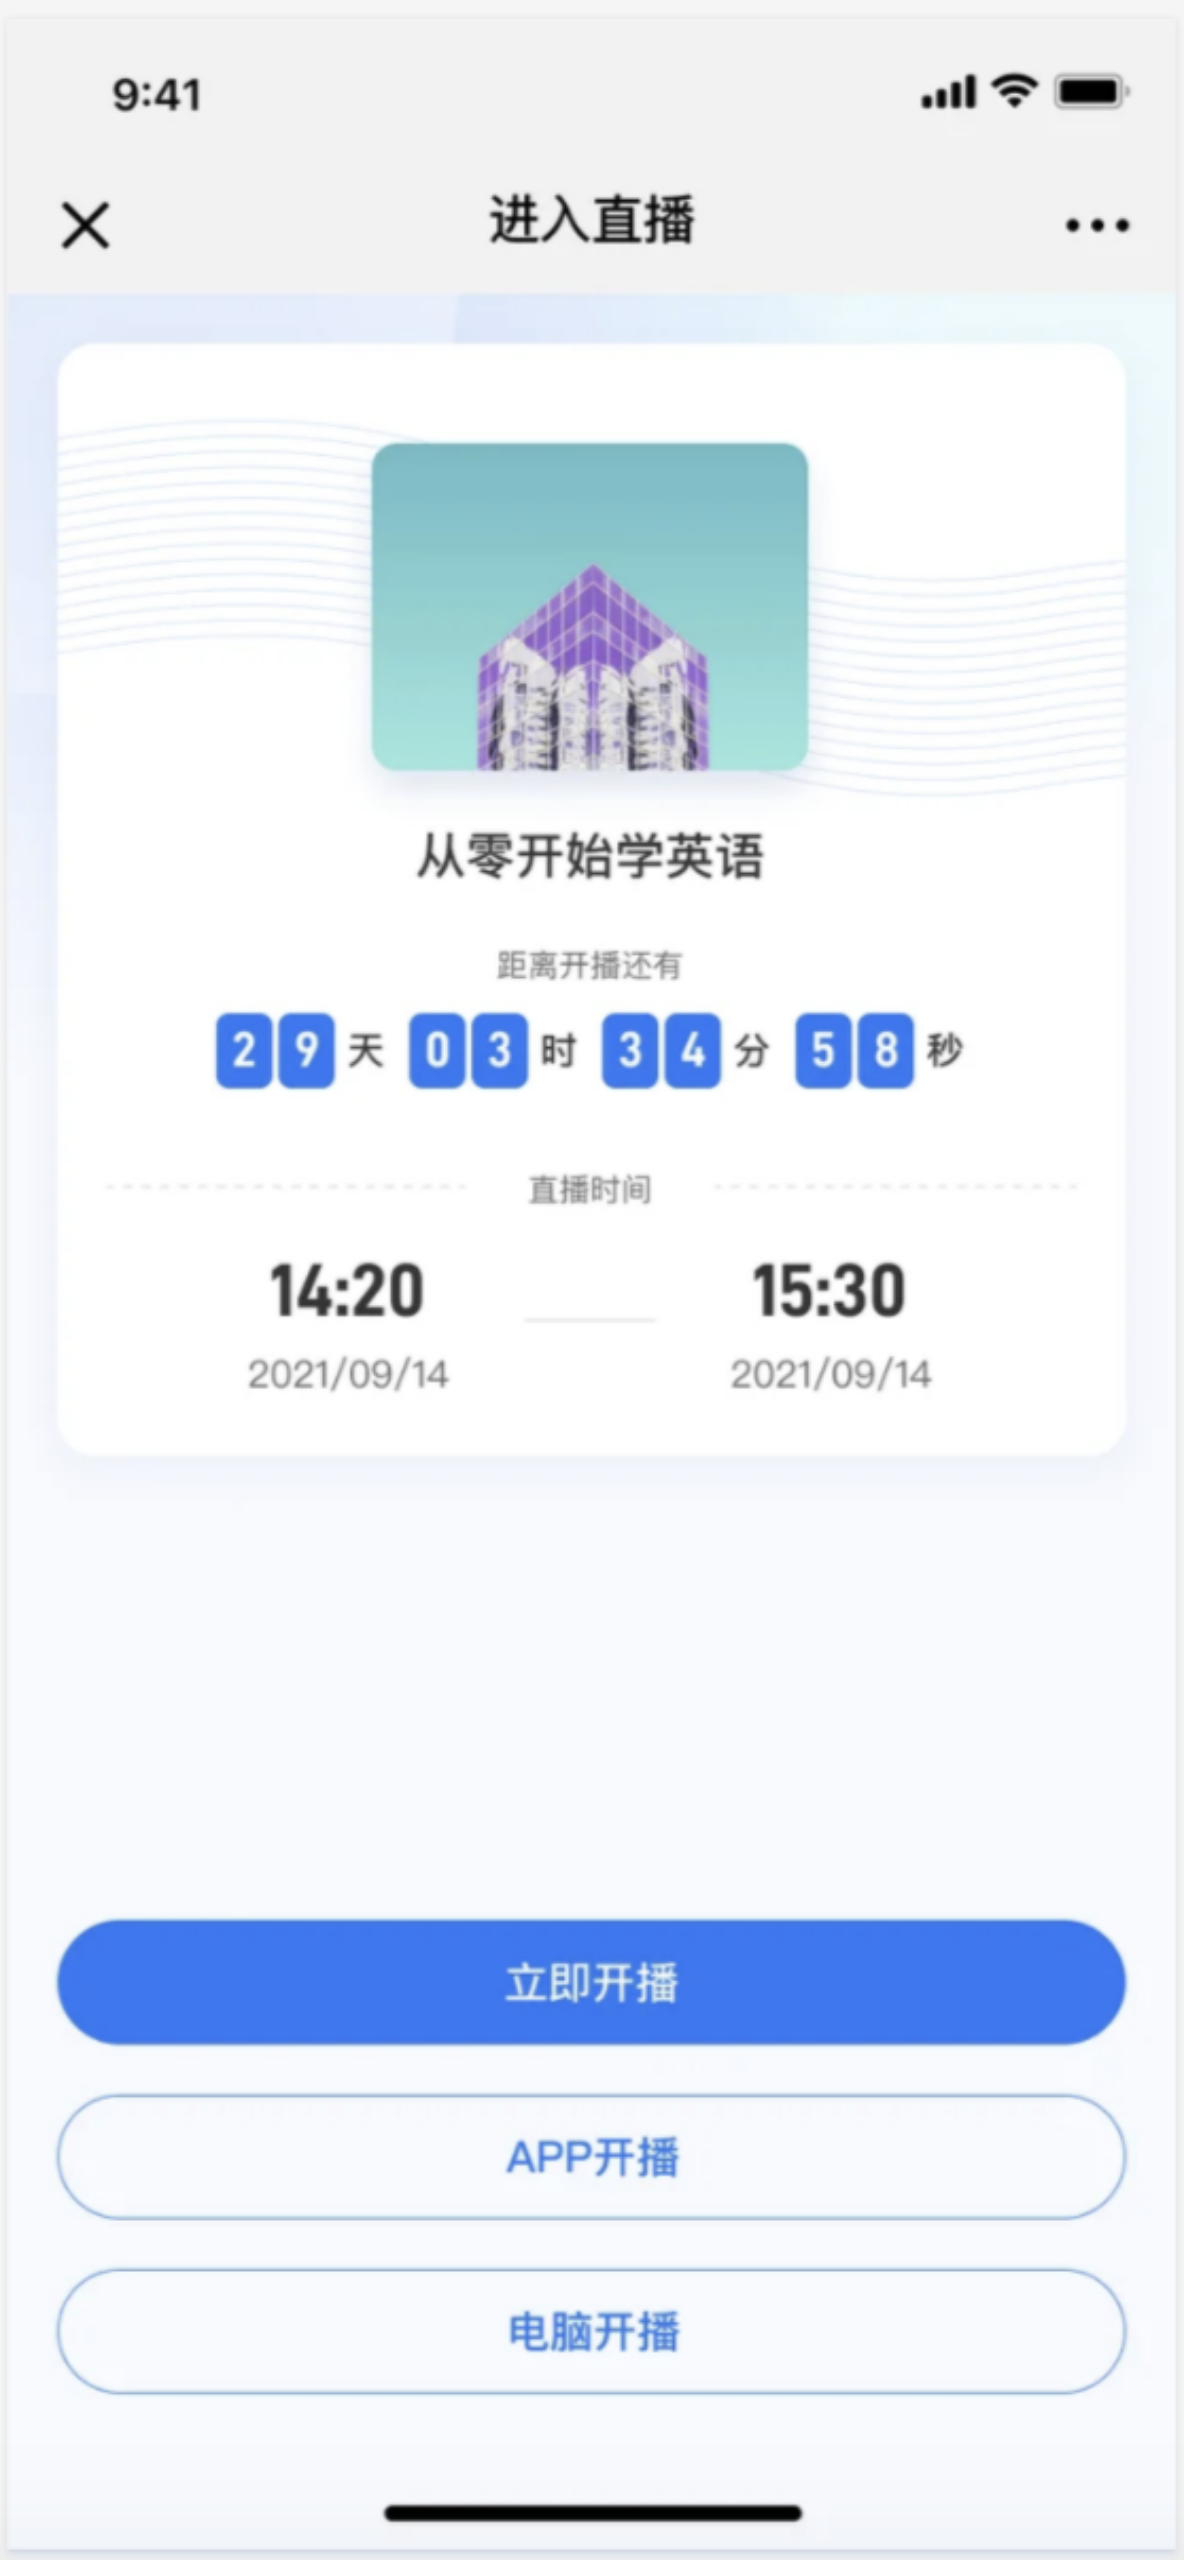
● After becoming an instructor: Select a terminal and enter the live - stream room to start the live stream;
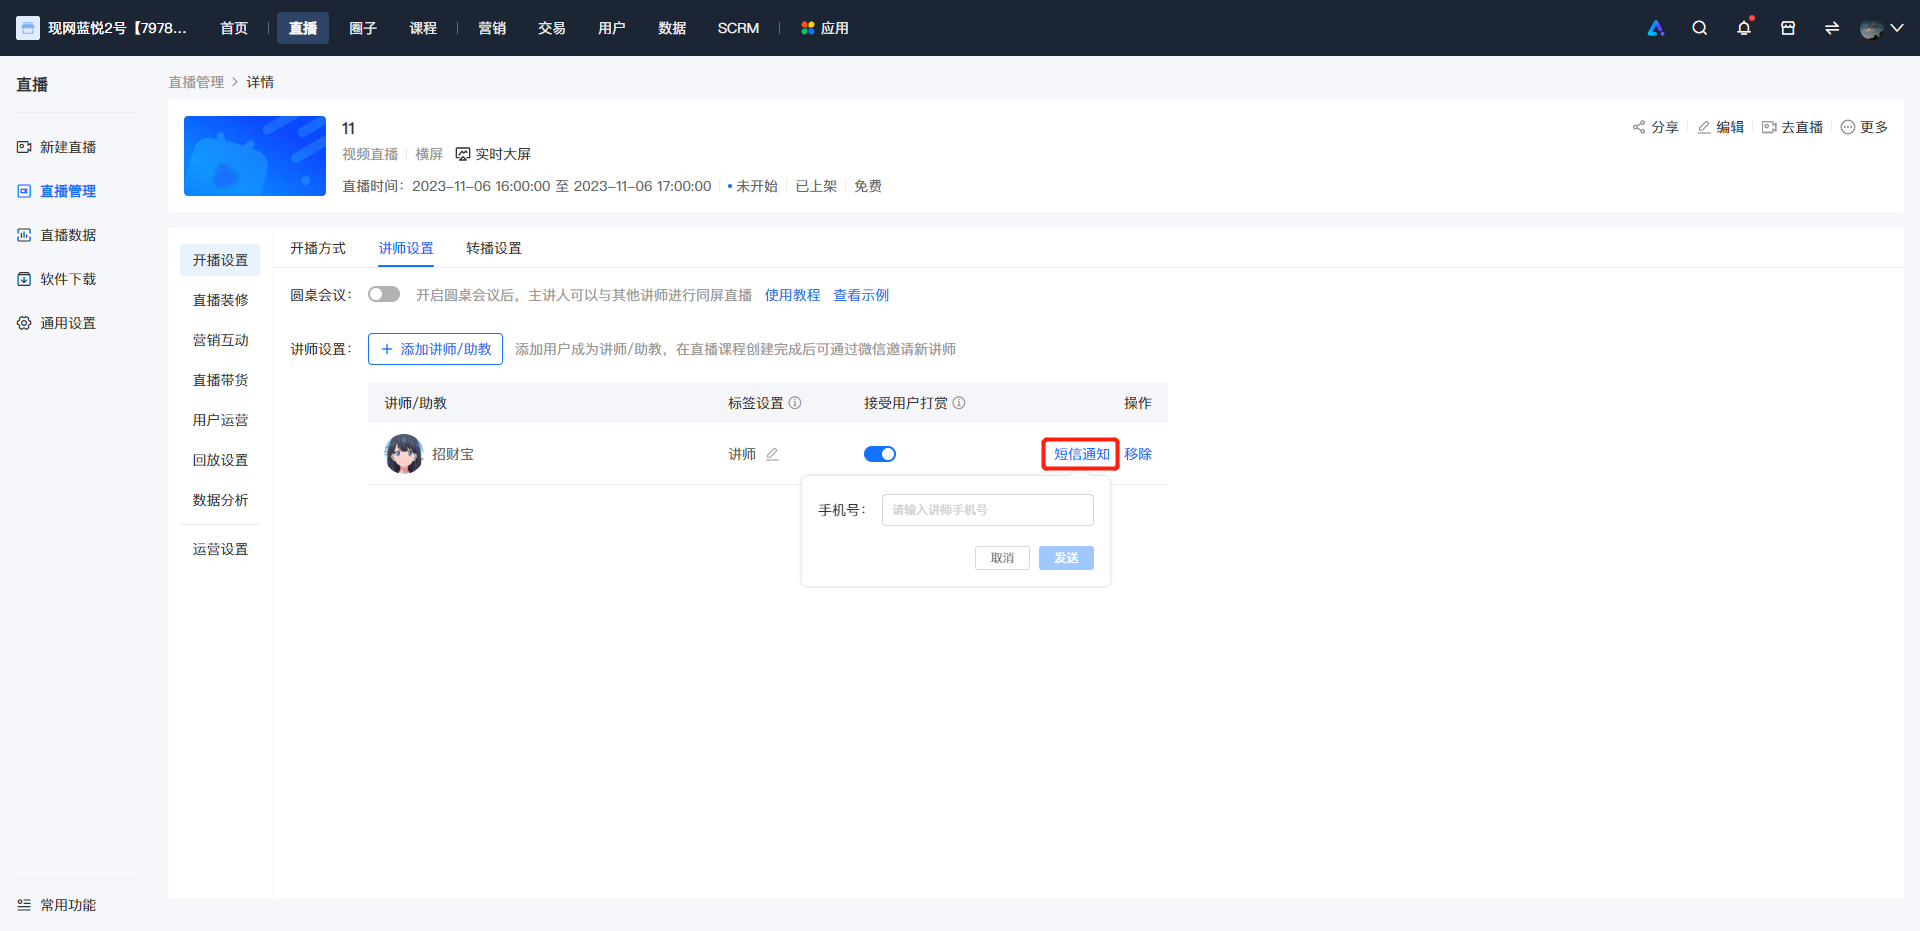
PS:In the live - stream room settings - Course settings, you can sendSMS notifications;
By default, SMS notifications will be sent to the phone number bound to the instructor in the store. If the phone number is not filled in or does not match, you can enter the phone number and then send the notification.
Tutorial on Using Ultra-Low Latency Live Streaming
I. Feature Introduction
The ultra-low latency feature can significantly reduce the live streaming latency (down to less than 1 second).It meets the specific scenario requirements of merchants with higher latency performance requirements, such as online education, live sports events, and online quizzes.This provides viewers with a more immersive live streaming experience.
II. Use Cases
1. Online Education: Teachers and students can have real-time Q&A interactions, ensuring the effectiveness of classroom teaching. Online classes can be as natural as face-to-face ones.
2. E-commerce Live Streaming: Users can interact with merchants in real-time, increasing the purchase conversion rate. Users won't miss out on promotional flash sales.
3. Large-scale Events: Information from large conferences and sporting events can be synchronously transmitted, quickly reaching users and allowing viewers to stay updated on the latest event dynamics.
4. Interactive Entertainment: Streamers can provide timely feedback on user likes and rewards, enhancing the user viewing experience and increasing interaction enthusiasm.
III. Operation Path
Merchant Side: Merchant Backend → Live Streaming → General Settings
IV. Usage Tutorial
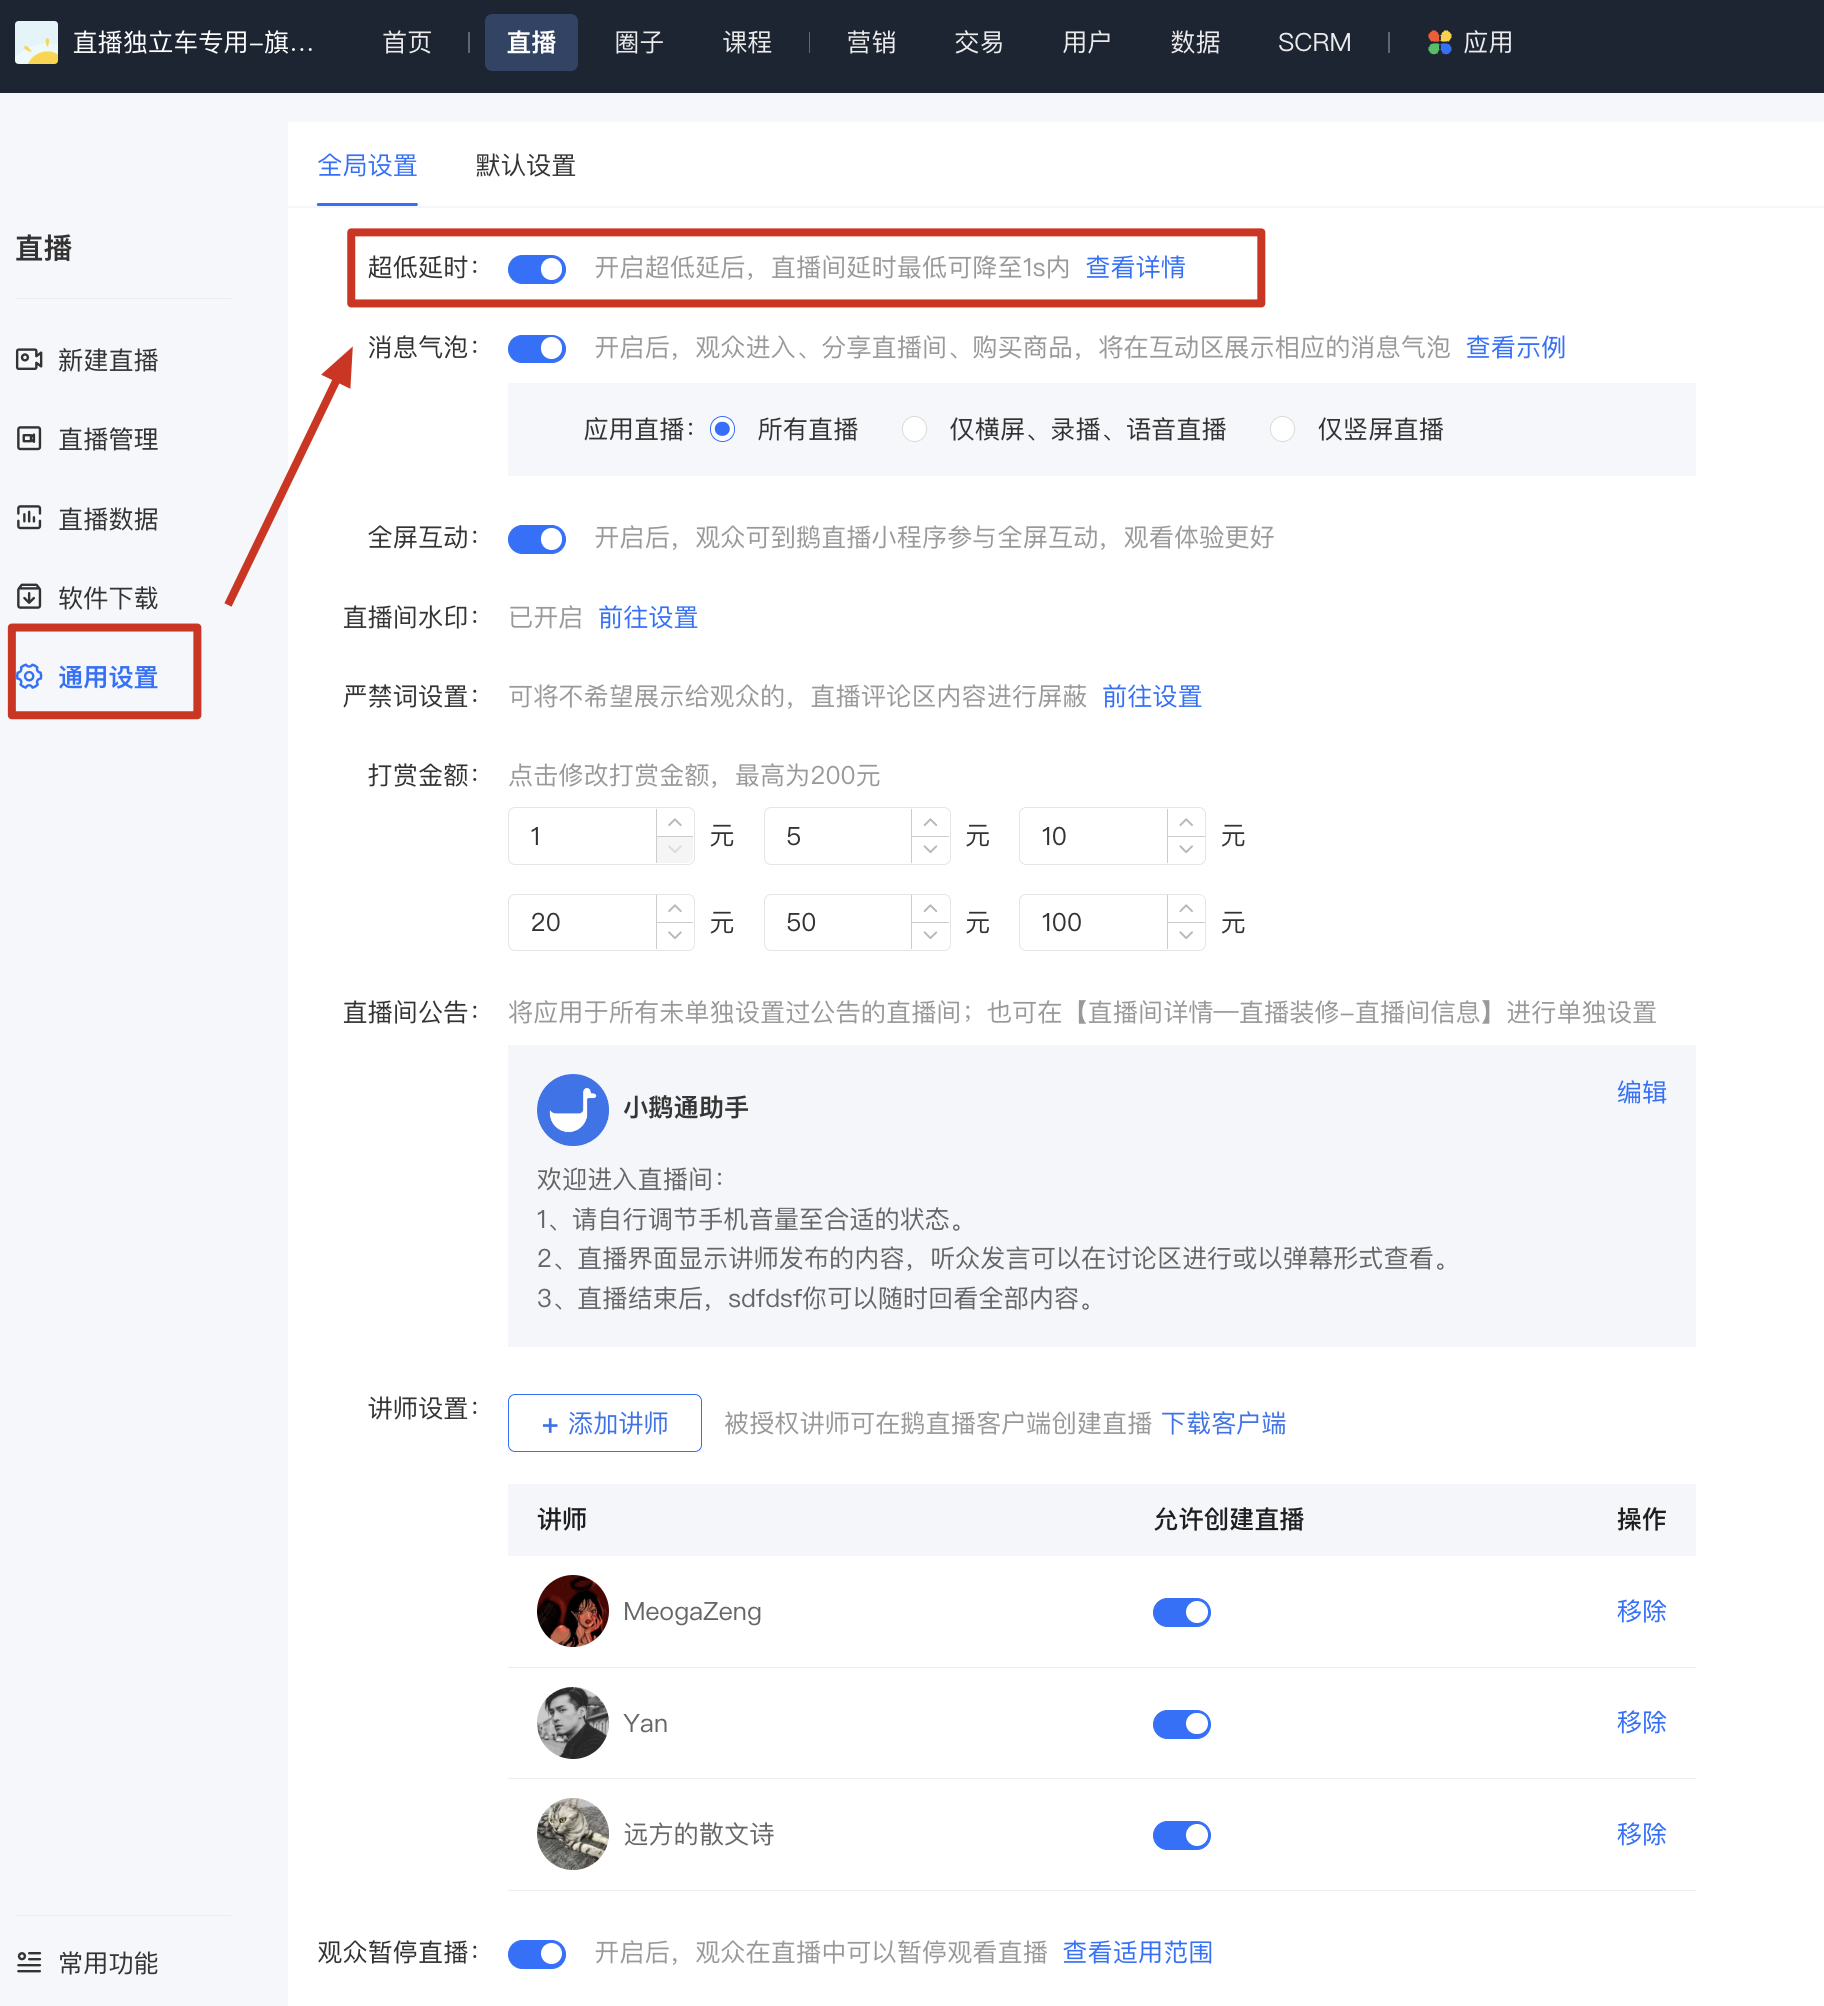
Step 1: Enter the [General Settings] page and enable ultra-low latency.
Click [Live Streaming] - [General Settings] and find [Ultra-low Latency] at the top of the page.After enabling it, learners can watch the live stream with ultra-low latency.
Will this feature take effect immediately after enabling ultra-low latency live streaming?
This function takes effect immediately after being enabled. If a live stream is in progress, you need to refresh the viewing page for the function to take effect.
After enabling ultra-low latency live streaming, can users enjoy ultra-low latency when watching on all devices?
After enabling ultra-low latency live streaming, ultra-low latency is supported when viewing on the following terminals:
·WeChat H5 (not supported on systems below iOS 12/Android 8 and some Huawei models for now)
· Web browsers (most browsers such as Google Chrome, 360 Browser, and Cheetah Browser are supported, but Safari is not)
· Mini Programs and the desktop version of WeChat will be supported in the future
Why is the live streaming latency still high after enabling ultra-low latency live streaming?
Under normal circumstances, when using the elink Assistant client for ultra-low latency live streaming, the latency on the viewing end can reach around 2 seconds (when using OBS for streaming after settings, the minimum latency can be within 1 second).
[Tutorial on Using OBS for Ultra-Low Latency Live Streaming]
(1) Go to the [Settings - Output] page.
(2) Output mode: Select "Advanced".
(3) Keyframe interval: Enter "2".
(4) CPU usage preset: Select "veryfast".
(5) Configuration: Select "baseline".
(6) Fine-tuning: Select "zerolatency".
(7) X264 options: Enter "sliced_threads=0".

Live streaming latency is affected by various factors, such as network conditions, the performance of live streaming devices, and the devices on the viewing end.
If there is severe latency, please check whether the network speed and the performance of the live streaming device meet the requirements.
1) Network speed requirements:During live streaming, the upload and download speeds of the device need to reach at least 10M. You can visit the website: https://www.speedtest.cn/ to measure the speed.
2) Device requirements:Currently, mainstream laptops priced over 5000 yuan can generally meet the live streaming requirements. For example, the new Xiaomi laptops. If the configuration is too low, it may cause stuttering and latency during live streaming.
Tutorial on converting documents to PDF
(1) Convert WPS documents to PDF
1. Open the courseware to be converted and click the "WPS Presentation" button in the top-left corner.

2. In the "WPS Presentation Menu", click: "Save As - Output as PDF Format".

(2) Convert Microsoft Office 2010, 2013, 2016 documents to PDF
1. Open the courseware to be converted and click the "File" button in the top-left corner.

2. Then click "Save As - Select the save path - Set the courseware name - Set the save type to PDF" and save.


Specification for configuring external links in recommendation cards
To facilitate merchants in promoting and selling their own platform products, elink supports configuring external link products for live commerce. To maintain a healthy online ecosystem and protect the legitimate rights and interests of consumers, the following regulations are hereby formulated. elink reserves the right to handle content that violates these regulations, including but not limited to taking down relevant live streams, courses, and products, banning them, and restricting or removing store functions. The details are as follows:
It is strictly prohibited to use external links to spread the following content:
I. Content that violates national laws and regulations, including but not limited to:
(1) Content that violates the basic principles established by the Constitution;
(2) Content that endangers national security, discloses state secrets, subverts state power, or undermines national unity;
(3) Content that damages national honor and interests;
(4) Content that incites ethnic hatred or discrimination and undermines ethnic unity;
(5) Content that undermines national religious policies and promotes cults or feudal superstitions;
(6) Content that spreads rumors, disrupts social order, or undermines social stability;
(7) Content that spreads pornographic, vulgar, gambling, violent, terrorist content or incites crime;
(8) Content that insults or slanders others and infringes on their legitimate rights and interests;
(9) Content that incites illegal assemblies, associations, marches, demonstrations, or gatherings to disrupt social order;
(10) Content that operates in the name of illegal non - governmental organizations;
(11) Content that contains other content prohibited by laws and administrative regulations;
II. Fraudulent content:
(1) Content that promotes or deceives users into buying items that infringe on the legitimate rights and interests of others through false advertising;
(2) Content that infringes on users' rights and interests by forging other official websites;
(1) Conducting relevant business activities without obtaining the required legal licenses or permits or failing to meet the requirements of regulatory authorities, including but not limited to illegally promoting drugs or medical devices, illegally providing paid investment consultations on securities or futures, and illegally promoting tobacco;
(2) Engaging in pyramid - selling activities;
(3) Other illegal business operations and suspicious services;
IV. Illegally obtaining and using user data and information:
(1) Copying, storing, using, or transmitting user data without the user's explicit consent and without truthfully disclosing the purpose and scope of data use to the user;
(2) Misusing user data and information without the user's explicit consent and without truthfully disclosing the purpose and scope of data use to the user;
V. Religious donation content:
Any information related to spreading “religious donations” that may damage the legitimate rights and interests of users, such as online Buddha offerings and online animal releases;
VI. Behaviors explicitly prohibited in the 《elink Service Agreement》 and 《Privacy Policy》
Tutorial on converting documents to PDF
(1) Convert WPS documents to PDF
1. Open the courseware to be converted and click the "WPS Presentation" button in the top-left corner.
2. In the "WPS Presentation Menu", click: "Save As - Output as PDF Format".
(2) Convert Microsoft Office 2010, 2013, 2016 documents to PDF
1. Open the courseware to be converted and click the "File" button in the top-left corner.
2. Then click "Save As - Select the save path - Set the courseware name - Set the save type to PDF" and save.
What should I do if the virtual background and beauty filter don't work?
1. After setting the virtual background and beauty effects, you can't see the results. ClickDownload the plugin. After installing the plugin, re-enter the client, and the virtual background and beauty effects will appear.
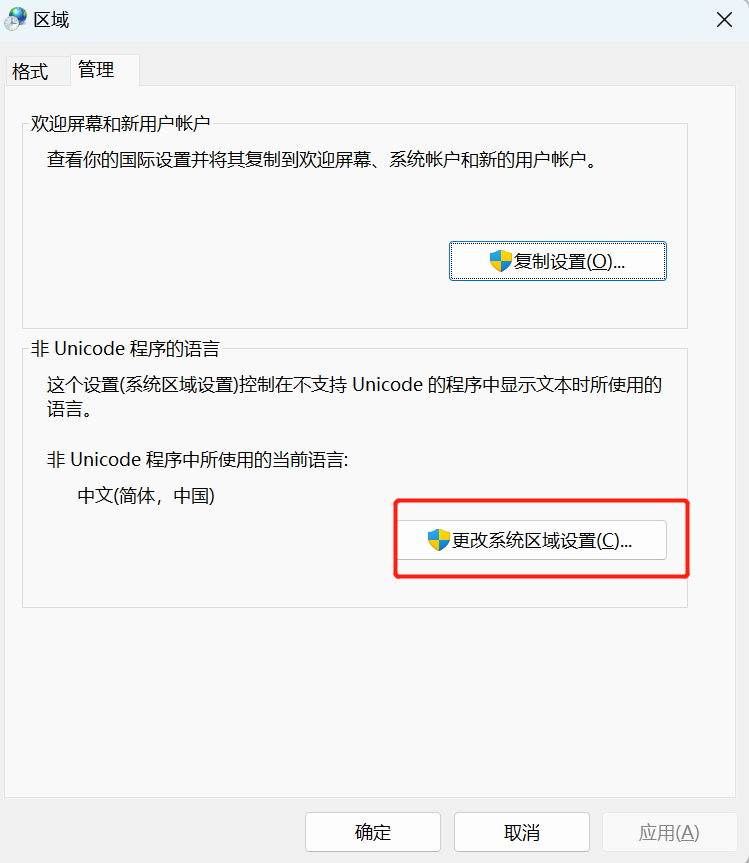
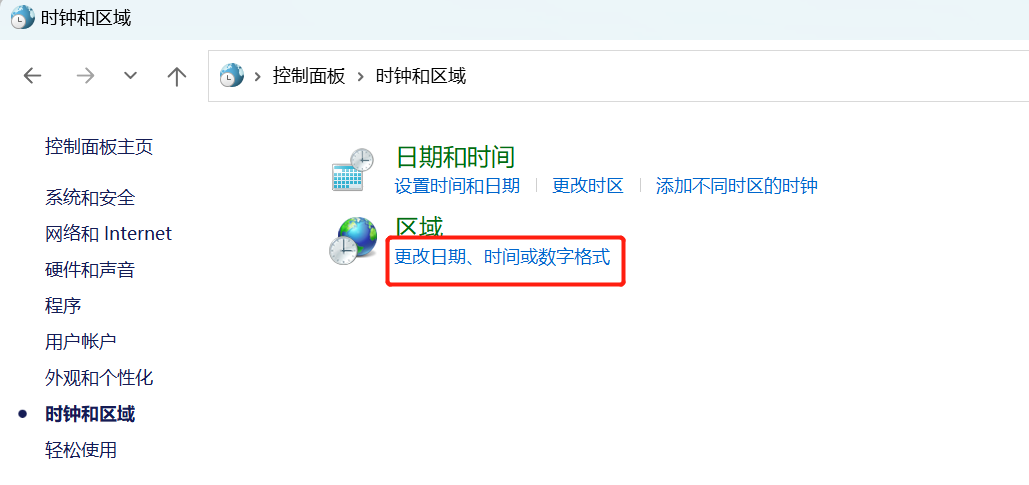
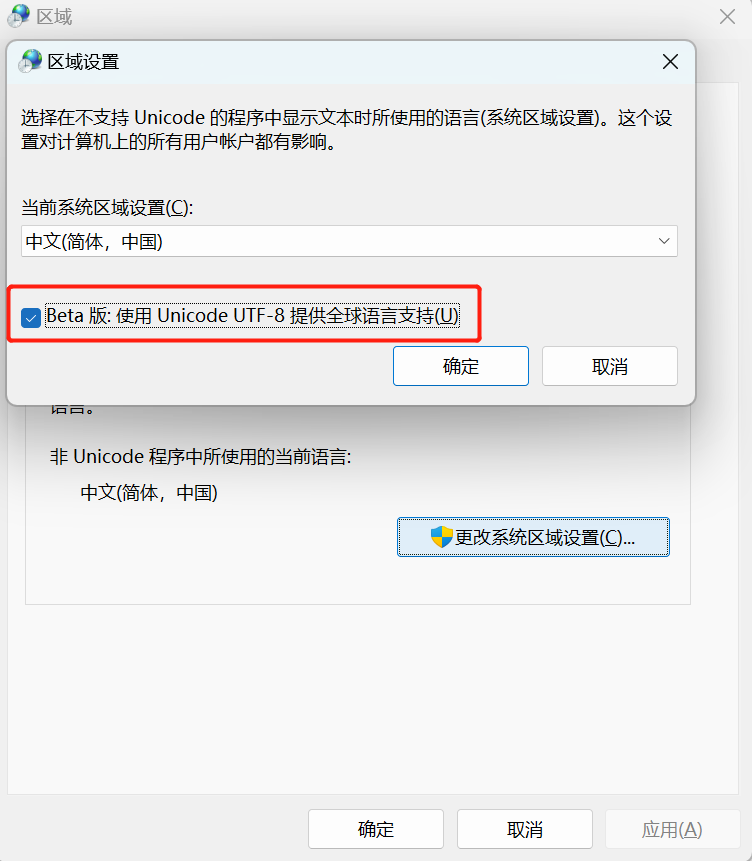
2. If the above method cannot solve the problem, you need to modify the system characters of your computer:
① First, right-click on the Start menu, click “Run” or use the shortcut key “Win + R” to open the Run window.
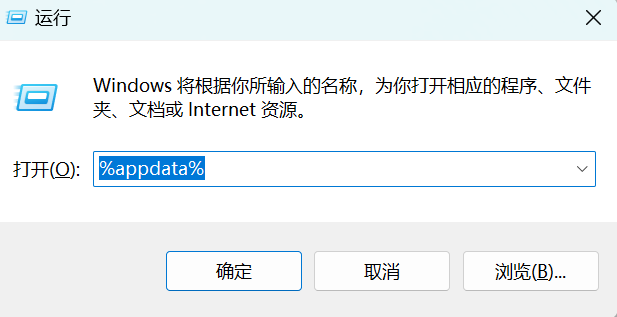
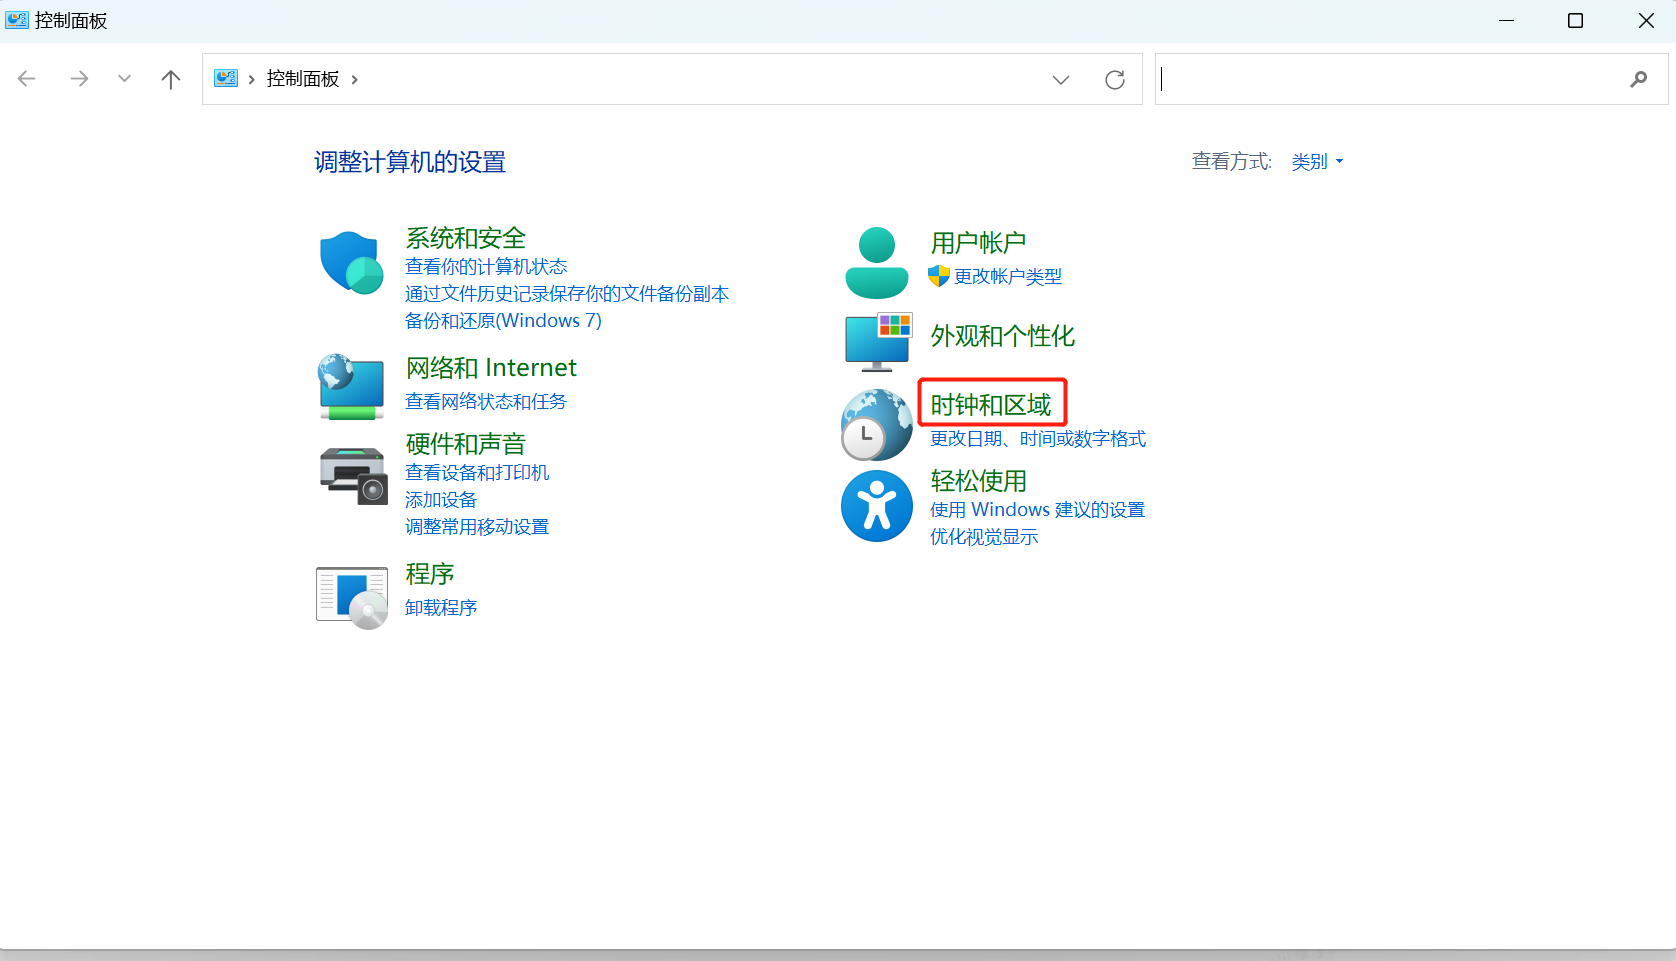
② Enter “control”, then press the “Enter” key to open the Control Panel. Find Clock and Region > Region > Management > Change system locale > Check “Beta: Use Unicode UTF-8 for worldwide language support”. Click “OK”, then click “Apply”. After that, reopen the client.
Tutorial on Privacy Protection Usage
I. Function Introduction
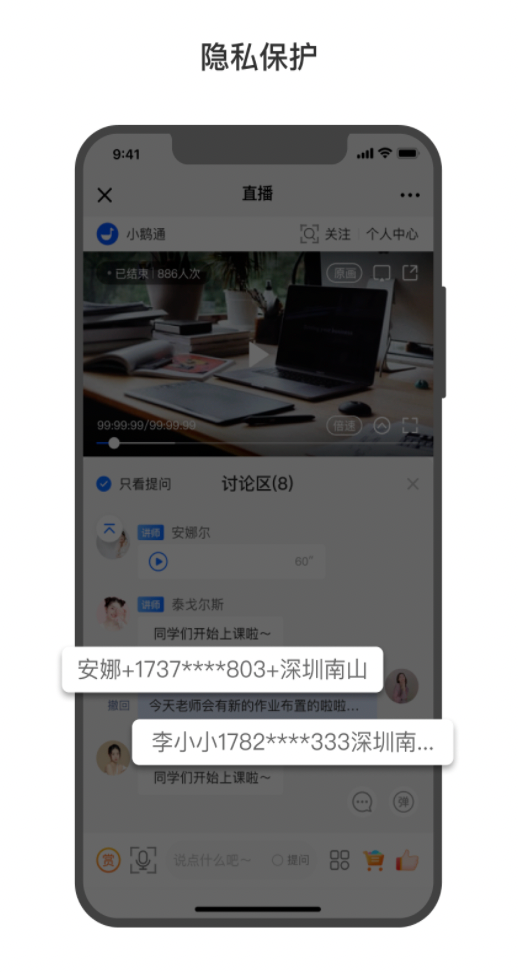
Privacy protection can effectively safeguard the privacy of learners. When a learner's nickname contains a phone number, the phone number in the nickname will be hidden when the learner comments in the live - streaming room. The instructor and teaching assistants can view the learner's comments and nicknames in the live - streaming room without any impact.
II. Purpose of Use
1. Protect the interests of merchants and ensure that the phone numbers of learners, which are the merchants' resources, will not be leaked from the live - streaming room.
2. Protect the privacy of learners and avoid unauthorized information leakage.
III. Usage Scenarios
After enabling the function, learners don't need to worry about their phone numbers being leaked when commenting. Merchants can effectively protect the learners' nicknames and avoid losses caused by customer data leakage.
IV. Operation Path
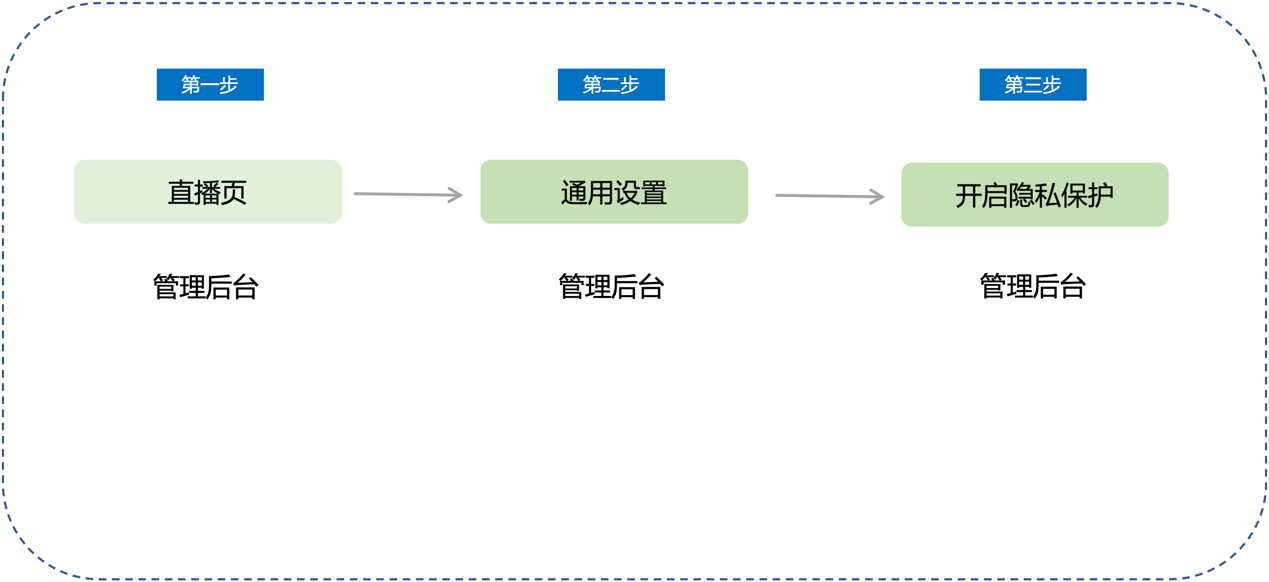
Merchant side: Merchant background → Live streaming → General settings
V. Usage Tutorial
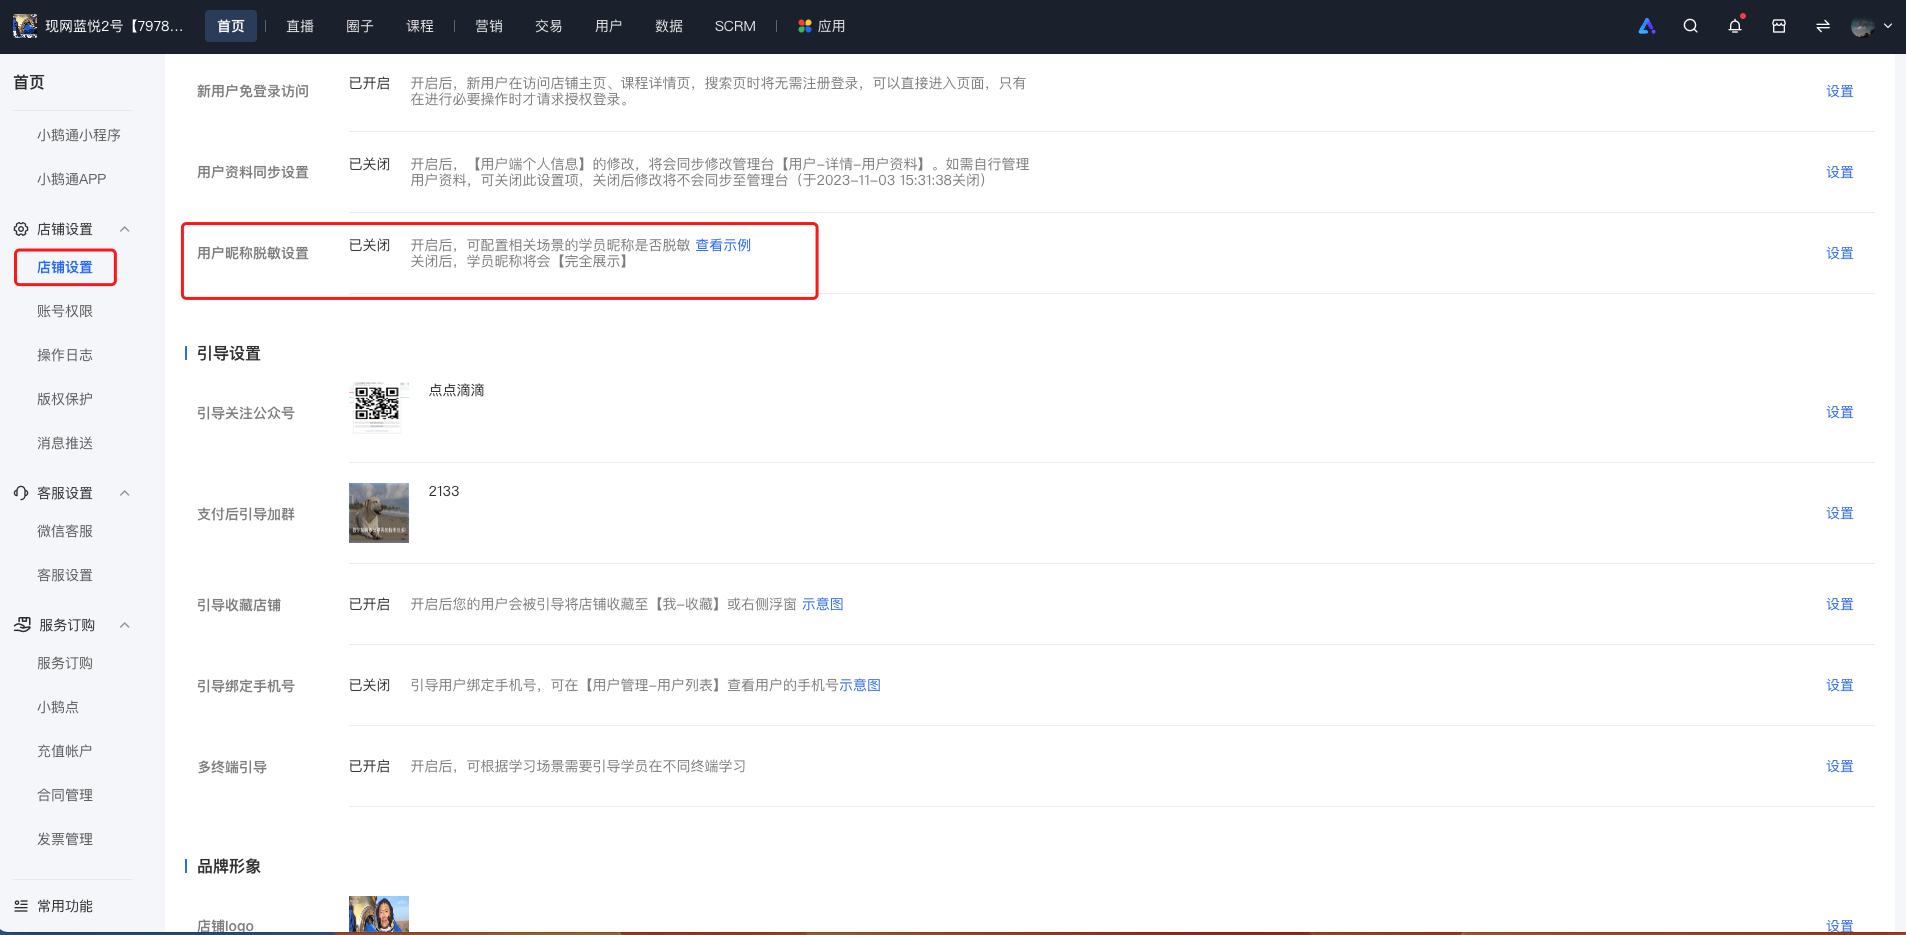
Step 1: Enter Settings - Store settings - User nickname desensitization settings(Management background)
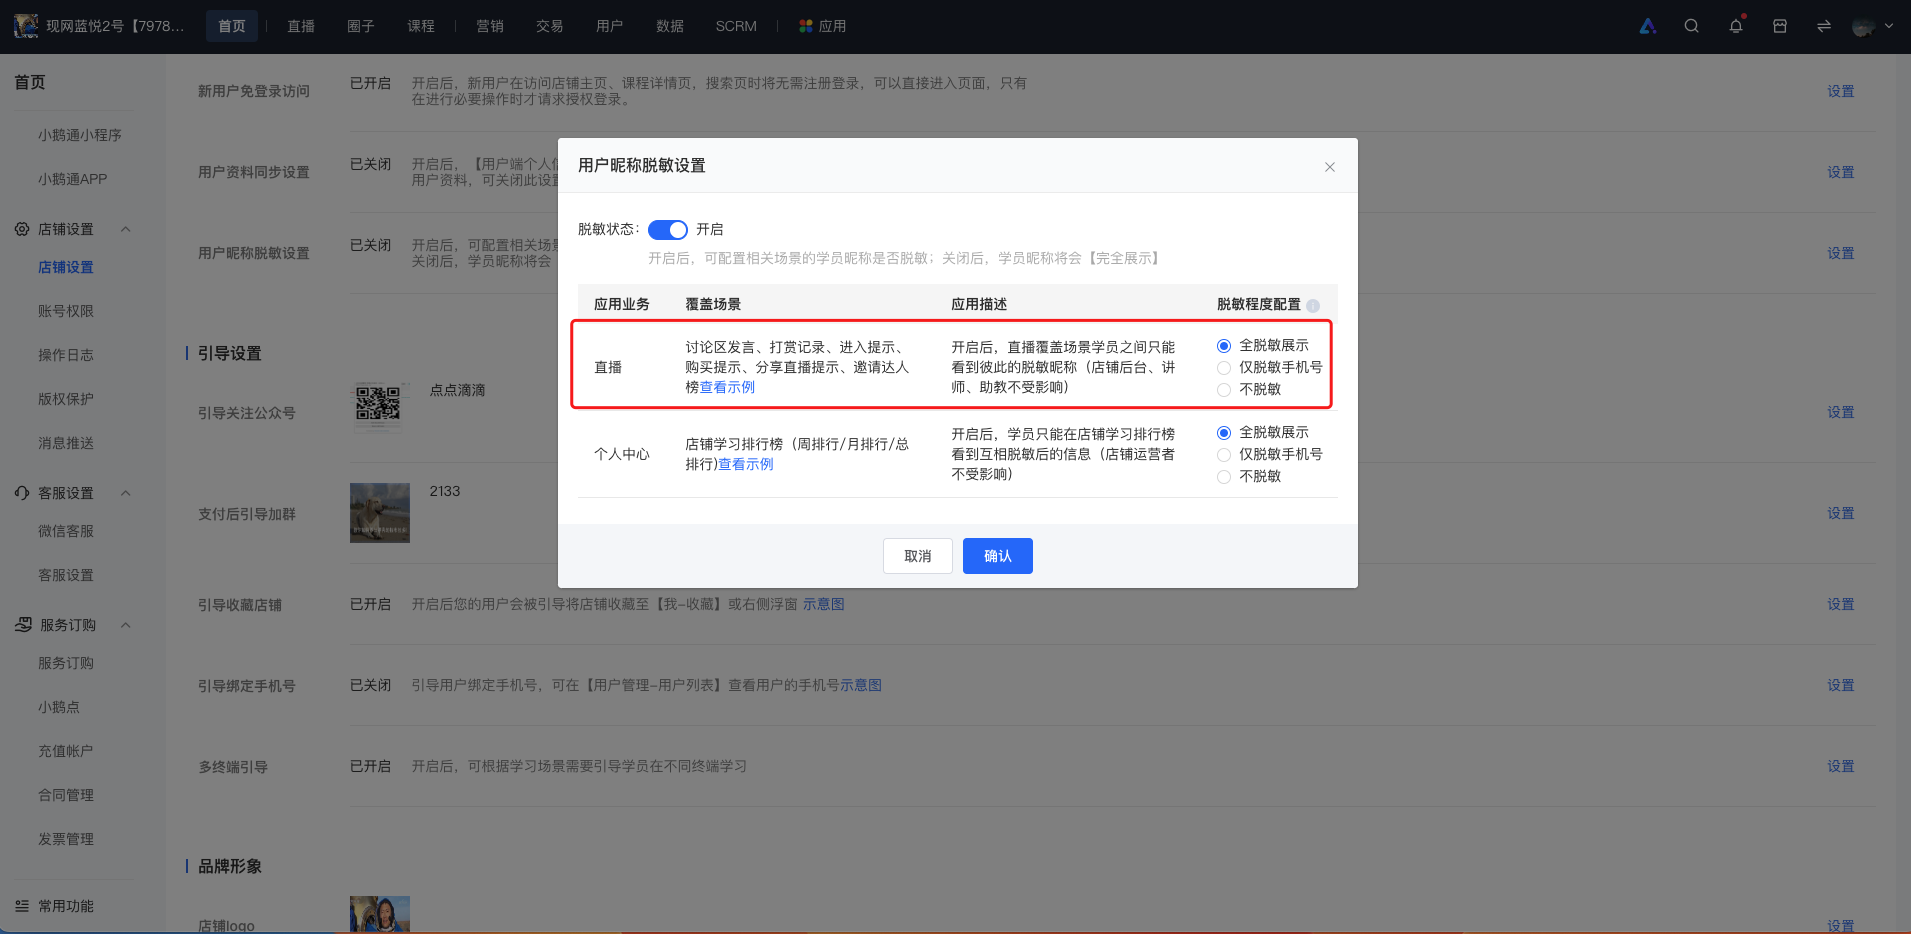
Step 2: Enable privacy protection(Management background)
Effect after enabling the privacy protection function:
Tutorial on Using Live Commerce Comment Review
I. Function Introduction
In the specific live streaming room settings - Comment Settings, after enabling the [Comment Review] function, merchants can review the comments in the live streaming room. After confirming that the comments meet the merchants' requirements, merchants can perform the "Display" operation on specific comments. After completion, the comment will be visible to all users in the live streaming room.
II. Purpose of Use
Merchants can use this function to more effectively manage and control the comments in the live streaming room.
III. Usage Scenarios
To prevent non - compliant comments (such as political, terrorist, pornographic remarks, advertising information, spamming information, etc.) from affecting the merchant's brand and live streaming effect during the live streaming, merchants can enable the [Comment Review] function to review the comments before displaying them to all users.
IV. Operation Path
Merchant side: PC management console → Live Streaming → Details → User Operations → Comment Settings
V. Usage Tutorial
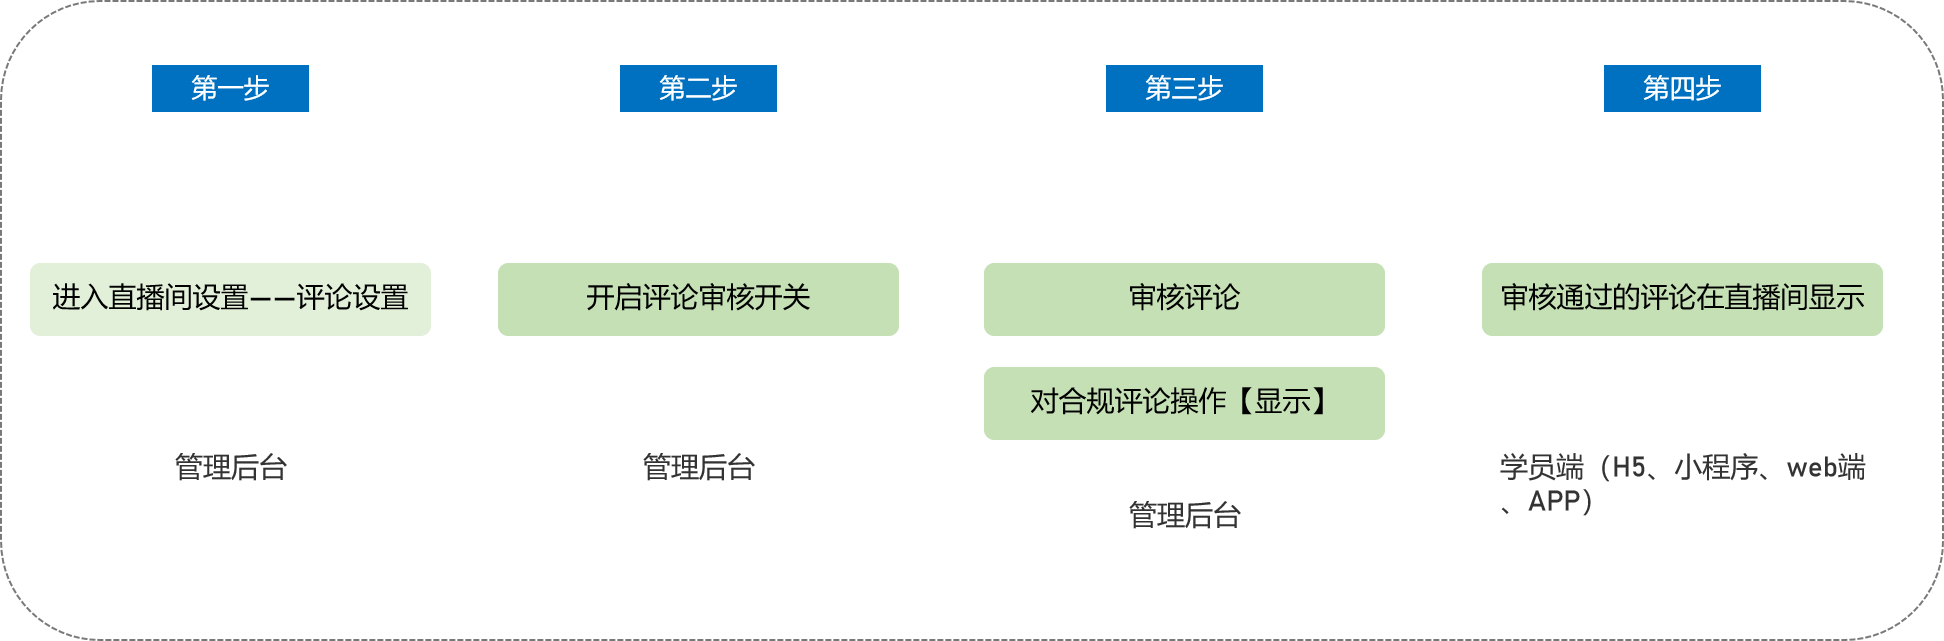
Step 1 Enter User Operations - Comment Settings (Management Backend)
Enter the details page of the specific live streaming room, click to enter User Operations, and select Comment Settings.
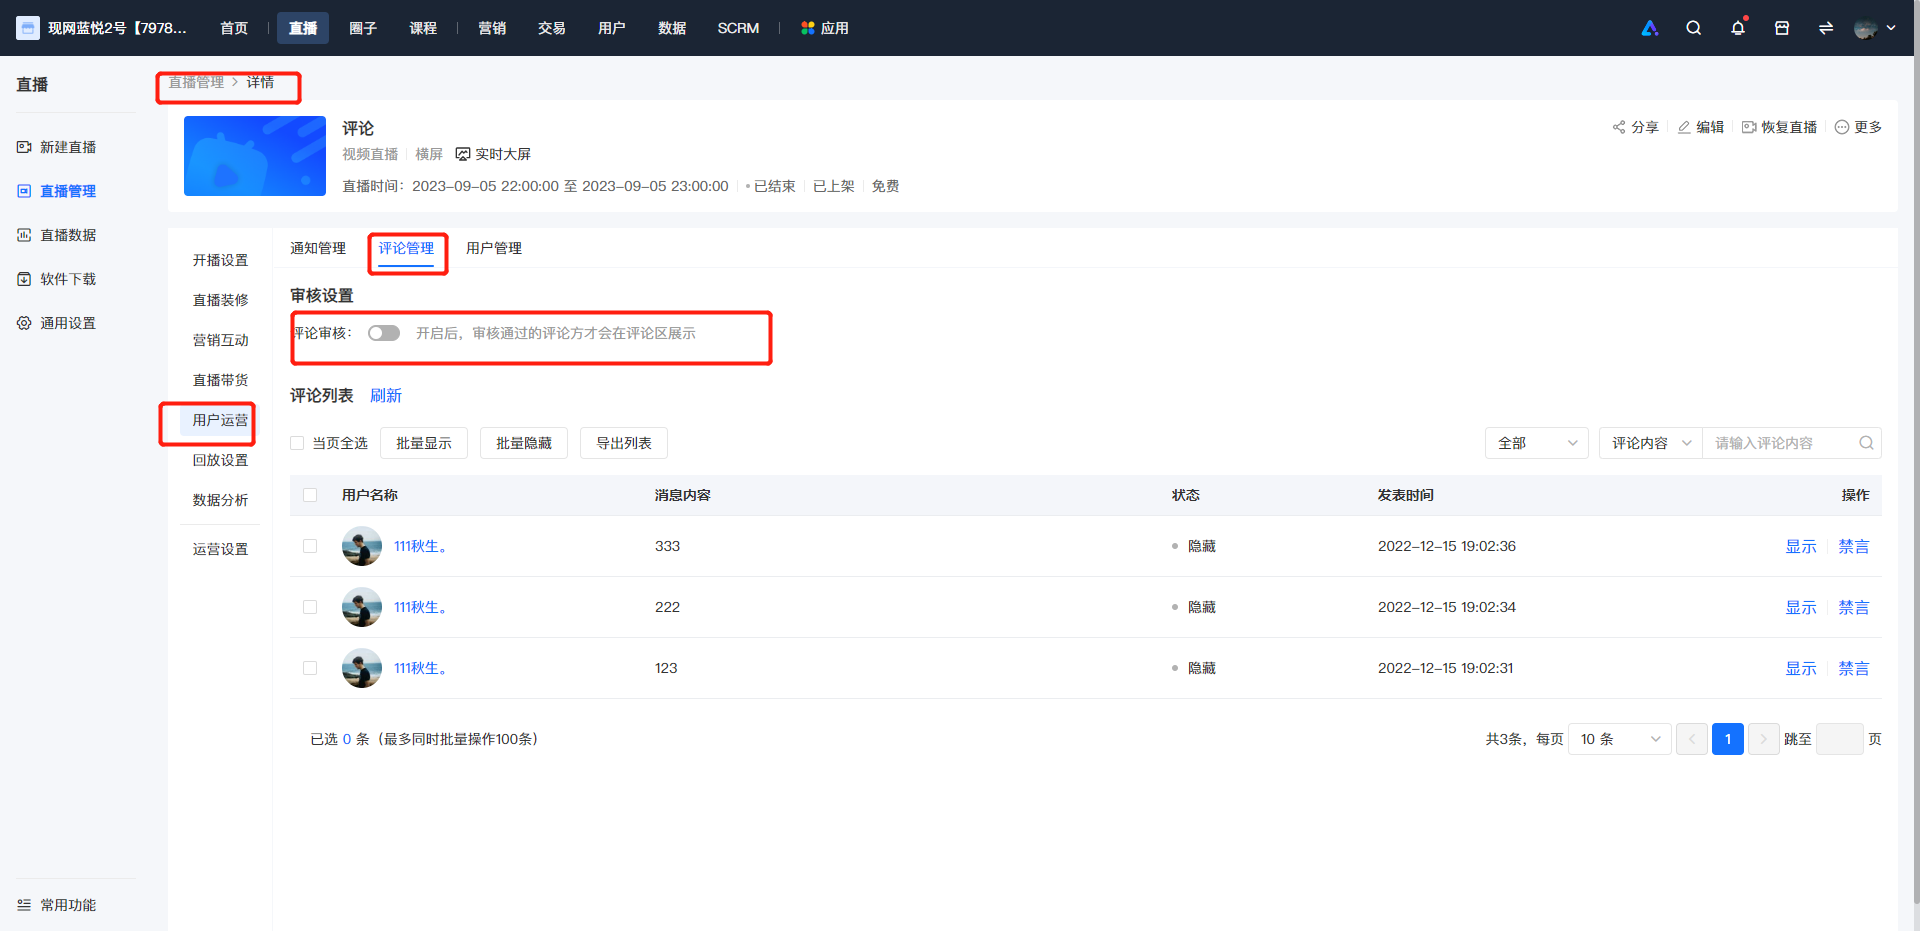
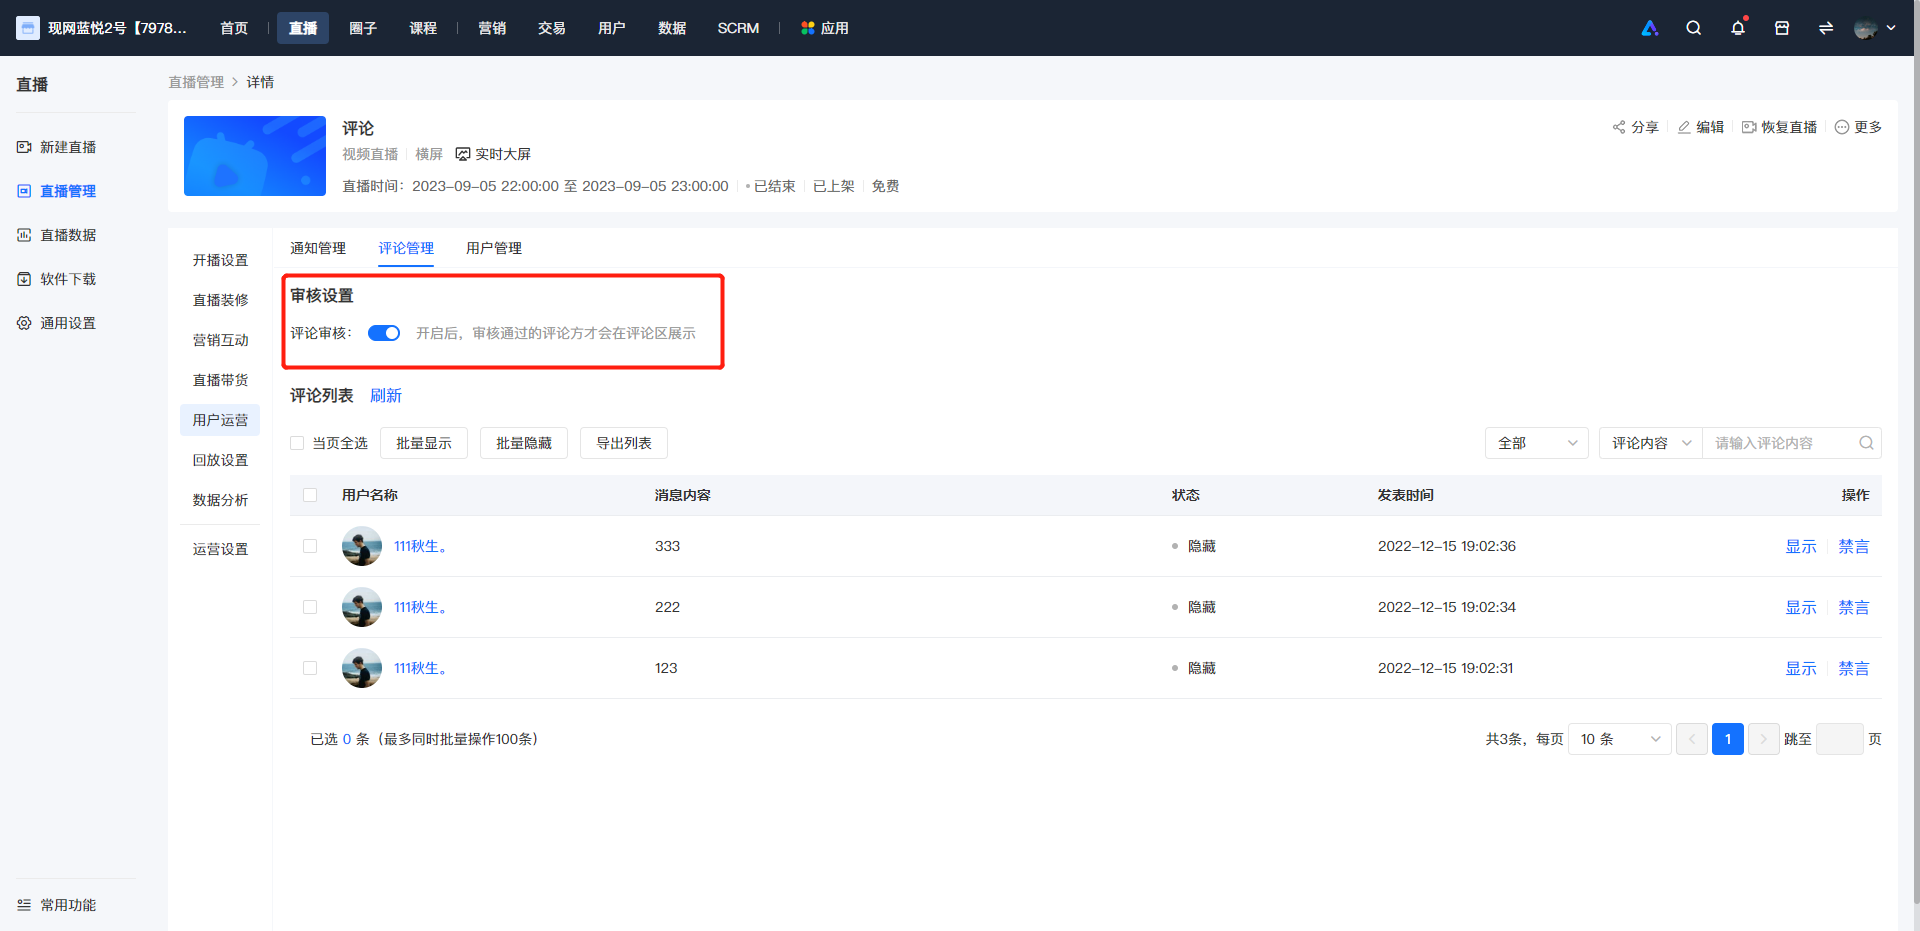
Step 2 Enable the Comment Review Switch (Management Backend)
Enable the comment review switch. After enabling, the comments sent by users in the live streaming room will be hidden by default and not visible to all users (except the user who sent the comment).
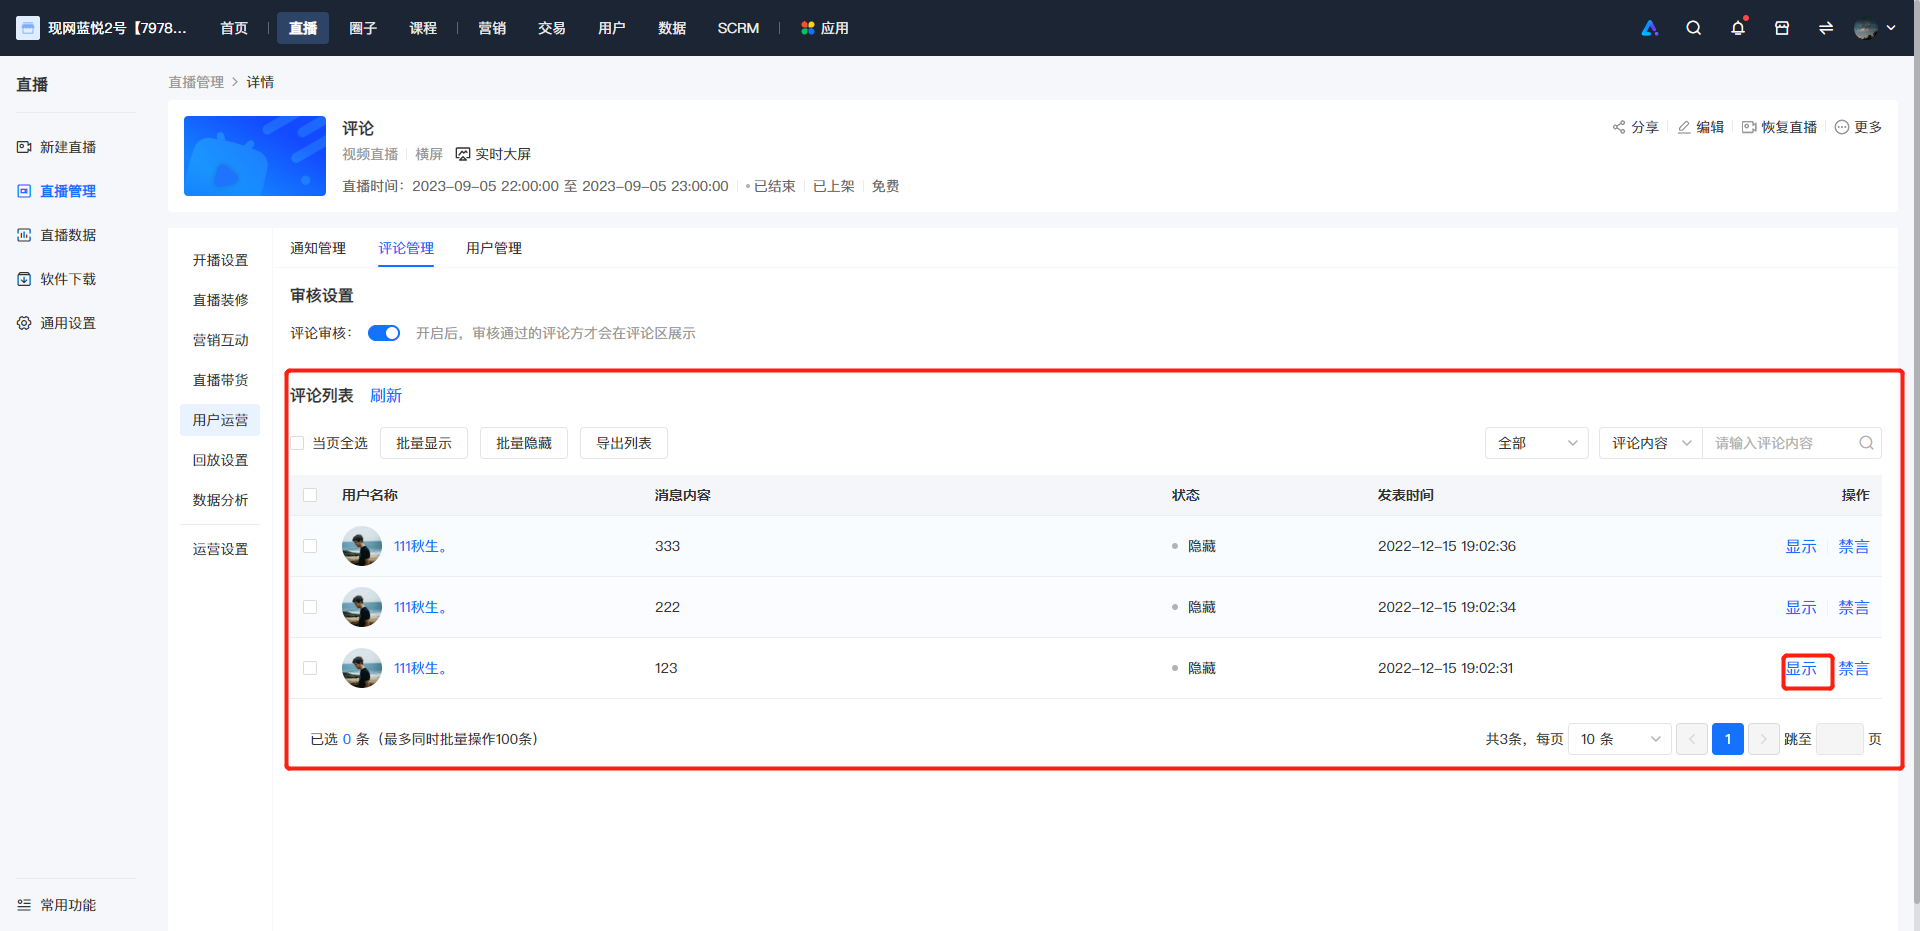
Step 3 Review Comments and Perform the [Display] Operation on Compliant Comments (Management Backend)
Review the comments sent by users in the live streaming room. Perform the [Display] operation on the comments that pass the review and meet the merchants' requirements. The status column shows the display status of the current comment. Comments with the status of "Display" are visible to all users in the live streaming room, and comments with the status of "Hidden" are not visible to all users in the live streaming room (except the user who sent the comment).
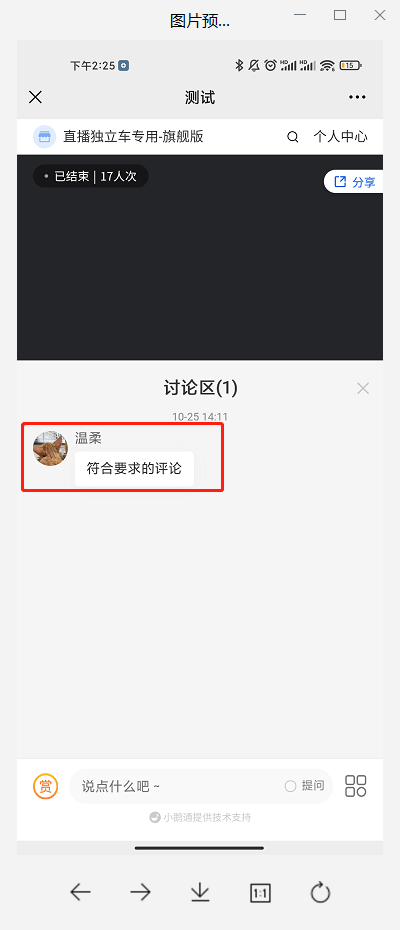
Step 4 Display the Approved Comments in the Live Streaming Room (H5, elink Live Mini Program, Web, elink App)
Comments that have passed the review and been operated with "Display" by the merchant in the backend will be displayed in the live streaming room and will be visible to all users.
Scope of application for trainees to pause live commerce
Merchants can choose to disable the 'Student Pause' function for live streams. When students are watching the live stream on the H5 page, elink Live Mini Program, or PC, the 'Pause' button on the player will be hidden, and they will not be able to pause the live stream during the viewing process.
Inapplicable Scope:
1. Due to certain limitations of some players, such as the system player which cannot hide the 'Pause' button. When a merchant selects the system player for their online store and disables the 'Student Pause' function for live streams, students can still pause the live stream when watching it in full - screen mode on the H5 page.
2.Currently, this rule does not apply to the App version. When merchants disable the 'Student Pause' function for live streams, students can still pause the live stream when watching it on the elink App.
Video live streaming - Real-time video mode
Video Live Streaming - Web Version Usage Tutorial
I. Function Introduction
The web-based instructor console is a tool for elink instructors to conduct live streams on the web. It is suitable for scenarios where desktop sharing, PPT courseware presentation, and instructor appearance are required. Compared with the desktop client, the web-based instructor console is easier to use and more straightforward to operate.
PS: You need to use Google Chrome for live streaming on the web-based instructor console. Google Chrome has better compatibility and will provide a better live streaming experience!
II. Purpose of Use
Using the web-based instructor console allows you to conveniently conduct live streams on the web, enabling real-time video, courseware & desktop sharing, and other live streaming content.
III. Use Scenarios
Web-based live streaming is suitable for scenarios where desktop sharing, PPT courseware presentation, and real-time video live streaming with students are required.
IV. Operation Path
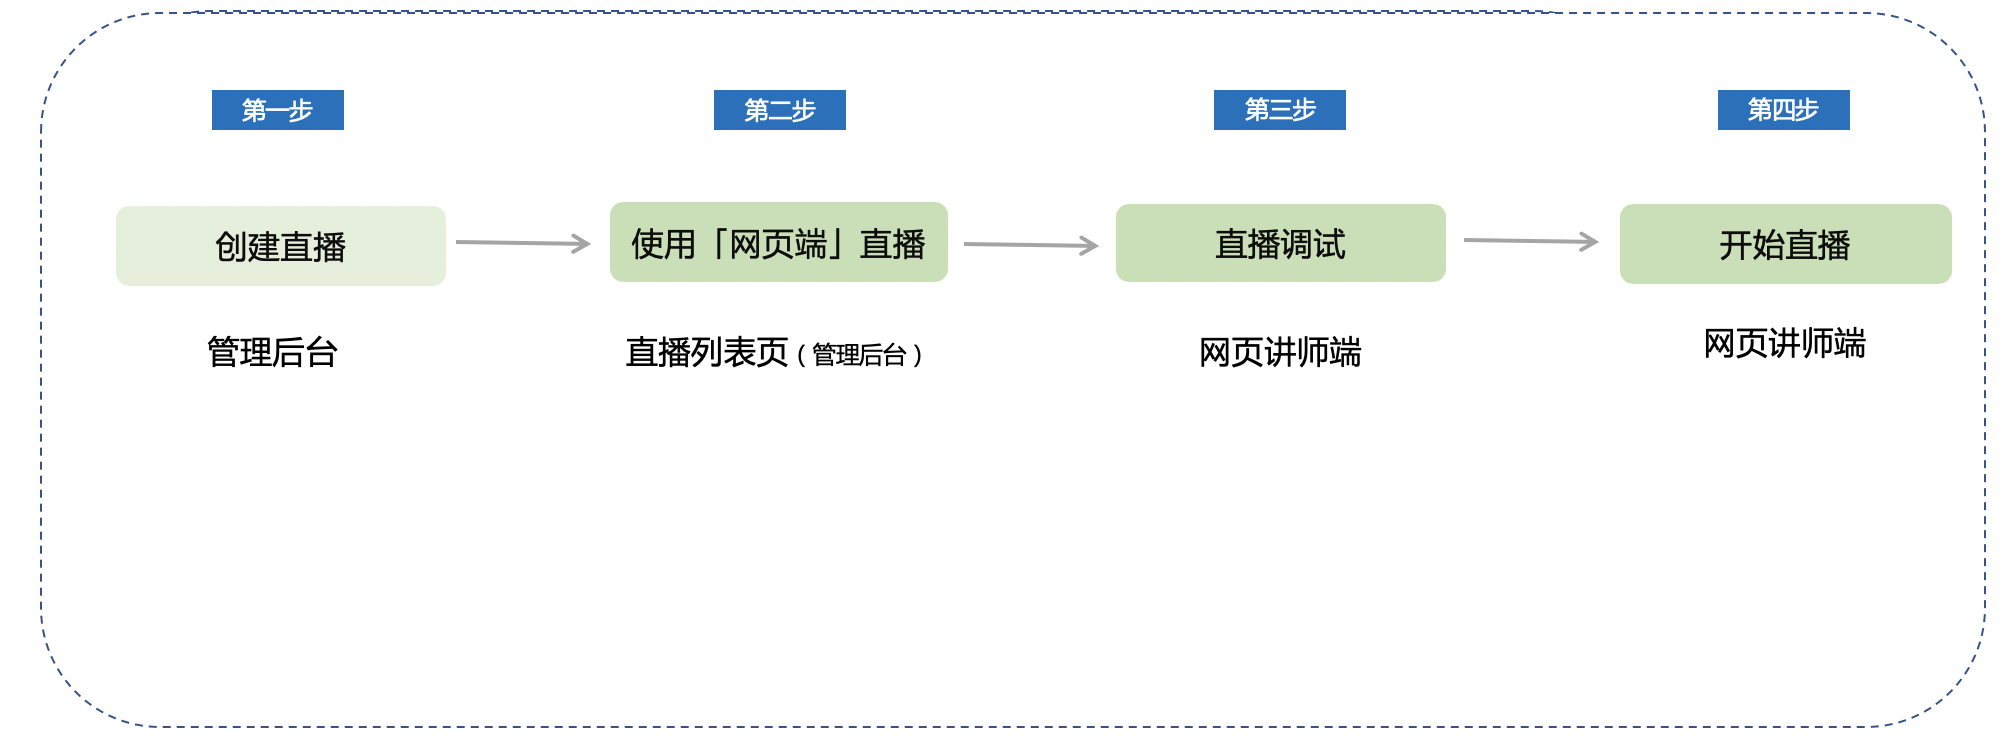
Merchant console: Merchant backend → Live streaming → Go live → Teach on computer → Web-based
V. Usage Tutorial
Step 1: Create a live stream (Management backend)
1. Enter the management backend - Create a new live stream
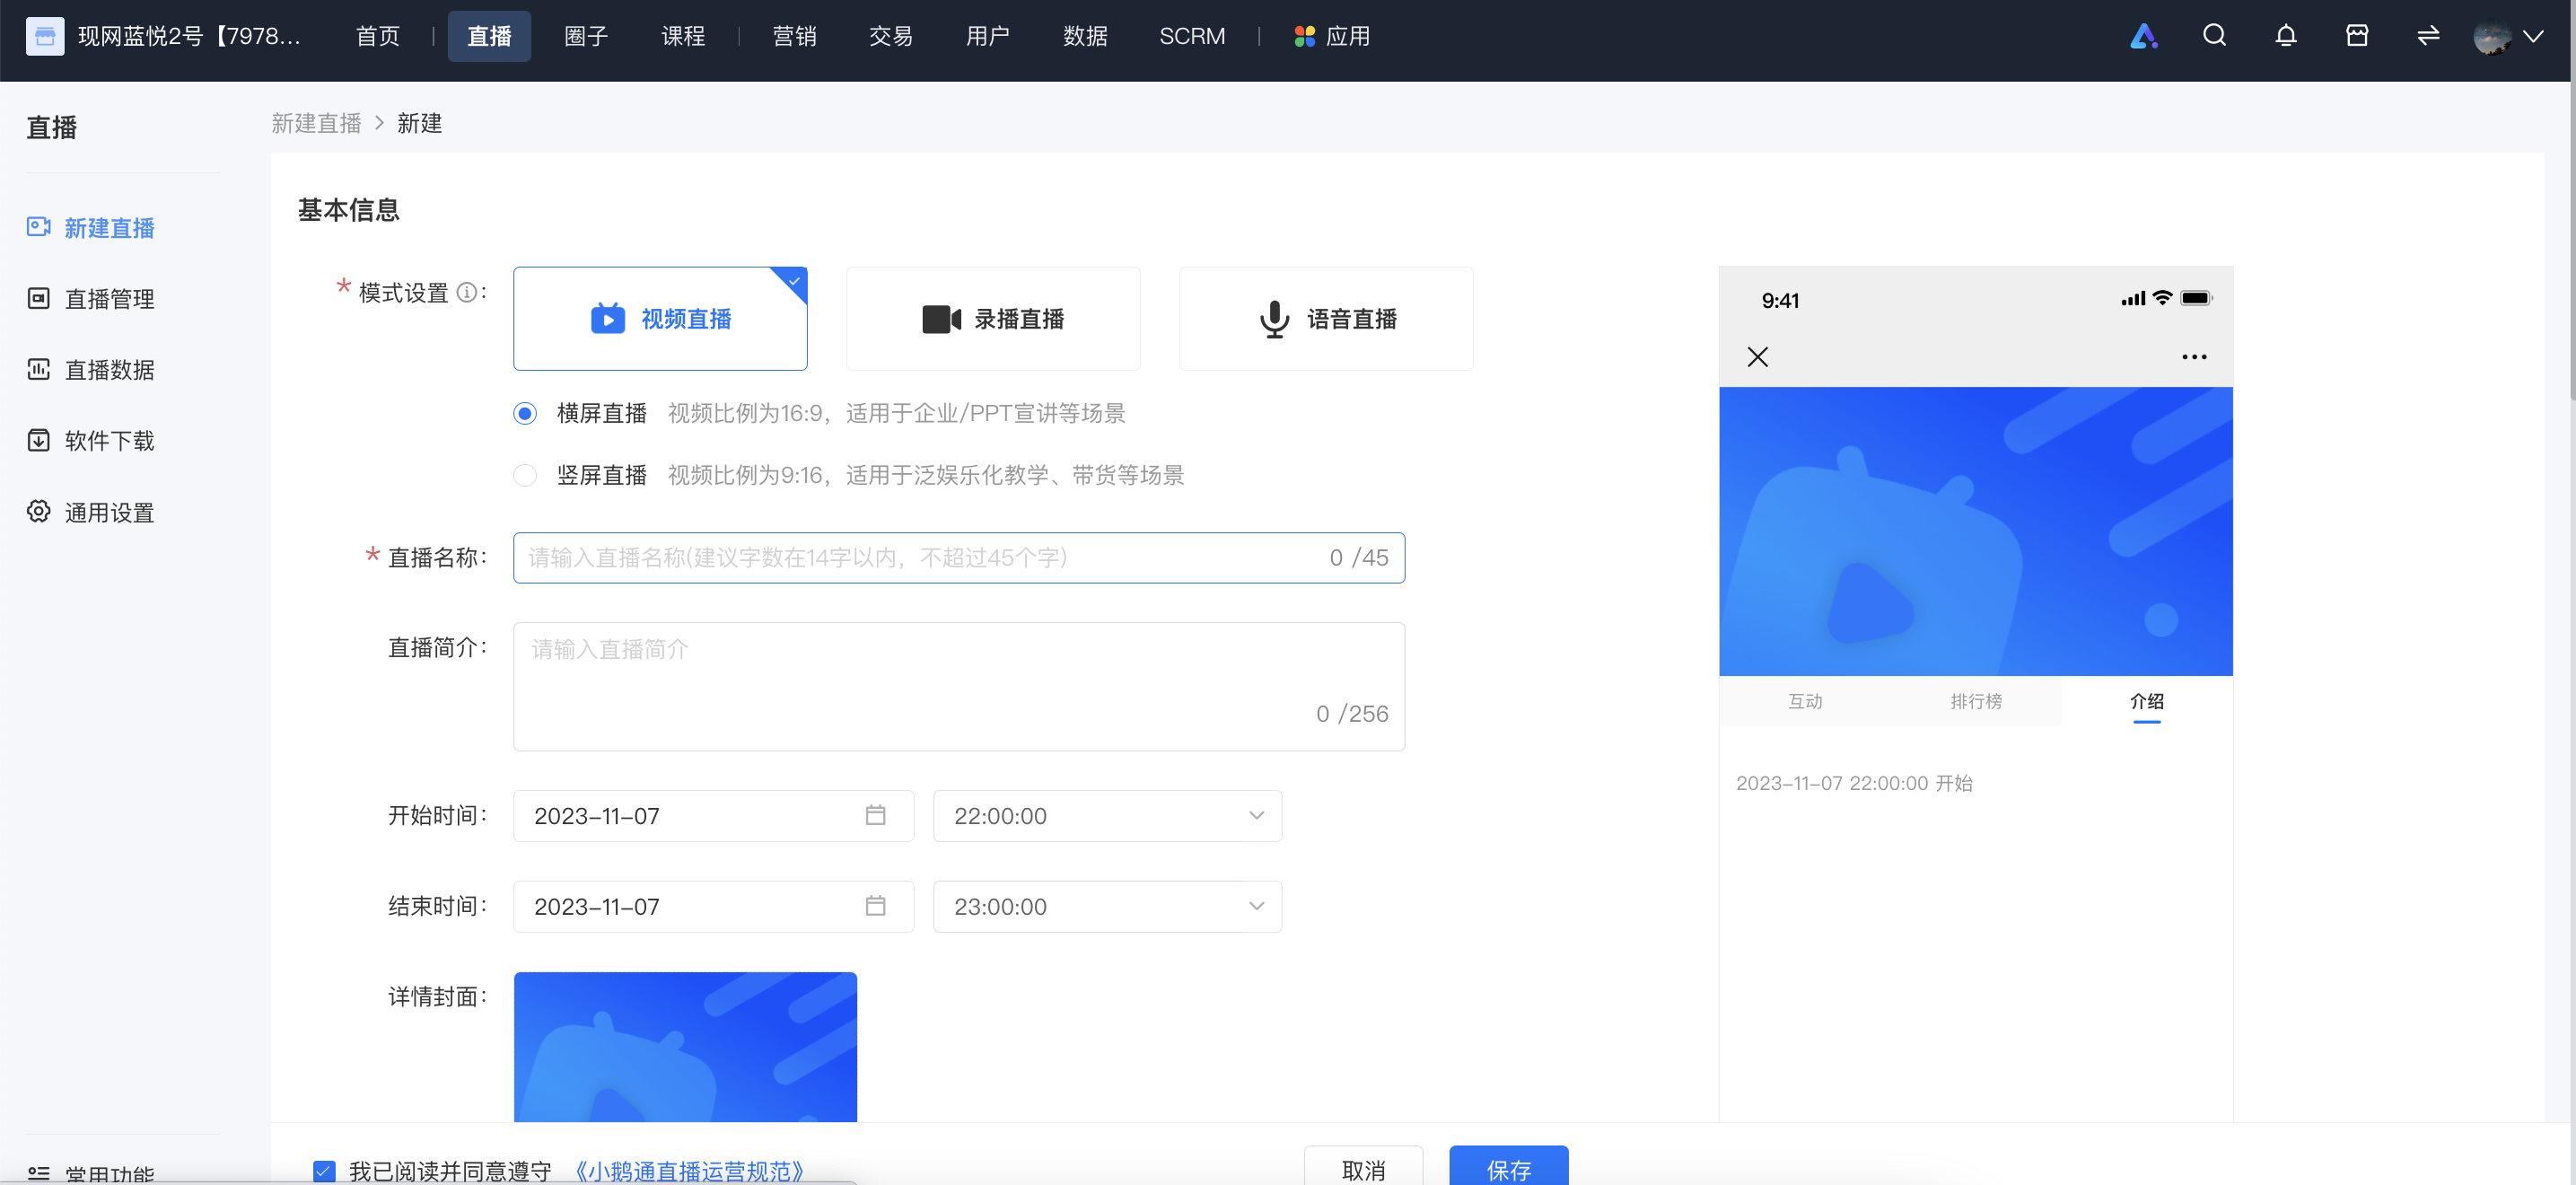
2. Fill in the live stream information and instructor settings, and click the Save button to complete the live stream creation.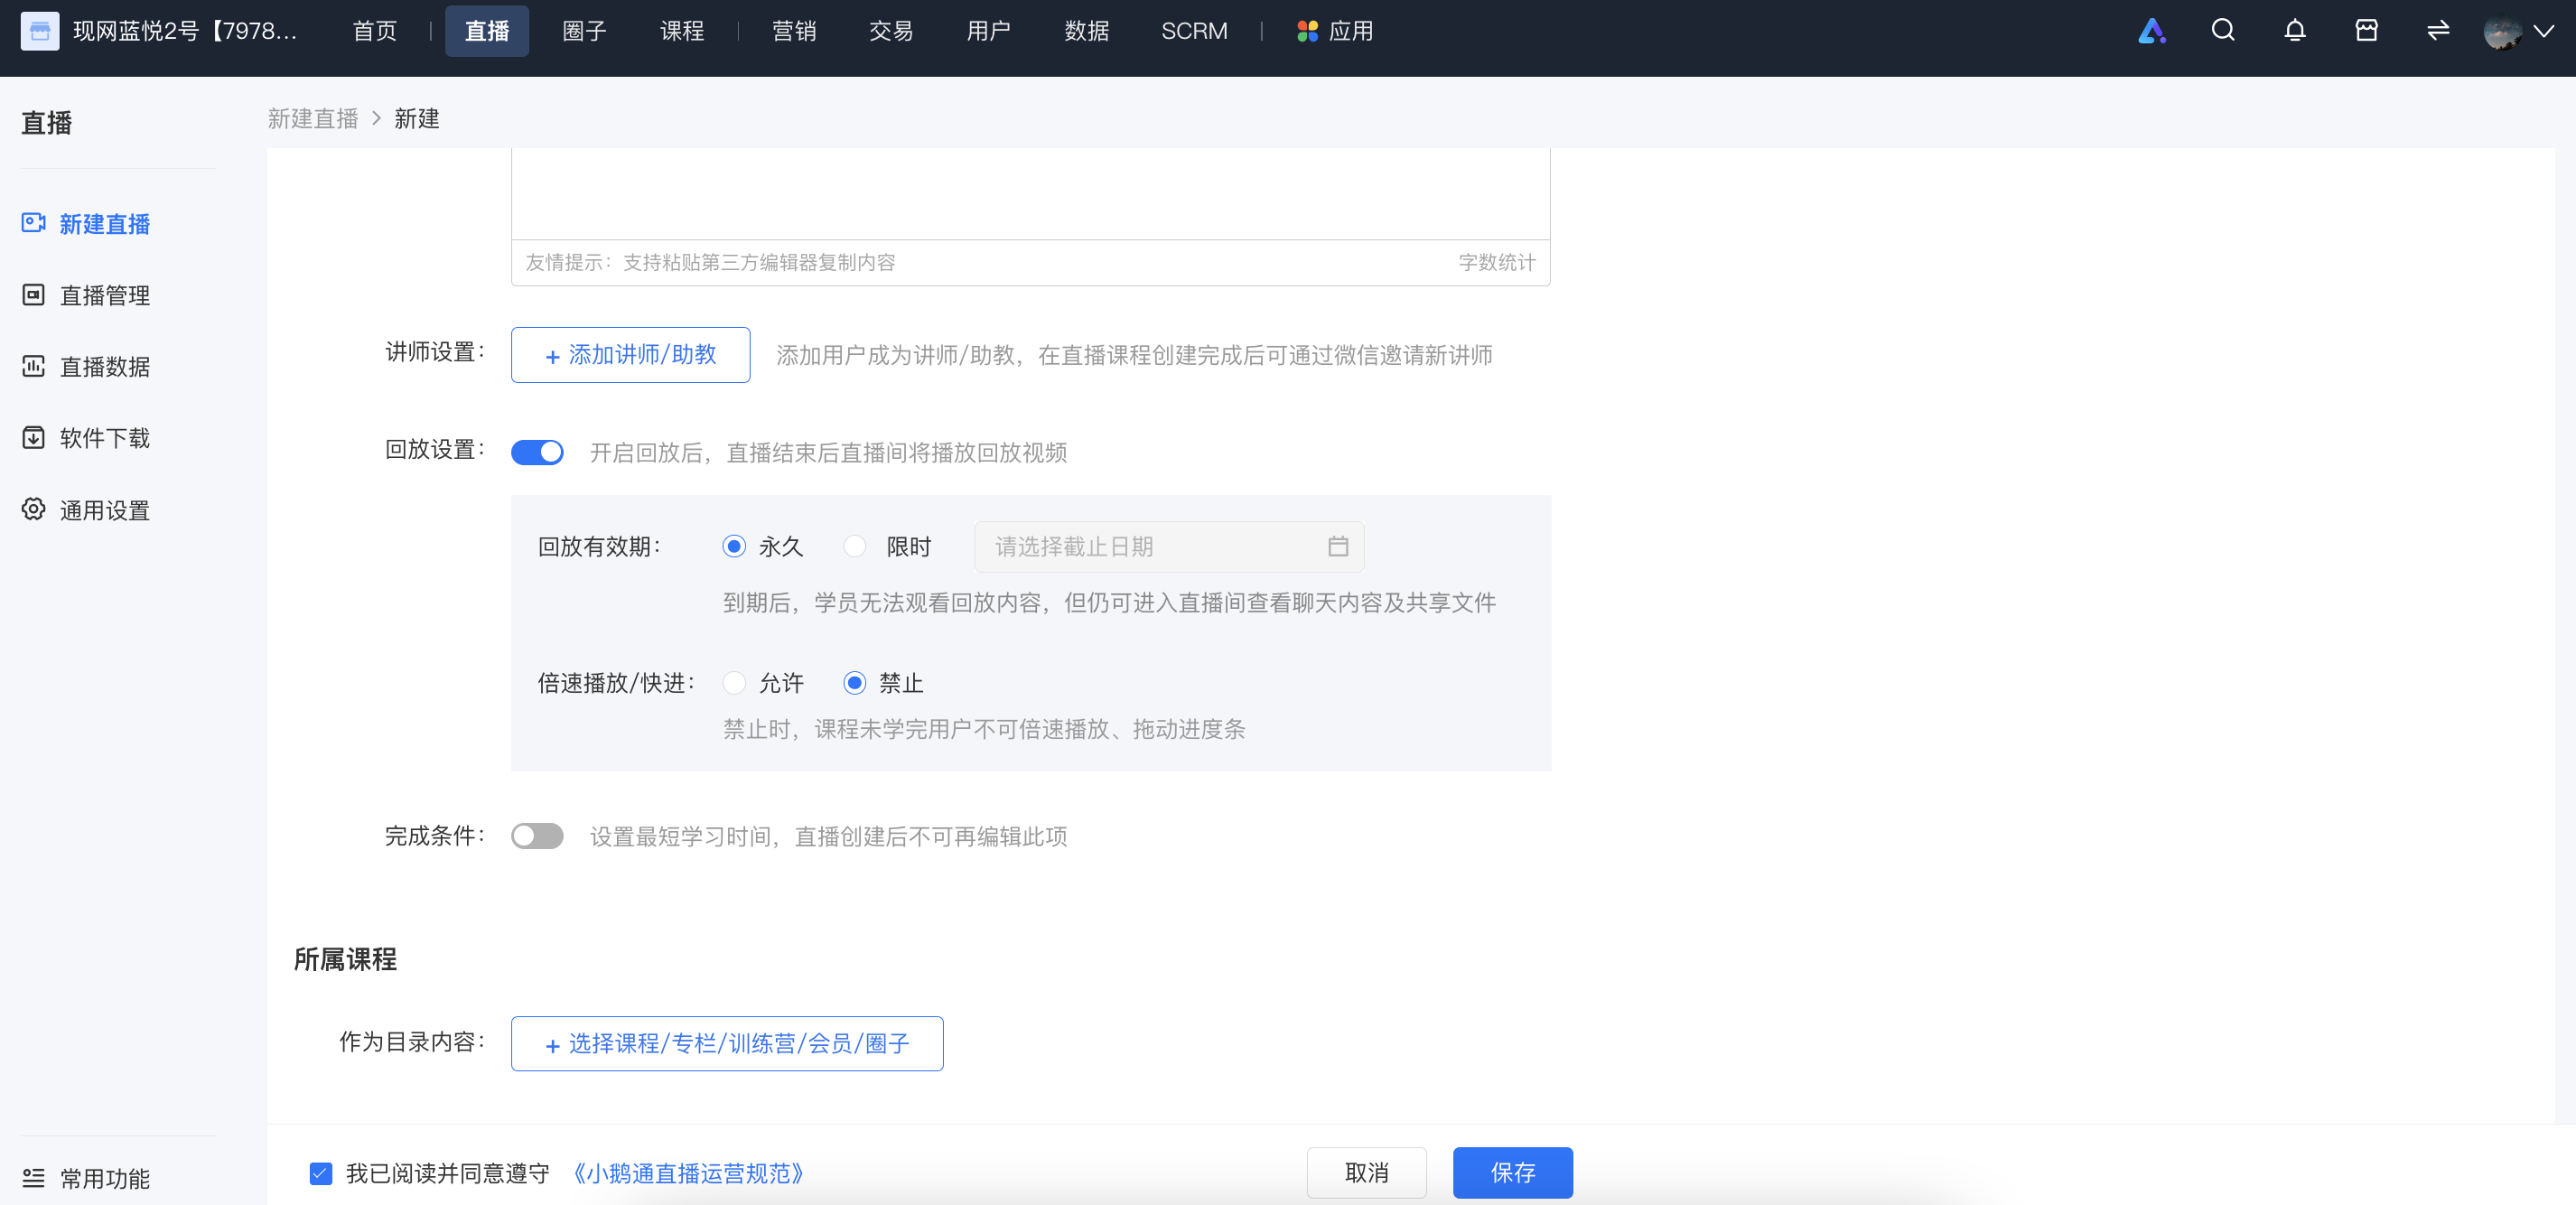
Step 2: After creation, click 'Go live' (Management backend)
1. Click 'Go live'
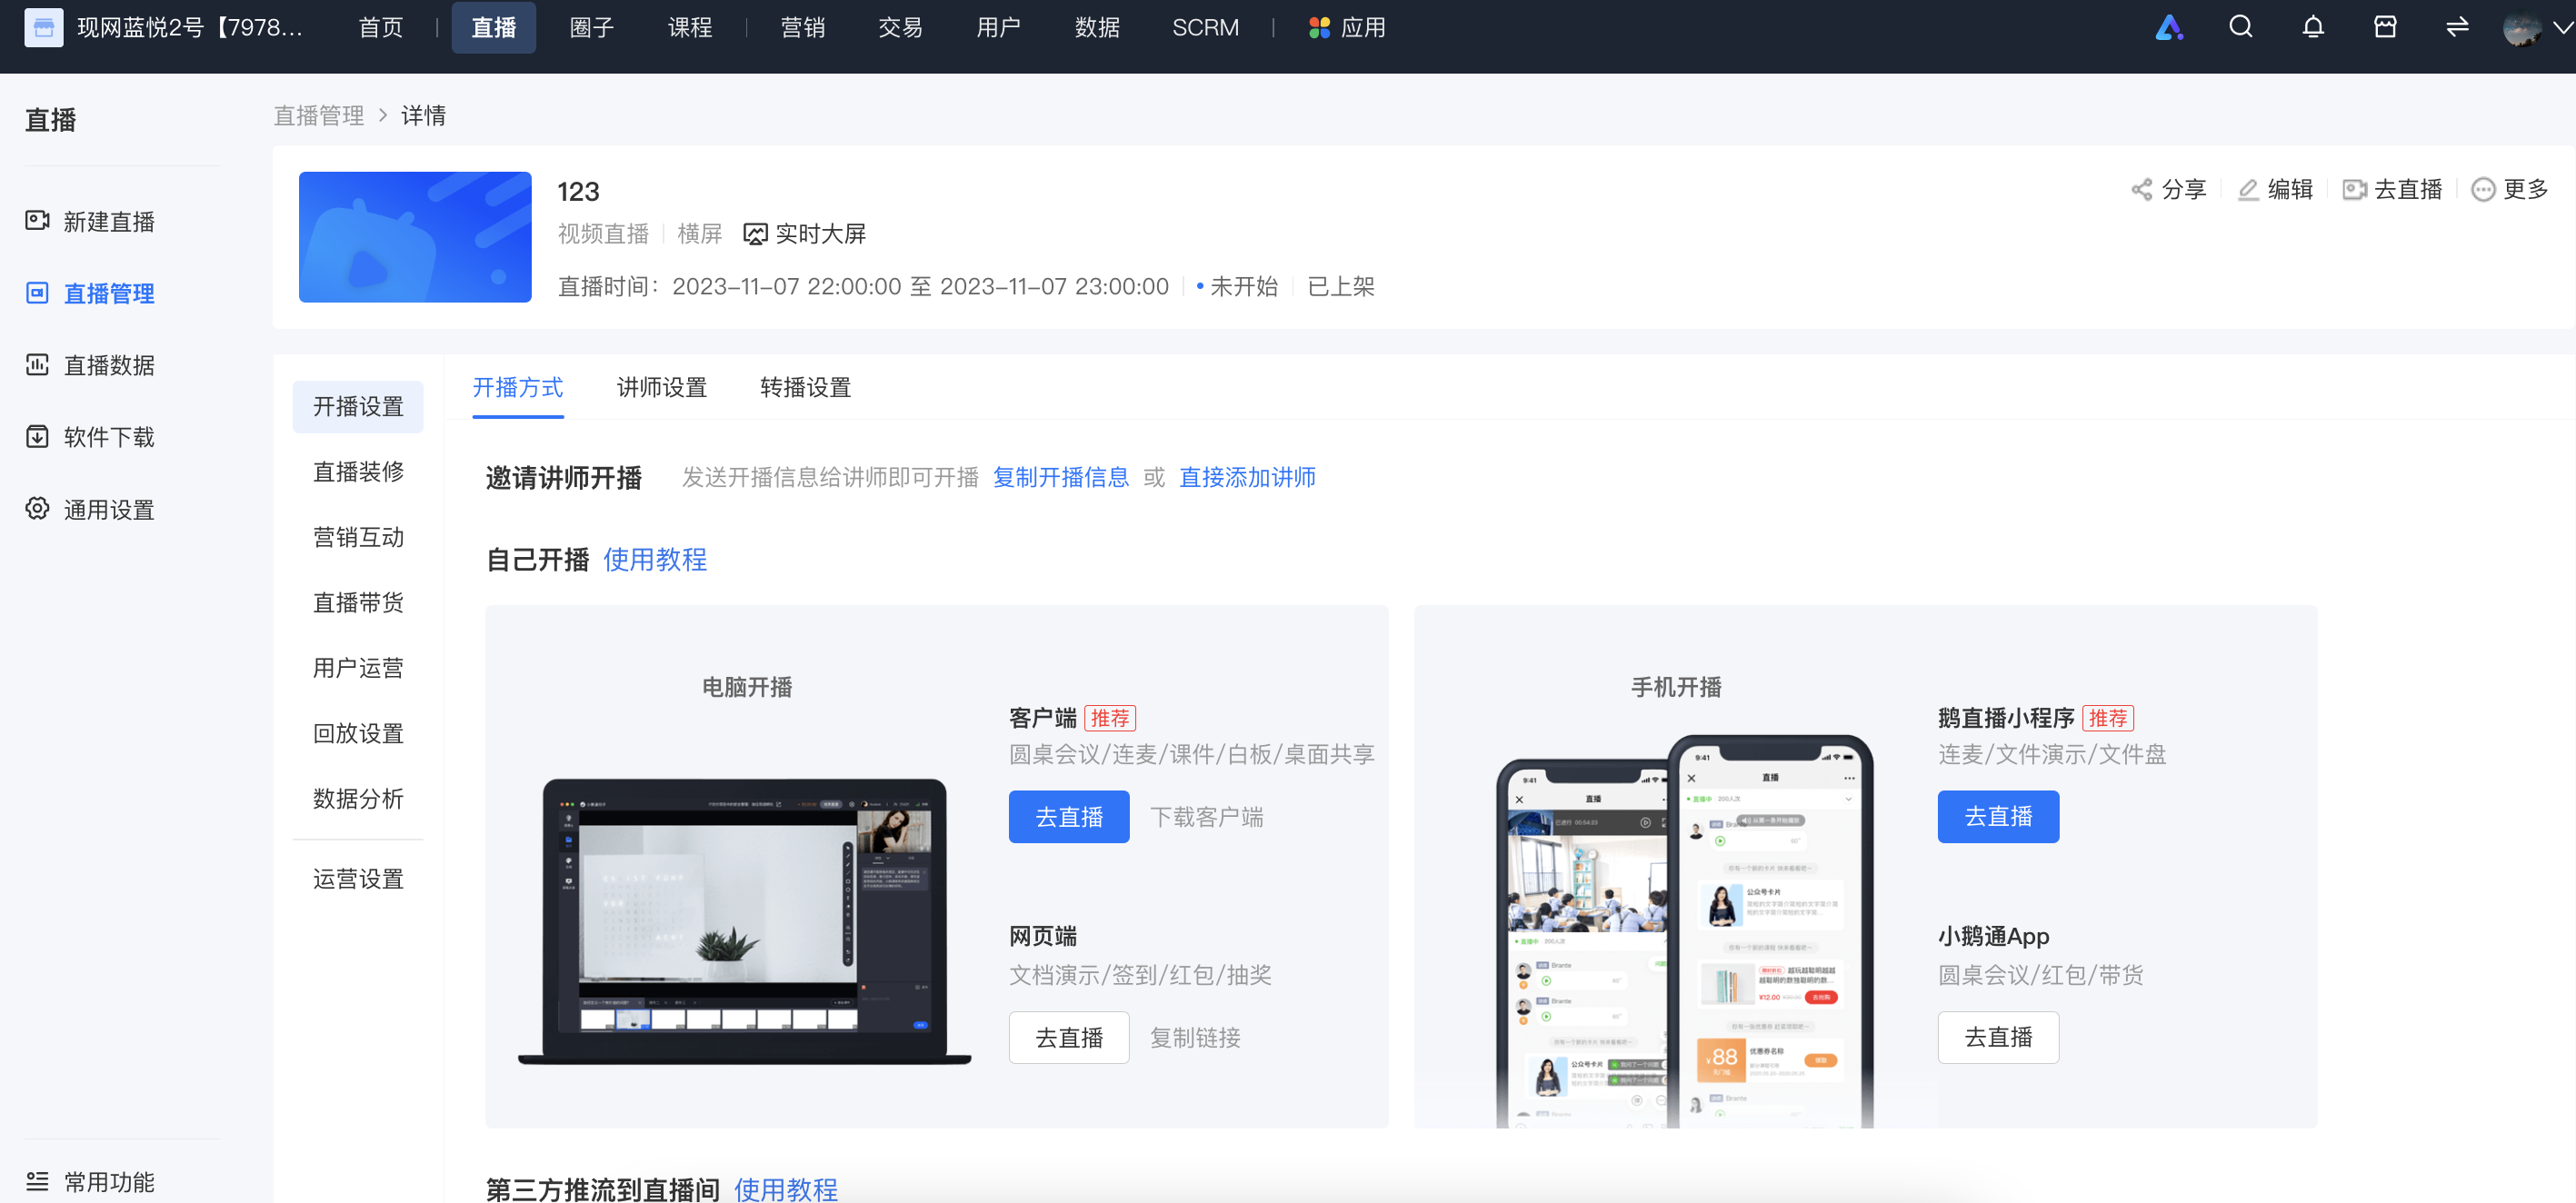
2. Select 'Web-based' for live streaming (Management backend)
Step 3: Enter the web-based instructor console and conduct live stream debugging (Web-based instructor console)
1. After entering the live stream room, follow the prompts to check if your camera and microphone are working properly
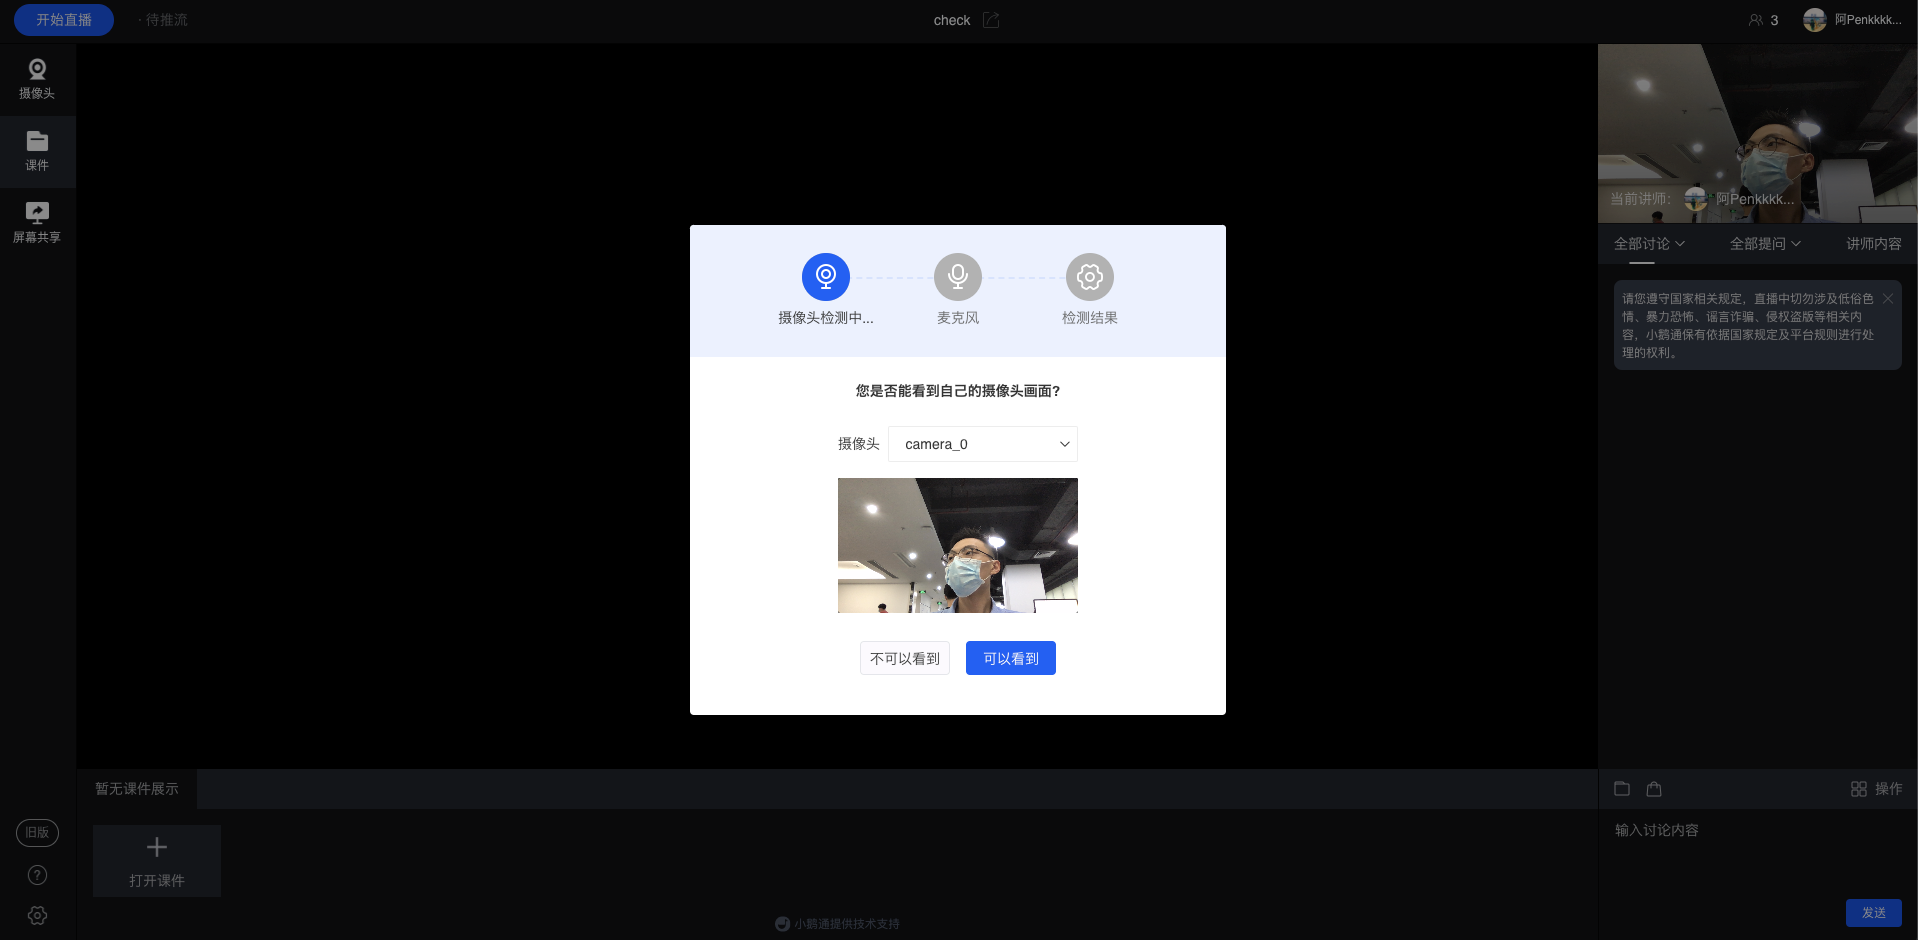
(Live stream instructor console)
2. You can upload relevant courseware PDFs in advance
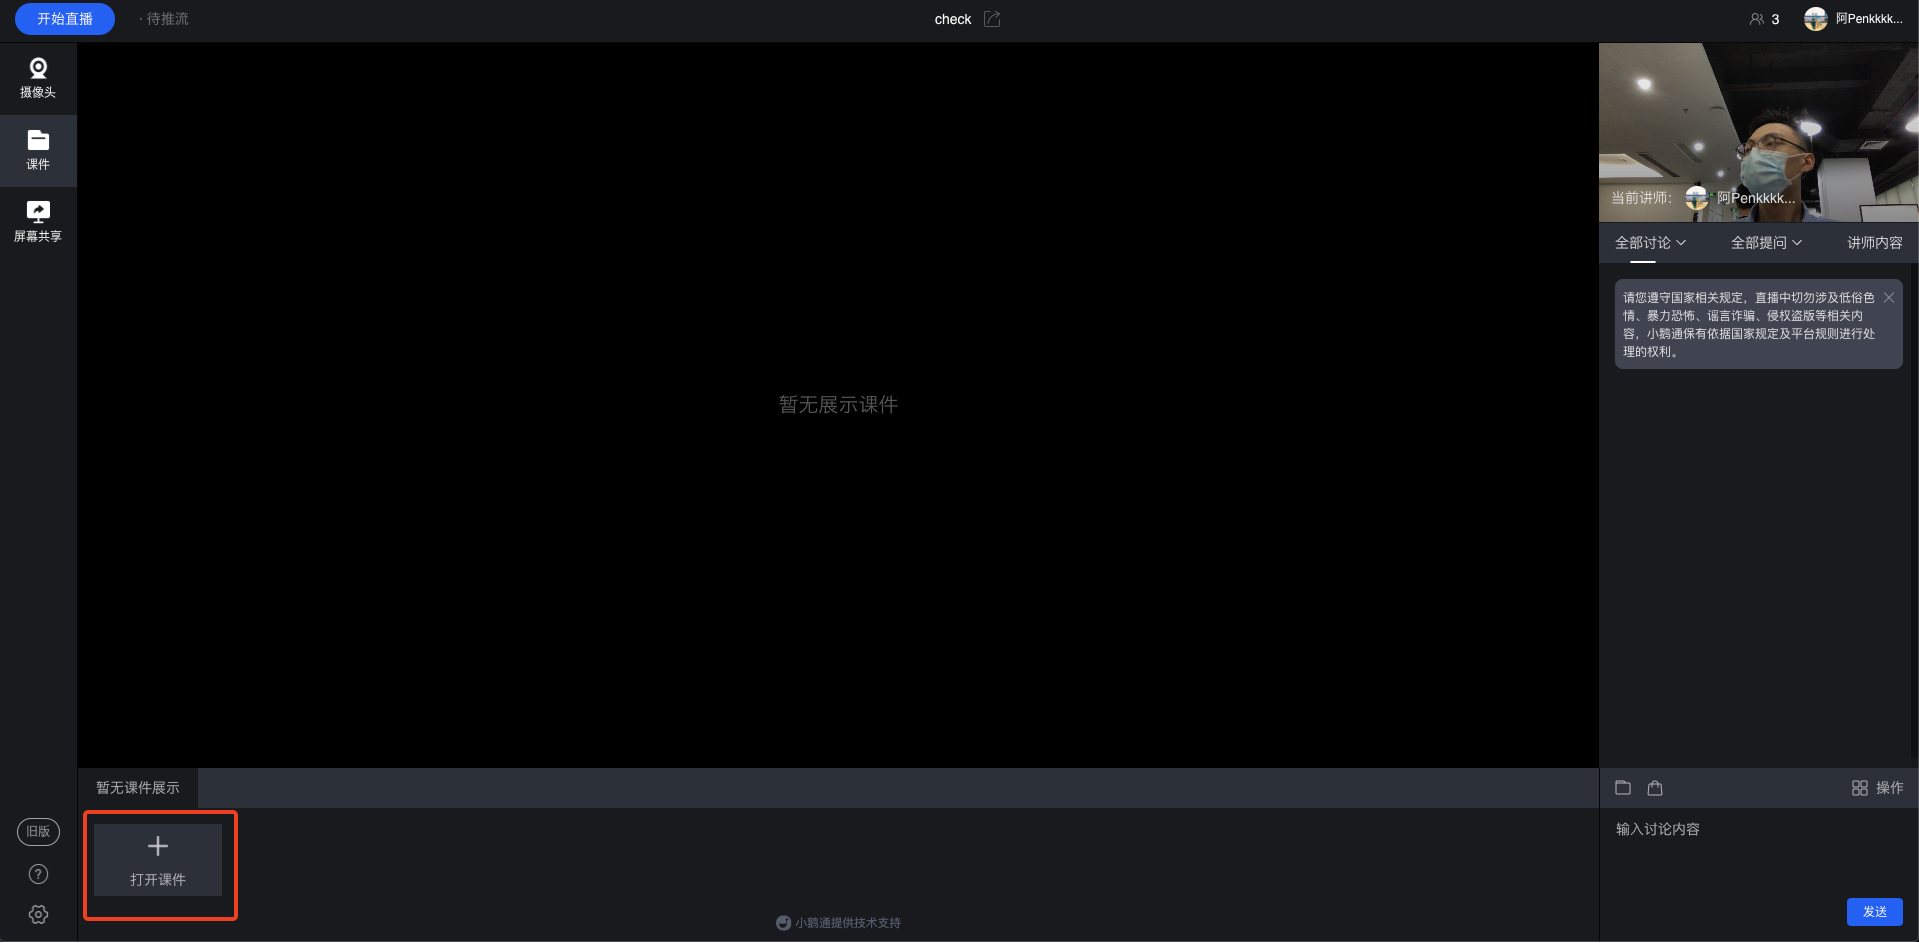
(Live stream instructor console)
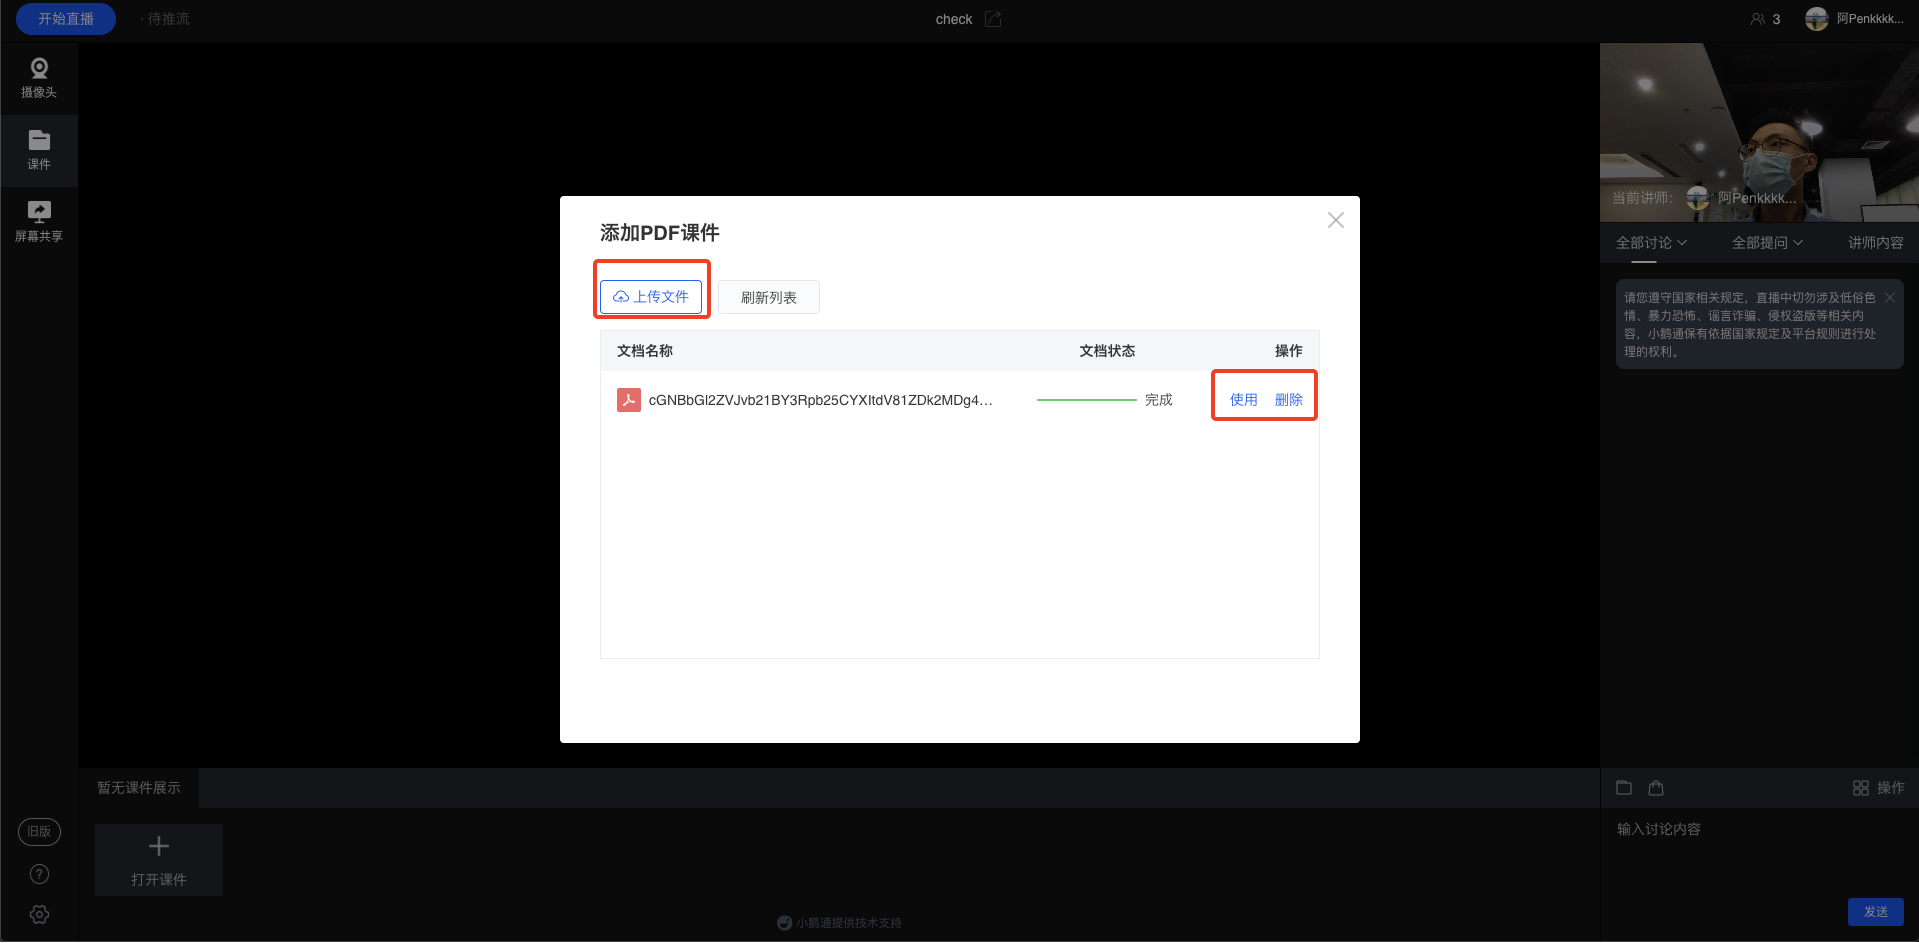
(Courseware management page)
Step 4: Start the live stream (Web-based instructor console)
1. After the devices and courseware are uploaded, click 'Start live stream' in the top-left corner to begin the live stream
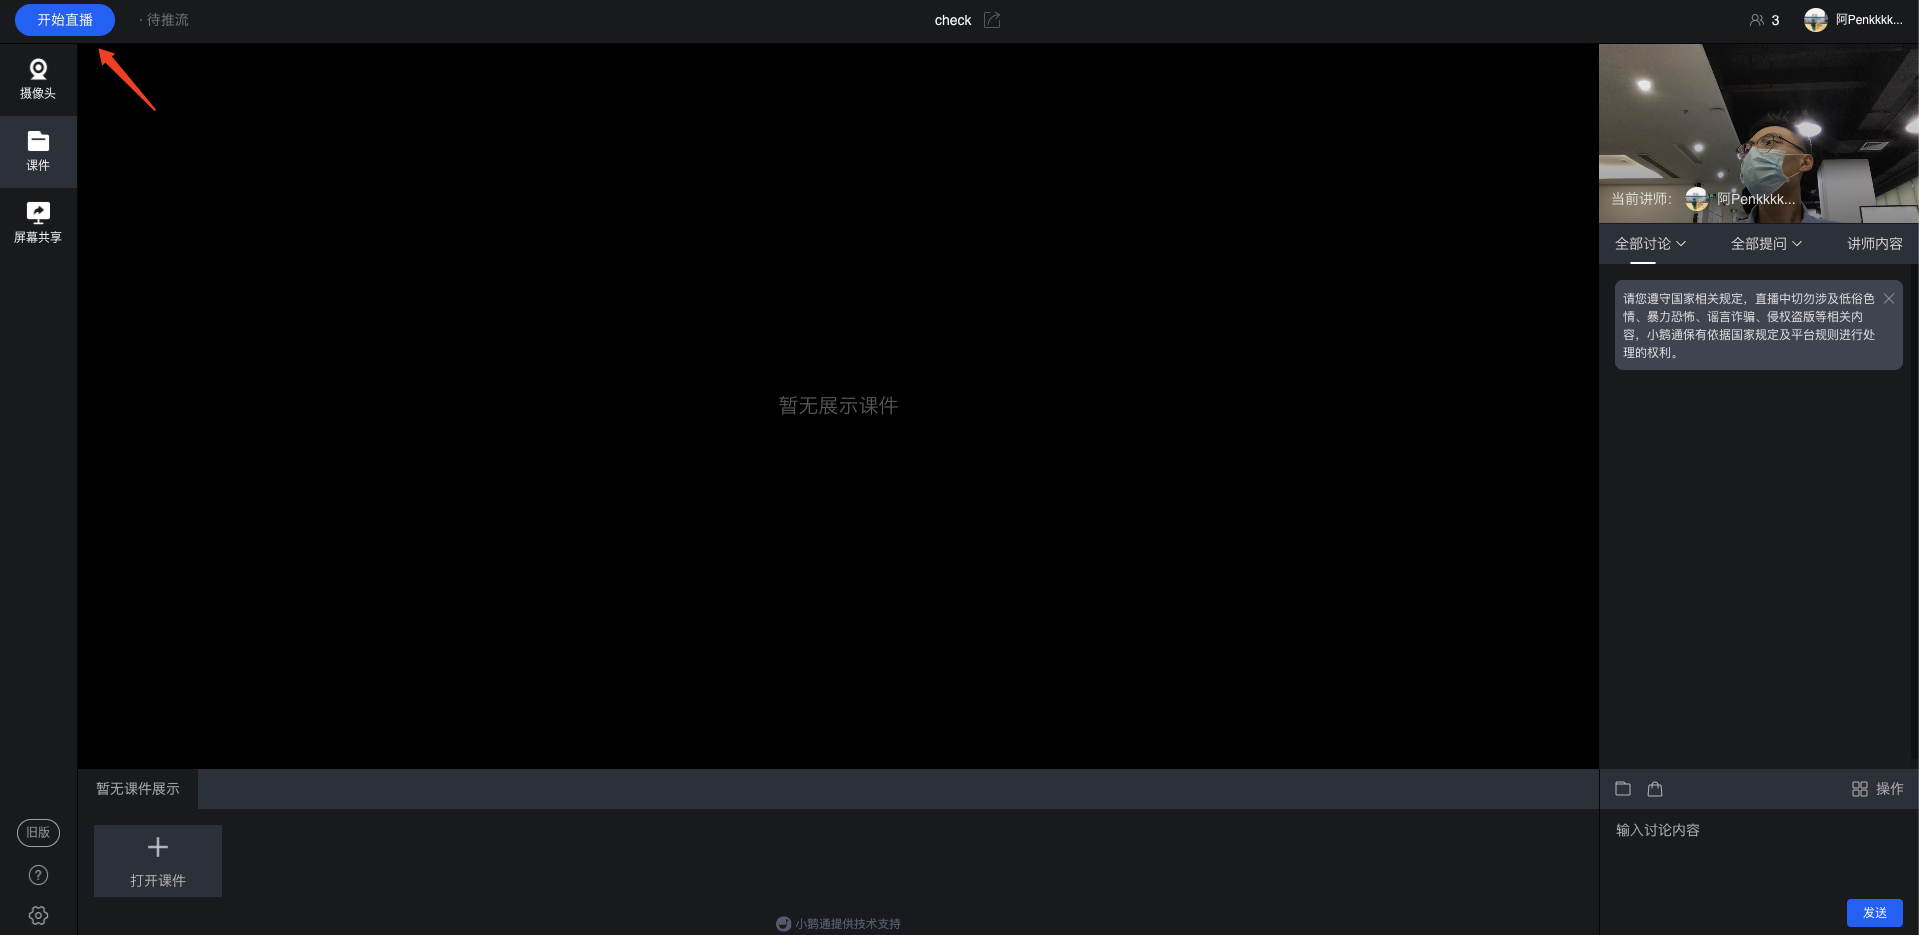
(Live stream instructor console)
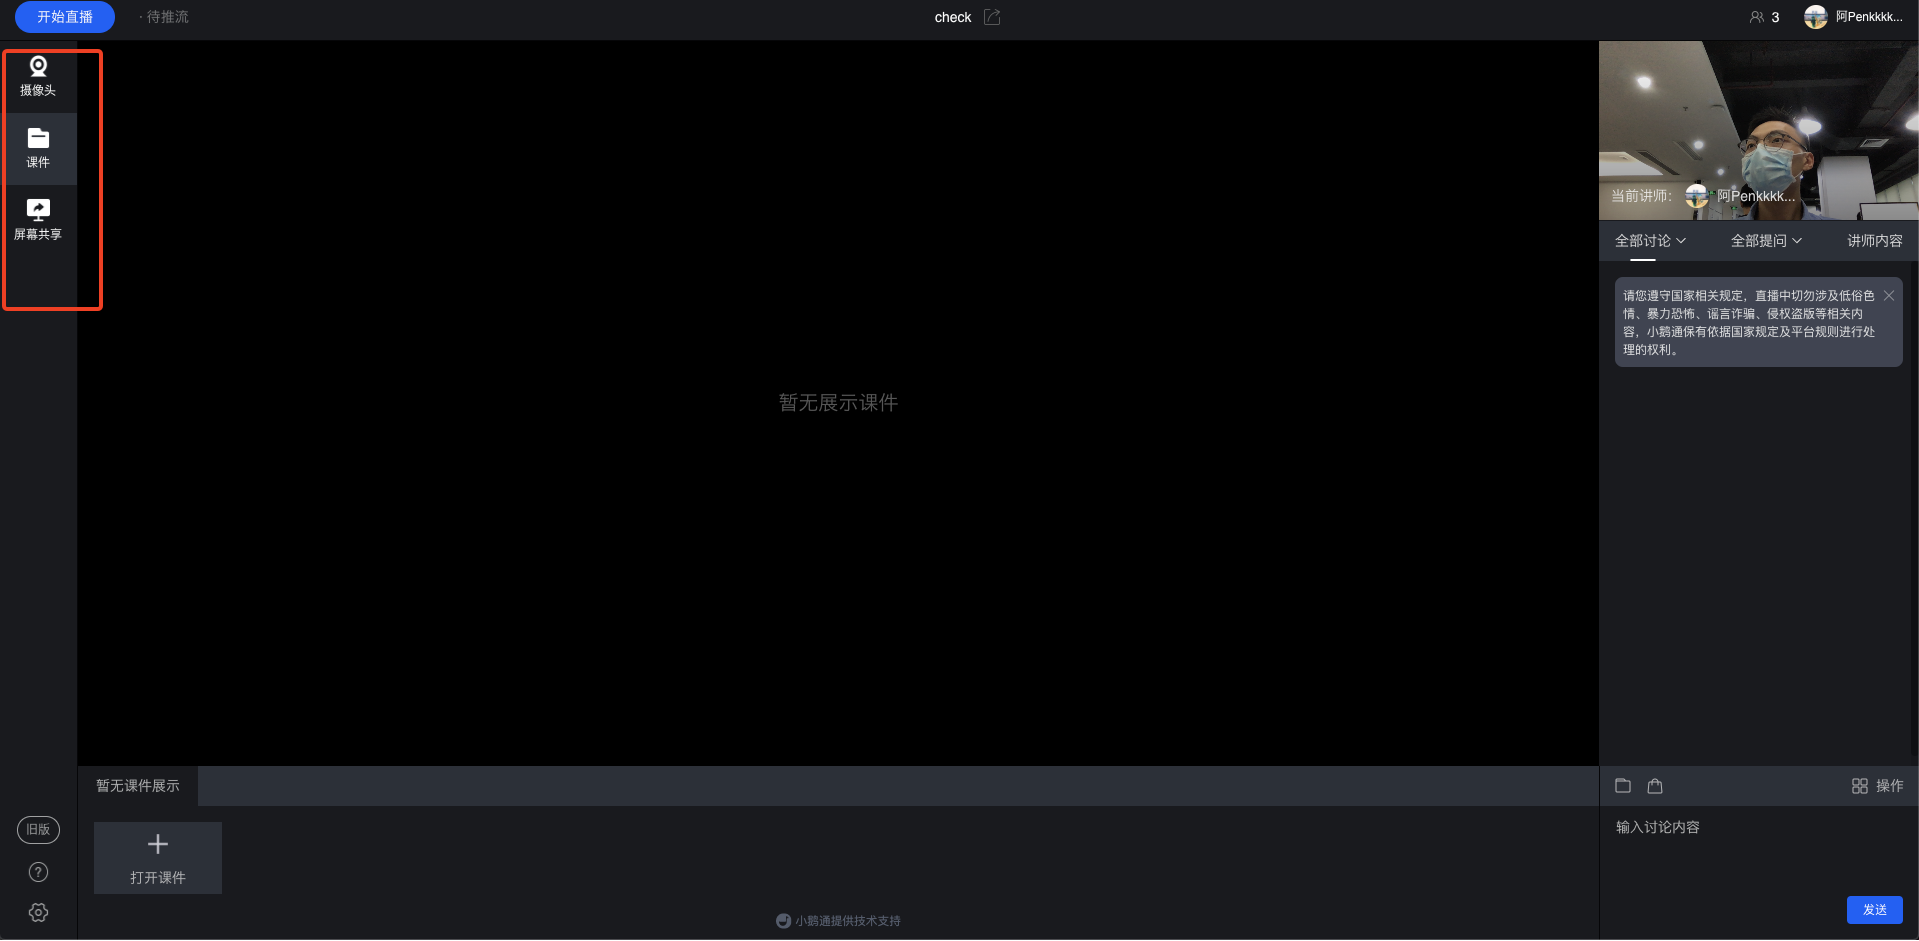
2. Click 'Camera', 'Courseware' & 'Screen sharing' on the left to switch the live stream mode at any time
(Live stream instructor console)
When the live stream mode is 'Screen sharing', you can click 'Switch window' on the right to switch the screen window
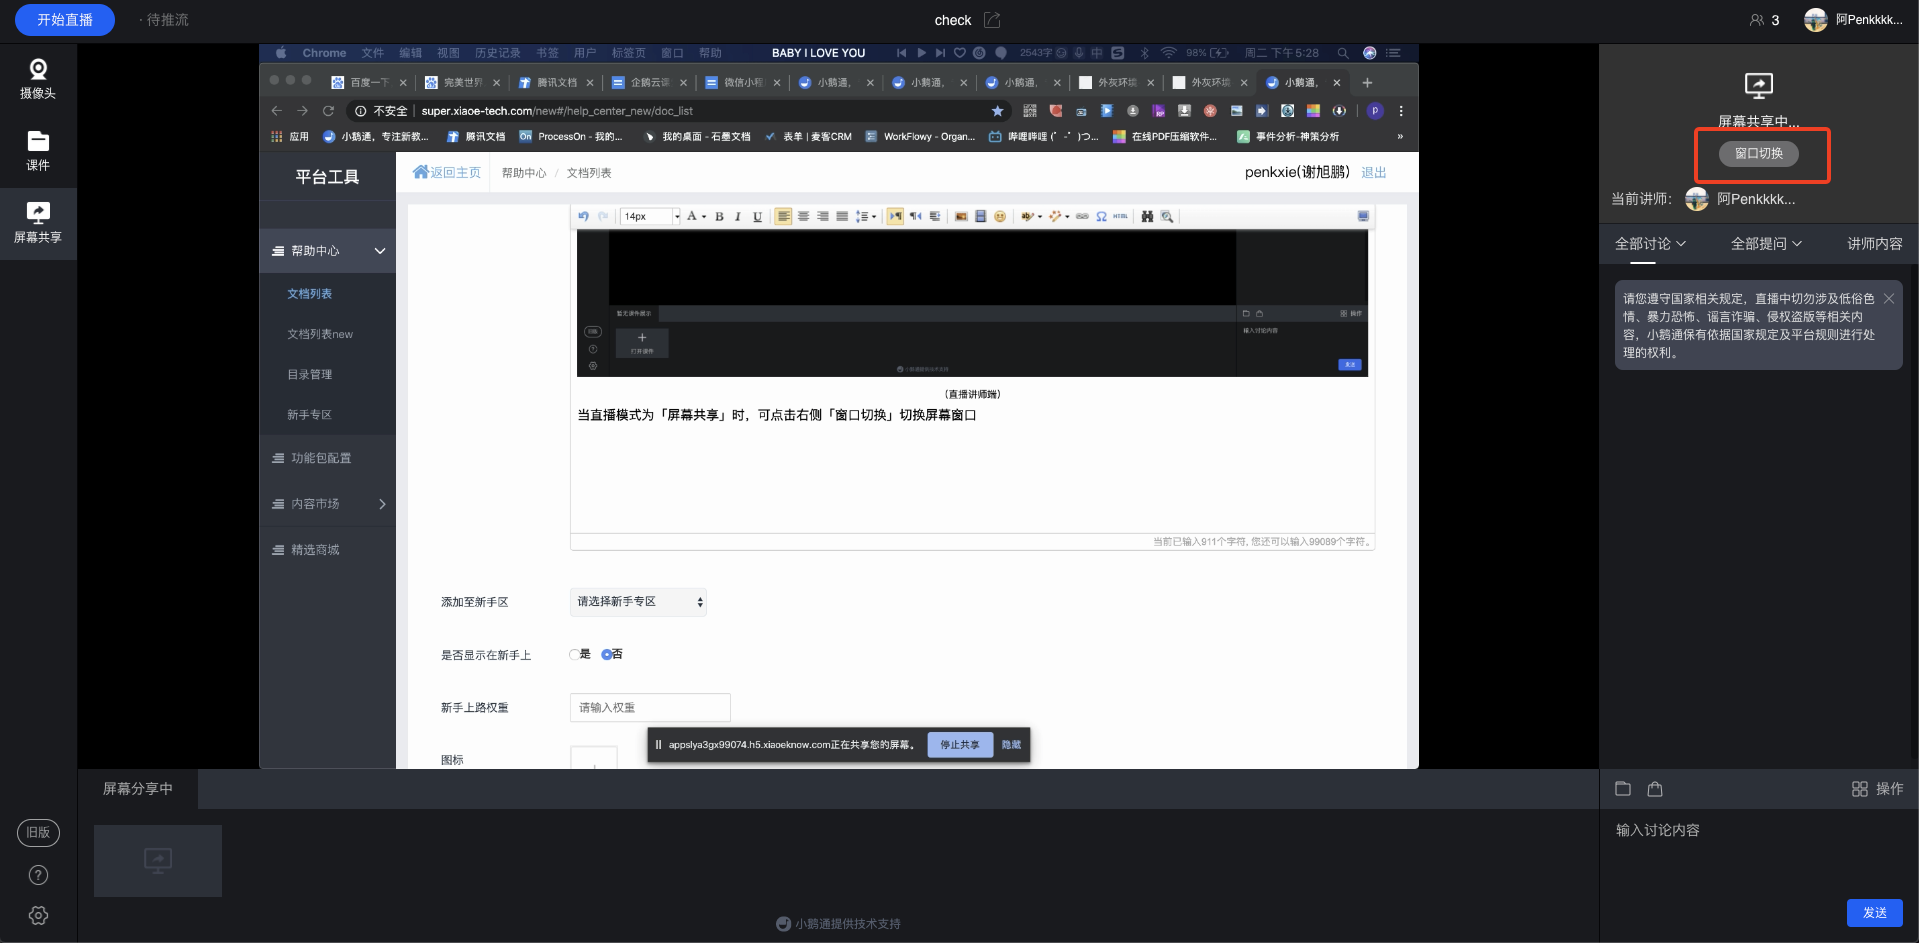
(Click 'Switch window' to...)
3. Other operations
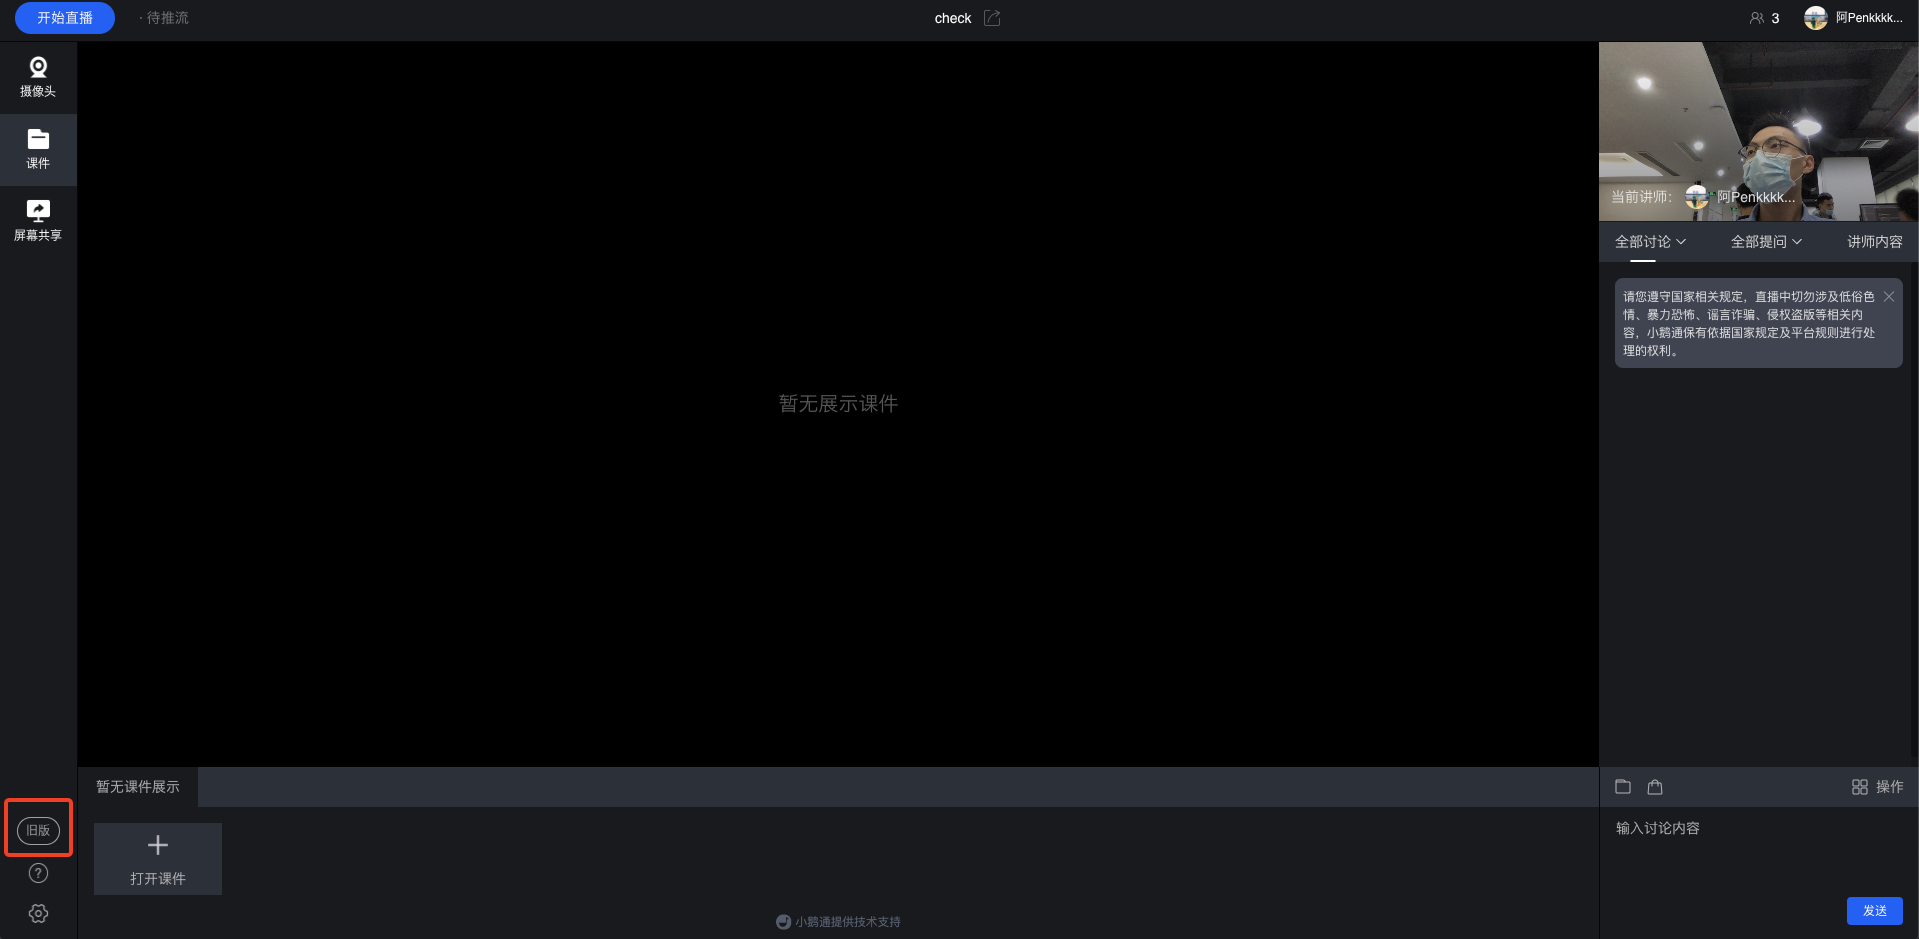
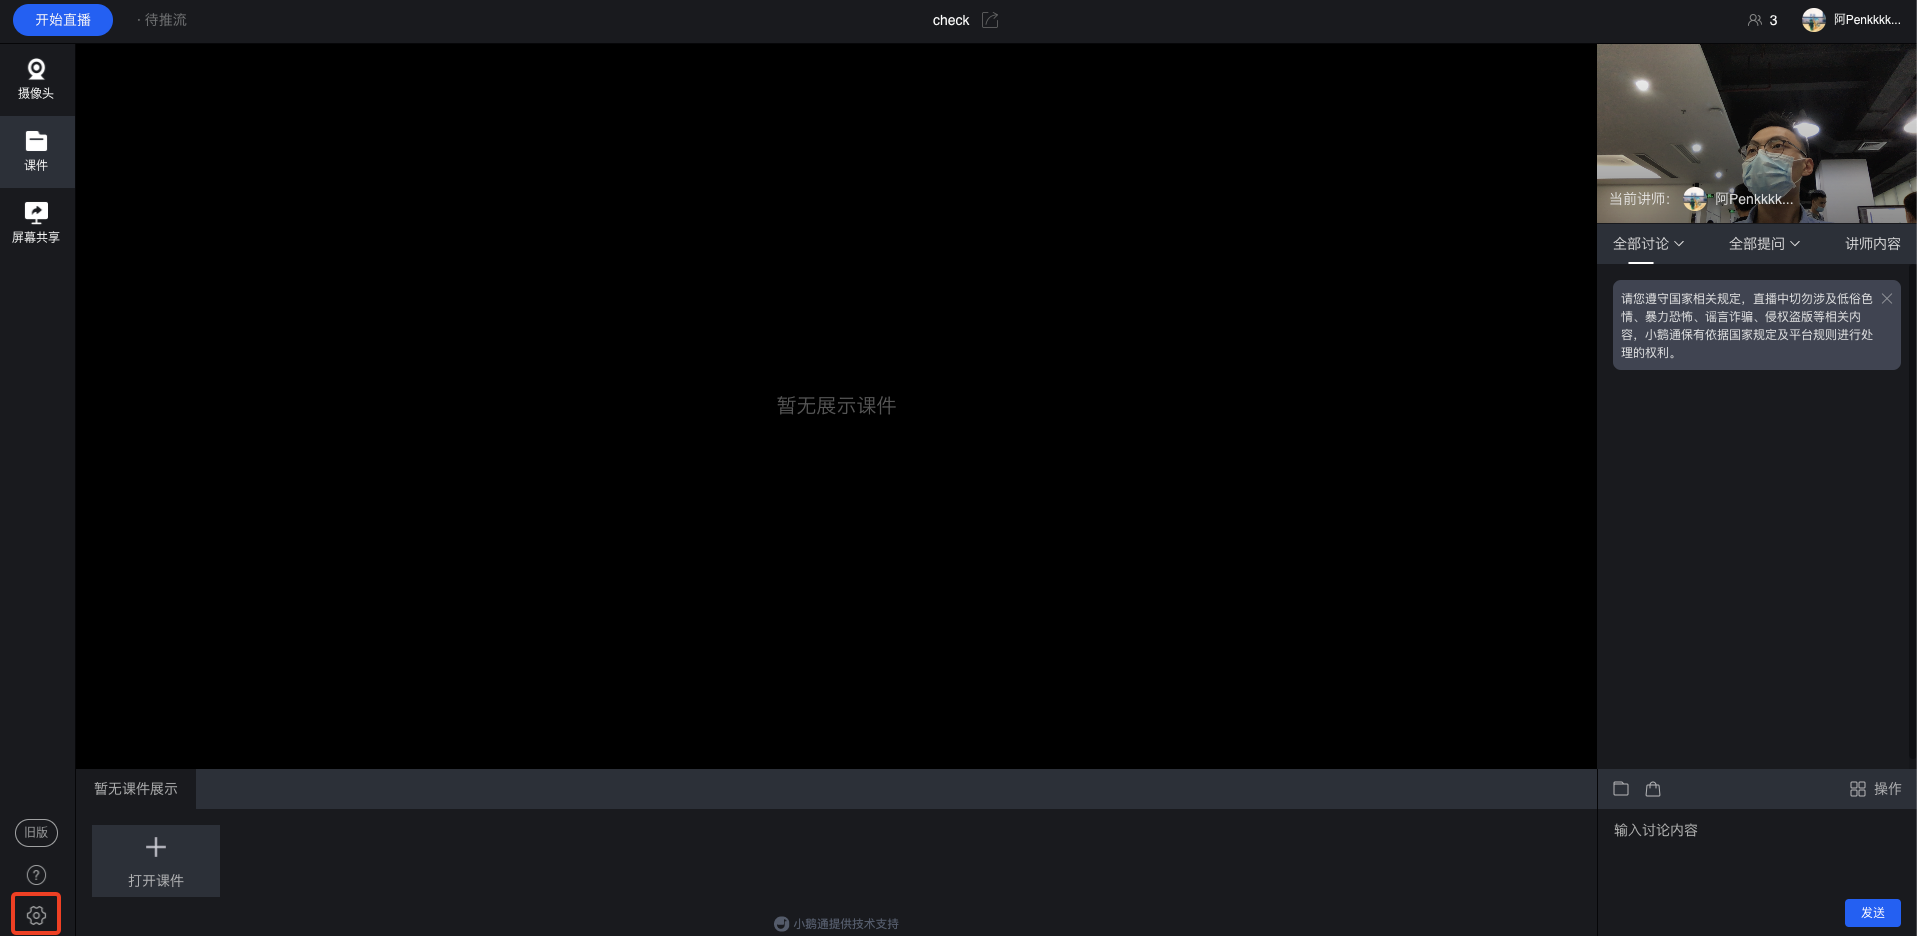
● Switch to the old-style live stream room
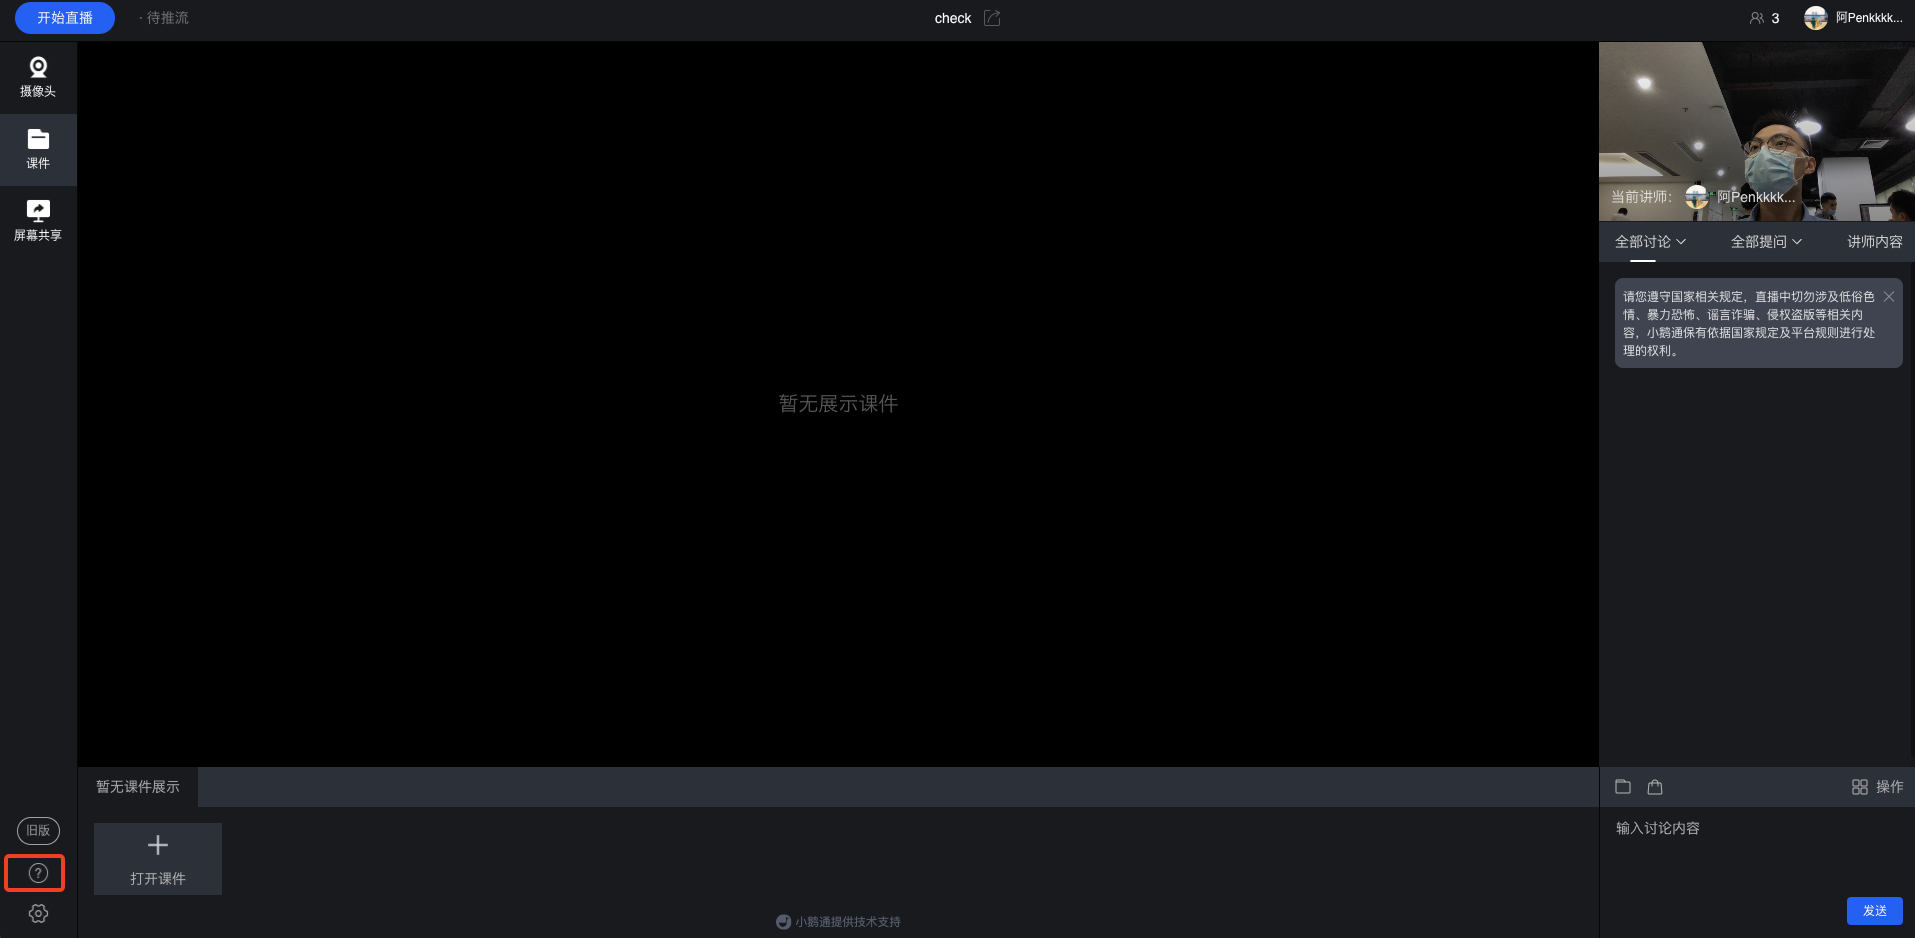
● View the usage tutorial
● Recheck the devices
● Send the explanatory content
● Send coupons, courses & cards
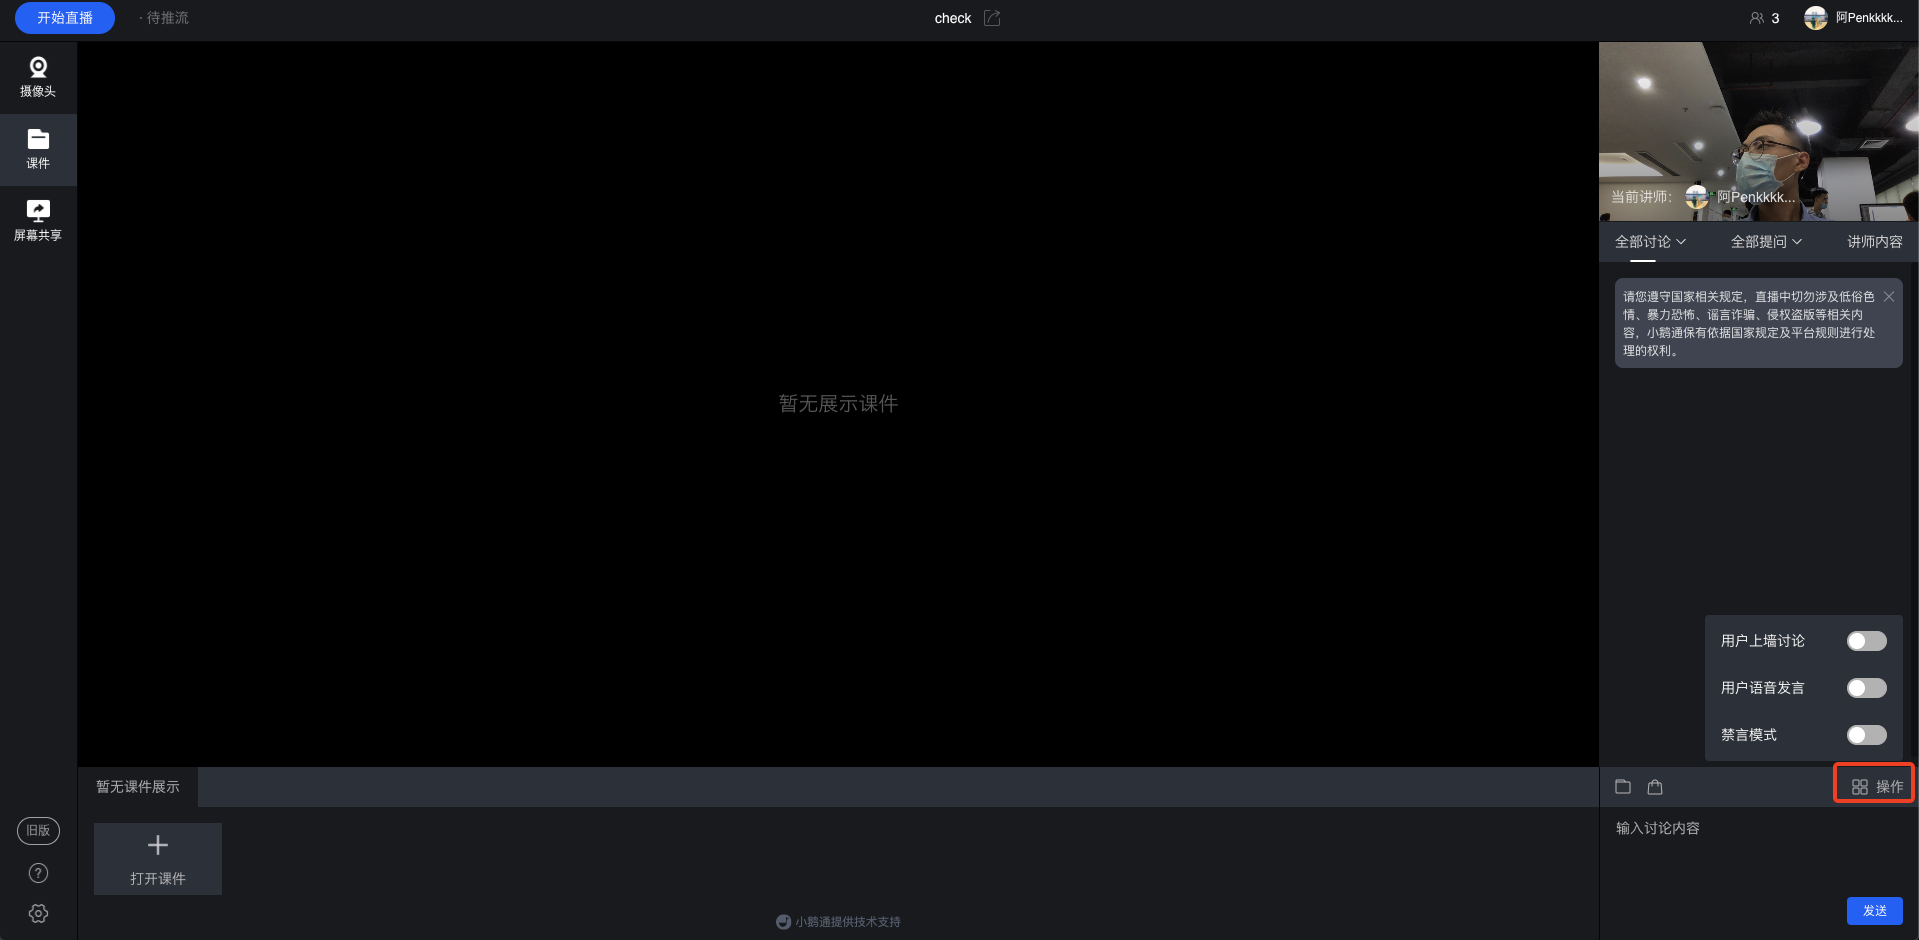
● Allow users to post on the wall, speak via voice, and mute users
When conducting a live stream on the web, if one instructor has already entered the live room, how can other instructors start their live streams?
When a lecturer is currently conducting a live stream, other lecturers can seize the live - streaming opportunity. For specific operation guidelines, please refer toTutorial on seizing live - streaming opportunities for lecturers
After starting the live video streaming, do I need to click the “Start Live” button on the management console?
No. After the live streaming starts pushing the stream, the status of the live streaming will change from 'Not started' to 'Live'.
Why does the content of Live Course A appear in Live Course B?
It's possible that the streaming push address in the instructor's OBS was entered incorrectly. Please verify that the entered streaming push address corresponds to the target live streaming room.
Can trial viewing be set for real-time video live streaming?
Trial viewing is not currently supported for live streams.
Can the Merchant Assistant Mini Program support live streaming?
The Merchant Assistant Mini Program currently supports instructors to conduct live streams, but it does not support students to watch live streams.
Live stream instructors can search for the "Merchant Assistant Mini Program" in the WeChat Mini Program, select a store and a live stream room, and then start a live stream.
For detailed usage instructions, please refer to:Tutorial on Using Live Streams on the WeChat Mini Program
Do live streaming instructors need to be certified?
elink Live Streaming supports adding users via mobile phone number or WeChat ID without the need for authentication.
Can I set a fee for the live replay after a free live commerce session ends?
Currently, only one sales status can be set for a live stream, regardless of whether it is before, during, or after the live stream.
If necessary, you can change the live stream back to a paid one after the free live stream ends.
Can the replay content of real-time video live streaming be modified or deleted?
Yes, you can use the live editing function to edit the recorded content of a live stream in the [Details > Recording Settings] of the corresponding live stream.
Unable to connect to the camera during live streaming
1. Refresh the page or restart OBS.
2. Re-plug the camera and check if it's a hardware issue.
How to handle freezing and latency issues during real-time live streaming?
For specific details, please refer to:
< How to solve the problem of live streaming freezing during OBS live streaming? >
< How to solve problems such as long live streaming delay during OBS live streaming? >
The instructor's video is not visible during the live stream
eLive Client / elink Assistant/Web version:
1. Check the camera indicator light to confirm if the camera is successfully turned on. 2. Confirm if you have authorized the camera to be turned on before the live stream. If not, you need to refresh the page and re-authorize. 3. Click 'Settings' in the window to open the video adjustment and confirm if the camera status is normal.
elink App Live Streaming:
1. Confirm if the camera is turned on.
2. Confirm if the phone camera is damaged.
eLive Mini Program / Merchant Assistant Mini Program Live Streaming:
1. Confirm if you have authorized the use of the camera before the live stream. If not, you need to re-enter the live room for authorization. 2. Confirm if the camera is turned on. 3. Confirm if the phone camera is damaged.
What are the different ways of live video streaming?
There are 7 types of live video streaming methods:

Common Questions about Live Streaming
What should I do if there is an error when exporting a video?
Currently, the export uses the MP4 format, which may have some compatibility issues. If you encounter an export failure, you can contact our customer service, and we will assist you with the export.
Can the courseware be downloaded?
Currently, courseware cannot be directly downloaded by students.
If instructors need to allow students to download courseware, they can click on the material library in the PC live streaming room/H5 live streaming room to upload the courseware they want students to download in advance (currently, only word, ppt, excel, and pdf file types are supported for upload).After uploading, the corresponding courseware can be sent to the discussion area for students to download. Students can also find the file in the shared files for download.
Can I export the leaderboard?
Yes, it's possible.
You can enter the live streaming list page, select the corresponding live stream, click [Details > Data Analysis] to enter the data statistics page, and thenyou can export the user data of the Top 100 Influencers Invited in the Live Stream Ranking.
Can live streaming be implemented in a WeChat group?
After creating the live streaming room, share the link to the live streaming room in the WeChat Community. When students click on the link, they will be redirected to your live streaming room.
How to apply for the restoration of a deleted live stream?
Within 30 days after deleting a live stream, you can find the corresponding log record in [Settings] - [Operation Logs] and click [Restore Course].
The preset end time of the live stream has passed, but the instructor is still in the live room. Will it affect the students' viewing of the replay?
If the instructor continues to stream after the scheduled live streaming time has ended, the live stream will not end until the instructor leaves the live streaming room and stops the stream.
Will the audio or video uploaded to the live streaming room play automatically? Or do users need to click manually to play?
The audio and video uploaded in the explanation area of the live streaming room will not play automatically. Users need to click manually to start playback.
Note: The uploaded video recordings in the voice live streaming need to wait until the live stream starts to play automatically.
What should I do if there is a harsh noise or the microphone howls during a live stream?
There are numerous reasons for squealing. Please check the following causes one by one: faulty microphone, excessive current, problematic motherboard sound card, or interference from nearby electronic devices.
You can refer to the solutions mentioned in this article.Article link
1. Try replacing the microphone to rule out device issues.
2. Keep the microphone away from external speakers and other audio - output devices to avoid interference.
How to solve issues such as live streaming freezing and long latency?
If the Live Streaming Assistant encounters issues such as lag or high latency, you can troubleshoot using the following methods.:
1. Check if the current network upload speed is too low. It is recommended that the network upload speed be above 10M. It is advisable to use an Ethernet cable for live streaming.
2. Enter the software - click on the top - right corner - Video Settings, and reduce the output resolution, bitrate, and frame rate. (The elink Assistant does not support video settings operations for the time being.)
3. Check if the current computer configuration is too low. Recommended network configuration: Recommended computer configuration.The computer has certain requirements for the CPU. It is not recommended to use ultra - thin laptops (because the CPU performance will be reduced, such as the macbook air).:
CPU:The CPU should be i5 - 9300H or higher (corresponding to non - ultra - thin laptops priced above 5000 on JD.com).
Graphics card: GTX1050 or higher (1050Ti).
If you are not recording games, you can directly use the integrated graphics of the CPU and ignore this item.
Memory: 8G or higher (16G).
Monitor: 1080.
Note: Precautions before live streaming: Before the official live stream, create a live streaming room for a pre - live test to avoid live streaming lag issues caused by poor network conditions.
Note: If there is still no improvement after troubleshooting in this way, it is recommended to use OBS for live streaming. You can set parameters to reduce latency and alleviate lag. The specific settings are as follows:
OBS: 1. Check if the current network upload speed is too low. It is recommended that the network upload speed be above 10M. It is advisable to use an Ethernet cable for live streaming.
2. The bitrate setting in the OBS software is too high. Recommended bitrate value: 500 - 1000. Solution: Please reduce the bitrate value or increase the current network speed.
3. The resolution or FPS set by the instructor in the OBS software is too high. Solution: Please reduce the resolution or the FPS value. Recommended resolution: 1280×720. Recommended FPS value: 30.
3. Check if the current computer configuration is too low. Recommended network configuration: Recommended computer configuration:
CPU: i5 - 6400 or higher (i5 - 6500).
Graphics card: GTX1050 or higher (1050Ti).
If you are not recording games, you can directly use the integrated graphics of the CPU and ignore this item.
Memory: 8G or higher (16G).
Monitor: 1080
Can I watch the replay and download the live stream after it ends?
Video live streaming: After the live stream ends, merchants can enable the playback in [Live Stream List - Details - Playback Settings], or set to enable the playback when editing the live stream details page. Then, after the live stream ends, students can watch the replay. Merchants can download and edit the replay video in the background [Live Stream List - Details - Playback Settings].
Audio live streaming: There is no need to set up the playback for audio live streaming. The playback will be automatically available after the live stream ends. Merchants can download and export the live stream audio by clicking [Export Audio] in the upper right corner of the background [Live Stream List - Details].
Can the live stream continue after the scheduled time?
If the set end time for the video live stream has arrived, but the instructor has not exited the live streaming room, the instructor can continue the live stream as long as the live stream remains stable. There is no impact on the voice live stream, and the instructor can still send voice messages in the live streaming room.
Note: If the instructor's lecture time in the video live stream has exceeded the current end time of the live stream, to ensure that the instructor can continue smoothly, it is recommended to appropriately extend the live stream time before the scheduled end time to guarantee the smooth progress of the live stream.
If I exit my live streaming room before the scheduled end time, will the live stream end and become available for replay?
During the live stream, if the instructor exits the live room (not due to accidental manual termination of the live stream), the students will see a prompt indicating that the instructor has left the live room, but the live stream will not end. If the instructor is not in the live room when the scheduled end time of the live stream arrives, the live stream will automatically end.
Can the avatar of the elink assistant in the live streaming room be changed?
It can be replaced.
You can make unified settings for all live stream announcements, replace the assistant avatar, and change the live stream announcements in [Live Streaming > General Settings > Live Stream Announcements]. This setting will take effect for all live streams that have not had their announcements set individually (there may be a certain delay before the modified announcements take effect).
You can also set the announcement for a single live stream in [Live Stream Details - Live Stream Decoration - Live Stream Information - Live Stream Announcement], which will only take effect for this particular live stream.
Can the live stream be resumed after manually ending it?
Manually ended live streams can be restored. You can perform the restoration operation through [Management Console - Live Stream List - More - Restore Live Stream].
Does the live replay support playback speed adjustment?
Instructions on live streaming playback speed adjustment:
1. Live streaming type: Video live streaming supports the playback speed adjustment function. (Not supported during the live stream)
2. Store terminals: Supported on both H5, Mini Programs, and PC clients
3. Mobile phone models: Supported on both iOS and Android devices
During the live stream, the live broadcast area shows a black screen, and the live stream footage cannot be displayed properly
If the user refuses the Flash request to use the camera and microphone, the live streaming area will go black. You can re-enter the live streaming room.
Step 1: Click the "lock" on the left side of the URL and select "Site settings".
Step 2: In the "Privacy and security settings", check the usage permissions for Flash, camera, and microphone as "Allow".
How to handle the issue of low audio volume in live streaming content?
This may be caused by the instructor being too far away from the microphone. When you need to conduct a live stream away from the device, it is recommended to use an external portable microphone device.
*Adding a pop filter or a sponge cover to the microphone will yield better results.
eLive Client
Select “Settings”. After entering the settings page, select “Audio” and find the voice enhancement function. When the microphone volume is low or you are far from the microphone, it is recommended to turn on the voice enhancement.
Select “Settings”. After entering the settings page, select “Audio” and find the option to increase the speaker or microphone volume.

What will happen and what impacts will there be if you start pushing the stream before the live streaming has begun?
The live streaming status is updated from 'Not started' to 'In progress', and other operational functions remain unaffected.
Multi-segment editing of live replay videos
Step 1: Enter the live stream details page
Click [Live Stream Management] - [Live Streams]. Find the live stream you need to edit in the live stream list, and click [Details] of this live stream to enter the live stream details page.
Step 2: Enter the video replay settings page
On the live stream details page, click [Replay Settings] to find all replay videos of this live stream. Find the segment you need to edit and click to edit it.
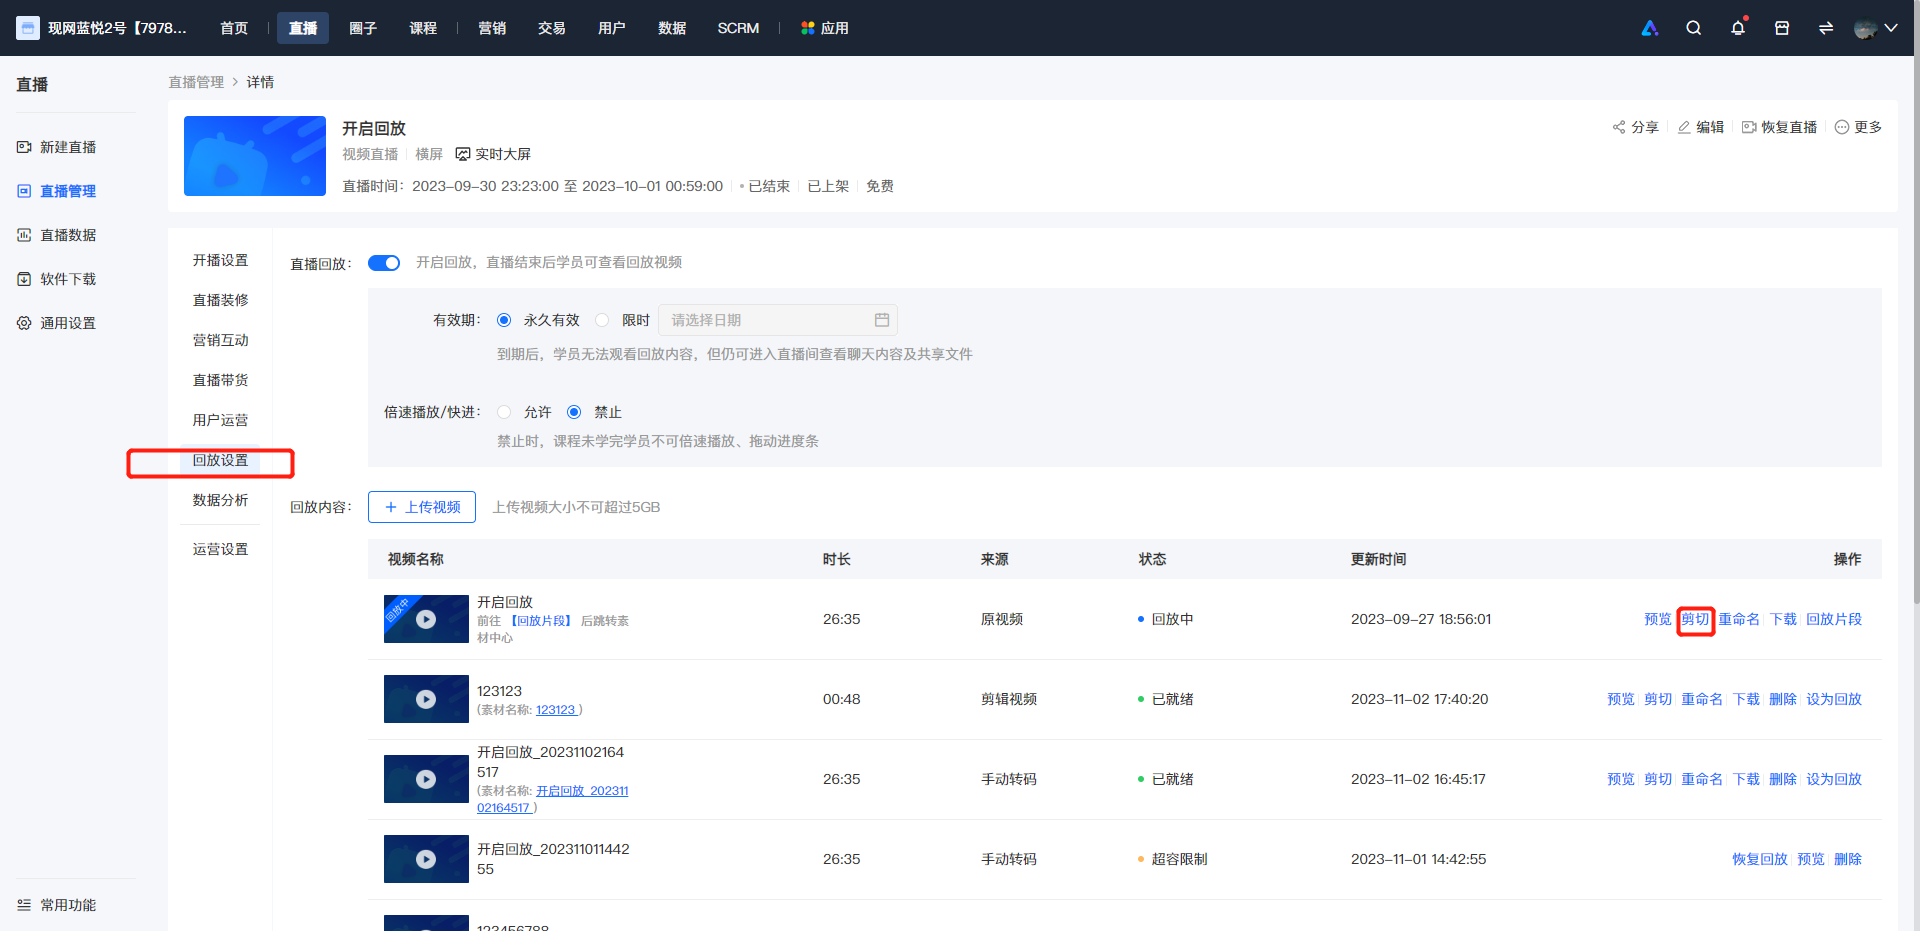
Step 3: Select the start - end time of the segment to be deleted
Click 'Get' to obtain the current video playback time point
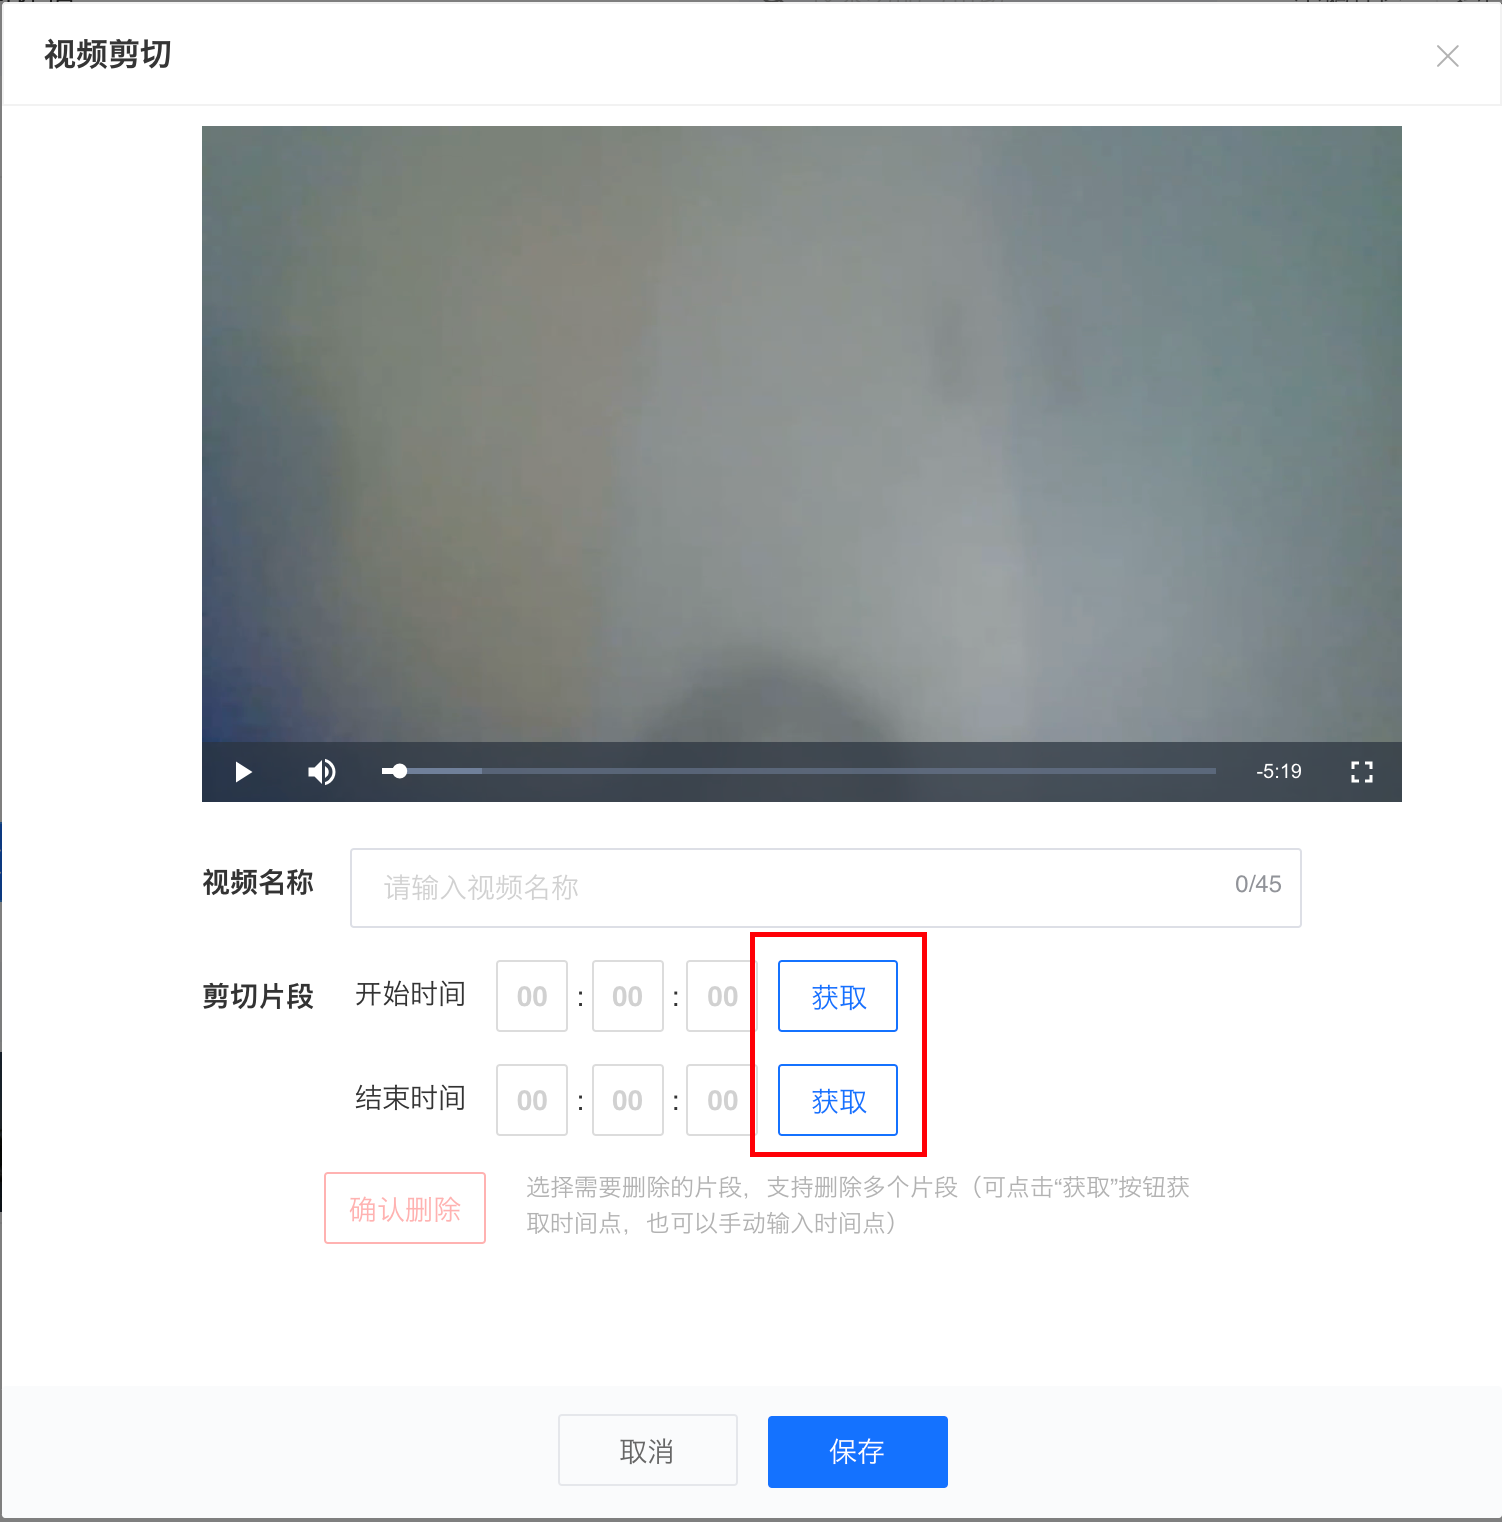
You can also manually enter 'hours - minutes - seconds' to select the time point (simply enter manually without clicking the 'Get' button again)
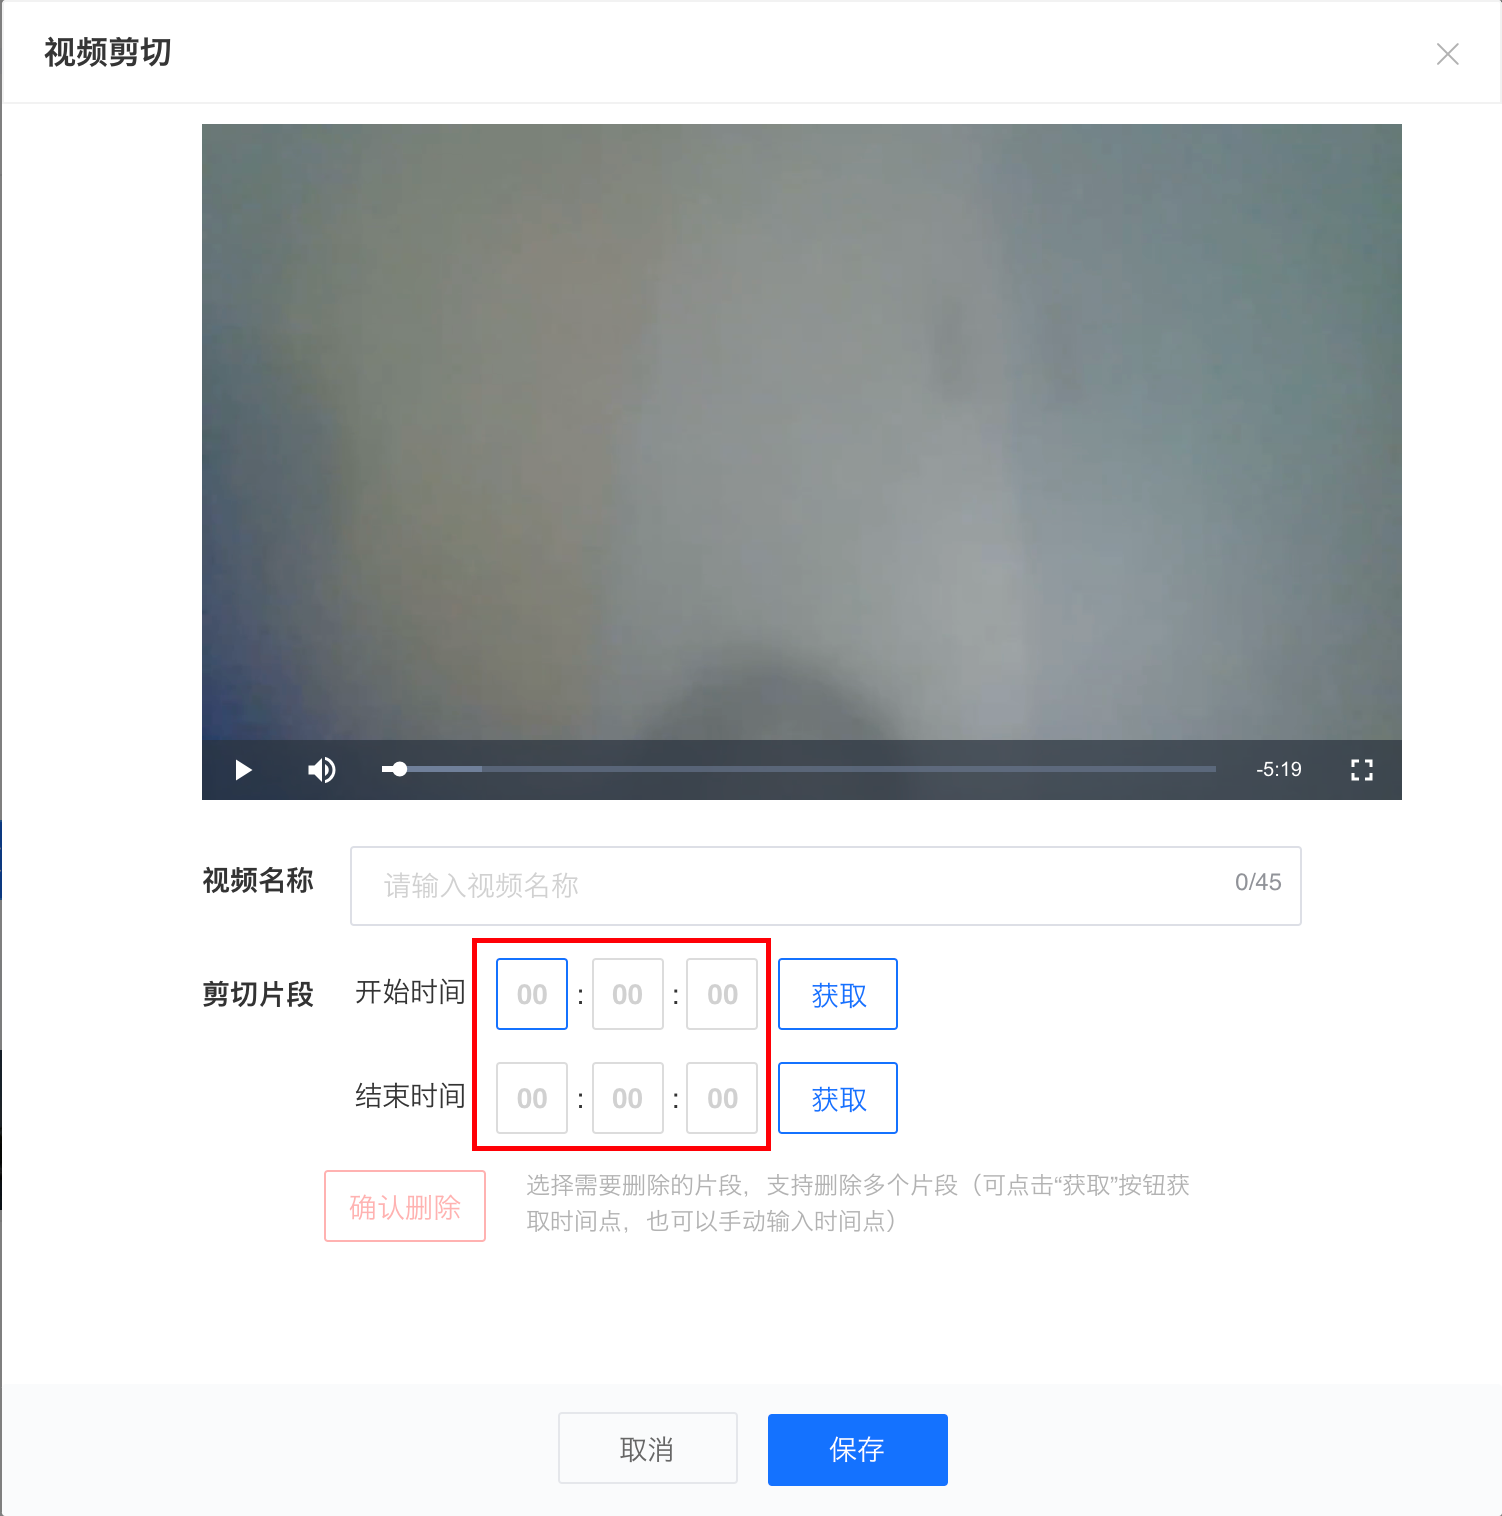
Step 4: Delete the segment
After selecting the start and end deletion time points, click 'Delete Segment' to delete the corresponding video segment
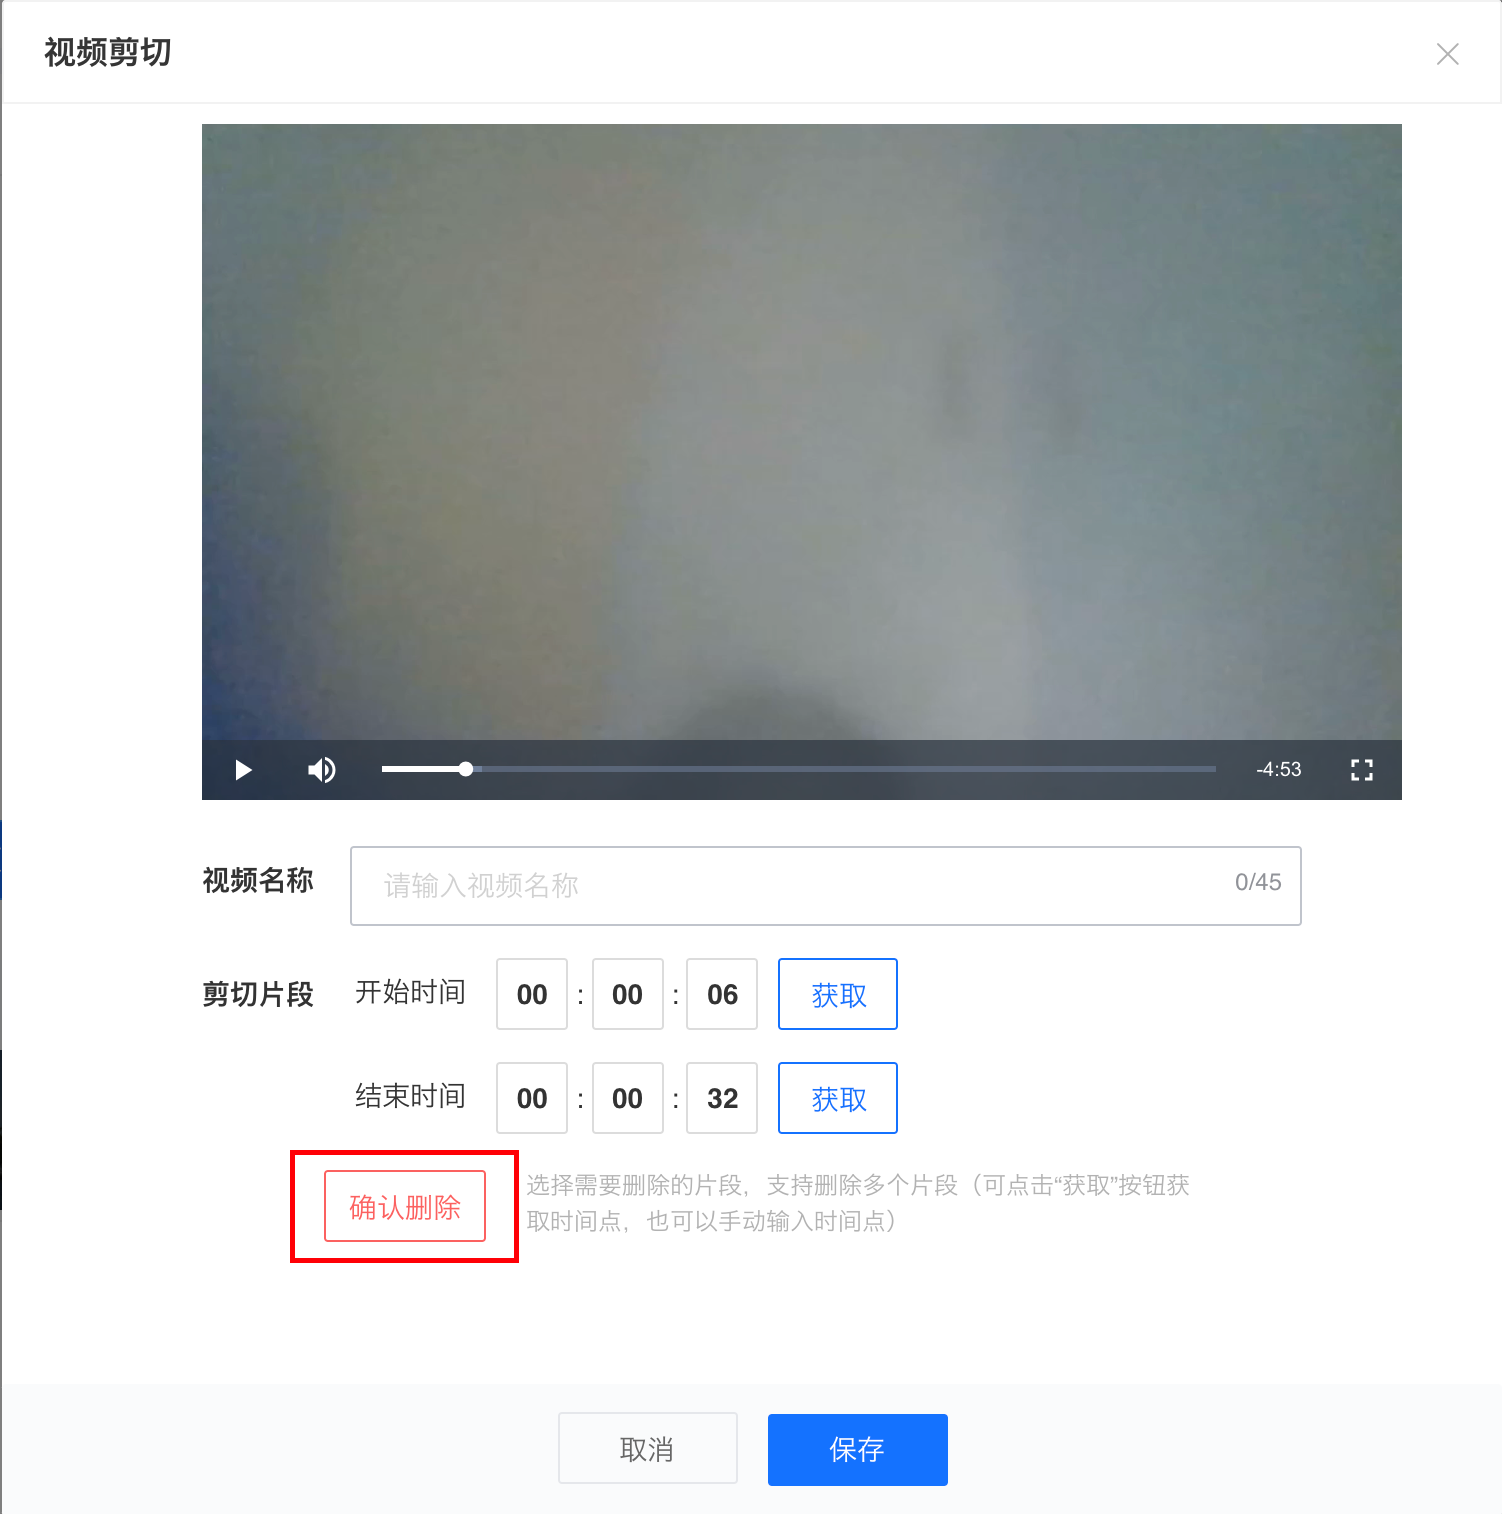
After confirming the deletion, the progress bar of the deleted video segment will be marked in red.
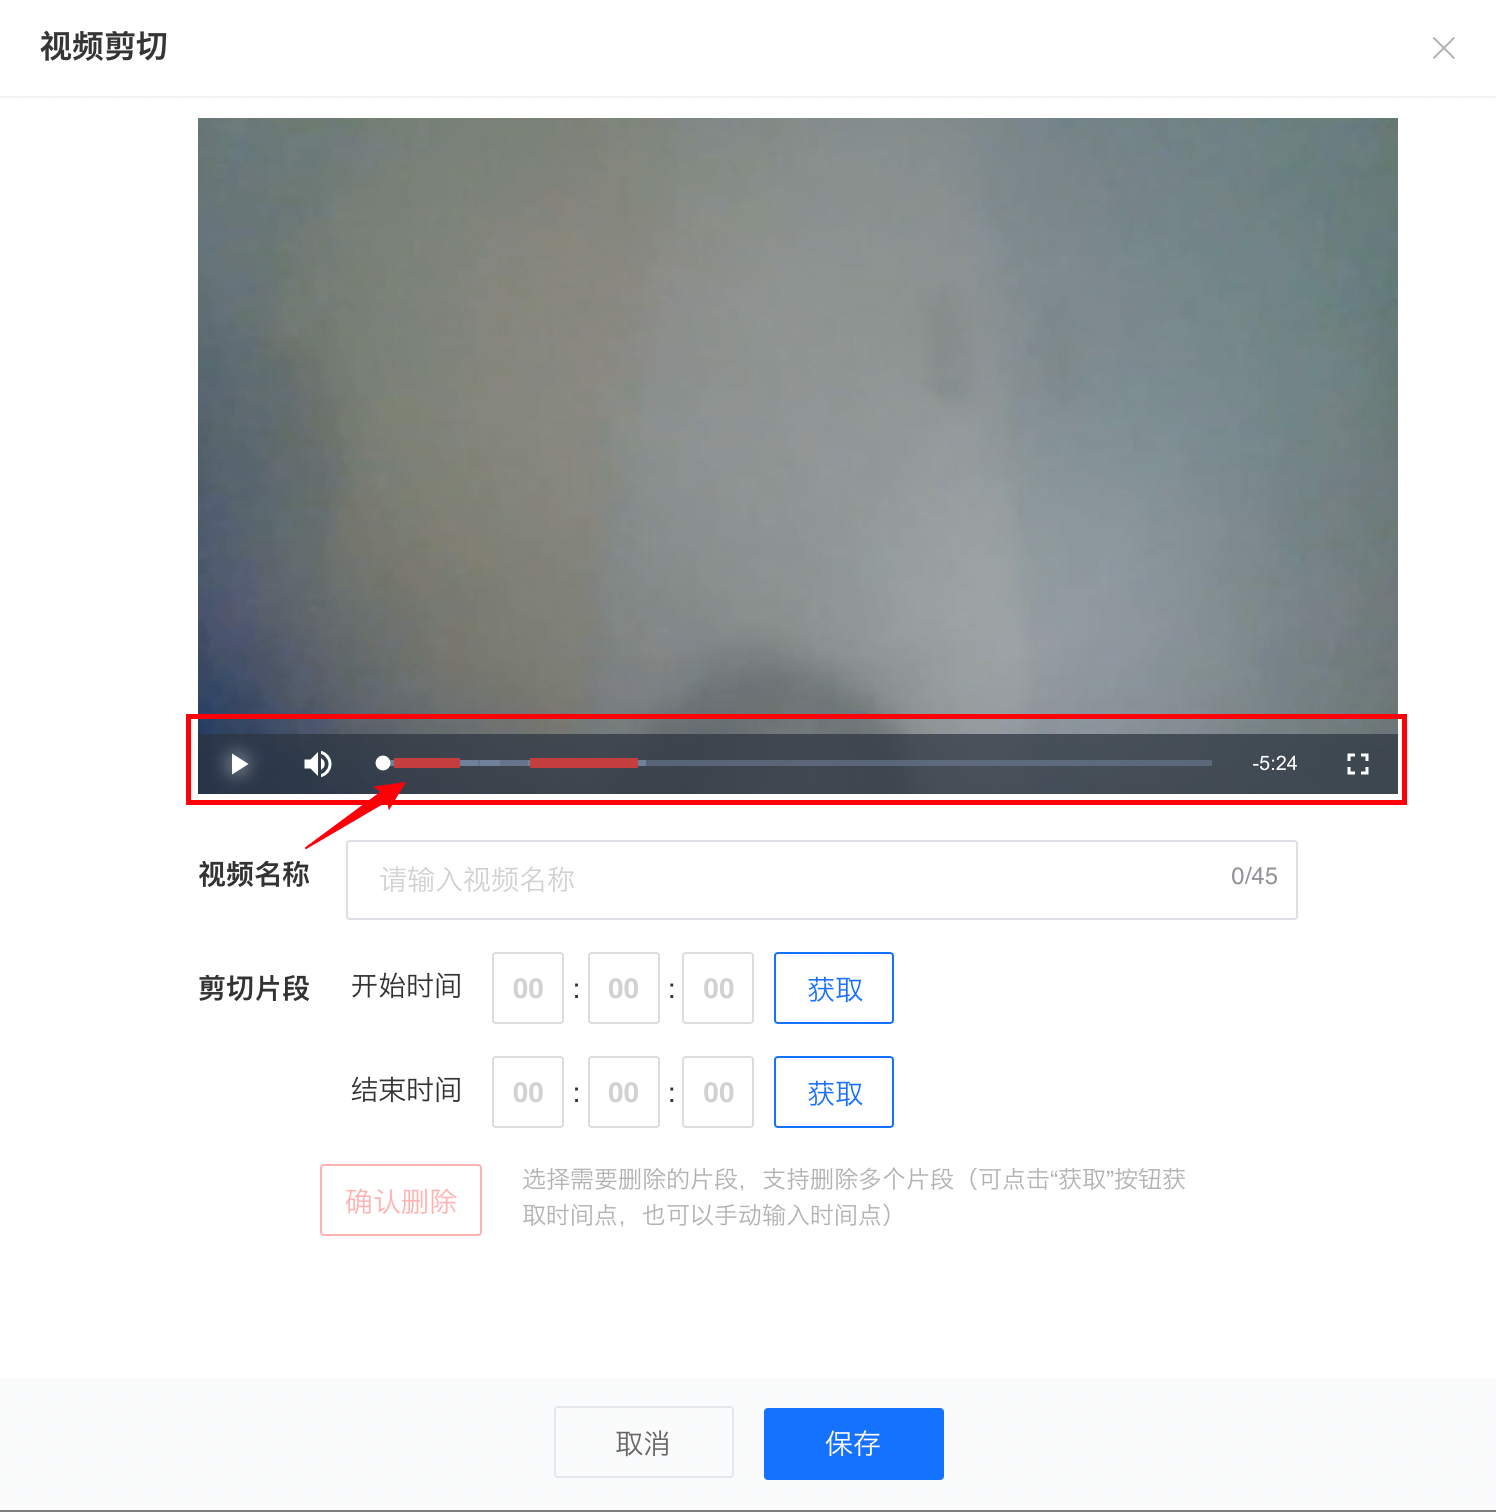
Repeat the above steps to delete multiple segments.
Step 5: Enter the video name
Click on the video name area to enter the video name
Step 6: Save the video
Click 'Save Video'. The segments marked in red will be deleted, and the remaining segments will be spliced together to form a new edited video.
If you need to set the edited video as a live stream replay, after saving, you need to wait for the video transcoding to succeed, and then click to set it as the replay video.
Tutorial on Using the Playback Validity Period Function
I. Feature Introduction
Merchants can set the validity period of the replay. They can control the viewing duration of students by selecting the [Limited Time] option on the replay settings interface or the live course editing page and specifying the expiration date of the replay.
II. Purpose of Use
To meet the merchants' needs to encourage students to watch the content promptly and improve the viewing rate.
III. Usage Scenarios
Merchants notice that students are lazy and lack motivation in learning. They hope to urge students to study the purchased courses by setting a validity period for the replay.
IV. Operation Path
Merchant side: Merchant backend
Student side: Live room details page → Enter the live broadcast
V. Usage Tutorial
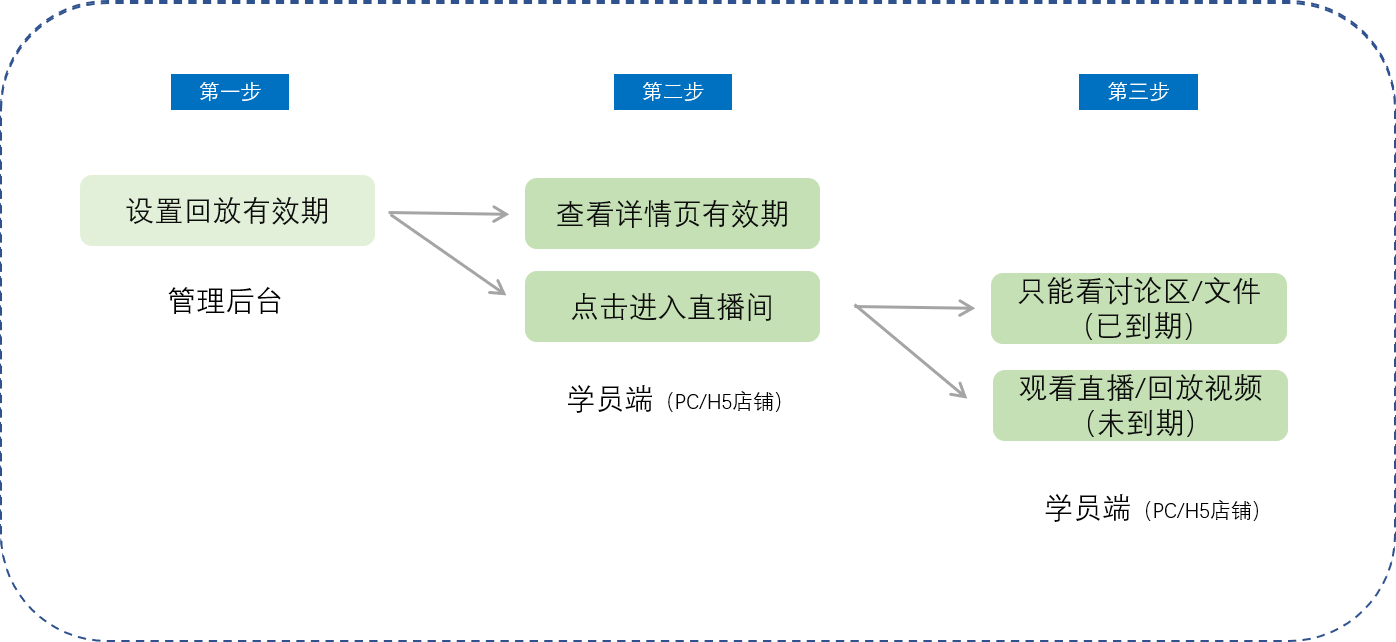
Step 1: Set the replay validity period (Management backend)
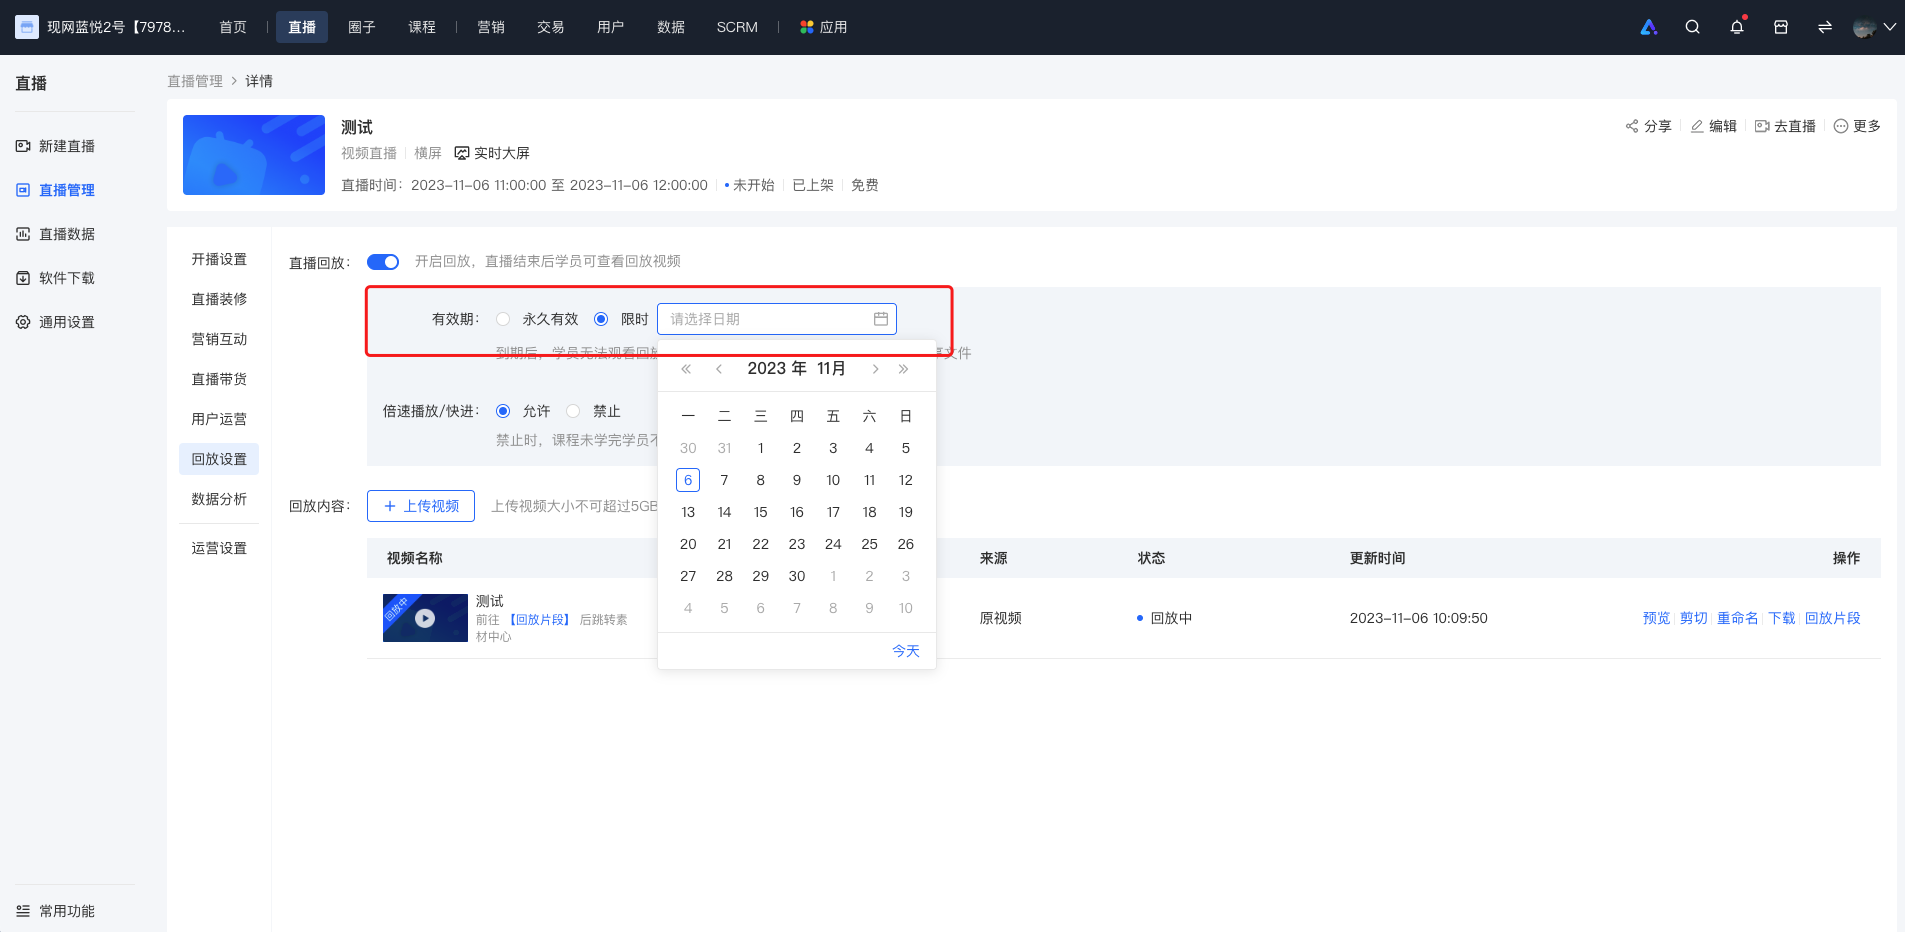
Step 2: Check the validity period on the details page (Student PC/H5 store)
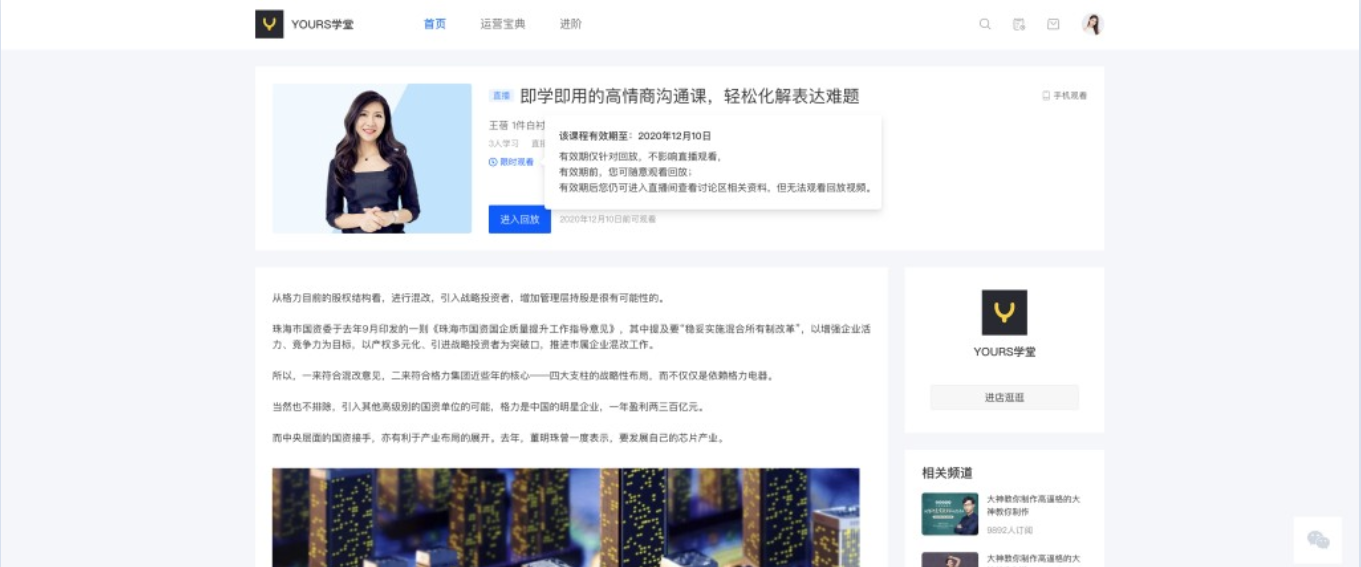
PC student store
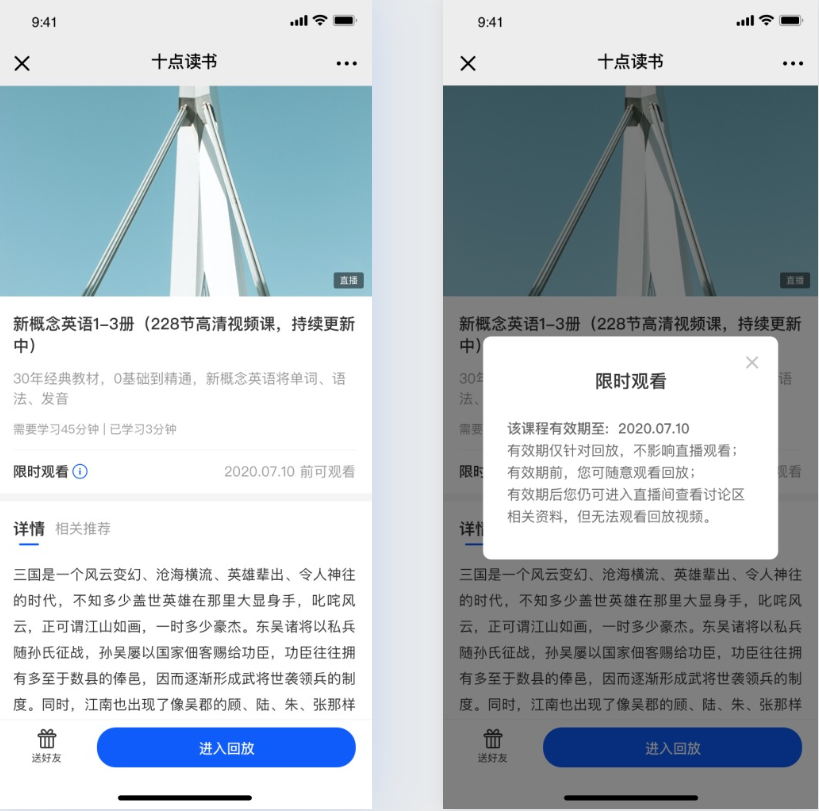
H5 student store
Step 3: Enter the live room (Student PC/H5 store)
When the replay is still within the validity period, students can watch the replay video normally without any issues.
When the replay has expired and students enter the live room:
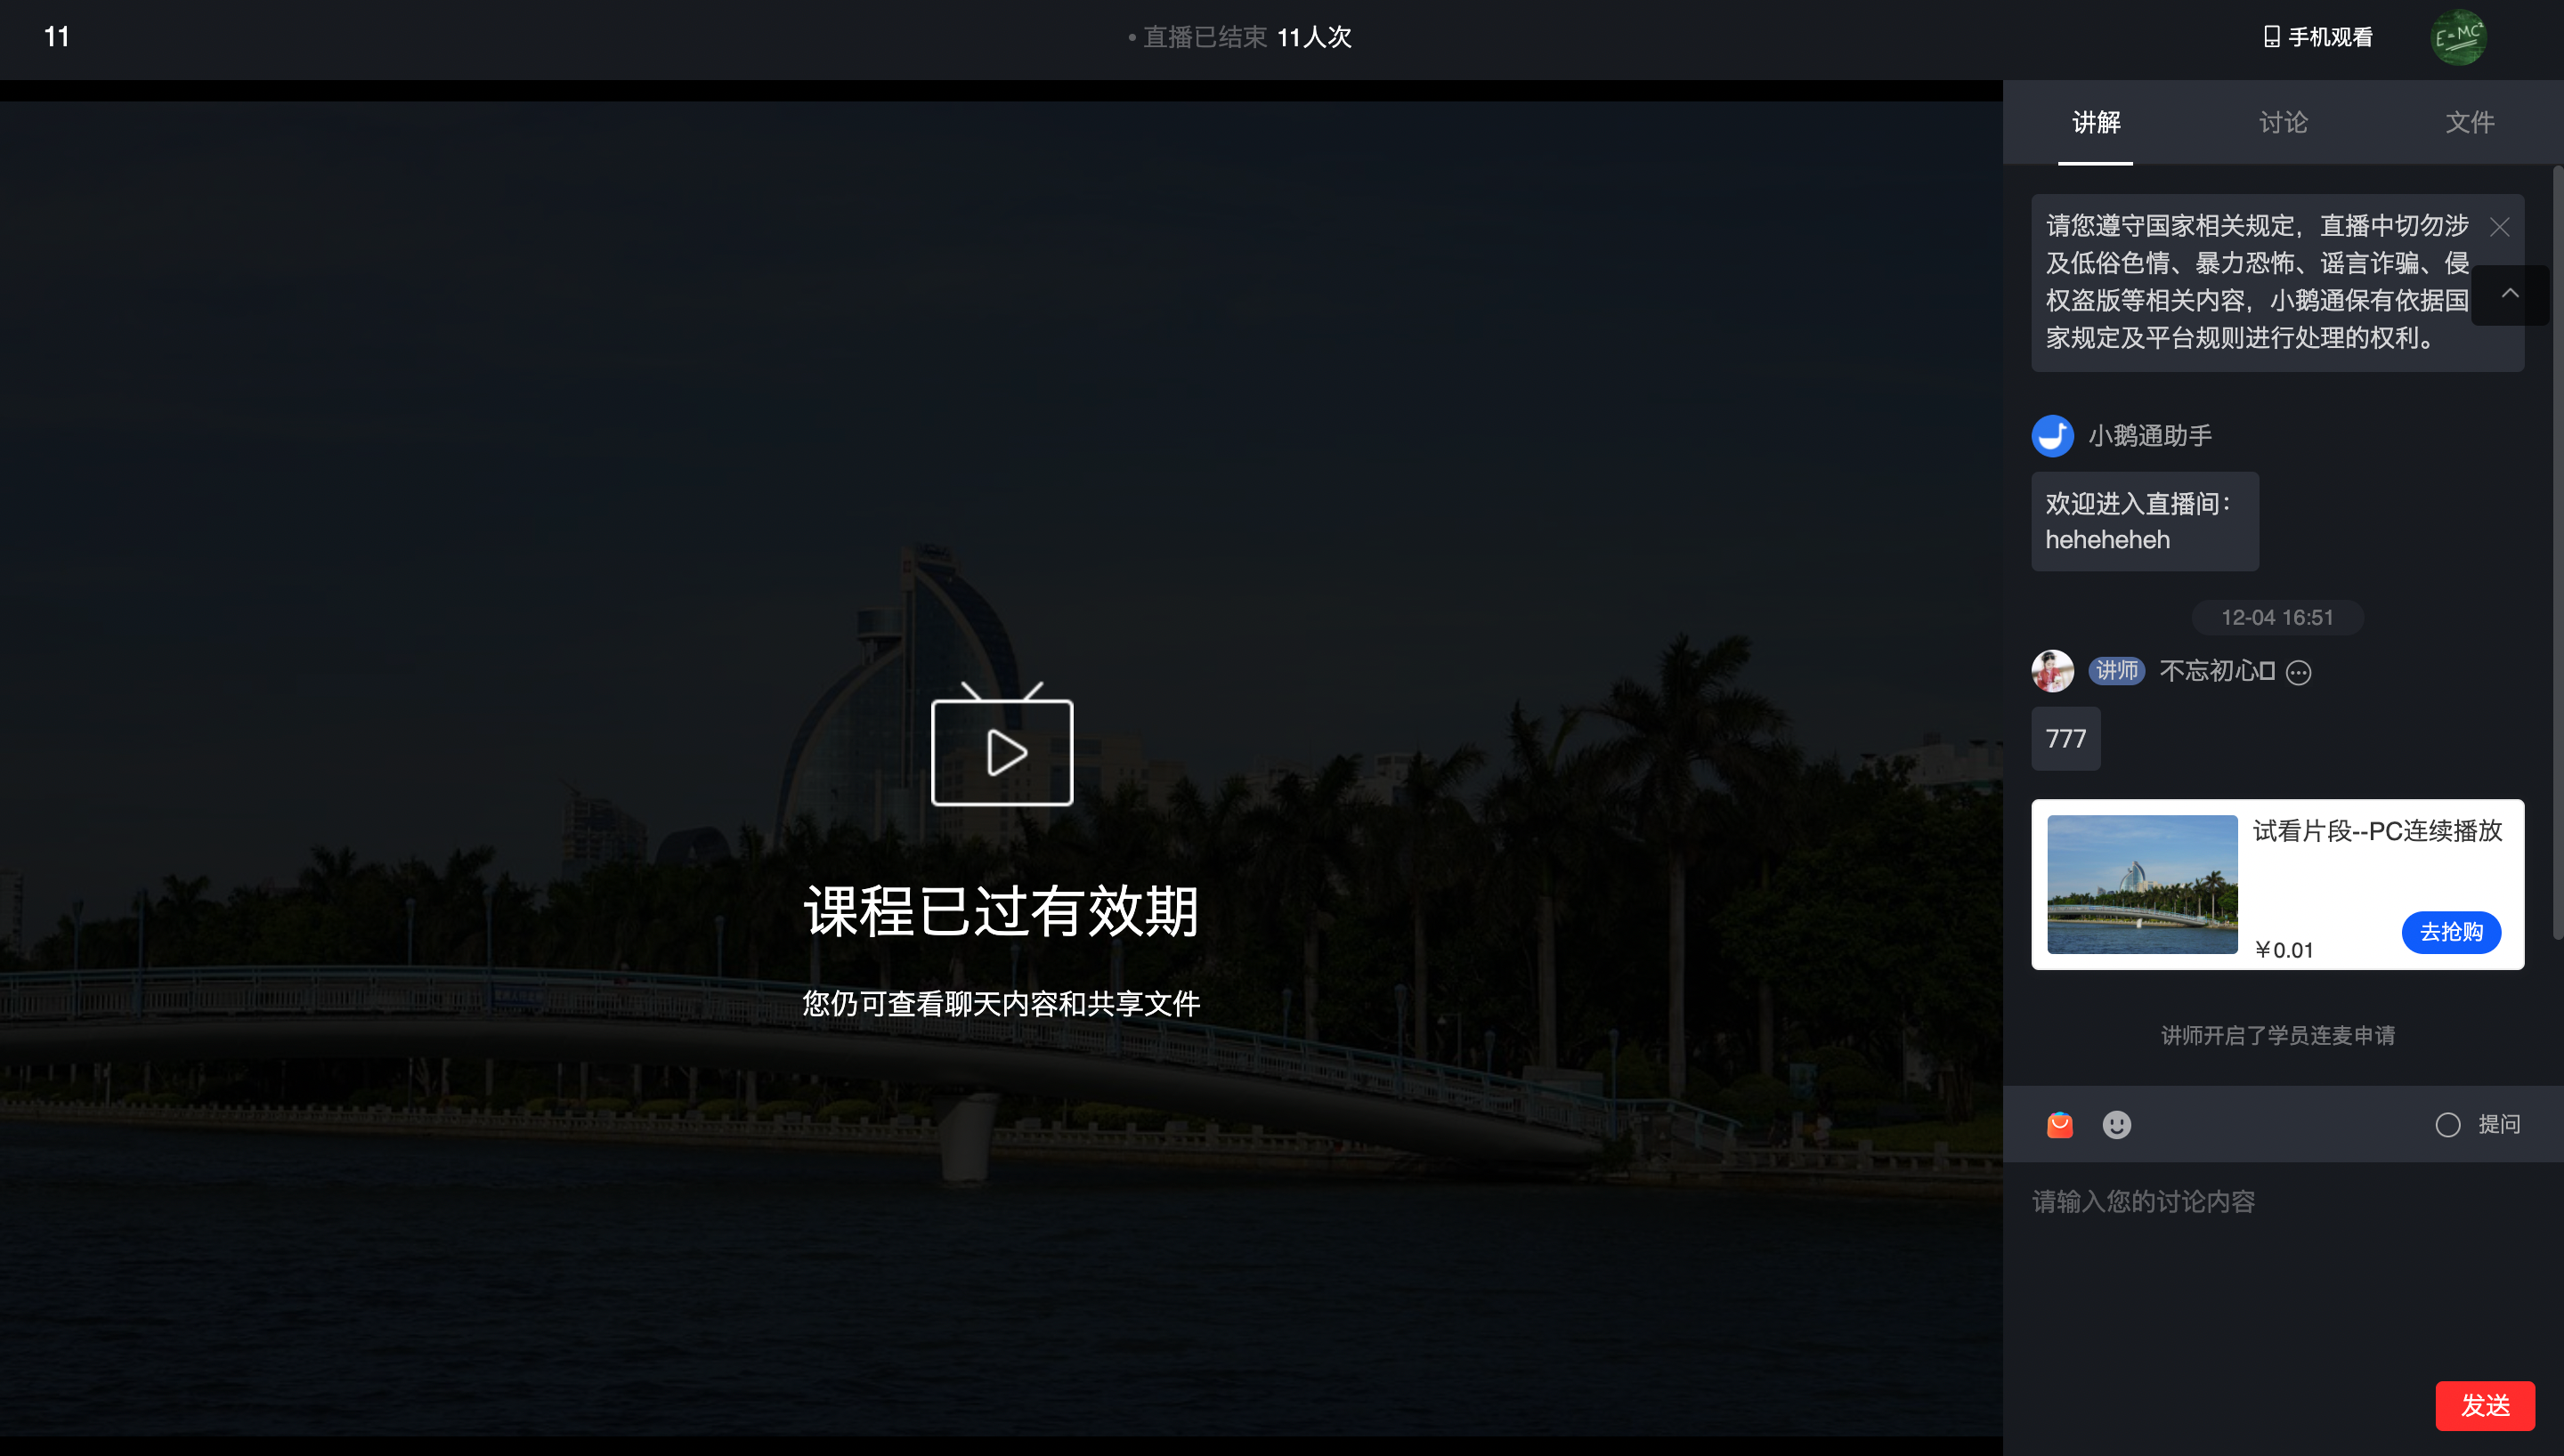
PC student store
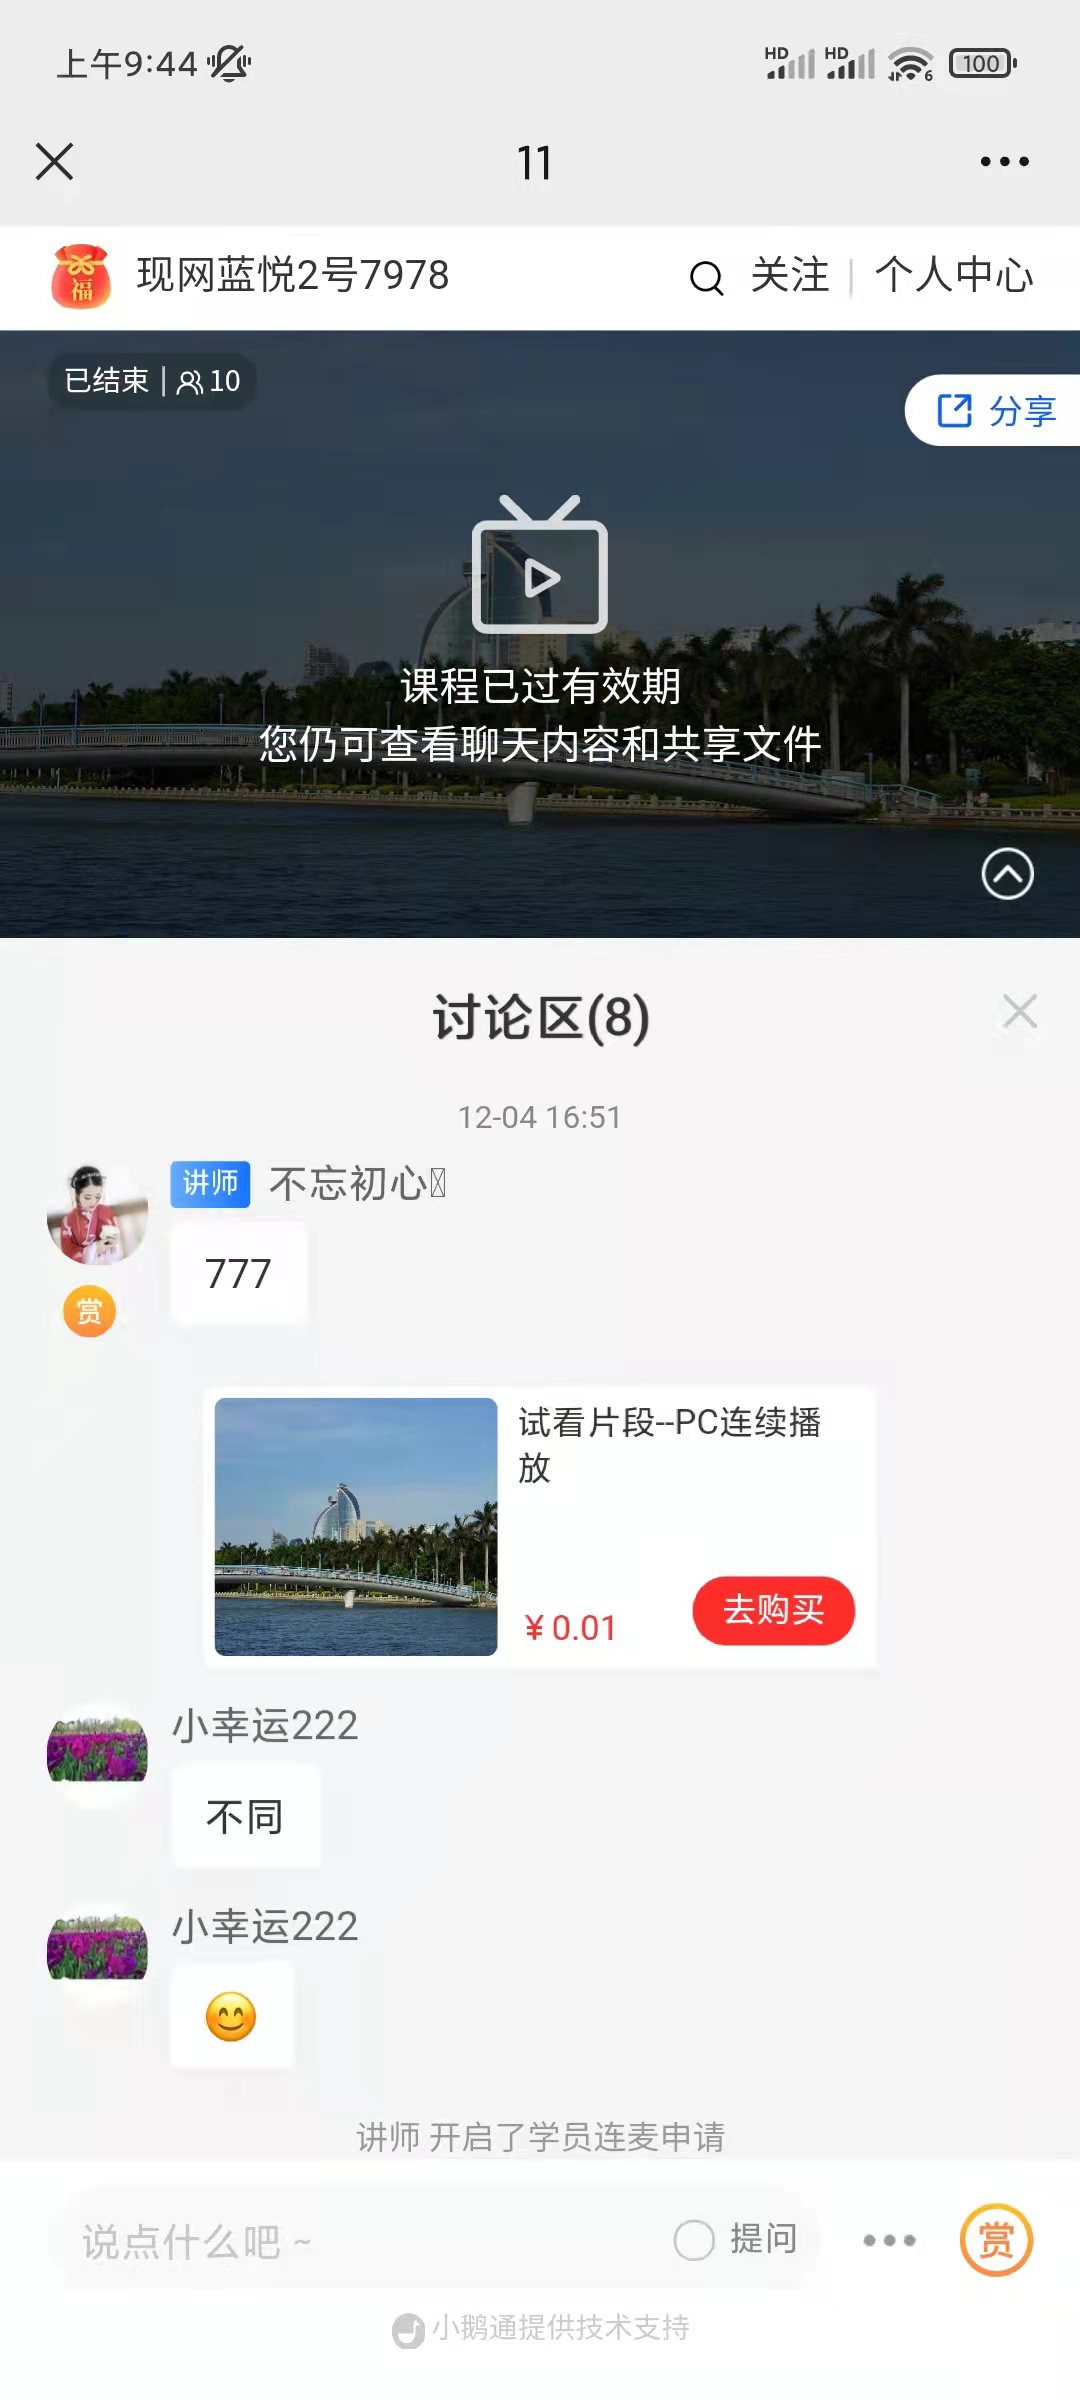
H5 student store
How can live course students download course materials?
I. Feature Introduction
Merchants can upload relevant courseware on the instructor's end, and then students can download the relevant courseware on their mobile phones and computers, which improves the students' review effect after class.
II. Purpose of Use
By downloading the courseware, students can study the live - streamed courses repeatedly in combination with the live replay content, thus enhancing the learning effect. They can also achieve this by repeatedly studying the courseware.
III. Use Scenarios
Teacher Zhang San conducts training for the sales staff in the company via live streaming. However, the sales staff usually face high work pressure and rarely have time for online review outside of class hours, resulting in less - than - satisfactory learning results. So, Teacher Zhang San shares the courseware with his students through elink live streaming. After downloading the courseware, the students watch and study it repeatedly during their free time, and both their learning effect and performance have improved significantly!
IV. Operation Path
Merchant's End:elinkAssistantClient/Web Version/WeChatH5 Instructor's End → Share Courseware
Student's End:WeChat H5/Web Version→ Live Room → Shared Courseware → Download Courseware
V. Usage Tutorial
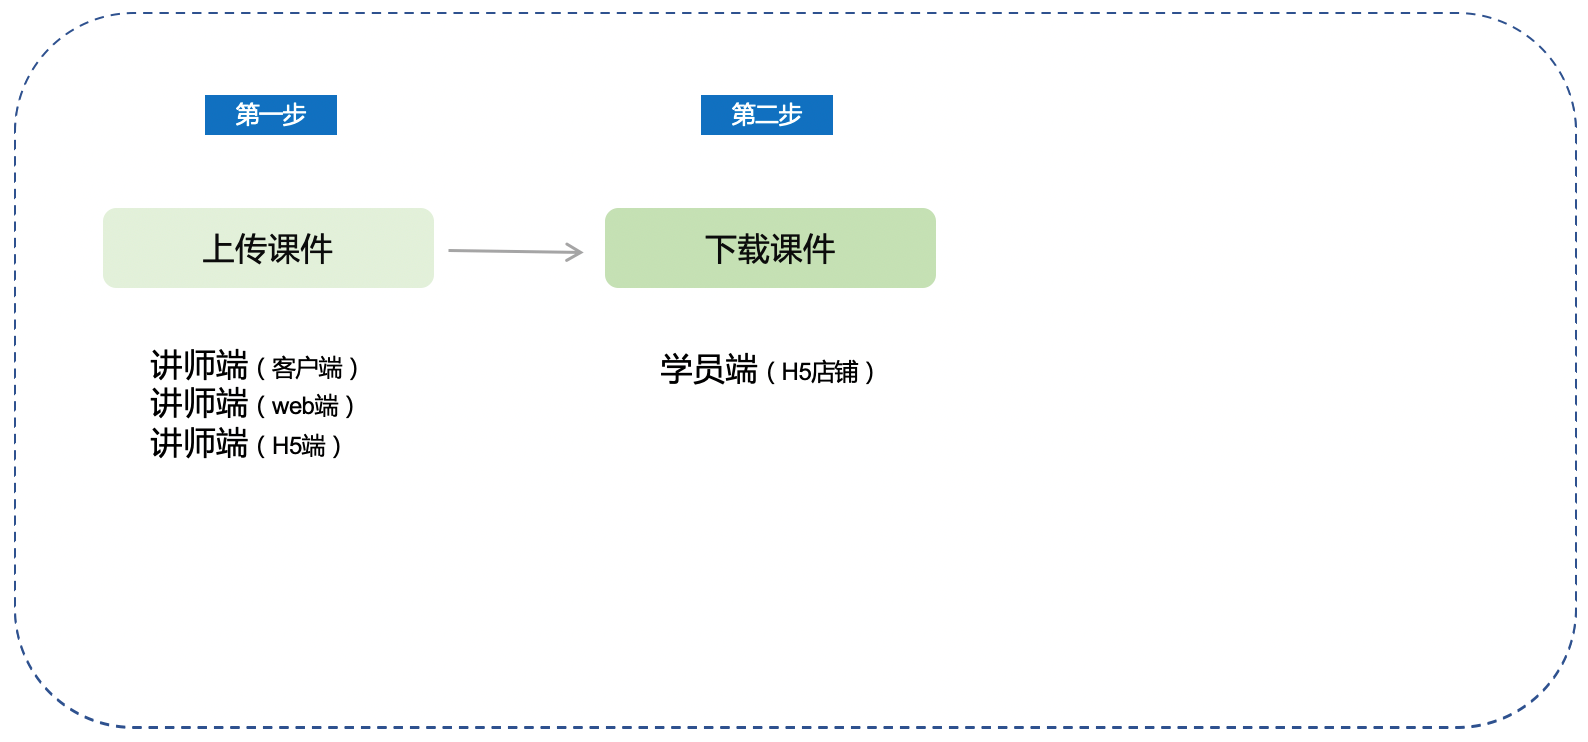
Step 1: Instructors Upload Courseware (e - Live Client/elink Assistant Client/Web Version/H5 Instructor's End)
1. Instructors enter the e - Live client and open [Presentation Courseware - Upload Courseware].
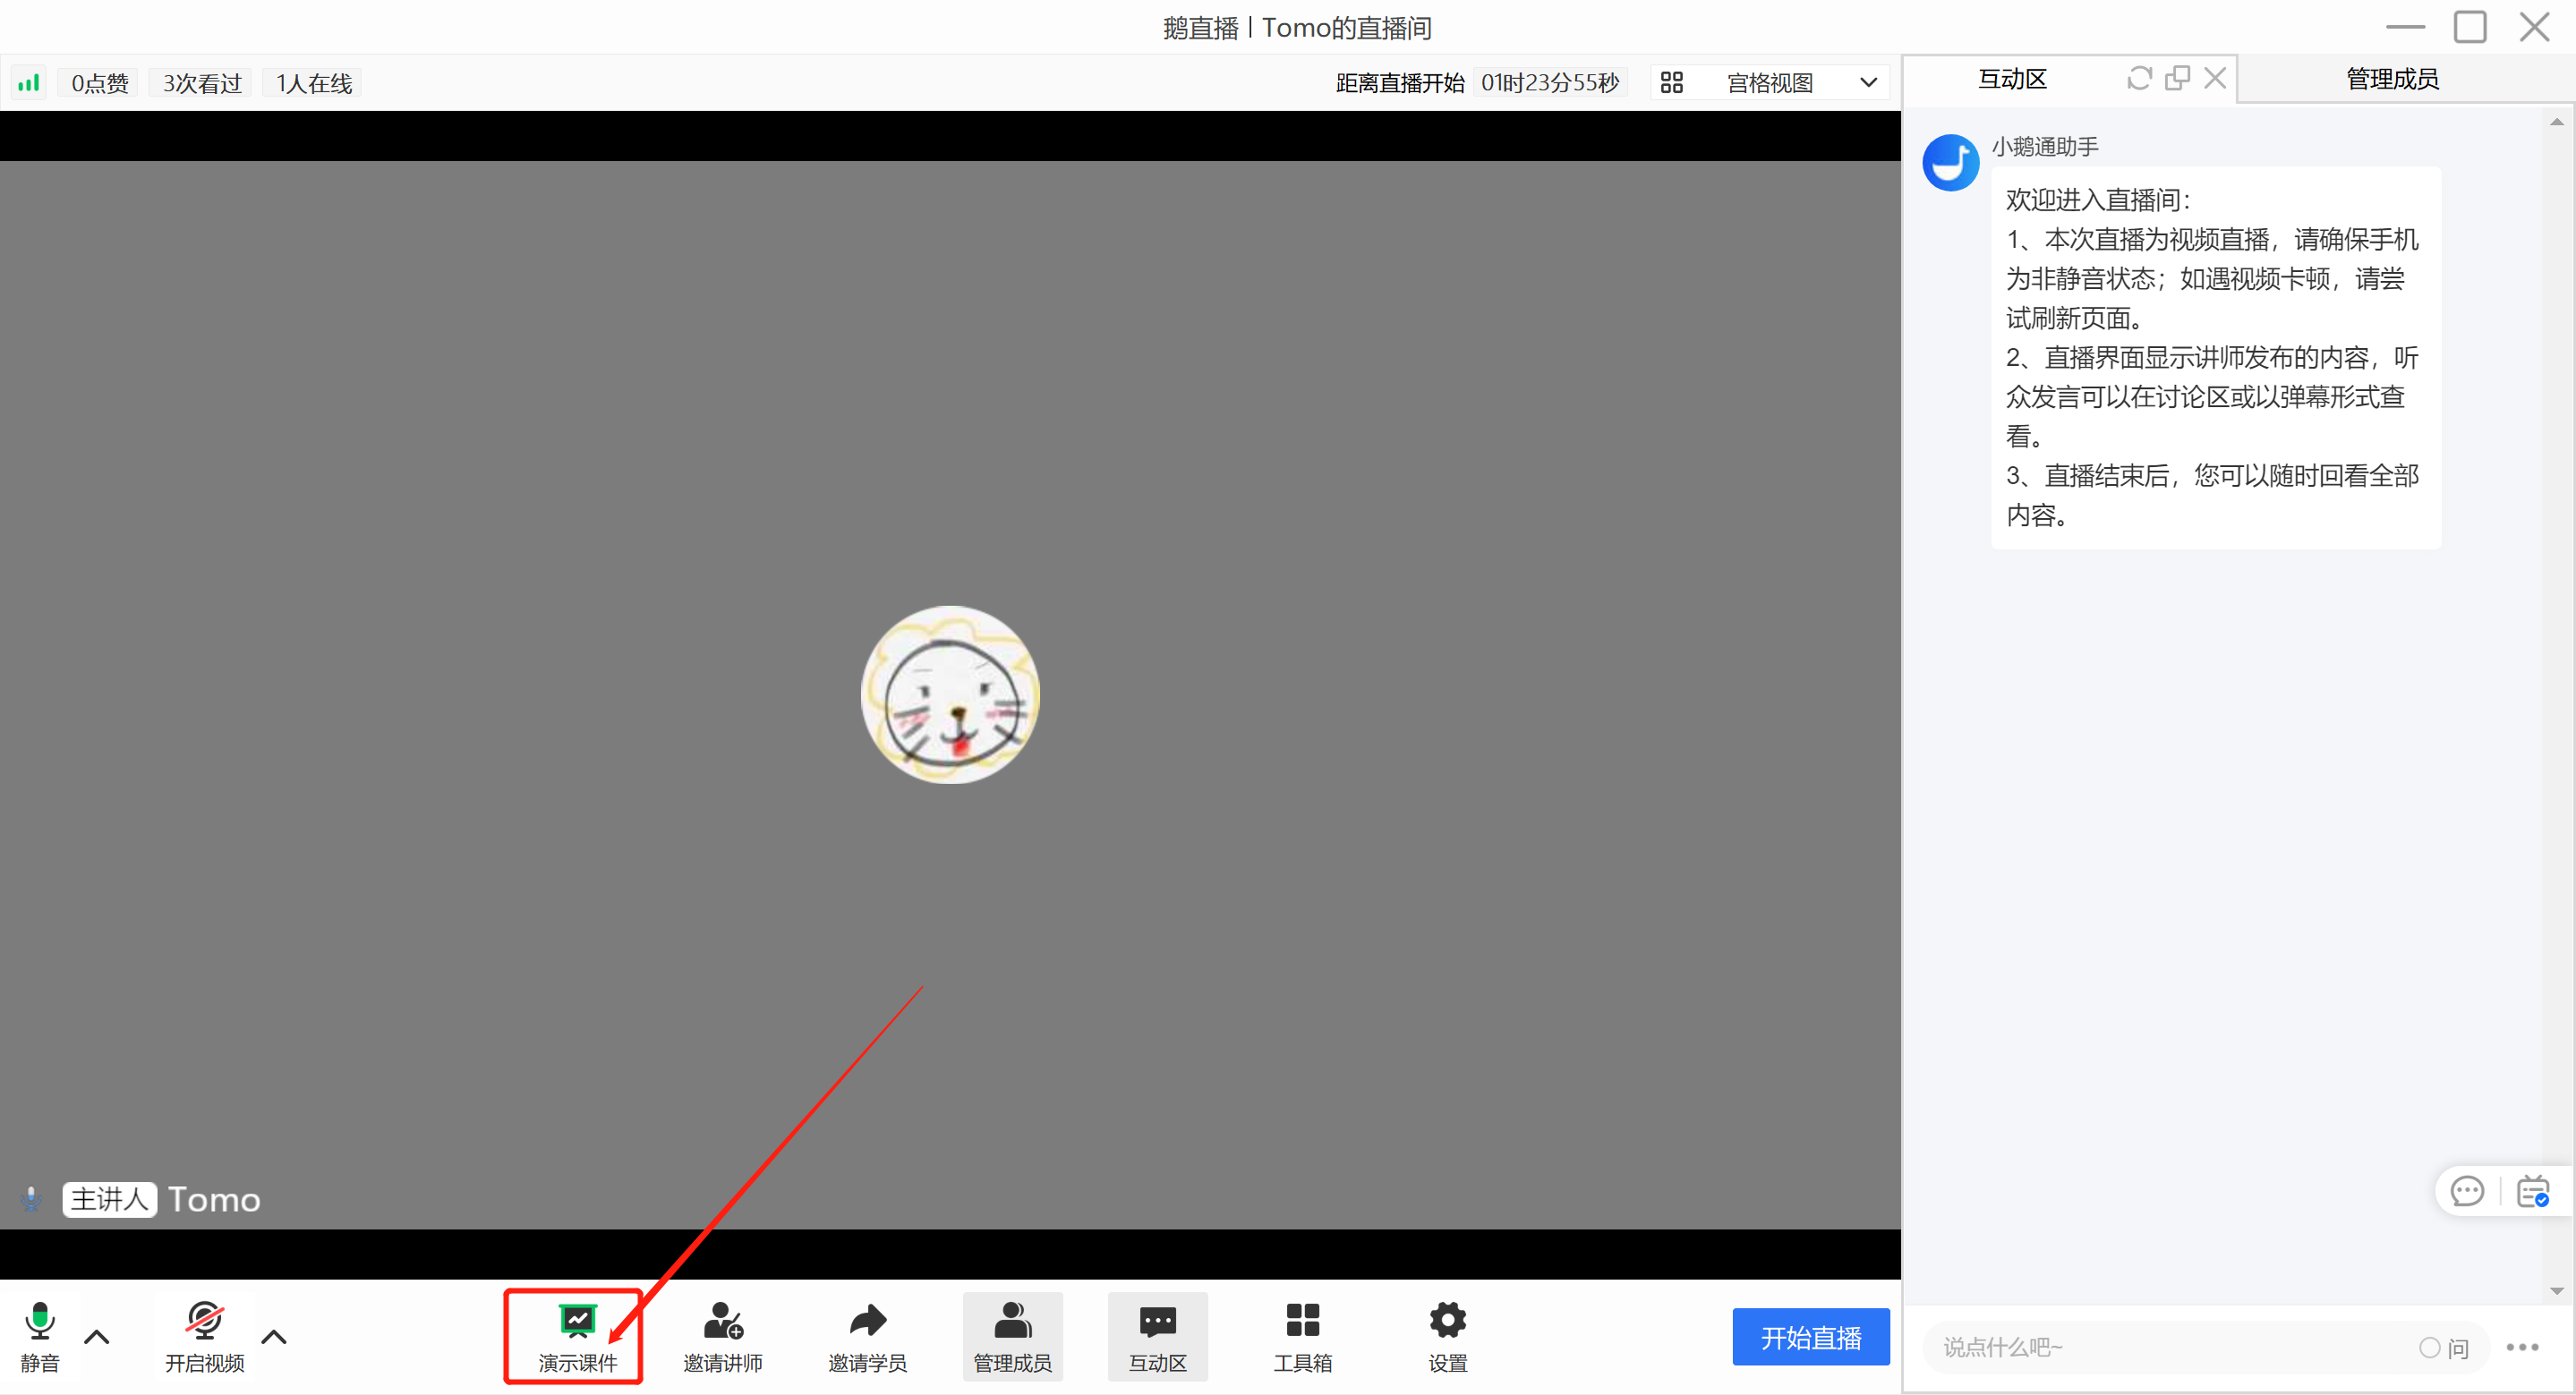
(e - Live Client Instructor's End)
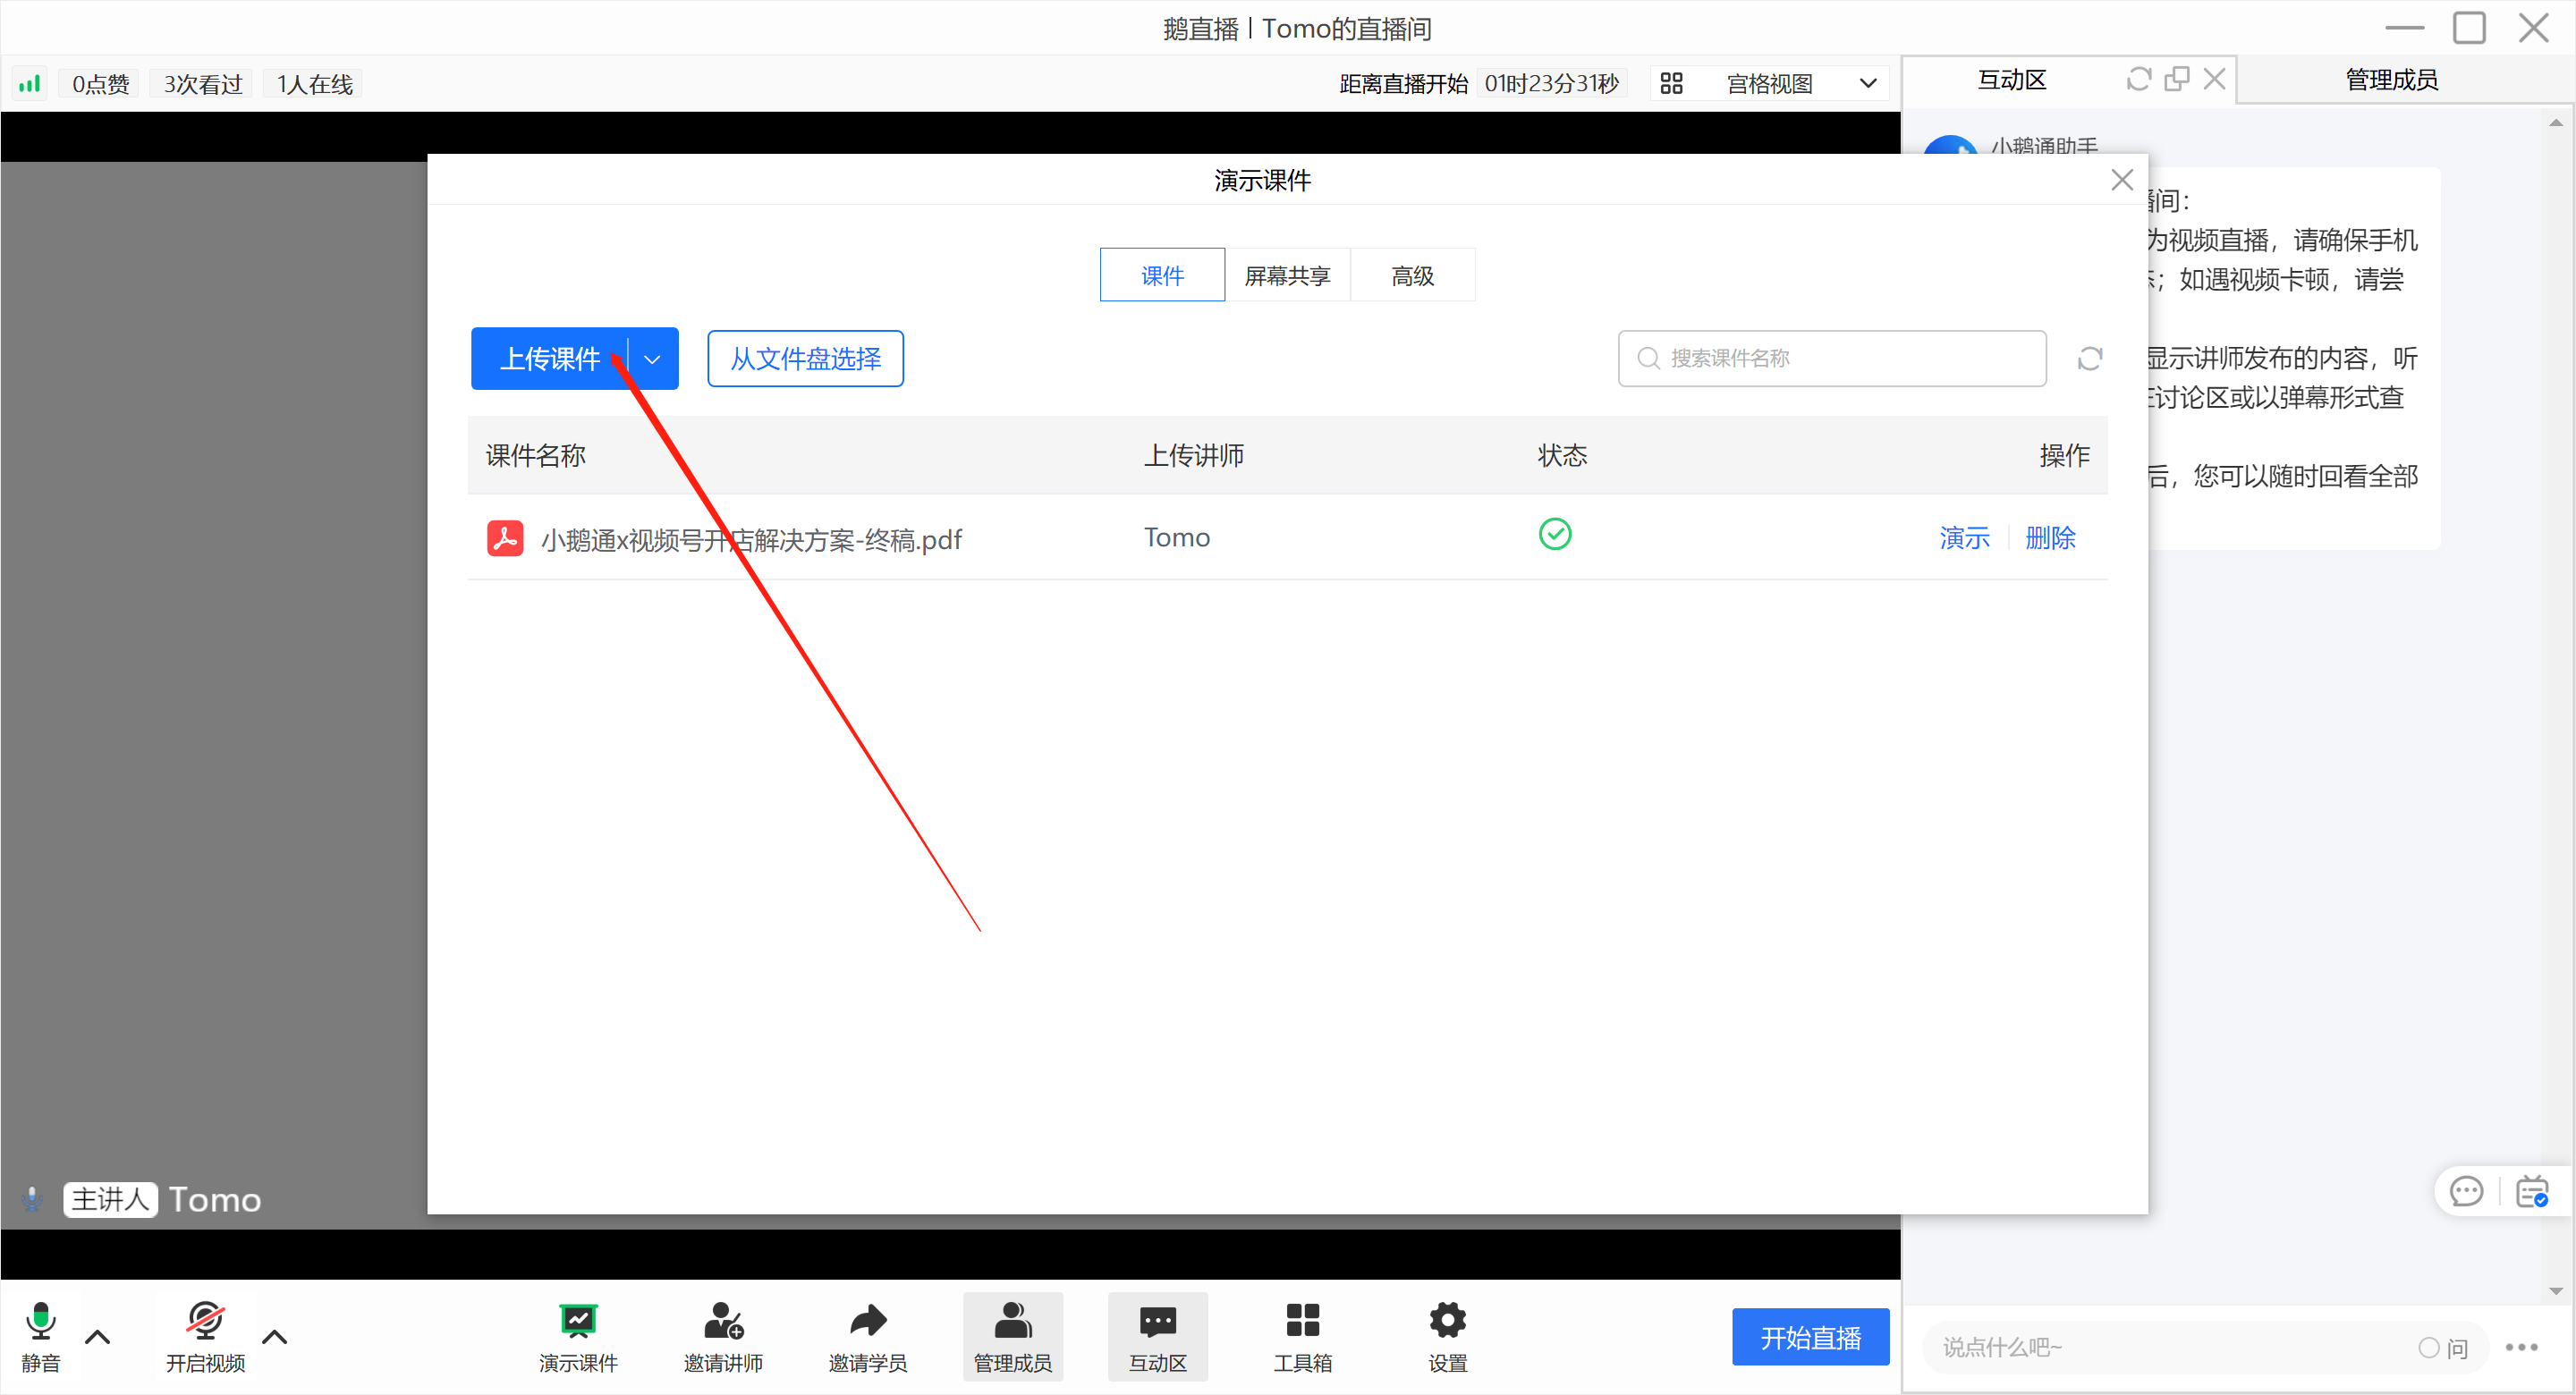
(e - Live ClientInstructor's End)
2. Instructors enter the elink client and open the material library to upload courseware.
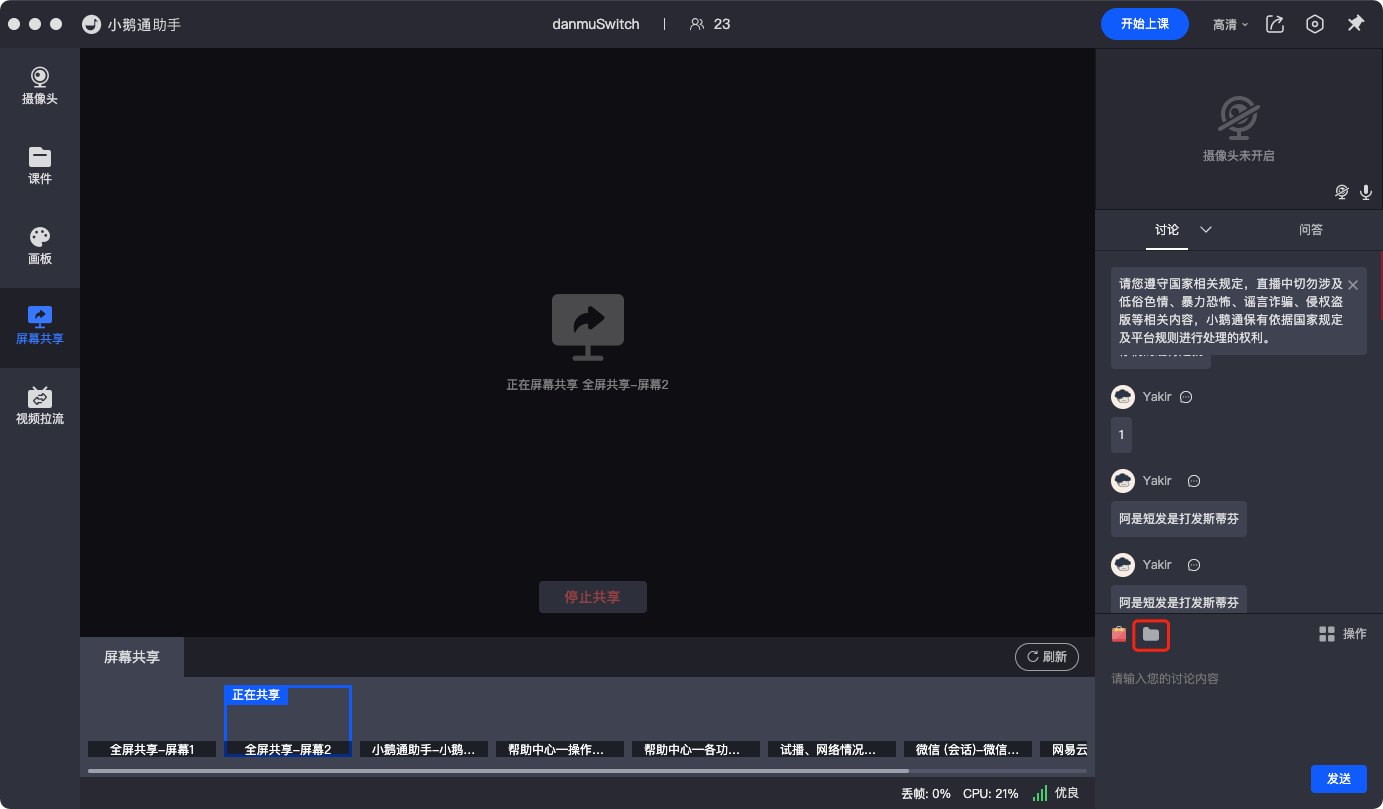
(elink Assistant Client Instructor's End)
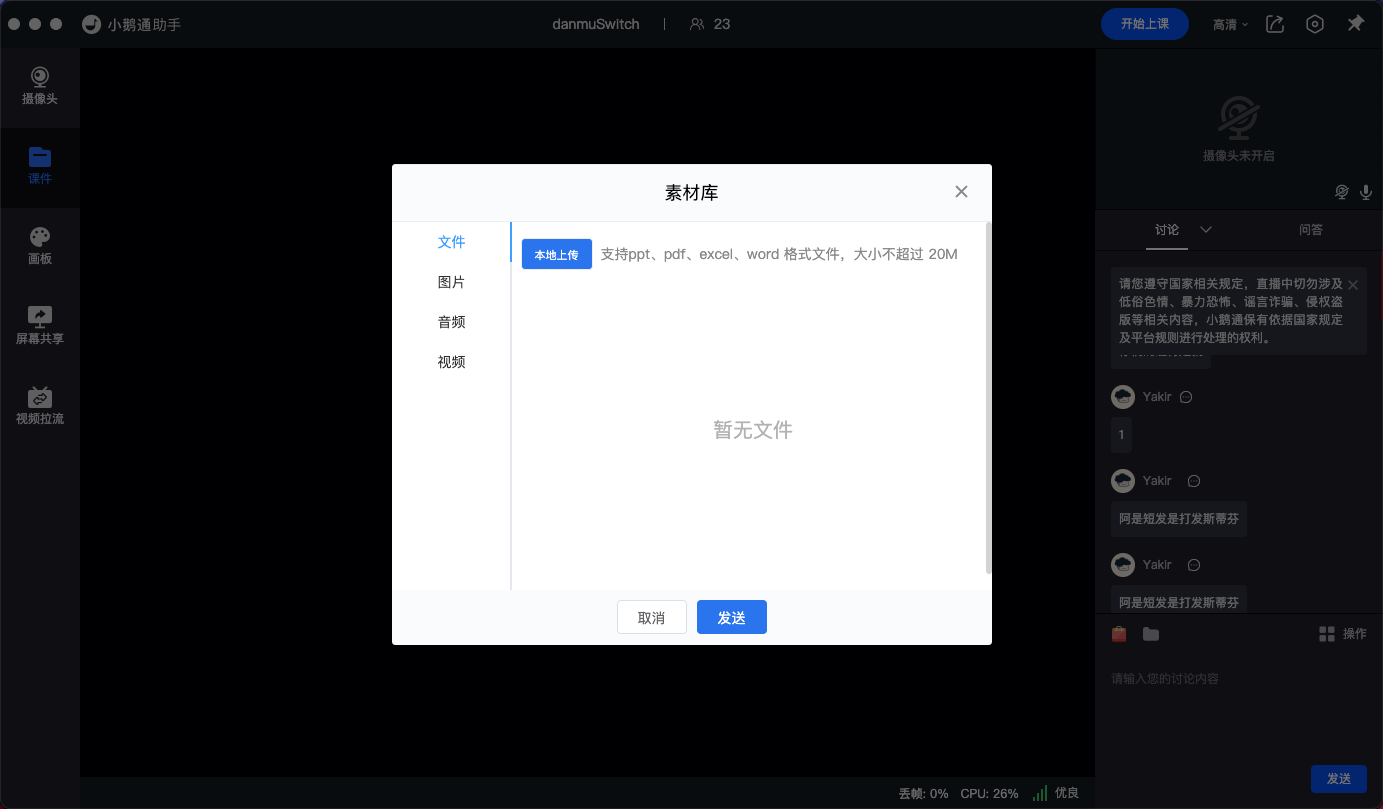
(elink Assistant Client Instructor's End)
3. Instructors enter the web - based instructor's end and open the material library to upload courseware.
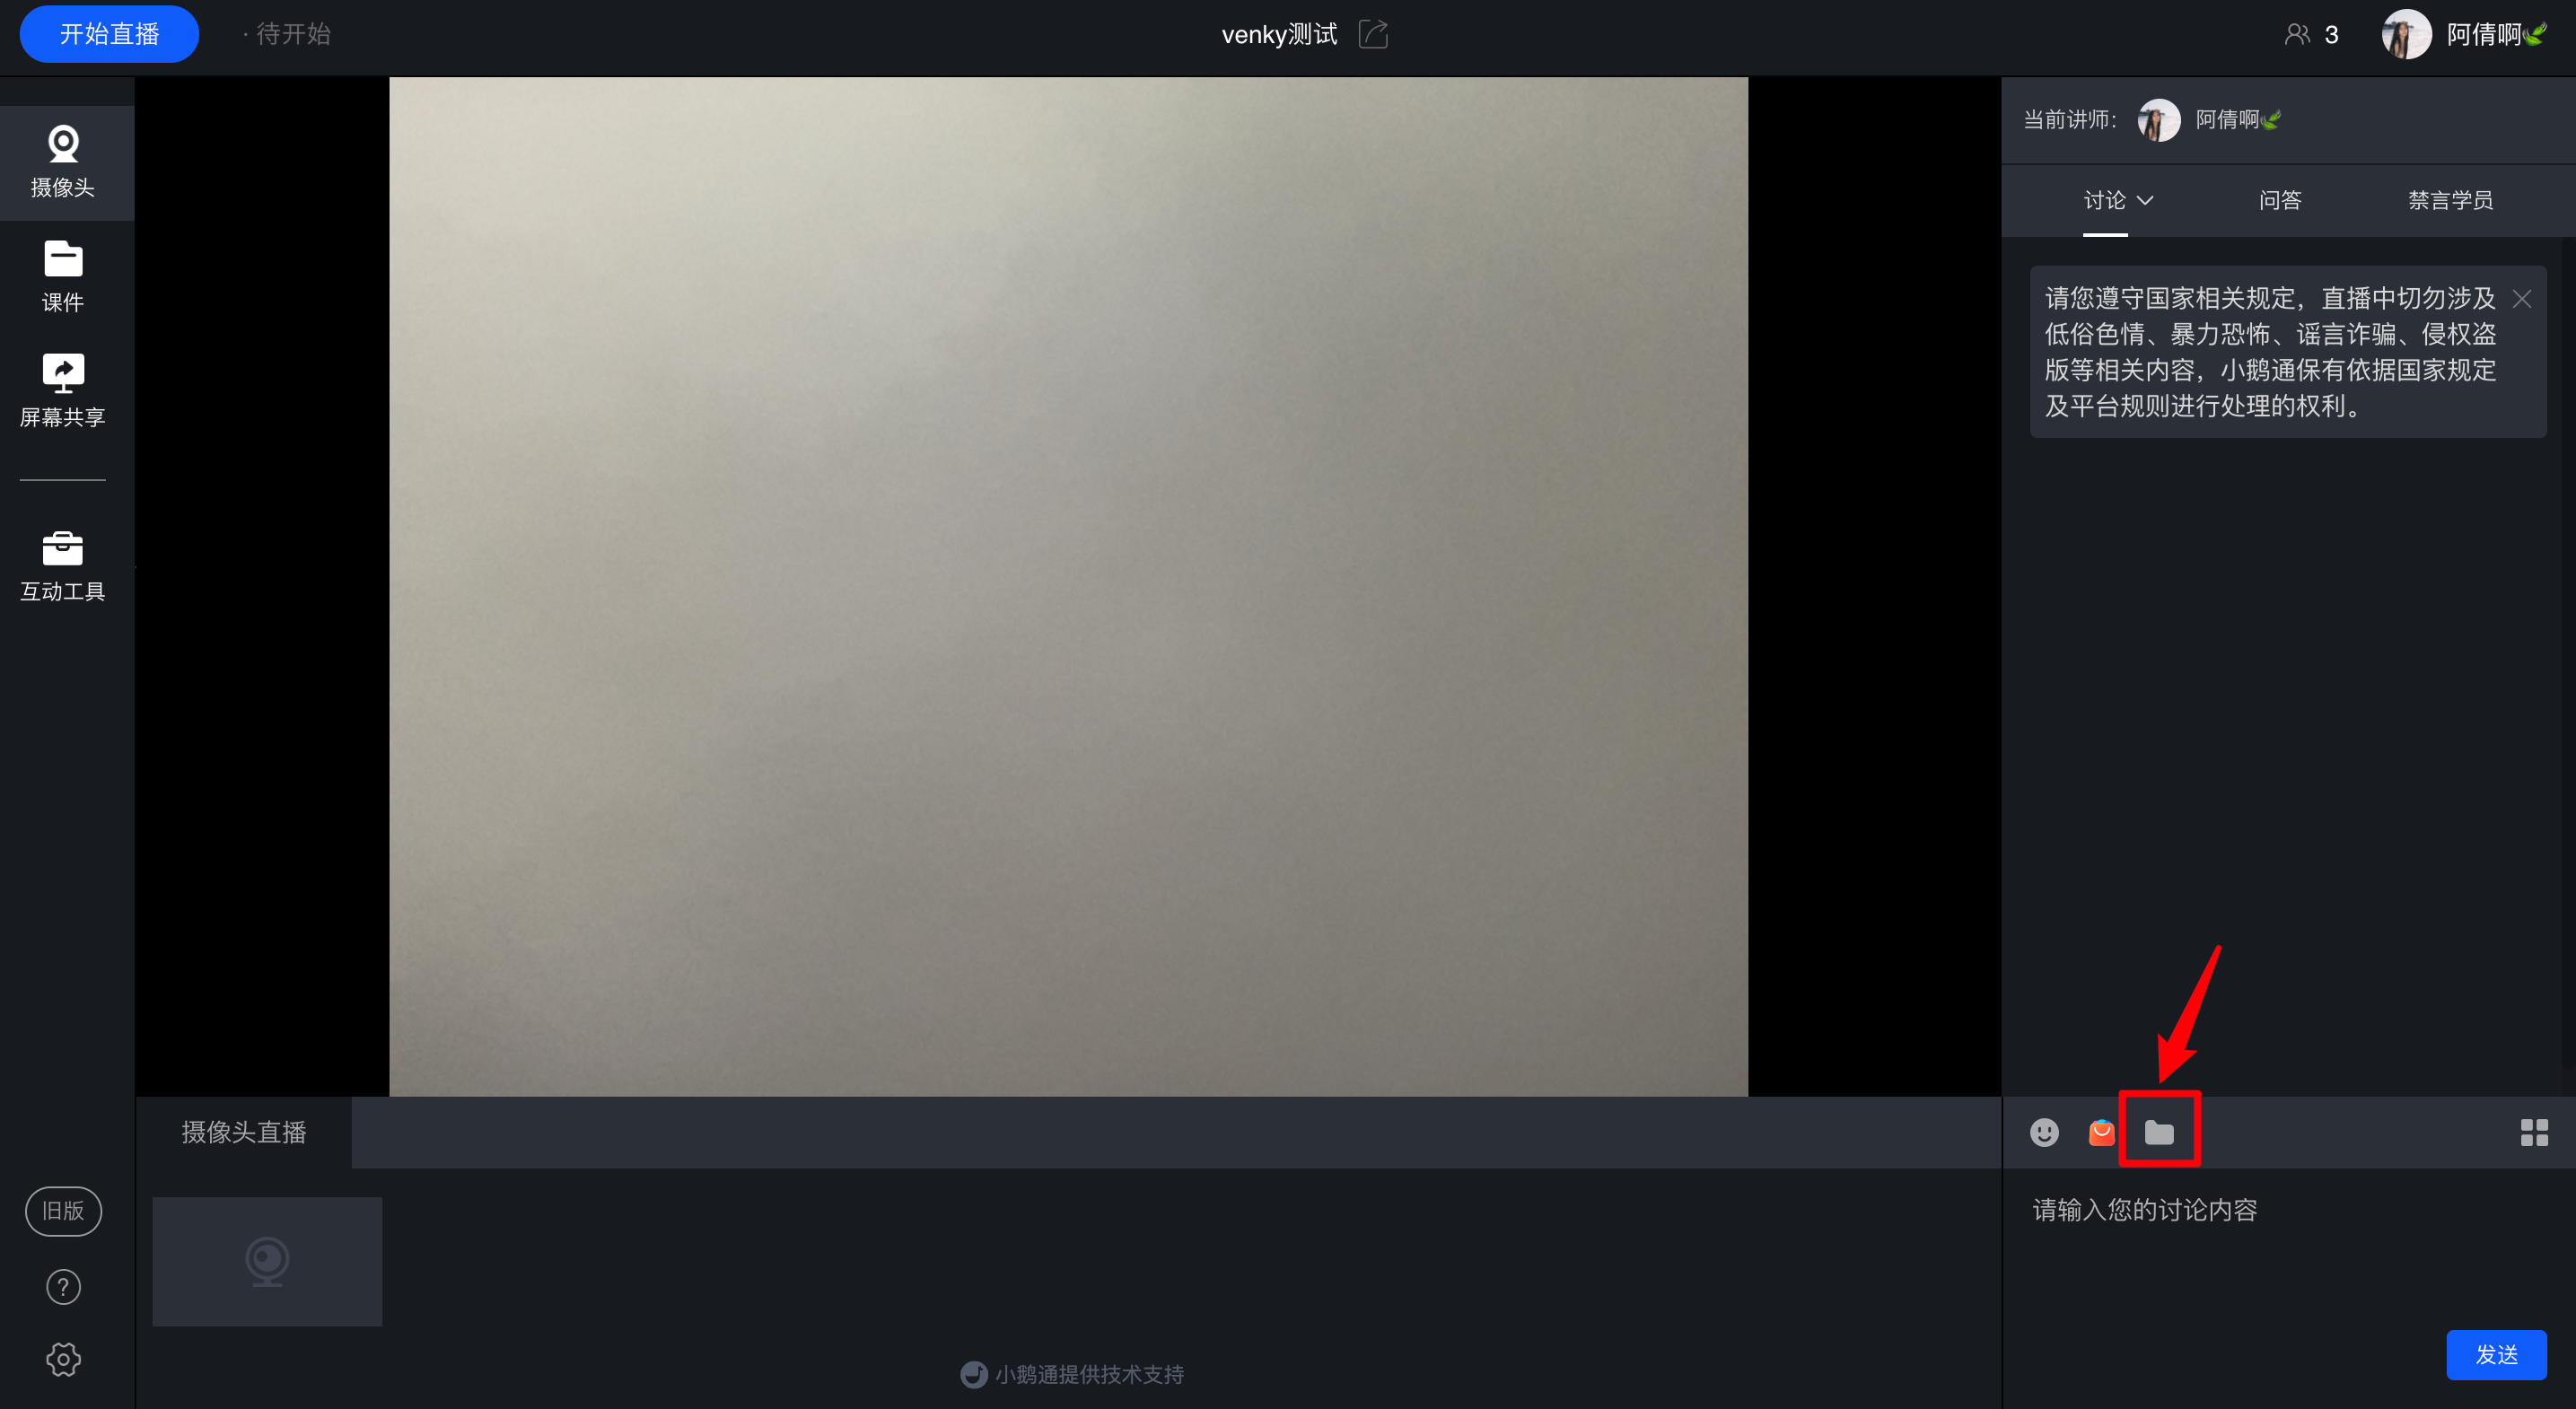
(Web - based Instructor's End)
4. Instructors enter the H5 instructor's end and open the material library to upload courseware (only Android phones are supported for courseware upload).
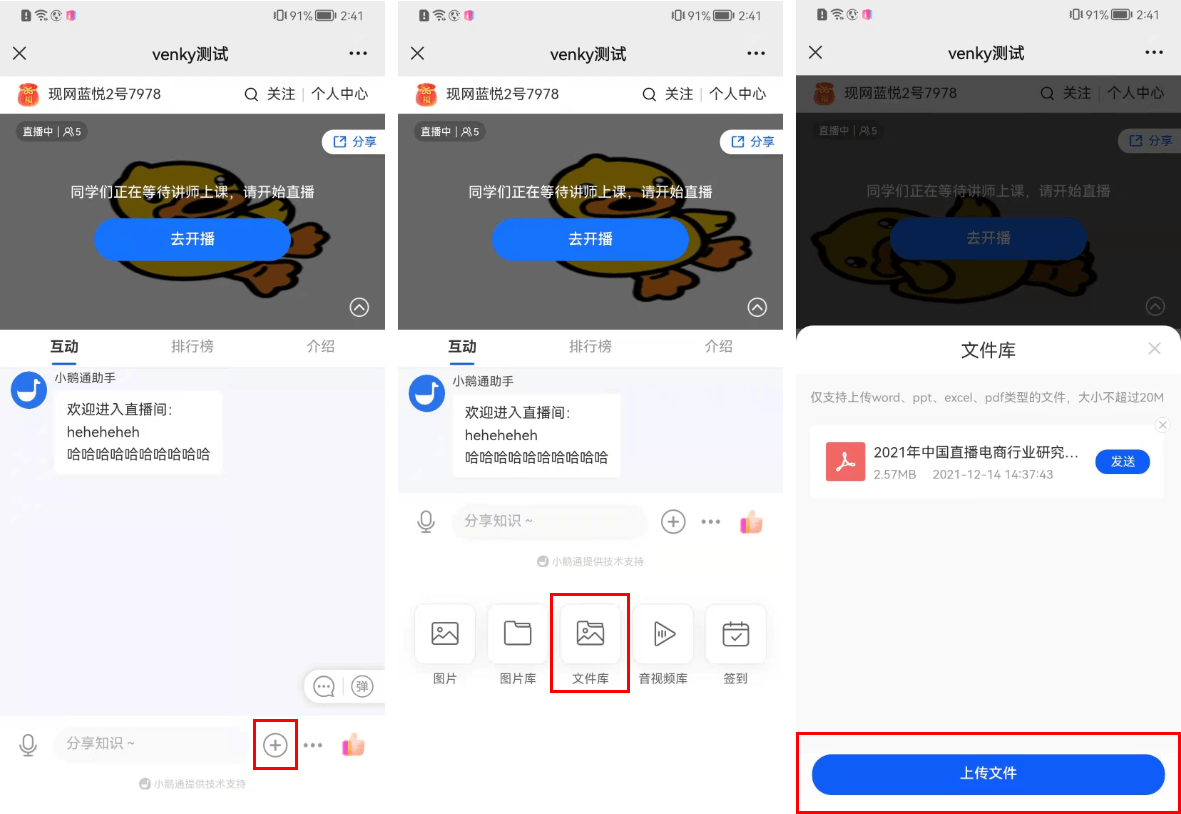
(H5 Instructor's End)
Step 2: Students Download Courseware (Web Version/H5 Student's End)
1. Download courseware on the H5 student's end:Find the shared files in the live room, enter the shared file page, click to download. You can preview the current courseware content. Copy the link and open it in the browser on your phone or computer to directly download the courseware.
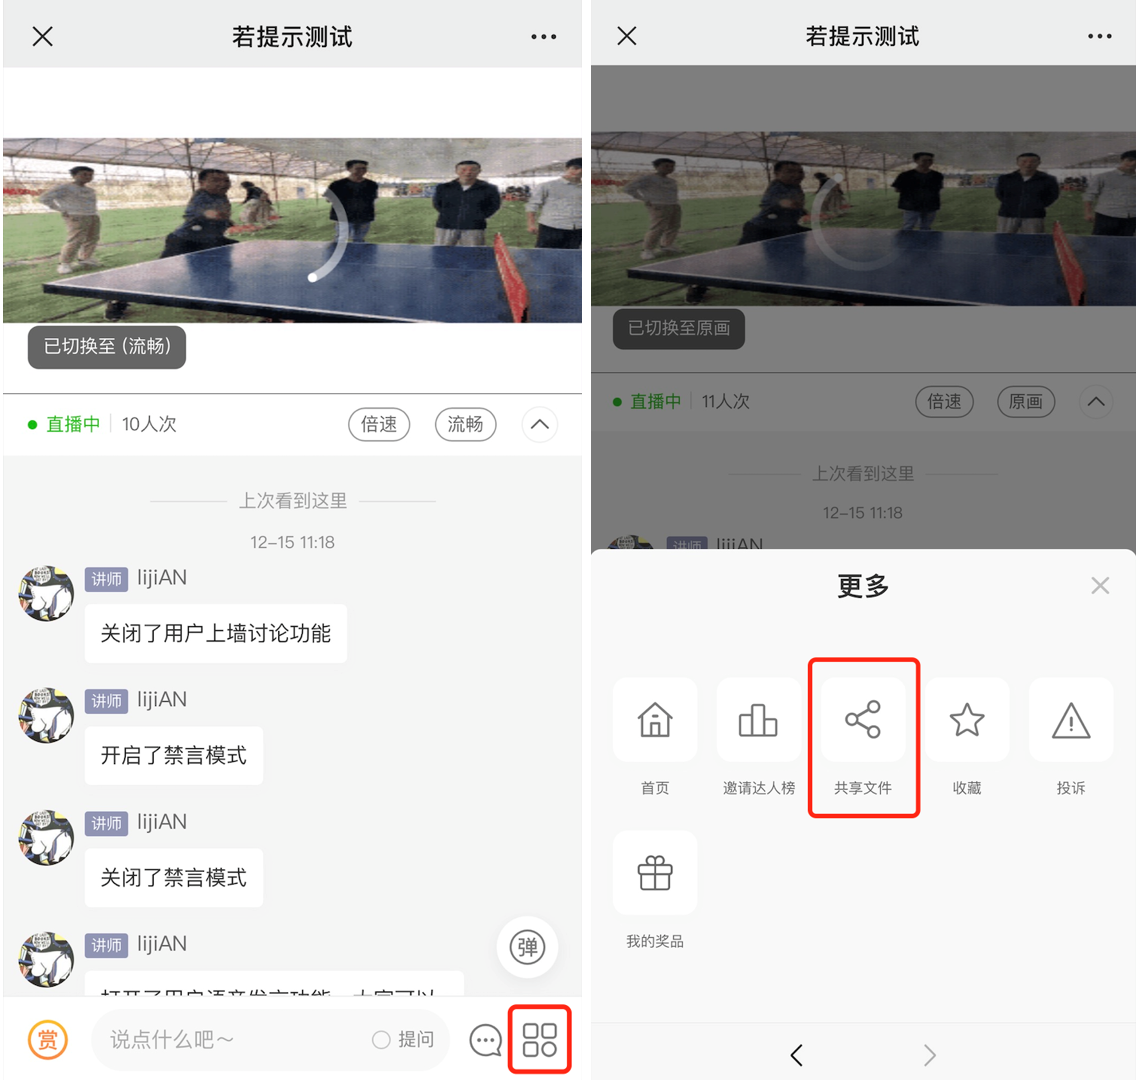
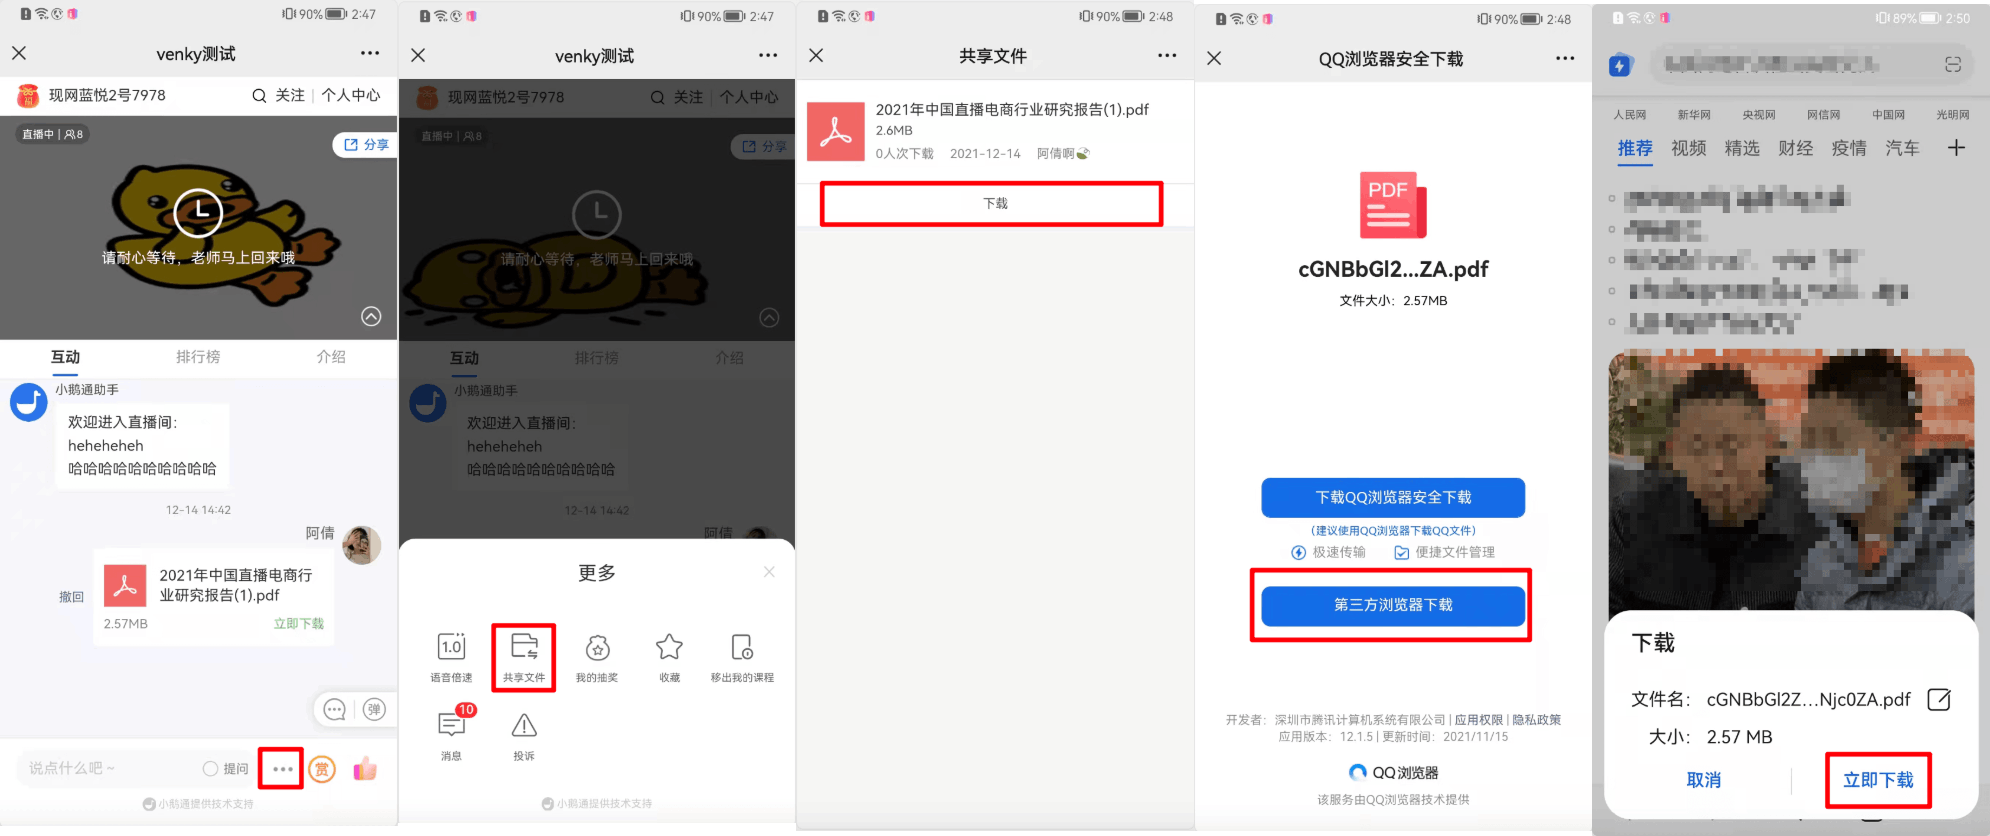
(H5 Student's End - Shared Files)
2. Download courseware on the web - based student's end:Find the shared file area on the web - based student's end, locate the file you want to download, and click to download the corresponding courseware.
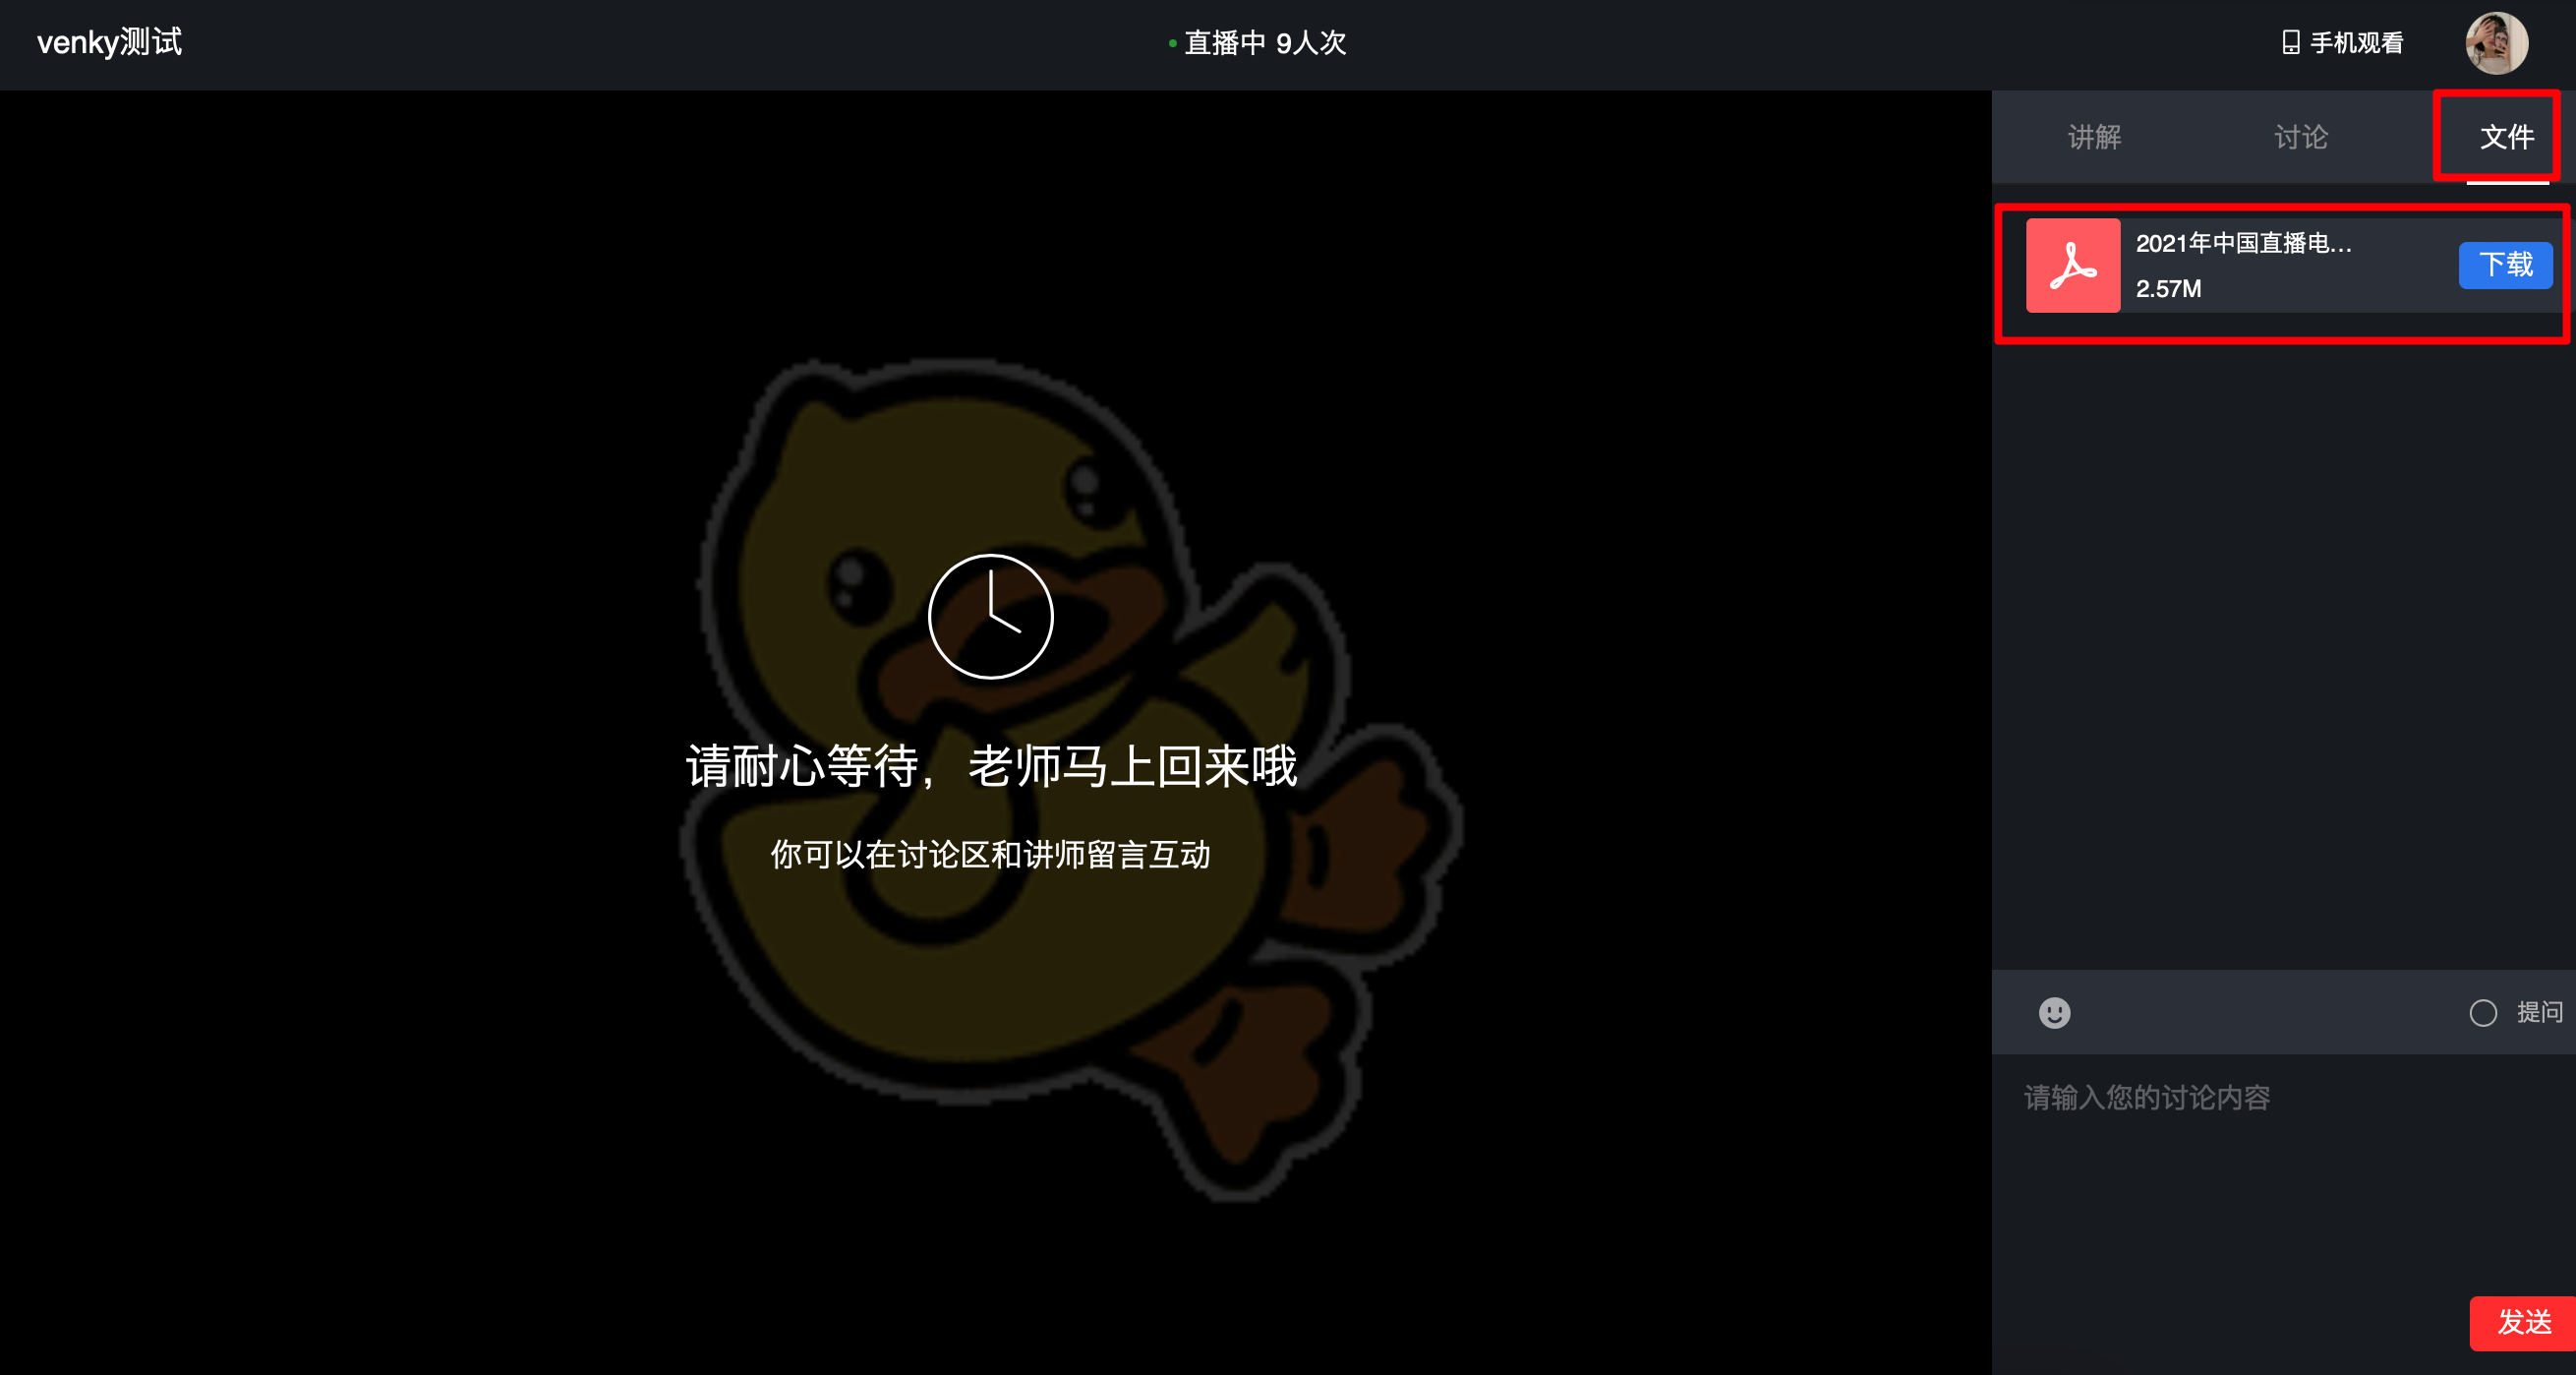
Tutorial on Manual Transcoding for Live Streaming
I. Feature Introduction
The manual transcoding feature is specifically designed forSingle - session cumulativeLive streaming scenarios where the duration exceeds five hours.For such scenarios, merchants can not only significantly improve the transcoding success rate and reduce transcoding time through manual transcoding but also more easily manage and edit long - term and multiple live replay videos.
II. Purpose of Use
Significantly improve the transcoding success rate and reduce the transcoding time, saving a great deal of time for merchants.
III. Usage Scenarios
After a user finishes a live stream that lasts more than five hours or the cumulative duration of a live stream exceeds five hours, they may encounter problems such as excessively long transcoding time and possible transcoding failures. After the live stream ends, users can enter the management console's replay management, select the replay file that needs to be transcoded, and perform manual transcoding. This can significantly improve the transcoding success rate and reduce the time consumed compared to automatic transcoding.
IV. Operation Path
Merchant side: Merchant background → Live streaming → Select the live - streaming room → Replay settings → Manual transcoding
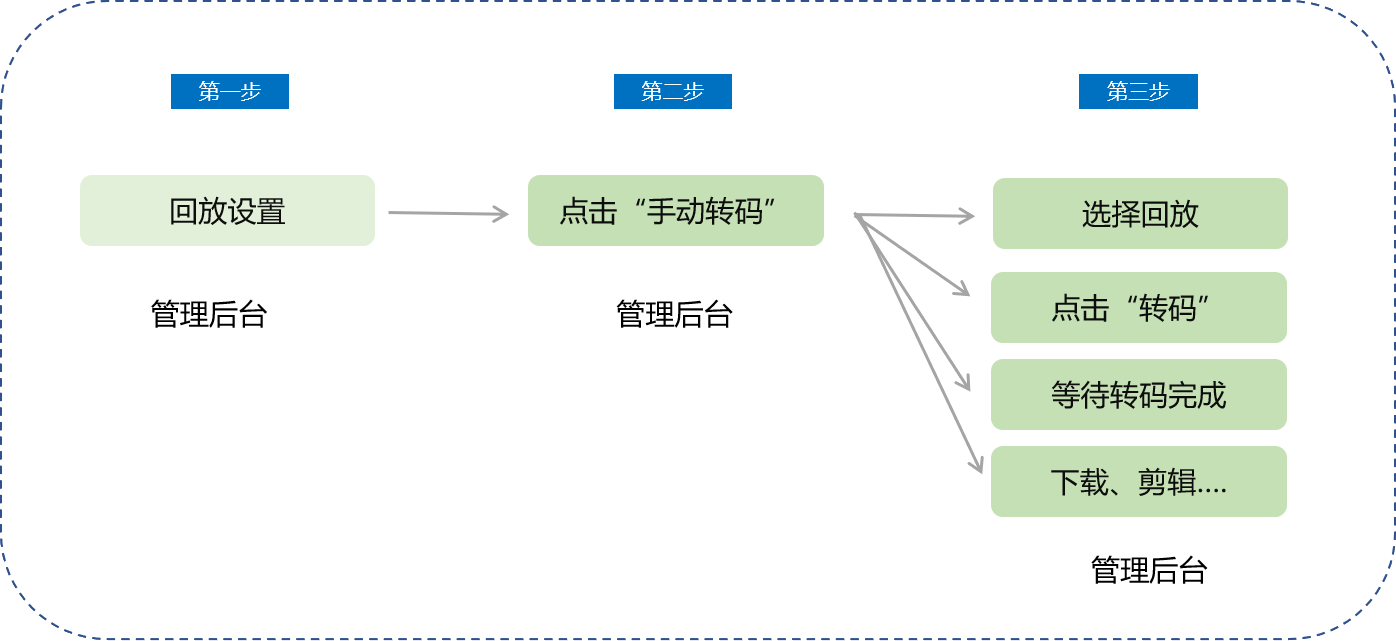
V. Usage Tutorial
Step 1: Replay settings (Management background)
Enter the merchant management background, click to enter the live - streaming section, find the corresponding live stream, and click [Details] - [Replay settings].
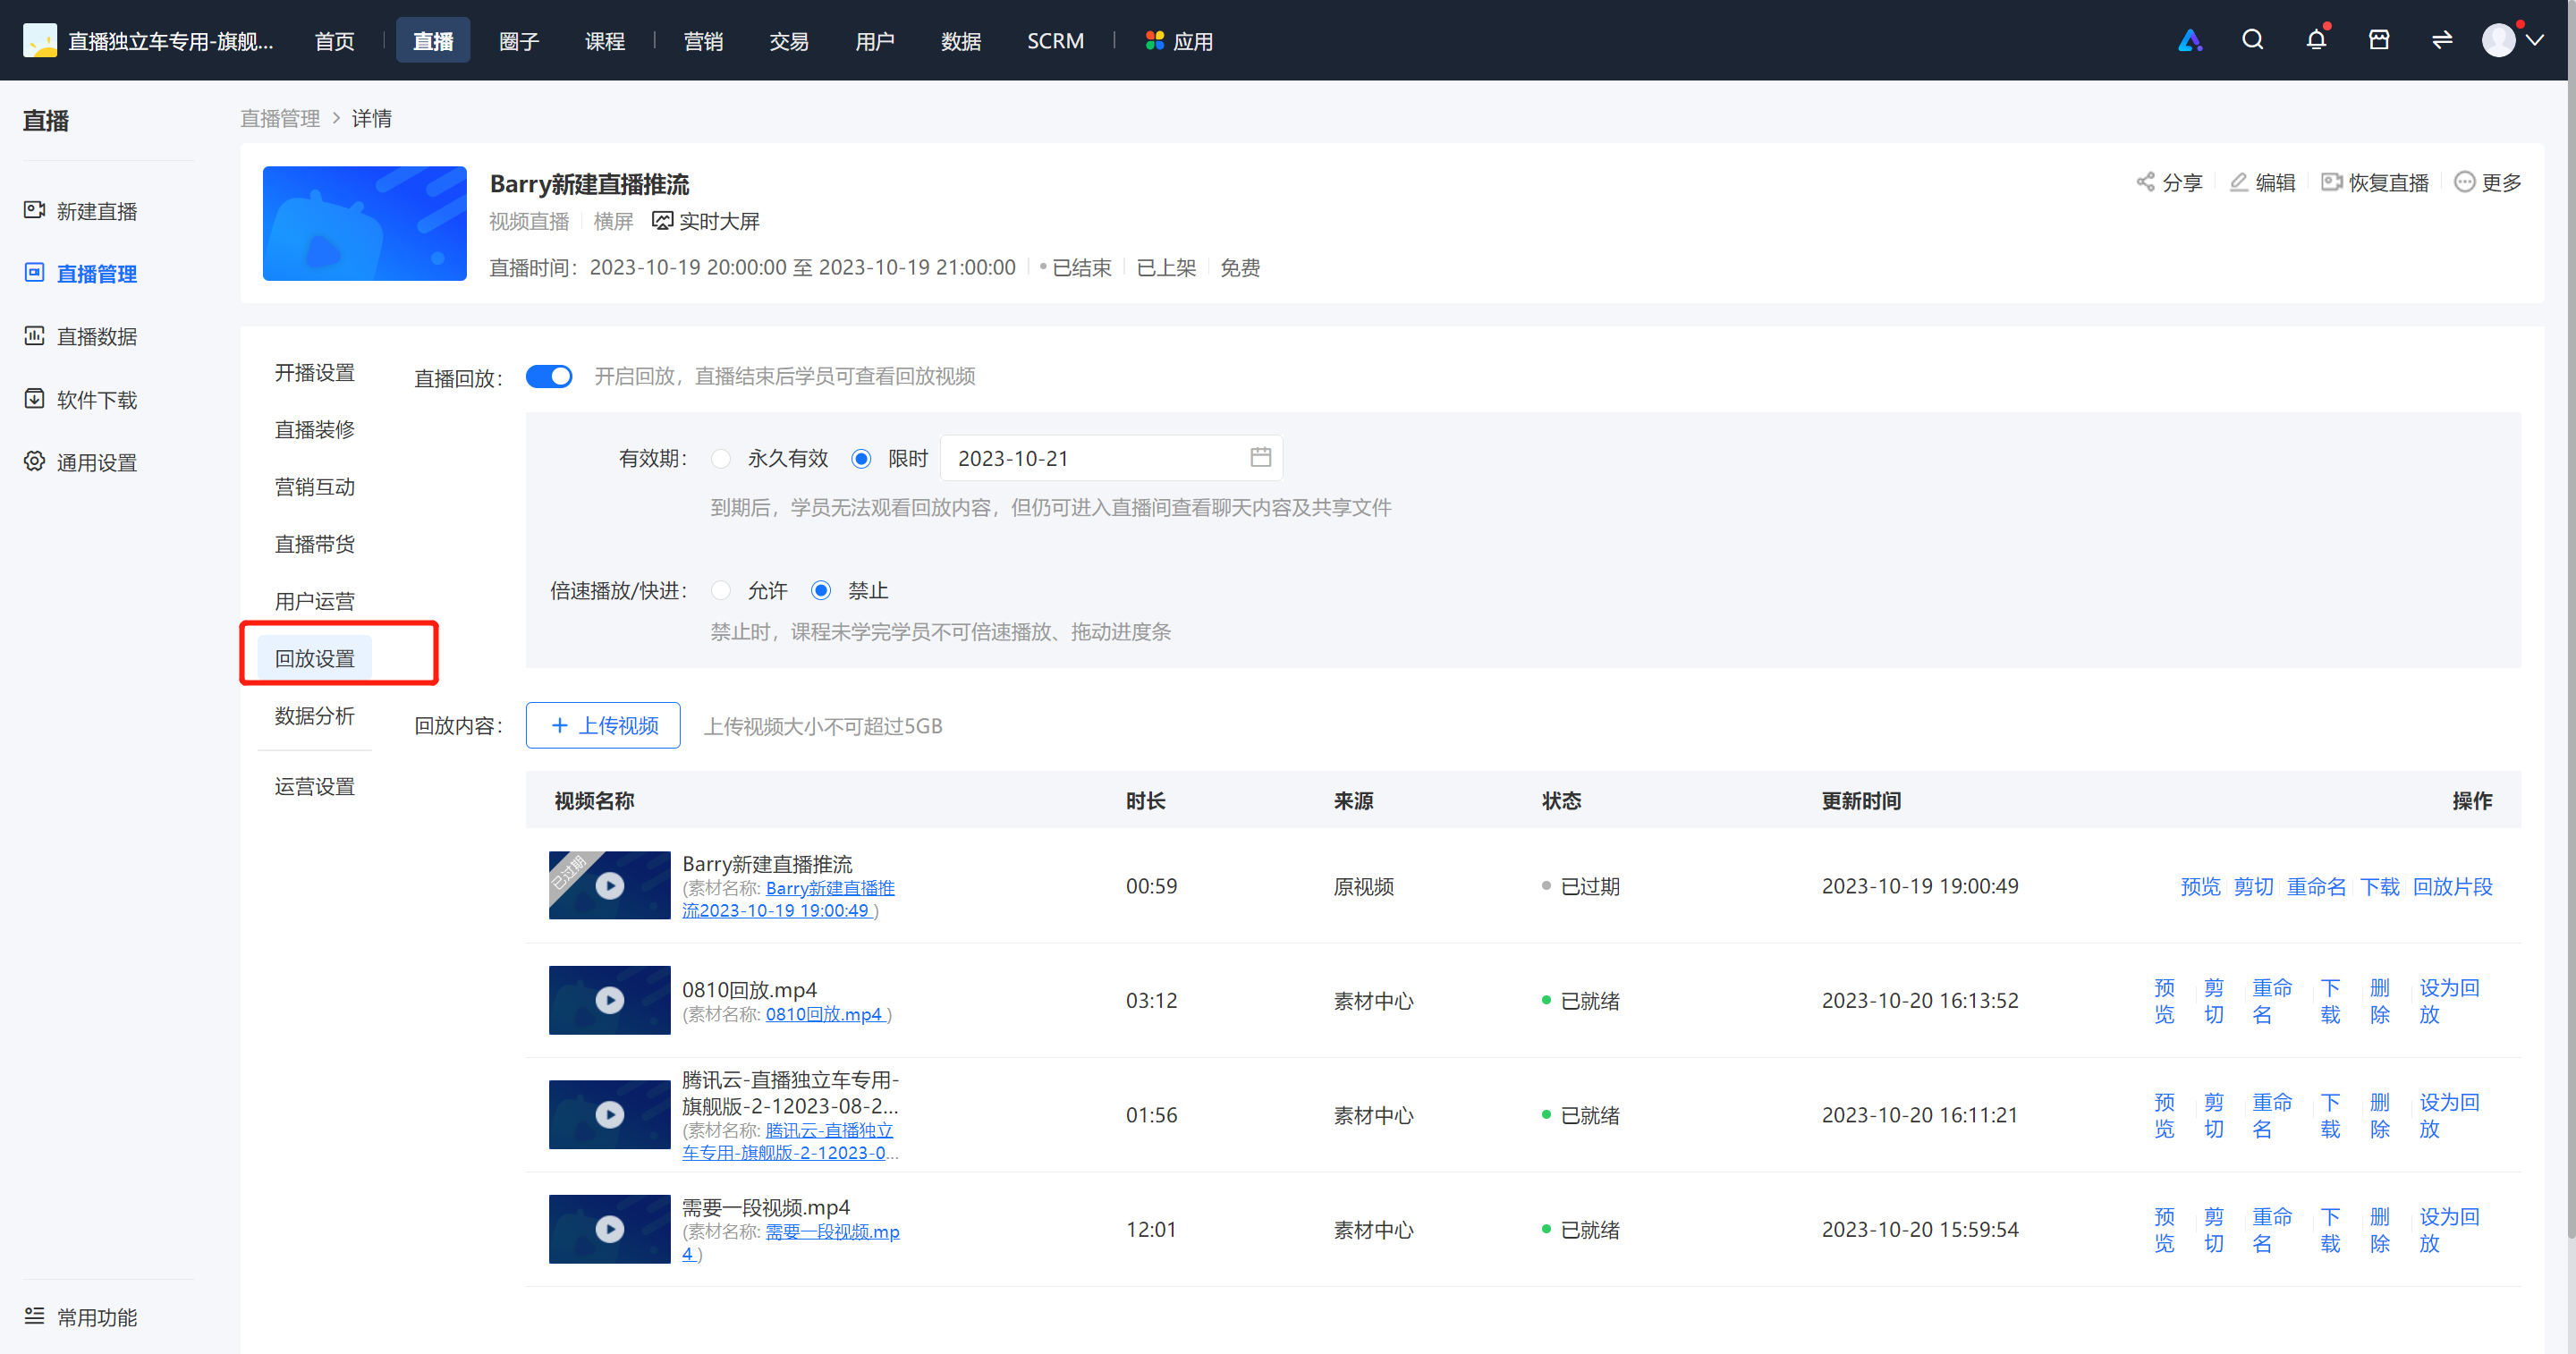
Step 2: Click Manual TranscodingSelect the file that needs to be transcoded and click [Transcode].(Management background)
**Note:The [Manual Transcoding] button will only be displayed when the cumulative duration of this live stream exceeds 5 hours.
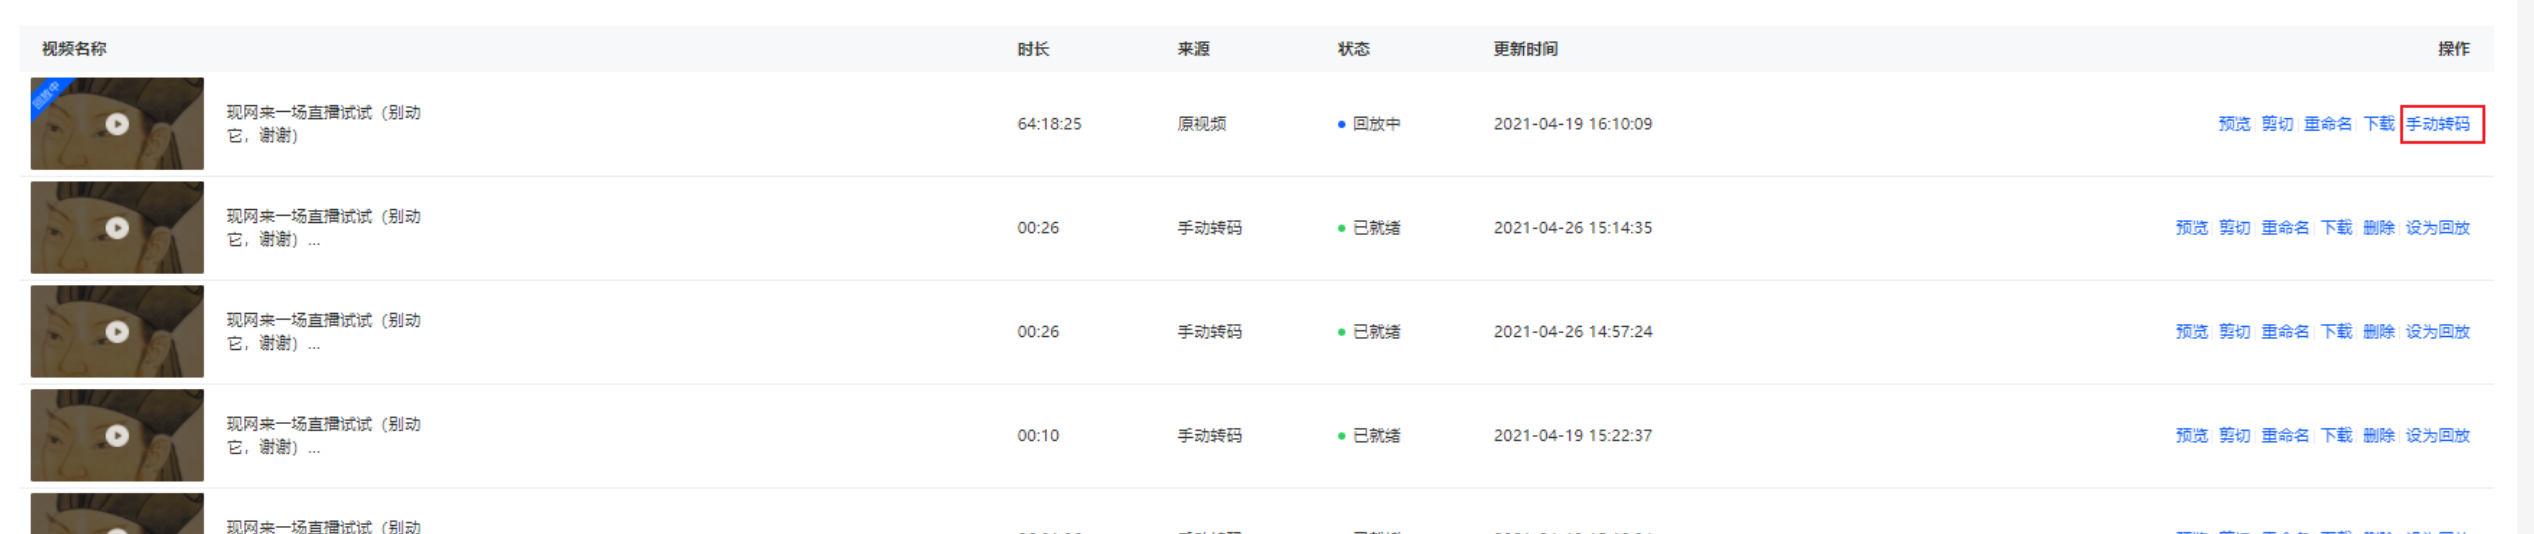
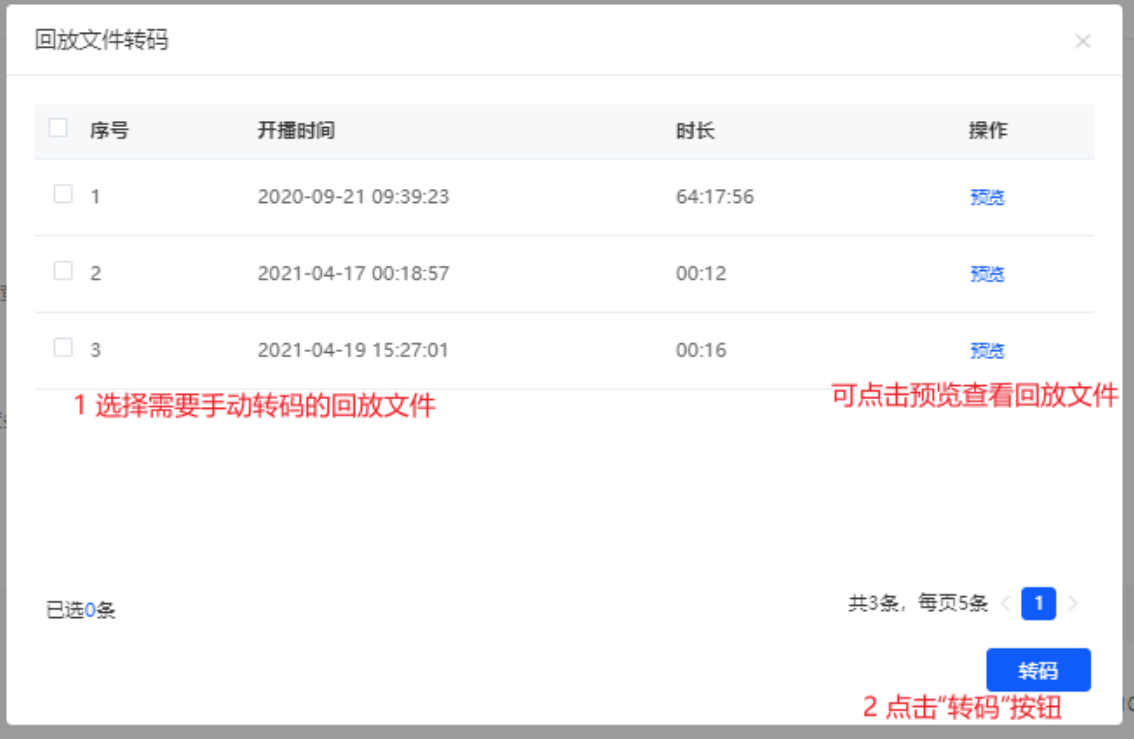
Step 3: Select the replay
A new transcoding record will be added to the replay video list. After the transcoding is successful, a series of operations such as editing can be performed.
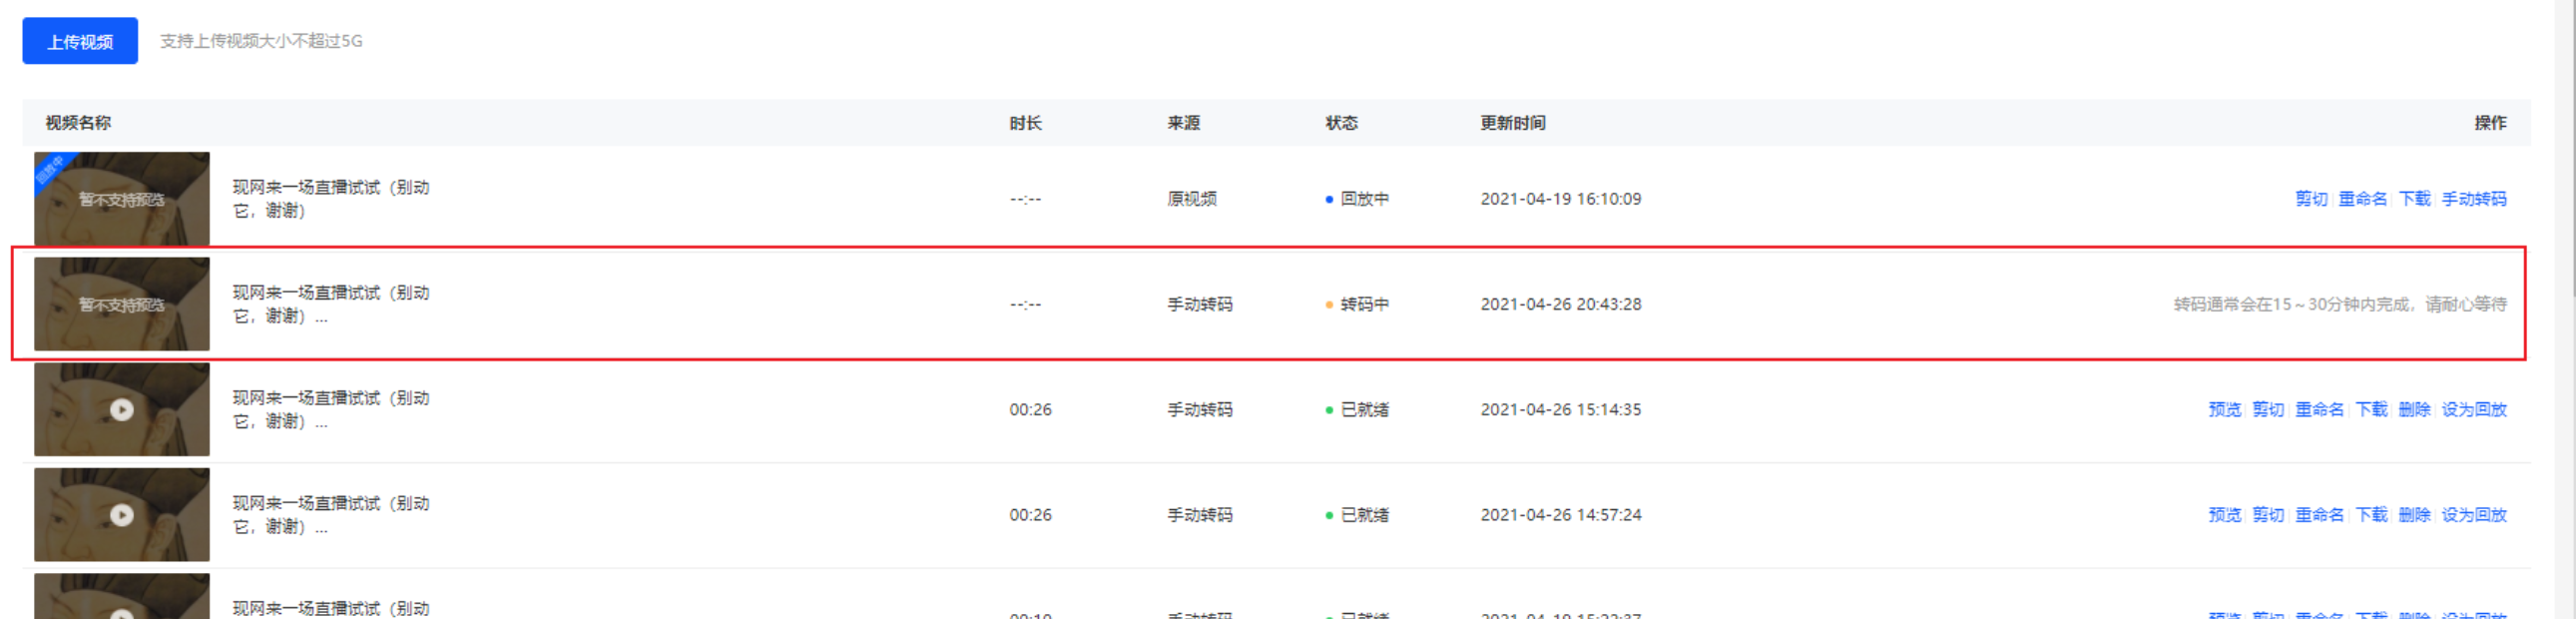
English version live streaming room usage tutorial
I. Function Introduction
To enhance the live streaming and viewing experience for overseas instructors and students, the live streaming room supports switching to the English version. After overseas instructors start a live stream in English on the client, they can interact with students in the live streaming room without language barriers. Overseas instructors who haven't downloaded the client can also directly start a live stream using the English version of the web page. Overseas students can choose to watch the live stream in English on the H5 and web platforms.
II. Purpose of Use
To meet the live streaming needs of overseas instructors and students.
III. Use Scenarios
Scenario 1: After overseas instructors start a live stream in English on the client, the English version can help them enhance interaction with students in the live streaming room.
Scenario 2: Overseas instructors can experience starting a live stream using the English version of the web page without downloading the client.
Scenario 3: Overseas students can watch the live stream in English on the web and H5 platforms.
IV. Operation Path
elink Assistant Client (Instructor): Settings → Switch Language → language → English
elink Live Streaming Client (Instructor): Settings → General Settings→ Switch Language → language → English
H5 Platform (Instructor/Student): H5 Live Streaming Room → More → Language → English
Web Platform (Instructor/Student): Switch the language in the upper - right corner of the page
V. Usage Tutorial
● Instructor Side - elink Assistant
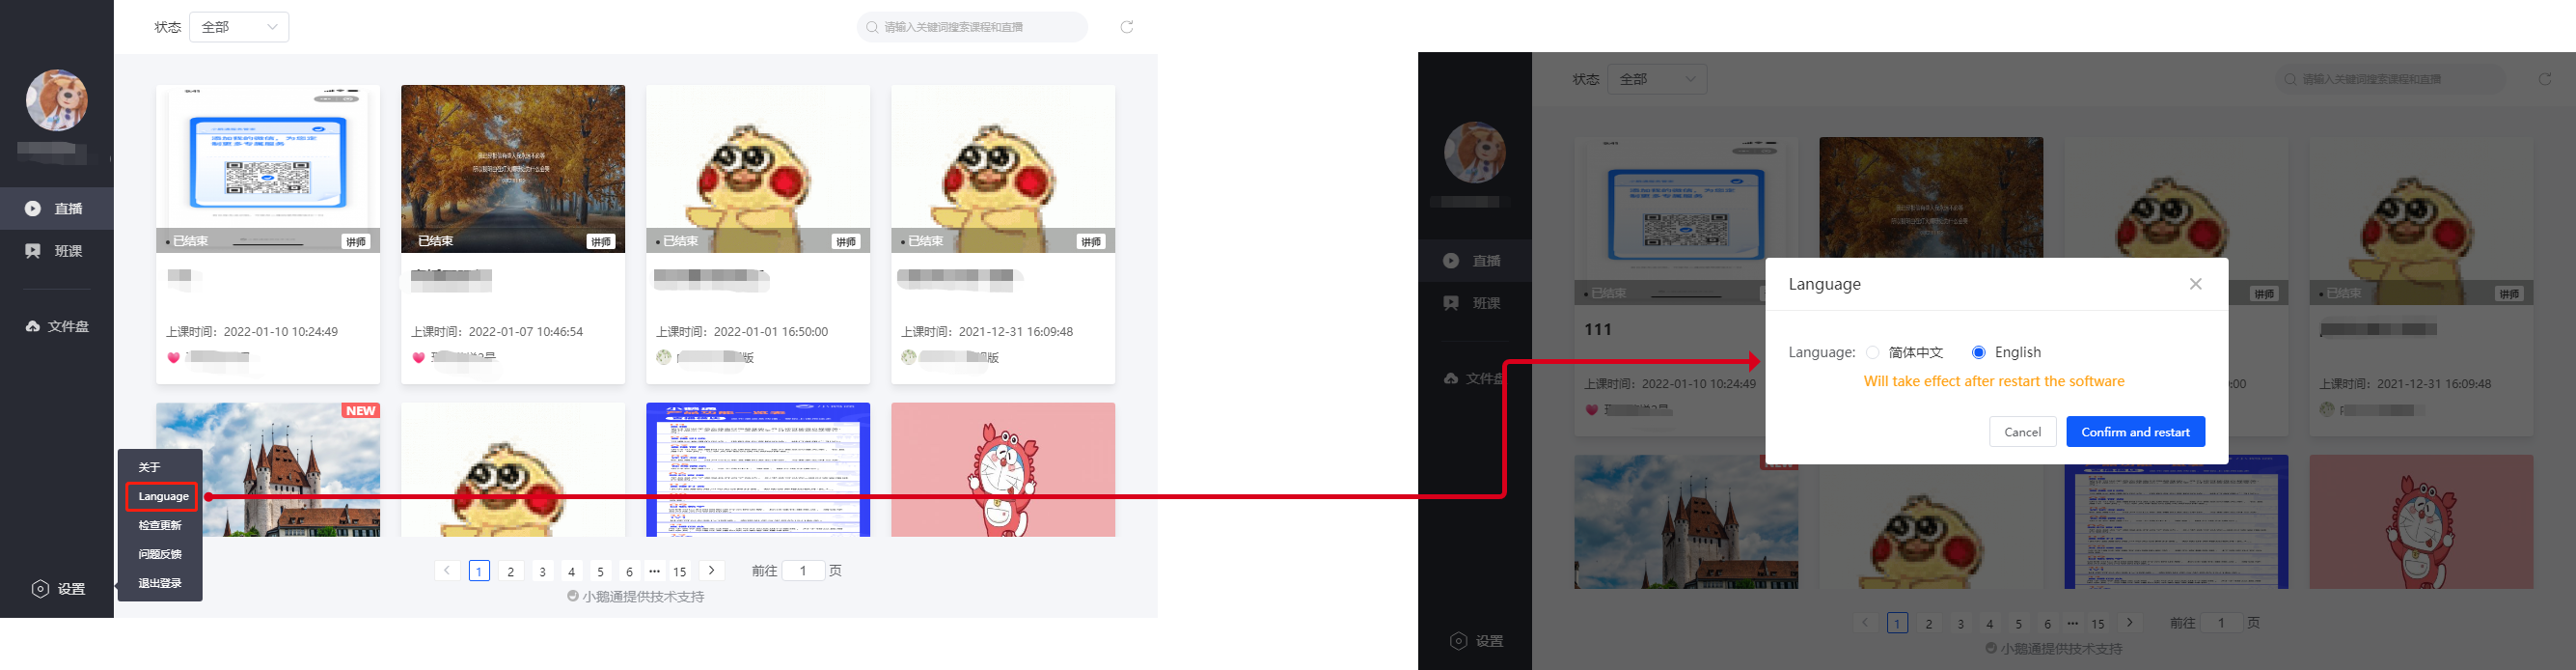
● Instructor Side - elink Live Streaming Client (Expected to be supported in August 2023)
Select 'Settings'. After entering the settings page, select 'General Settings'. You can find 'Select Language' at the bottom of this page. Select the corresponding language to take effect.
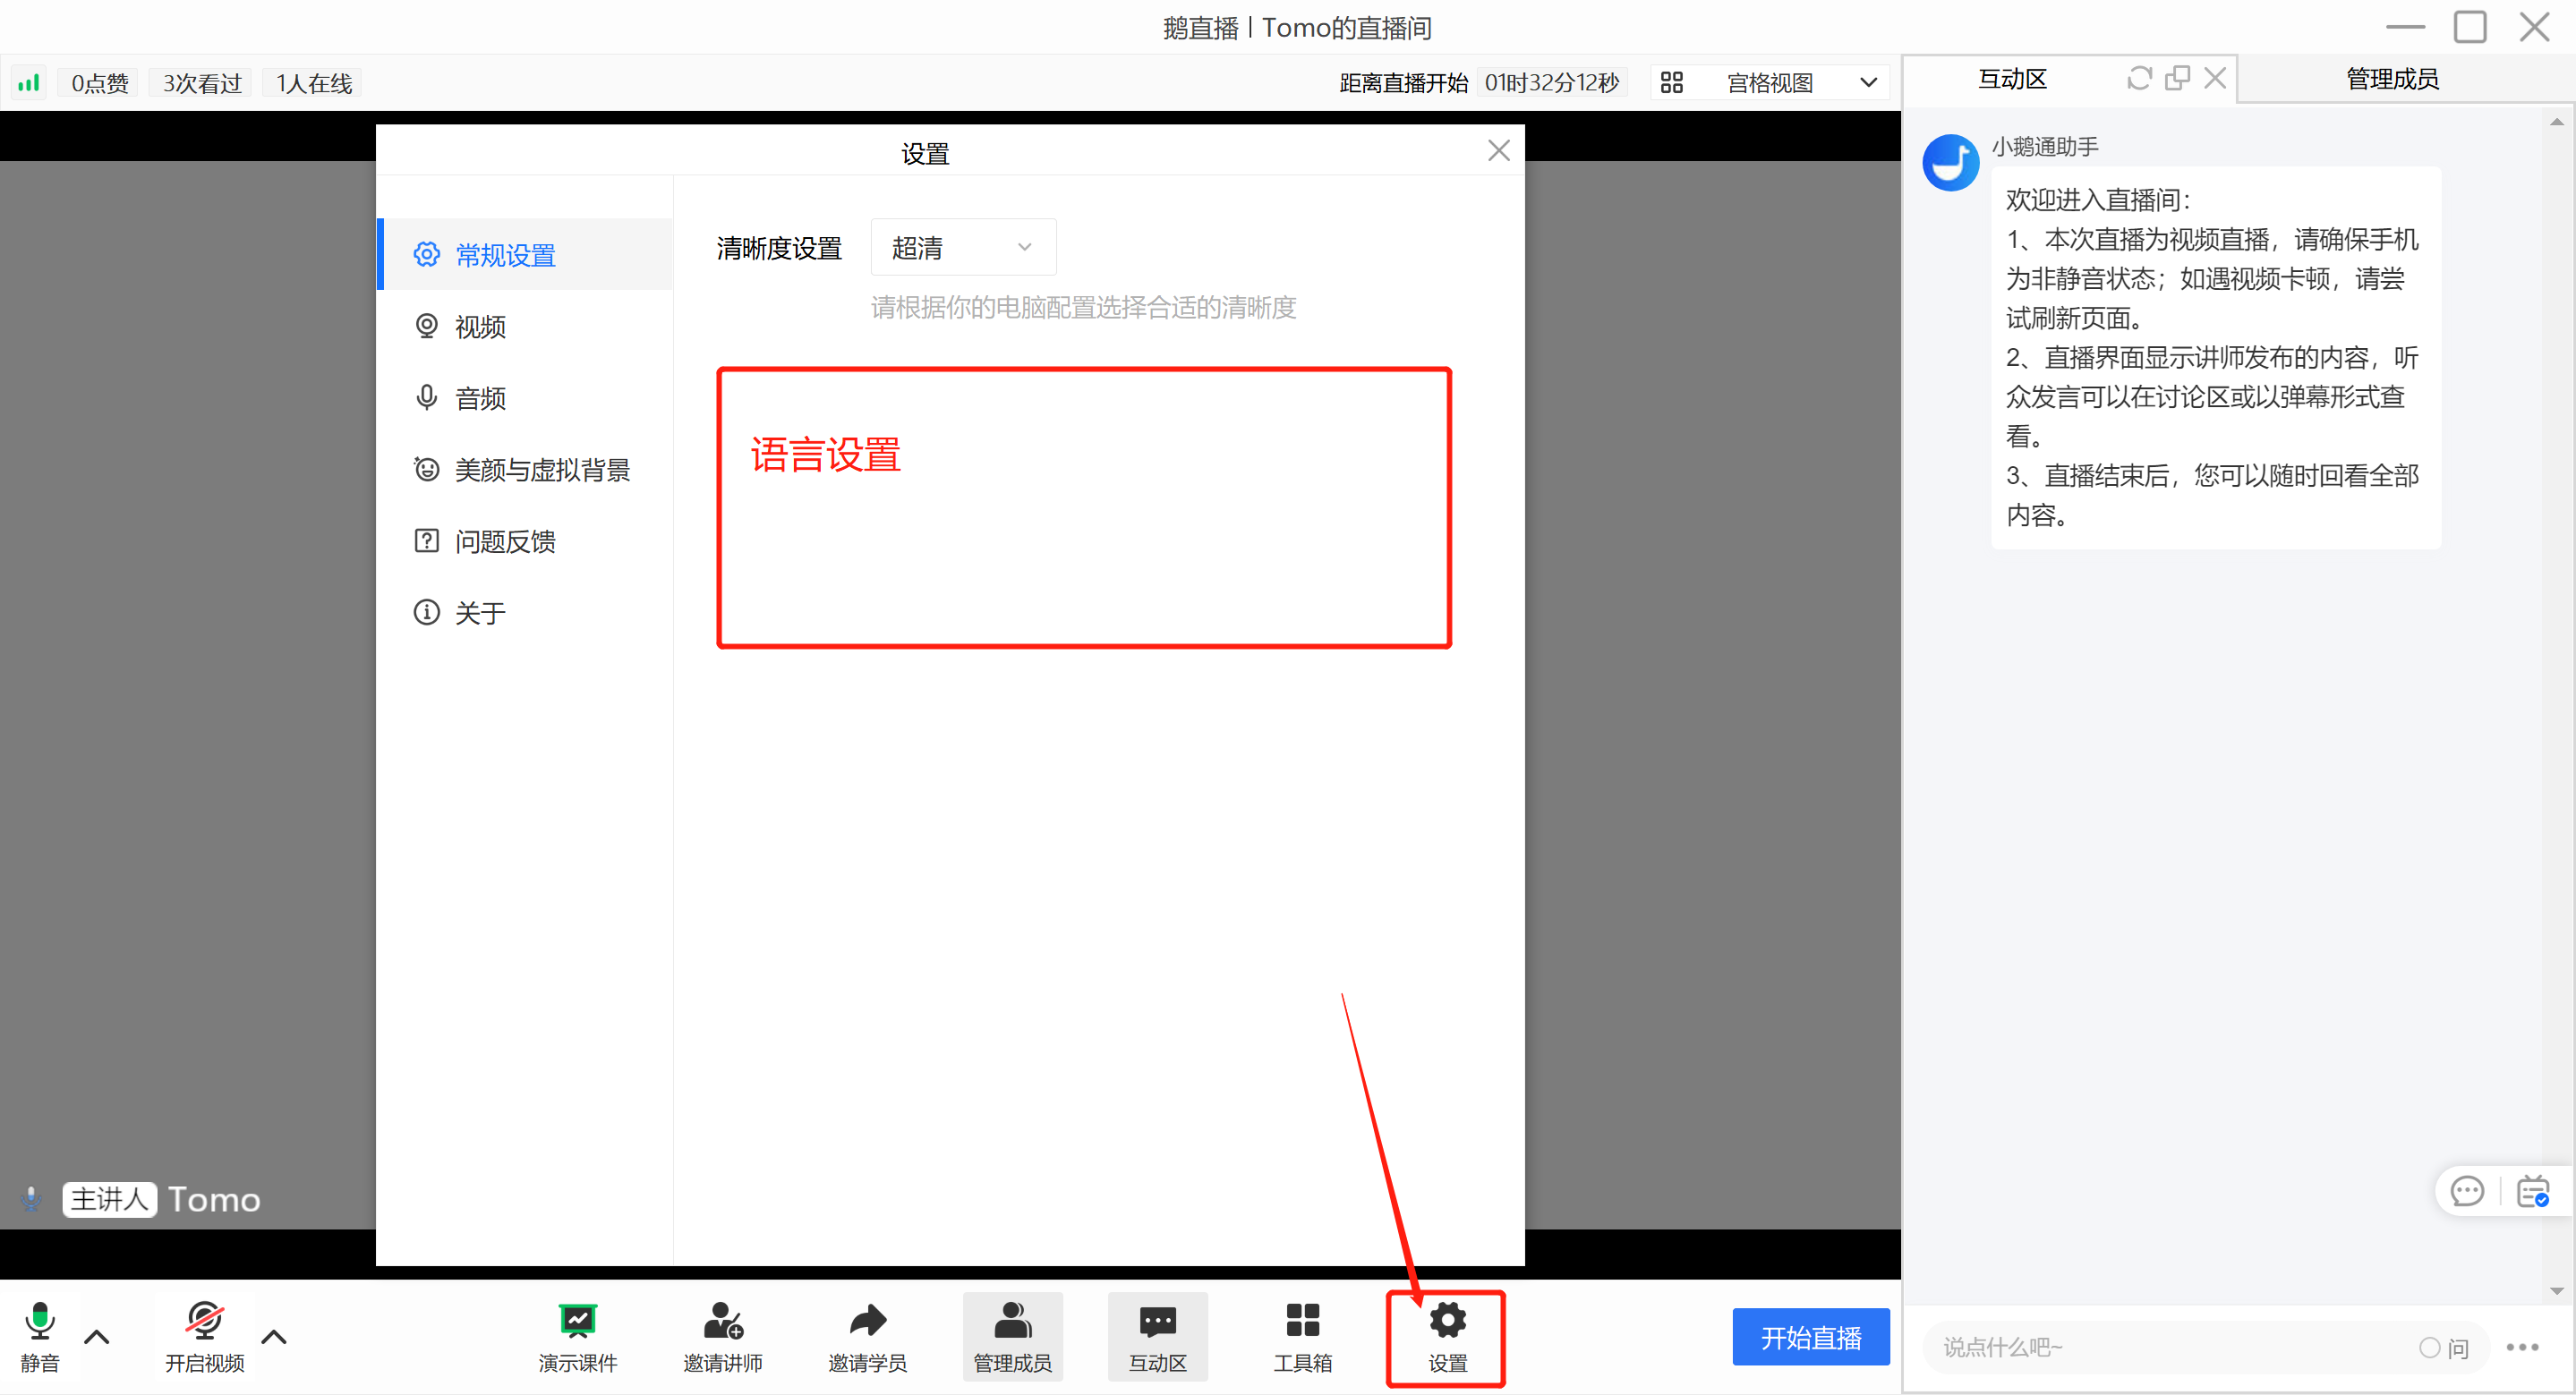
● Instructor Side - H5 Live Streaming Room
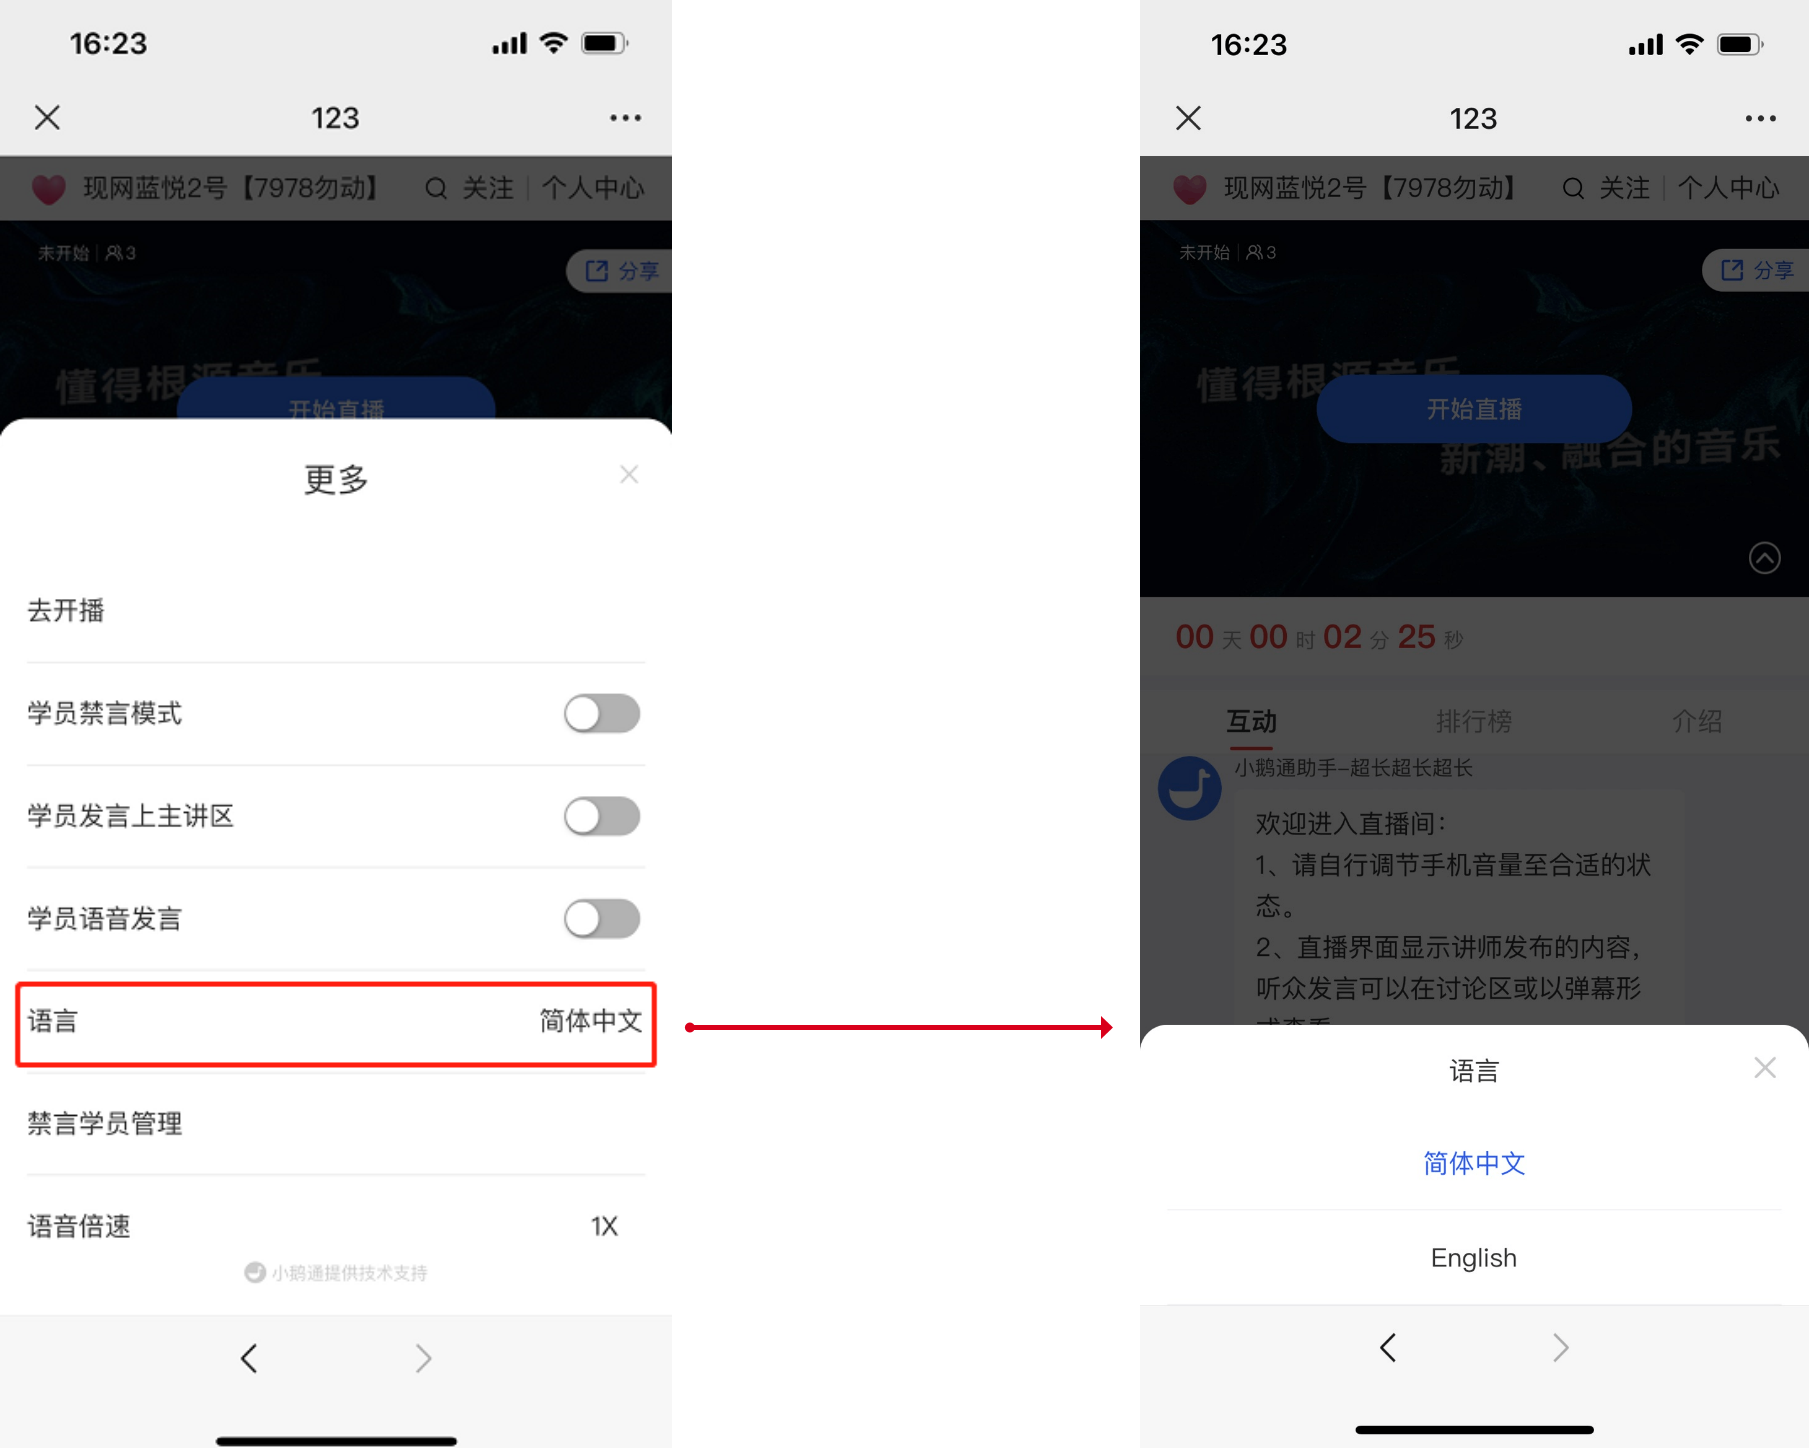
● Student Side - H5 Live Streaming Room
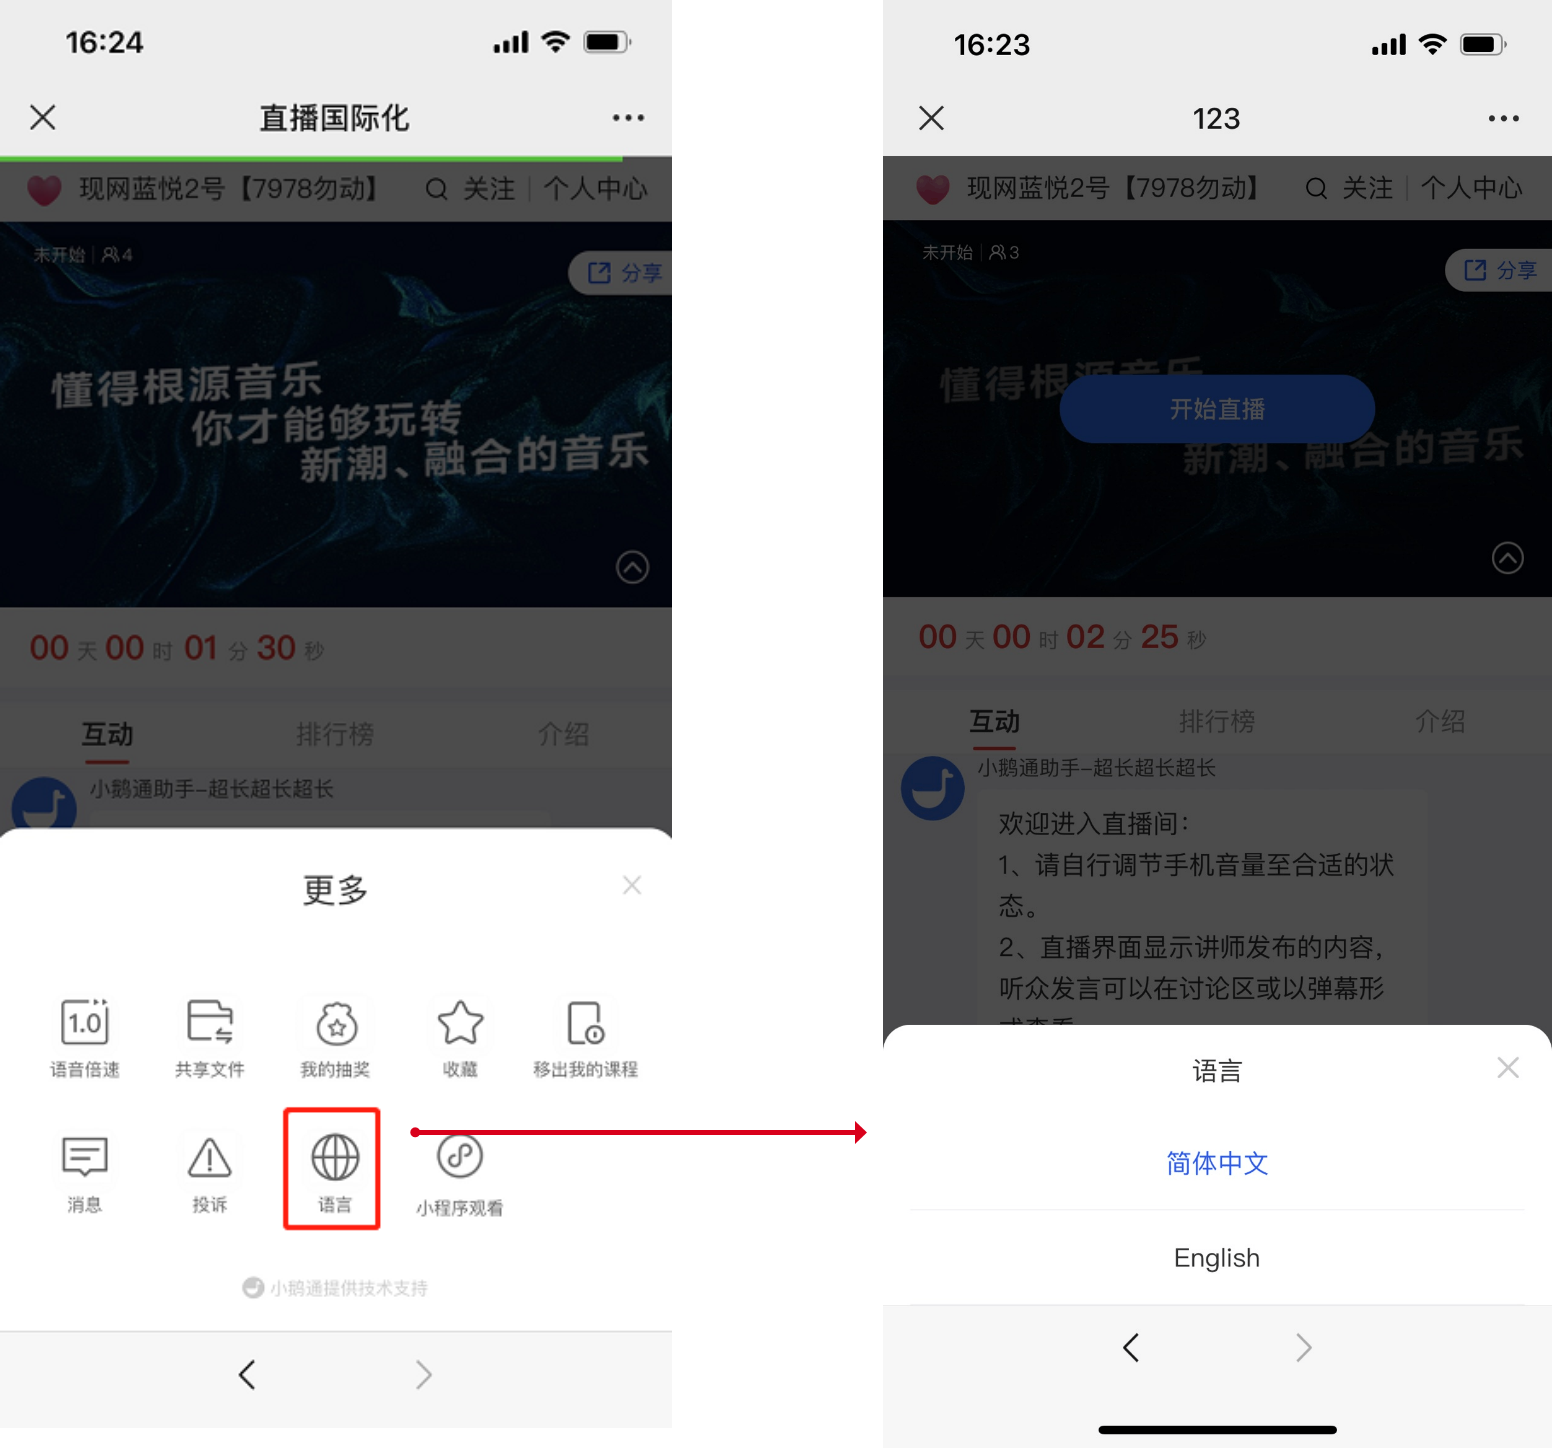
●Instructor/Student Side - Web Platform
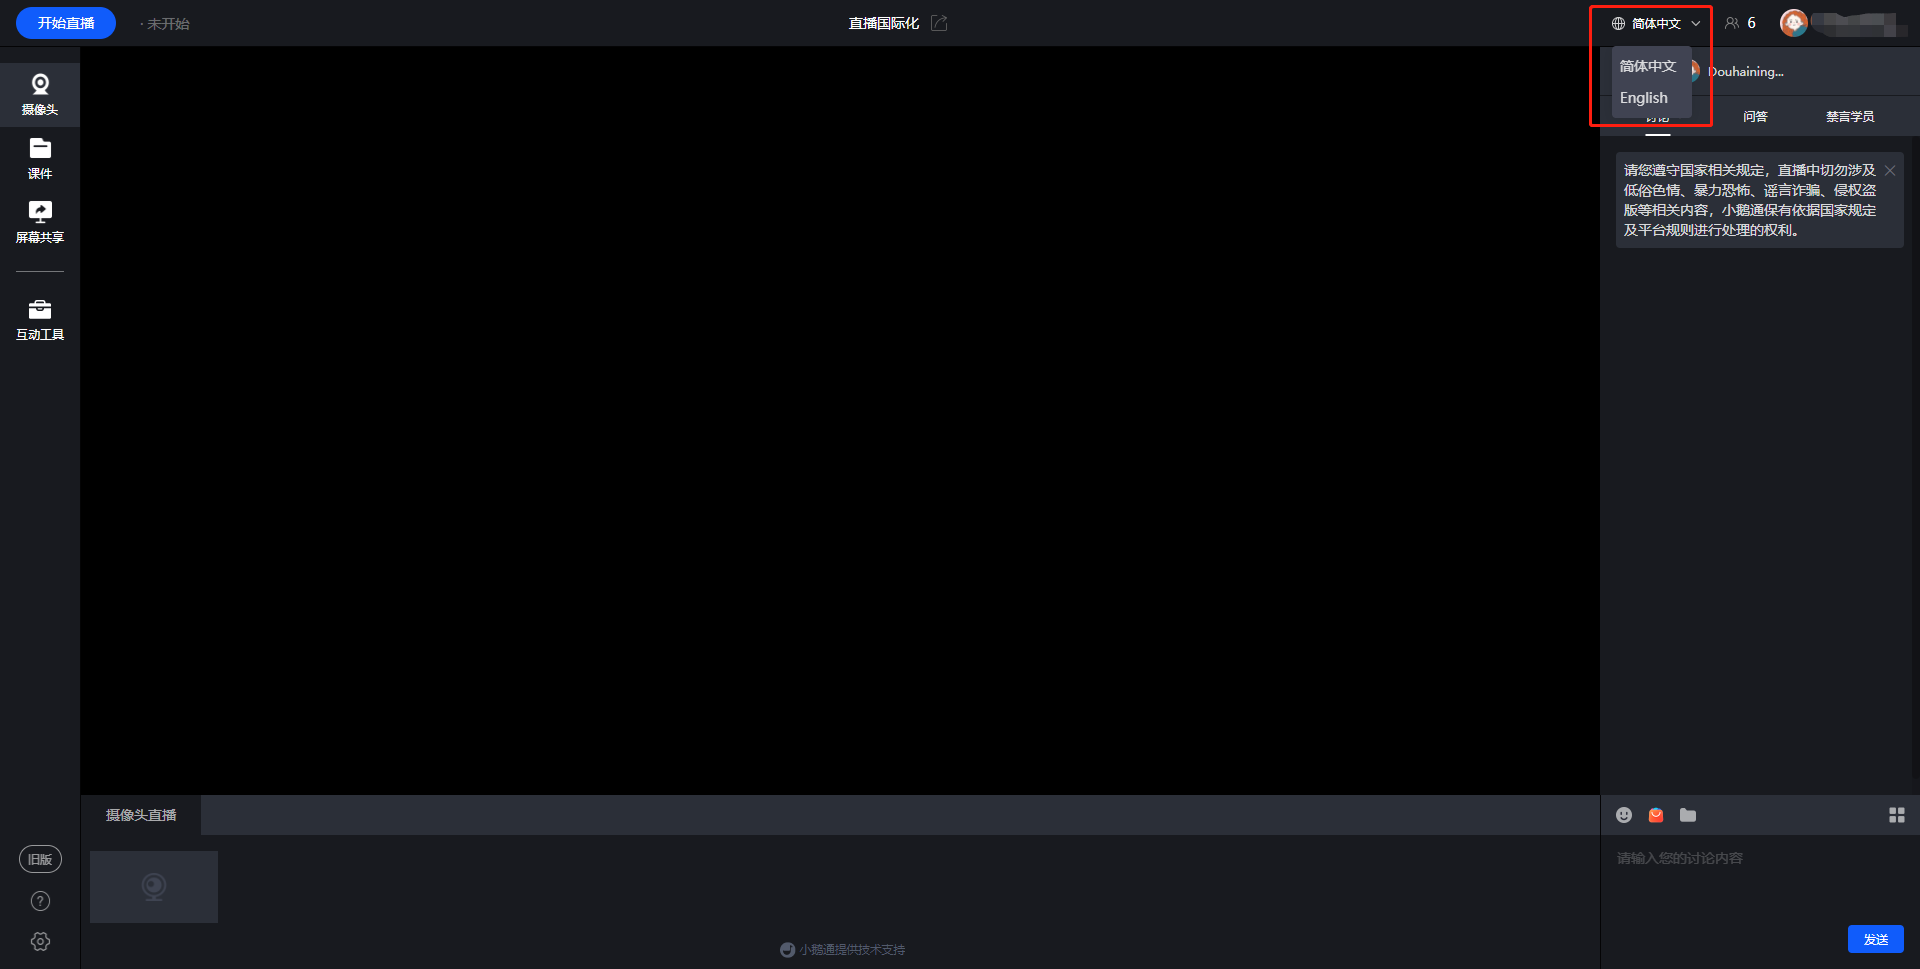
PS: The English version only takes effect in the live streaming room.
【OBS】 Frequently Asked Questions
I. Basic Operations
1. Where can I download [OBS]?
2. Tutorial on using the [OBS] client
3. Recommended live streaming settings for [OBS]
4. How to download the video streamed by [OBS]?
5. How to monitor the streaming quality of [OBS]?
6. How to adjust the size of the instructor's picture in [OBS]?
7. How to use vertical screen live streaming in [OBS]?
8. How to use beauty filters in [OBS]?
9. How to use green screen keying in [OBS]?
10. Combine the elink Assistant with [OBS] to achieve green screen keying
II. Live Streaming Screen
1.Is the streaming screen in [OBS] inconsistent with the actual screen?
2. How to handle abnormal or out - of - sync audio and video during [OBS] live streaming?
3. Is the [OBS] live streaming screen blurry?
4.Is there any lag during [OBS] live streaming?
5. How to solve the problem of live streaming delay in [OBS]?
6. Tutorial on capturing desktop audio without affecting speaker output in [OBS] (MAC computers)
7. Does the screen go black when using display capture in [OBS]?
III. Error Reporting
1. [OBS] shows that there is no connection to the server (due to restrictions of some office networks)
2. Does [OBS] keep prompting that the connection has been disconnected?
How to authorize the microphone on a Mac computer?
1. On your computer, click the Apple icon and then click System Preferences.
2. Click Security & Privacy.
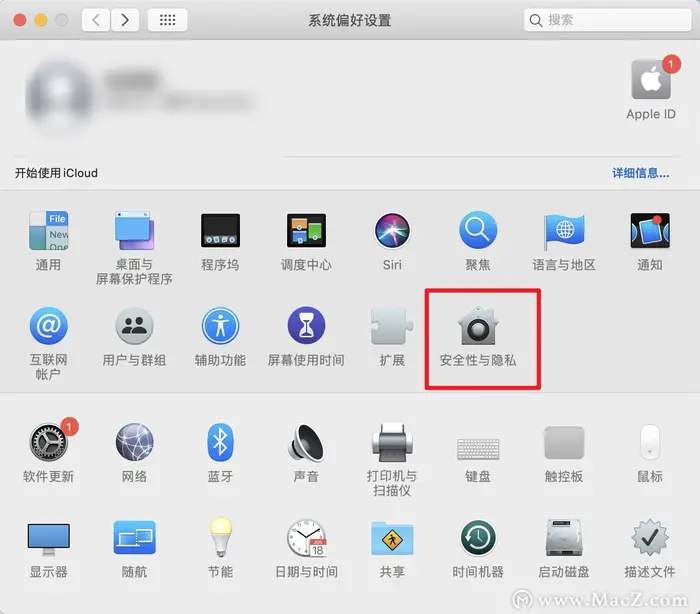
3. Click Privacy, find Microphone on the left side, and click the small lock icon in the lower - left corner.
4. Enter your password to allow changes, and then select the program you want to use the microphone with (here, select the eLink Live app or eLink Assistant).
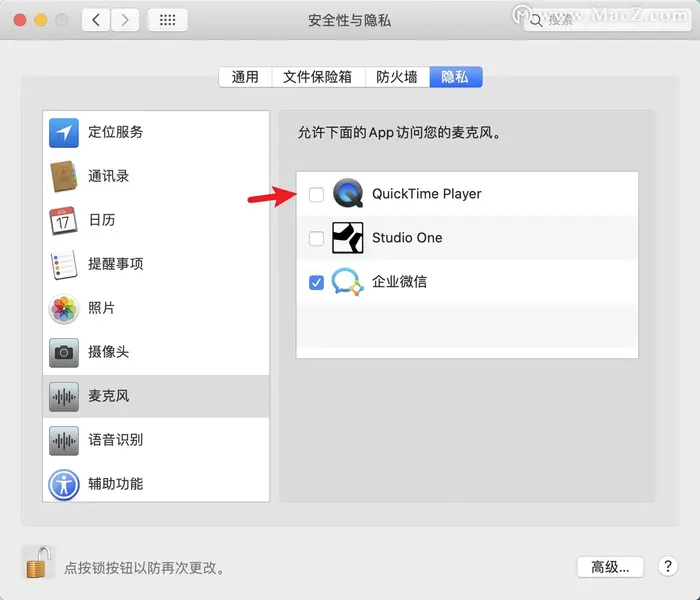
How to authorize the microphone?
For Windows 10 computers, please clickhttps://jingyan.baidu.com/article/f0e83a2590c6f863e59101d9.html
For Windows 11 computers, please clickhttps://jingyan.baidu.com/article/4853e1e555da485808f72612.html
For Mac computers, please clickhttps://helpcenter.xiaoe-tech.com/#/problem/detail?document_id=doc_63fc4e7a40d64_0EAUW
How to authorize the camera on a Mac computer?
1. On your computer, click the Apple icon and then click System Preferences.
2. Click Security & Privacy.
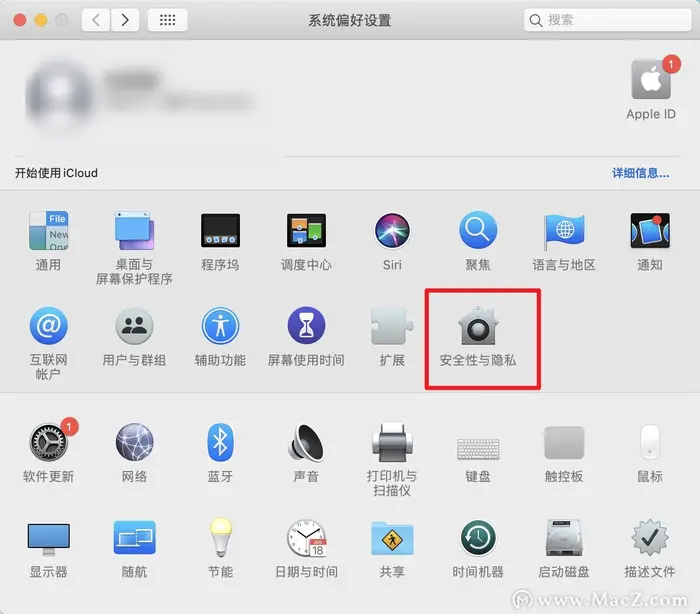
3. Click Privacy, find Camera on the left side, and click the small lock icon at the bottom left.
4. Enter your password to allow changes, and then select the program you want to use the camera with (here, select the eLink Live app or eLink Assistant).
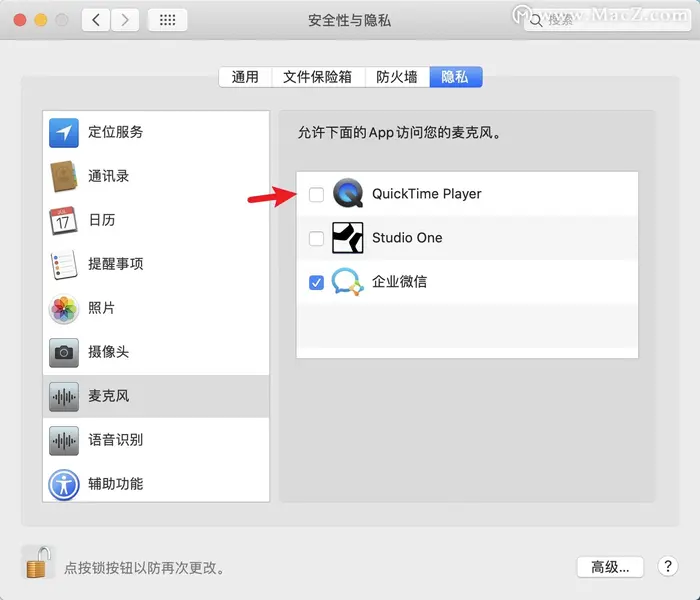
How to authorize the camera?
For Windows 10 computers, please clickhttps://jingyan.baidu.com/article/0eb457e5d9738242f1a905f7.html
For Windows 11 computers, please clickhttps://jingyan.baidu.com/article/7908e85cb3861aee491ad264.html
For Mac computers, please clickhttps://helpcenter.xiaoe-tech.com/#/problem/detail?document_id=doc_63fc5152bf8d5_BTsGD
How to check if the microphone permission is occupied?
How to check if the microphone permission is occupied?
1. Click on Privacy and Security
Press Win + I to open Settings and search for Microphone Privacy Settings.
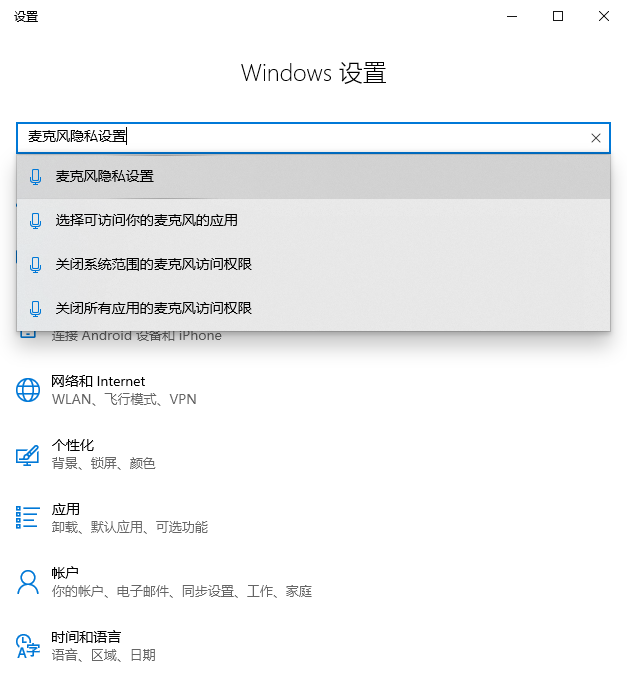
2. Check if there is an app with the "Currently in use" indicator in "Allow desktop apps to access your microphone" and quit that app.
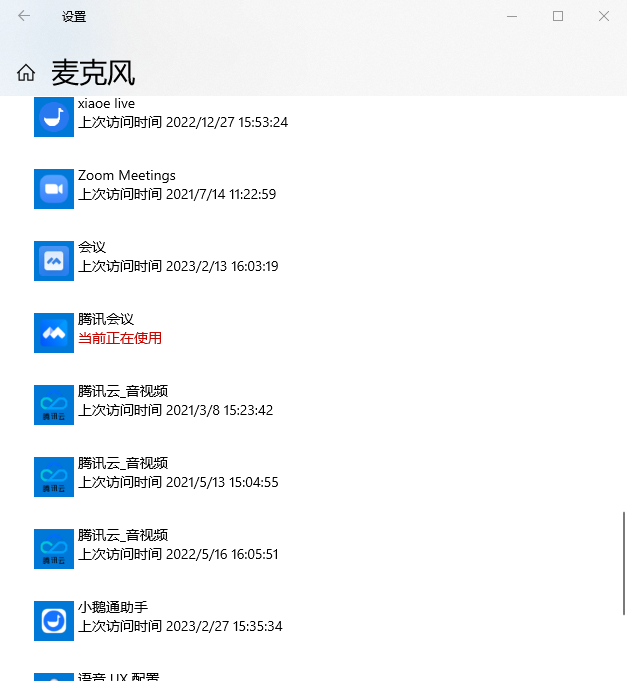
3. Reopen the elink Assistant client and check if you can use the microphone normally.
How to reduce the CPU usage of a computer?
How to reduce the CPU usage of a computer?
I. Reduce CPU usage by closing unnecessary programs (taking Windows 10 as an example)
1. Directly enter the Windows 10 Task Manager by pressing shift + ctrl + esc, as shown in the following figure:
2. Find some running processes that we don't need in the Task Manager, and click to select them. As shown in the following figure:
3. Then click 'End Task' in the lower right corner to close the task.
II. Clean up computer junk: Check the Control Panel - Programs - Uninstall - to see if there are any unnecessary or similar software installed. If there are multiple antivirus or optimization software, you can uninstall them and keep only one.
III. Computer configuration is also very important. If your computer has a relatively low configuration, it will cause lag. It is not recommended to use ultra - thin laptops. It is recommended to have a CPU of i5 - 9300H or higher.
How to check if the camera permission is occupied?
How to check if the camera permission is occupied?
1. Click on Privacy and Security
Press Win + I to open Settings and search for Camera privacy settings.
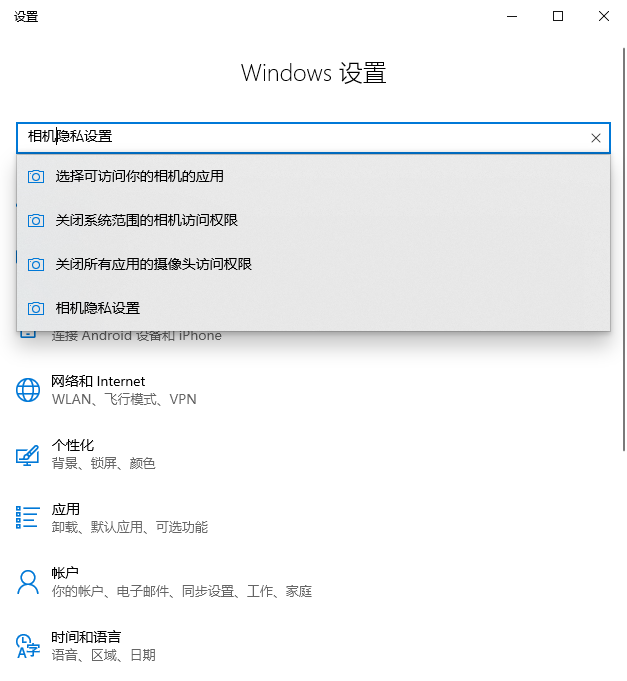
2. Check if there is an app with the 'Currently in use' indicator in 'Allow desktop apps to access your camera', and close that app.
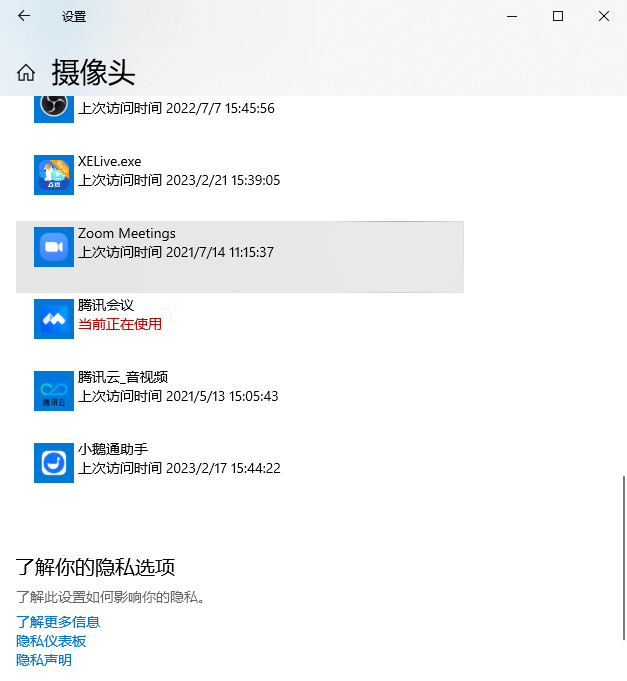
3. Reopen the elink Assistant client and check if the camera can be used normally.
How to check if the current microphone is working properly?
How to check if the current microphone is working properly?
1. Click the following URL to test:https://webcammictest.com/check-mic.html
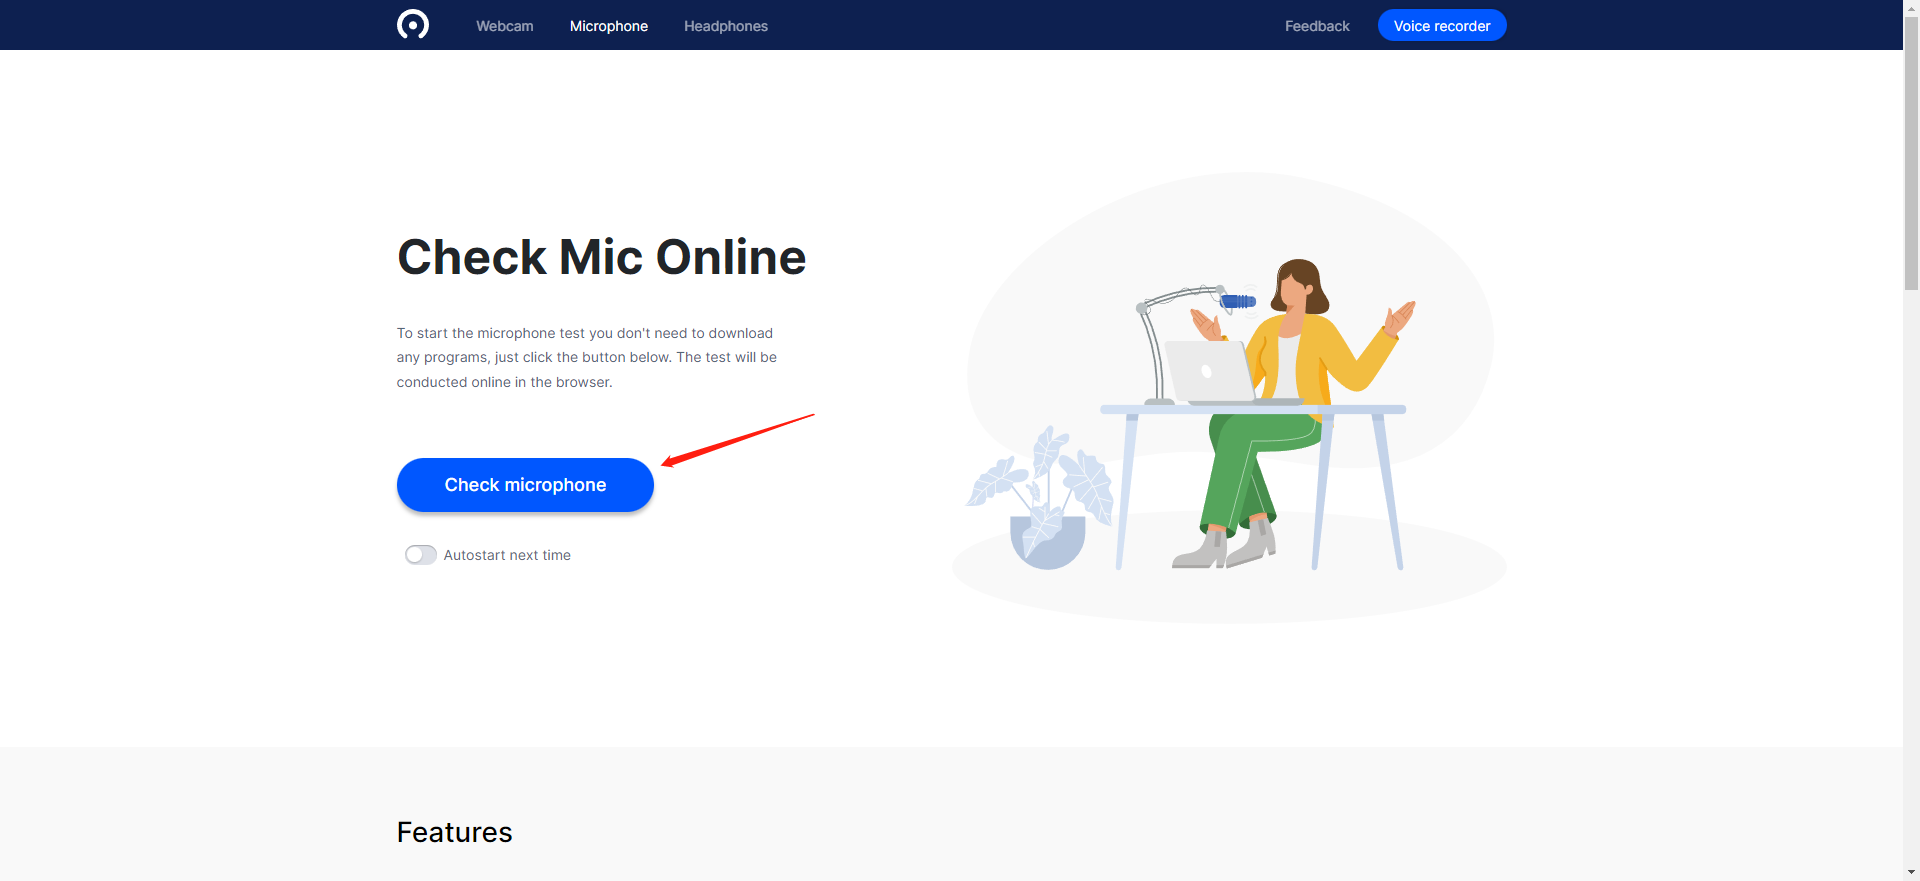
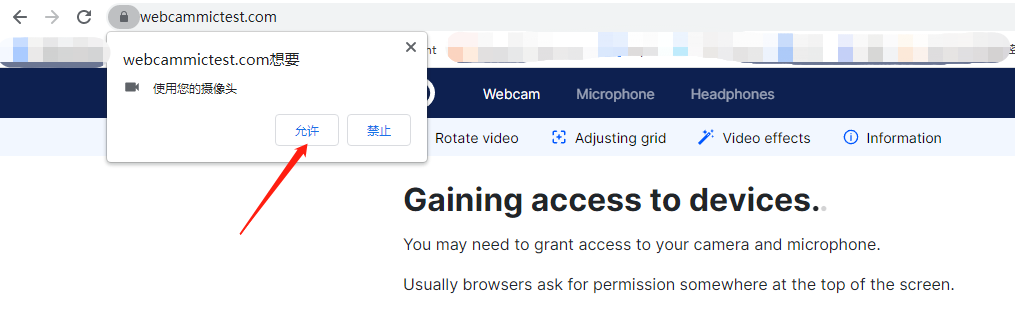
3. If the detected microphone volume is abnormal or there are no available devices in the device list, you need to check if the microphone device is malfunctioning or replace the microphone.
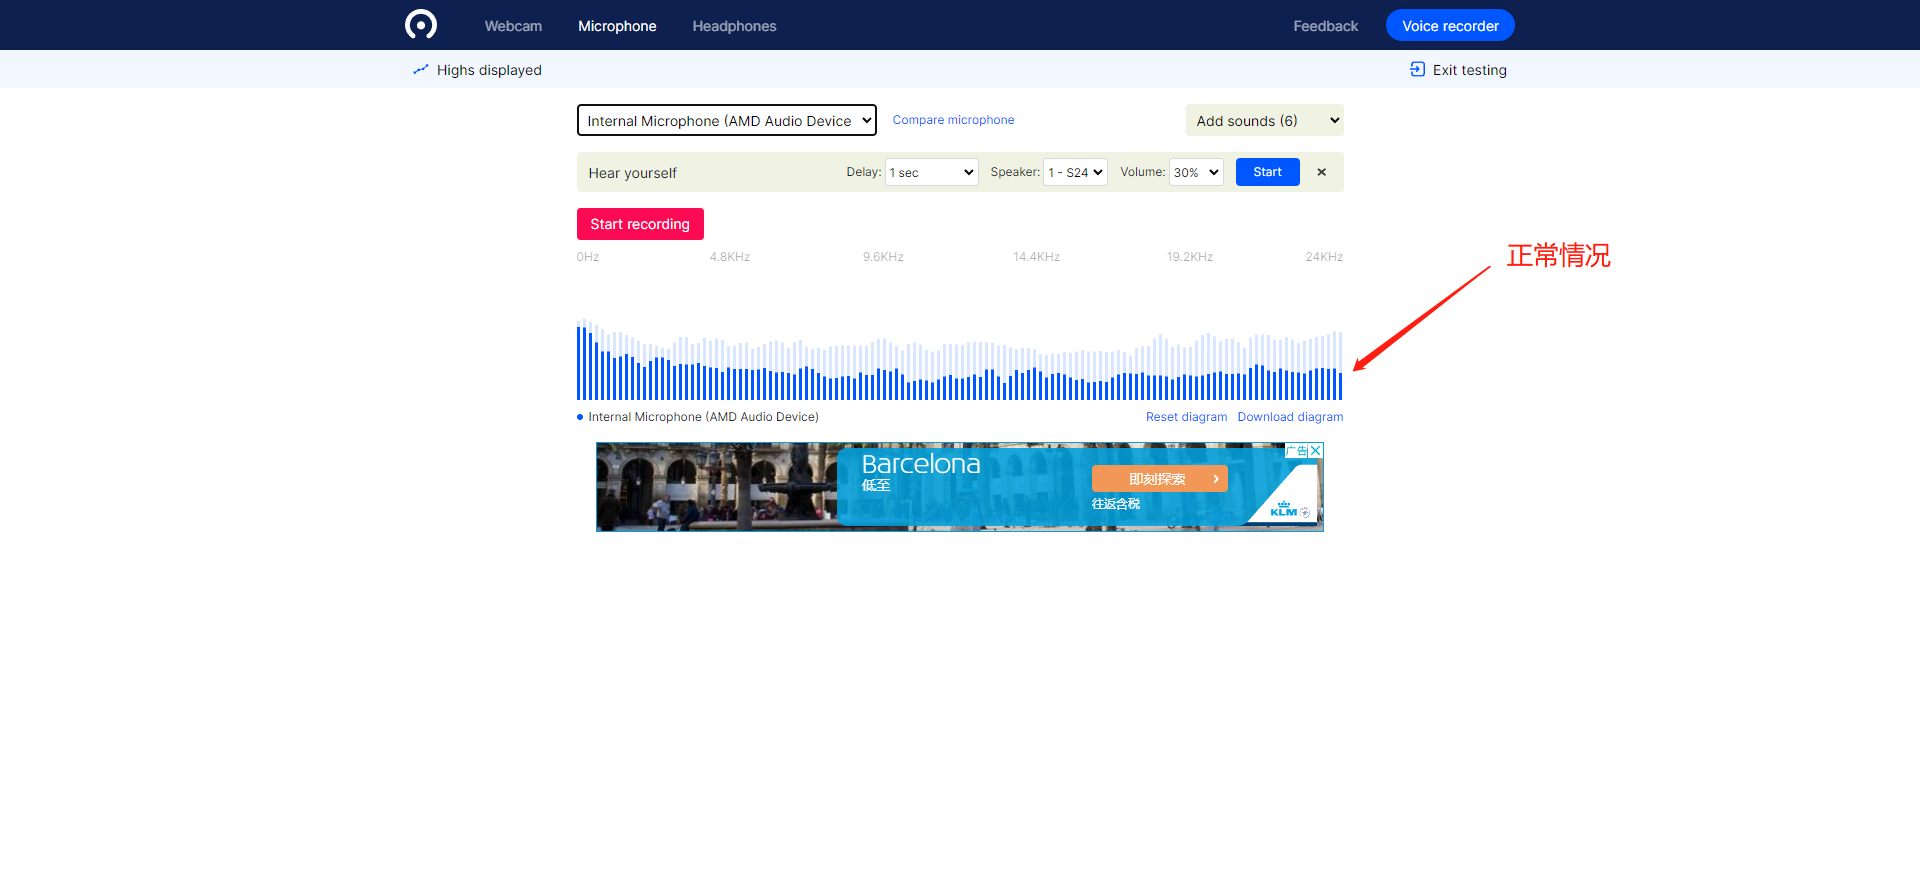
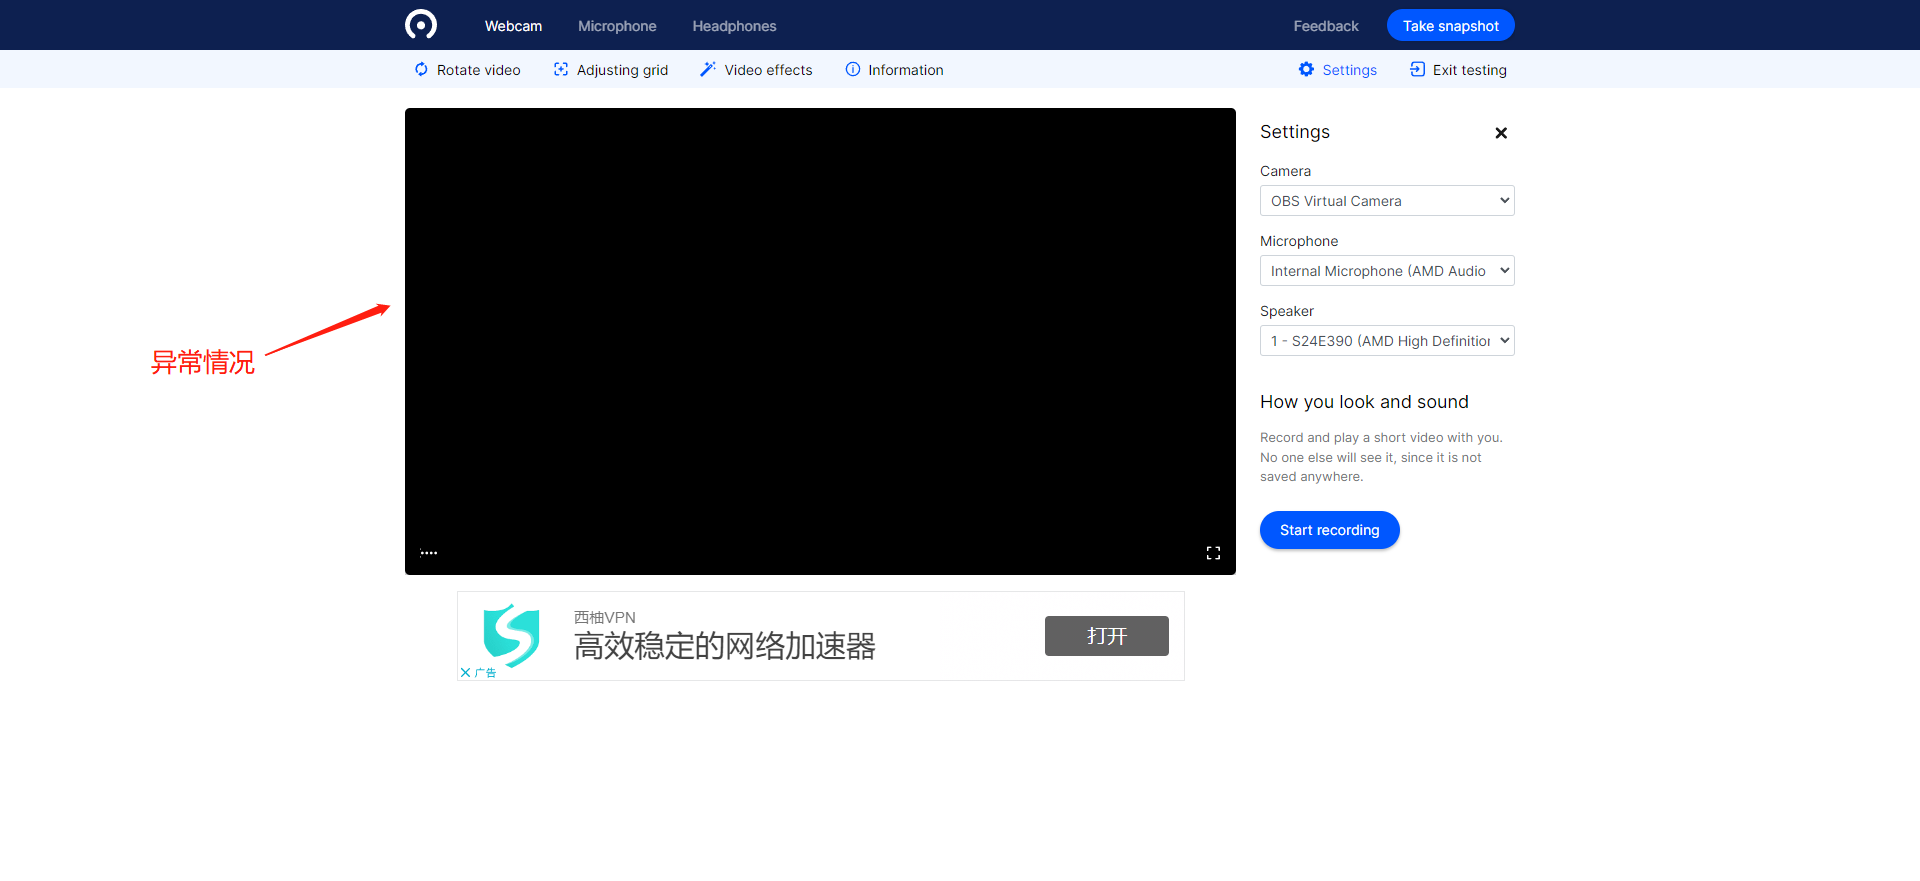
How to check if the current camera is working properly?
How to check if the current camera is working properly?
1. Click the following URL to test:https://webcammictest.com/
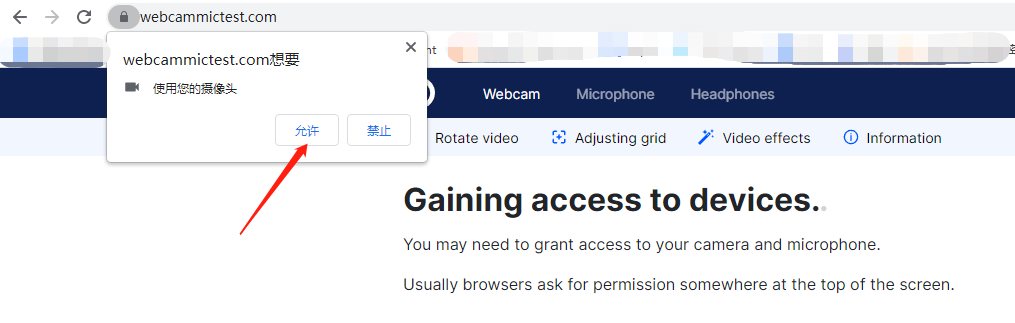
3. If the detected image is abnormal or there are no available devices in the device list, you need to check if the camera device is malfunctioning or replace the camera.
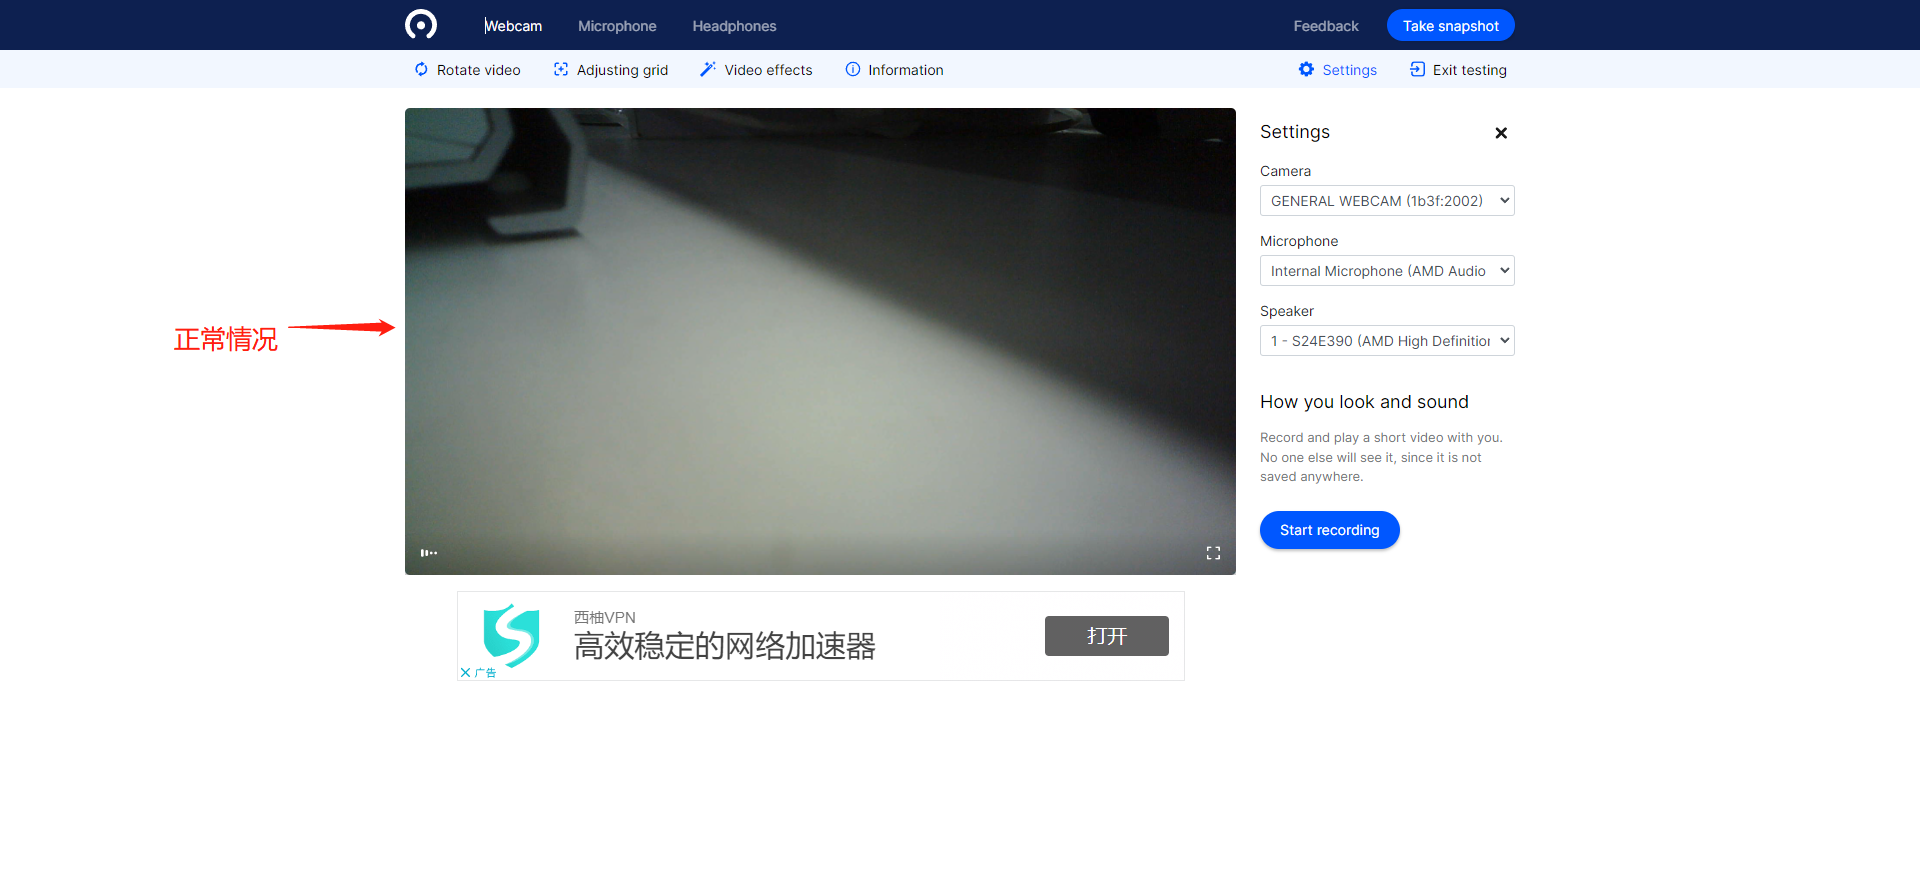
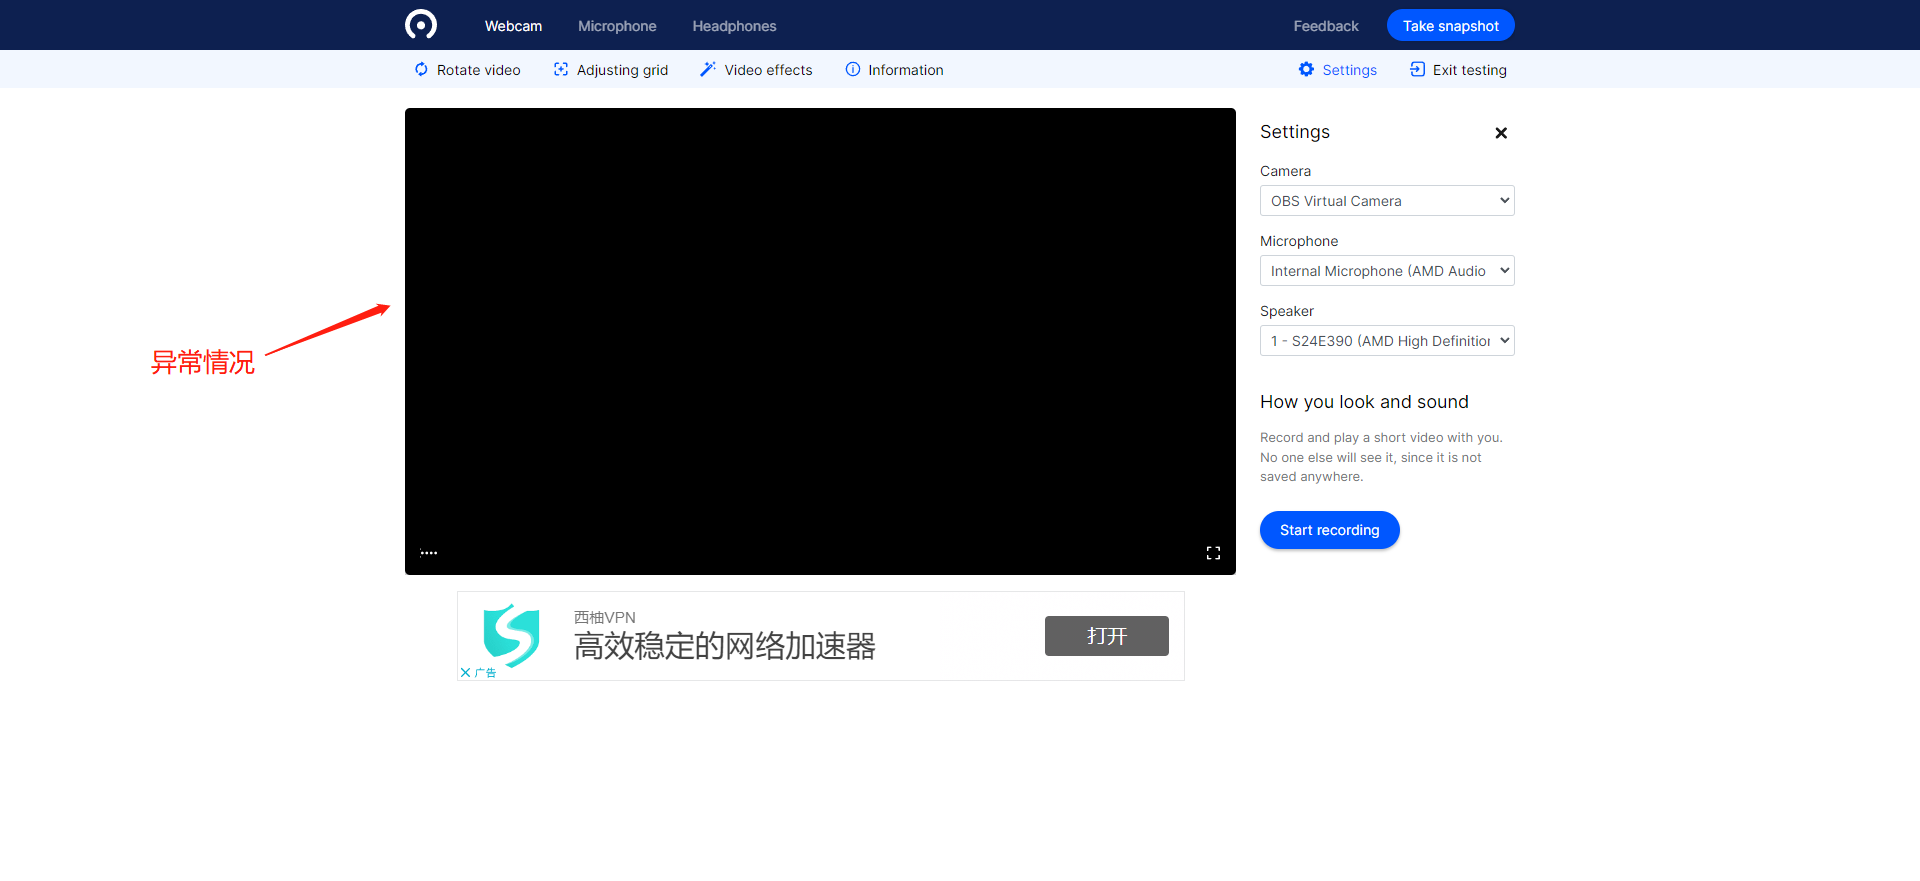
Common Questions about Kuaishou Relay
Q: For a live stream rebroadcast to Kuaishou, do I need to click 'Start Live' on Kuaishou after the live stream starts?
A: No need if you use the one - click rebroadcast to Kuaishou. If you use the Kuaishou streaming address to rebroadcast to Kuaishou, you need to click 'Start Live' on Kuaishou.
Q: Can I view the replay of a live stream rebroadcast to Kuaishou on Kuaishou?
A: Kuaishou has a replay function. You can turn on the replay switch for the rebroadcast live stream on Kuaishou.
Q: When elink rebroadcasts a live stream to Kuaishou, will the Kuaishou live stream end automatically after the elink live stream ends?
A: No. After the elink live stream stops pushing, you need to manually end the Kuaishou live stream.
Q: Does the live stream of a trial - version online store support rebroadcasting to Kuaishou?
A: Yes, it does.
Q: How many elink live streams can a single Kuaishou account receive for rebroadcast at the same time?
A: A single Kuaishou account can receive at most one elink live stream for rebroadcast at the same time. If there is an overlap in the rebroadcast time using the same Kuaishou account, the new live stream will overwrite the old one.
Q: Do I need to reset every time I create a new Kuaishou rebroadcast?
A: If you have previously bound a Kuaishou account, when creating a new live stream, it will automatically bind the account and cover image of the previous live stream that was in the 'ended' state and was rebroadcast using a Kuaishou account. You can modify them.
Q: When users watch a live stream rebroadcast to Kuaishou, can they synchronously participate in the relevant interactions of the elink live stream, such as co - hosting?
A: Rebroadcasting to Kuaishou is limited to the rebroadcast of the live - stream picture. Other interactive capabilities will not be synchronized. Co - hosting, live commerce, etc. initiated in the elink live stream can only be participated in the elink live - stream room and cannot be participated in the Kuaishou live - stream room.
Q: Can I use the method of filling in the Kuaishou streaming address for rebroadcast?
A: Yes. You can obtain the Kuaishou streaming address and use the third - party rebroadcast function. For the specific tutorial, clickhttps://helpcenter.xiaoe - tech.com/#/problem/detail?document_id=doc_5f6c4d59a1a00_Cu4yM. Note: After starting the live stream, you need to click 'Start Live' in the Kuaishou live - stream room.
How to reduce live streaming traffic consumption
I. How to reduce live streaming traffic consumption when using the elink Live client or elink Live Mini Program for live streaming with push streaming
1. elink Live client: Find [Settings] - [General Settings] in the live streaming room. By lowering the clarity level, you can reduce the live streaming traffic consumption after push streaming. (Note: Lower clarity may affect the live streaming image quality.)
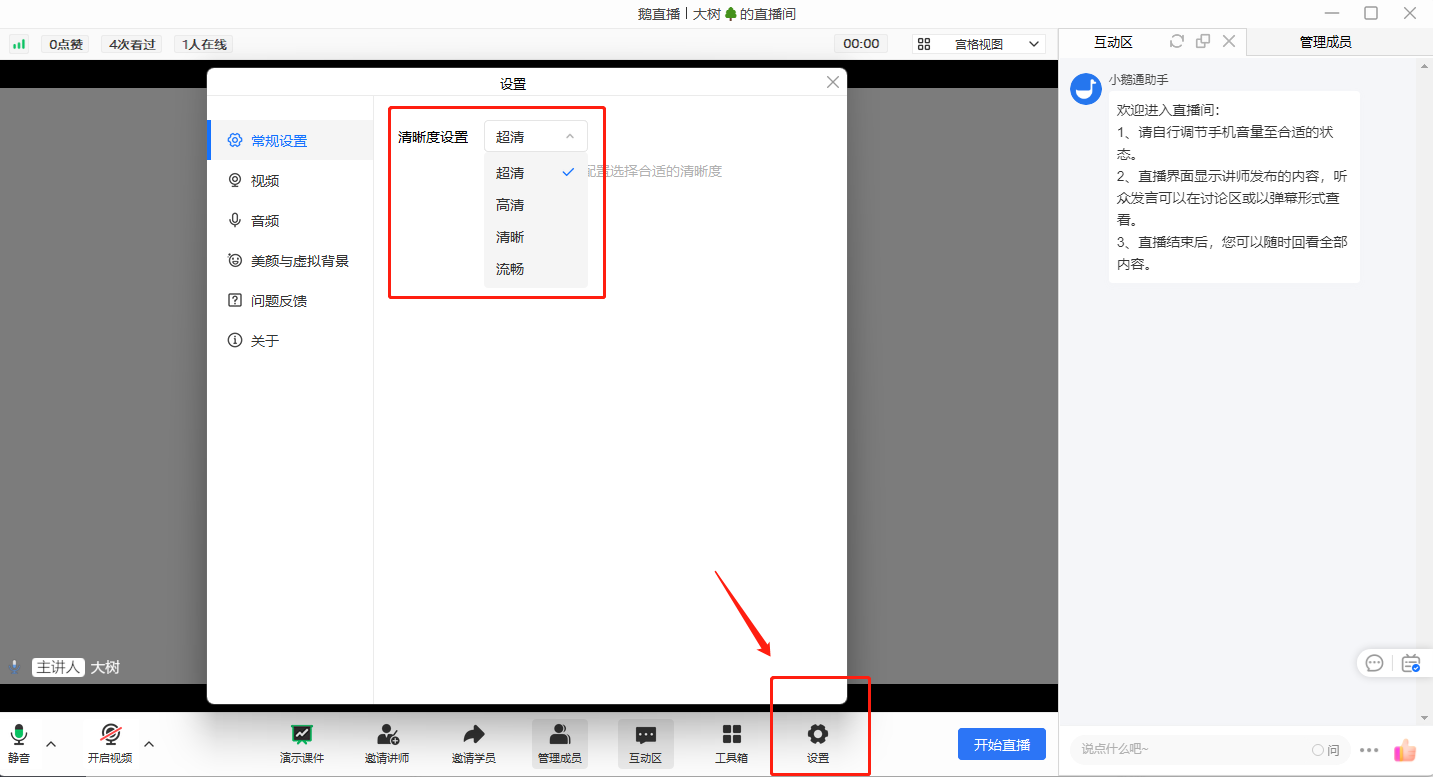
2. elink Live Mini Program: Find [Live Streaming Settings] - [Clarity] in the live streaming room.By lowering the clarity level, you can reduce the live streaming traffic consumption after push streaming. (Note: Lower clarity may affect the live streaming image quality.)
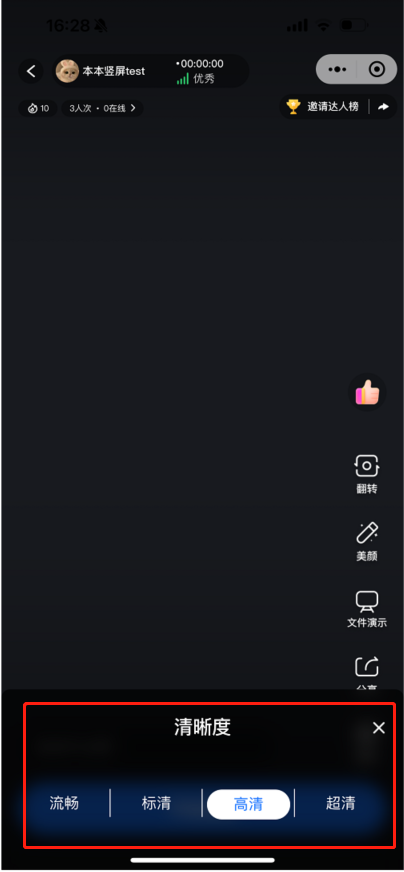
II. How to reduce live streaming traffic consumption when using OBS for live streaming with push streaming
Click [Settings]. In the [Output] settings, lower the values of the video bitrate and audio bitrate. The lower the values, the lower the live streaming traffic consumption after push streaming. (Note: Extremely low video and audio bitrates may affect the live streaming image quality.)
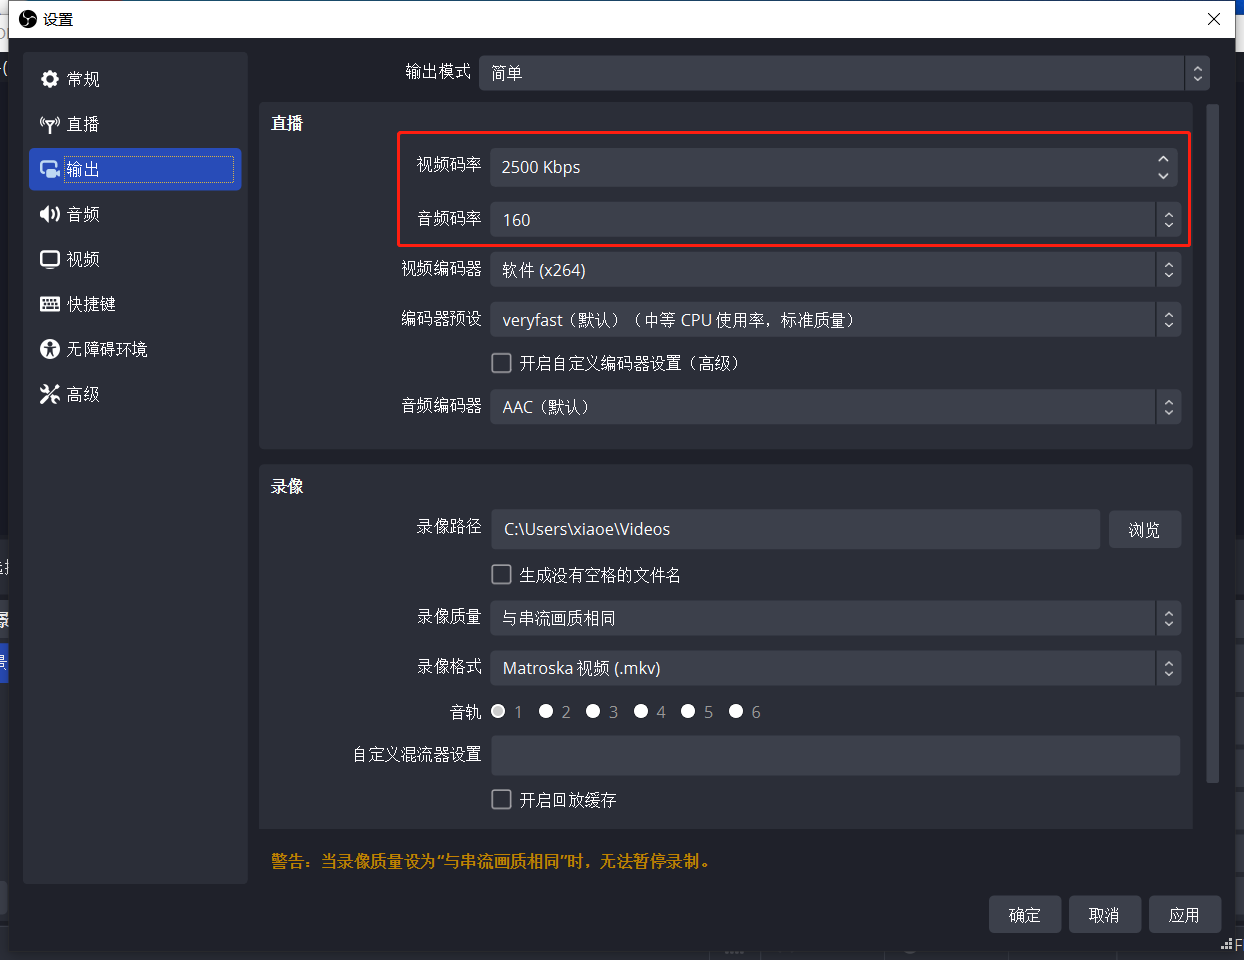
III. How to reduce live streaming traffic consumption when usingrecorded live streaming
You can reduce the live streaming traffic consumption by lowering the clarity level settings or selecting a lower bitrate.
Operation path 1: New live streaming - Recorded video - Image quality settings
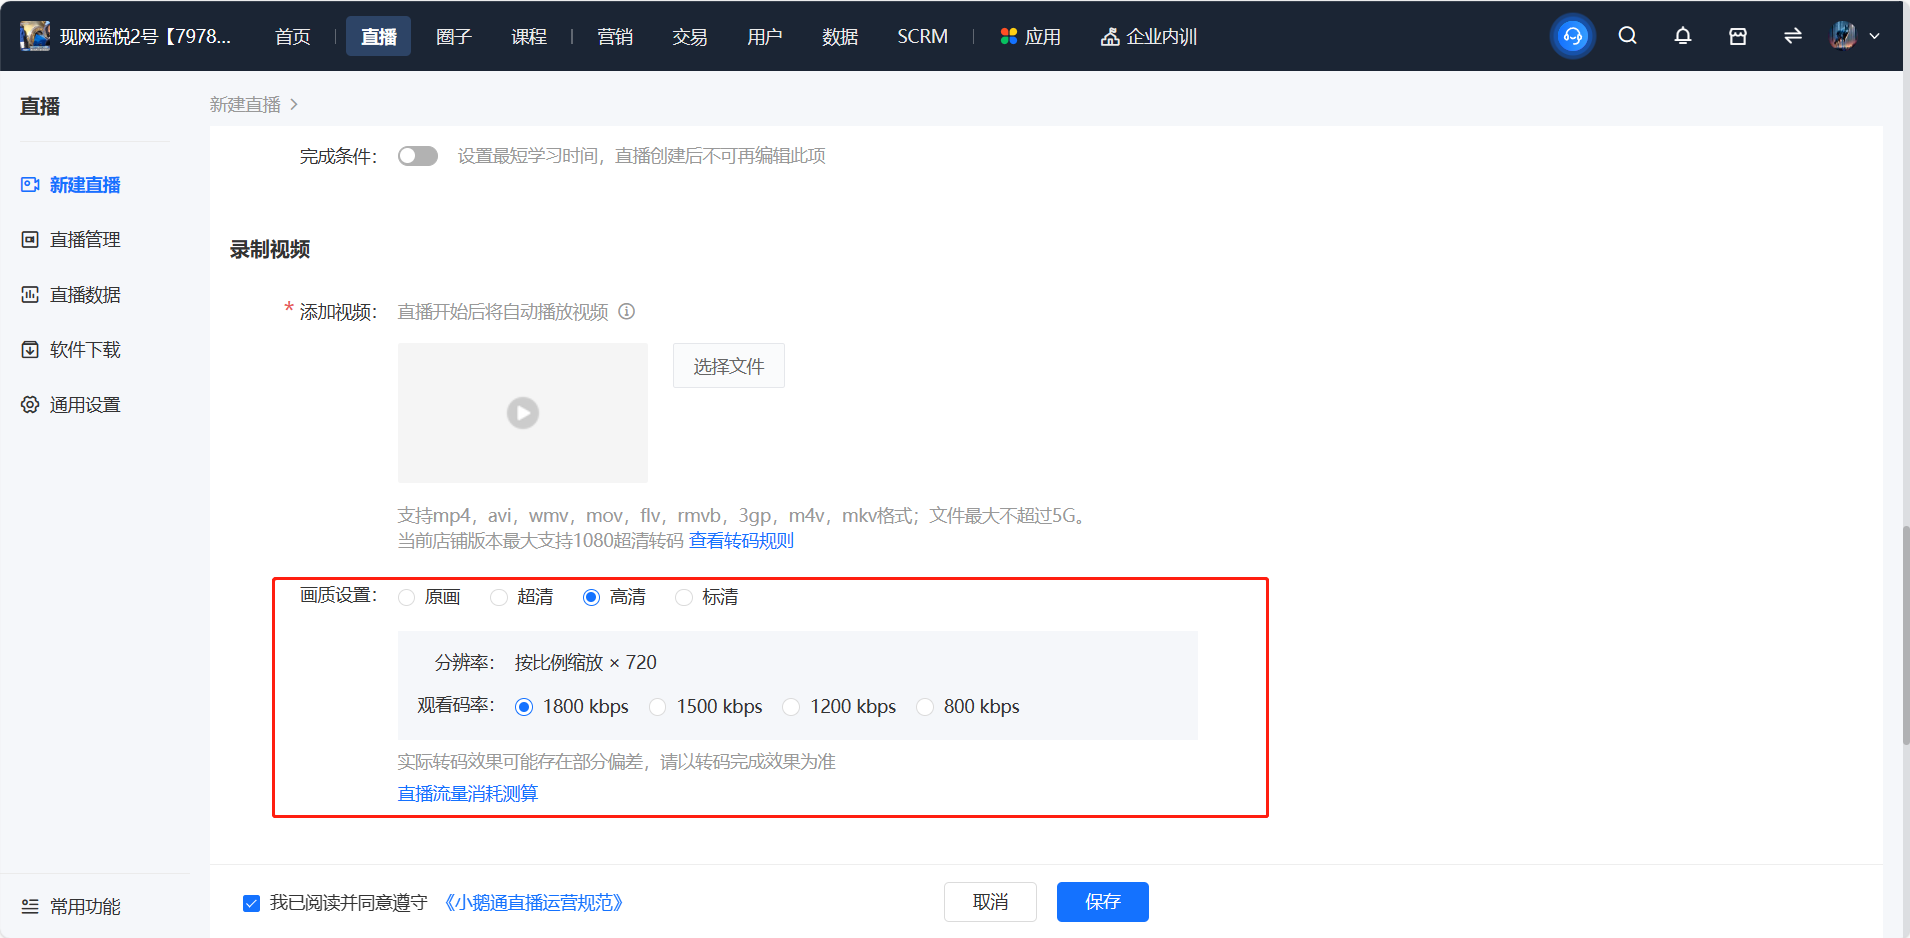
Operation path 2: Live streaming management - Management - Recorded video - Image quality settings
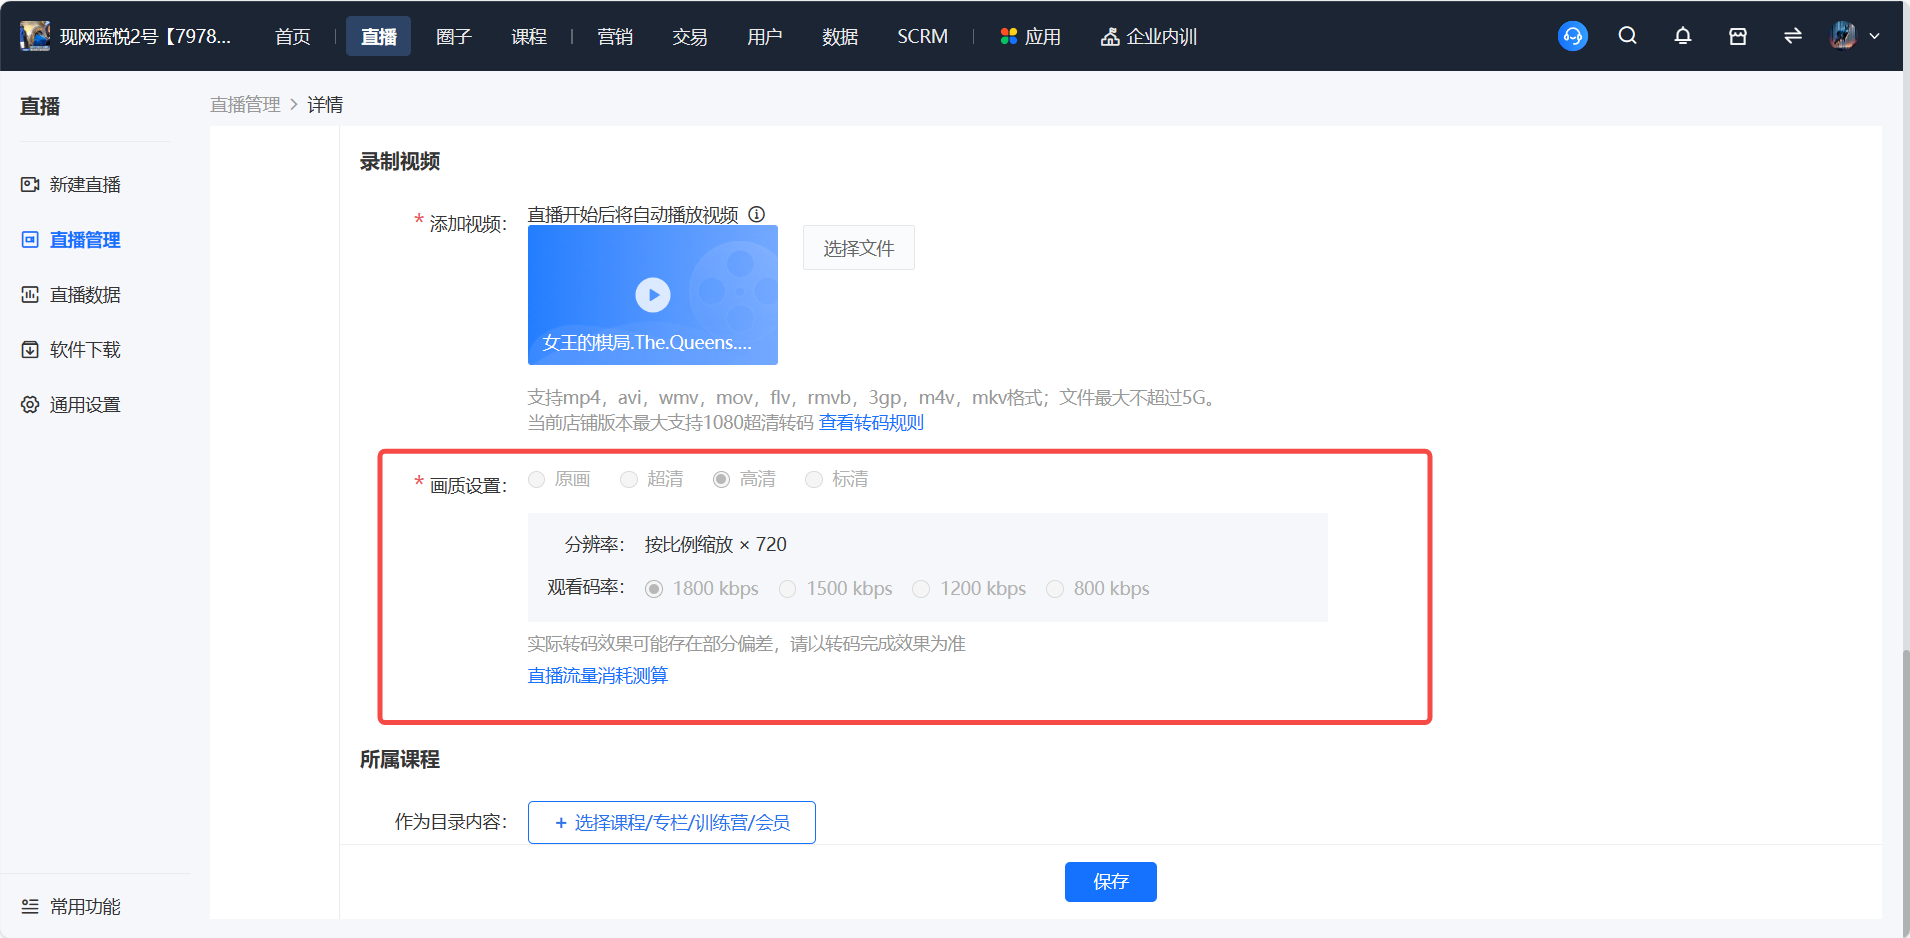
Operation path 3: General settings - Global settings - Recorded live streaming image quality settings
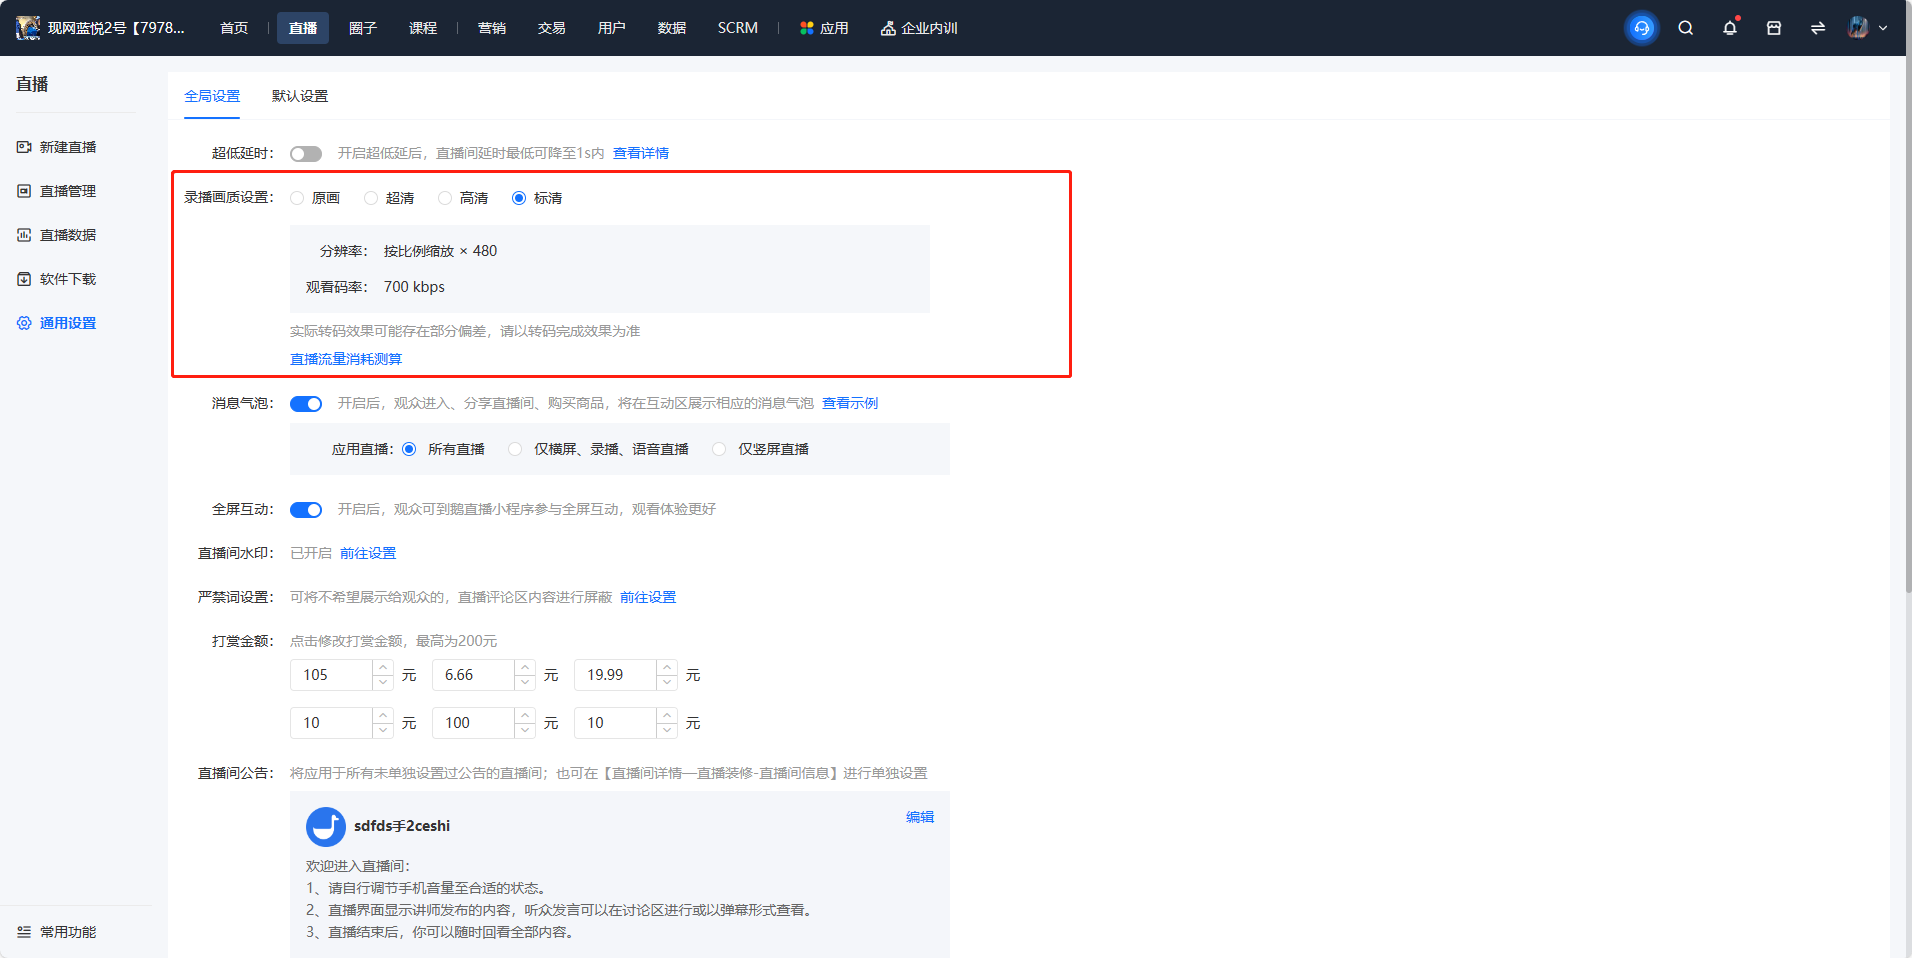
Black borders or incomplete display in the live streaming video
I. Black borders on the screen
● Scenario 1: Black borders appear during screen sharing
○ Example: Sharing the desktop
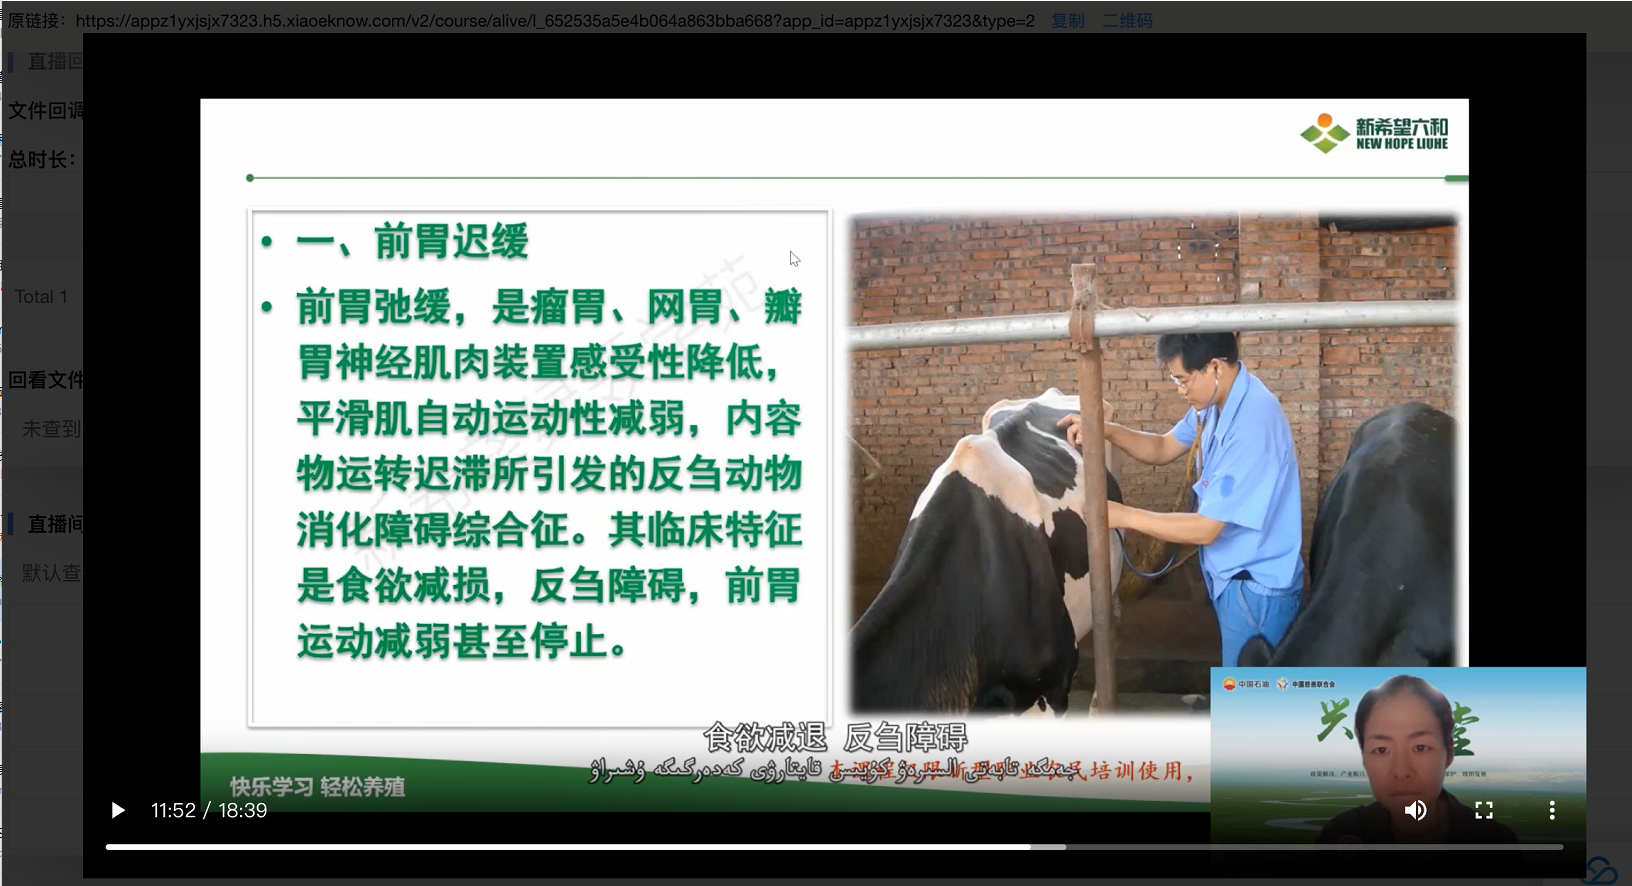
○ Reason 1: The screen sharing resolution of the computer desktop is not 16:9, which is common on Mac and Huawei computers. The resolution of Mac computers is usually 16:10.
○ Suggestion 1:
■ Step 1: It is recommended to check the screen resolution and adjust it to 16:9 if possible. The adjustment method is as shown in the following figure:
【Adjusting the screen resolution on a Mac computer】
【Screen resolution on a Windows computer】
■ Step 2: If there is no such resolution (e.g., on a Mac computer), it is recommended that the instructor share the window and ensure that the ratio of the shared window is 16:9 to avoid black borders. (Note: If some videos have built - in black borders, there will also be black borders when sharing these videos through window sharing.)
■ Step 3: If you cannot confirm the size of the shared window; if you are sharing courseware, it is recommended to upload the courseware to the live - streaming room for demonstration. Note that before uploading the courseware, you can adjust the size of the courseware to “Wide screen (16:9)” locally. The specific operation is as shown in the following figure:
◆ Step 1: Adjust the slide size in the design
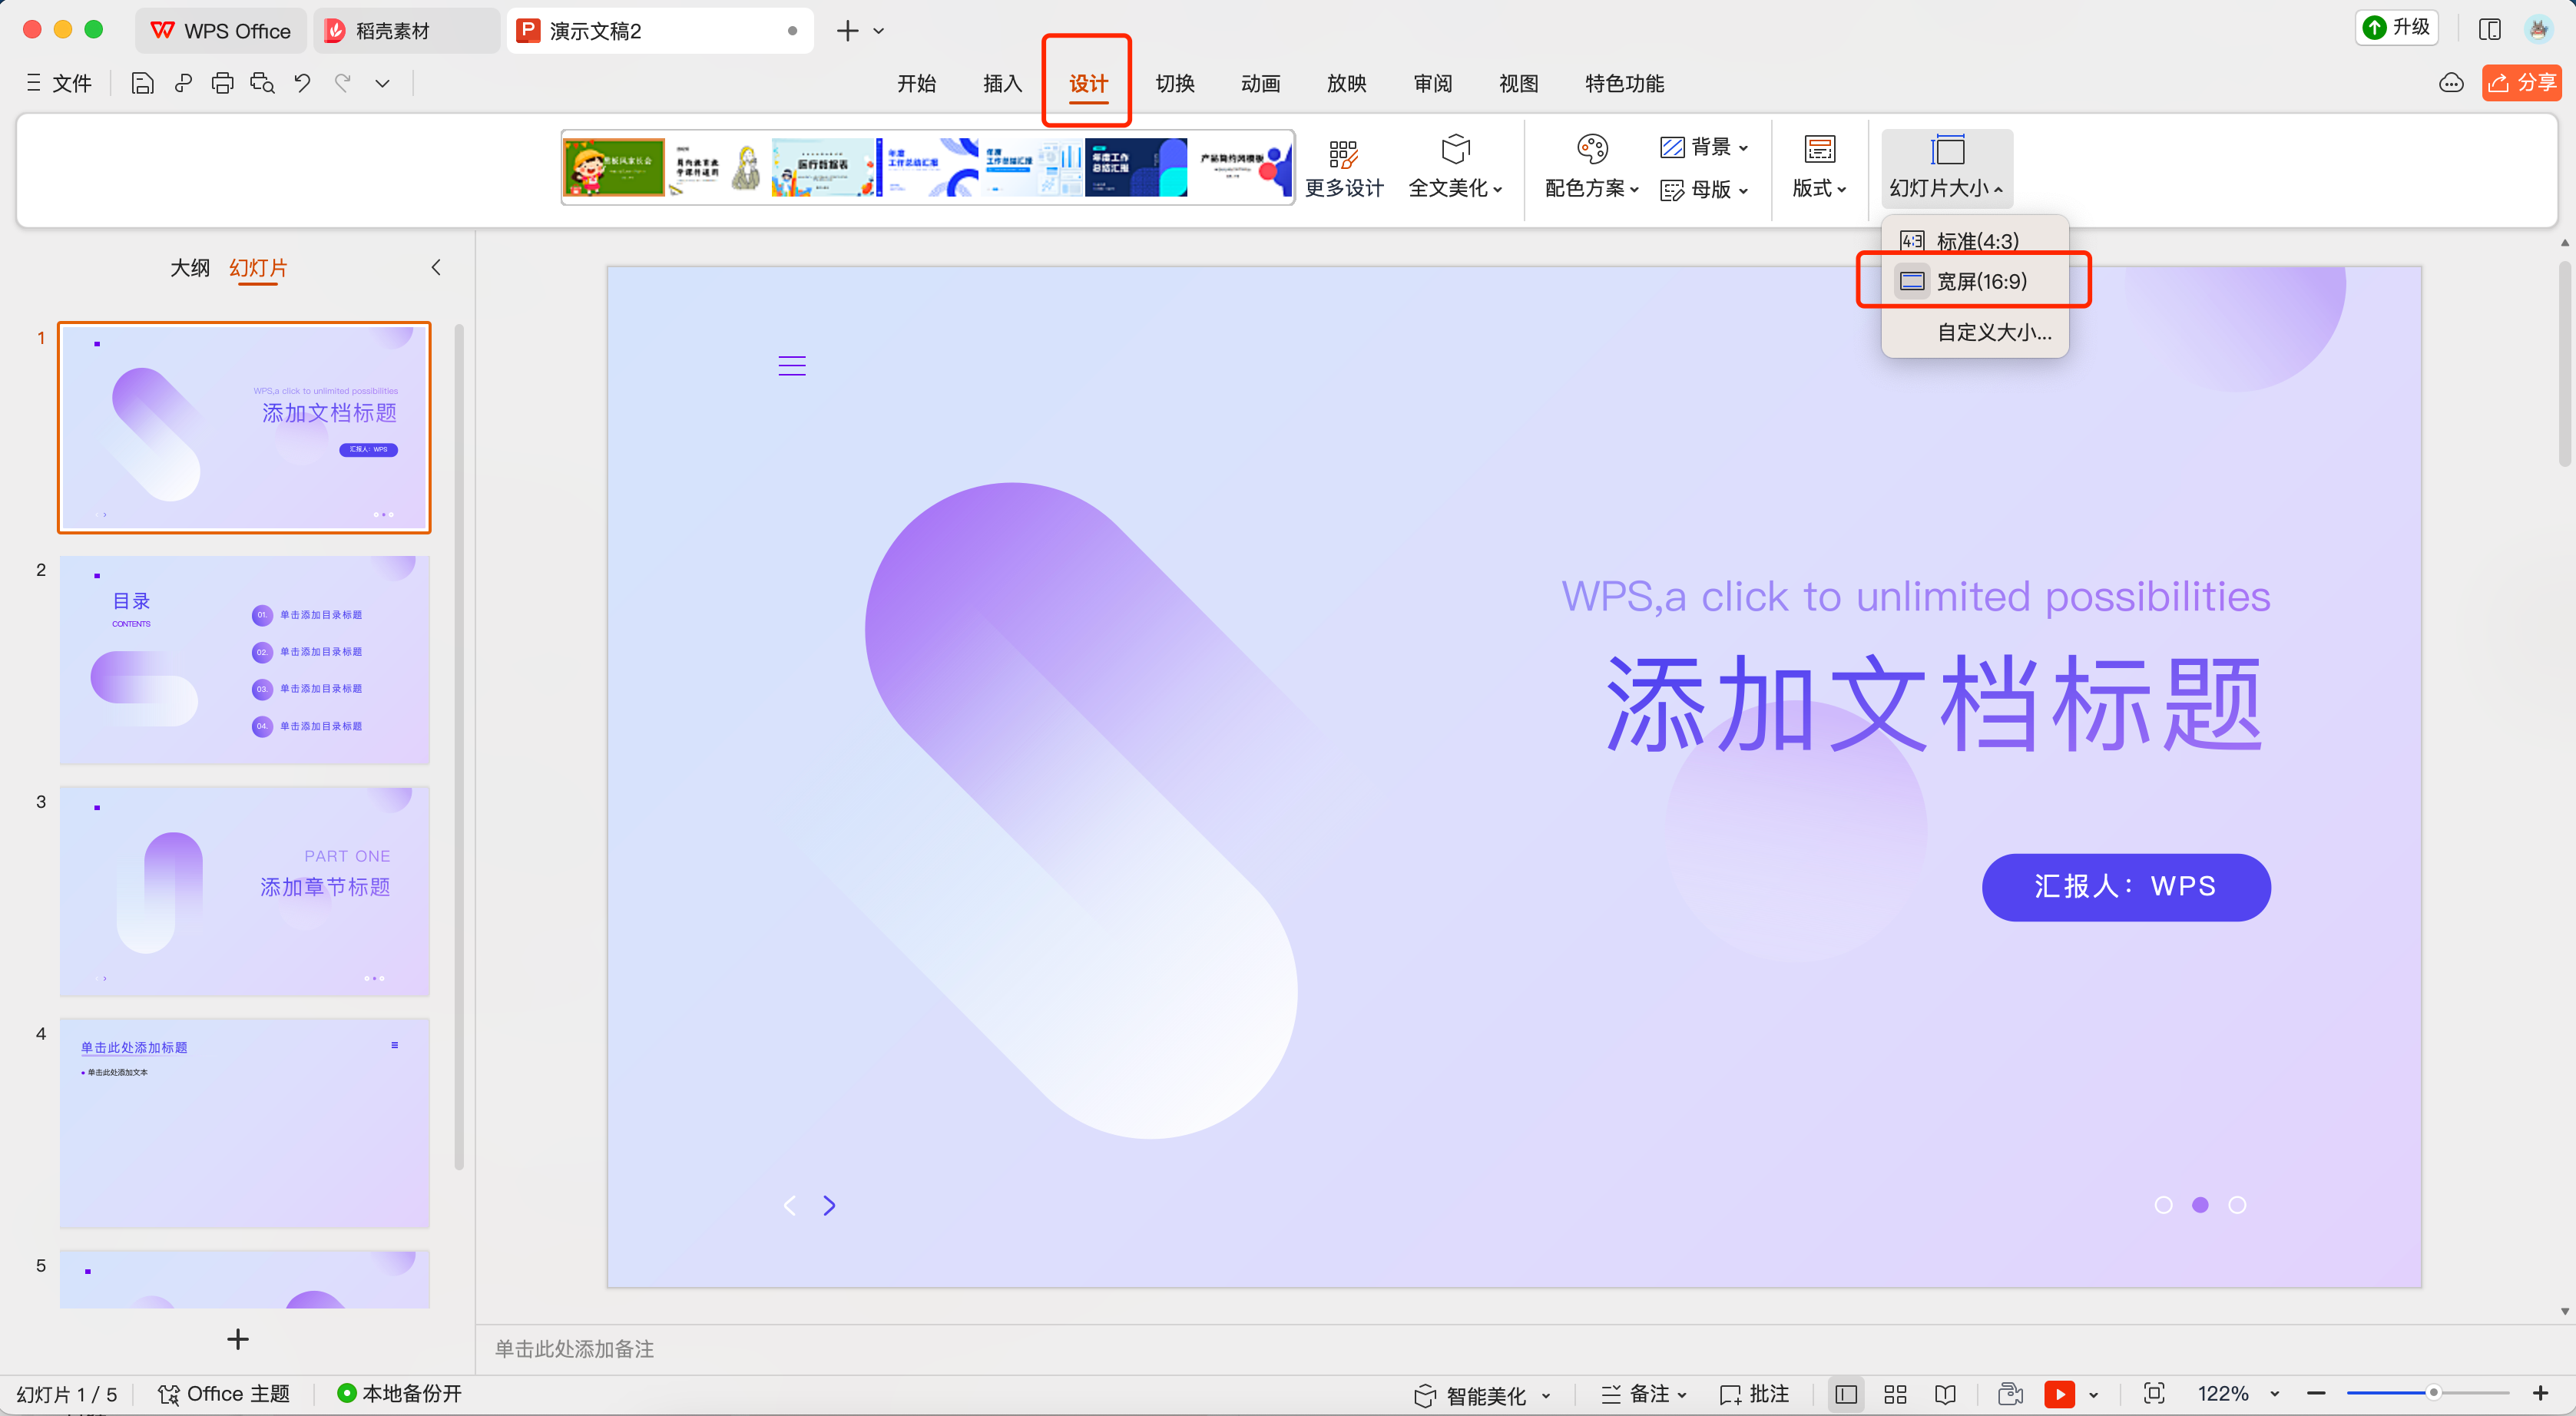
◆ Step 2: Upload the courseware to the live - streaming room/file storage and select “Presentation”
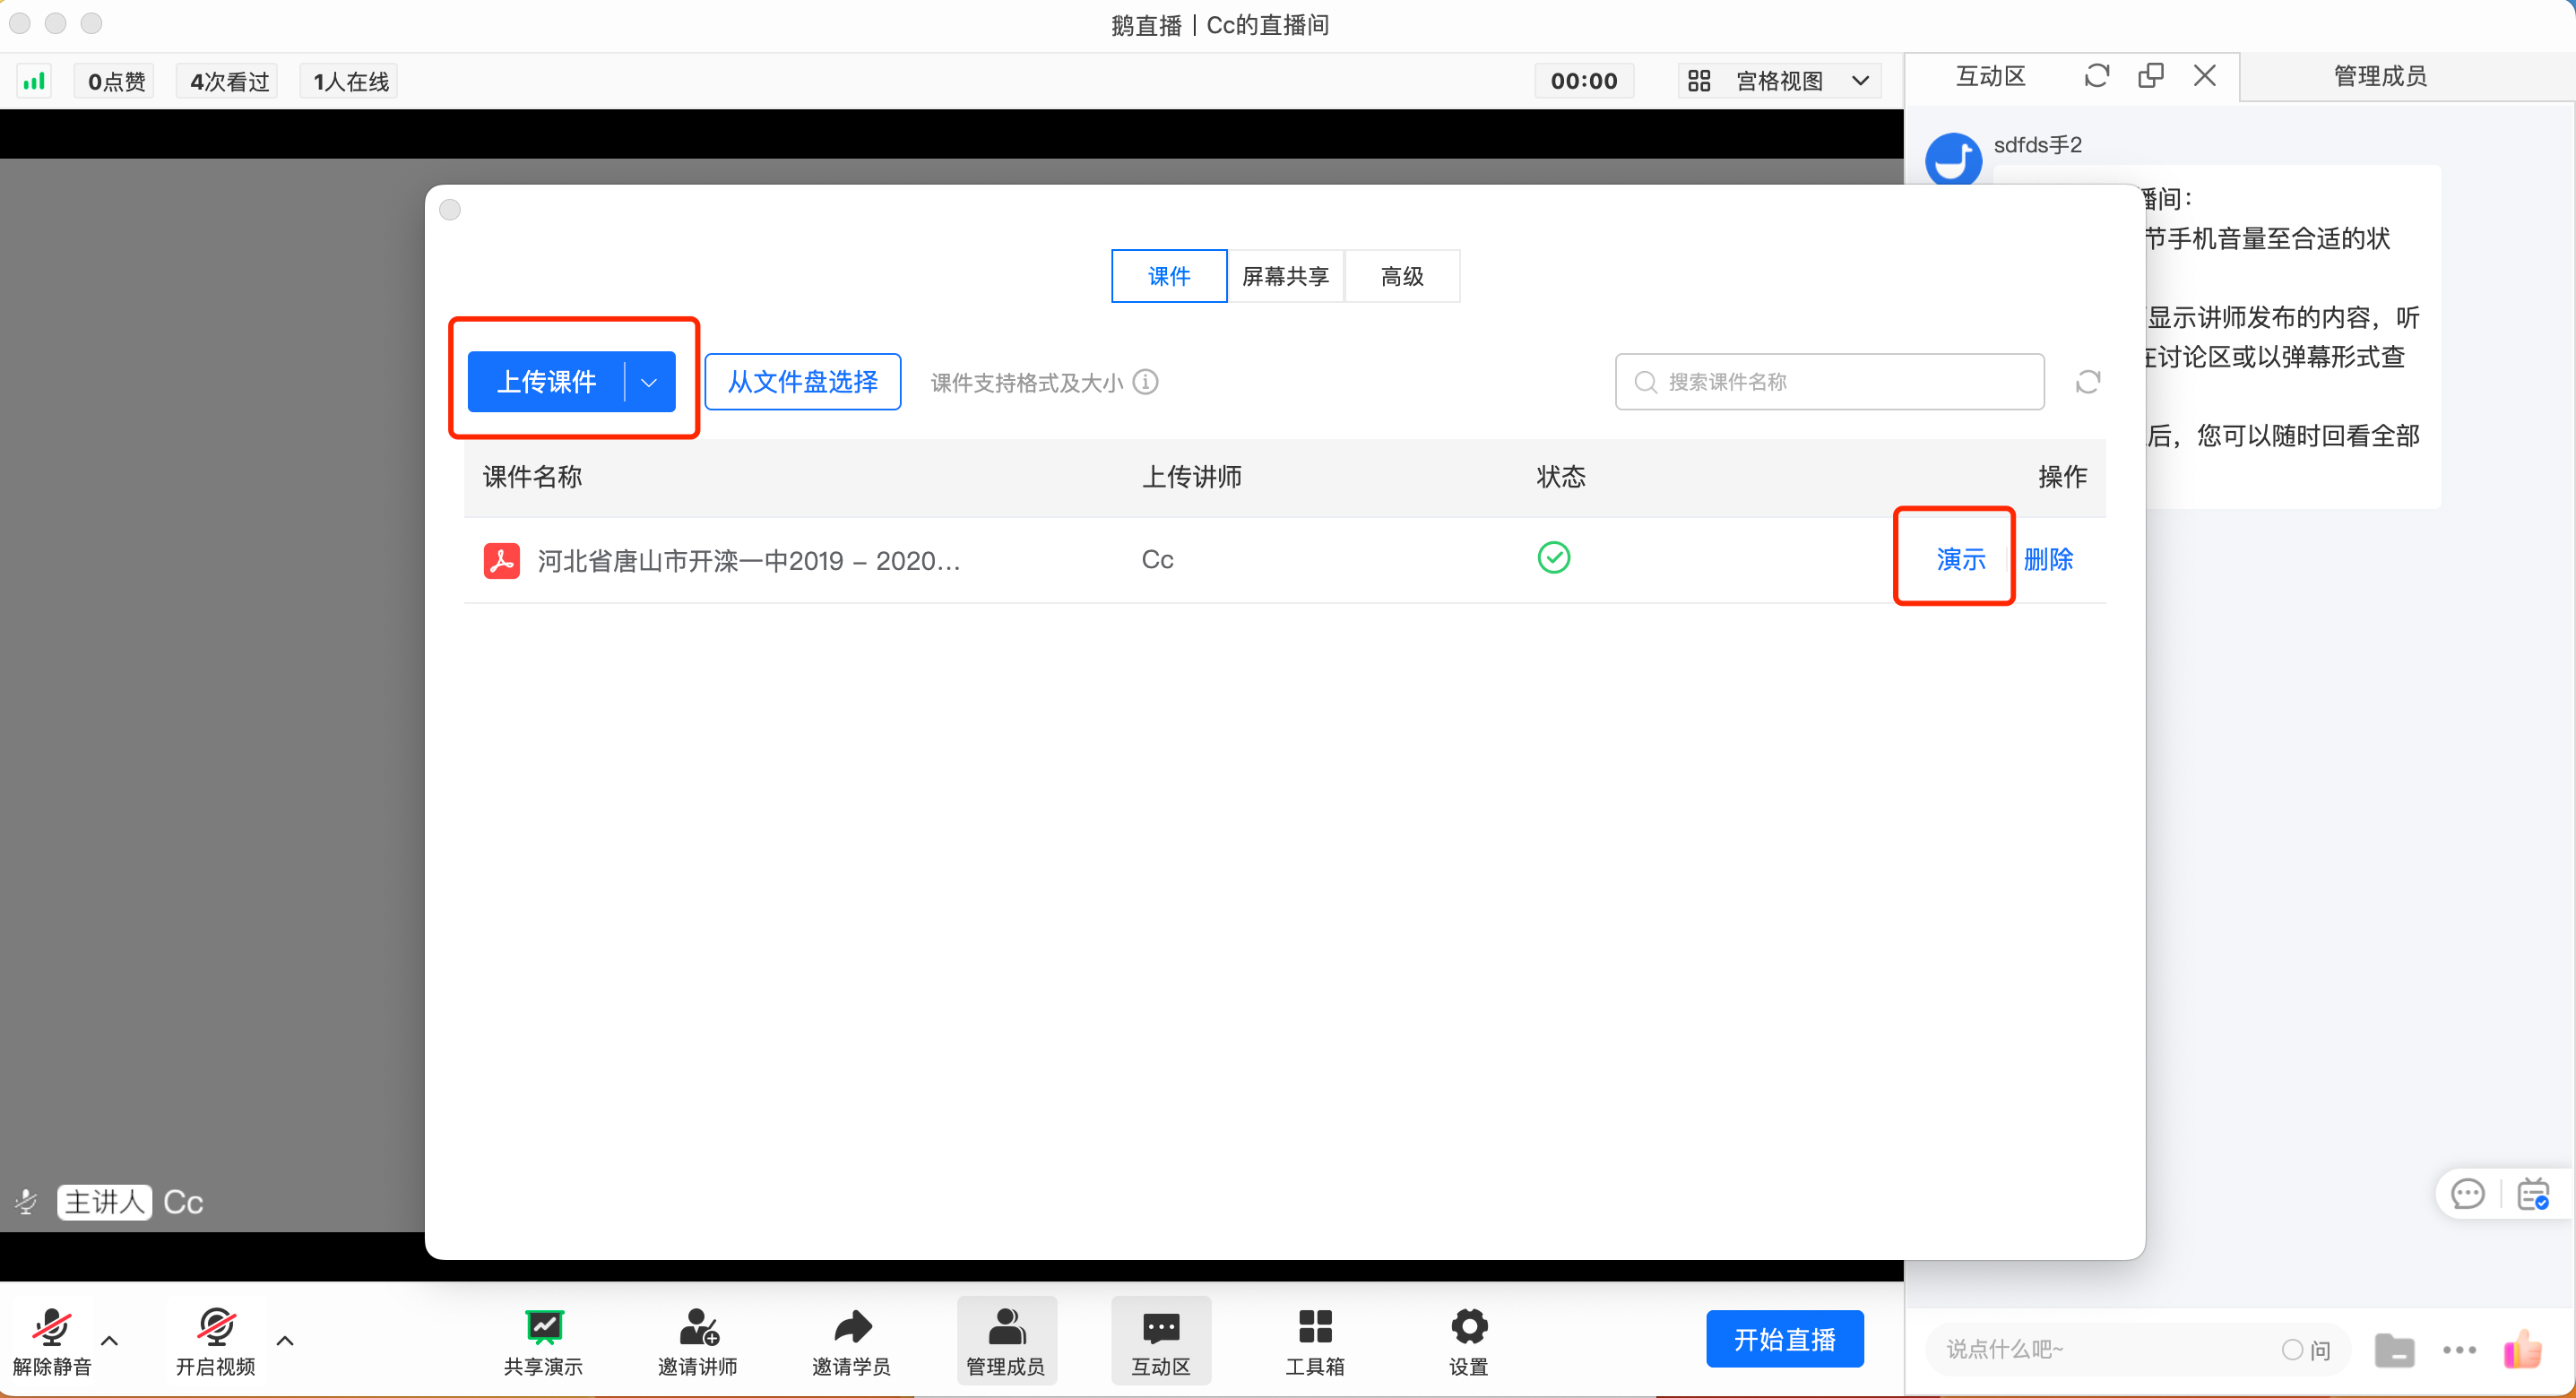
If you are sharing a video, it is recommended to adjust the size of the local player. Taking Tencent Video as an example, if it is not in the compact mode, first enter the compact mode in the upper - right corner. If there are still black borders at this time, you can stretch the playback interface to adjust until you are satisfied.
■ Step 1: Open Tencent Video
■ Step 2: Click the compact mode
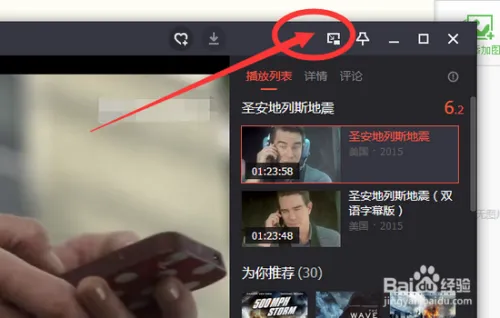
■ Step 3: After clicking the 【Compact mode】 icon, it will automatically enter the 【Compact mode】 for playback. At this time, you can also adjust the size of the video playback window with the mouse.
○ Reason 3: Since the viewing devices of some students are not 16:9, no matter how the instructor adjusts, there will still be black borders on some viewing devices.
● Scenario 2: Black borders appear in the round - table mode
○ Example:
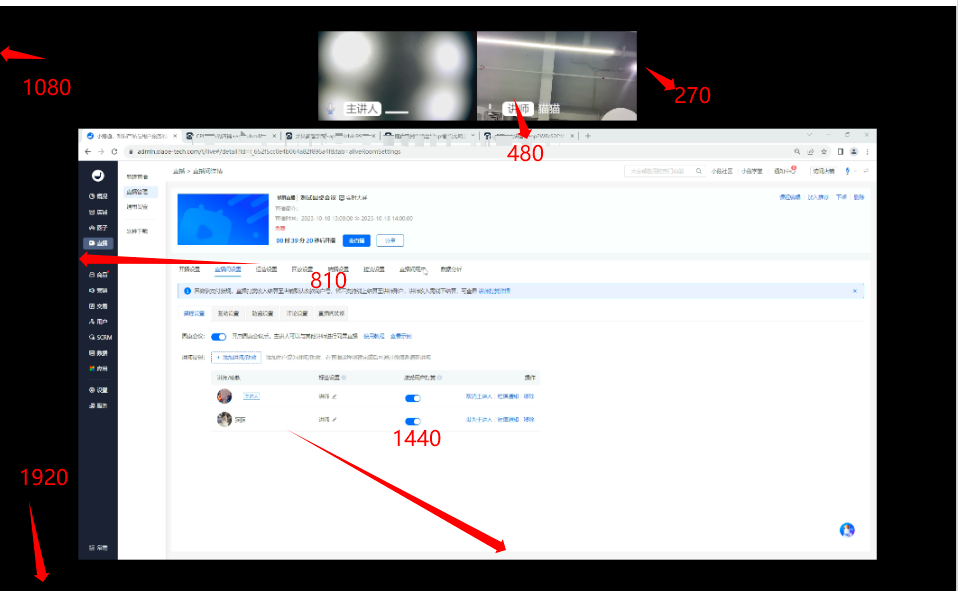
○ Reason: In the round - table meeting mode, the camera ratio is fixed at 16:9, and the content sharing ratio mode is 16:9. There will definitely be black borders in the empty part of the camera and around the content sharing. If the ratio of the shared window content itself is not 16:9, there will be two layers of black borders.
○ Suggestion: Adjust the ratio of the content - sharing window to 16:9 and set the background image of the video area to fill the black borders.
II. Incomplete screen display
● Scenario 1: In the vertical screen live - streaming mode, the viewing end cannot see the full screen
○ Reason: This situation is mainly related to the instructor's mobile device for streaming. The system defaults to streaming the entire screen of the instructor's mobile phone, while the screen ratios of each viewer's mobile phone model are different. Therefore, some models may have incomplete screen display.
○ Suggestion: When the instructor is doing vertical screen live - streaming, they can use another mobile phone to test the effect and leave a safe distance when making the background image. If using OBS for live - streaming and pushing, it is recommended to adjust the output ratio to 9:16.
● Scenario 2: In the horizontal screen live - streaming mode, the output image of the camera is inconsistent with the image captured by the external camera
○ Reason: Currently, the output image of the camera is 16:9, while the image captured by the external camera has a different ratio, so part of the image will be cropped.
○ Suggestion: It is recommended to check the output effect in the camera preview screen and adjust the ratio of the image captured by the external camera to 16:9.
Video clarity of each live streaming push terminal
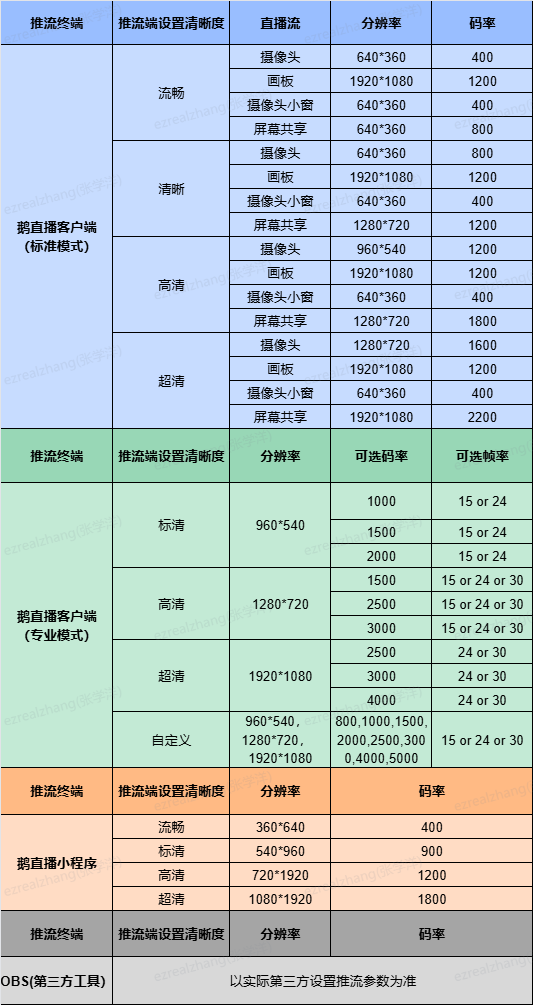
Problems and Solutions for Abnormal Live Room Access
When users encounter issues accessing the live streaming room, they can match the information on the pageand handle it with the corresponding solutions
1. Failed to enter the live streaming room due to network issues
● Scenario 1: Network issues
When you see the above page while accessing the live streaming room, you can follow the steps below to check if your network connection is normal:
1. Check the Wi-Fi connection: First, make sure that the Wi-Fi function of your device is turned on
a. Check if you are connected to an available Wi-Fi network
b. If you are connected to Wi-Fi but there is an exclamation mark next to the network icon, it means the network is unavailable. You can try disconnecting and reconnecting to Wi-Fi or restarting your device
2. Check the mobile data connection: If Wi-Fi is unavailable or the signal is weak, you can try using mobile data
a. Make sure that the mobile data function on your device is turned on
b. Check if the signal bar on your device shows a mobile data signal (e.g., 4G/5G)
3. Check the VPN settings: If you have used a VPN (Virtual Private Network) before, it may affect your network connection
a. You can go to the 'Settings' menu on your device and find the 'VPN' option
b. If the VPN is enabled, it is recommended to turn it off and then try to connect to the network again
4. Set the device DNS: The DNS settings of your device may affect the network connection
a. Go to the 'Settings' menu and find the 'Wi-Fi' option
b. Select the Wi-Fi network you are currently connected to and click on 'Modify Network' or a similar option
c. In the 'IP settings' or 'Advanced options', find the DNS settings and try changing the DNS address to 114.114.114.114
d. After the change, save the settings and reconnect to the Wi-Fi network
After following the steps above, most network connection issues should be resolved. If the problem persists, it is recommended that you contact your network service provider or device manufacturer for further assistance.
Common issues and solutions for audio-video out-of-sync in live streaming
WhenAudio and video are out of sync during the live stream, affecting the viewing experience, you can match the corresponding solution according to the live streaming tool and scenario for processing
1 OBSStreaming tool
Problem | Scenario | ProblemCause | SolutionMethod |
1 | OBSStreaming + Network frame loss | Streaming deviceNetworkPacket loss,resulting in frame loss or skipping in the input picture of the stream/Frame skipping | It is recommendedCheck the OBS monitor andadjust the network by yourself:【OBS】How to monitor the streaming quality? |
OBS | Streaming + Ultra - high bitrateStreaming | Configuring an ultra - high bitrate requires a high network bandwidth. When the bandwidthis not sufficient, frame loss occursBandwidthIt is recommended | to set the bitrate according to therecommendedbitrate value:【OBS】Recommended live streaming settings |
OBS streaming + Beauty filter plugin | The camera uses | YY Beautyand otherplugins, causing a delay in the camera picture output and resulting in audio - video out - of - sync● | If the beautypluginis enabled,it is recommendedto turn off the beautyplugin and try● If a voice - tuning software is enabled,it is recommendedto turn off the voice - tuning software and try● If the sound card has a built - in voice - tuning console,it is recommendedto set it back to thedefaultconfiguration and try4OBSStreaming + Device performance |
The CPU usage of the streaming device is high, resulting in audio - video out - of - sync | It is recommended to check the OBS monitor. If the device performance is poor, consider replacing thedevice: | 【OBS】How to monitor the streaming quality?5 | OBS streaming + Non - network and non - device performance scenarioIf it is confirmed that the network and CPU of the streaming device are normal, |
1. You can try | to adjust the audio synchronization offset and manually correct the audio and video | 2. If the previous steps have no effect, try restarting OBS2 | elink Live streaming clientProblemScenario Problem |
CauseSolution
Method | 1 | Network jitterNetwork jitter causes packet loss and frame loss in the audio and video upload | When the clientshows a poor network prompt, |
it is recommended | to switch to a stable network | 2 | Device performance (mainly CPU)When the CPU load is high, the frame rate of audio and video picture capture fluctuatesIt is recommendedto close unused software or replace the device with better performance3 |
External microphone malfunction | The input delay of the external microphone causes audio - video out - of - sync | 1. It is recommended to test whether there is a delay when using this peripheral in other software | 2. If it malfunctions in all software, it is recommended to replace the problematic peripheral4 |
Custom beauty filter | Users use a custom beauty filter, which consumes performance and | affects audio and video encoding and decoding | It is recommended to temporarily turn off the beauty effect |
or replace the device with better performance | 5 | Virtual camera input delayUsers use virtual cameras such as YY and OBS, but input delay occurs, resulting in audio - video out - of - sync | Third - party virtual cameras are currently uncontrollable. It is recommended to try turning off the virtual camera for debugging and observe whether there is a delay in the pictureTemporarily turn off the beauty effectOr replace with a device with better performance |
5 | Input delay of the virtual camera | The user is using virtual cameras such as YY or OBS, but input delay occurs, resulting in out-of-sync audio and video | Currently, third-party virtual cameras cannot be controlled. It is recommended to try turning off the virtual camera for debugging and observe if there is any delay in the picture |
Suggestions for live streaming equipment and parameter settings
I. Live Streaming via eLink Live Client
1. Live Streaming Device
CPU: Intel i5 - 9300
Graphics Card: NVIDIA GTX 1060 3GB
Memory: Over 8GB
2. Live Streaming Network
Stable upload speed of 3000KB/S;
3. Camera
Logitech C920 or C930e, or other HD cameras capable of supporting 1080P (resolution should support at least 1280*720);
Camera Resolution: 1920*1080 or 1280*720;
4. Beautification Software
It is recommended to use the beautification tool built - in the eLink Live Client;
5. Live Streaming Parameters
Clarity Settings:
Ultra - HD: Bitrate around 3200, Frame Rate 24, 1080P
HD: Bitrate around 2400, Frame Rate 15, 1080P
SD: Bitrate around 1600, Frame Rate 15, 1080P
Clear: Bitrate around 1000, Frame Rate 15, 1080P
II. Live Streaming via eLink Live Mini Program
1. eLink Live Mini Program - Streaming Instructor
Ultra - HD: Bitrate around 3200, Frame Rate 30, 1080P
HD: Bitrate around 2400, Frame Rate 24, 1080P
Clear: Bitrate around 1600, Frame Rate 24, 1080P
Smooth: Bitrate around 1000, Frame Rate 24, 1080P
2. eLink Live Mini Program (Multi - person) - Students/Guests
No Selection: Bitrate 400, Frame Rate 15, 540P
III. Live Streaming via eLink Live APP
Clarity Settings:
Ultra - HD: Bitrate around 3200, Frame Rate 30, 1080P
HD: Bitrate around 2400, Frame Rate 24, 720P
SD: Bitrate around 1600, Frame Rate 24, 540P
Smooth: Bitrate around 1000, Frame Rate 24, 360P
IV. Live Streaming via eLink Assistant
1. Live Streaming Device
CPU: Inteli5 - 9300
Graphics Card: NVIDIA GTX 1060 3GB
Memory: Over 8GB
2. Live Streaming Network
Stable upload speed of 3000KB/S;
3. Camera
Logitech C920 or C930e, or other HD cameras capable of supporting 1080P (resolution should support at least 1280*720);
Camera Resolution: 1920*1080 or 1280*720;
4. Beautification Software
It is recommended to use the beautification tool built - in the eLink Assistant;
5. Live Streaming Parameters
Clarity Settings:
Ultra - HD: Bitrate around 3200, Frame Rate 24, 1080P
HD: Bitrate around 2400, Frame Rate 15, 1080P
Clear: Bitrate around 1600, Frame Rate 15, 1080P
Smooth: Bitrate around 1000, Frame Rate 15, 1080P
V. Live Streaming via PC Web
1. Live Streaming Device
CPU: Intel i5 - 9300
Graphics Card: NVIDIA GTX 1060 3GB
Memory: Over 8GB
2. Live Streaming Network
Stable upload speed of 3000KB/S;
3. Camera
Logitech C920 or C930e, or other HD cameras capable of supporting 1080P (resolution should support at least 1280*720);
Camera Resolution: 1920*1080 or 1280*720;
4. Live Streaming Parameters
Clarity Settings(No Selection):
Main Stream (Camera): Bitrate around 900, Frame Rate 15, 720P
Secondary Stream (Screen Sharing): Bitrate around 2000, Frame Rate 15, 720P
VI. Third - Party Streaming (OBS)
1. Live Streaming Parameters
Bitrate: The recommended bitrate is 1500 - 3000, which can be selected according to the network speed and computer equipment as needed.
Frame Rate: The higher the frame rate, the smoother the picture. It is recommended to set the common FPS value to 30;
Smooth: 1000
SD: 1600
HD: 2400
Ultra - HD: 3200
And so on...
2. OBS Usage Tutorial
You can refer to the following link :
https://helpcenter.xiaoe - tech.com/#/problem/detail?document_id=doc_5eb50e26e1f6e_fcnIf
Or search in the Help Center:【OBS】Client Usage Tutorial
Common Questions about Live Learning Data
Scenario 1:
Question: Why do users enter the live - streaming room to claim coupons, sign in, or participate in lucky draws, but their live - streaming viewing time is 0?
Answer: Only when the live - streaming room player is in the playing state will it be regarded as valid learning for reporting. There is no necessary relationship between the actions of claiming coupons, signing in, or participating in lucky draws and the viewing time. It's possible that users only participated in the interaction but did not actually play the live - stream.
Scenario 2:
Question: Why do users who have entered the live - streaming room have a viewing time of 0?
Answer: If users stay in the live - stream for less than 10 seconds, their viewing time will be recorded as 0 seconds.
Scenario 3:
Question: Users use the campus network and enter multiple live - streaming rooms to watch, but their viewing time is 0?
Answer: Some campus networks have restrictions, which prevent the learning data from being reported normally. It is recommended to try switching the network for viewing.
Scenario 4:
Question: Will the learning time be accumulated if users switch between different devices/ports during the live - stream viewing?
Answer: Yes, it will be accumulated.
How to edit the recorded playback of live streams?
【Scenario 1】Recorded live streaming rooms created on or after May 22, 2024
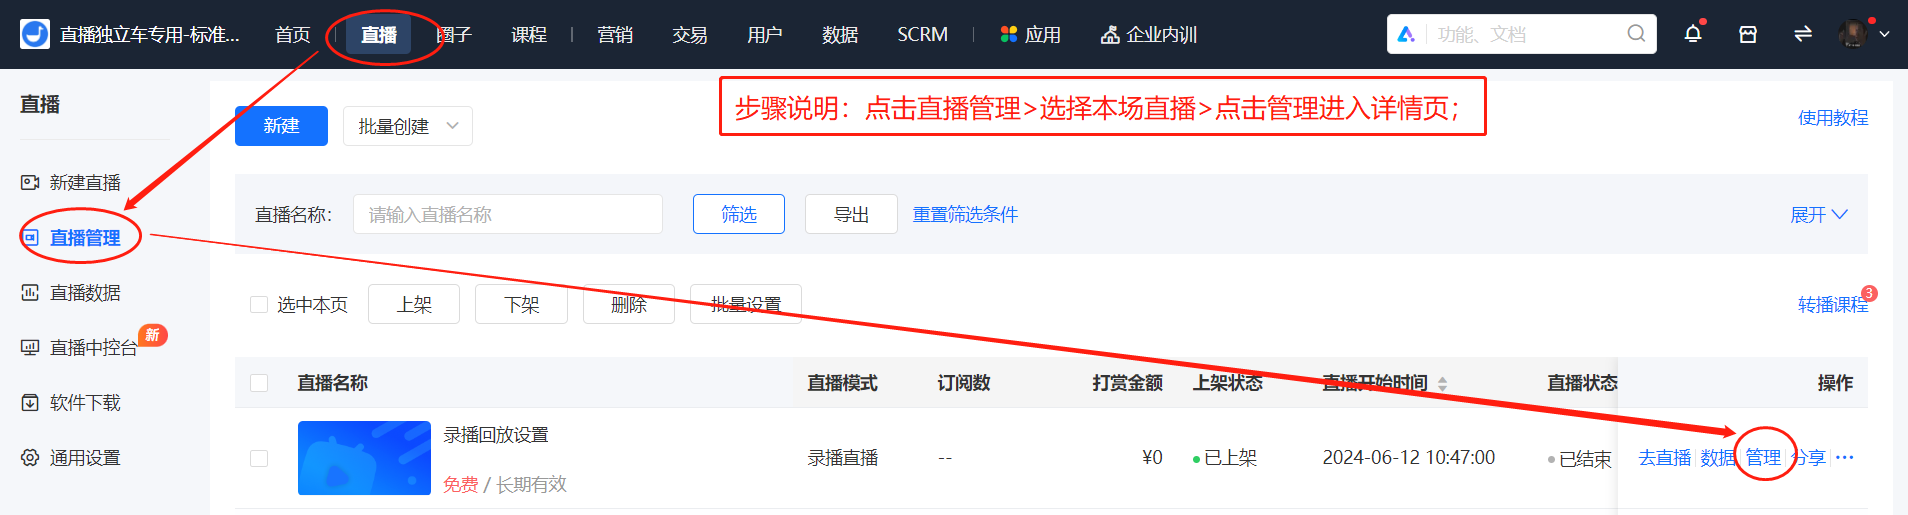
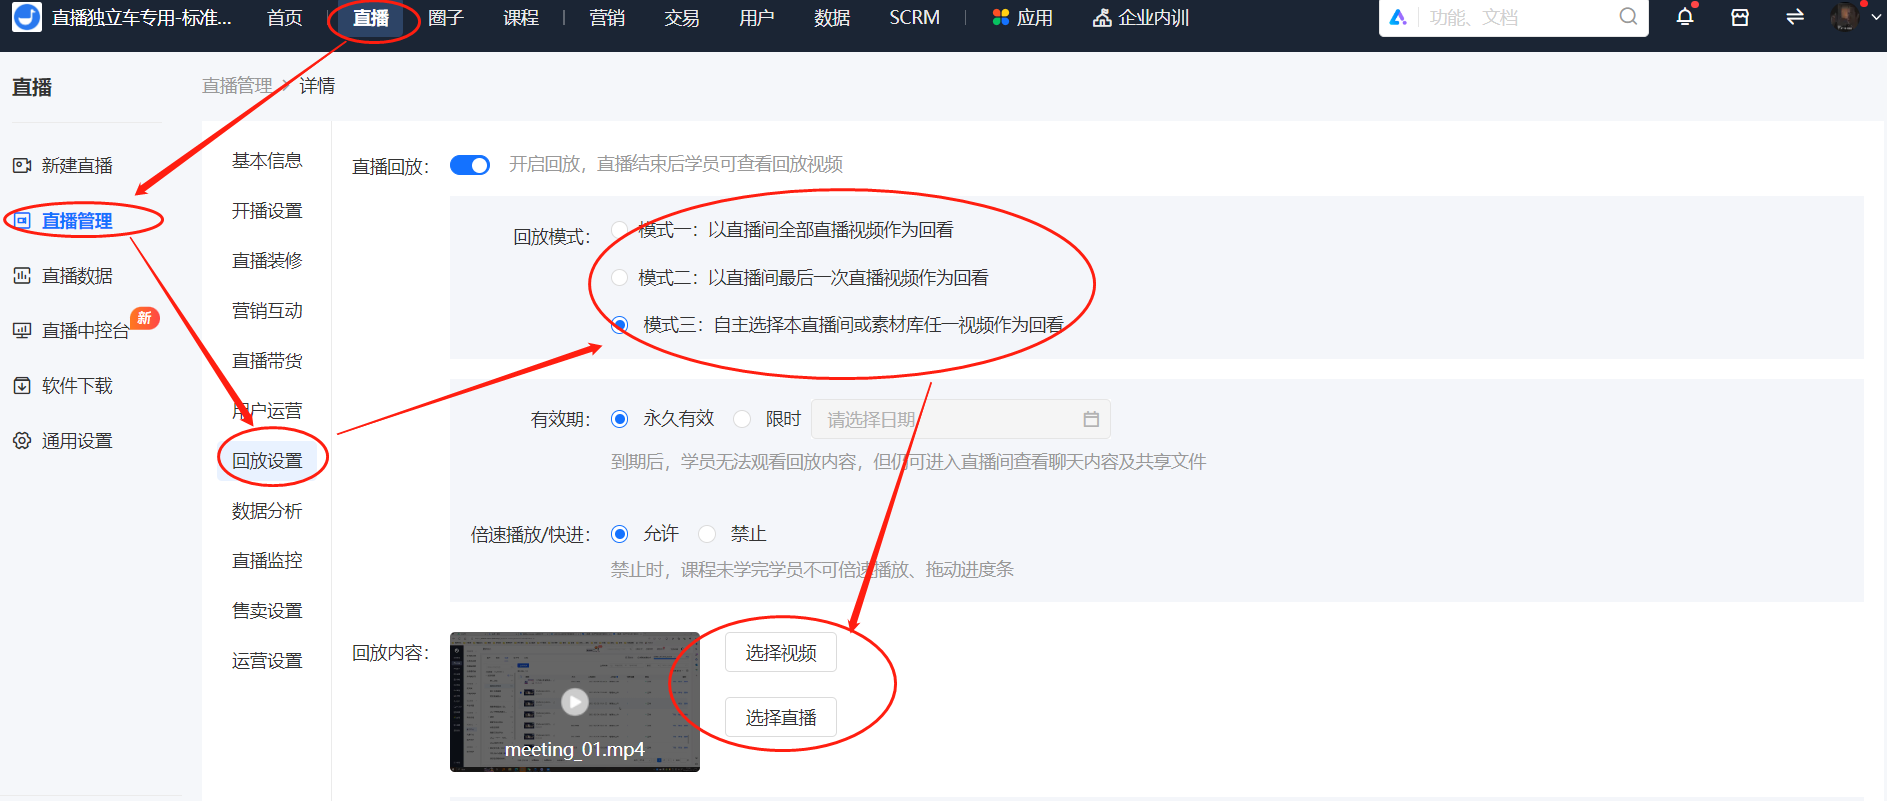
If your current recorded live streaming room was created on or after May 22, 2024, you can enter the playback settings via Live Streaming Management > and select from three modes. If you need to replace the previous live streaming playback video, you can select 【Mode 3】 and choose a video or a previously streamed live broadcast to replace the playback video. You can refer to the above guidance.
(If your live streaming room is a "Streamed Live Streaming Room" and was created after May 22, 2024, you can also modify the playback video using this method.)
Kind reminder: If you choose to reference a historical live broadcast, currently only live broadcasts created after June 1, 2024 are supported.
【Scenario 2】Recorded live streaming rooms created before May 22, 2024
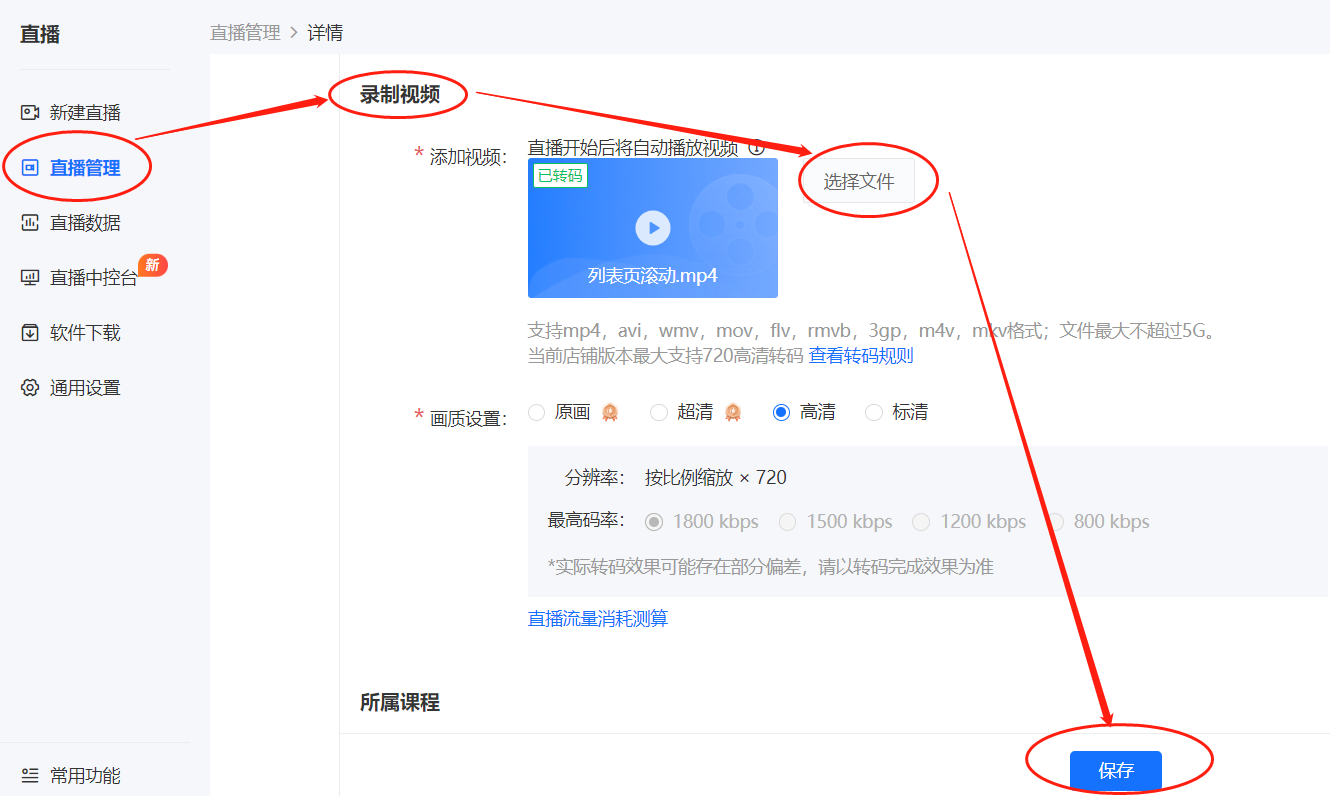
If your current recorded live streaming room was created before May 22, 2024, and you need to replace the playback video, you can click "Select File" on the live streaming details editing page, choose the video you want to replace, and after successful saving, once the transcoding is completed, the playback video that users watch in the live streaming room will be the newly replaced video. You can refer to the above guidance.
Live Streaming Management and Operation
Where is the entry for live streaming data?
Enter the live streaming list page. In the 'Details' section of the operation bar, click 'Data Analysis' to enter the data statistics page.
Will instructors and teaching assistants be counted in the live streaming data when they enter the live streaming room?
All users entering the live streaming room will be counted in the live streaming data.
What data can be collected for live courses in data analysis?
Live streaming session data: It can help review user interaction and stay duration during the session, facilitating subsequent adjustment of operational strategies.
Query path: Live streaming management > Data > Data analysis

Data content:
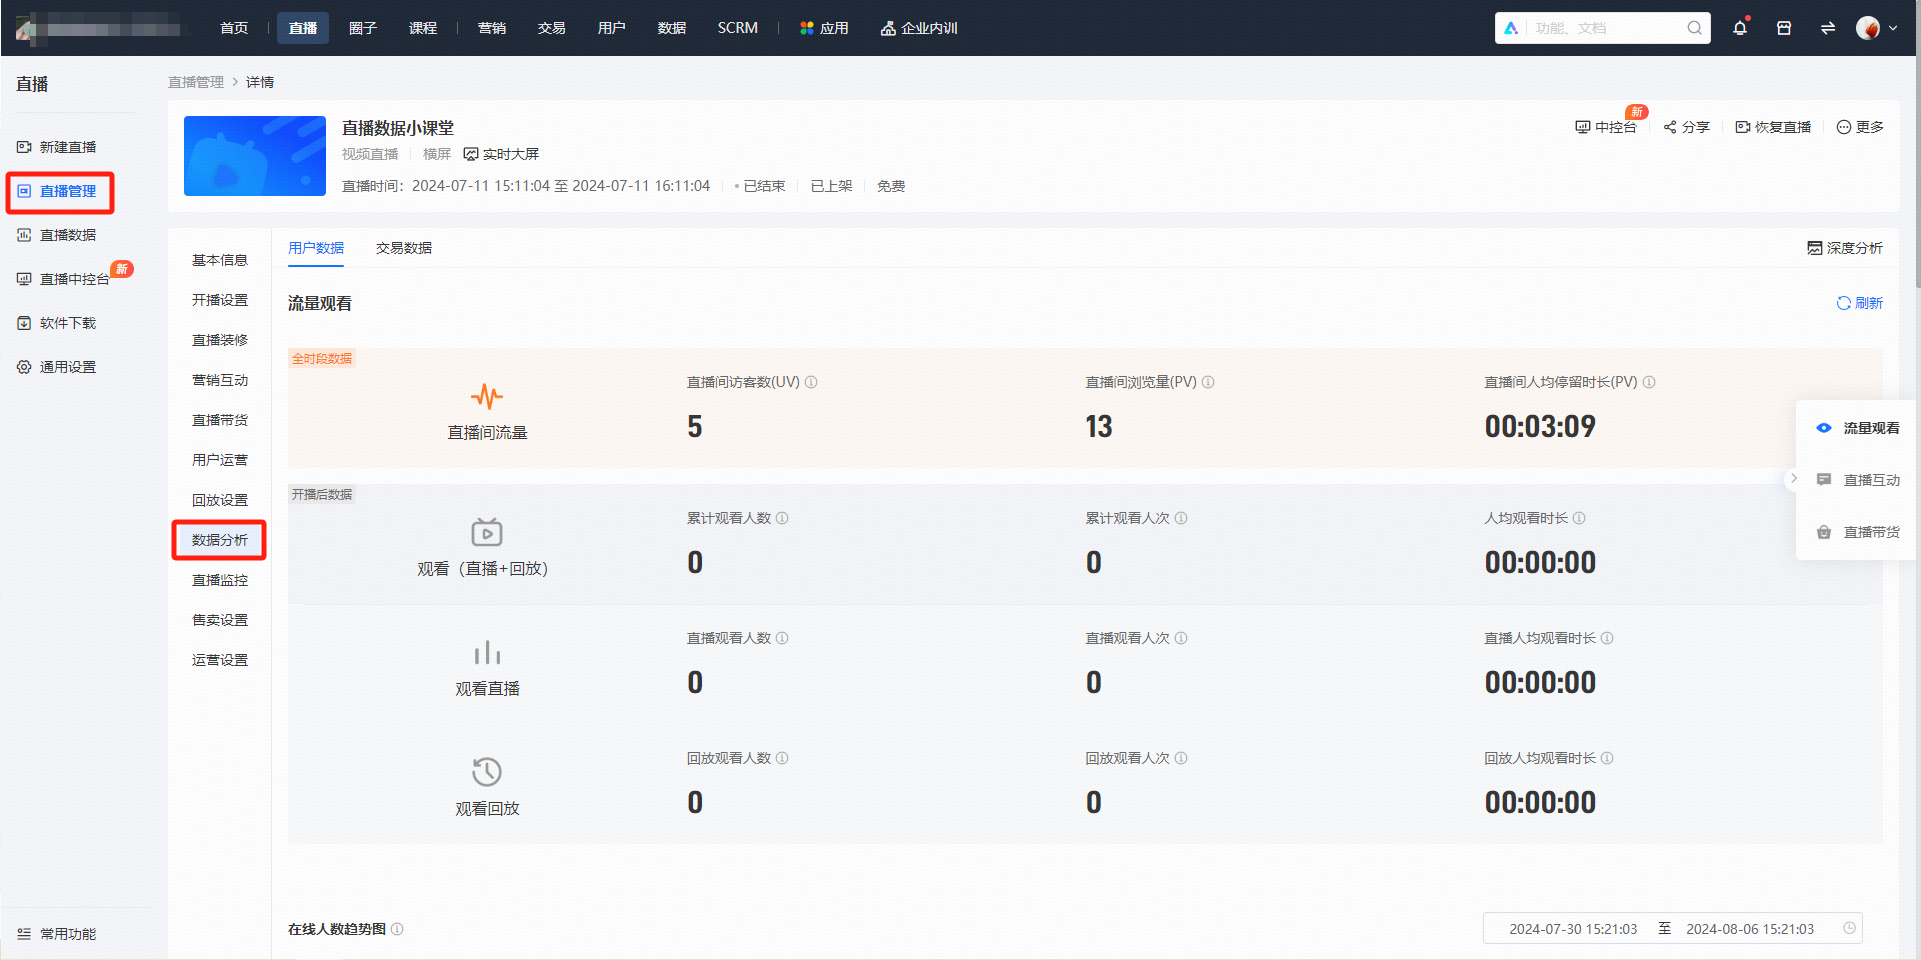
● Traffic viewing: Supports segmented viewing of UV, PV, and stay duration for both live streaming and playback scenarios.
○ For example, some merchants found that there was still a 20% increase in traffic after the live streaming ended. Analysis showed that this was due to students reviewing the playback and some new students. In response, the merchants set a playback password. Students need to share the link on their WeChat Moments and send a screenshot to obtain the password for viewing the playback, thereby retaining a lot of targeted traffic.

● Live streaming interaction: Supports viewing the performance of all marketing tools, including the influencer invitation leaderboard, share - to - win rewards, reservation, sign - in, tipping, red envelopes, lucky draws, voting, and questionnaires. All data supports one - click export. When exporting, you can freely select the specific user information you need to accurately improve the user profile.


● Live commerce: Supports viewing the sales efficiency of promoted products and coupons.
○ Combined with data such as the trend chart of online viewers and live streaming viewing details, it can targetedly improve the quality of live streaming. For example, analyze which time period has the most users and what kind of dialogue or live streaming format is more popular among the audience.
○ After the live streaming ends, the sales data of products can be summarized. This not only optimizes the product selection strategy but also allows popular products to be restocked for secondary sales. The number of product purchasers and the number of product views represent the conversion rate of the product. If the conversion rate is low, you can consider whether the selected products differ from the user profile and fail to attract users to purchase, or whether the cost - performance ratio of the unit price is not attractive enough to users, and update the product marketing activities.

Live streaming scenario data: It can compare the data performance of multiple live streaming sessions and adjust and optimize session strategies.
Query path: Live streaming data
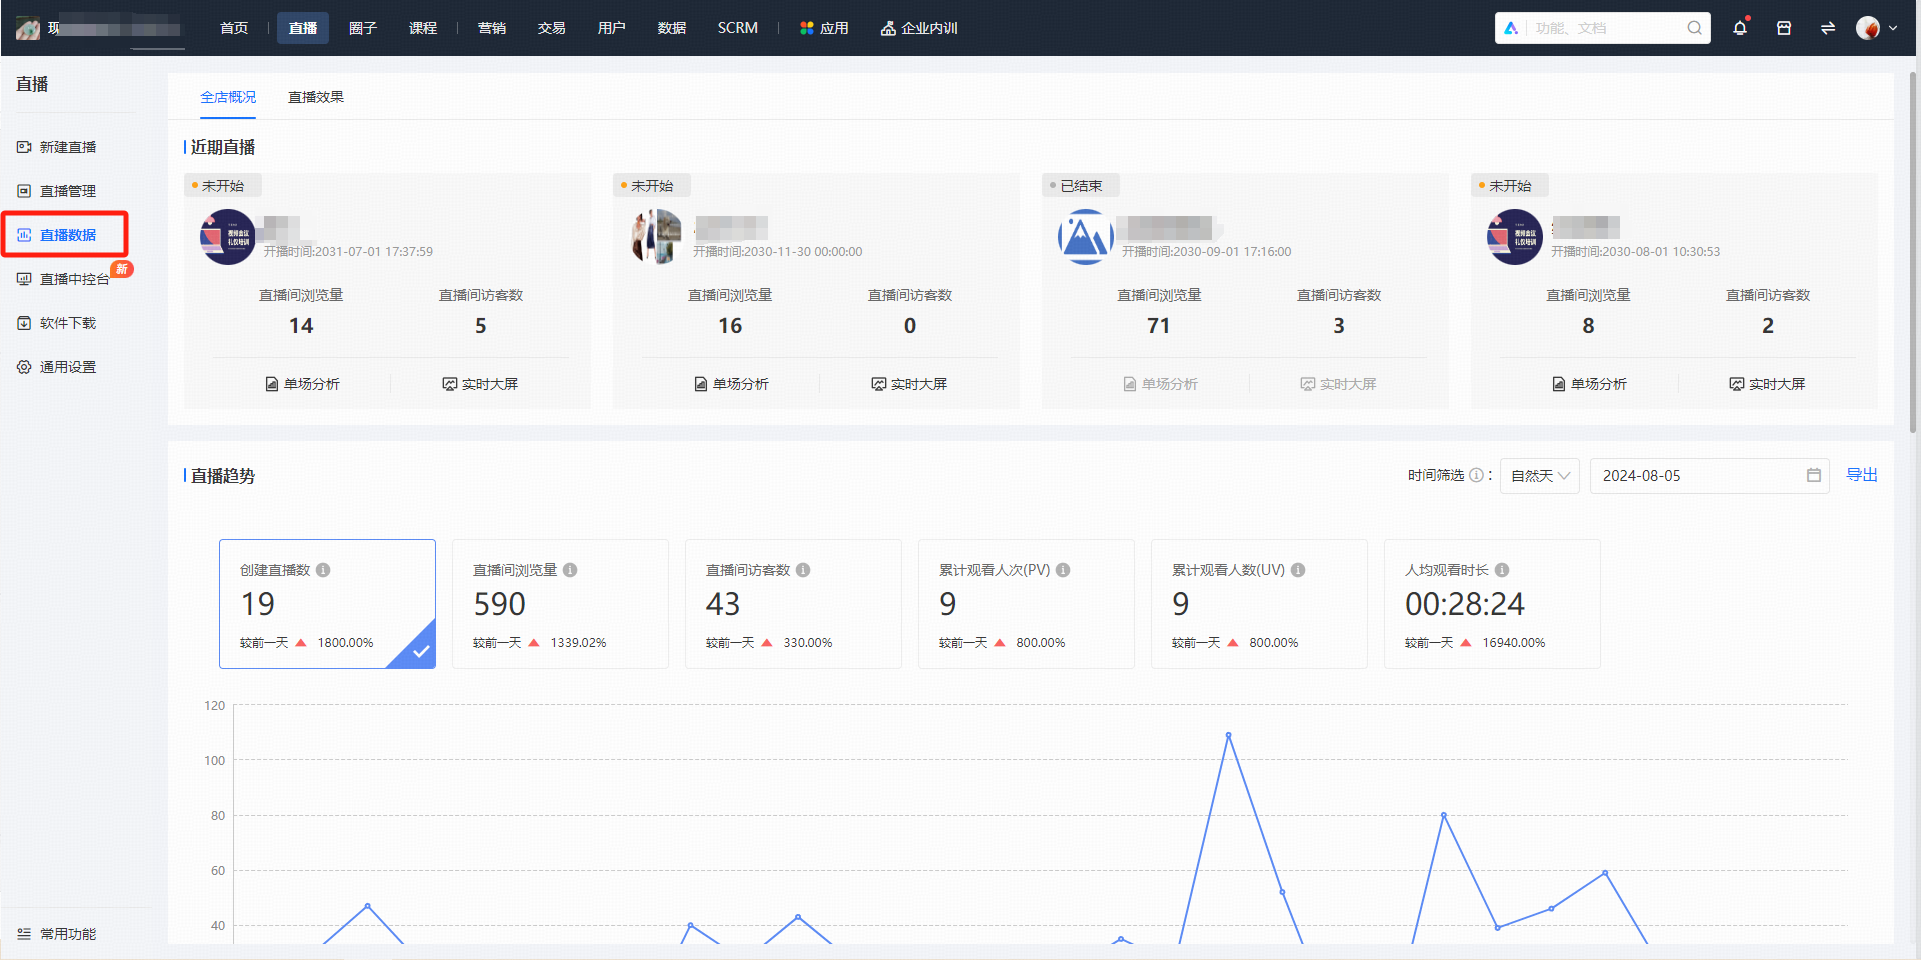
Data content:
● Live streaming trends: Supports filtering by natural days, natural weeks, natural months, and specific dates to meet the needs of data review at different granularities.
● Live streaming best - and - worst list: Intuitively shows users' preferences. Combined with session data, it can specifically analyze the audience profile, understand the user structure, and directionally adjust the live streaming content.


How are the live streaming data statistics calculated after the live streaming duration is edited?
无论原有直播当前处于什么直播状态,数据将按照直播间实际直播时间统计。
Does the live streaming data statistics include the entry method of users through the PC?
Users who enter the live streaming room through WeChat H5 or the PC version can be counted.
Currently, Mini Program versions below 3.0 do not support data statistics.
How is the data on the number of online viewers in the live streaming room calculated?
The total number of trainees who have entered the live streaming room since the creation of the live stream (updated every 2 minutes)
Can I view the time when students first entered the live streaming room and the duration of their viewing in the live streaming data?
Yes, you can view the time when the corresponding trainees first entered the live streaming room and the total viewing duration in the [Live Streaming Viewing Details] under [Details - Data Analysis - User Data].
How to display the newly created live stream on the homepage?
1. After creating a new live stream, select 'Publish'. Then, click to build the store homepage in [Store Management > Mobile > Store Homepage].
2. Click [Course Component > Live Stream] to add a live stream template. Select the corresponding live stream in [Live Stream Source > Manual Selection] on the right, and it will be displayed on the homepage.
* Note: [Default Rule] means that the first two latest live streams are displayed by default. Currently, live streams are sorted by live stream status and start time, in the order of [Ongoing Live Streams] - [Upcoming Live Streams] - [Ended Live Streams].
Can I see the real number of viewers in the live streaming room?
Yes, you can enter the live streaming list in the backend and click [Details > Data Analysis] to view the live streaming data.Among them, the cumulative number of online viewers (UV) is the actual number of unique viewers in the live streaming room.
If a promoter shares a poster to invite users to enter the live streaming room, will it be reflected in the Invited Influencer Ranking?
Yes, students who enter the live streaming room through the promoter's poster will also be counted in the number of invitees on the influencer leaderboard.
After entering the live course, why does the invitation card button sometimes appear and sometimes not?
If a paid live stream is changed to require an encryption method to enter, do users who have already purchased need to enter a password?
No, users who have purchased this live stream can enter without entering the password again.
Can the replay video be replaced after the live stream ends?
Yes, after the live video broadcast ends, you can edit and save the live replay content in the background, and then set the edited video as a new replay.
What should I do if the live streaming time exceeds the scheduled duration?
Scenario 1: If your live streaming duration exceeds the set time, don't worry. As long as the network remains stable, you can continue the live stream.
Note: In a video live stream, if the lecturer's teaching time has exceeded the current scheduled end time, to ensure the lecturer can proceed smoothly, it is recommended to appropriately extend the live streaming time before the scheduled end time to guarantee the smooth progress of the live stream.
Scenario 2:If your live streaming duration is less than the set time, you can manually end the current live stream by going to [Live Streaming - Live Stream Management - Live Stream List - More - End Live Stream].
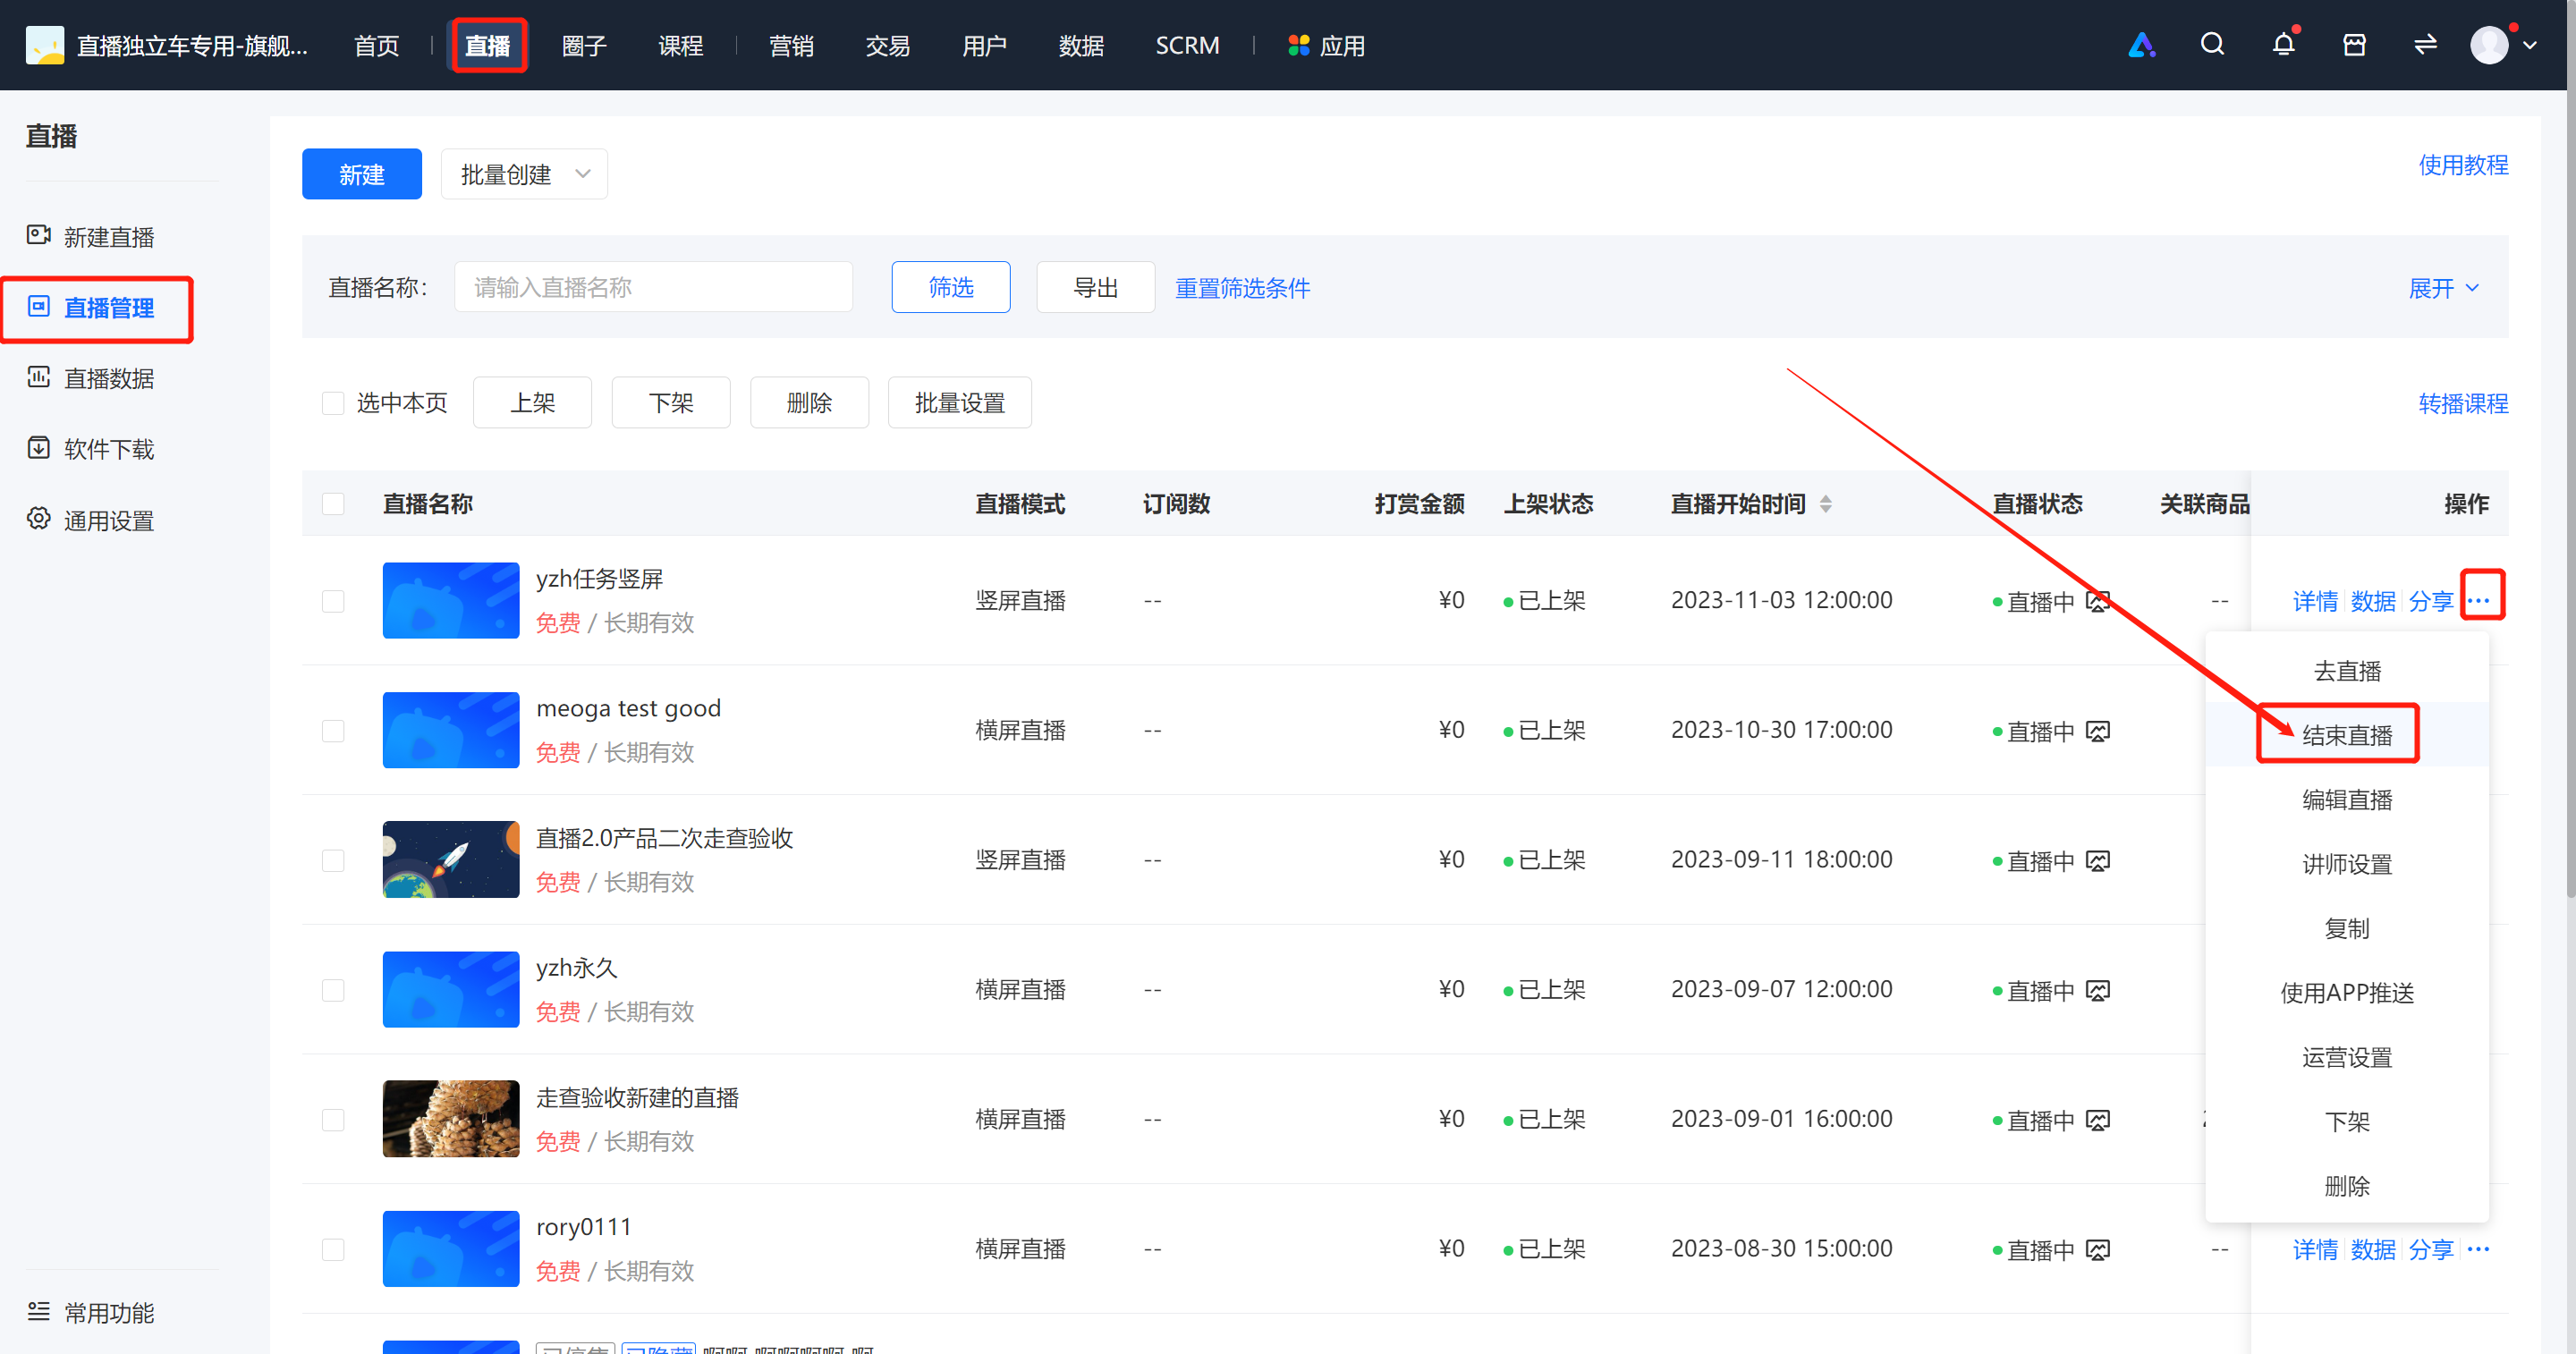
How can users watch the live replay in the C-end live streaming room?
Five minutes after the live stream ends, users can directly watch the live replay via the original live stream link.
Content Management
I.Function Introduction
After the live stream ends, for merchants who have enabled the replay feature and wish to share the content of voice live streams, we offer replay,+editing+download functions for video live streams, and a voice export function for voice live streams. This facilitates merchants in secondary management and reuse of their live stream content.
II.Purpose of Use
For video live stream merchants, once the replay is enabled, learners can replay the live stream repeatedly, enhancing the learning effect. Replay editing also helps merchants remove irrelevant footage from the live stream. Meanwhile, merchants can download the replay for secondary use.
For voice live stream merchants, after exporting the audio, they can create new audio courses, which is convenient for secondary use or further promotion.
III.Operation Path
Video Live Stream:Merchant backend → Live Stream → Details → Replay Settings → Live Stream Editing or Download
Voice Live Stream:Merchant side: Merchant backend → Live Stream → Details → Export Audio
IV. Usage Tutorial
1.Video Live Stream
Enter the 「Live Stream Details」, turn on the 「Live Stream Replay」. After turning it off,the live streamcourse page will not display the live stream replay video.
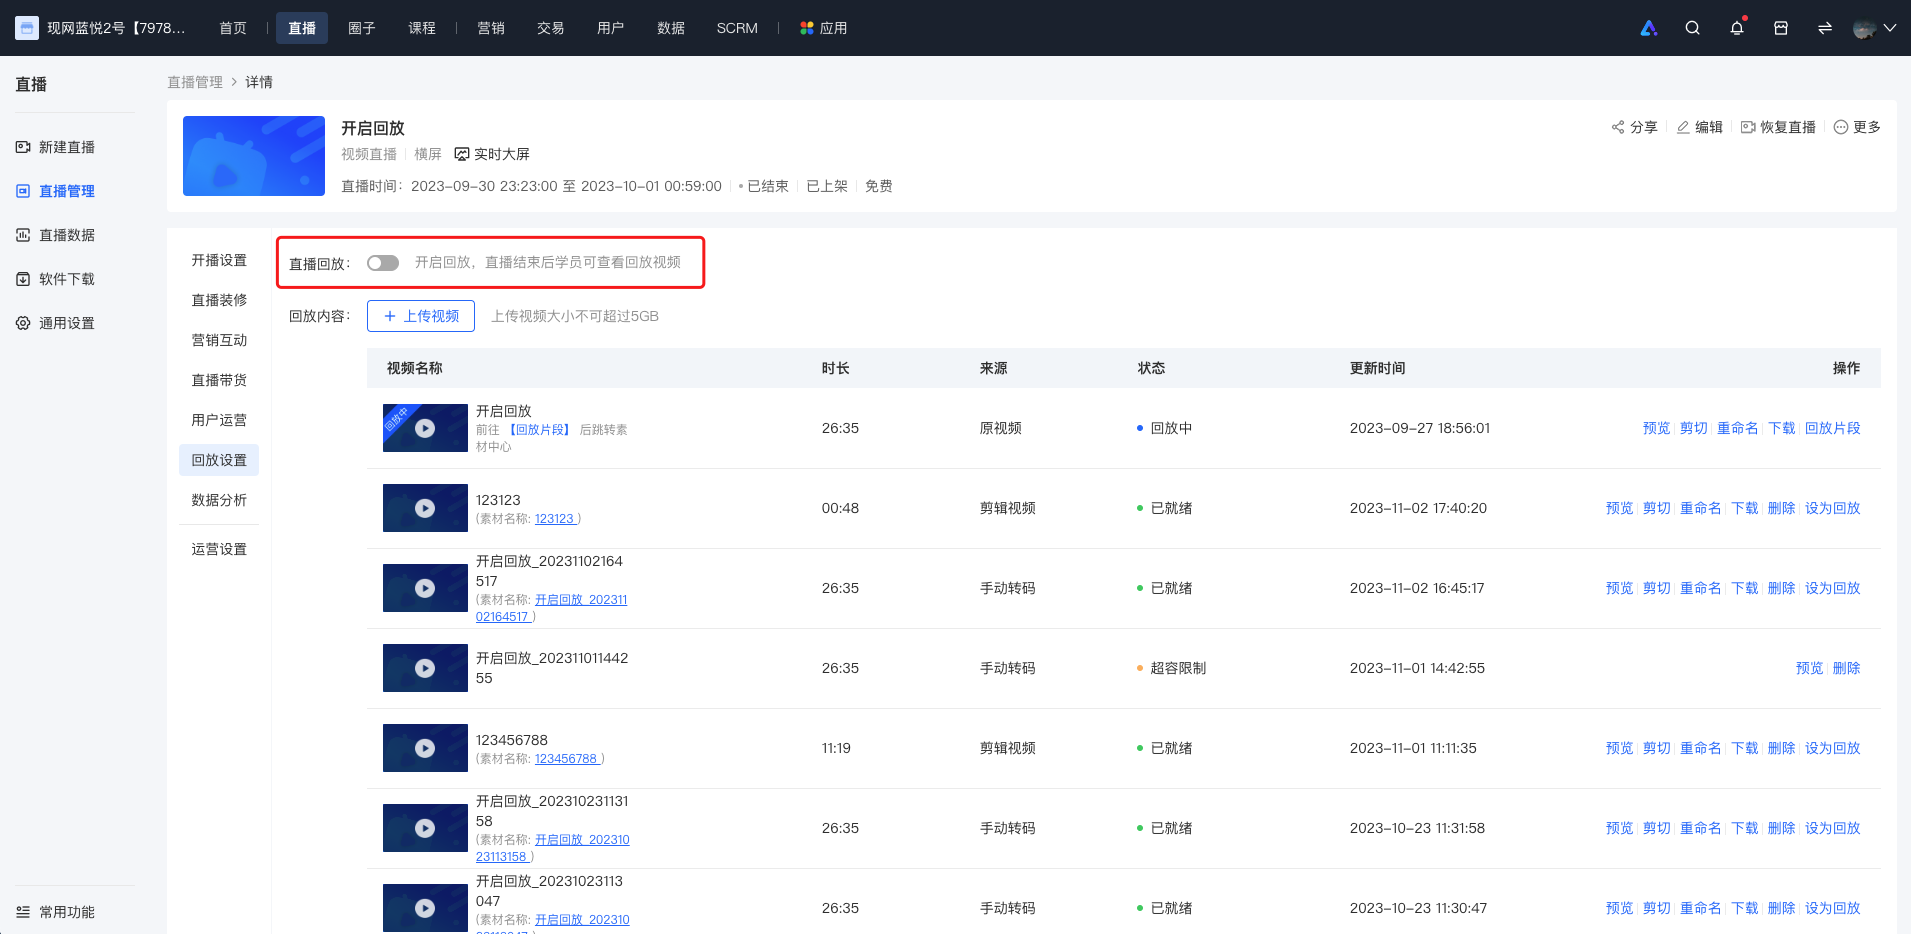
After the original video is transcoded, you can edit the original video in the operation section.
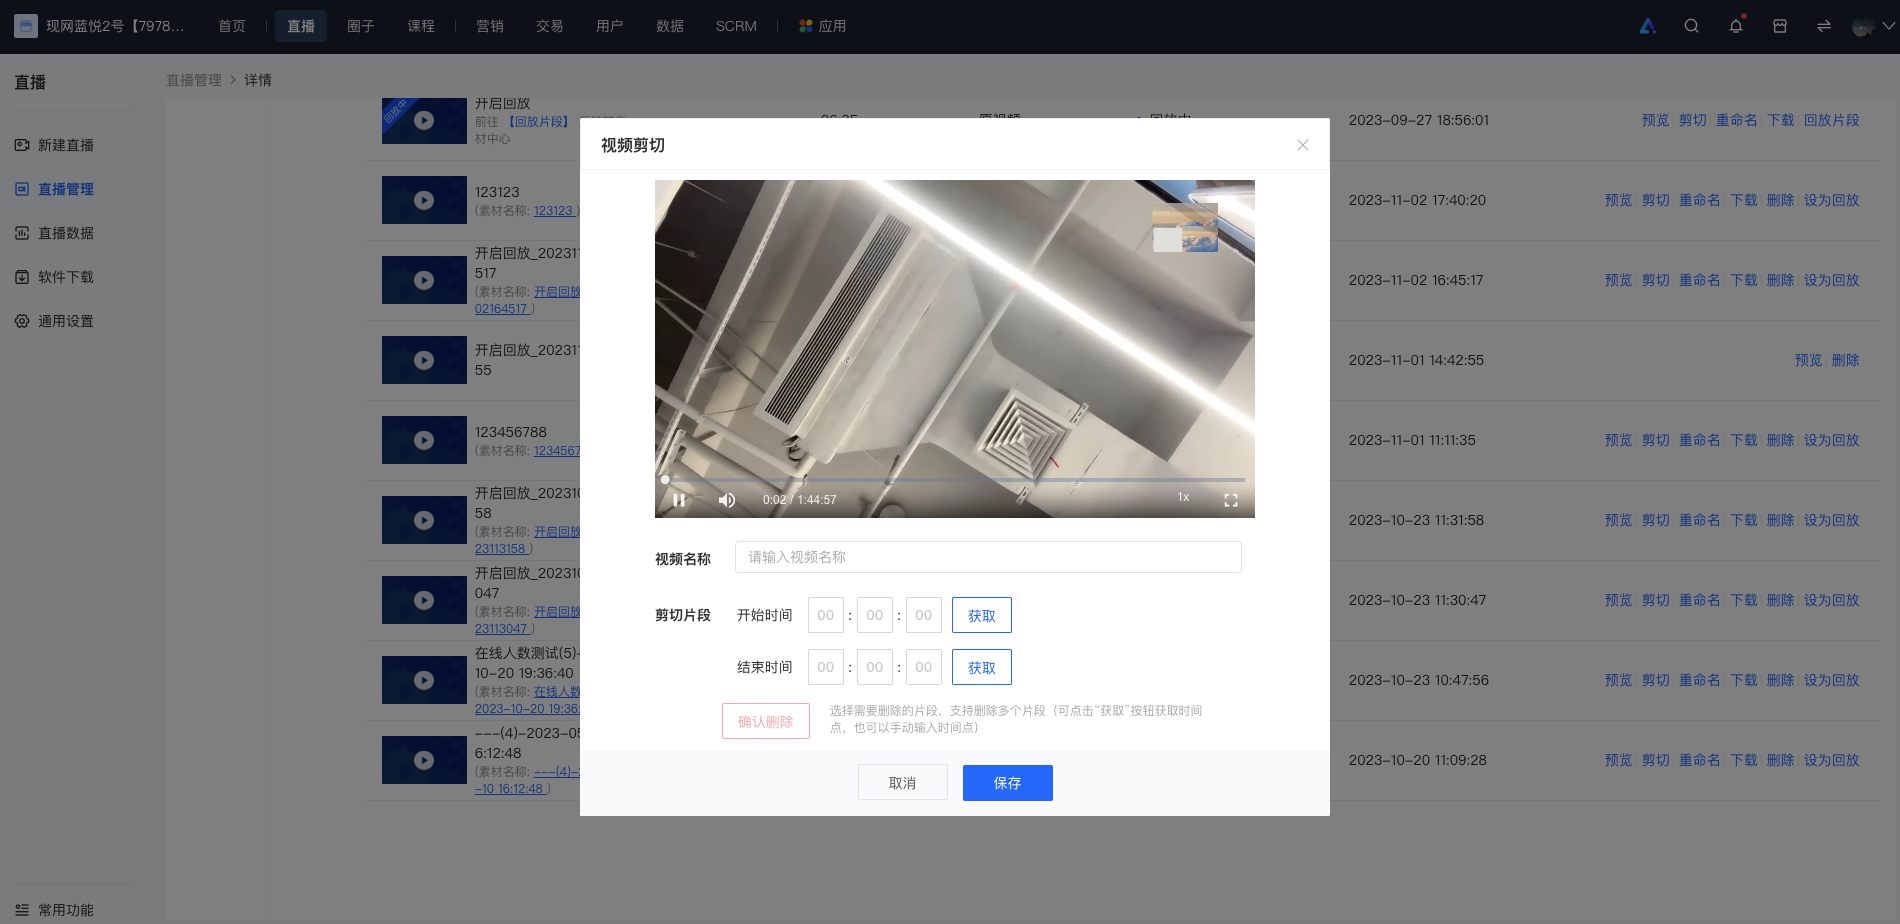
Editing Method1:Click “Get” to obtain the time point of the currently playing video. After selecting the start and end times, you can delete the segment.
Editing Method2:Manually enter the start and end time points. After entering, click “Delete Segment” to delete it.
Multiple segments can be deleted during video segment editing. Click “Save” to save the edited video.
Preview: Click “Preview” to preview the edited video/the original video.Click “Download” to download the
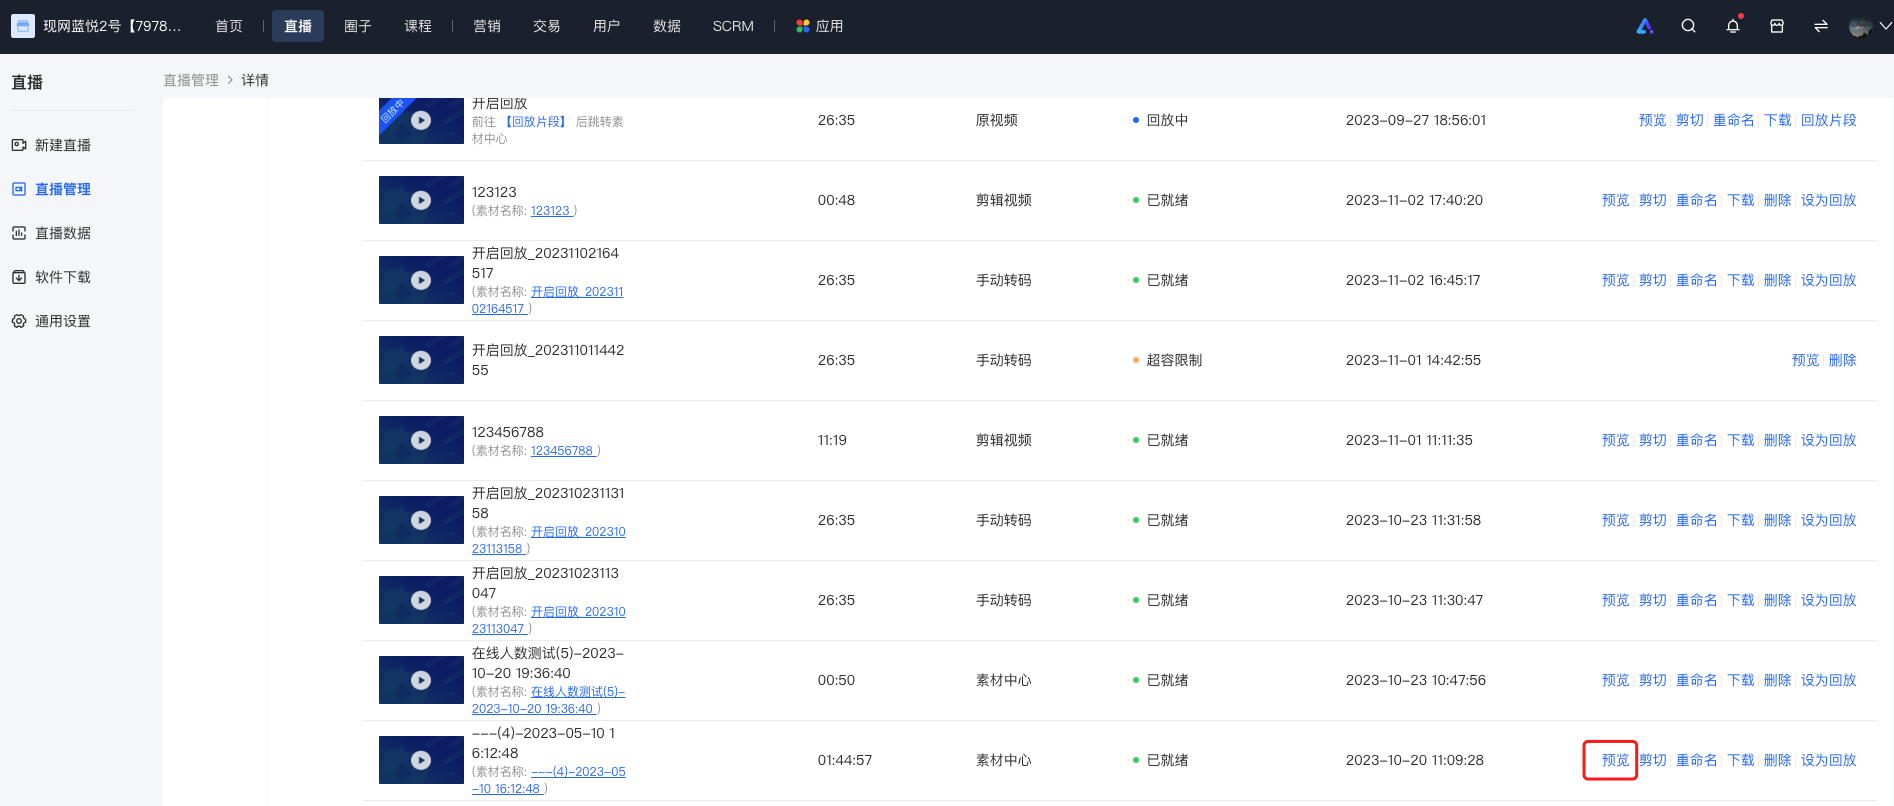
Click “Download” to downloadm3u8format live stream video.
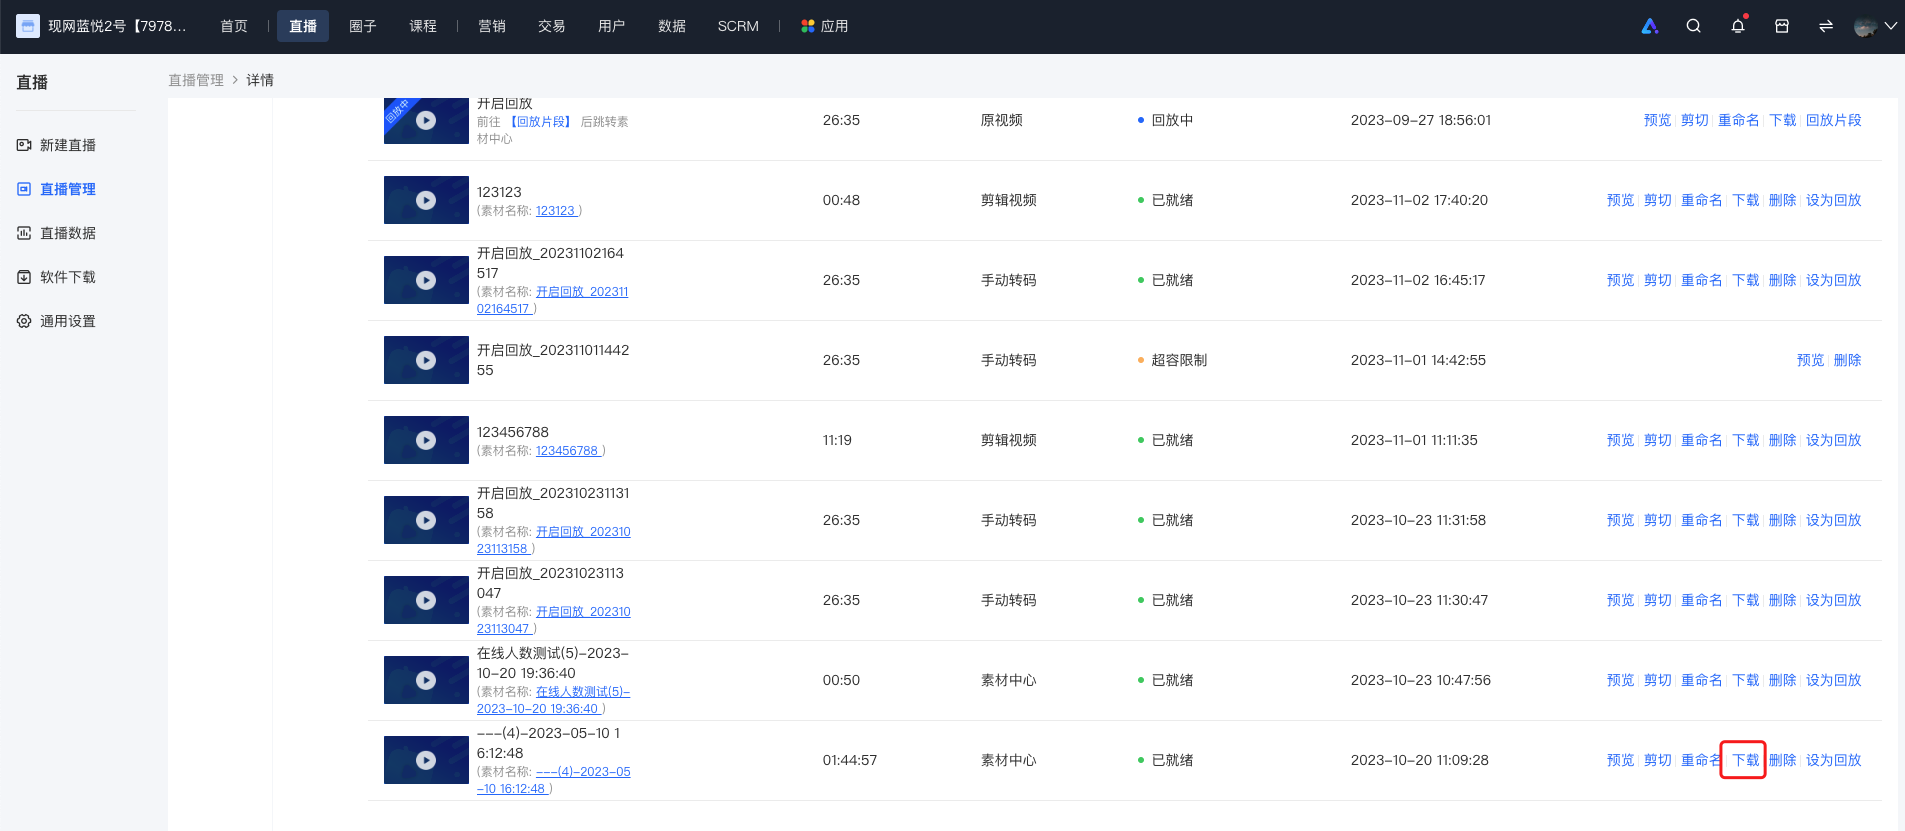
2.Voice Live Stream
Enter the 「Voice Details」 of the voice live stream, click “More” in the upper - right corner and select 「Export Audio」 to complete the audio export.
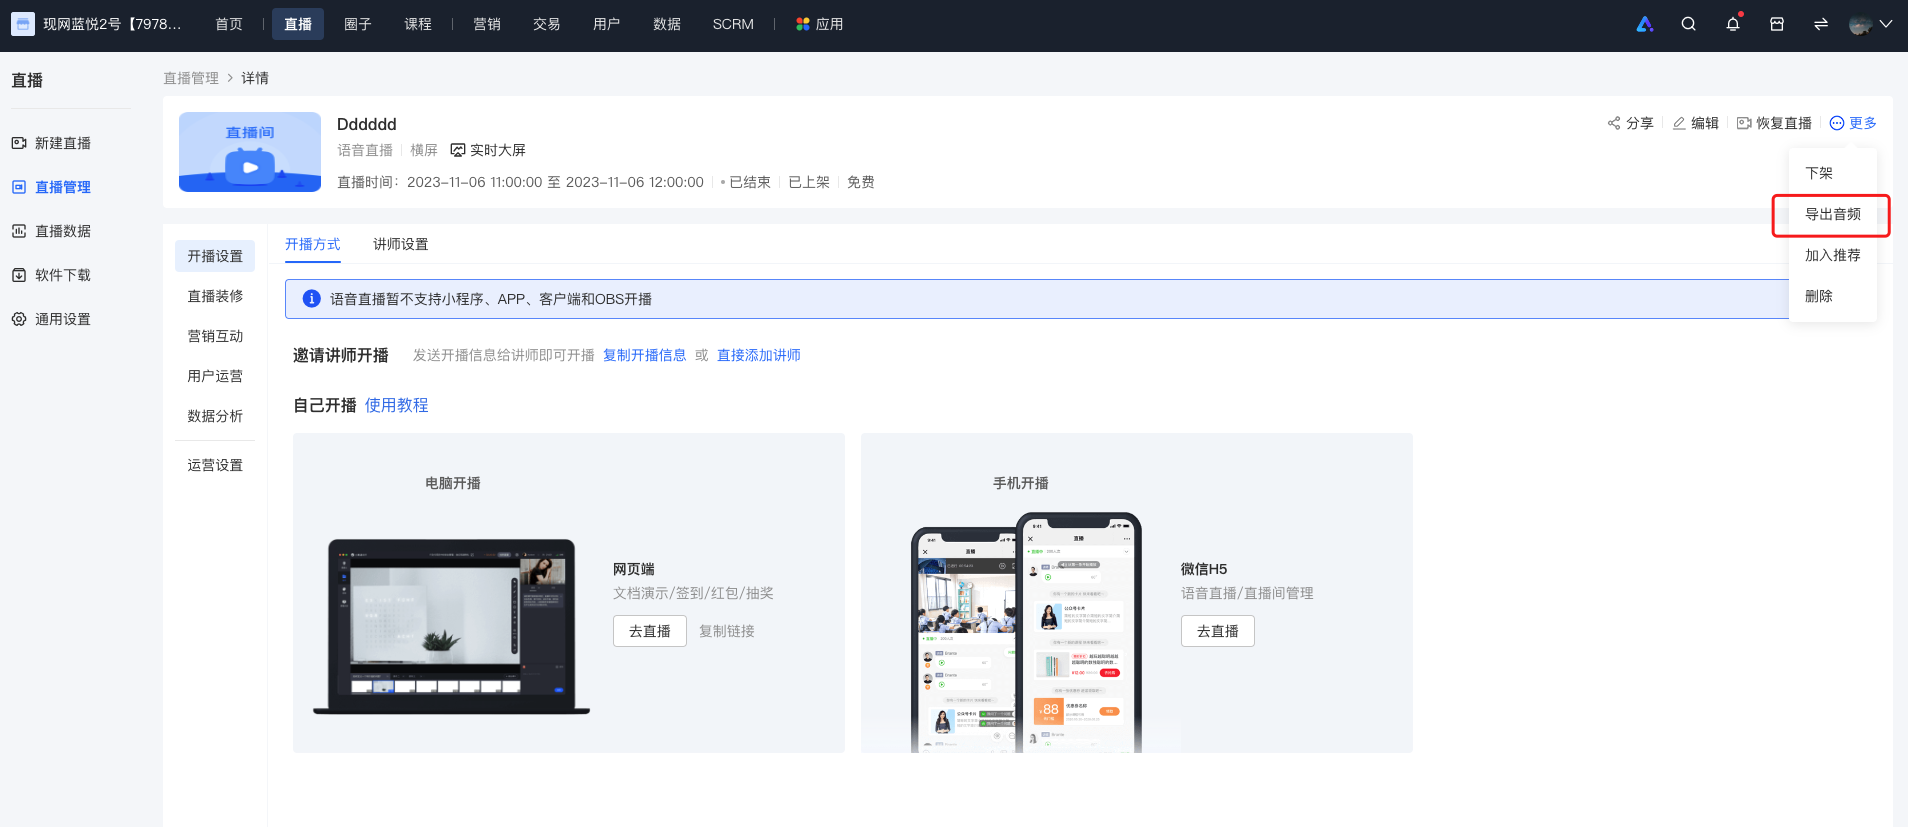
Data description of live commerce user management
1. In [Live Details - User Operations - User Management], the "Cumulative Points Earned" includes which types of points?
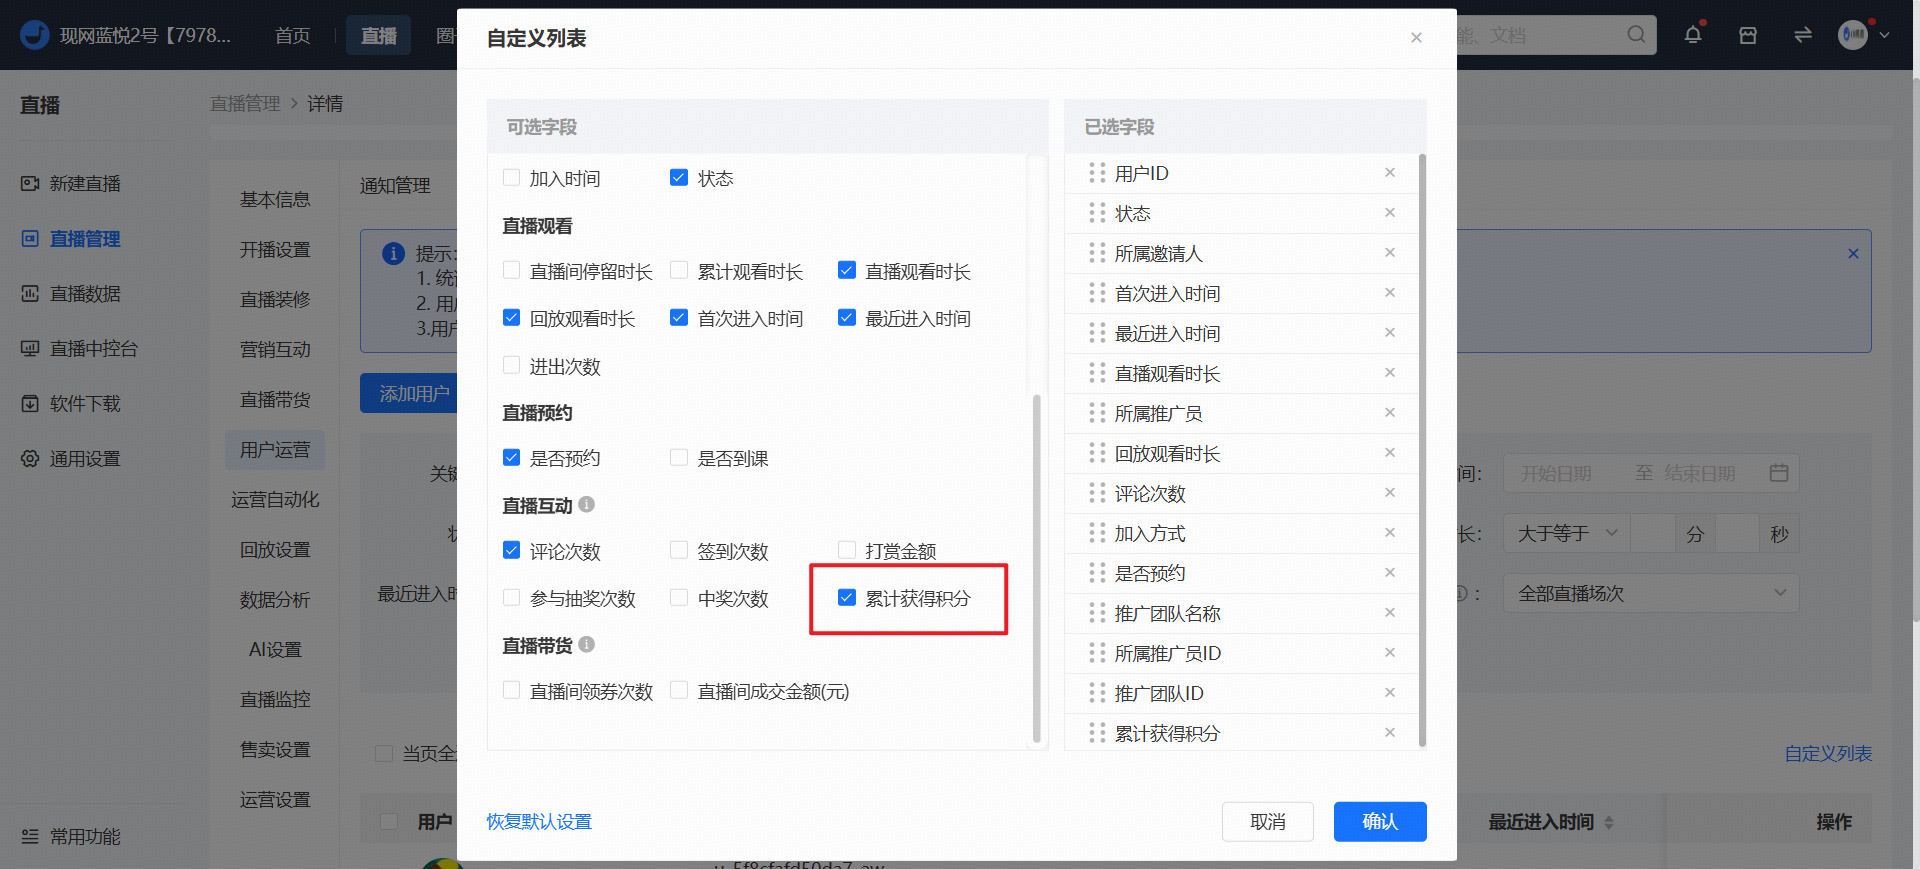
Data Clarification:This data refers to the total cumulative points earned by users in this live - streaming room, includingPoints won from lucky draws,Points rewards from tasks,Claimed point red envelopesandPoints rewards from participating in share - to - win campaigns.
Note:This data - the cumulative points earned during the live stream - is counted starting from 00:00 on August 9, 2024. Points earned by users in the live - streaming room before this time will not be included in the statistics.
Appendix: The following circled point - issuing functions will be included in the statistics
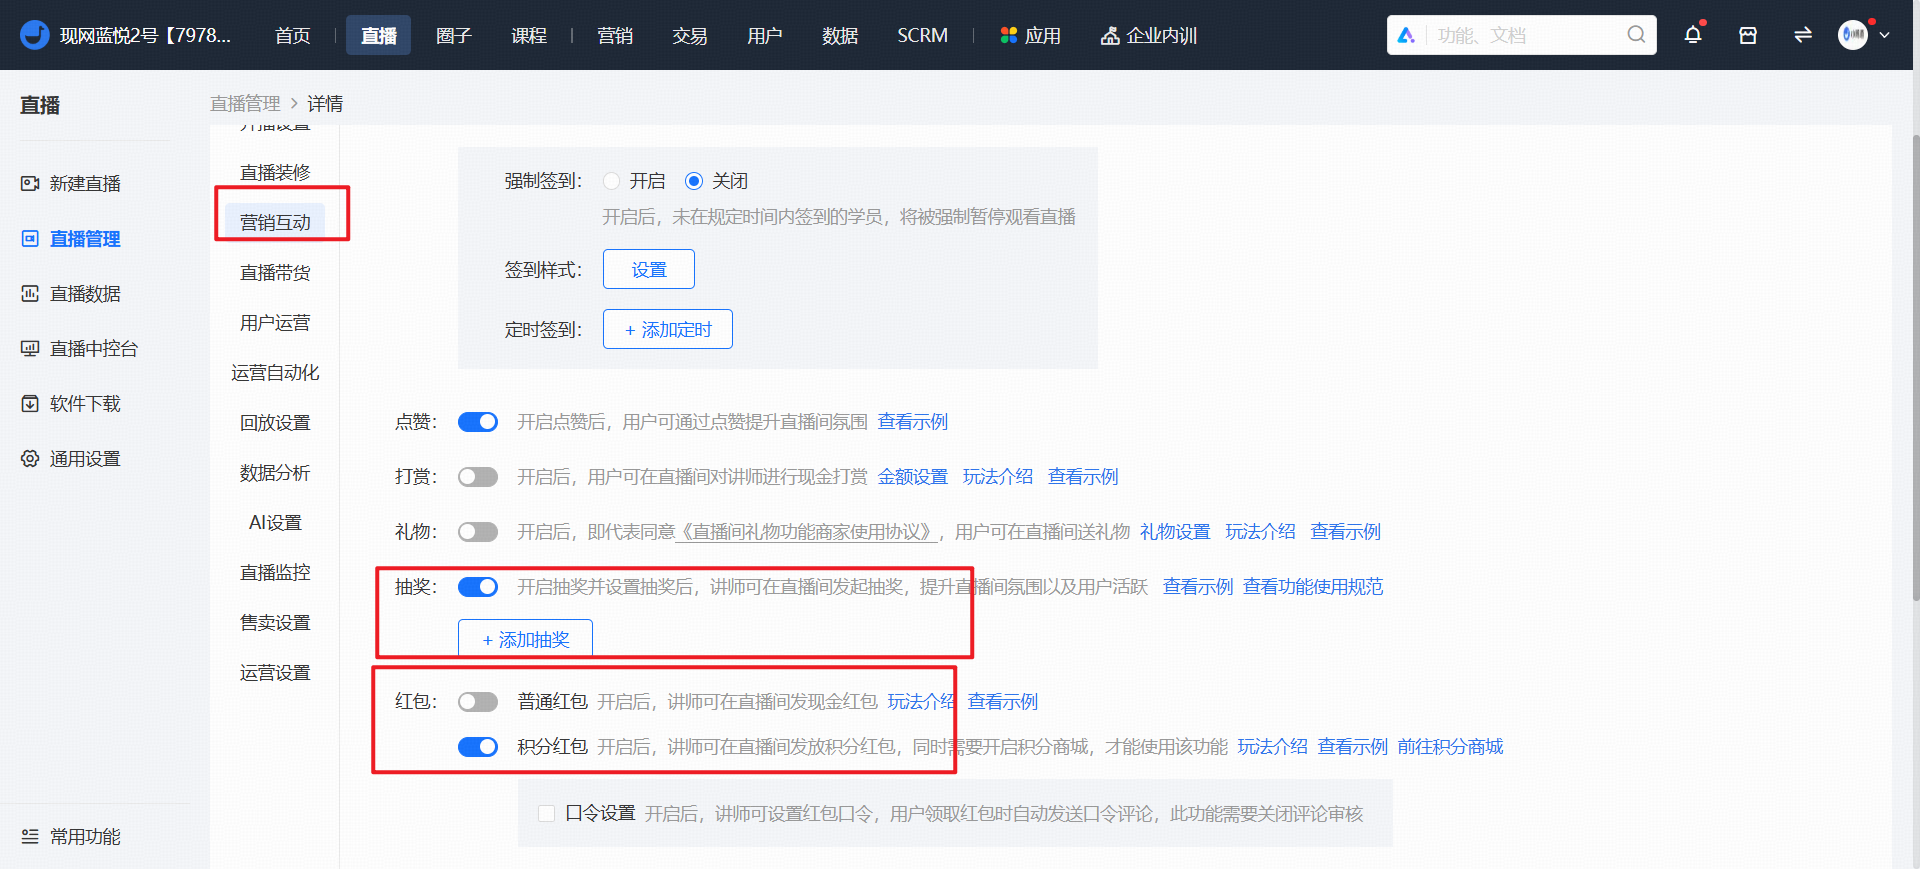
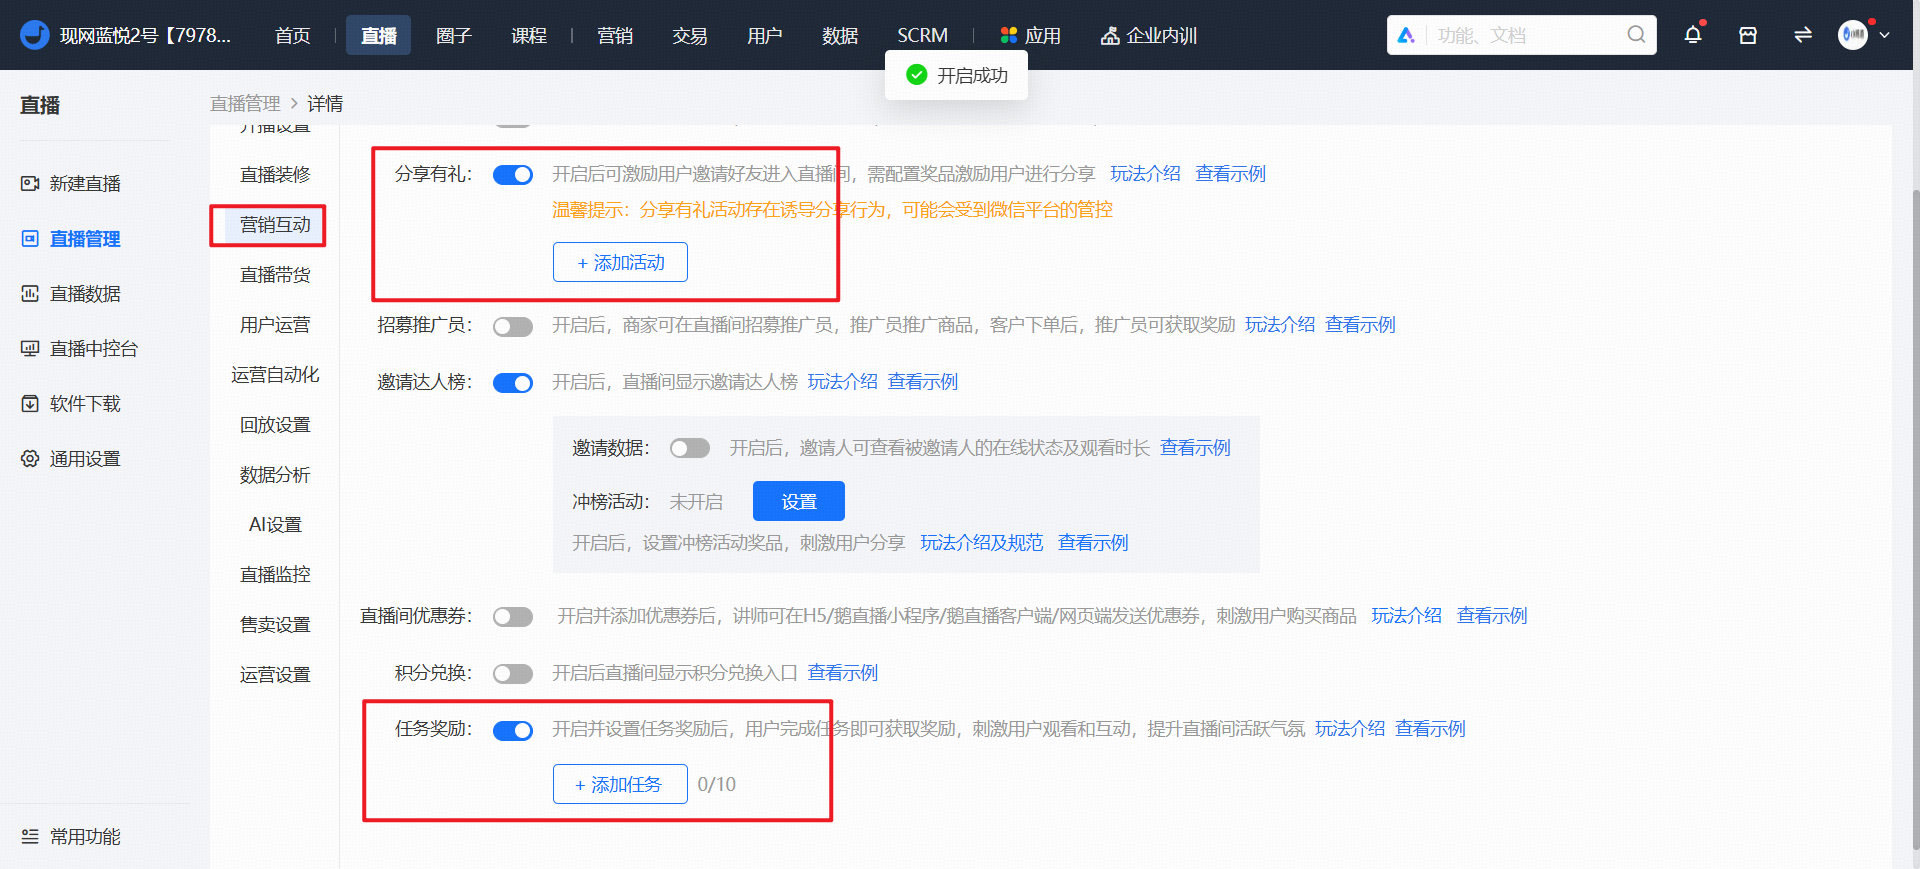
Live marketing interaction
What is the statistical principle of the Invitation Influencer Ranking?
1. Free courses:The number of users who enter the live streaming details page through the live streaming courses, live streaming links, and poster QR codes directly shared by the inviter.
2. Paid courses:The number of users who successfully place orders through the live streaming courses, live streaming links, and poster QR codes directly shared by the inviter.
Note:
1) Orders placed at 0 yuan after coupon deduction are excluded.
2) The purchase quantity of buy - get - free orders will be accumulated in the number of invited users, but the lists of buyers and recipients of buy - get - free orders will not be exported.
Are there any requirements for the mobile phone to download files during live streaming?
No requirements
Why can't I record voice during a live stream on the PC?
1. First, check if your computer's microphone can record audio properly.
2. Check if Google Chrome has granted access to the microphone for voice input and if the Flash plugin is allowed to be used. You can enable these settings within the browser.
3. Check if your current browser version is the latest version of Google Chrome.
Can external links be posted in the live streaming room?
External links can be sent.
1. Links sent by instructors:Clicking on a link in the live streaming room will redirect to the page of that link.(This feature is available in the H5 live streaming room and is not currently supported on other platforms.)
2. Links sent by students:Only sending links is supported. Clicking on the links to redirect is not supported.
Can instructors only send voice messages when the live stream starts?
After creating a live streaming room, instructors can enter the room and start the live stream in advance without waiting for the scheduled start time.
Can the instructor continue the lecture after the set live streaming duration has ended?
Yes. After the set live streaming time arrives, as long as the instructor is still conducting normal live streaming within the live room, the system will not automatically end the live stream. The instructor can still continue teaching, and students can still view the instructor's teaching footage.
Note: In the case of video live streaming, if the instructor's teaching time has exceeded the current live stream end time, to ensure that the instructor can continue smoothly, it is recommended to appropriately extend the live streaming time before the end of the set live streaming time to guarantee the smooth progress of the live stream.
Can the user speak in the next live stream after being muted?
The instructor can mute a specific student in a live streaming room. This mute only applies to the current live streaming room, and the student can speak normally when accessing other live streaming rooms.
How to prevent users from discussing during a live stream?
1. Instructors or guests can click [Operations] in the bottom right corner of the live streaming room on the mobile app and enable [Mute Students Mode]. After enabling this mode, all users will be unable to post messages in the discussion area.
2. Instructors can click the [Operations] button in the top right corner of the live streaming room on the PC browser to enable [Mute Mode].
3. Instructors can mute students on the elink Live client.
Mute a single student
Find the student's card, click "More - Mute". The mute will take effect after confirmation.
Click "More - Unmute" again. The student will be unmuted after confirmation.
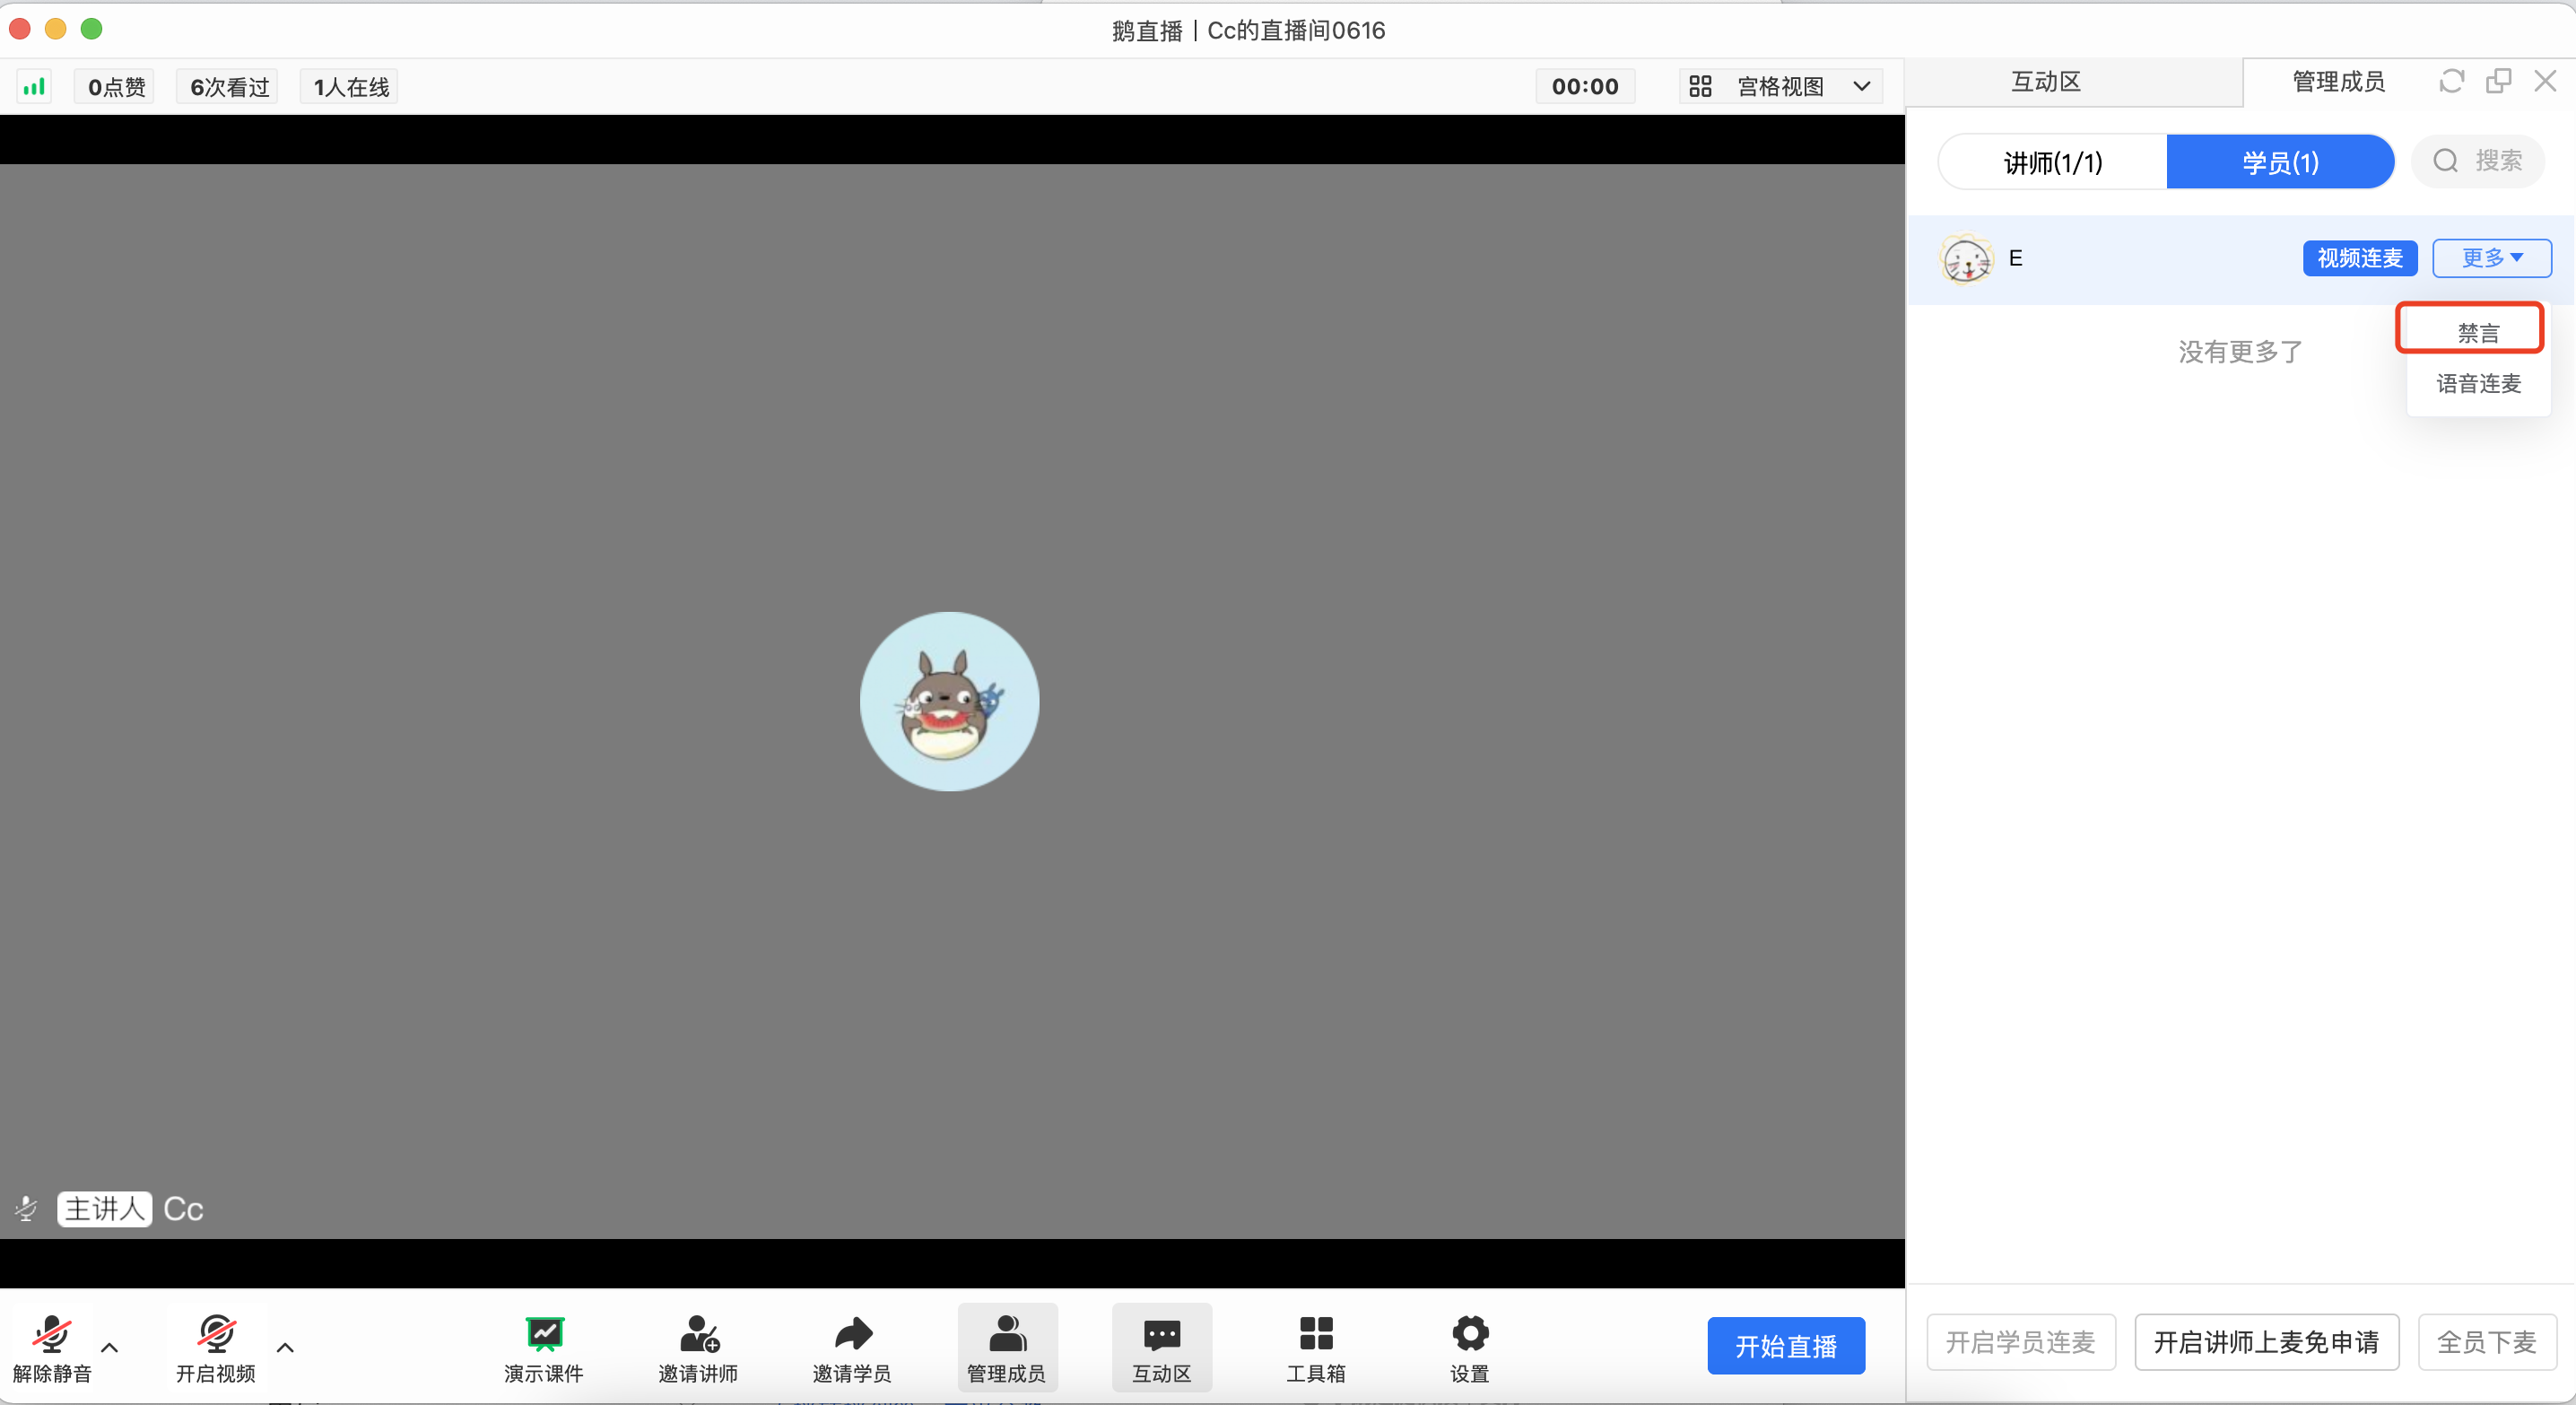
Mute all students
Open the "Interaction Area", click the three dots of "More". After confirming to enable the "Mute Students Mode", all students will be muted.
When the "Mute All Students" mode is enabled, a single student cannot speak even if unmuted.

How to restore the live streaming room after the instructor has enabled the mute mode?
The live chat mute mode applies to all students in the live room. Currently, the supported live broadcast ports are: Web, eLive Client, elink Assistant PC Client, elink Assistant App, and H5.
1. Webelink Assistant PC Client:Click [Operations] in the discussion area on the right and turn off the [Mute Mode] button.
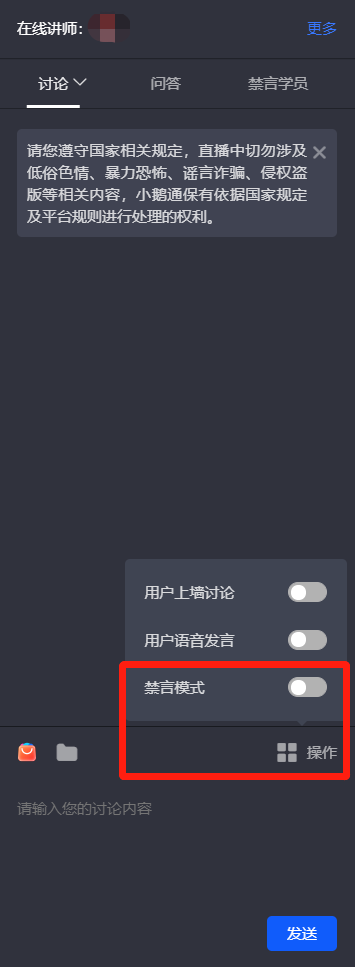
eLive Client
Open the "Interaction Area", click the three dots for "More", and confirm to turn off the "Student Mute Mode" to cancel the mute for all students.
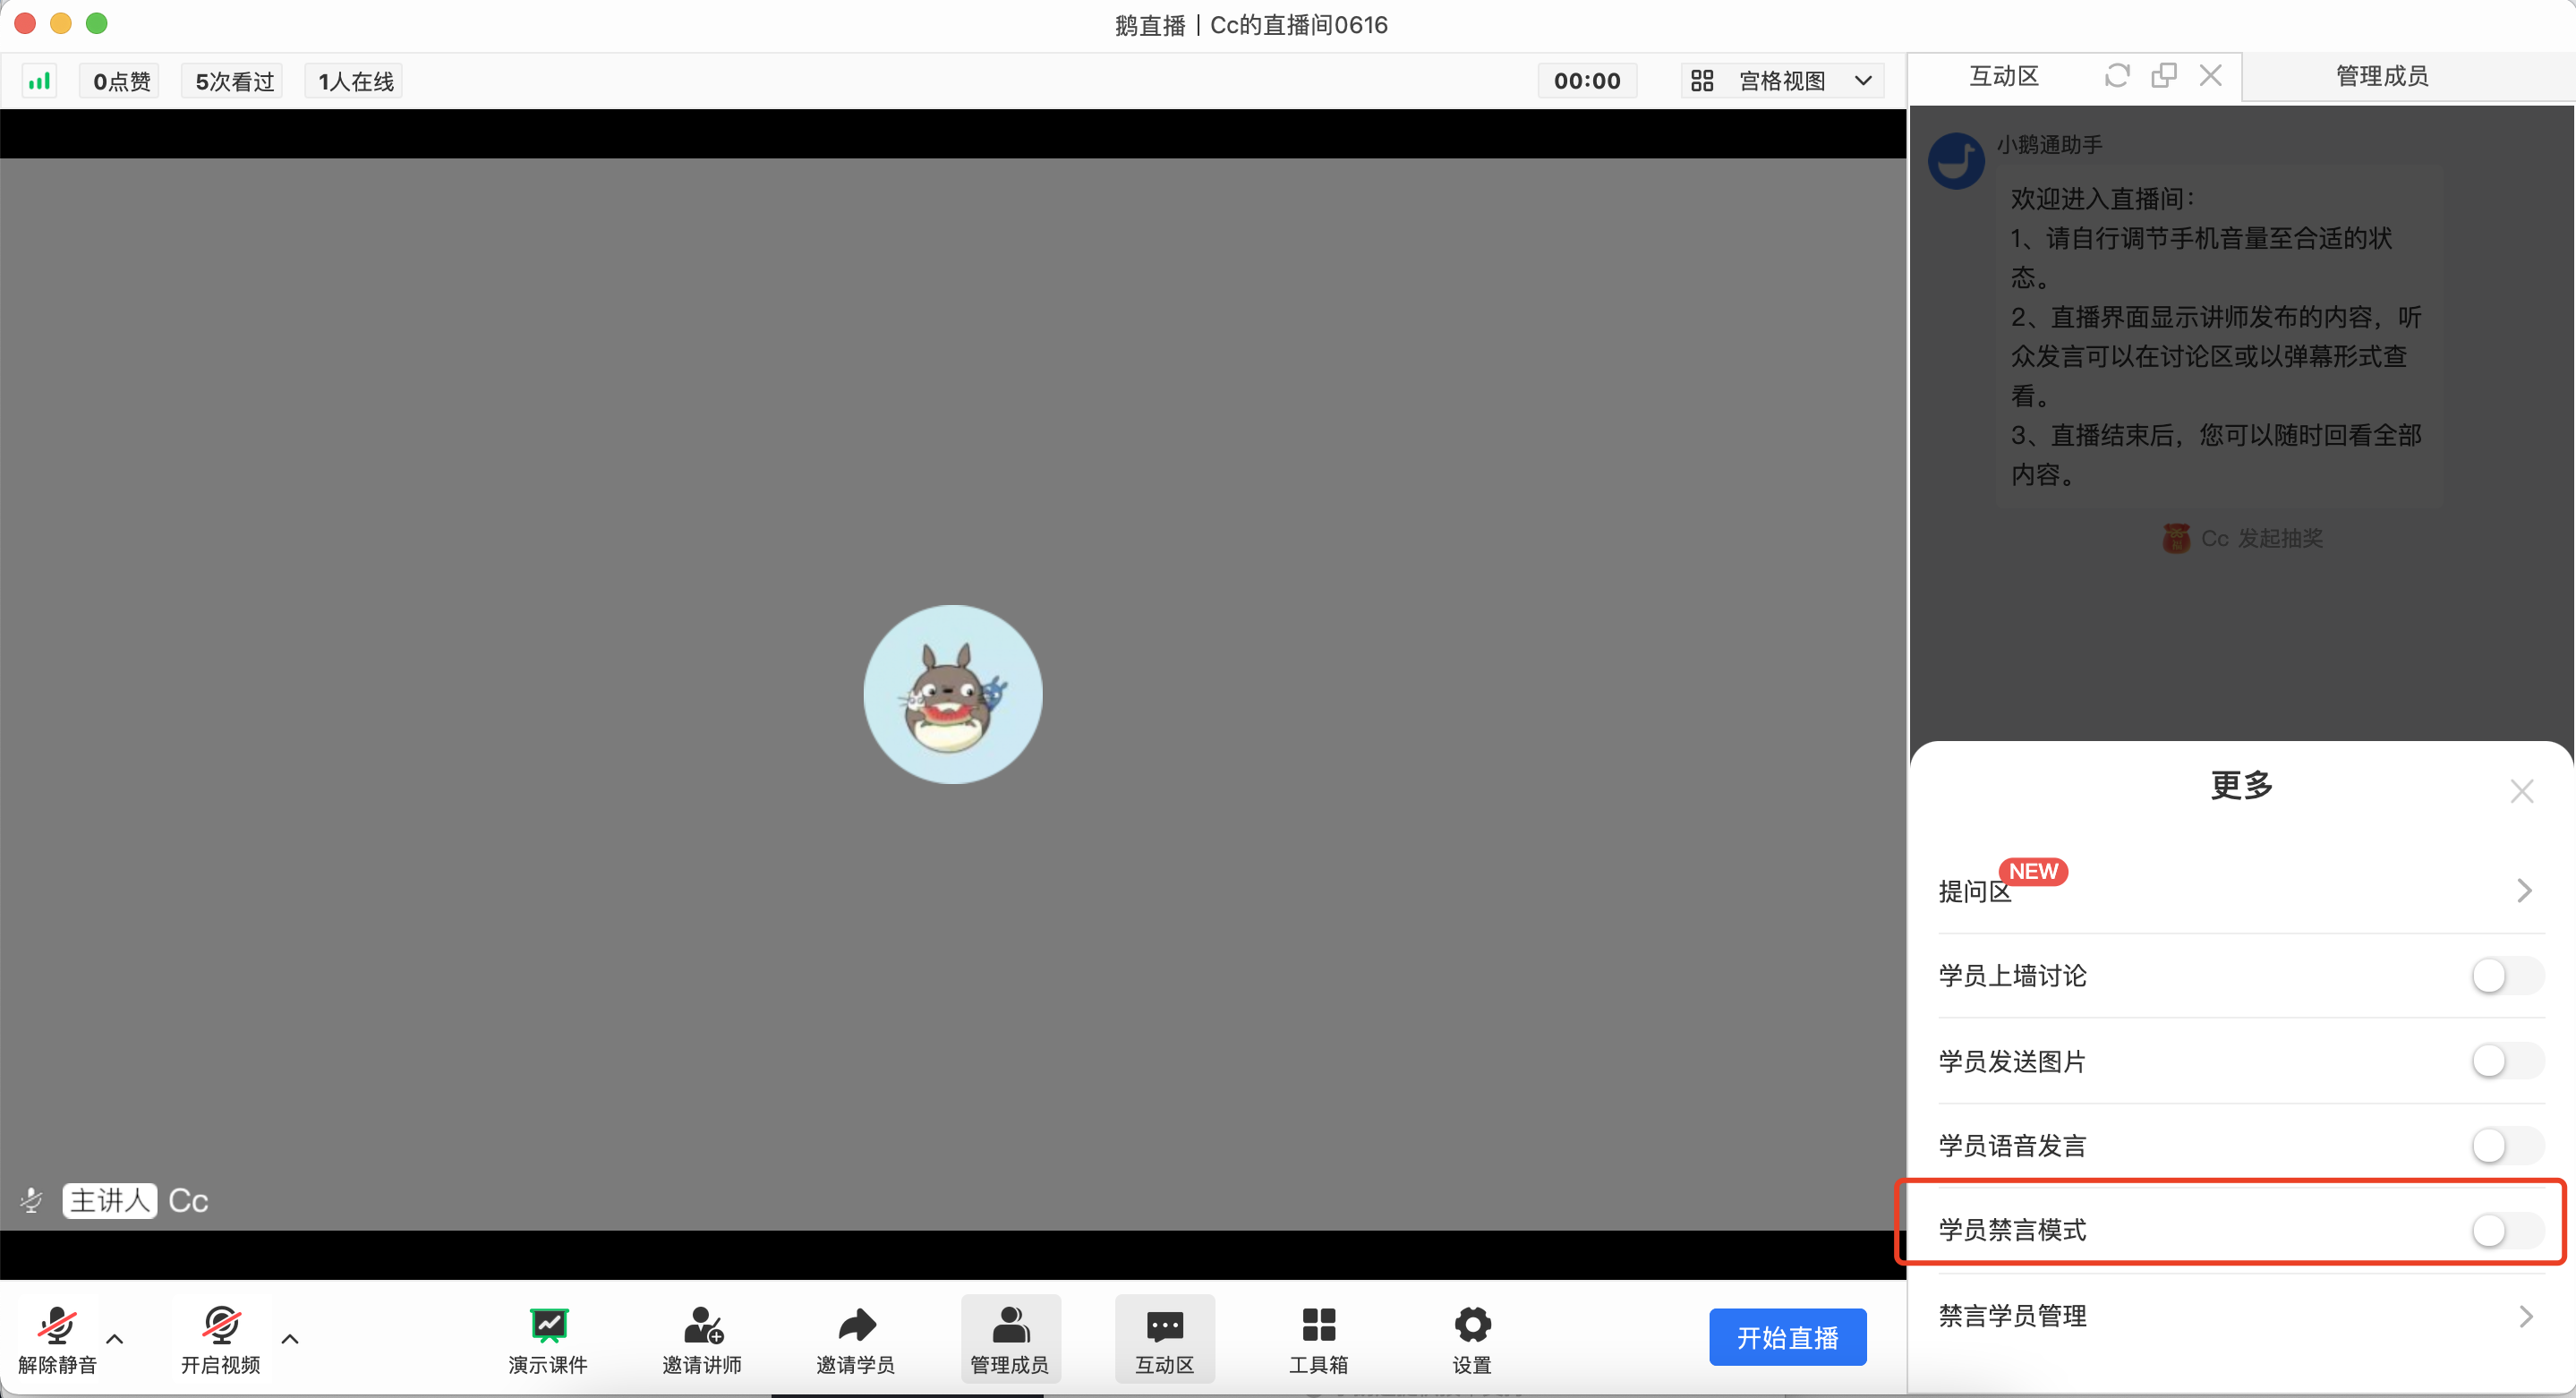
2.elink Assistant App(Taking vertical screen live broadcast as an example):Find the [More Operations] button in the live room.Turn off [Mute Mode].
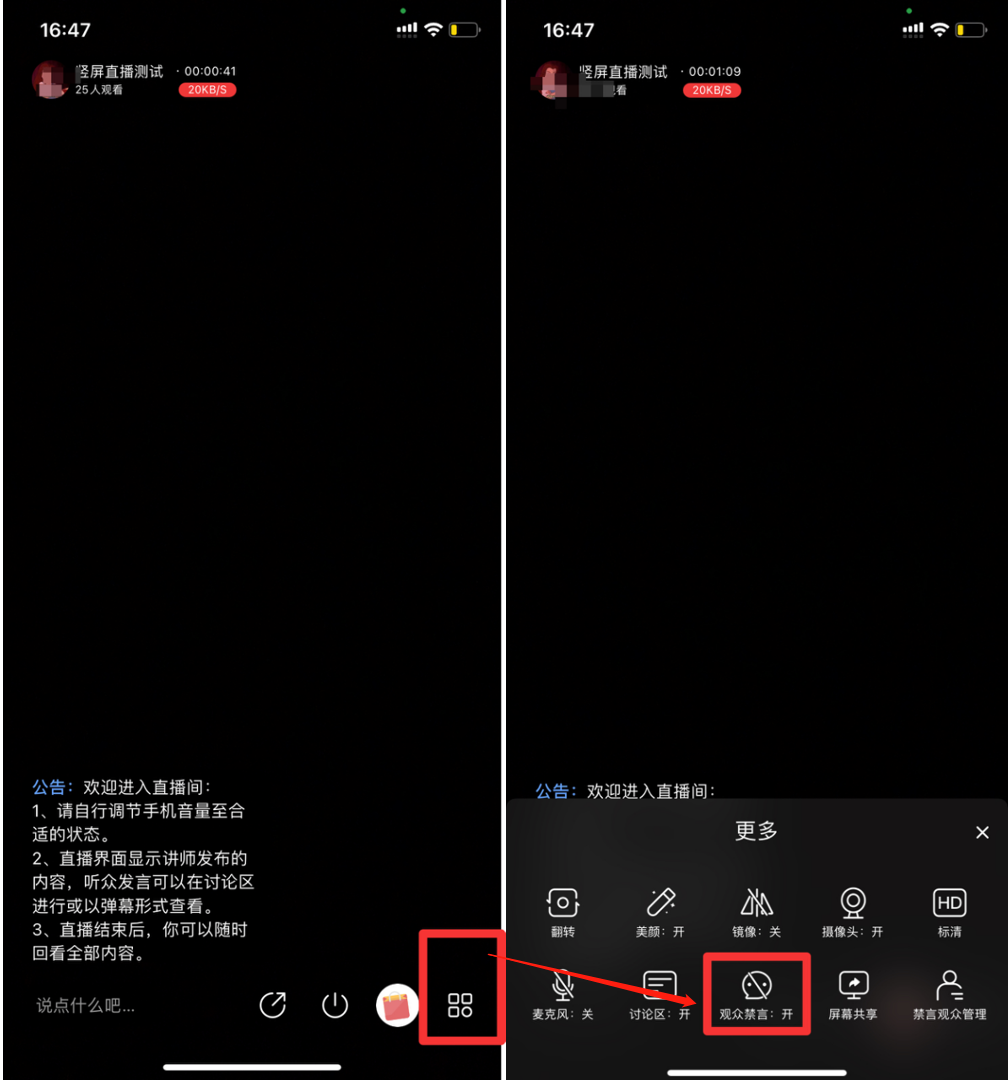
3. H5 Live Room:Find the [More Operations] button in the live room.Turn off the [Mute Mode] button.
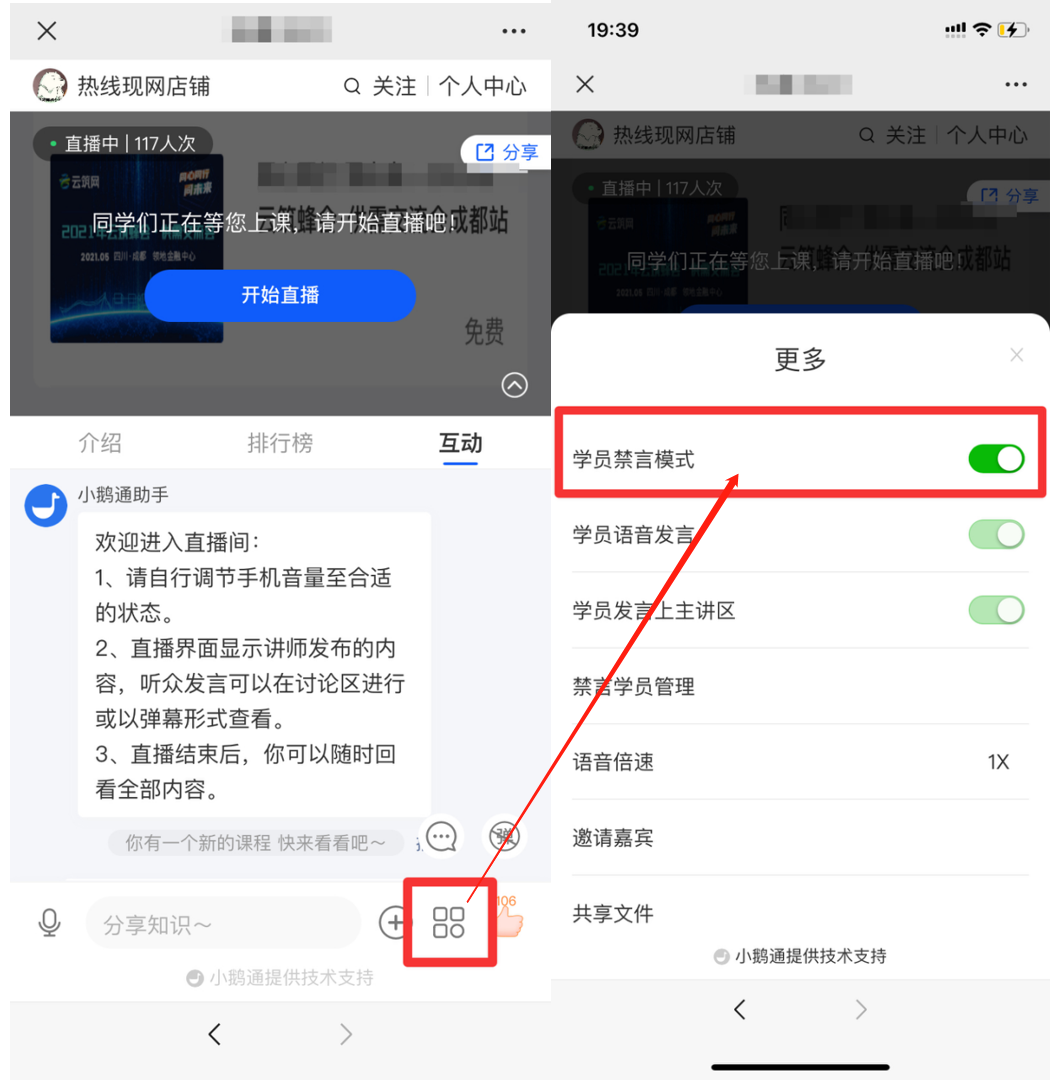
How to restore a muted user?
In the live streaming room, instructors can restore students' speaking permissions in the live streaming room through the [Mute Students] list.
Currently supported live streaming ports include: eLink Live Client, Web version, eLink Assistant PC Client, eLink Assistant App, and H5.
How to delete a user's comment during a live stream?
elink Assistant Client
Hello, the instructor can click [Discussion] → [Delete] → [Delete message only] in the lower right corner of the live streaming room to delete the message. After deletion, other viewers won't be able to see the message, but the message will still be visible on the live streaming interface of the speaker, who won't be aware that the message has been deleted.
eLive Client
Hello, the instructor can click [Interaction Area] in the lower right corner of the live streaming room → find the user's comment → [Delete] → [Delete message only] to delete the message. After deletion, other viewers won't be able to see the message, but the message will still be visible on the live streaming interface of the speaker, who won't be aware that the message has been deleted.
How to mute a specific user during a live stream?
1. The instructor can click [Discussion] → [Delete] → [Delete and Mute] in the lower right corner of the live streaming room to prohibit the listener from speaking.
2. The instructor can also click [Discussion] → [Delete] → [Delete and Mute] in the live streaming room on the PC browser to prohibit the listener from speaking.
Is there a prompt when the instructor leaves the live streaming room?
During the scheduled live streaming period of a specific live event, if the instructor leaves the live streaming room, users on the client side will see a prompt indicating that the instructor has temporarily left the live streaming room.
How can instructors share learning materials in the live streaming room?
Terminals supporting instructors to share videos:elink Live client,elink Assistant client, computerWeb terminal, H5Live room
The operation steps are as follows:
Upload the corresponding files to the material library (currently only files in word, ppt, excel, and pdf formats are supported). After the upload is completed, you can click the relevant file and send it to the lecture area. After sending, students can find the corresponding file in the shared files in the live room for download.
1. elink AssistantUpload from the client live room:
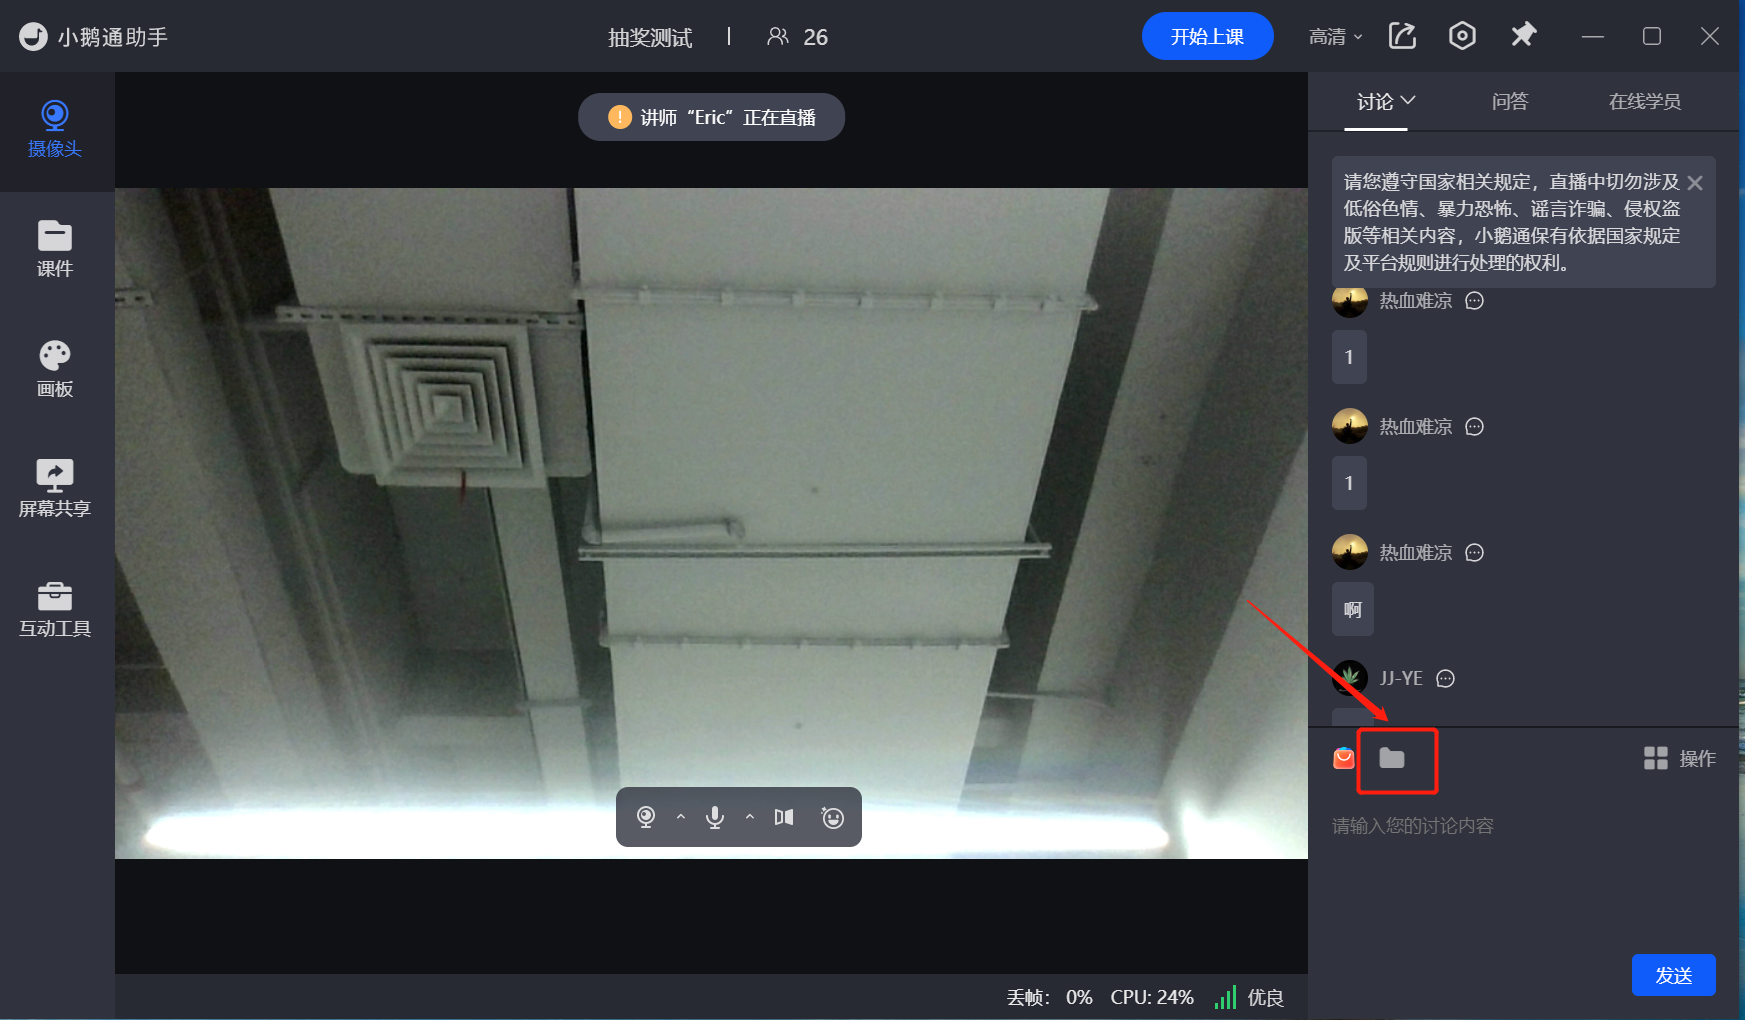
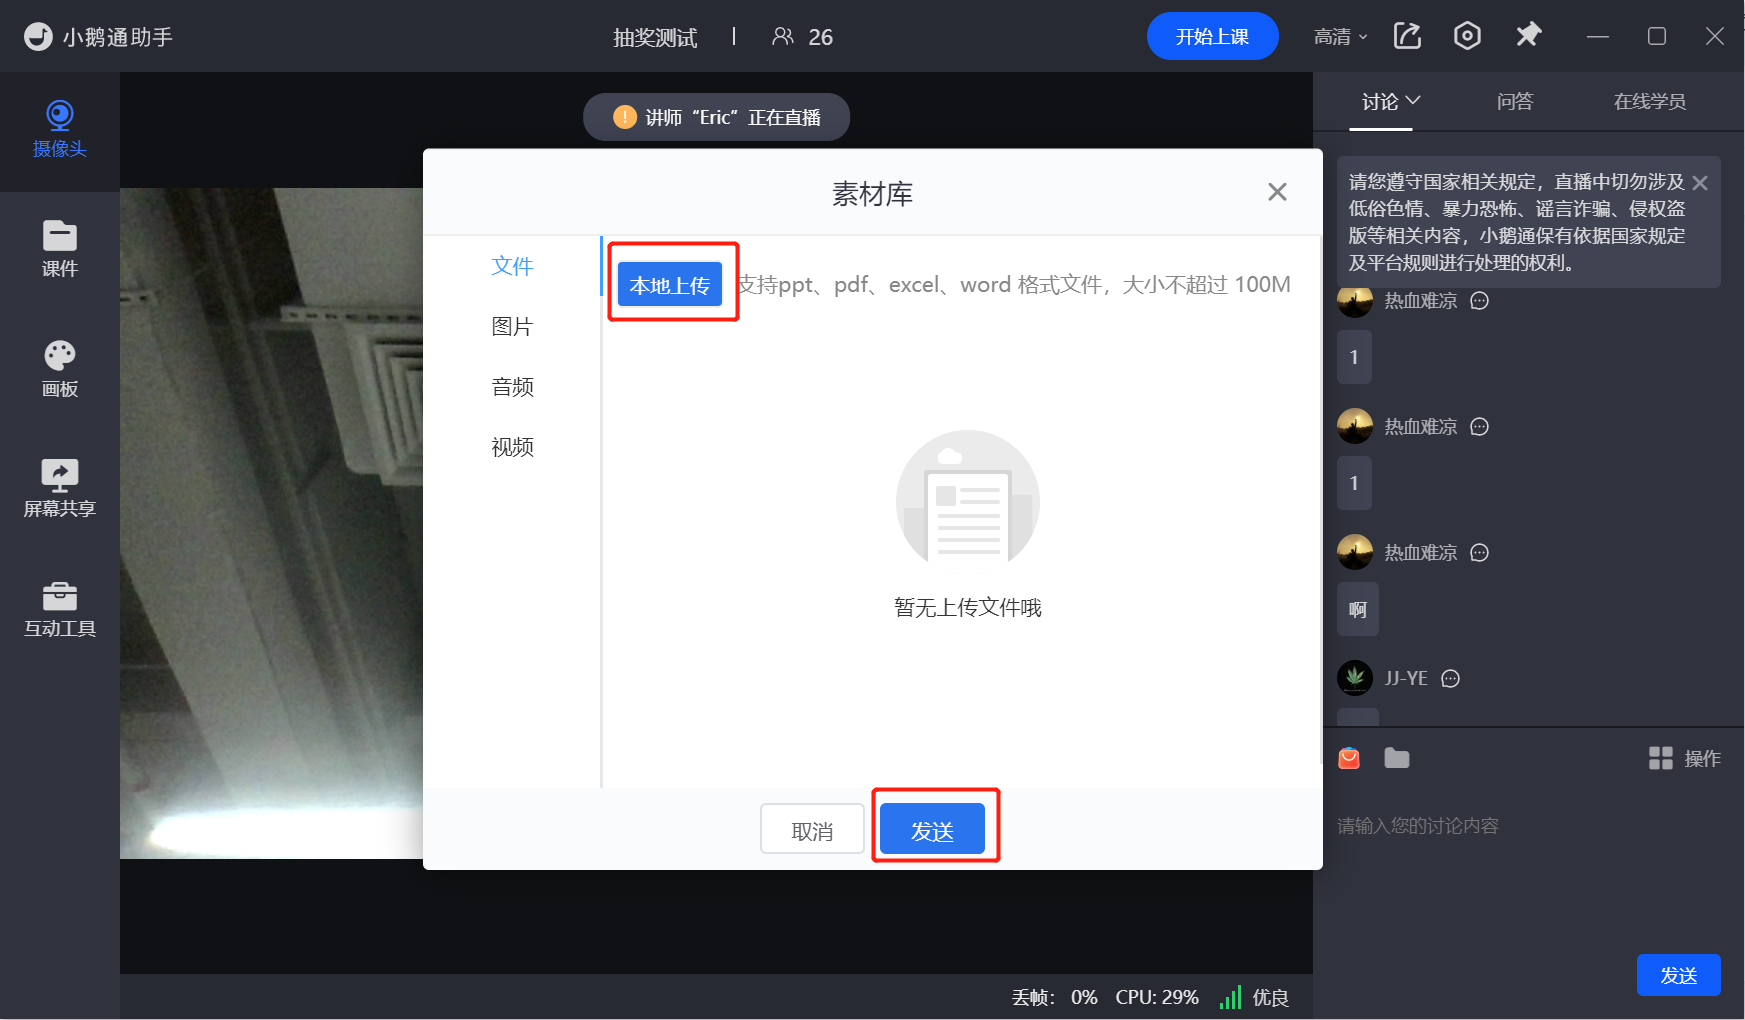
2.WebUpload from the web - terminal live room:Find the location of [Folder] and click to upload
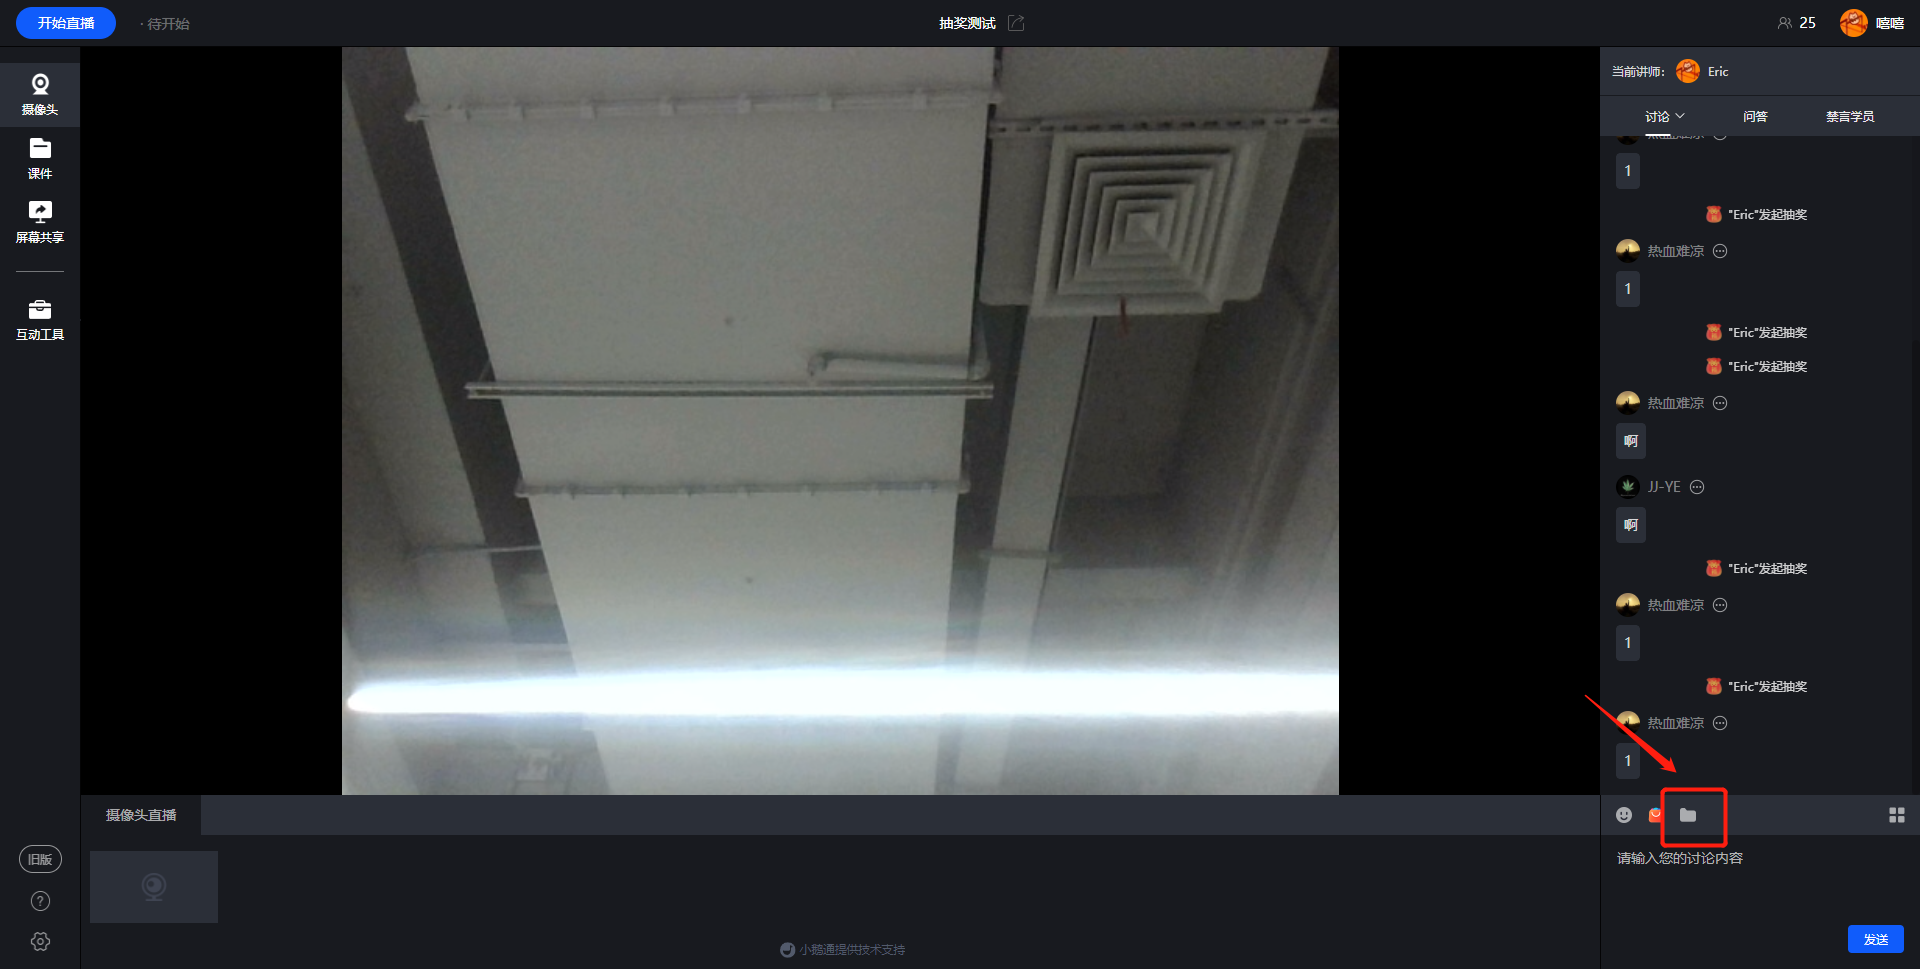
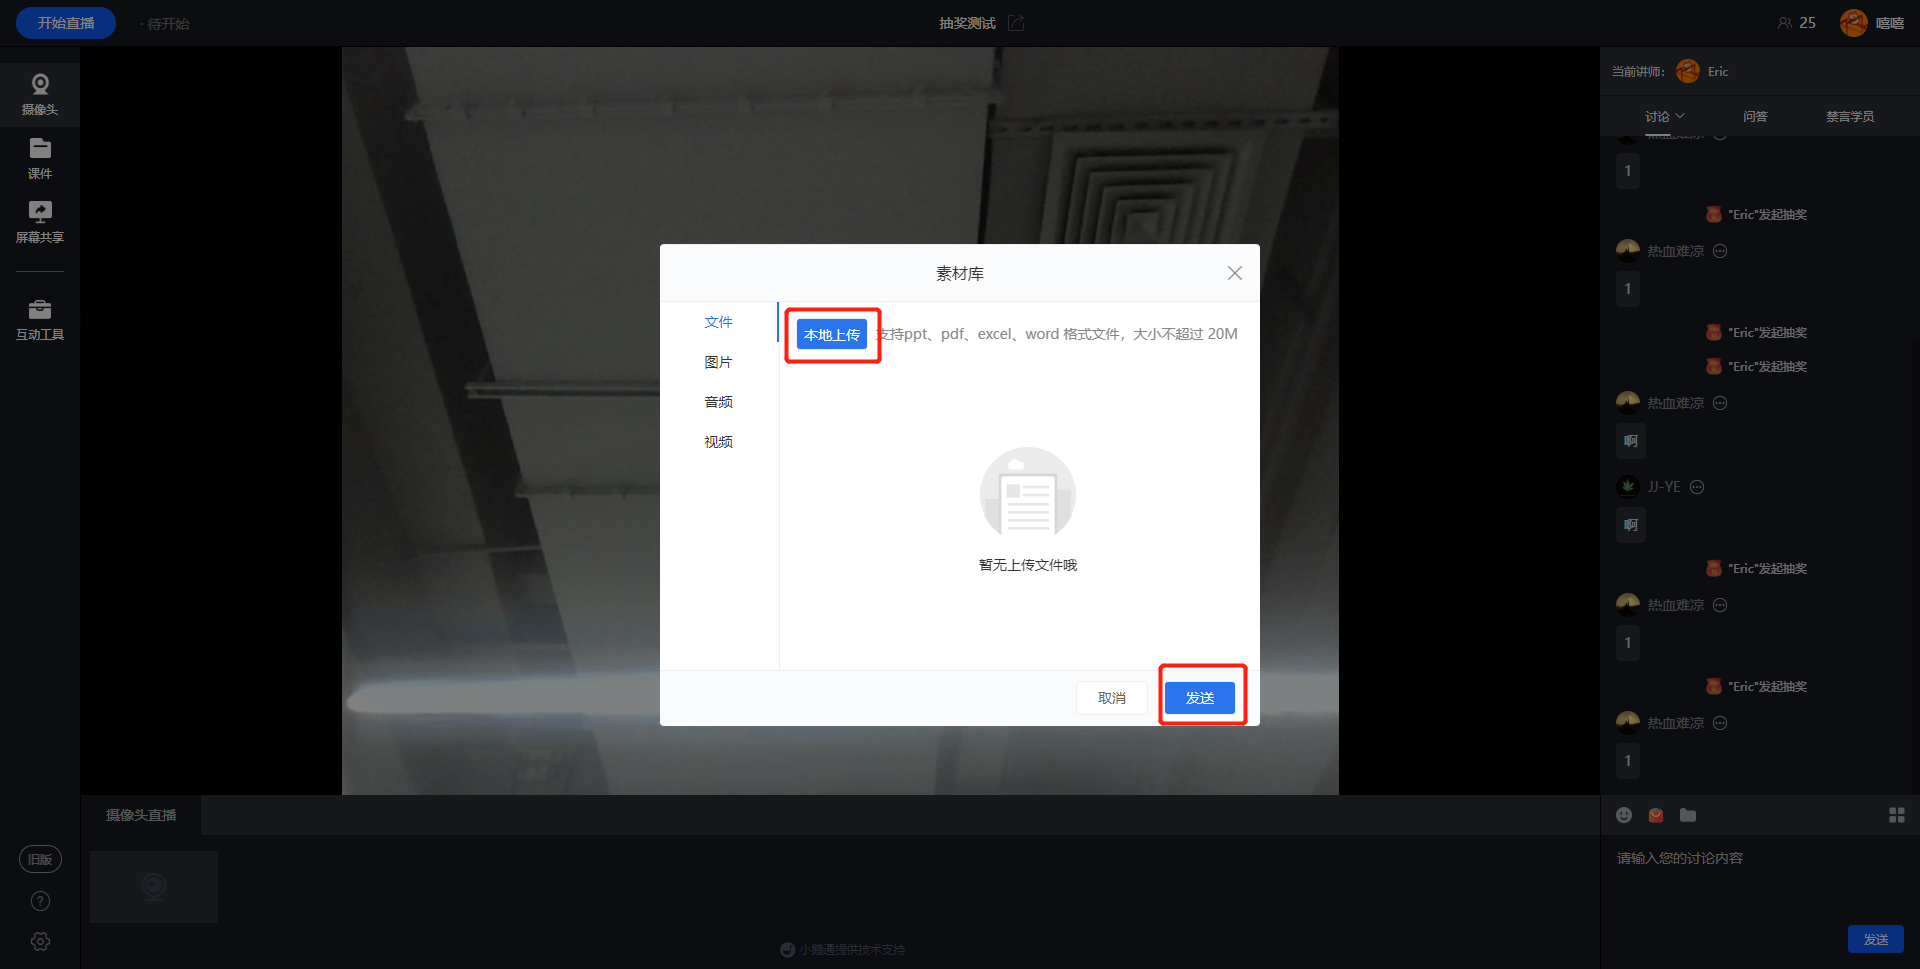
3. Upload from the instructor's WeChat H5:The instructor enters the H5 live room, clicks the [+] sign on the left, and selects [File Library] to upload files
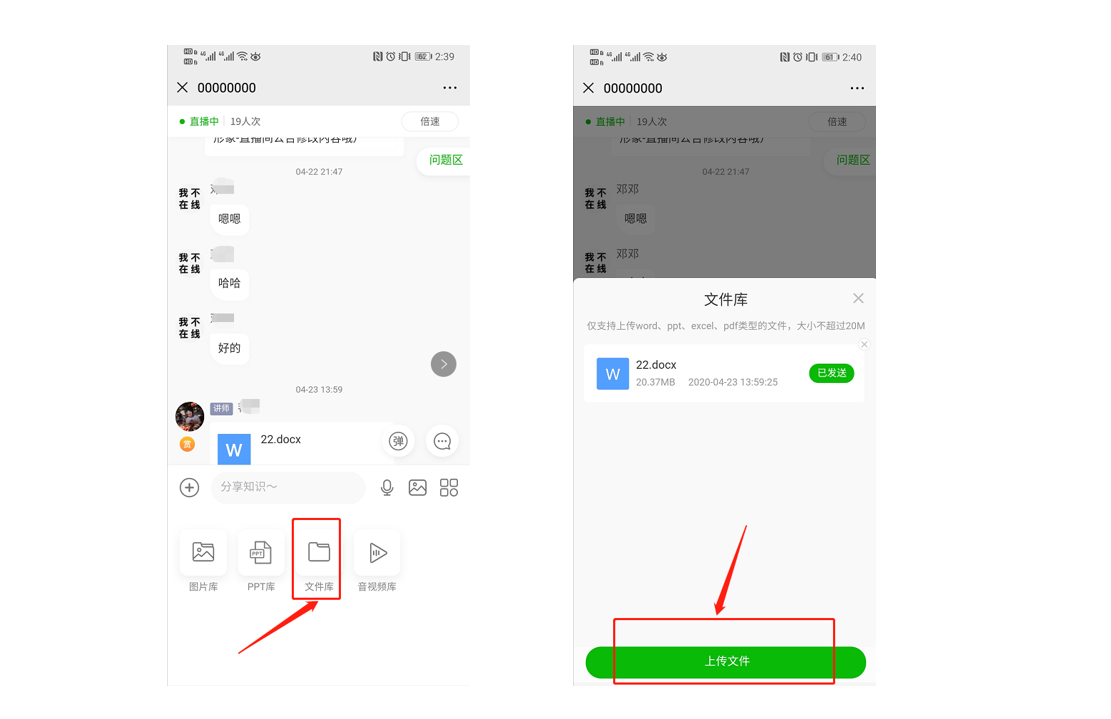
Note: Only when the instructor uses the Android mobile - phone client or the PC browser to open the live broadcast can files be uploaded
4. Upload from the instructor's elink Live client: The instructor enters the live room, clicks the toolbox, selects [File Disk], and clicks to send to the discussion area
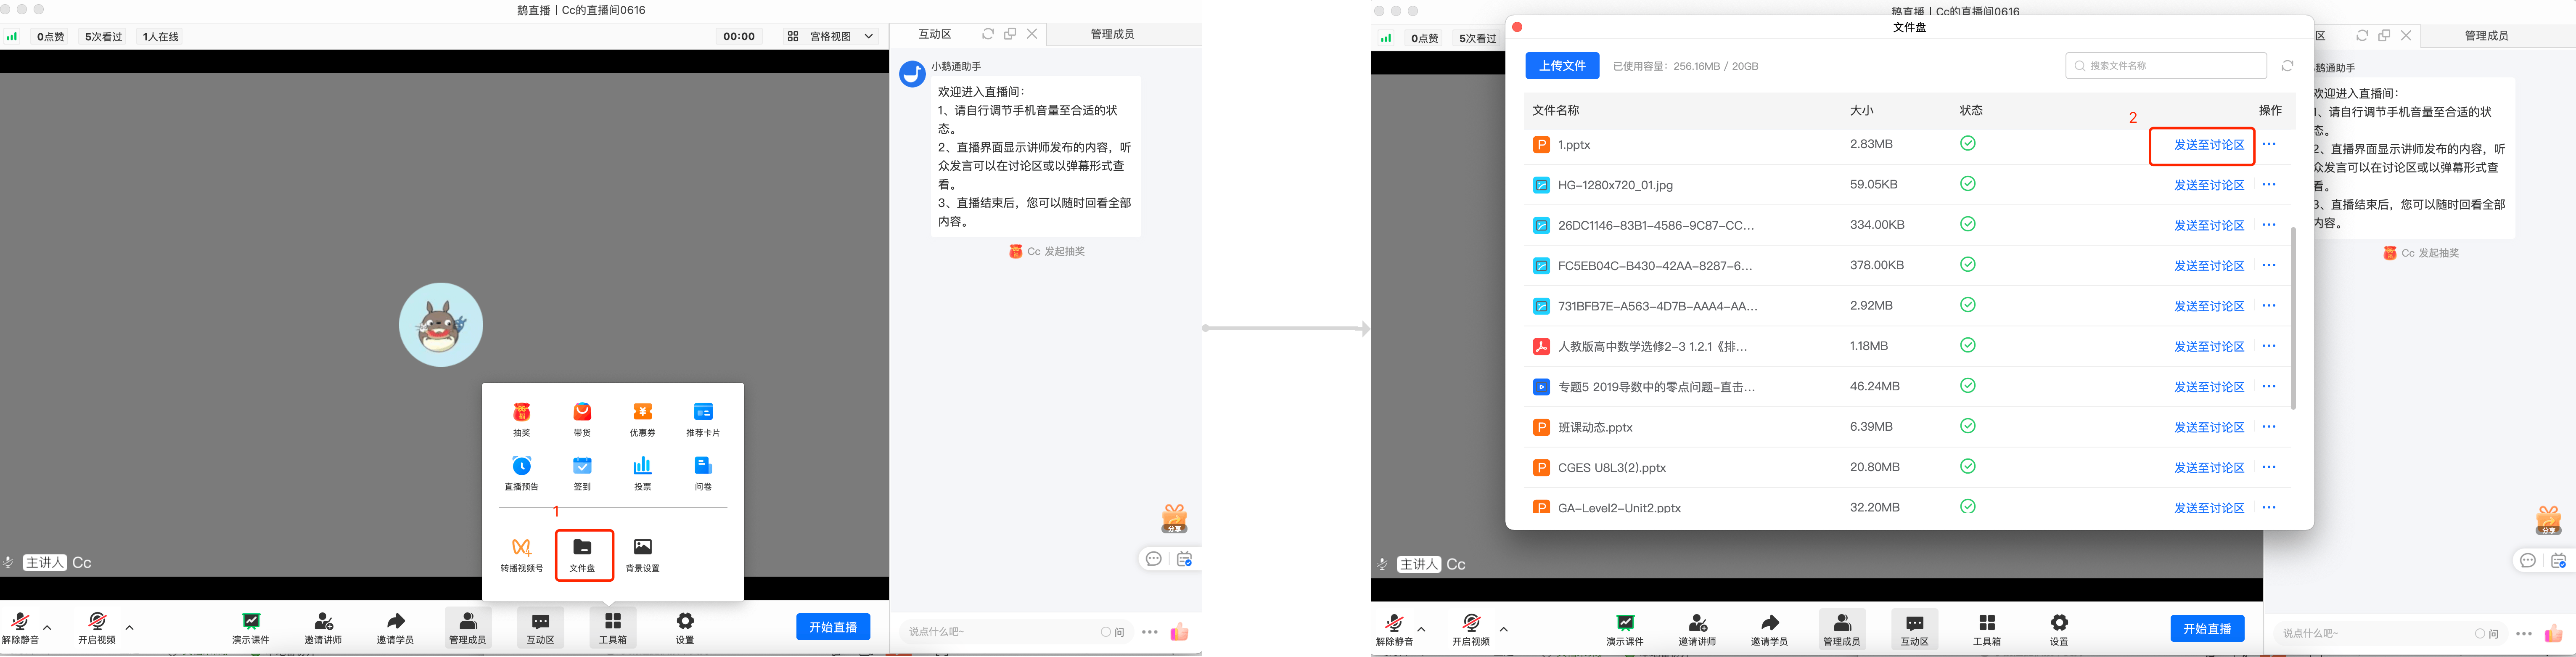
5. Download location for students:Students click [Operation -> Shared Files -> Click to download] in the live room. Or if the instructor sends the file to the lecture area, students can directly download it in the lecture area.Download
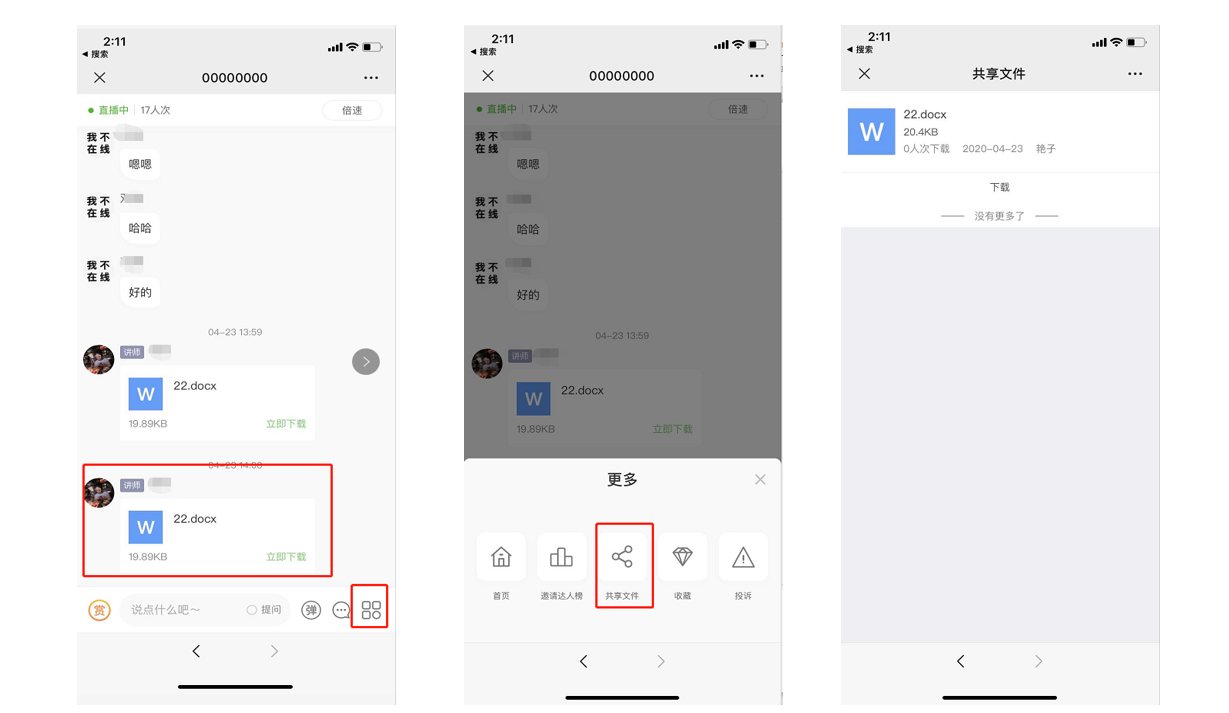
How to share videos during a live stream?
Terminals supporting instructors to share videos: eLink Live Client, eLink Assistant Client, ComputerWeb version,H5Live streaming room
The operation steps are as follows:
eLink Assistant Client
1. The instructor enters the live streaming room, clicks the [Folder] button, and a pop - up window appears.
2. Switch to the video type in the pop - up window, click [Upload from local], and upload the video.
eLink Live Client
Open the toolbox, select the "File Disk", find the corresponding video file, click "Send to the discussion area", and the file will be sent to the discussion area for students to view and download.
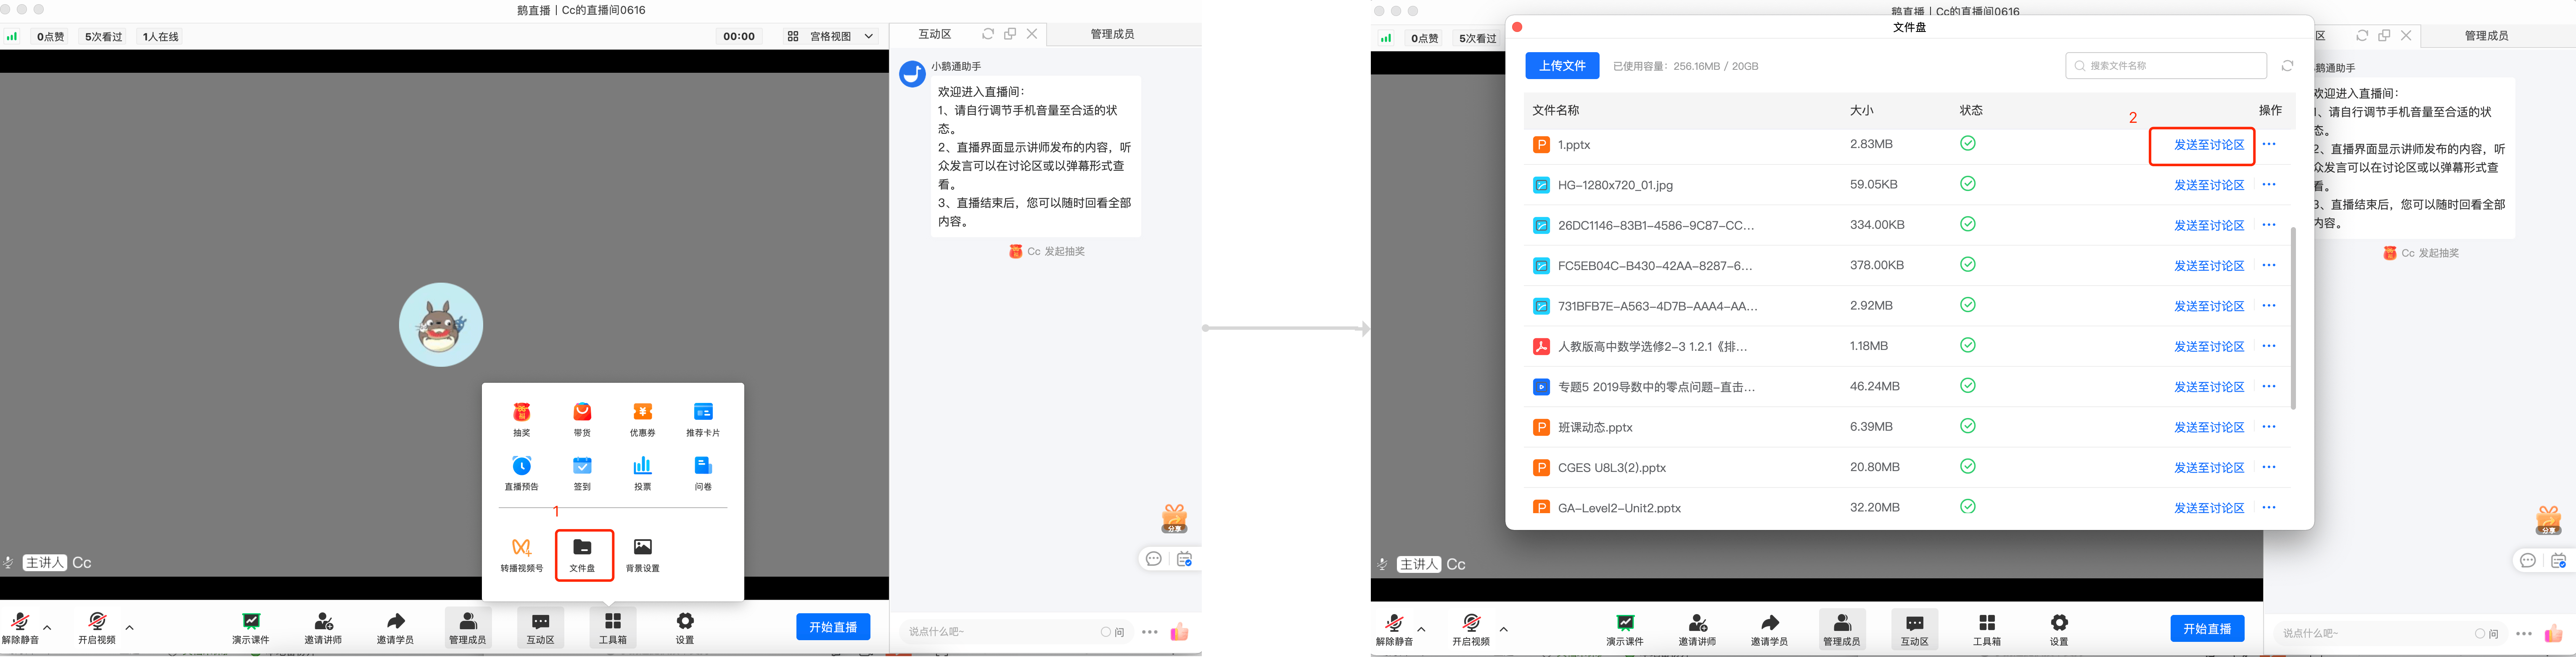
3. Wait for the video to be transcoded. After successful transcoding, you can select the video, click the [Send] button, and the video will be sent.
4. After sending, students can see the video in the discussion area.
eLink Assistant Client
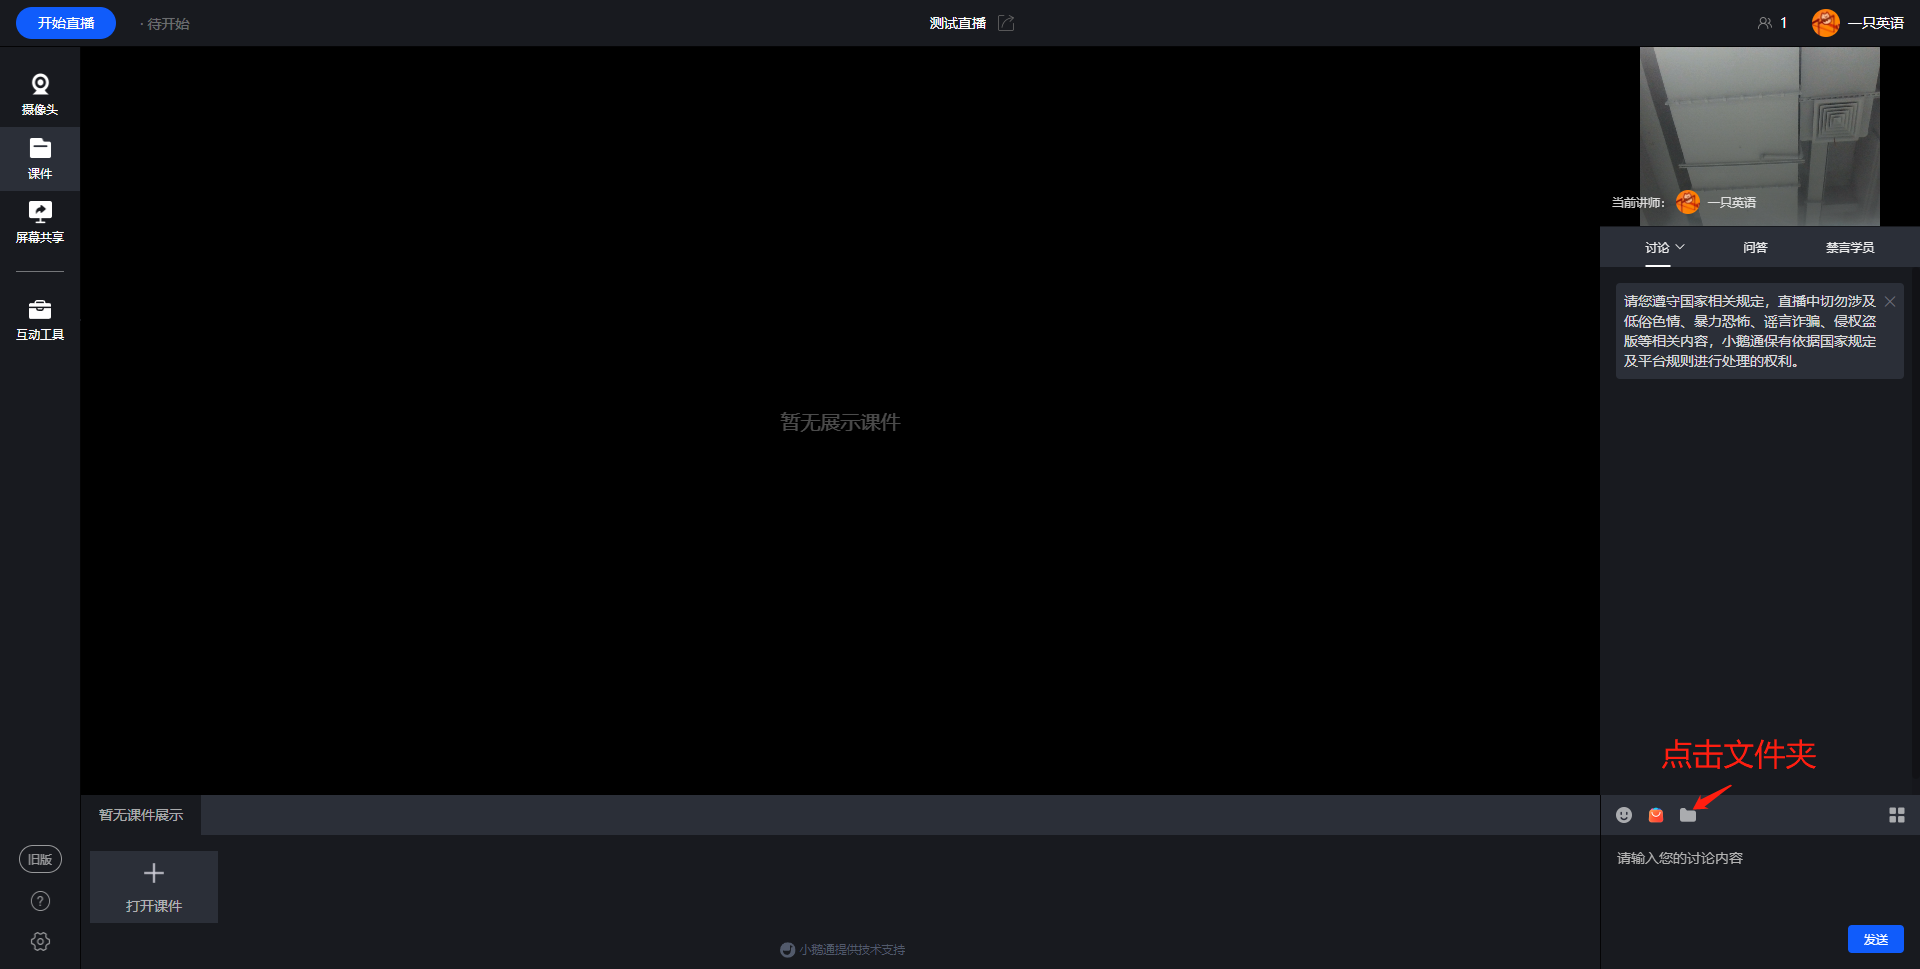
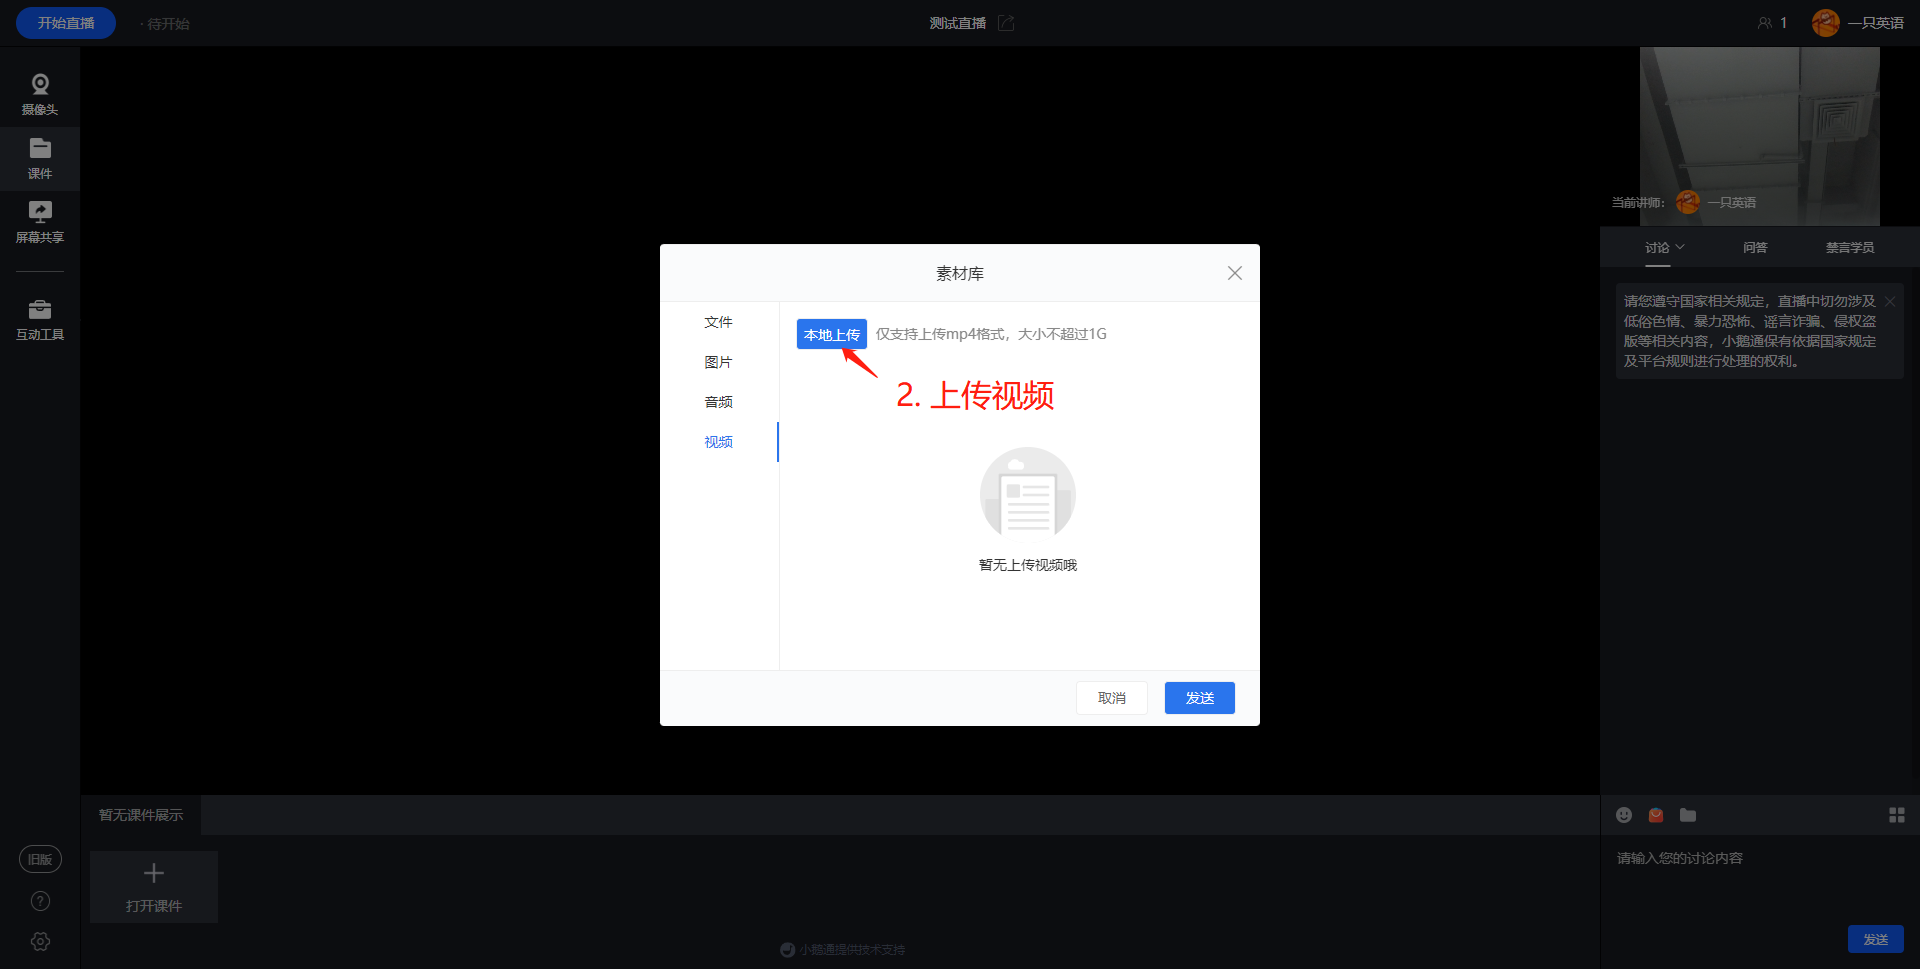
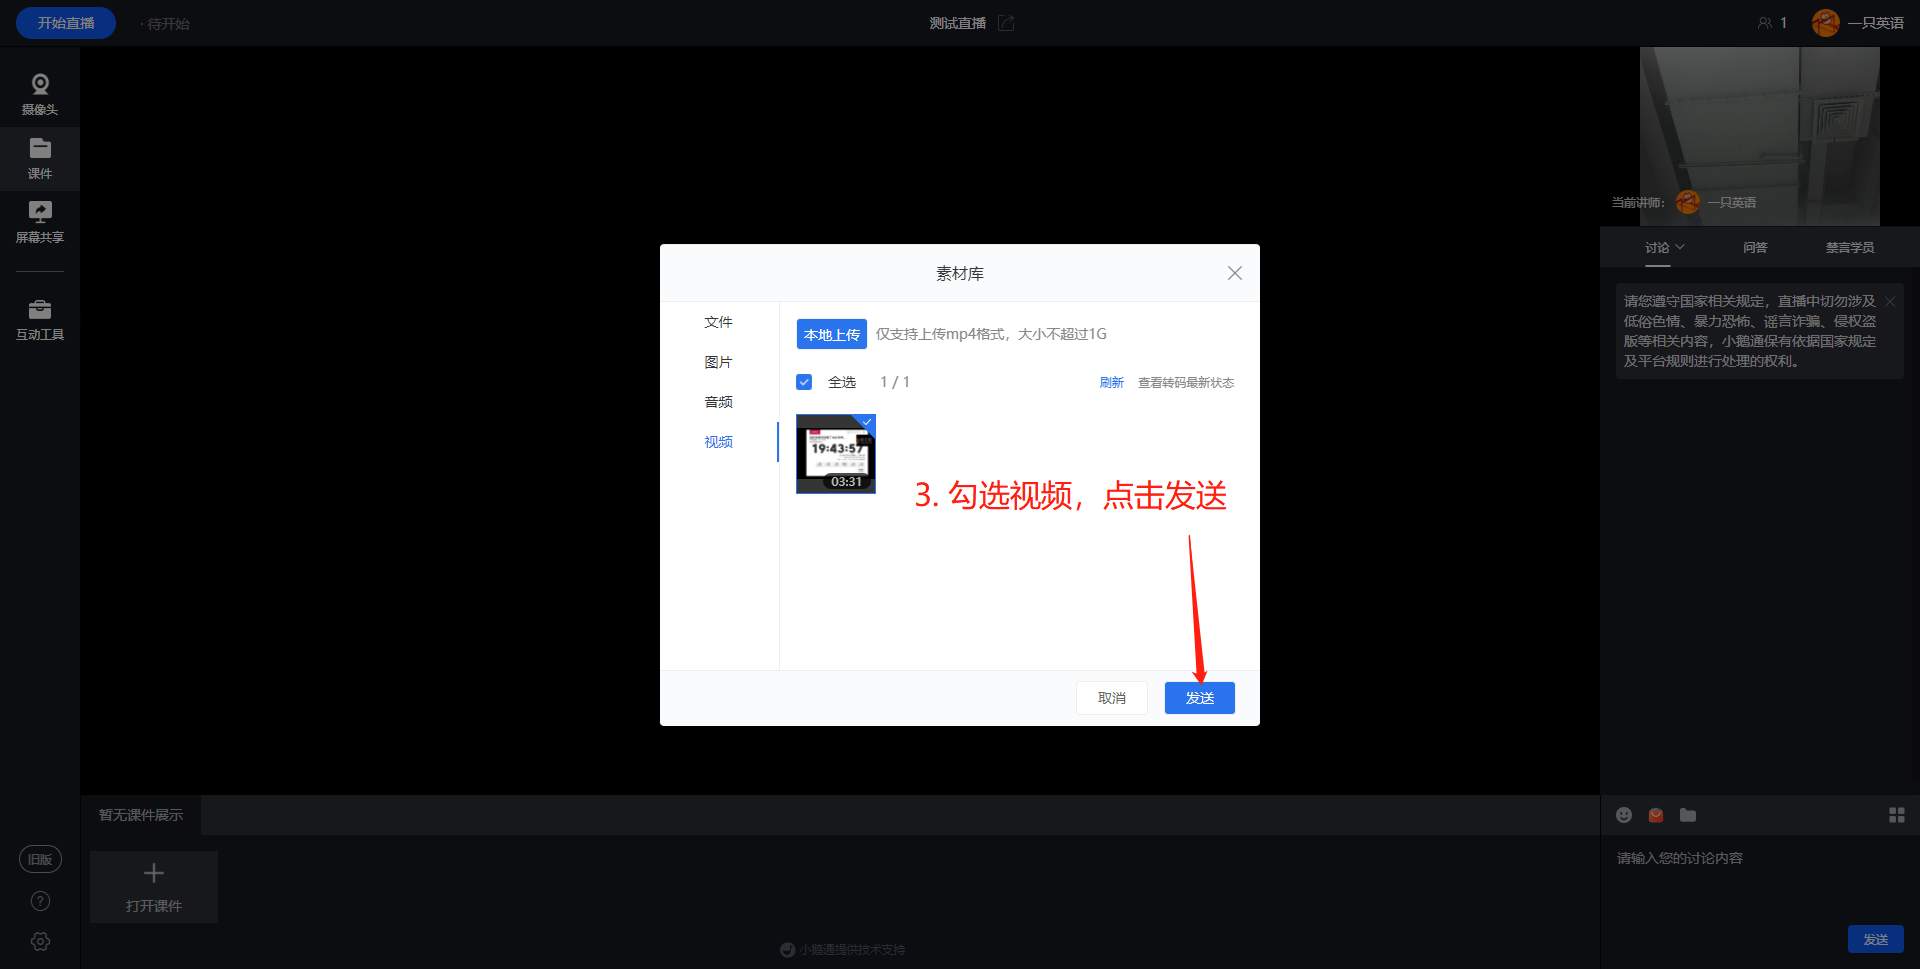
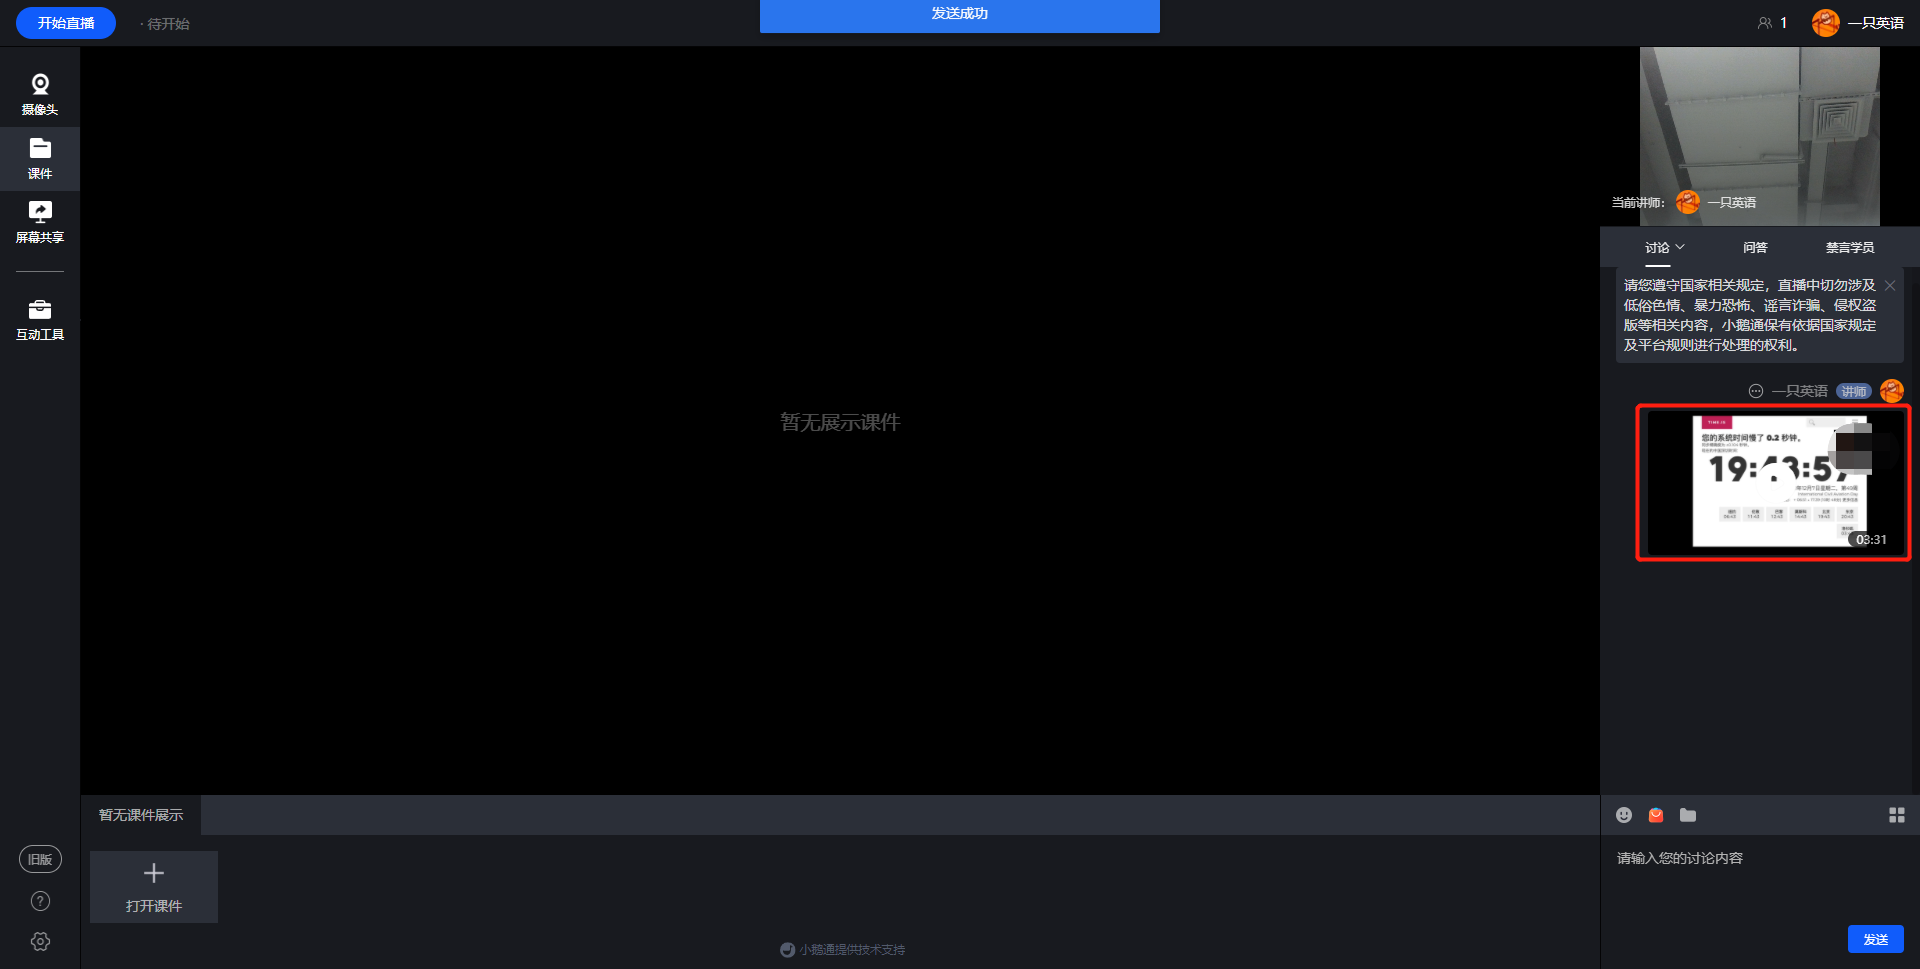
Tutorial on Sharing Live Streaming Courseware
I. Function Introduction
Support instructors to upload files in the live streaming room for students to download
II. Purpose of Use
Provide file - assisted teaching during live streaming to enhance the live streaming effect
III. Usage Scenarios
Meet the scenarios where merchants need file - assisted teaching during live streaming
IV. Operation Path
Merchant side:Upload files → Send files → Click to download
V. Usage Tutorial
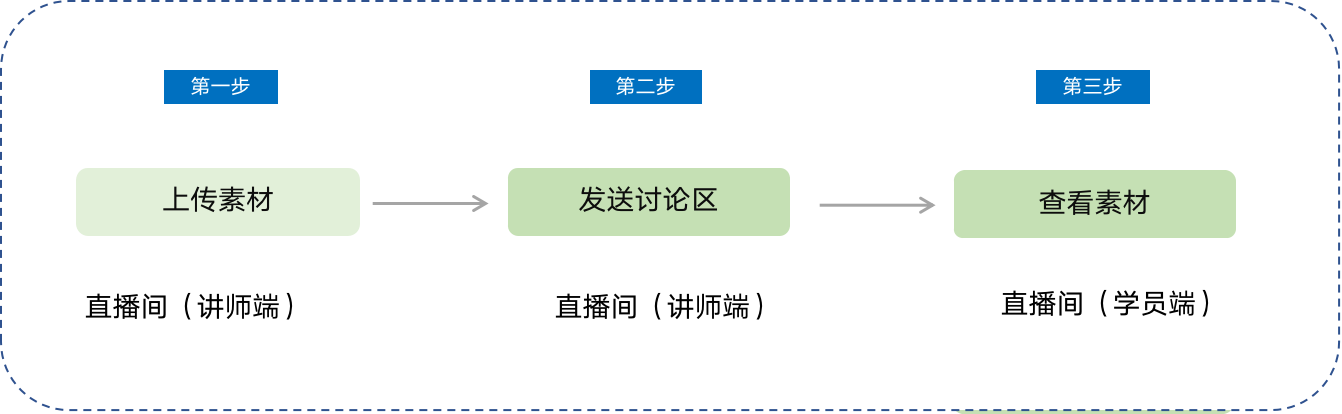
Step 1:Upload files (in the live streaming room)
Instructors canPCIn the live streaming room, eLink Live client, or WeChat browserH5Upload the corresponding files to the file disk/material library in the live streaming room (temporarily only support uploadingword, ppt, excel, pdffiles)
Step 2:Send files (in the live streaming room)
After uploading is completed, you can click the relevant file and send it to the explanation area. After sending, students can find the corresponding file in the shared files in the live streaming room and download it
(eLink Live client)
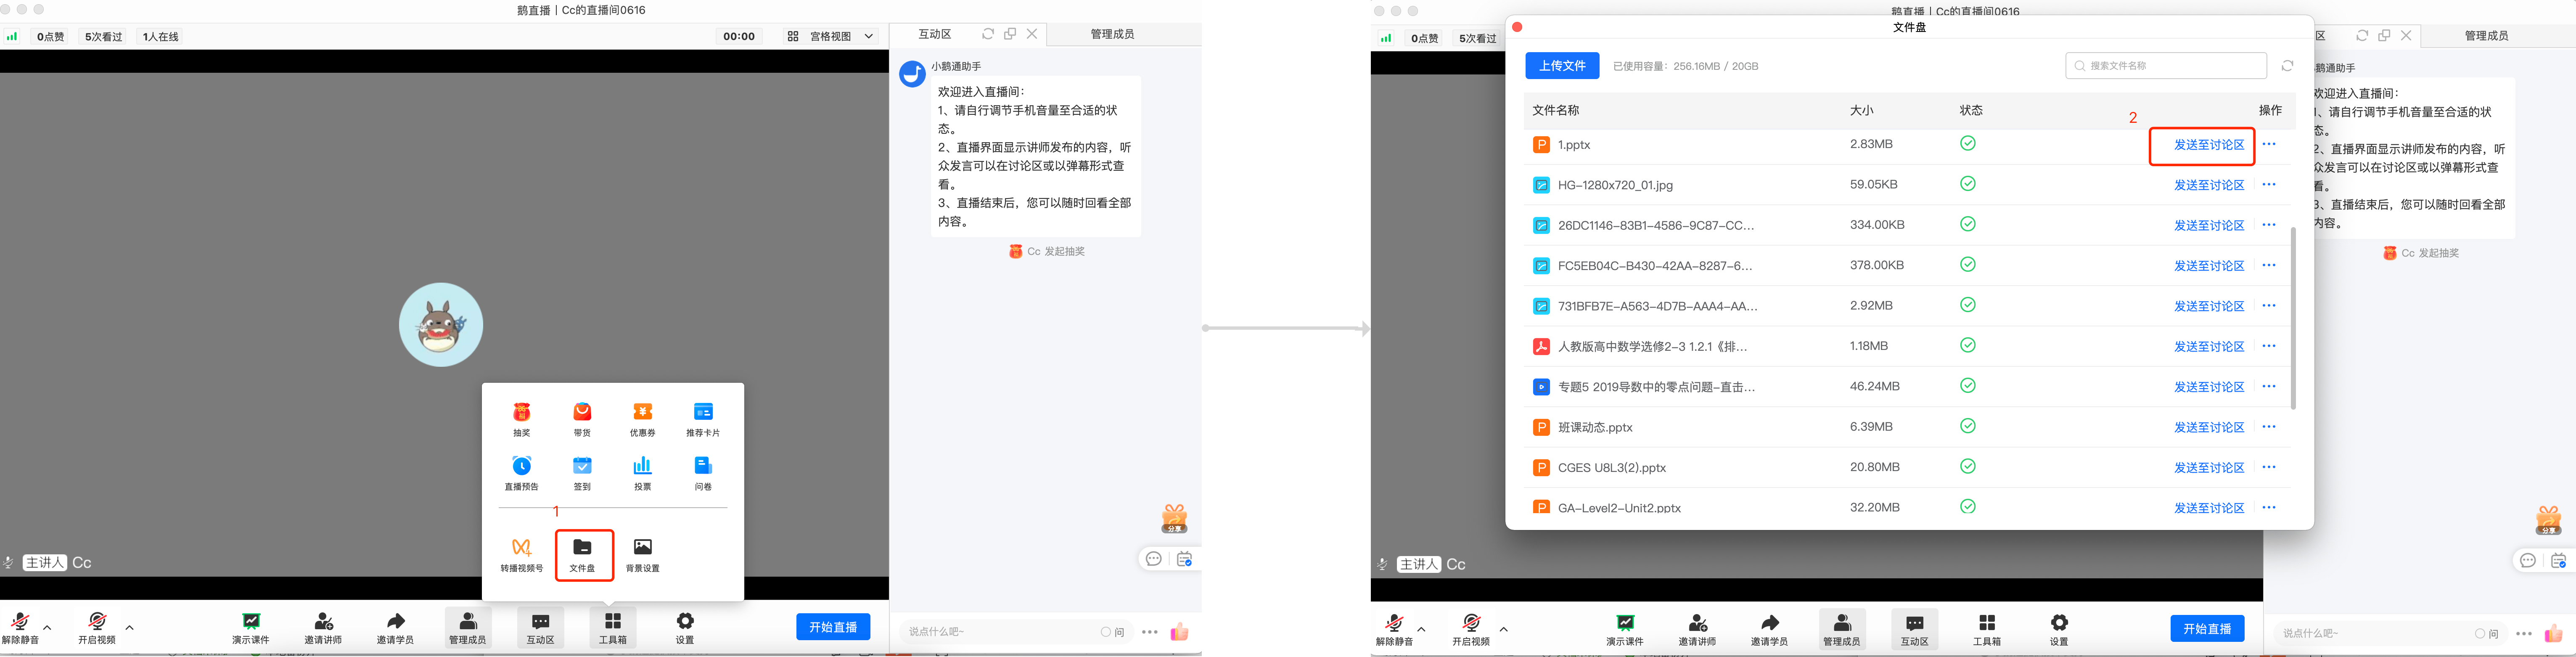
(PC live streaming room)
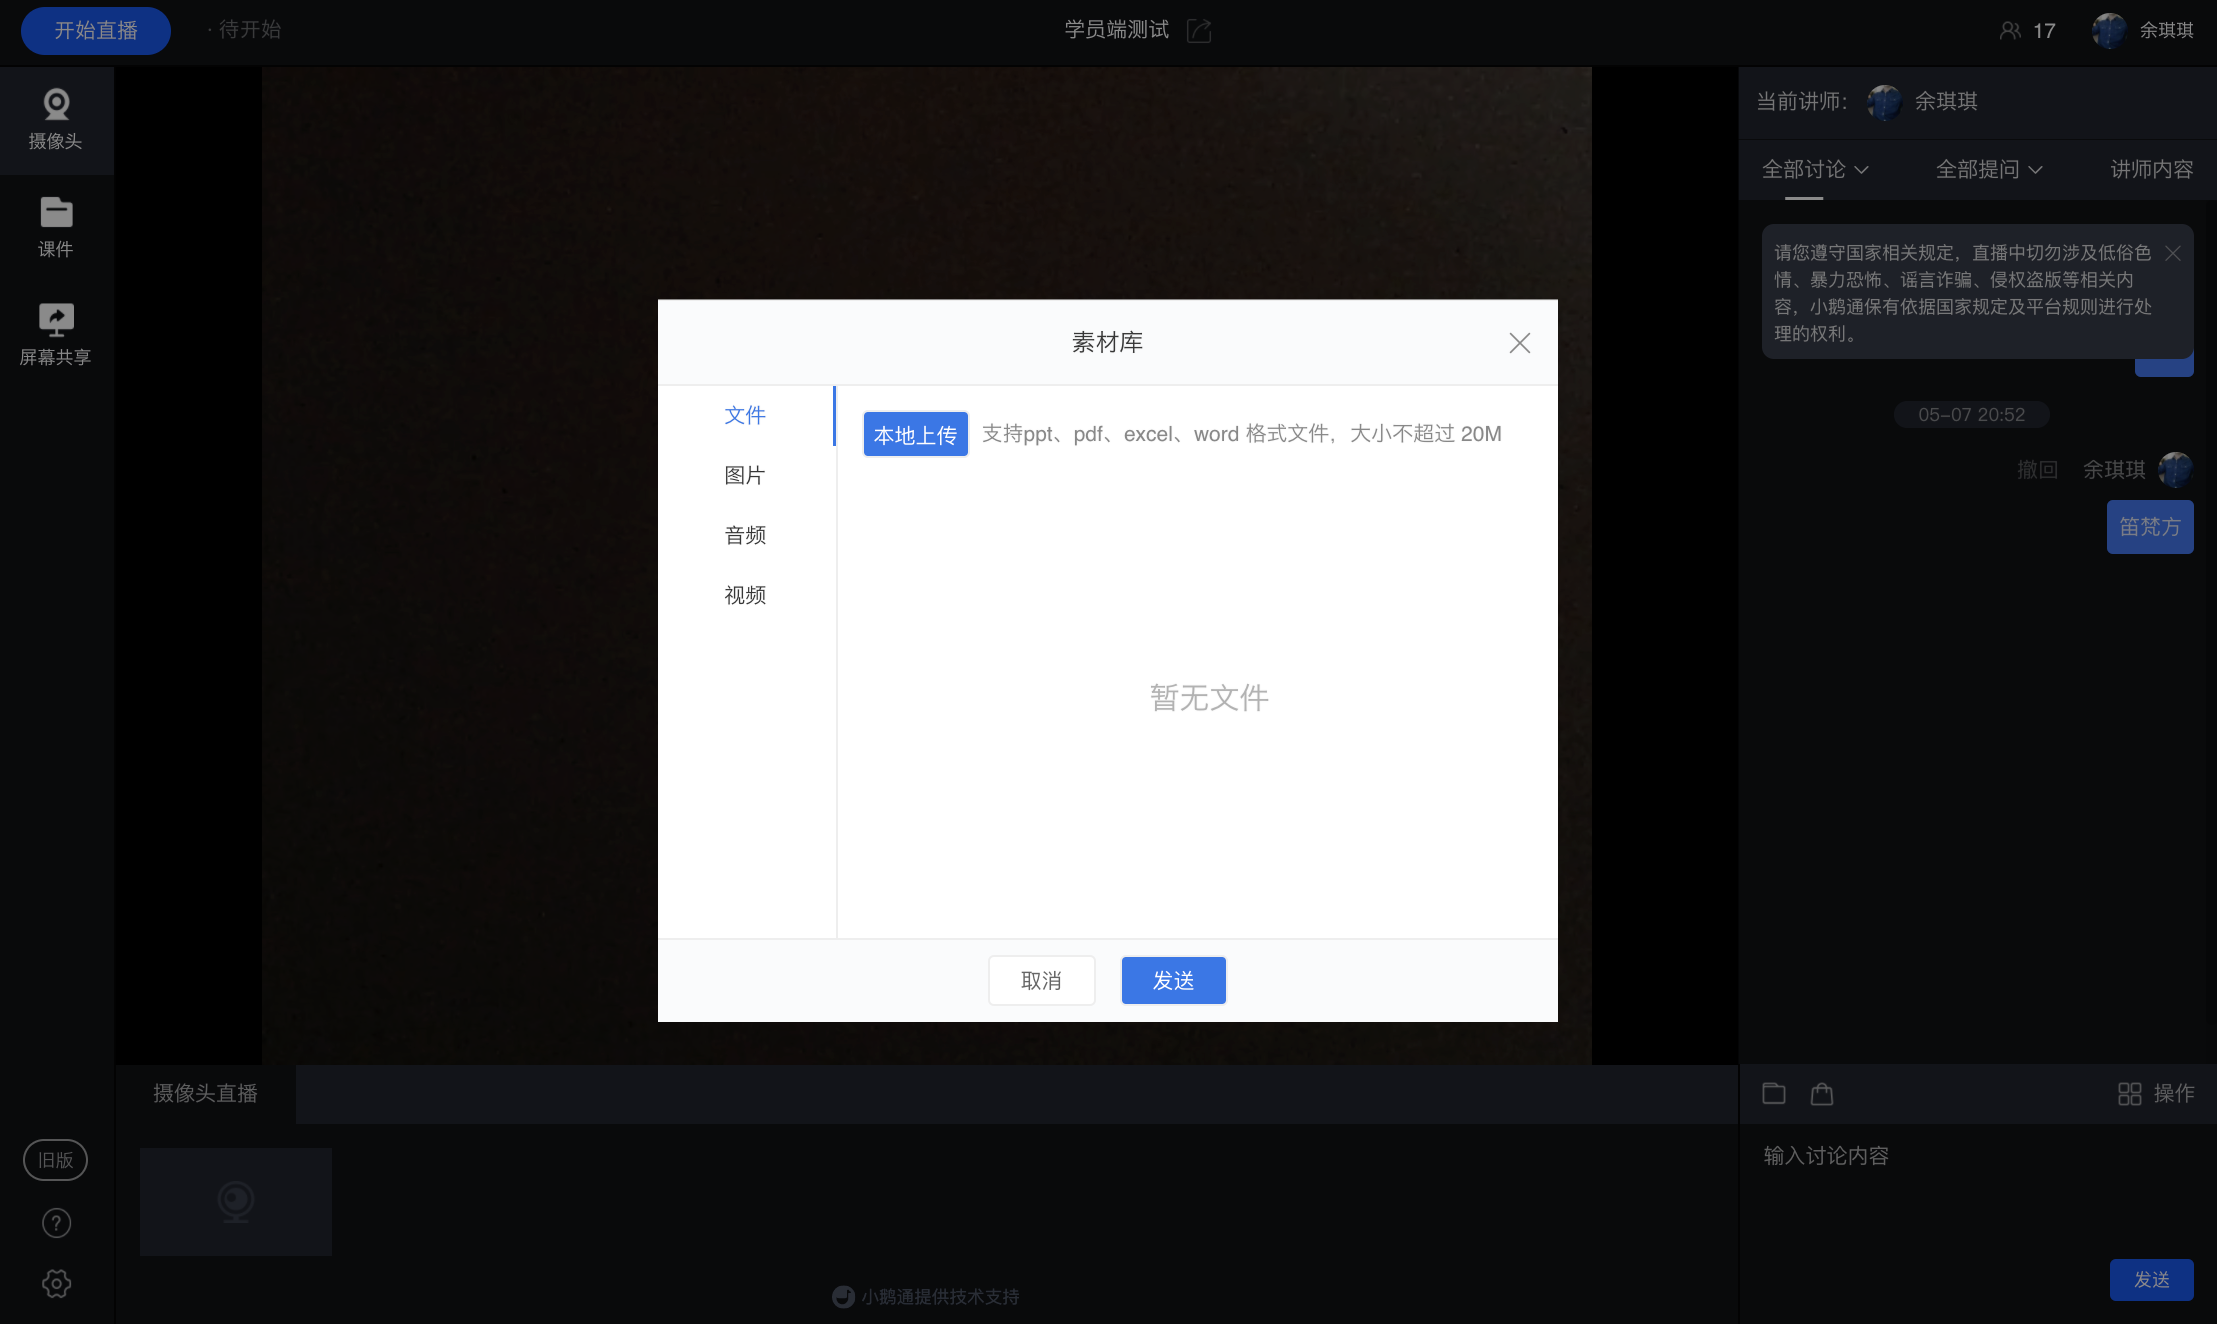
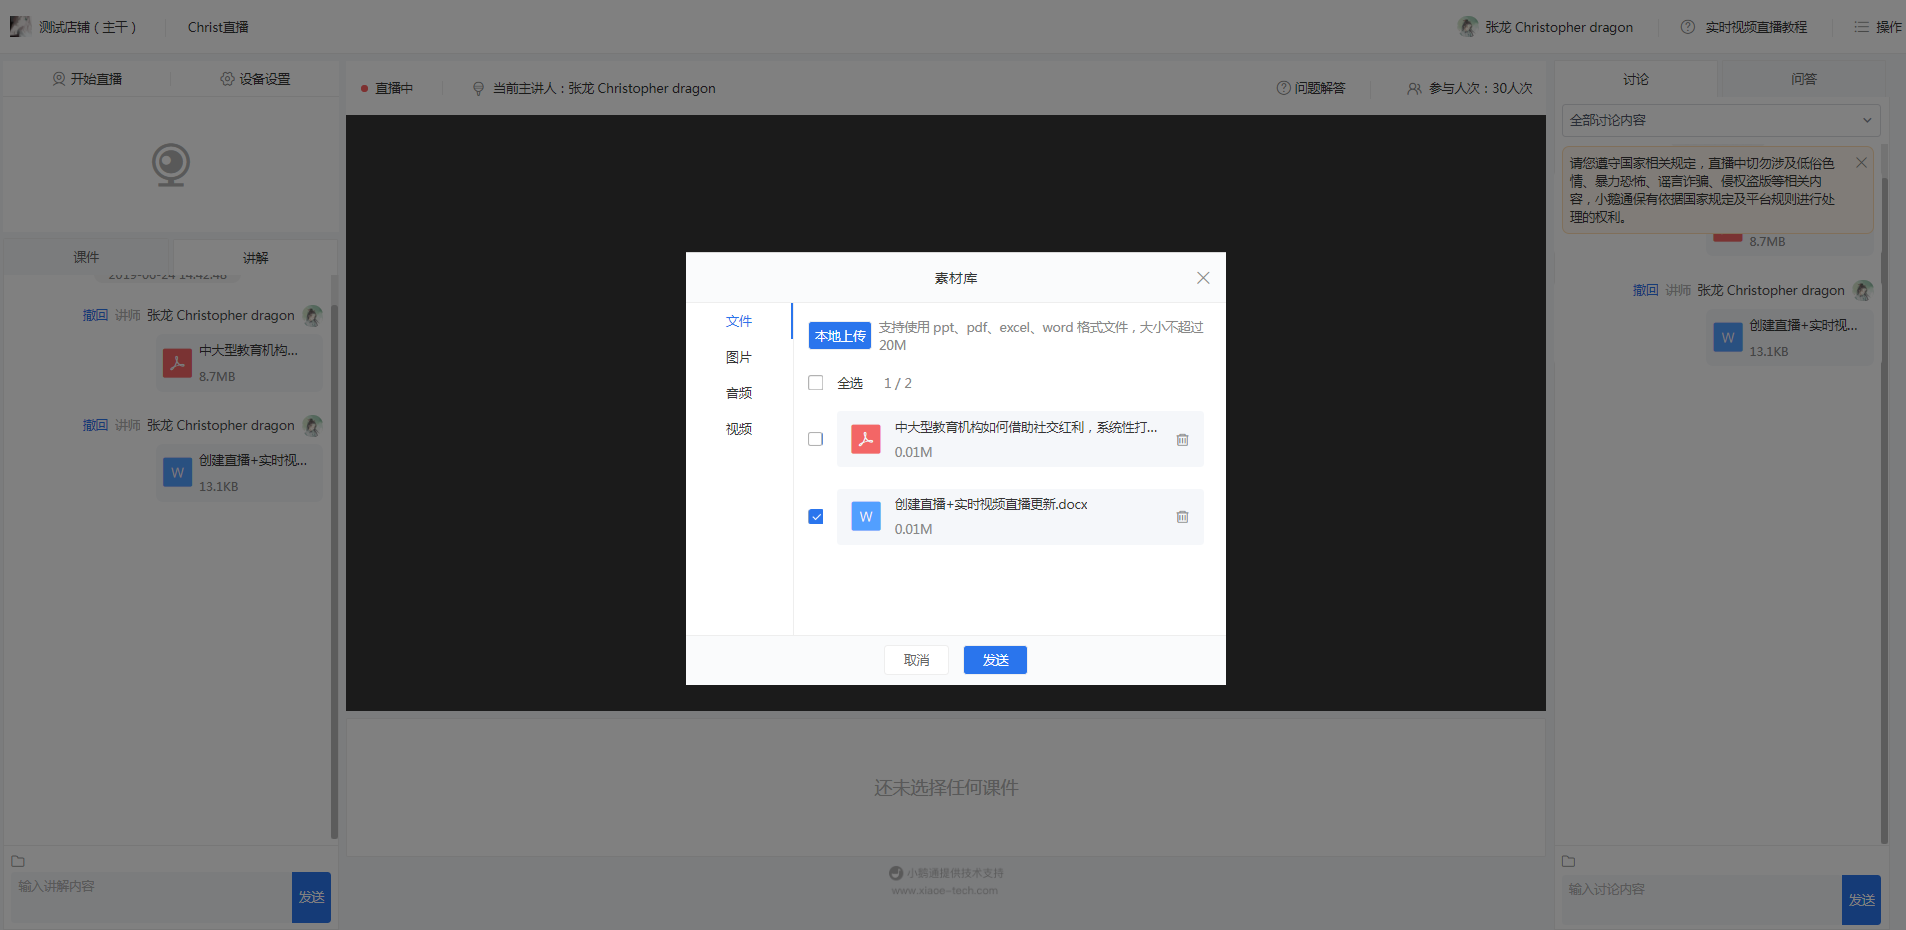
Step 3:Download files (student side)
In theH5Click the operation in the live streaming of the store->Shared files,Select the corresponding file to download.
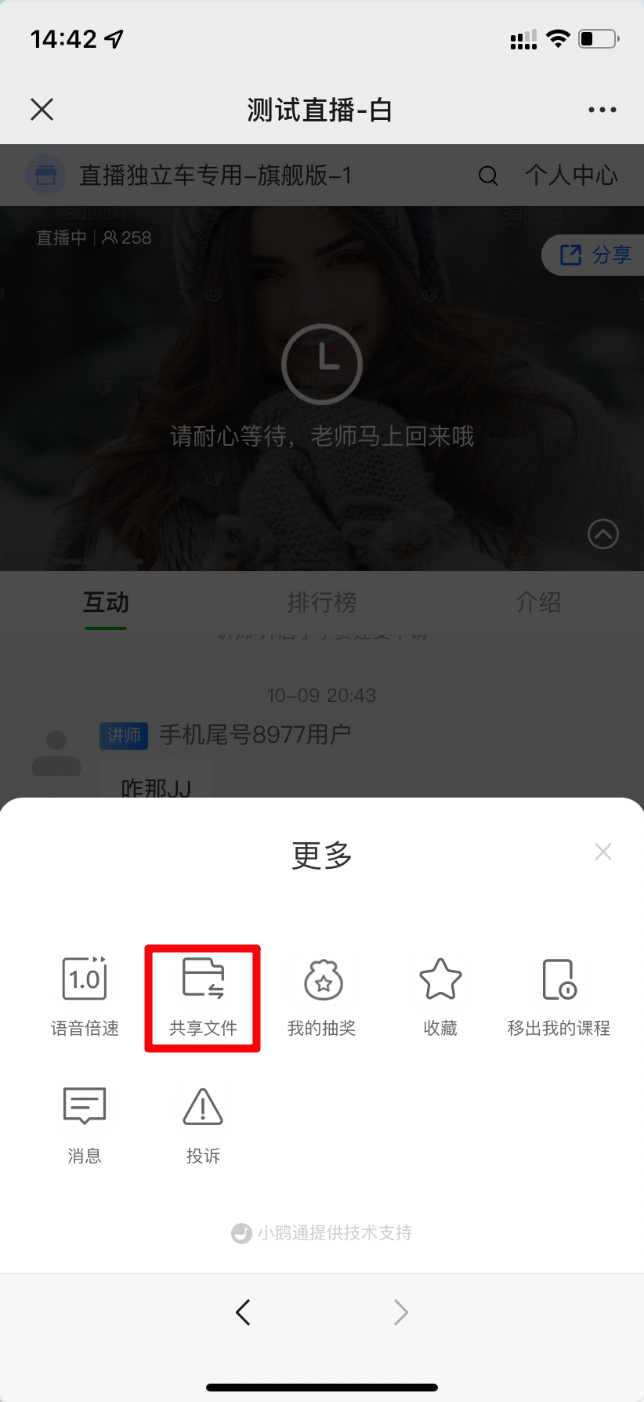
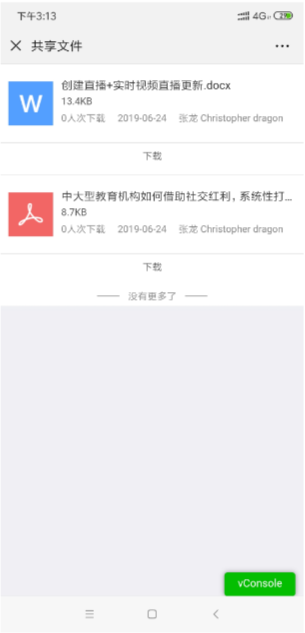
Tutorial on Sending Audio and Video by Instructors in the Live Streaming Terminal
I. Feature Introduction
Support instructors to send audio and video in the live streaming room
II. Purpose of Use
Merchants can use audio and video during live streaming to assist teaching and enhance the live streaming effect
III. Use Scenarios
Meet the merchants' needs to send audio and video during live streaming
IV. Operation Path
Merchant side:Upload files → Send files → View files
V. Usage Tutorial
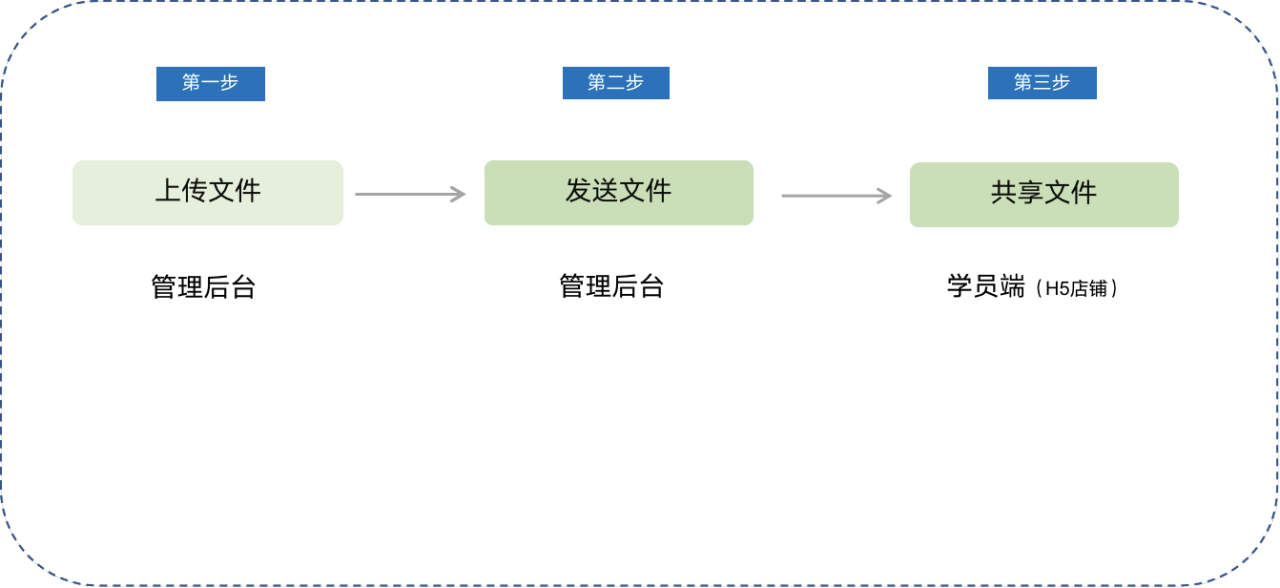
Step 1:Upload files
Web version
1. Instructors can upload the corresponding audio or video files to the material library on the web streaming end
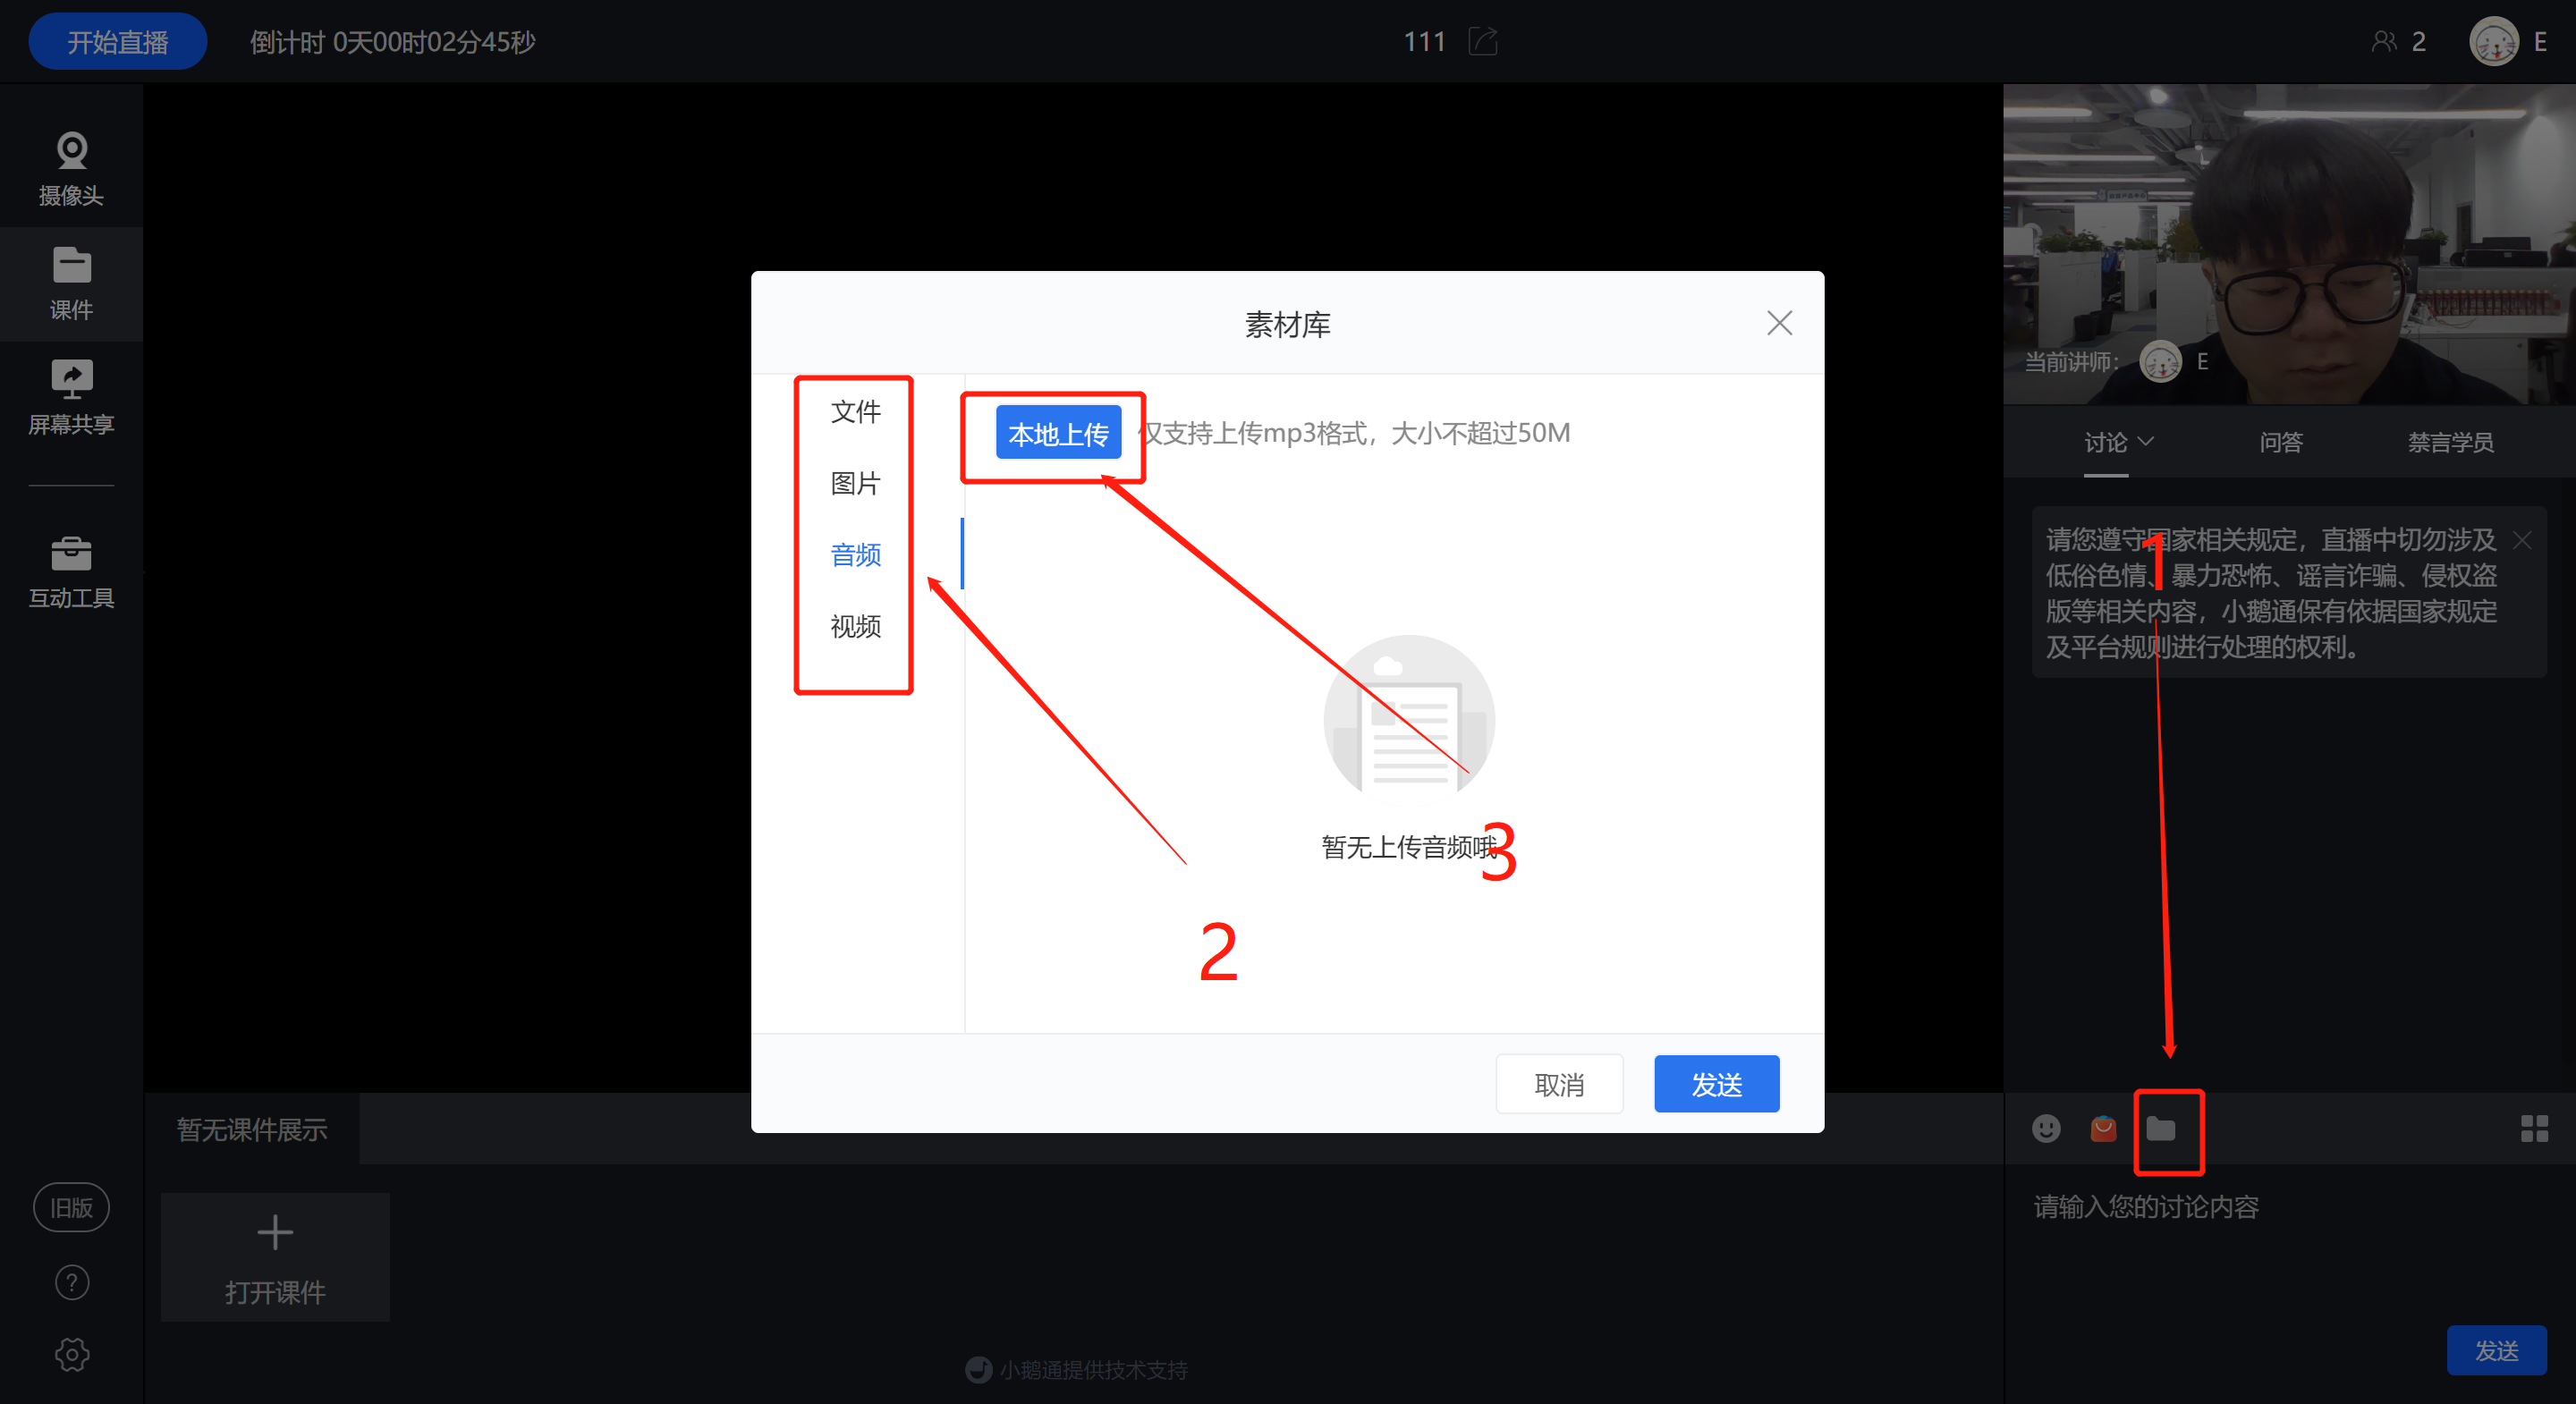
elink Live Client
Open the toolbox, select 'File Disk', find the corresponding audio or video file, and click 'Send to the discussion area' to send the file to the discussion area for students to view and download
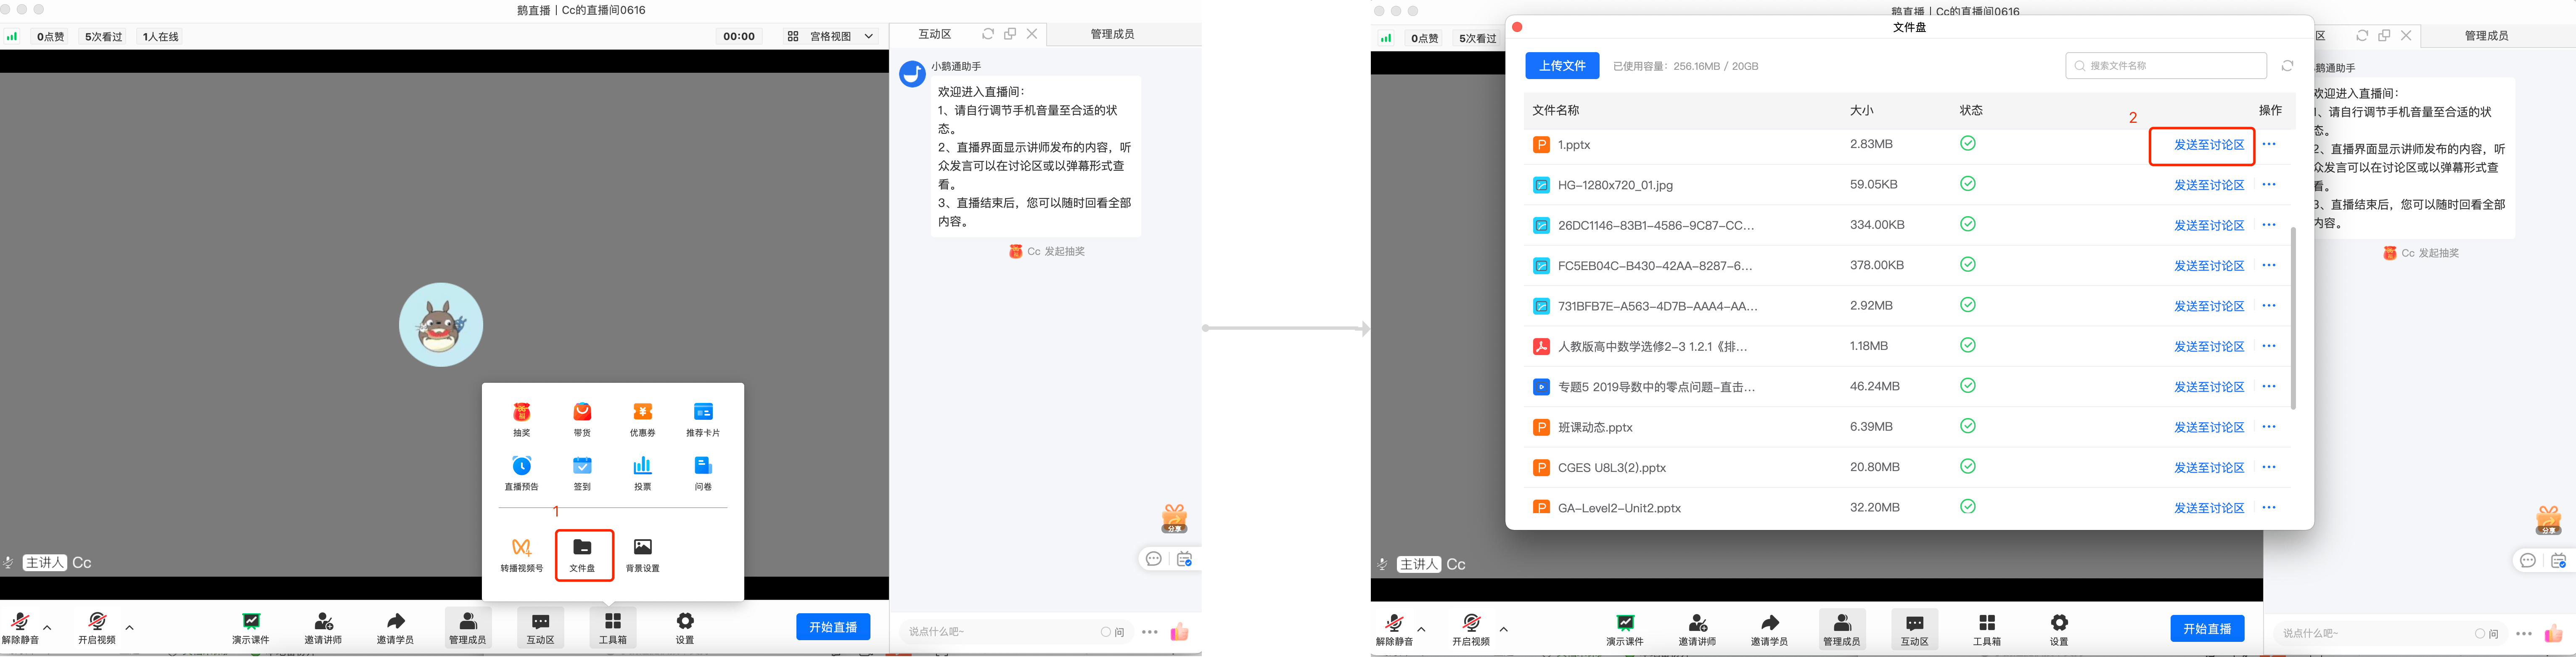
2. Instructors can alsopaste the link in the H5 live streaming roomTencent Videoto upload audio and video files.Currently, due to the upgrade of QQ Music, the function of pasting URLs is temporarily unavailable.
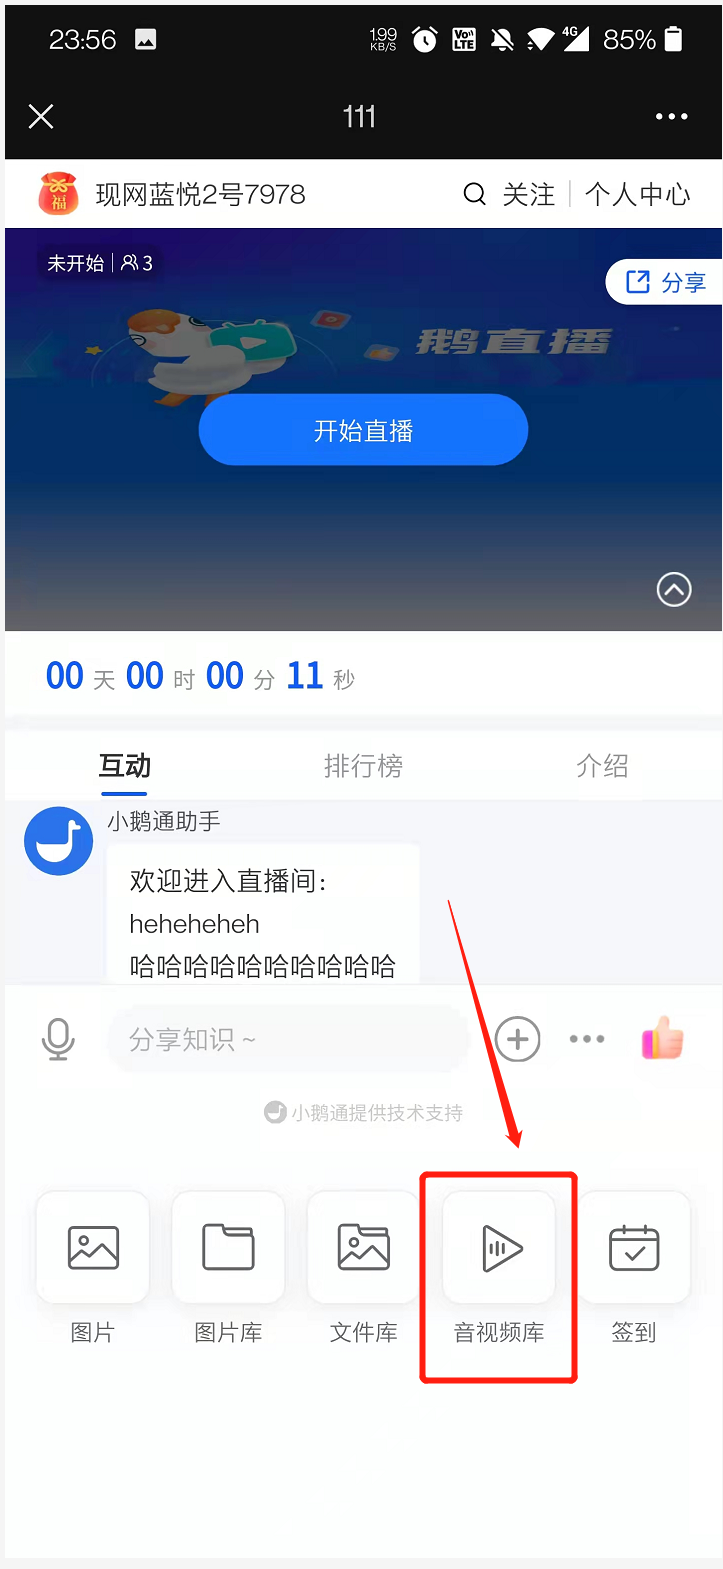
Step 2:Send files (Student side)
1. After uploading is completed, you can click the relevant file to send it to the explanation area
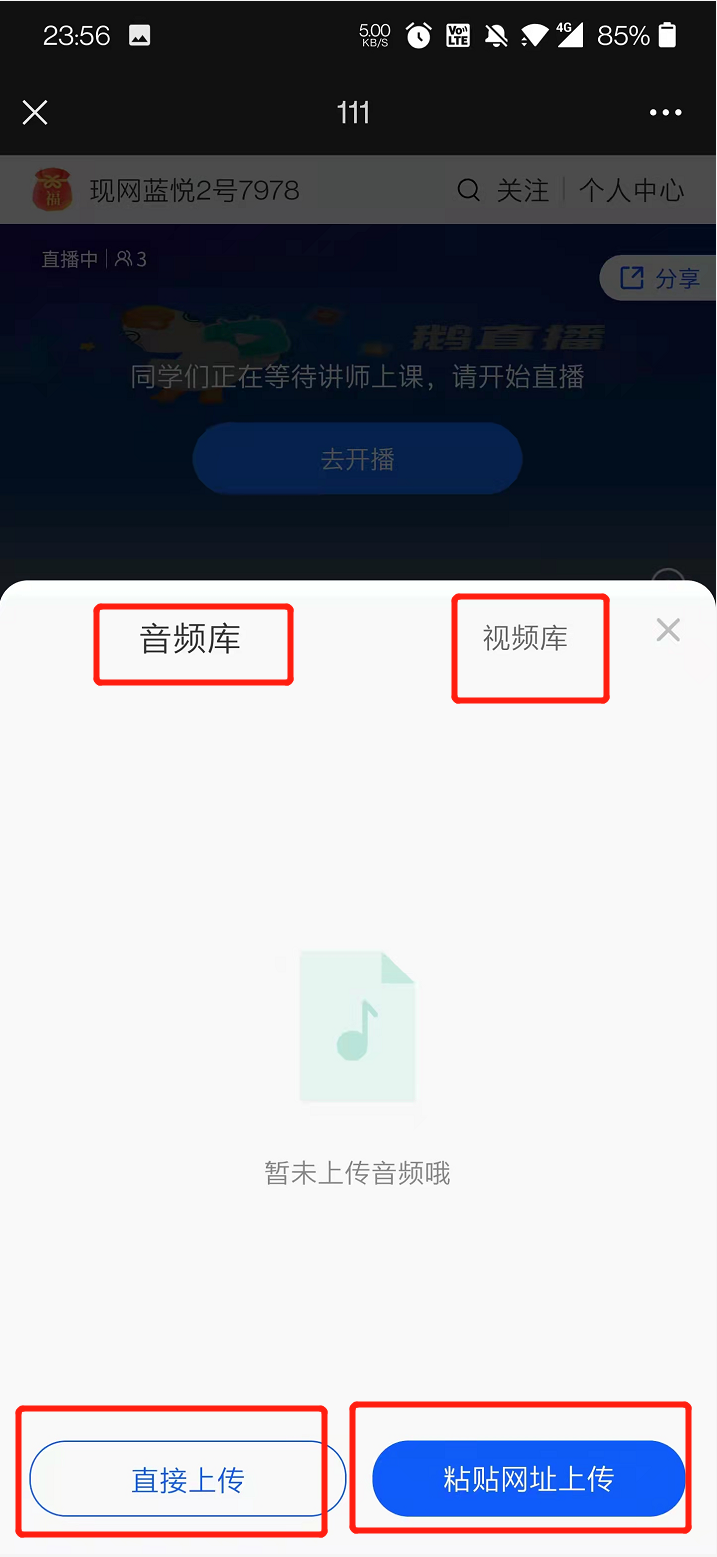
Step 3:View files (Student side)
After the instructor successfully uploads the audio and video files, students can view them in the explanation area
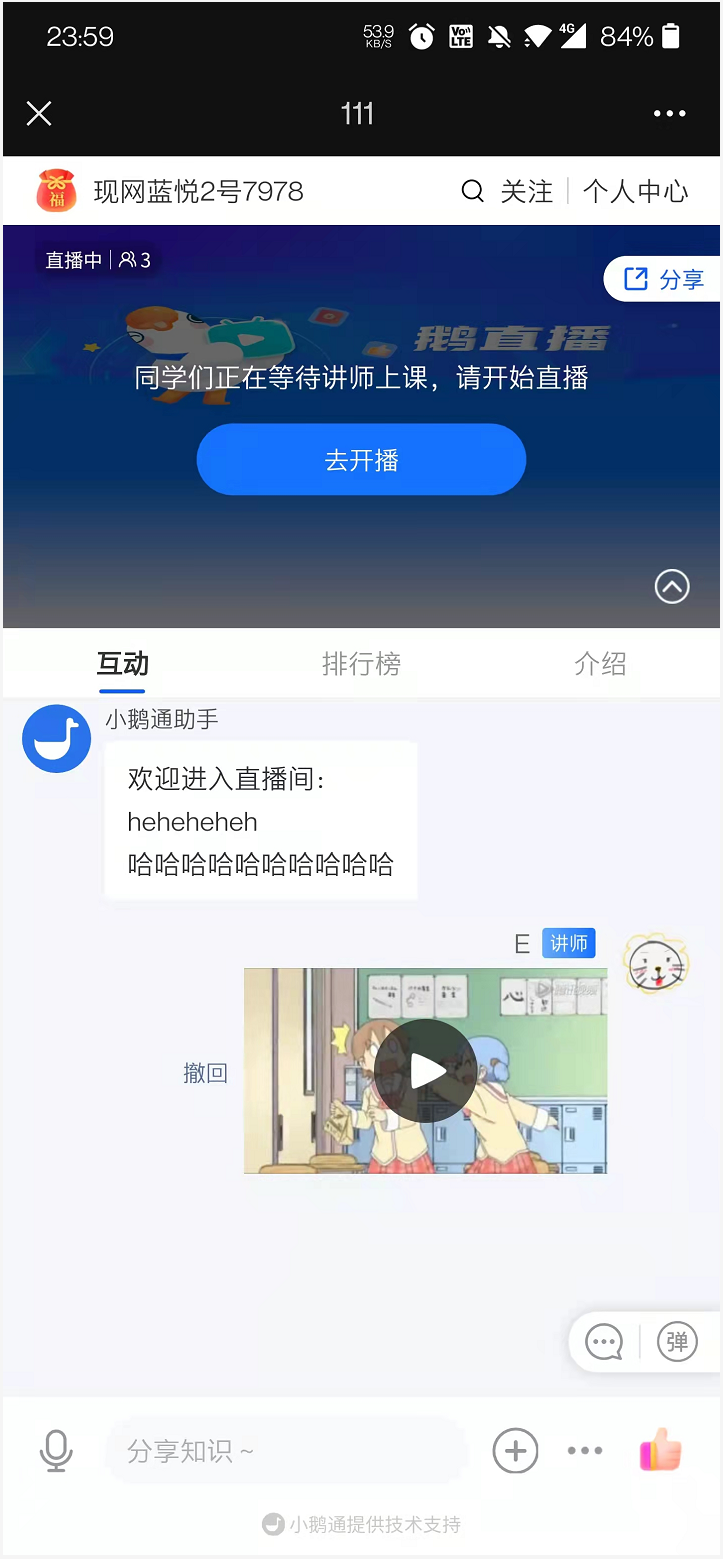
Tutorial on how to send pictures, texts, and voices for live streaming instructors
I. Feature Introduction
It supports instructors to send pictures, texts, and voices during live streaming.
II. Purpose of Use
Instructors can use pictures, texts, and voices during live streaming to assist teaching and enhance the live streaming effect.
III. Use Scenarios
It meets the scenarios where instructors need to send pictures, texts, and voices during live streaming.
IV. Operation Path
Send pictures → Send texts → Send voices
V. Usage Tutorial
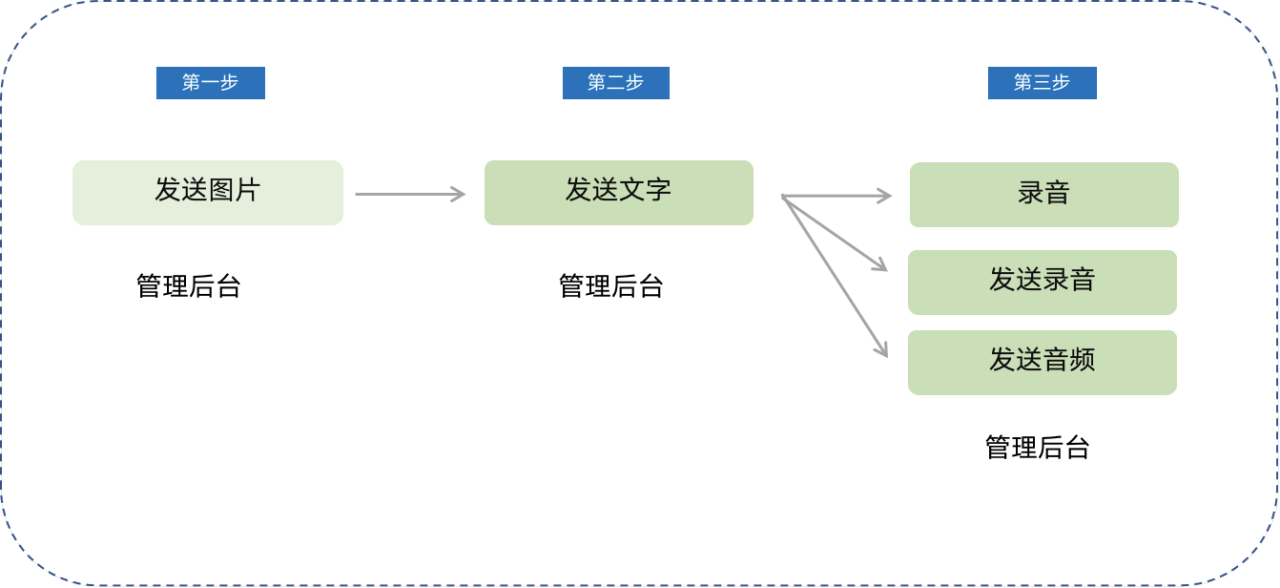
Step 1:Send pictures (Live streaming room)
Instructors canSelect pictures from the material library in the PC live streaming room and upload them to the explanation area
(elink Assistant Client)
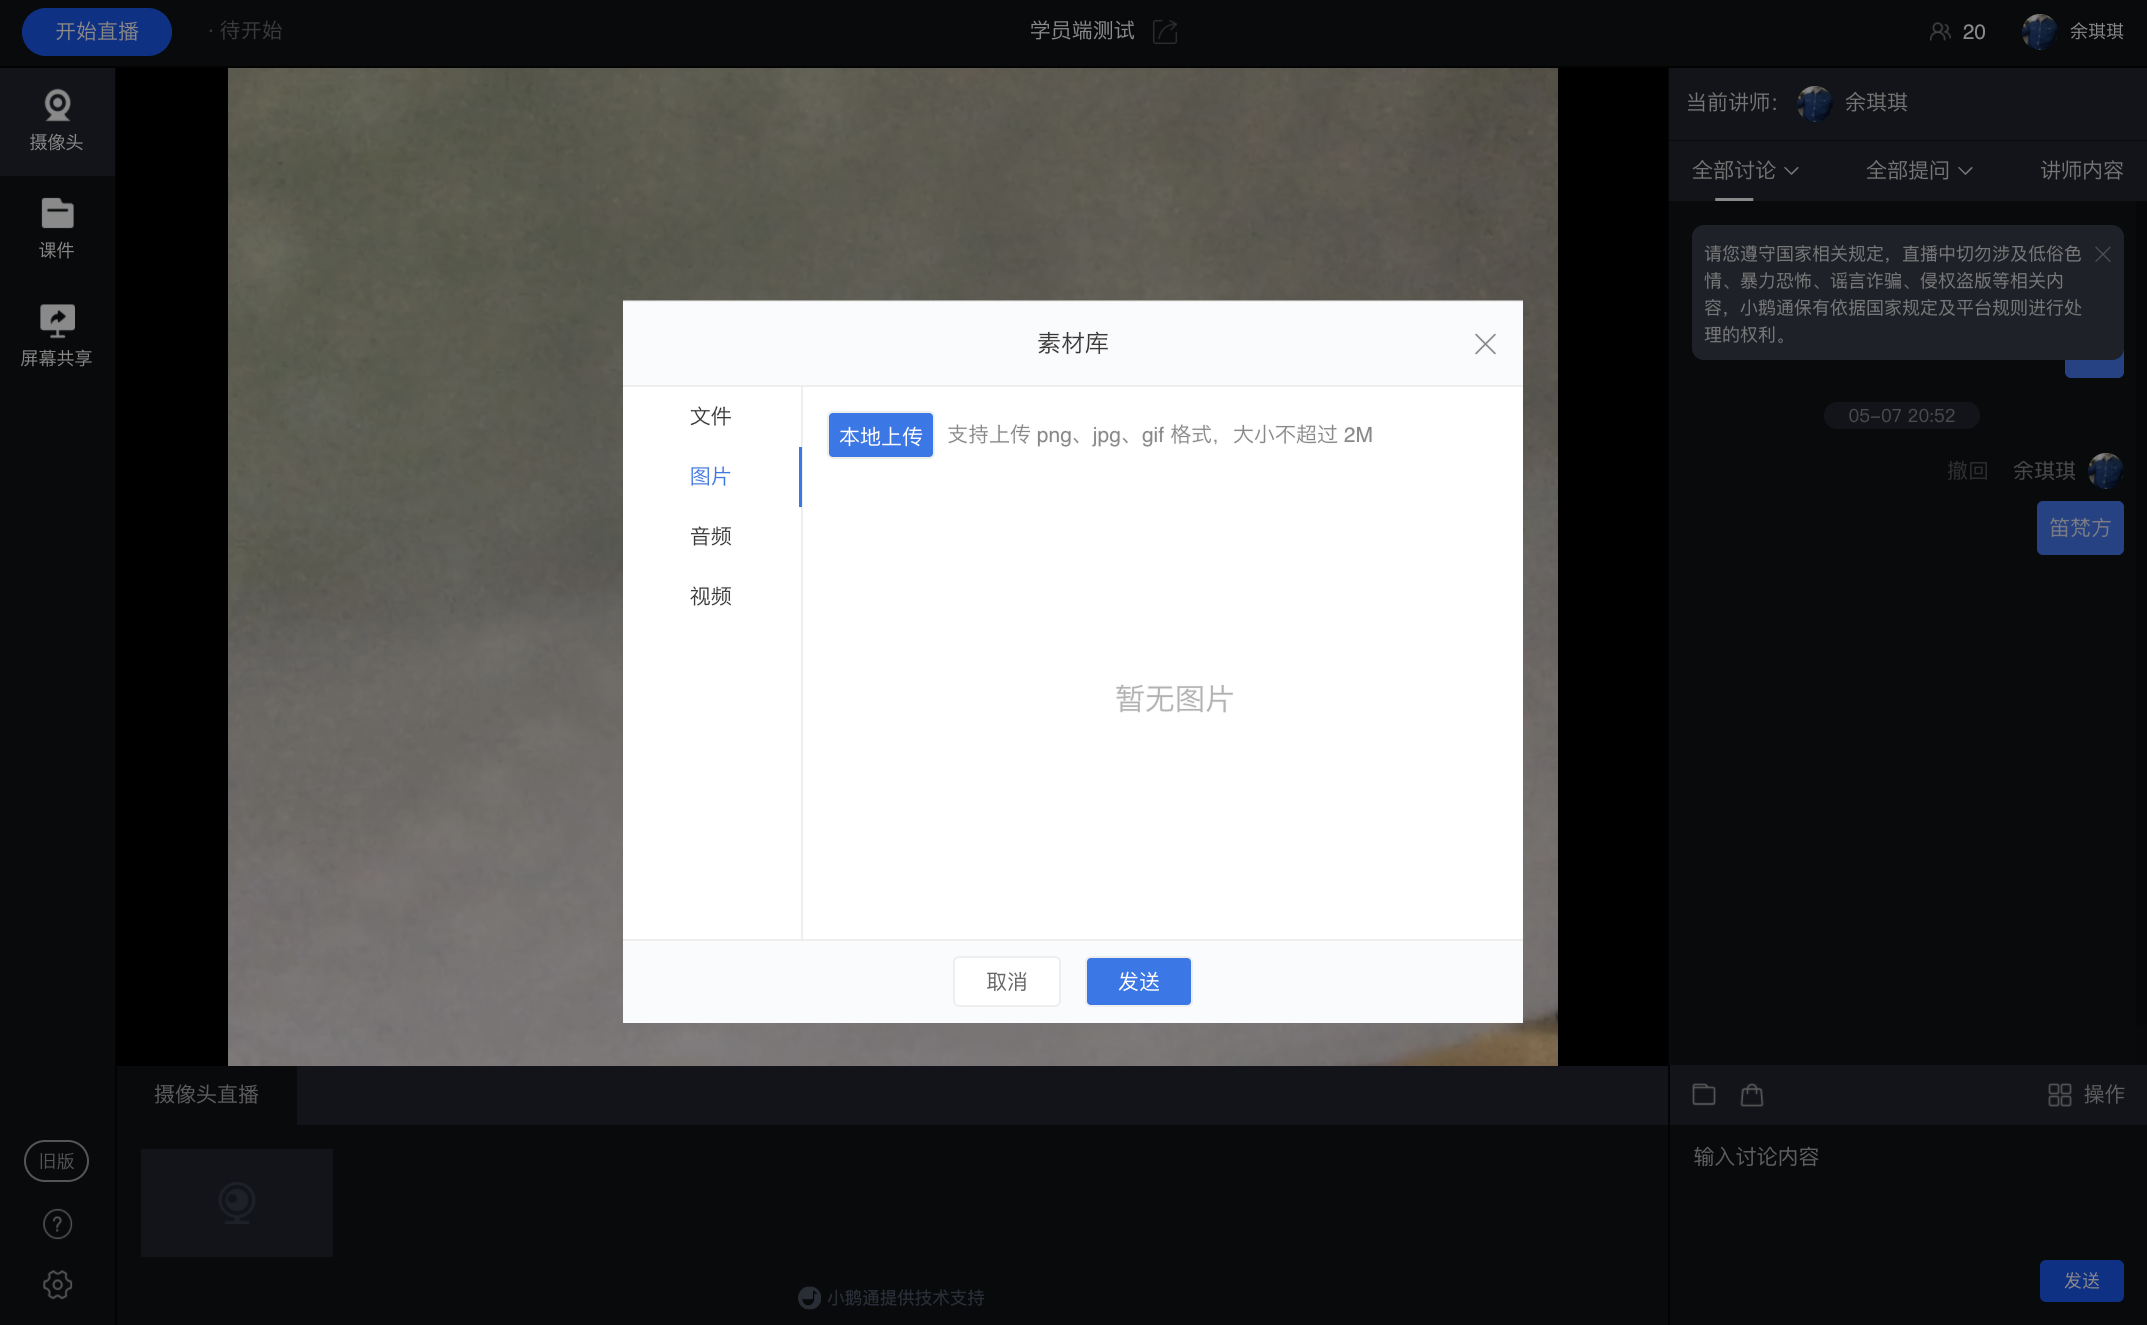
elink Live Client
Open the toolbox, select the 'File Disk', find the corresponding picture file, and click 'Send to the discussion area' to send the file to the discussion area for students to view and download
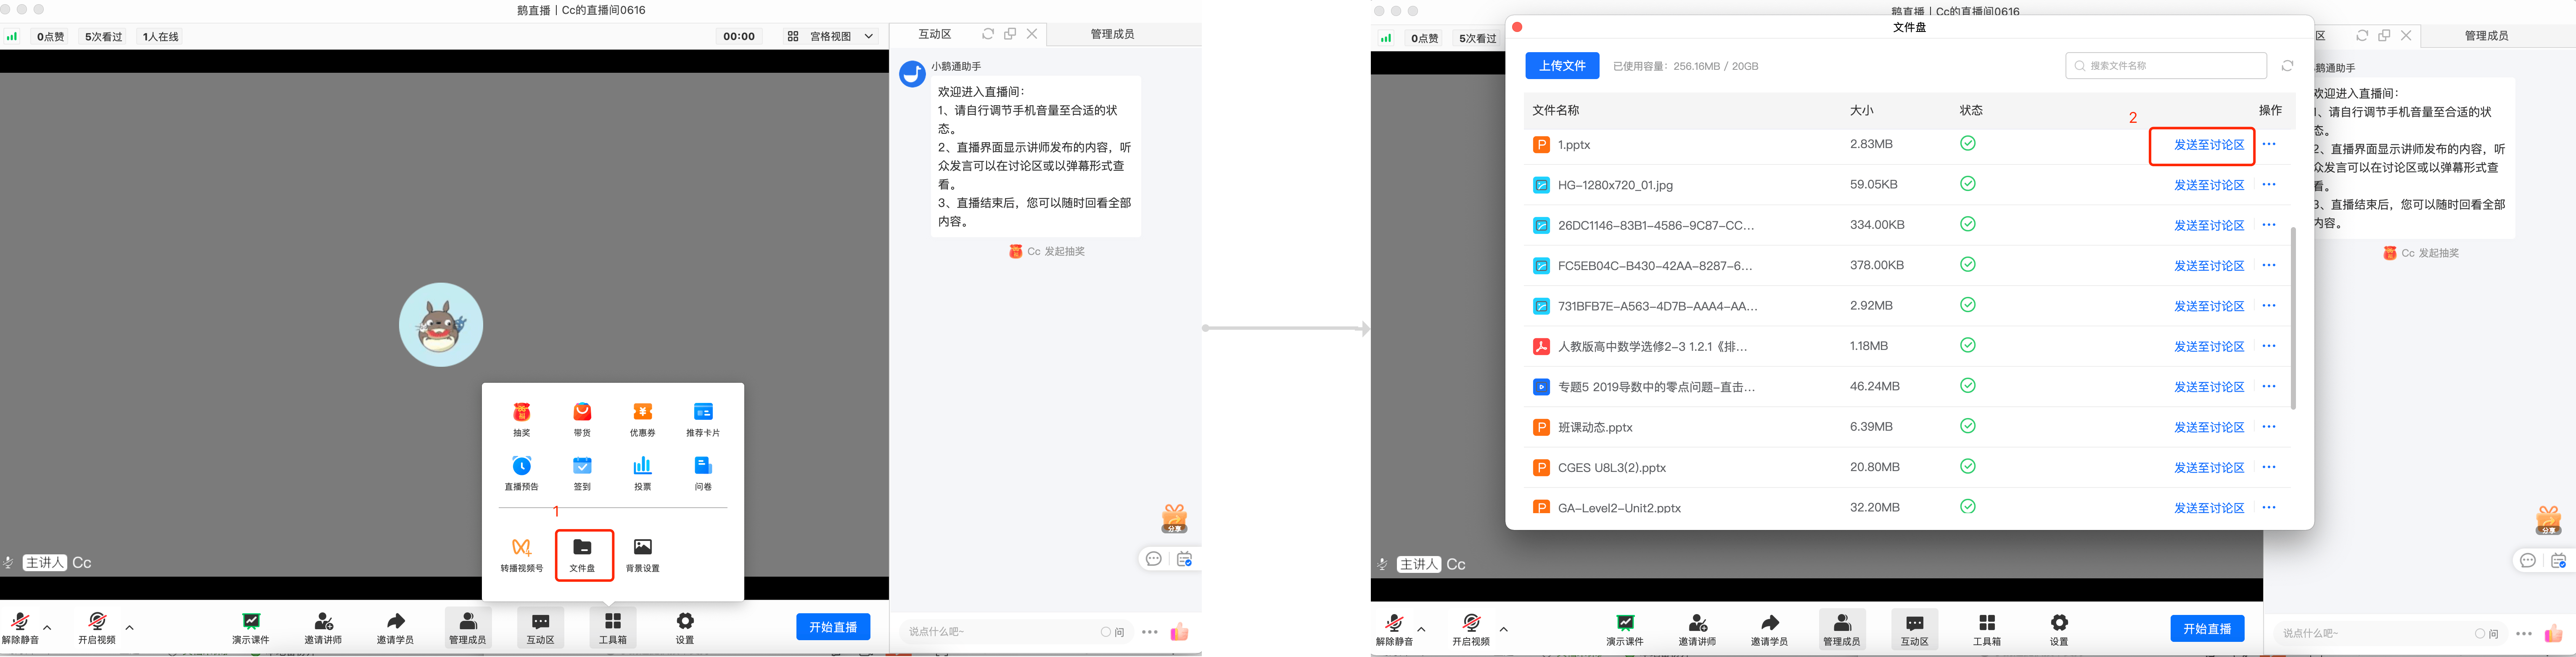
Step 2:Send texts (Store management console)
1. InYou can send content in text form below the explanation area and the discussion area on the PC
2. The explanation area is mainly used for teaching content (the sent content will be synchronized in the discussion area)
3. You can filter the content in the discussion area. If you want to interact in a timely manner, you can post texts in the discussion area
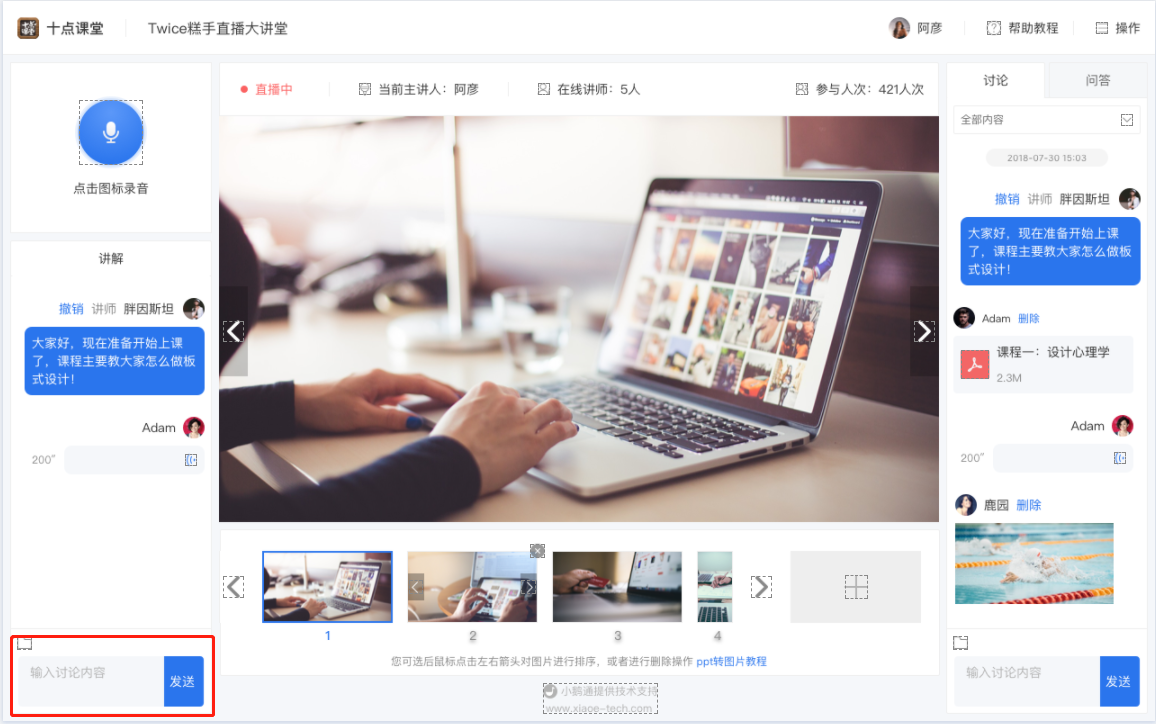
Step 3:Send audio (Store management console)
Copy the live streaming room address link and open it in the browser to enter the live streaming room, and you can see the recording area in the upper - left corner
1. Click on the blue picture to start recording
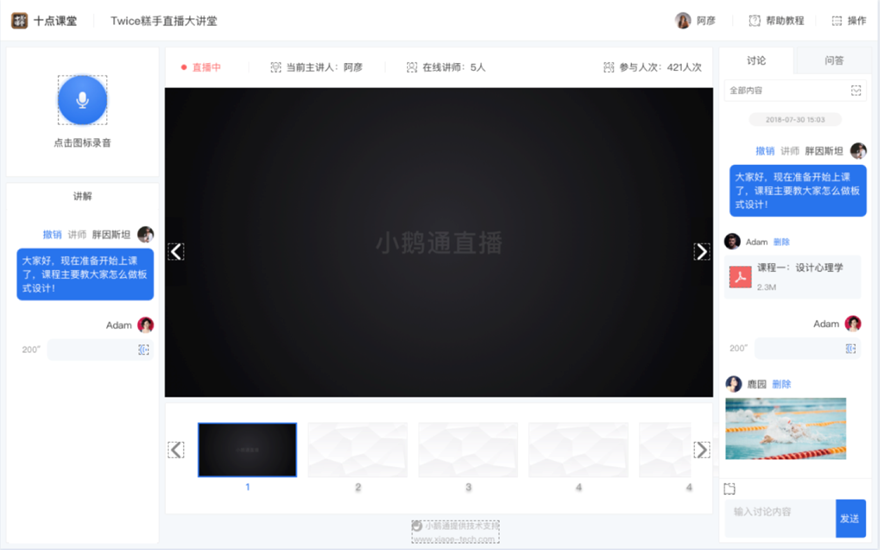
2.Only 10 - minute voice recordings are supported. After 10 minutes of recording, the voice will be automatically sent, and the next recording will start
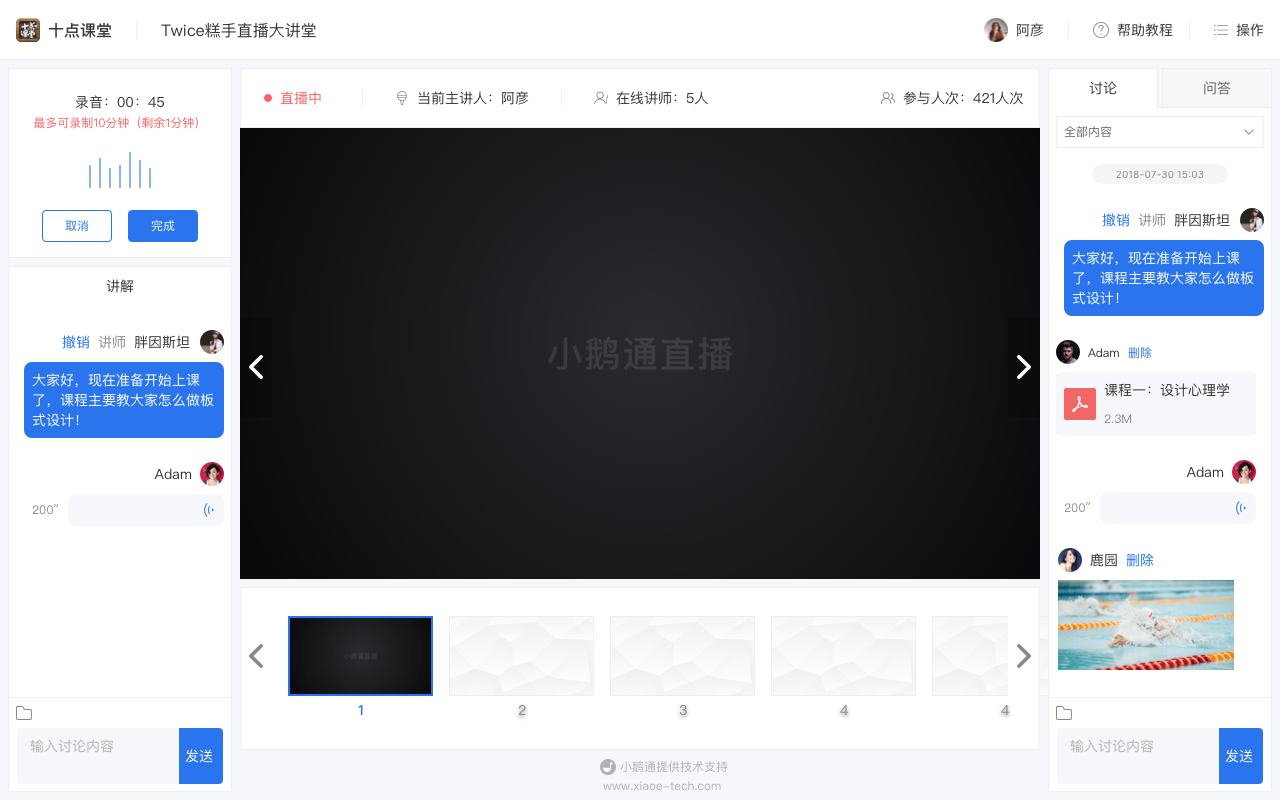
Click [Finish] and then you can choose to send it to the explanation area/Discussion area; or [Cancel] to record again
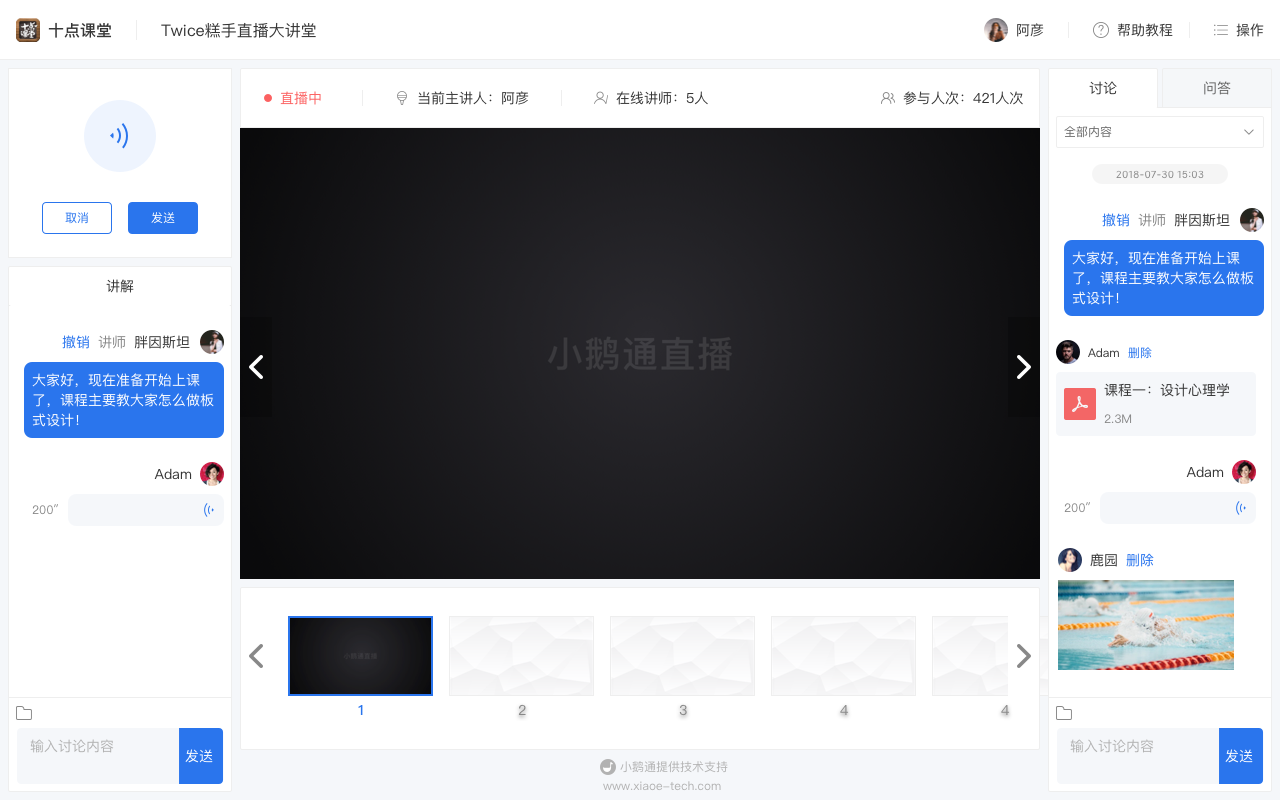
3. Instructors can also send uploaded audio through the material library
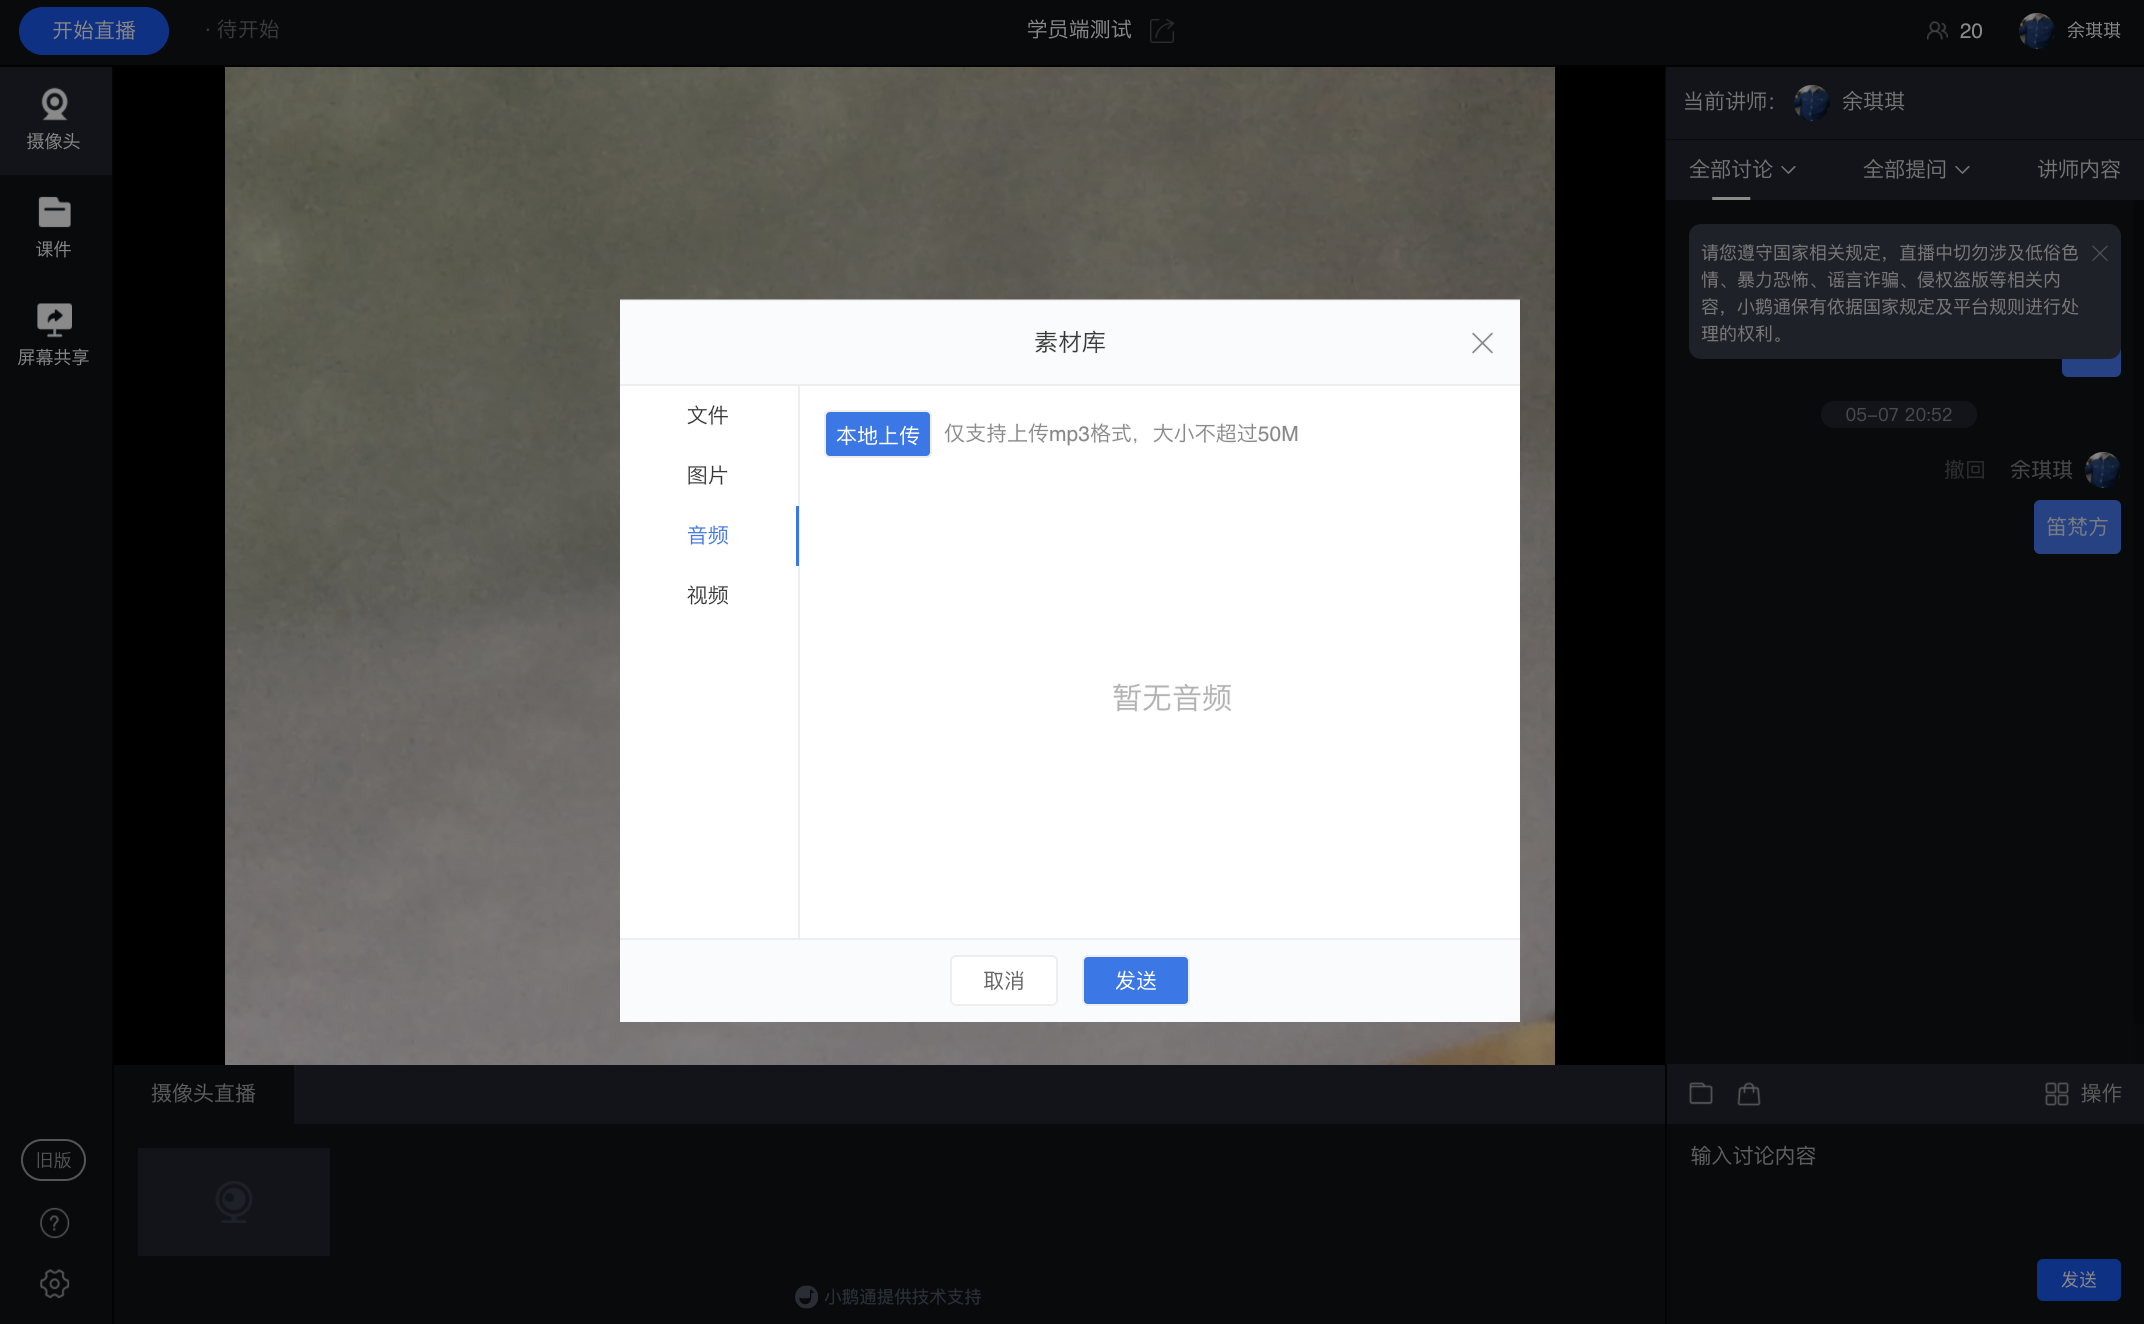
Supplementary interactive prompts for vertical screen live rooms and optimization of the product list refresh function
I. Feature Introduction
Added relevant interactive prompts in the vertical-screen live streaming room and supported automatic refresh after opening the product list each time.
II. Purpose of Use
Help enliven the atmosphere of the live streaming room and enhance users' experience of watching live streams and making purchases.
III. Use Scenarios
Add interactive prompts (such as entry prompts, purchasing prompts, sharing prompts, etc.) on the page during vertical-screen live streaming to enliven the atmosphere of the live streaming room and encourage users to engage in more interactive operations (such as clicking on products and sharing the live streaming room).
Meanwhile, when merchants use live commerce and add products in the background, the product list will automatically refresh when users open it, enhancing users' experience of watching live streams and making purchases.
IV. Operation Path
Learner's end: WeChat H5 --- Live streaming page
V. Usage Tutorial
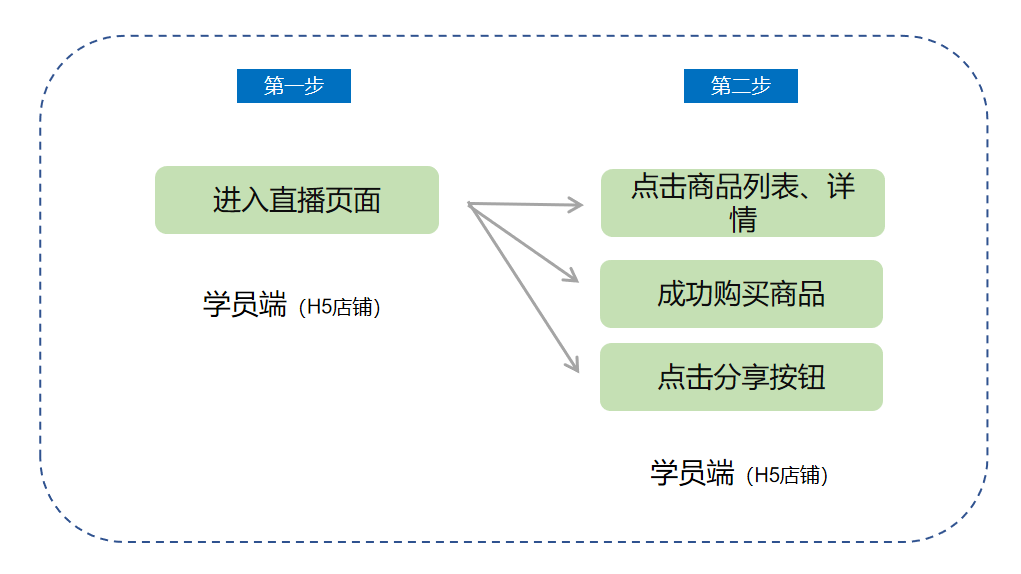
Step 1: Enter the [Vertical-screen Live Streaming] page
1. When users perform the following actions during live streaming (currently only vertical-screen live streaming is supported), corresponding prompts will be displayed:
· Enter the live streaming room ----> Entry prompt
· Click on a product ----> Purchasing prompt
· Successfully purchase a product ----> Purchase success prompt
· Click the sharing button ----> Sharing prompt
The styles of each prompt are as shown in the figure below. The interaction actions are as follows: The prompt slides in from left to right to the specified position → stays and displays → fades out in place, and then the next prompt is displayed.

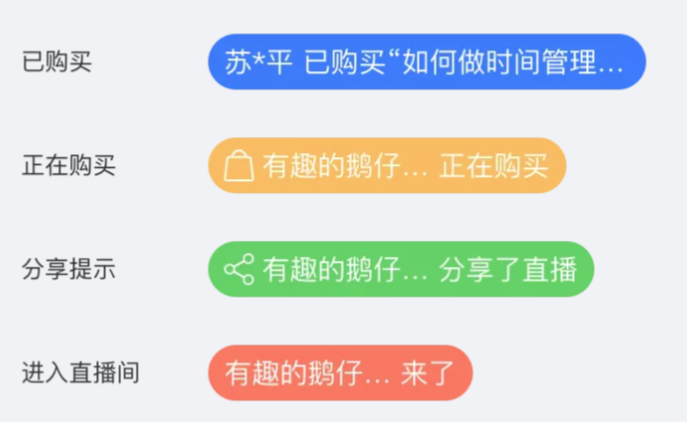
Step 2: Click on the product list
On the live streaming page (including both horizontal-screen and vertical-screen live streaming), each time users click to open the product list pop-up window in the live streaming room, the content of this pop-up window will be refreshed.
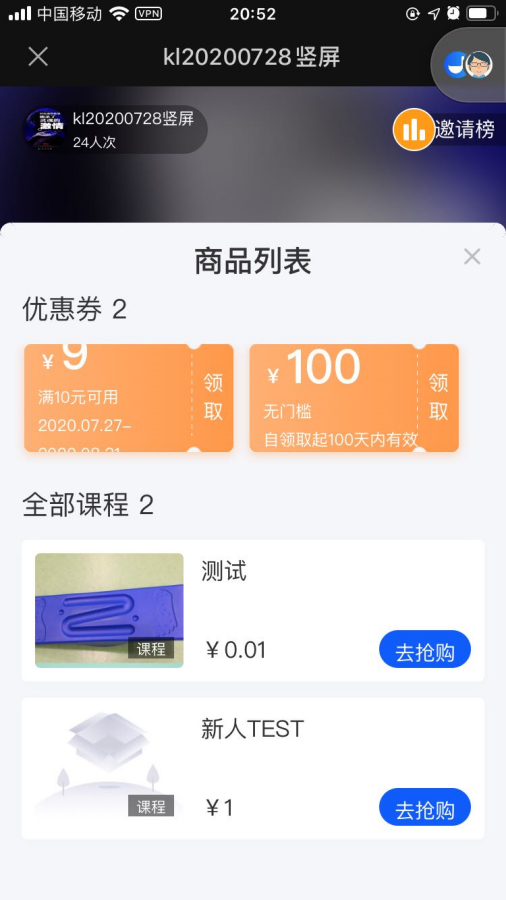
Instructions for using the Influencer Invitation Leaderboard event
Important Note: Event implementation must comply withRegulations for Managing the Invitation Influencer Ranking Event,Please read carefully before use.
I. Feature Introduction
Invitation Influencer Ranking Feature: An important tool for live streams to acquire traffic, which encourages fans to forward and share the live stream in the form of a ranking list.
Invitation Influencer Ranking Event: Refers to setting event rewards based on the Invitation Influencer Ranking. The prizes are directly displayed to stimulate more users to share and drive viral marketing.
II. Purpose of Use
Through the Invitation Influencer Ranking Event, stimulate more users to share and drive viral marketing, and acquire more traffic for live streams.
III. Use Scenarios
A merchant starts a live stream and sets rewards for the Invitation Influencer Ranking Event, then shares the live stream in the community. When users enter the live - stream room, they find that they can win prizes by ranking up.This enhancestheir initiative to invite friends to watch the live stream, and they forward the live stream to their Moments/community. Finally, the merchant attracts more new users through the event.
IV. Operation Path
Merchant side: Desktop management console → Live stream → Live - stream management→ Marketing interaction → MarketingSettings→Invitation Influencer Ranking
Student side: Live - stream room → Invitation Influencer Ranking
V. Usage Tutorial
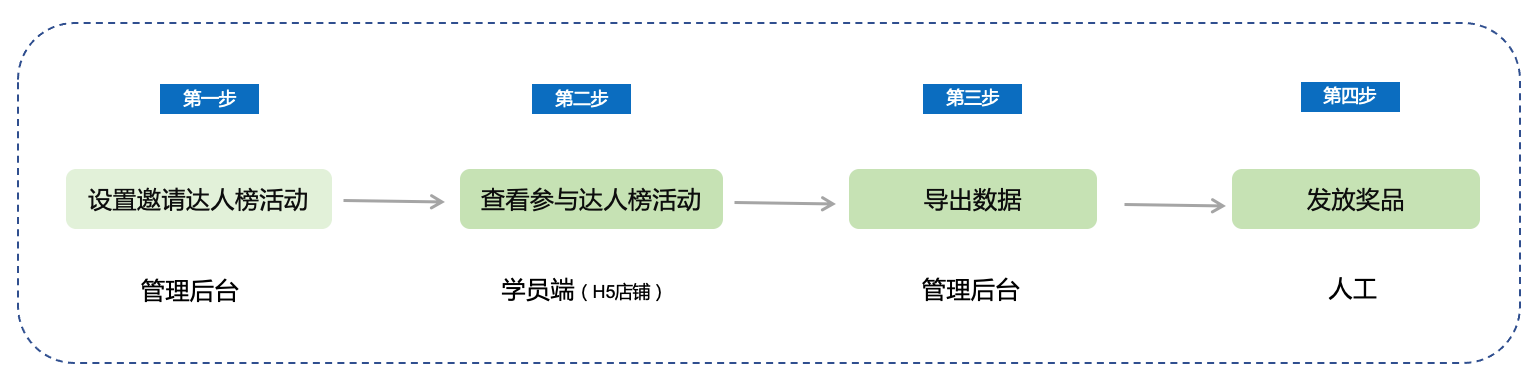
Step 1: Set up the Invitation Influencer Ranking Event (Management background)
1. Enter the [Live - stream room details page] - Marketing settings - Invitation Influencer Ranking module.Turn on the [Invitation Influencer Ranking switch] and click “Go to settings” to set up the Invitation Influencer Ranking Event.
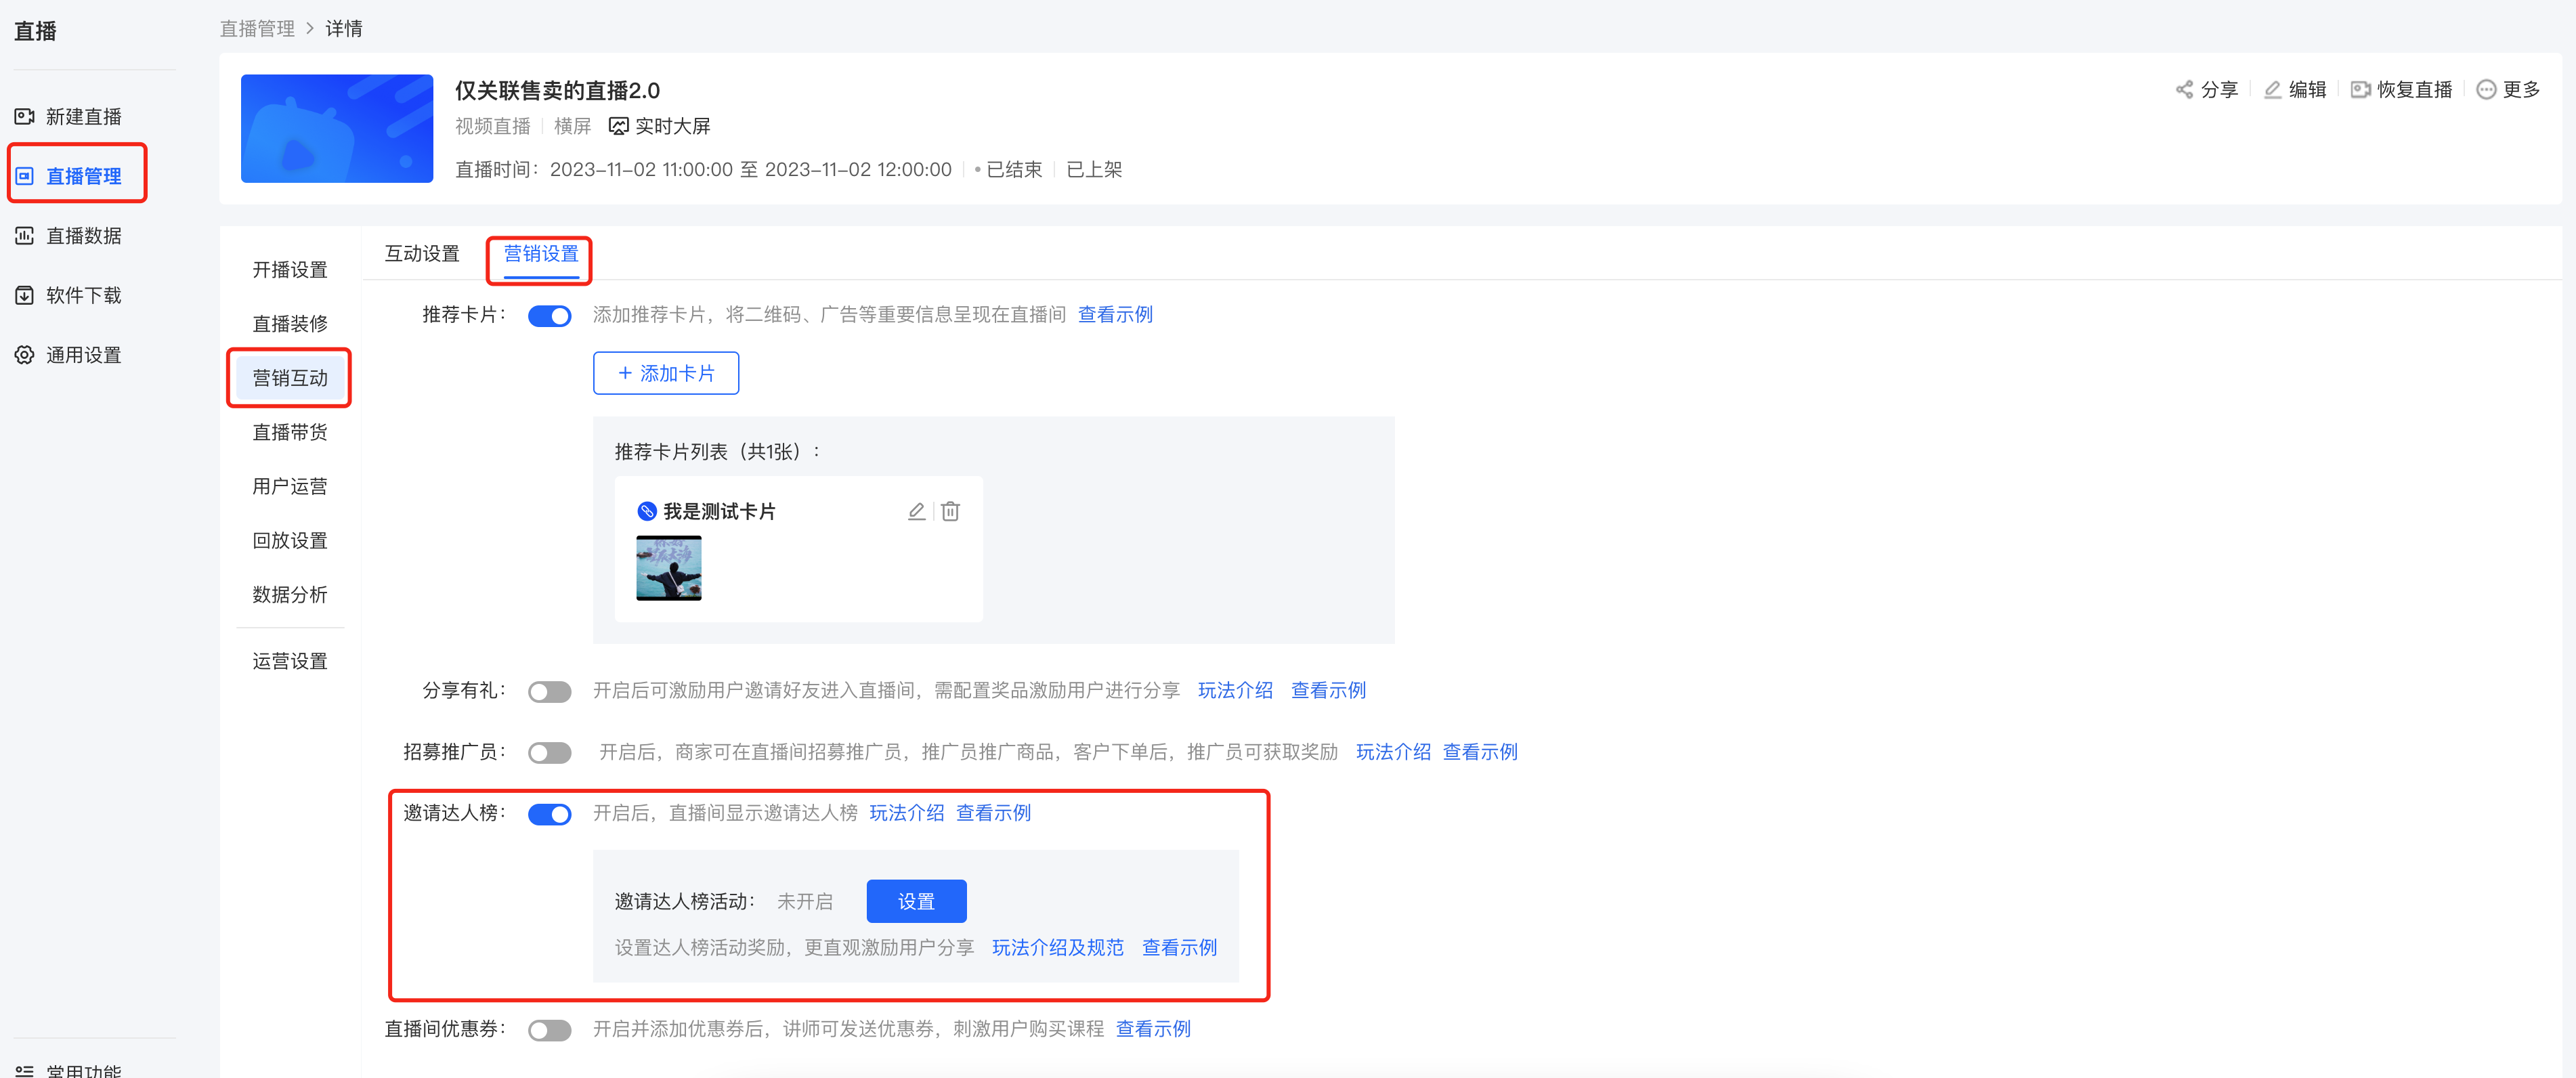
(Management background)
2. Start the Invitation Influencer Ranking Event, set the event end time (after the end, users will see the status “Event has ended”), event rules, and event prizes
(A maximum of 10 prizes can be set).
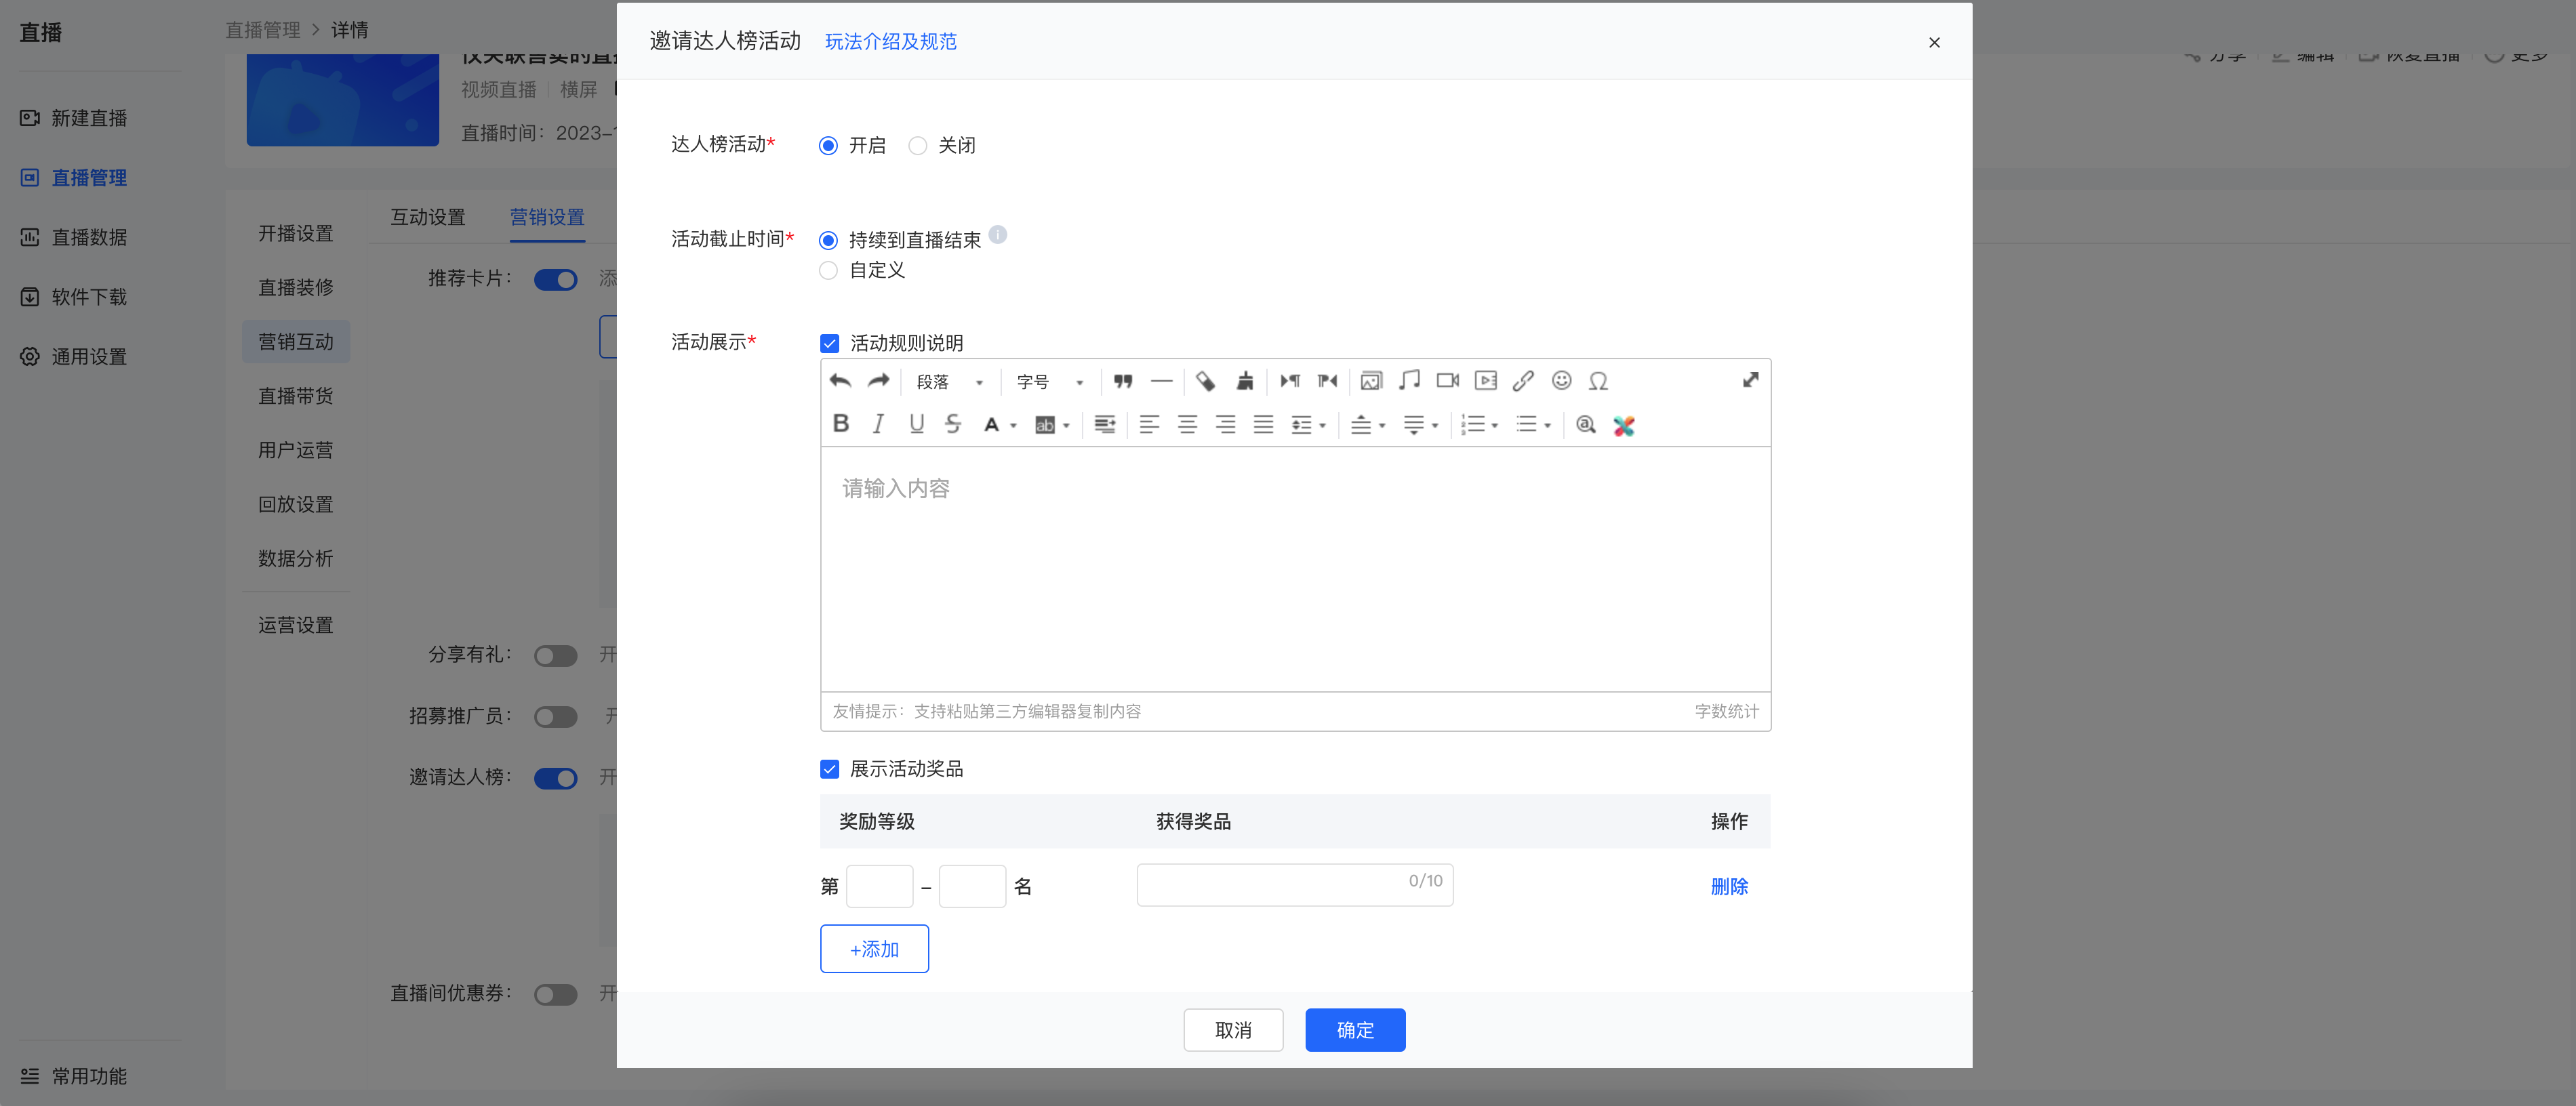
Step 2: View participation in the Invitation Influencer Ranking Event (H5 store)
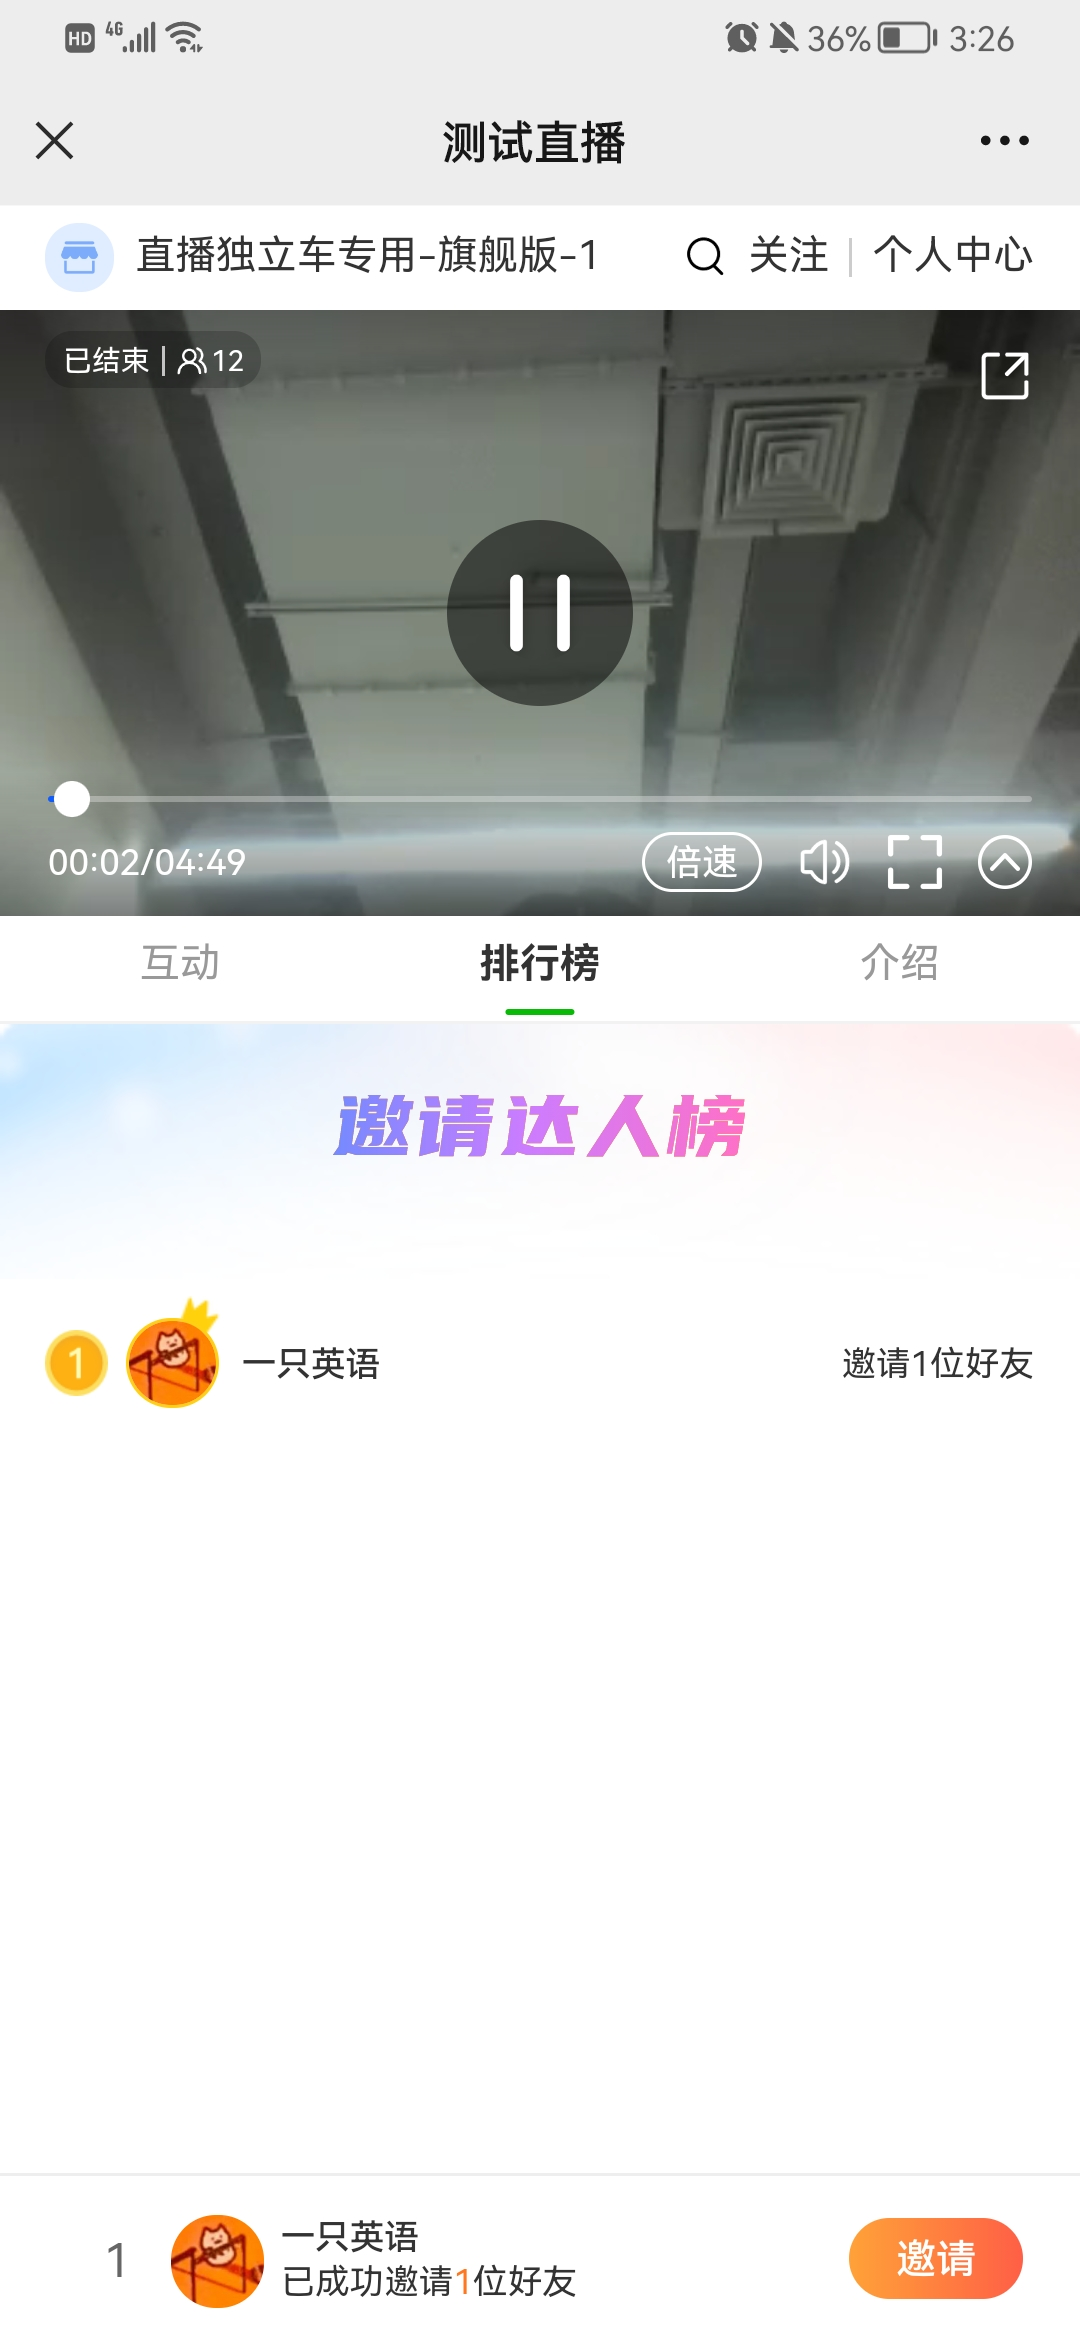
Step 3: Export data from the Invitation Influencer Ranking (Management console)
Enter the [Live - stream room details page] - Data analysis - User data - Invitation Influencer Ranking - Export.
(Note: Currently, only the cumulative data of the Invitation Influencer Ranking can be viewed and exported. Selecting data during the Invitation Influencer Ranking Event is not supported yet. Please remember to manually export the data from the Influencer Ranking when the event ends.We will update the feature later to support exporting data during the event)
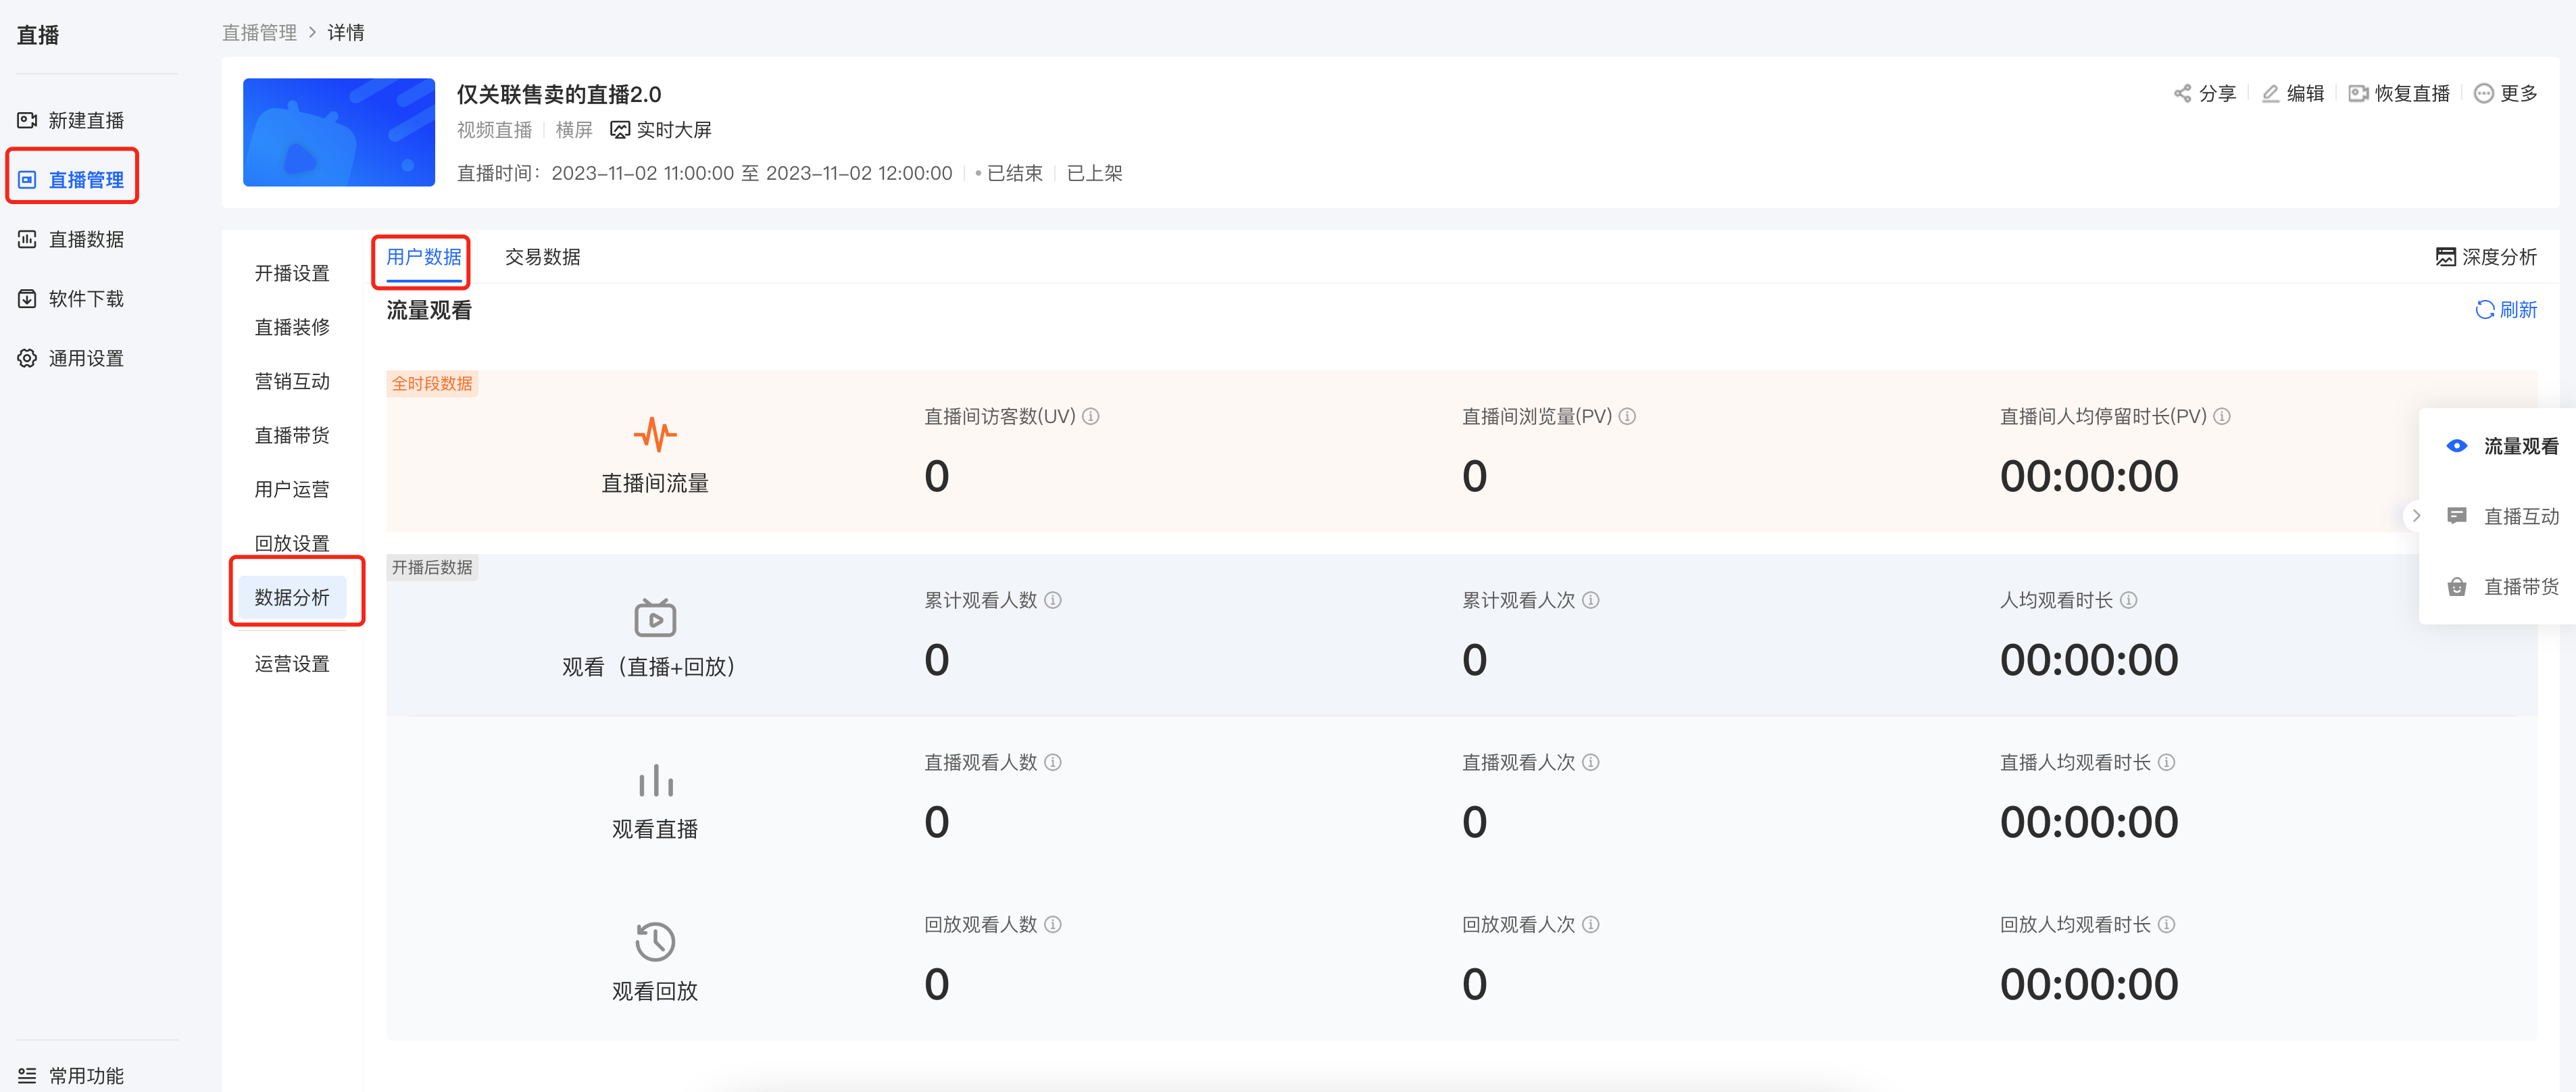
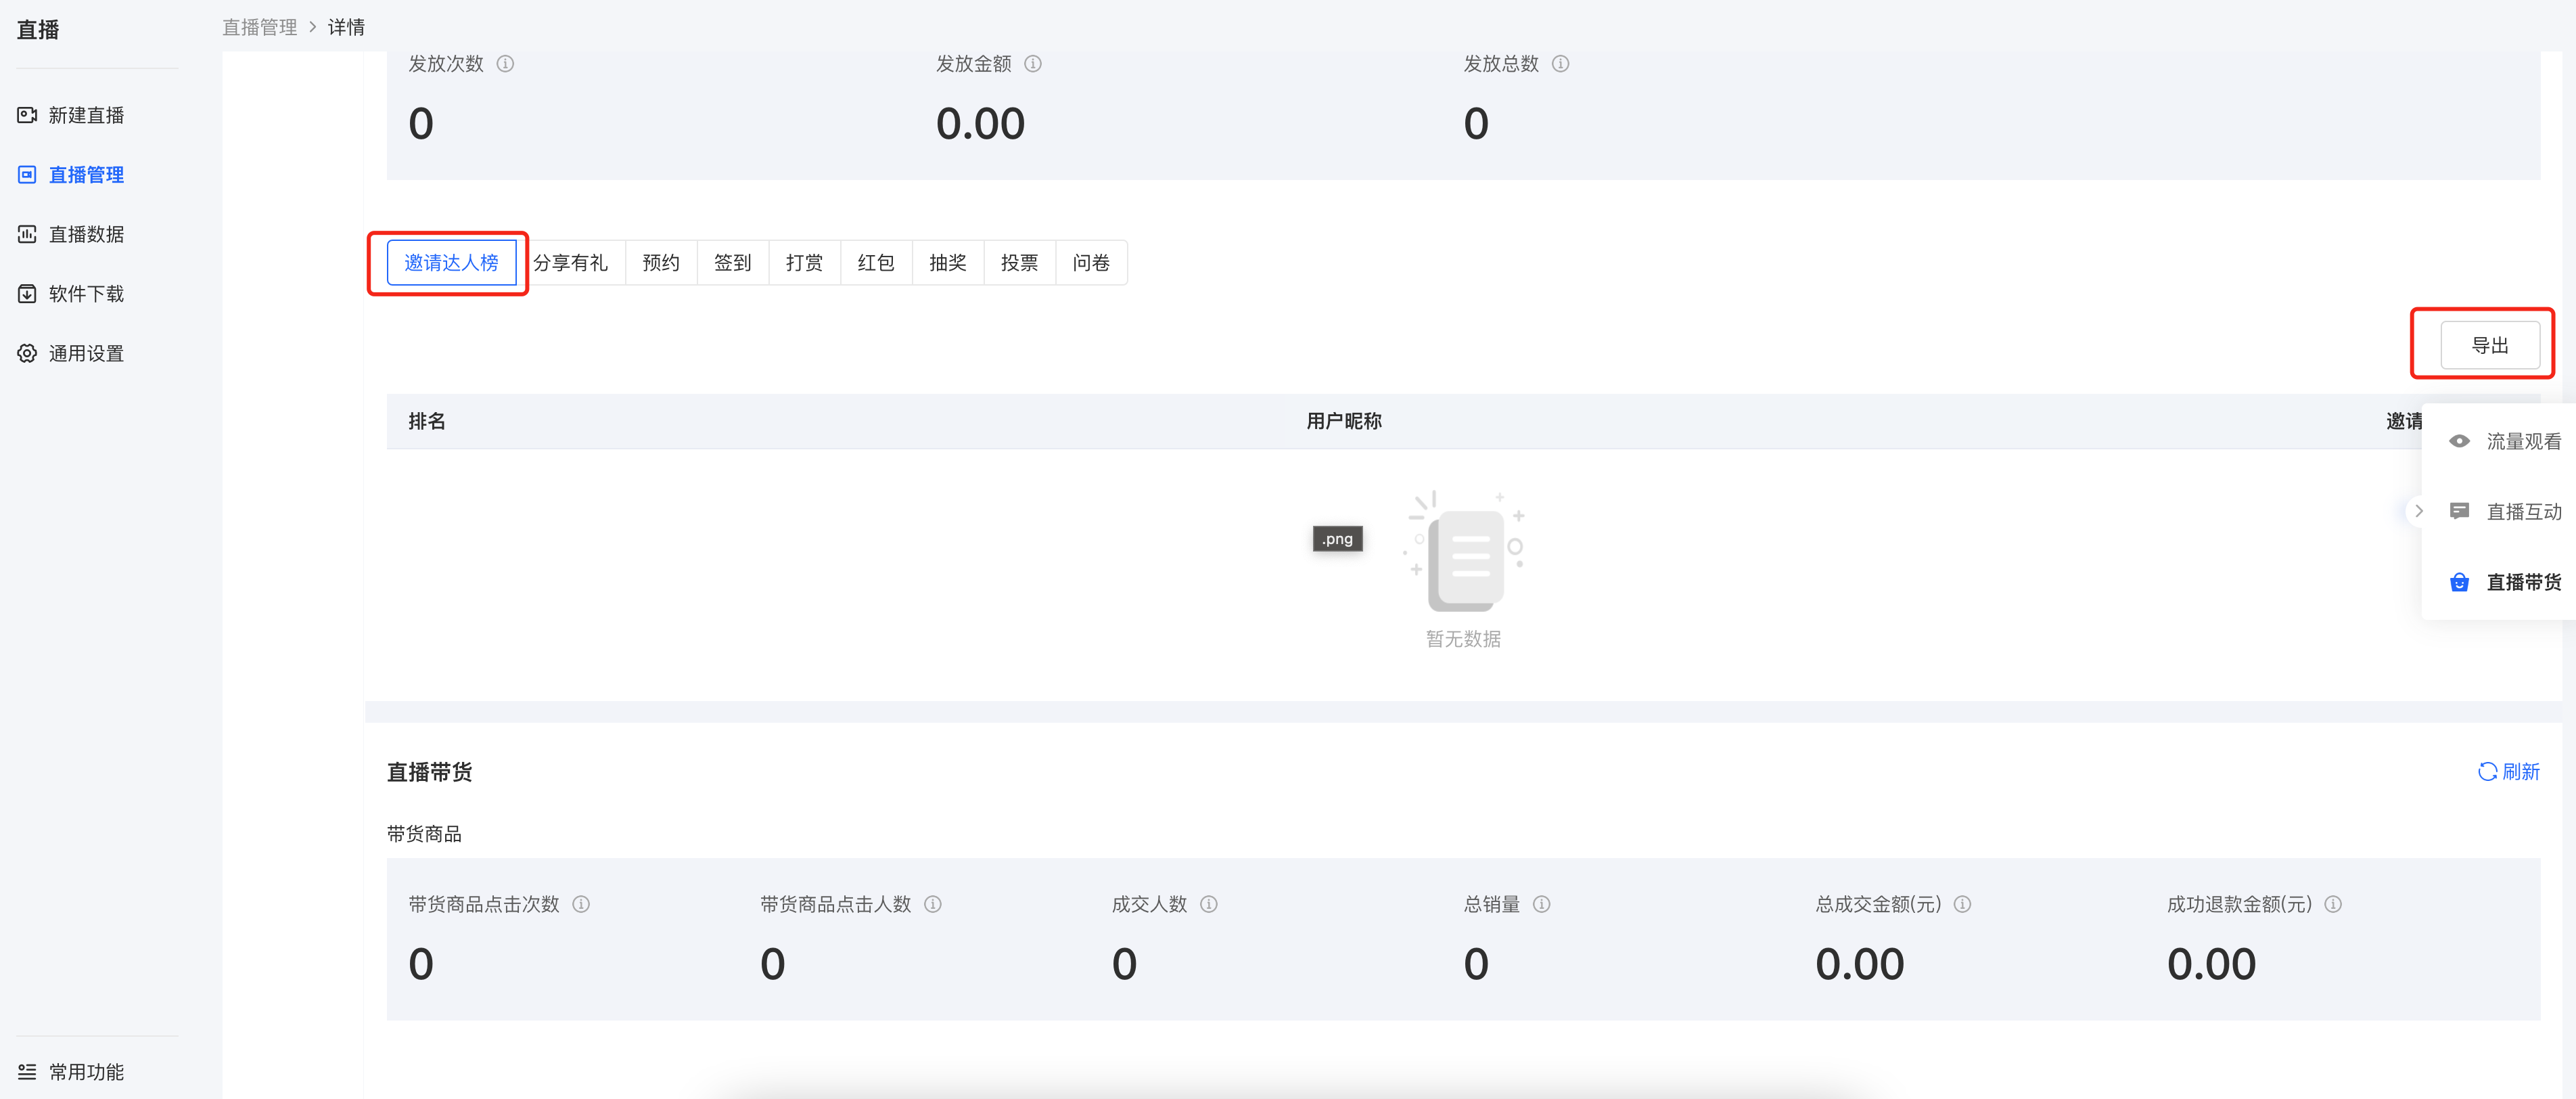
Step 4: Distribute prizes (Manually)
You can notify users of their winning information and distribute prizes via (WeChat/SMS/Phone call).
Note: During the event, you can guide users in the live - stream room to add your WeChat to avoid situations where users cannot contact you to redeem prizes
Management Regulations for the Influencer Invitation Leaderboard Event
To maintain the normal operation order of elink and standardize users' Invitation Influencer Ranking List activities, elink formulates these regulations in accordance with current laws and regulations and the Elink Service Agreement. These regulations are an inseparable part of the Elink Service Agreement. Where these regulations are silent, the relevant provisions of the Elink Service Agreement shall apply. Users should carefully read these regulations before initiating or participating in the Invitation Influencer Ranking List activities (hereinafter referred to as the 'Activities'). Once you initiate or participate in these Activities, it shall be deemed that you have read and understood these regulations and voluntarily accept and comply with all the provisions herein.
Elink may amend these regulations according to business development and will publicly announce such amendments on the official website of elink (www.xiaoe-tech.com). Users should check the website in a timely manner. If a user does not agree to the relevant amendments, the user shall immediately stop using the corresponding services. If a user continues to use the corresponding services, it shall be deemed that the user agrees to the amended regulations.
Activity Management Requirements
Article 1: When a user initiates an activity (i.e., the 'Activity Initiator'), the user shall truthfully, objectively, and accurately describe the bonus amount or the price of the prizes, the names, types, and quantities of the prizes. Misleading users and playing word - games are prohibited. The Activity Initiator shall distribute the prizes to the winning users in one go after the lottery draw.
Article 2: The Activity Initiator shall not change the activity, add additional conditions, or affect the prize redemption, except where it is beneficial to the activity participants.
Article 3: If the prizes distributed by the user are inconsistent with the prizes recorded in the elink backend at the time of the lottery draw, the Activity Initiator and the winning user may negotiate. If the negotiation fails, the prizes recorded in the elink backend shall prevail.
Article 4: The Activity Initiator shall not charge the winning users any additional fees (such as postage, taxes, usage fees for discounts, etc.) for any reason.
Article 5: The maximum value of a single prize shall not exceed RMB 50,000. If virtual items, the right to use items, services, etc. are used as rewards, the normal market value of the relevant items, services, etc. shall not exceed RMB 50,000.
Article 6: The description of the prizes shall be truthful, objective, and accurate. Ambiguous and misleading words are prohibited. Activities with prizes of goods under state - authorized sales (such as tobacco, lottery tickets, pharmaceuticals, etc.) or contraband are strictly prohibited.
Article 7: The winning users shall send the relevant information (such as mailing address, contact information, etc.) to the Activity Initiator within 15 days after the end of the current activity. If the information is not filled in within the time limit, the Activity Initiator has the right to deem that the winning user has waived the winning qualification. Once the contact information is submitted, it cannot be modified. Please fill it in carefully.
Article 8: The Activity Initiator shall distribute the prizes within 15 days after receiving the information filled in by the winning users and inform the users of the channels and information for querying the prize distribution.
User Behavior Regulations
Article 9: When initiating or participating in the Invitation Influencer Ranking List activities, users must comply with relevant laws, regulations, and service rules. Users shall not engage in, and shall not facilitate any behavior that violates laws and regulations, including but not limited to the following:
(1) Posting and spreading illegal and non - compliant information that endangers national order and security, contains feudal superstition, obscenity, porn, vulgarity, etc. [Manual adjustment required]
(2) Engaging in fraud, false or misleading behavior.
(3) Engaging in any behavior that infringes upon others' privacy, personal information, intellectual property rights, trade secrets, or other legitimate rights and interests.
(4) Engaging in behavior that insults or slanders others and infringes upon others' right of reputation or right of portrait.
(5) Engaging in any behavior that changes or attempts to change the system configuration provided by this activity or damages the system security.
(6) Engaging in any behavior that damages or attempts to damage network security.
(7) Engaging in improper participation in the activity, including using bullet - screen robots, using plugins in violation of regulations, maliciously registering multiple accounts, etc.
(8) Using this function to carry out activities suspected of gambling.
(9) Initiating activities with the purpose of unfair competition.
(10) Initiating activities to maliciously smear elink.
Handling of Violation Behaviors
Article 10: In case of disputes over prize distribution, elink has the right to require the Activity Initiator to prove that the prizes have been delivered to the winning users.
Article 11: In case of disputes over the Invitation Influencer Ranking List activities, the Activity Initiator and the winning user shall negotiate with each other. If the negotiation fails, they shall report or complain to elink customer service within 60 days after the end of the activity. If the time limit of 60 days is exceeded, it shall be deemed that no dispute has occurred, and elink will no longer accept reports or complaints.
Article 12: Violations of the 'Activity Management Requirements' and 'User Behavior Regulations' are regarded as violation behaviors. Depending on the severity of the circumstances, elink may restrict or prohibit the use of some or all functions or ban the account.
Statement and Disclaimer
Article 13: If a user directly incurs legal disputes due to the use of the Invitation Influencer Ranking List function, the two parties shall handle the disputes by themselves, and elink shall not assume any liability.
Article 14: If a user's behavior causes losses to elink and/or its affiliated companies (including but not limited to direct economic losses, loss of goodwill, and indirect economic losses such as compensation paid to third - parties, settlement fees, lawyer's fees, and litigation fees), the user shall compensate elink and/or its affiliated companies for all the above losses.
Article 15: If a user's behavior causes a third - party to claim rights against elink and/or its affiliated companies, elink and/or its affiliated companies may recover all the losses from the relevant person after fulfilling the obligation of monetary payment to the third - party.
Article 16: These regulations shall come into force on November 26, 2020.
How many rounds of lucky draws can be launched in one live stream?
Currently, a maximum of 50 rounds can be initiated. You can freely configure them according to your needs.
Is there a limit to the number of prizes for live interactive lucky draws?
Currently, only 5 types of prizes can be set for each round, and the quantity of each prize cannot exceed 200 pieces.
How can the winning students claim their prizes?
Students can claim prizes in three ways:
① Claim on the winning page;
② After winning, click the button in the bottom right corner of the live stream room to view your prizes and claim the ones you've won;
③ Click [Personal Center], then click [My Prizes] to view the prizes you've won.
Which platforms does the current lottery feature support?
1. Instructor side: H5 live streaming room, elink App,Goose Live Mini Program, computerWeb version, Goose Live Client, and elink Assistant Client can initiate lucky draws;
2. Student side: H5 live streaming room, Xiaoxiaotong App, computer web version, Goose Live Client, and Goose Live Mini Program all support participating in lucky draws;
How can merchants obtain learner information when using course products as prizes for live interactive lotteries?
You can associate information collection with this course and set it to be filled out [before payment]. When students claim prizes, they need to fill out this information collection to claim successfully. Merchants can view student information through this information collection form.
What are the lottery rules when the number of participants is less than the number of prizes?
1. If the number of participants is less than or equal to the number of prizes: Participants are guaranteed to win, and prizes are randomly distributed.
2. If the number of participants is greater than the number of prizes: The number of winners is equal to the total number of prizes, and prizes are randomly matched with winners.
Tutorial on using the Live Comment Wall and Voice Message Sending features for trainees
I. Feature Introduction
During the live stream, the instructor can conduct the following interactive operations with the students:
● The instructor manages the students' (i.e., the audience's) permission to post on the discussion board.
● The instructor manages the students' (i.e., the audience's) permission to speak via voice.
II. Purpose of Use
The instructor uses live - stream interaction to assist teaching and enhance the live - stream effect.
III. Usage Scenarios
Meet the scenarios where merchants interact with students during live - stream teaching.
IV. Usage Tutorial
(1) Managing Students' Permission to Post on the Discussion Board
Enable the function for users (i.e., the audience) to post their speeches on the board. Users' speeches will be displayed on the main live - stream interface, just like the instructor's.
Operation path: The instructor clicks [Operations] in the bottom toolbar → Enable [User Posting on the Discussion Board].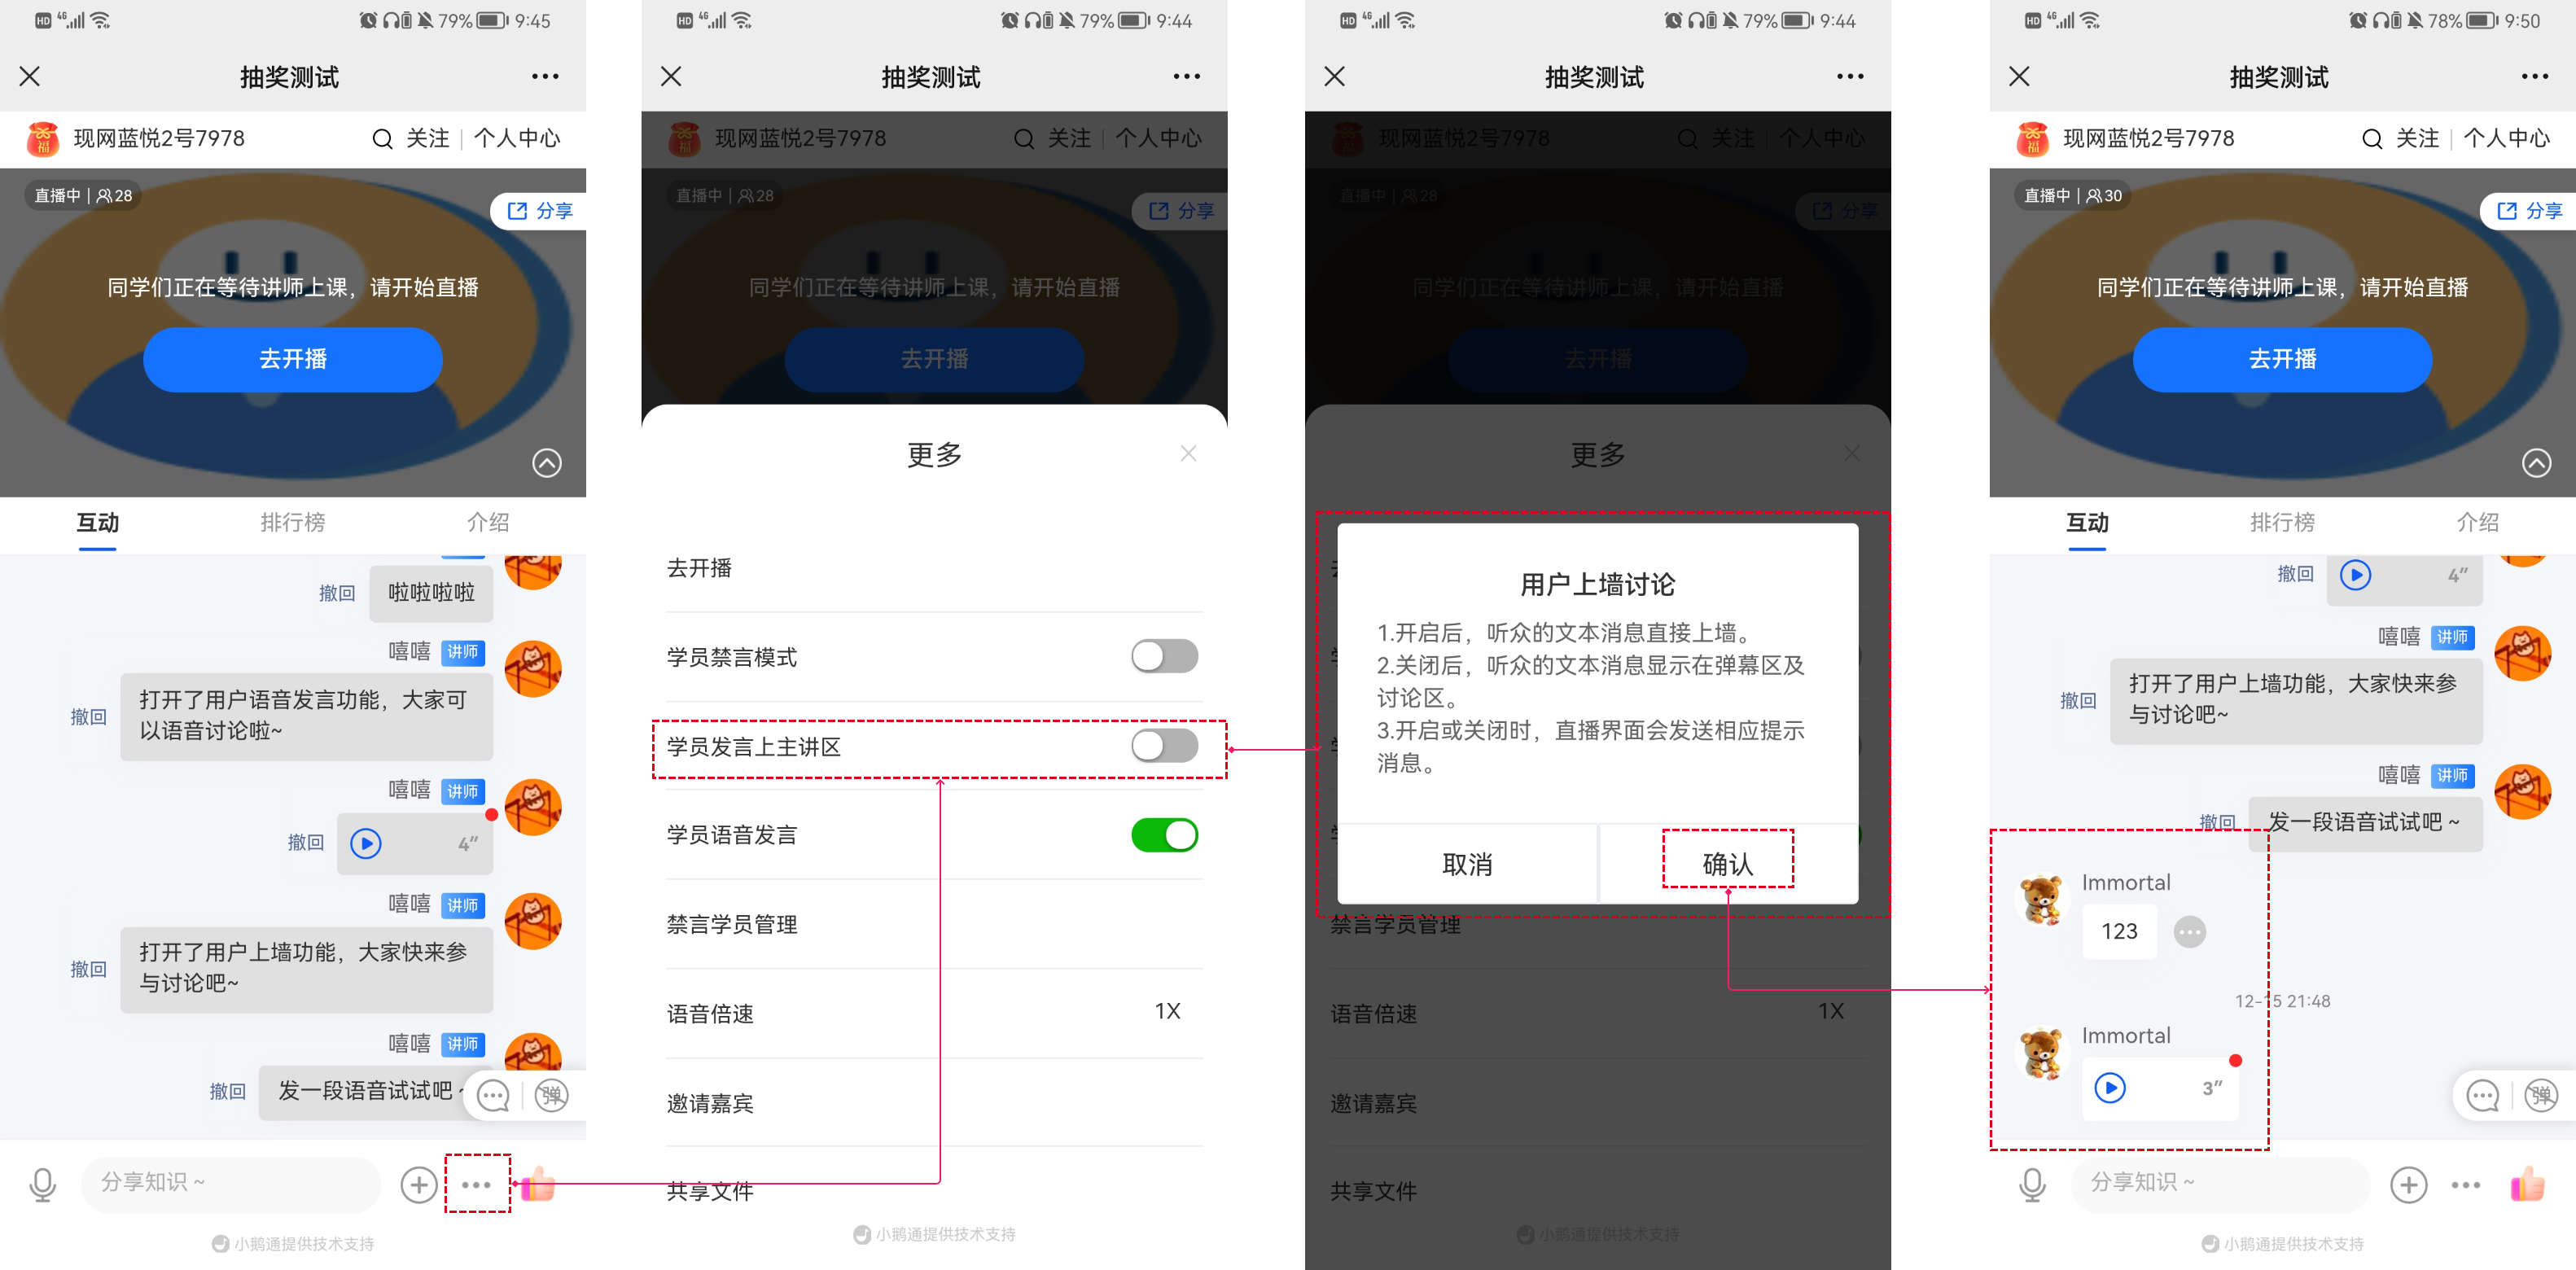
elink Live Streaming Client
Open the "Interaction Area", click the three dots of "More", and enable "Students' Comments on the Wall". The comments sent by students will be displayed in the comment wall area of the live - stream room.
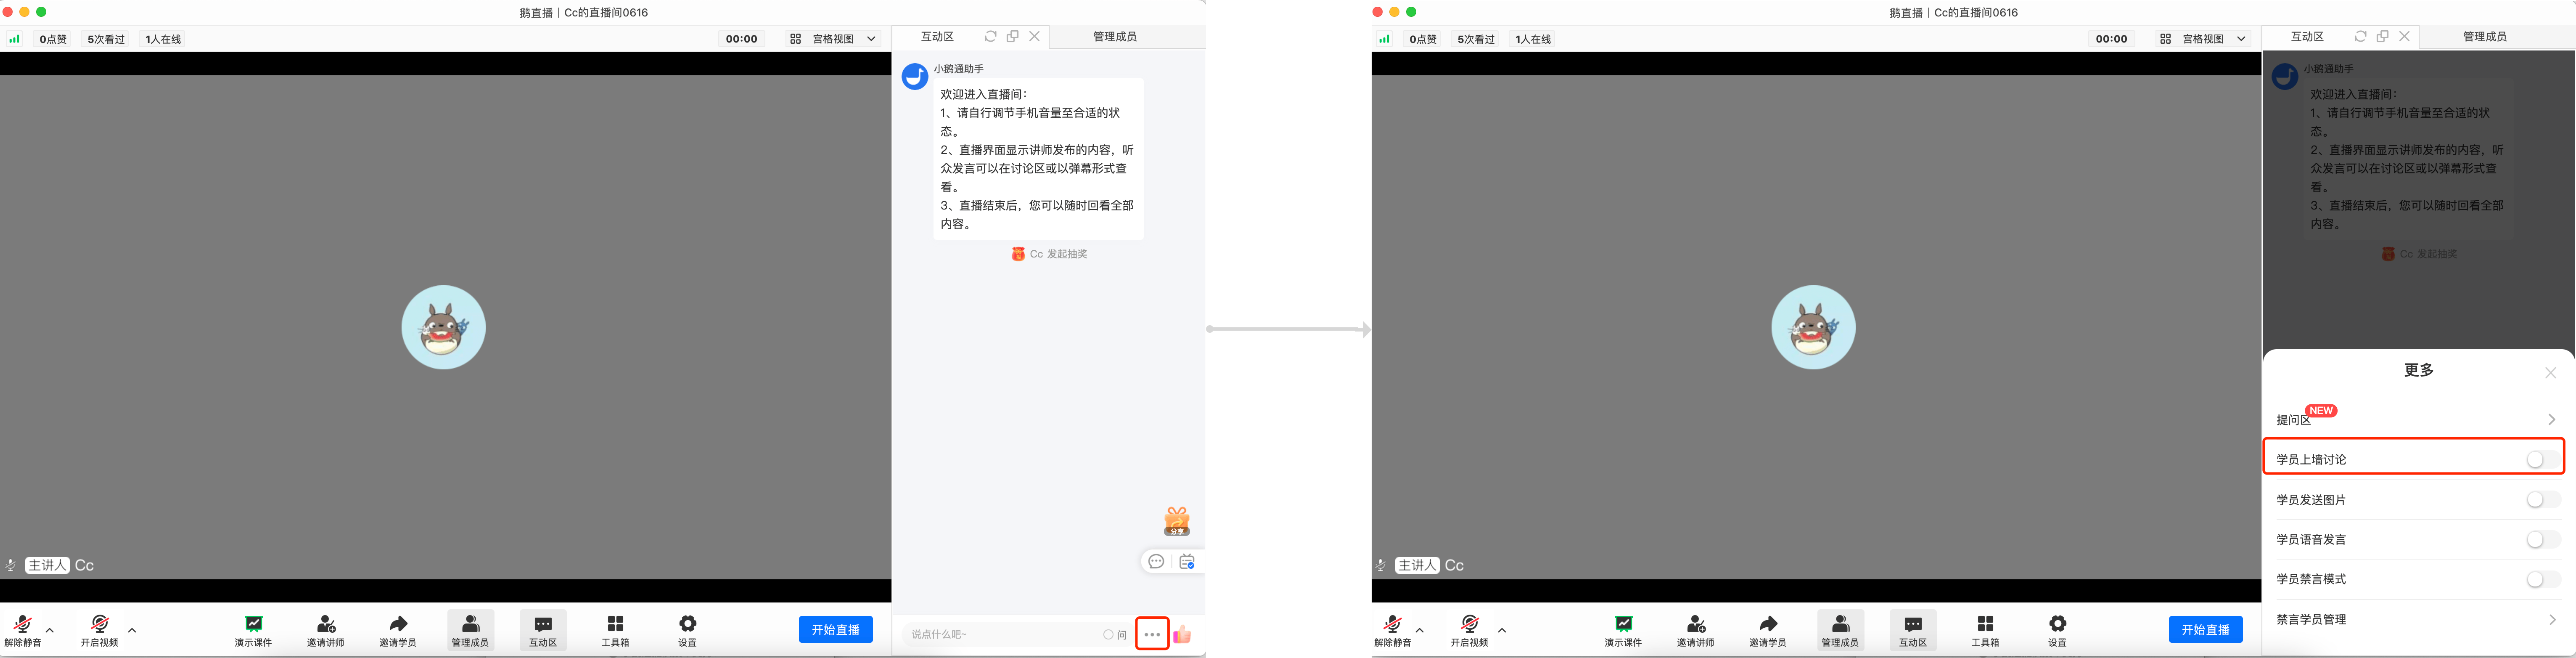
After disabling the user posting on the discussion board, the system automatically helps the instructor send a message to remind the audience that the function has been disabled. The messages sent by the audience will be displayed in the bullet - screen area.
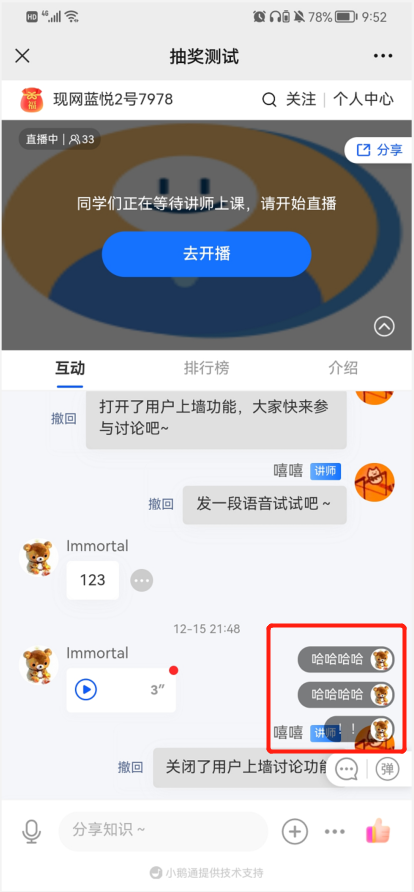
2. Managing Students' Permission to Speak via Voice
Enable the function for students to speak via voice. The audience can send voices, and the voices will be presented on the main live - stream interface. Operation path: The instructor clicks [Operations] in the bottom toolbar → Enable [User Voice - Speaking Function].
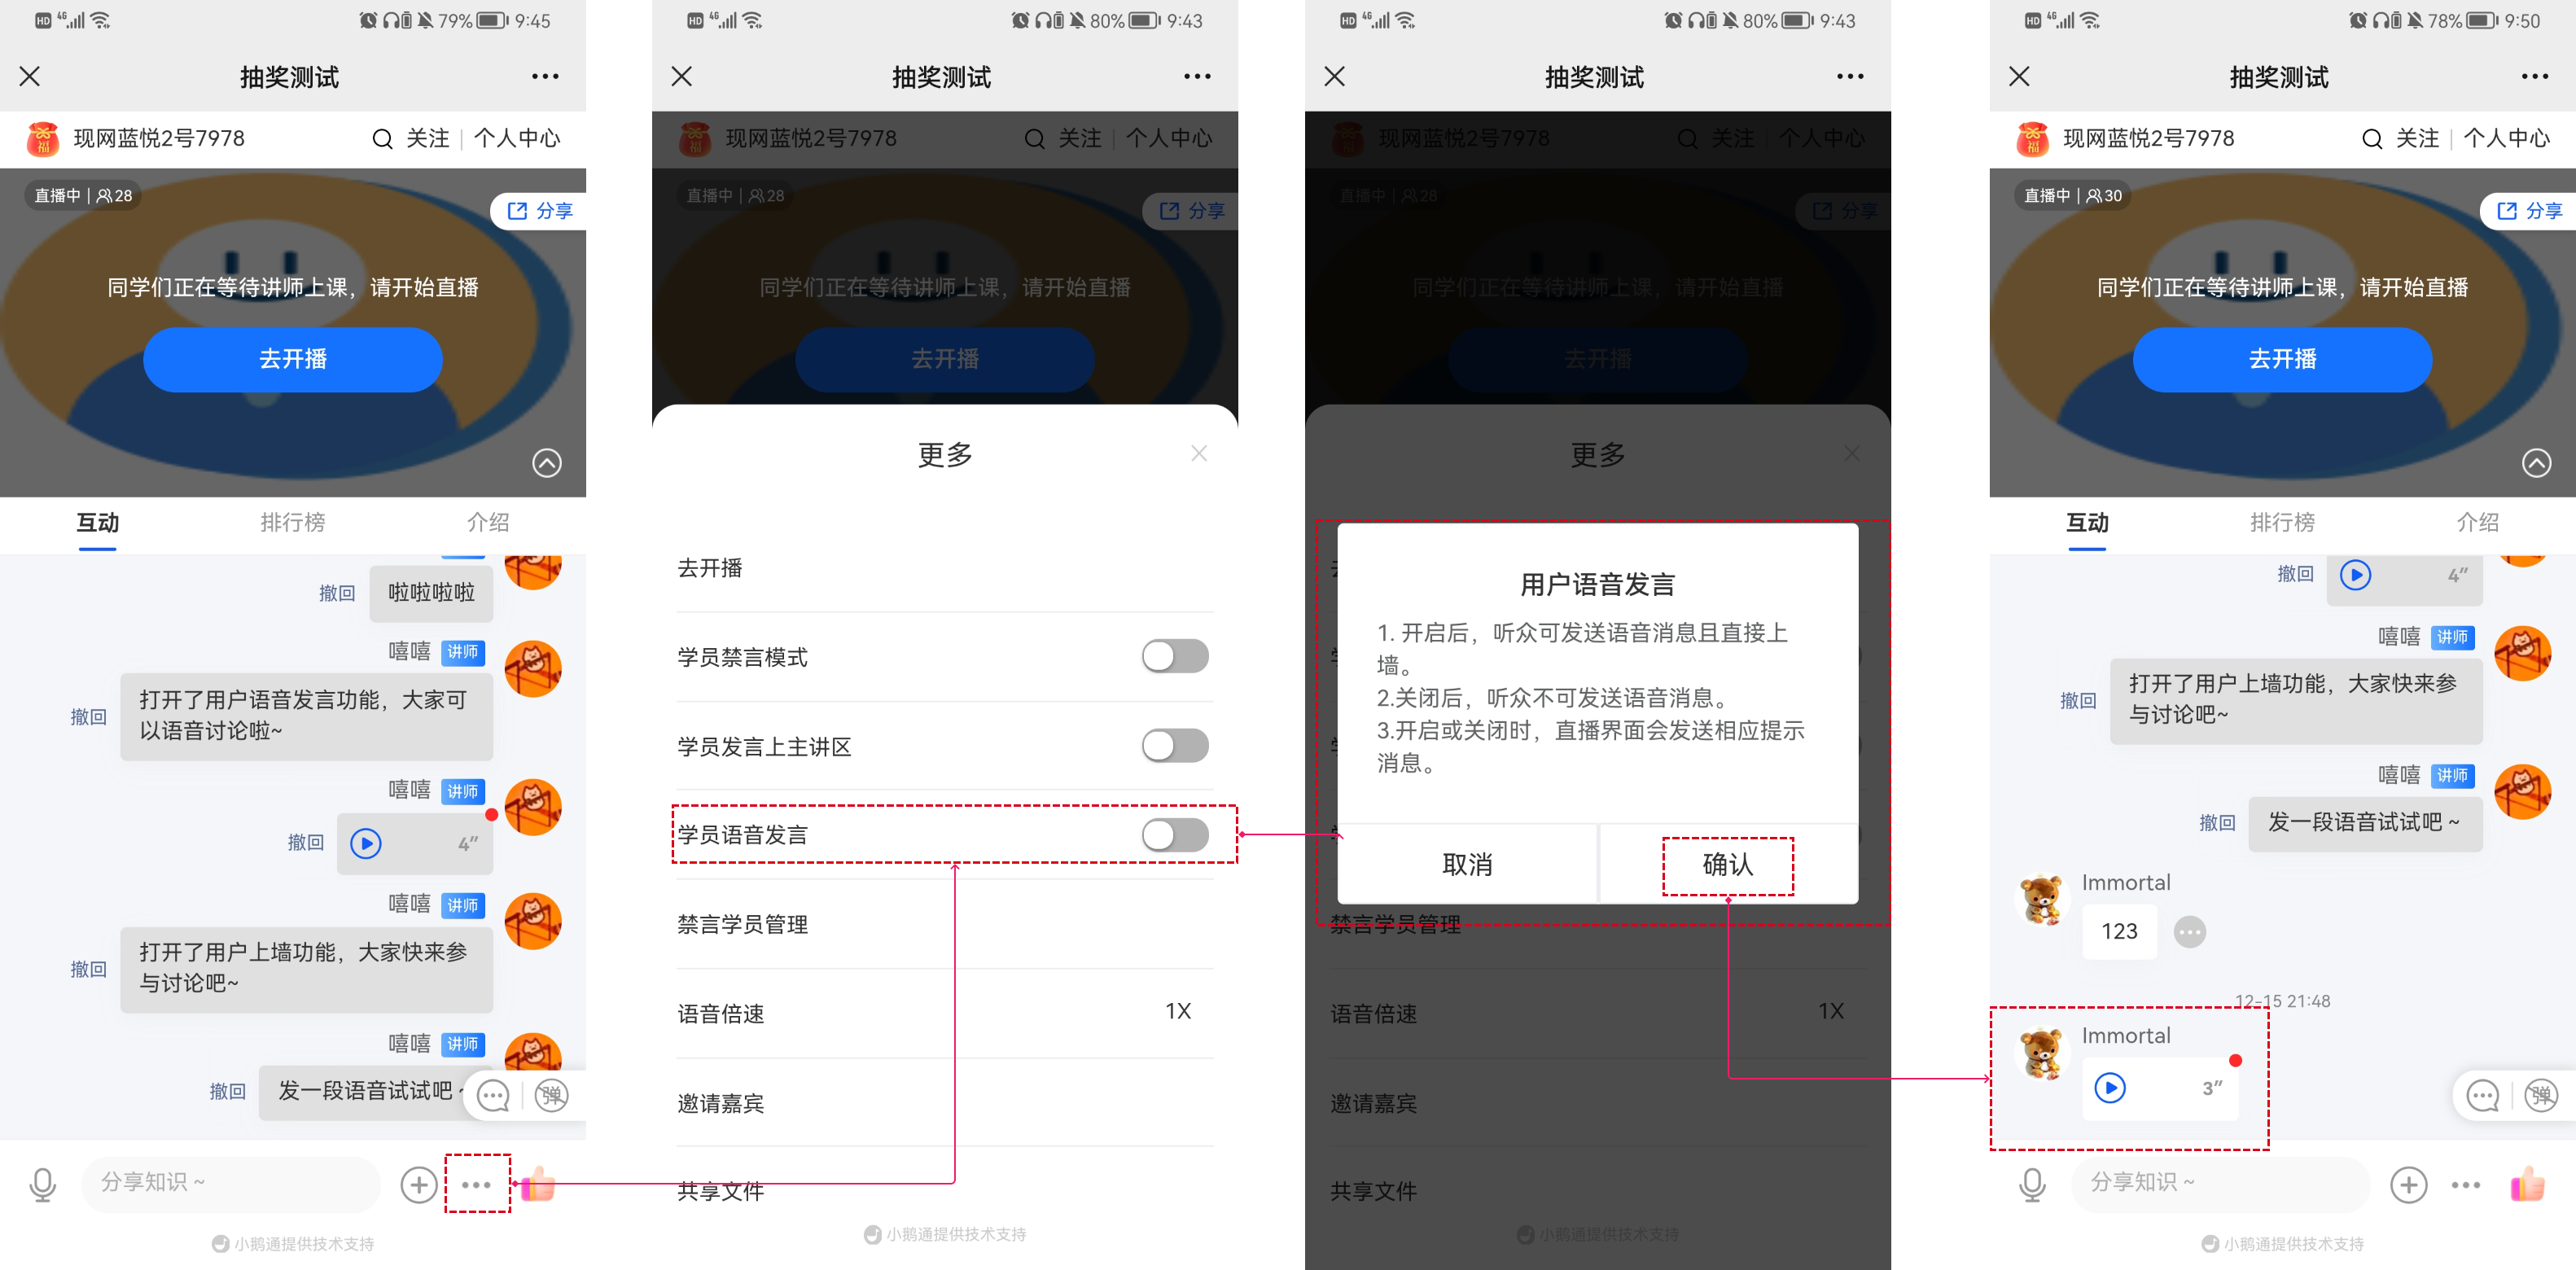
elink Live Streaming Client
Open the "Interaction Area", click the three dots of "More", and enable "Students Sending Voices". Then students can send voices as comment content.
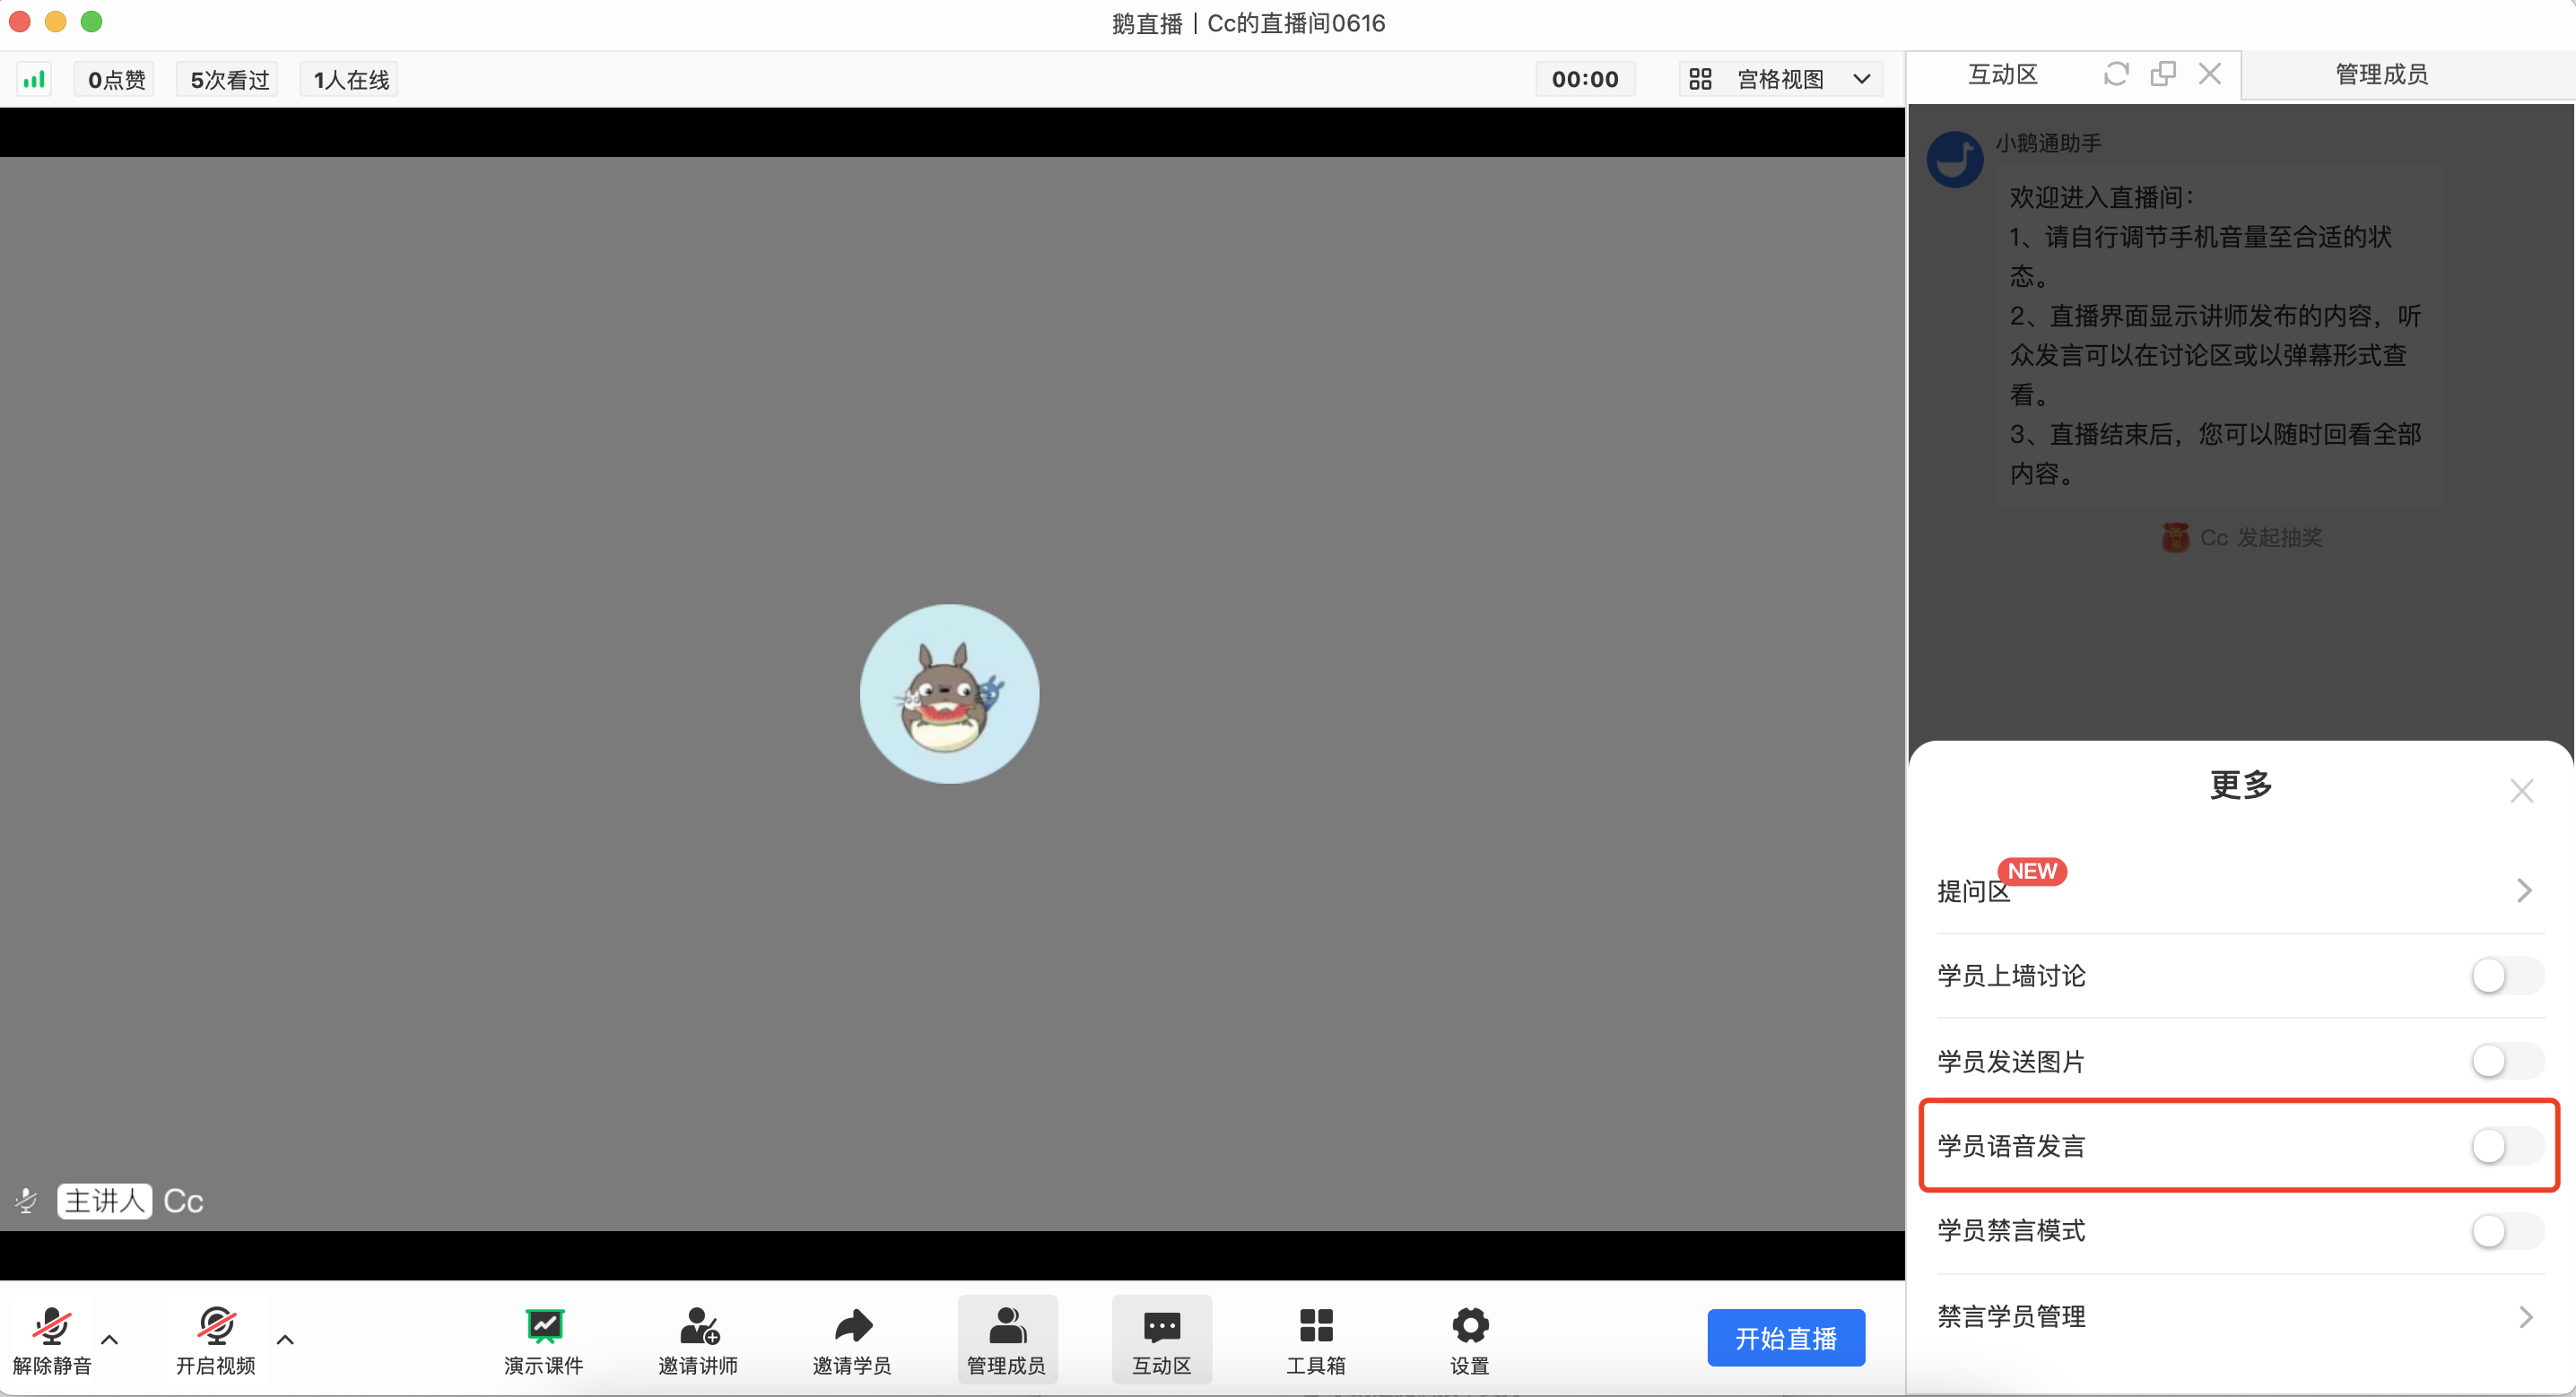
After enabling, the system automatically helps the instructor send a message to remind the audience that the function has been enabled. The "Microphone" icon appears on the audience's end, and they can use the voice - speaking function.
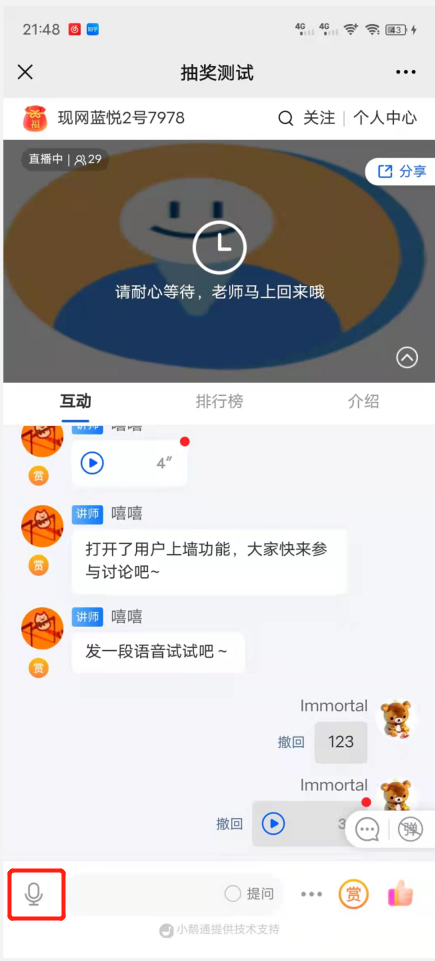
After disabling, the system automatically helps the instructor send a message to remind the audience that the function has been disabled. The "Microphone" icon disappears on the audience's end, and they cannot use the voice - speaking function.
Tutorial on Using the Check-in Feature in the Live Streaming Room
Tutorial on Using the Sign-in Function in the Live Streaming Room
I. Function Introduction
SupportThe instructor can initiate sign-in at any time during the live streamsign-in, and can also set up scheduled sign-in on the management console. When the sign-in time arrivesstudents can sign in within the live streaming room. After completingsign-in, they canobtain the list of students in the current live streaming room.
II. Purpose of Use
Through sign-in, merchants can interact with students in the live streaming room and view the list of students currently in the room. The scheduled sign-in on the management console supports pre - configuration, improving operational efficiency.
III. Use Scenarios
1. Education and Training: Merchants can use the sign-in function to obtain the list of students in the live streaming room before or at the beginning of the live stream to check which students are absent;
2. Education and Training: Merchants want to know the listening status of students in the current live streaming room. After initiating sign-in, they can view the listening status of current students.
IV. Operation Path
Merchant side: Live stream details - Interactive settings - Turn on the sign-in switch - Configure scheduled sign-in as needed - View sign-in data
Instructor side: The instructor can set up sign-in at any time
Student side: Participate when sign-in is triggered
V. Usage Tutorial
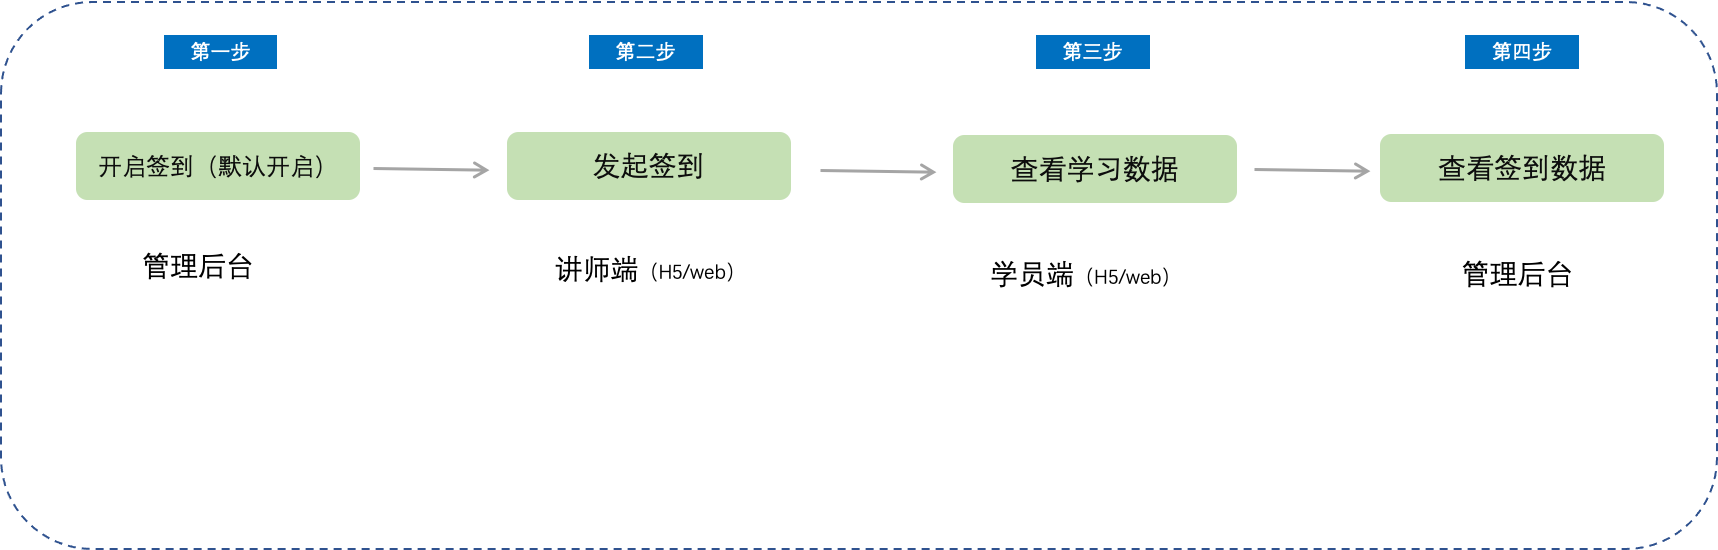
Step 1Turn on the sign-in switch(Management background)
1. Find the live streaming room that needs to be set up and click to enterthe live stream details page. Find [Marketing interaction] - [Interactive settings] and turn on the [Sign-in switch] (default is on);
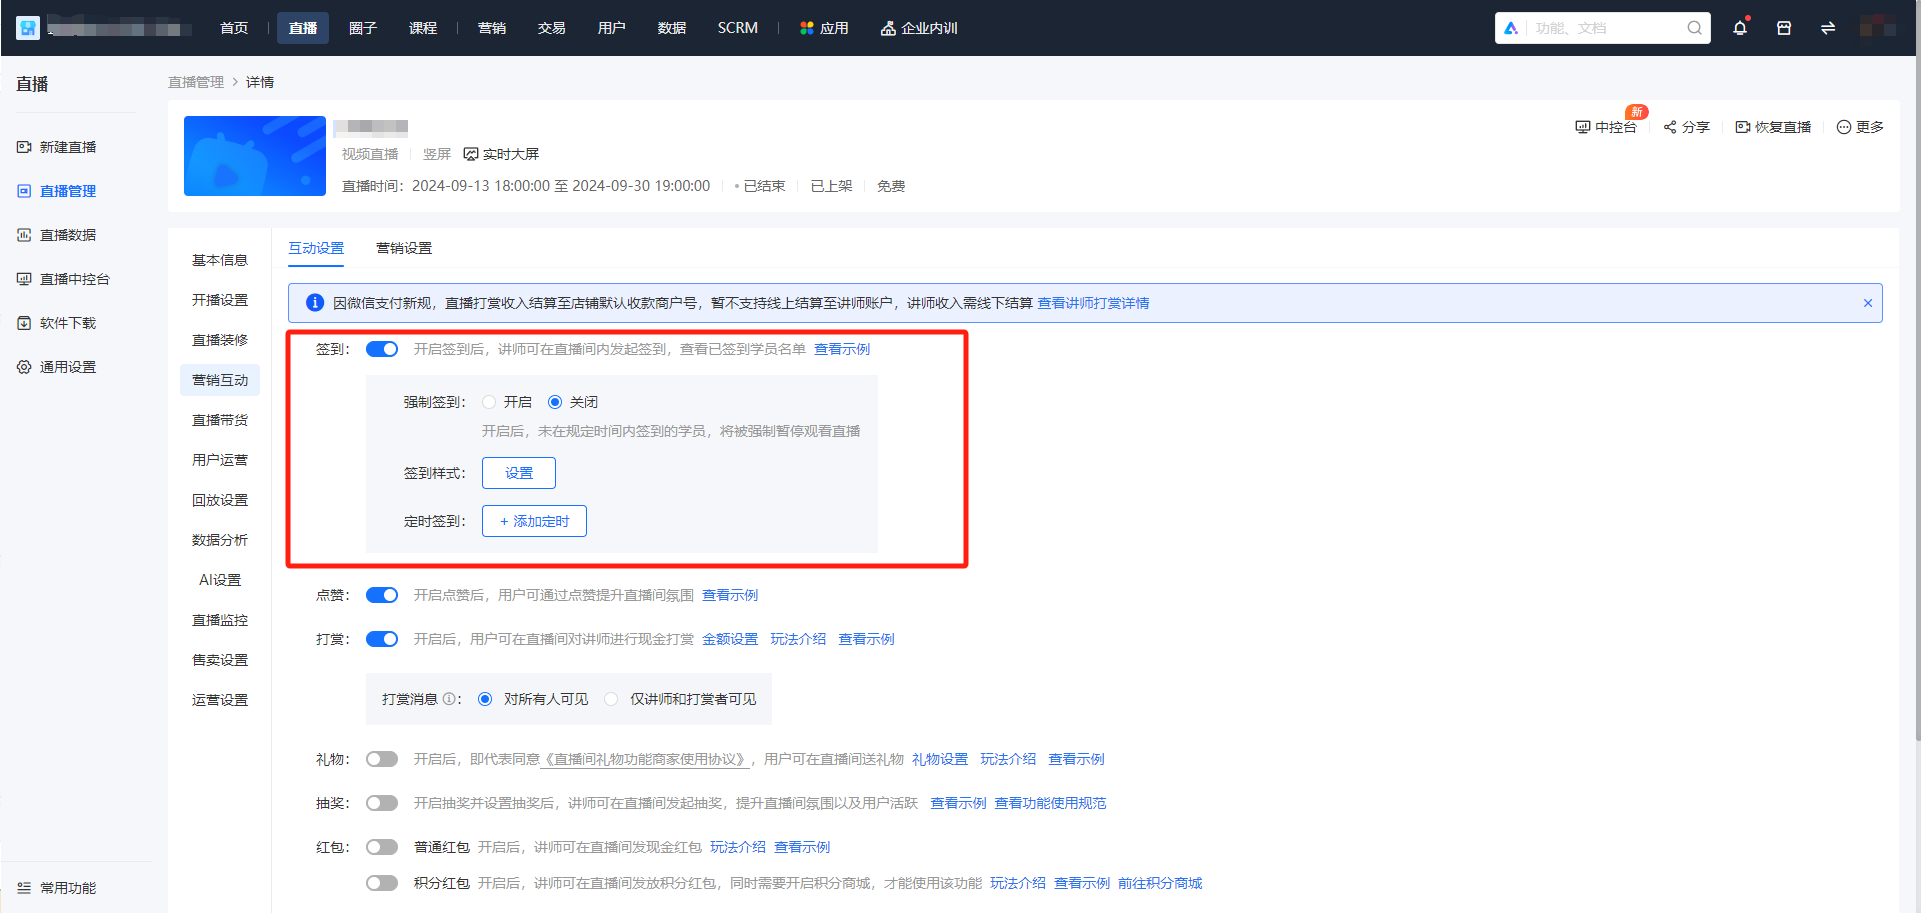
(Management background -Live stream management - Marketing interaction - Sign-in)
Step 2 The instructor initiates the live stream
1. The instructor initiates sign-in on the H5 landscape screen instructor side
The instructor can click on the 「+」 on the H5 landscape screen instructor side to pop up a window, click on sign-in, and enter the sign-in initiation page;
Click on 「Initiate sign-in」, and you can select a sign-in duration of 「30 seconds」, 「1 minute」, 「2 minutes」, 「5 minutes」, 「10 minutes」, and 「30 minutes」, or customize the sign-in duration. After confirmation, you can initiate sign-in;
At the same time, the instructor can click on 「Sign-in records」 to view the initiated sign-ins and the corresponding list of signed-in students;
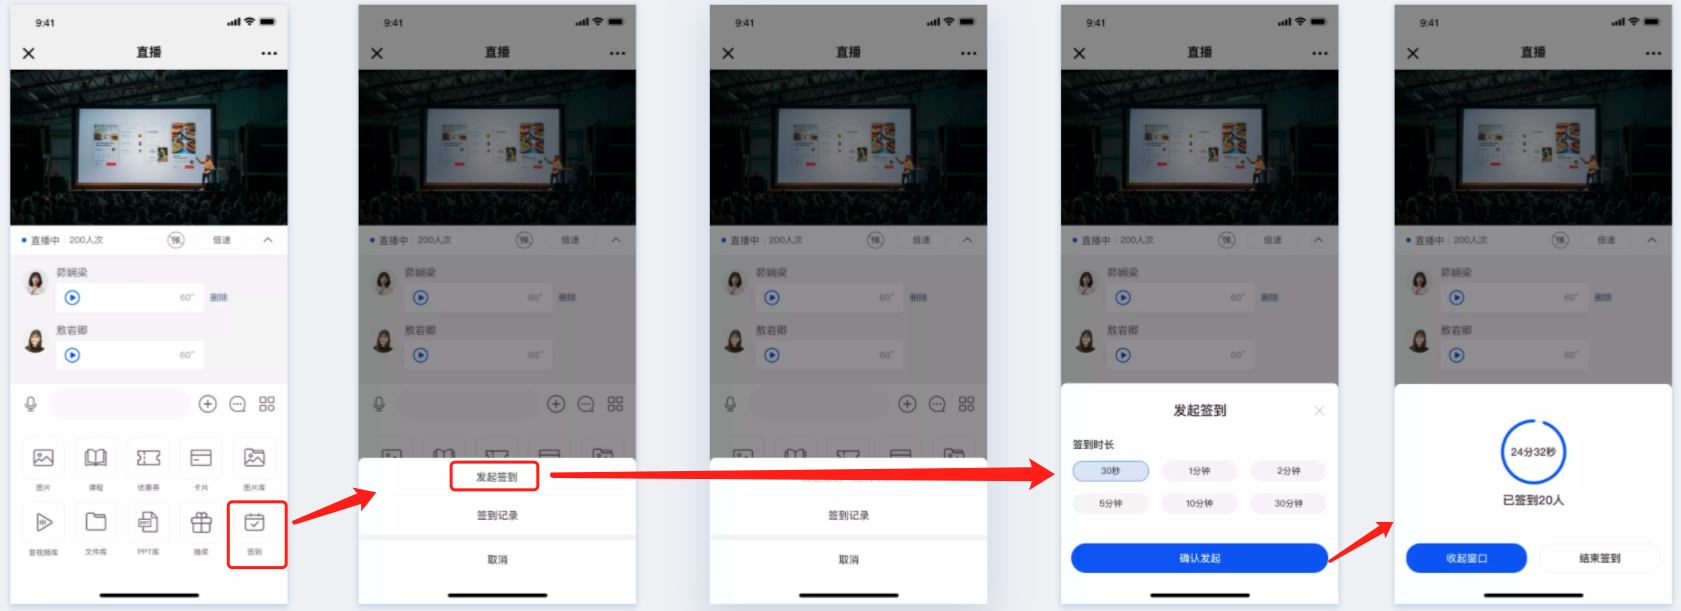
(The instructor initiates sign-in on the landscape screen)
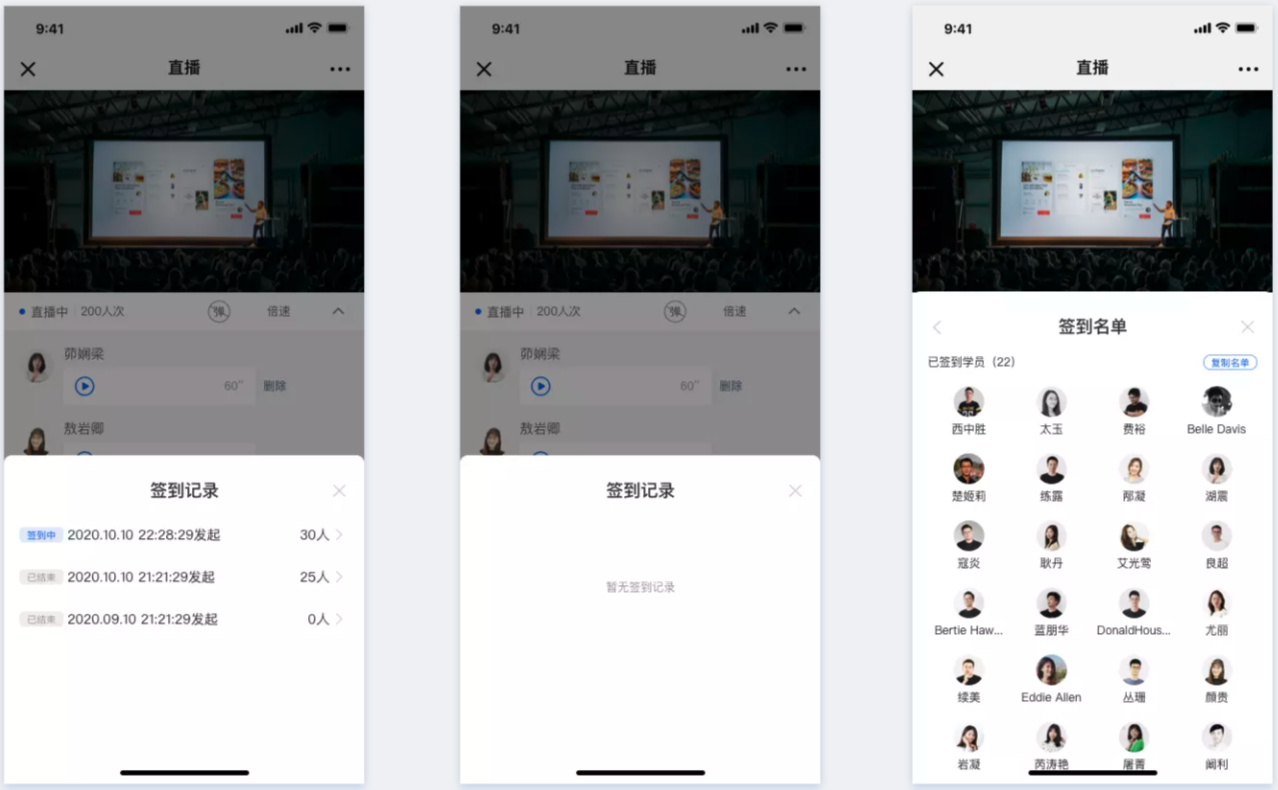
(The instructor views sign-in records on the landscape screen)
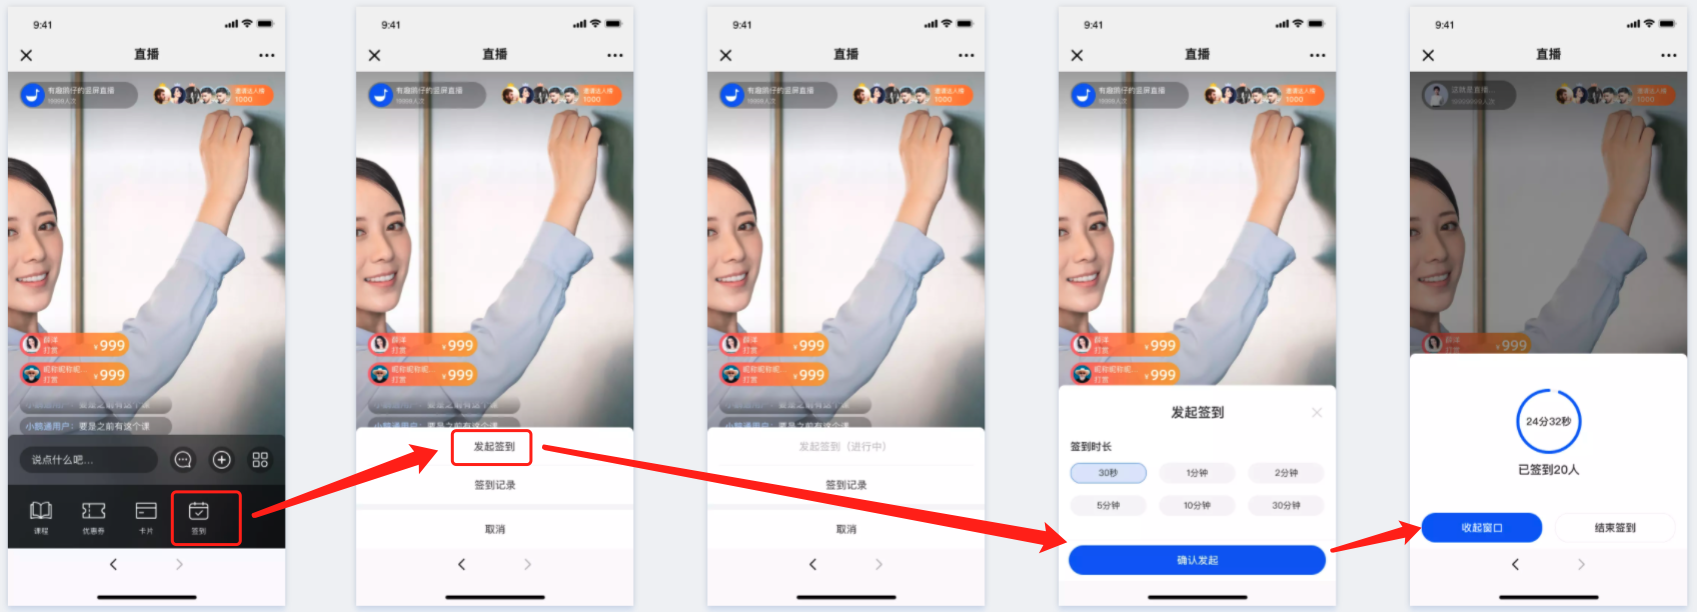
(Instructor sidePortrait screenInitiate a sign-in)
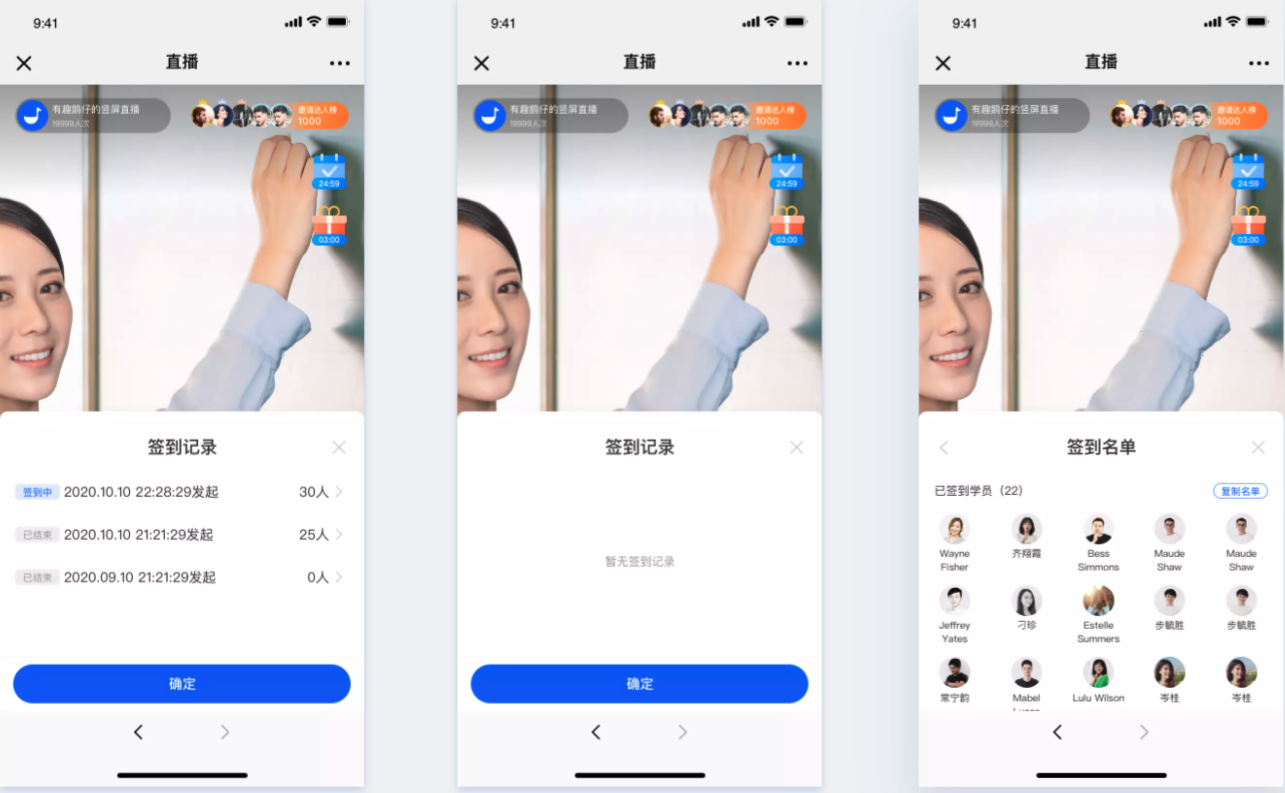
(Instructor sidePortrait orientationView sign-in records)
2. The instructor initiates a sign-in on the web side
The instructor can click on 'Interactive Tools' on the web instructor side, and click on 'Sign-in' in the pop-up window to enter the sign-in initiation page.
Click on 'Initiate Sign-in', and you can select a sign-in duration of '30 seconds', '1 minute', '2 minutes', '5 minutes', '10 minutes', and '30 minutes'. You can also customize the sign-in duration. After confirmation, you can initiate the sign-in.
At the same time, the instructor can click on 'Sign-in Records' to view the initiated sign-ins and the corresponding list of signed-in students.
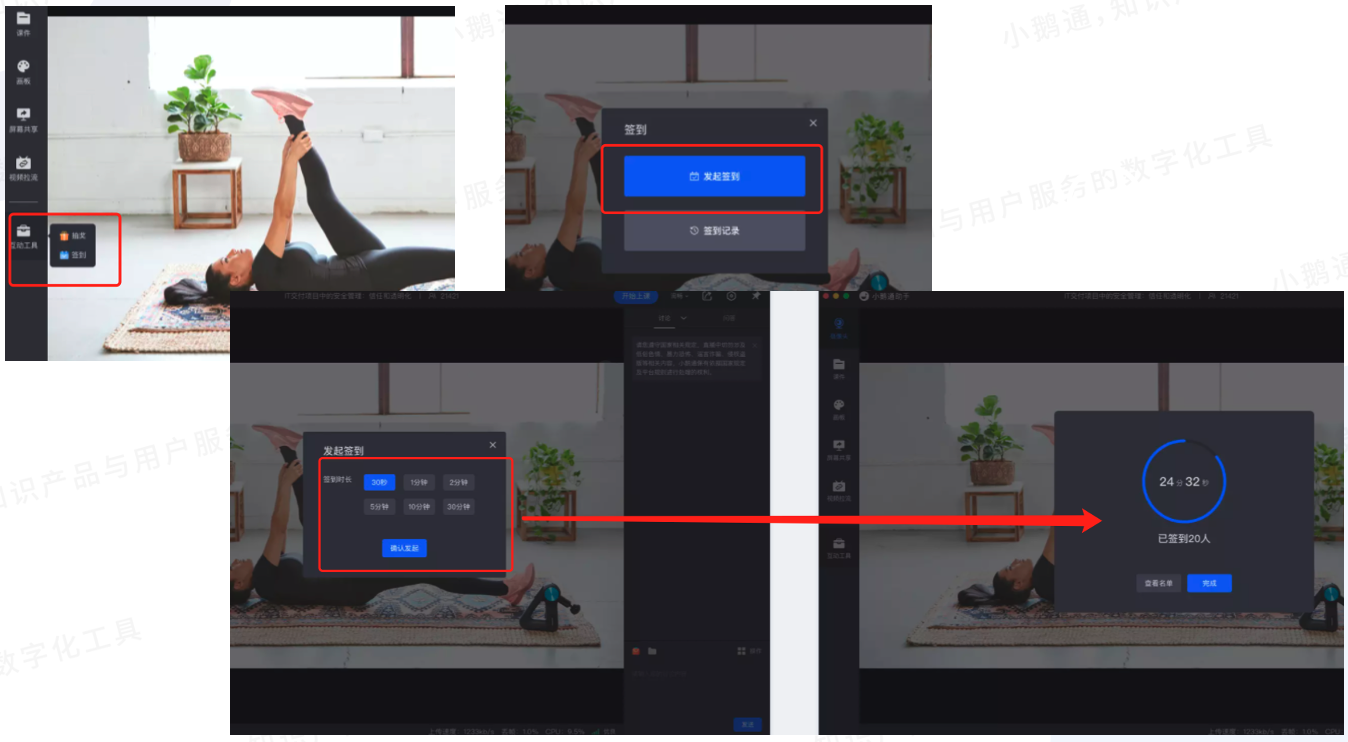
(Initiate a sign-in on the web instructor side)
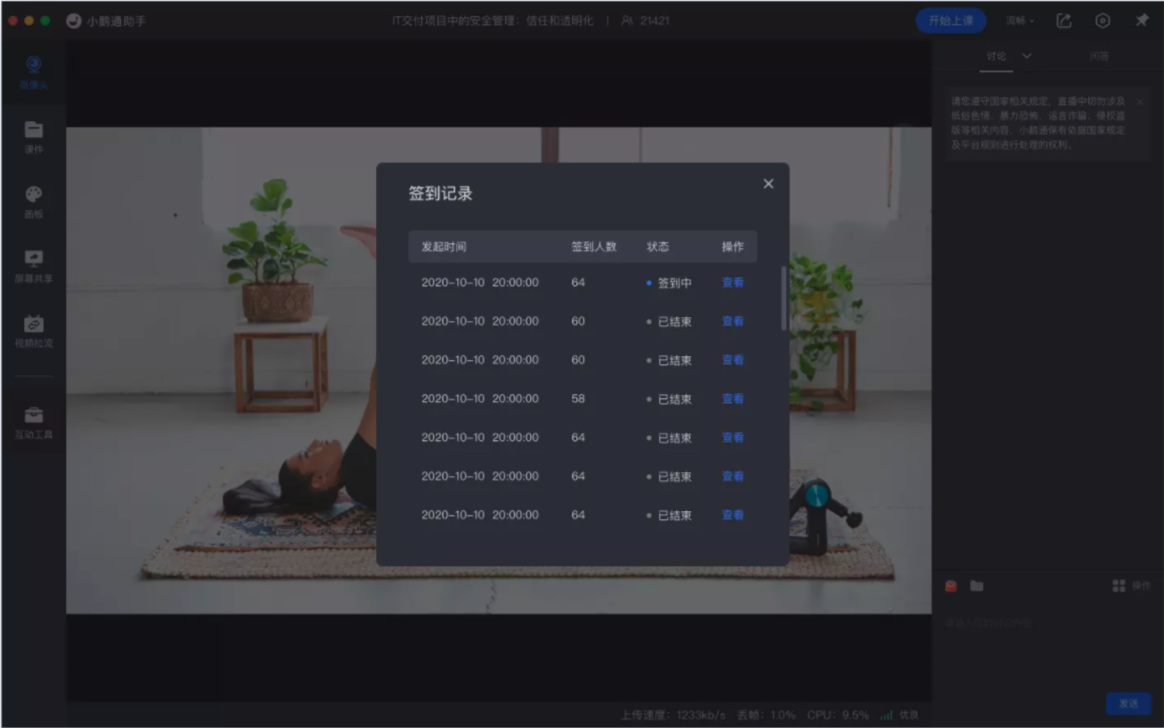
(On the web instructor sideViewSign-in data)
3. eLinkThe instructor initiates a sign-in on the live streaming client

4. Set scheduled sign-ins on the management consoleSign-in
① You can set scheduled sign-ins on the management console. When the trigger time is reached, the sign-in will be automatically triggered in the live streaming room without the instructor's manual setting. If the instructor needs to end the scheduled sign-in, they can directly close it manually without affecting the live streaming rhythm. The display method of scheduled sign-in data is the same as that of the sign-ins set by the instructor.
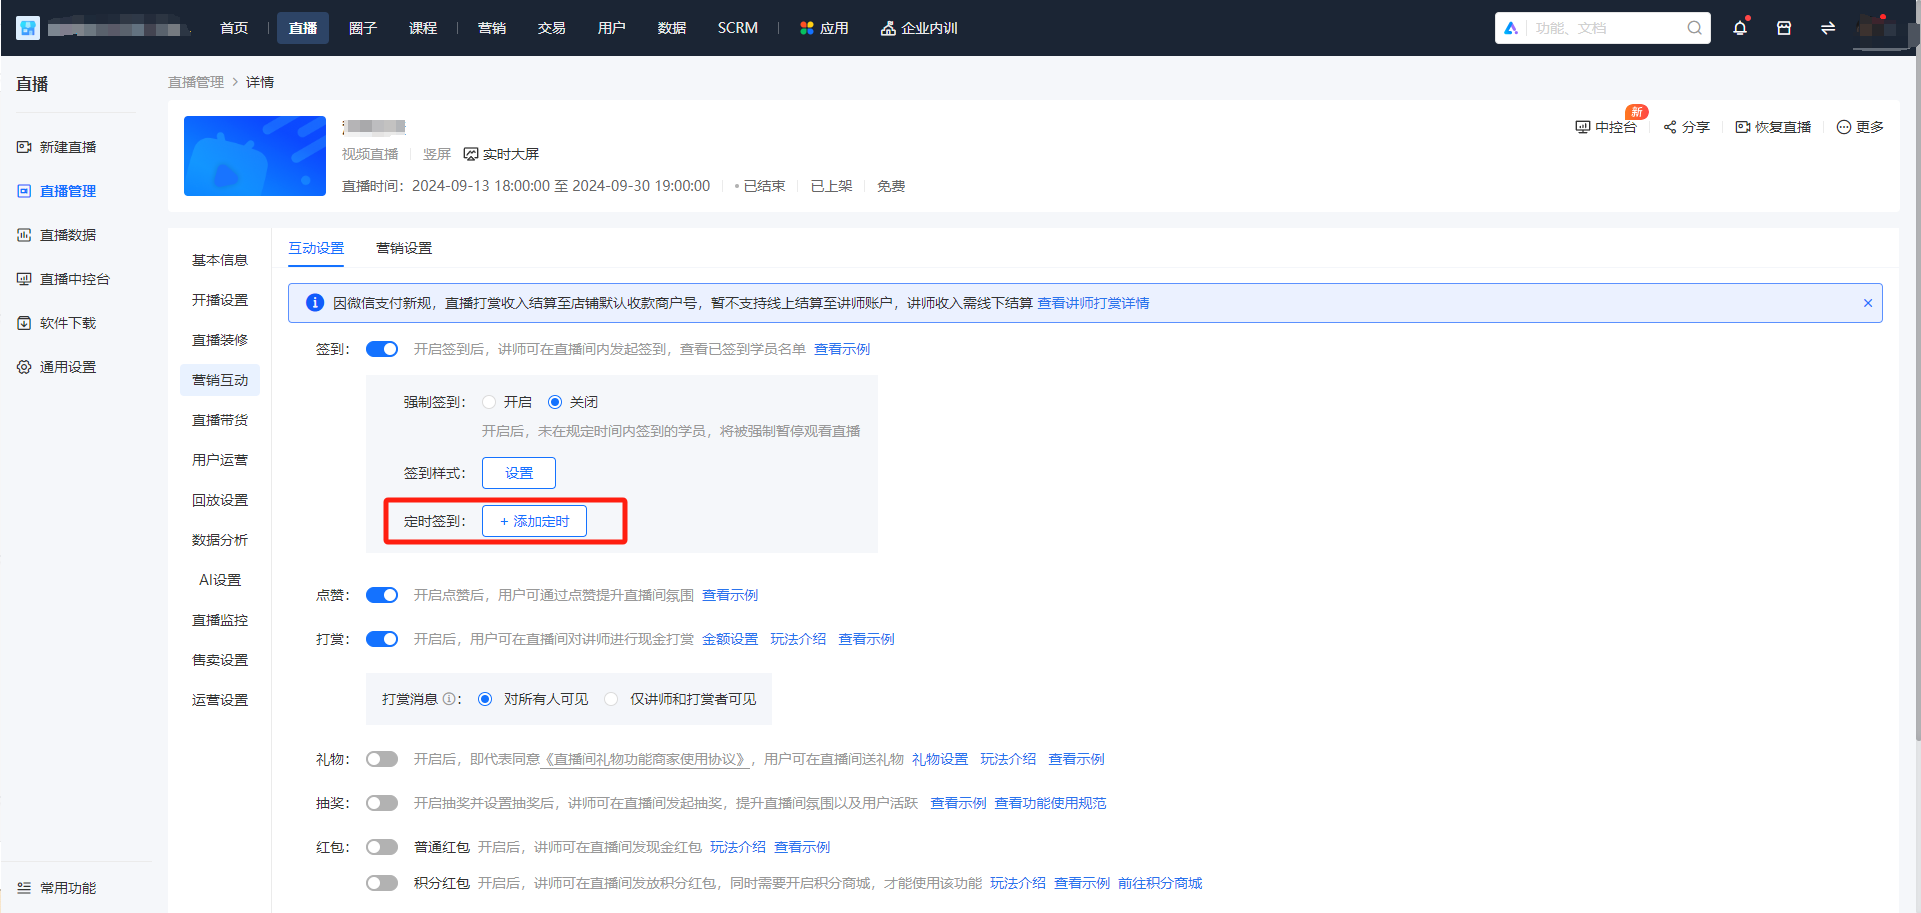
② Sign-in is a periodic function. You need to configure the start and end times. If the configuration is not fully completed, it cannot be saved.
The time limit for configuring a single scheduled sign-in on the management console is the same as that on the instructor side. The shortest sign-in duration is 30 seconds, and the longest is 2 hours, 59 minutes, and 59 seconds. If the time difference configuration does not meet the requirements, it also cannot be saved.
There should be no time overlap between scheduled sign-ins for different sessions. If there is time overlapIt also cannot be saved.
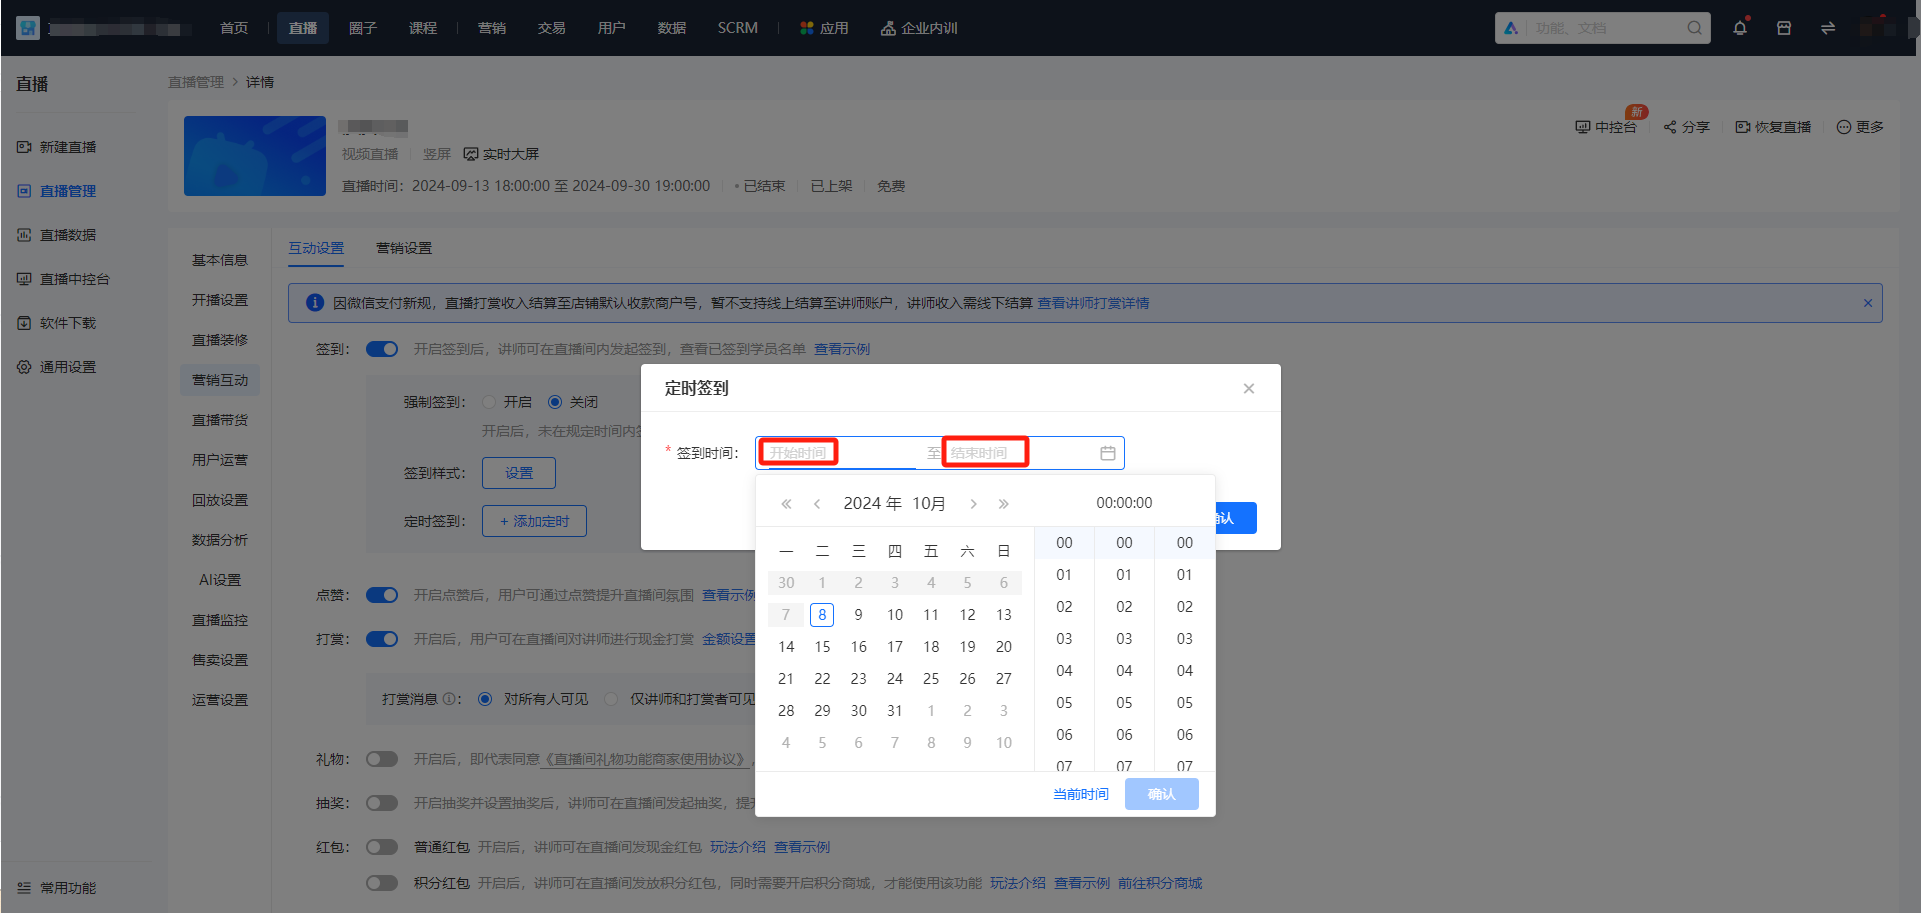
③ After the scheduled sign-in configuration is successful, a session list will appear. There are a total of three states
Not started:The scheduled sign-in has not started yet. At this time, editing and deletion are supported. Editing can adjust the start and end times of the scheduled sign-in. Deletion means that the sign-in will not be automatically triggered.
Started:The scheduled sign-in has started normally. Users in the live streaming room can participate in the sign-in. This state cannot be edited or deleted.
(There is no 'ended' state. As long as the sign-in starts on time, the status will be displayed as 'started')
Skipped:When a scheduled sign-in is triggered, there is another sign-in in progress in the live streaming room. This scheduled sign-in will be skipped directly. This state cannot be edited or deleted.
This situation means that the instructor in the live streaming room is randomly initiating a sign-in and the sign-in has not ended. For example, the instructor initiated a sign-in at 17:00 with a duration of 10 minutes, and there is a scheduled sign-in starting at 17:05 on the management console. Since this time overlaps with the instructor's sign-in, it will not be triggered, and the status will be recorded as'skipped'.
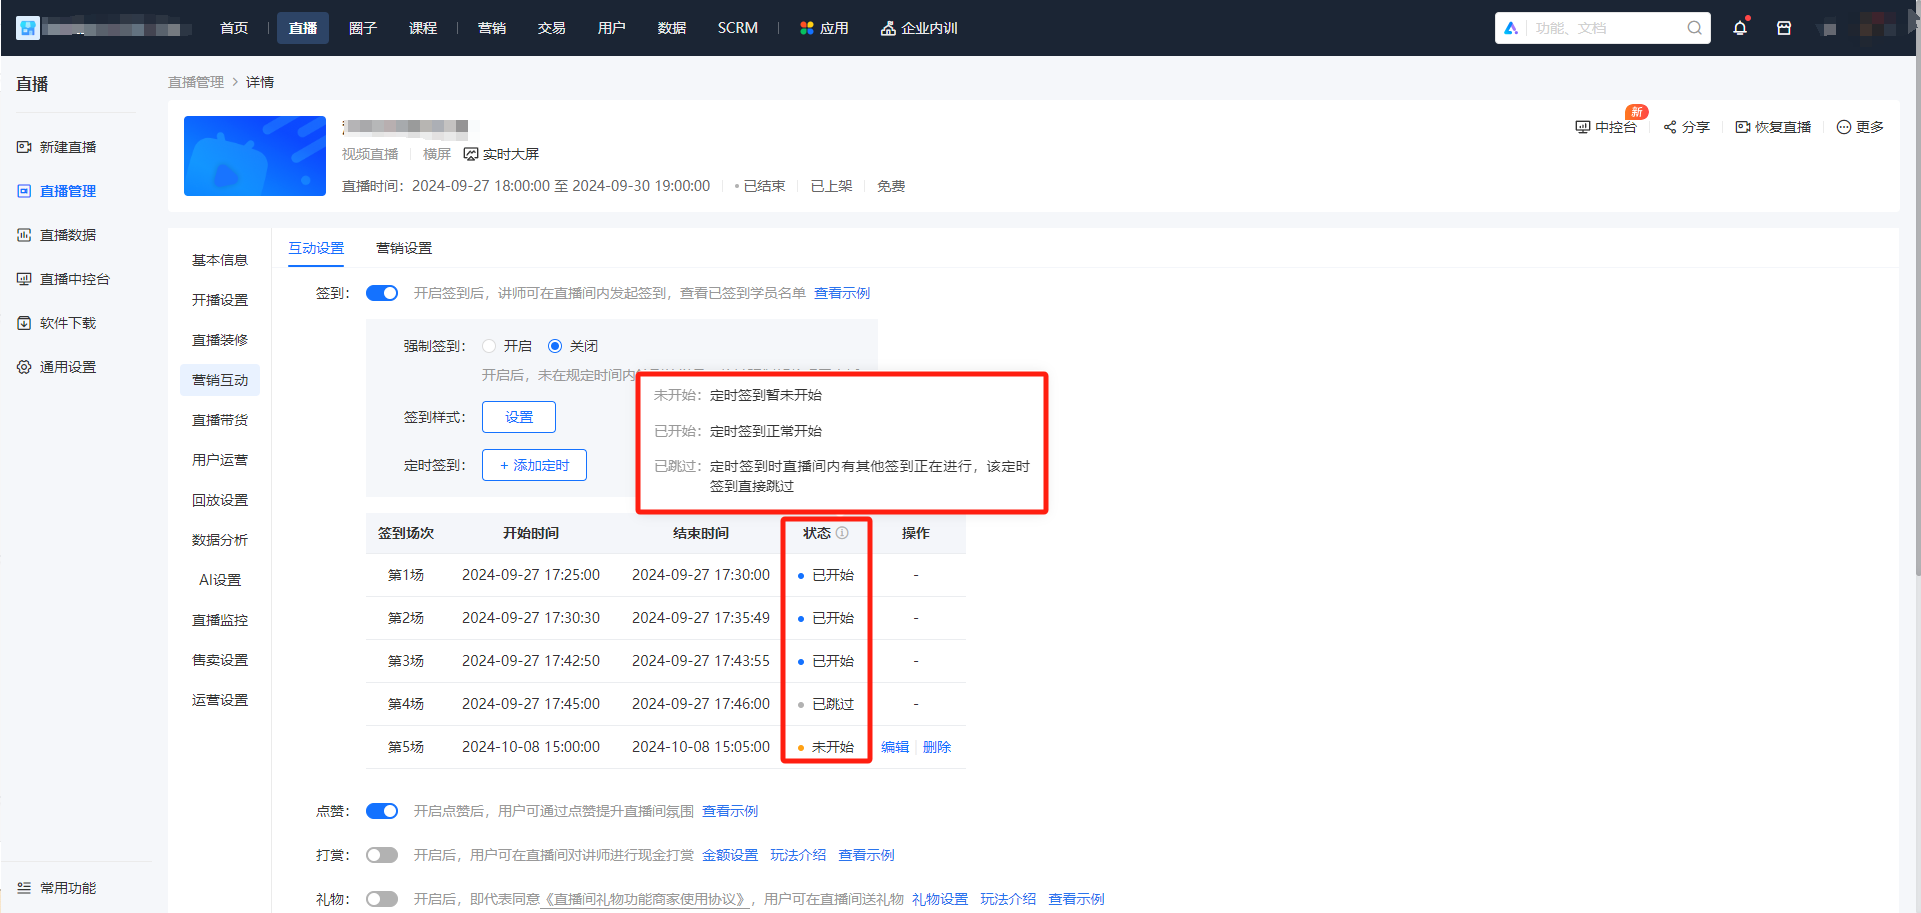
Step 3: Students participate in the sign-in
After the instructor initiates a sign-in, students can click on 'Sign in immediately' in the pop-up window to participate in the sign-in. Even if they close the pop-up window immediately, they can click on the sign-in icon in the live streaming room to sign in again.
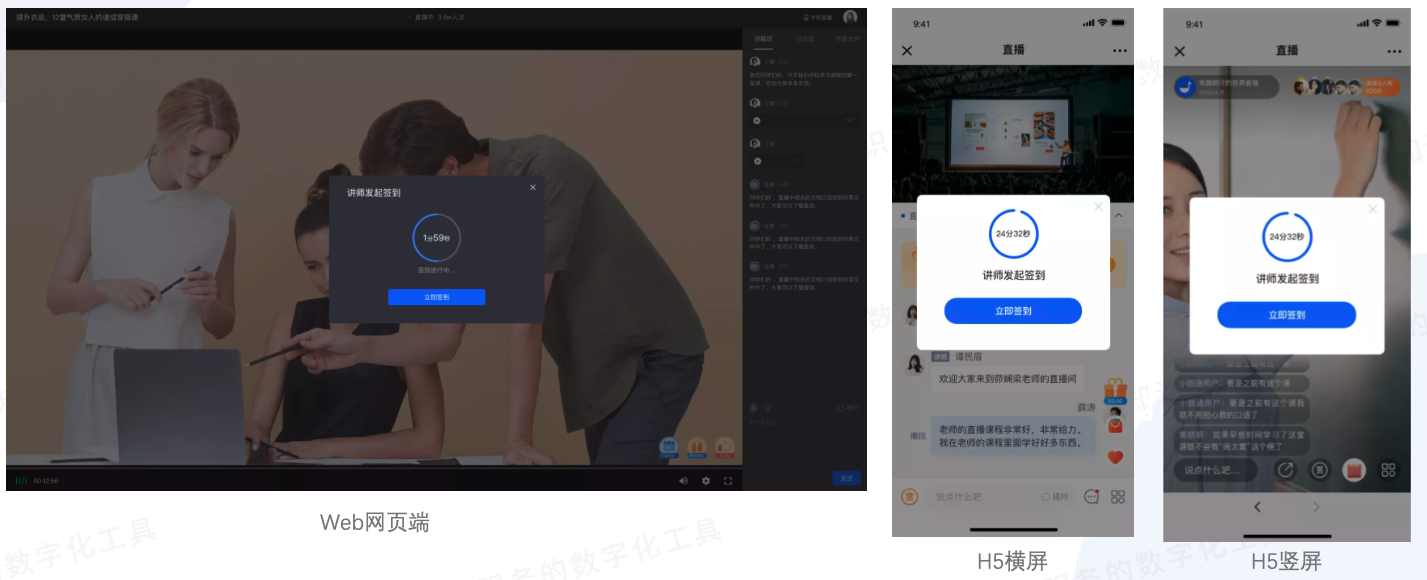
StepFourStepView and export sign-in data (Management backend)
In the live streaming room details - data analysis - interaction data, you can find the sign-in details corresponding to the live stream and export the relevant data.
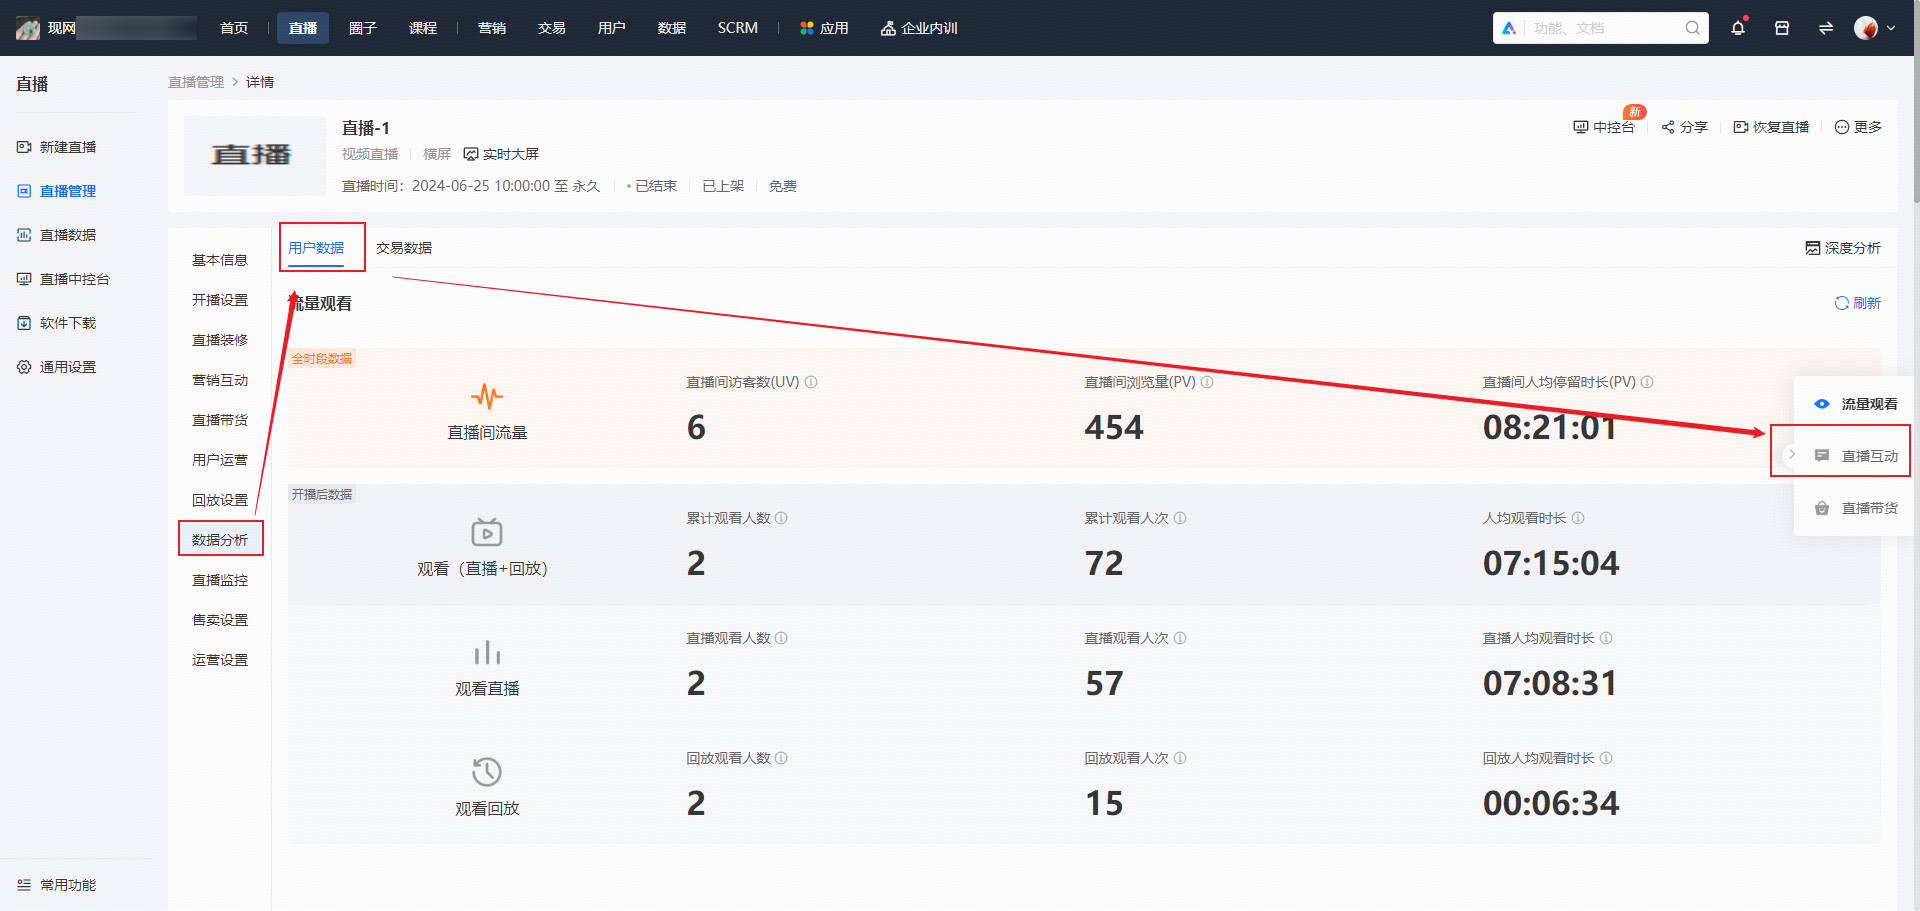
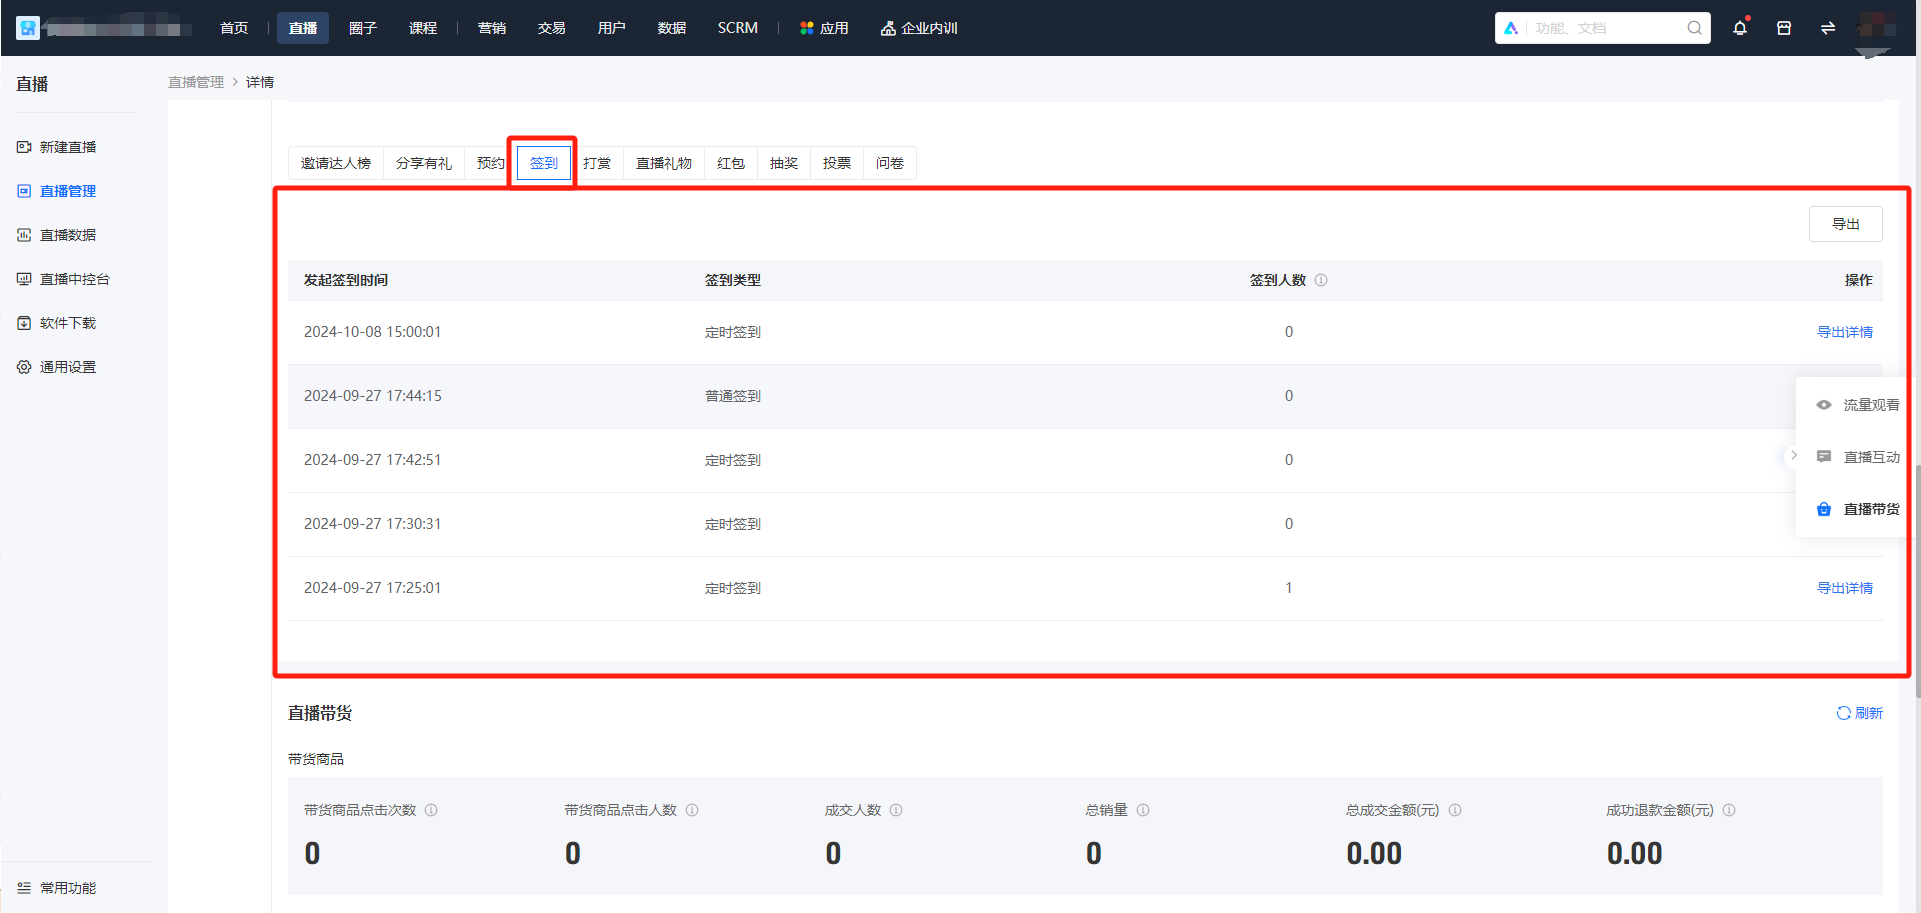
(Management backendView sign-in data)
How can learners view their participation records in live stream giveaways?
Click [···] - [My Raffles] - [View Participation Records], and students can view the results of the raffle activities they have participated in during this live stream.
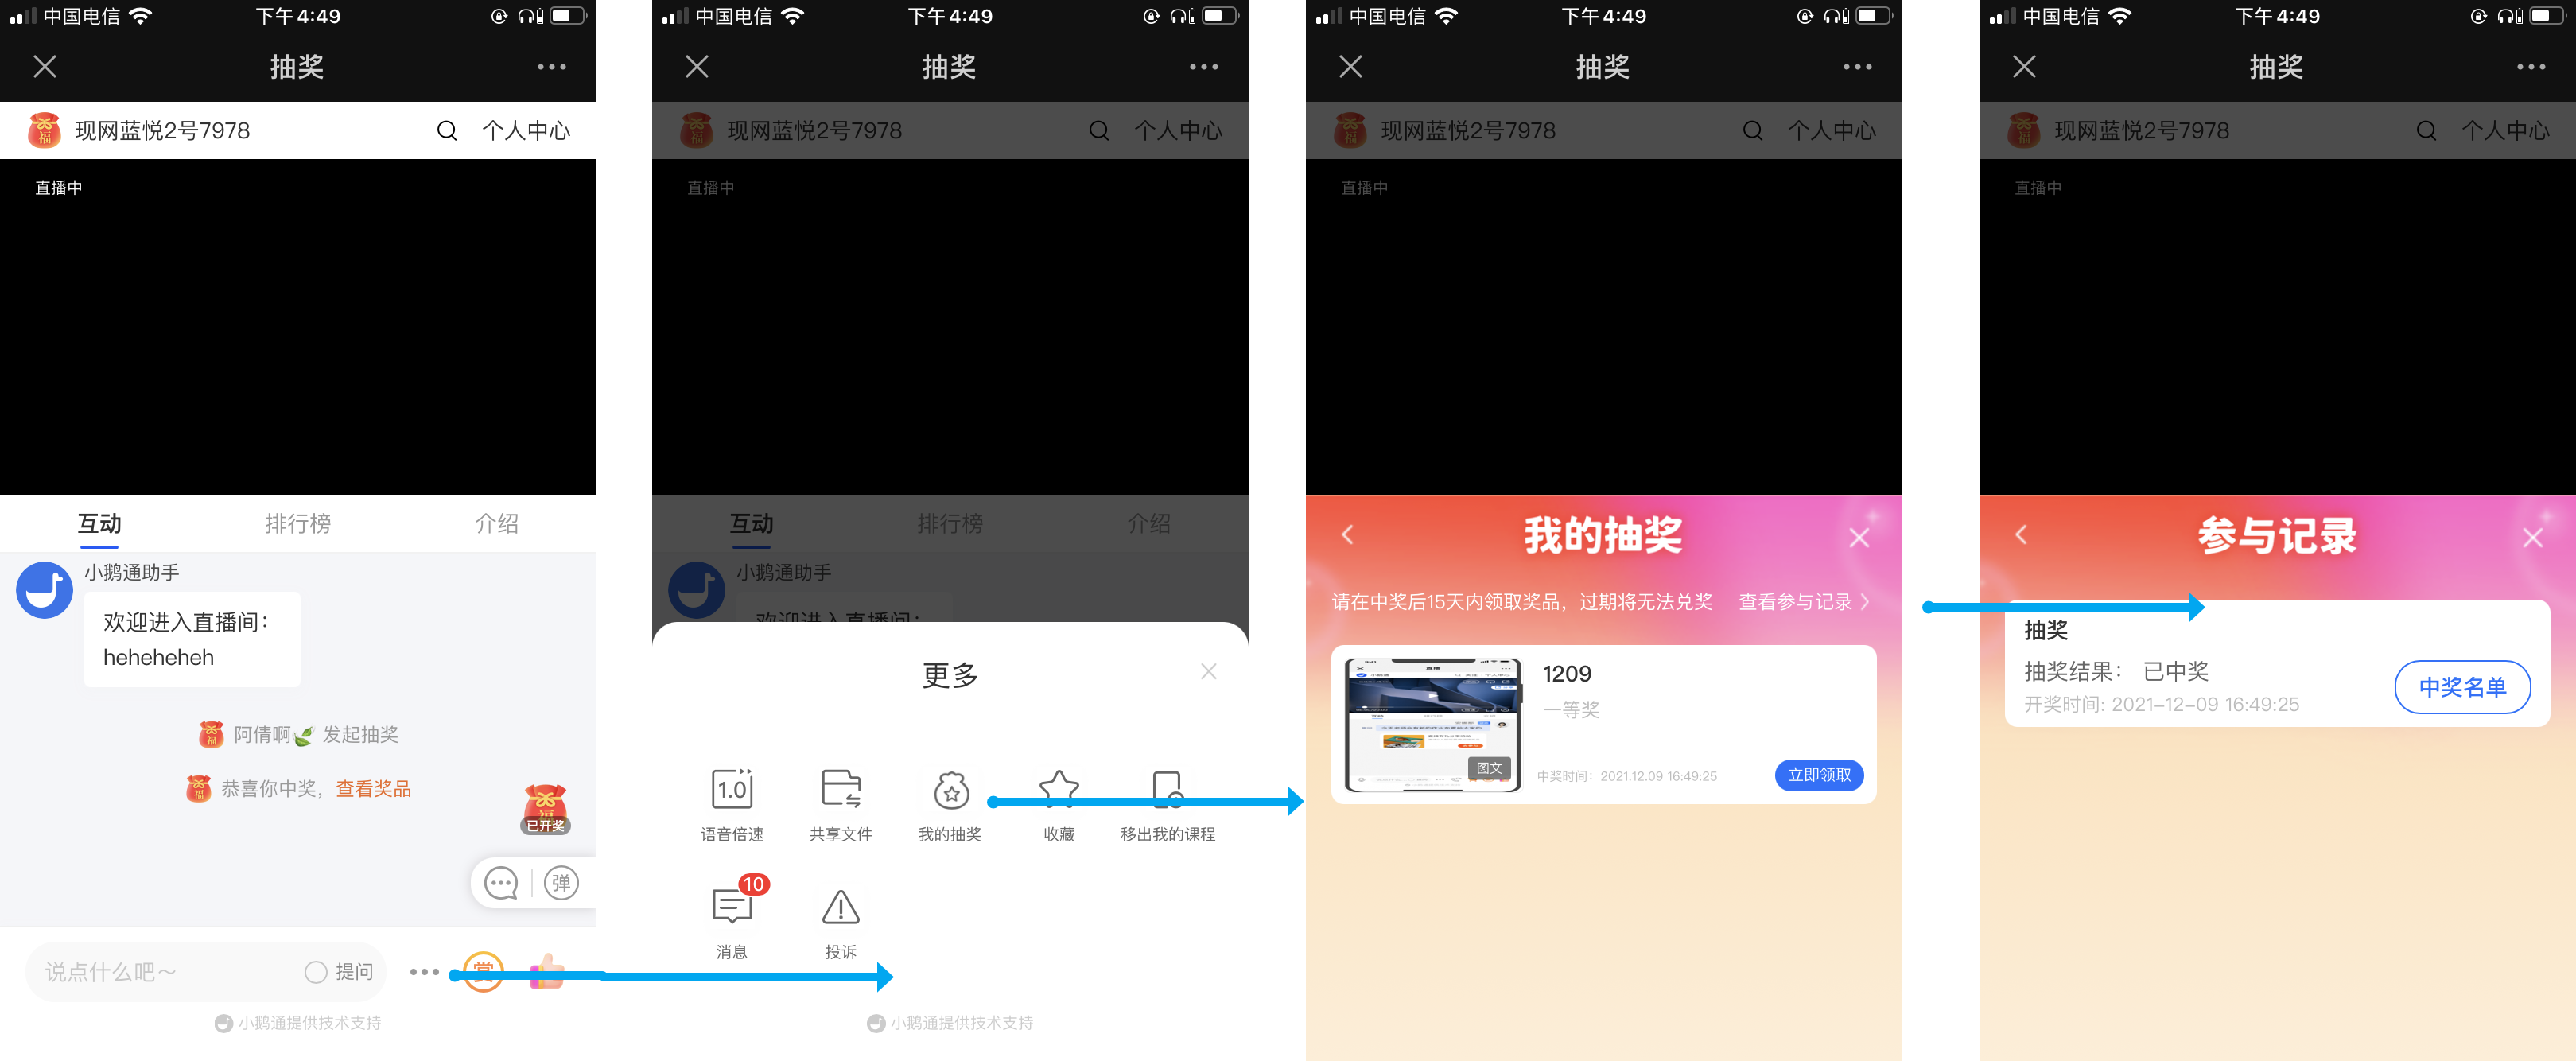
How to prevent students who have already won from winning again in a live commerce lottery?
When creating a lottery activity in [Live - Marketing Interaction — Interaction Settings], check [No Repeated Wins] in the rule settings and click Save.After the configuration is successful, students who have won prizes before the start of this round of the activity will not win in this round of the lottery activity.
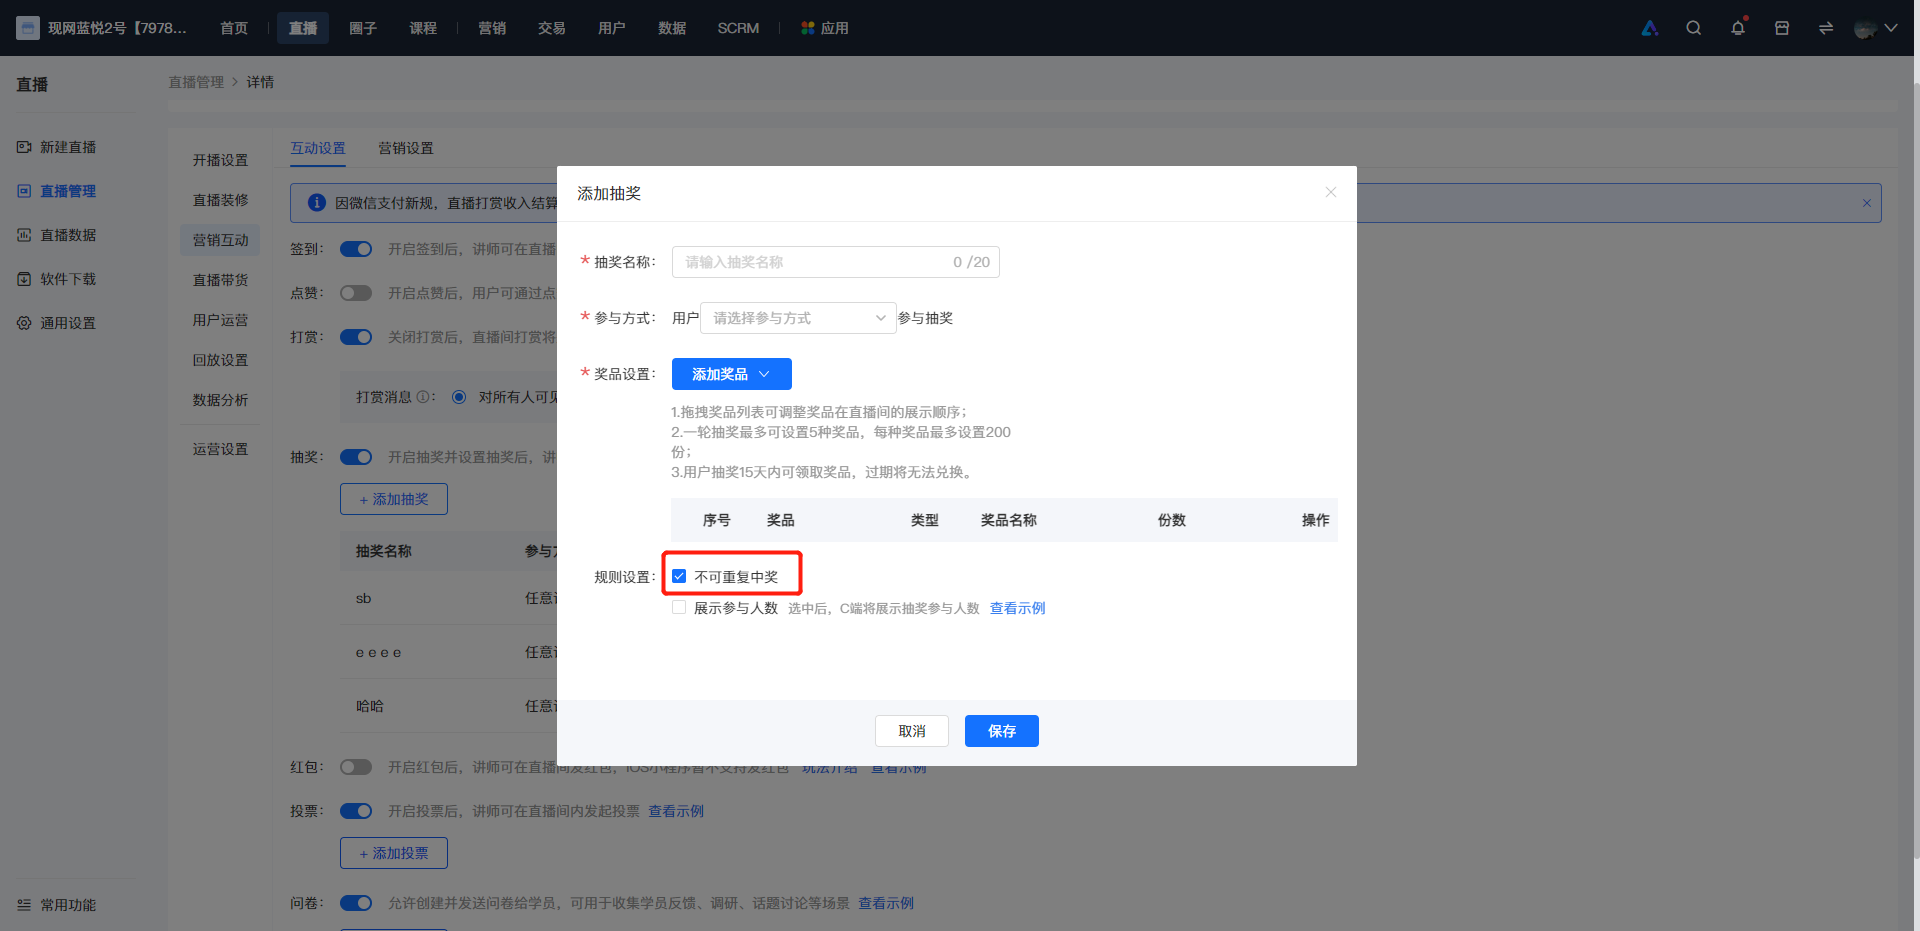
Tutorial on Sending Products during Live Commerce
I. Function Introduction
It supports instructors to send course products in the live streaming room.
II. Purpose of Use
Merchants can drive the sales of course products by sending them during live streaming.
III. Usage Scenarios
It meets the merchants' needs to send course products during live streaming.
IV. Operation Path
Merchant side:Select products→ Send products → View products
V. Usage Tutorial
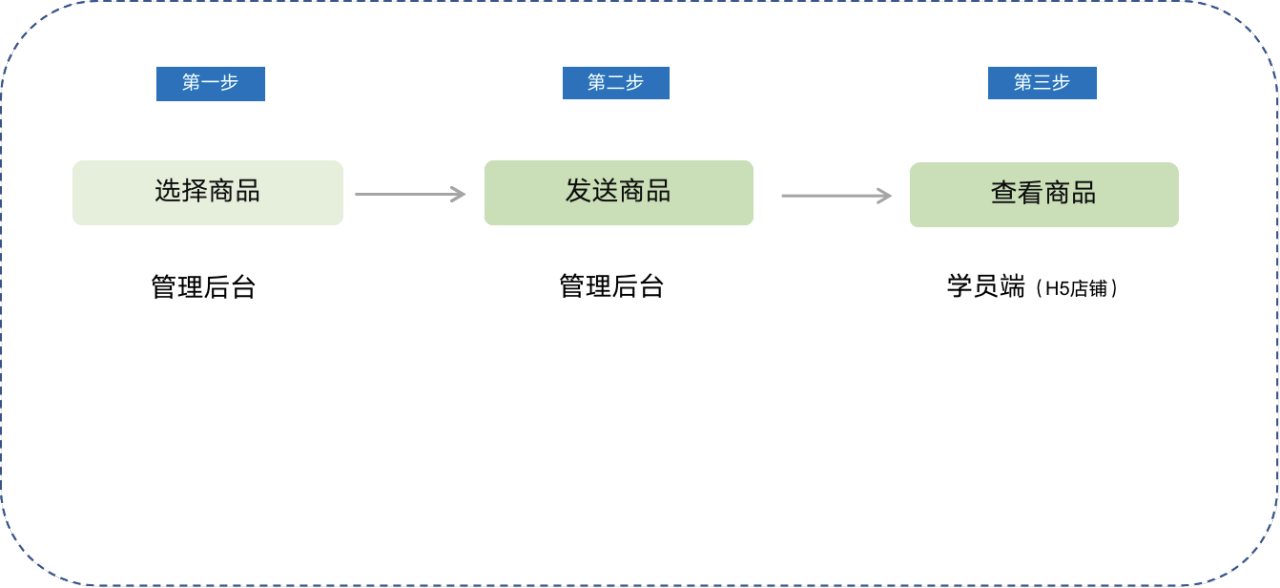
Step 1:Select products (Store management console)
1. Instructors canclick [Marketing Tools] in the PC live streaming room to select products.
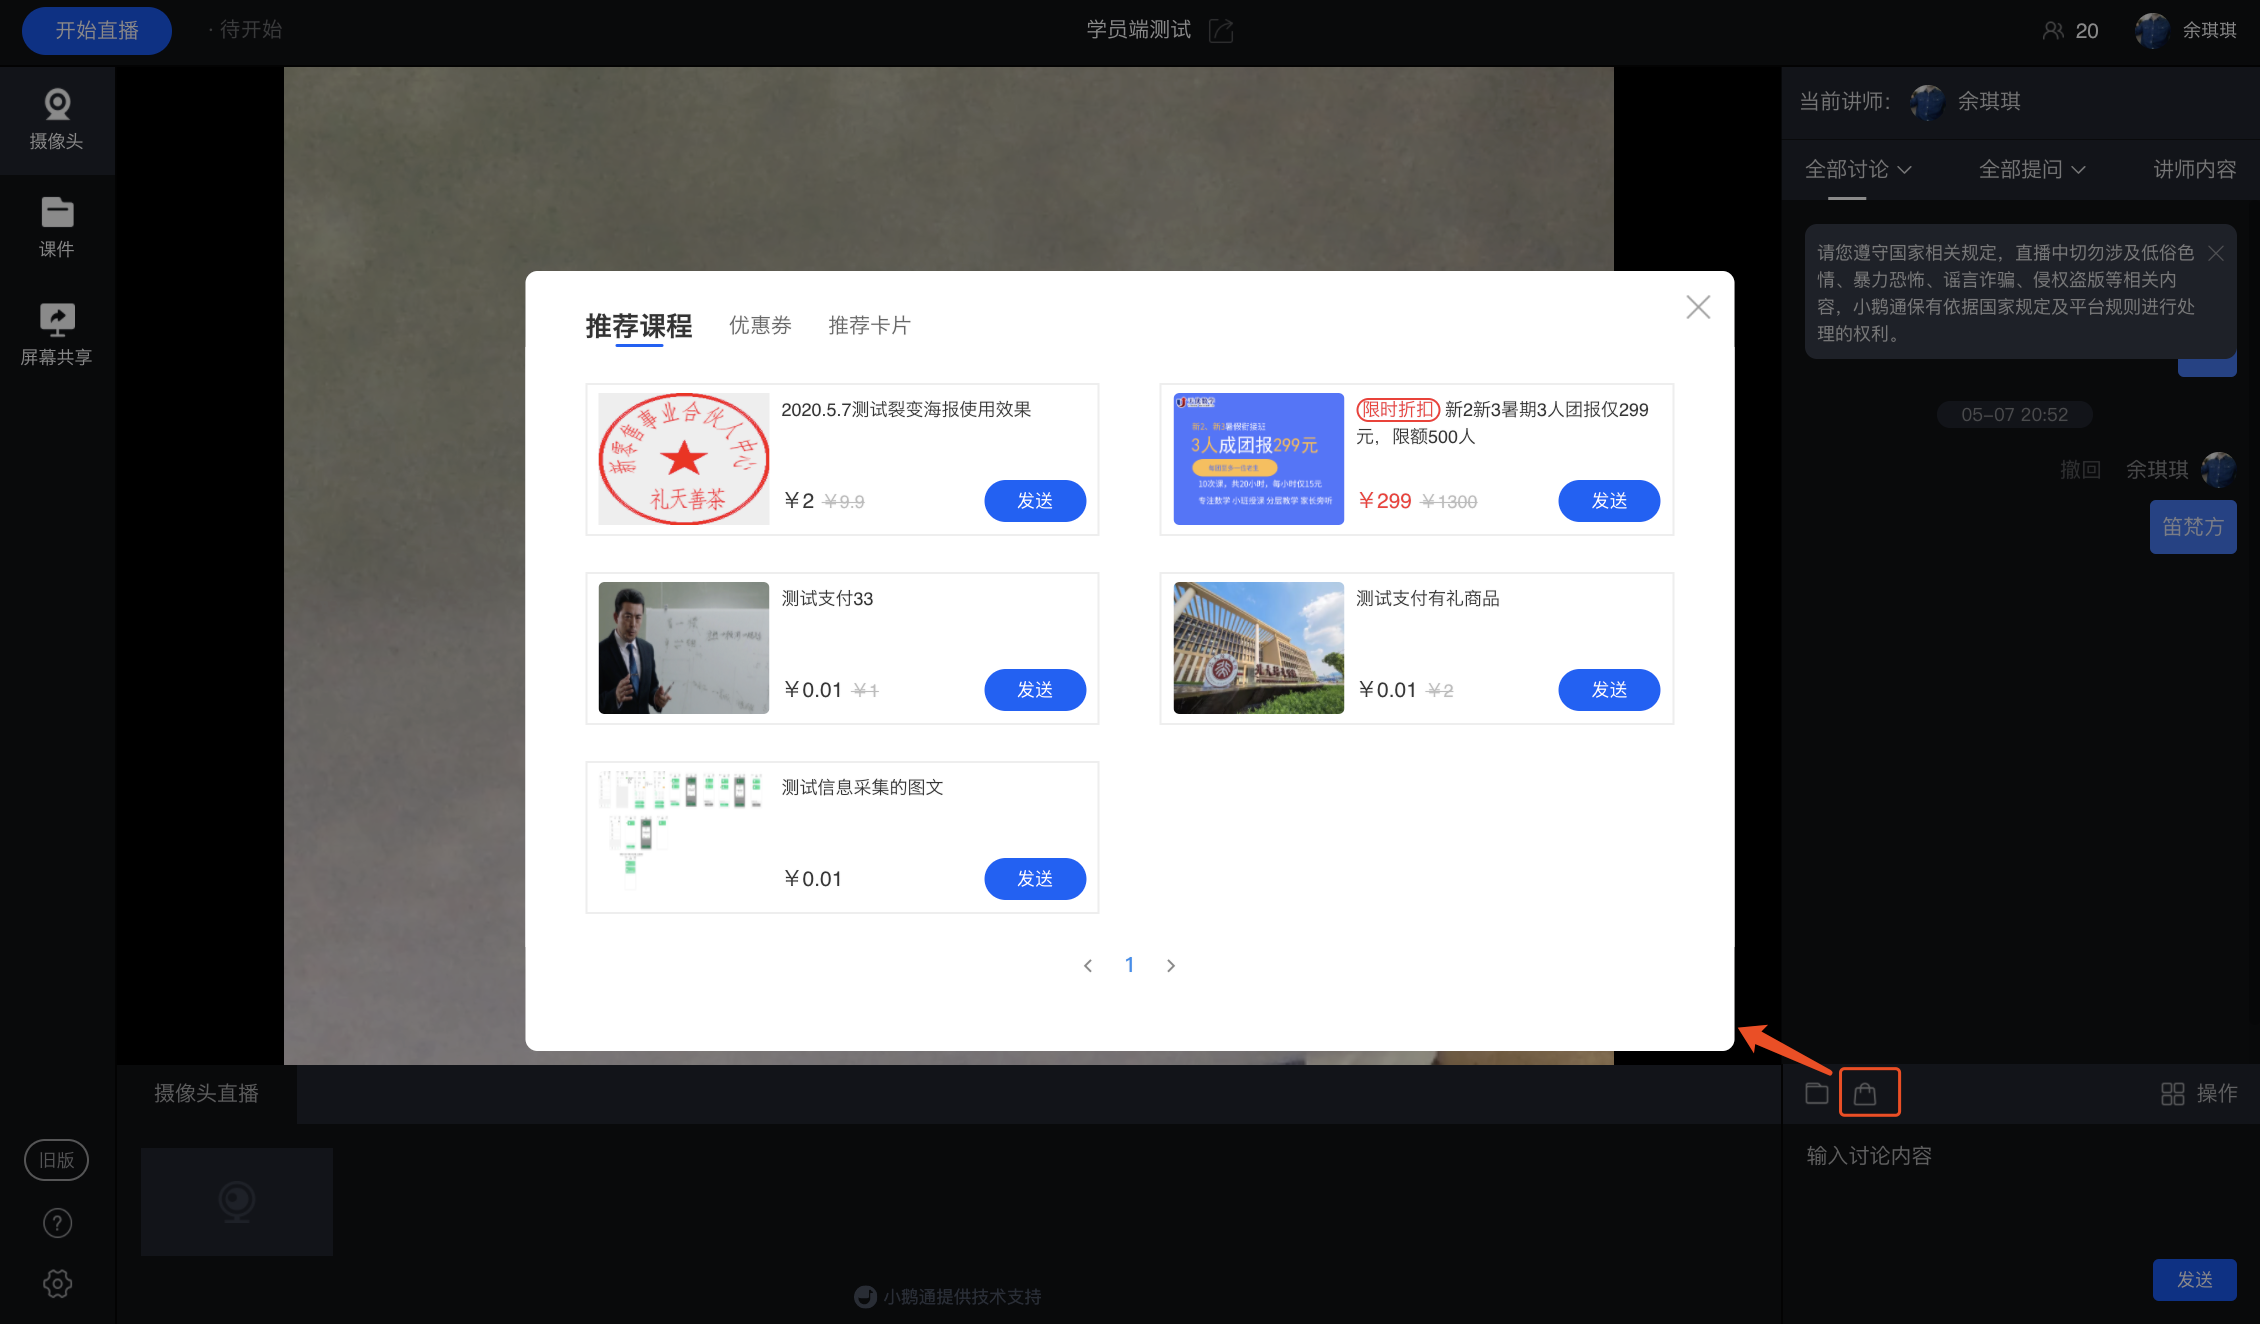
2. Instructors can alsoWeChat browser H5In the live streaming room, [click the product list entry -> select products and continue to send] to send the corresponding products to the explanation area.
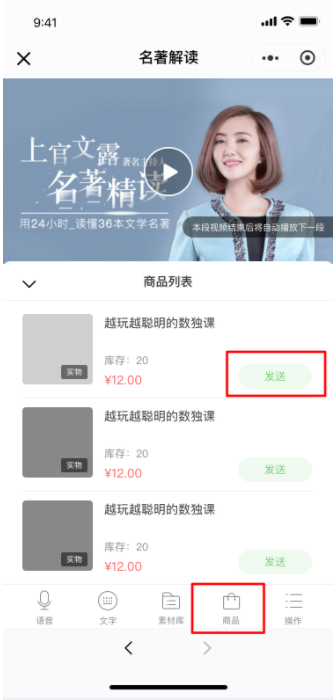
Step 2: Send products (Store management console)
You can select the corresponding products and send them to the explanation area.
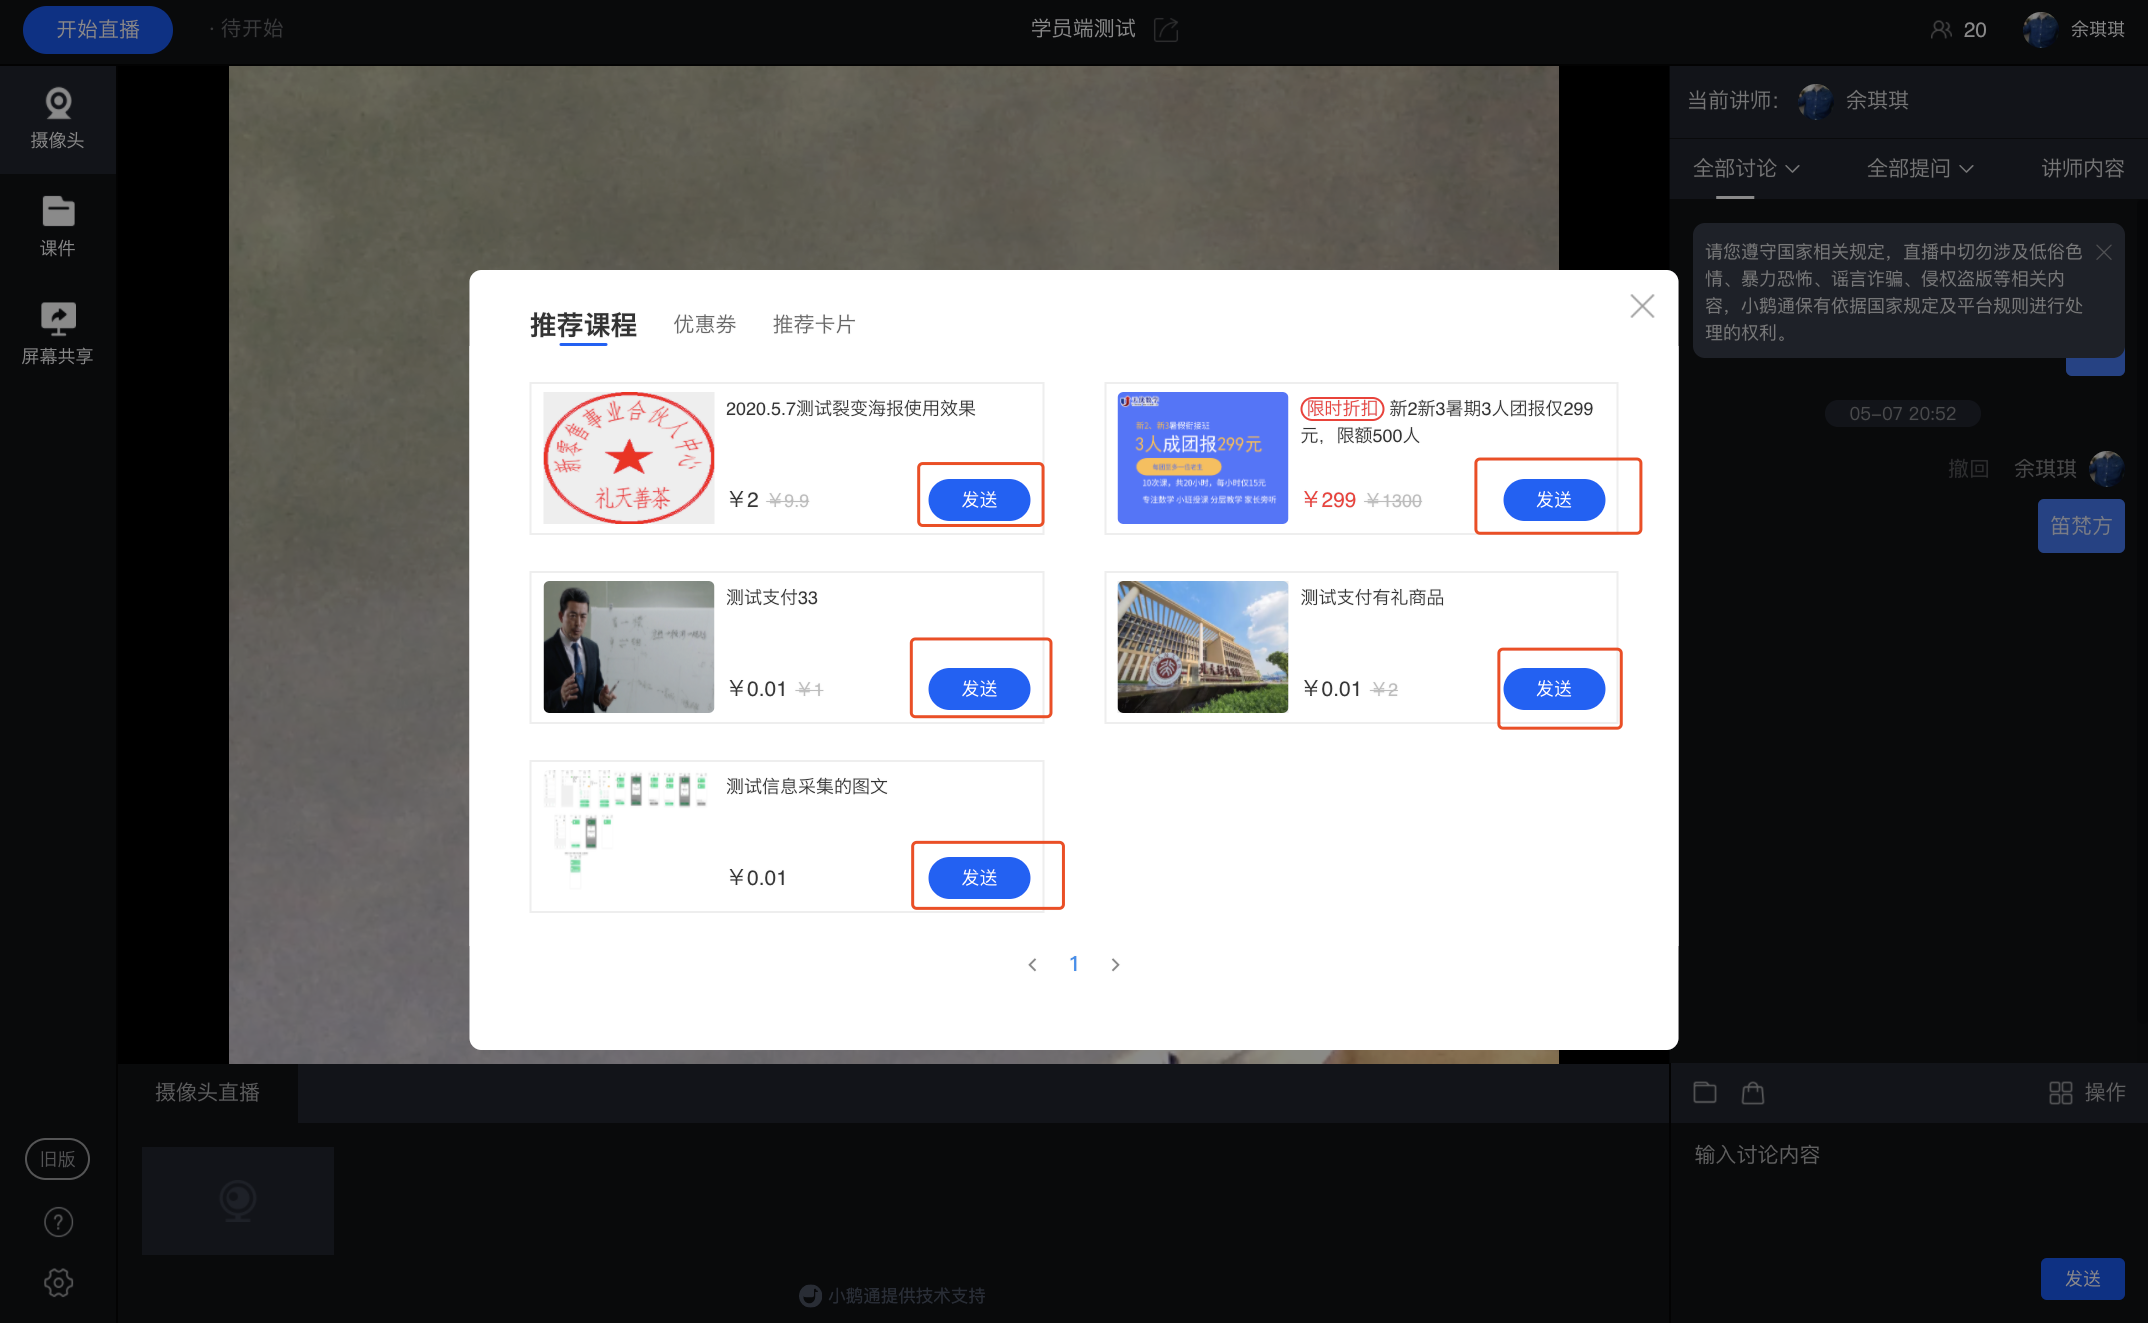
Step 3:View products (Learner side)
After the instructor successfully sends the products, learners can view them in the explanation area.
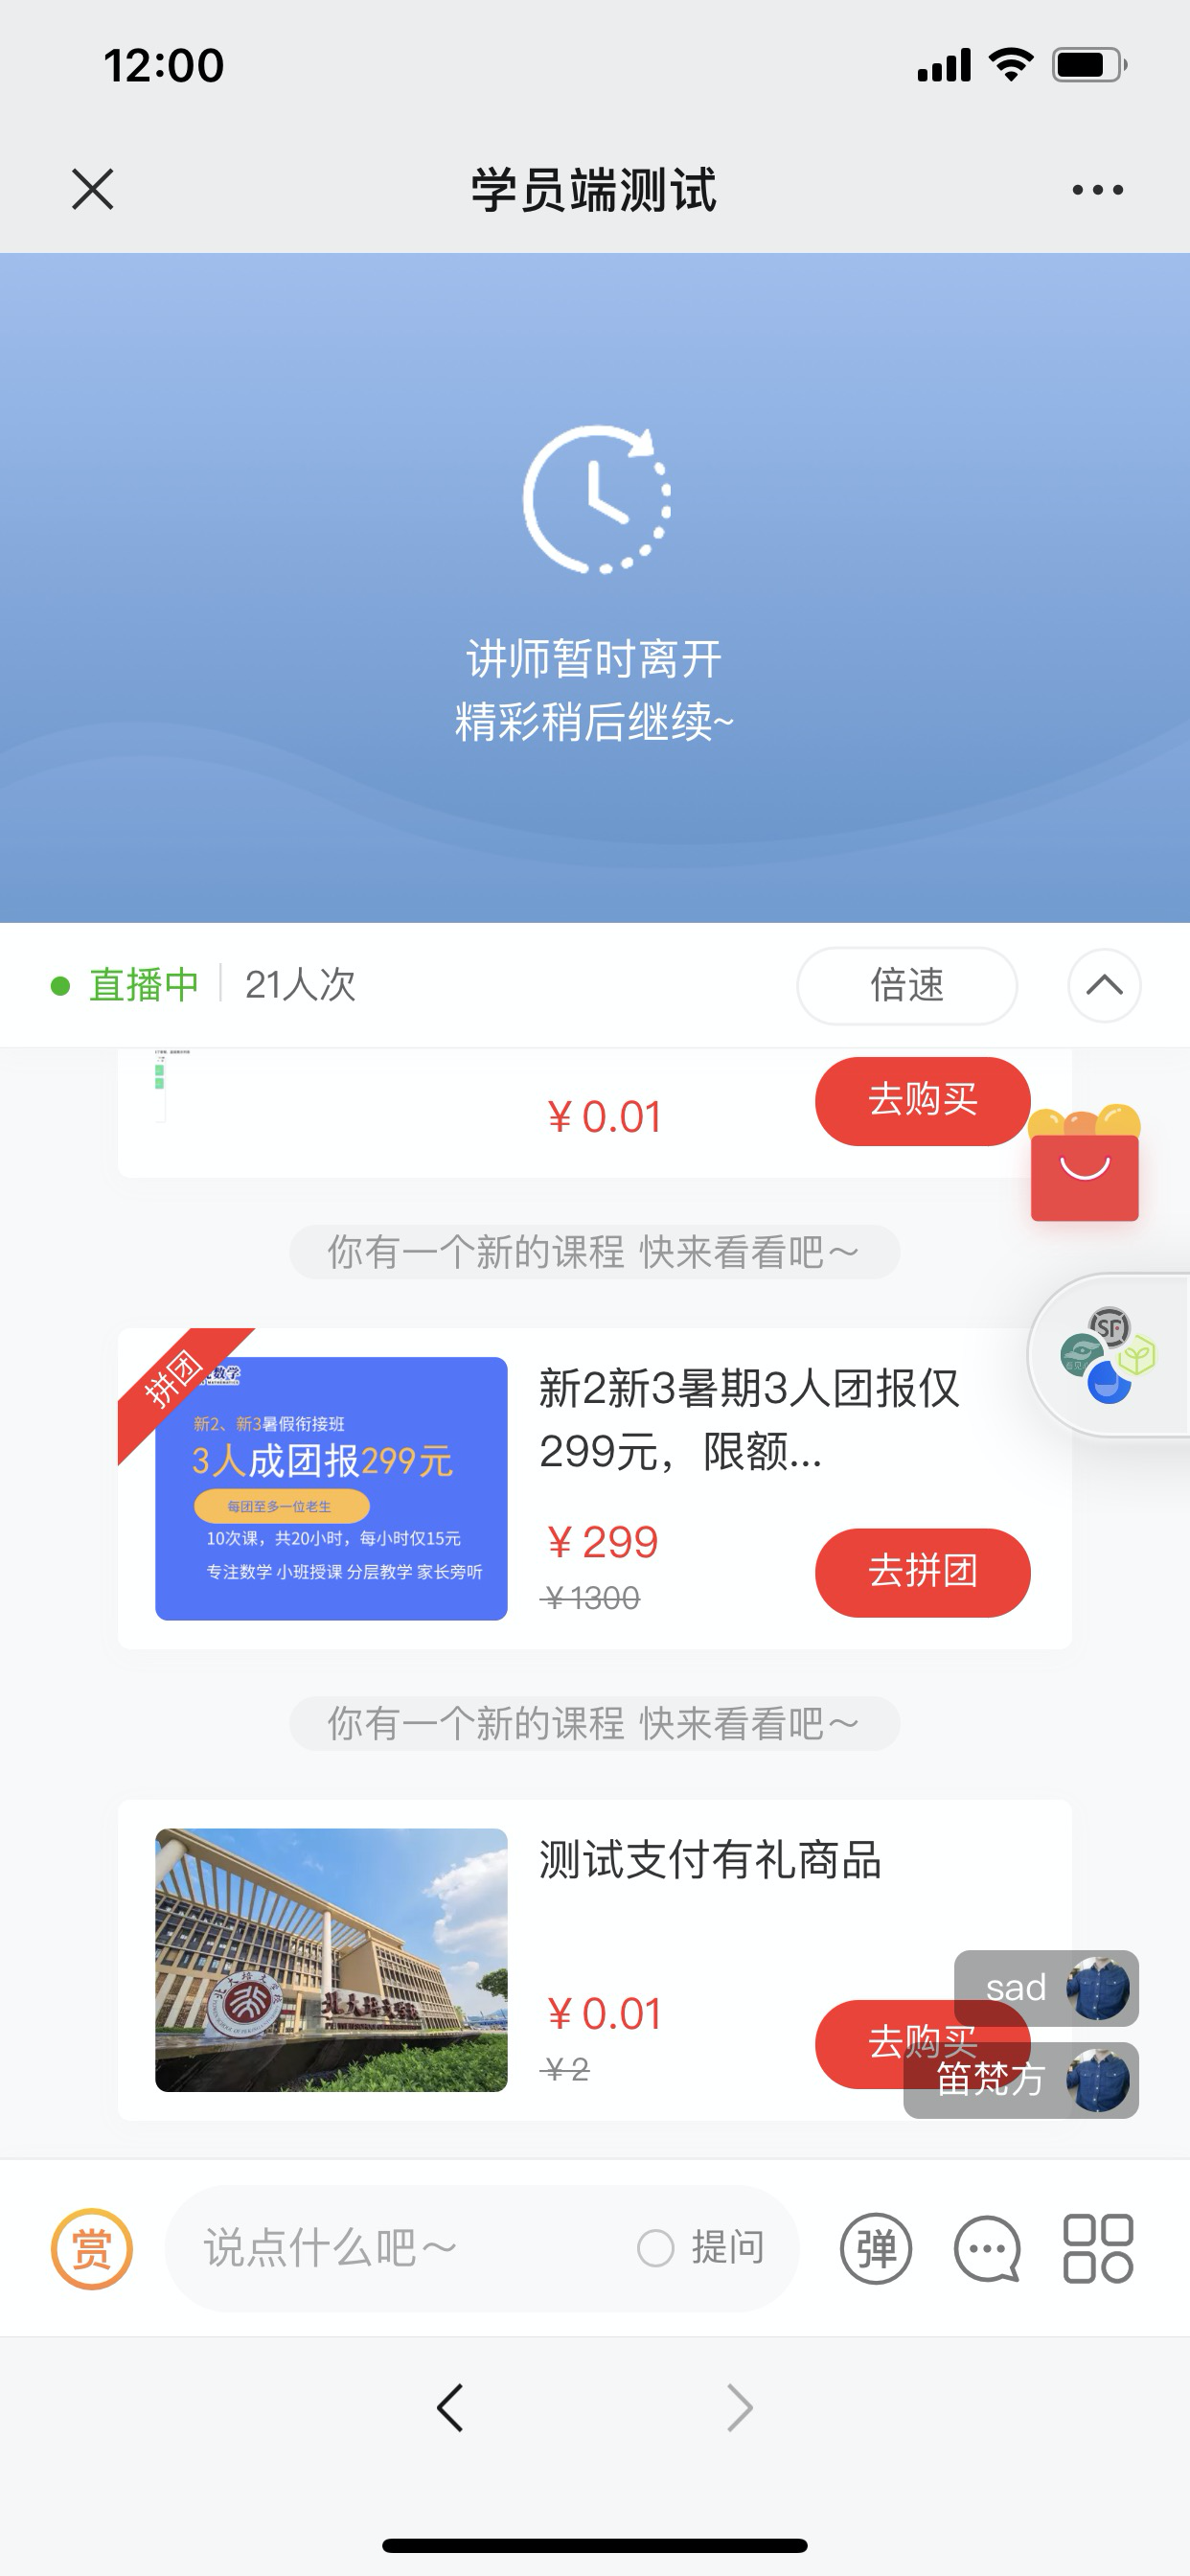
Supplementary interactive prompts for vertical screen live rooms and optimization of the product list refresh function
I. Function Introduction
Added relevant interactive prompts in the vertical-screen live streaming room. The product list supports automatic refresh every time it is opened.
II. Purpose of Use
Help liven up the atmosphere in the live streaming room and enhance users' experience of watching the live stream and making purchases.
III. Usage Scenarios
During vertical-screen live streaming, add interactive prompts on the page (prompts for entering the live streaming room, prompts for ongoing purchases, sharing prompts, etc.) to liven up the atmosphere in the live streaming room and encourage users to engage in more interactive operations (such as clicking on products, sharing the live streaming room, etc.).
Meanwhile, when merchants use live commerce, once the merchant adds products in the backend, the product list will automatically refresh when the user opens it, enhancing users' experience of watching the live stream and making purchases.
IV. Operation Path
Learner's end: WeChat H5 - Live streaming page
V. Usage Tutorial
Step 1: Enter the [Vertical-screen Live Streaming] page
1. When users perform the following actions during the live stream (currently only vertical-screen live streaming is supported), the corresponding prompts will be displayed:
· Enter the live streaming room --> Prompt for entering the live streaming room
· Click on a product --> Prompt for ongoing purchase
· Successfully purchase a product --> Prompt for successful purchase
· Click the sharing button --> Sharing prompt
The styles of each prompt are as shown in the figure below. Interaction actions: The prompt slides in from left to right to the specified position → stays and displays → fades out in place, and then the next prompt is displayed.
Step 2: Click on the product list
On the live streaming page (including both horizontal-screen and vertical-screen live streaming), every time the user clicks to open the product list pop-up window in the live streaming room, the content of this pop-up window will be refreshed.
How can instructors watch the live stream from the perspective of students?
I. Function Introduction
The "Watch Live Stream" feature is a general capability for instructors. It provides instructors with an entry to switch to the viewer's perspective, enabling them to create a live streaming room with a better user experience.
II. Purpose of Use
1. Support instructors to enter the live streaming room before and during the live stream and switch to the viewer's perspective.
2. Support instructors to perform interactive operations as teaching assistants from the viewer's perspective.
III. Usage Scenarios
Meet the needs of merchants/instructors to manage the live stream in the live streaming room as teaching assistants.
IV. Operation Path
Instructor's end: Search for and open the "eLive Mini Program" on WeChat - Enter the live streaming room - Click "More" - Click "Watch Live Stream"
*Currently, the "Watch Live Stream" feature supports live streams created from the store. Supported terminal type: eLive Mini Program
V. Usage Tutorial
Before the live stream: Enter the live streaming room > Click "More" > Click "Watch Live Stream" > You can switch to the viewer's perspective;

During the live stream: Click "More" > Click "Watch Live Stream" > Click "Confirm" in the secondary confirmation pop - up window > You can switch to the viewer's perspective

VI. Frequently Asked Questions
1. Can the instructor's watching function be disabled on the management console?
Currently, the function for instructors to watch the live stream is a general basic function. It does not support enabling/disabling for now, and by default, all instructors have this permission.
2. What will happen when the instructor clicks the "Watch Live Stream" button during the live stream?
When the instructor clicks the "Watch Live Stream" button during the live stream, the instructor will switch to the viewer's perspective, and the live stream will be paused at this time.
Tutorial on Using the Live Sharing Reward Program
I. Function Introduction
The Live Stream Share-and-Win function is a tool for attracting new users and driving traffic to the live stream room. It encourages students to spontaneously share the live stream room by offering prizes, thereby boosting the popularity of the live stream room. When the prize is a coupon, it not only motivates their friends to watch the live stream but also encourages target students to place orders in the live stream room.
II. Purpose of Use
Motivate students to share the live stream room with prizes to attract new users and drive traffic to the live stream room.
III. Use Scenarios
1. Merchant Xiaotong has just started trying live streaming, and the live stream room has a low number of visitors. To address this, Xiaotong created a share-and-win activity. Users saw the activity and thought it was easy to get a gift, so they shared the live stream with their friends. After multiple friends clicked on the link, the user received a 20-yuan coupon as a reward. As a result, the number of visitors to Xiaotong's live stream room continued to increase.
2. Merchant Xiaozhi wants to host a free public course live stream and hopes to attract a large number of students to the live stream room for subsequent live commerce. Students noticed the share-and-win activity in the live stream room and kept sharing it with their friends. As a result, Xiaozhi's live stream room attracted many students. The lecturer also gave a great presentation, and many courses were sold.
IV. Operation Path
Merchant side: B-side management console - Live Streaming - Live Stream Room Details - Live Stream Room Settings - Interaction Settings - Share-and-Win Switch;
Lecturer side (H5): Live Stream Room - Bottom Toolbar - More - Share-and-Win;
Student side (H5): Entry ①: Live Stream Room - Interaction Area - Share-and-Win Card;
Entry ②: Live Stream Room - More - Share-and-Win.
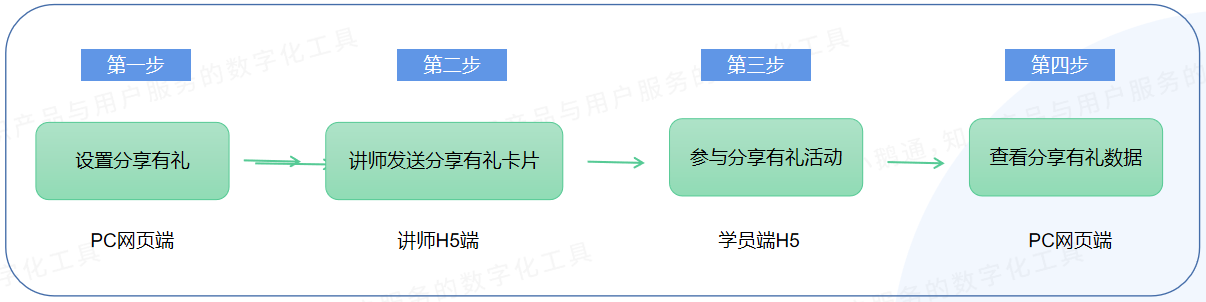
V. Usage Tutorial
Step 1: Turn on the Share-and-Win switch and set up the share-and-win activity.(PC web management console)
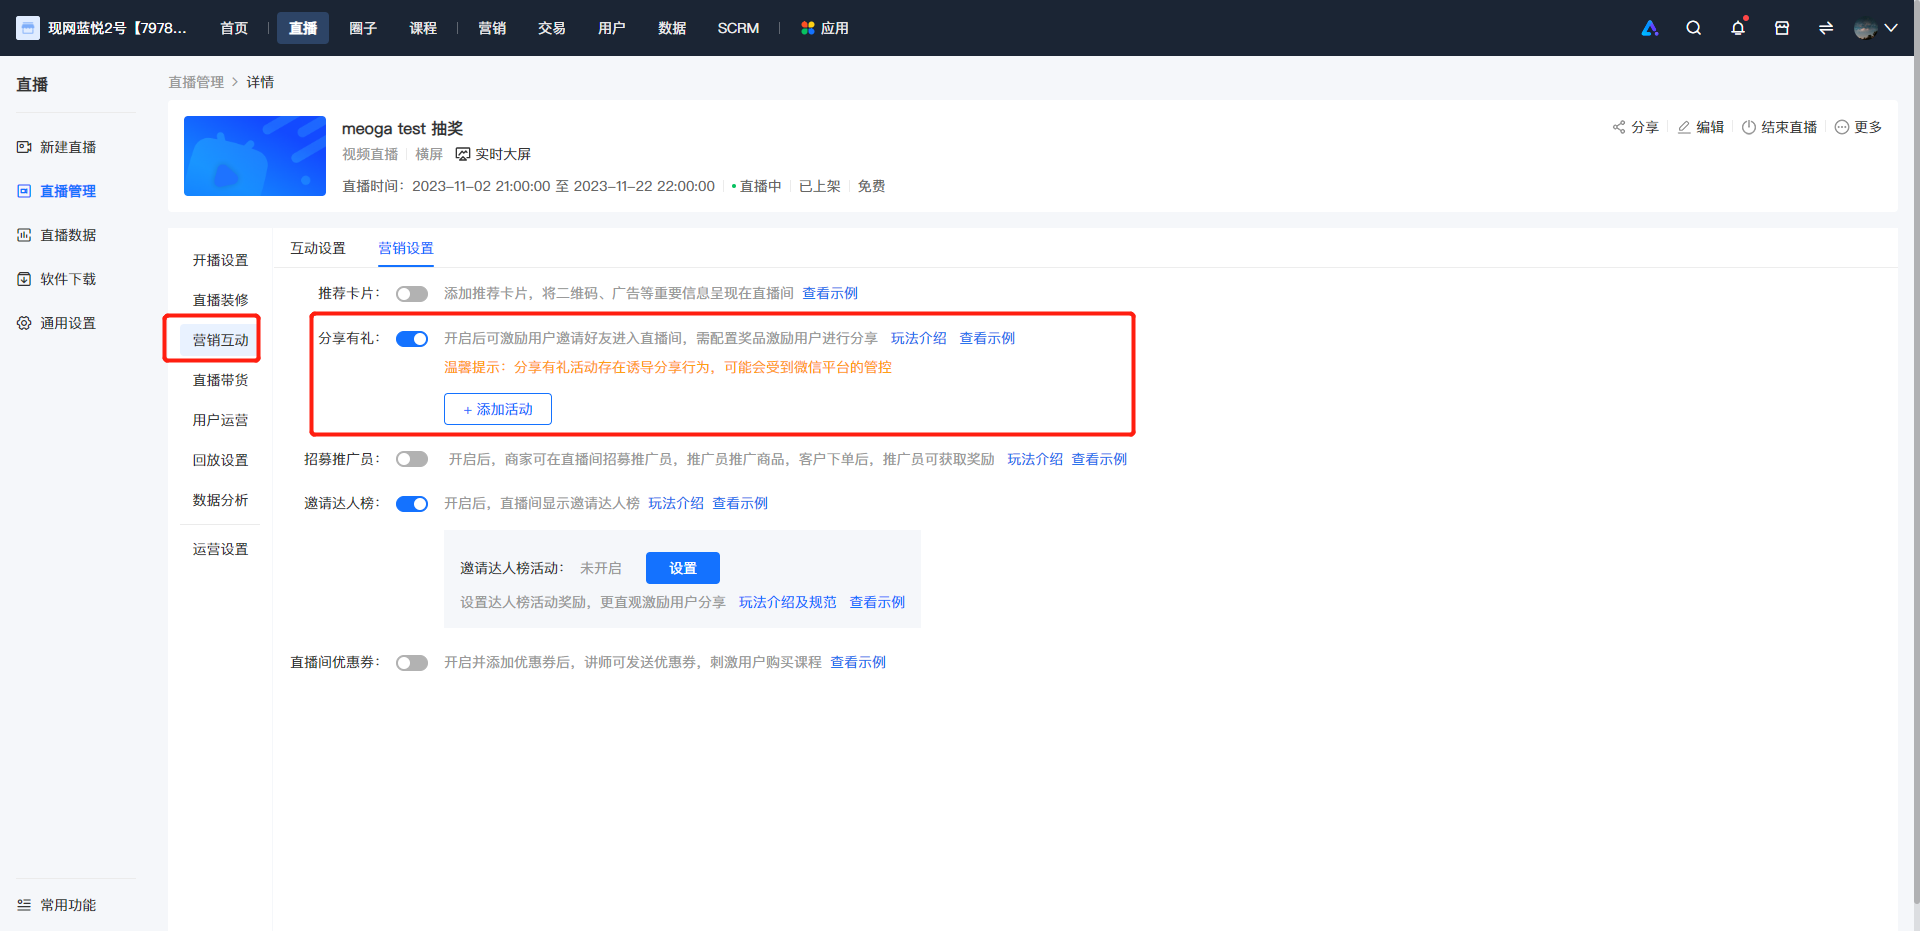
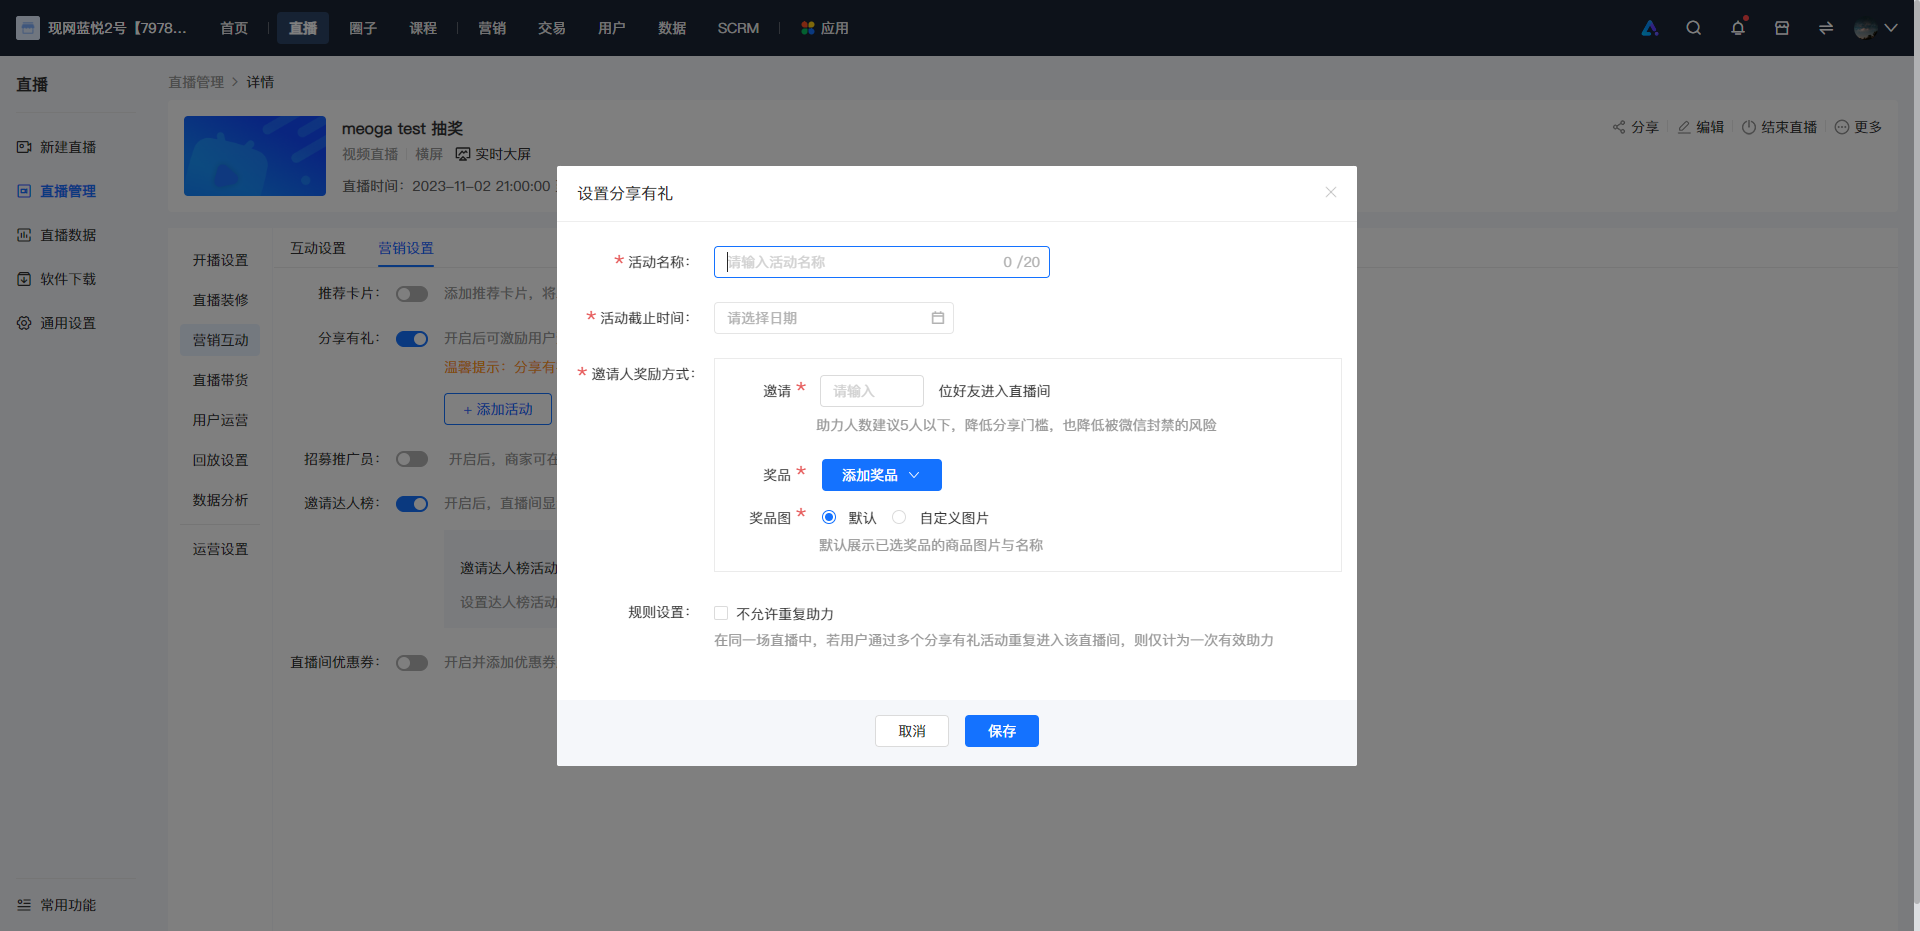
● When setting up the share-and-win activity, you need to configure the [Activity Name], [Activity End Time], [Number of Invitees], [Prize Settings], and [Prize Image Settings].
○ The [Activity Name] should not exceed 20 characters.
○ The [Activity End Time] should be later than the current time when setting up the activity. It is recommended to set it as the estimated end time of each live stream. (After the end time, the C-side will display the status of 'Activity has ended'.)
○ The [Number of Invitees] should not exceed 999. It is recommended to set it to less than 5. On the one hand, it can reduce the risk of being blocked by WeChat. On the other hand, it can lower the threshold for students to obtain prizes and encourage them to share.
○ The [Prize Settings] include: online courses, physical prizes, student benefits, marketing coupon codes, and custom prizes.
○ [Prize Image Settings]
Option ①: The default is the product image and name.
Option ②: Custom image: You can use the big gift package image on the cover or upload your own image. It is recommended that the size be 4:3. You can customize the prize name, which should not exceed 20 characters.
After successful saving, the share-and-win task is created successfully, and the share-and-win icon entries on the lecturer side and student side are enabled.
Step 2: The lecturer sends the share-and-win card.(H5)
1. Landscape live streaming:
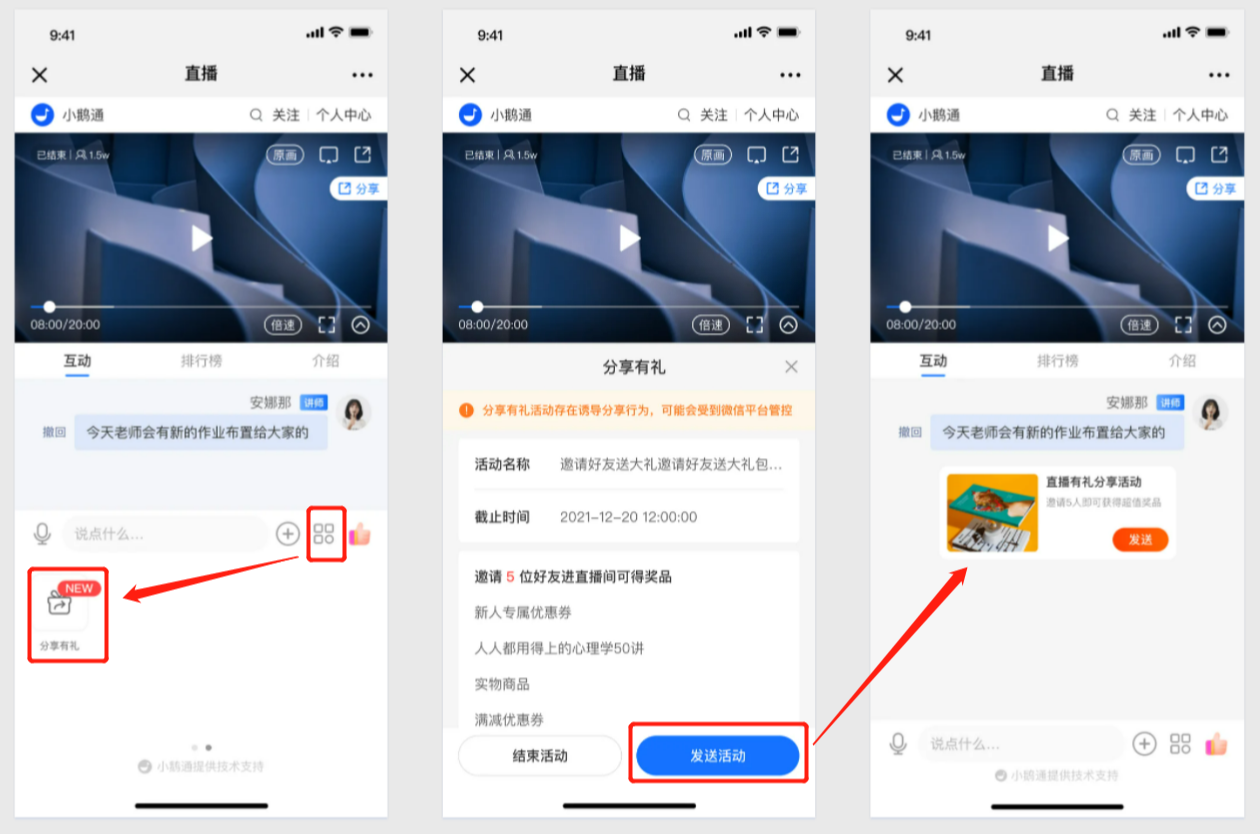
2. Portrait live streaming:
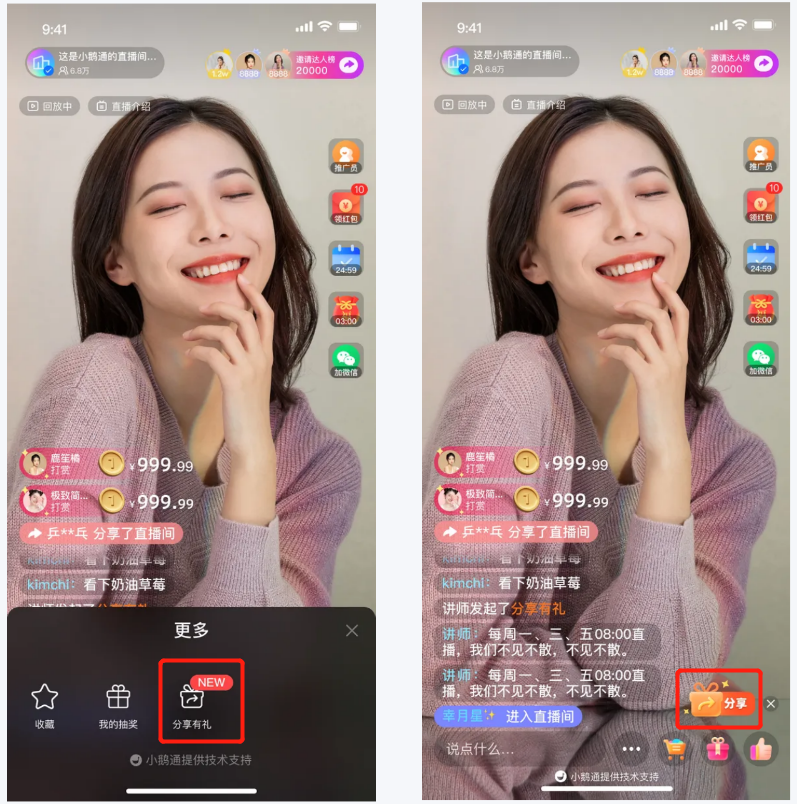
Step 3: Students participate in the share-and-win activity.(H5)
1. Click on the share-and-win participation entry:
● Landscape live streaming:
Entry ①: Students click the 'Go to Participate' button.
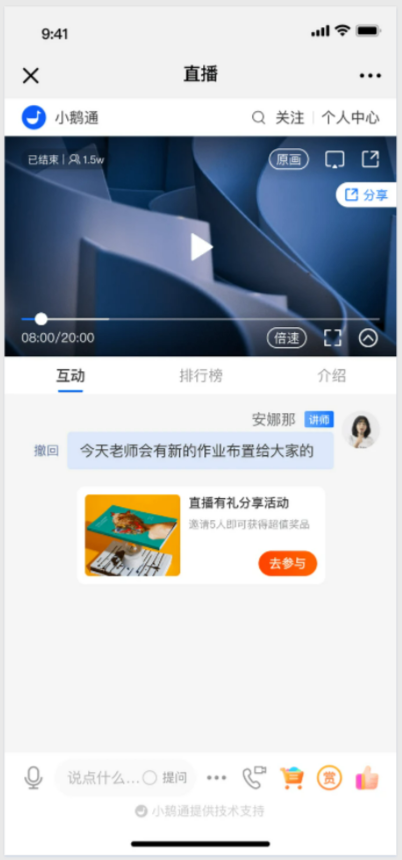
Entry ②: It is fixedly displayed in the live stream room - More - Share-and-Win icon.
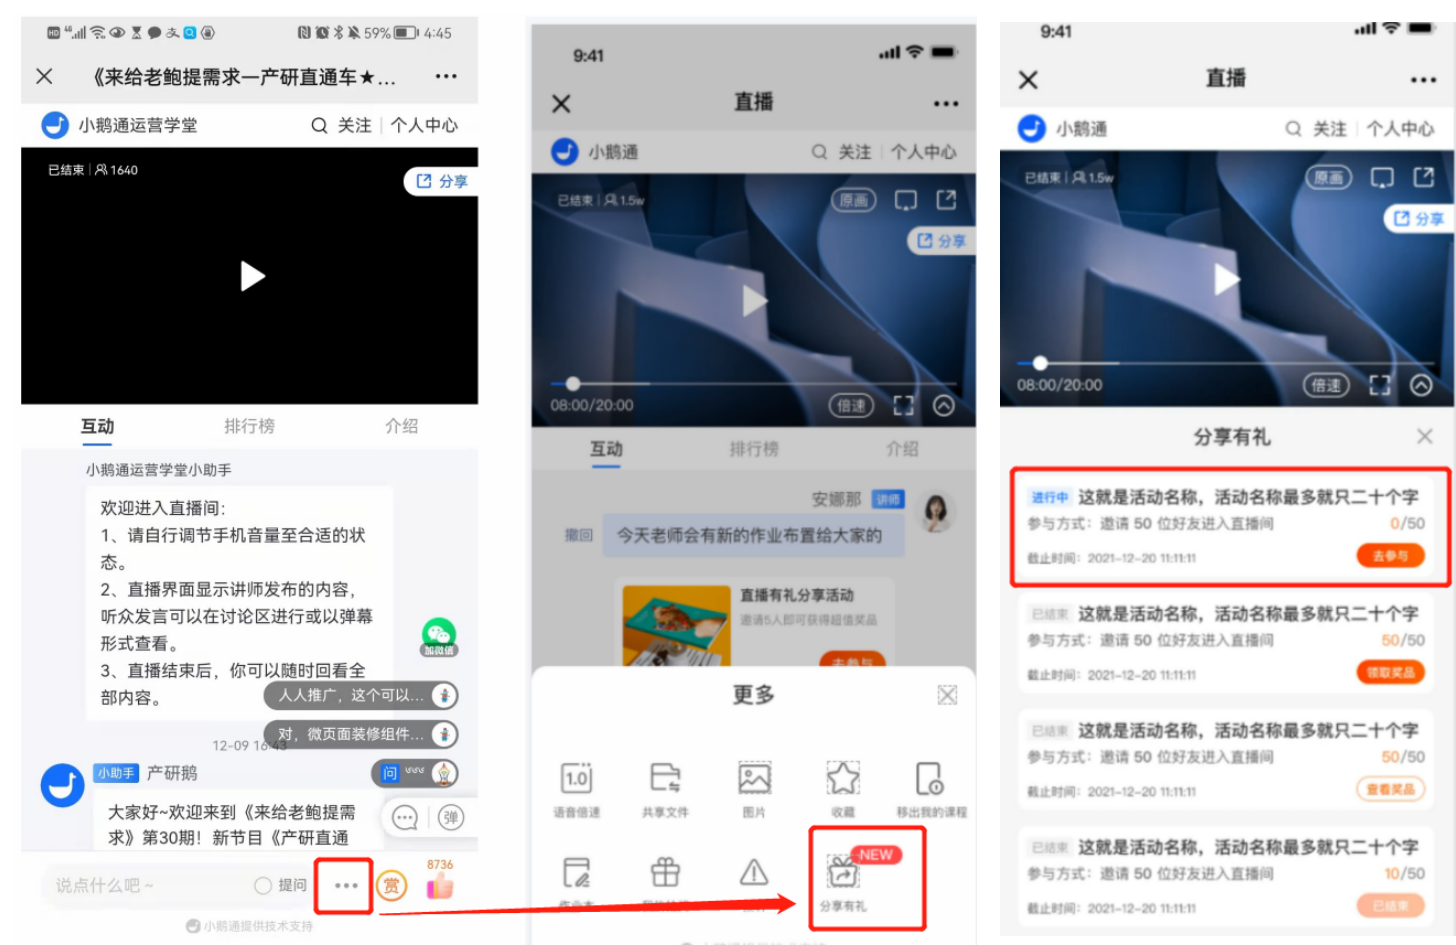
Entrance ③: The “Share” icon permanently displayed on the right sidebar of the live streaming room;
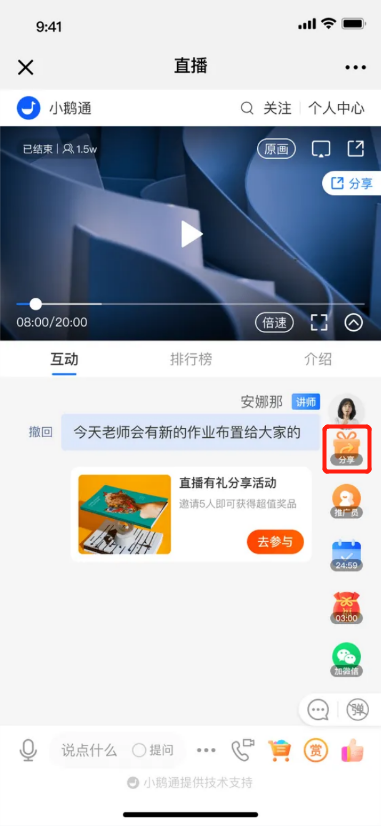
● Portrait live streaming:
Entrance ①: Learners click the “Share” button;
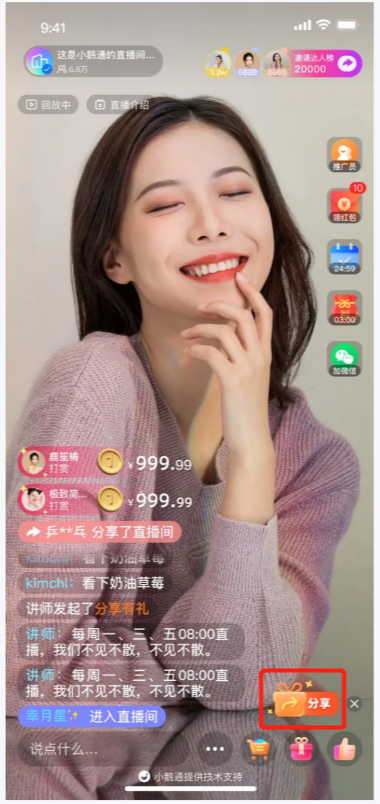
Entrance ②: More - Share for Rewards icon
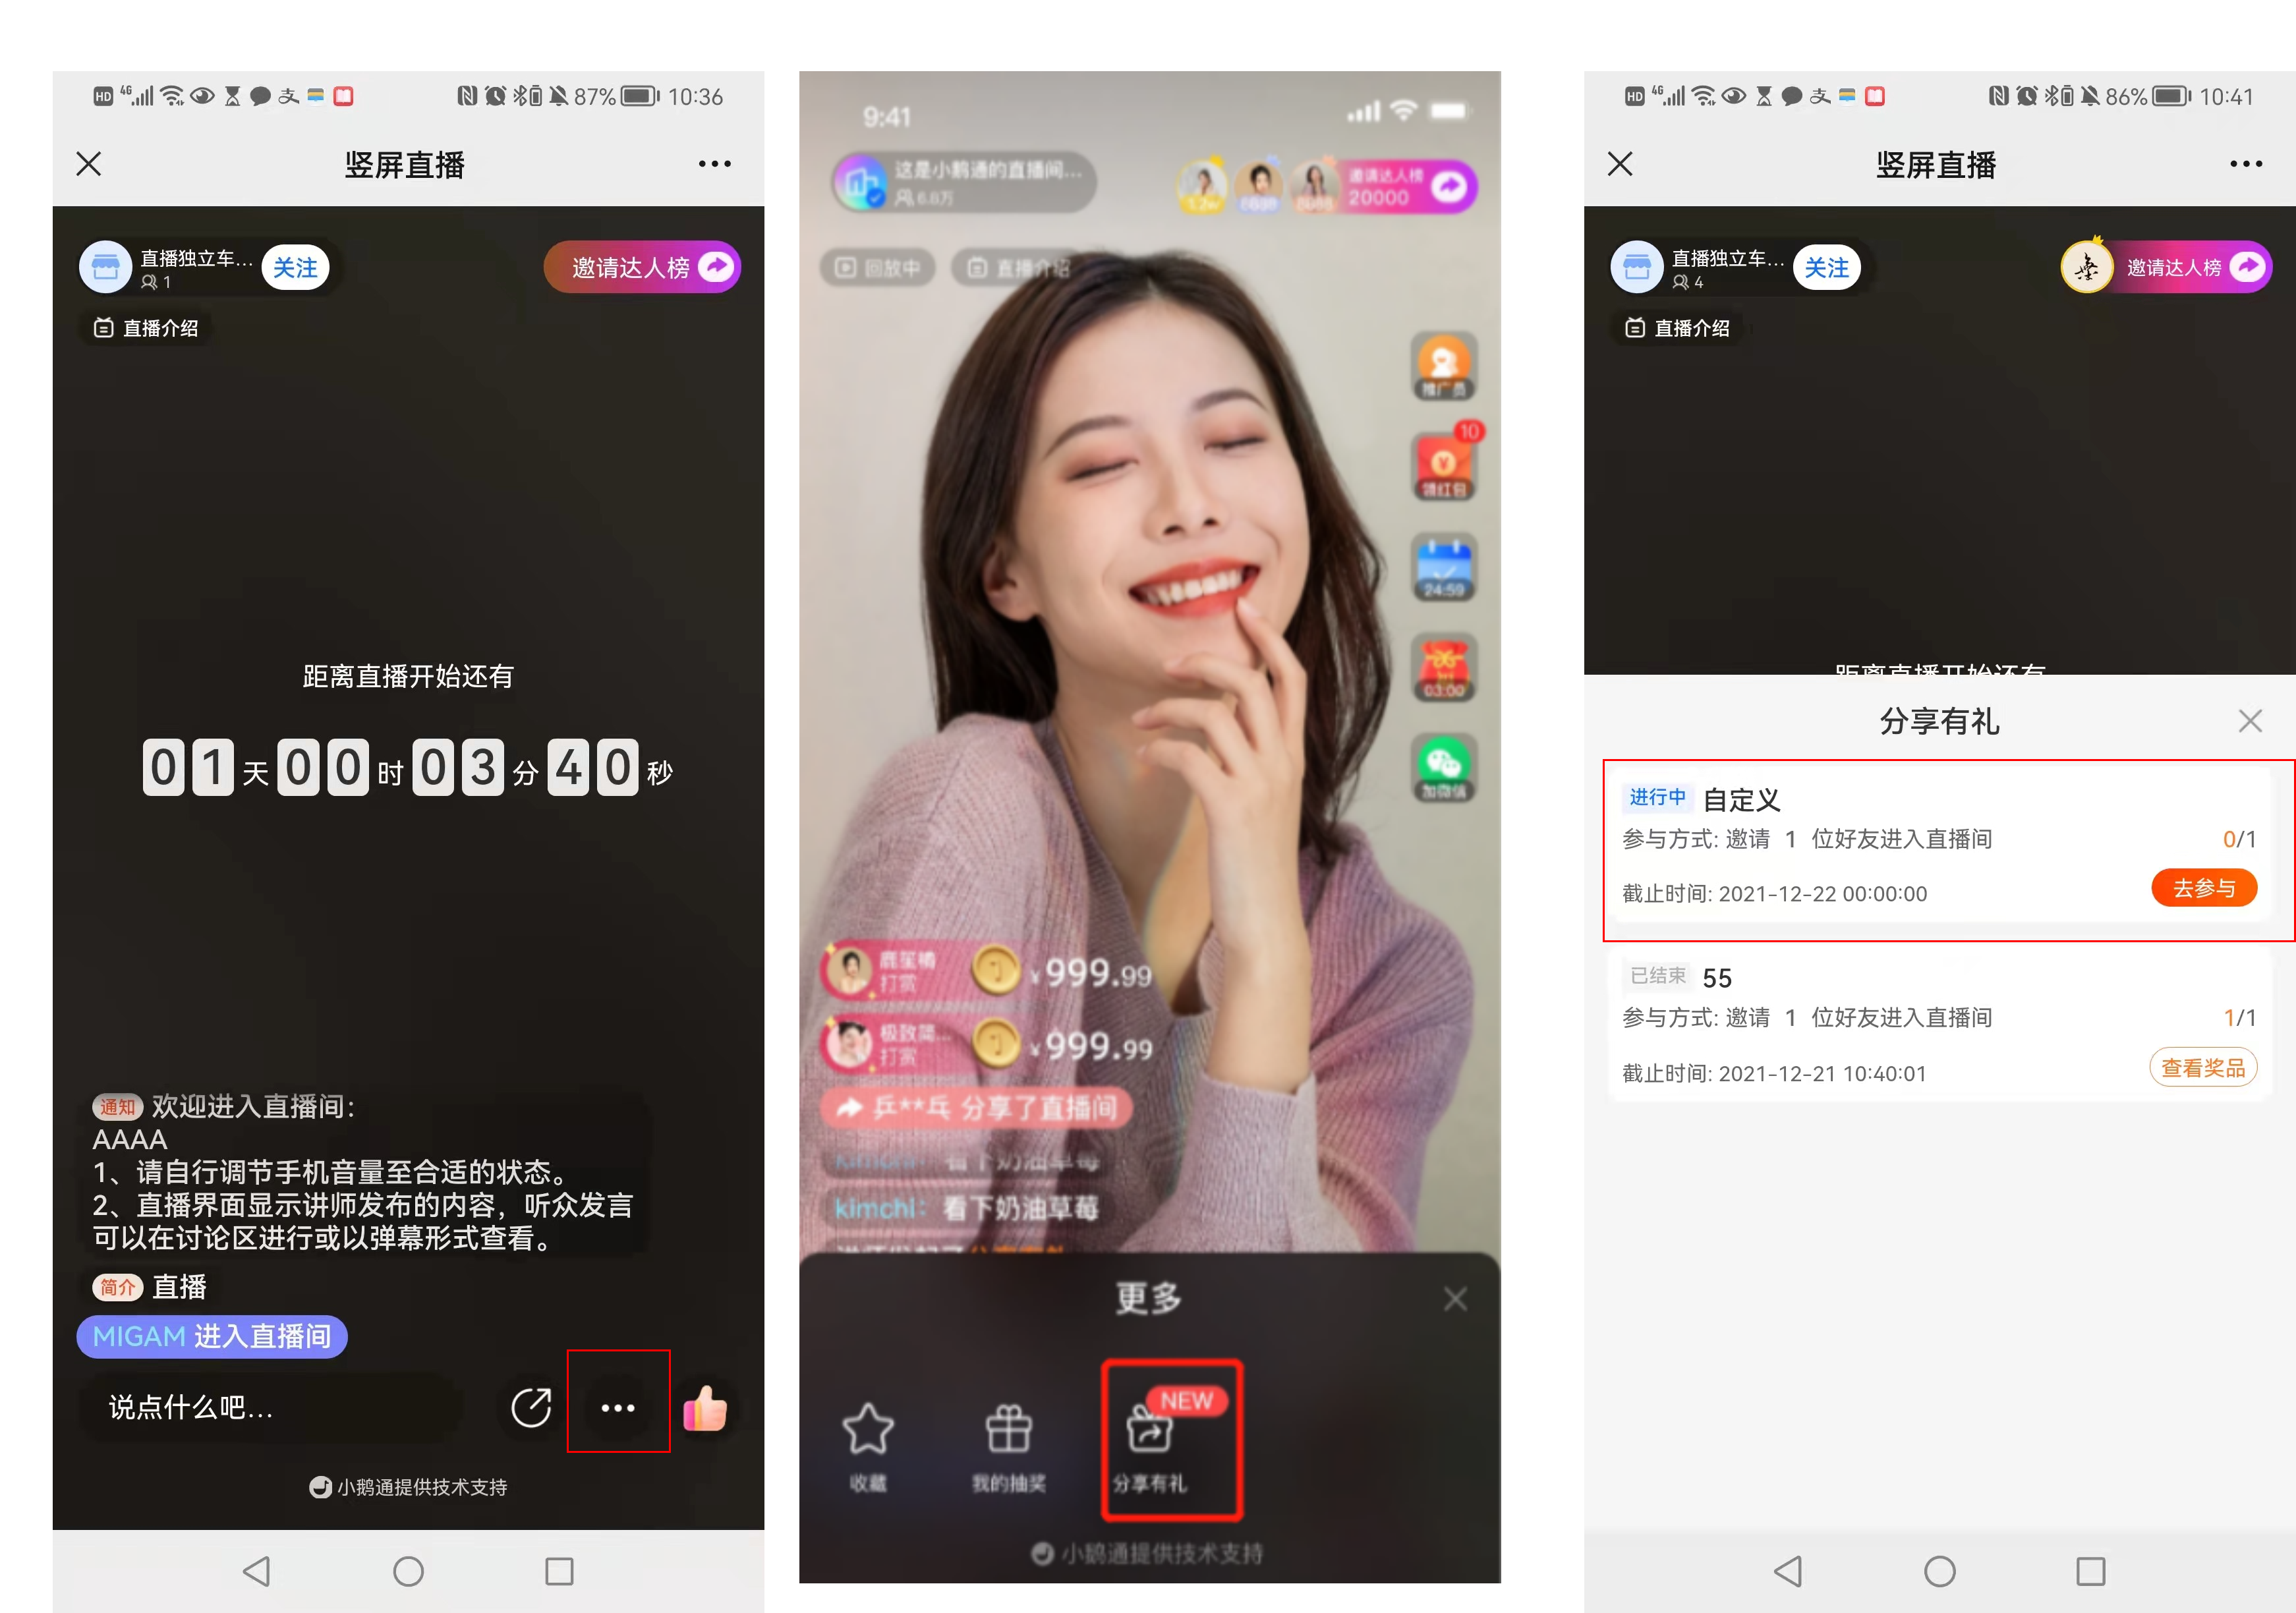
(More about Share for Rewards) (Share for Rewards icon) (Share for Rewards list)
2. Learners participate in the Share for Rewards activity
Click the “Invite Now” button to participate;
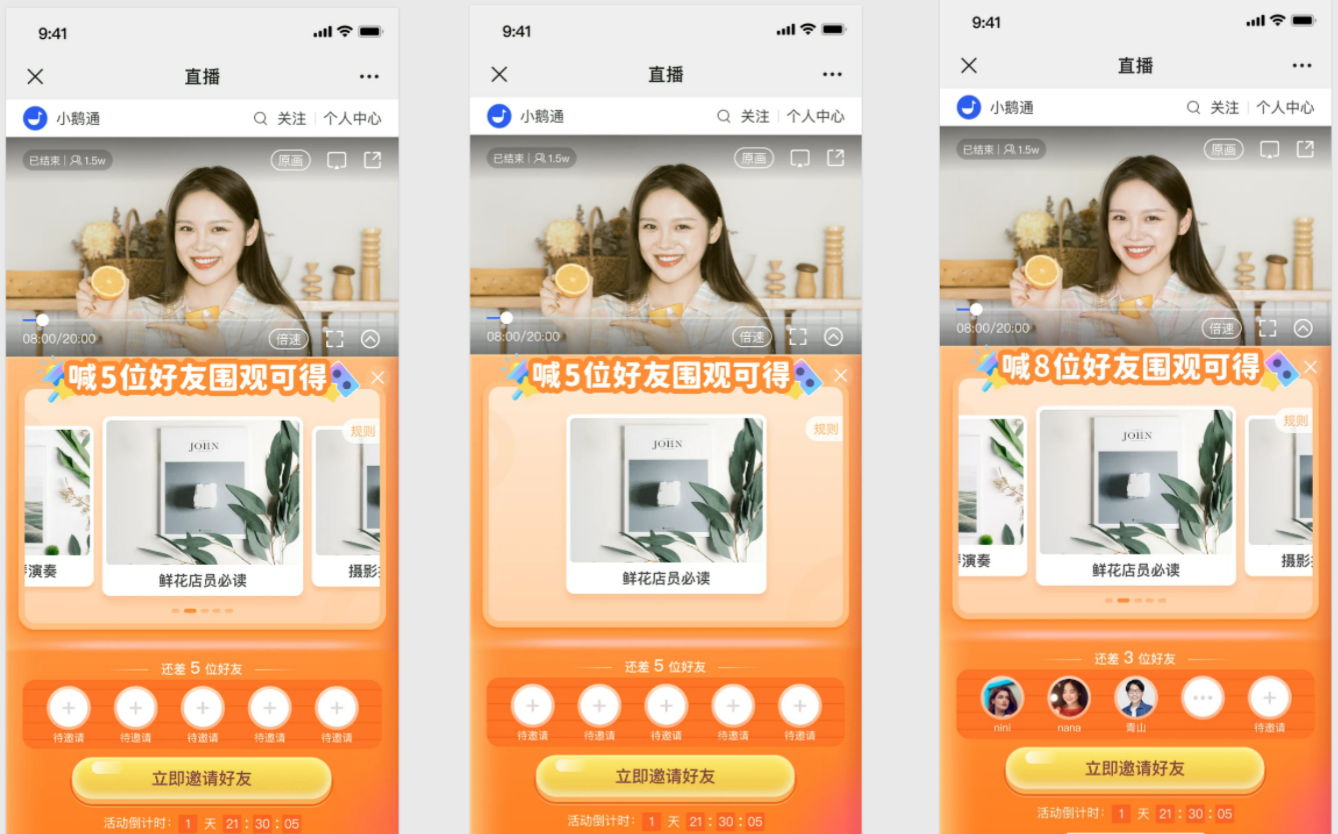
(Multiple prize images) (Single prize image) (Inviting in progress)
3. Friends successfully provide assistance
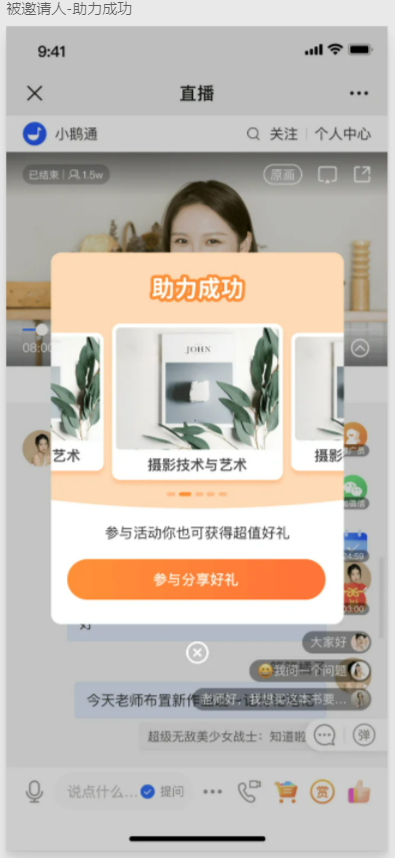
(Assistance pop - up window)
4. Claim prizes:
After inviting the specified number of people, a winning pop - up window will automatically appear. Click it to claim the prize;
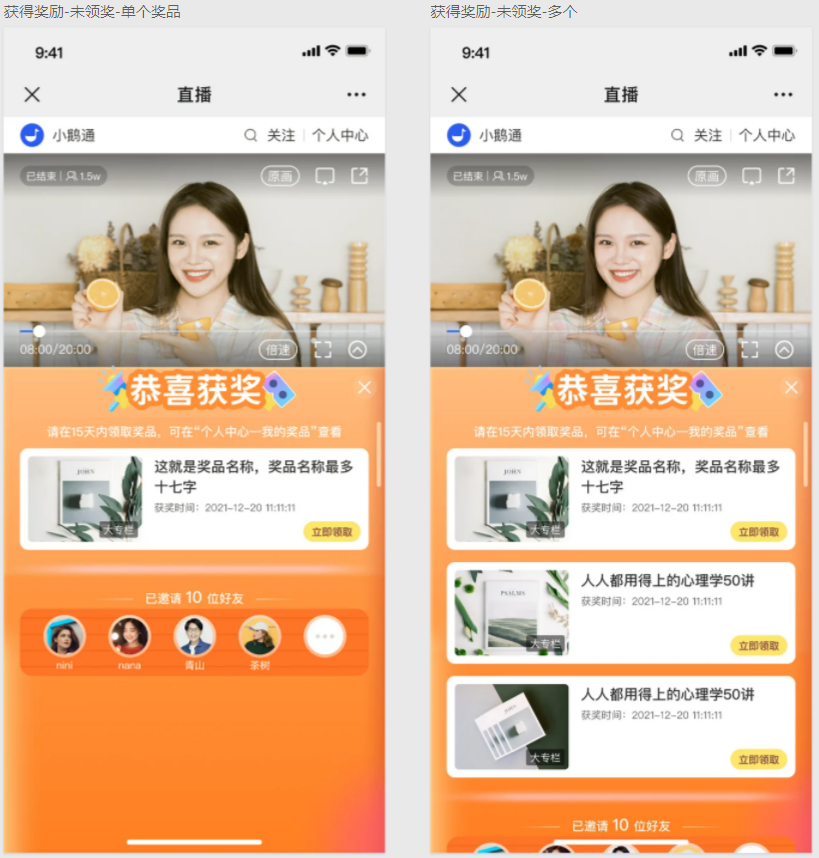
(Winning pop - up window for a single prize) (Winning pop - up window for multiple prizes)
5. View prizes:
If you haven't claimed the prize, you can continue to claim it in the prize list or in Personal Center - My Prizes - Share for Rewards;
If you have already claimed all the prizes, you can still view them here.
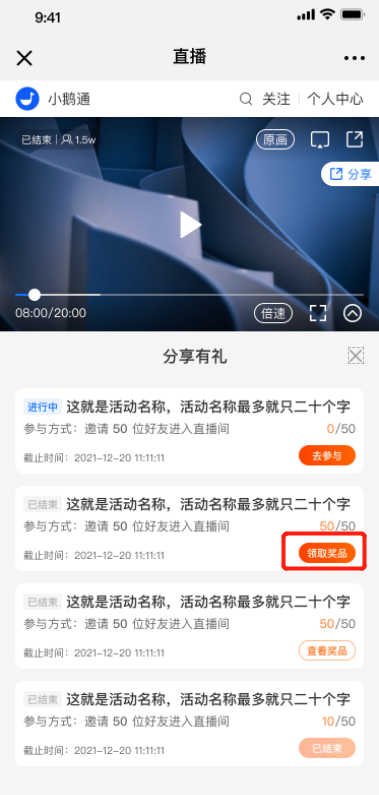
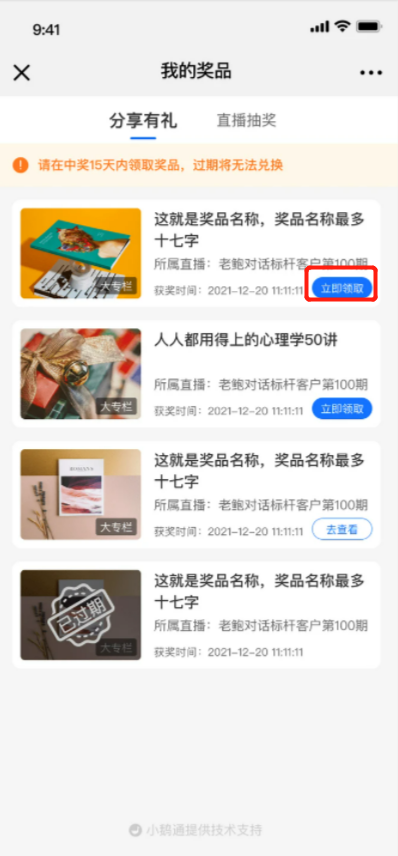
Step 4: Check the event effectiveness(Merchant management background)
Check the data analysis. You can view detailed invitation data and export the data.
Live streaming - Live streaming room details page - Data analysis - User data - Share for Rewards - Invitation records
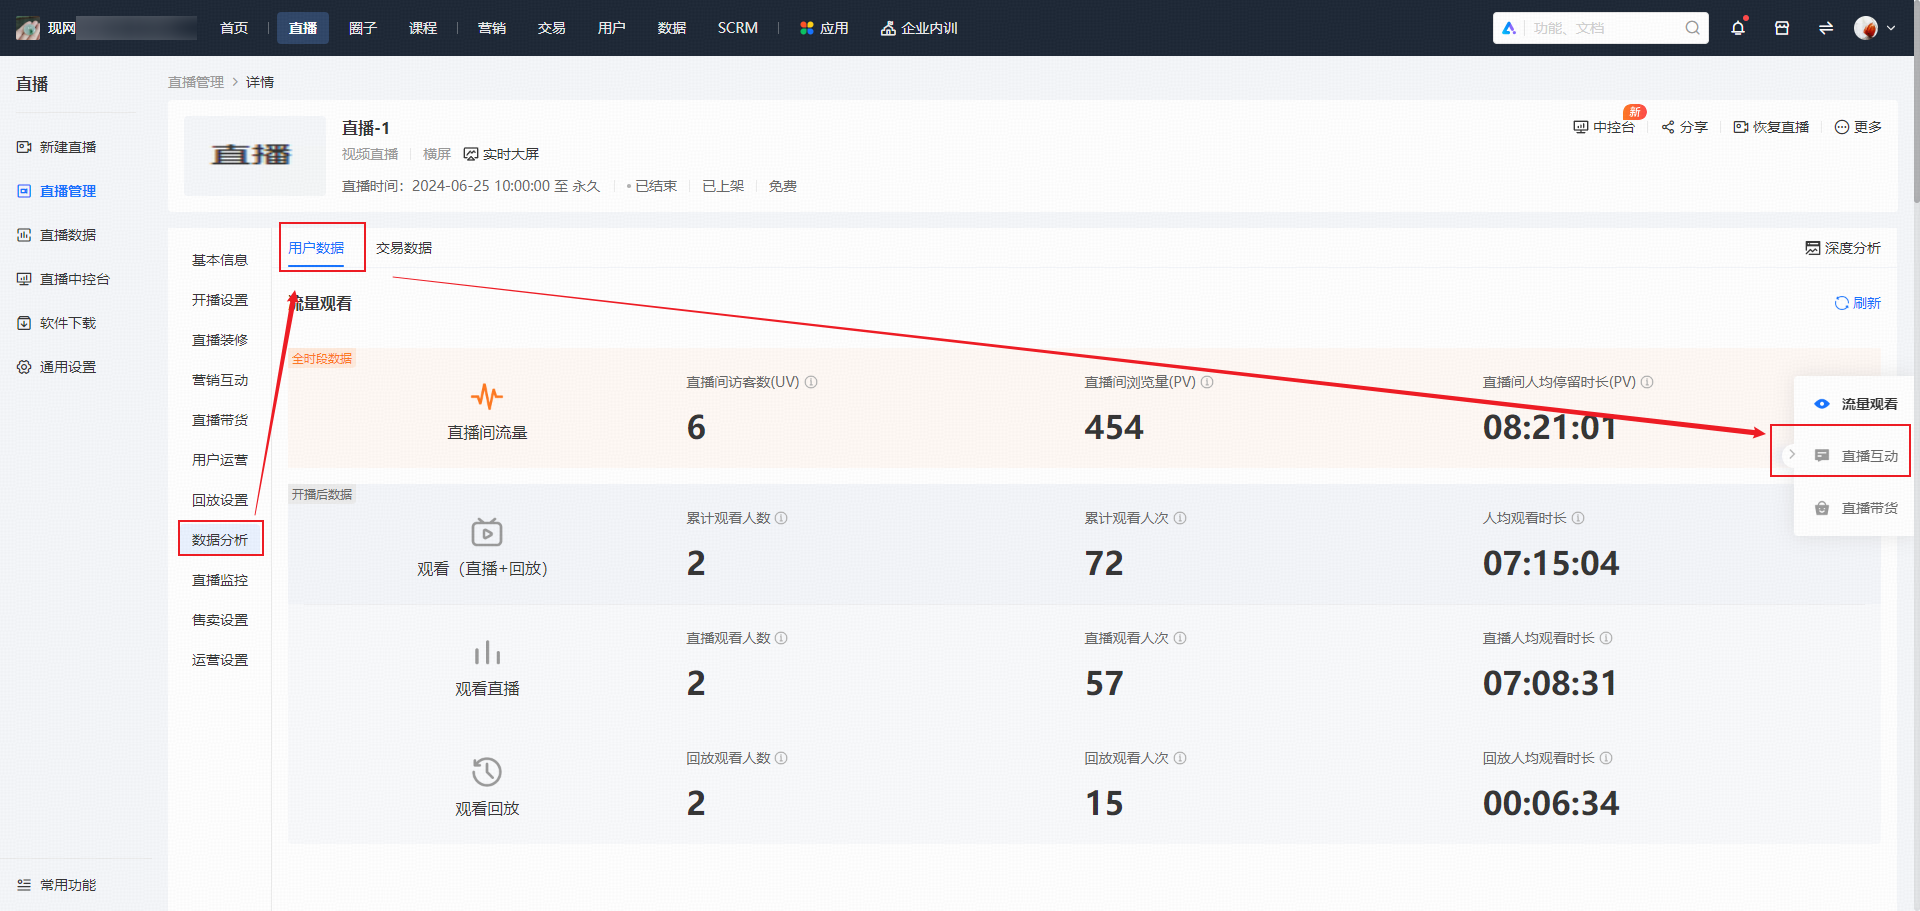
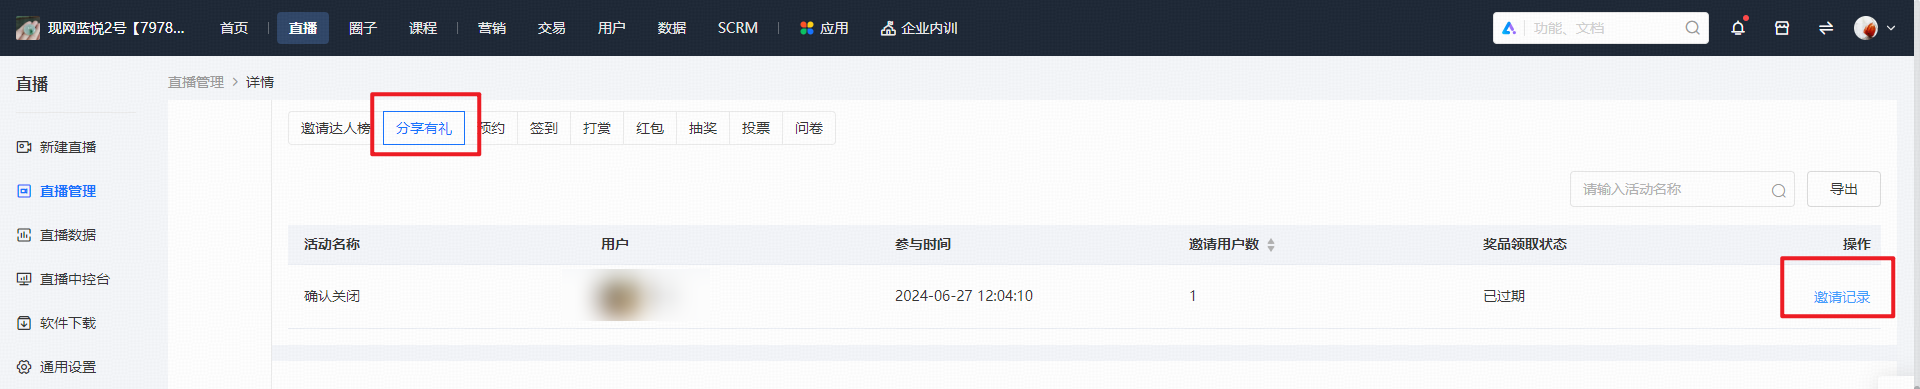
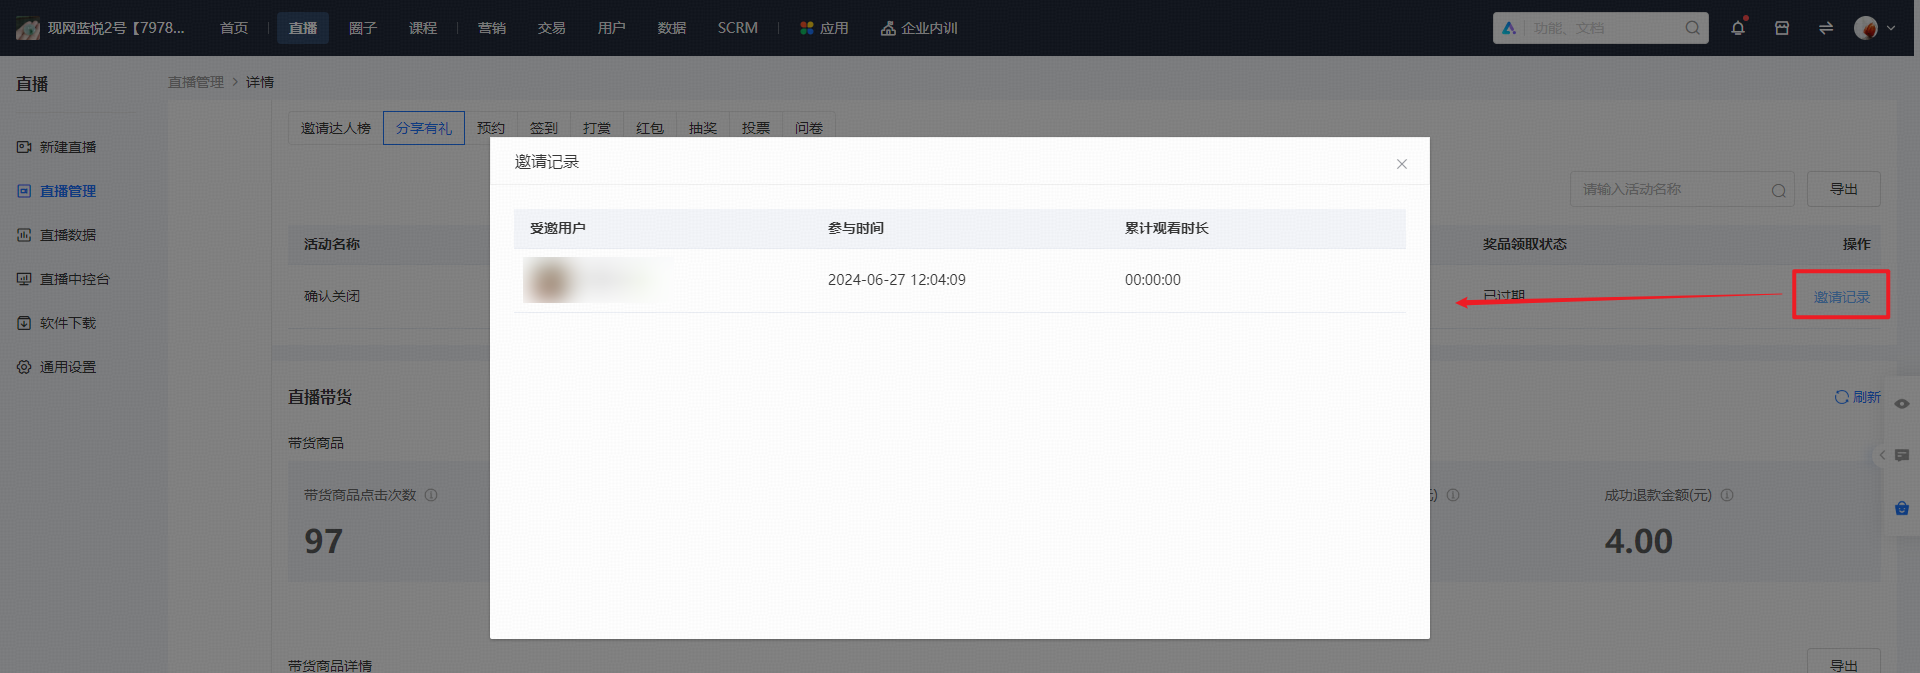
(Management background - Share for Rewards invitation data)
VI. Frequently Asked Questions
1. How to ensure the viral effect of the live streaming room and guide more learners to participate in the Share for Rewards activity to invite people back to the live streaming room?
Answer: ① Create posters with the Share for Rewards activity before the live streaming to let more learners know about this activity; ② During the live streaming, ask the host to regularly orally guide learners to share.
2. Can multiple Share for Rewards tasks be carried out simultaneously in one live streaming session?
Answer: No. Currently, multiple ongoing Share for Rewards tasks cannot exist simultaneously in a single live streaming session. If you want to start a new event task, you can end the current event in advance or wait for the current event to end and then create a new one.
3. How many times can each learner win prizes at most within the validity period of each task event?
Answer: Once. To prevent learners from taking advantage of the system repeatedly, each learner can win prizes at most once.
4. Is there a limit to the number of prizes?
Answer: Currently, a maximum of 5 types of prizes can be set. If the prizes are virtual products, there is no limit to the quantity; if the prizes are “physical products”, “coupons/codes”, or “classes” with inventory, you need to fill in the number of prize copies (less than or equal to the inventory) when configuring the prizes.
VII. Notes:
Tutorial on Using Points Exchange in the Live Streaming Room
Tutorial on Using Points Redemption in the Live Streaming Room
I.Function Introduction
It supports students and viewers to directly pull up the points redemption page without leaving the live streaming room, which is connected with the process of distributing points in the live streaming room, enabling more convenient and faster use of points.
II.Purpose of Use
When users complete tasks and receive points red envelopes in the live streaming room, it allows the instructor to quickly guide users or users to spontaneously redeem points, promoting the consumption of user points.
III.Usage Scenarios
Scenario 1: When users obtain points in the live streaming room, the instructor can guide users to consume points in real - time, accelerating the consumption of points.
Scenario 2: After integrating points redemption into the live streaming room, points redemption can be used as a marketing method to stimulate viewers to interact in the live streaming room and obtain points.
IV.Operation Path
Merchant side: Merchant background → Live streaming → Live streaming management → Marketing interaction → Marketing settings → Points redemption
WeChat H5, elink APP, elink Live Mini Program, elink Live Client: Live streaming room → “Redeem points” icon
V.Usage Tutorial
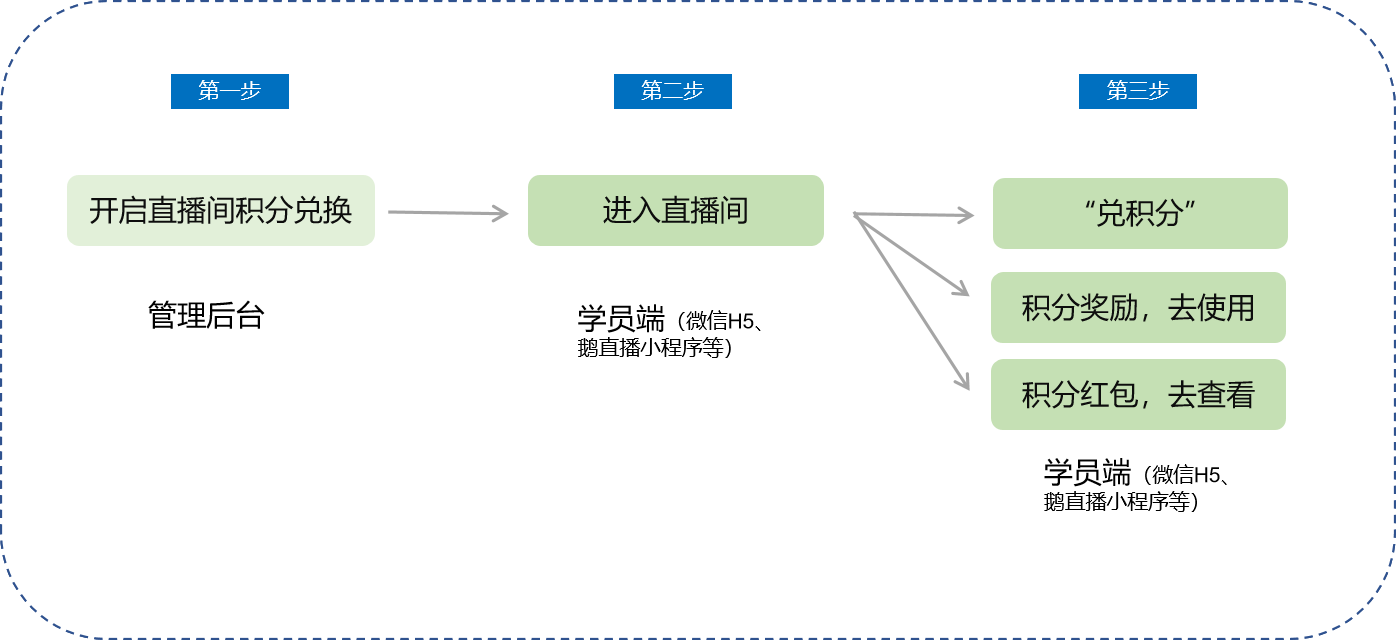
Step 1: Enable points redemption in the live streaming room and add redemption products(Management background)
1.Enter live streaming management and enable the live streaming roomPoints redemptionSwitch
Prerequisites:
①The merchant's store function rights include the points mall function
② The points function has been enabled in [Users - Points mall]
③ (Recommended) Enable points redemption and add redemption products in [Users - Points mall - Points consumption - Points redemption settings]
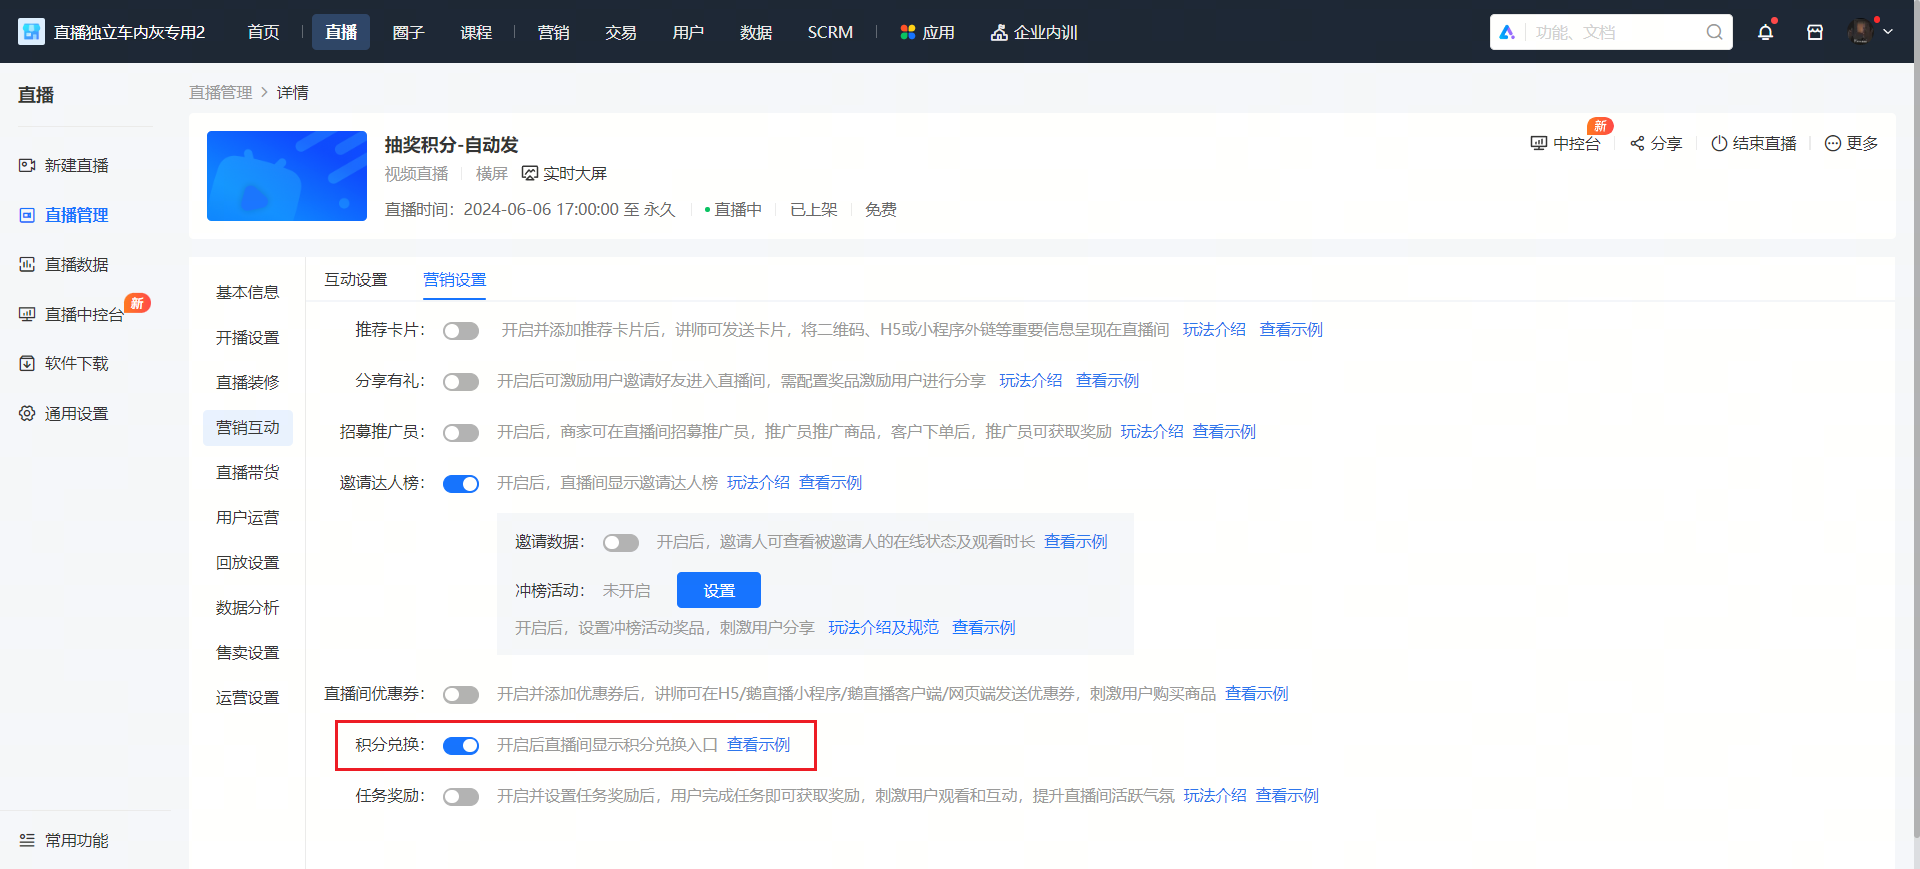
(New - version management background - Live streaming management - Marketing settings)
If you want future newly created live streaming rooms to open the points redemption entrance by default, you can turn on the points redemption switch in the live streaming default settings. Future newly created live streaming rooms will open points redemption by default (Note: already created live streaming rooms are not affected by the default configuration).
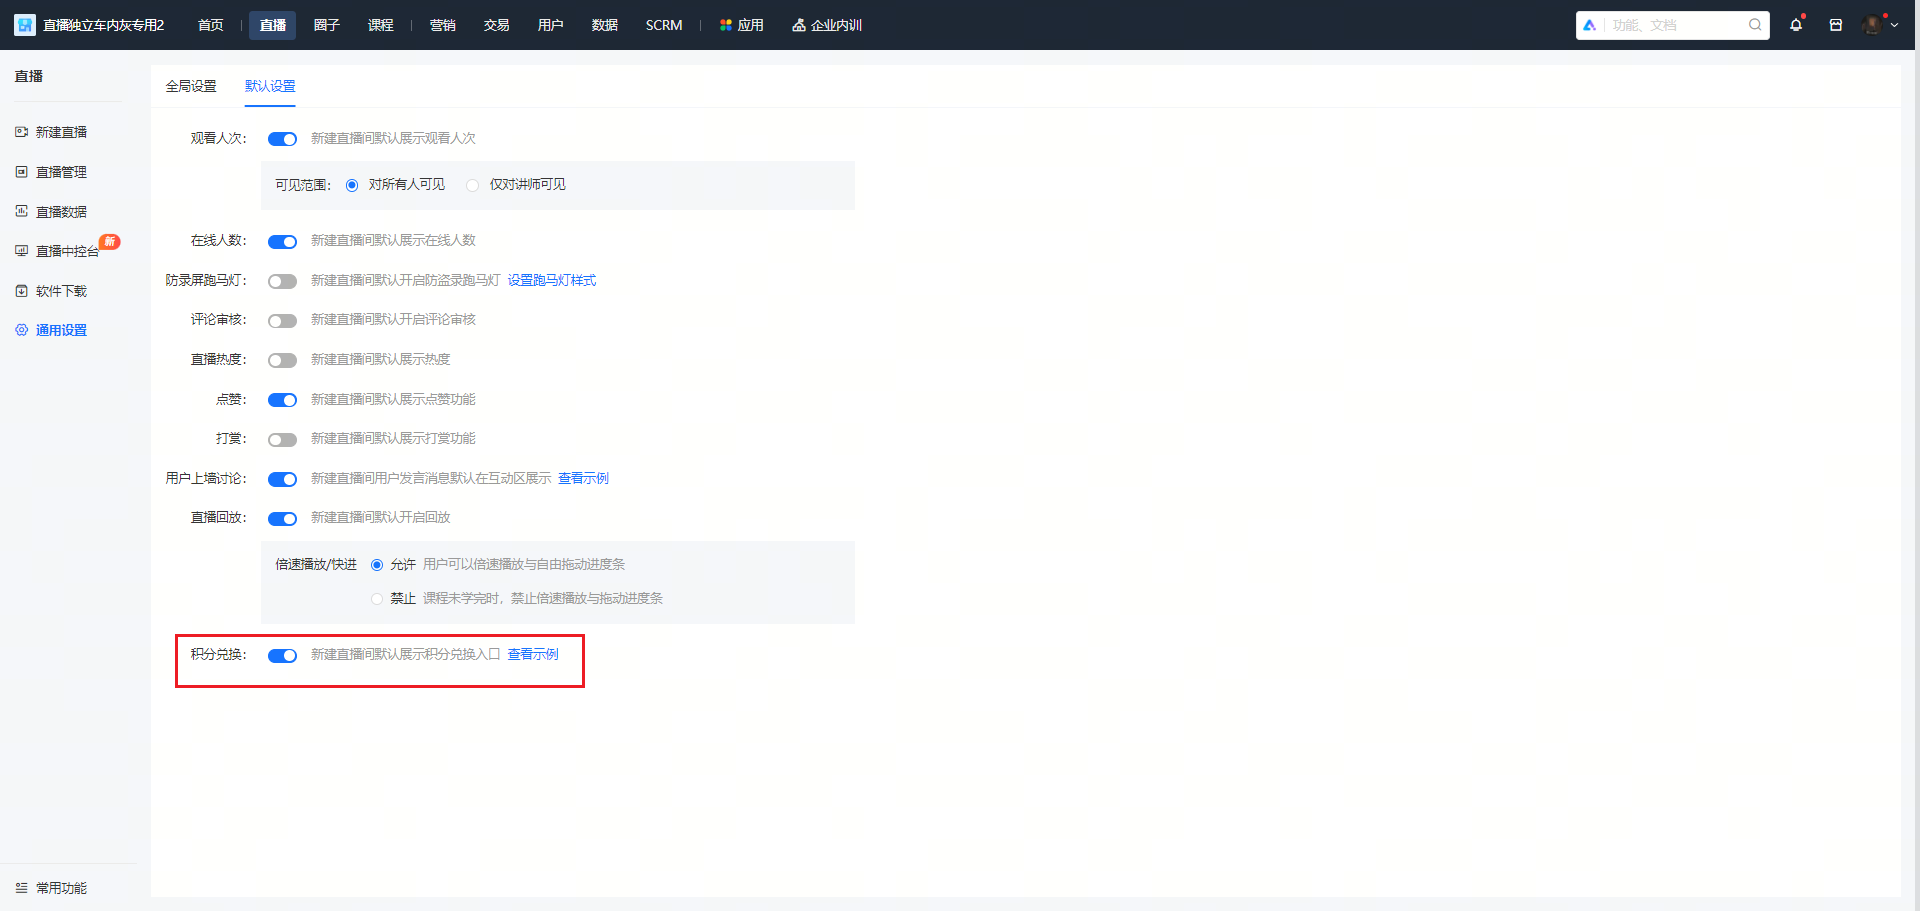
(New - version management background -General settings - Default settings- Points redemption)
If you are using the old - version management background,you need to enable the new - version management background for use.
If you don't want to display the points redemption entrance in the live streaming room later, you can similarly turn off points redemption at the corresponding switch in the live streaming module, which will not affect points redemption in the personal center.
2.Add points redemption products to ensure that viewers in the live streaming room have products to redeem
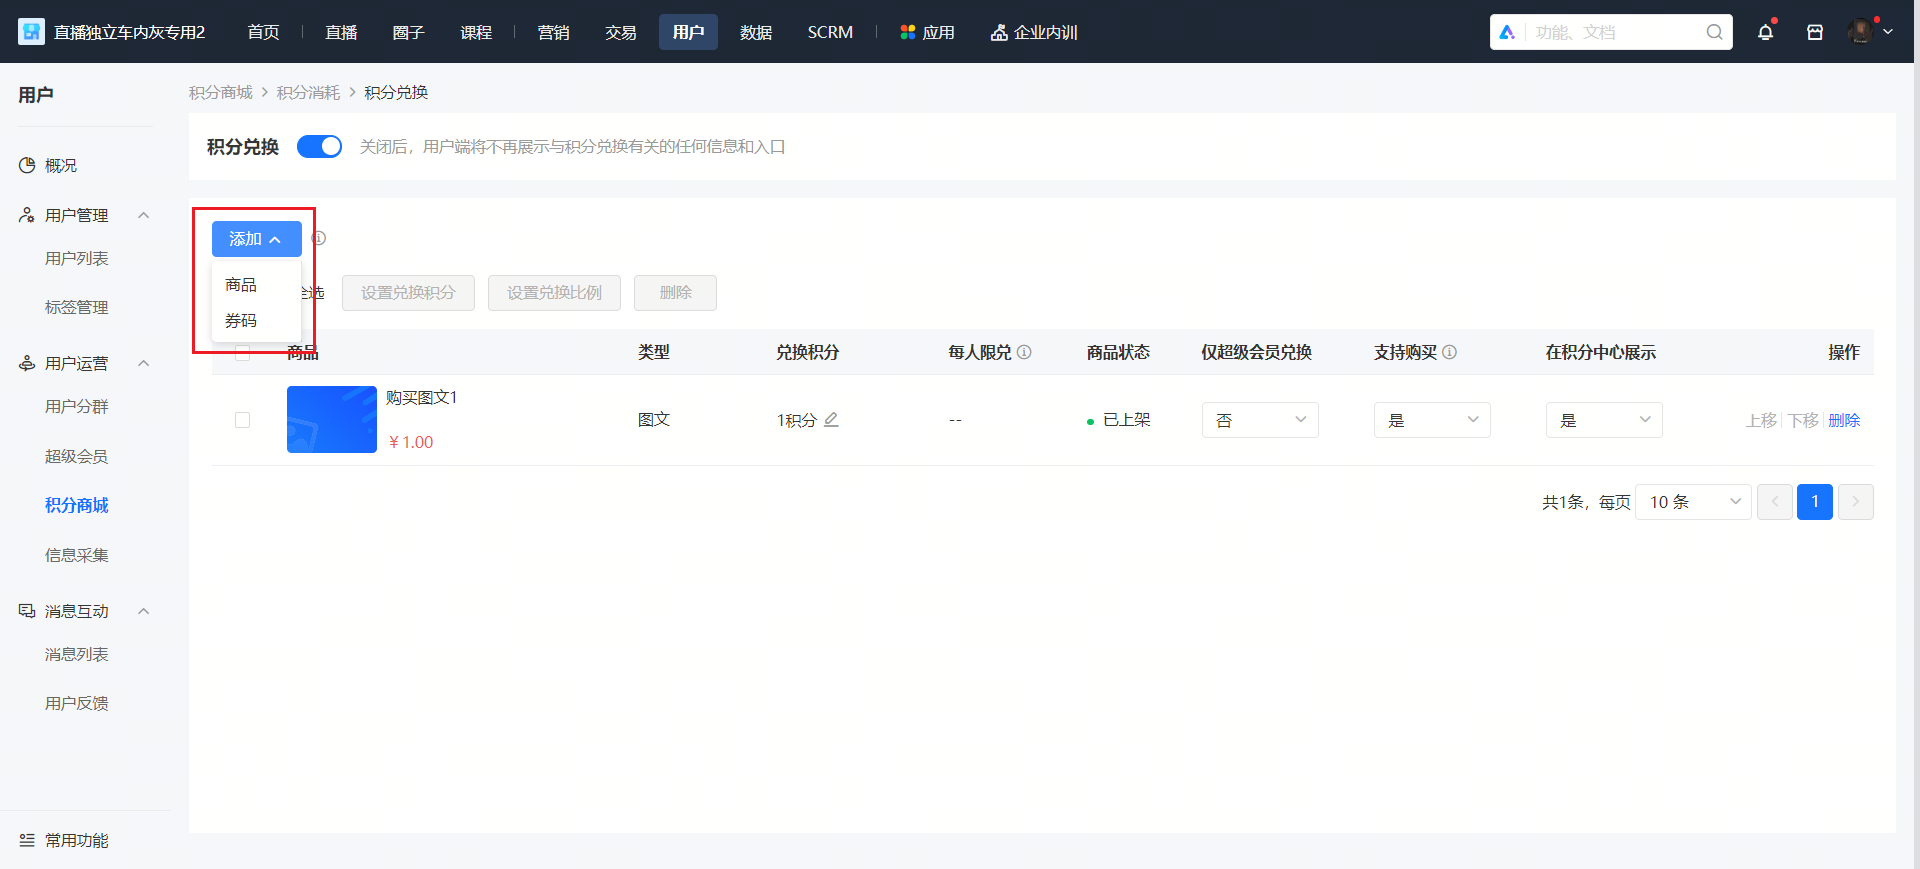
(New - version management background -Users-Points mall - Points consumption - Points redemption)
Step 2: Guide users to use points for redemption in the live streaming room(H5, elink Live Mini Program)
When points redemption is enabled in the live streaming room,Enter the live streaming room through the H5 store or the elink Live Mini Program. You can guide viewers to use points for redemption according to the following three scenarios:Guide viewers to redeem points in the following three scenarios:
① Directly pull up the points redemption page: Check points and redeem points products
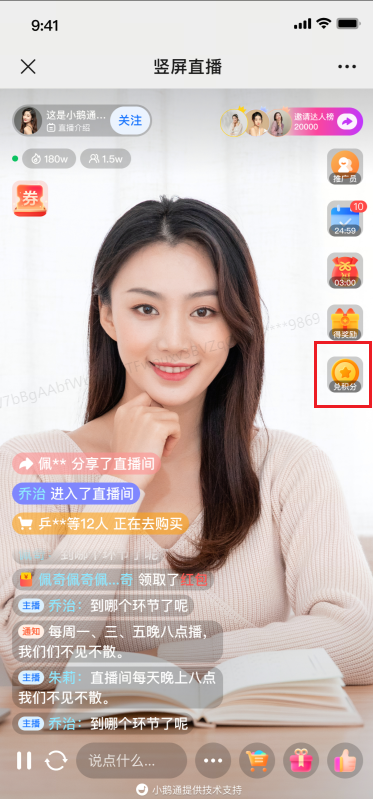
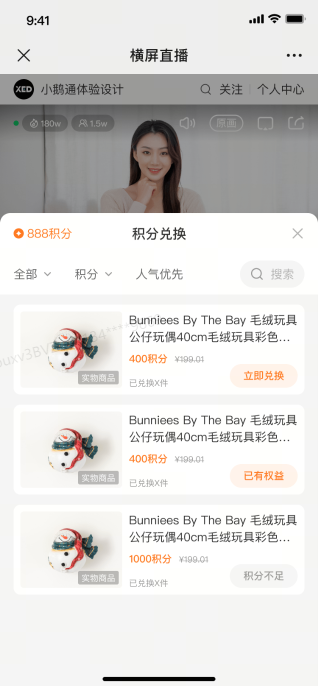
(Live streaming room- RedeemPointsIcon -Points redemption)
② After completing tasks and getting points rewards, use the points:Check points and redeem points products
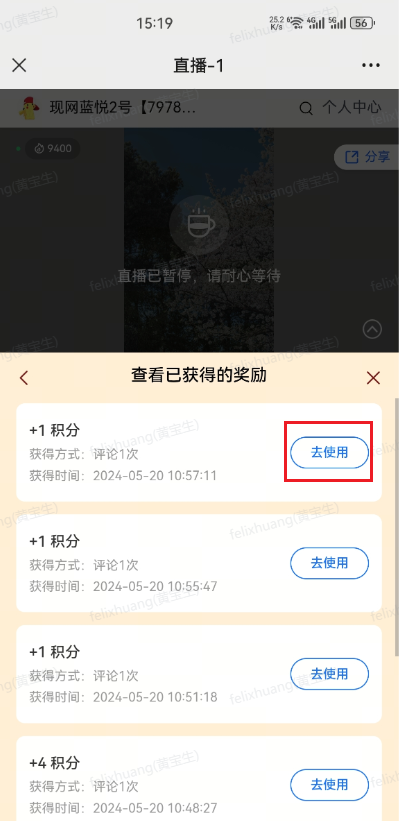
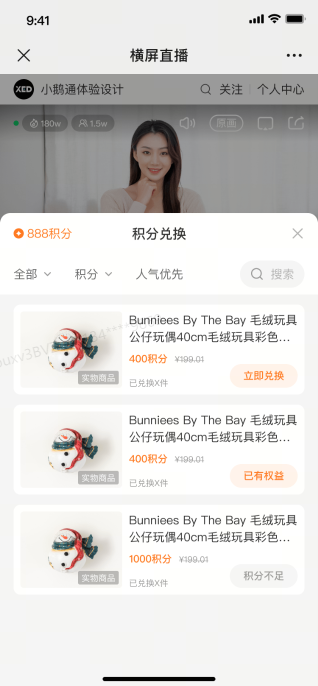
(Live streaming room -Reward icon - View obtained rewards- Go to use-Points redemption)
③ After receiving points red envelopes, check the points:Check points and redeem points products
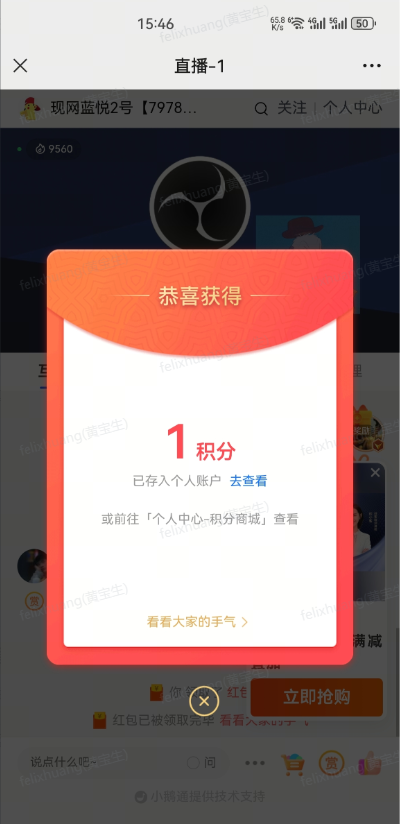
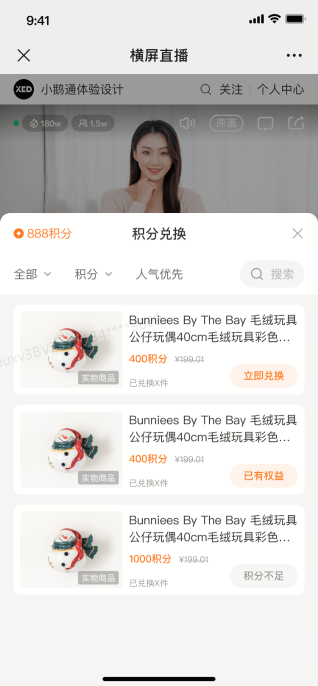
(Live streaming room -Receive points red envelope- Go toCheck- Points redemption)
Coupon campaigns in live streaming rooms
I.Function Introduction
Supports instructors/anchors to distribute coupons in the live streaming room to enhance interaction with the audience, increase the liveliness of the live streaming room and the audience's sense of participation, and also contribute to improving the conversion rate of live commerce.
II.Purpose of Use
By distributing coupons, instructors can motivate the audience to participate in live streaming promotional activities and provide actual discounts to the audience, thereby increasing the audience's satisfaction and loyalty.
III.Use Scenarios
Scenario 1: Merchants who wish to attract new users to become store students can distribute coupons in the live streaming room as an incentive to acquire new customers.
Scenario 2: Simply introducing products in the live streaming room fails to prompt the audience to place orders, so coupon distribution is needed to stimulate audience interaction.
Scenario 3: At critical moments during the live stream, instructors can distribute coupons to motivate the audience to complete transactions and promote sales.
IV.Operation Path
Merchant side: Merchant backend → Live streaming → Live streaming management → Marketing interaction → Marketing settings → Live streaming room coupons
WeChat H5, elink APP, elink Live Mini Program: Live streaming room → More → Coupons
elink Live client: Live streaming room → Toolbox → Coupons
V. Usage Tutorial
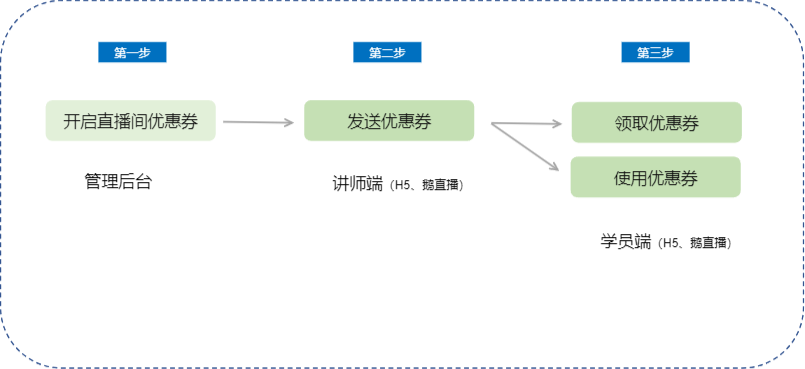
Step 1: Enable live streaming room coupons(Management backend)
1.Enter live streaming management and turn on the live streaming room coupon switch
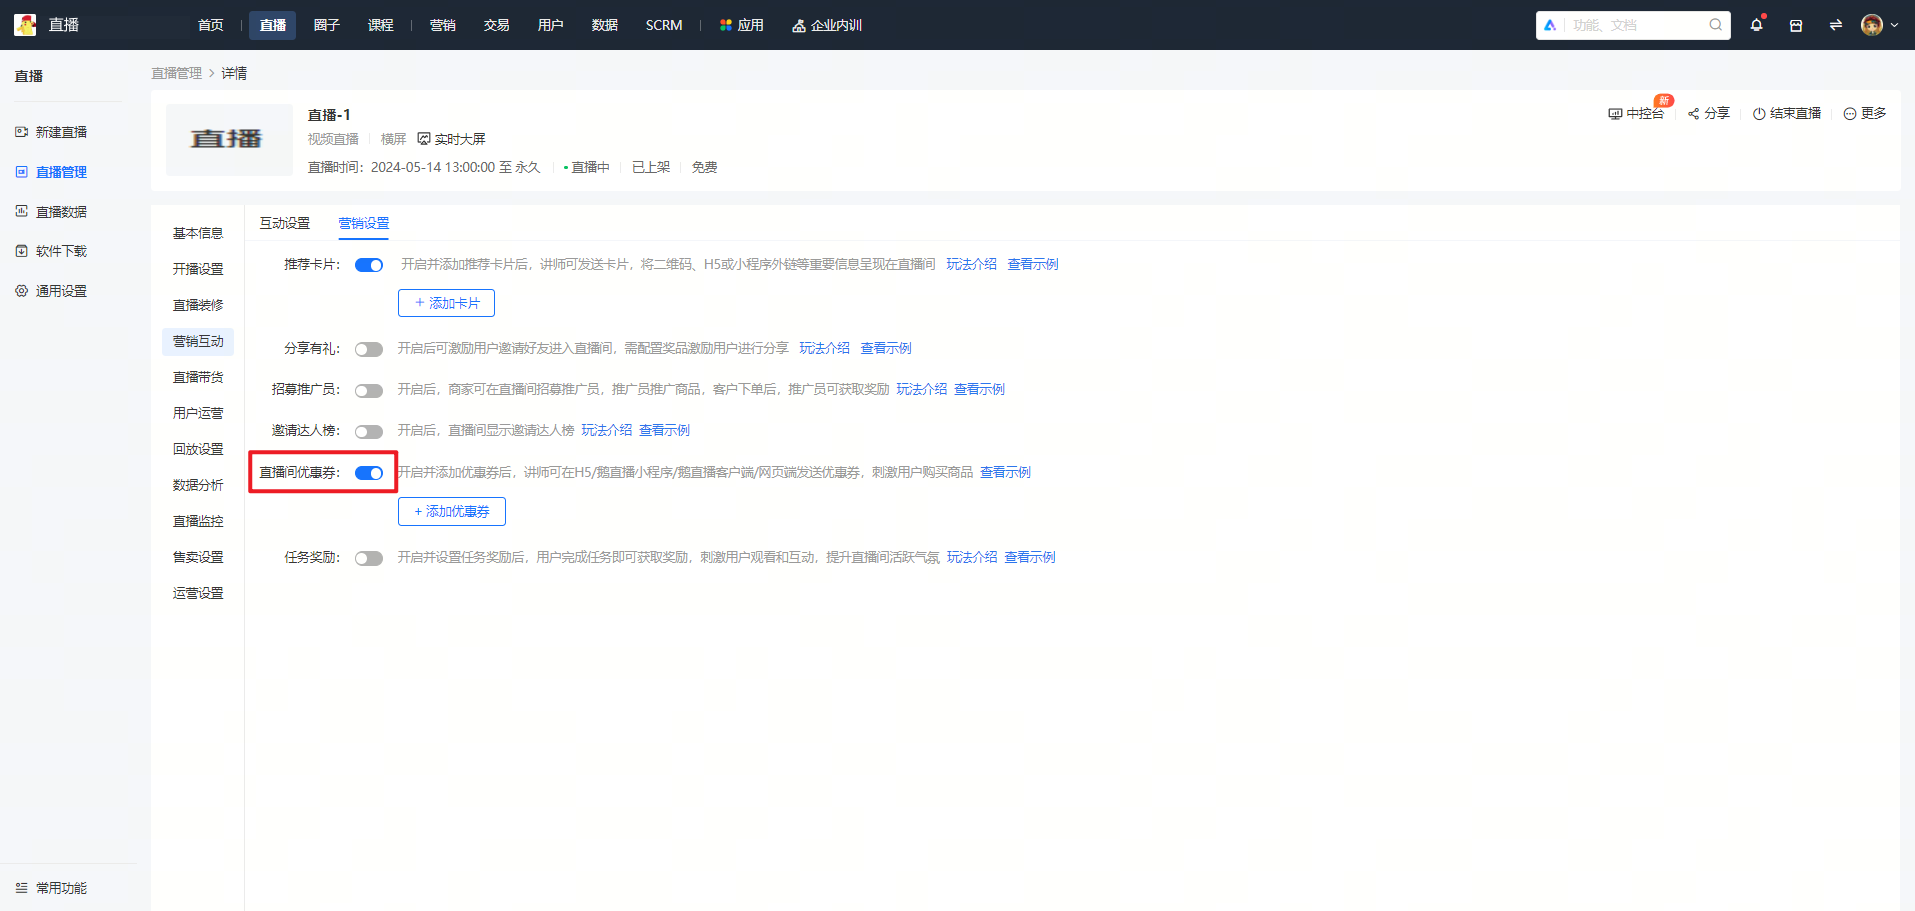
(New version management backend - Live streaming management - Marketing settings)
If you are using the old version of the management backend, you can enable it on the following path page: [Live streaming - Live streaming management - Live streaming details - Live streaming room settings - Interaction settings - Coupon configuration]
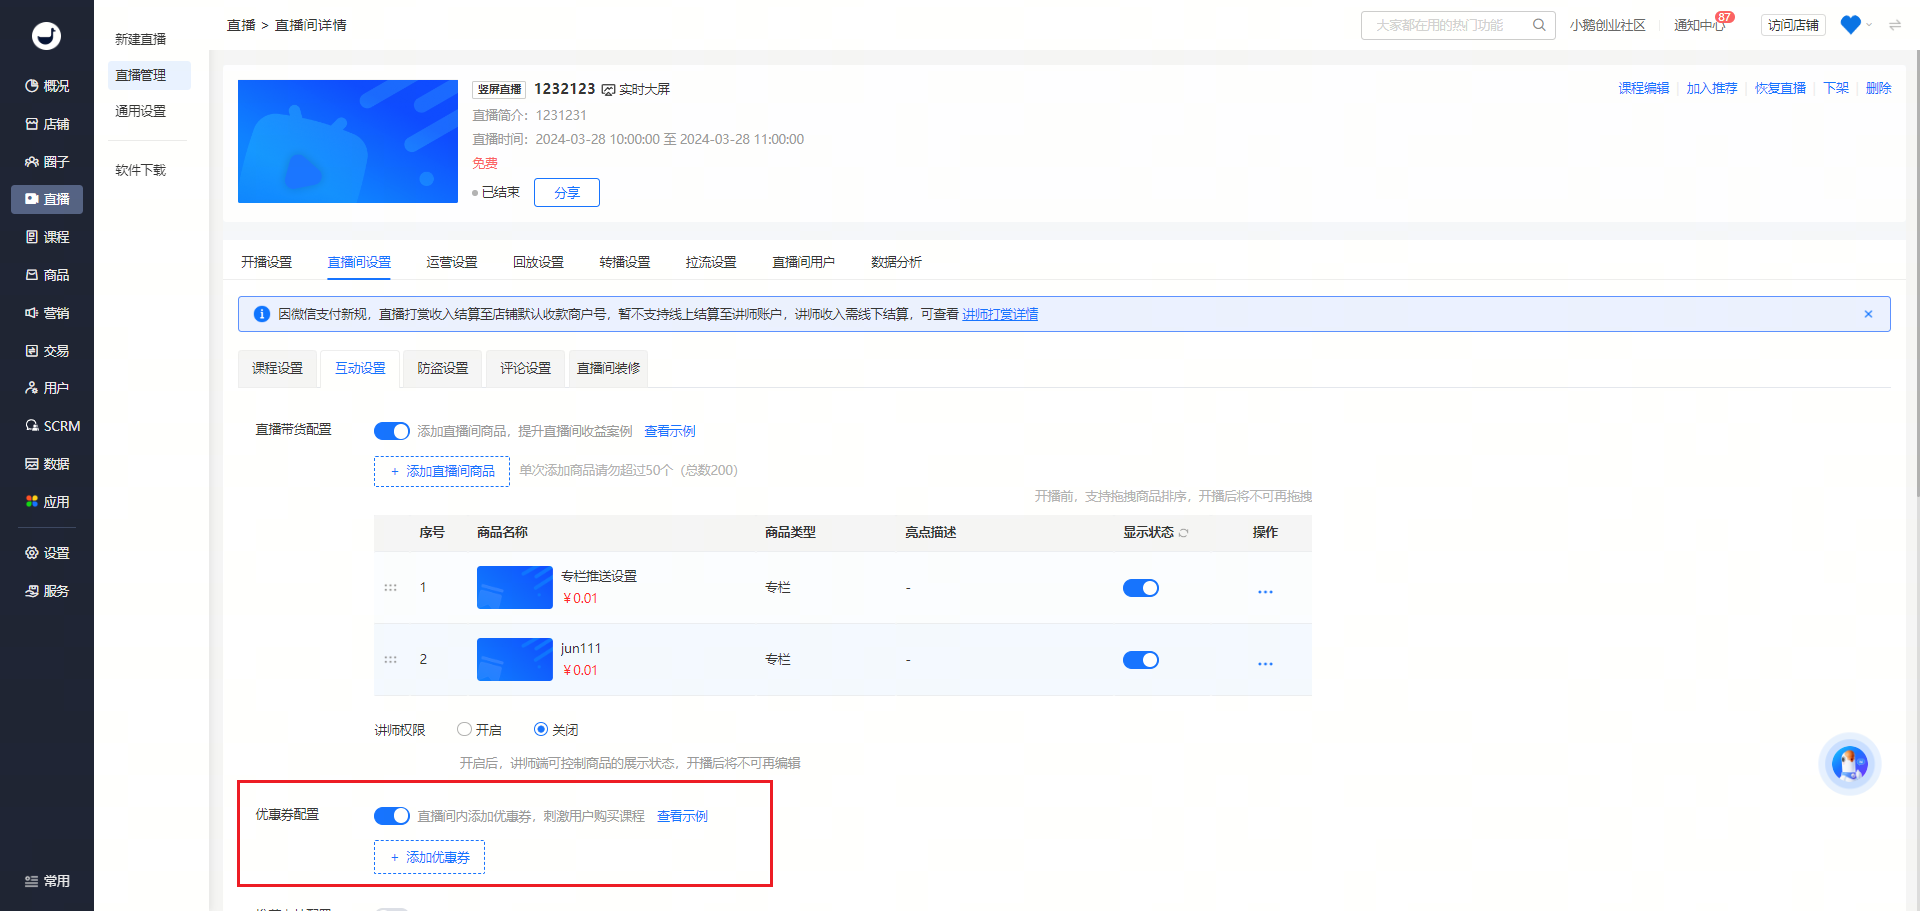
(Old version management backend - Live streaming details - Live streaming room settings - Interaction settings)
2. Add the coupons to be distributed during this live stream
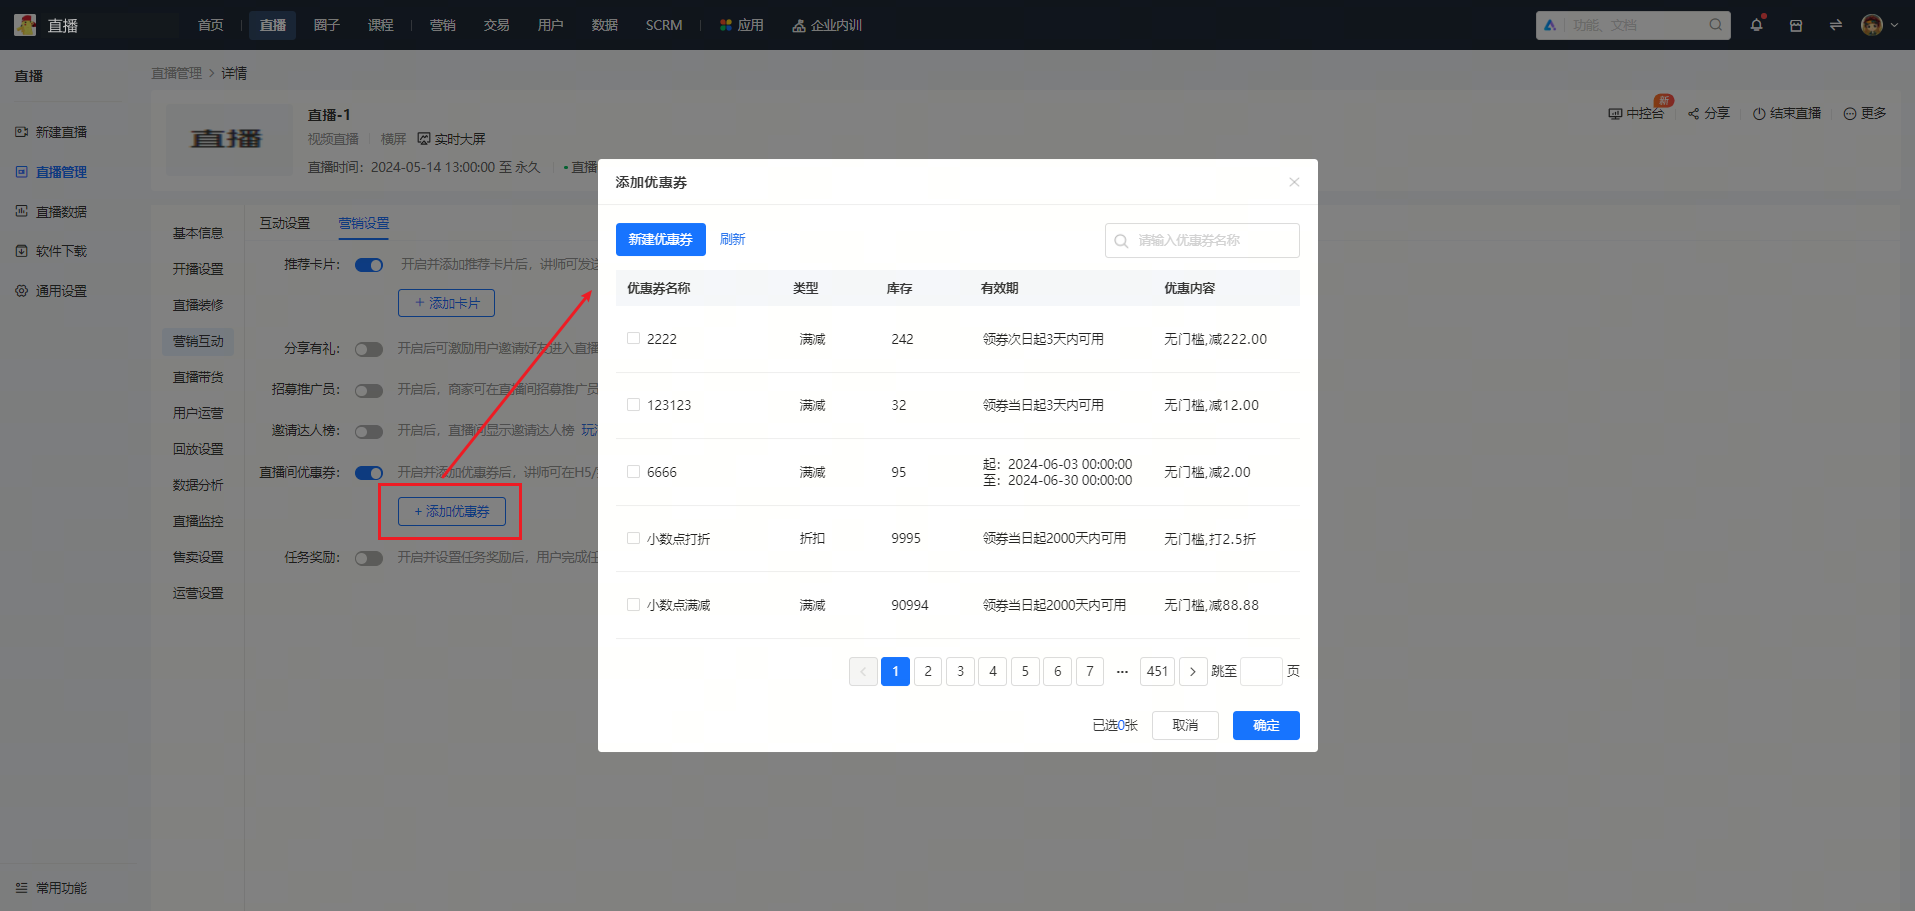
(Management backend - Live streaming management - Add coupons)
Step 2: Instructors send coupons(H5, elink Live Mini Program)
Enter the live streaming room on the H5 store or elink Live Mini Program. Instructors can open [More - Coupons] when starting the live stream, click to send coupons, and a coupon pop - up card will be sent to the student side.
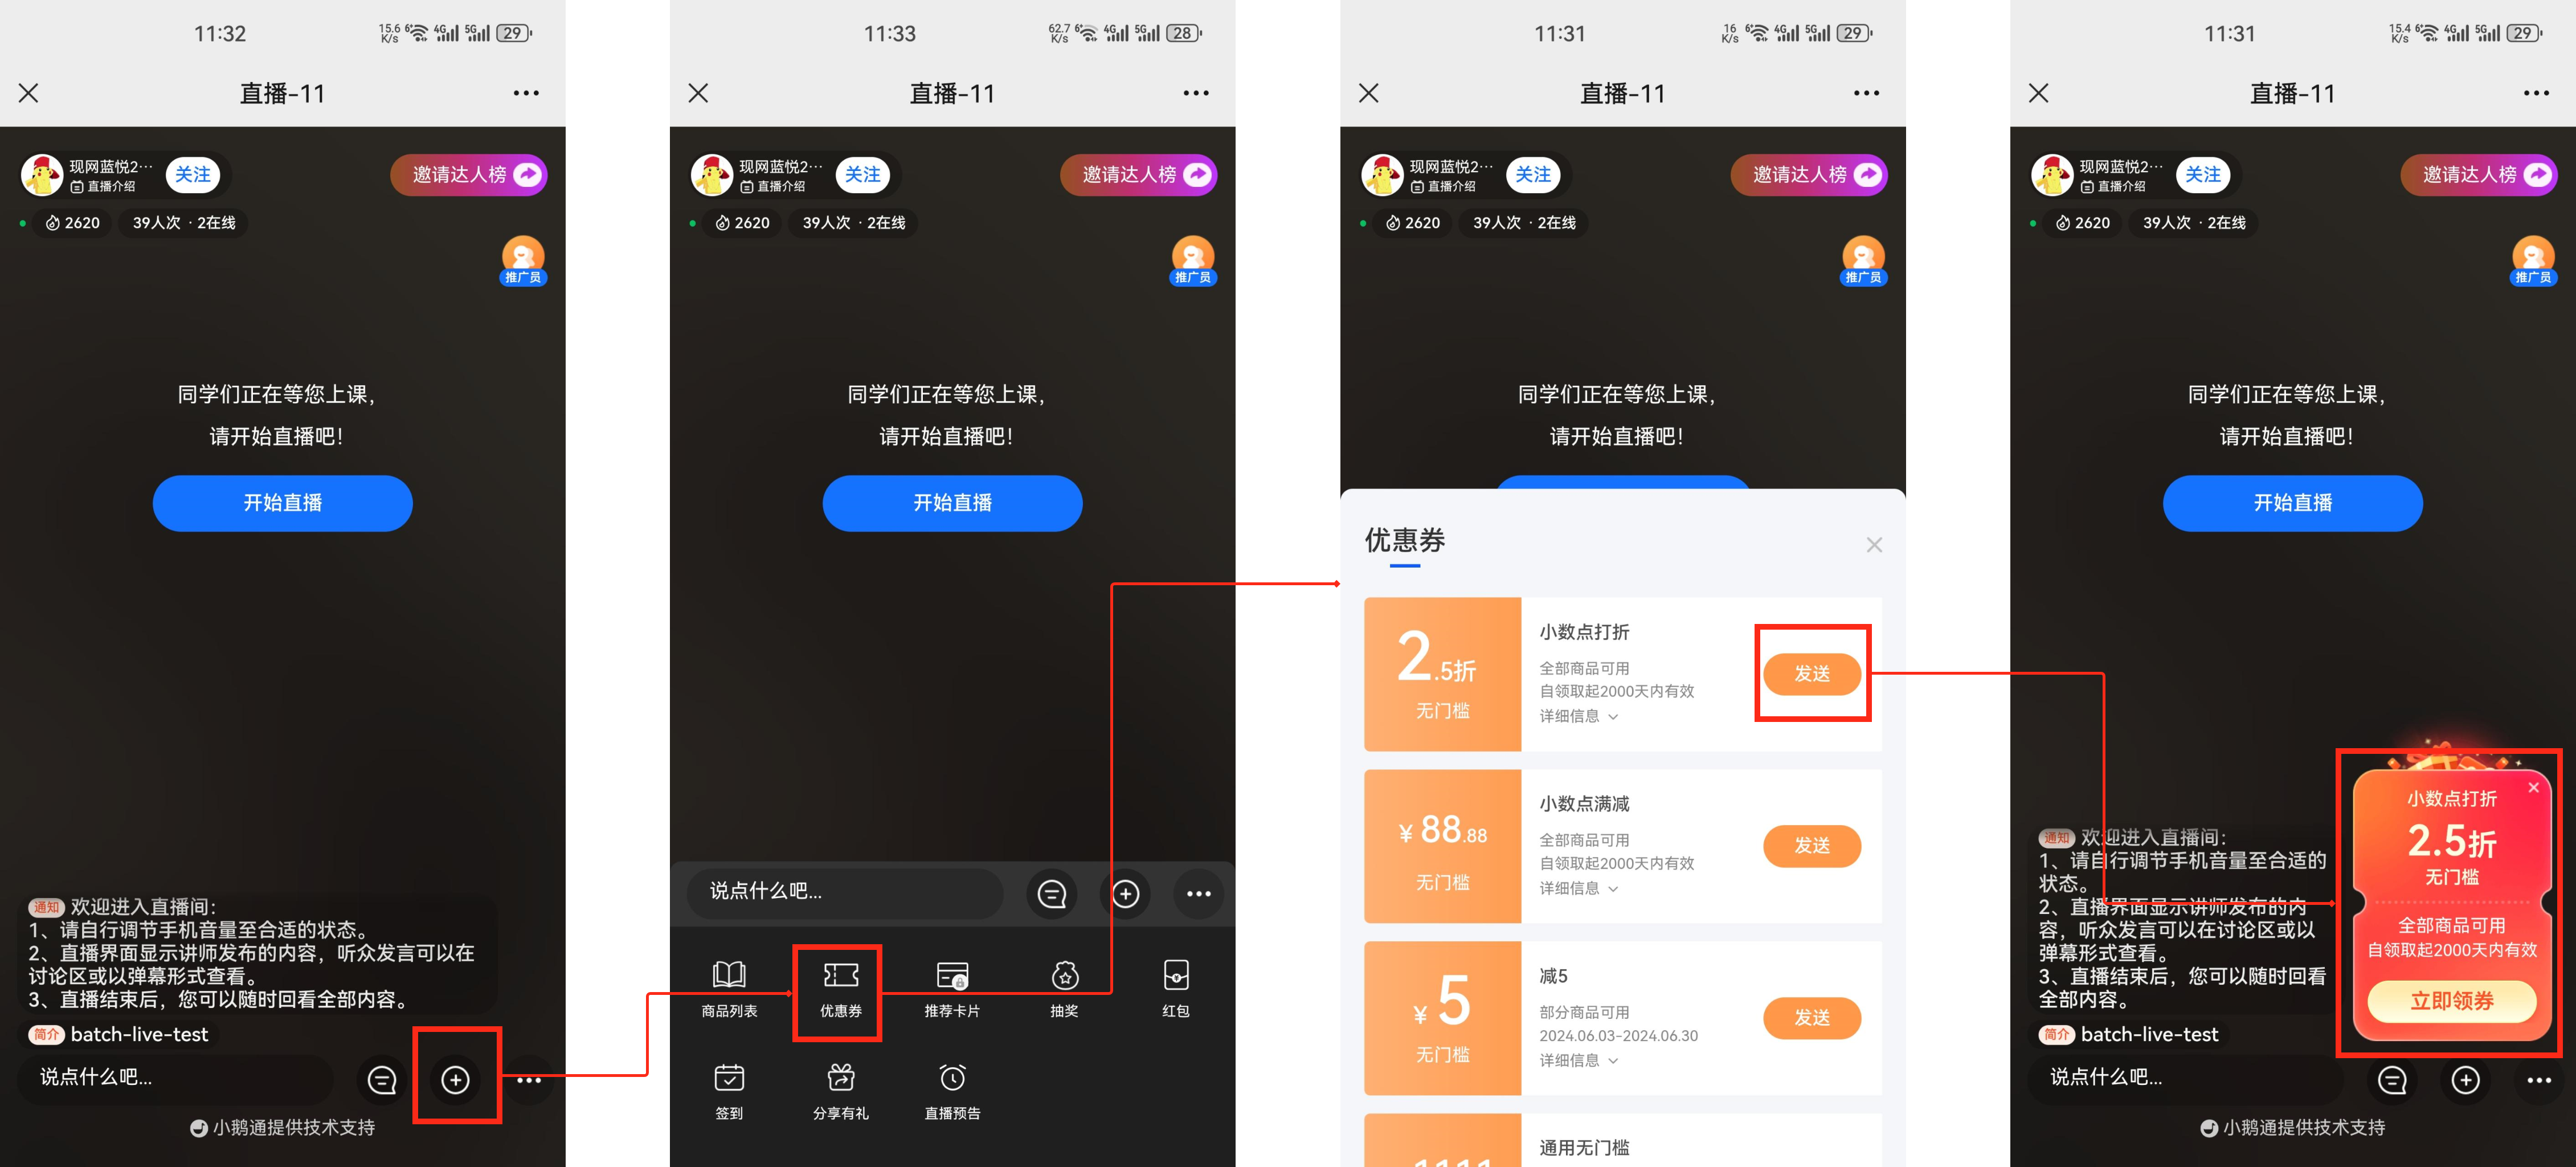
(H5 live streaming room - More - Coupons)
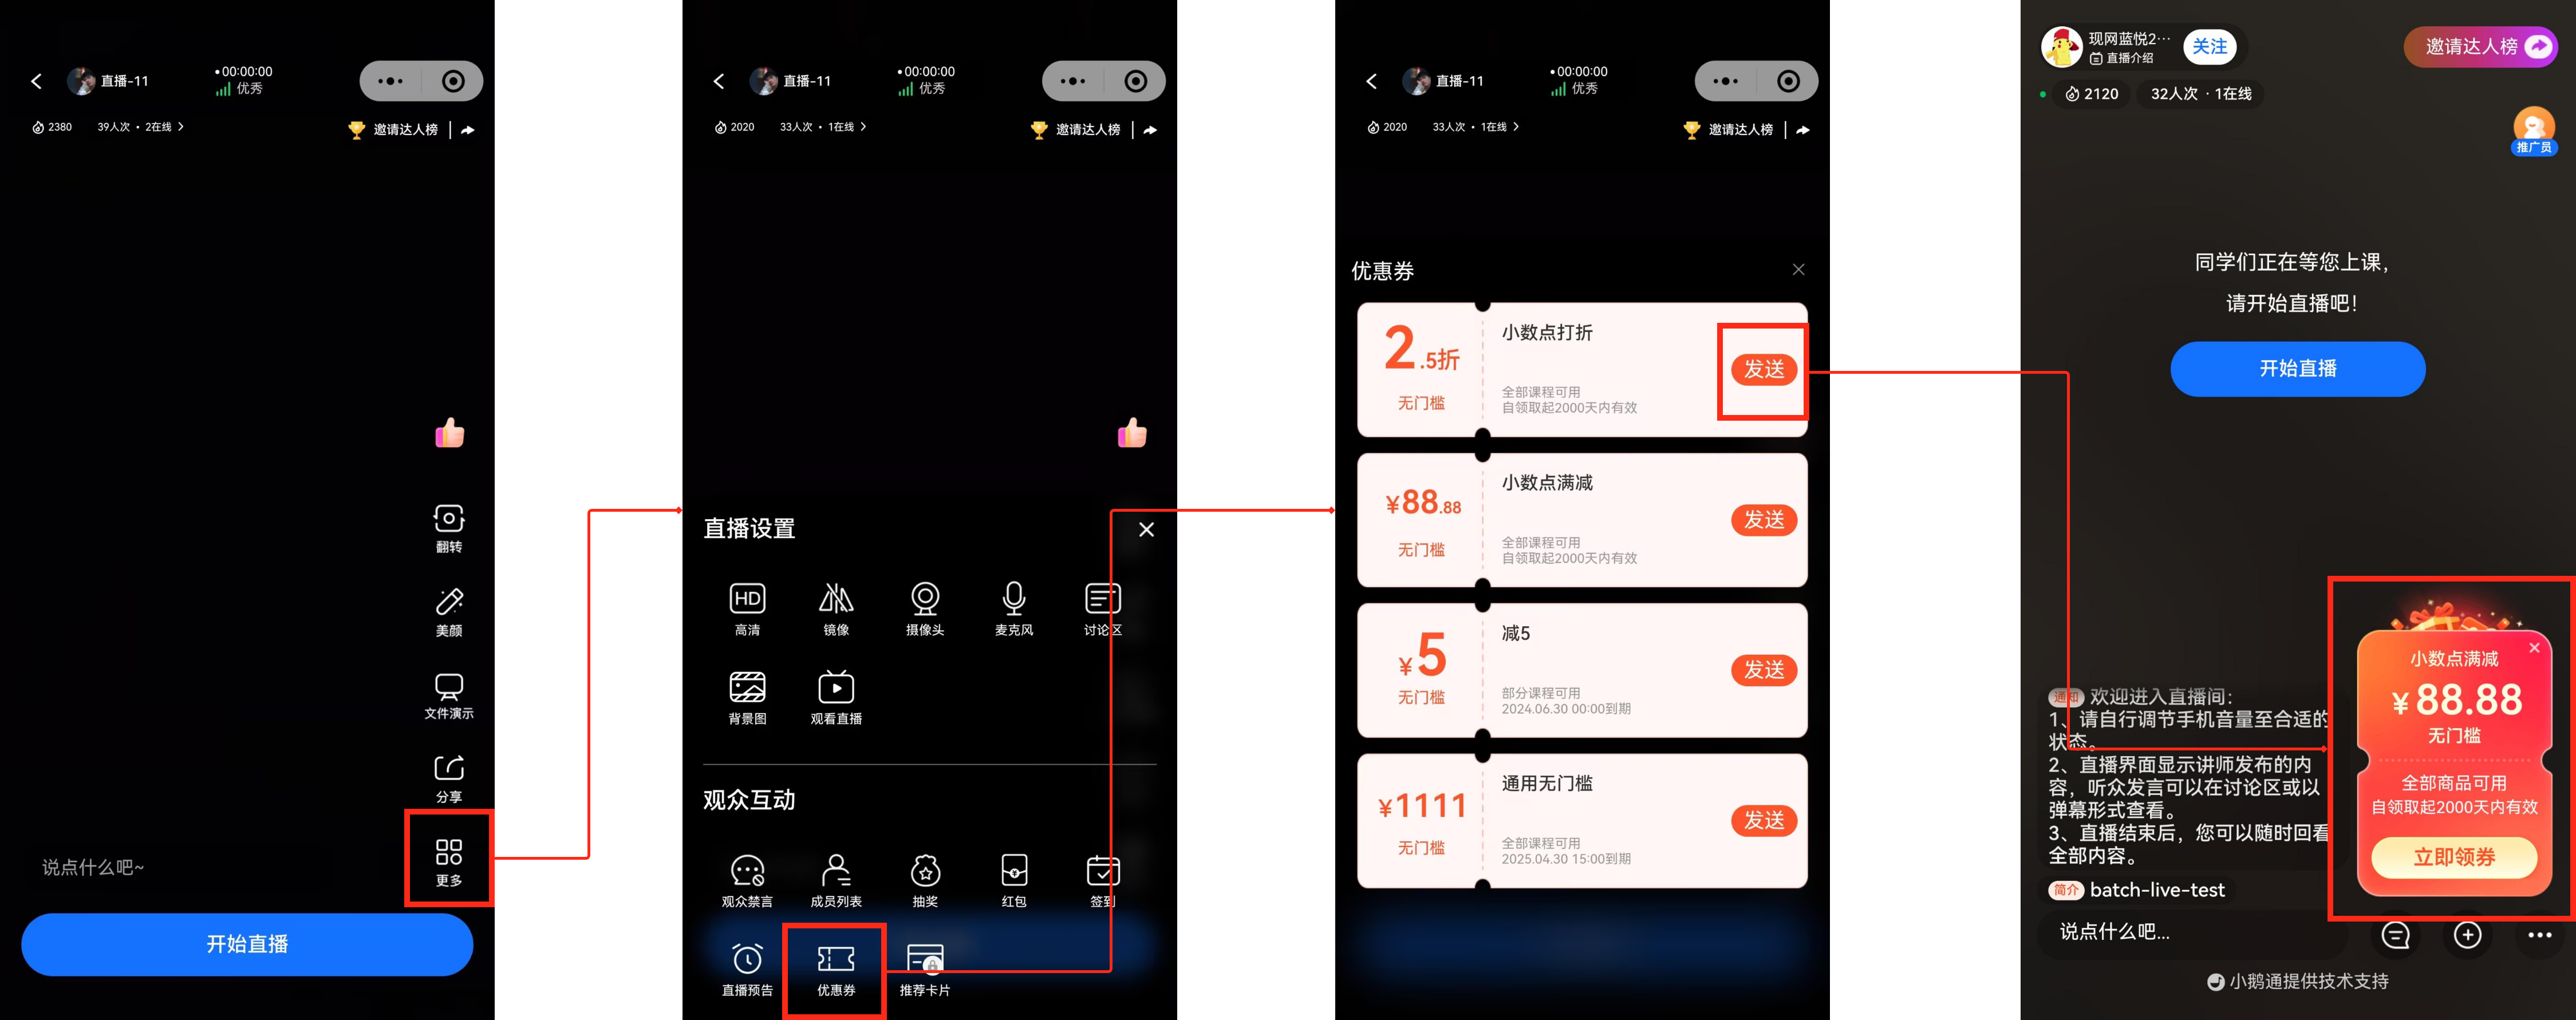
(elink Live Mini Program - Live streaming room - More - Coupons)
Step 3: Users receive and use coupons(H5, elink Live Mini Program)
1. Receive coupons
The followinglists three entrances to receive coupons: the live streaming room coupon icon, the coupon pop - up card, and the coupon receiving entrance in the product list
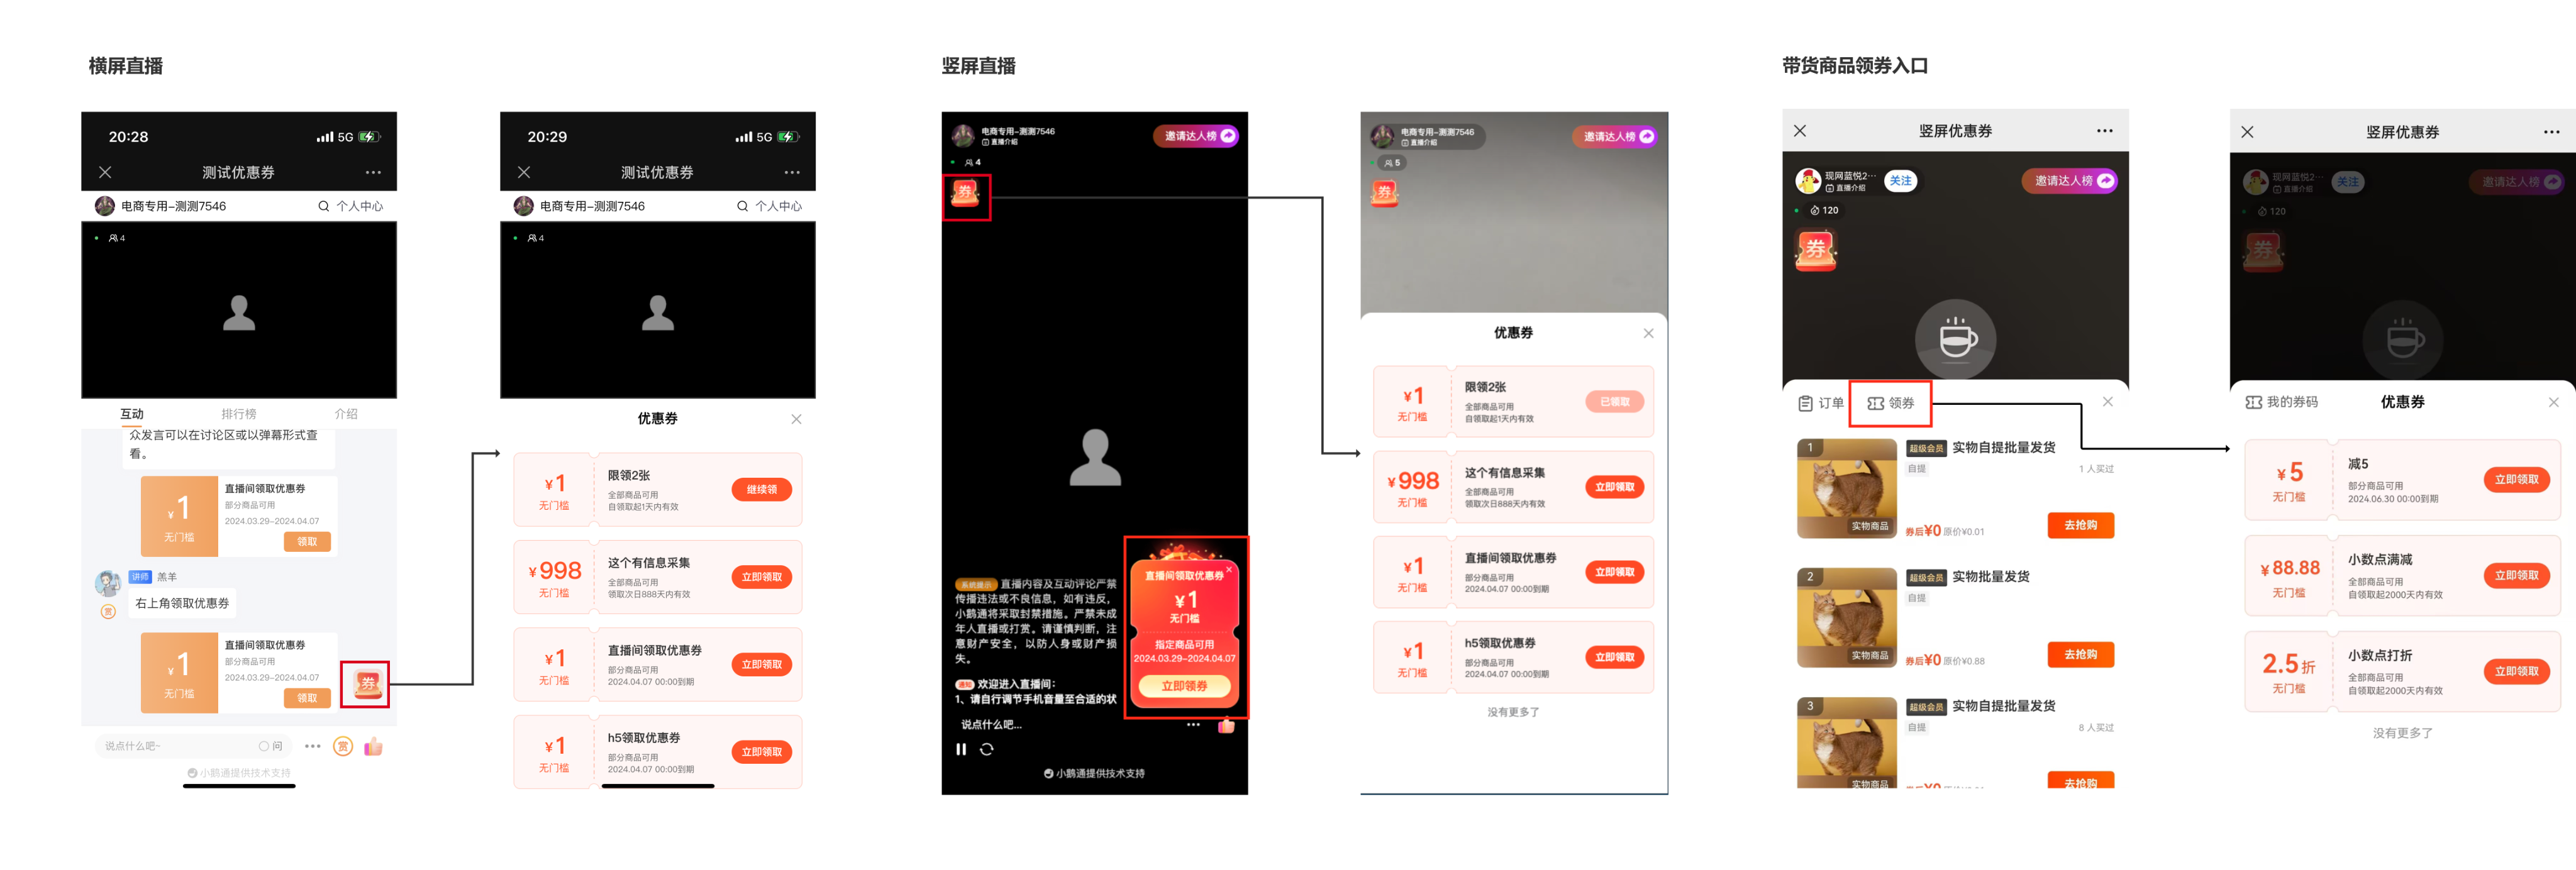
(Live streaming room - Coupon receiving)
2. View my coupon codes
After users receive coupons, they can view the coupon codes received in this live streaming room in [My coupon codes].
You can enter the [My coupon codes] page through [Product list - Receive coupons - My coupon codes], [Coupon icon - My coupon codes], [Coupon receiving card - Go to view], and [More - My coupon codes] to view the coupon codes received in this live streaming room.
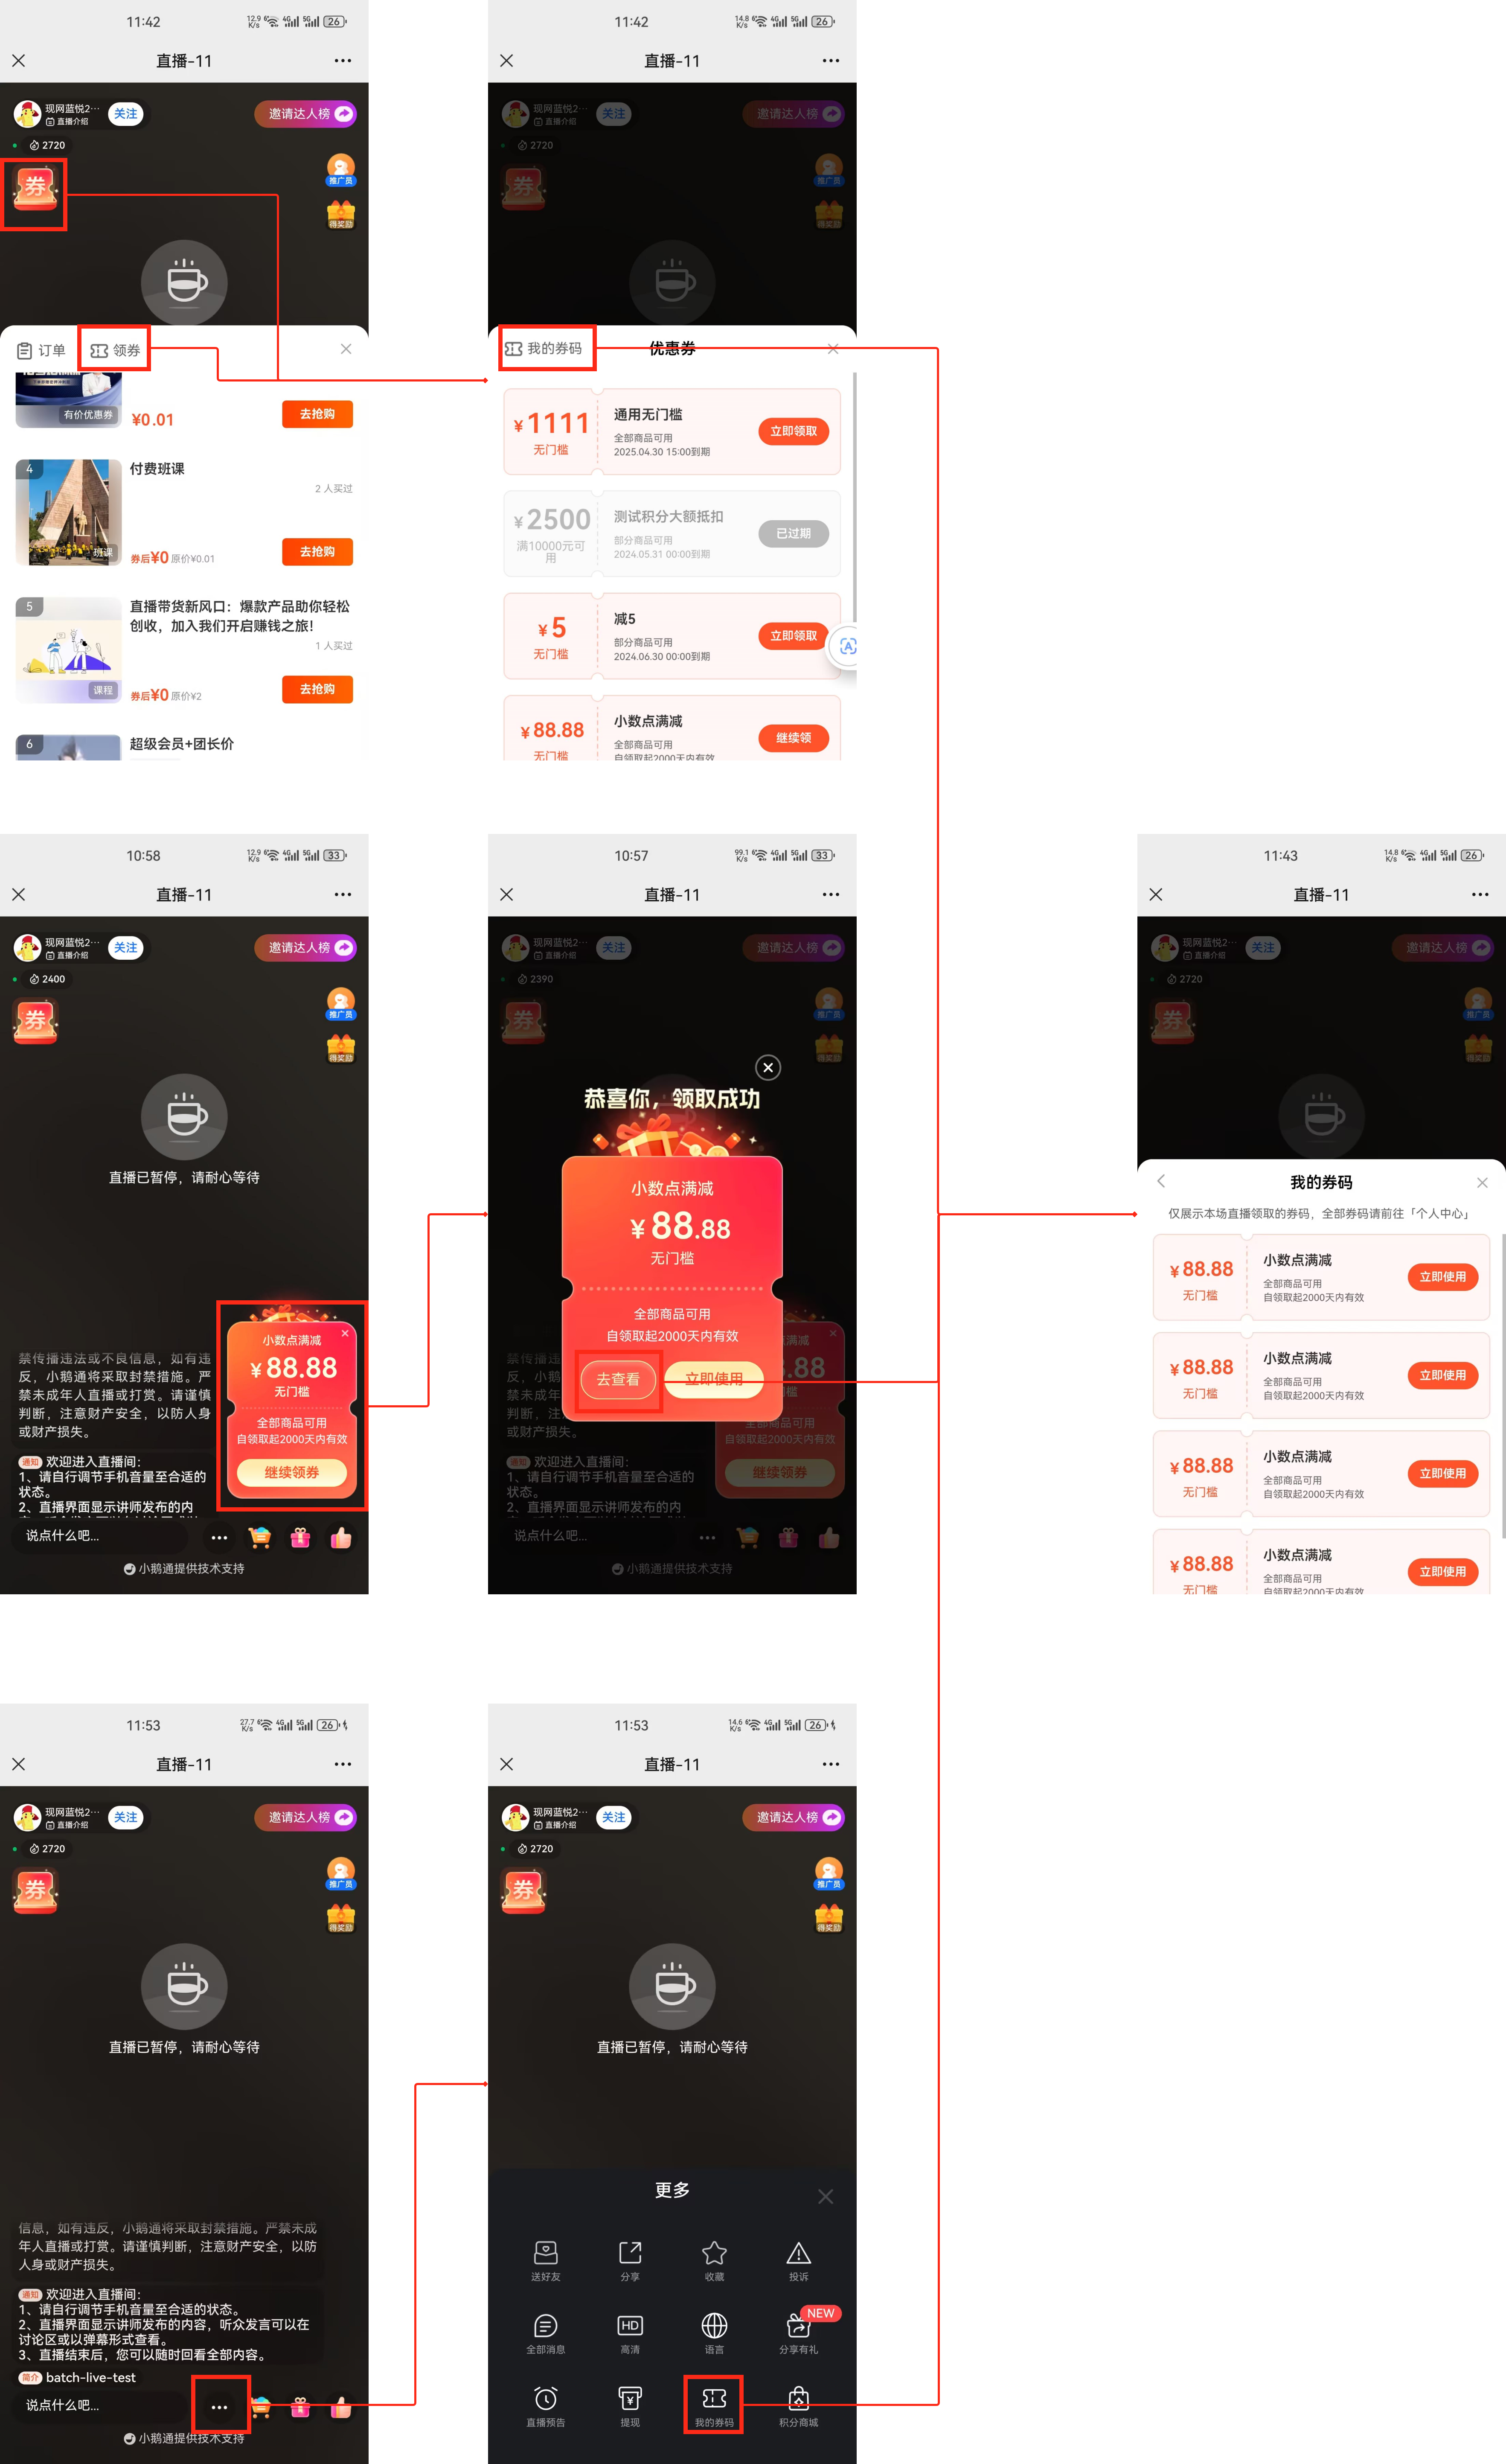
(Live streaming room - View my coupon codes)
3. Use coupons
After users receive coupons in the live streaming room, they can directly jump to the product list to use the coupons to purchase products.
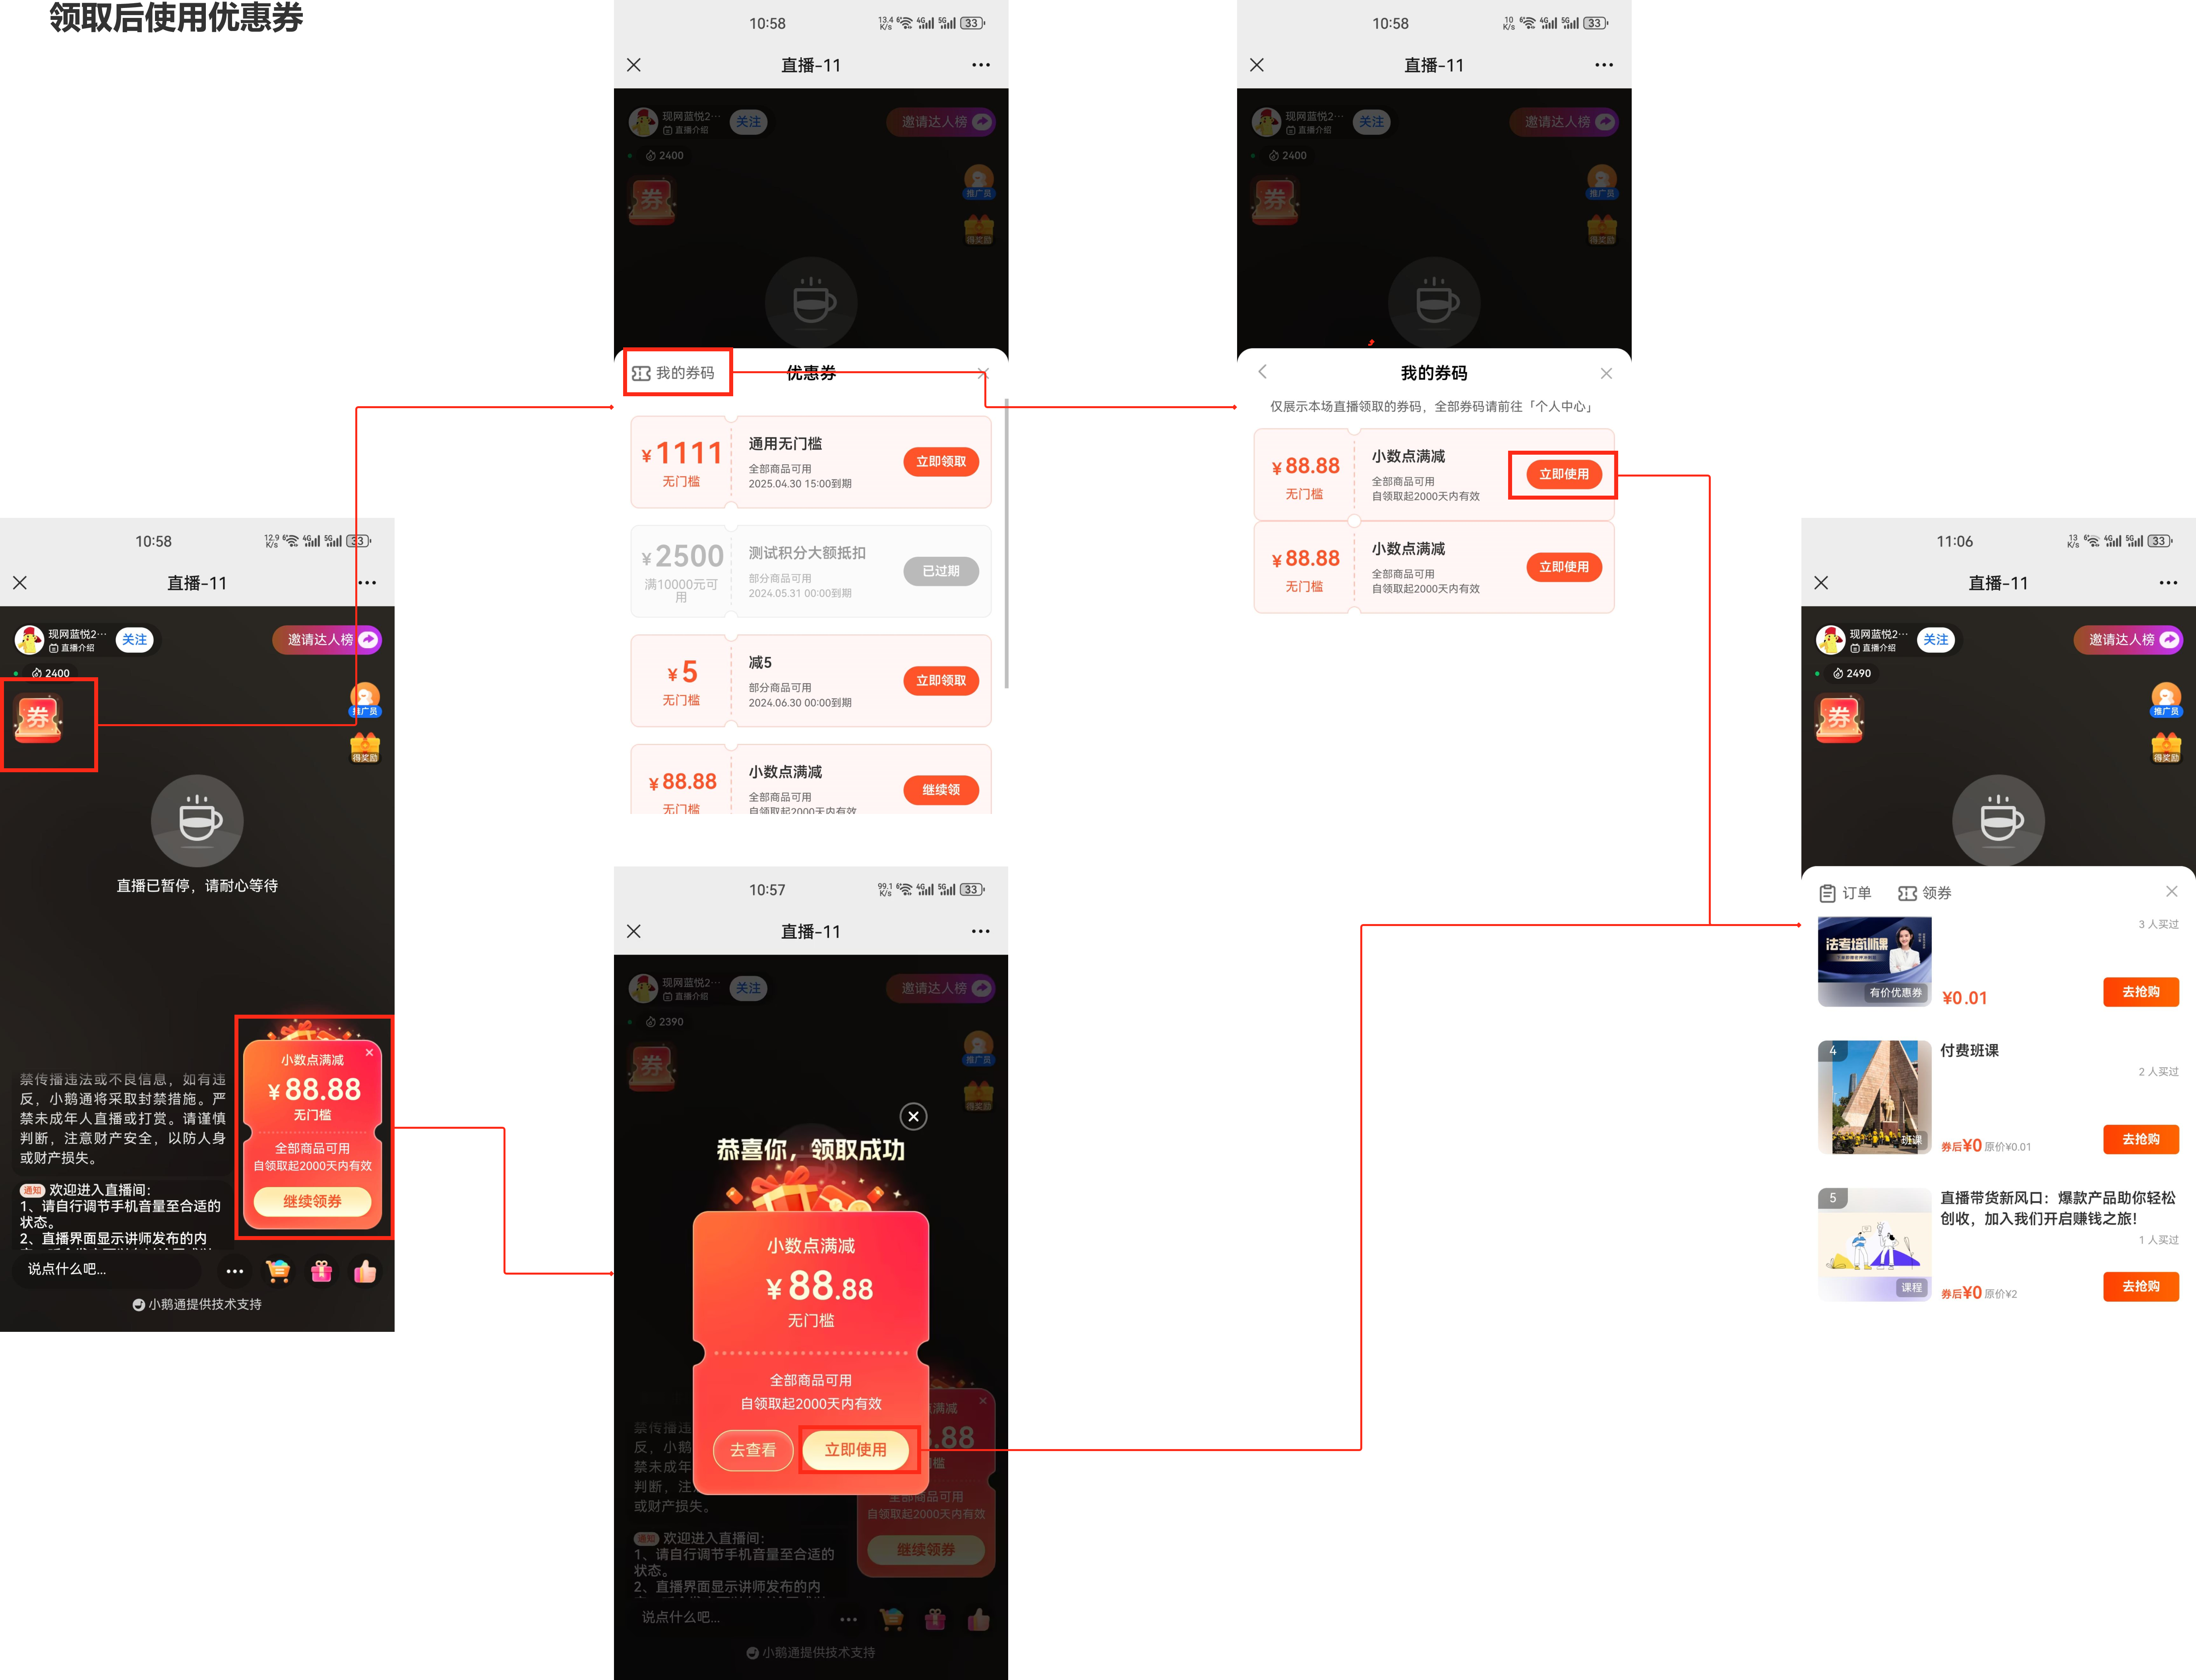
(Live streaming room - Use coupons)
Live Commerce Sold-out Strategies
Live Streaming RoomMark products as sold outFeatures
I. Function Introduction
SupportInManagement Backend/InstructorSideMark live commerce products as sold out,This operation will not affect the actual product inventory. It can display the effect of 'Sold Out' on the user side, and viewers in the live streaming room cannot purchase the products..
II. Purpose of Use
During the live commerce process, as the products are being introduced, marking products as sold out can create a sense of scarcity, boost the atmosphere of live flash sales, and promote sales..
III. Usage Scenarios
Scenario 1:Merchants conducting live commerce hope to create a sense of product scarcity by marking products as out of stock, thereby encouraging viewers to place orders.
Scenario 2:Merchants can mark products as sold out in the live streaming room even when there is still stock. The product cannot be ordered immediately in the live streaming room. Combined with marketing slogans, this can control the rhythm of the live streaming atmosphere..
IV. Operation Path
Merchant side: Merchant Backend → Live Streaming → Live Streaming Management →Live Commerce→Product List→Mark as Sold Out
Instructor side -WeChat H5, elink Live Mini Program, elink Live Client: Live Streaming Room →More → Product List→Product Management
Student side - WeChat H5, elink Live Mini Program, elink Live Client: Live Streaming Room →Product Cards, Product List
Usage Tutorial

Step 1Add live commerce products(Management Backend)
1. In the live commerce section of the live streaming details, enable live commerce, add the products needed for the live stream, and pay attention to setting the instructor's permissions. If you need the instructor to manage products (display/hide products, mark as sold out/cancel sold out, etc.), you need to enable the instructor's permissions. If not, you can disable the instructor's permissions.

(Management Backend - Live Streaming Details - Live Commerce)Details-Live Commerce)
Step 2Mark products as sold out(Management Backend,H5, elink Live Mini Program)
1. Mark products as sold out in the management backend. If you operate the live streaming management backend in real - time during the live stream, you can mark products as sold out in the management backend..

(Management Backend - Live Streaming Details - Live Commerce - Product List)
2. Mark products as sold out on the instructor side. After enabling the instructor's permissions, the instructor can enter the product management section. In the product management, you can operate [Mark as Sold Out]. At this time, the product will show 'Sold Out', which is different from the display of products with actual inventory of 0 showing 'Sold Out', making it easier for the instructor to distinguish. If you want to continue selling, you can operate [Cancel Sold Out], and the product will return to the normal selling state.

([Instructor/Teaching Assistant] H5 Store,elink Live Mini Program - Live Streaming Room -Product List-Product Management)

([Instructor/Teaching Assistant] elink Live Client - Live Streaming Room - Product List - Product Management)
Step 3Products show 'Sold Out' on the student side(H5, elink Live Mini Program)
For products marked as [Sold Out], the display on the student side will be the same as that of products with normal sold - out inventory, showing 'Sold Out', and users cannot click into the product details to purchase.


([Student]Live Streaming Room -Product Cards, Product List)
OBS Streaming
【OBS】How to download the video streamed by OBS?
During the use of OBS, merchants can use the OBS software to record the video during the streaming process. After the recording is completed, they can view and use it.
1. Select the save location and format for the recorded video:
1) Open the OBS software, click the settings button in the lower right corner, and enter the settings page.
2) Select 'Output' in the left - hand function bar on the settings page, and click 'Recording' on the output page.
3) You can click the 'Browse' button after the recording path to modify the save path for the recording.
4) You can click the recording format to switch the video format of the recording.
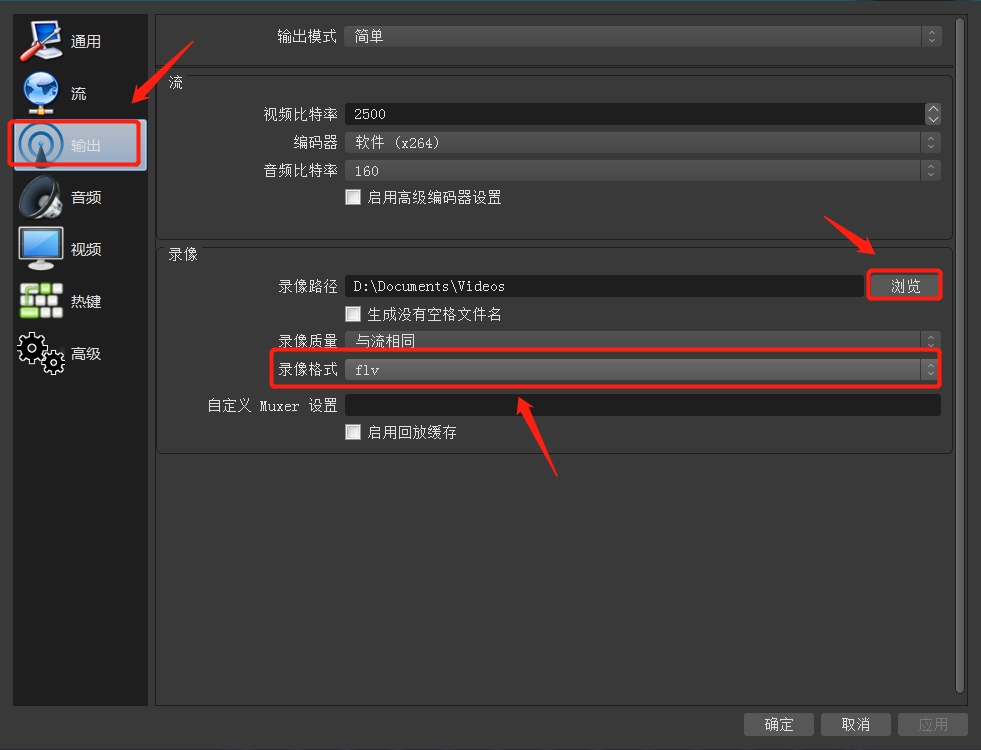
2. Steps for recording a video: After starting the streaming, click the 'Start Recording' button to start recording the video. When ending the streaming, click 'Stop Recording' to complete the recording of the live - stream video. After the recording is completed, users can open the folder where the video is saved to view the recorded video.

【OBS】 Experiencing lag during live streaming?
There may be four possible reasons:
1. Possible reason: The upstream network speed of your current computer is too low.
Solution: Please switch to a network with a higher upstream speed or use a 4G network for live streaming. A minimum upstream bandwidth of 10M/s is required for live streaming with OBS.
Network speed test: http://www.speedtest.cn/
2. Possible reason 2: The bitrate setting in the OBS software is too high.
If you want to adjust the video bitrate to suit your needs, you can check the status indicator in the lower right corner during the streaming test. If the network speed indicator is green and the frame loss is 0, it indicates a smooth network;
If the network indicator is orange or red and there is significant frame loss, it means the network is congested. In this case, you need to lower the video bitrate. The following figure shows a smooth network situation.

Solution: Method to modify the bitrate: Open the OBS streaming software, click [Settings -> Output], and set the bitrate to 500. (Note: The higher the bitrate, the clearer the video, but it also makes the stream more prone to congestion and increases the live streaming latency.)

3. Possible reason 3: The resolution or FPS settings in the OBS software set by the user are too high.
Solution: Please lower the resolution or the FPS value. Recommended resolution: 1280×720. Recommended FPS value: 30
Modify the resolution and FPS settings:
4. Possible reason 4: The computer configuration is too low.
Solution: Please upgrade your computer configuration or close other software except elink and OBS.
Recommended computer configuration:
CPU: i5 - 6400 or higher (i5 - 6500)
Graphics card: GTX1050 or higher (1050Ti)
If you are not recording games, you can directly use the integrated graphics card of the CPU and ignore this item.
Memory: 8G or higher (16G)
Monitor: 1080
Check the computer configuration: Right - click on 'This PC' on the desktop, click 'Properties' to enter the system page. The CPU is displayed under 'Processor' in the system, and the installed memory is shown under 'Installed memory'. Click 'Display adapters' in the Device Manager to view the graphics card.
【OBS】How to solve the live streaming latency issue?
Reasons for live streaming delay and solutions:
1. The current upload speed of your computer's network is too low.
Solution: Please switch to a network with a higher upload speed or use a 4G network for live streaming. A minimum upload bandwidth of 10M/s is required for live streaming with OBS. Network speed test: http://www.speedtest.cn/
2. Improve the situation by adjusting OBS parameters
Solution (preferred): Open the OBS streaming software, click [Settings -> Output], and set the bitrate to 500 - 1000. (Note: The higher the bitrate, the clearer the video, but it is also more likely to cause stuttering and increase the live streaming delay.) Check if the live streaming delay has improved.
If the live streaming delay is still not resolved
Click [Settings -> Output], set the output mode to Advanced, then set the bitrate to 500 - 1000 and the keyframe interval to 1

【OBS】Is the streaming screen inconsistent with the actual screen?
When using OBS for live streaming, there are generally two types of abnormal display issues with the streamed video: 1. Only part of the video is displayed. 2. The video is too small.
Solution for the first issue: Right-click on the video on the screen -> Transform -> Center on screen.
Solution for the second issue: Right-click on the video on the screen -> Transform -> Fit to screen.
How to obtain the server and streaming key?
1. You can log in to the elink Merchant Backend, click [Live Streaming], find the corresponding course, and then click [More > Go to Live > Live Streaming Settings] to copy the "Server" and "Stream Key".
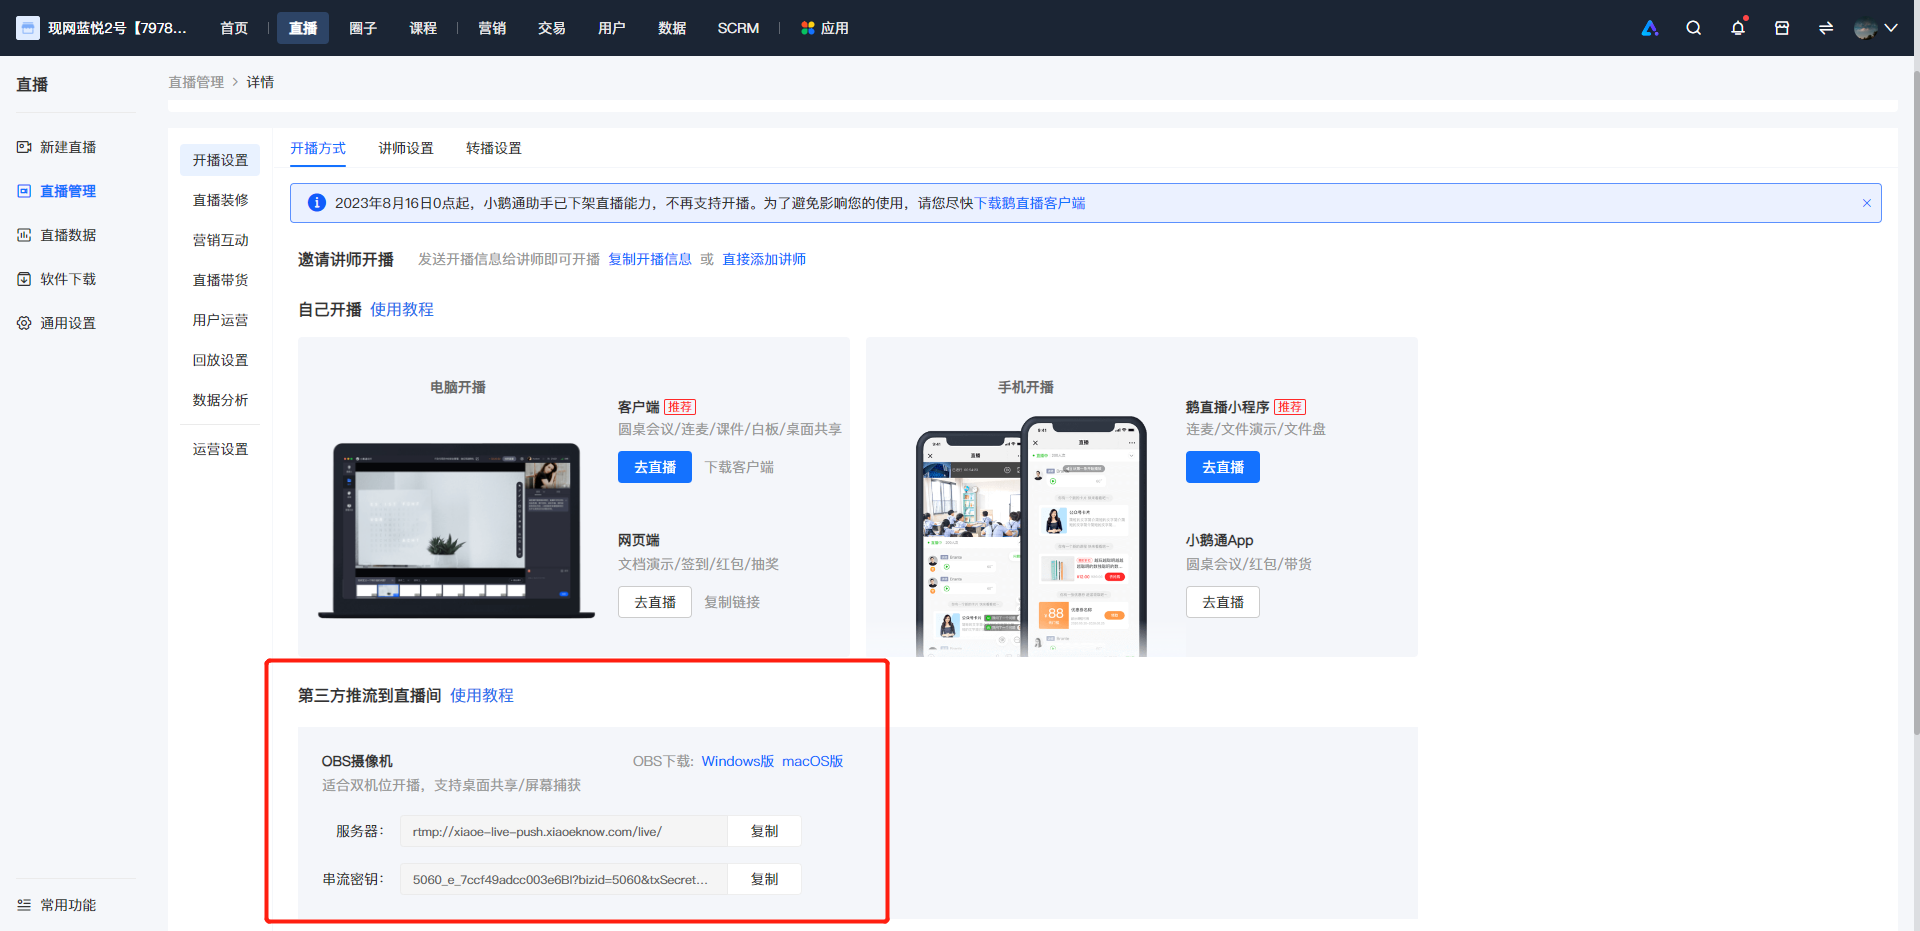
2. After obtaining the "Server" and "Stream Password", open OBS, click the settings button in the bottom right corner. On the settings page, select "Streaming" from the left - hand sidebar. On the streaming settings page, click the dropdown menu next to "Service" and select "Custom".Then fill in the corresponding information in the "Server" and "Stream Key" fields.
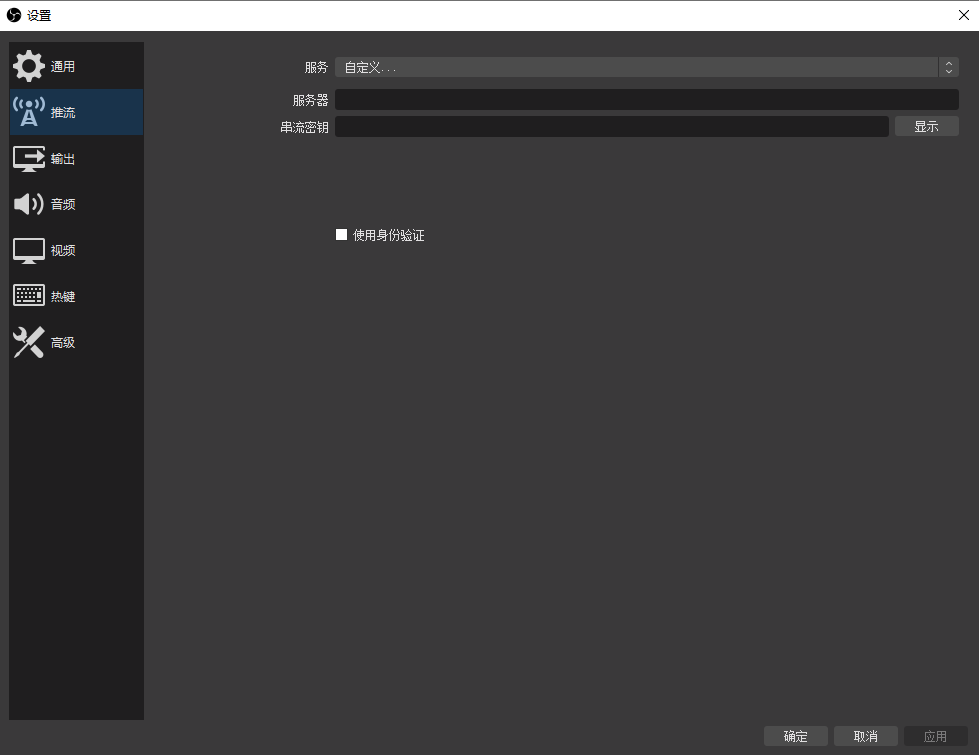
Where can I download [OBS]?
1. You can go to the official OBS website for download: https://obsproject.com/
2. You can access the elink Merchant Store Management Console: [Live Streaming — Live Streaming Management— Live Streaming Details— Live Streaming Settings — Live Streaming Method — Third - party Streaming to the Live Room — OBS Download], click on the corresponding computer system to enter the download page.
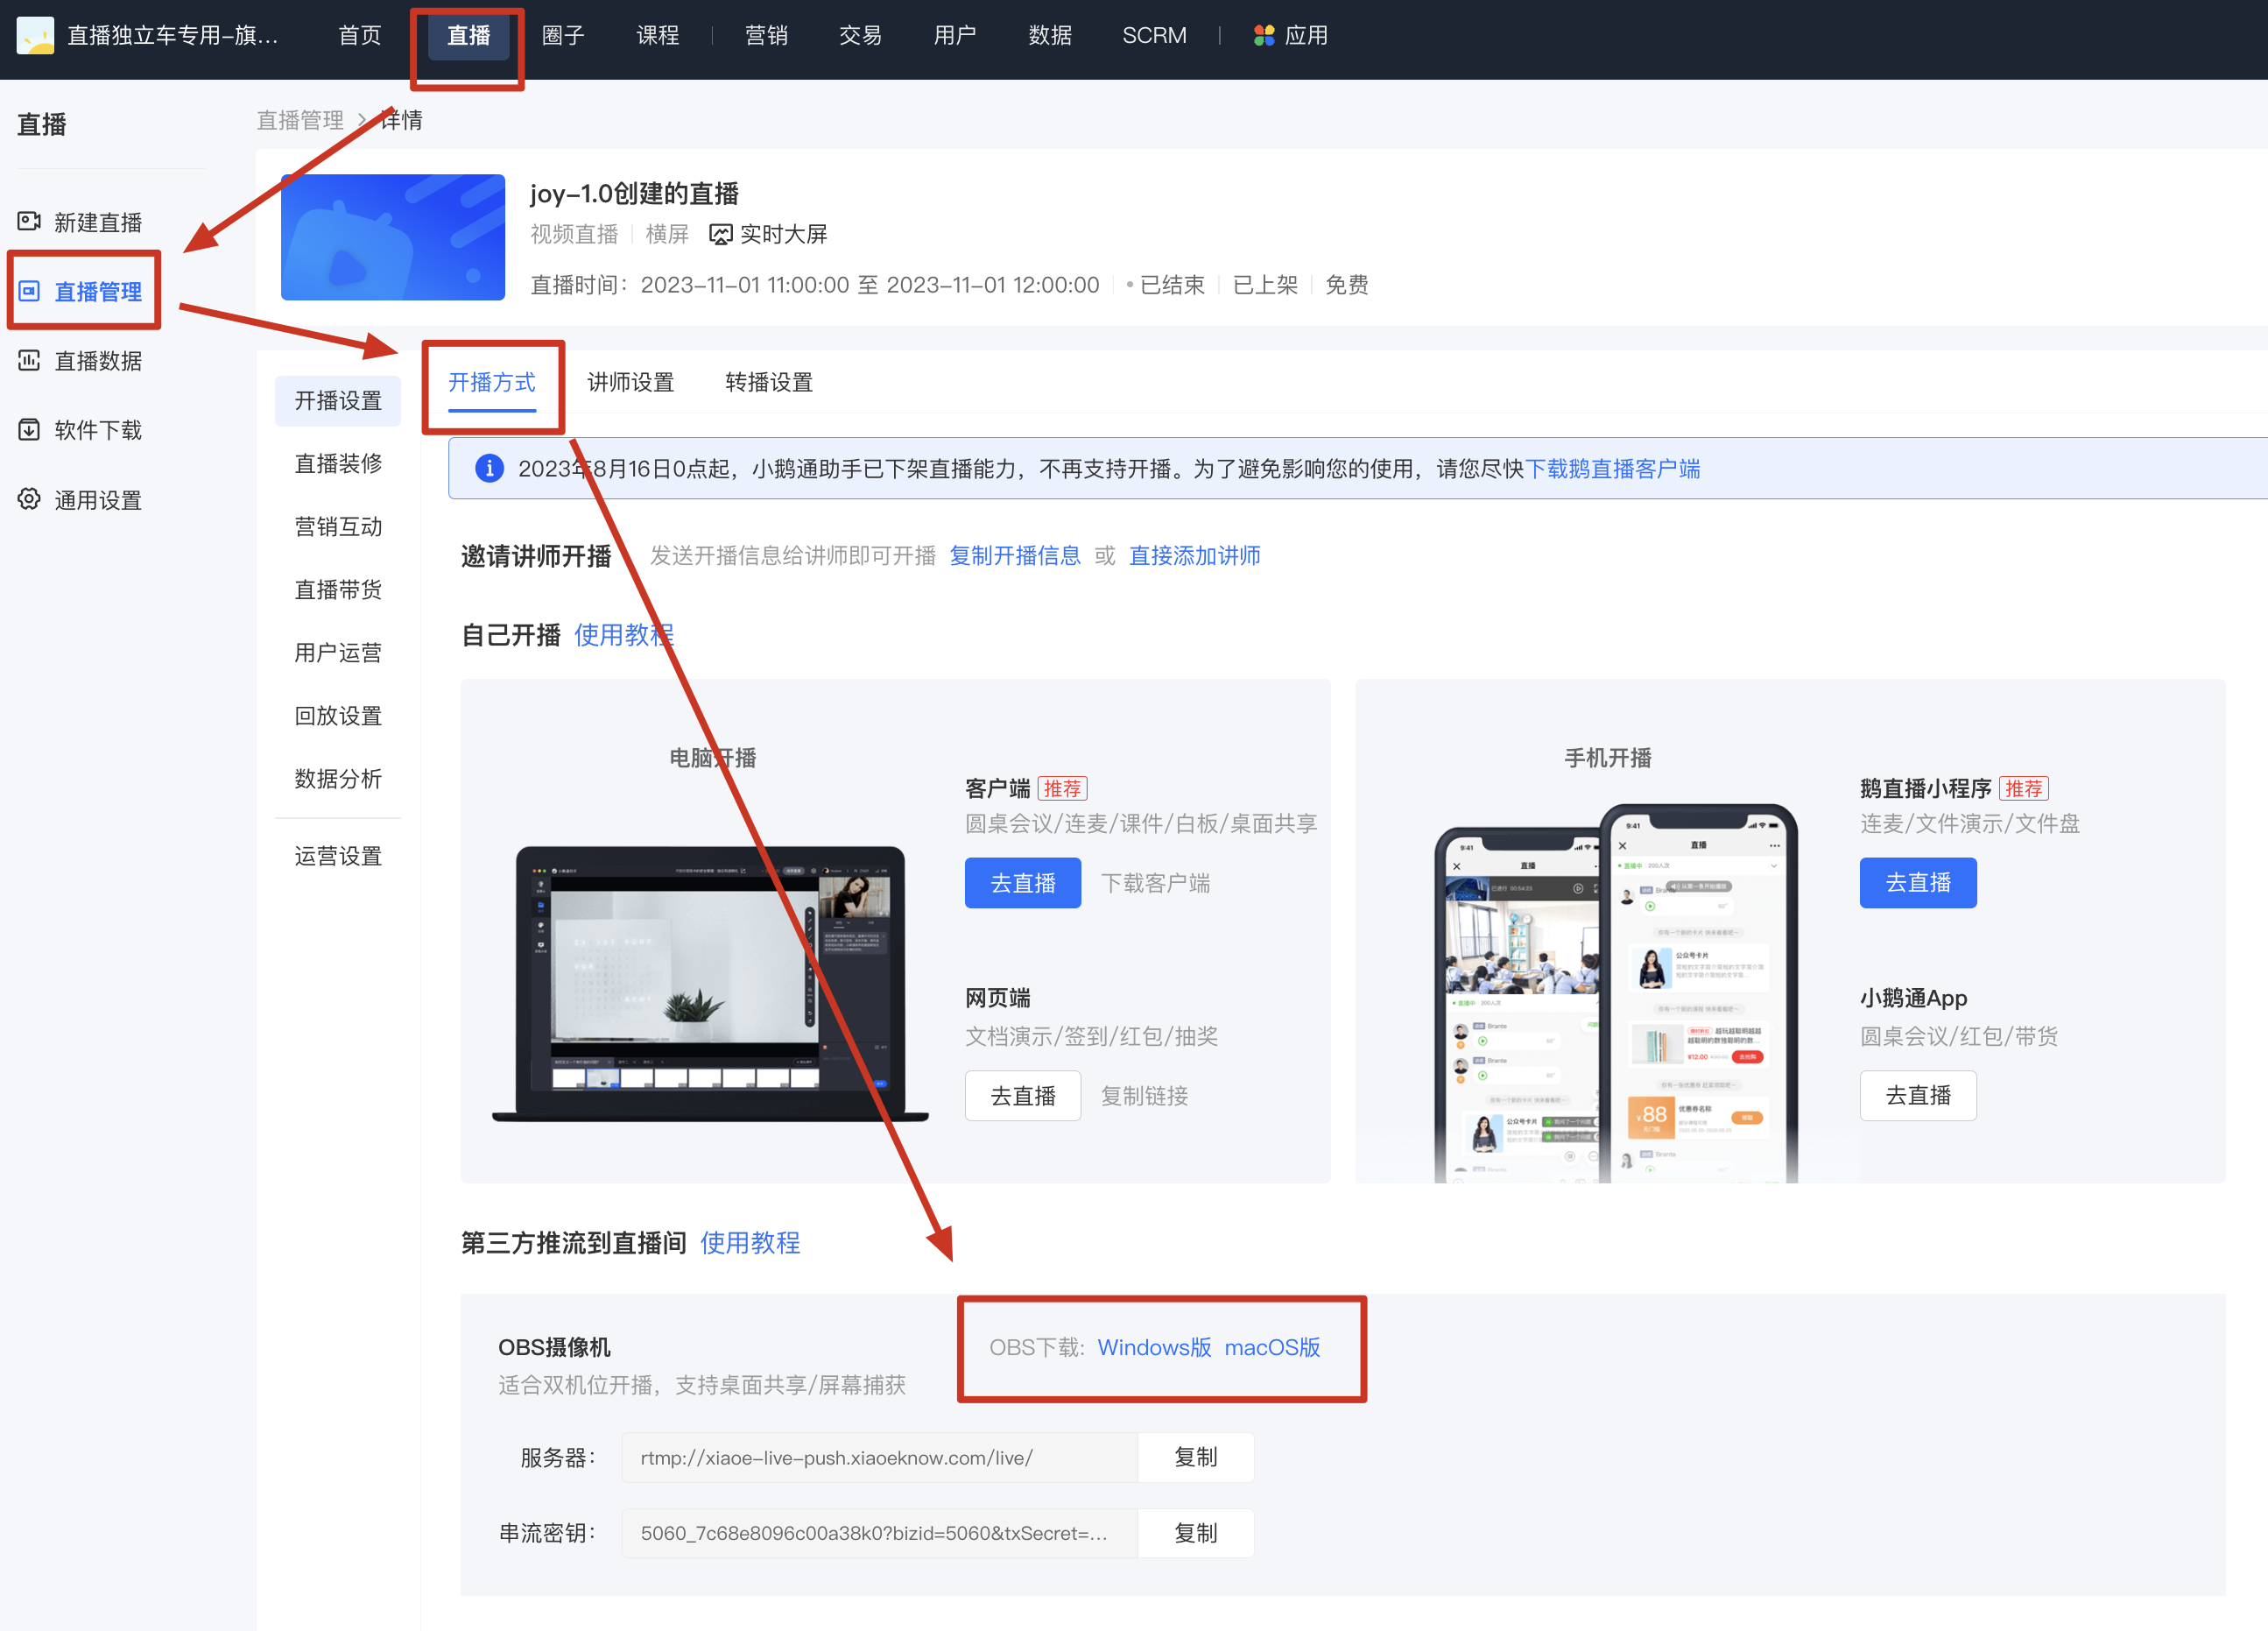
After successfully configuring live streaming, why can't students see the video?
After streaming, students won't immediately see the streaming screen. There's approximately a 12-second delay. If the streaming screen isn't visible for an extended period, ensure that the settings in the OBS software are correct:
1. Confirm that the streaming key and server address for the stream have been entered correctly (i.e., the URL and stream name of the target live room filled in OBS). If the instructor hasn't filled in the corresponding streaming key, the live screen may be pushed to another live room. If the corresponding streaming key and server address have been filled in, verify their accuracy [Verification path: OBS - Settings - Stream].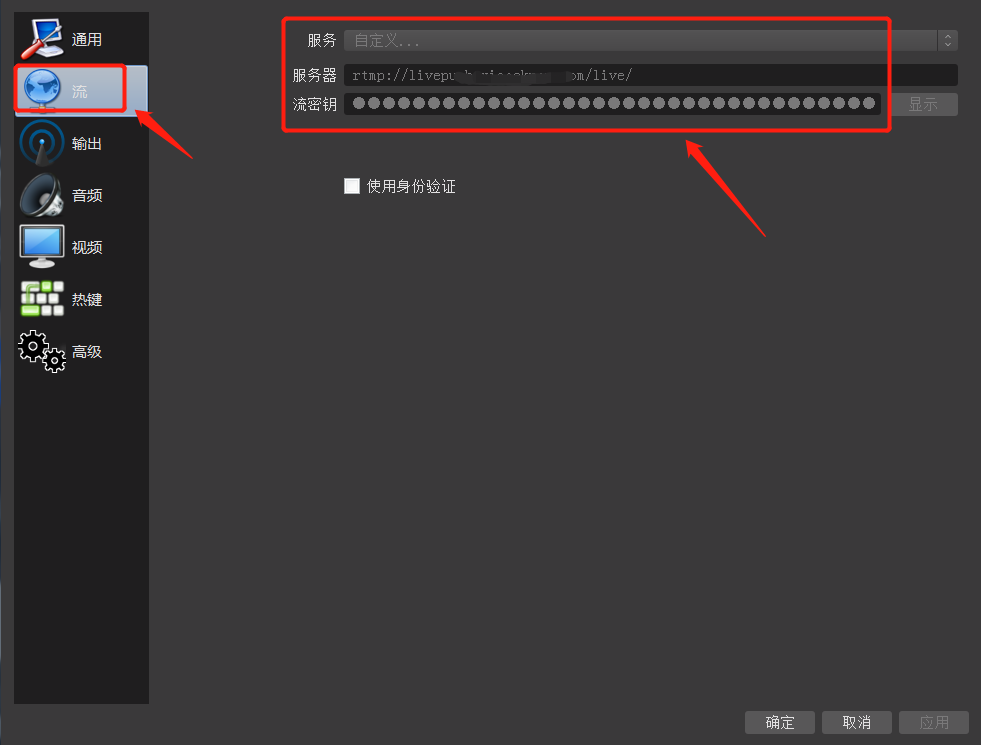
2. Check if the 'Start Streaming' button has been clicked in the OBS operation area to start the stream. If the stream has started, 'Stop Streaming' should be displayed in the bottom right corner.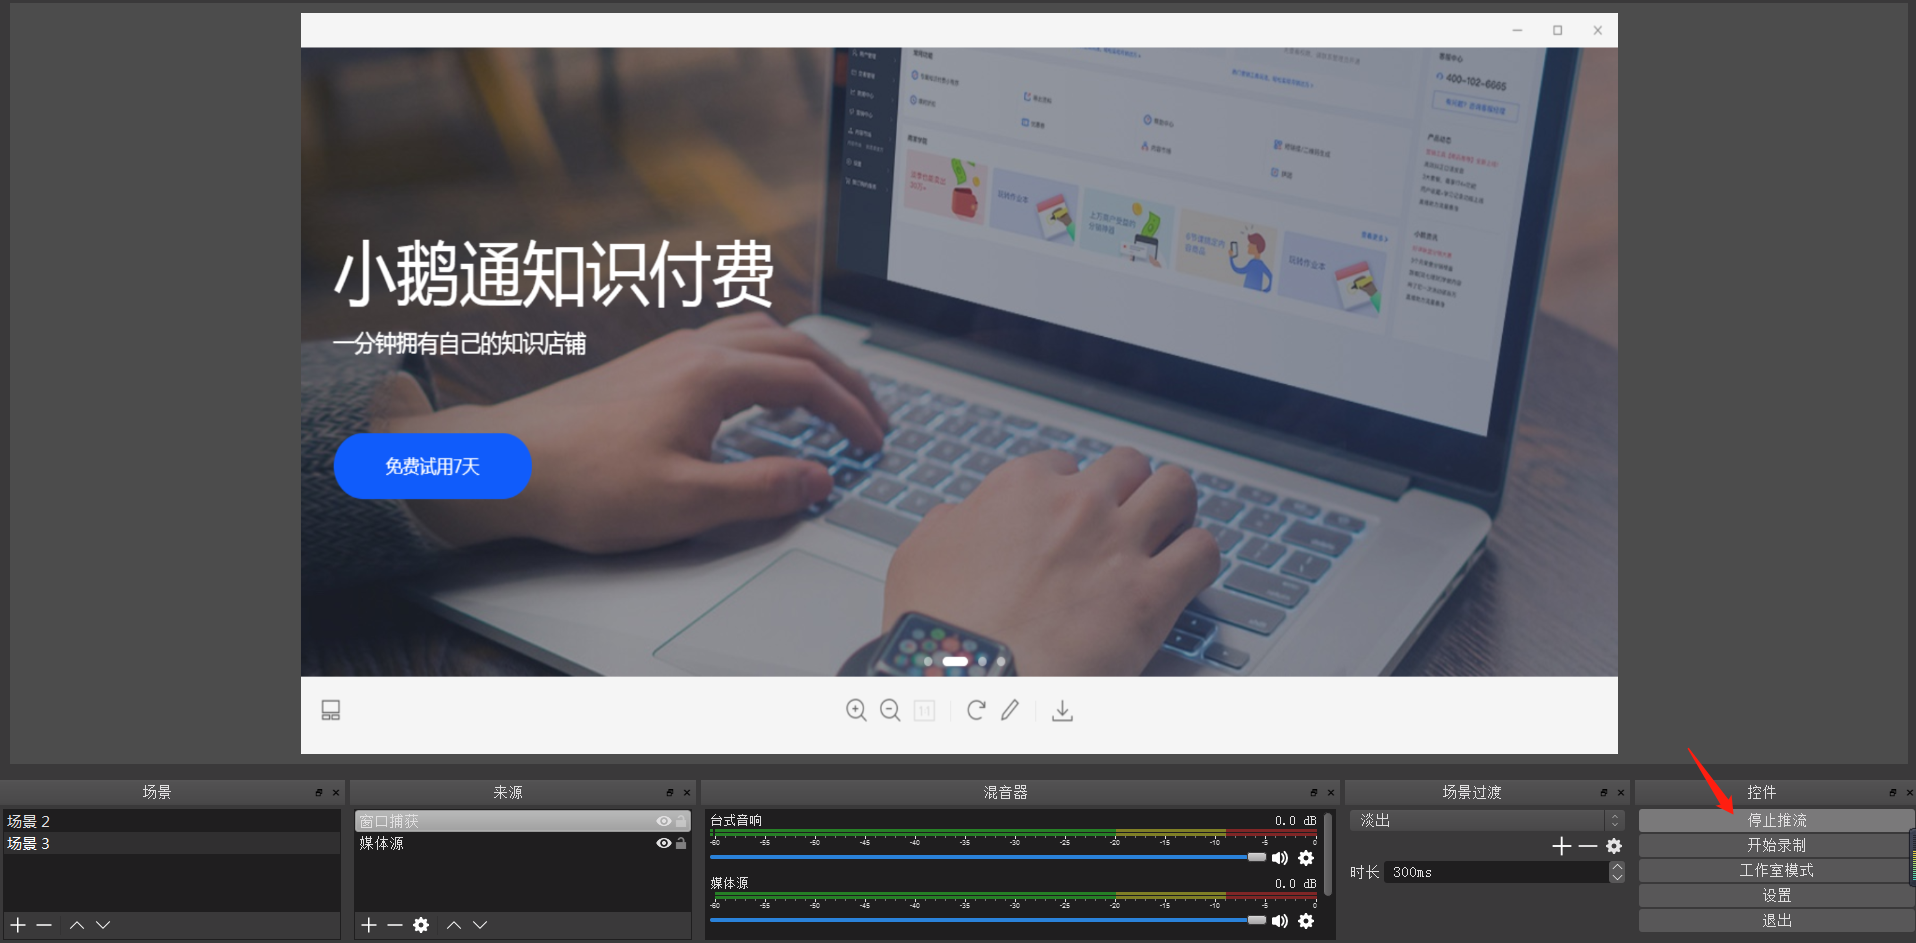
3. Check if the streaming quality indicator in the bottom right corner of OBS is green. If not, reduce the live streaming quality.
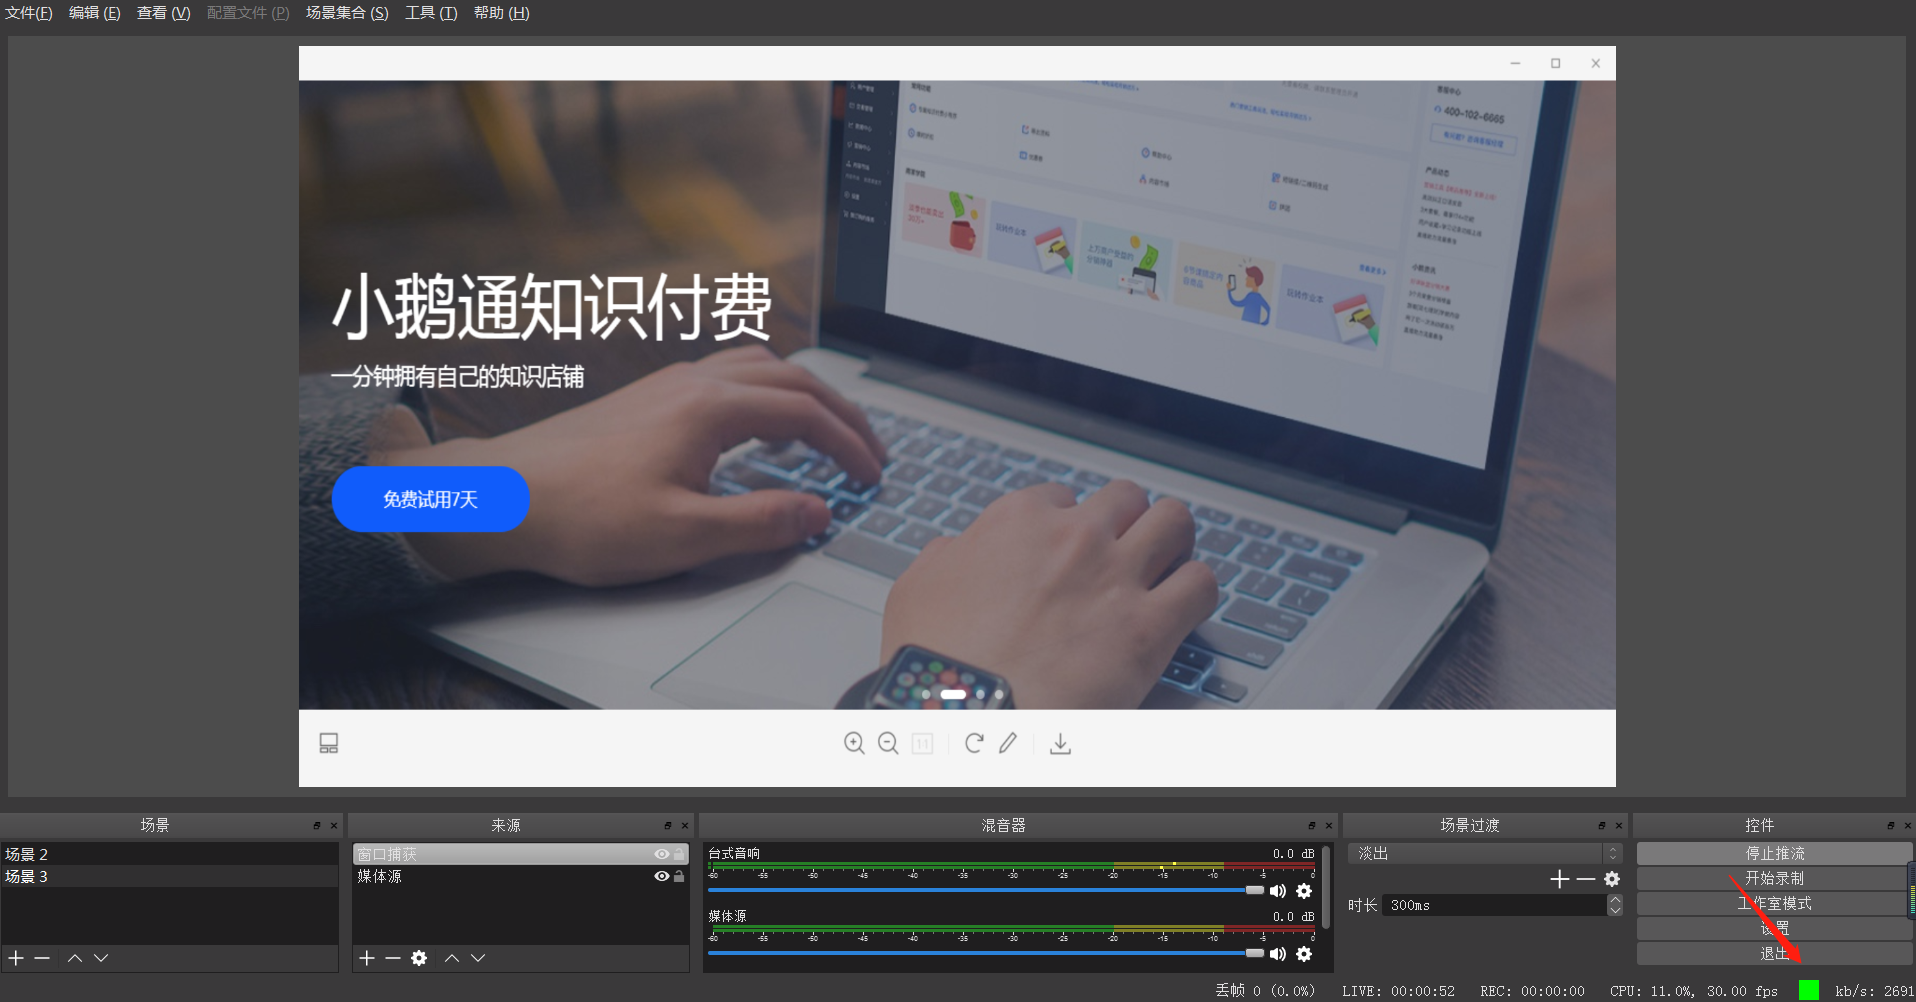
【OBS】 How to adjust the size of the instructor's video?
Click and drag the bottom right corner of the video frame to adjust its position. You can also zoom in or out on the instructor's video.
Can the stream name be used permanently after being set once?
Each live course has a dedicated streaming key, which cannot be used permanently. You can log in to the elink merchant backend, click [Live], find the corresponding course, and then click [More - Go Live] to copy the "Stream Name".
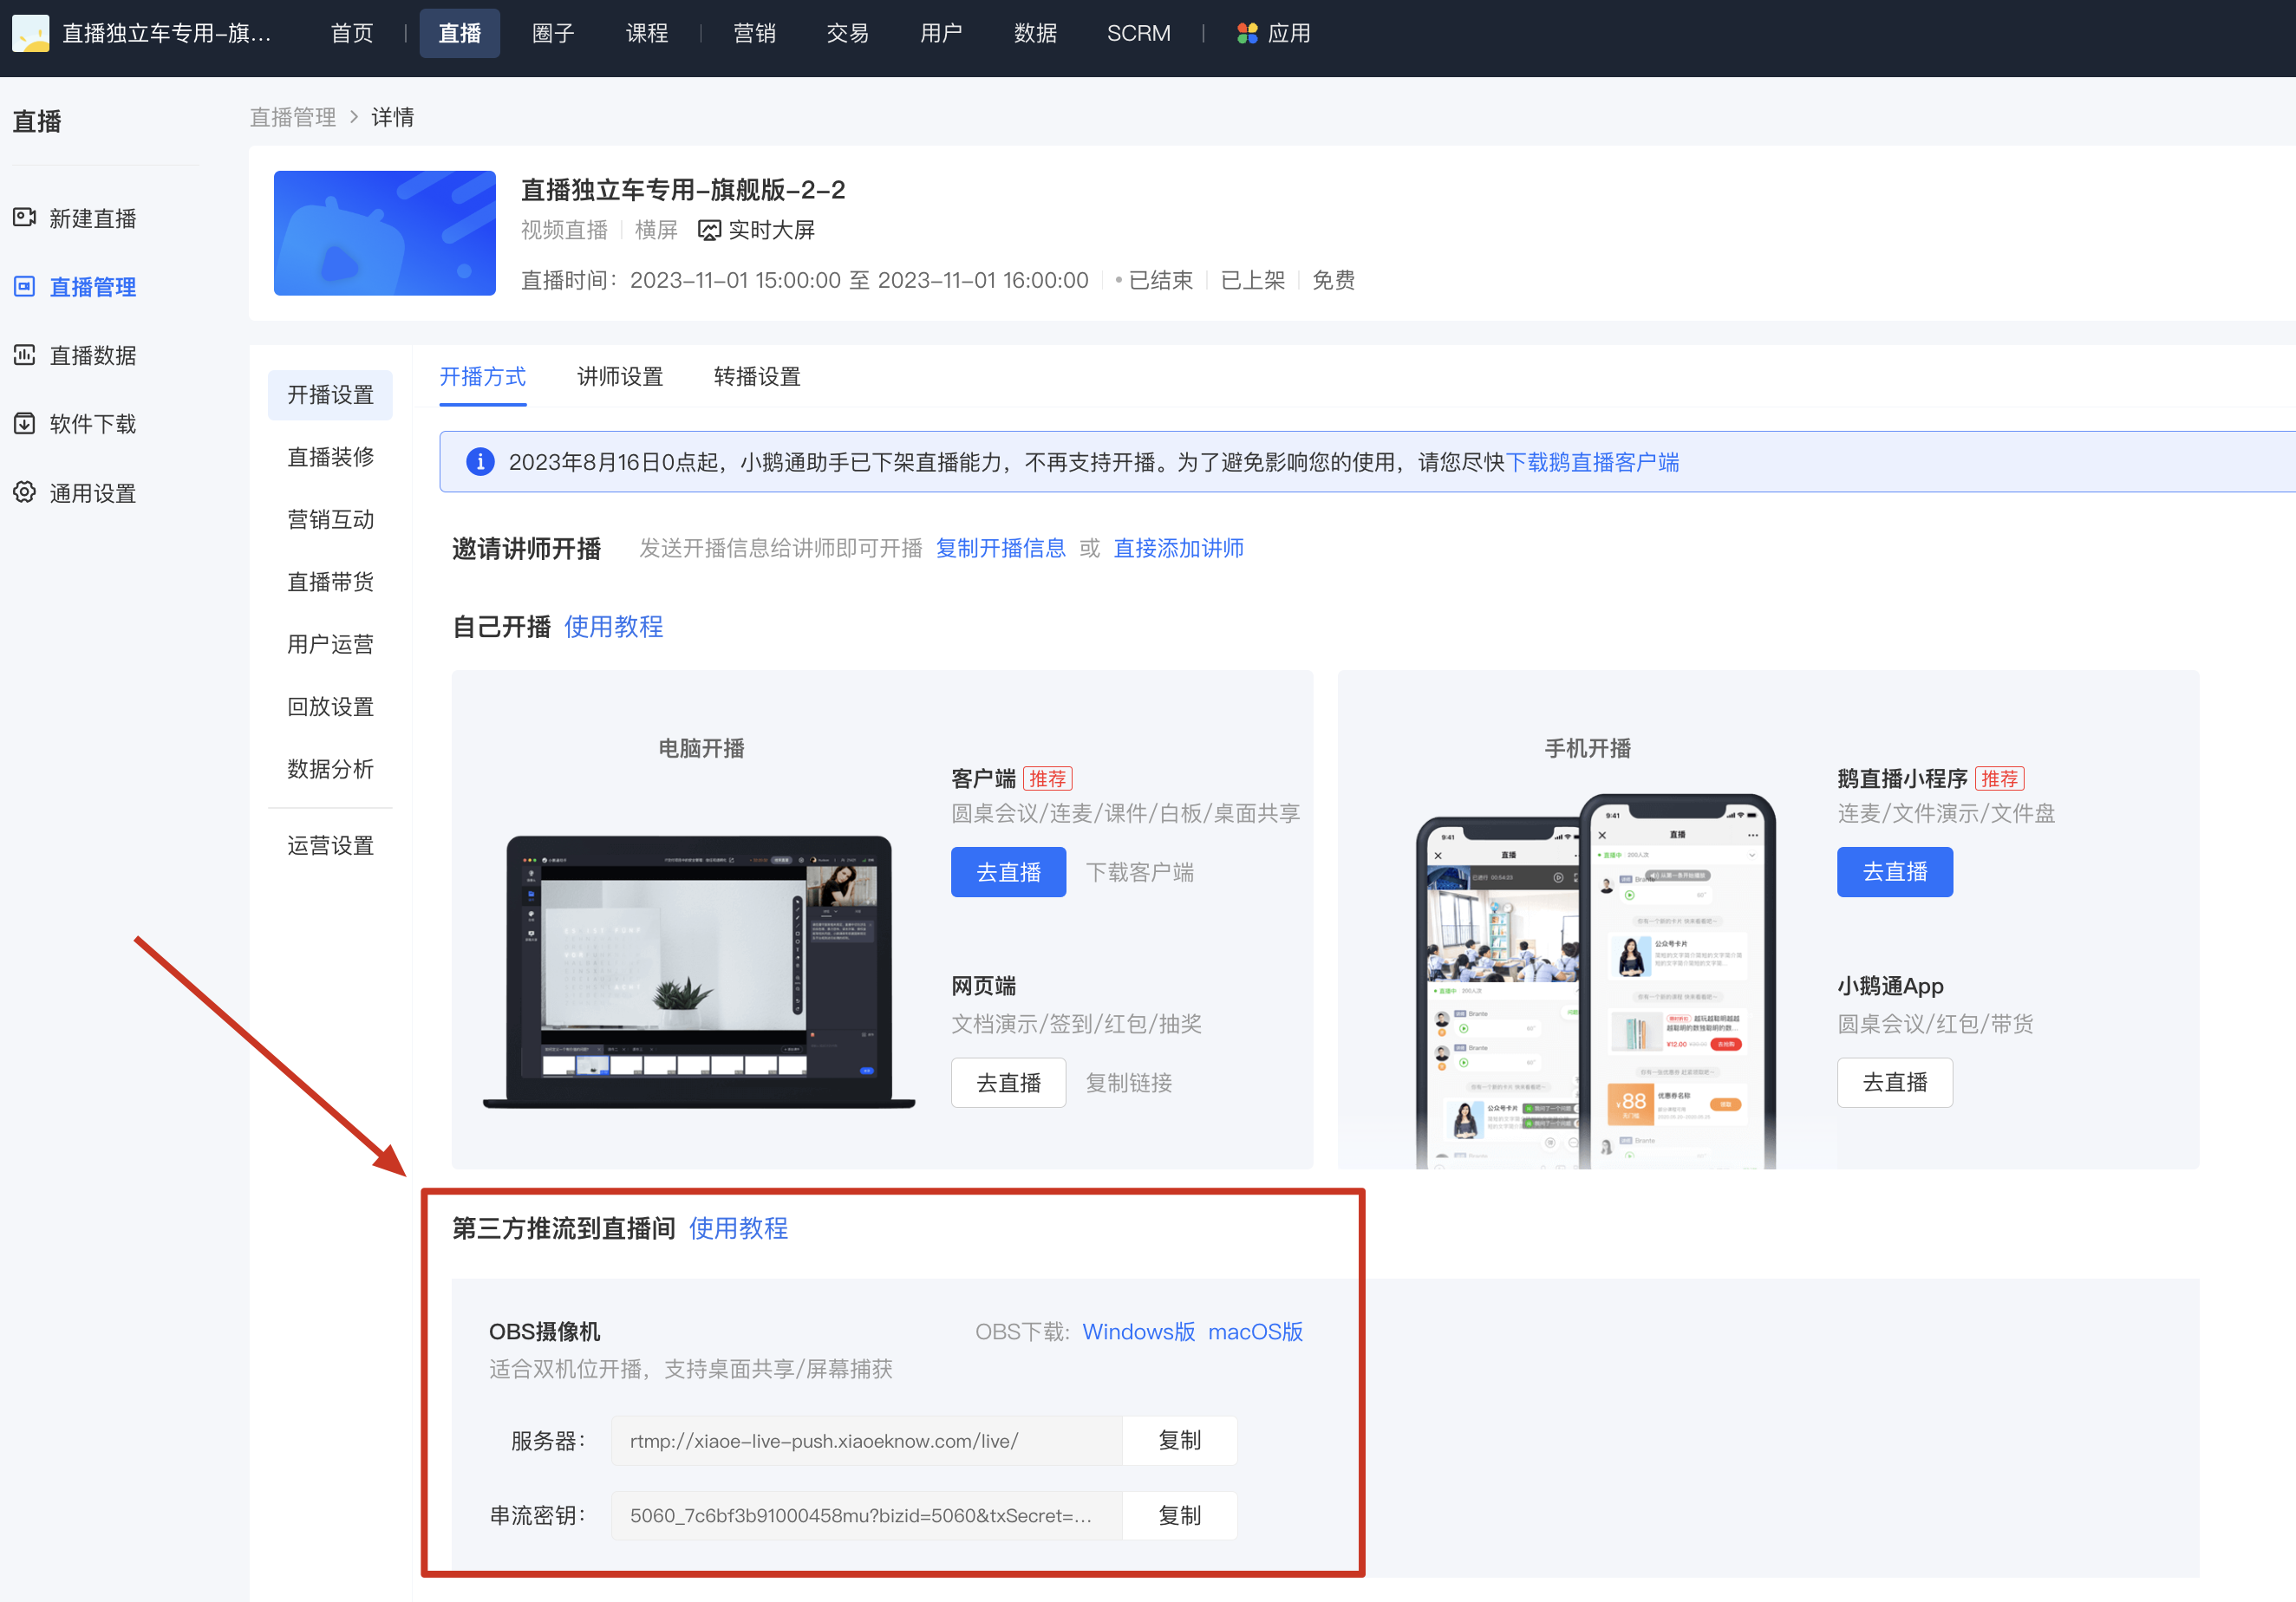
[OBS] Streaming shows no connection to the server (some office networks may have restrictions)
Problem Phenomenon
OBS shows that the service is not connected. Please refer to the following methods to solve the problem:
Method 1: Check the streaming address
① Check if the streaming link settings in the settings are correct
② Click the settings button in the lower right corner of the OBS page. Enter the settings page, select “Stream” in the left sidebar, and check if the streaming information is consistent with the streaming address of the live room
Method 2: Switch the network
① Try to change the network (such as using a 4G hotspot)
② If the problem still exists after switching the network, please change the DNS
<1> Right - click the network icon in the lower right corner and select “Open Network & Internet settings”.
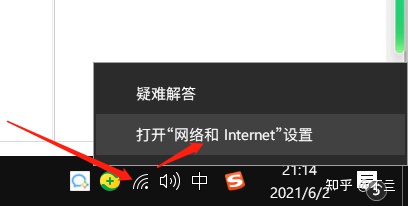
<2>Select “Change adapter options”.
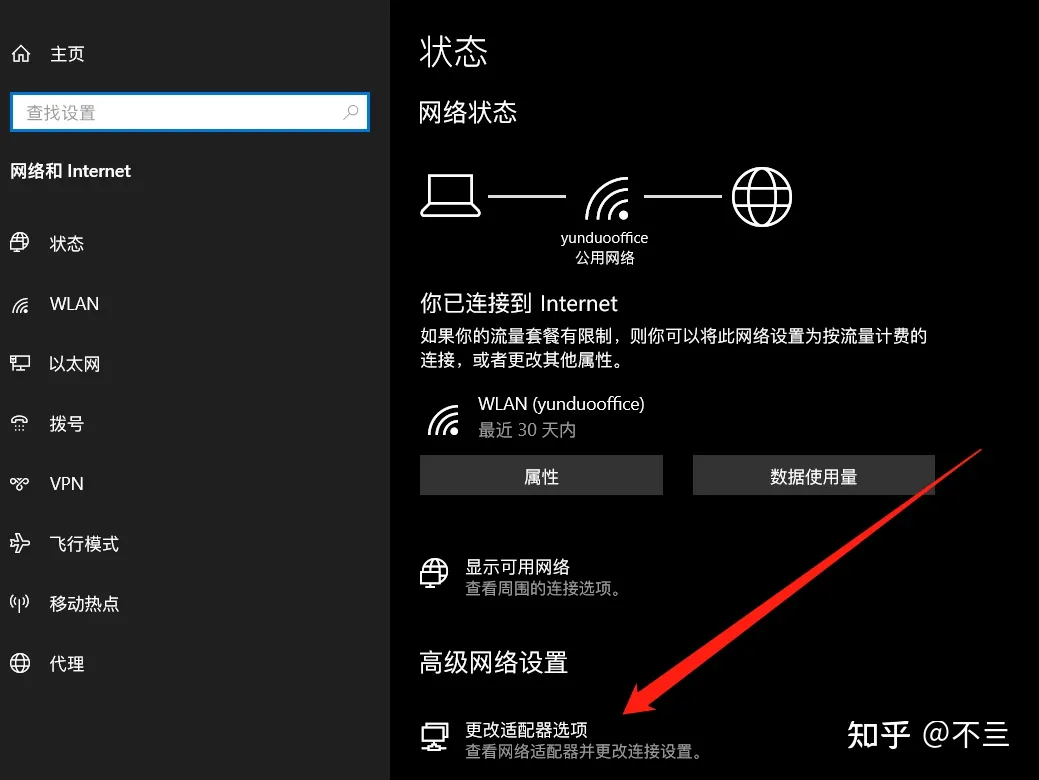
<3> Right - click the “WLAN” icon and select “Properties” (if you are connected via Ethernet, you need to change the properties of “Ethernet”. Just change the properties of the network you are using).
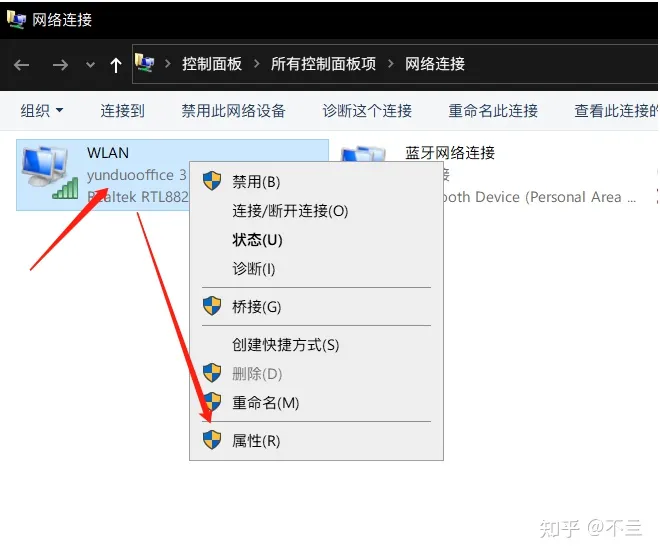
<4> In the properties, select “Internet Protocol Version 4 (TCP/IPv4)” and double - click to open it. Change the DNS from “Obtain automatically” to “Manual input”, enter a set of DNS, and save it.
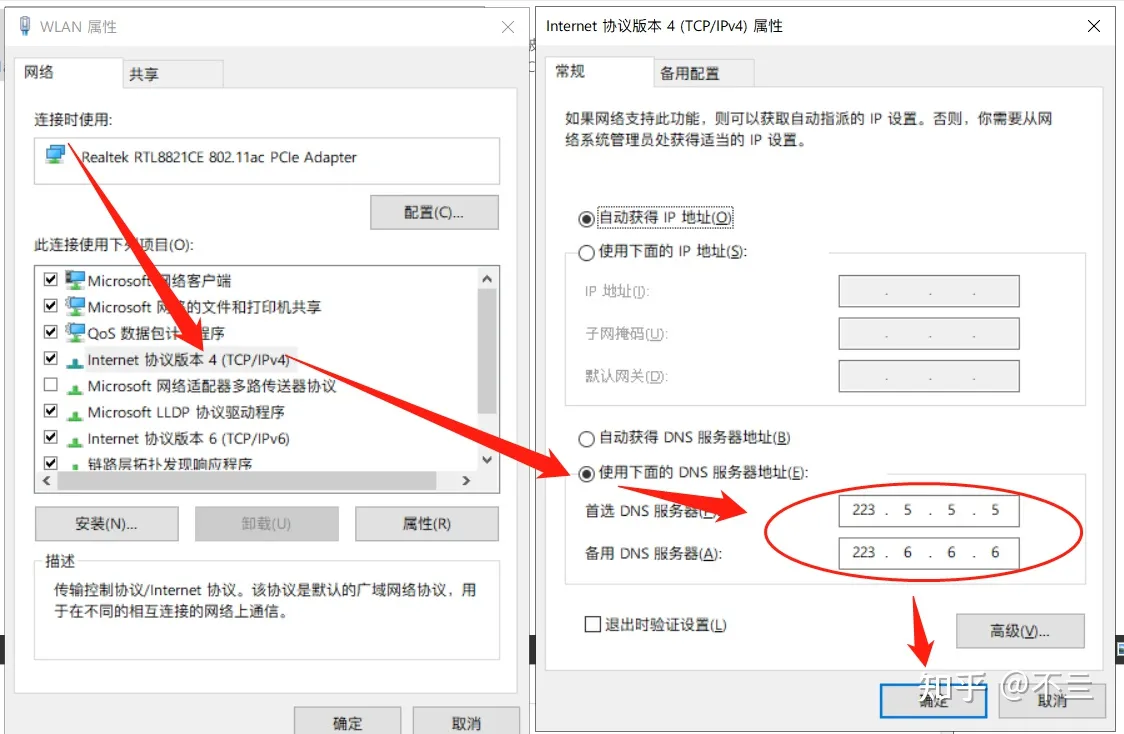
Common public DNS
Tencent: 119.29.29.29
Alibaba: 223.5.5.5, 223.6.6.6
③ If the problem still cannot be resolved after changing the DNS as described above, please use the following method:
<1> Open the following detection website link in your browser
https://ping.huatuo.qq.com/thirdpush.xiaoeknow.com
<2> After all the content data on the page has finished loading, click the blue button “Copy result URL for sharing”
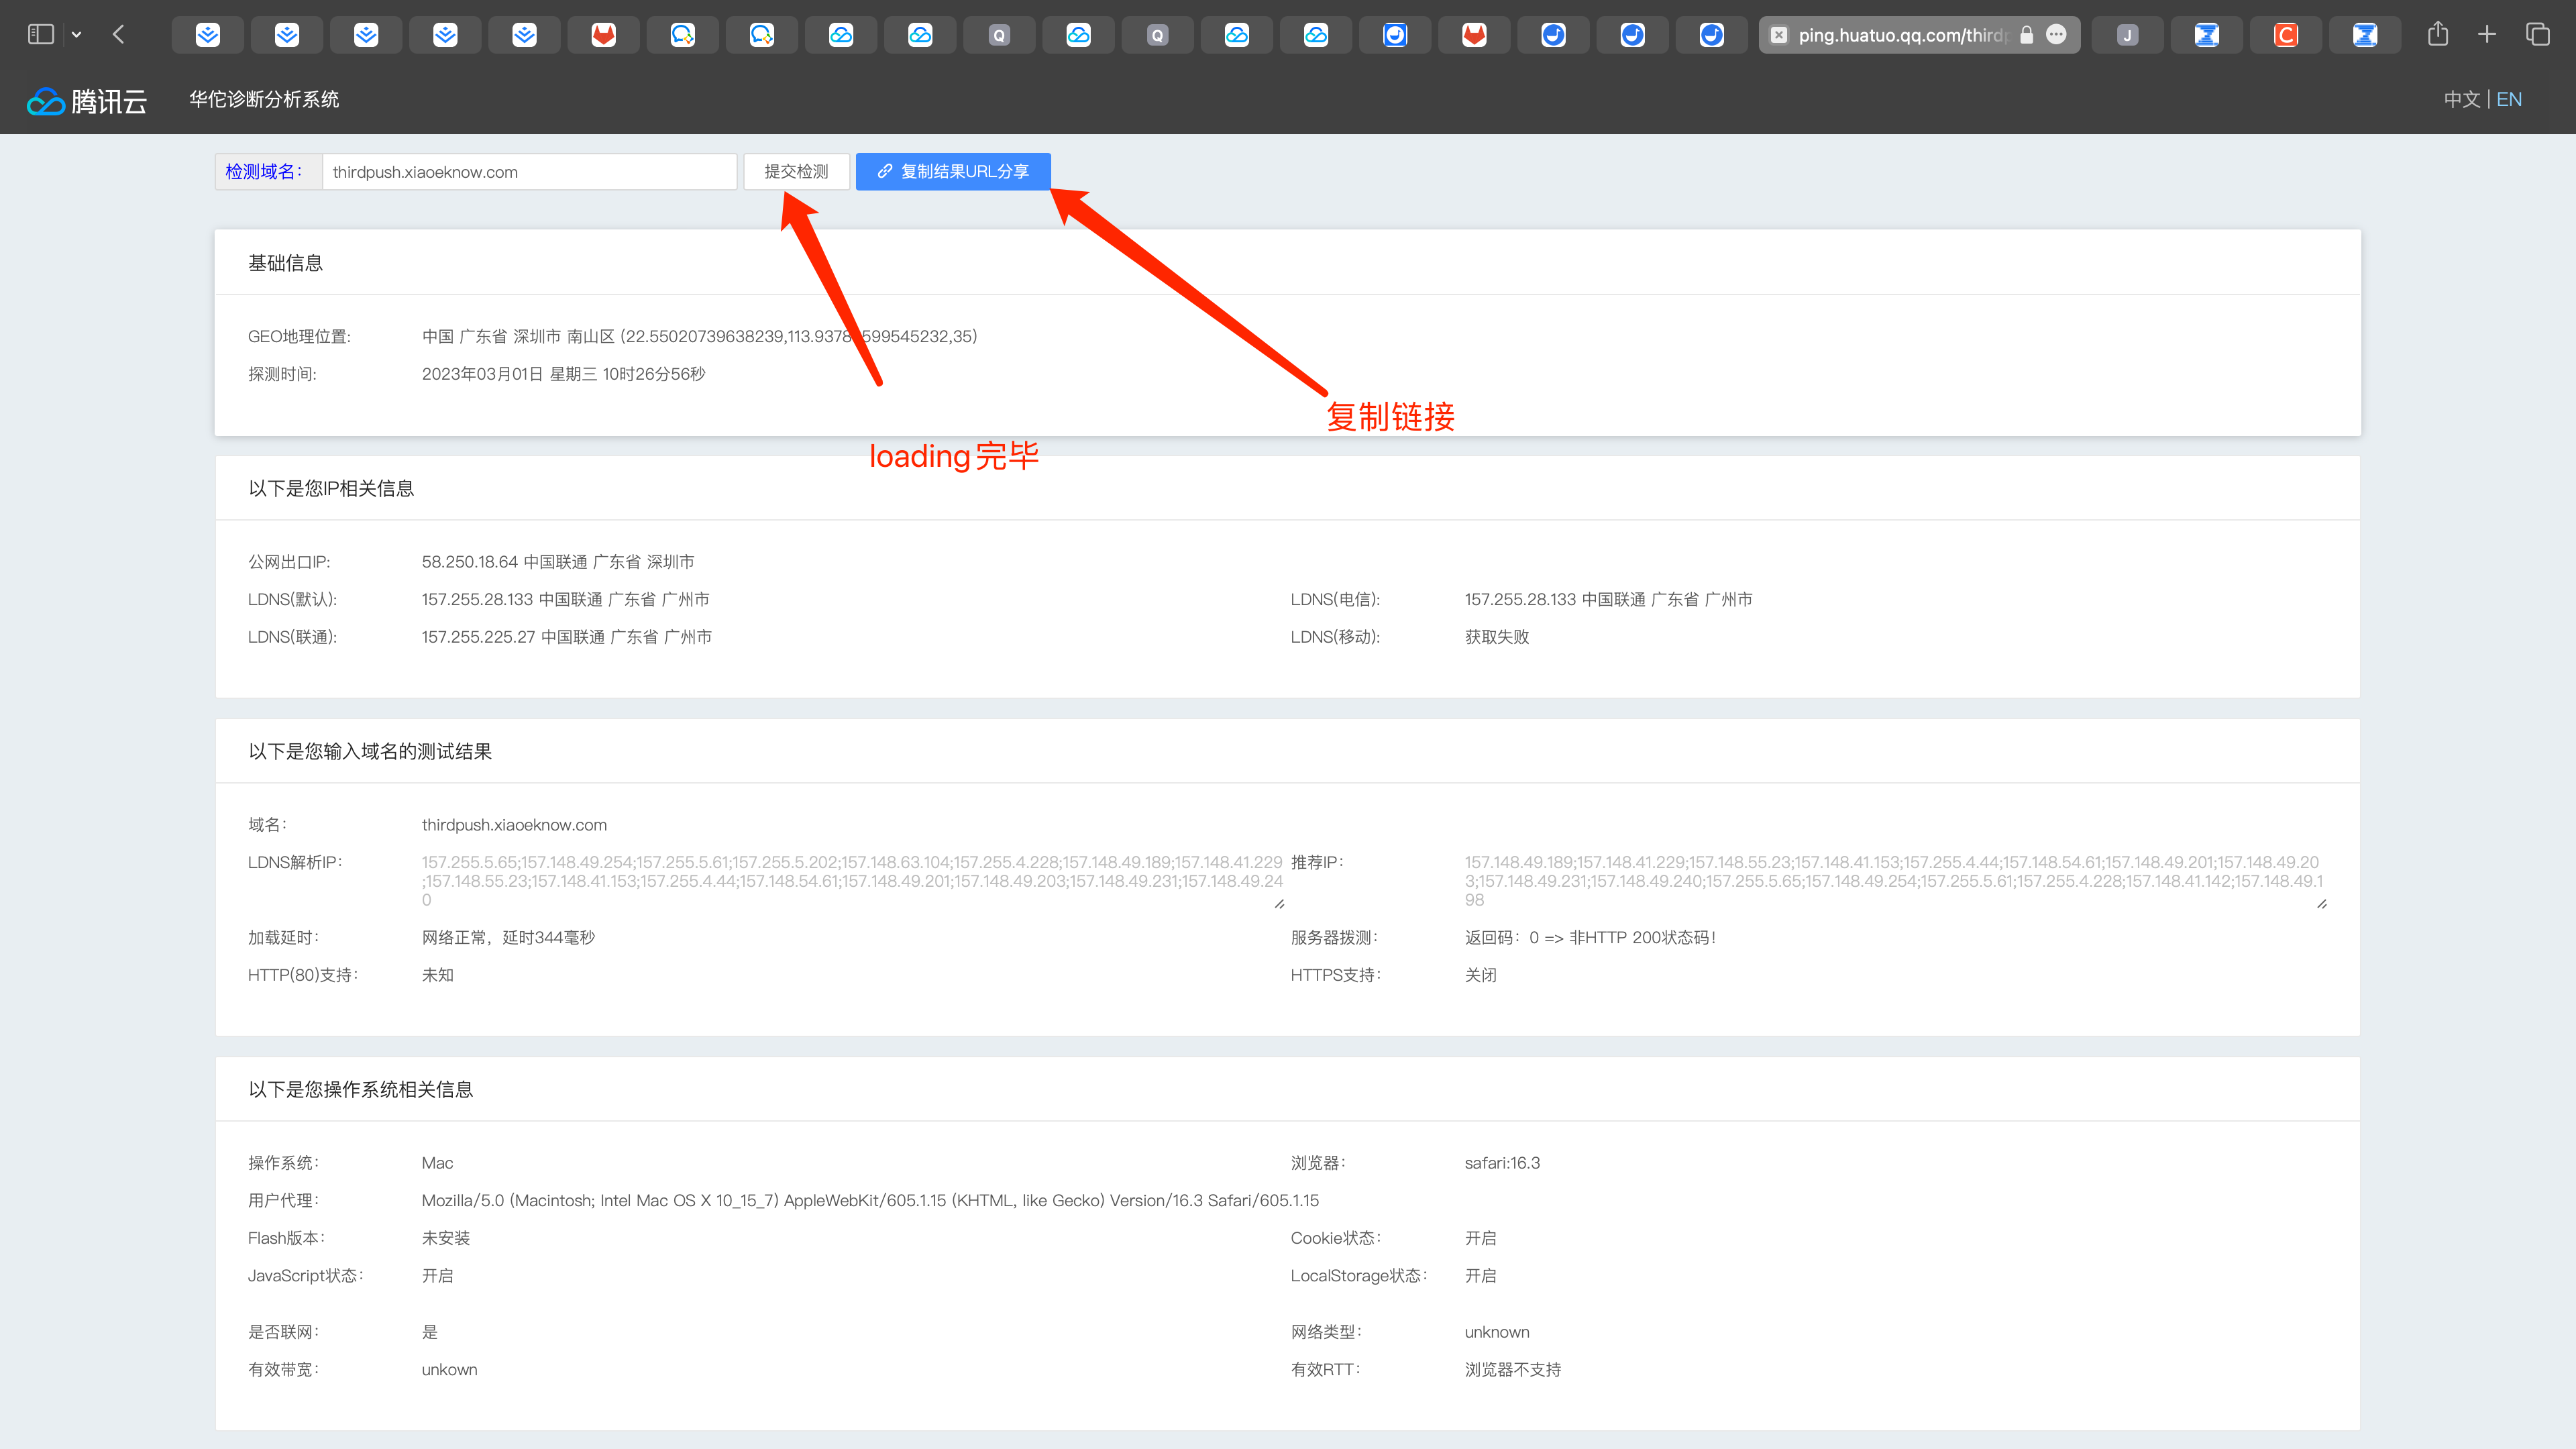
<3> Send the copied content to your service manager, and the service manager will perform further troubleshooting for you.
What is a streaming key?
The OBS streaming code refers to the streaming address and streaming password used by the anchor to push the locally captured audio and video streams to the media server, ensuring a one-to-one correspondence between your live content and your live streaming room.
The streaming code is generally divided into two parts: the RTMP address and the stream key. Enter them in the following locations in OBS:Server and Stream Key.
What should the instructor do if they need a break during the live stream?
When the instructor of the desktop sharing live stream needs to take a break, after notifying the students, click 'Stop Streaming' in the OBS software. To resume the live stream, click 'Start Streaming'.
Note: Please ensure that the live stream has not reached the current end time.
Voice live broadcast
Does voice live streaming support progress seeking?
Yes, you can drag the progress bar during playback.
During a PPT live stream, will the students' PPTs follow the instructor's flipping actions?
There are two scenarios:
1. If the instructor sends voice after flipping the PPT, the courseware will flip accordingly when the learner plays this voice message.
2. If the instructor flips the PPT but does not send voice, the PPT on the learner's end will not flip accordingly.
How to sort the uploaded PPT images?
As shown in the figure: Drag the courseware images at the bottom of the PPT courseware to adjust the order.
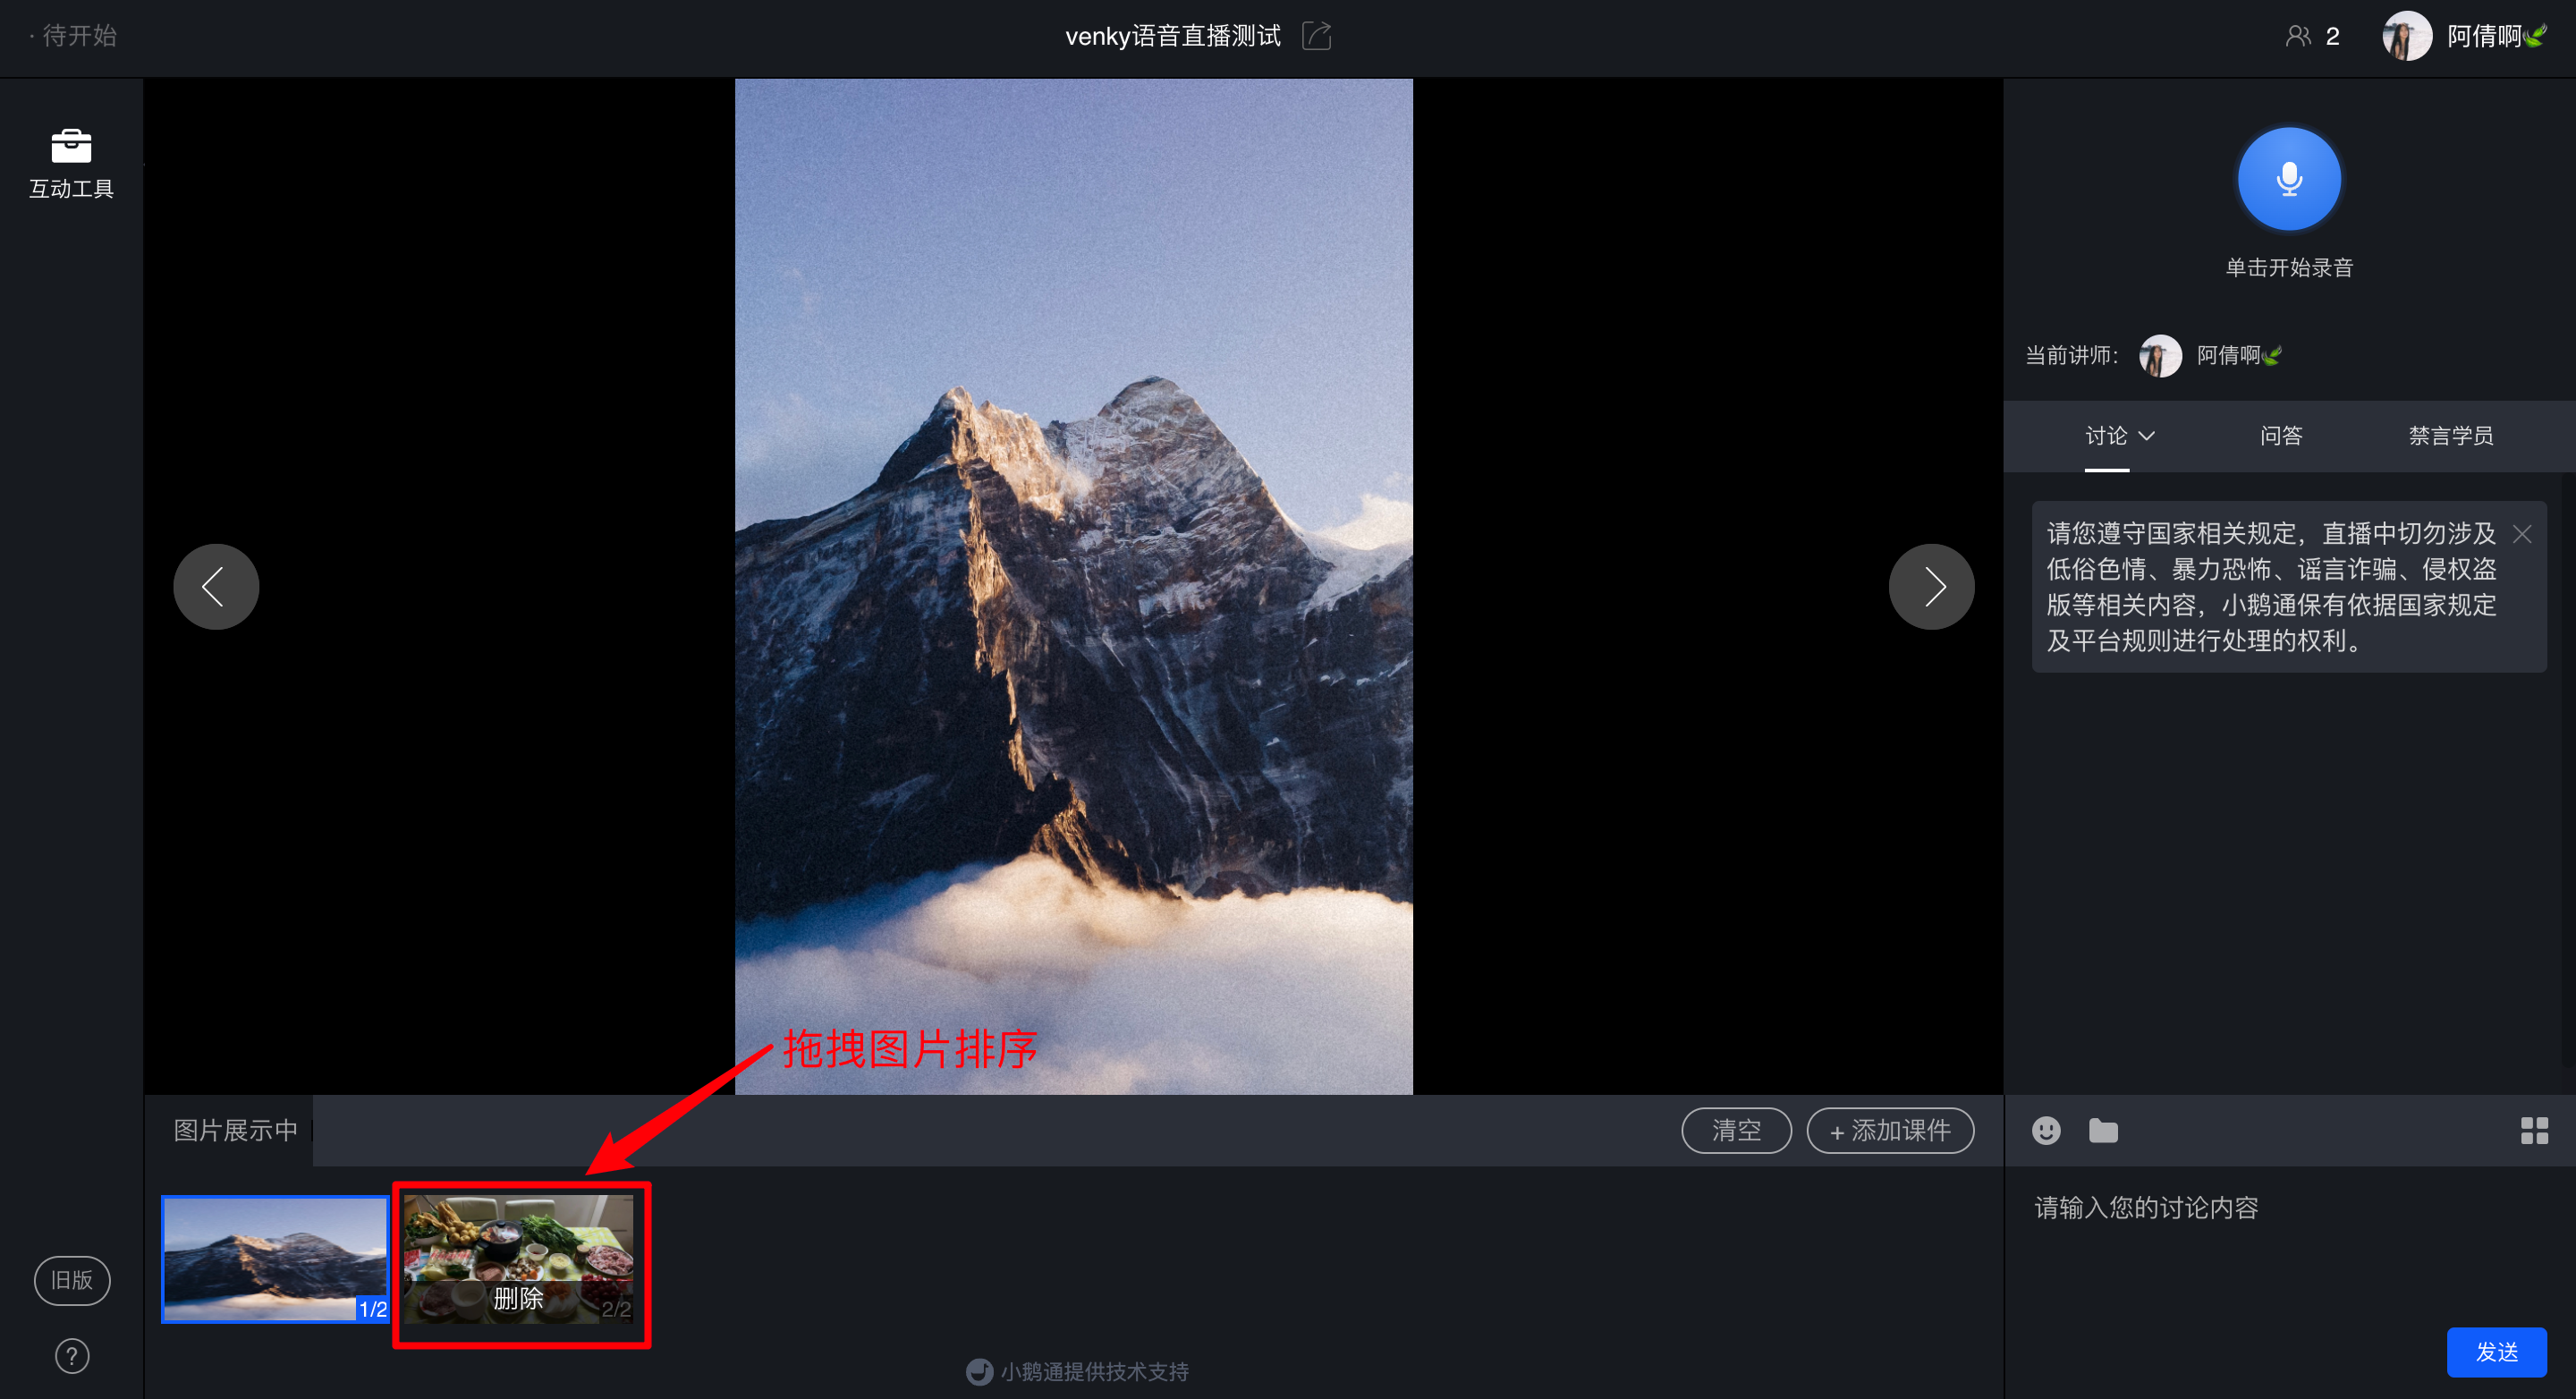
What is the supported size for PPT images uploaded during PPT live streaming?
Each image should be within 2MB, and there is no limit on the total size.
How to bind voice to PPT in PPT live streaming?
The instructor clicks on the PPT image to be used, records and sends the voice, then the binding is successful. After successful binding, when the student plays this voice, the courseware will jump to the corresponding page.
Other instructions:
1. PPT live streaming does not support the binding of text and PPT images.
2. If the instructor deletes a PPT image that has already been bound to a voice, the originally bound voice will no longer belong to any image. That is, when the voice is clicked, the PPT display area will not jump.
3. If the order of the PPT images is adjusted after uploading, the bound voice will still follow the bound PPT image and will not be affected.
4. It is recommended that the instructor check in advance whether the PPT display effect meets the expectations after uploading the PPT images to avoid the influence of factors such as font size on the PPT display effect.
5. When the instructor answers the questions of the audience using voice, the answer will also be bound to the current PPT image.
How to handle the issue of excessively long transcoding time for recorded broadcasts?
Recorded videos are uploaded to Tencent Cloud for transcoding. If the video shows as being transcoded for an extended period, please contact customer service for priority handling.
Time reference: Generally, it takes less than 30 minutes to process a 1G video.
What should I do if the transcoding of the recorded live stream is not completed when starting a new live stream?
If the file is large, it is recommended that you upload the relevant recorded broadcast one day in advance.
If the live stream is about to start but the transcoding of the recorded broadcast is not completed, you can contact customer service for priority processing (since processing also takes a certain amount of time, it is also recommended that you contact customer service one hour in advance).
Tutorial on Using Voice Live Streaming
I. Function Introduction
Students can participate in the live voice broadcast in real - time. Teachers can explain course content with courseware in the live - broadcast room and interact with students by sending voice, text, courseware, and videos in real - time.
II. Purpose of Use
The voice broadcast - courseware mode is a relatively lightweight live - broadcast form, suitable for live - broadcast content that does not require a camera. Merchants can upload courseware and send voice and other content in the live - broadcast room to interact with students.
III. Usage Scenarios
It is suitable for live broadcasts with a large amount of voice, text, and pictures. After uploading text & courseware, instructors can explain in the form of voice.
IV. Operation Path
Merchant side: Merchant background → Create voice live broadcast → Start live broadcast
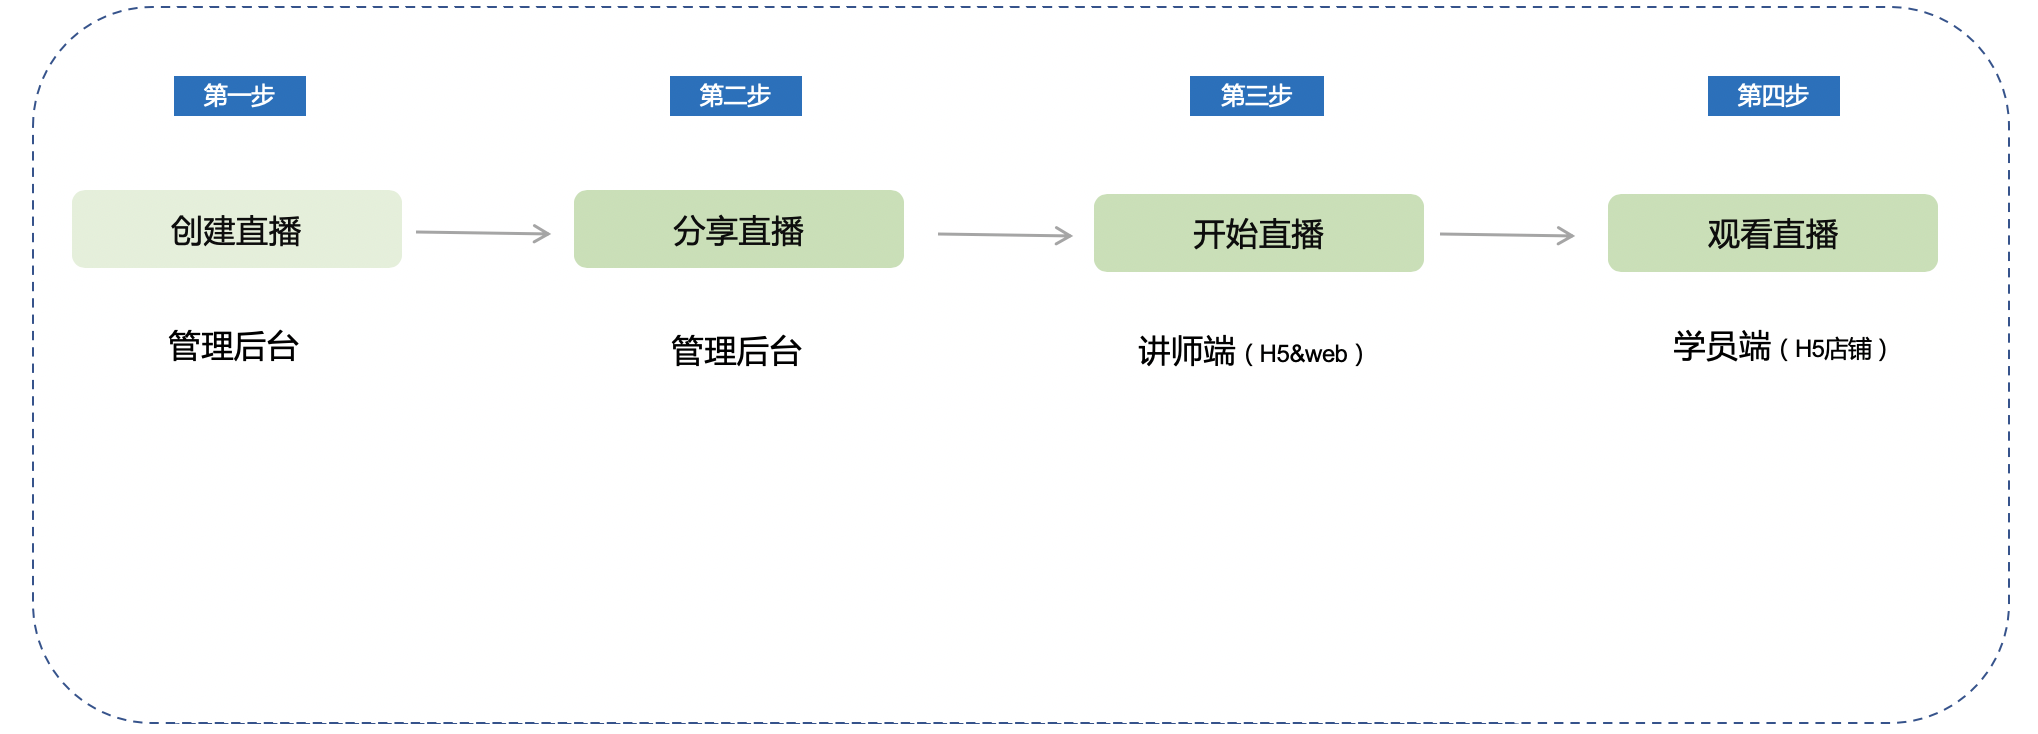
V. Usage Tutorial
Step 1: Create a live broadcast (Management background)
1. Enter the store management background, click [Live broadcast] - [New live broadcast];
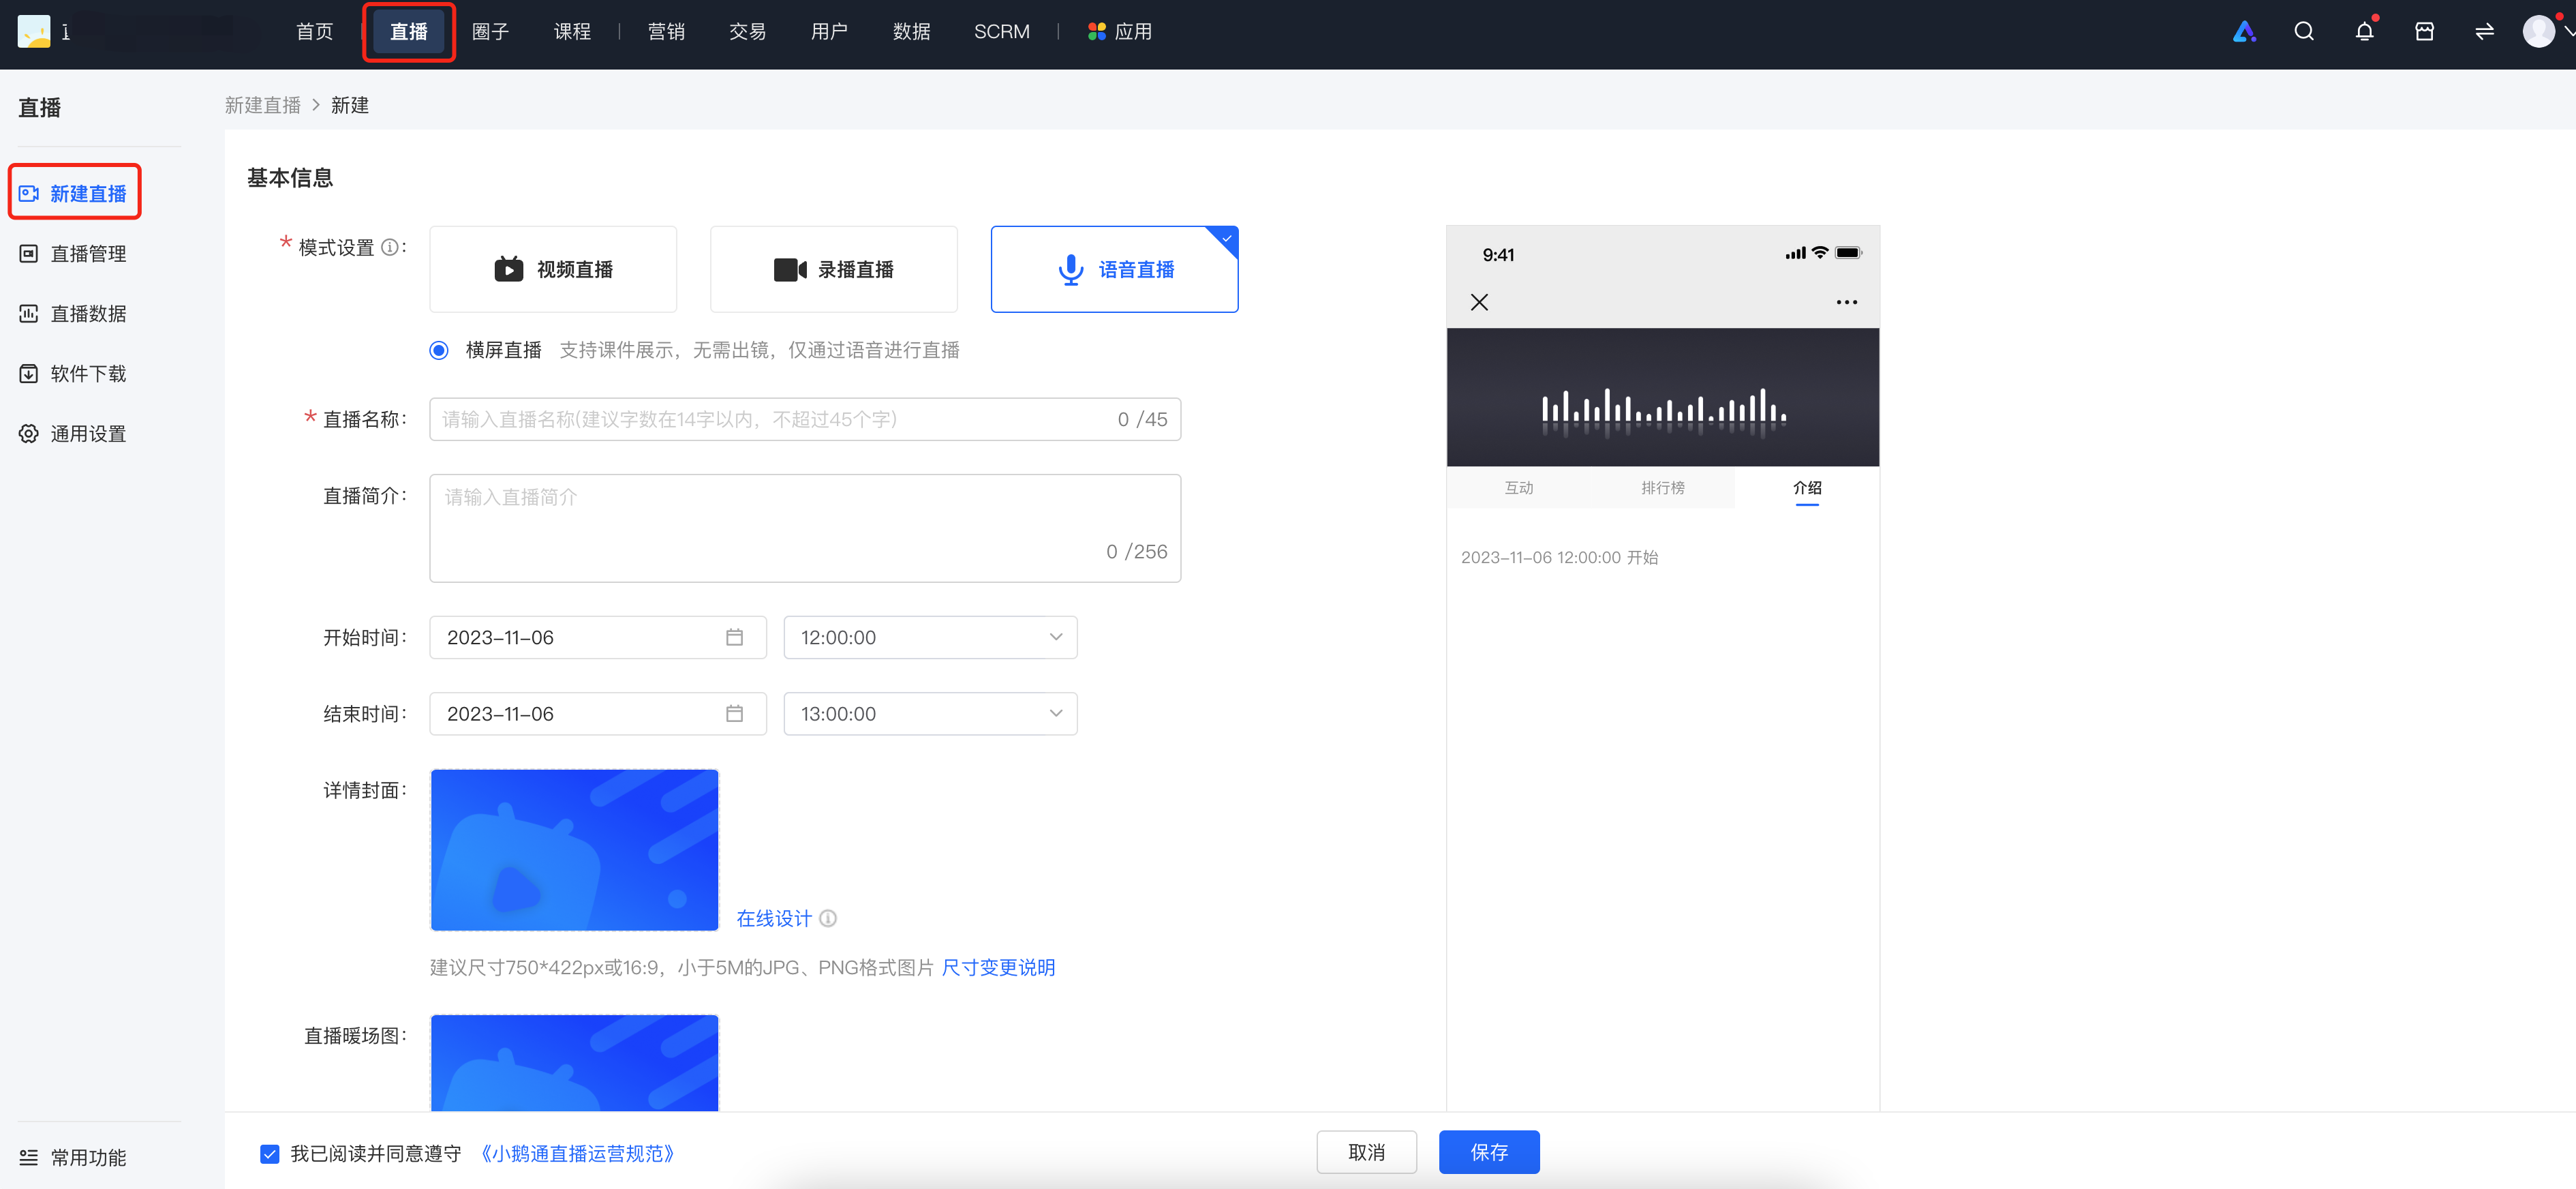
2. Select the [Voice Live Broadcast] mode, fill in relevant information (basic information, product information, listing settings), and click Save to complete the creation of the live broadcast;
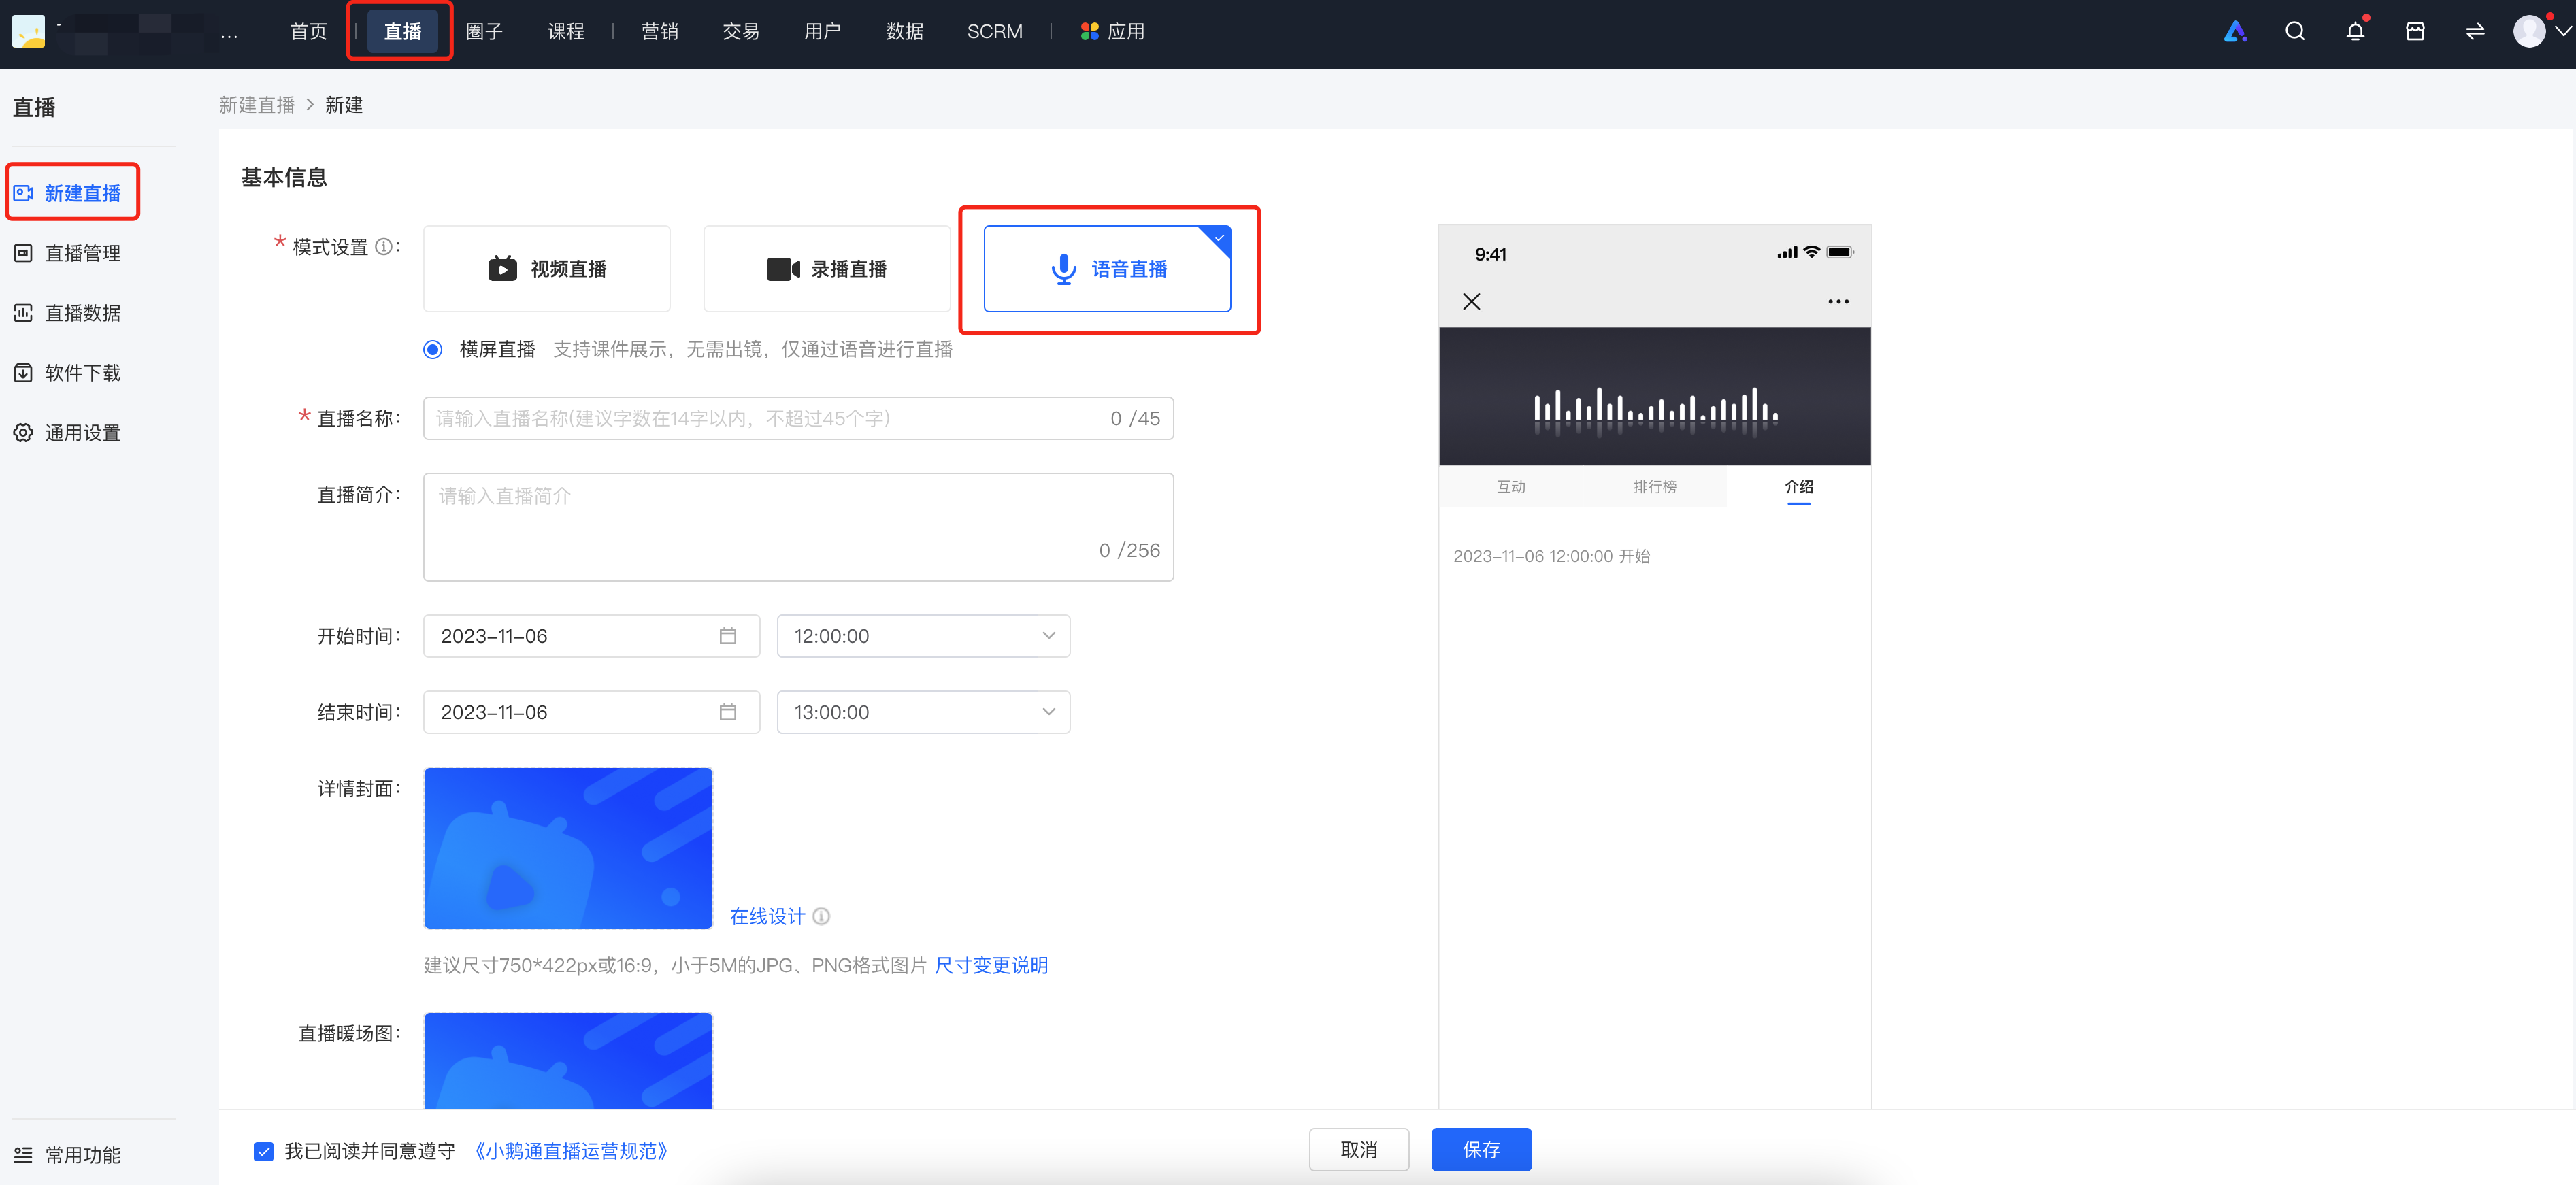
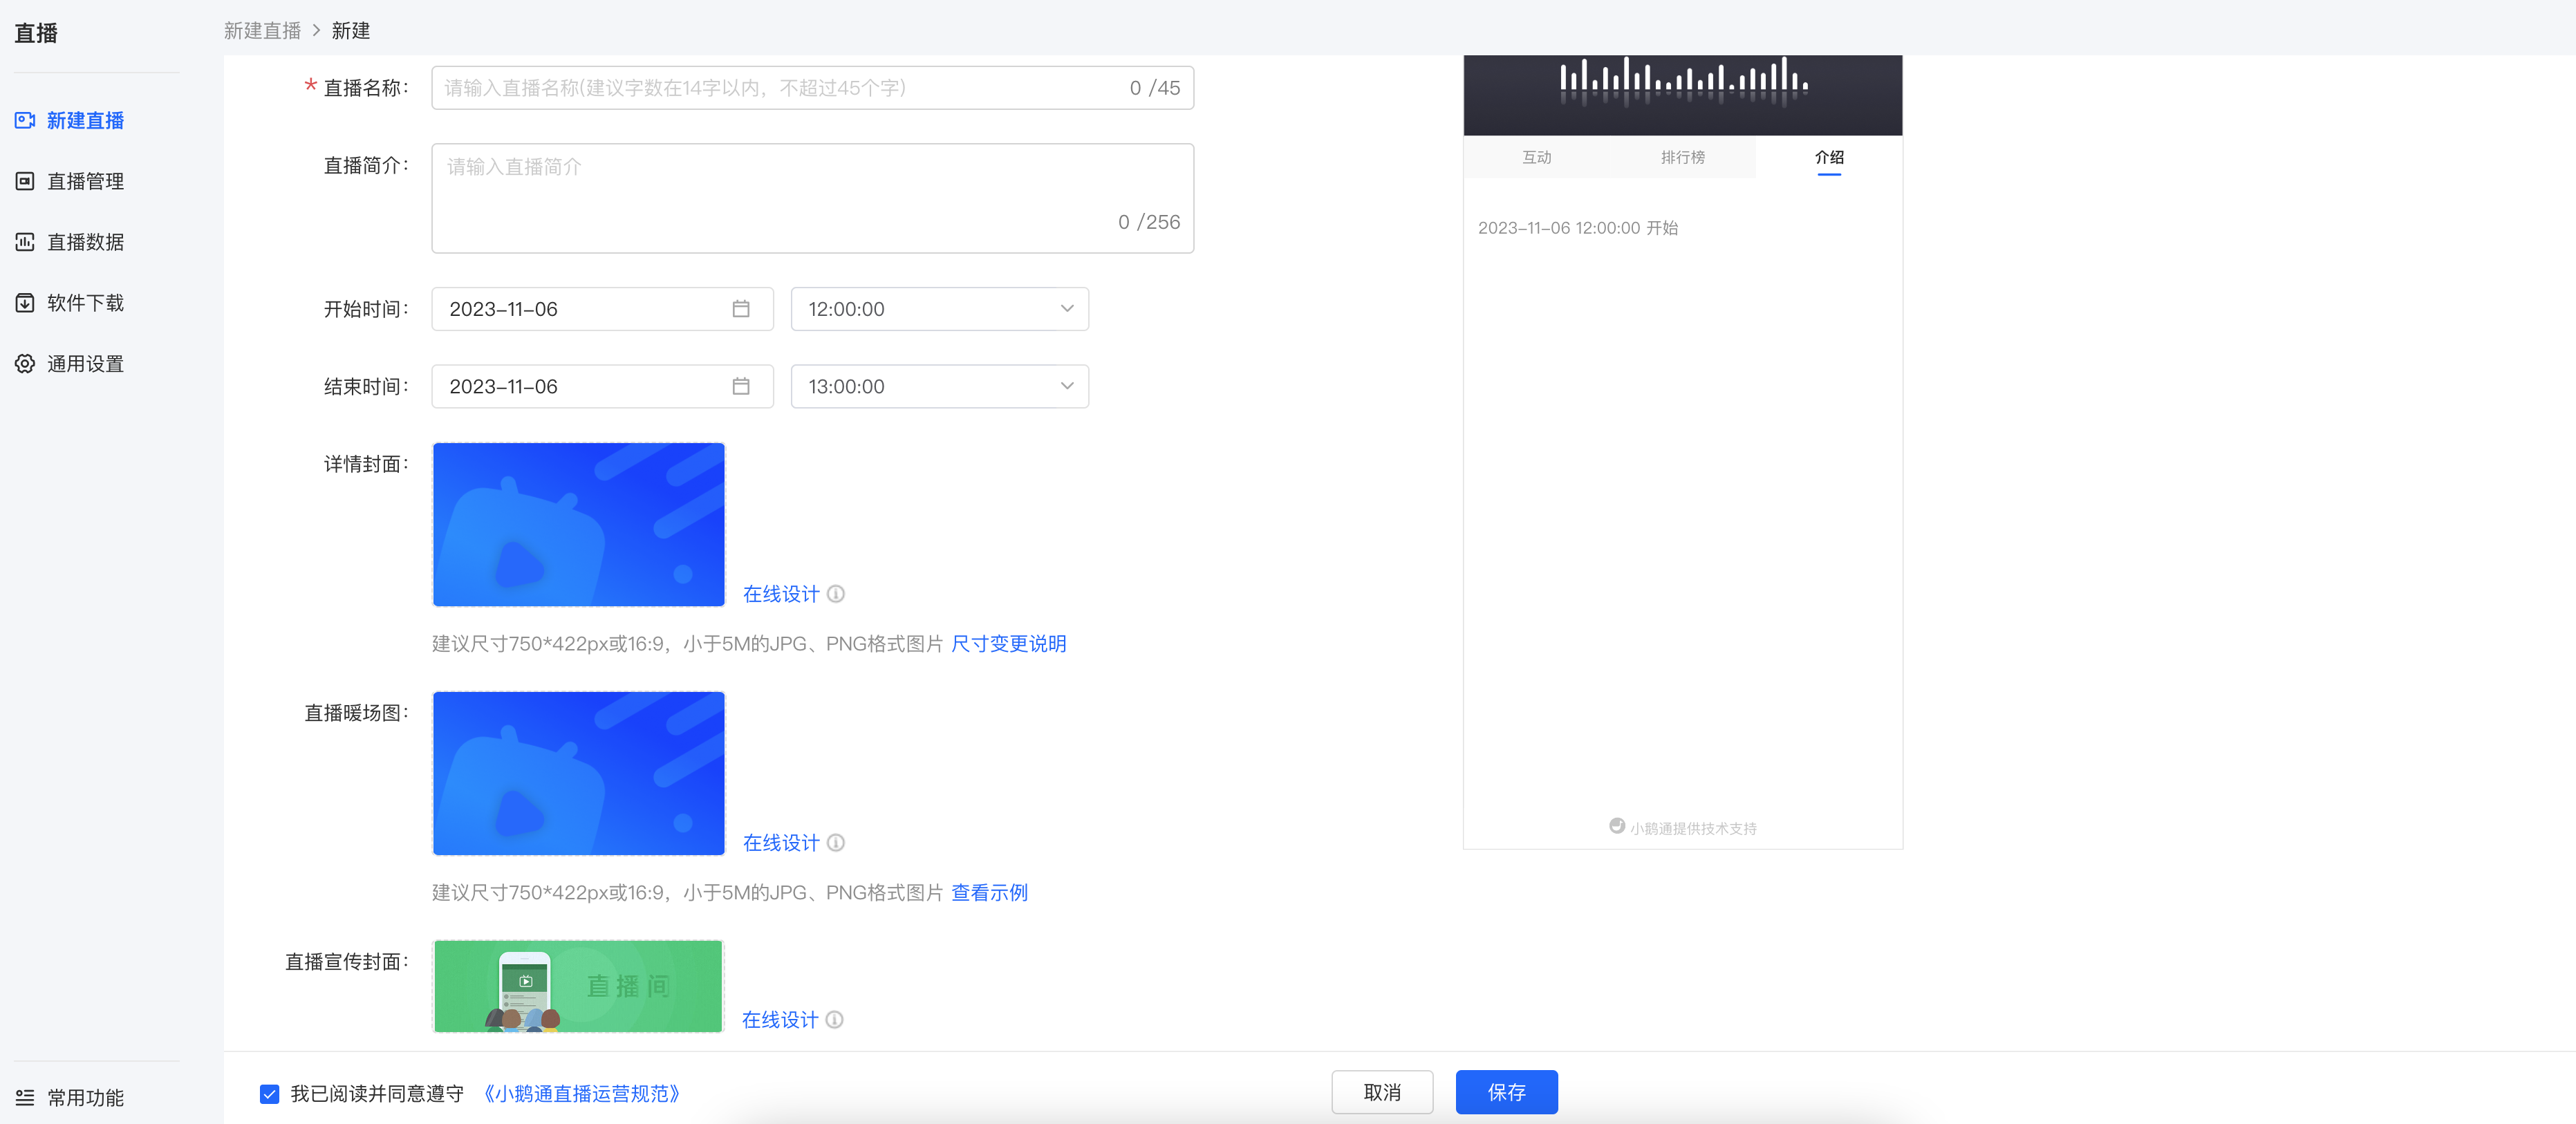
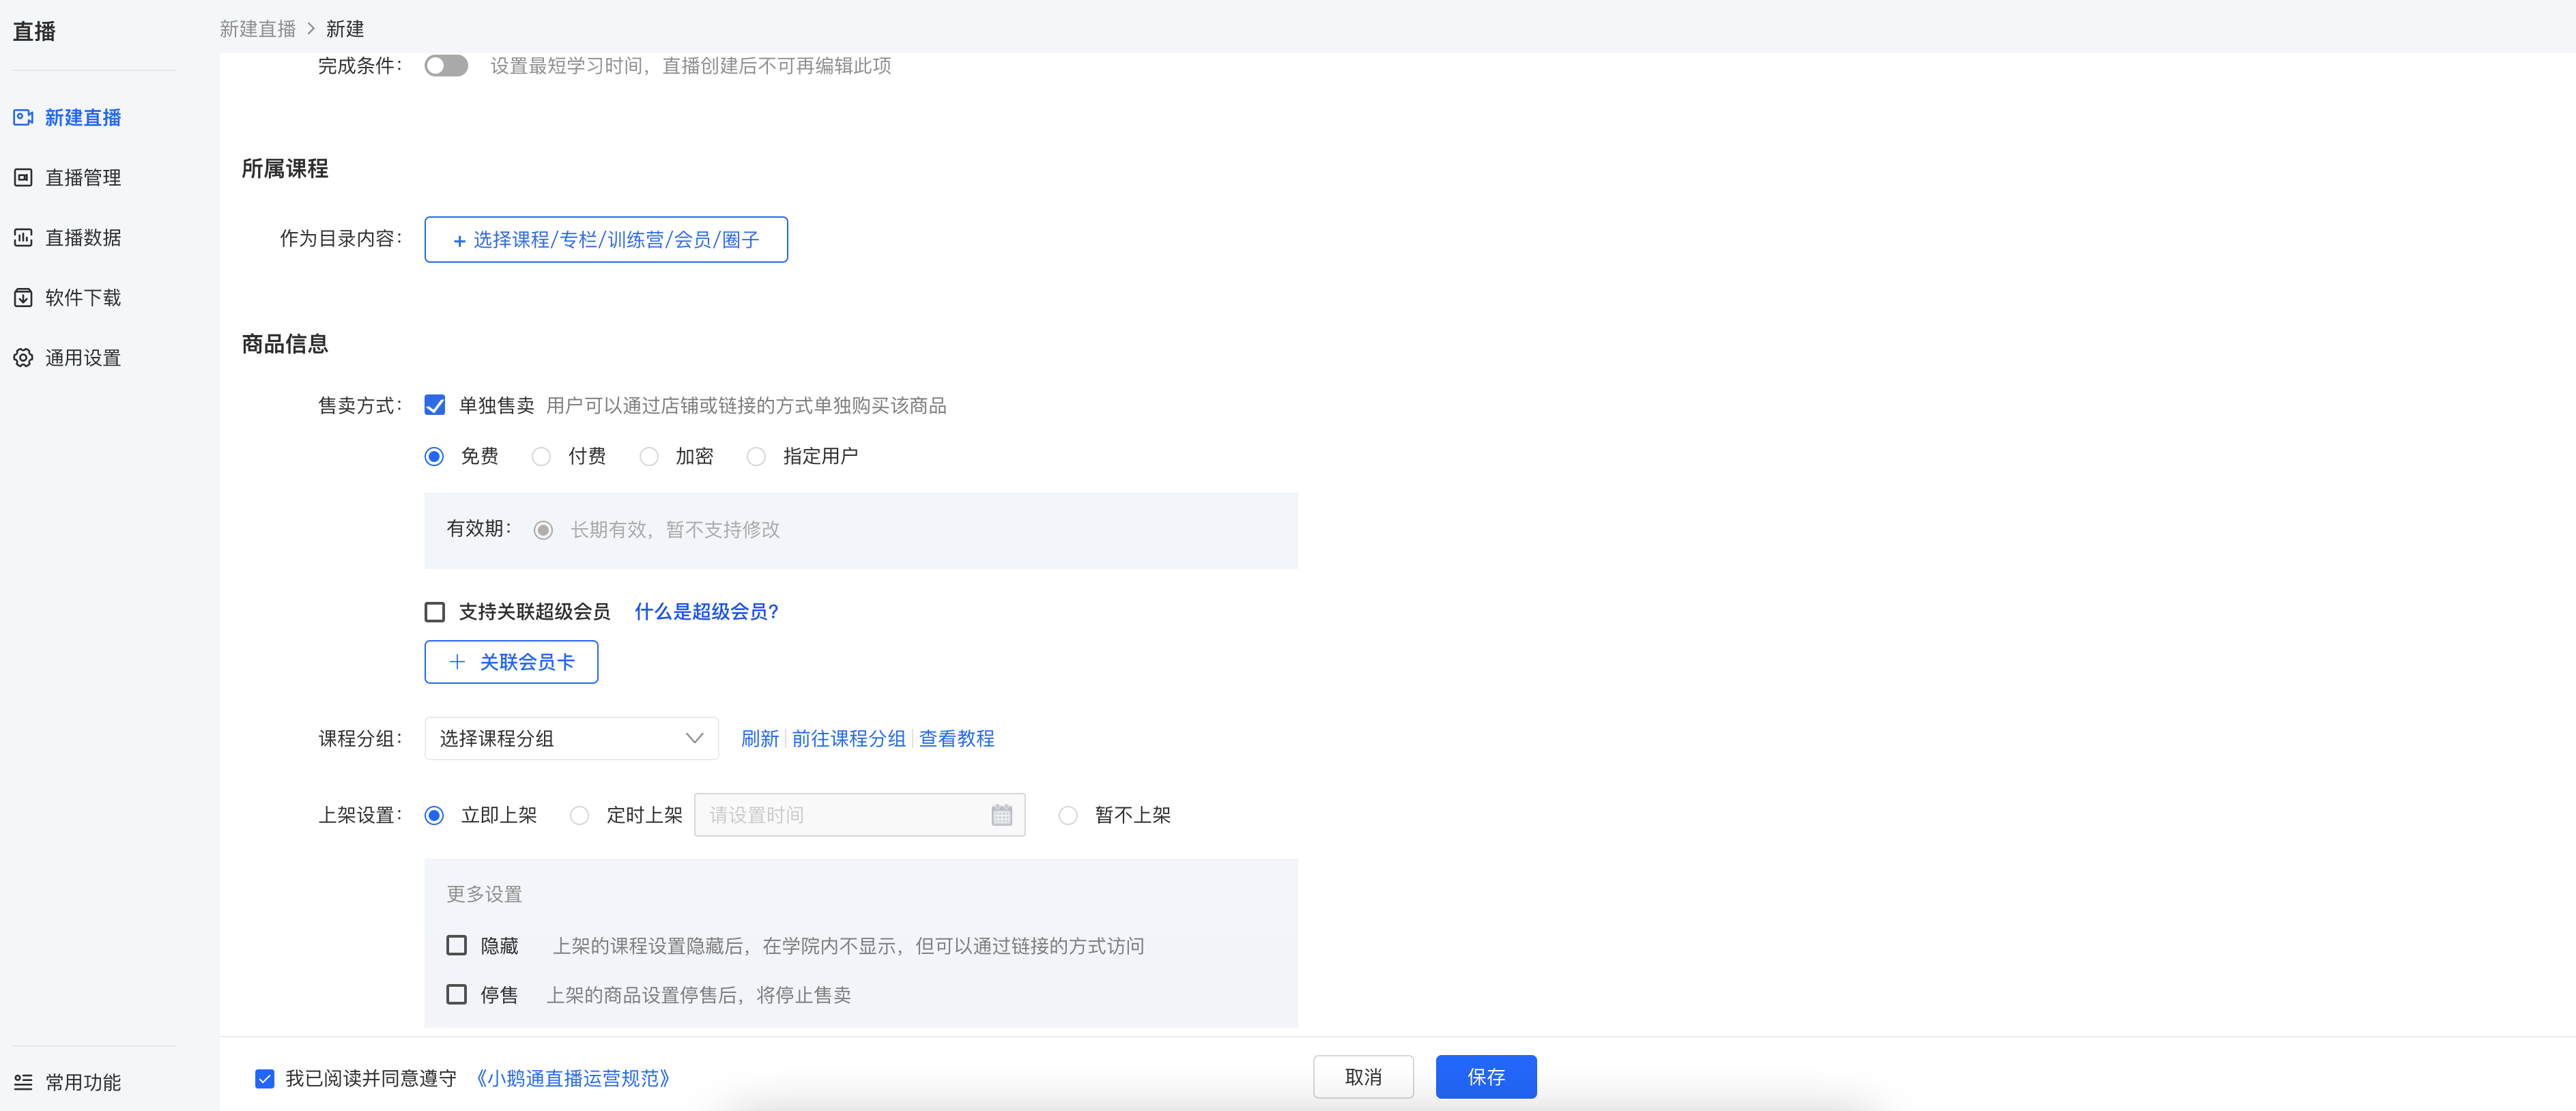
1. After the creation is completed, on the live - broadcast details page, click the [Share] button to get the QR code and link of the live - broadcast room, and share them with students;
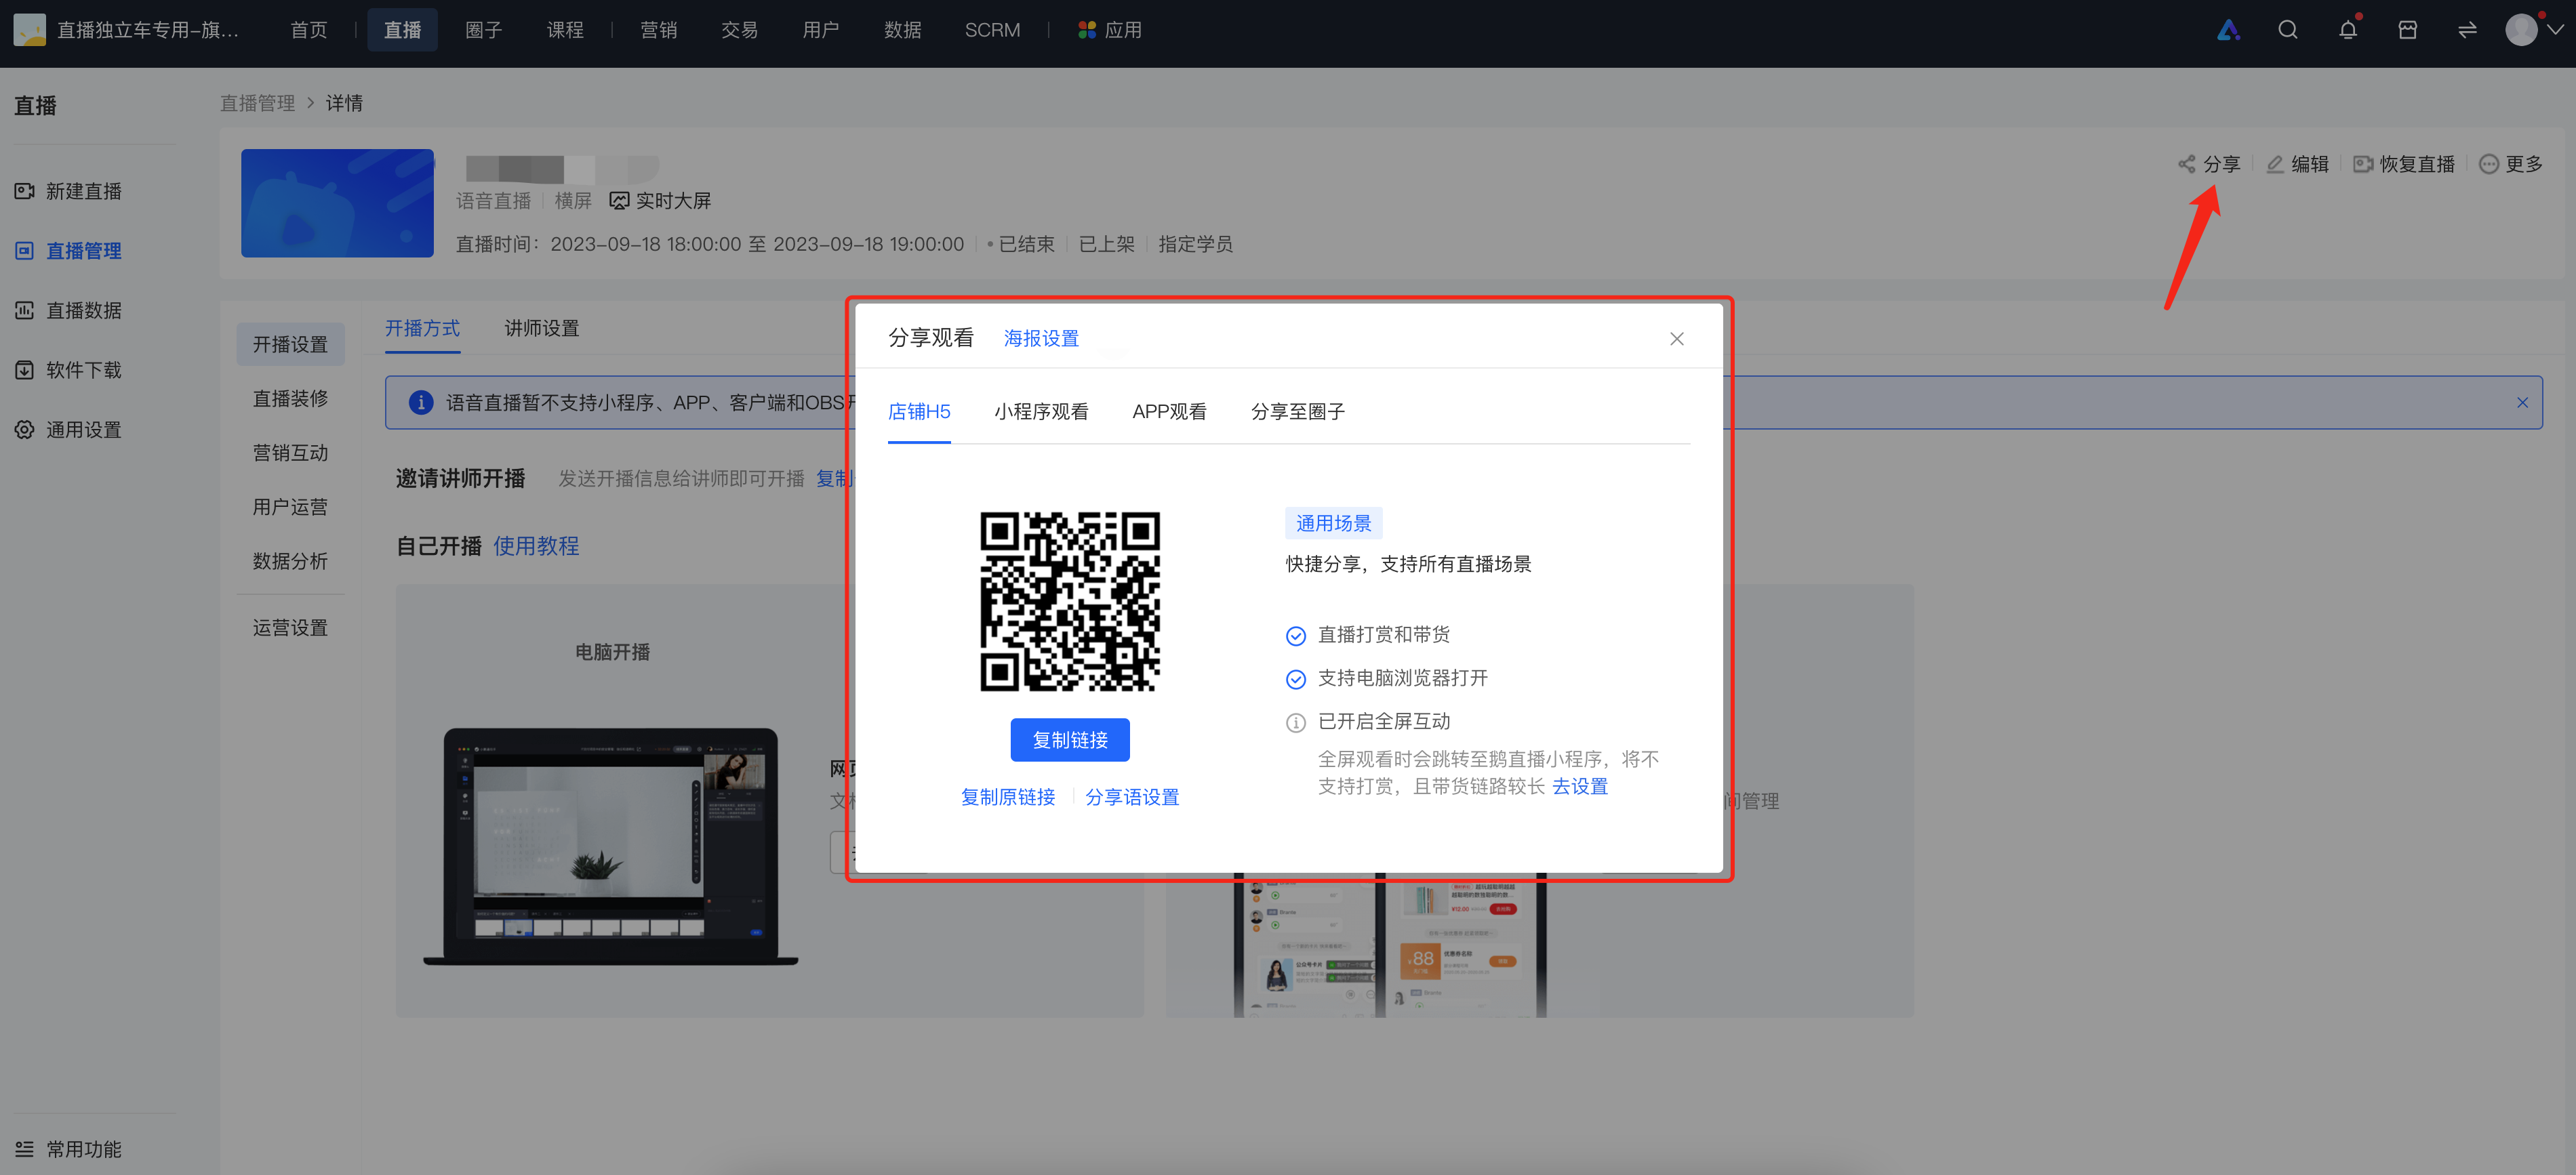
2. H5 - end sharing
On the mobile - phone side, you can get the live - broadcast invitation card and share it through channels such as Moments, WeChat groups, and Official Accounts
Method for creating an invitation card: [Live - broadcast room] → [Invitation influencer list] → [Click the share course button] → Long - press the picture to save → Send and share
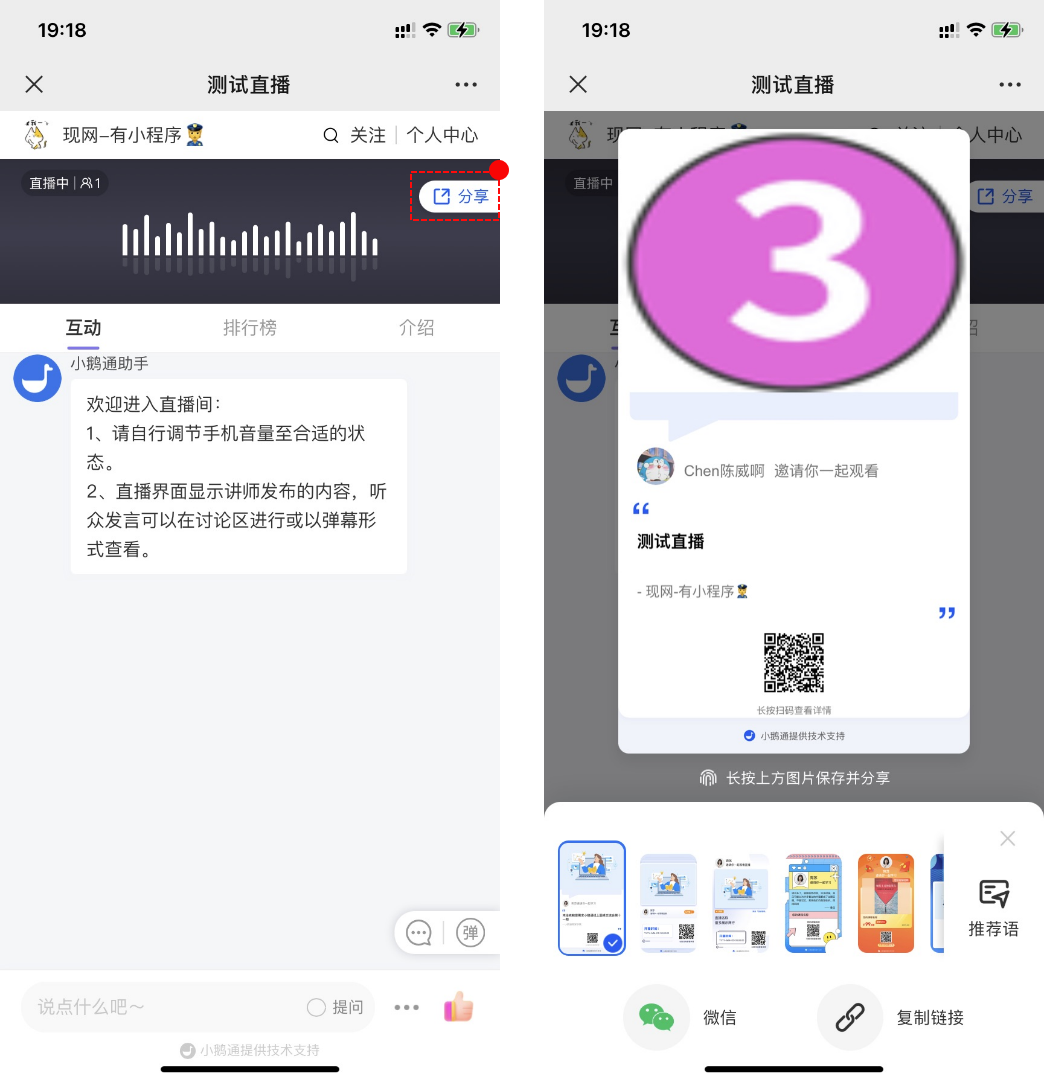
Step 3: Instructors start the live broadcast (H5, Web side)
1. Web - side voice live - broadcast room
(1) Enter the web live - broadcast room
After creating a voice live broadcast, the instructor clicks [Live - broadcast settings] - [Live - broadcast method] - [Start the live broadcast by myself], selects the web side, opens the live - broadcast room address, scans the QR code with WeChat to log in, and then enters the live - broadcast room page, and clicks [Start live broadcast];
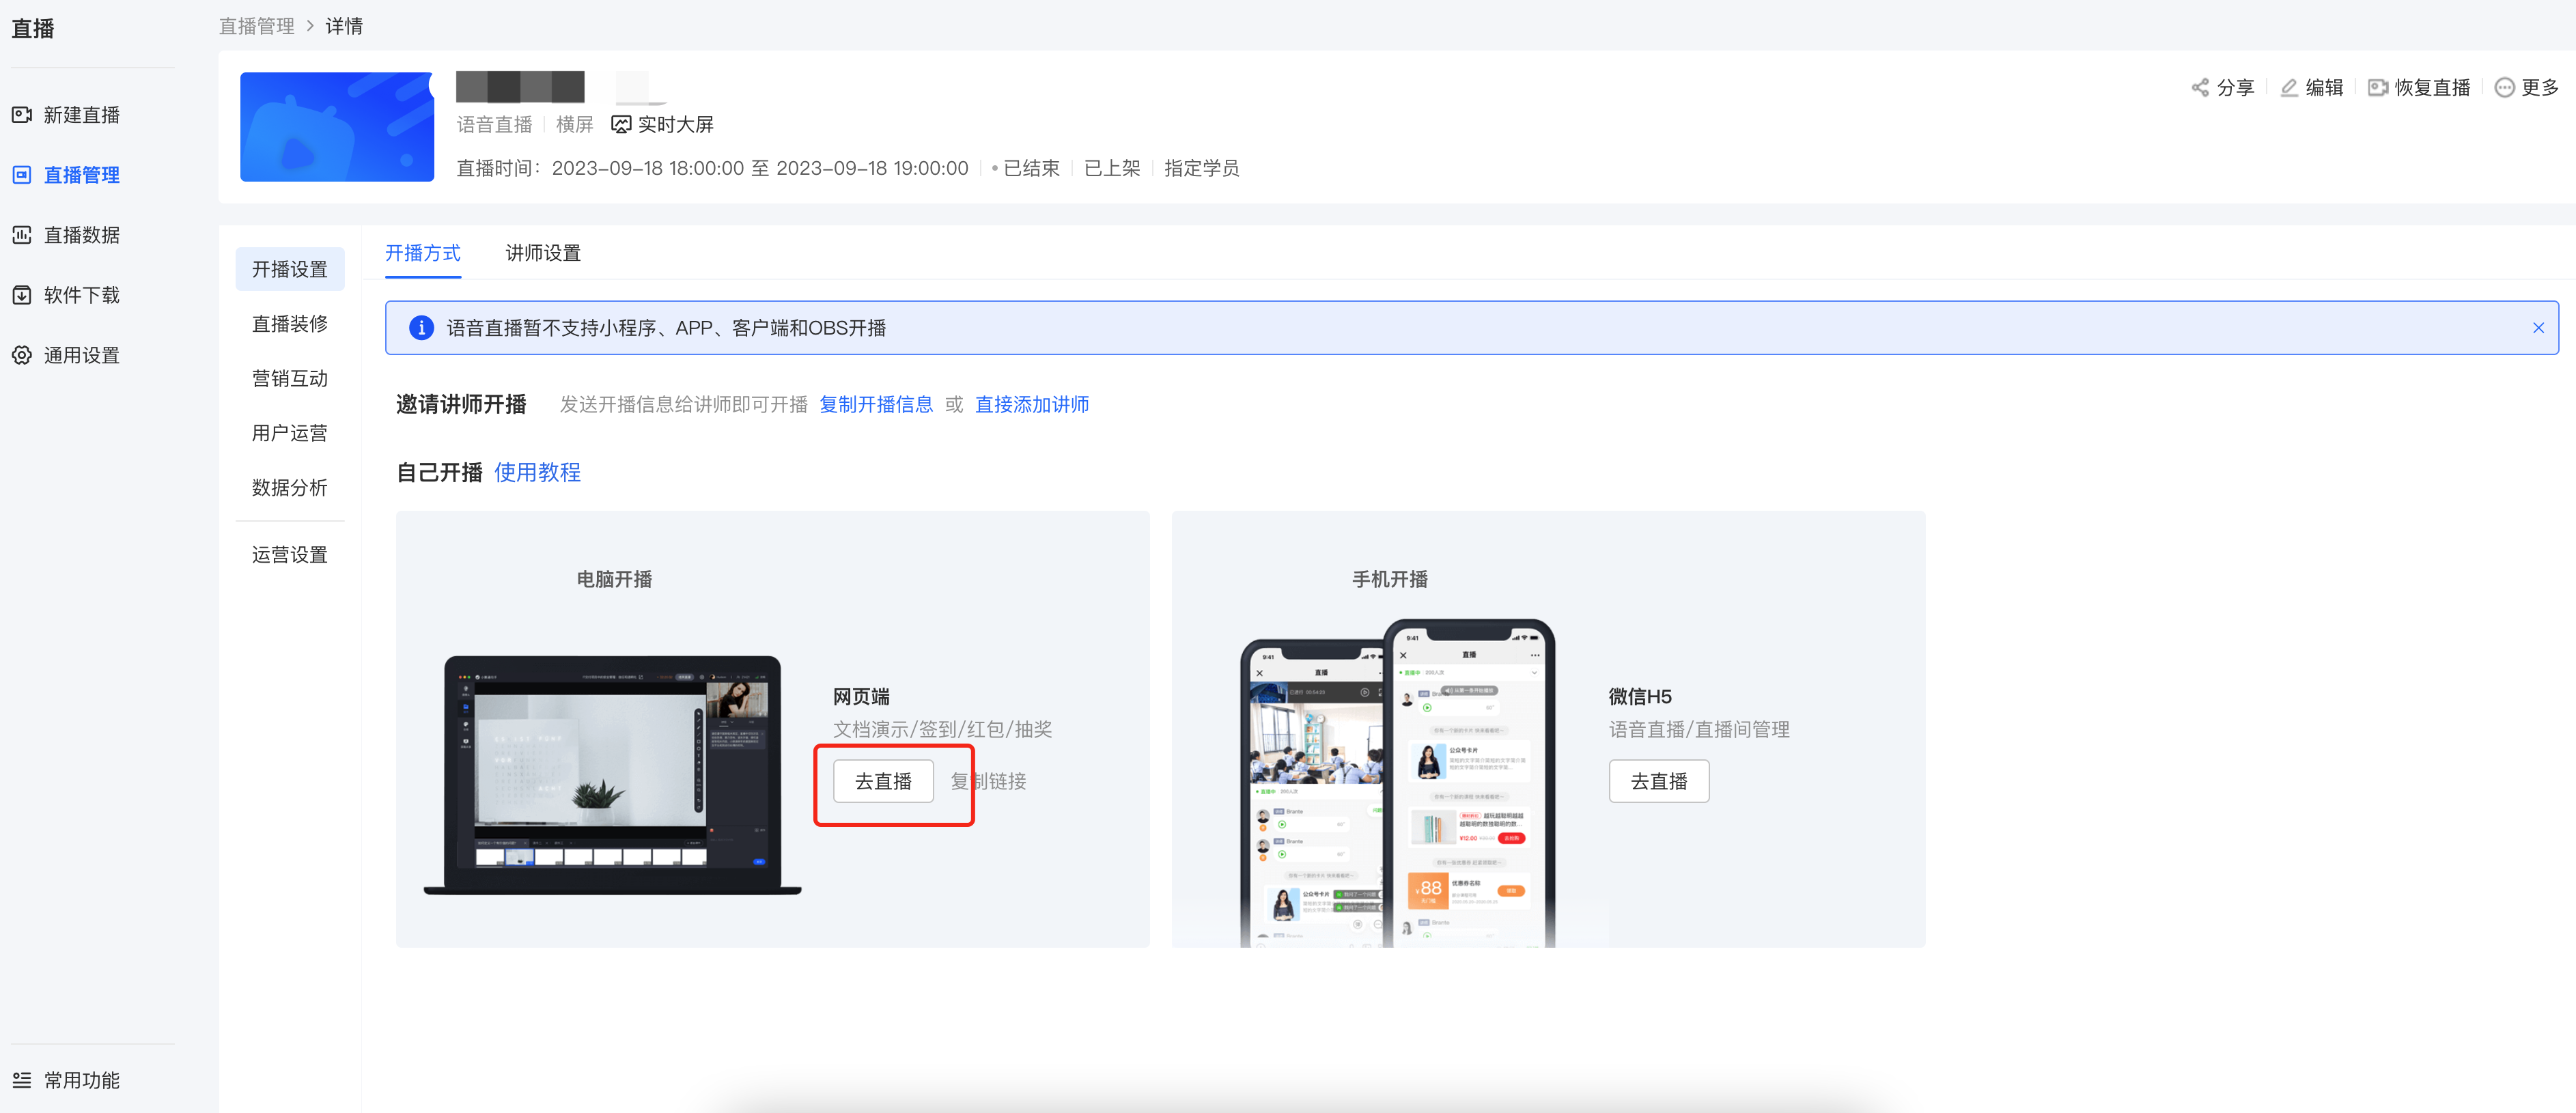
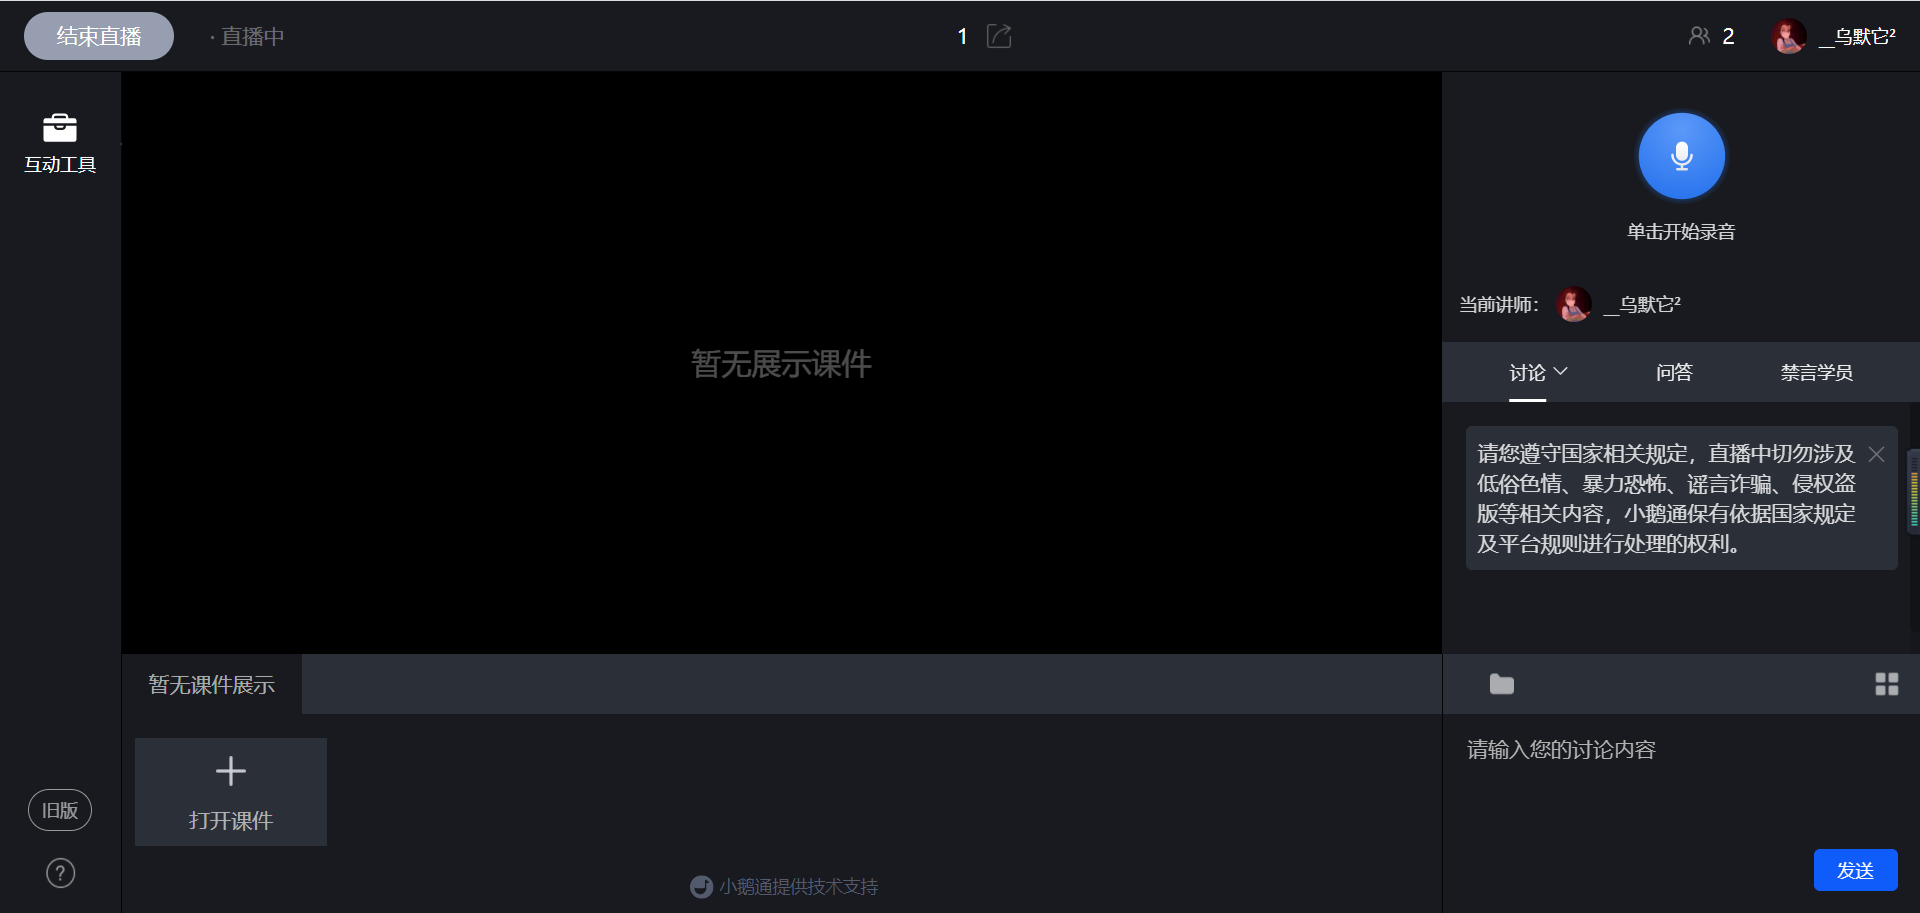
(2) Send voice
Click the microphone icon to start voice recording;
Click to end voice recording. Click [Complete] to finish voice recording, click [Cancel] to cancel sending;
After voice recording is completed, click the send button to send the voice, click [Cancel] to cancel sending
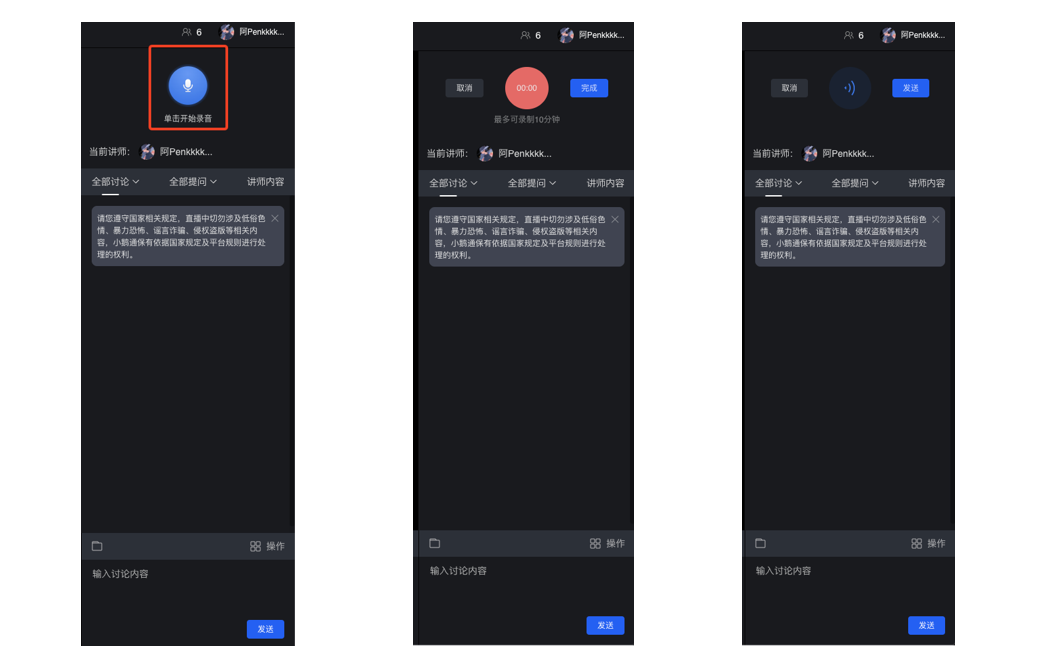
(3) Courseware display
Click [Open courseware] at the bottom of the live - broadcast room to upload pictures, supporting single - picture or multi - picture upload;
After uploading, click the left and right arrows in the courseware display area to turn pages, and the student side will synchronize the page - turning;
Click the [Folder] button in the lower - right corner to enter the material library, where you can upload and send files in other formats;
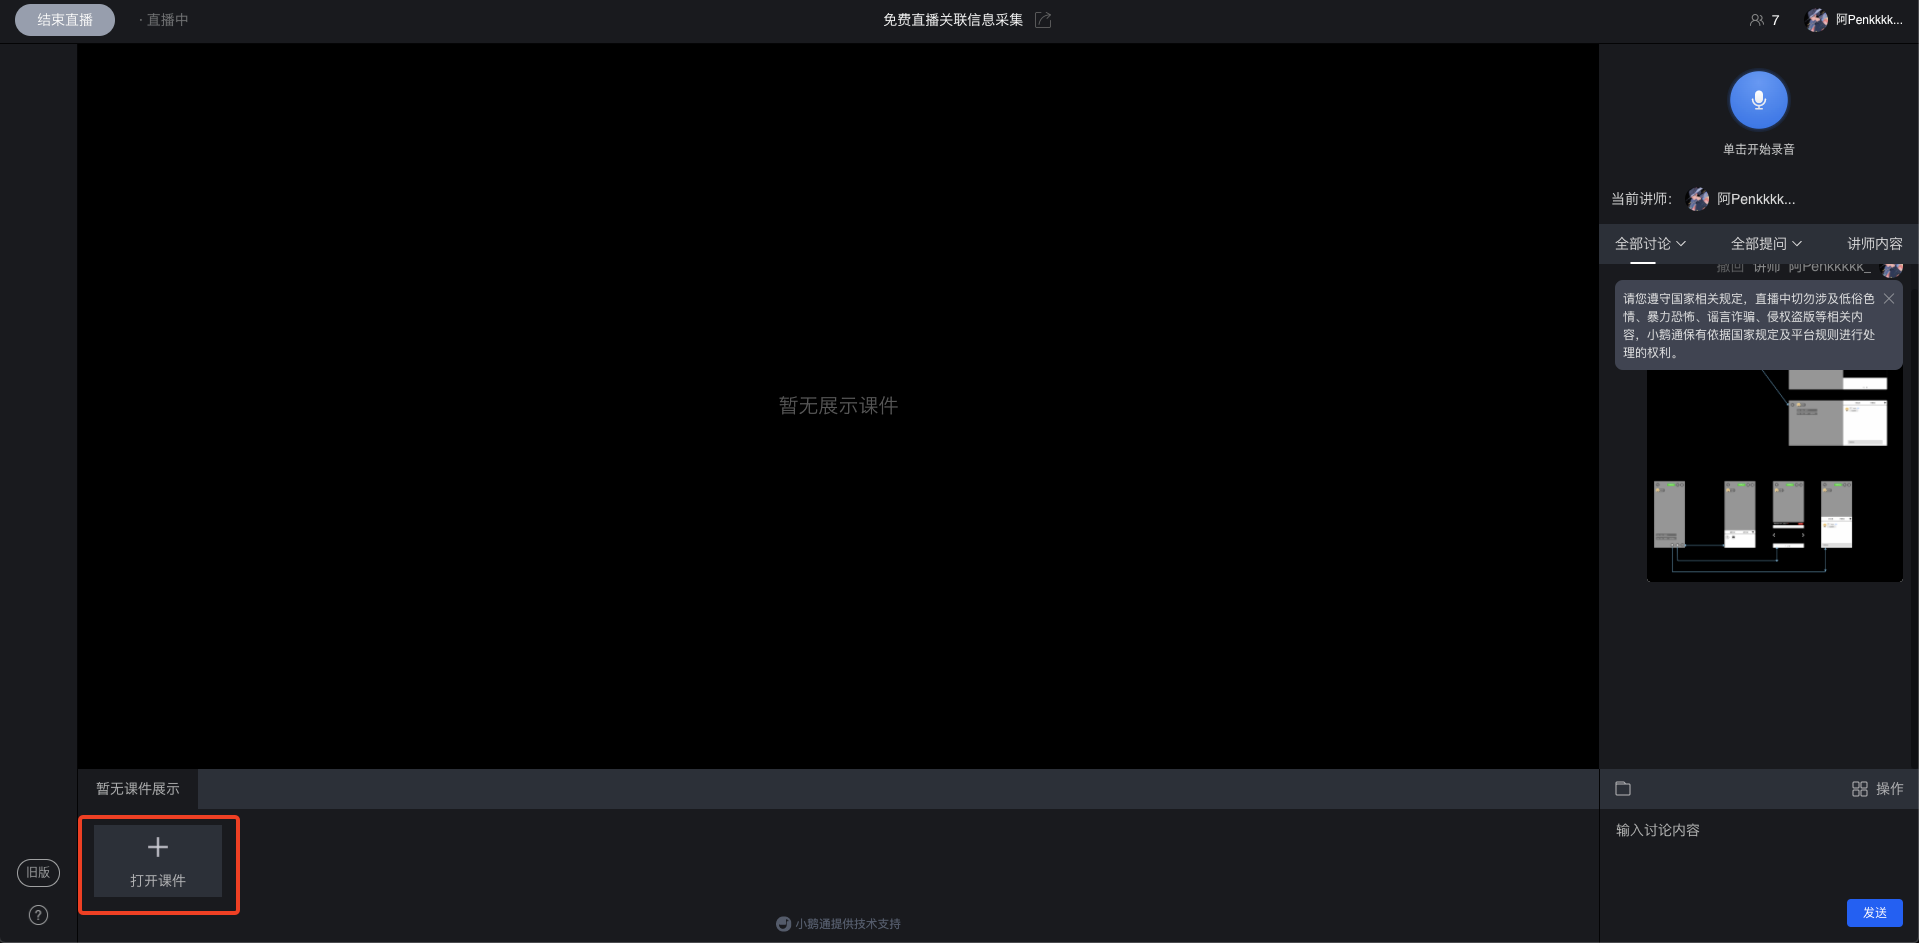
(4) End the live broadcast
When the instructor needs to end the live broadcast, click the operation button in the upper - left corner to end the live broadcast.
2. H5 voice live - broadcast room
(1) Enter the H5 live - broadcast room
After creating a voice live broadcast, the instructor clicks [Live - broadcast settings] - [Live - broadcast method] - [Start the live broadcast by myself], selects 'WeChat H5' to start the live broadcast, and scans the QR code with WeChat on the mobile phone to enter the live - broadcast room for the live broadcast.
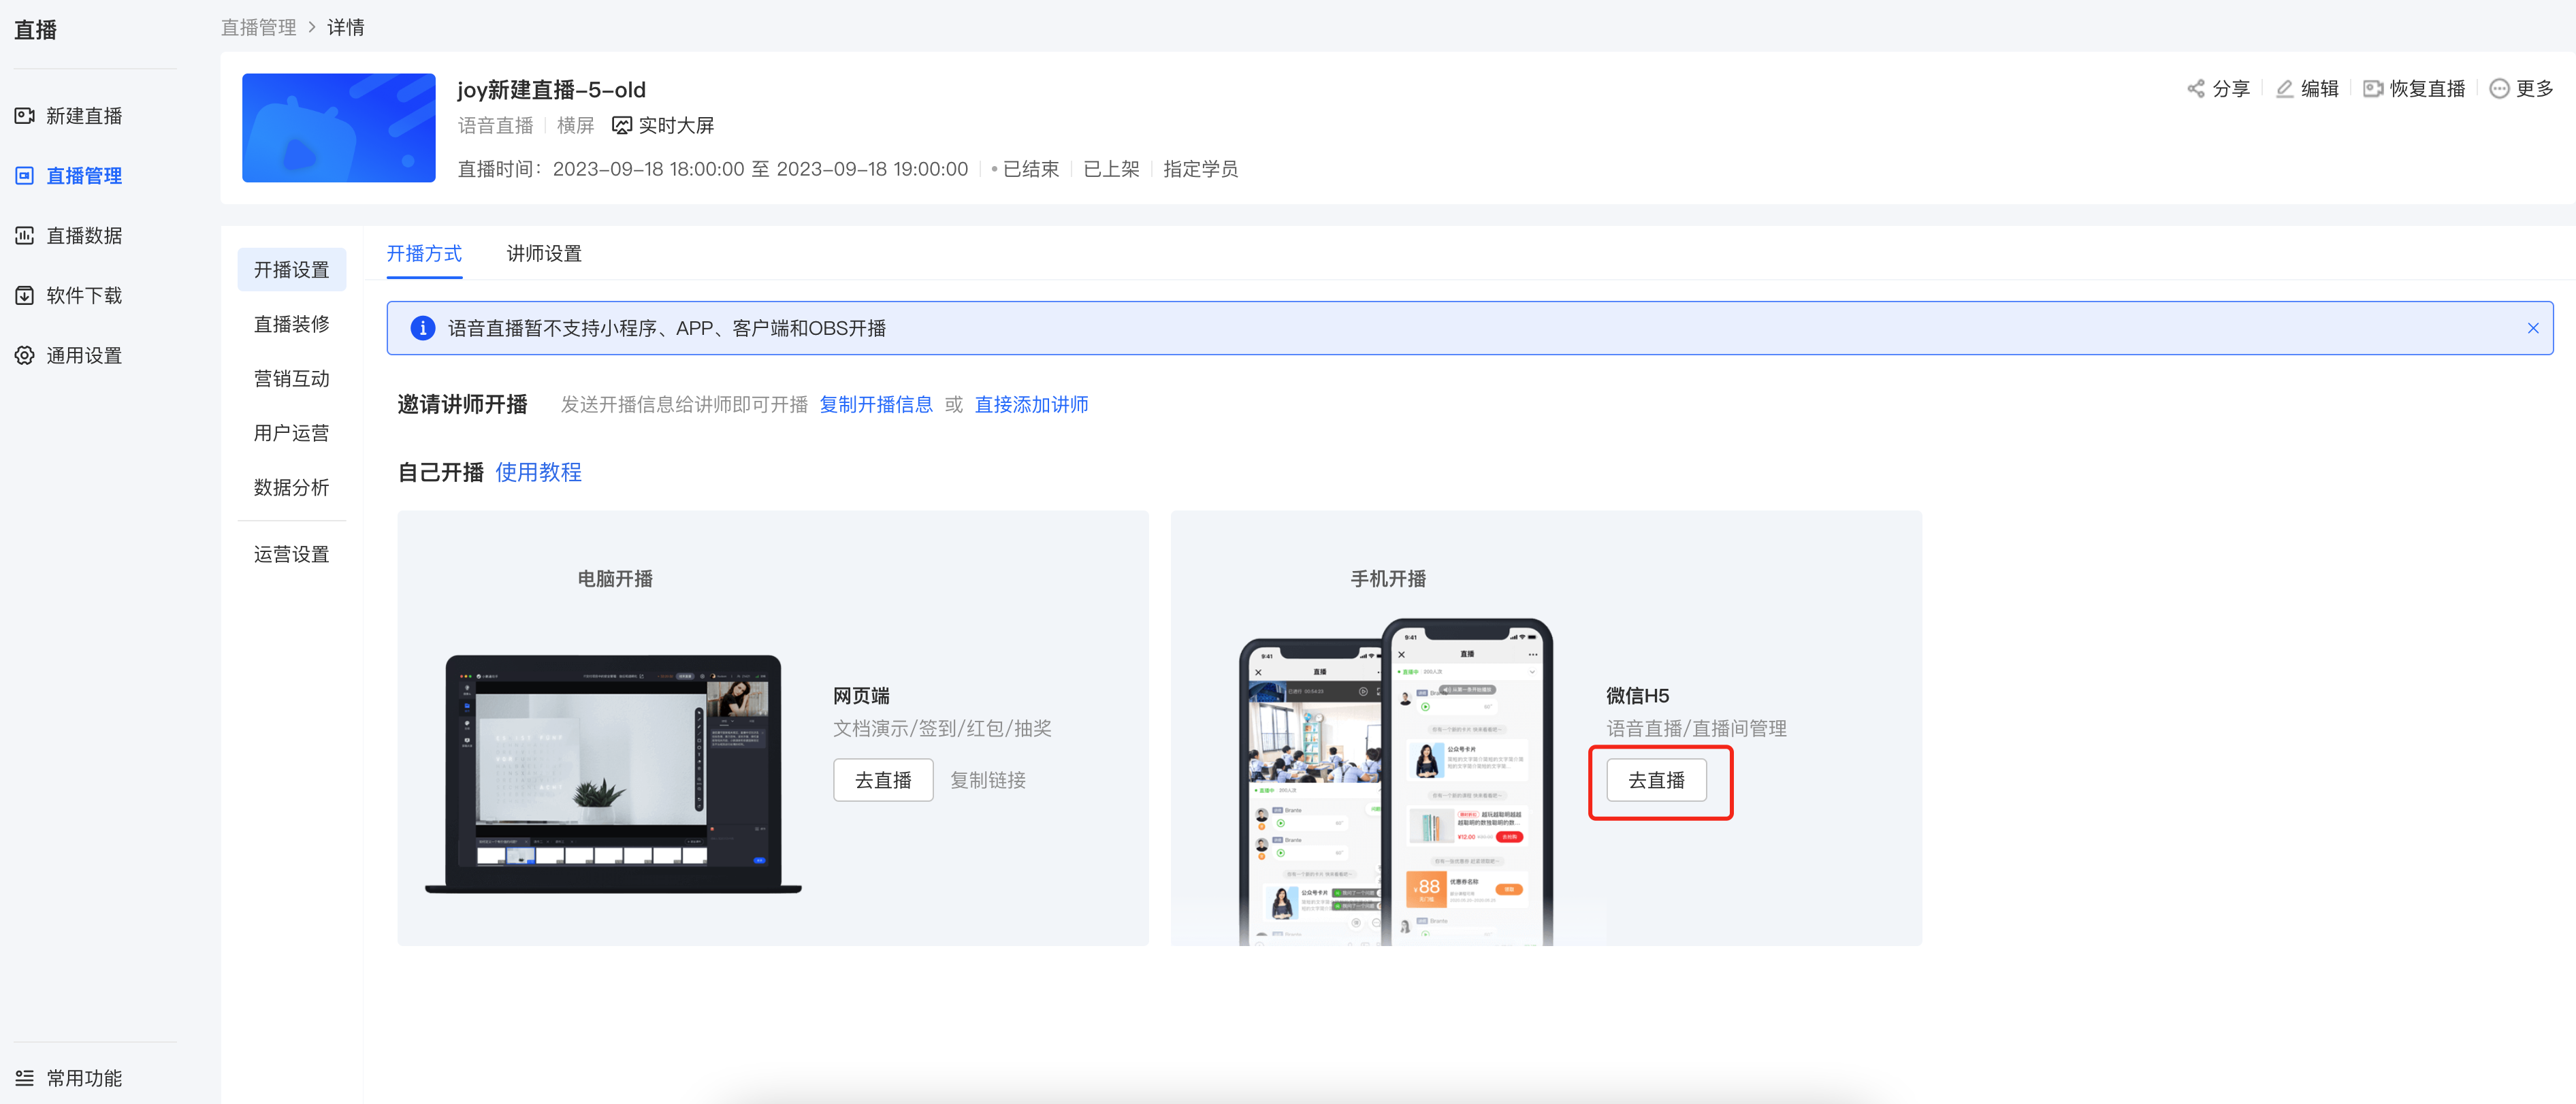
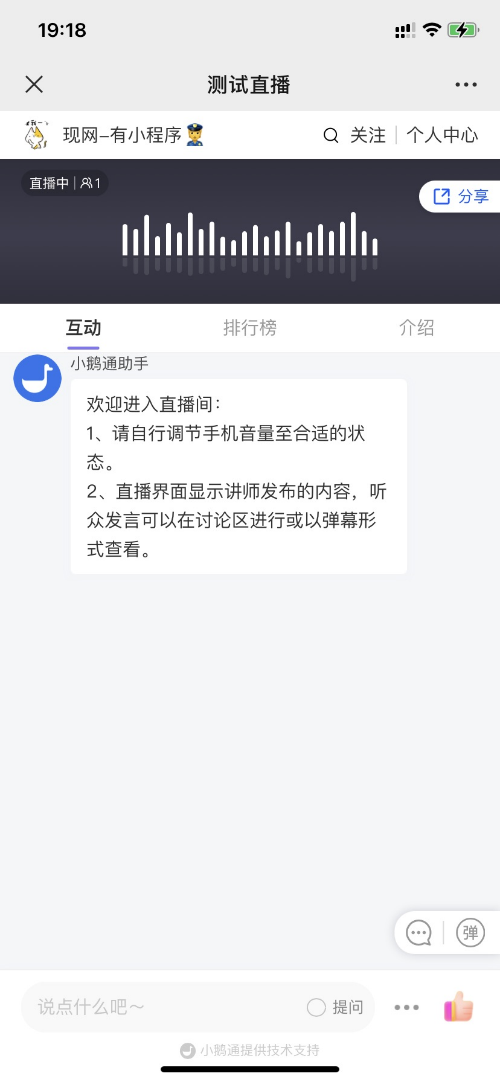
(2) Send voice
Click the microphone icon to start voice recording;
Click to end voice recording. Click [Complete] to finish voice recording, click [Cancel] to cancel sending;
After voice recording is completed, click the send button to send the voice, click [Cancel] to cancel sending
In the elink live - broadcast room, instructors can record voice continuously. Instructors do not need to manually click to send the recording, and the system will automatically cut the recording into 60 - second voice messages and send them out.
This allows instructors to teach at their own pace without being interrupted by the action of sending voice messages.
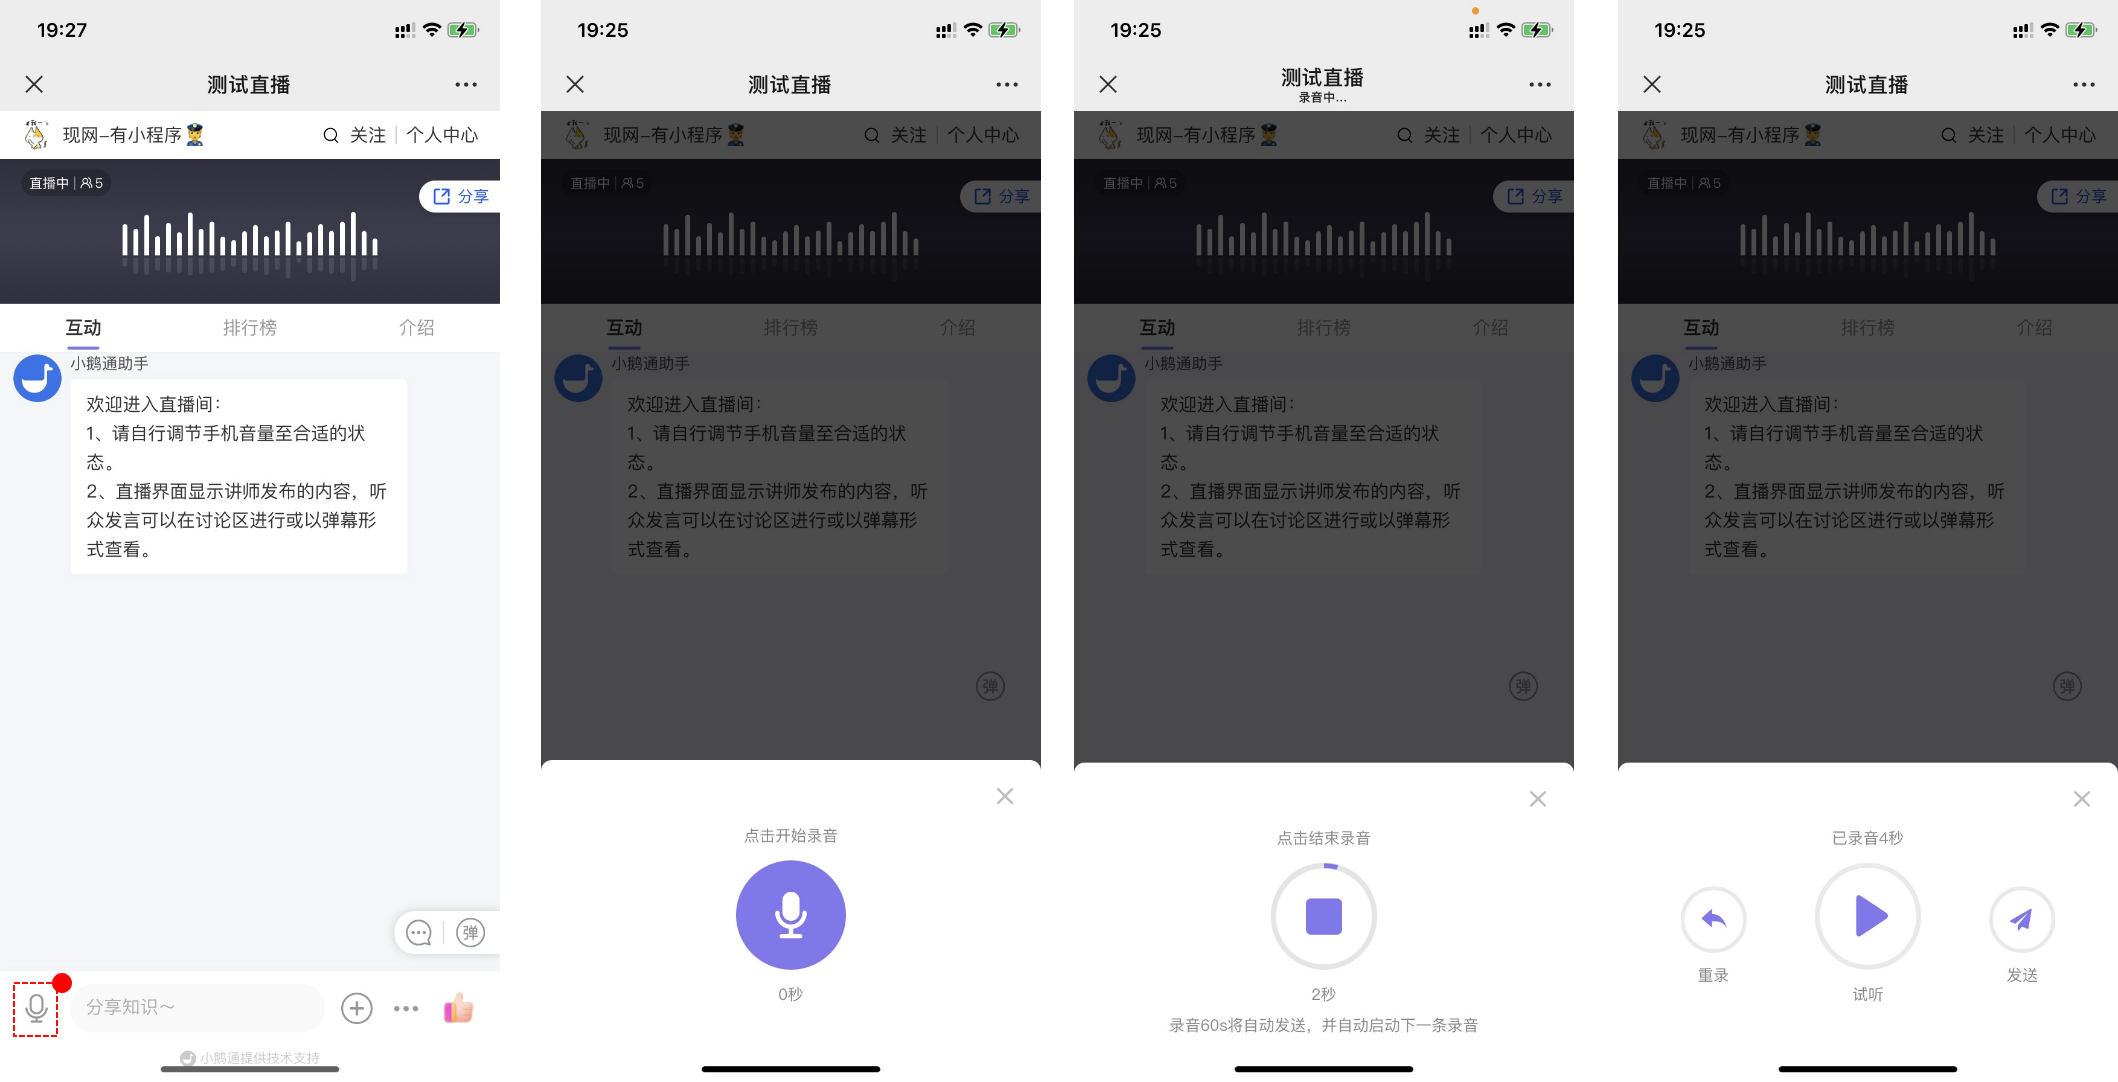
(3) Courseware display
Click [+] in the lower - left corner of the live - broadcast room, then click the PPT library to upload pictures, supporting single - picture or multi - picture upload;
After uploading, the corresponding courseware will be displayed at the top of the live - broadcast room. Slide to turn pages;
Click the file library or audio - video library to upload content in other formats (need to upload on the web side)
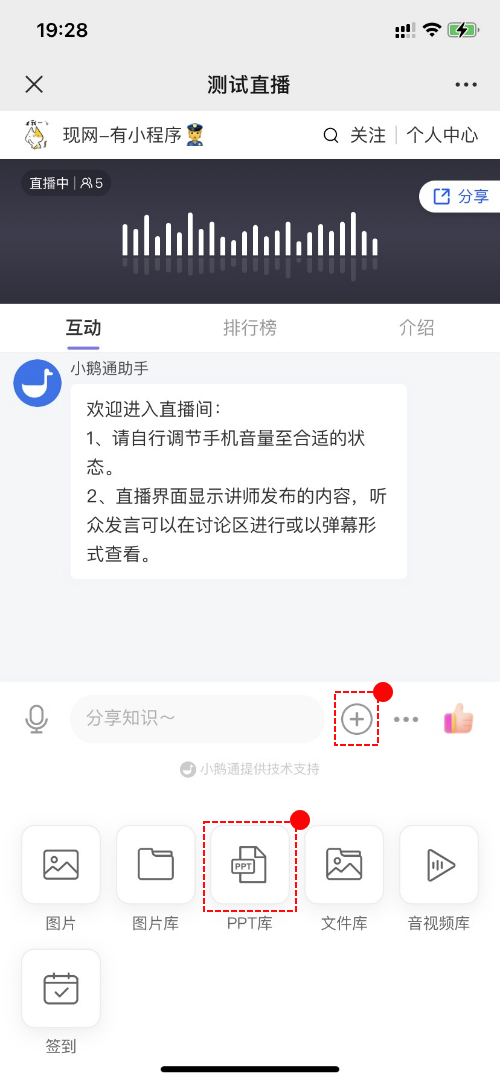
(4) End the live broadcast
When the instructor needs to end the live broadcast, click the [More] button in the lower - right corner, and click 'End live broadcast' in the pop - up drop - down box to end the live broadcast.
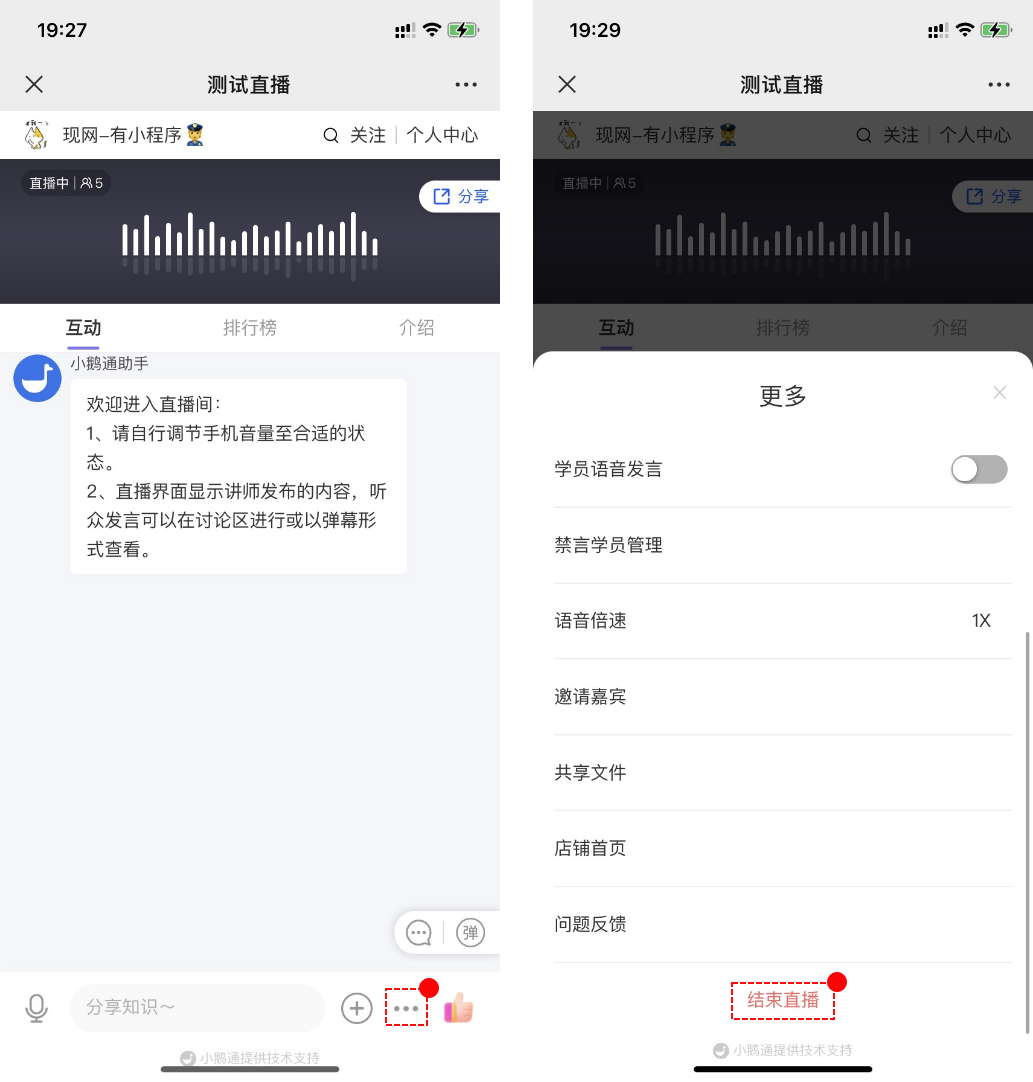
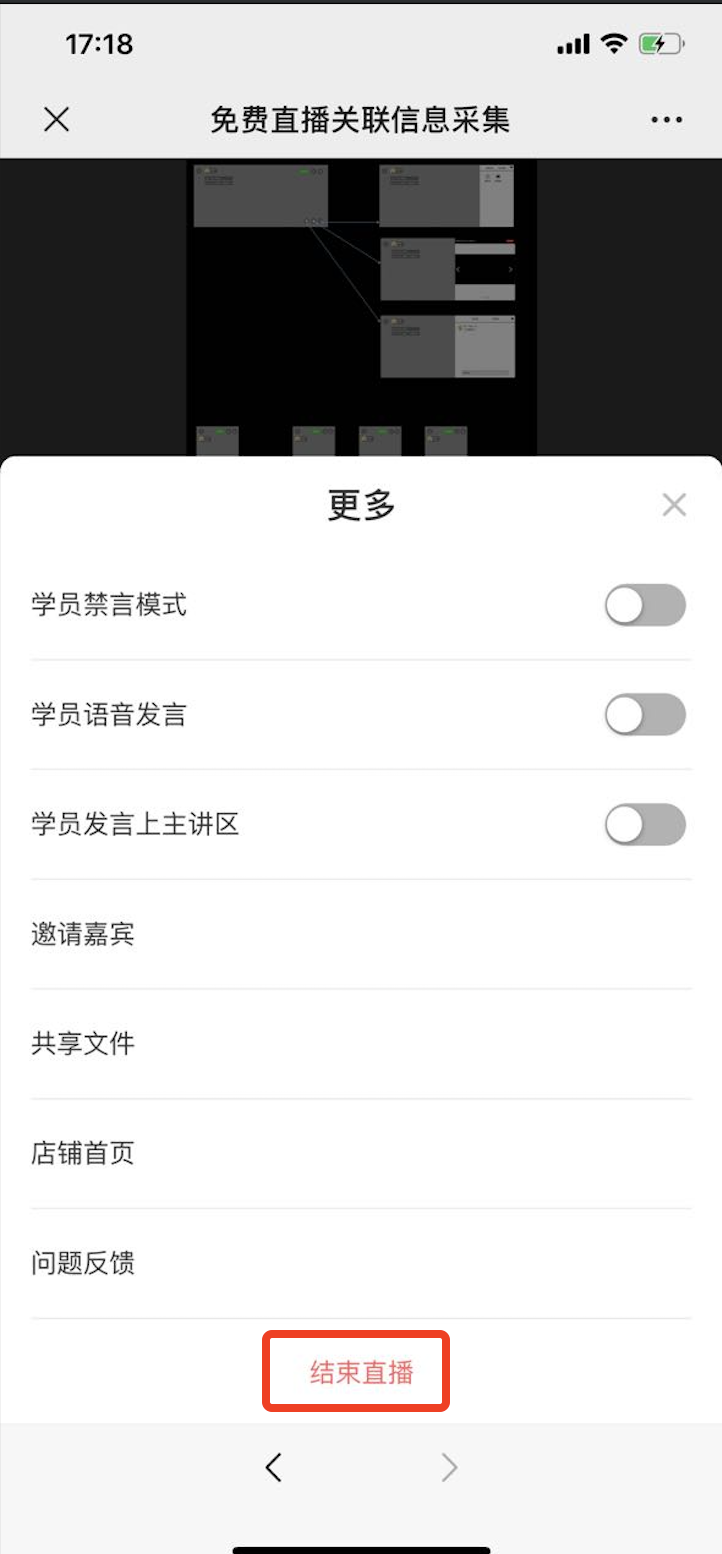
Step 4: Watch the live broadcast (H5 store or elink Live Mini Program)
1. Users can enter the live - broadcast room by scanning the QR code or opening the link.
2. After entering the live - broadcast room, students can interact with instructors by sending text content, asking questions, etc.
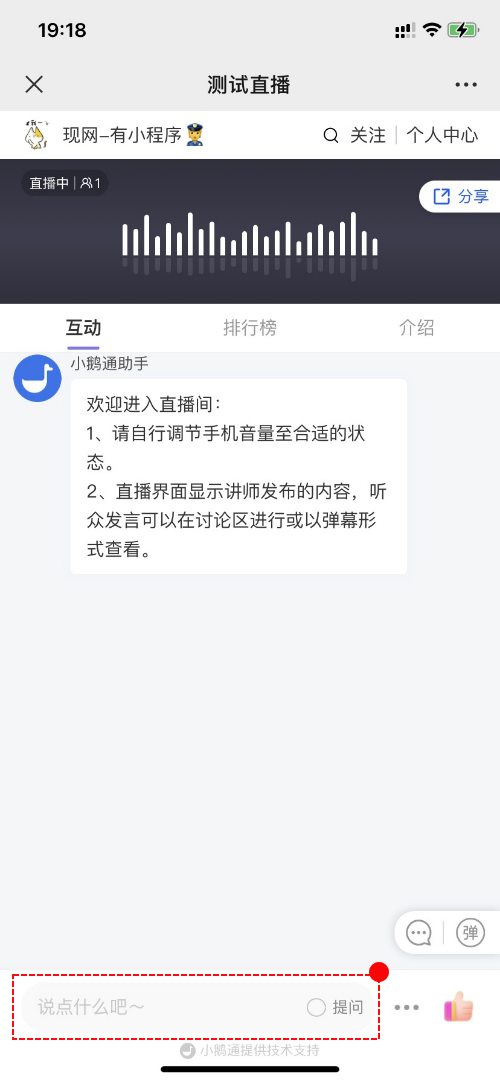
Recorded and live broadcasts
Is there a size limit for the videos uploaded for recorded or live broadcasts?
Currently, the video upload restrictions in the [Recorded and Live Streaming] mode are as follows: Supported formats include mp4, avi, wmv, mov, flv, rmvb, 3gp, m4v, and mkv. The file size should not exceed 5GB. It is recommended that the video resolution be 1280×720.
Tutorial on Using the Video Mode for Recorded and Live Streams
I. Function Introduction
Students can participate in the live stream in real - time in the video mode and watch the video content uploaded by the teacher. They can also interact with the teacher by sending voice messages, texts, courseware, and videos in real - time.
II. Purpose of Use
Recorded live stream - video mode is suitable for scenarios where there are videos and the live - stream content is relatively lightweight. Merchants can upload videos to the live - stream room, and the videos will start playing once the live stream begins.
III. Use Scenarios
It is suitable for live streams where the lecturer can prepare recorded videos in advance. The lecturer prepares the recorded videos in advance, and users can view the videos uploaded by the lecturer during the live stream. The lecturer can explain the content in the form of voice or text.
IV. Operation Path
Merchant side: Merchant background → Create recorded live stream → Start live stream
V. Usage Tutorial
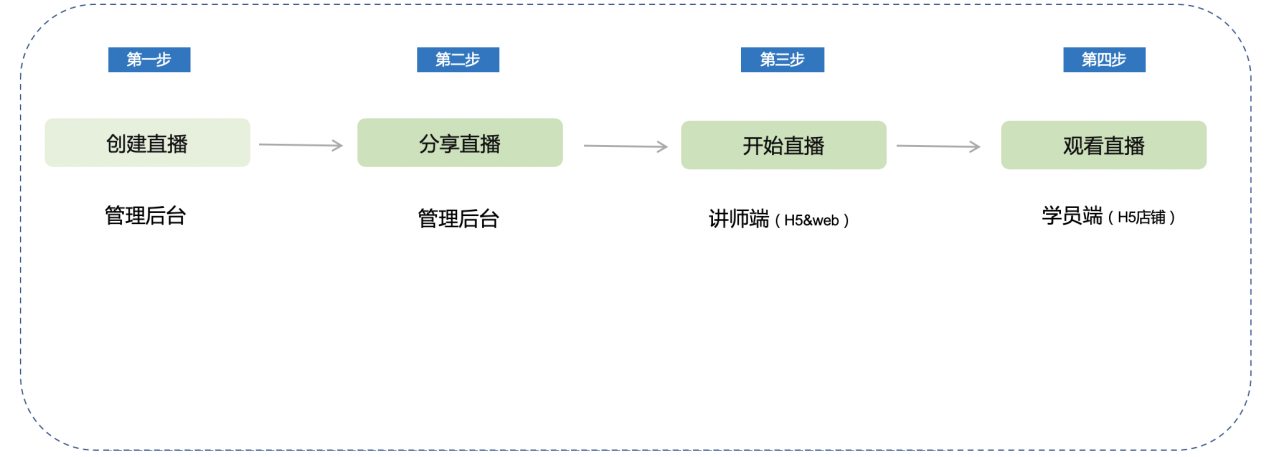
Step 1: Create a live stream (Management background)
1. Enter the merchant management background - click on Live Stream - New Live Stream, and select Recorded Live Stream.
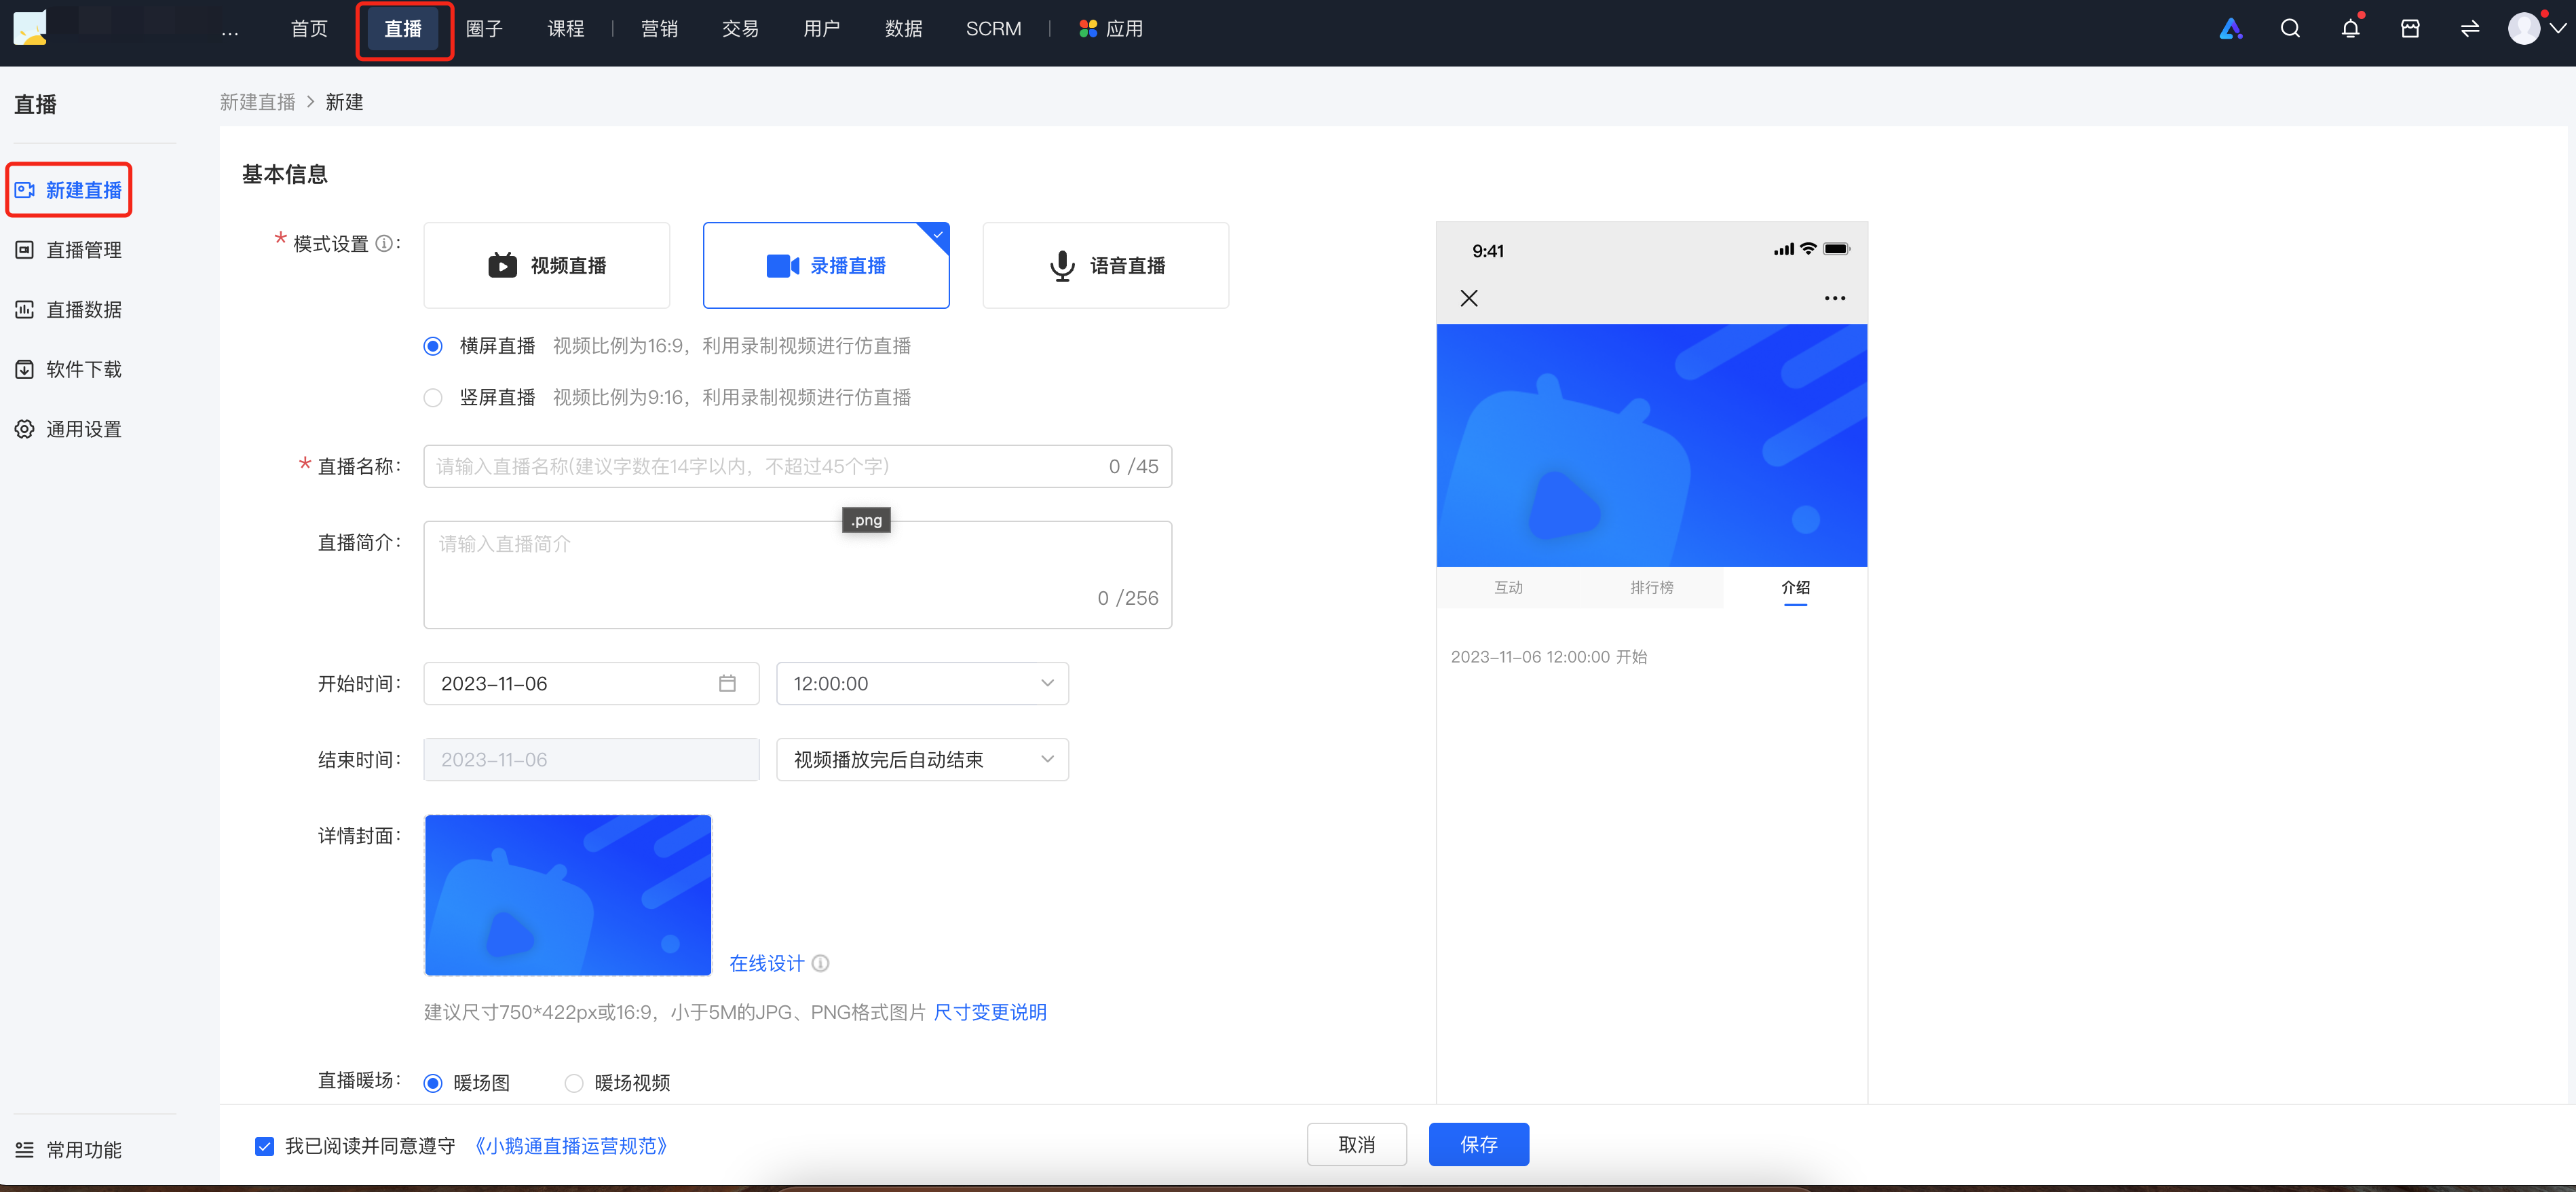
(Management background)
2.Select the 'Recorded Live Stream' mode
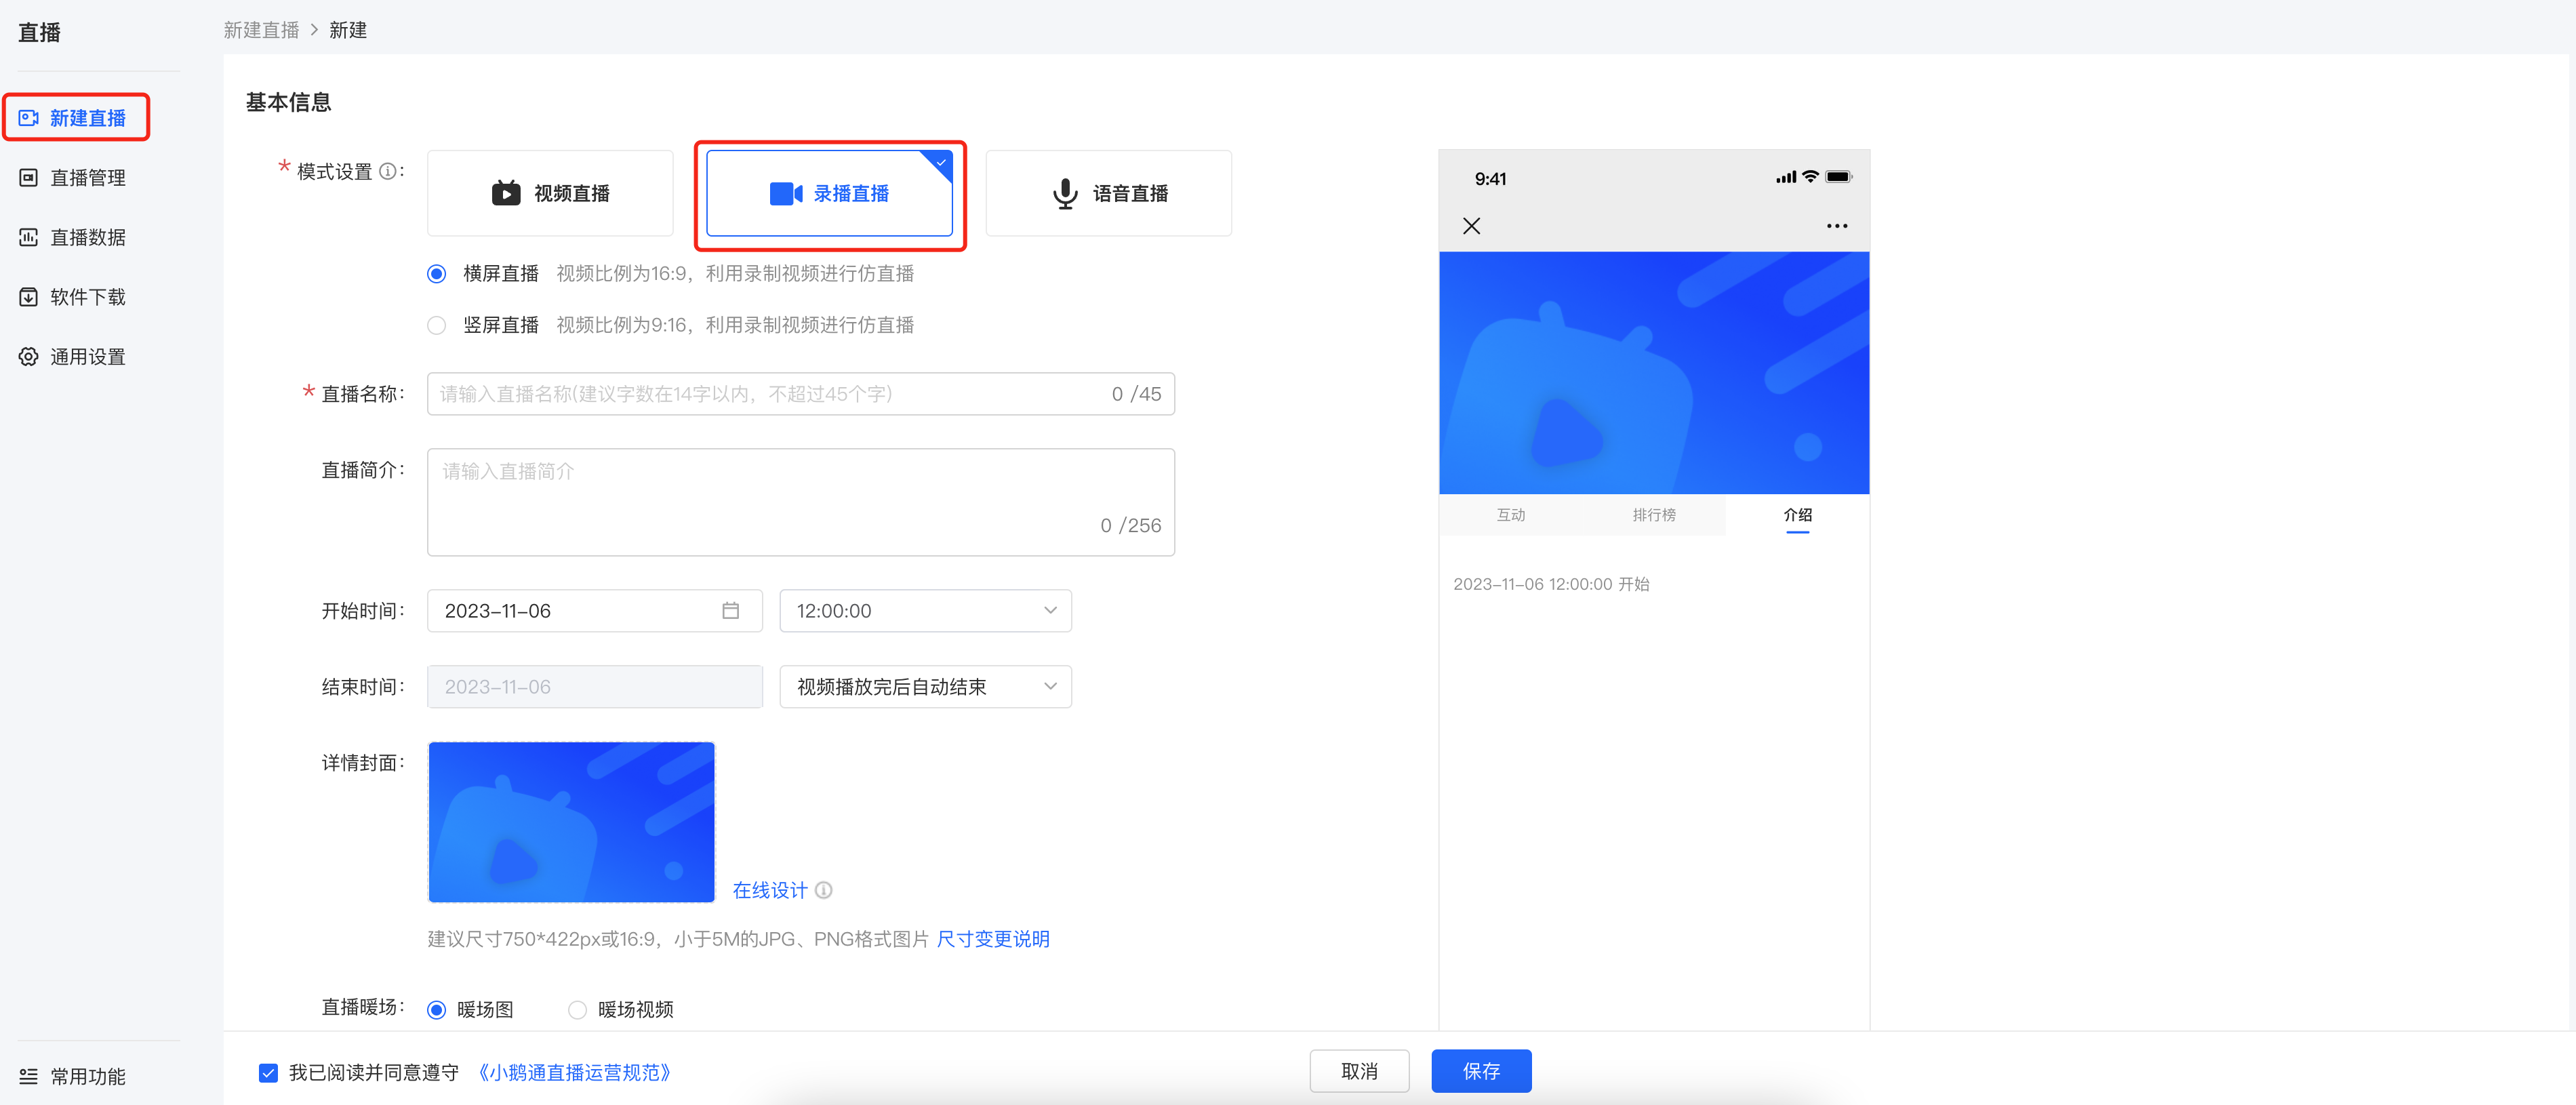
3. Fill in the relevant information, click Save, and complete the creation
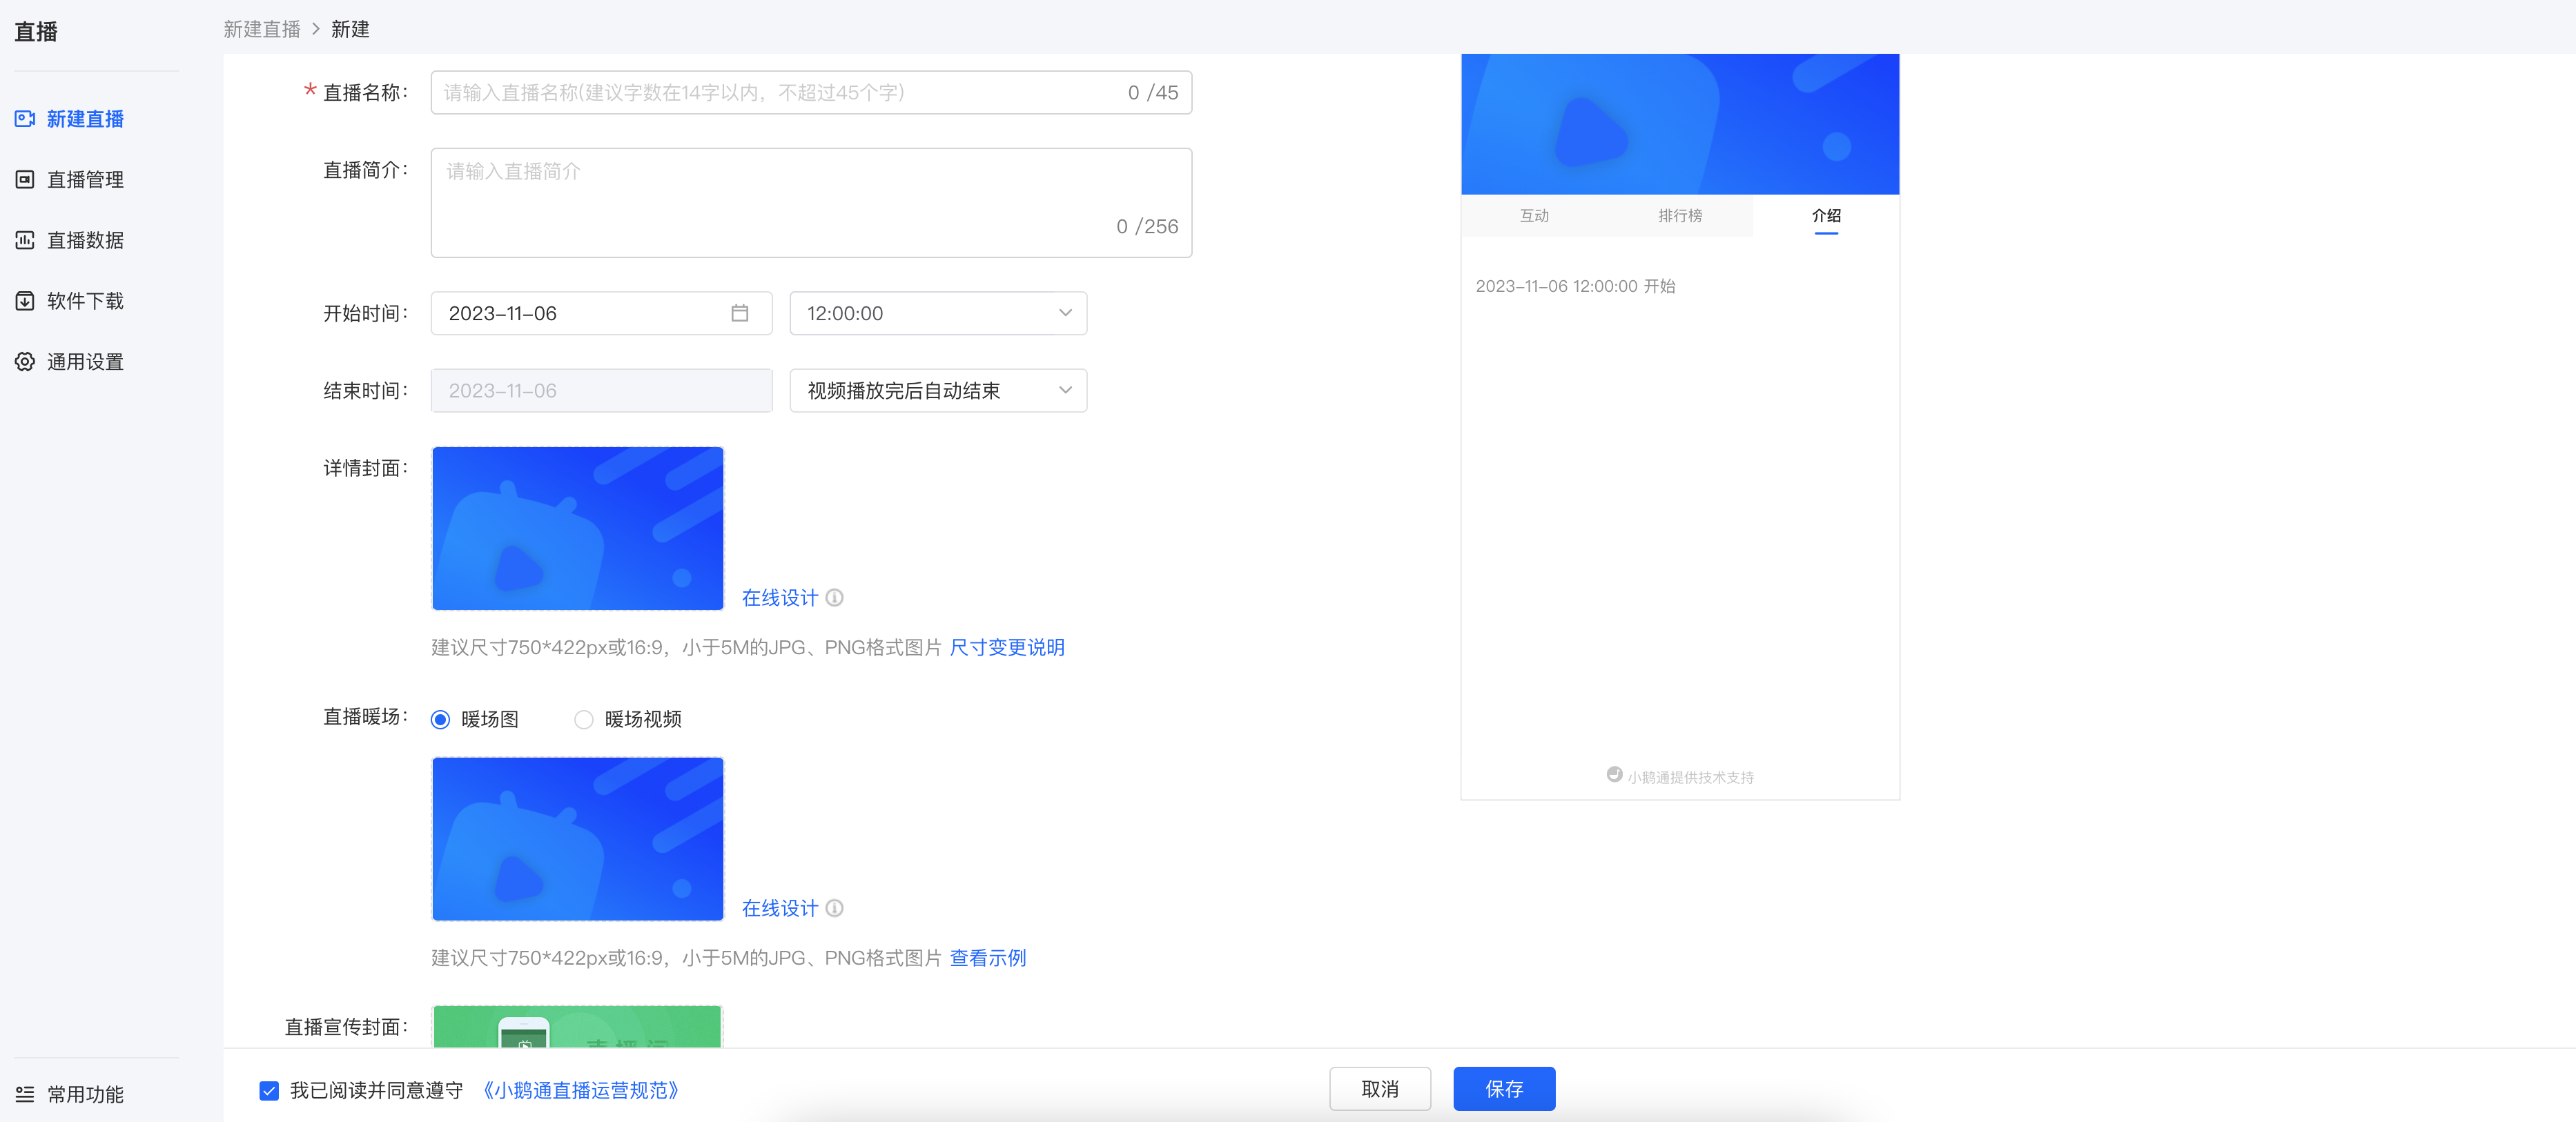
PS: Don't forget to select and upload the video at [Recorded Videos] - [Add Video]!
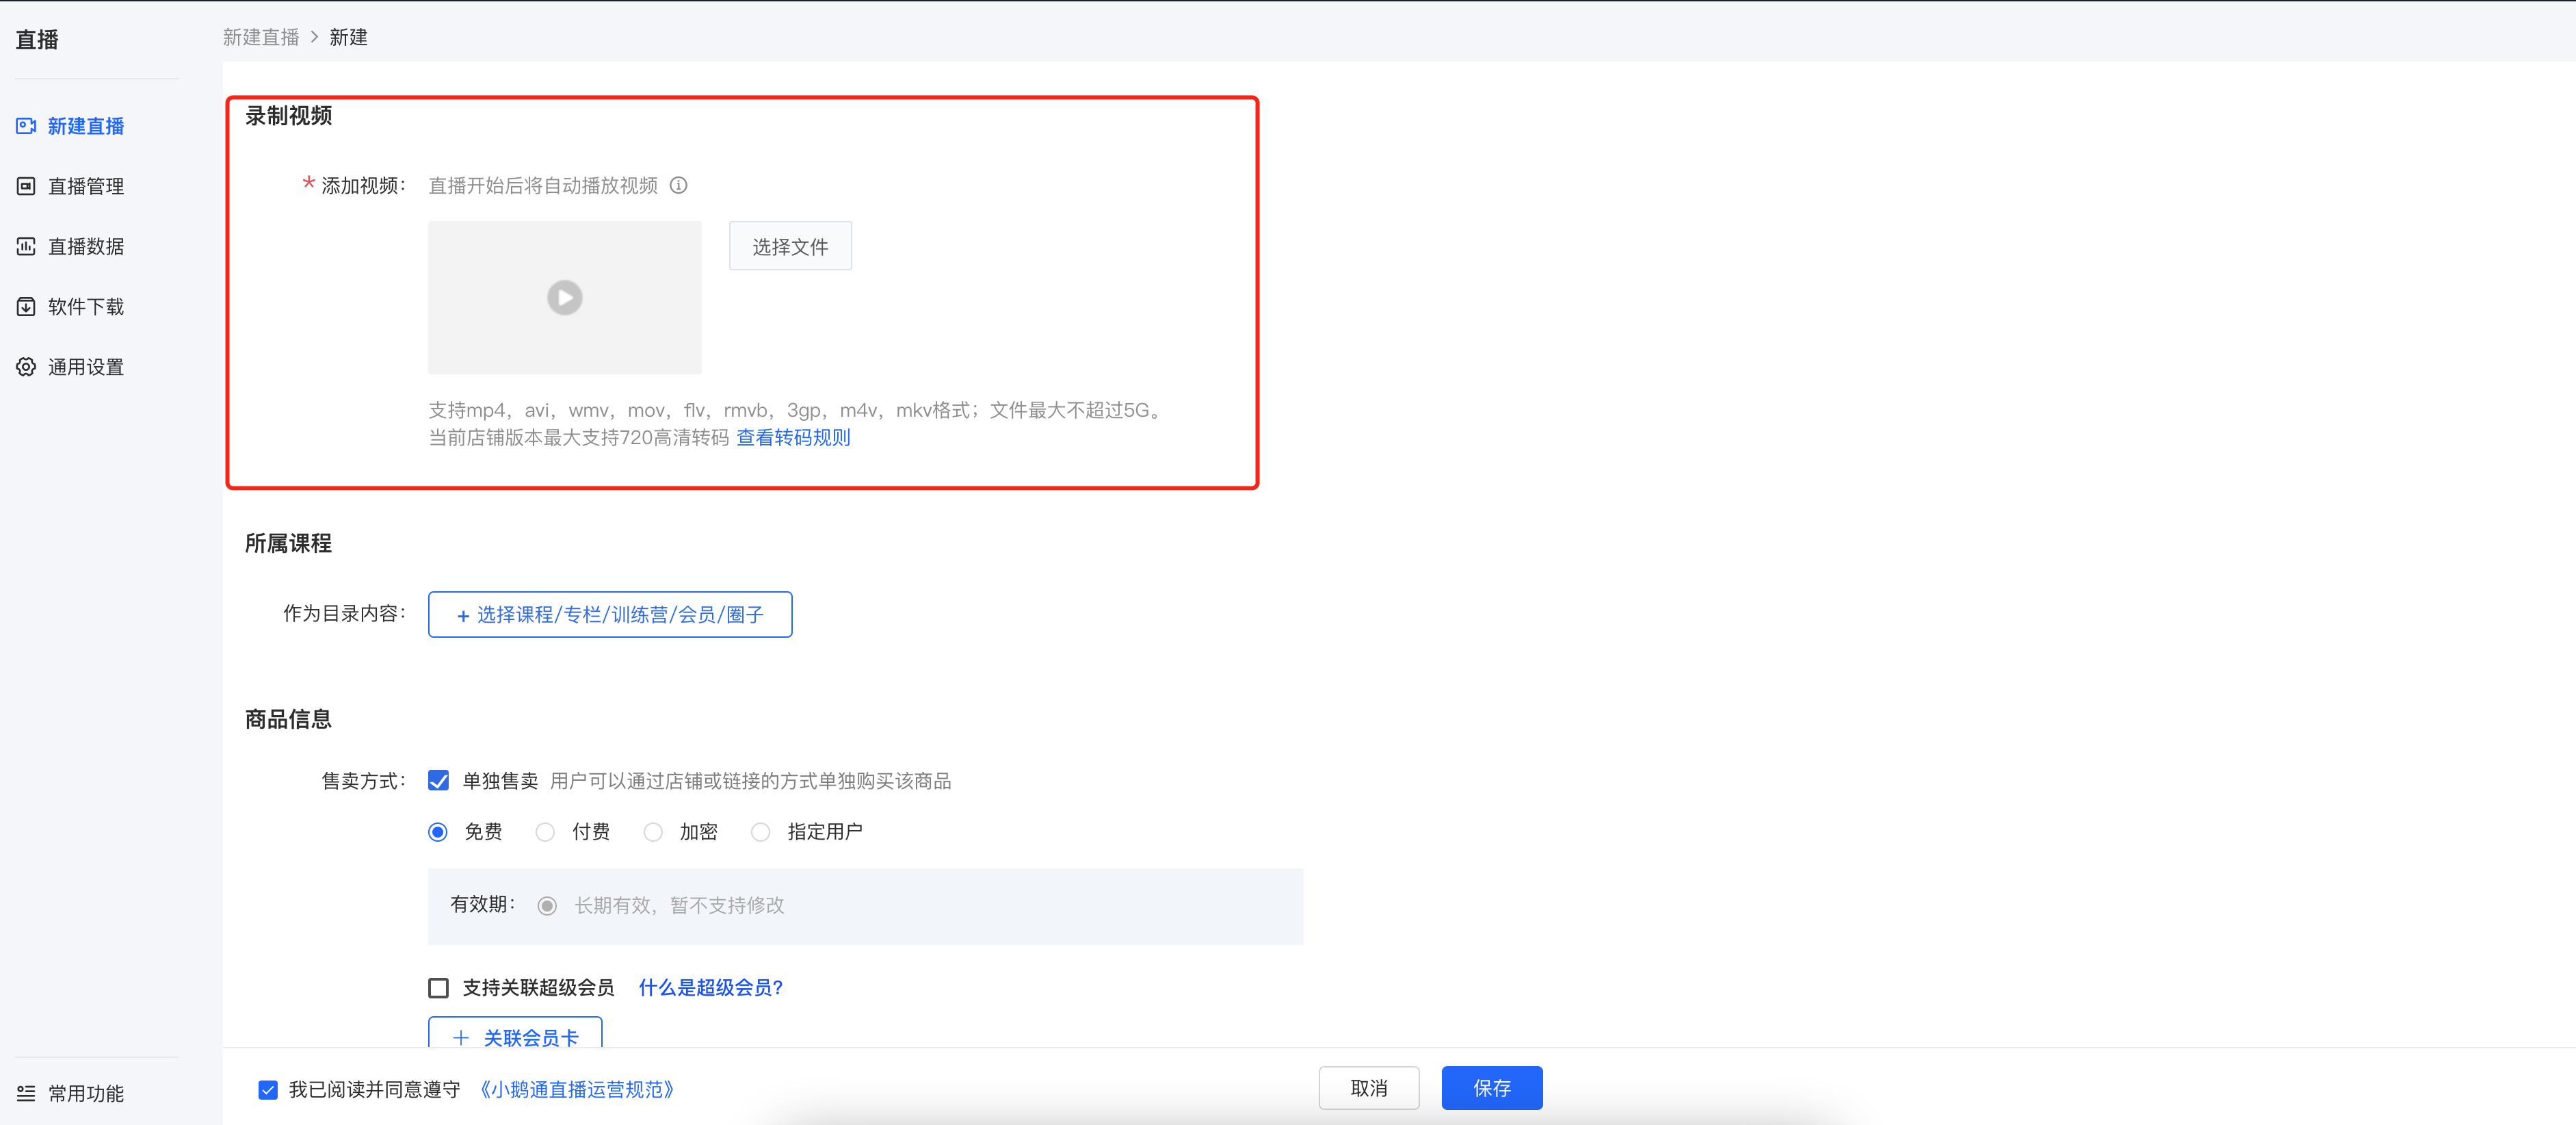
(Management background)
1. After the creation is completed, on the live - stream list page, click the 'Share' button to get the QR code and link of the live - stream room, and share them with students.
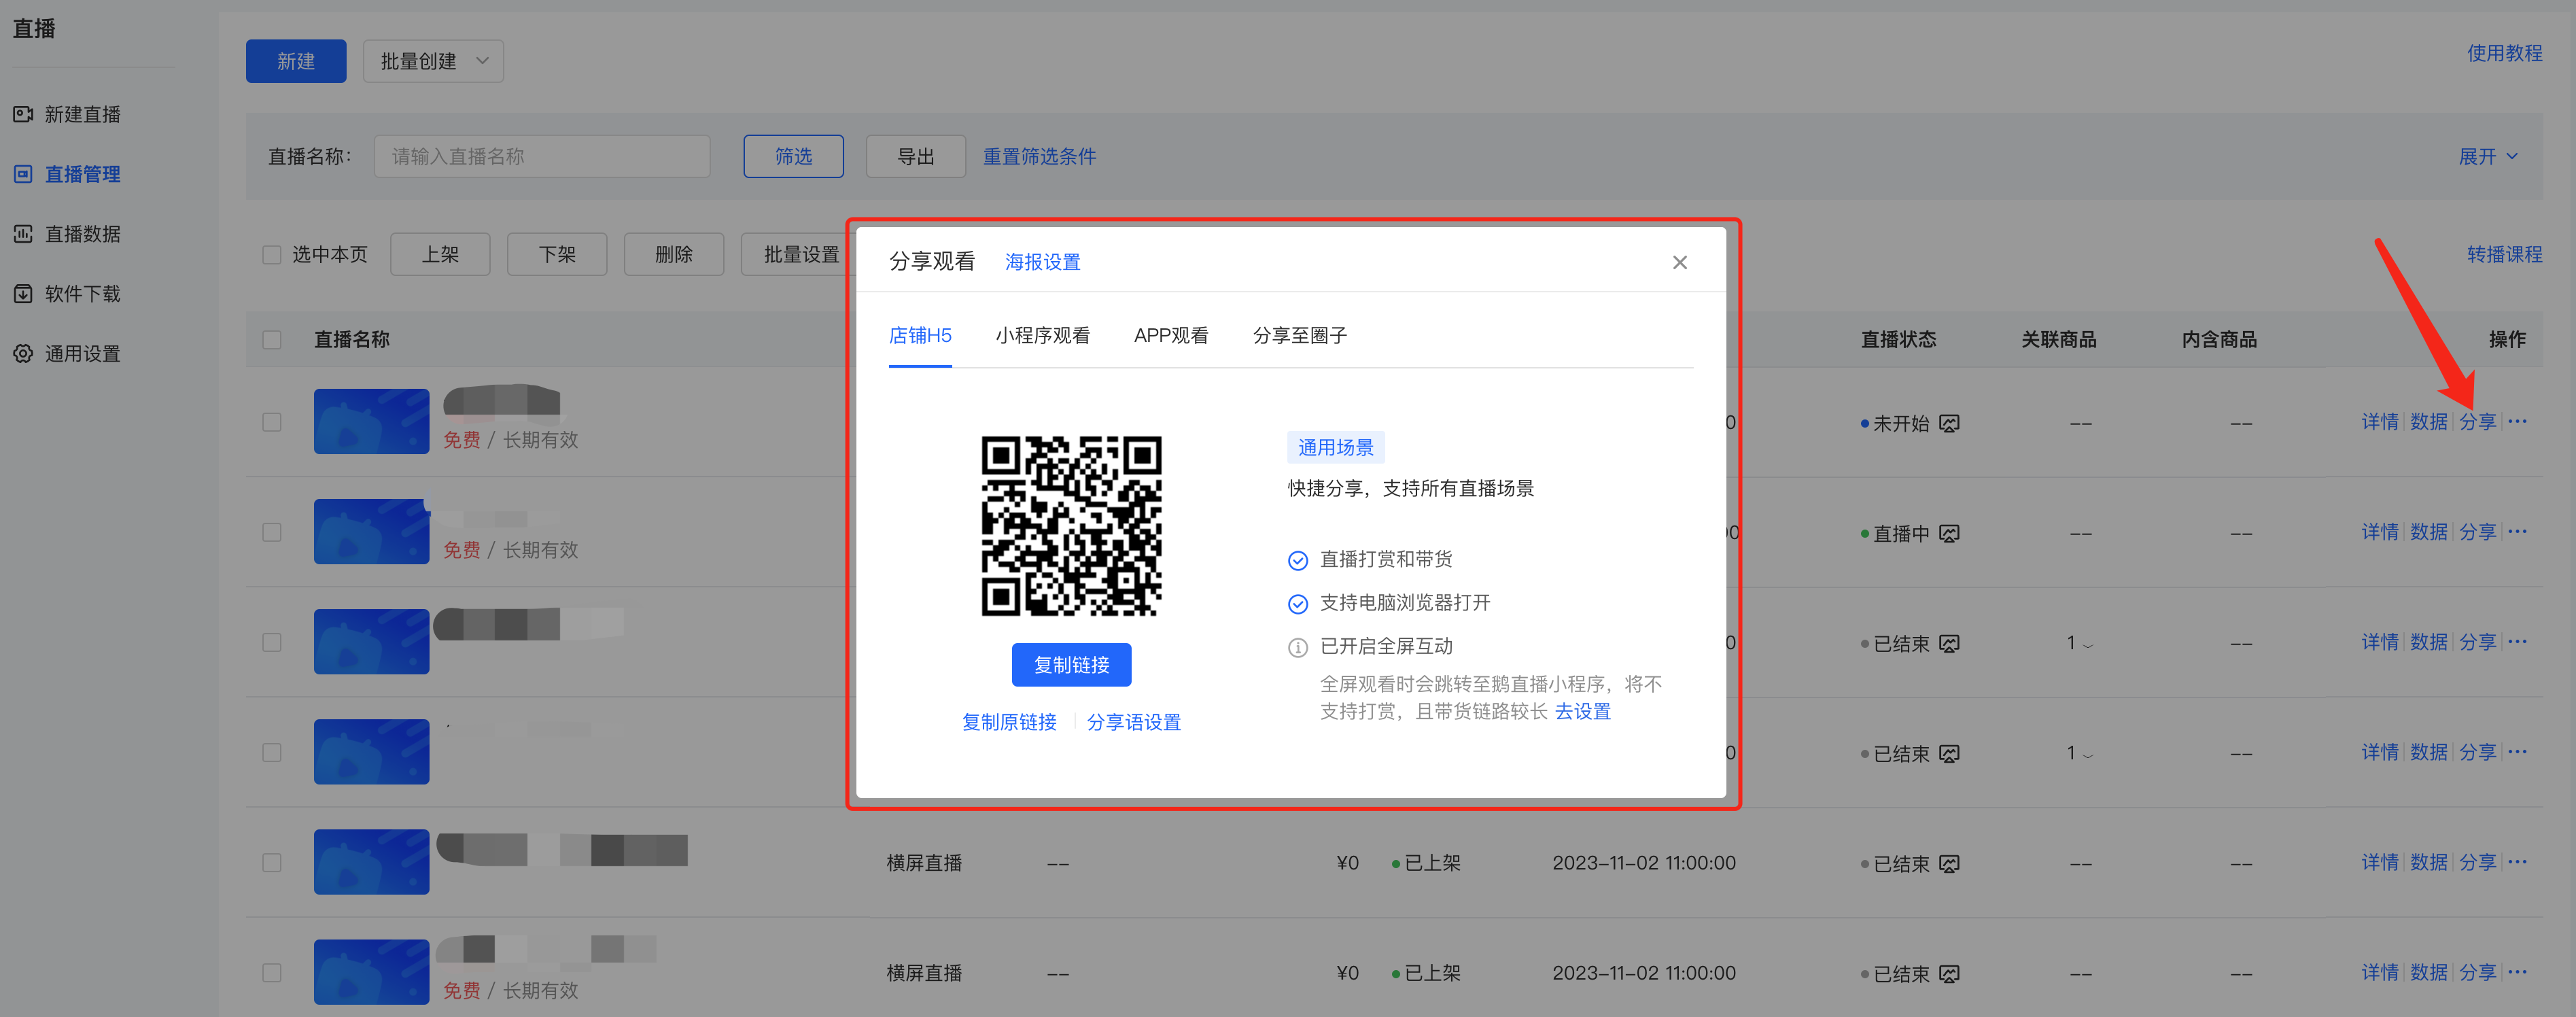
(Management background)
2. H5 - end sharing
On the mobile end, you can create a live - stream invitation card and share it through channels such as Moments, WeChat groups, and Official Accounts [Manual adjustment required].
Method for creating an invitation card:[Live - stream room] → [Click the share button] → Long - press the picture to save → Send and share
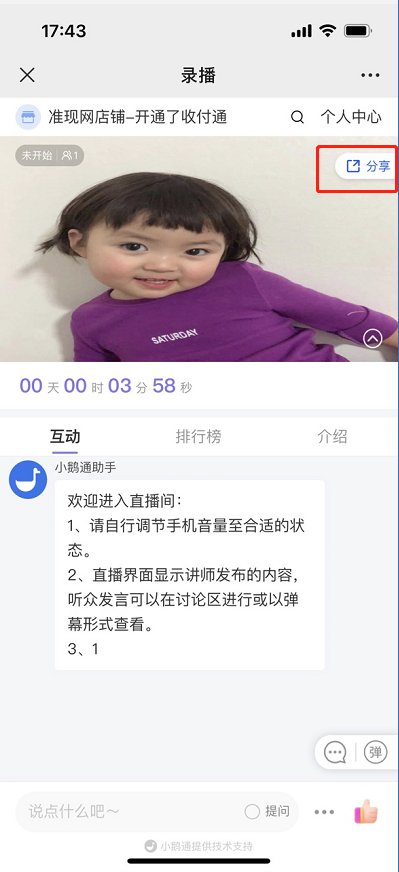
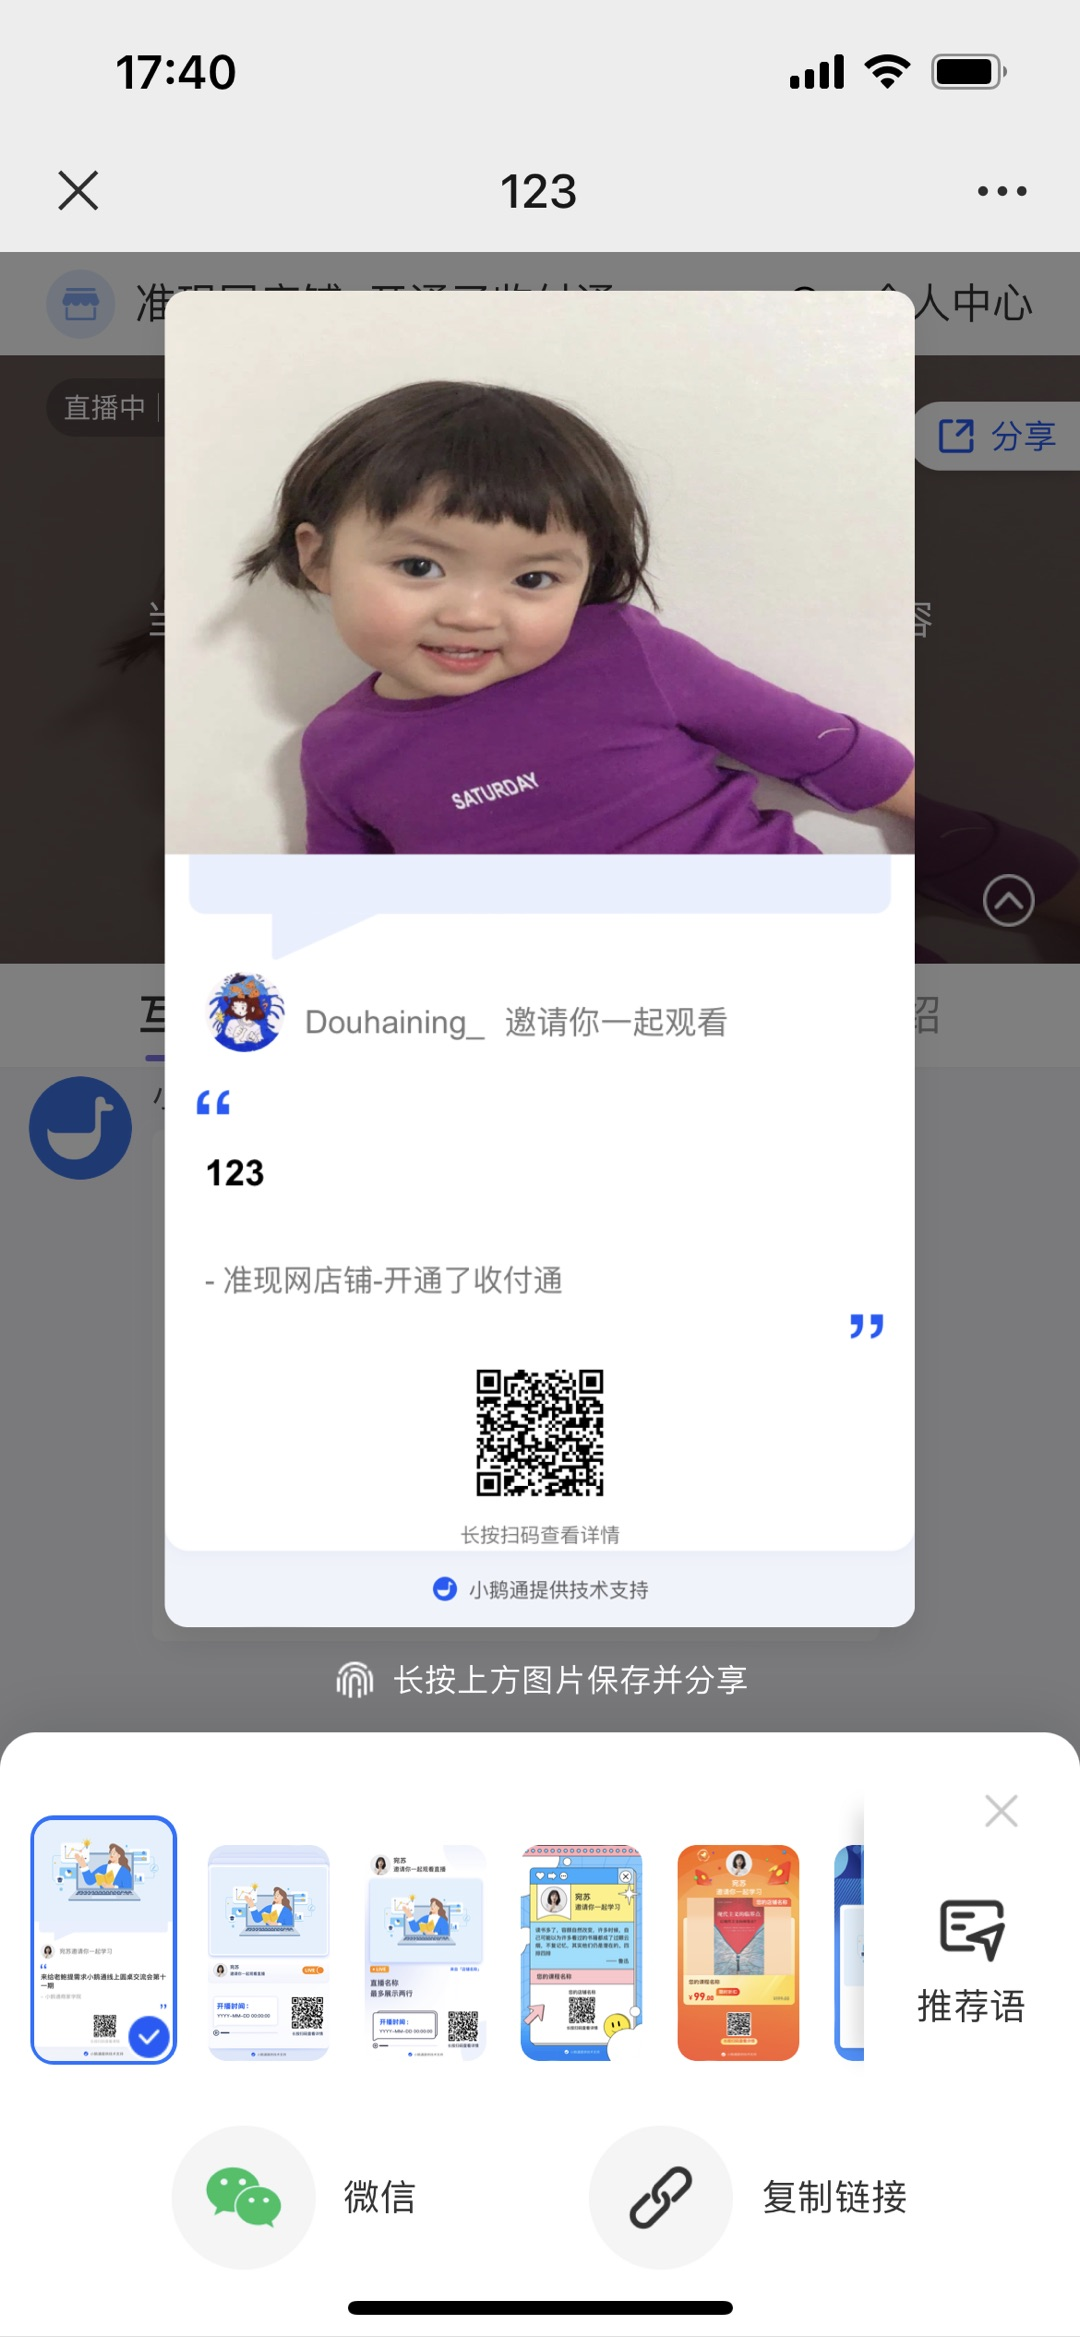
Step 3: Start the live stream (H5 & web lecturer side)
1. Web - end voice live - stream room
(1) Enter the web - end live - stream room
After creating a voice live stream, the lecturer clicks 'Go to live stream' and selects the web end. Open the live - stream room address, scan the QR code with WeChat to log in, and then enter the live - stream room page. The live stream will start as soon as the scheduled time arrives, and the uploaded videos will start playing.
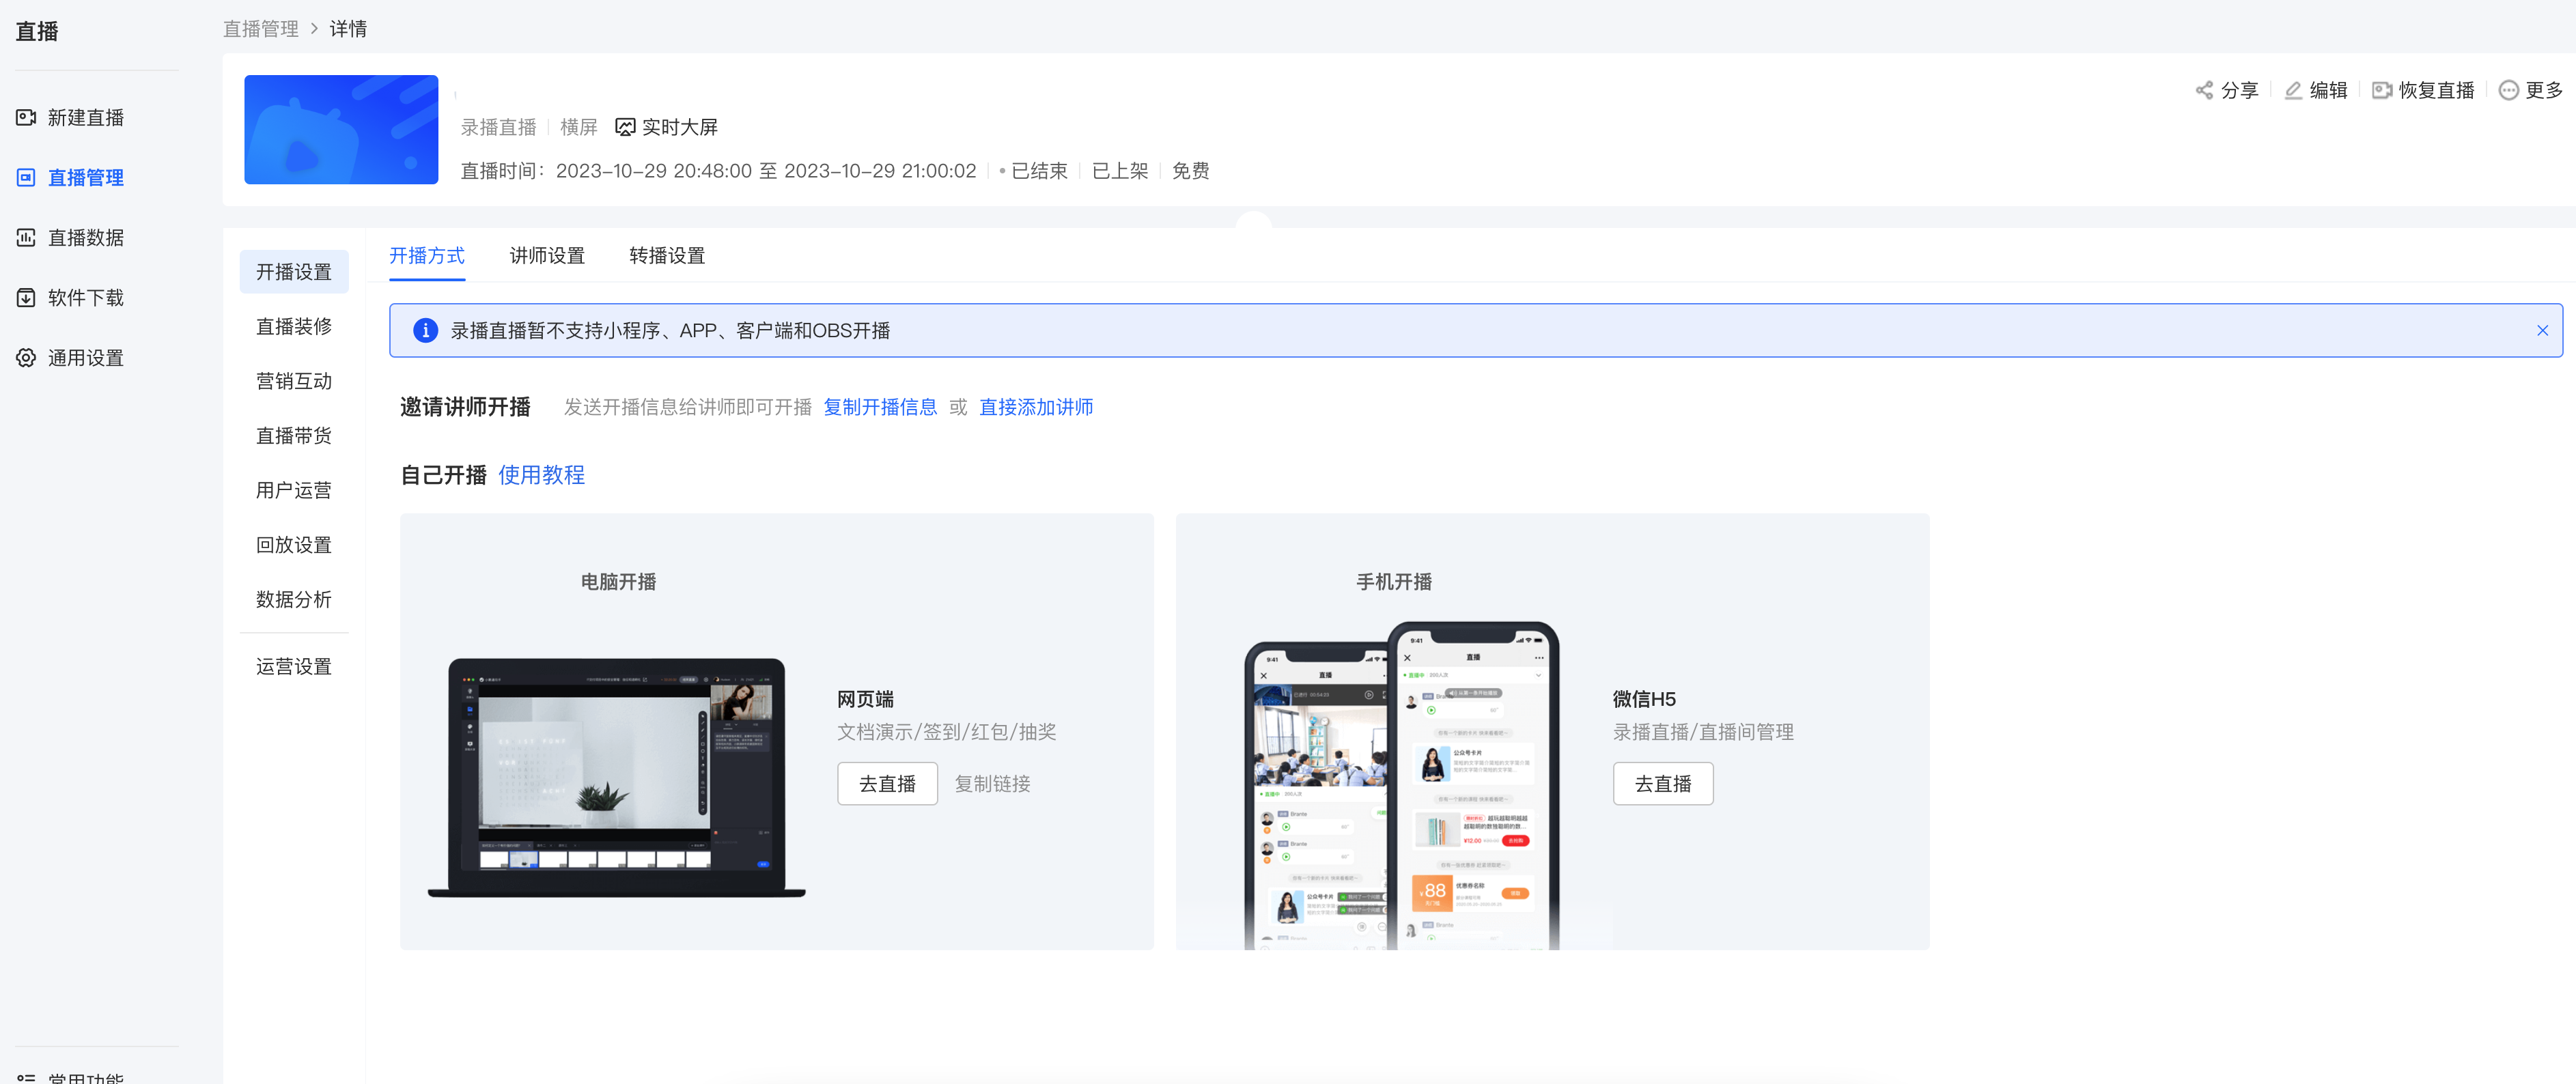
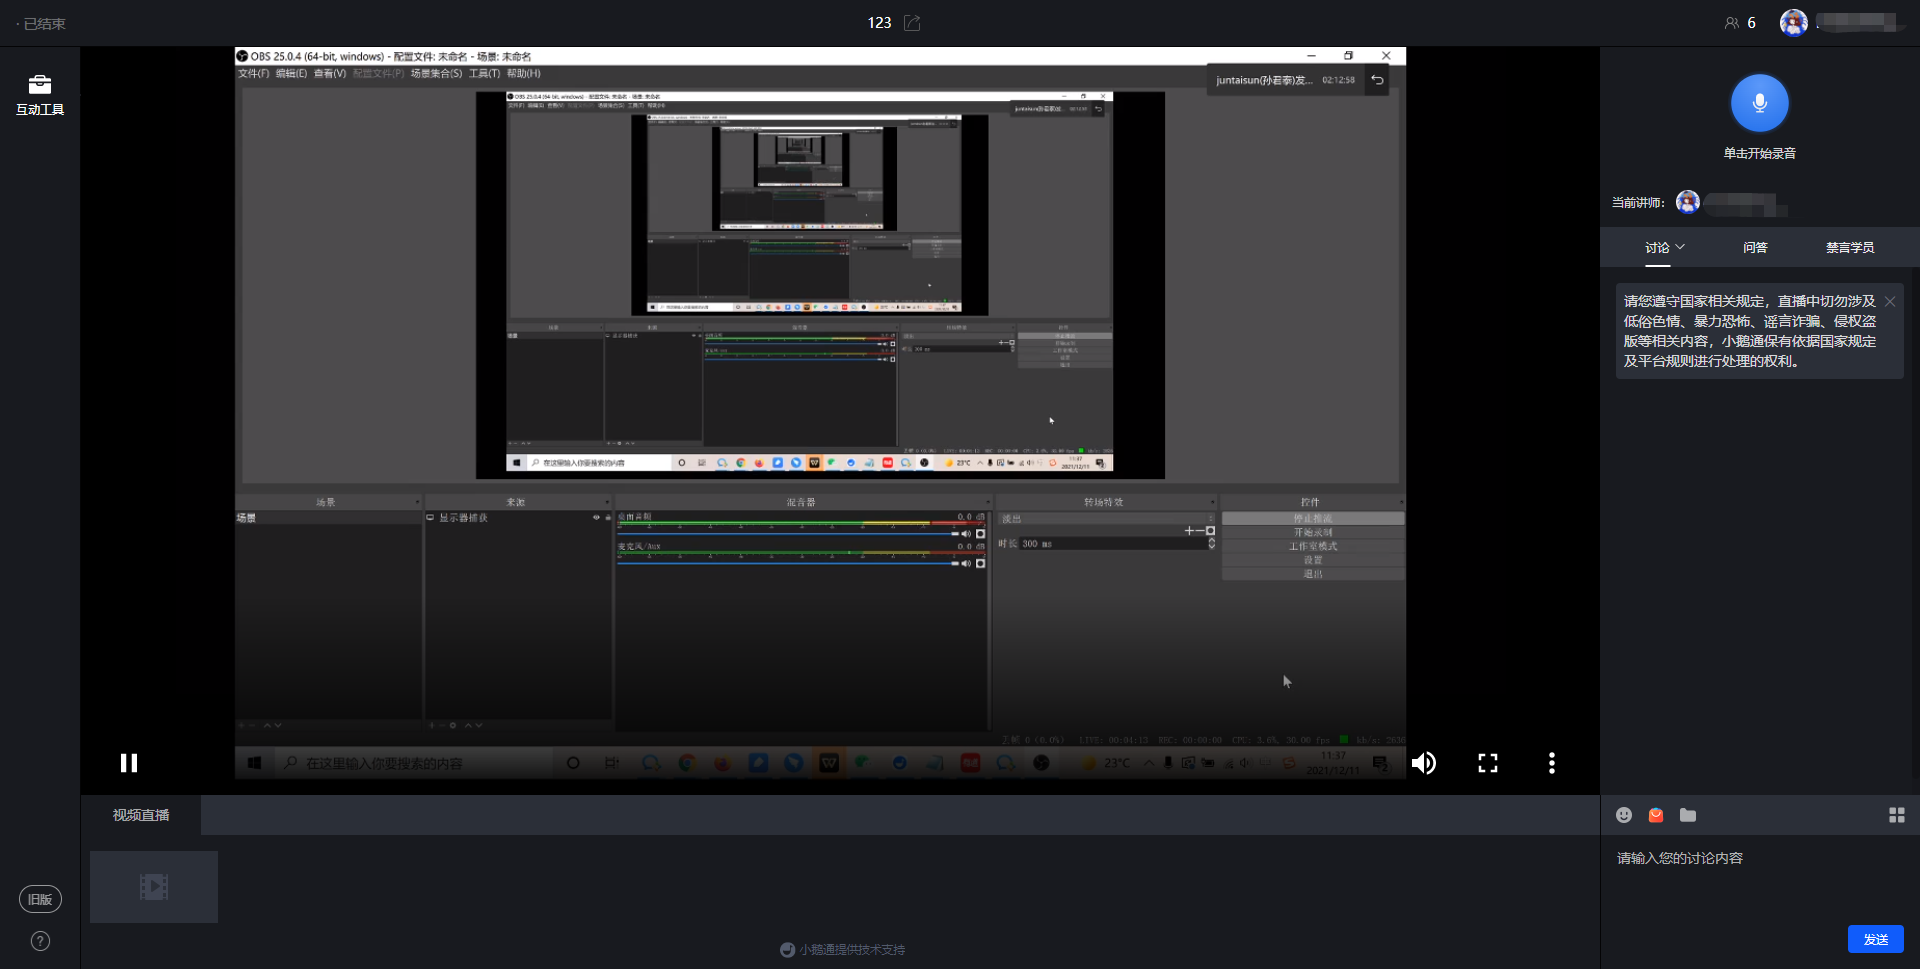
(2) Send voice messages
Click the microphone icon to start recording voice messages;
Click [Finish] to complete the voice recording; click [Cancel] to cancel the sending
After the voice recording is completed, click the [Send] button to send the voice message. Click Cancel to cancel the sending.
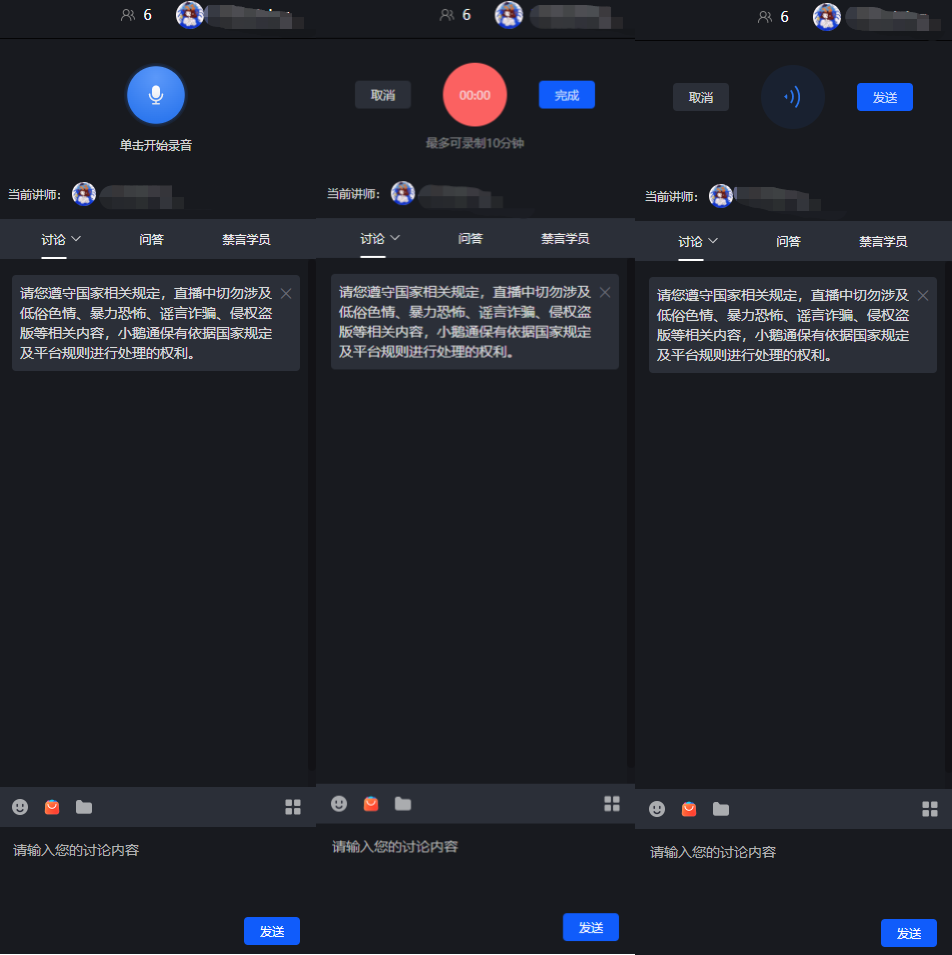
(3) Courseware display
Click the 'Folder' button in the lower - right corner to enter the material library, where you can upload and send files in other formats;
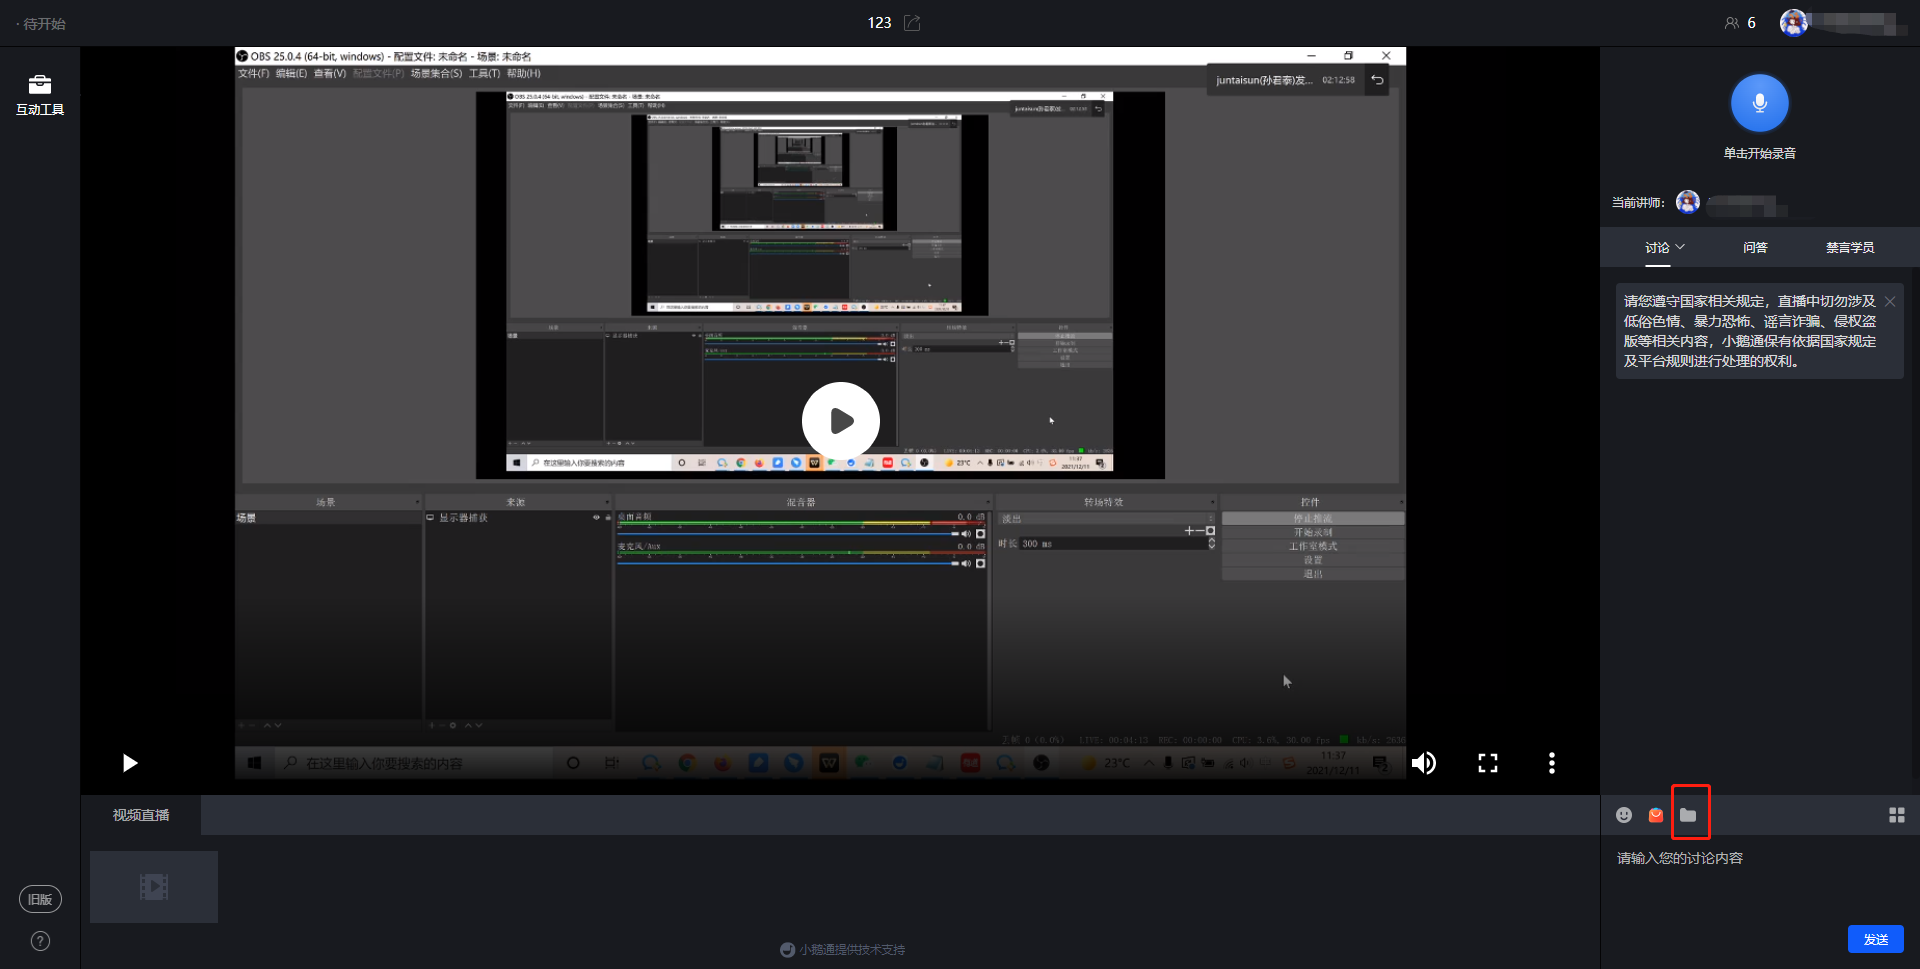
(4) End the live stream
When the lecturer needs to end the live stream, click the operation button in the upper - left corner to end the live stream
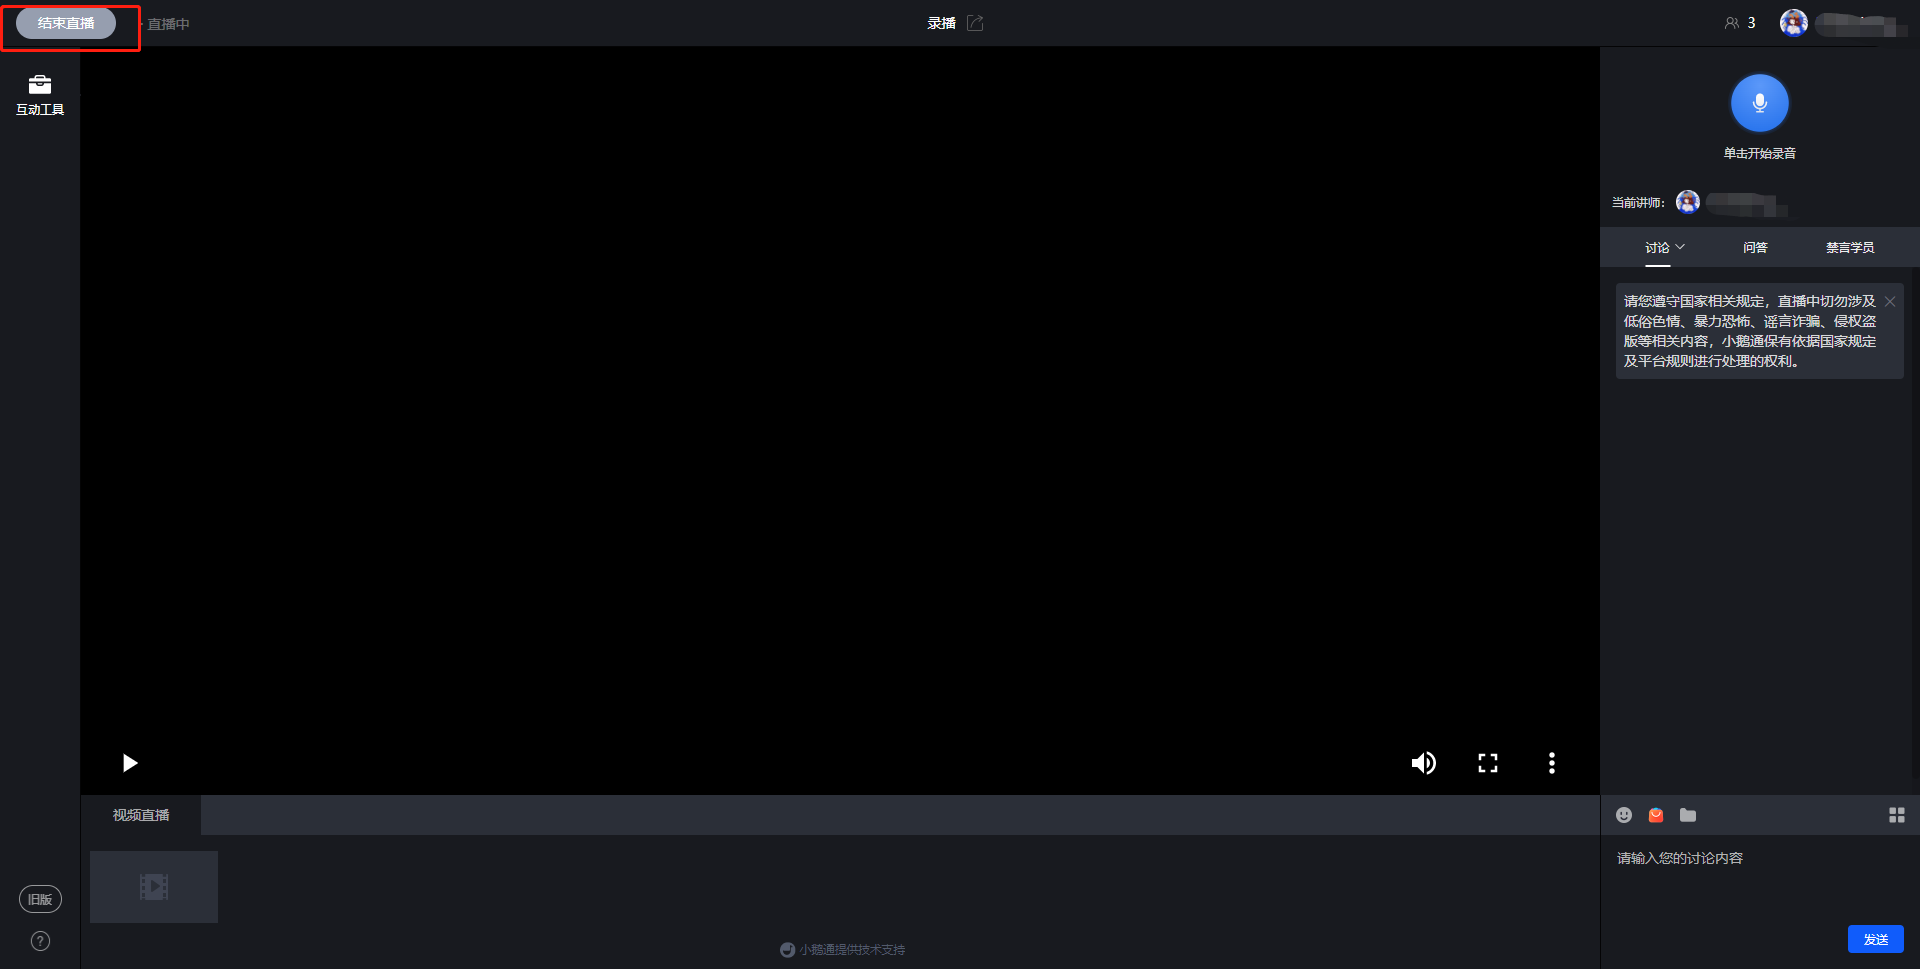
2. H5 voice live - stream room
(1) Enter the H5 live - stream room
After creating a voice live stream, the lecturer clicks 'Go to live stream', then clicks 'Share', and scan the QR code with the mobile phone to enter the live - stream room. The live stream will start as soon as the scheduled time arrives, and the uploaded videos will start playing.
(2) Send voice messages
Click the microphone icon to start recording voice messages;
Click the [Red square] to complete the voice recording. Click Cancel to cancel the sending;
After the voice recording is completed, click the send button to send the voice message. Click Cancel to cancel the sending
The live - stream room on elink supports continuous voice recording by the lecturer. The lecturer does not need to manually click to send the recordings. The system will automatically cut the recordings into 60 - second voice messages and send them one by one.
This allows the lecturer to teach at their own pace without being interrupted by the action of sending voice messages.
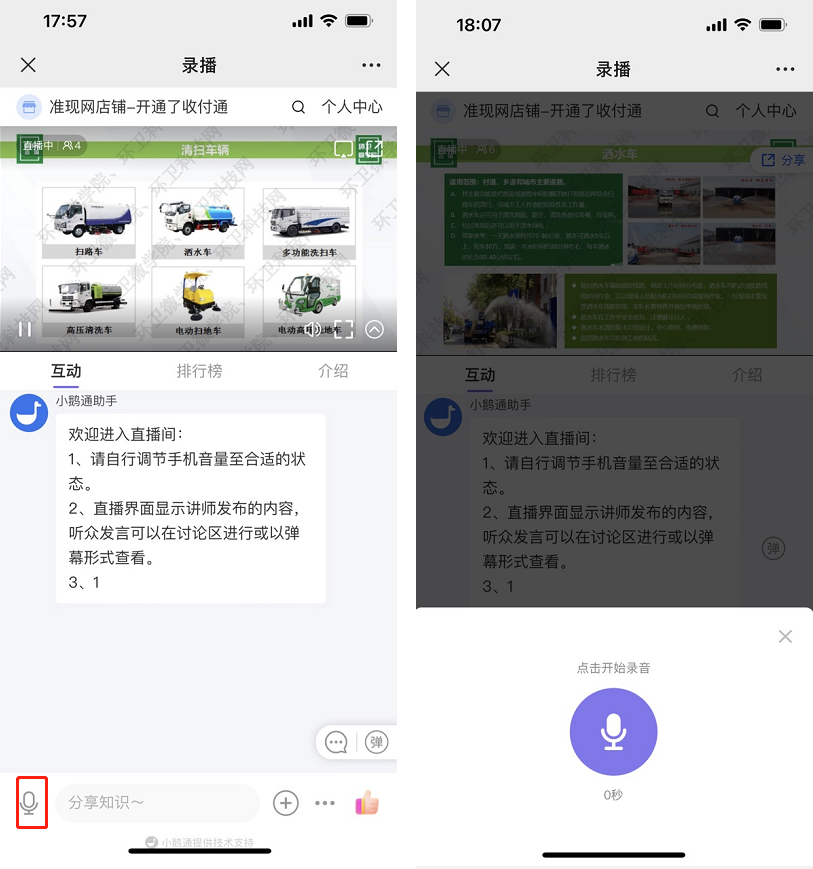
(3) Courseware display
Click the '+' in the lower - left corner of the live - stream room, and then click the File Library or Audio - Video Library to share content in other formats (you need to complete the upload in the material library on the web - end lecturer side).
(4) End the live stream
When the lecturer needs to end the live stream
click the 'More' button in the lower - right corner and click 'End Live Stream' in the pop - up drop - down box to end the live stream.
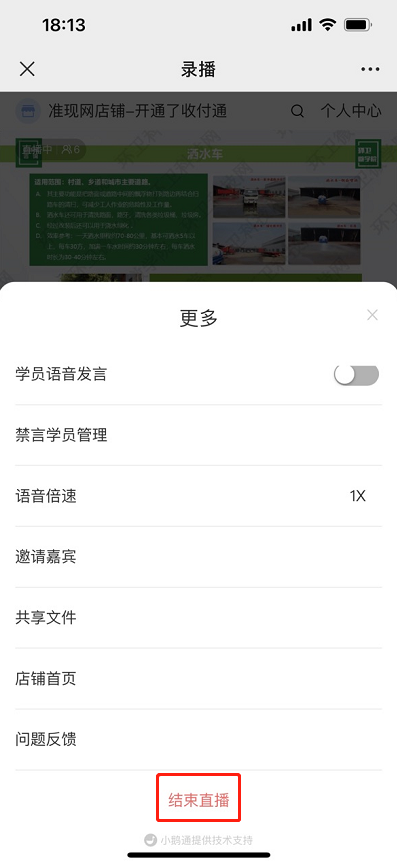
Step 4: Watch the live stream (H5 store or elink Live Mini Program)
1. Users can enter the live - stream room by scanning the QR code or opening the link
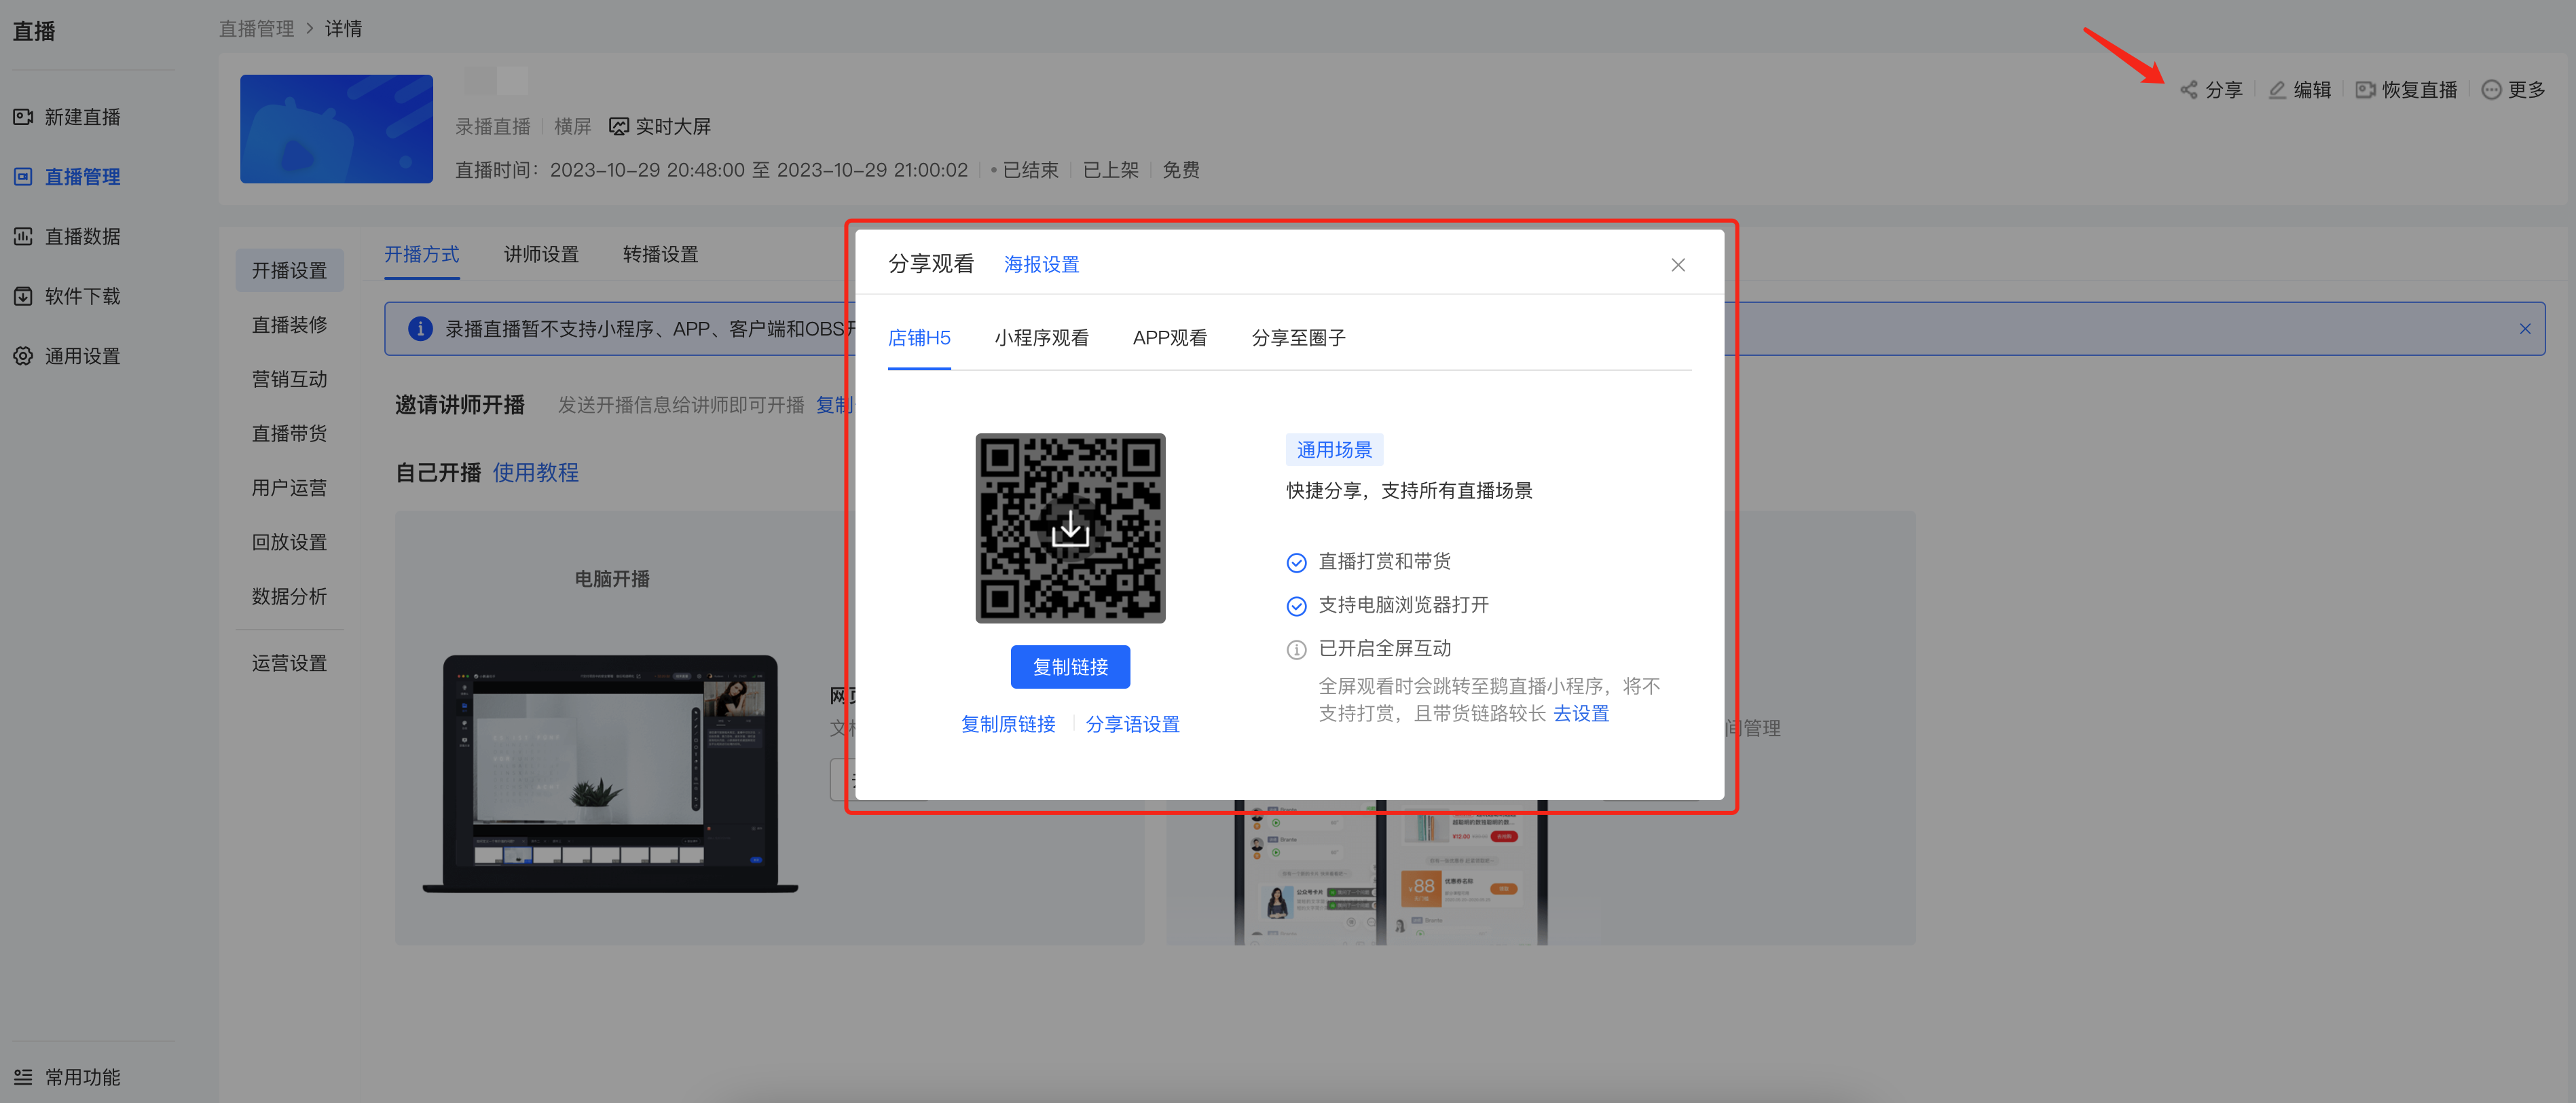
2. After entering the live - stream room, students can interact with the lecturer by sending text content, asking questions, etc.
If the live streaming duration is longer than the uploaded video duration, will the words [Video playback completed] appear after the video finishes playing?
Yes, when the video duration is shorter than the live streaming duration (for example, the video duration is 5 minutes and the live streaming duration is 1 hour, this message will appear after the video finishes playing).
● Instructor side - Web version:
● Student side - Web version:
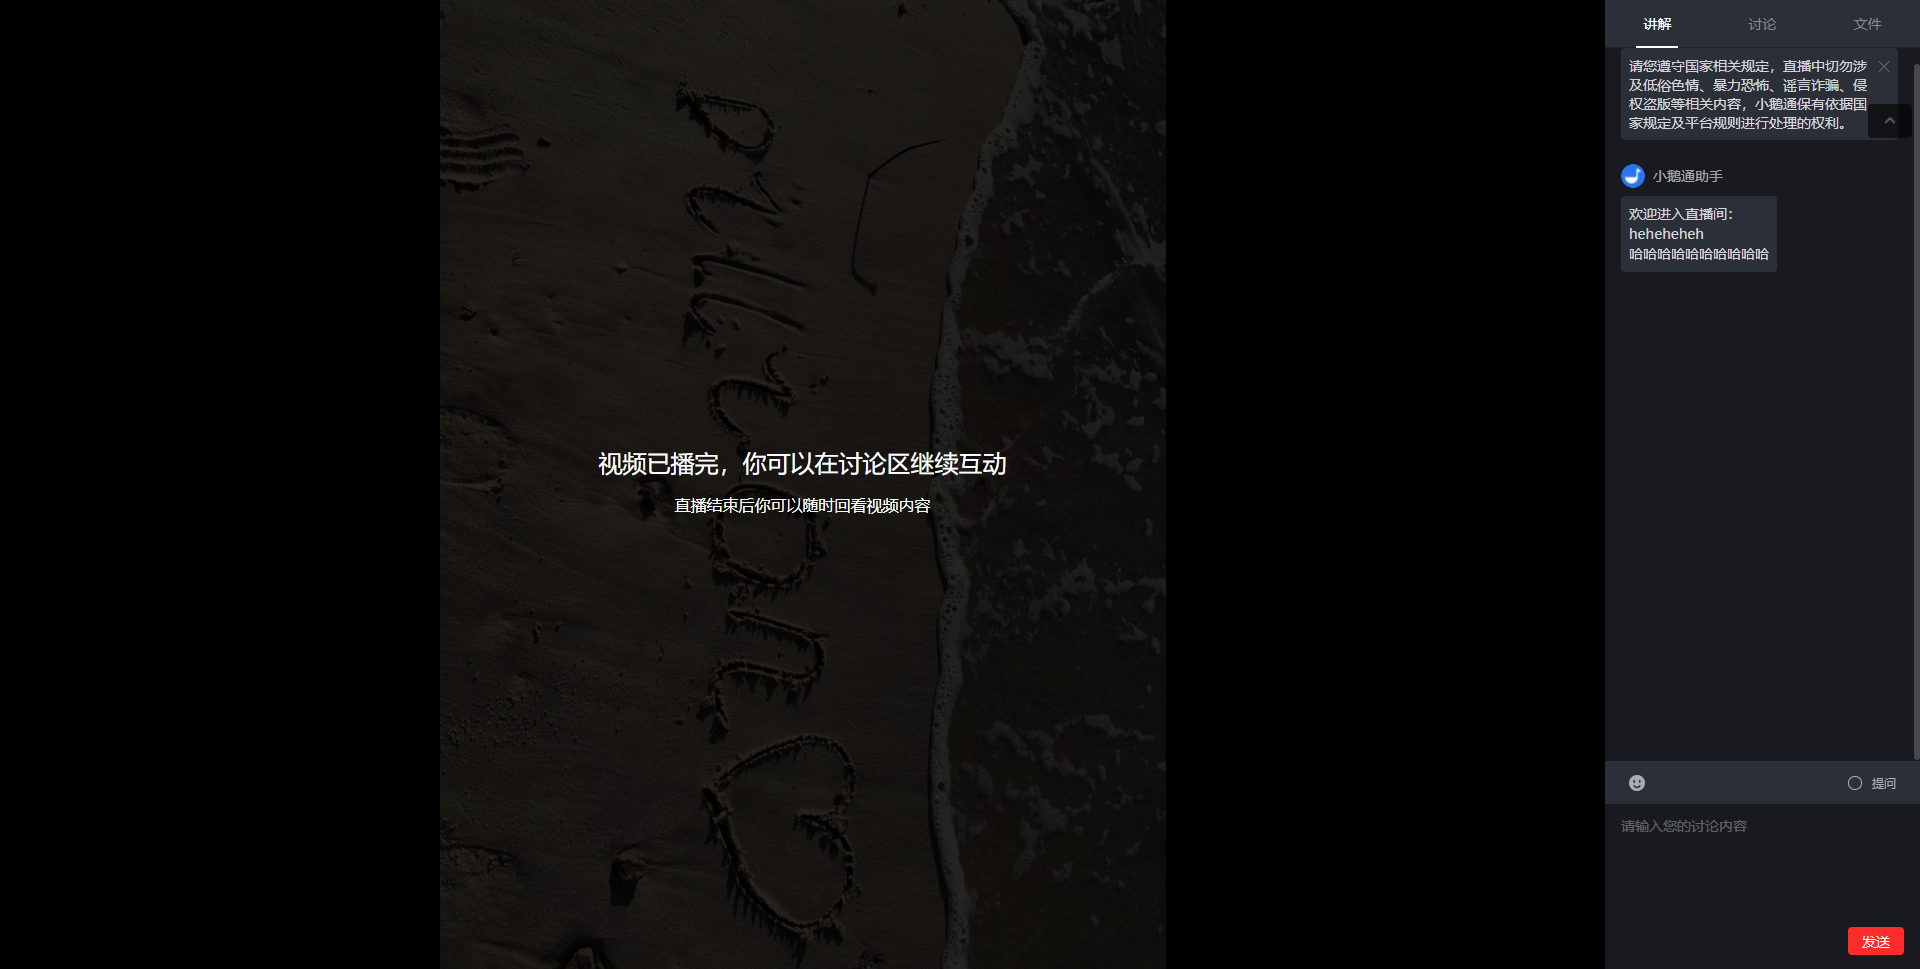
● Student side - H5 version:
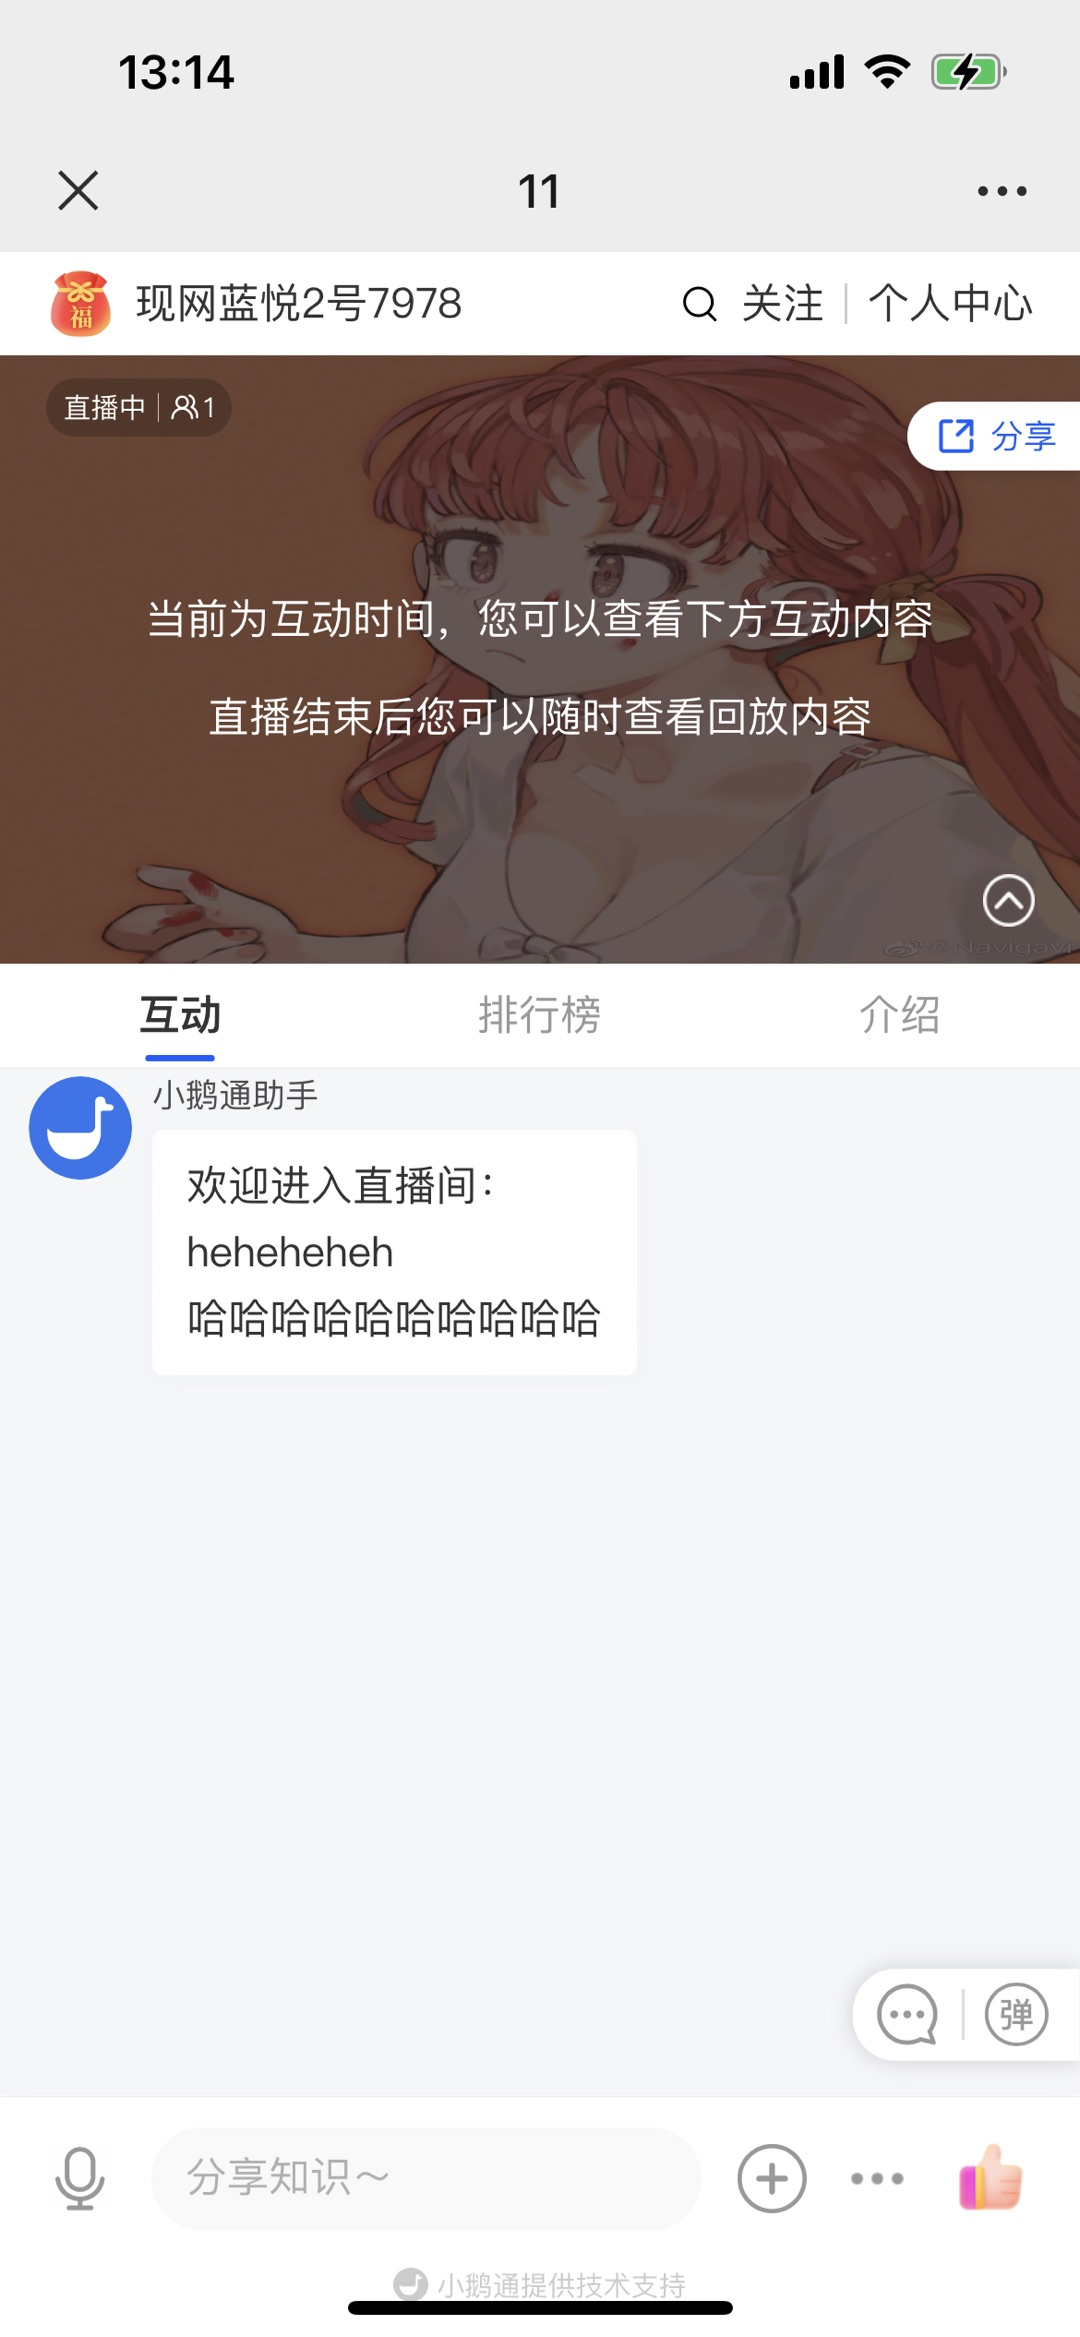
Tutorial on Using Recorded and Live Streams
I. Function Introduction
The recorded live streaming mode is suitable for scenarios where there are videos and the live content is relatively lightweight. Merchants can upload videos to the live room. Once the live stream starts, the video will begin to play, and they can interact with students through voice and other means.
II. Use Scenarios
It is applicable to live streams where the instructor can prepare recorded videos in advance. The instructor prepares the recorded video in advance. Users can view the video uploaded by the instructor during the live stream, and the instructor can give explanations through voice.
III. Operation Path
Merchant side: Merchant background → Create recorded live stream → Start live stream
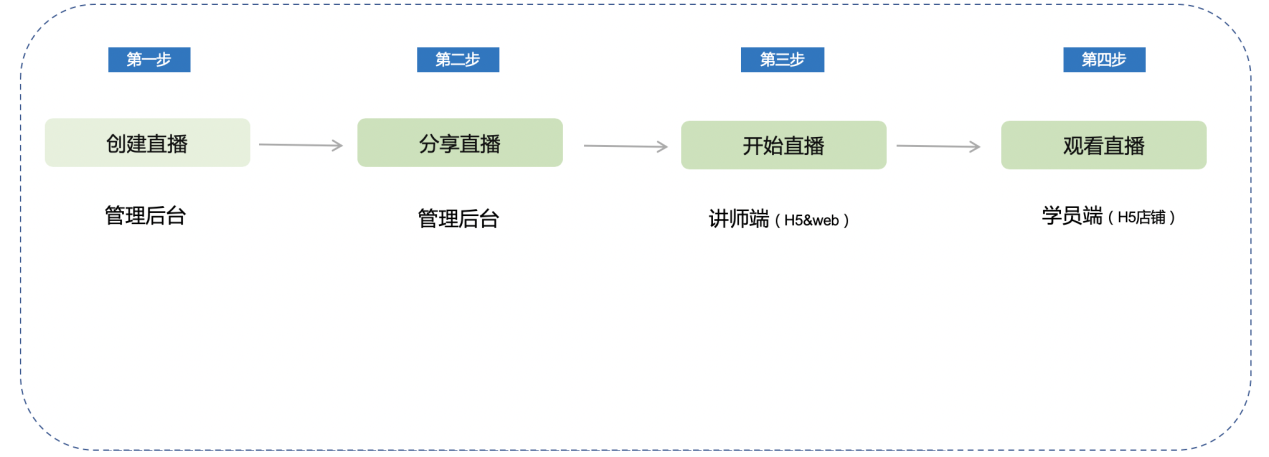
IV. Usage Tutorial
Step 1: Create a live stream (Management background)
1. Enter the management background - New live stream, and select 'Recorded live stream'.
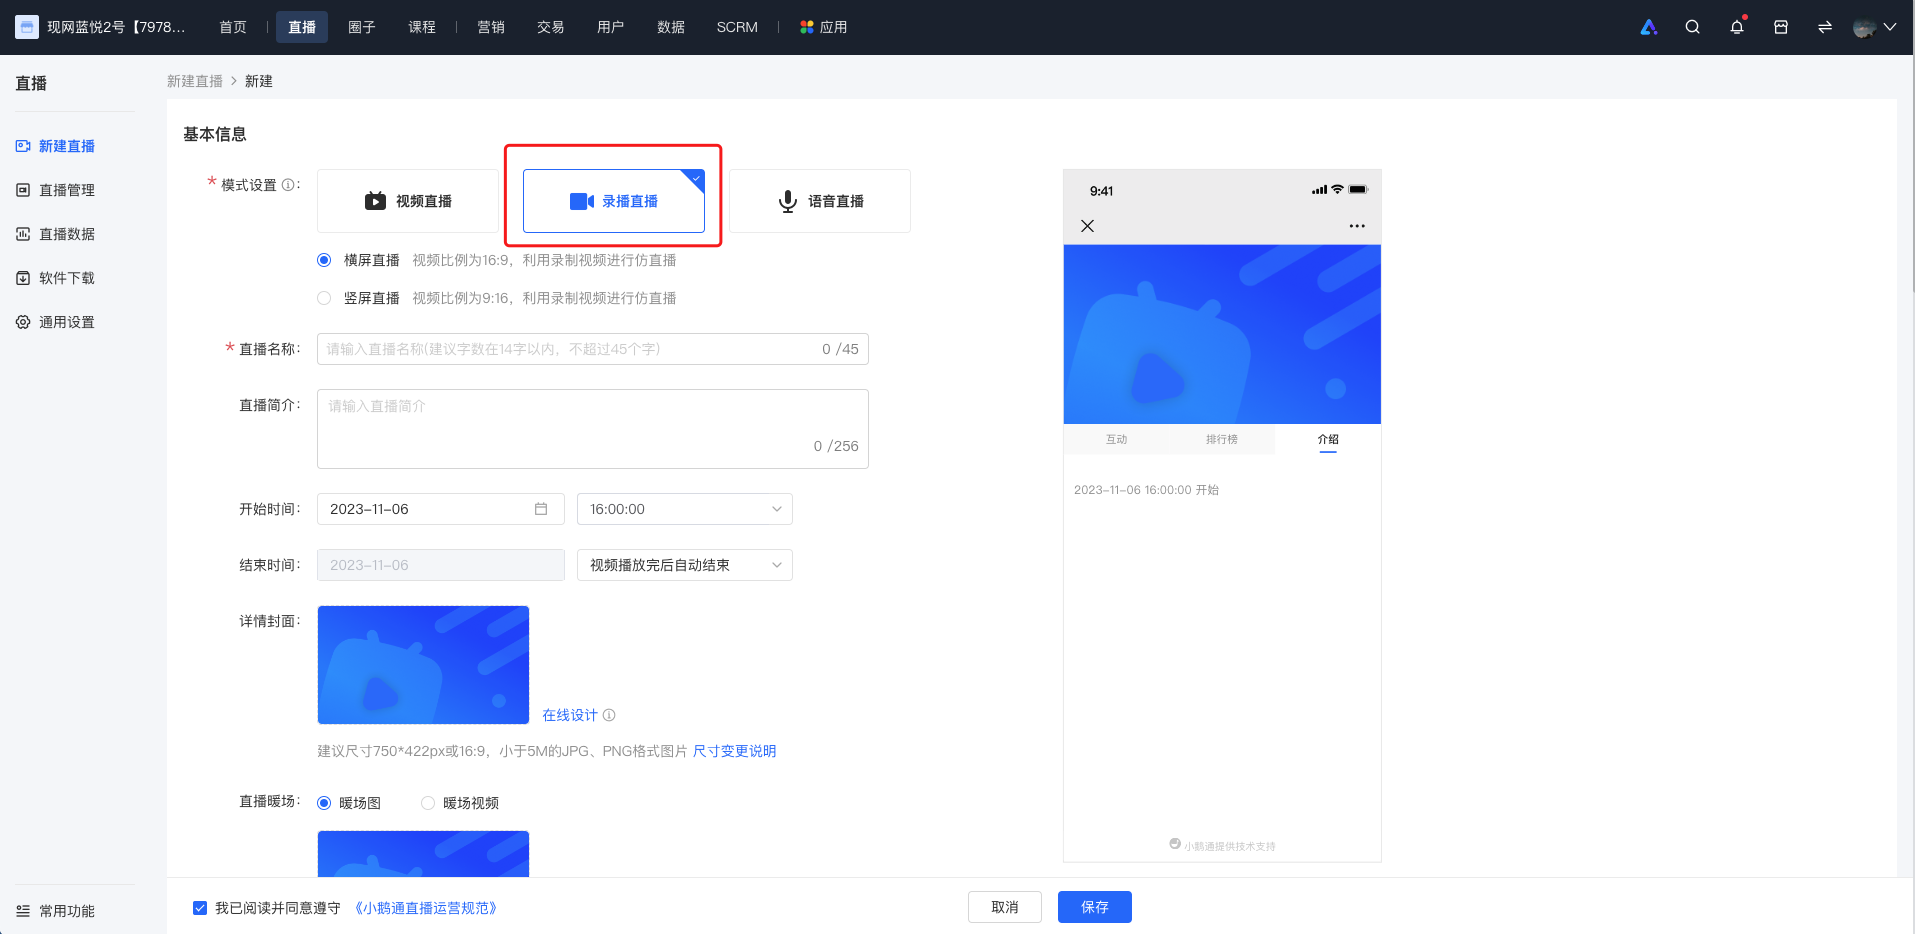
(Management background)
2. Fill in the relevant information, click 'Save' to complete the creation.
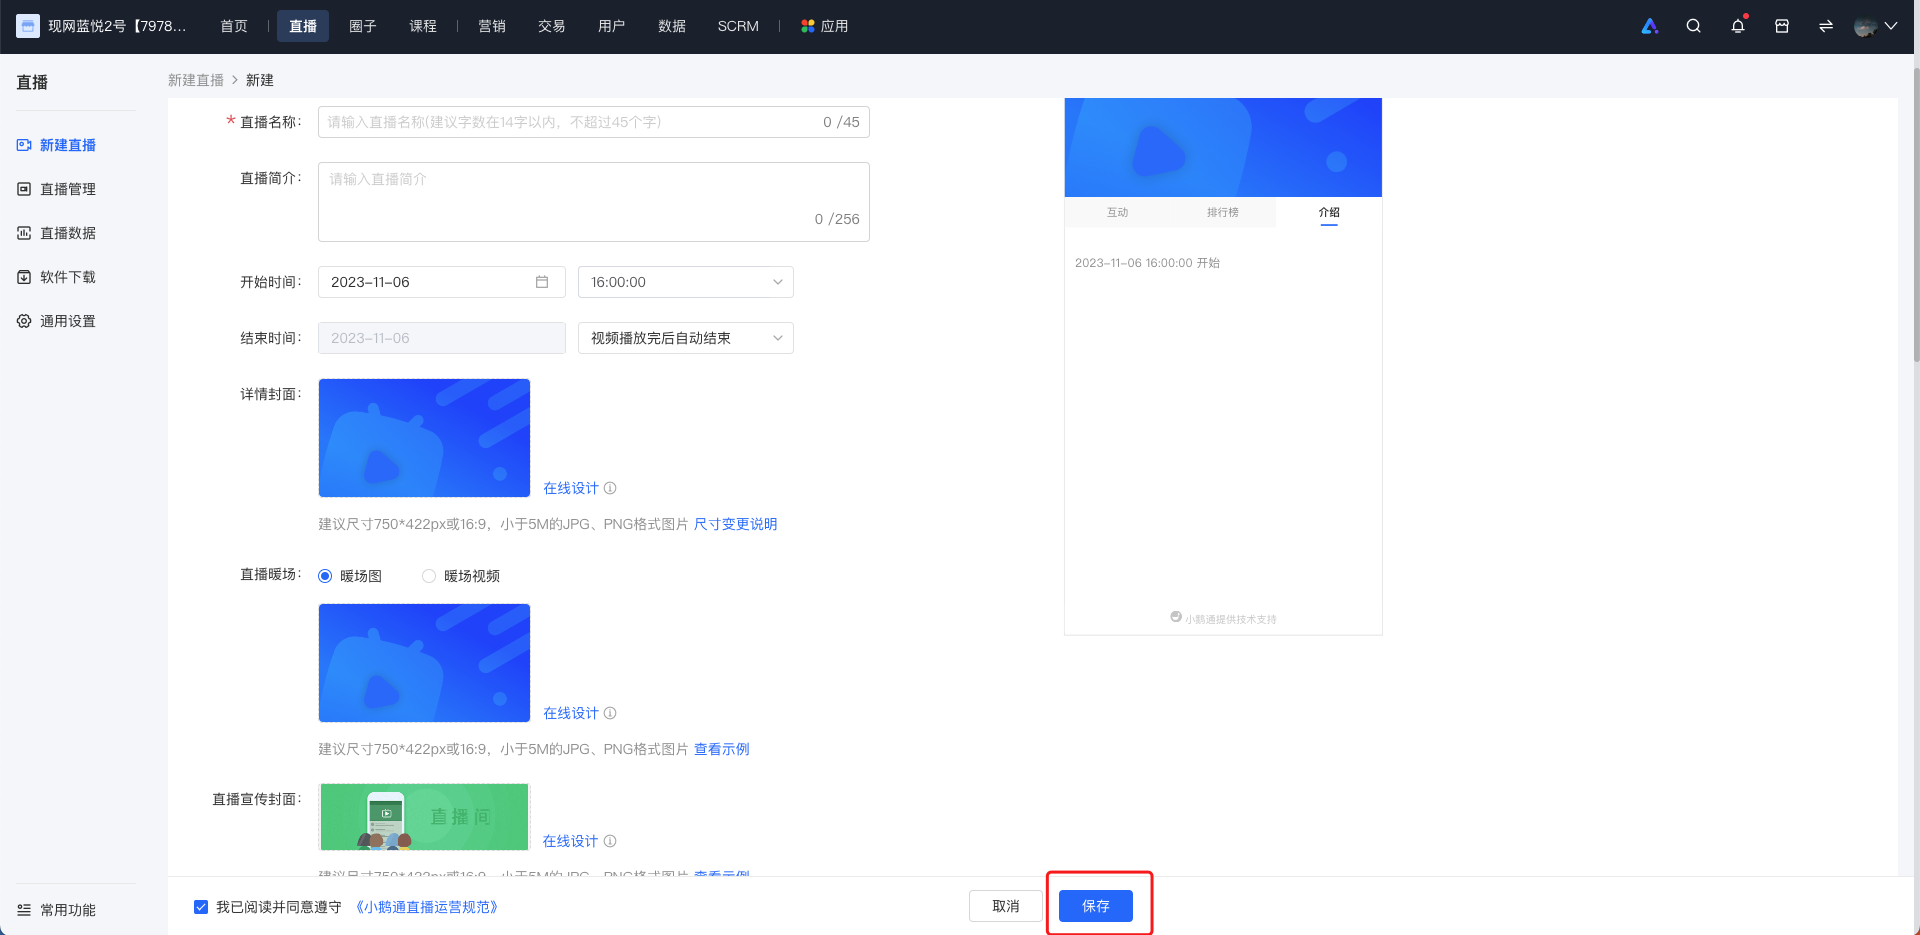
PS: Don't forget to select and upload the video at [Recorded video] - [Add video]!
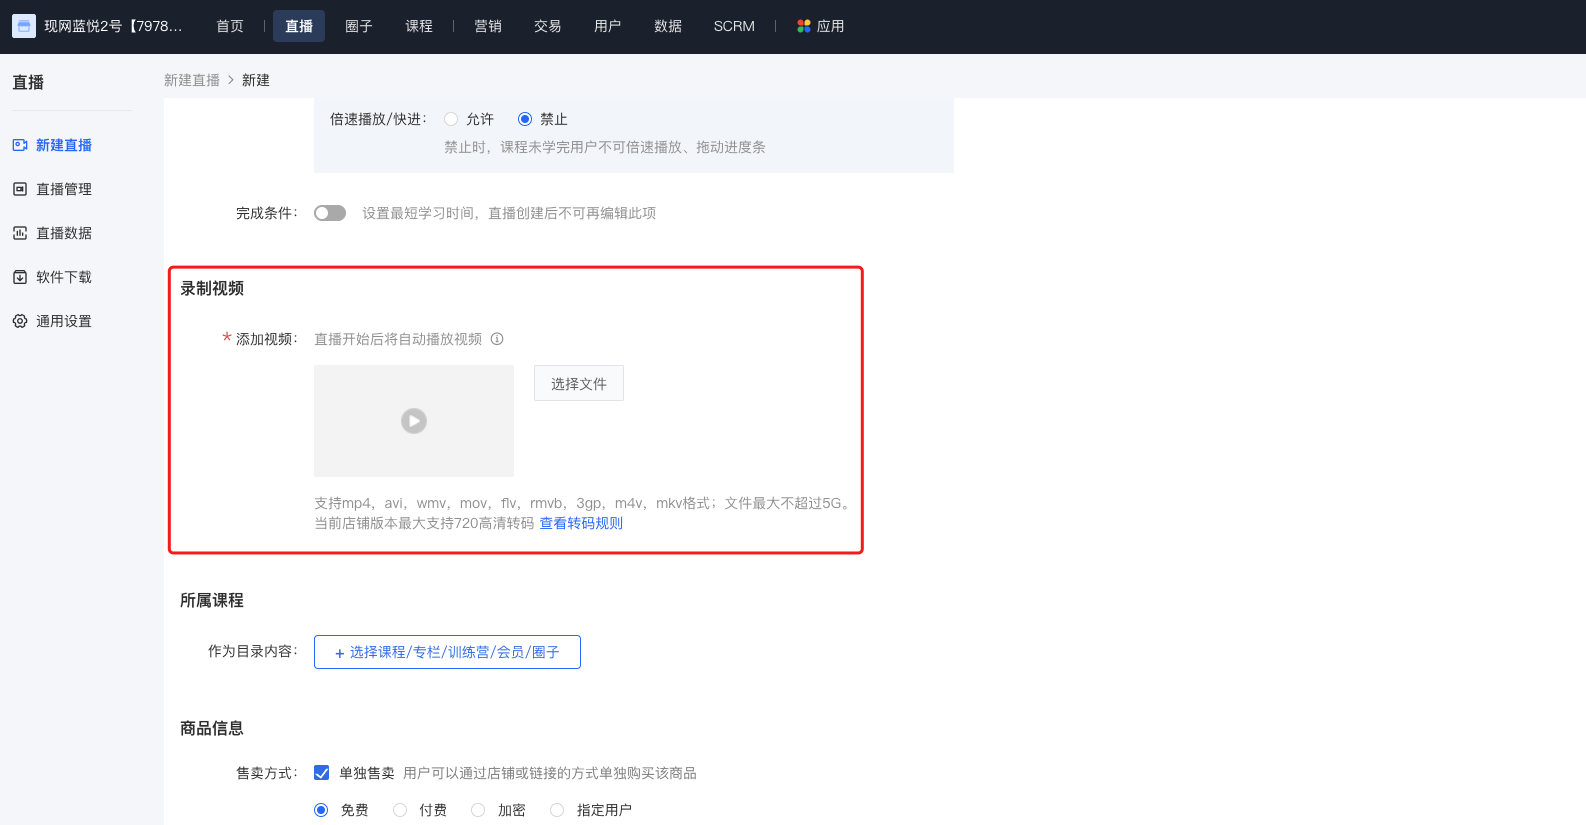
(Management background)
1. After the creation is completed, on the live stream list page, click the 'Share' button to get the QR code and link of the live room, and share them with students.
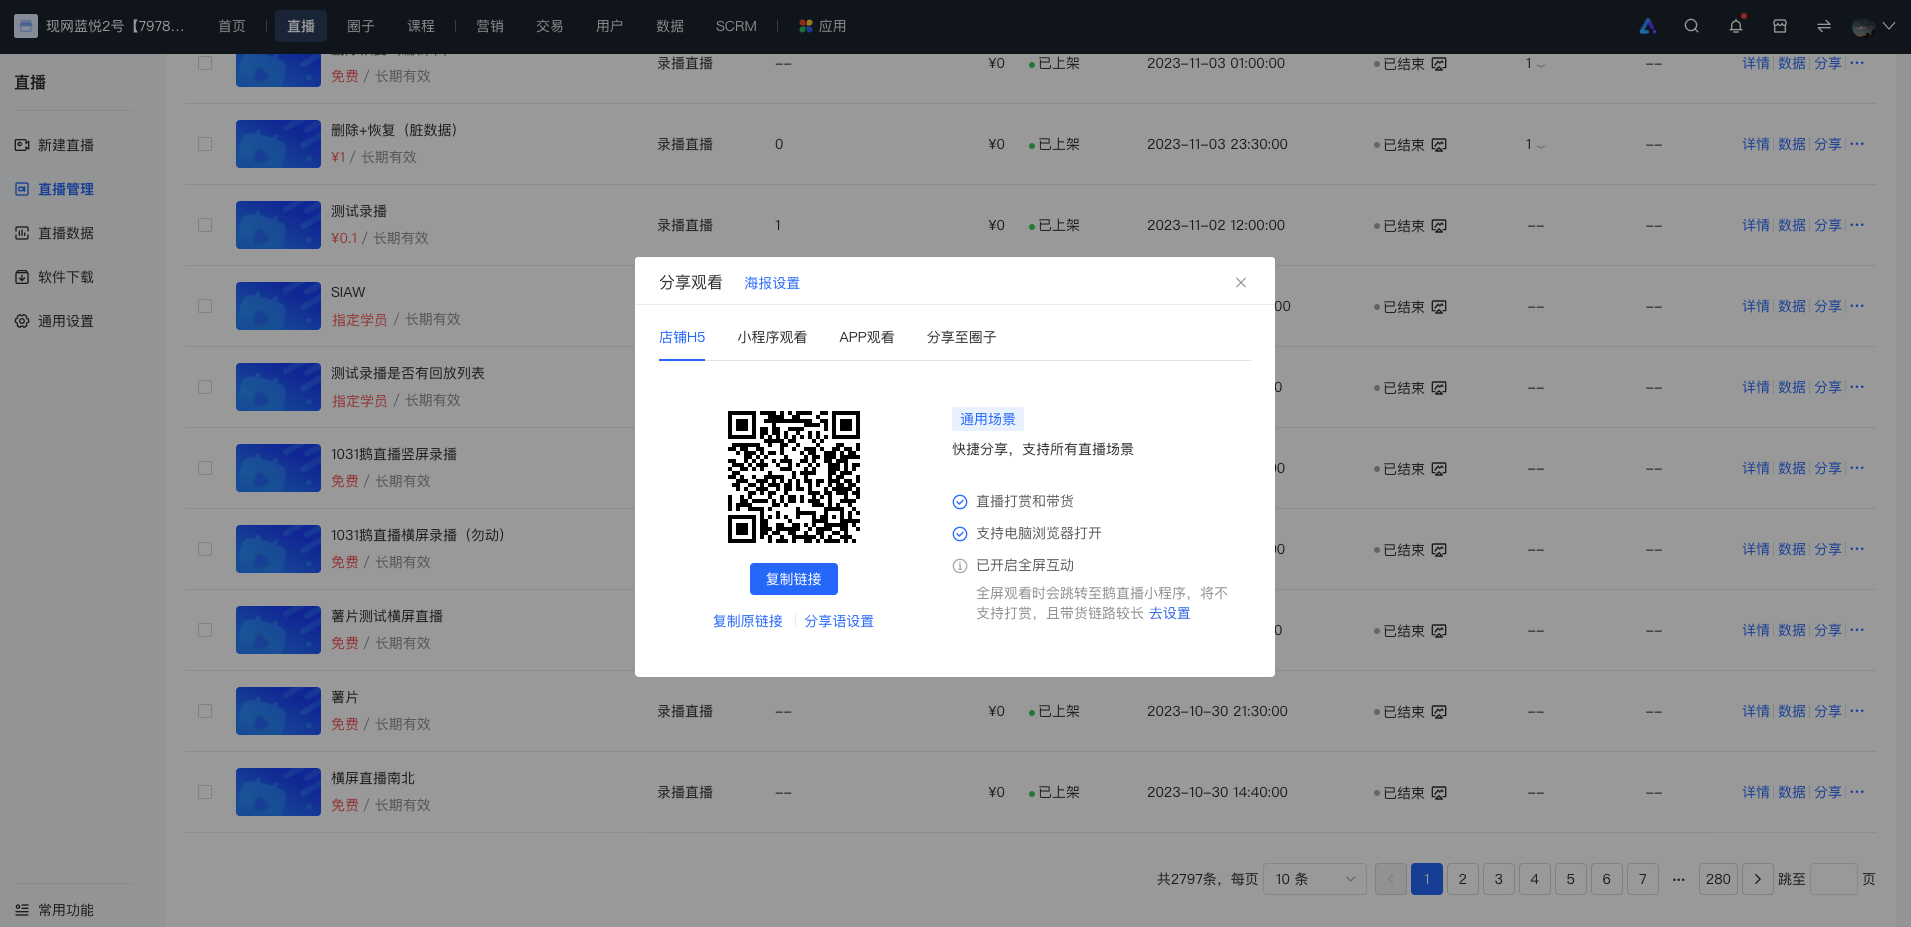
2. H5 - end sharing
On the mobile - end, you can get the live stream invitation card and share it through channels such as Moments, WeChat groups, and Official Accounts.
Method for creating the invitation card:[Live room] → [Click the share button] → Long - press the picture to save → Send and share
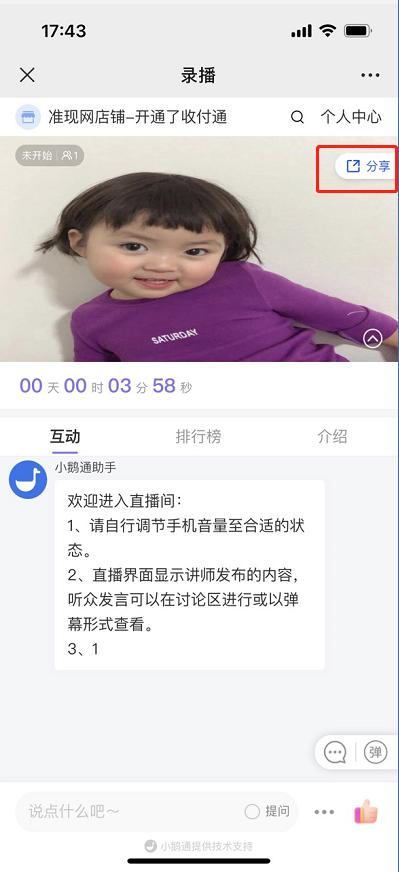
Step 3: Start the live stream (WeChat H5 & Computer web instructor side)
1. Web - end recorded live room
(1) Enter the web live room
After creating a recorded live stream, the instructor clicks 'Go live' and selects the web - end. Open the live room address, scan the QR code with WeChat to log in and enter the live room page. When the live stream time arrives, the live stream can start, and the uploaded video will begin to play.
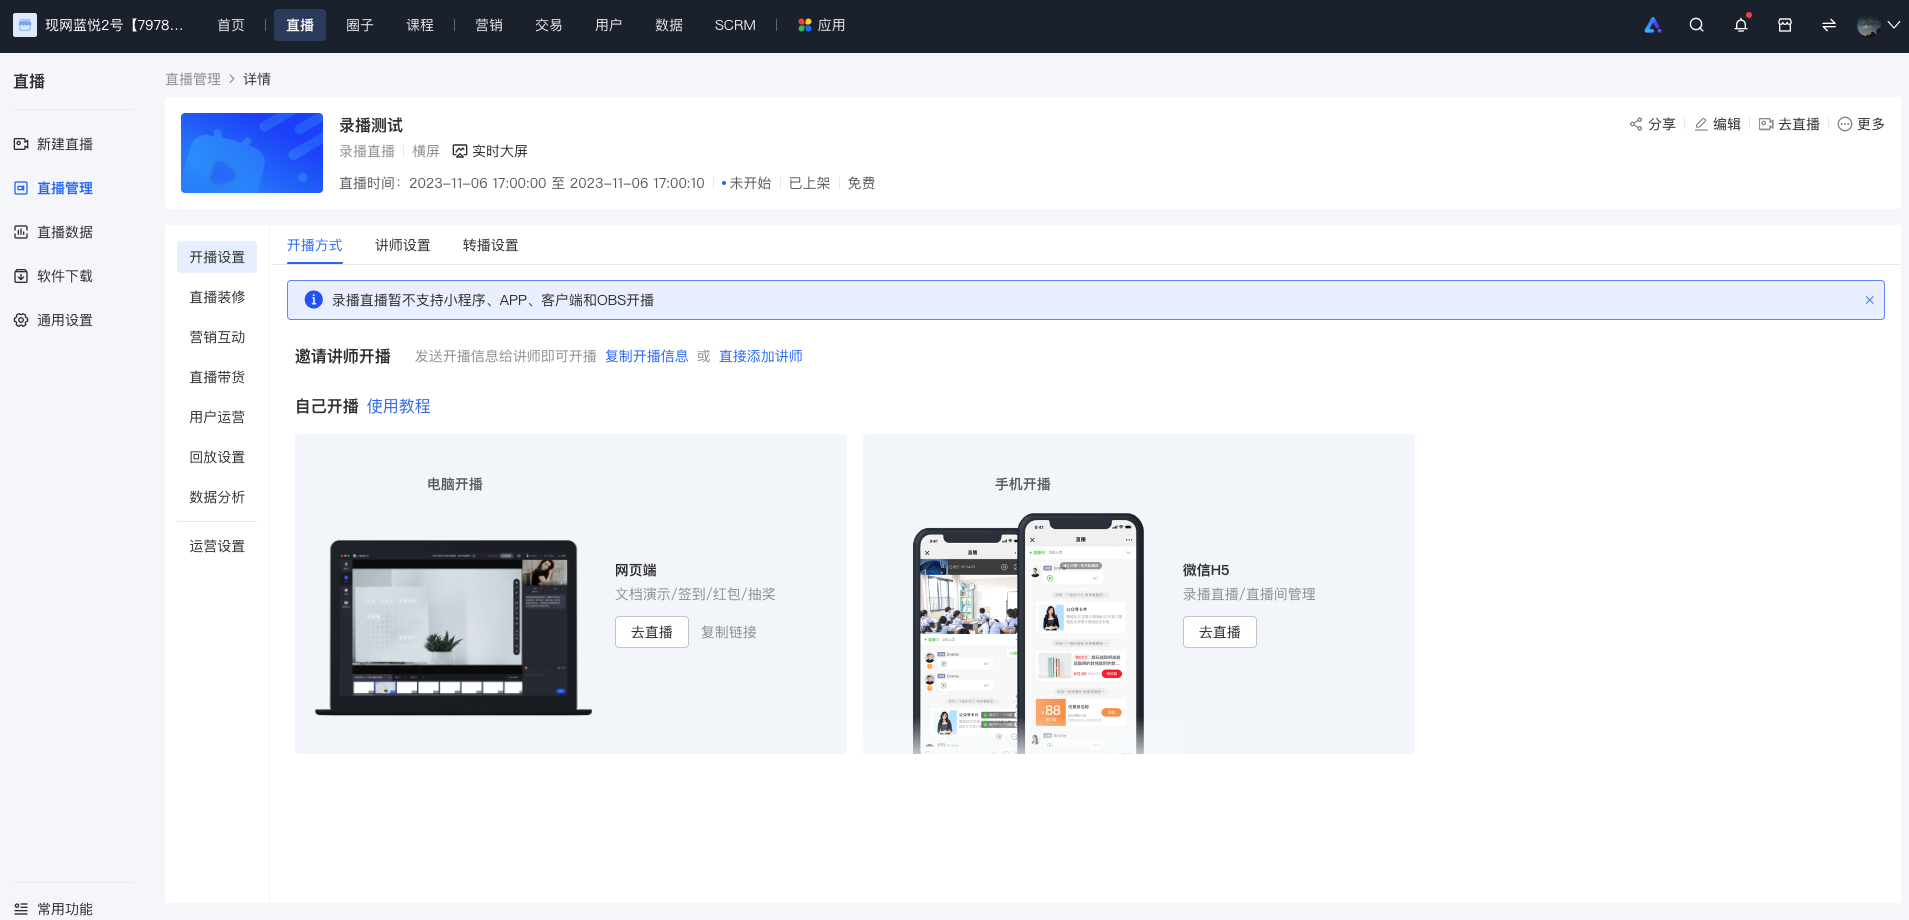
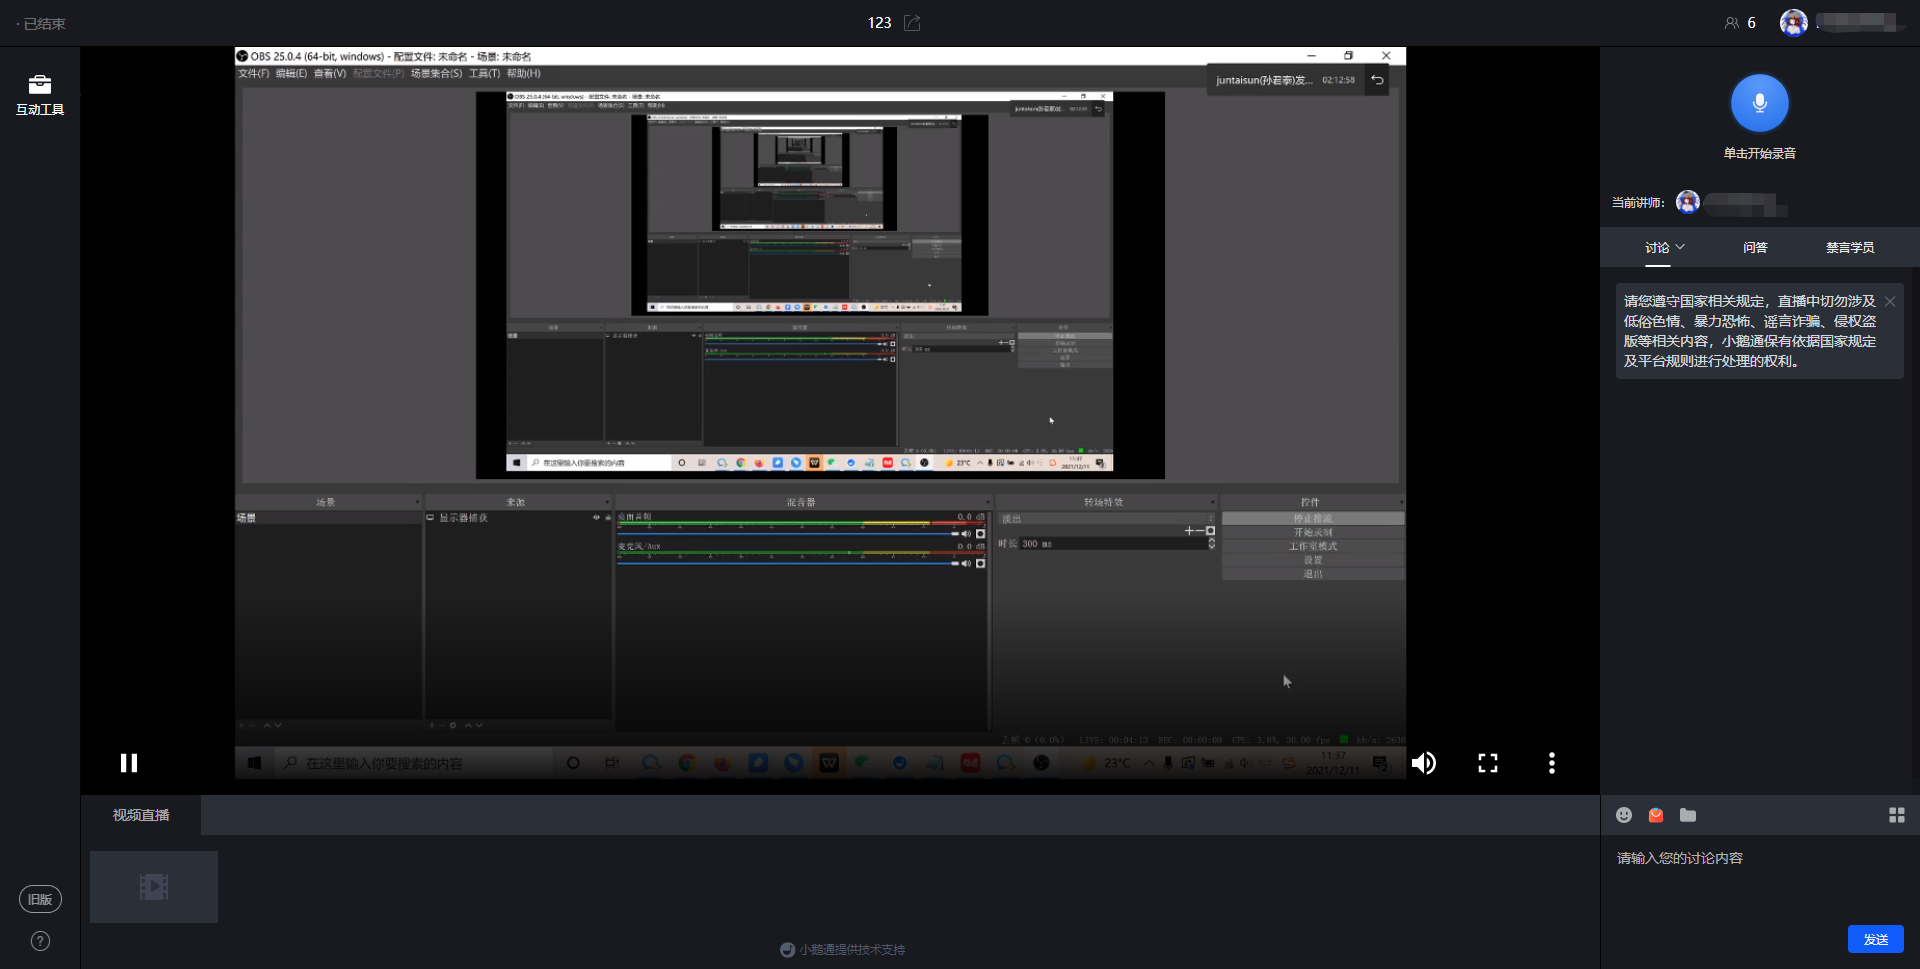
(2) Send voice
Click the microphone icon to start the voice recording time.
Click [Finish] to complete the voice recording; click [Cancel] to cancel the sending.
After the voice recording is completed, click the [Send] button to send the voice. Click 'Cancel' to cancel the sending.
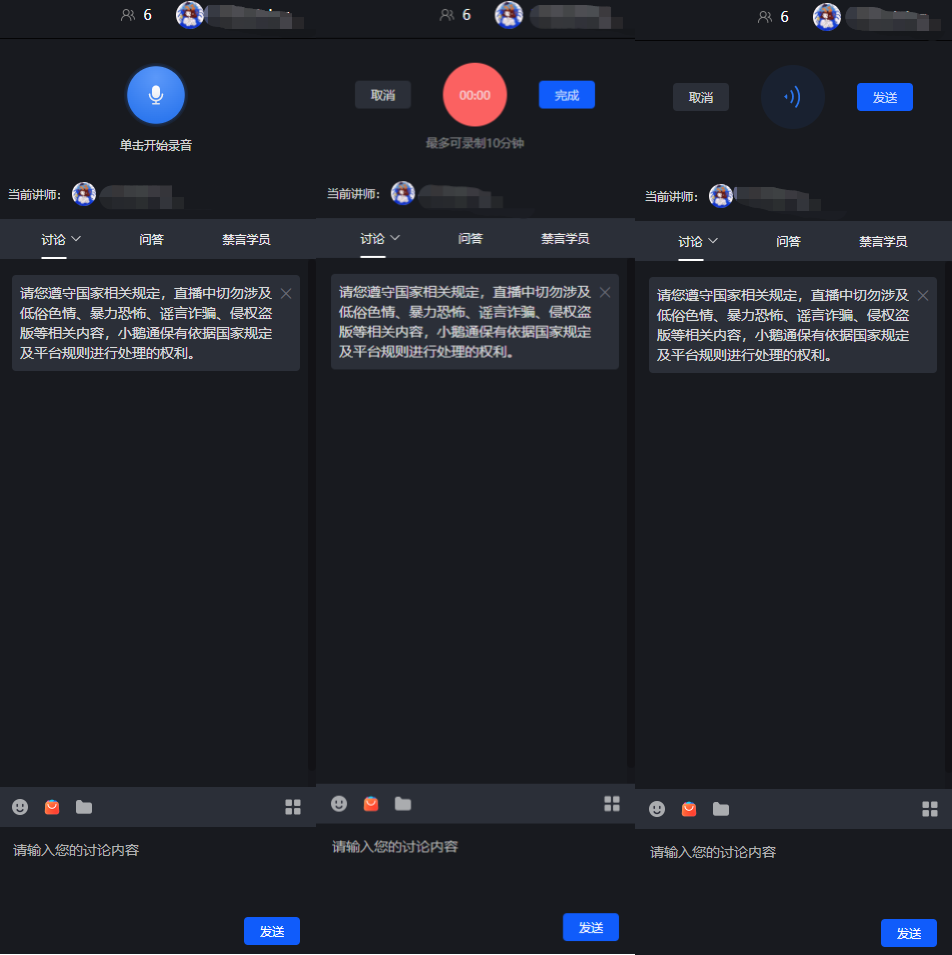
(3) Courseware display
Click the 'Folder' button in the lower - right corner to enter the material library, where you can upload and send files in other formats.
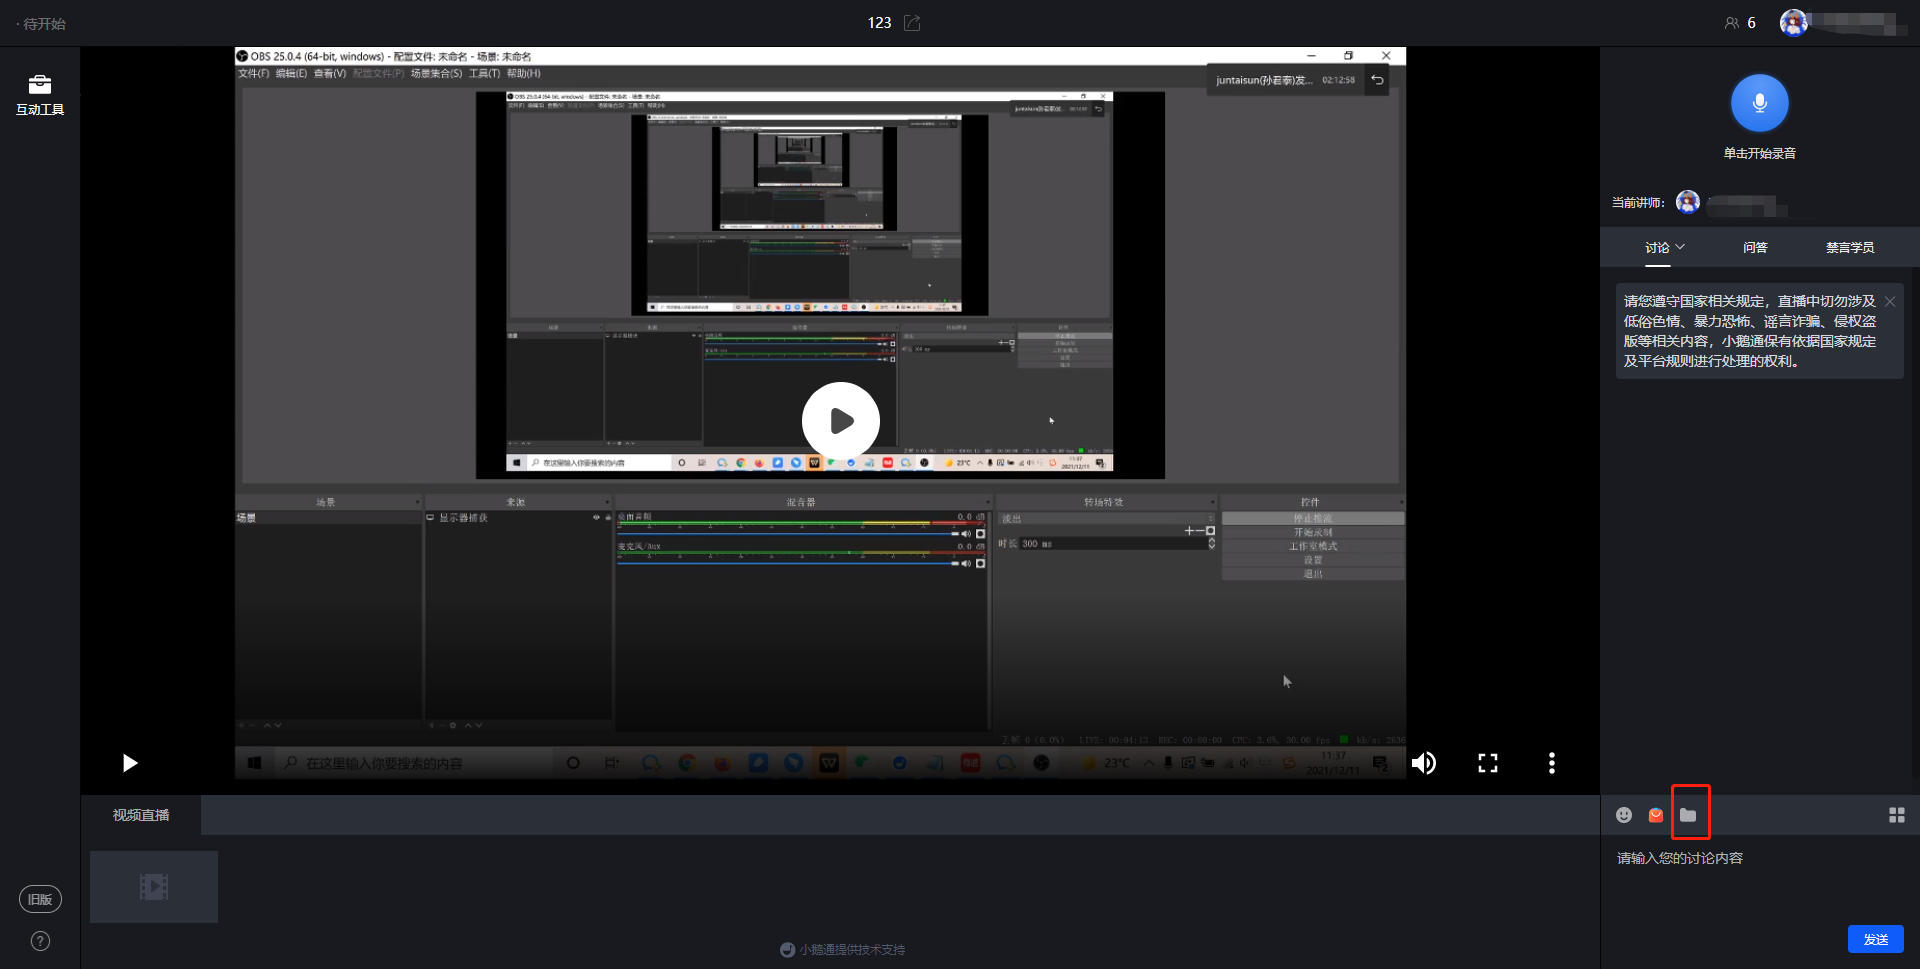
(4) End the live stream
When the instructor needs to end the live stream, click the operation button in the upper - left corner to end the live stream.
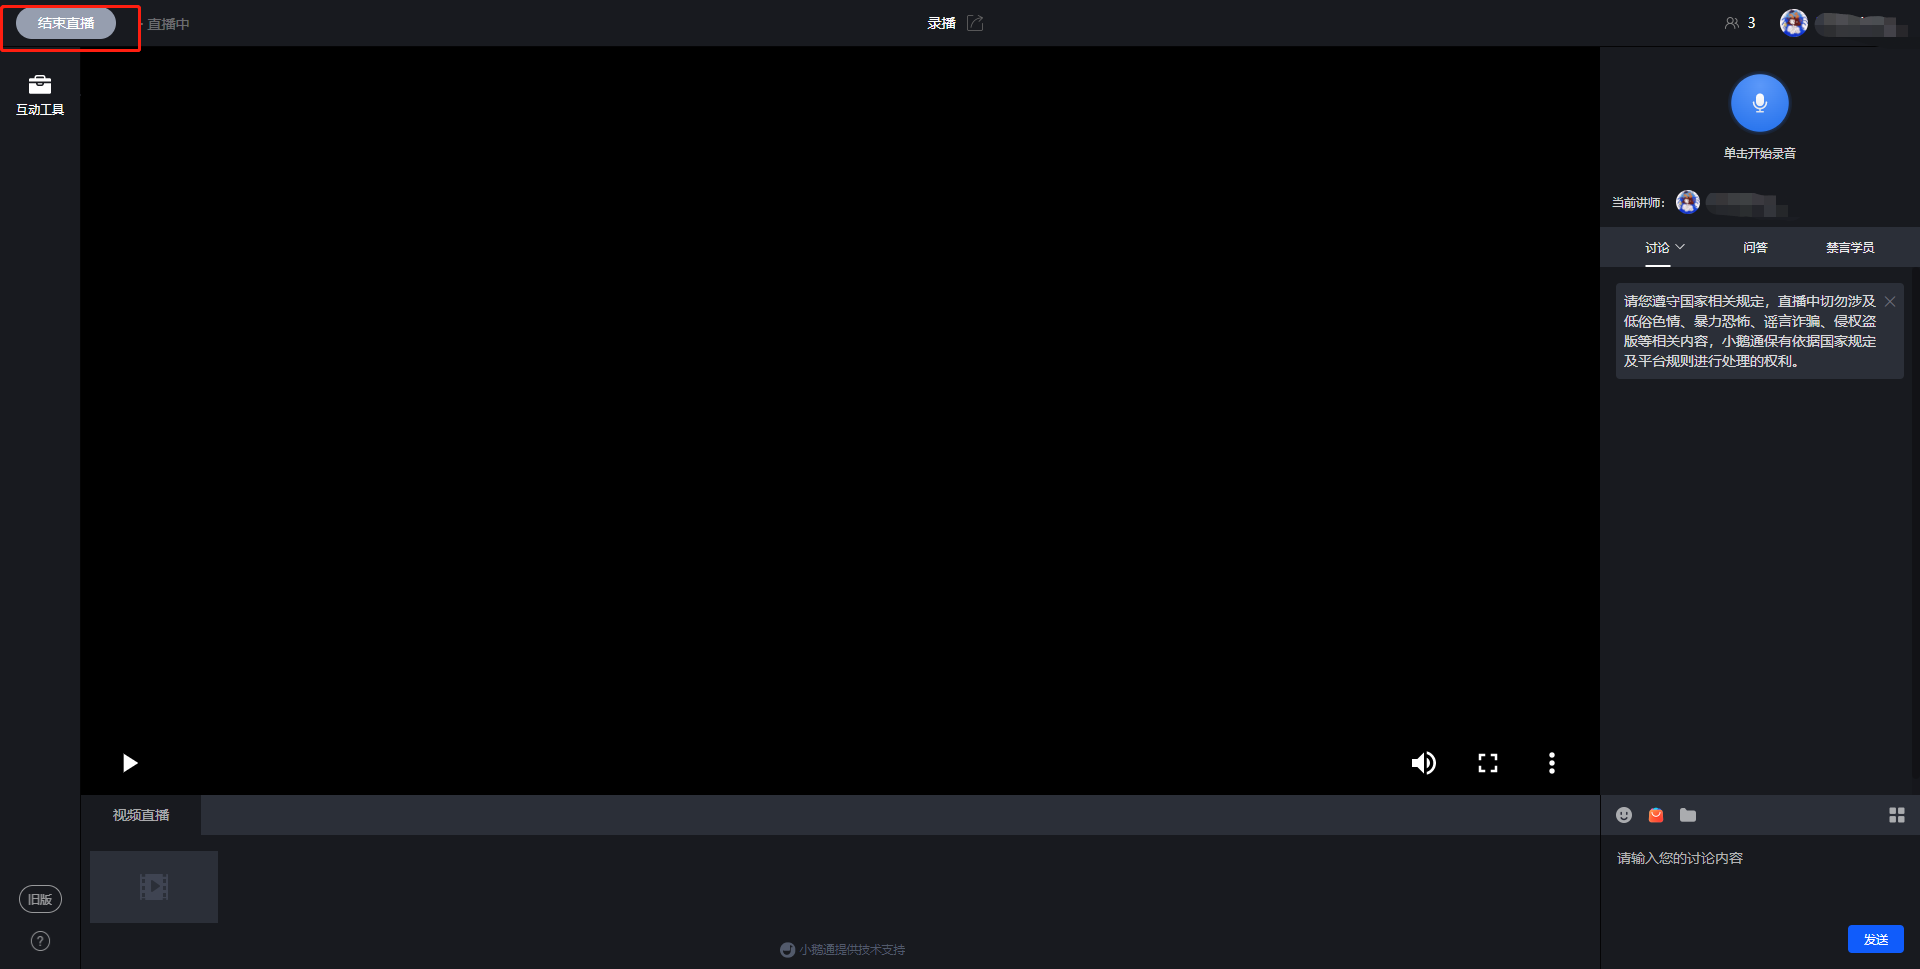
2. H5 recorded live room
(1) Enter the H5 live room
After creating a recorded live stream, a 'Share' pop - up window will appear.Scan the QR code with your mobile phone to enter the live room. When the live stream time arrives, the live stream can start, and the uploaded video will begin to play.
(2) Send voice
Click the microphone icon to start the voice recording time.
Click the [Red square] to complete the voice recording. Click 'Cancel' to cancel the sending.
After the voice recording is completed, click the send button to send the voice. Click 'Cancel' to cancel the sending.
The elink live room supports continuous voice recording by the instructor. The instructor doesn't need to manually click to send the recording. The system will automatically cut the recording into 60 - second voice messages and send them one by one.
This allows the instructor to teach at their own pace without being interrupted by the action of sending voice messages.
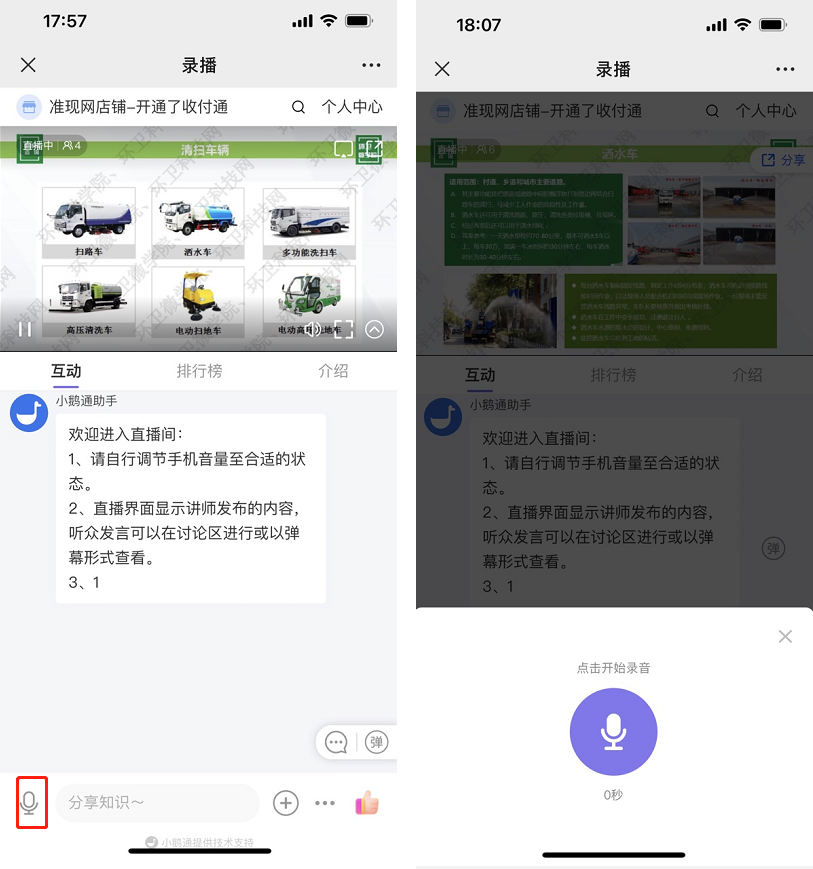
(3) Courseware display
Click the '+' in the lower - left corner of the live room, then click the file library or audio - video library to share content in other formats (the upload needs to be completed in the material library on the web instructor side).
(4) End the live stream
When the instructor needs to end the live stream, click the 'More' button in the lower - right corner and click 'End live stream' in the pop - up drop - down box to end the live stream.
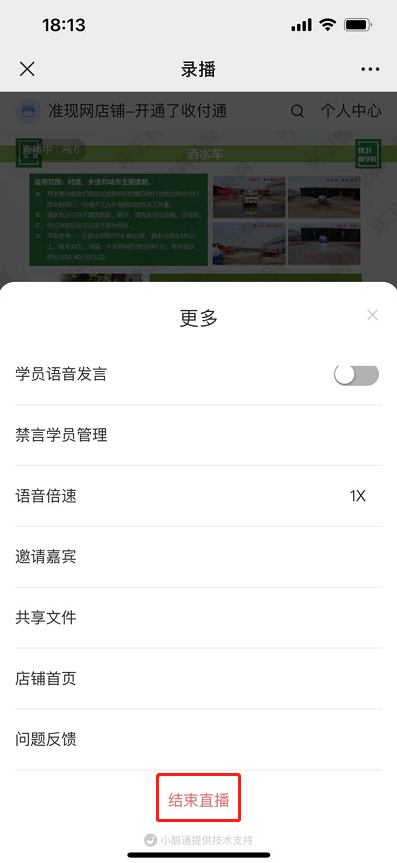
Step 4: Watch the live stream (H5 store or elink live Mini Program)
1. Users can enter the live room by scanning the QR code or opening the link.
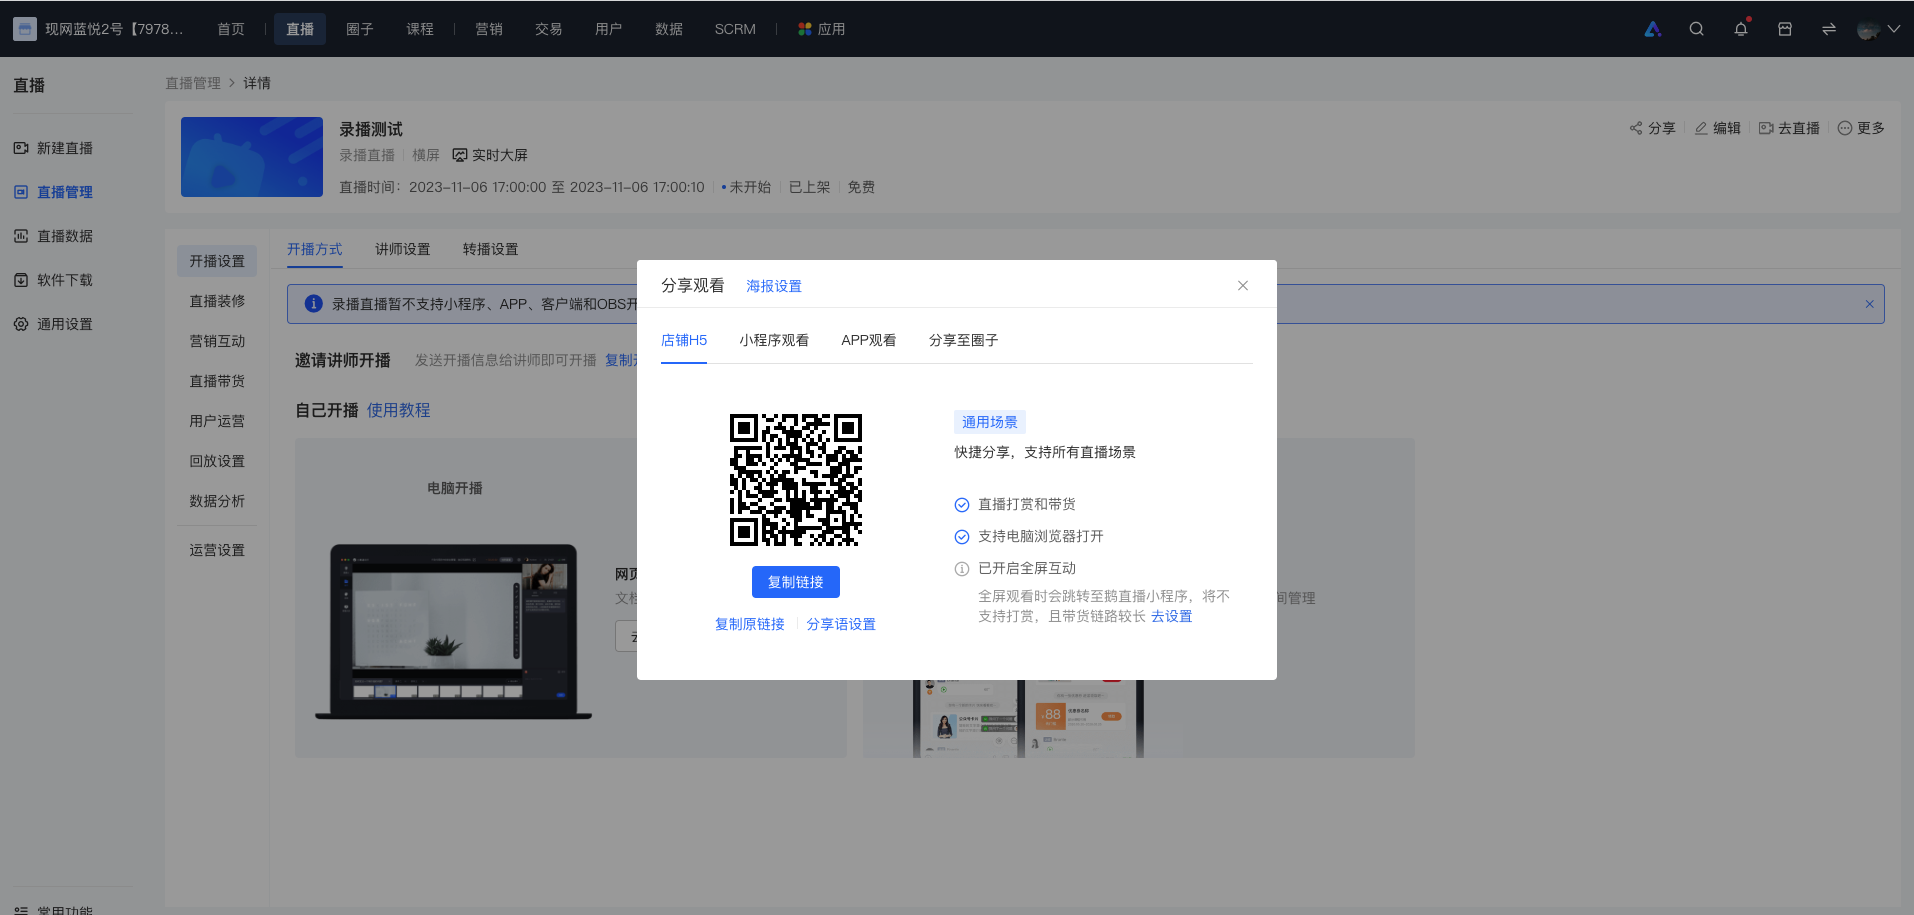
2. After entering the live room, students can interact with the instructor by sending text content, asking questions, etc.
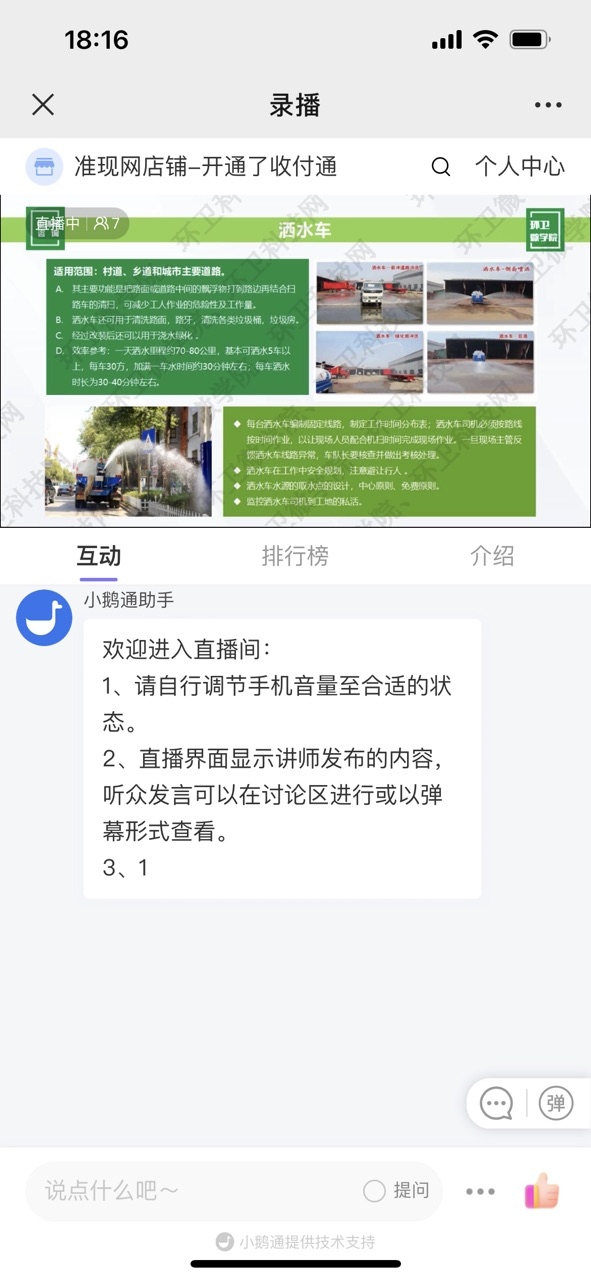
If the live streaming duration is shorter than the uploaded video duration, will the words [Video playback completed] appear after the video finishes playing?
When the video duration exceeds the set live streaming duration (for example, the video duration is 1 hour and 15 minutes while the live streaming duration is 1 hour), the video will stop playing once the live streaming end time is reached.
*Note:
1. If students stay in the live streaming room without exiting when the live streaming duration ends, they can watch the video normally without being able to drag the progress bar.
2.If students exit the live streaming room before the video finishes playing when the live streaming duration ends and then re - enter, the video will continue playing from the current time point without the ability to drag the progress bar.
3. If the instructor refreshes the page during the live streaming on the web - based platform,the video will continue playing from the current time point,and the playback cannot be dragged.
After the live streaming duration ends, when students enter to watch, it will be the same as the state of watching the replay after a normal live streaming ends.【As shown in the following figure】Please see the progress bar display after playback:


Relay broadcast
Where can I obtain the streaming push address from a third-party platform?
Obtain directly from the third-party platform's backend or consult the third-party platform's customer service. For details, please refer to the documentation:Tutorial on Live Streaming Relay to Third-Party Platforms
What should I do if adding or modifying the streaming push address during a live stream does not take effect?
Limited by Tencent Cloud technology, after adding or modifying, you need to pause the live stream for 5 minutes and then restart it for the changes to take effect. It is recommended to configure the streaming push address 5 minutes before the live stream starts.
Which online stores can authorize live rebroadcasting?
Currently, only the trial version, professional version, and flagship version are supported. The basic version is not supported.
Which online stores can accept live rebroadcasting?
All versions of the online store can accept live rebroadcasts
Third-party streaming to the elink live streaming room
I. Function Introduction
This function allows merchants to push the live - streaming footage from other platforms to the elink live - streaming room, where the live - streaming footage will be synchronously displayed.
II. Purpose of Use
With this function, merchants can re - broadcast third - party live - streaming content to the store's live - streaming room, which can quickly expand the store's influence. Learners can also watch more diverse non - store content.
III. Use Scenarios
Through cooperation, merchants can push third - party live - streaming content to the store's live - streaming room and make it available to learners for free or at a charge. This can not only expand the store's influence but also provide learners with more diverse content.
IV. Operation Paths
Path 1: Merchant side: Management console → Create live - streaming → Live - streaming settings → Third - party push to the live - streaming room → Copy the stream name and streaming key
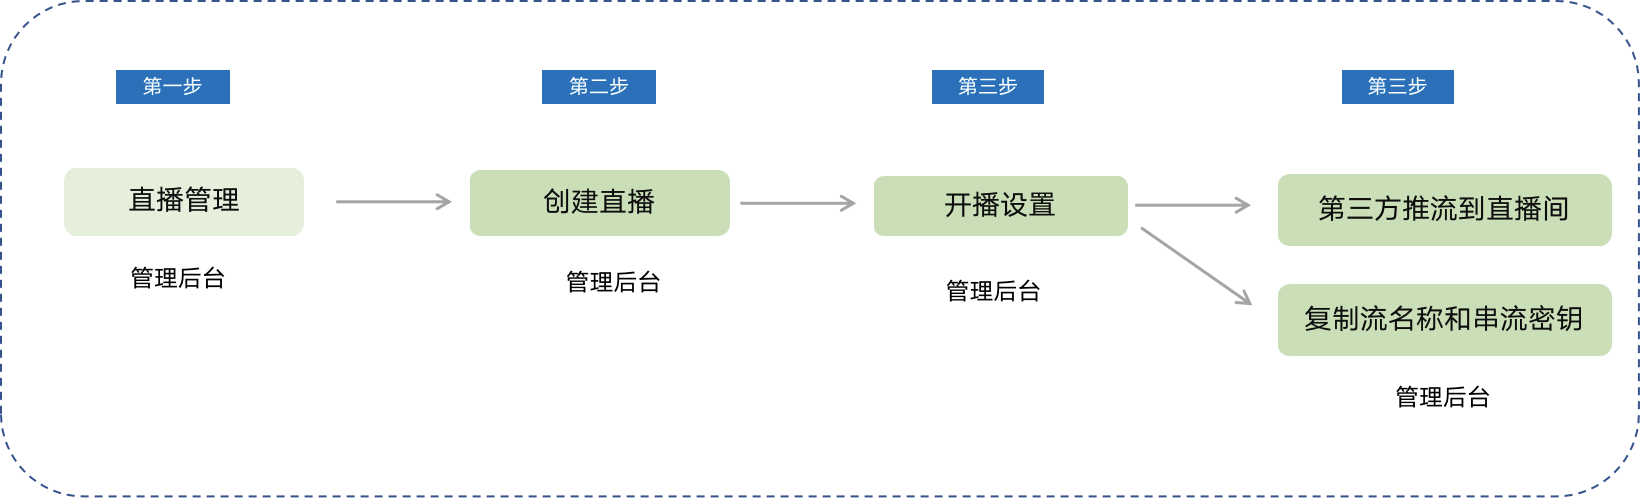
Path 2: Copy the stream name and streaming key and paste them into the third - party's push - stream address settings (see the usage tutorial for details).
V. Usage Tutorial
Step 1: Create a live - streaming session.Find the corresponding stream name and streaming key for the live - streaming room.
Users can find [Third - party push to the live - streaming room] in the live - streaming details > Live - streaming settings > Live - streaming method of the 'Created' live - streaming sessions.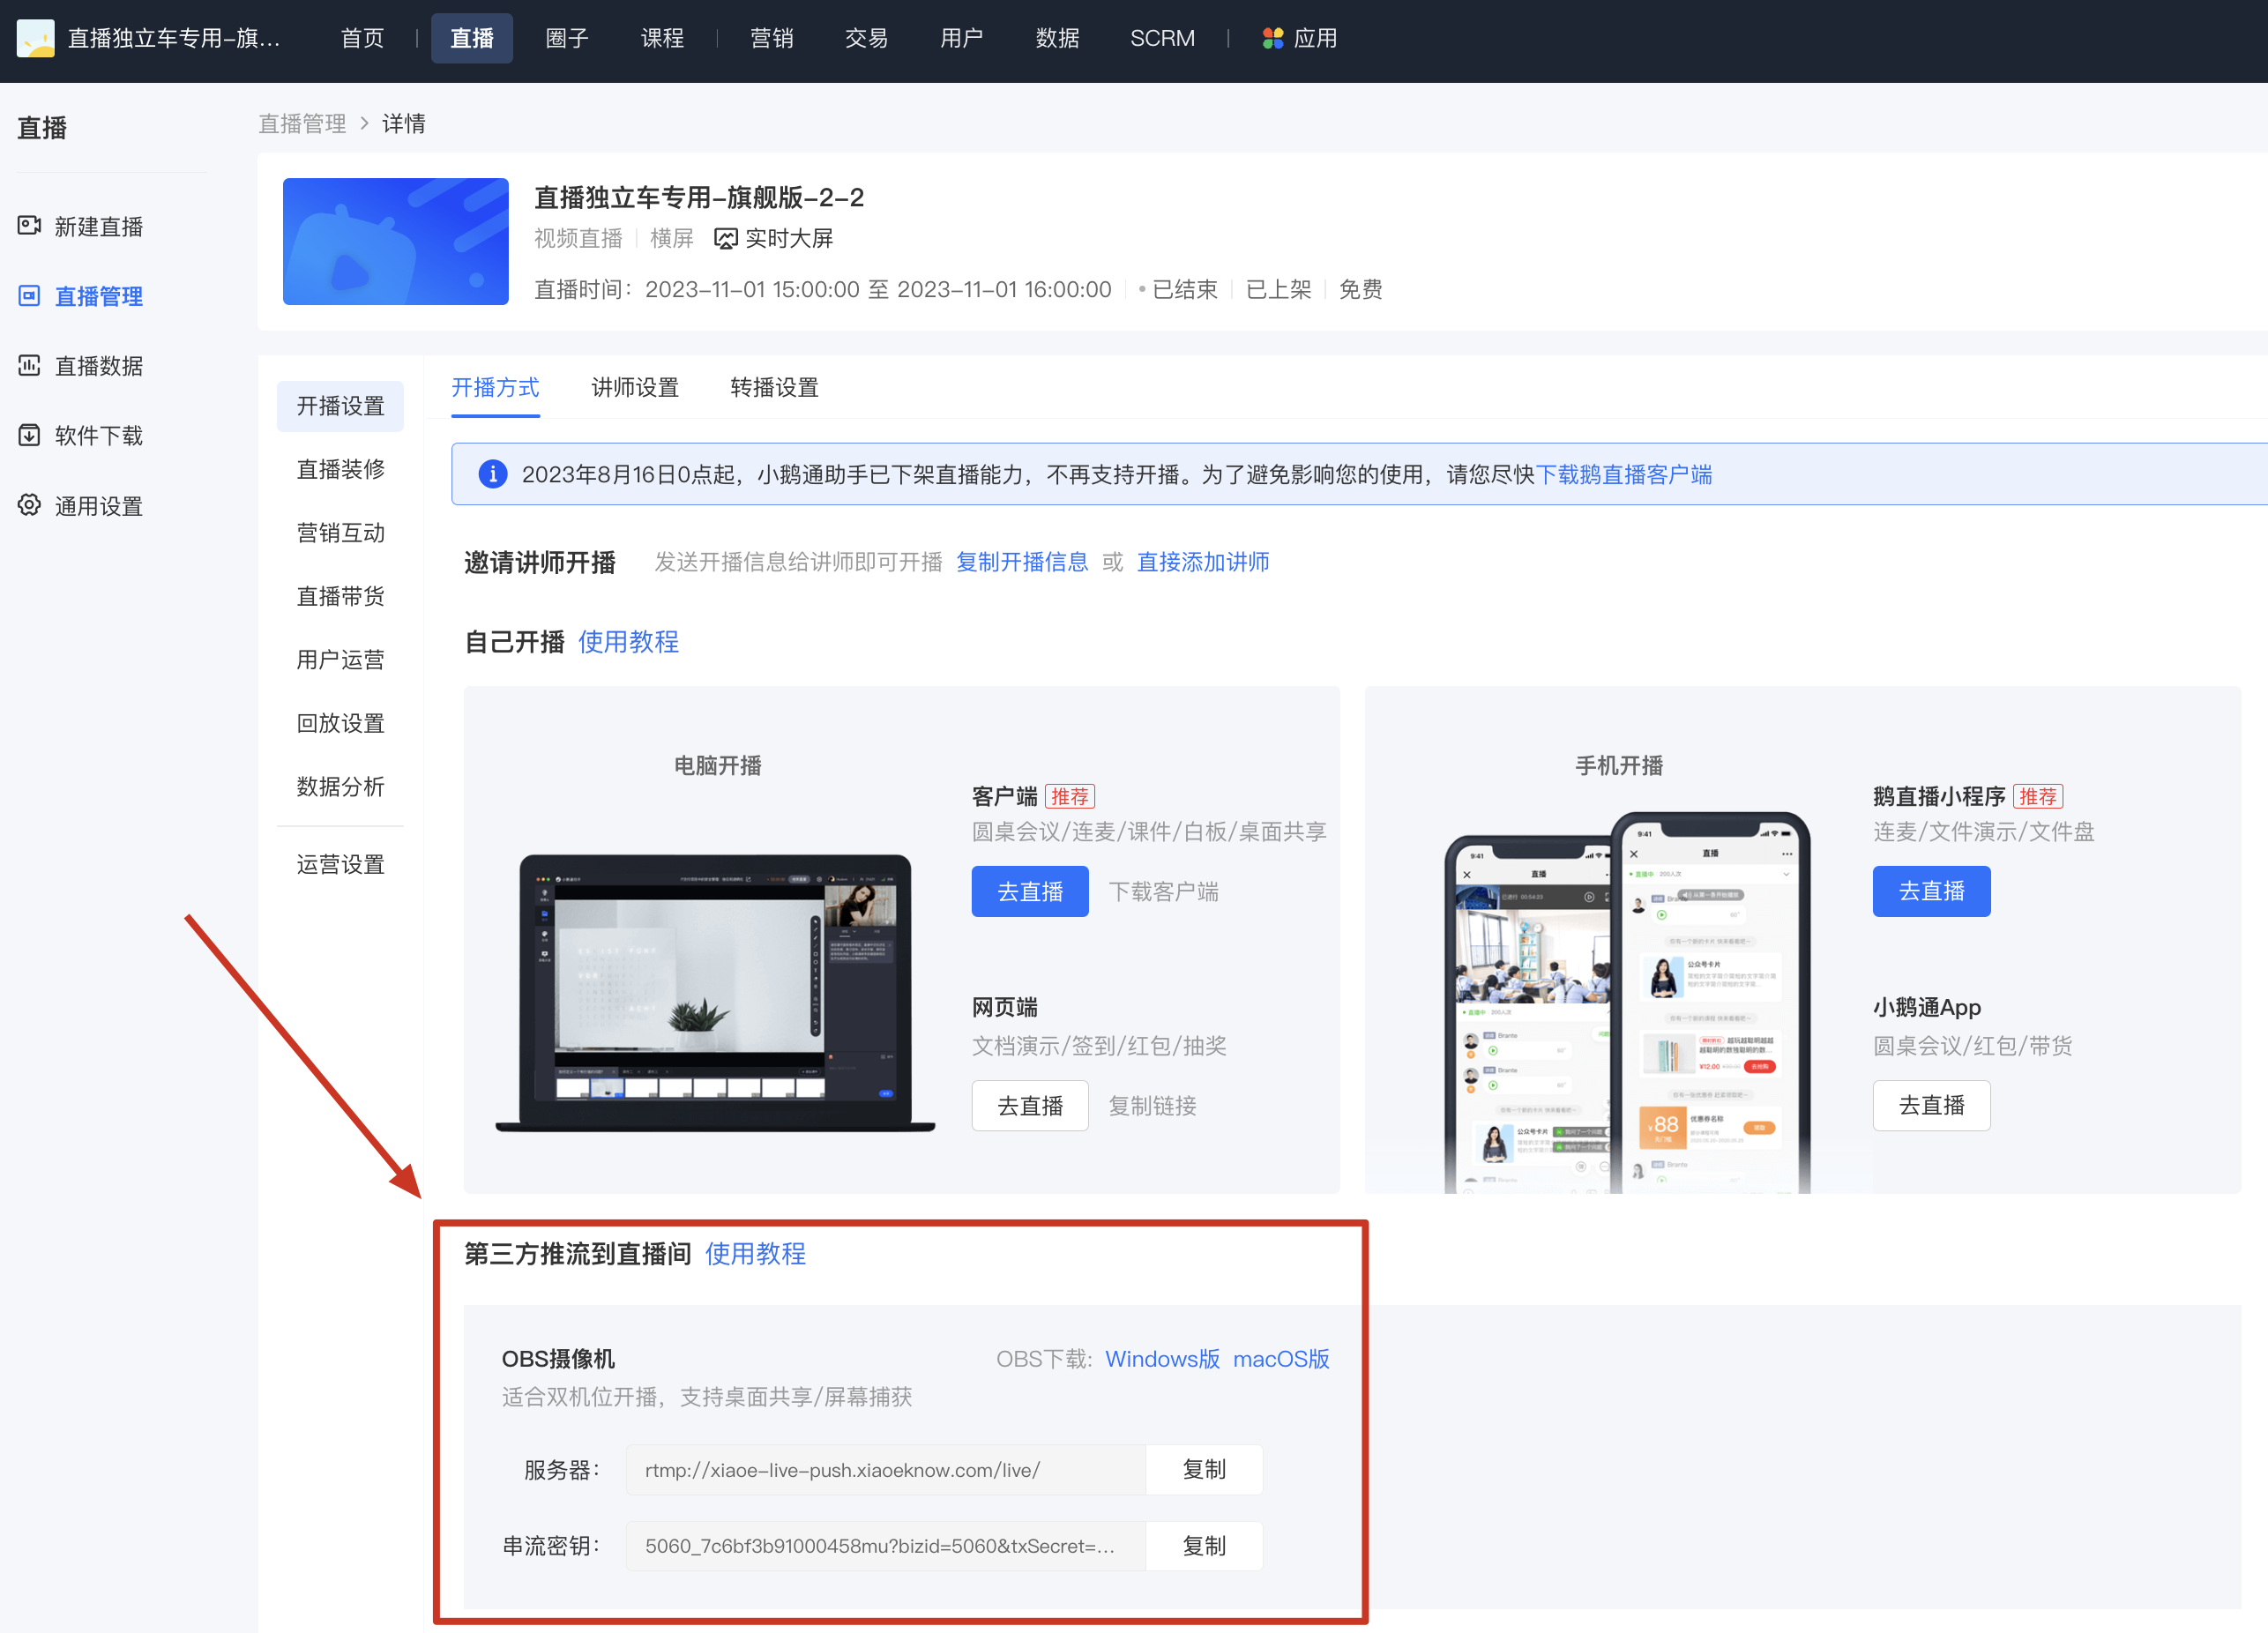
Step 2: Copy the stream name and streaming key.
Note: The stream name and streaming key here need to comply with the requirements of the third - party platform for filling in the push - stream address. If there is only one line in the 'input box', the server URL and the streaming key need to be copied together.
Step 3: Push the stream to the third - party live - streaming room.
(1) OBS Operation
1. Open the main interface of the OBS client and click [Settings].
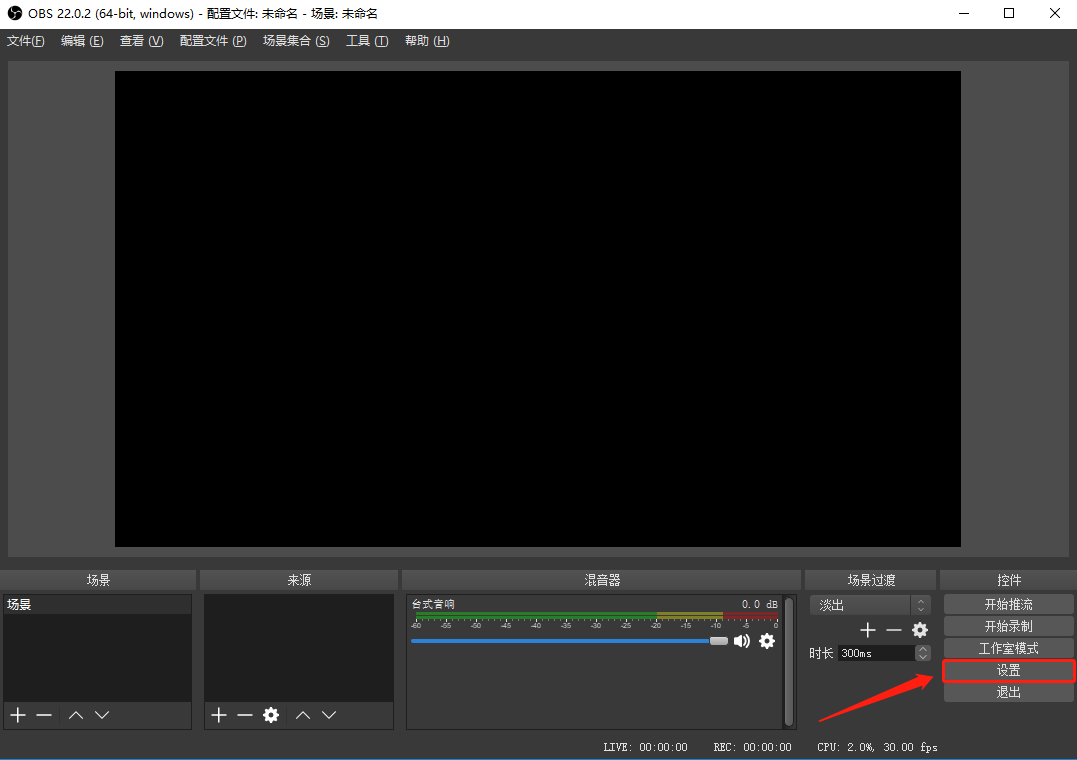
2. Select 'Streaming' in the left - hand function bar and choose 'Custom streaming server' as the service type. Paste the server URL and streaming key copied from the elink management console into the corresponding positions in OBS respectively.
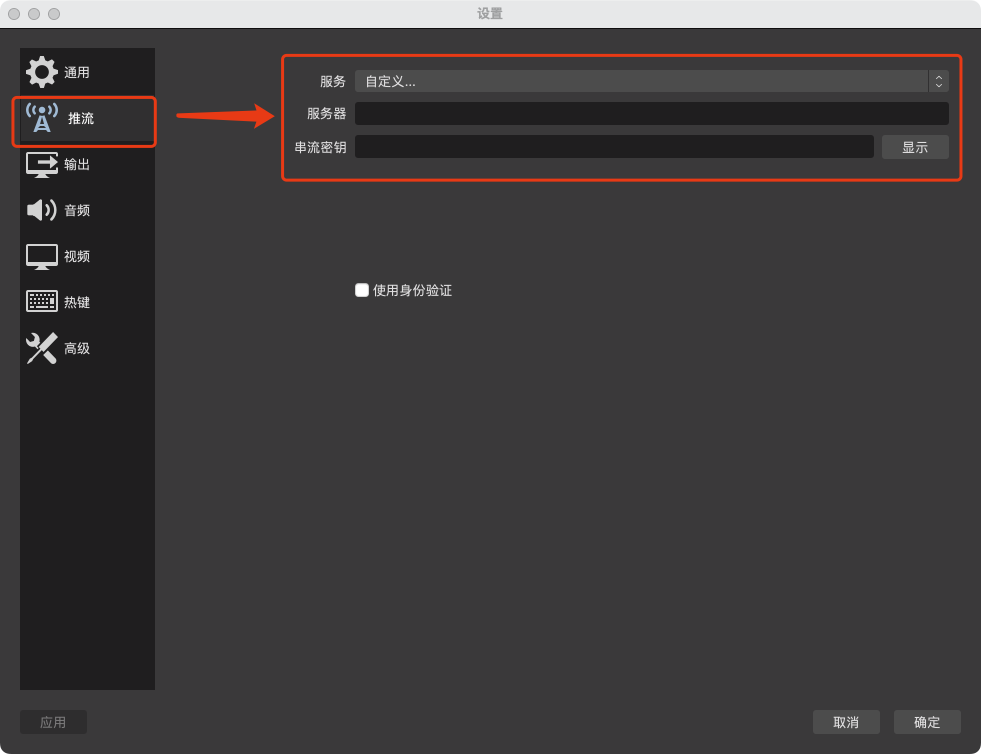
3. Set the output bitrate (video bitrate). It is recommended to set it between 1000Kbps and 3200Kbps, which can be adjusted as needed:
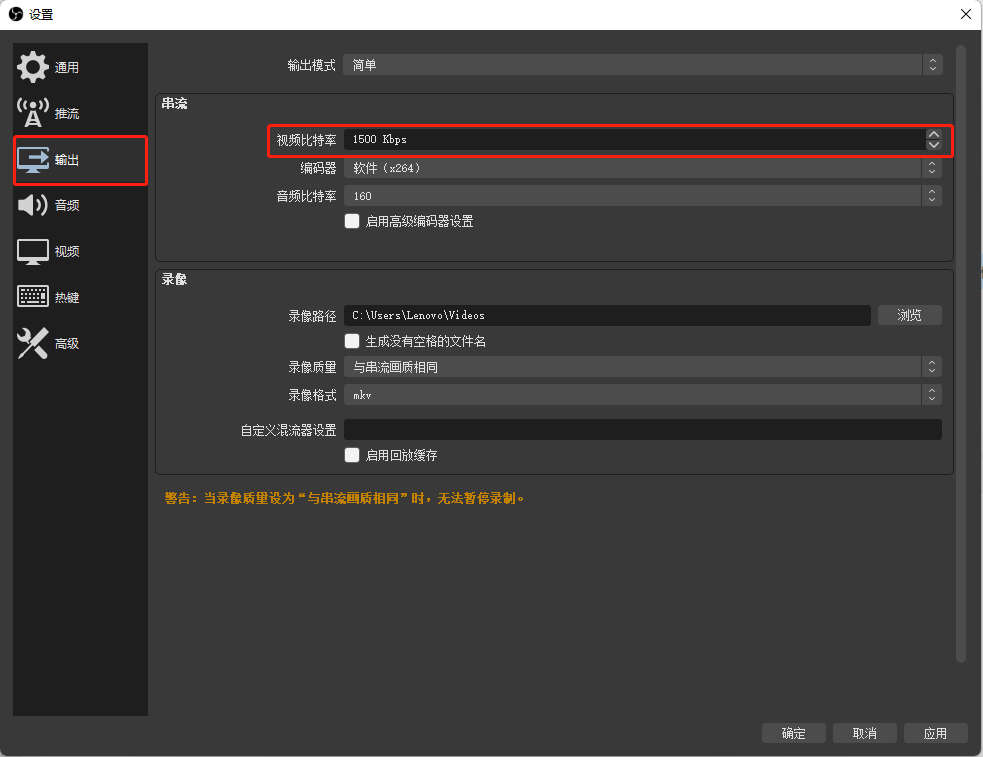
Generally, the standard live - streaming latency is about 15 seconds, and the ultra - low live - streaming latency is within 4 seconds.If there is abnormal latency in the OBS push - stream, it is recommended to modify the settings in the red - framed area to reduce the latency:
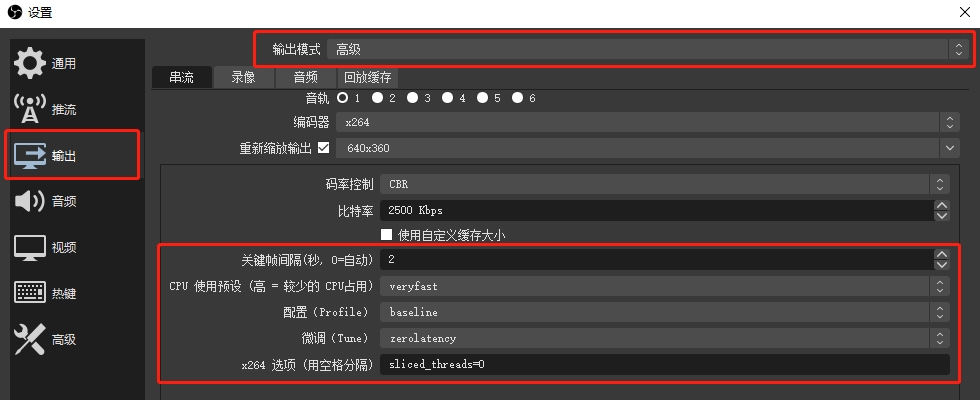
1. Key - frame interval: 2s
2. Profile configuration: baseline
3. CPU preset: veryfast
4. Fine - tune tune: zerolatency
5. It is recommended to use x264 as the encoder, and the x264 option: sliced_threads = 0
Note: If ultra - low latency is enabled for the live - streaming but the actual viewing latency is still 15 seconds, it is usually because the ultra - low latency viewing guarantee strategy is triggered. To ensure normal viewing for users, those who cannot play the low - latency live - streaming due to network or device issues will be automatically switched to the standard live - streaming mode.
4. Set the canvas resolution and the frame rate to 30.
Note: For horizontal - screen live - streaming, a resolution of 1920x1080 with an aspect ratio of 16:9 is recommended; for vertical - screen live - streaming, a resolution of 900x1600 with an aspect ratio of 9:16 is recommended.
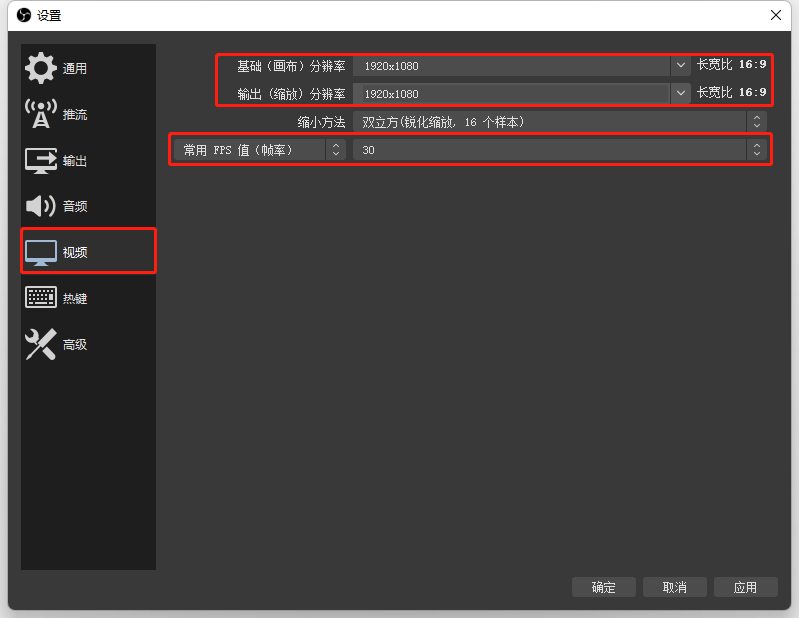
5. After adjusting the relevant settings, click 'OK'. After clicking 'Start streaming' on the OBS interface, the elink live - streaming room will synchronously display the footage.
Note: For other OBS tutorials, please refer to《OBS Tutorial Collection》at the link:
(2) Kuaishou Live Companion
1. Open the Kuaishou Cloud Live web - based backend. After creating a live - streaming session, find [Distribution Center] on the details page.
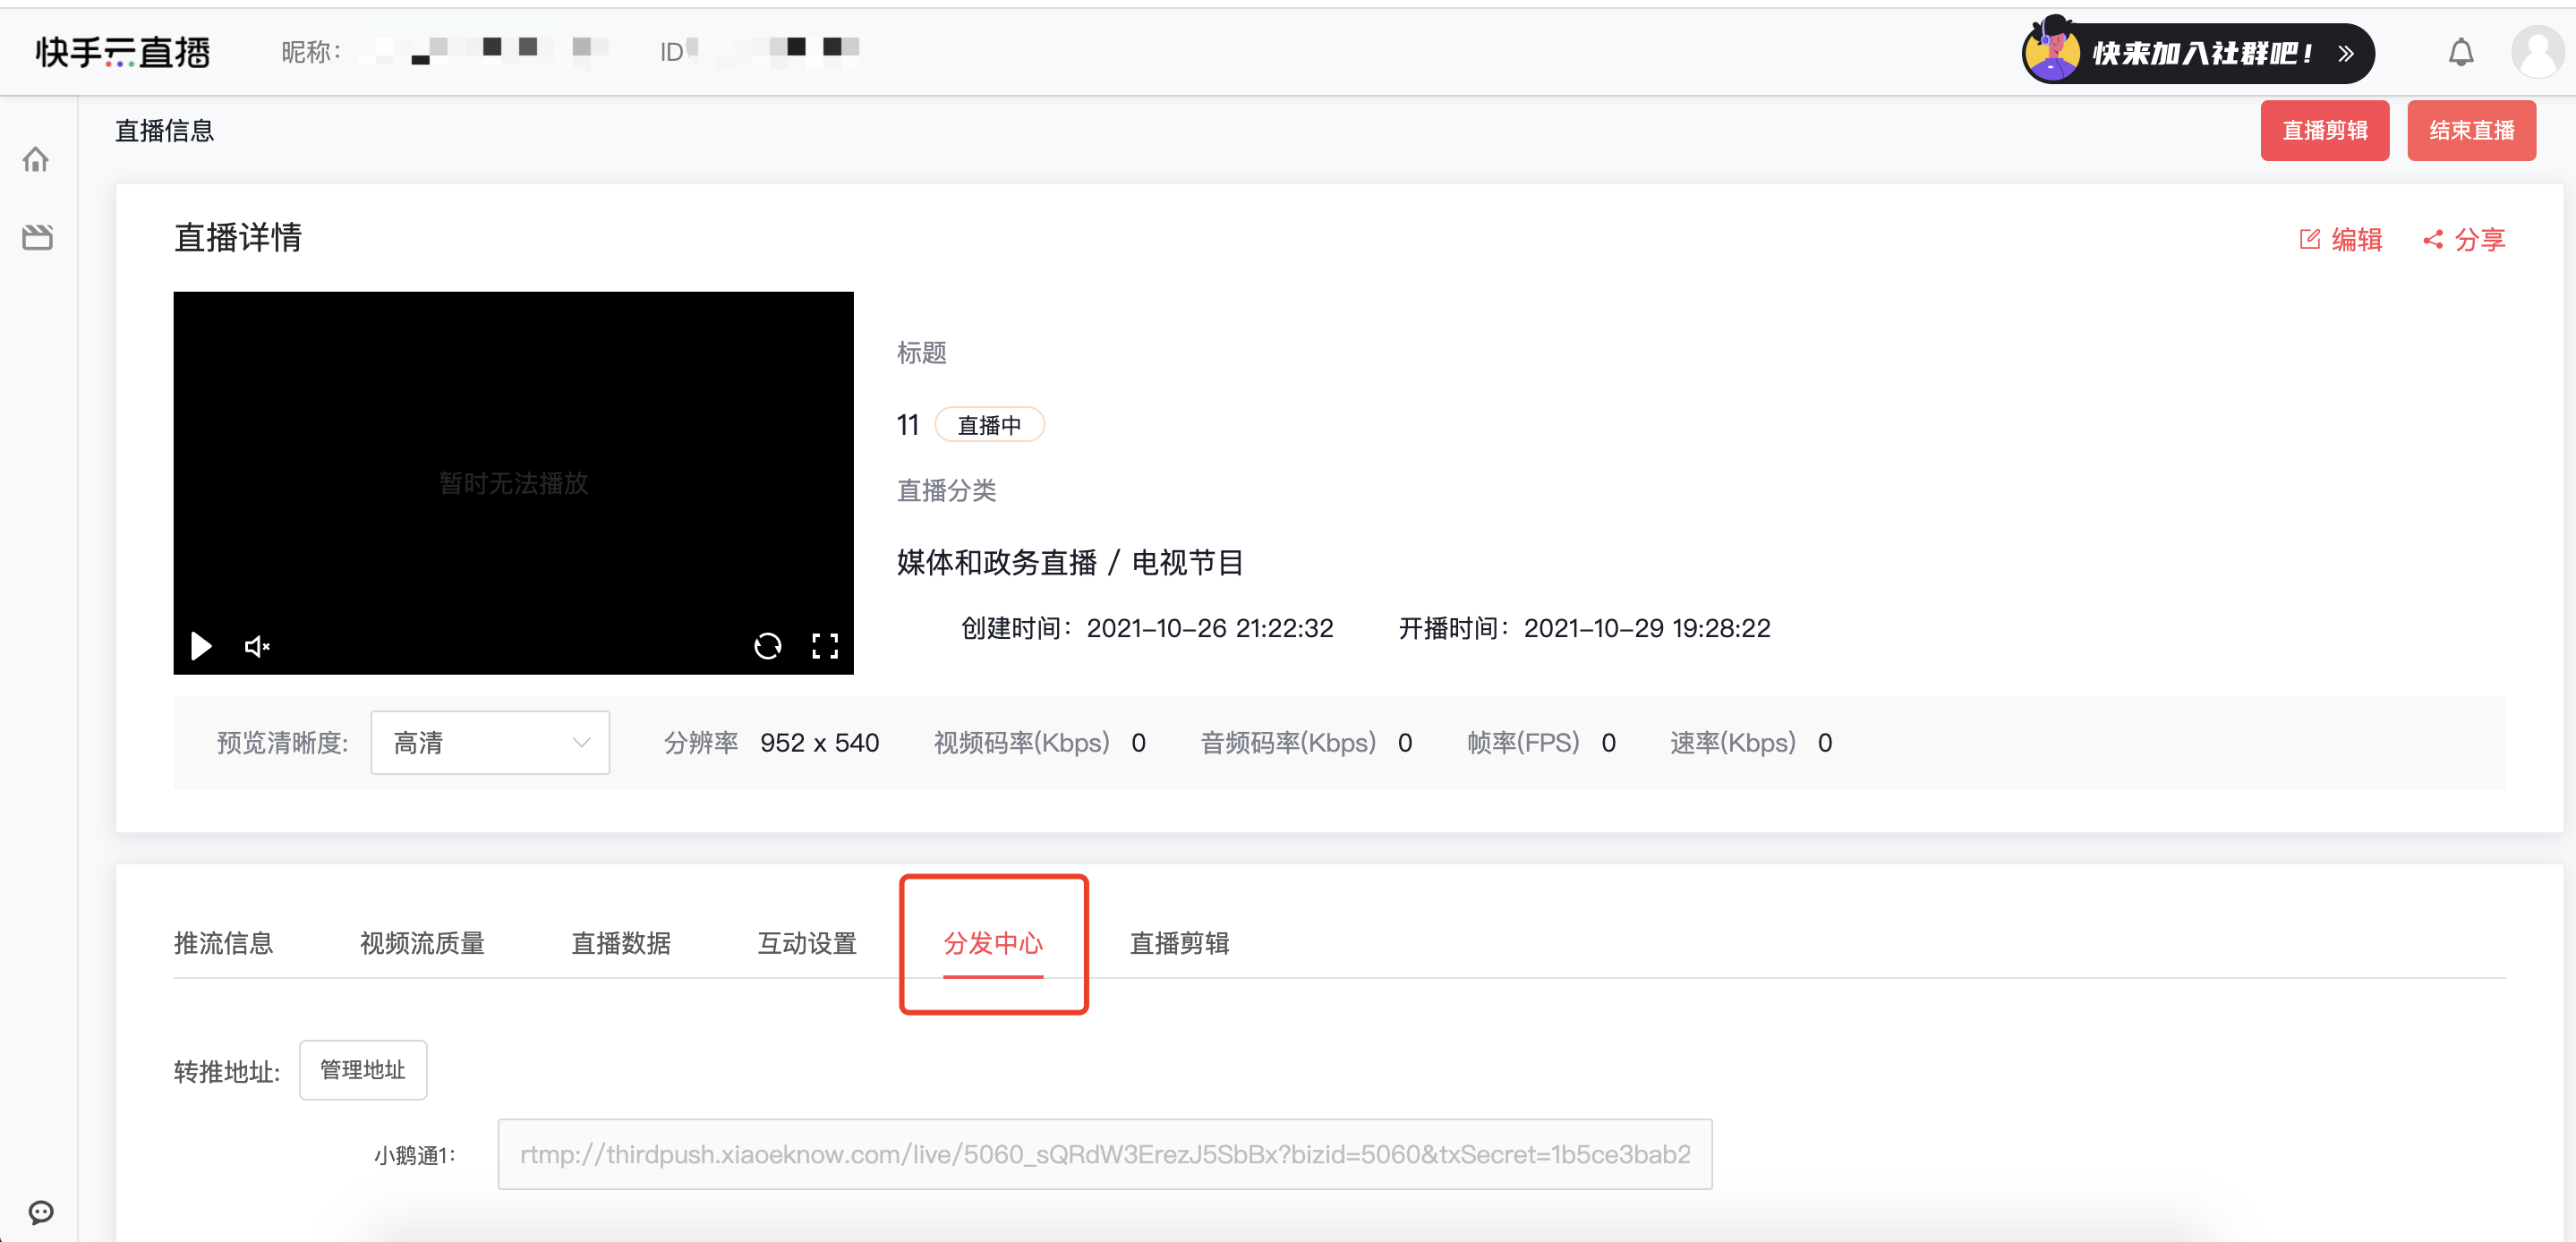
2. Find the 'Manage address' button on the page. Combine and copy the server URL and streaming key copied from the elink management console into the push - stream address, and click the 'OK' button to save. After starting the push - stream, the elink live - streaming room will synchronously display the footage.
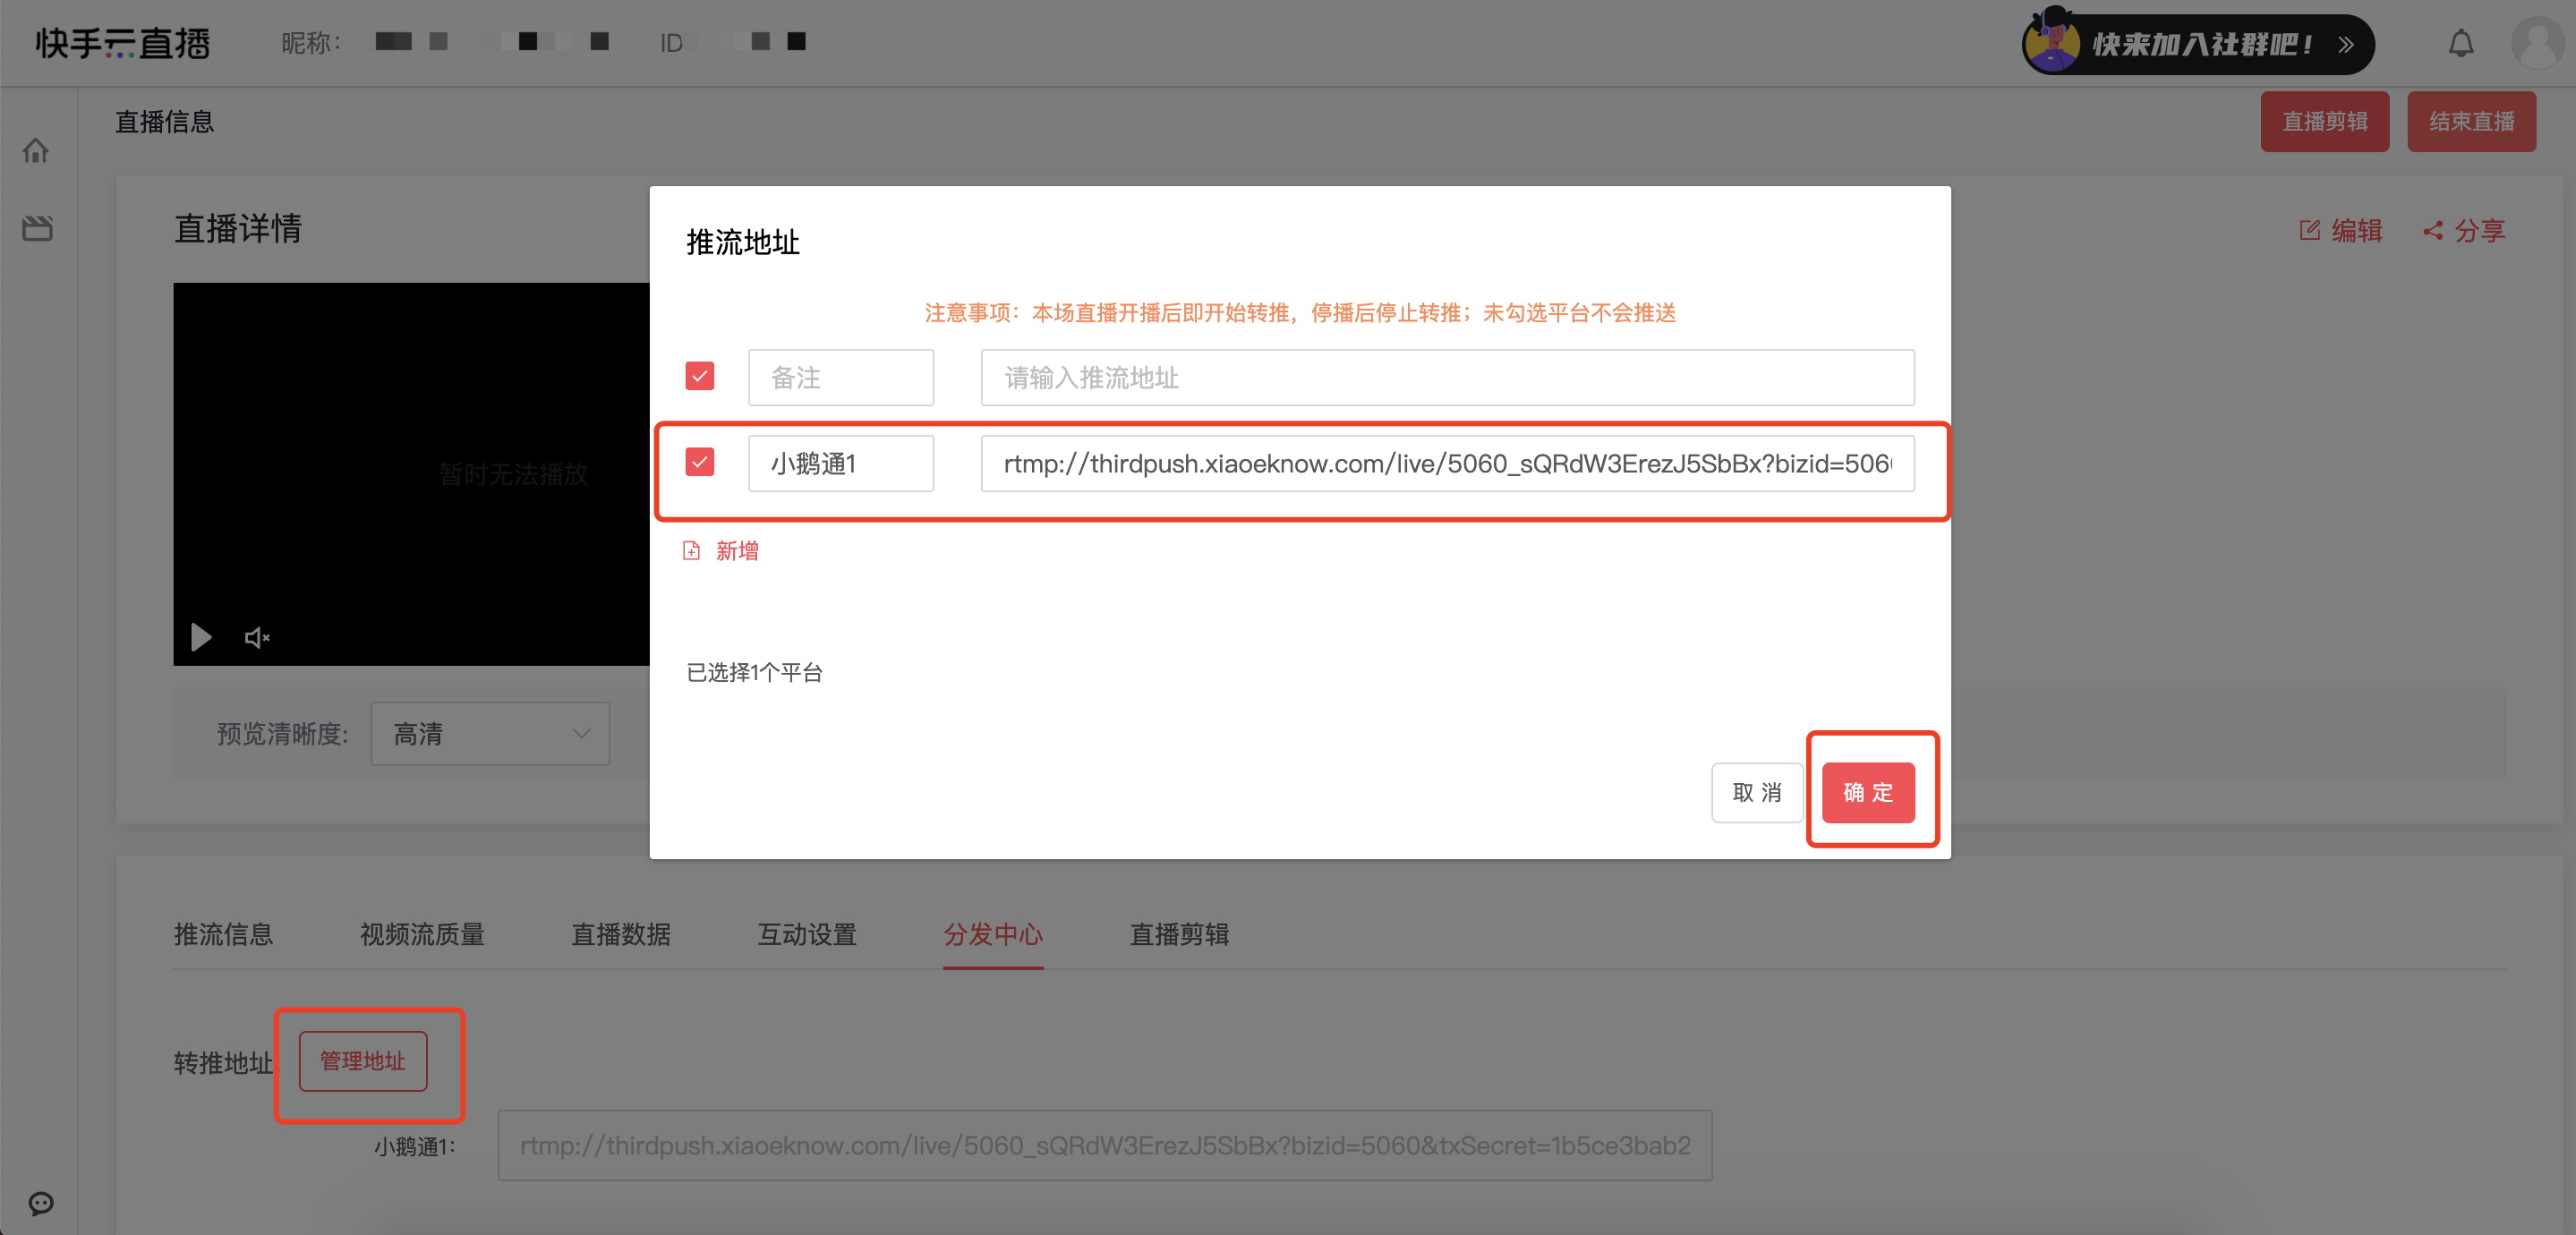
Note: For Kuaishou Cloud Live push - streaming, the stream needs to be pushed/pulled from other platforms to the Kuaishou live - streaming room first, and then redirected to the elink live - streaming room through the Distribution Center.
VI. Notes
1. When using the third - party push - stream method, there is no need to click 'Start live - streaming' on the elink assistant/GoLive client.
Currently, onlysimultaneouslysupports the push - stream content from one terminal. When two or more devices push the stream simultaneously, only the content from the device that starts the live - streaming first will be displayed.
VII. Frequently Asked Questions
Q: The elink assistant cannot find the OBS camera option?
A: Please use the latest version of the OBS client and click 'Start virtual camera' to find it.
Q: How to monitor the quality of the OBS push - stream?
A:How to monitor the quality of the push - stream when using OBS for live - streaming?
Q: How to conduct vertical - screen PPT live - streaming?
A: The vertical - screen live - streaming mode can be combined with OBS to achieve vertical - screen PPT live - streaming.Usage tutorial for vertical - screen PPT live - streaming configuration
What should I do if the live streaming push URL for Channels fails to work?
Merchants need to recreate a Channels live streaming room and obtain the streaming push address. The specific operations are as follows:
1. Cancel the current live streaming room.
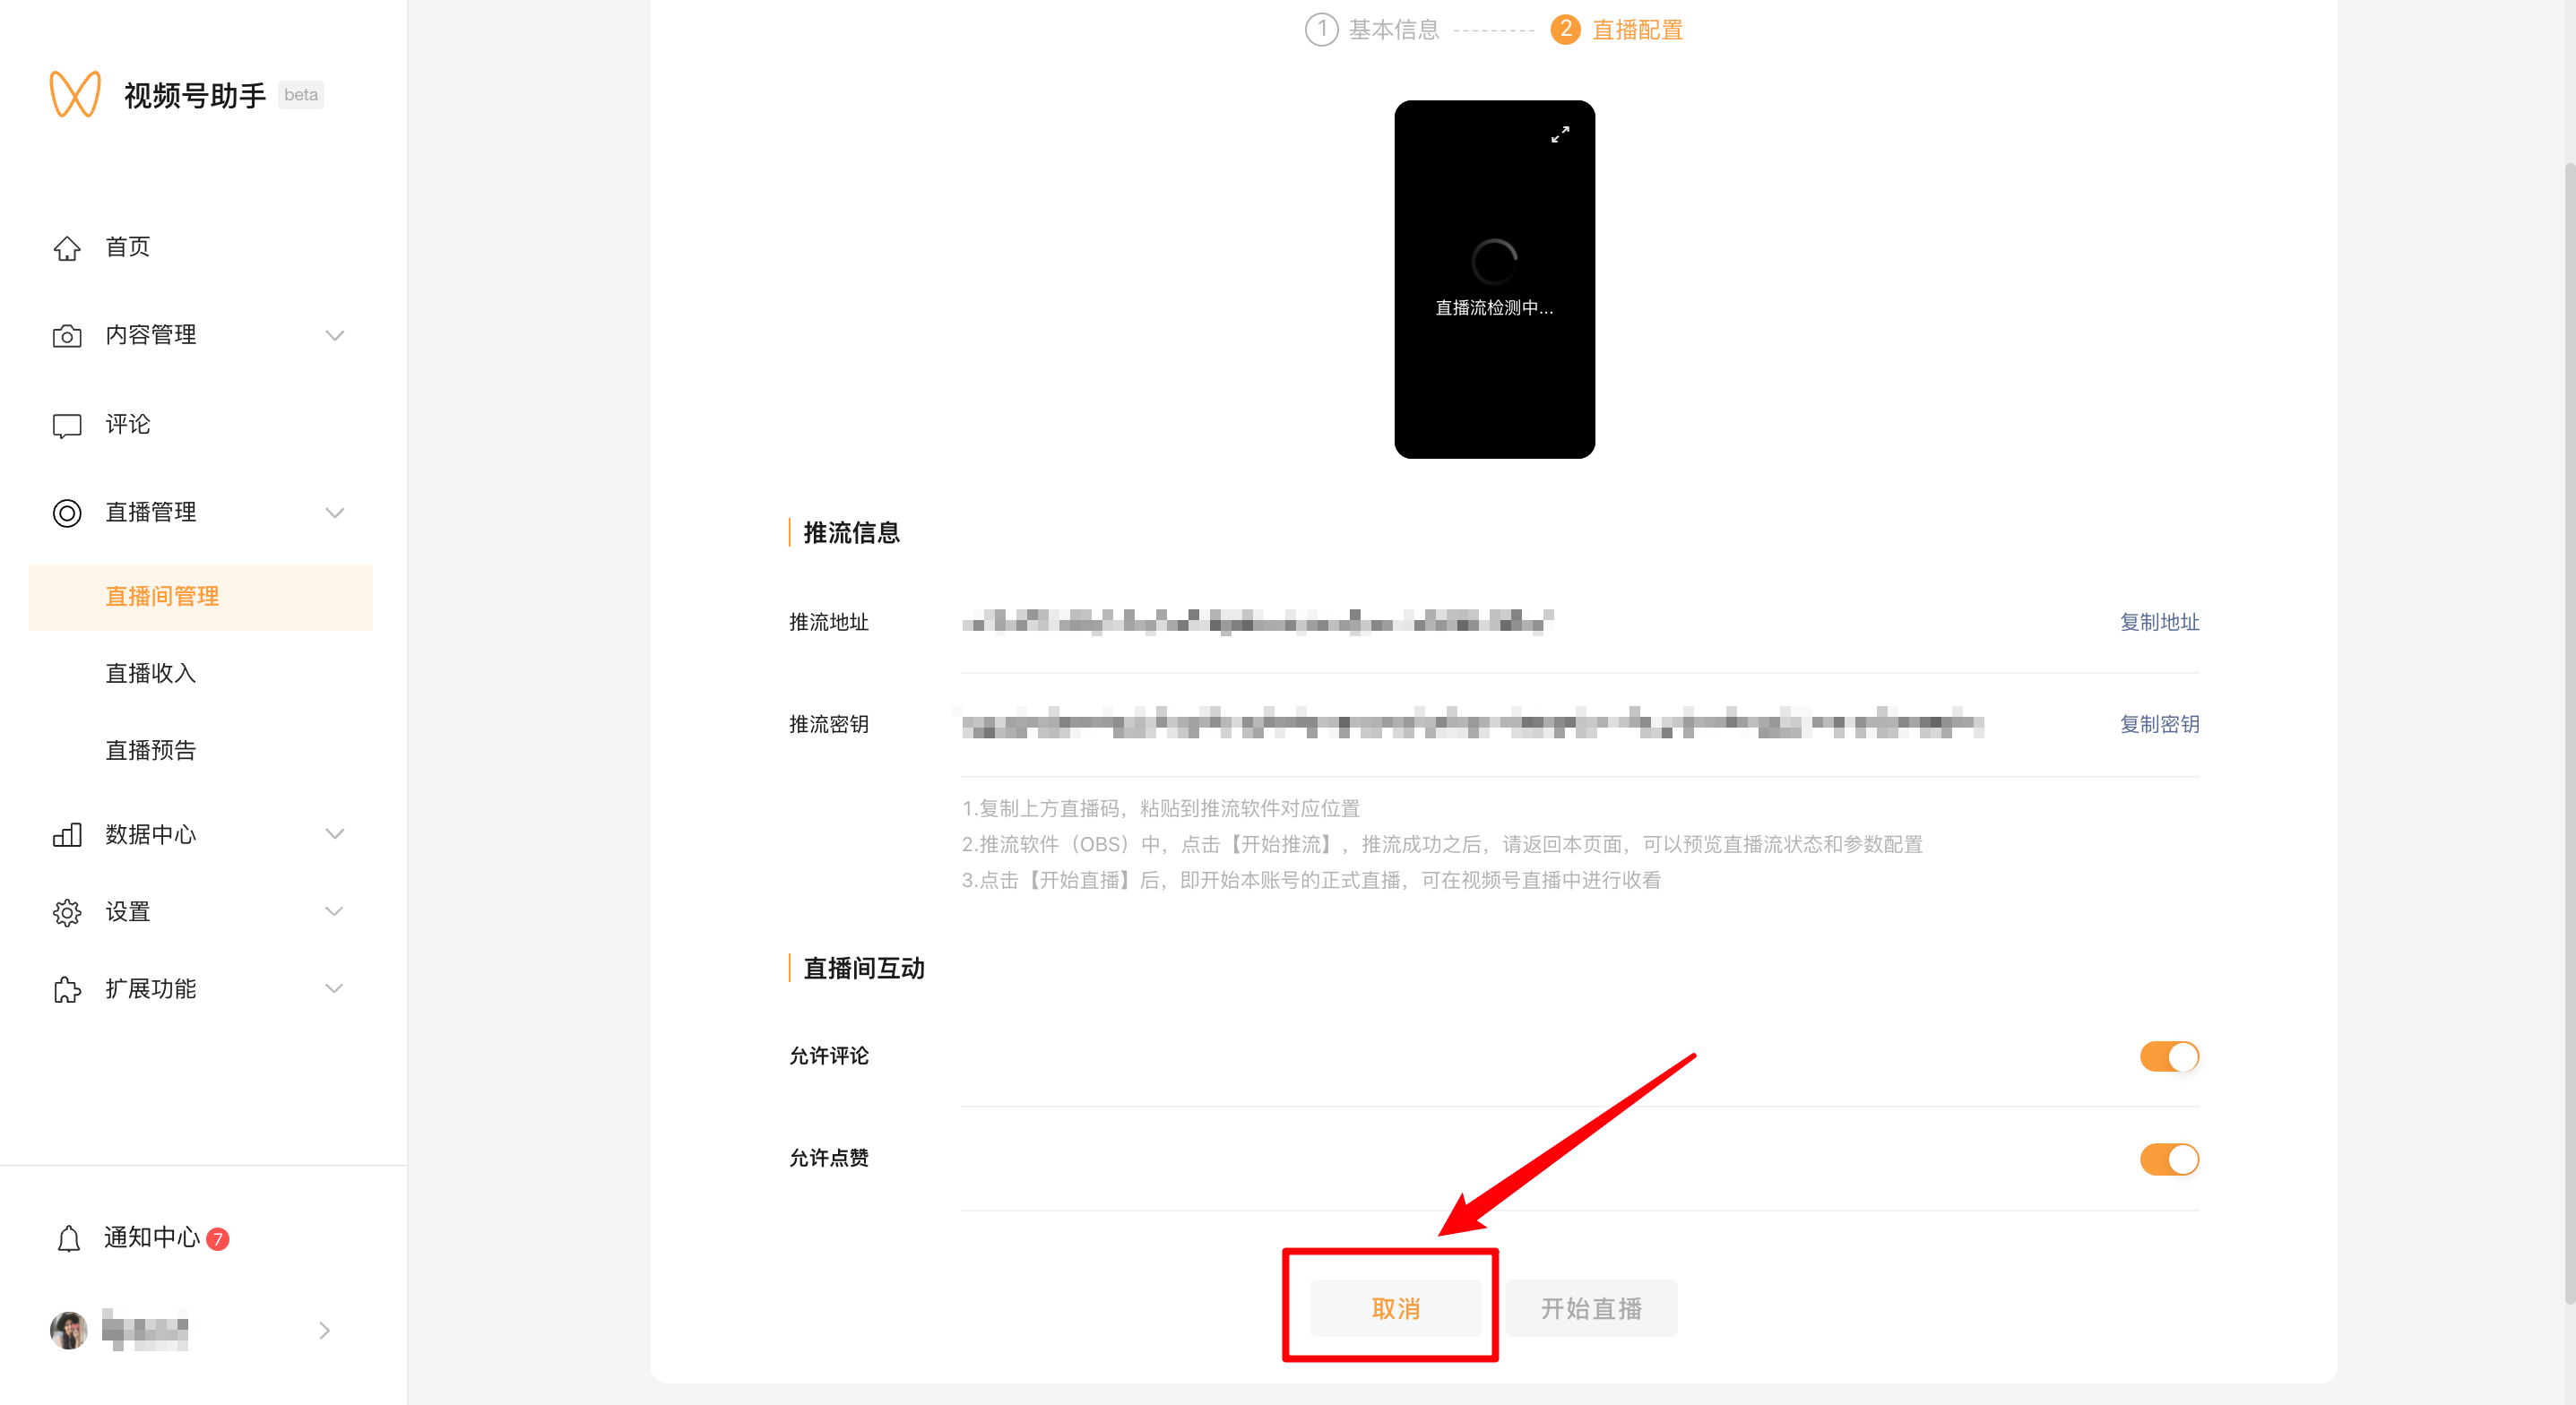
2. Recreate the live stream and obtain the streaming push address.
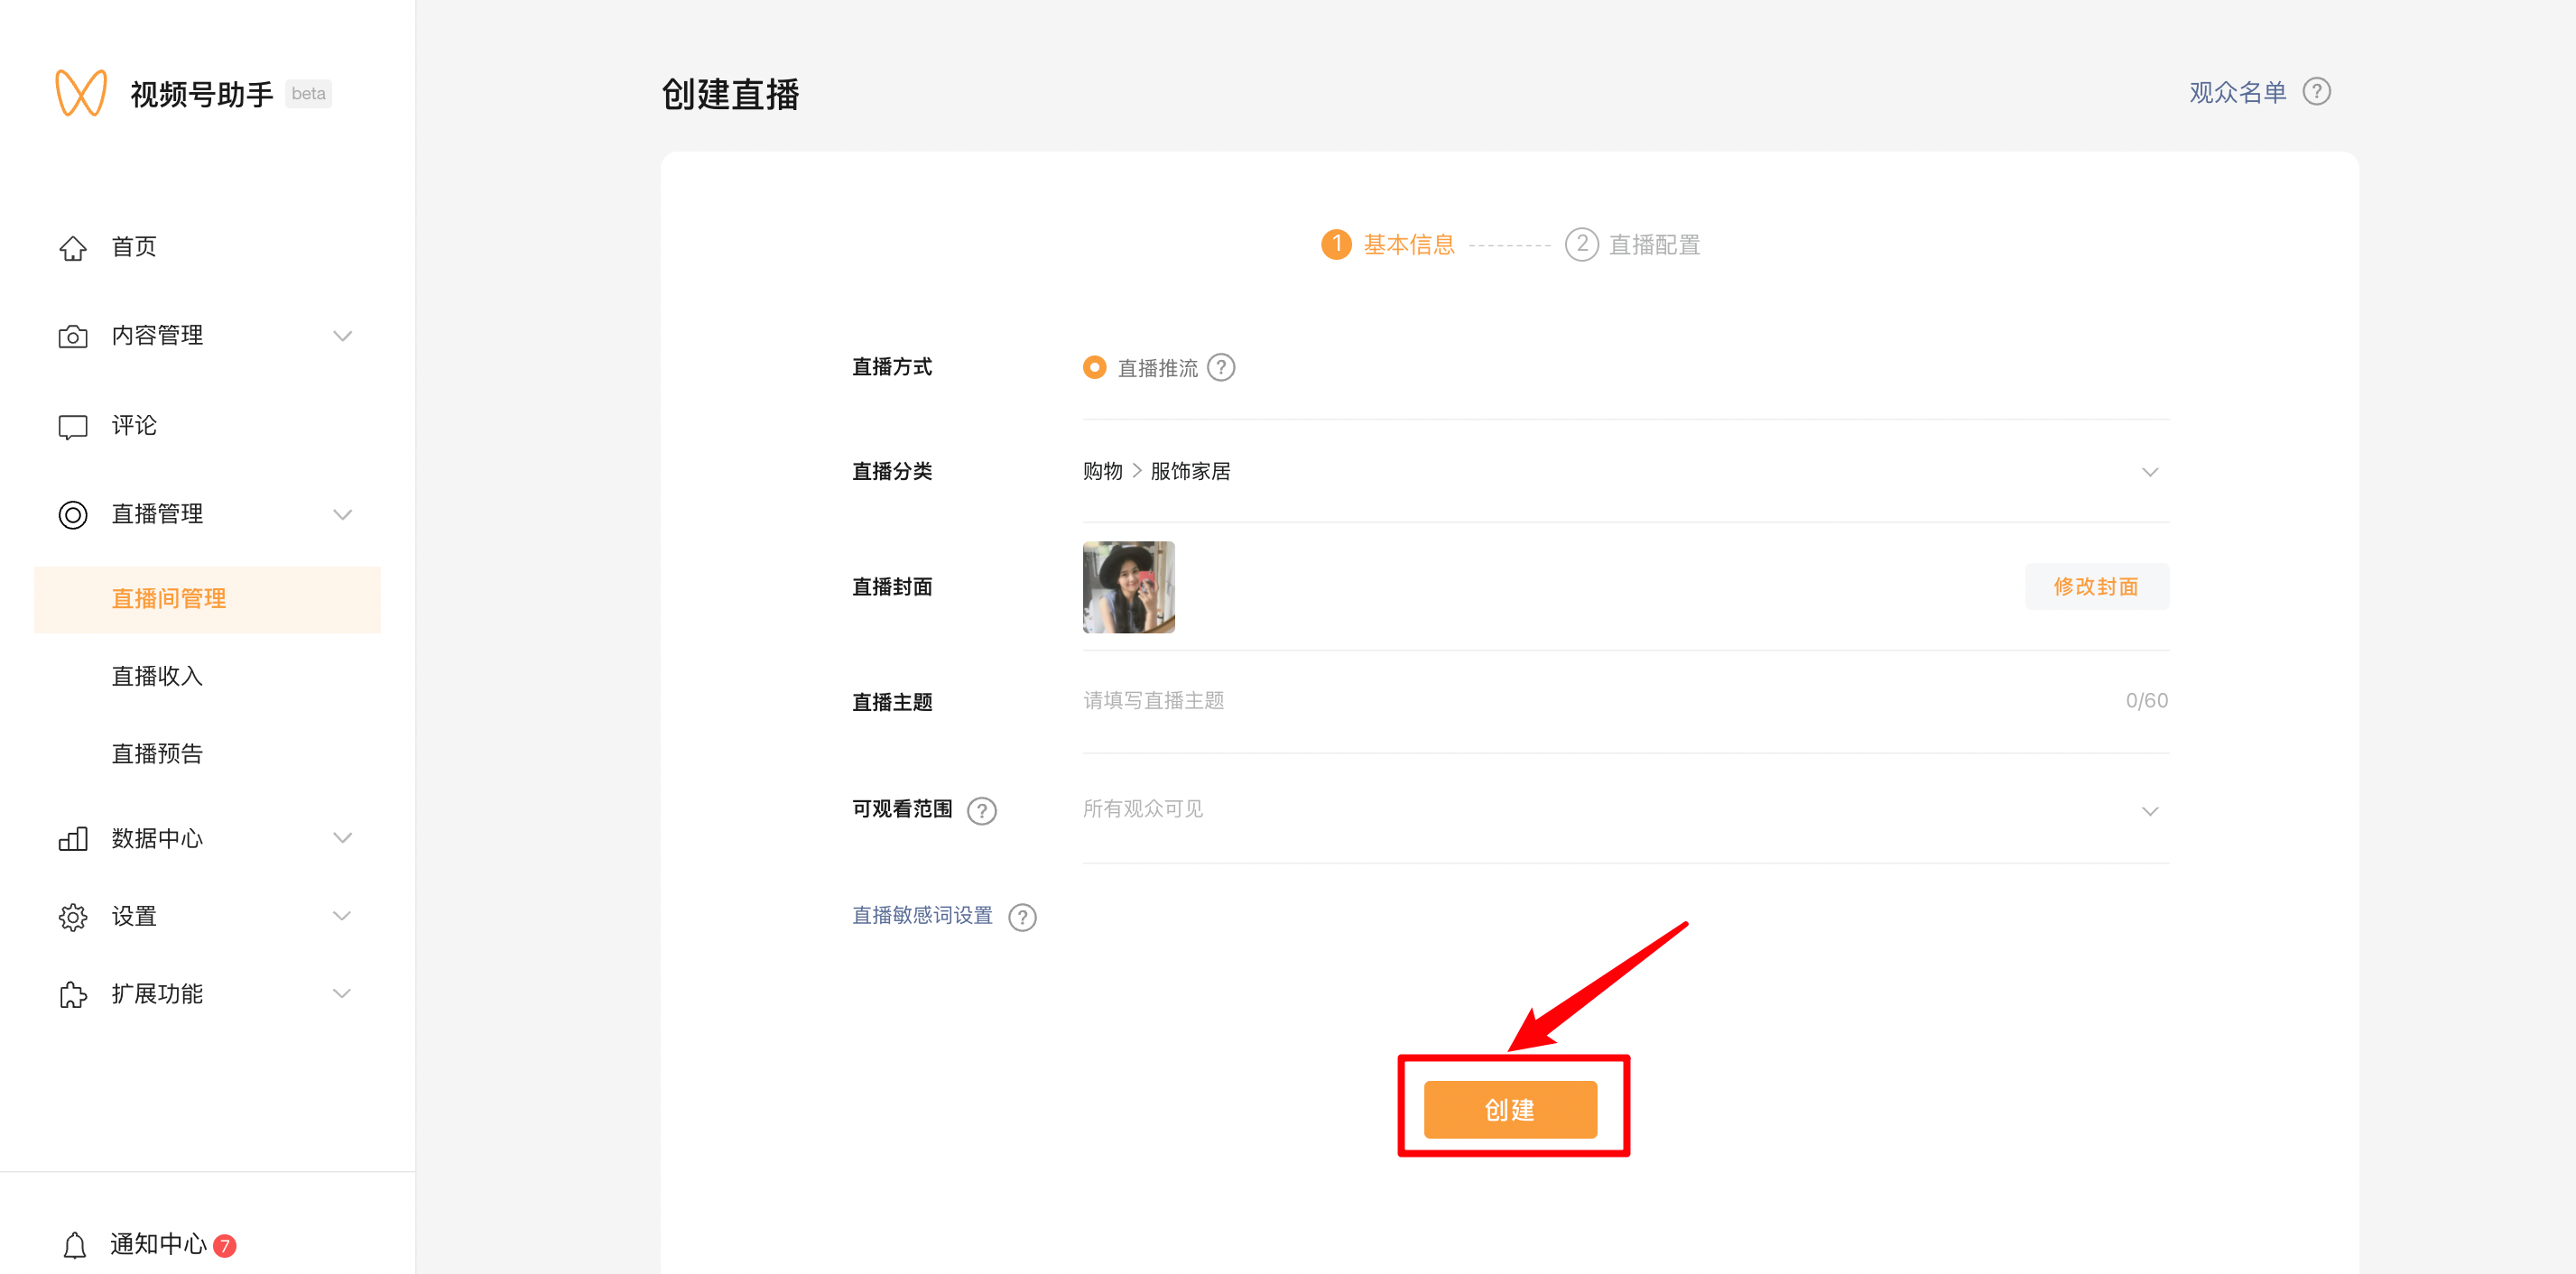
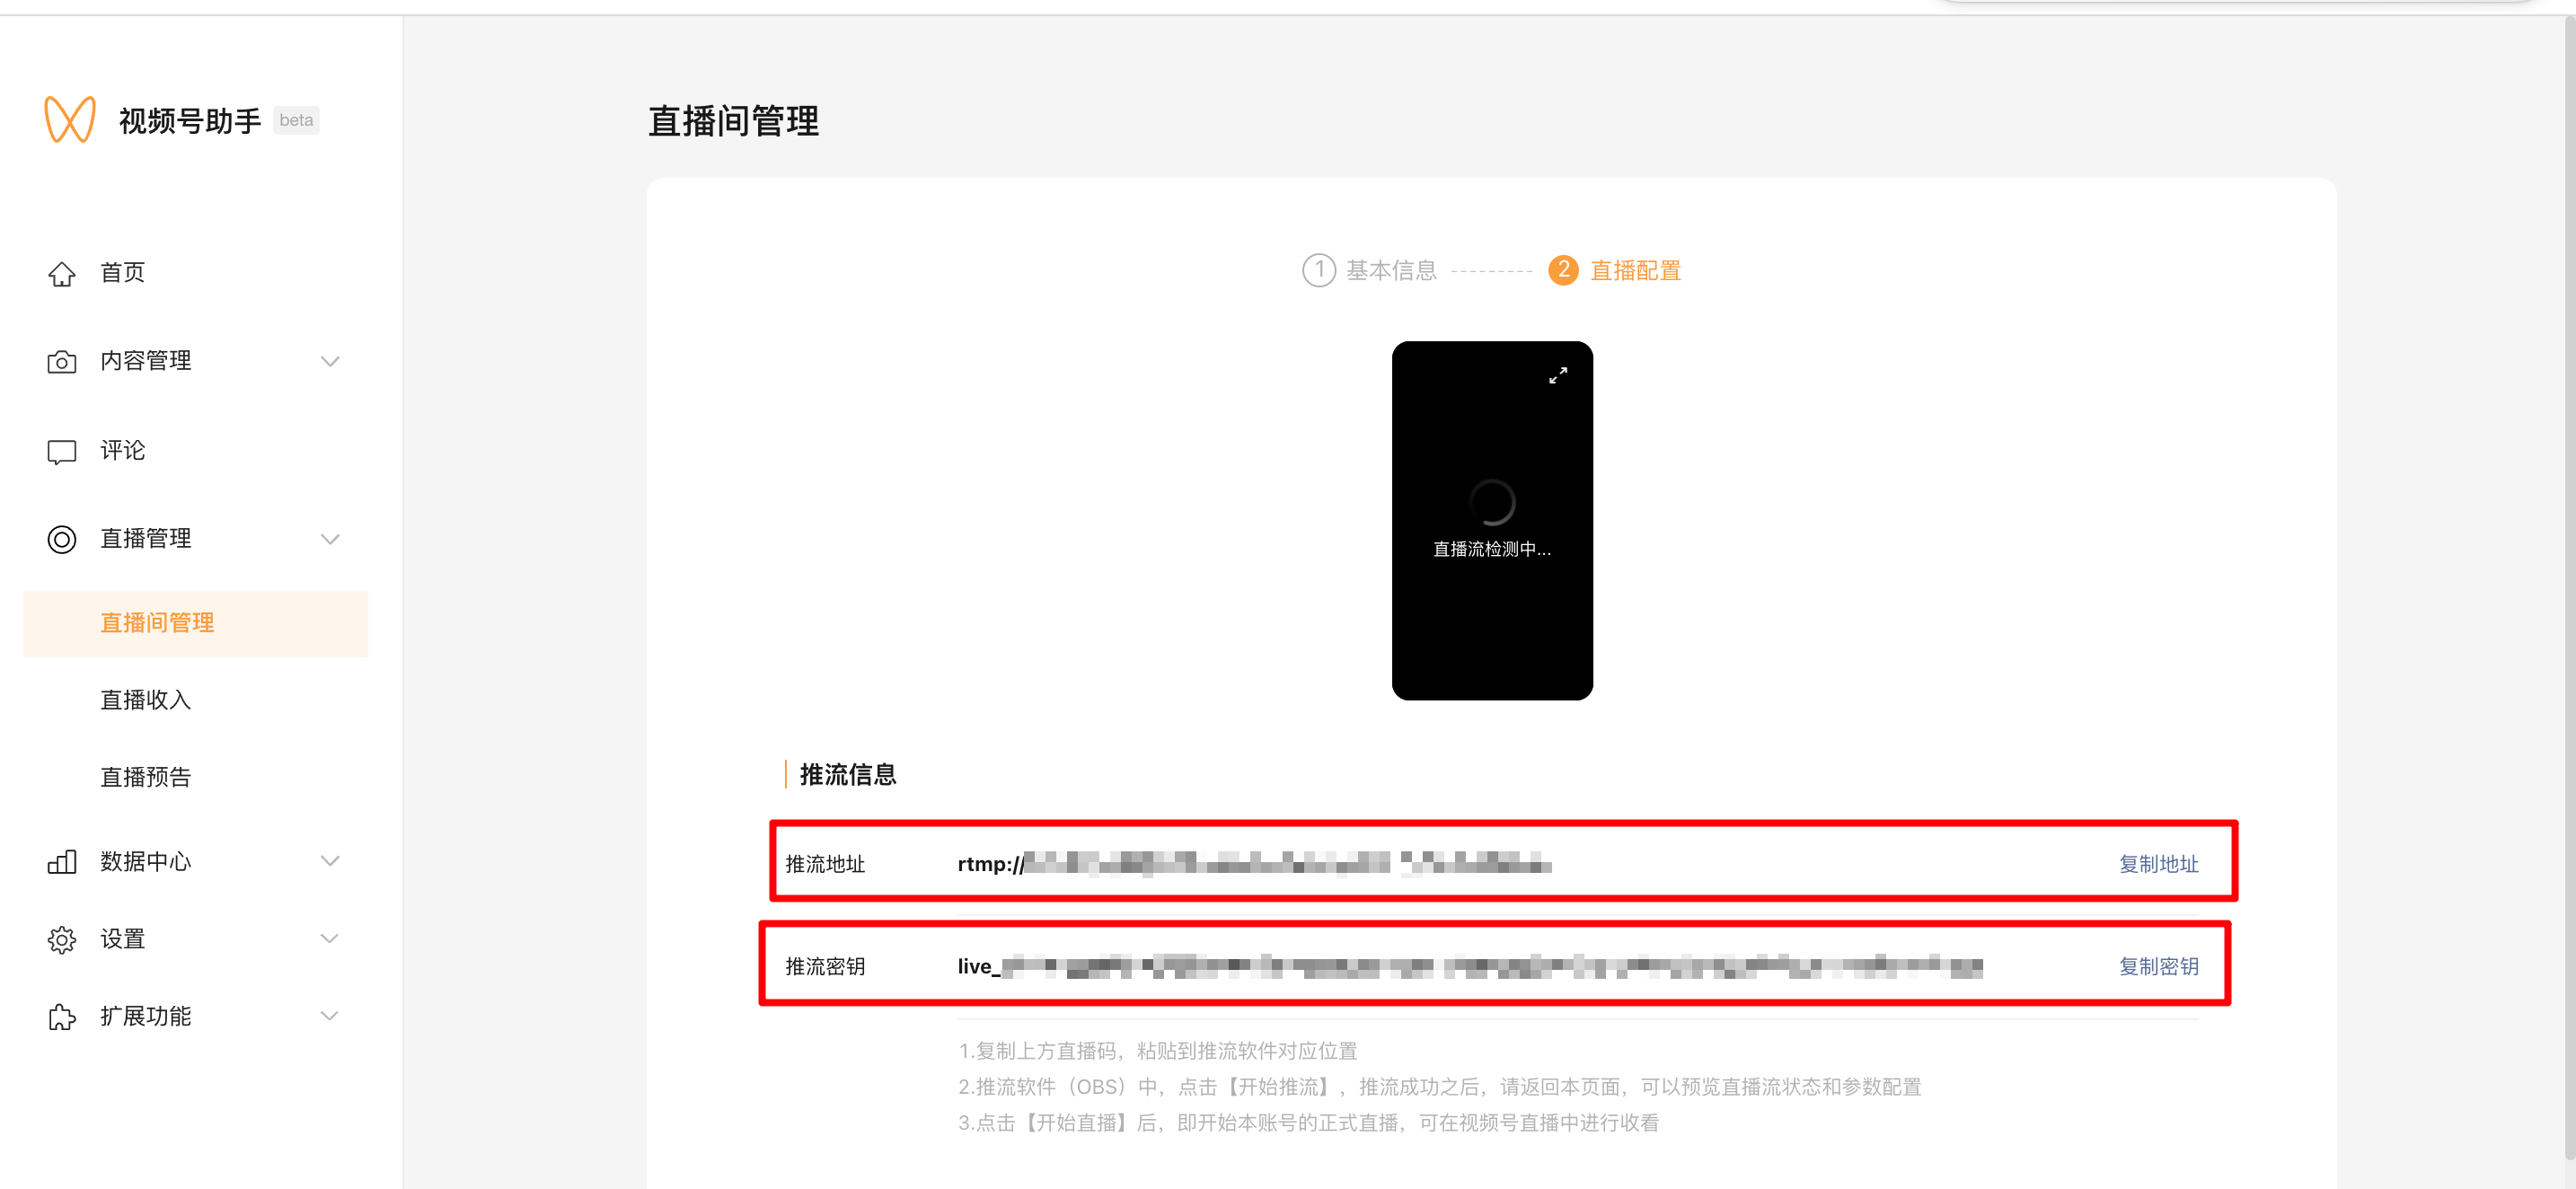
3. Replace the streaming push address with the latest one.
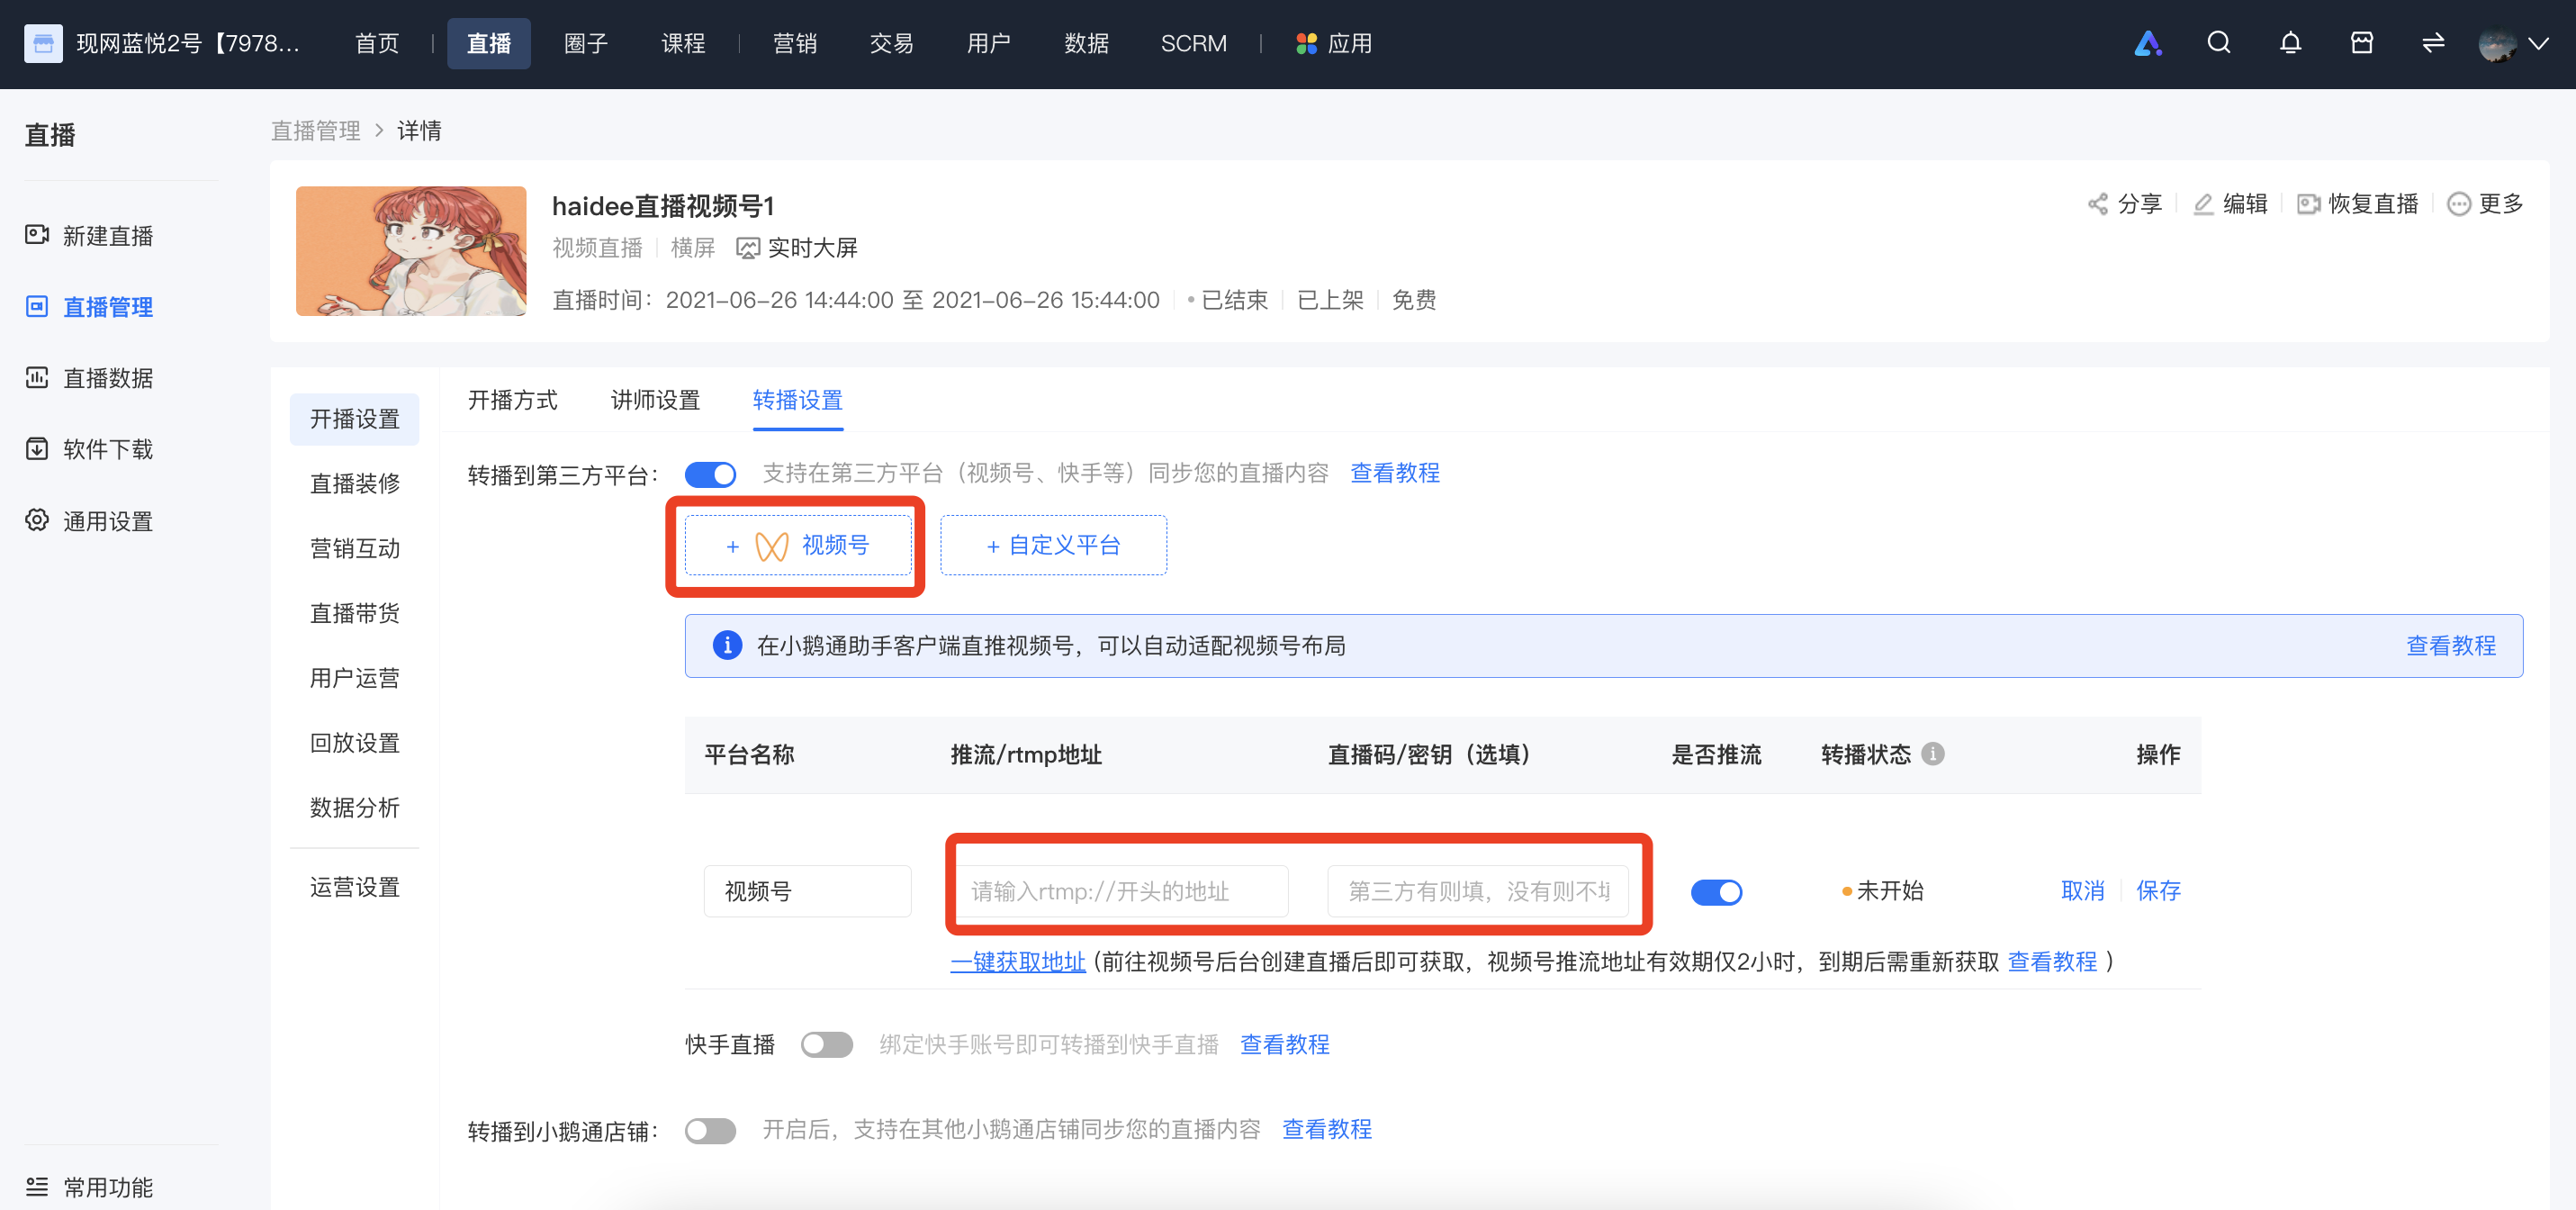
What should I do if students can't watch the live rebroadcast on Channels?
There are two solutions:
1. Check if the student is included in the visibility scope of the Channels. If not, adjust the visibility scope.

2. If live streaming cannot be pushed, recreate the Channels live streaming room and obtain the streaming push address (Click to view the specific operations).
How to rebroadcast a live stream to Bilibili
Merchants can use the rebroadcast function on elink to synchronize their live - streaming content to Bilibili, thereby increasing the content reuse rate and traffic reach rate.
I. Step 1: Obtain the Bilibili streaming address
1. Log in to Bilibilihttps://www.bilibili.com/Click on your avatar to enter your personal center
2. Click [My Live Room - Live Streaming Settings] on the left - hand navigation menu to enter your live - streaming room
3. Set the title and category of the live - streaming room. After clicking the 'Start Live Streaming' button, copy the streaming address and key.
*Note: Ifthe streaming address starts with the format 'rtmp://txy......', it is an invalid streaming address. Please check if the VPN on your computer is enabled. If it is enabled, please turn it off and then re - obtain the streaming address.If it is not enabled, please try switching the hotspot, browser, or device. If the format of the streaming address remains unchanged after the attempt, please consult Bilibili's official customer service.
II. Step 2: Fill in the elink management background
Log in to the elink management background, select the live - streaming room you want to rebroadcast, enter [Details Page - Live Streaming Settings - Rebroadcast Settings - Rebroadcast to Third - Party Platform - Custom Platform], fill in the name of the rebroadcast platform, the streaming address, and the key, and then click 'Save'.
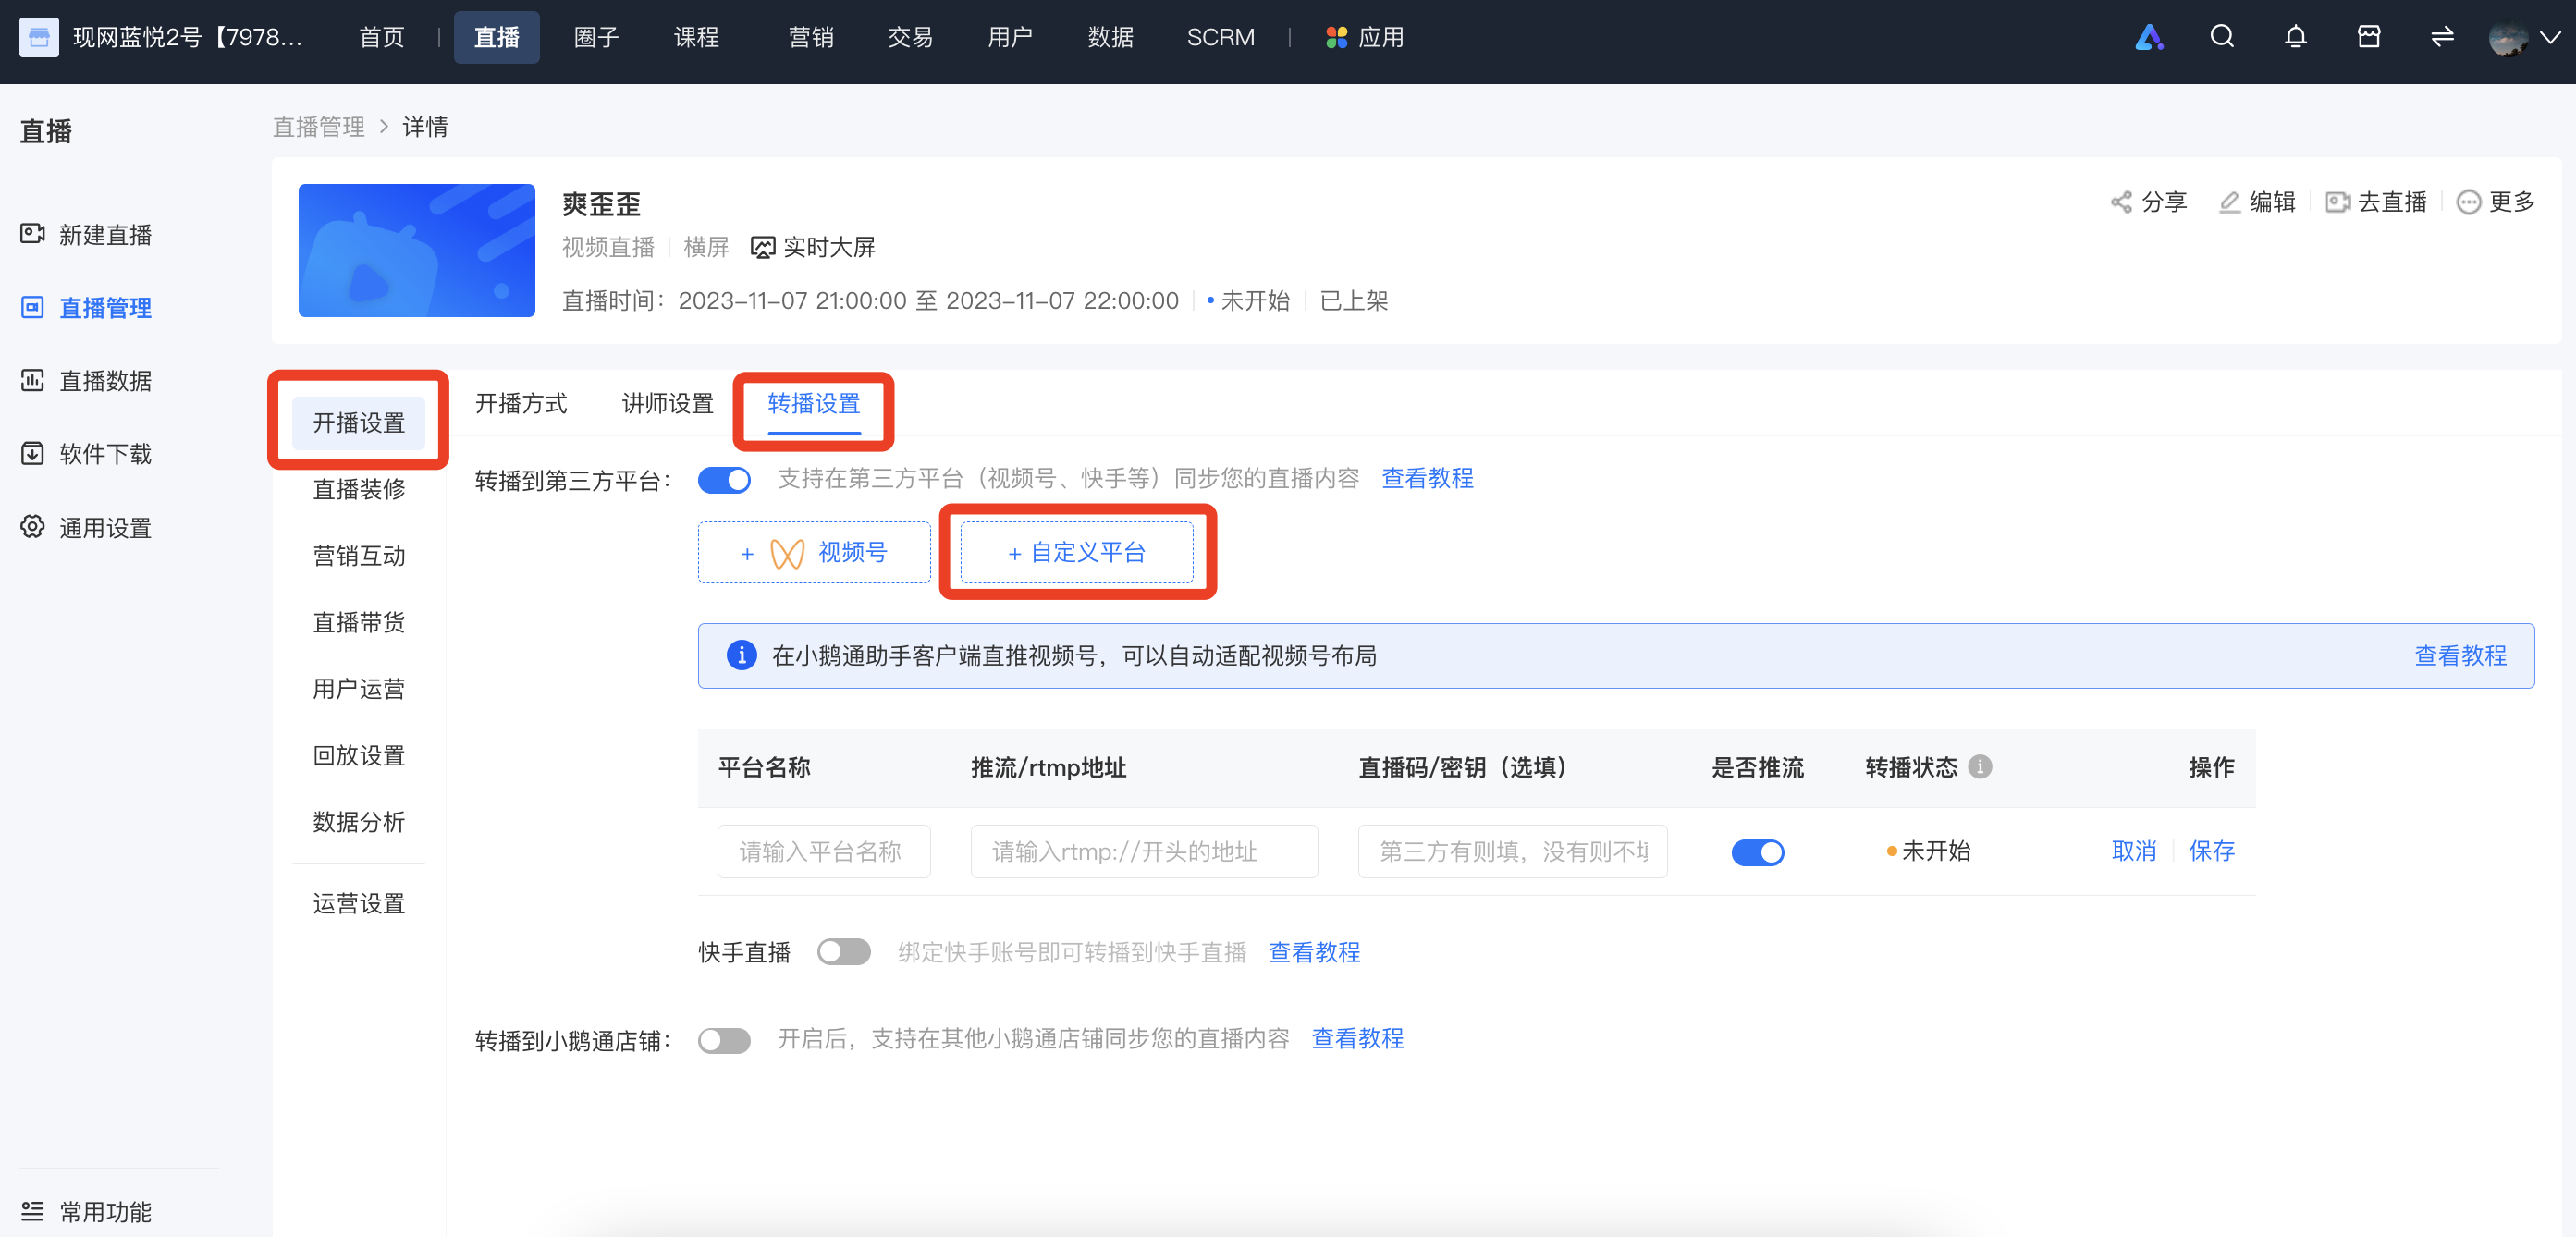
III. Step 3: Start live streaming
Go to the eLive client or the elink live - streaming terminal to start live streaming. Different live - streaming modes are applicable to different live - streaming terminals:
- Landscape live streaming: Computer (eLive client,elink Assistant client, web version), Mobile phone (eLive Mini Program)
- Portrait live streaming: Mobile phone (eLive Mini Program)
- Recorded live streaming: Computer (web version), Mobile phone (H5)
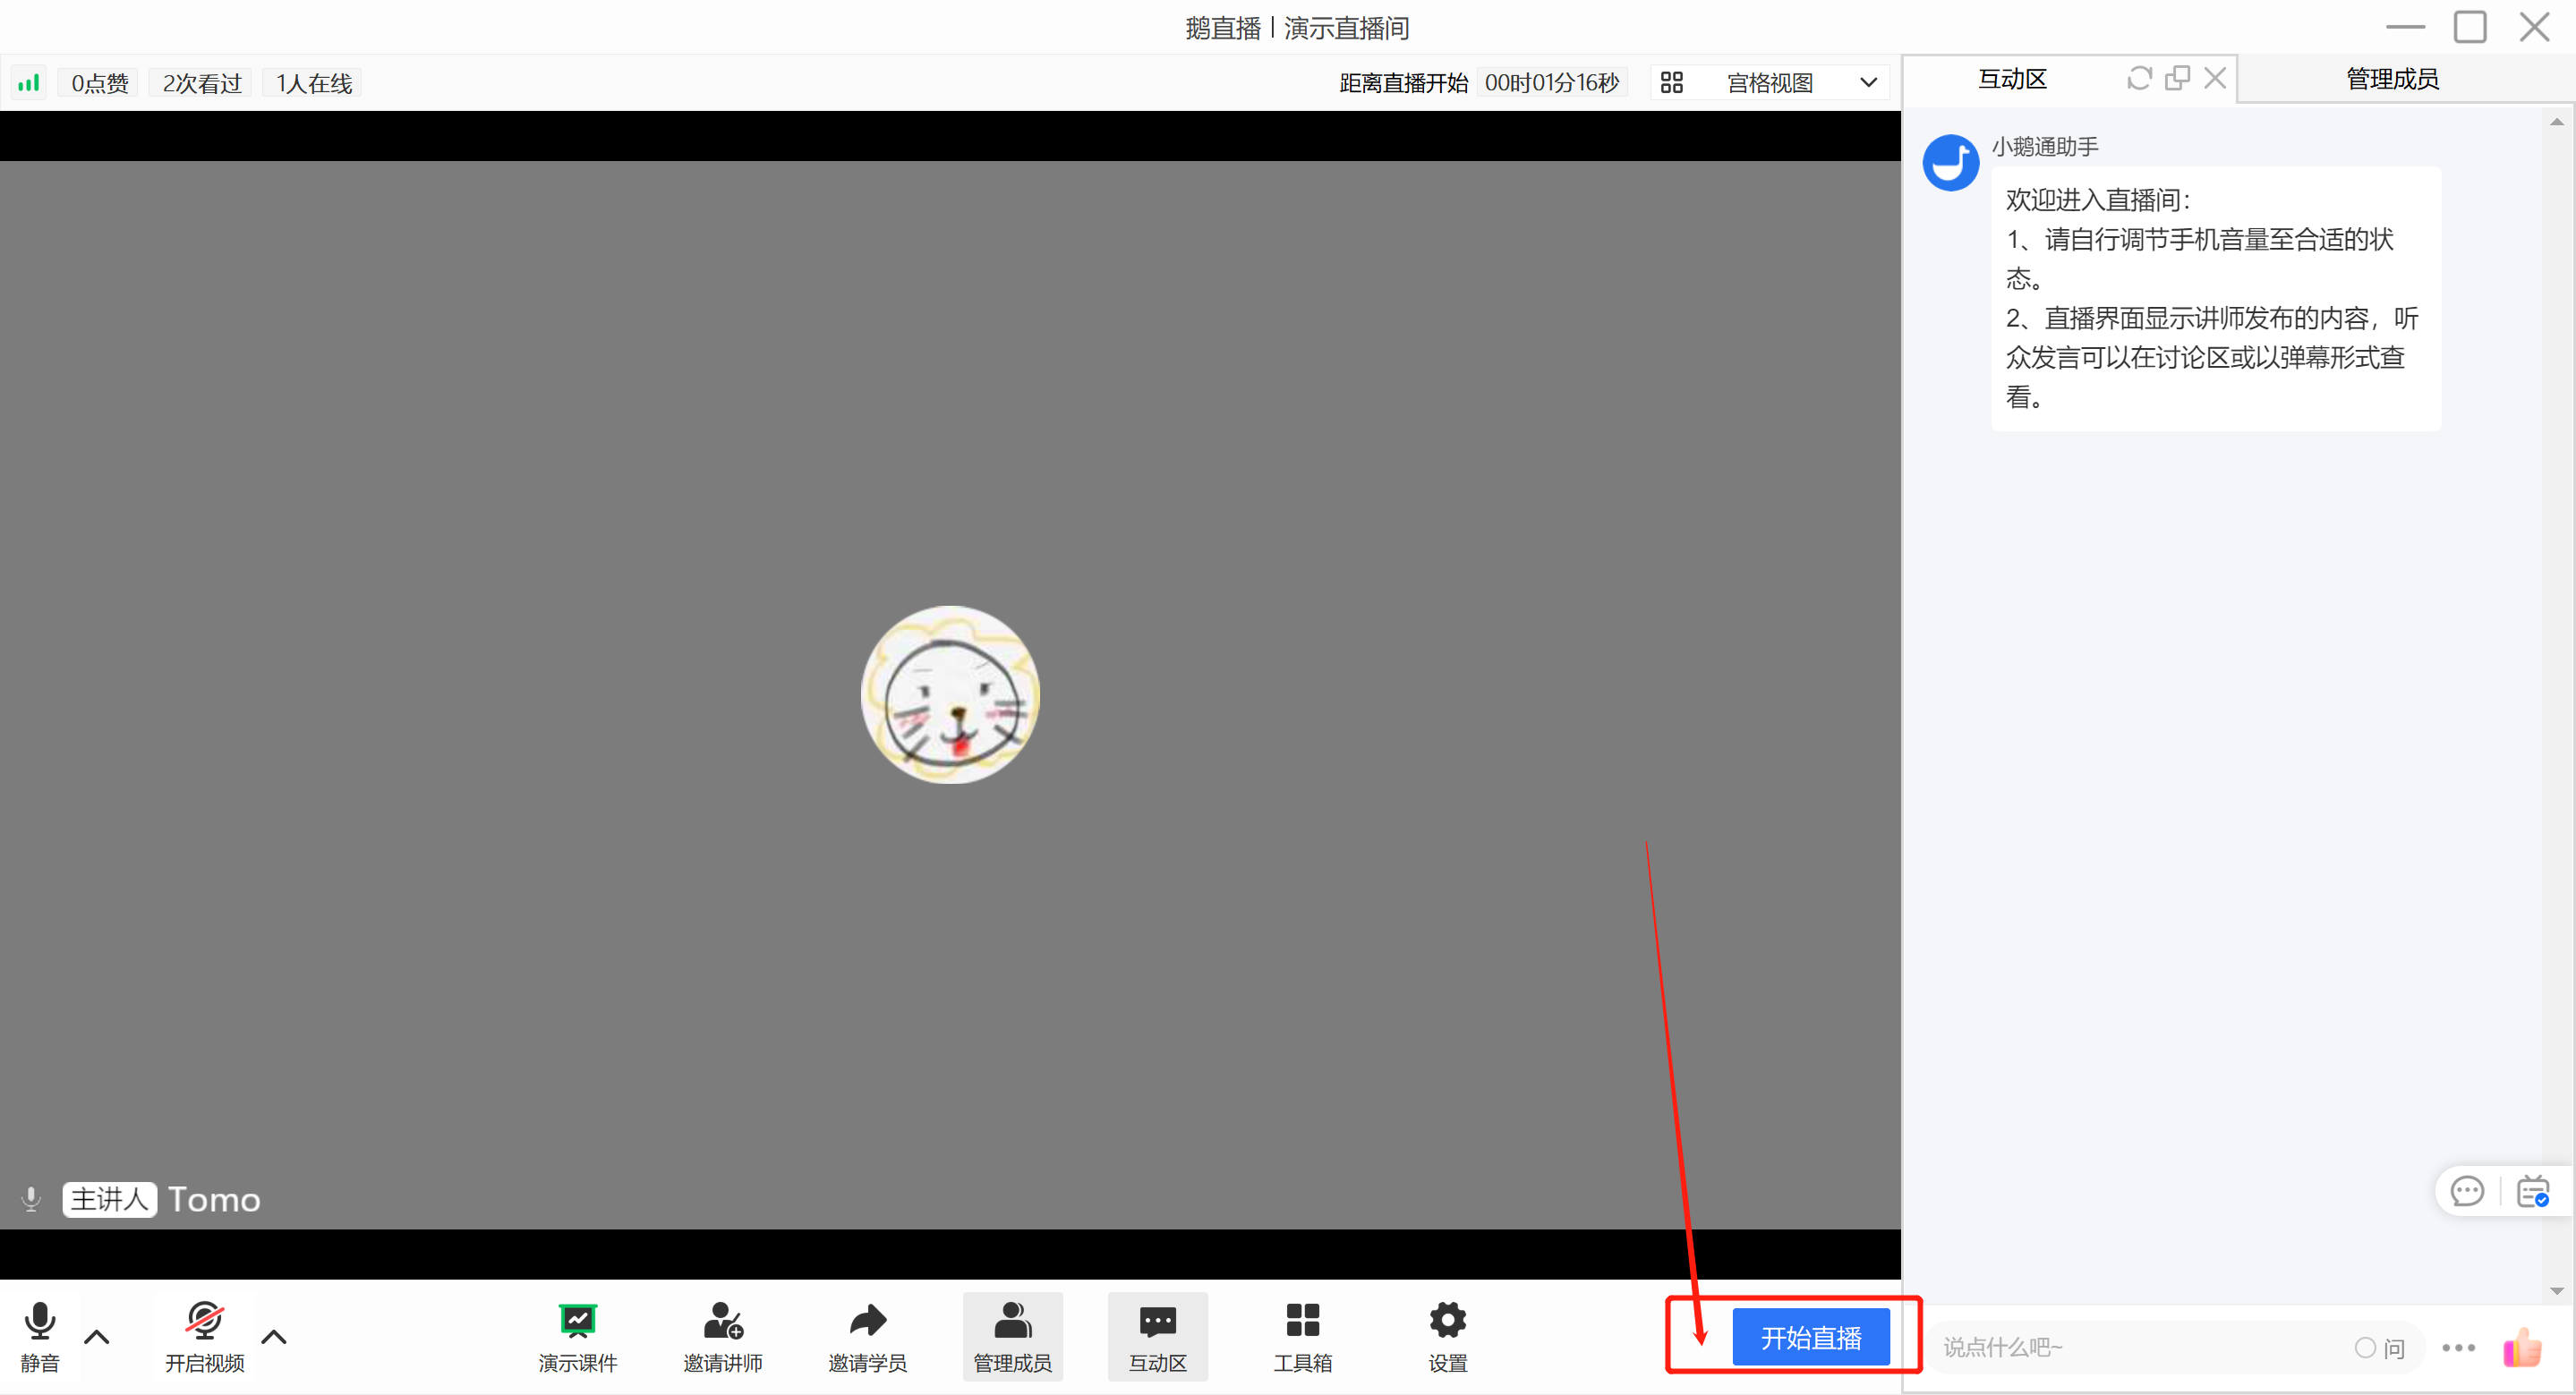
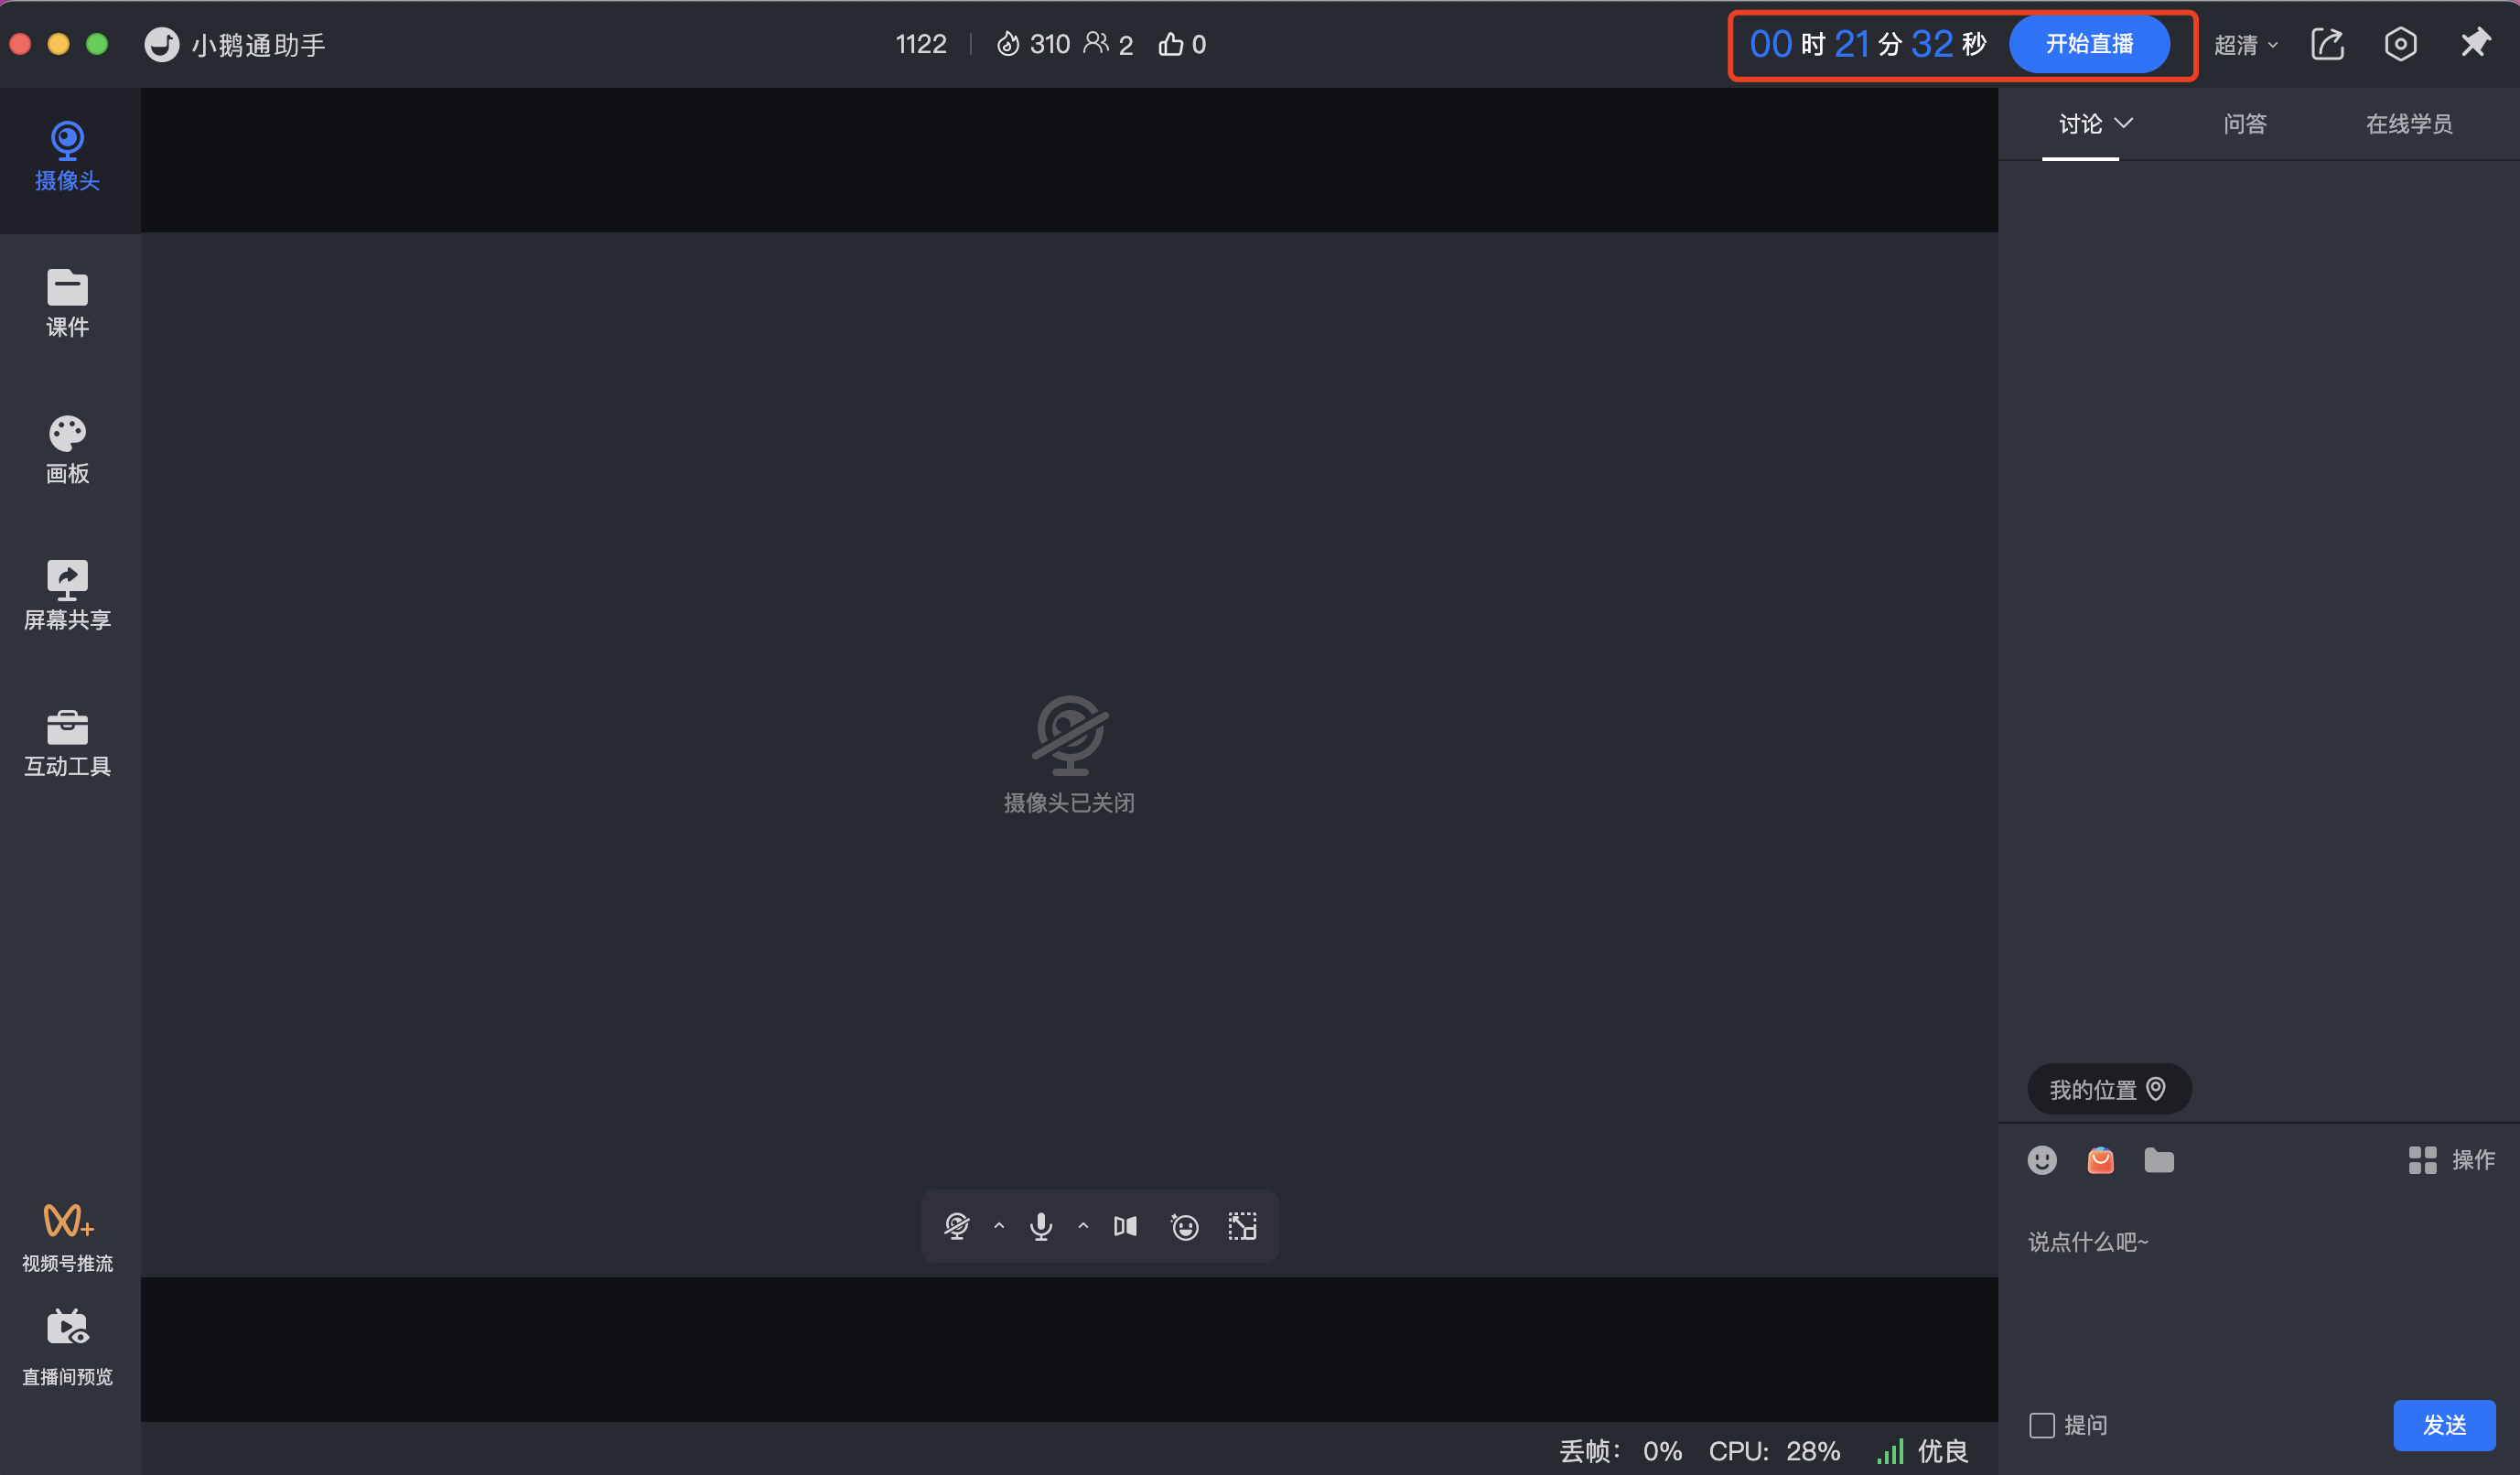
IV. Frequently Asked Questions
1. After starting the live streamWhy can't I see the picture on Bilibili?
1) Check if the streaming address and key have expired. If they have expired, you need to go to Bilibili to re - obtain them and then fill them in the elink management background.
2) Ifthe streaming address starts with the format 'rtmp://txy......', it is an invalid streaming address. Please check if the VPN on your computer is enabled. If it is enabled, please turn it off and then re - obtain the streaming address.If it is not enabled, please try switching the hotspot, browser, or device. If the format of the streaming address remains unchanged after the attempt, please consult Bilibili's official customer service.
2. Do I still need to start the live stream on Bilibili after starting it on elink?
No. Under normal circumstances, you can see the streaming picture in the Bilibili room after starting the live stream on elink.
How to rebroadcast a live stream to Weibo
Merchants can use the rebroadcasting function in elink to synchronize the live content they broadcast on elink toWeibo, thereby improving the content reuse rate and traffic reach rate.
I. Step 1: Obtain the Weibo streaming address
1. Visit and log in to the Weibo management backendhttp://t.cn/A6Uoeoga
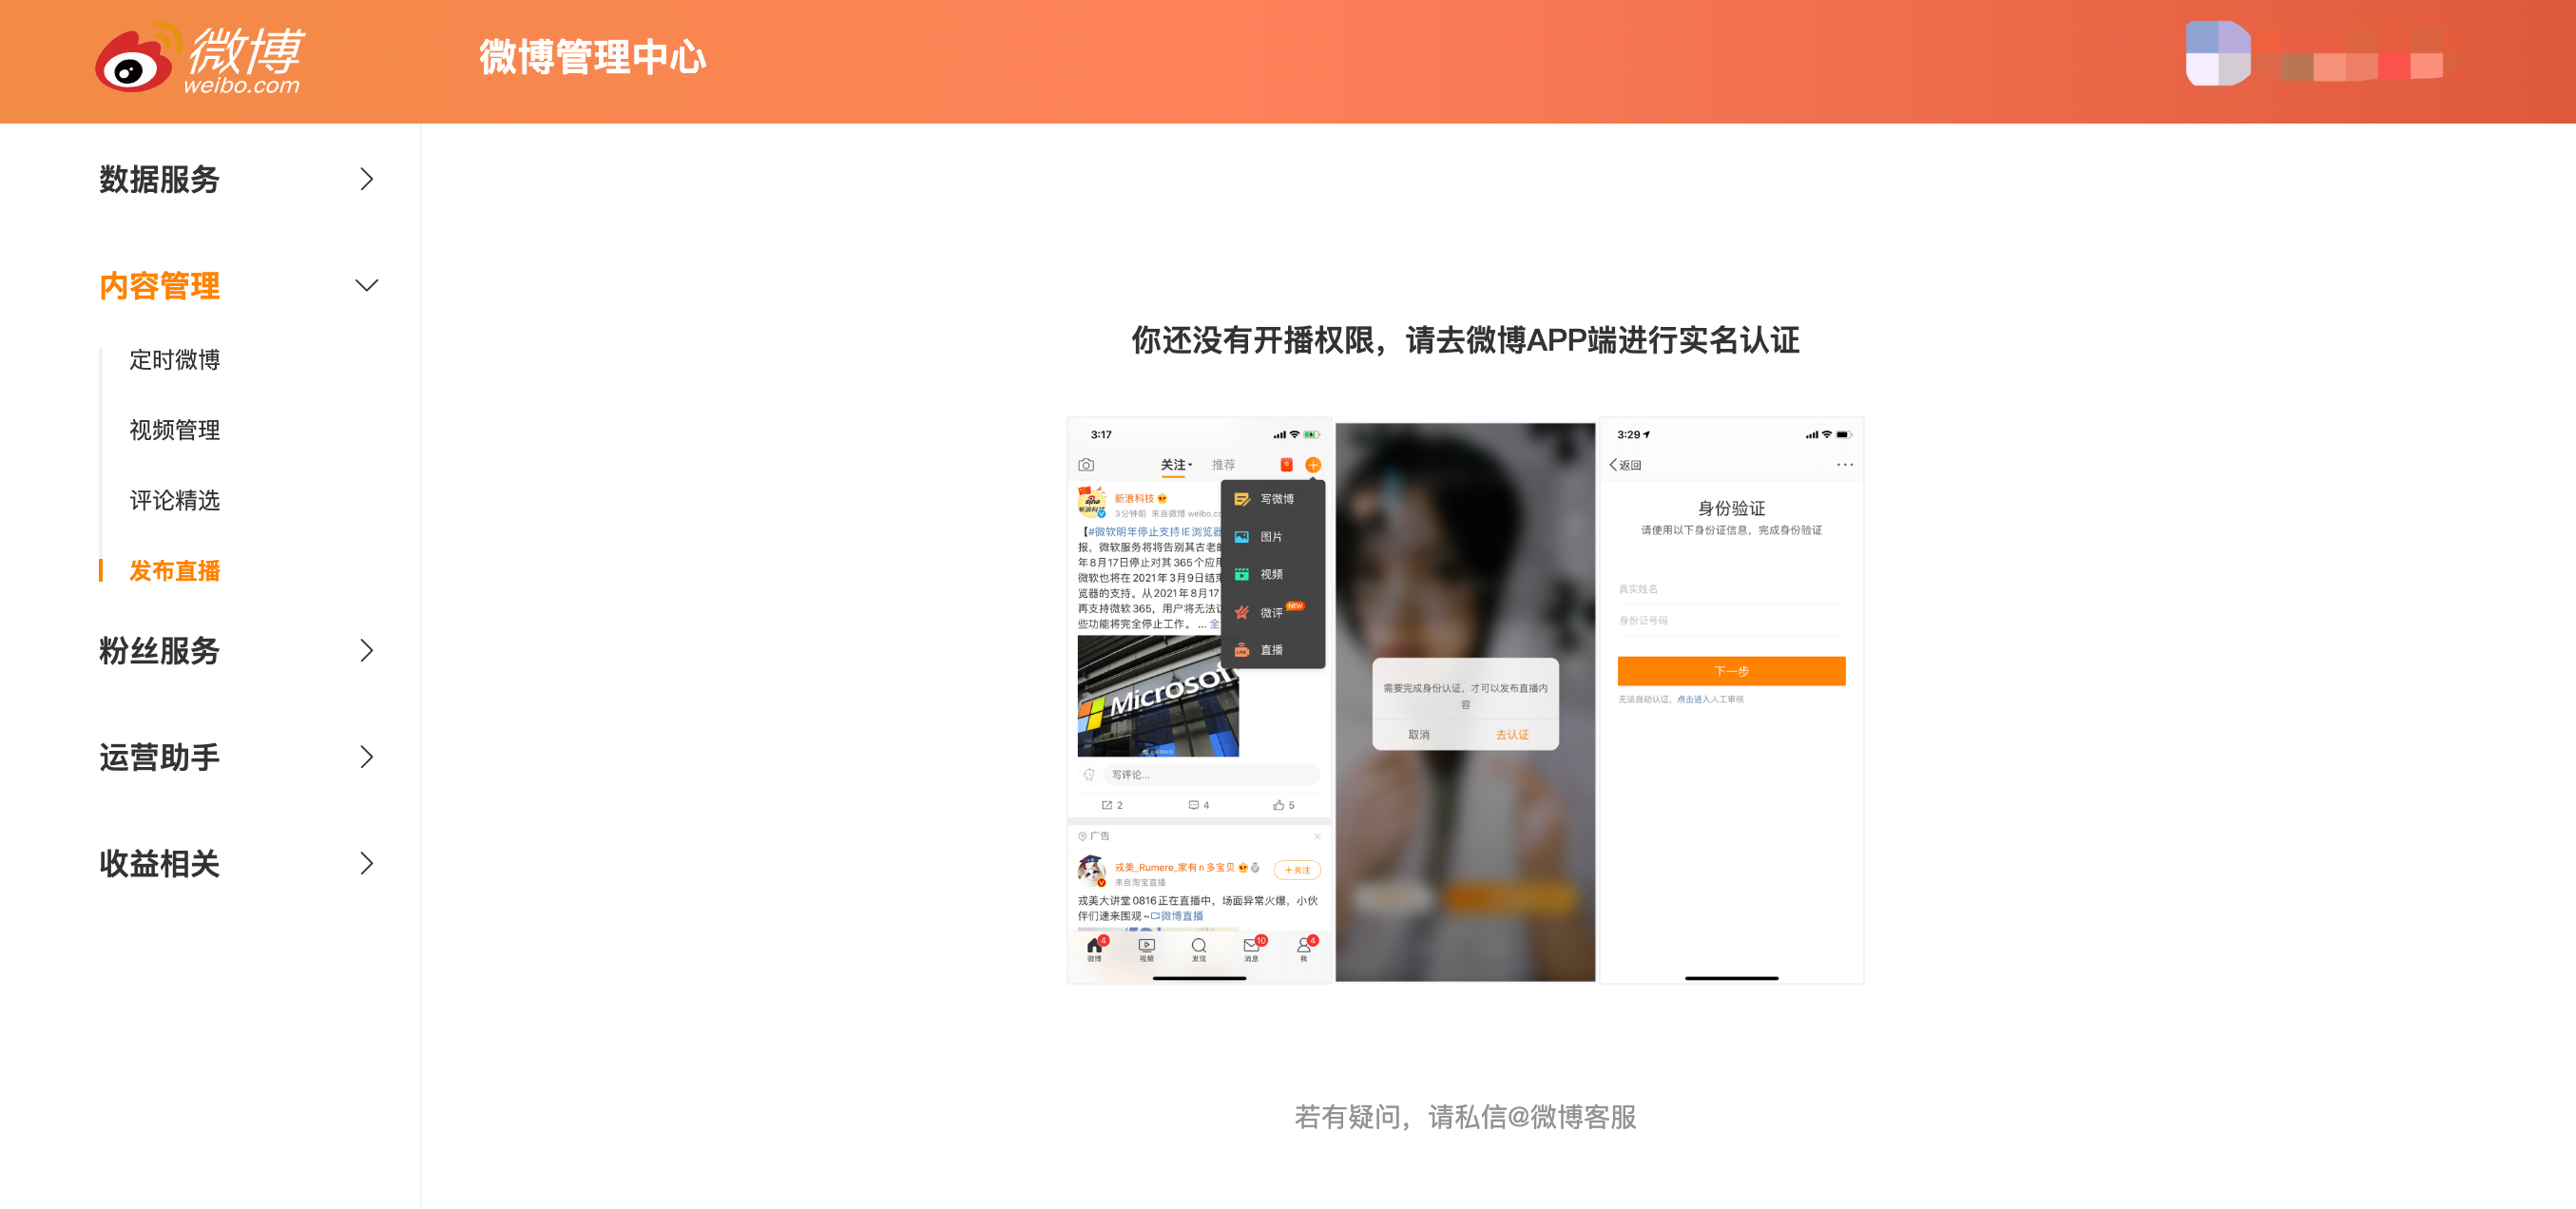
If your account is not real - name verified, you need to complete the verification on the Weibo app before you can start a live broadcast
2. Select “Content Management - Publish Live” in the left - hand navigation bar, click “Create Live”, and copy the stream address and stream key
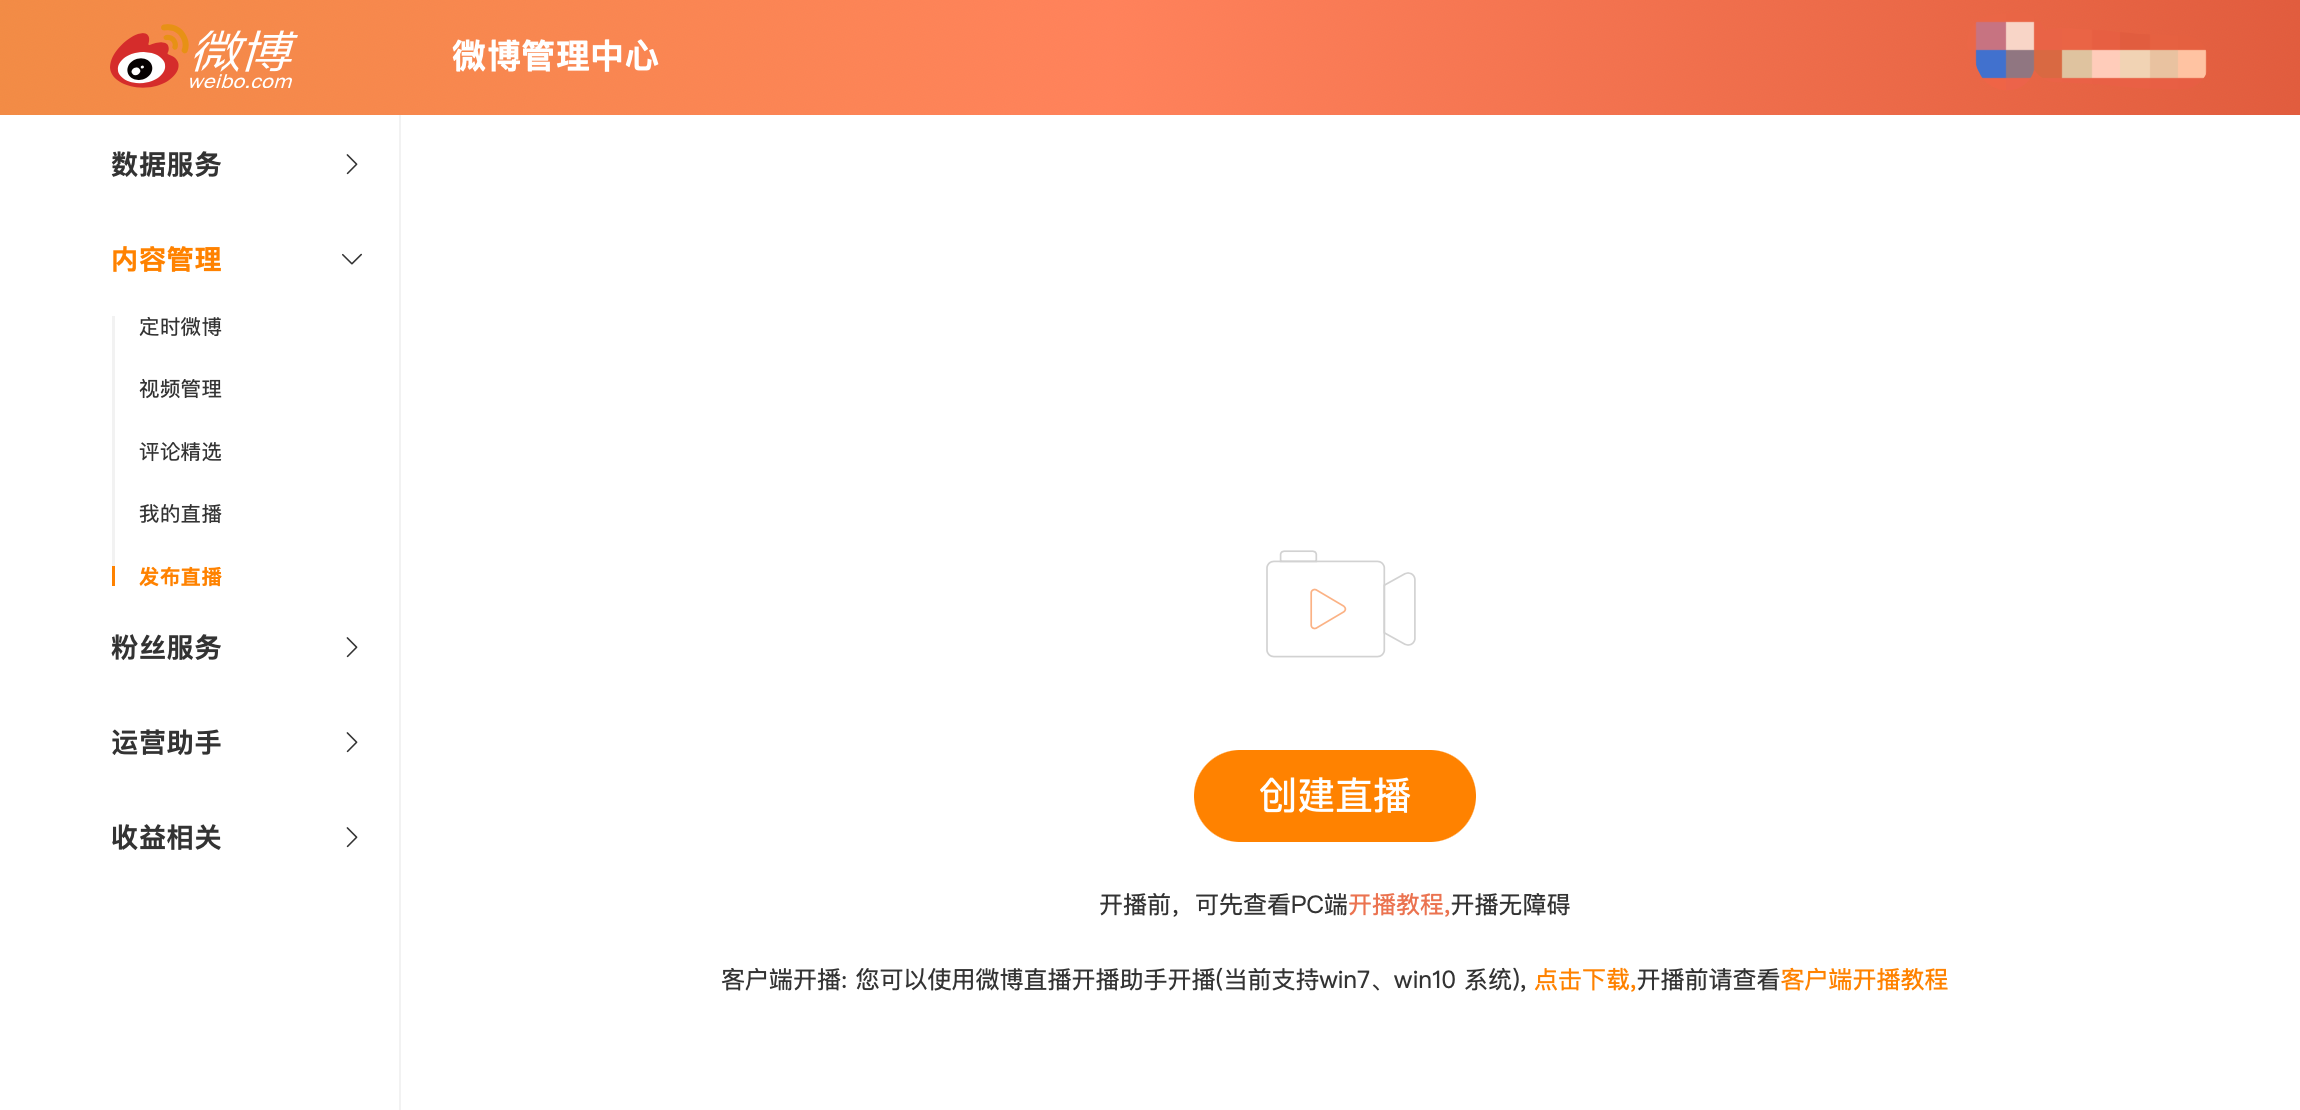
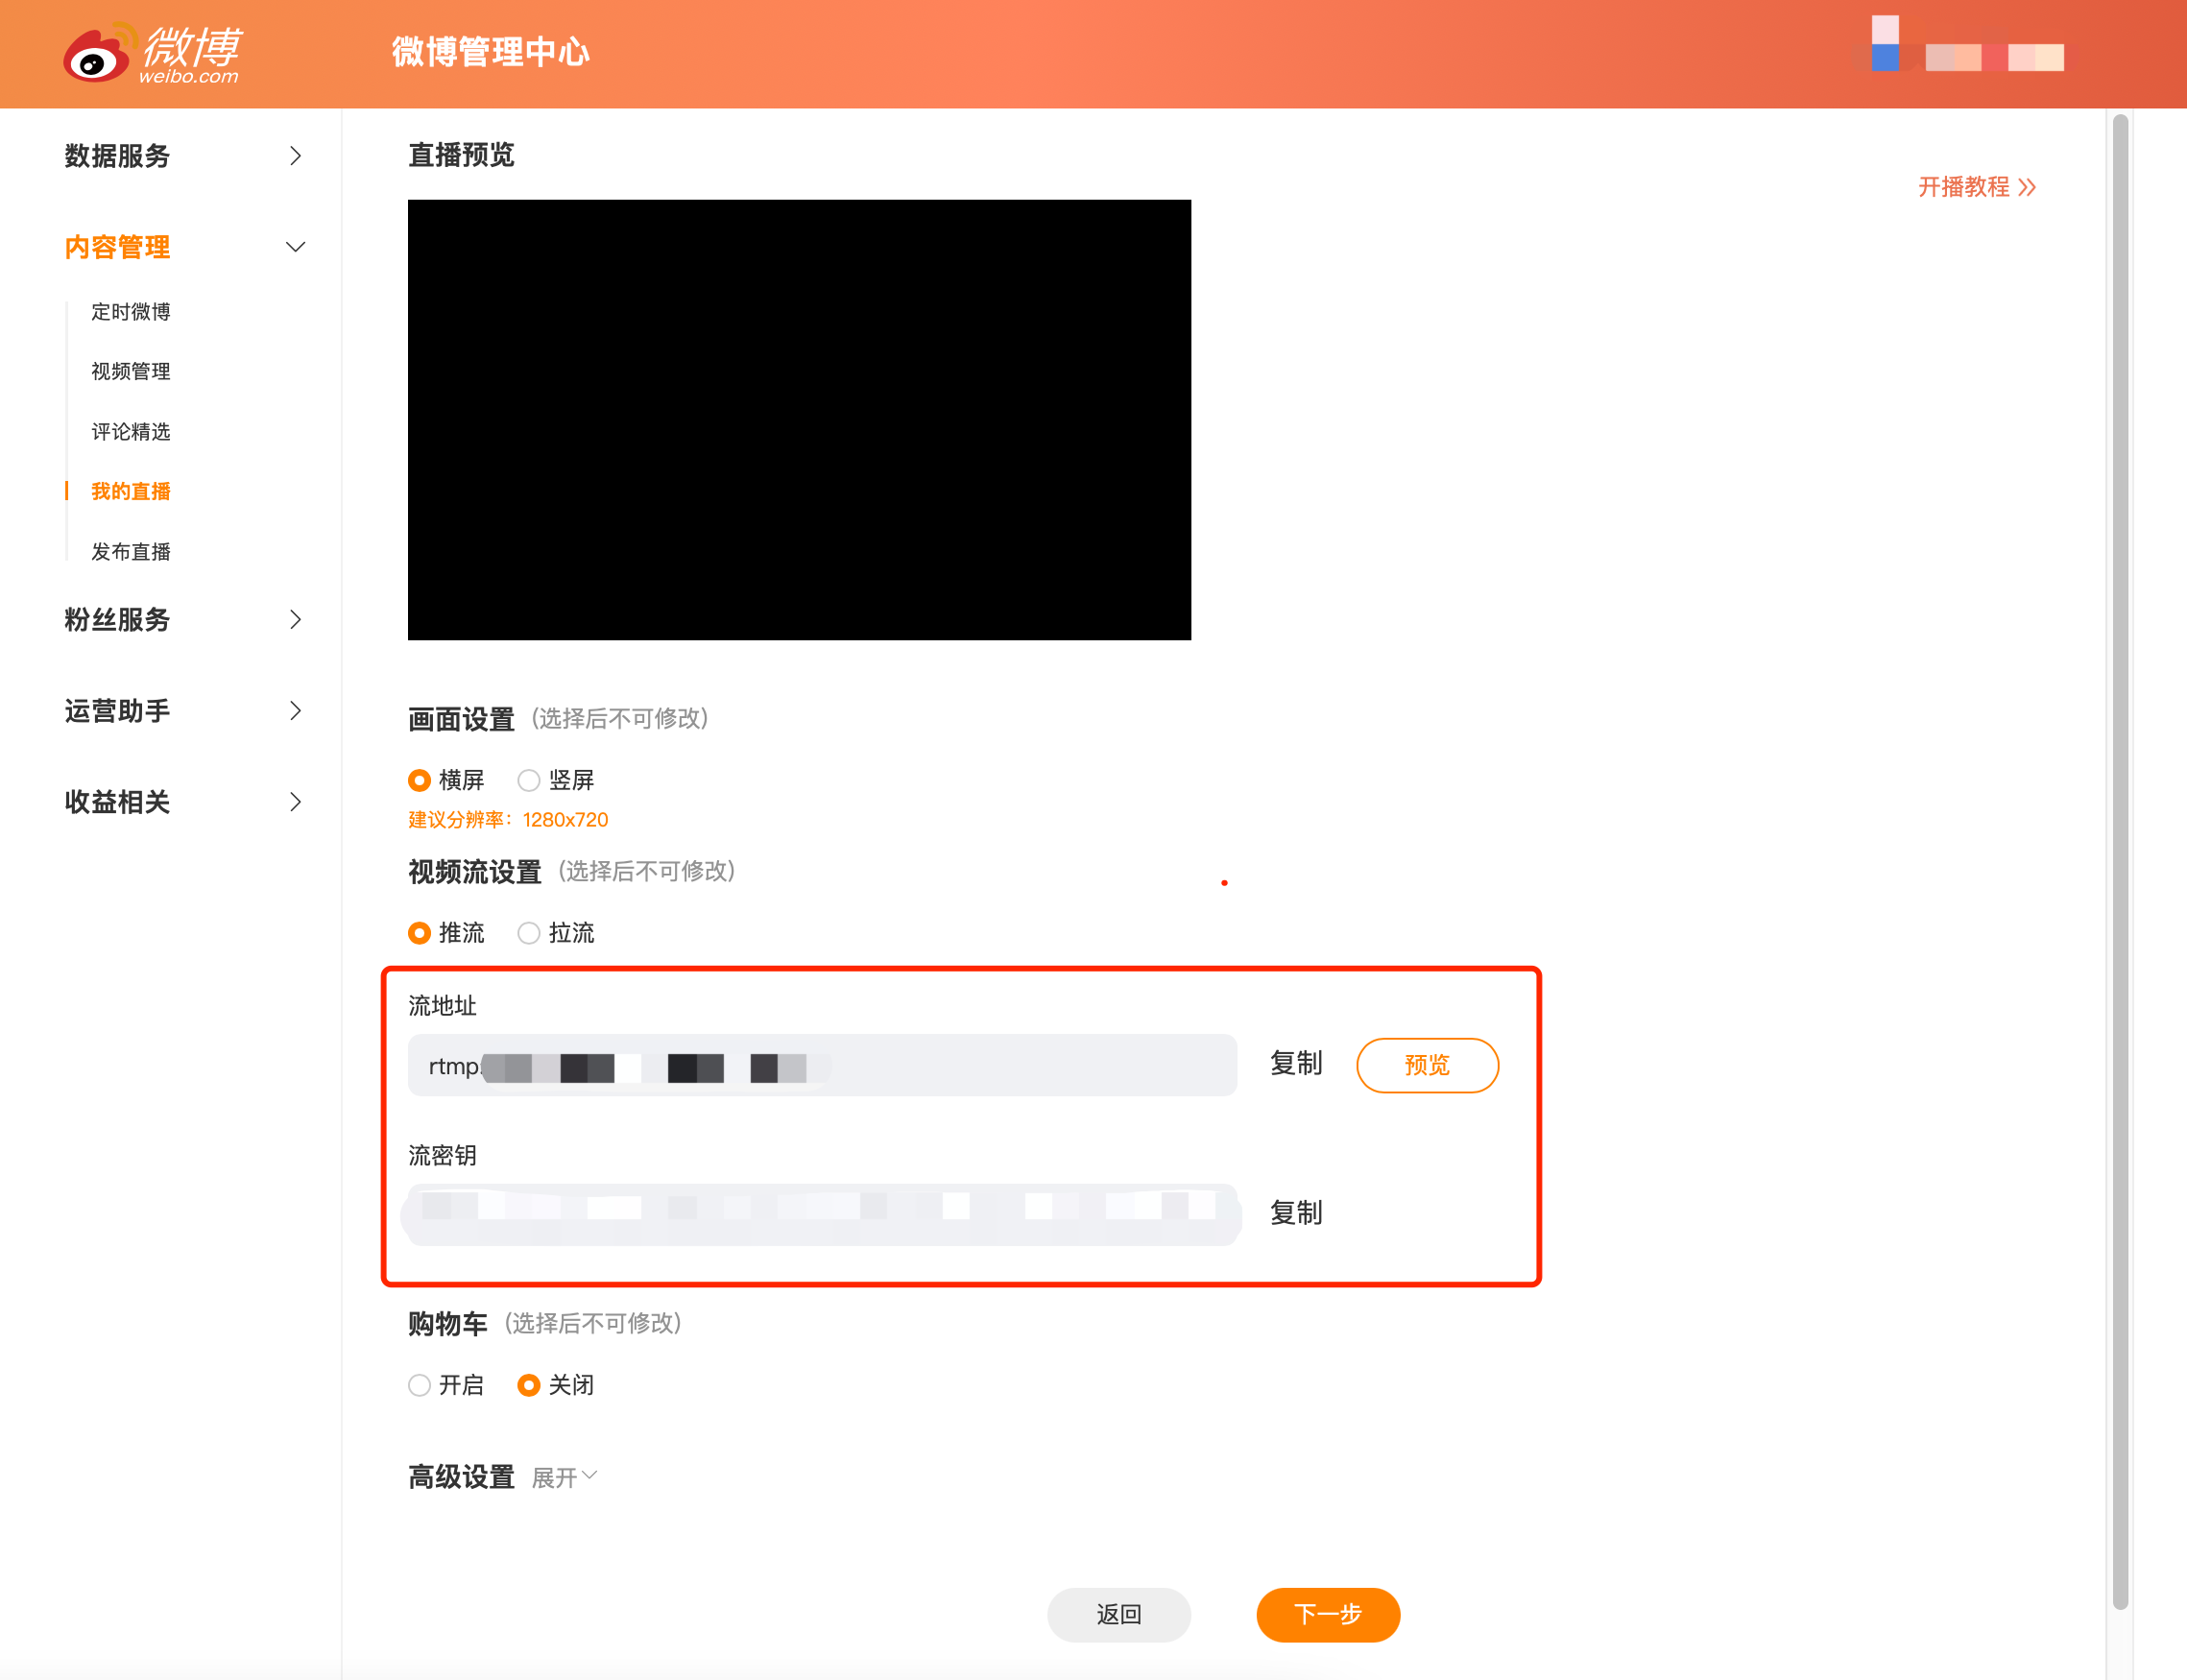
3. After completion, click “Next” to set the live broadcast information. Once completed, the live broadcast will be successfully created. You can manage the live broadcast in “My Live Broadcasts”.
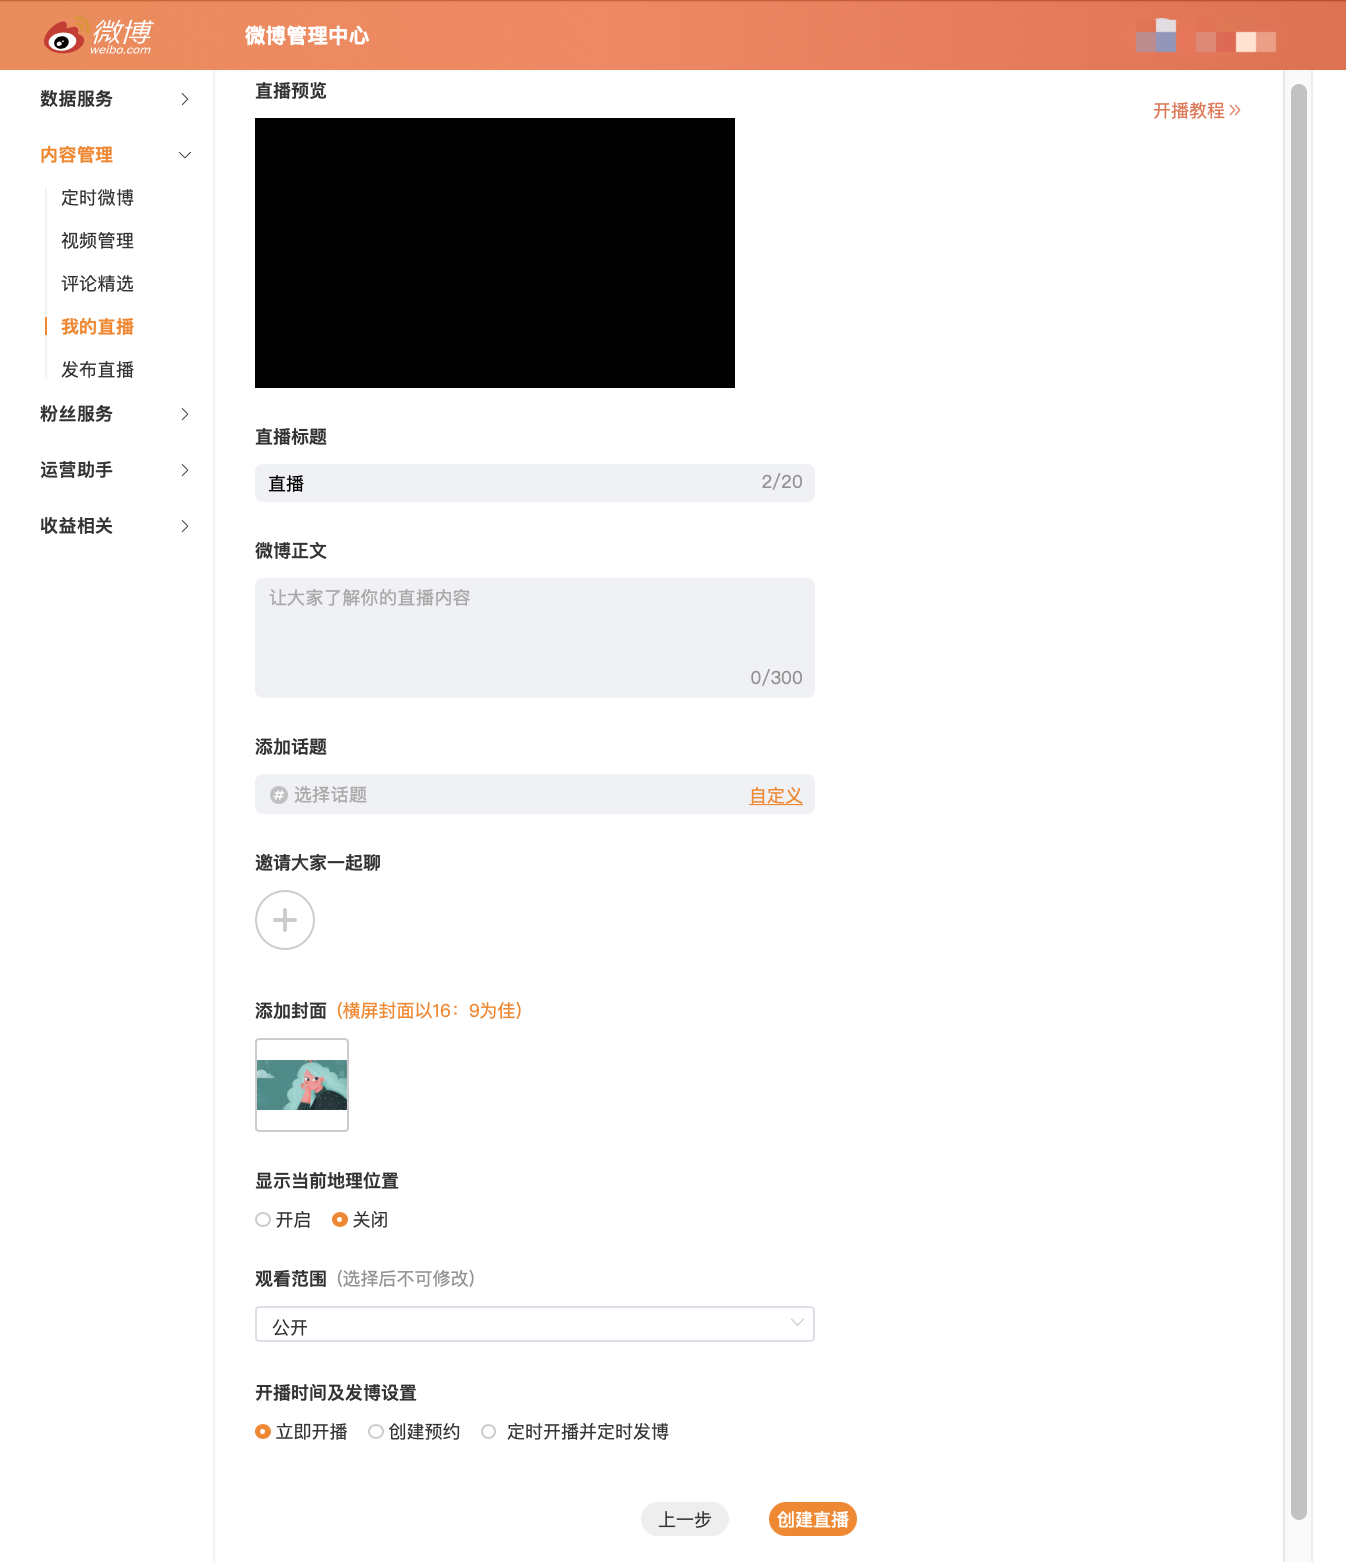
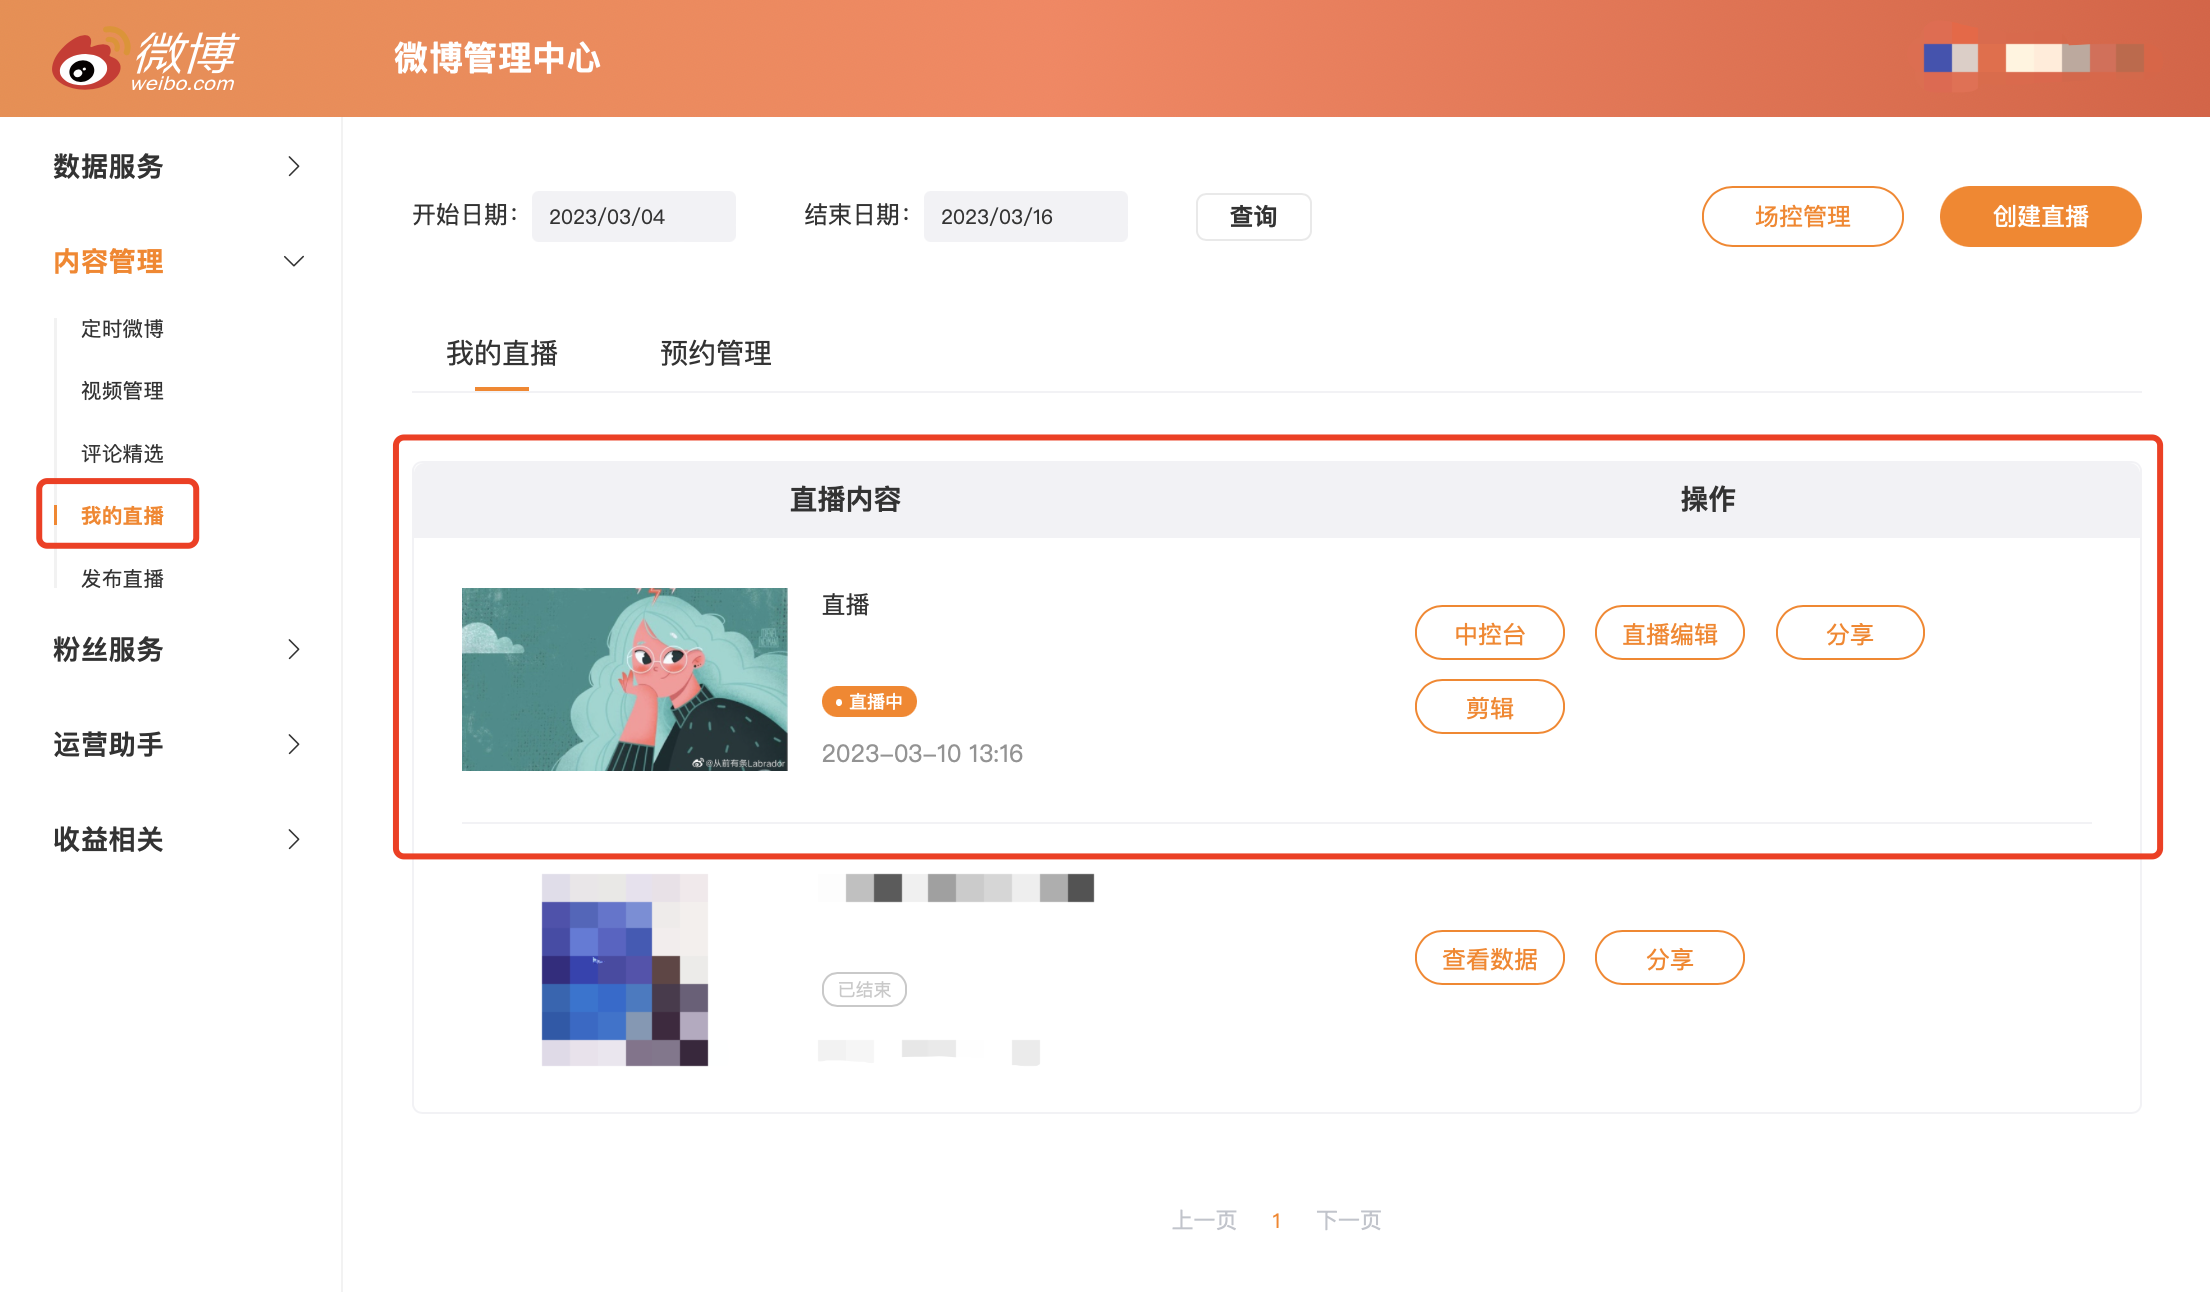
For more information on starting a live broadcast on Weibo, please refer to the official tutorial:https://weibo.com/l/wblive/act/k2mw80kz3kw0
II. Step 2: Fill in the elink management backend
Log in to the elink management backend, select the live - broadcast room you want to rebroadcast, go to [Details Page - Live - broadcast Settings - Rebroadcast Settings - Rebroadcast to Third - party Platforms - Custom Platform], fill in the name of the rebroadcasting platform, the streaming address, and the key, and then click “Save”.
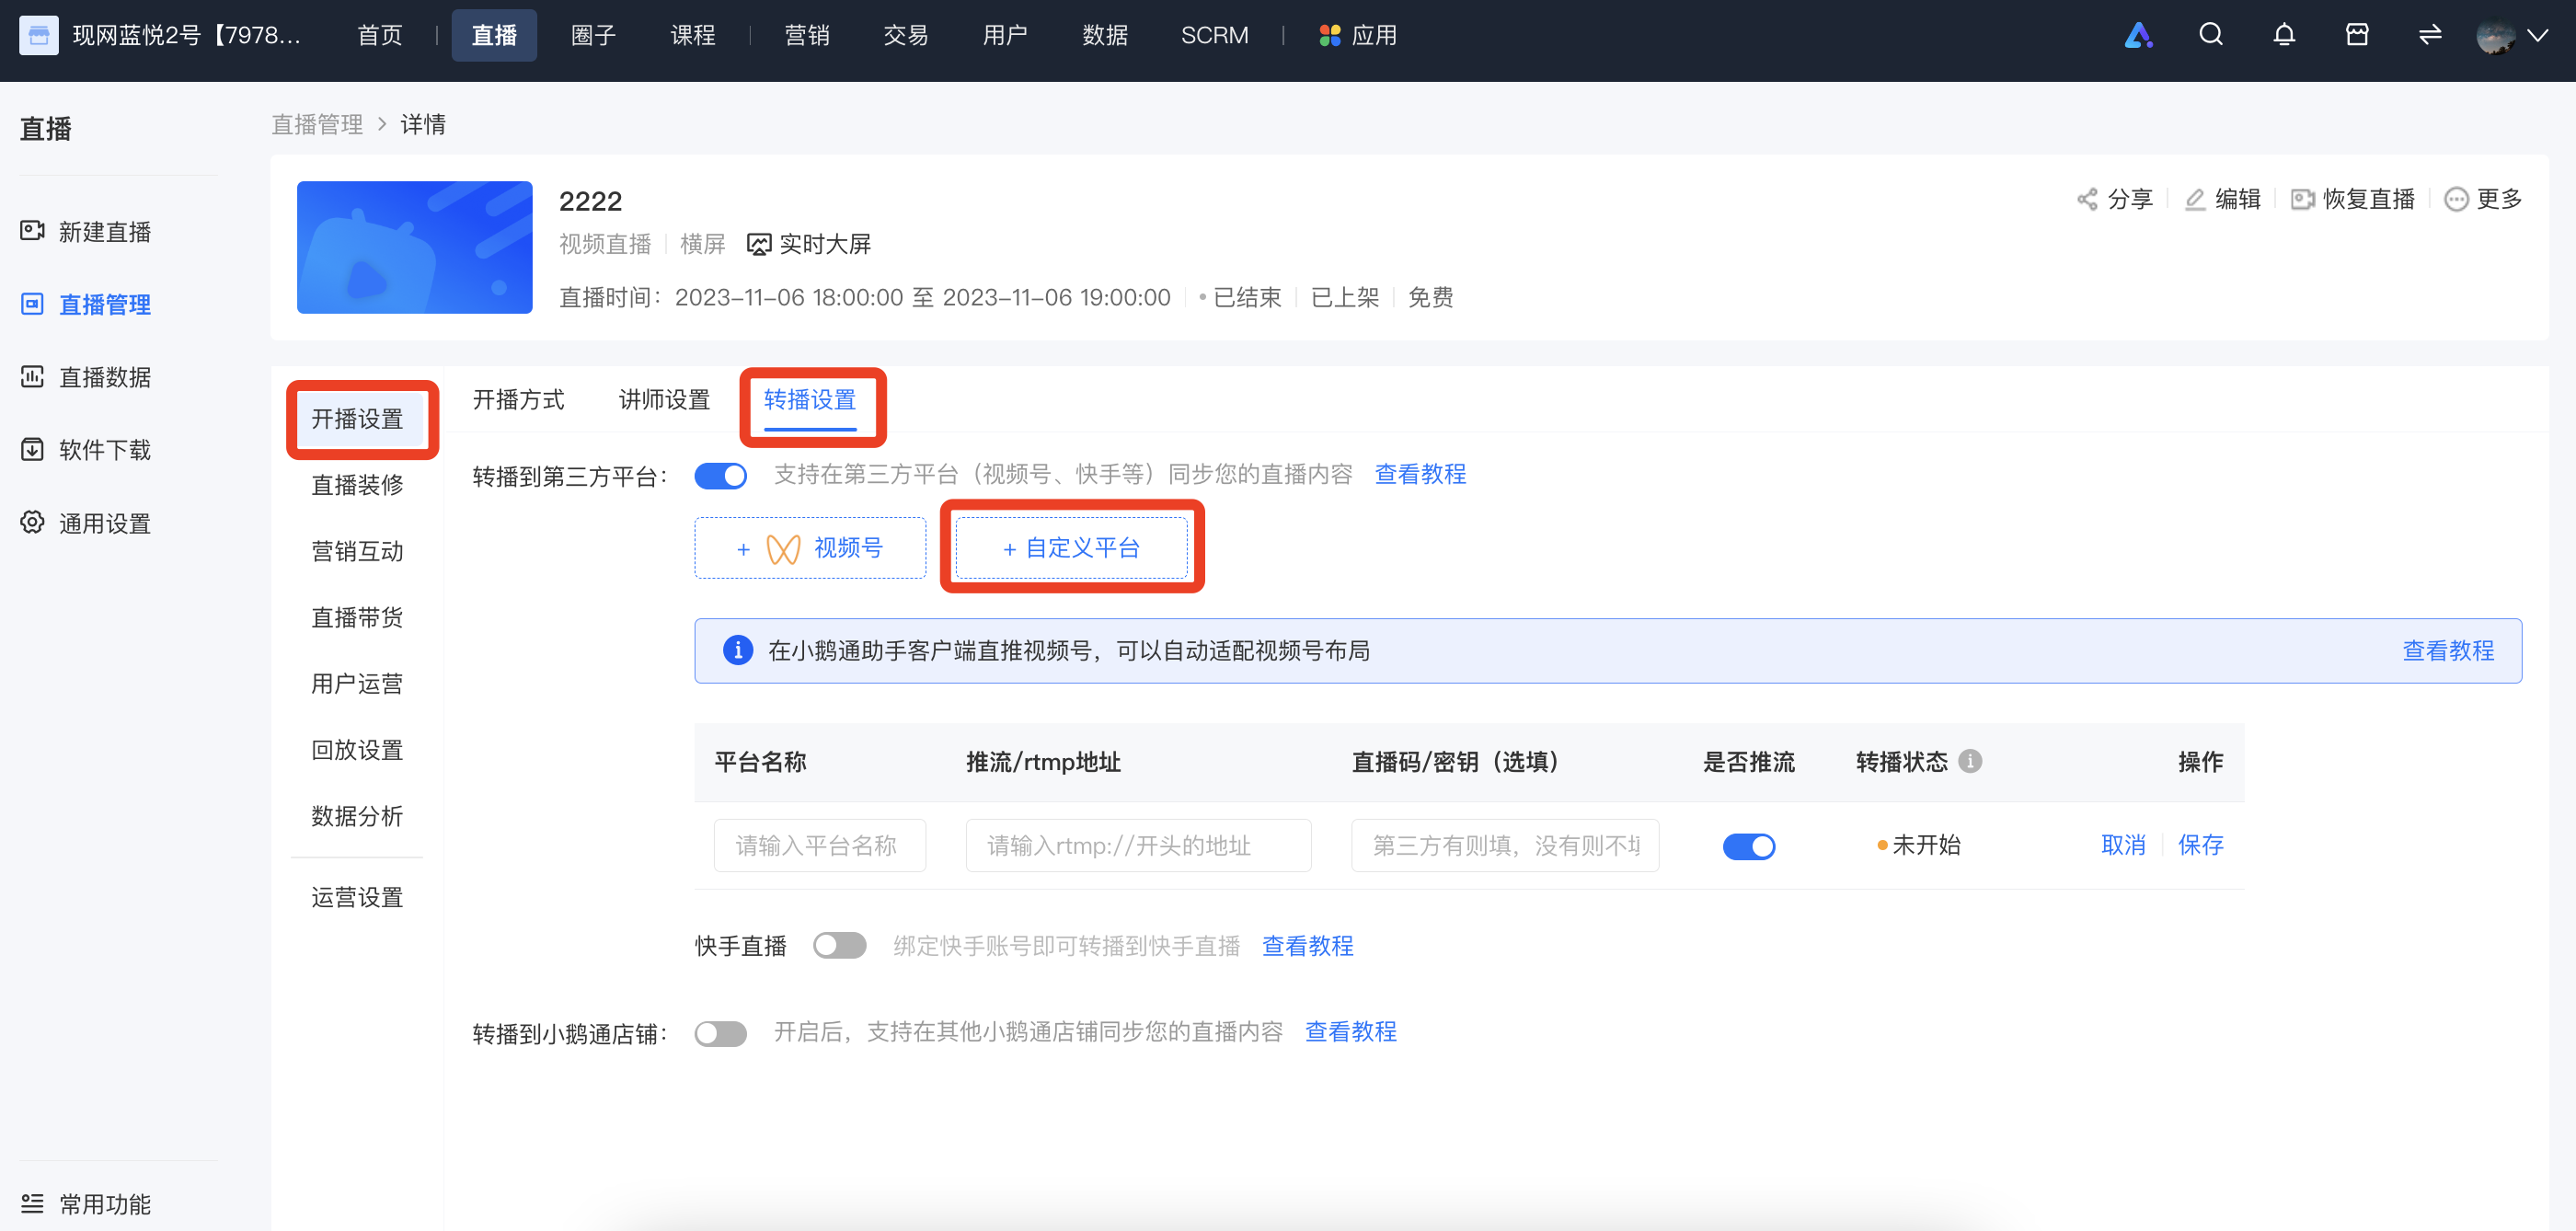
III. Step 3: Start the live broadcast
Go to the eLive client/elink live - broadcast terminal to start the live broadcast. Different live - broadcast modes are applicable to different live - broadcast terminals:
- Landscape live broadcast: Computer (eLive client,elink Assistant client, web version), mobile phone (eLive Mini Program)
- Portrait live broadcast: Mobile phone (eLive Mini Program)
- Recorded live broadcast: Computer (web version), mobile phone (H5)
(Schematic diagram of the eLive client)
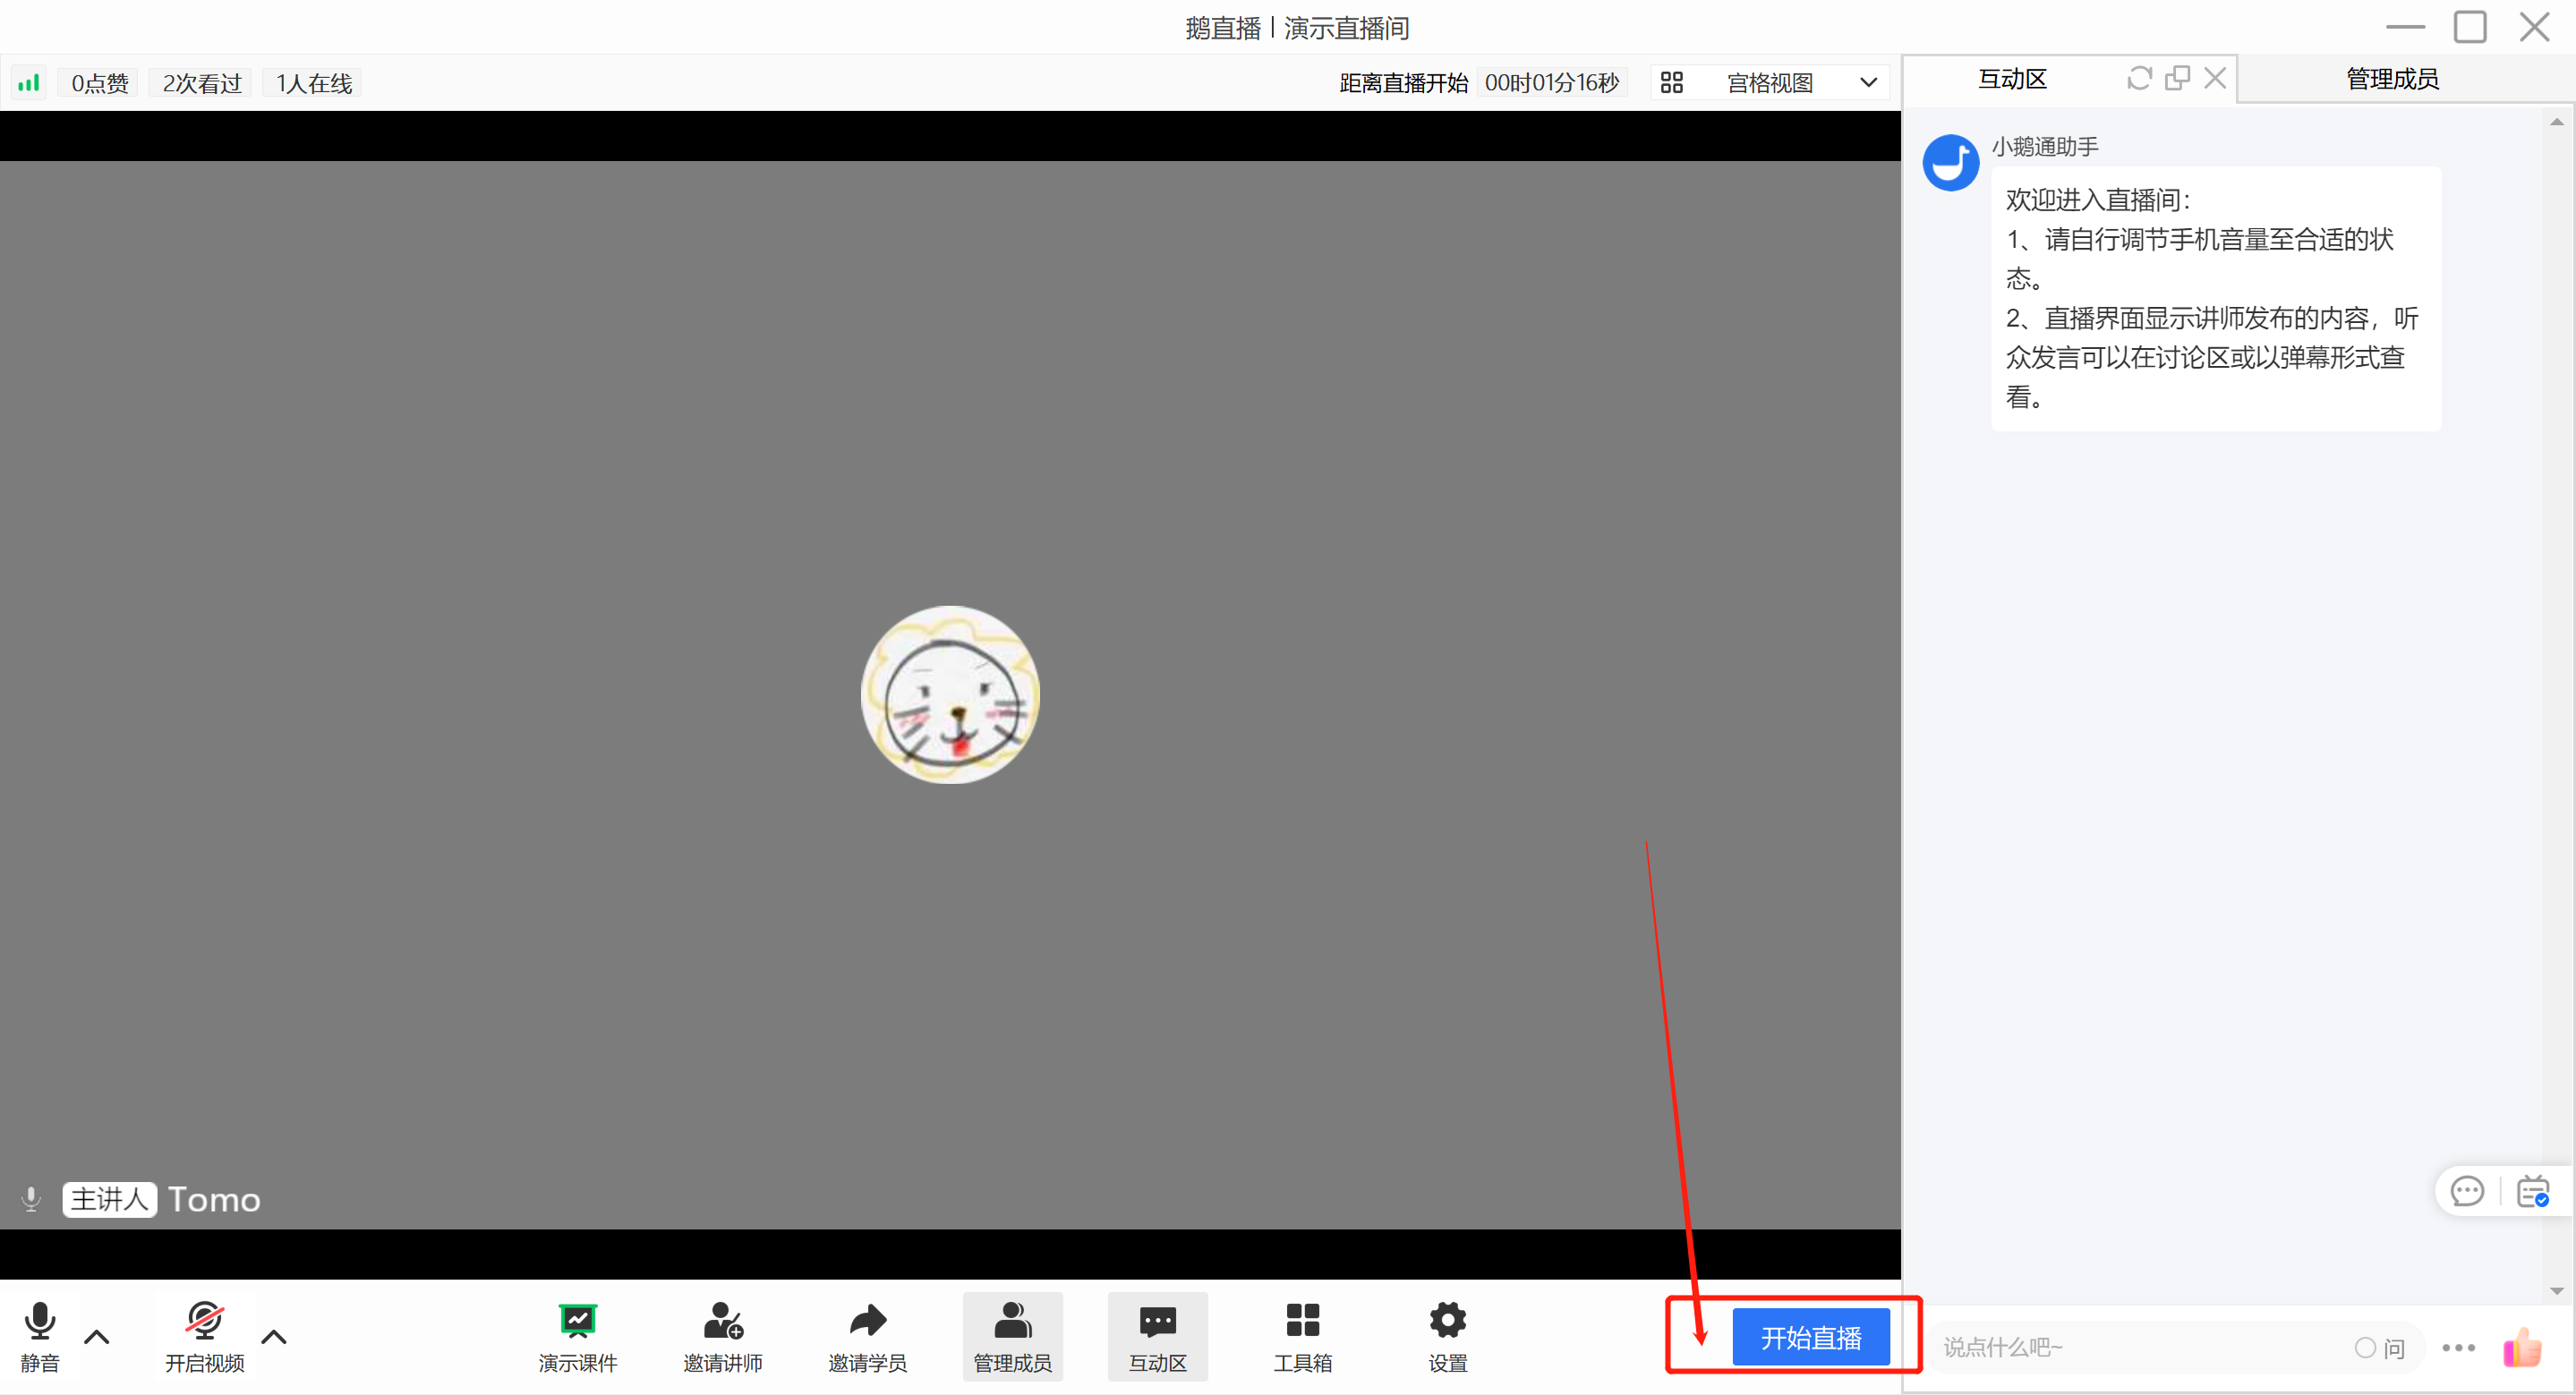
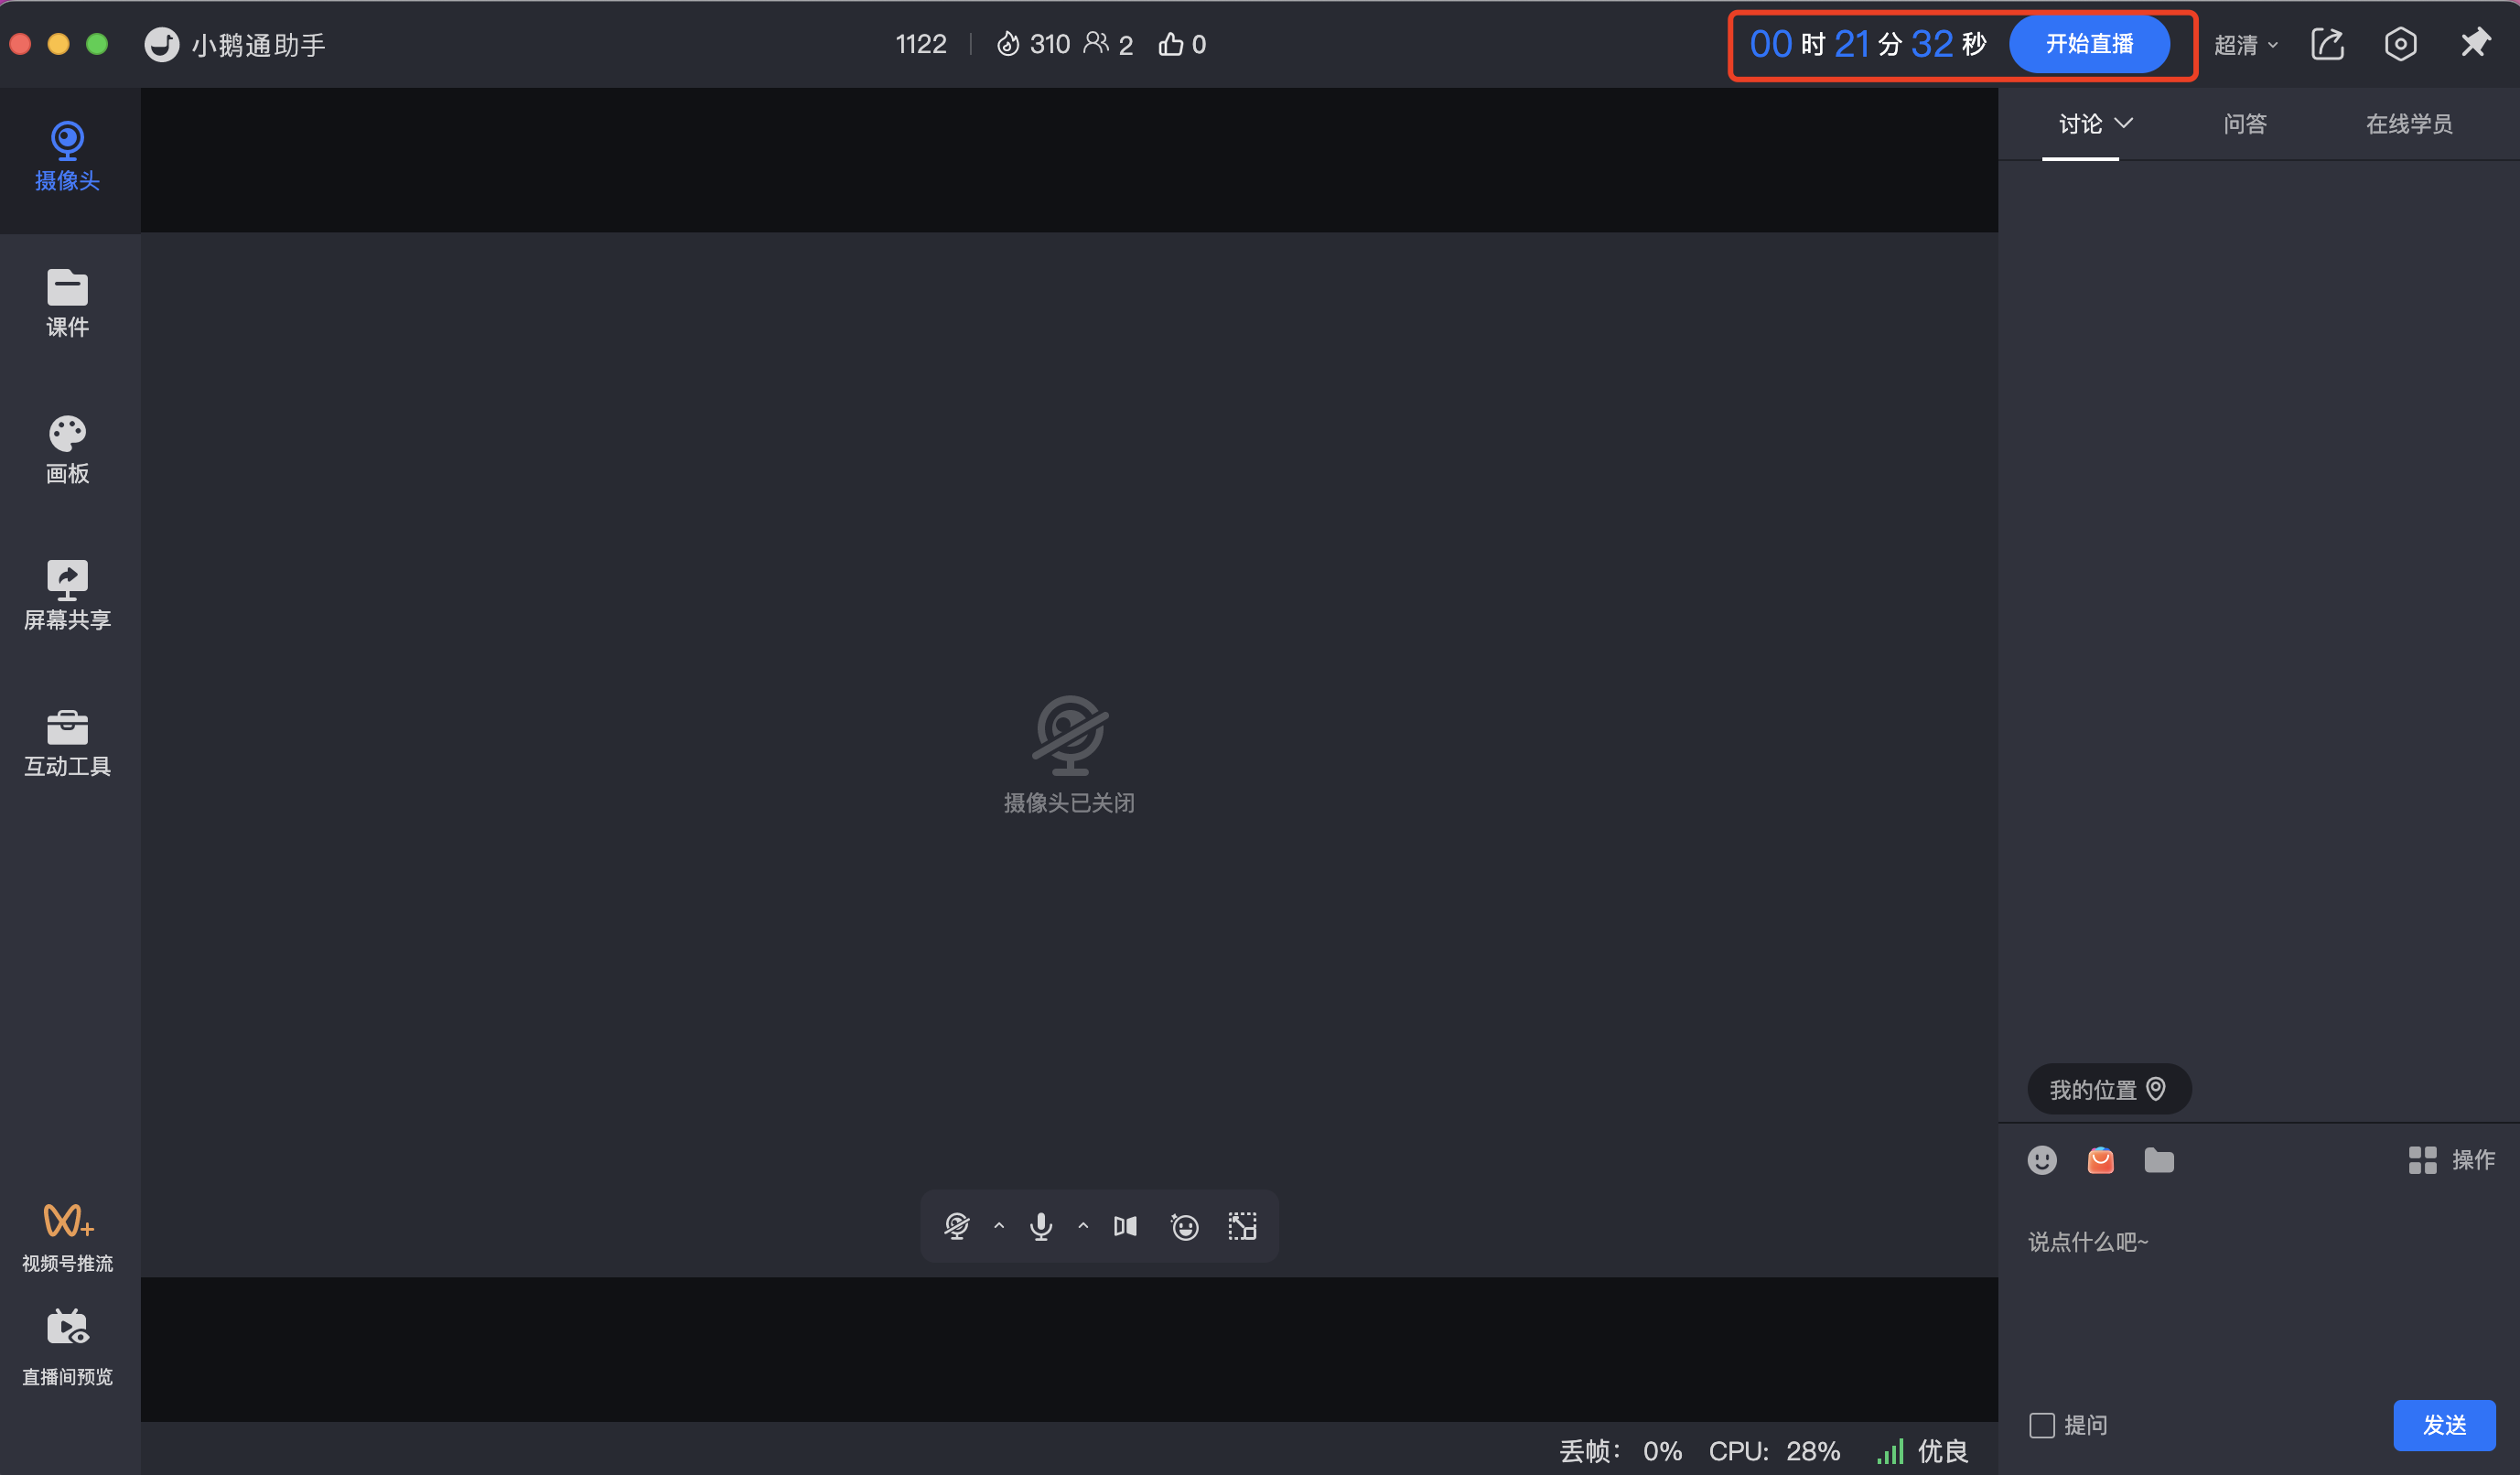
(Schematic diagram of the elink Assistant)
Stream pulling
Where can I obtain the stream pulling address?
Obtain directly from the third-party platform's backend or consult the third-party platform's customer service.
What should I do if there is no video after adding or modifying the streaming pull address during a live stream?
Check if the streaming pull address is filled in correctly, or ask the third party if the live stream has started.
Start a live broadcast
Going live on a computer - Tutorial for using the web version
I. Feature Introduction
The web-based instructor terminal is a tool for elink instructors to conduct live streams on the web. It is suitable for scenarios that require desktop sharing, PPT courseware display, and instructor appearance. Compared with the computer client, the web-based instructor terminal is easier to use and more straightforward to operate.
PS: You need to use Google Chrome for live streaming on the web-based instructor terminal. Google Chrome has better compatibility and can provide a better live streaming experience!
II. Purpose of Use
Using the web-based instructor terminal allows you to conveniently conduct live streams on the web, enabling live video, courseware & desktop sharing, and other live content.
III. Use Scenarios
Web-based live streaming is suitable for scenarios that require desktop sharing, PPT courseware display, and real-time video live streaming with students.
IV. Operation Path
Merchant side: Merchant background → Live streaming → Go live → Teach on the computer → Web-based terminal
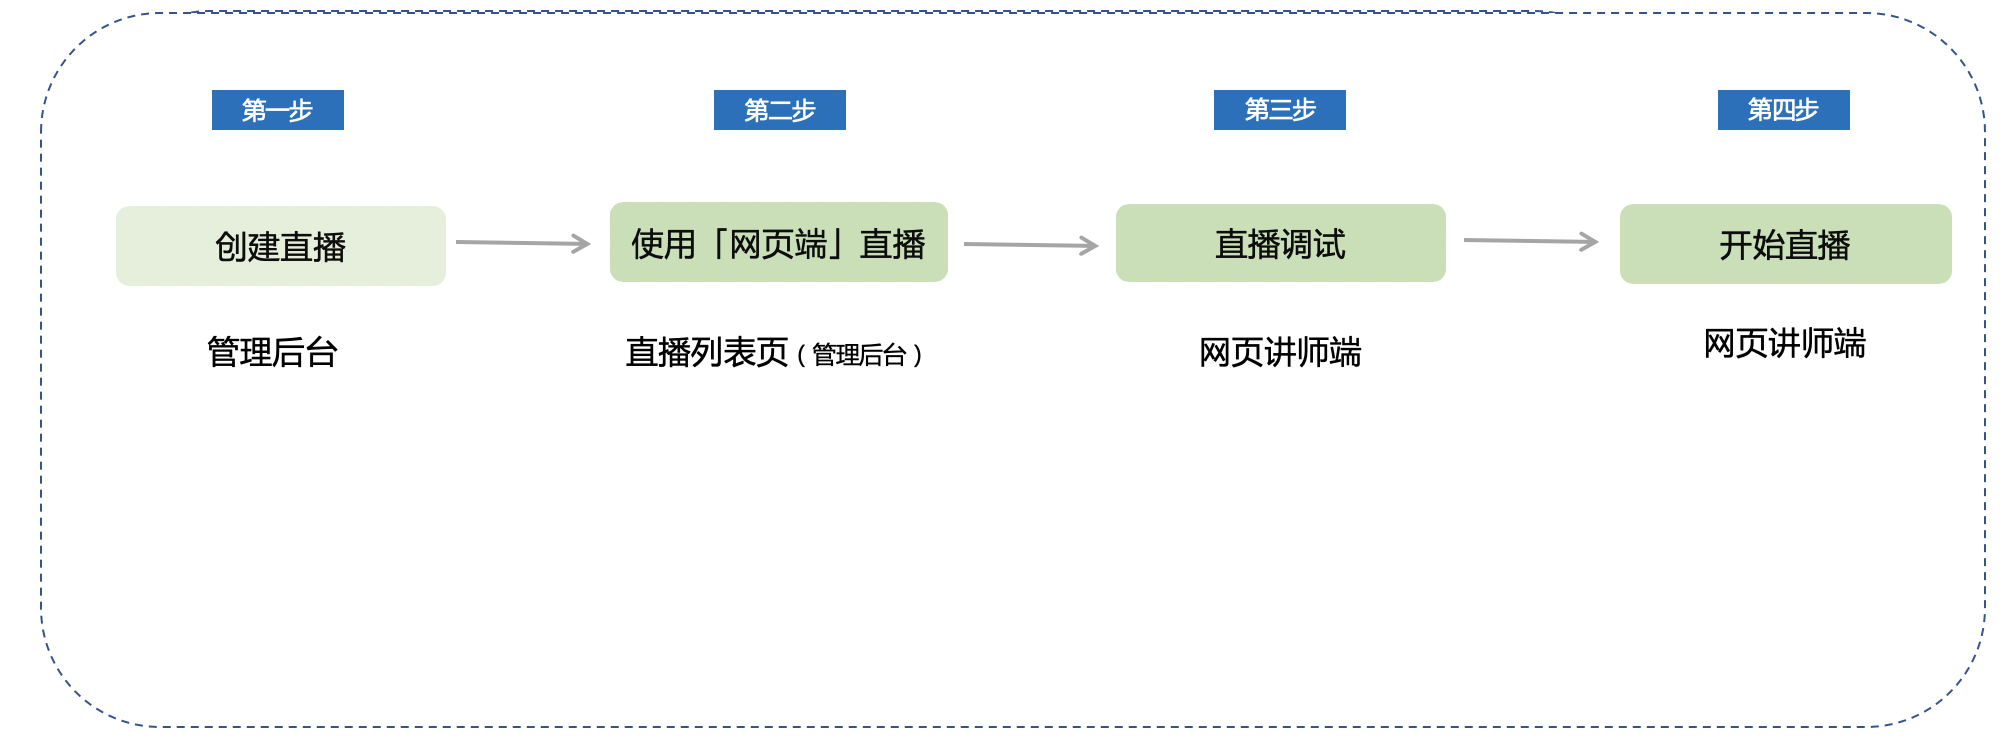
V. Usage Tutorial
Step 1 Create a live stream (Management background)
1. Enter the management background - Create a new live stream
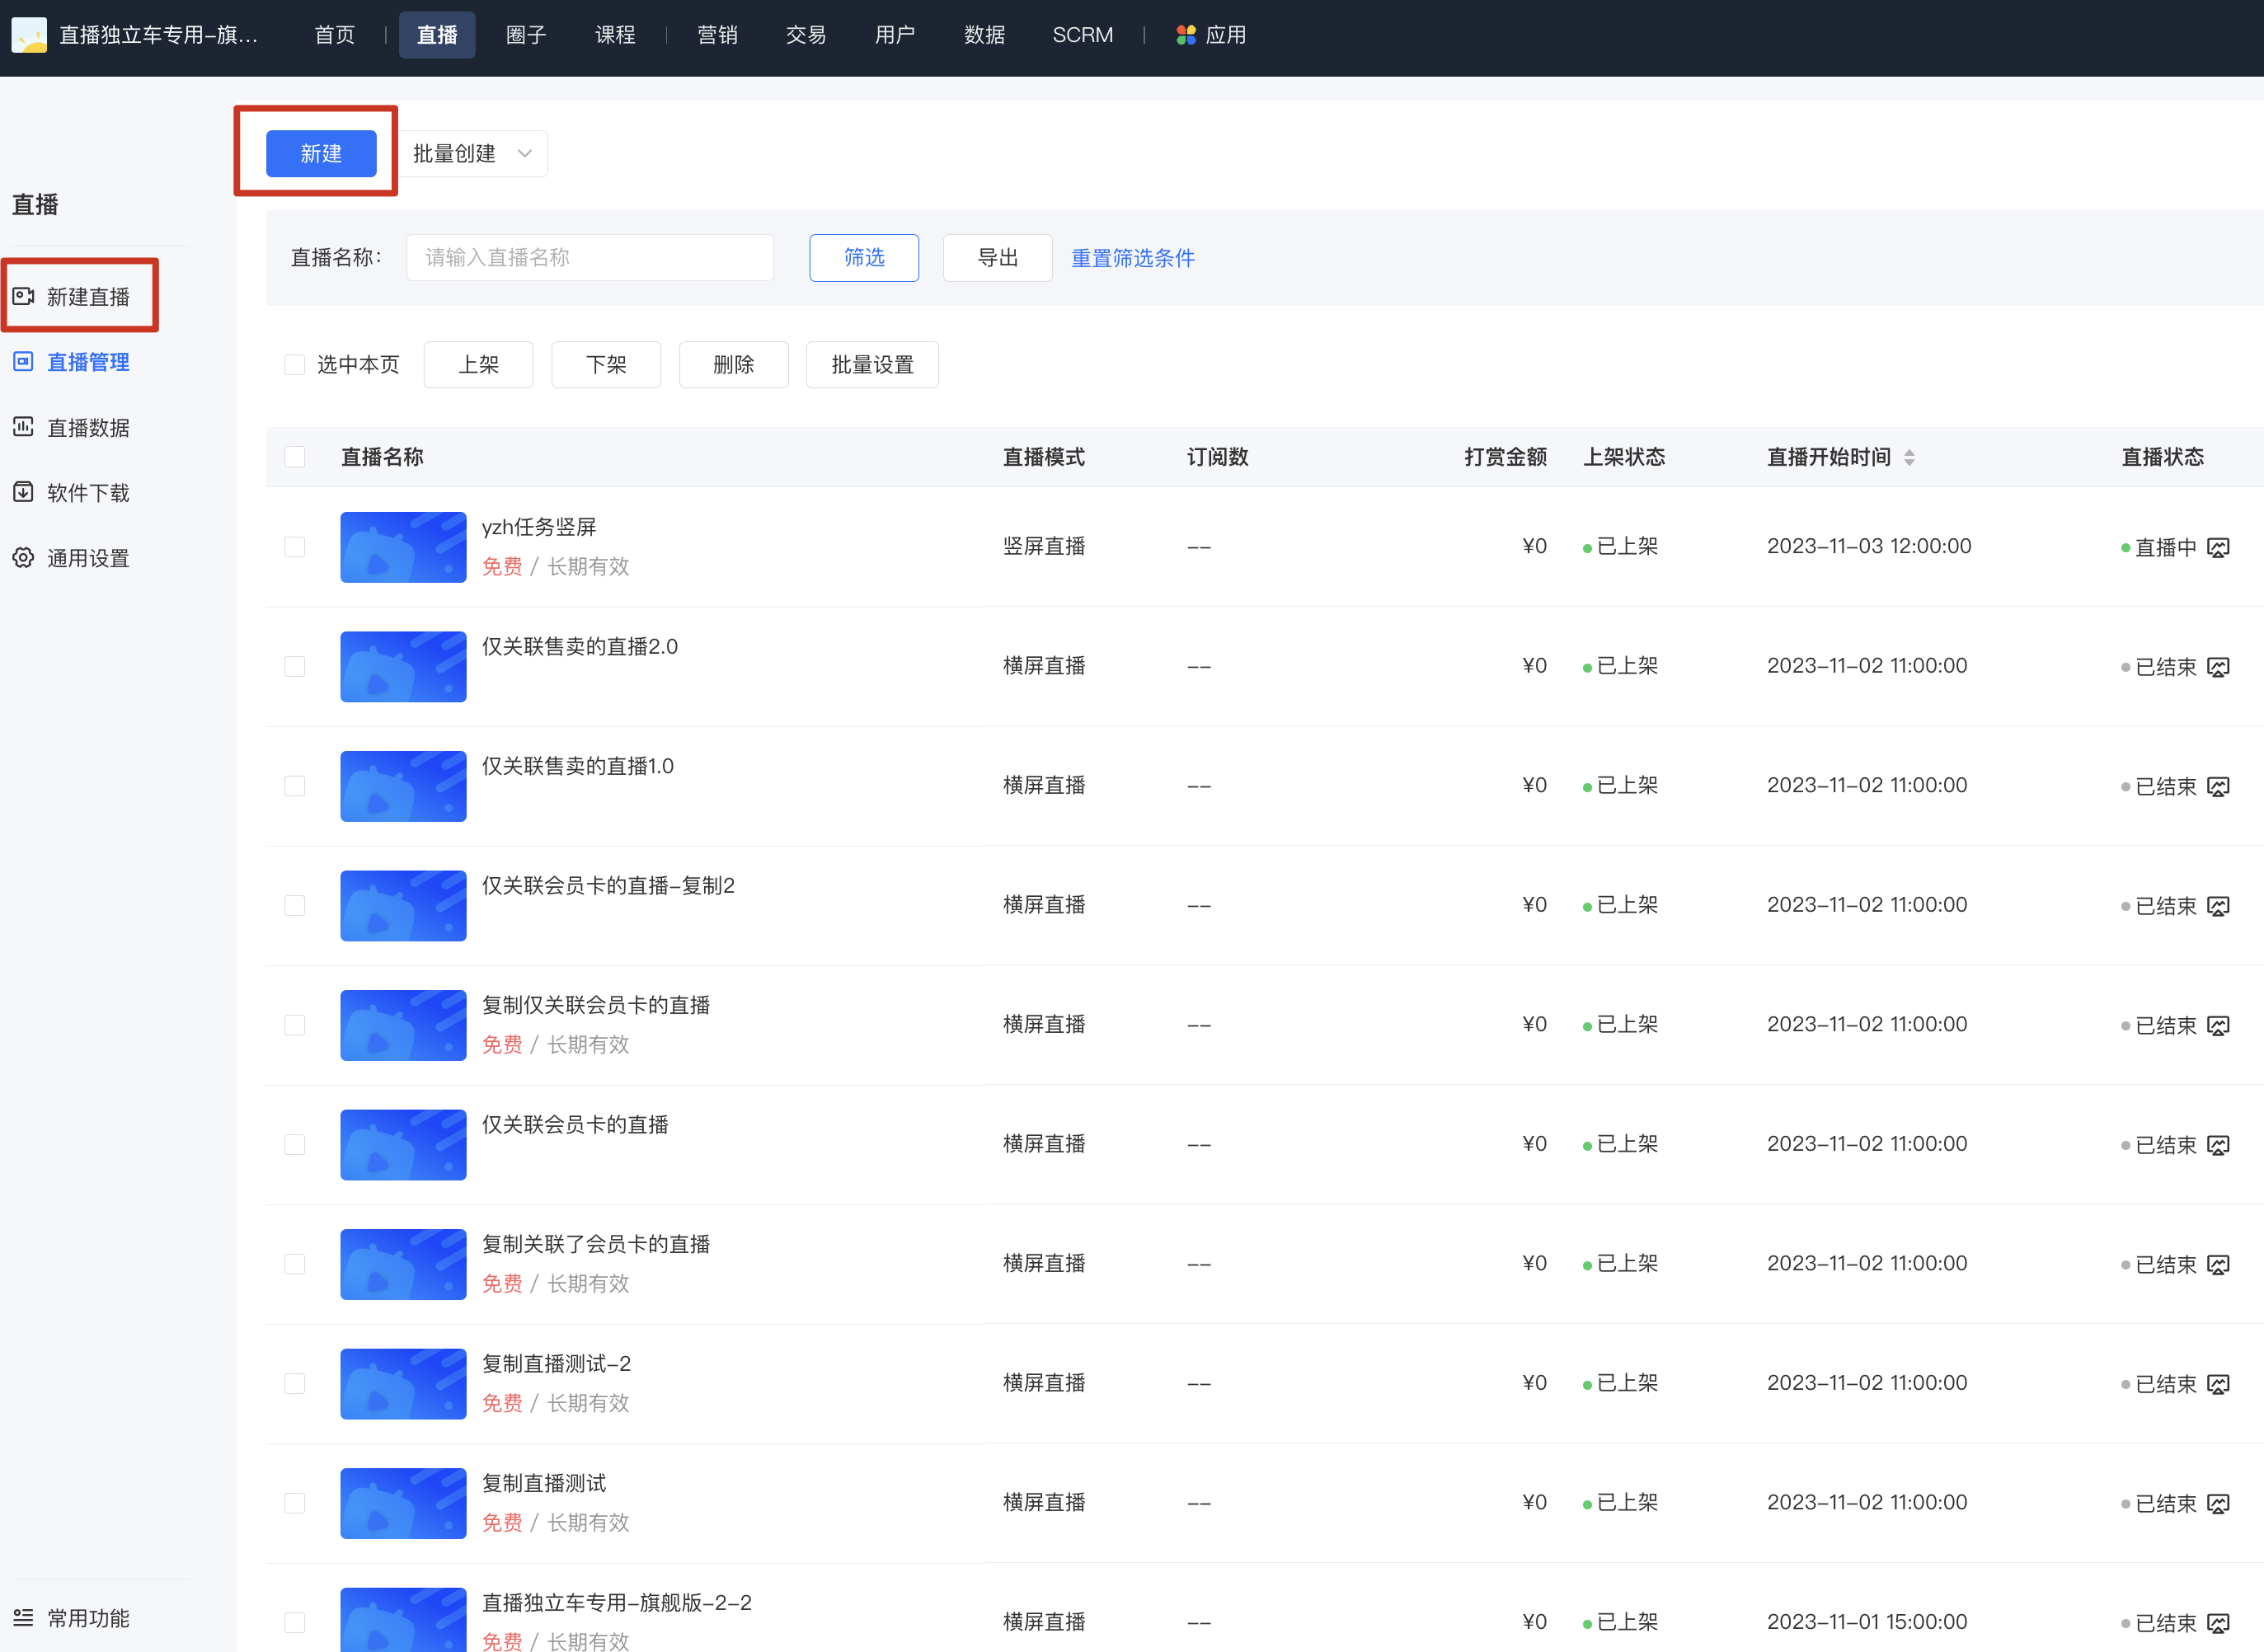
(Management background)
2. Fill in the live stream information and instructor settings, and click the Save button to complete the live stream creation
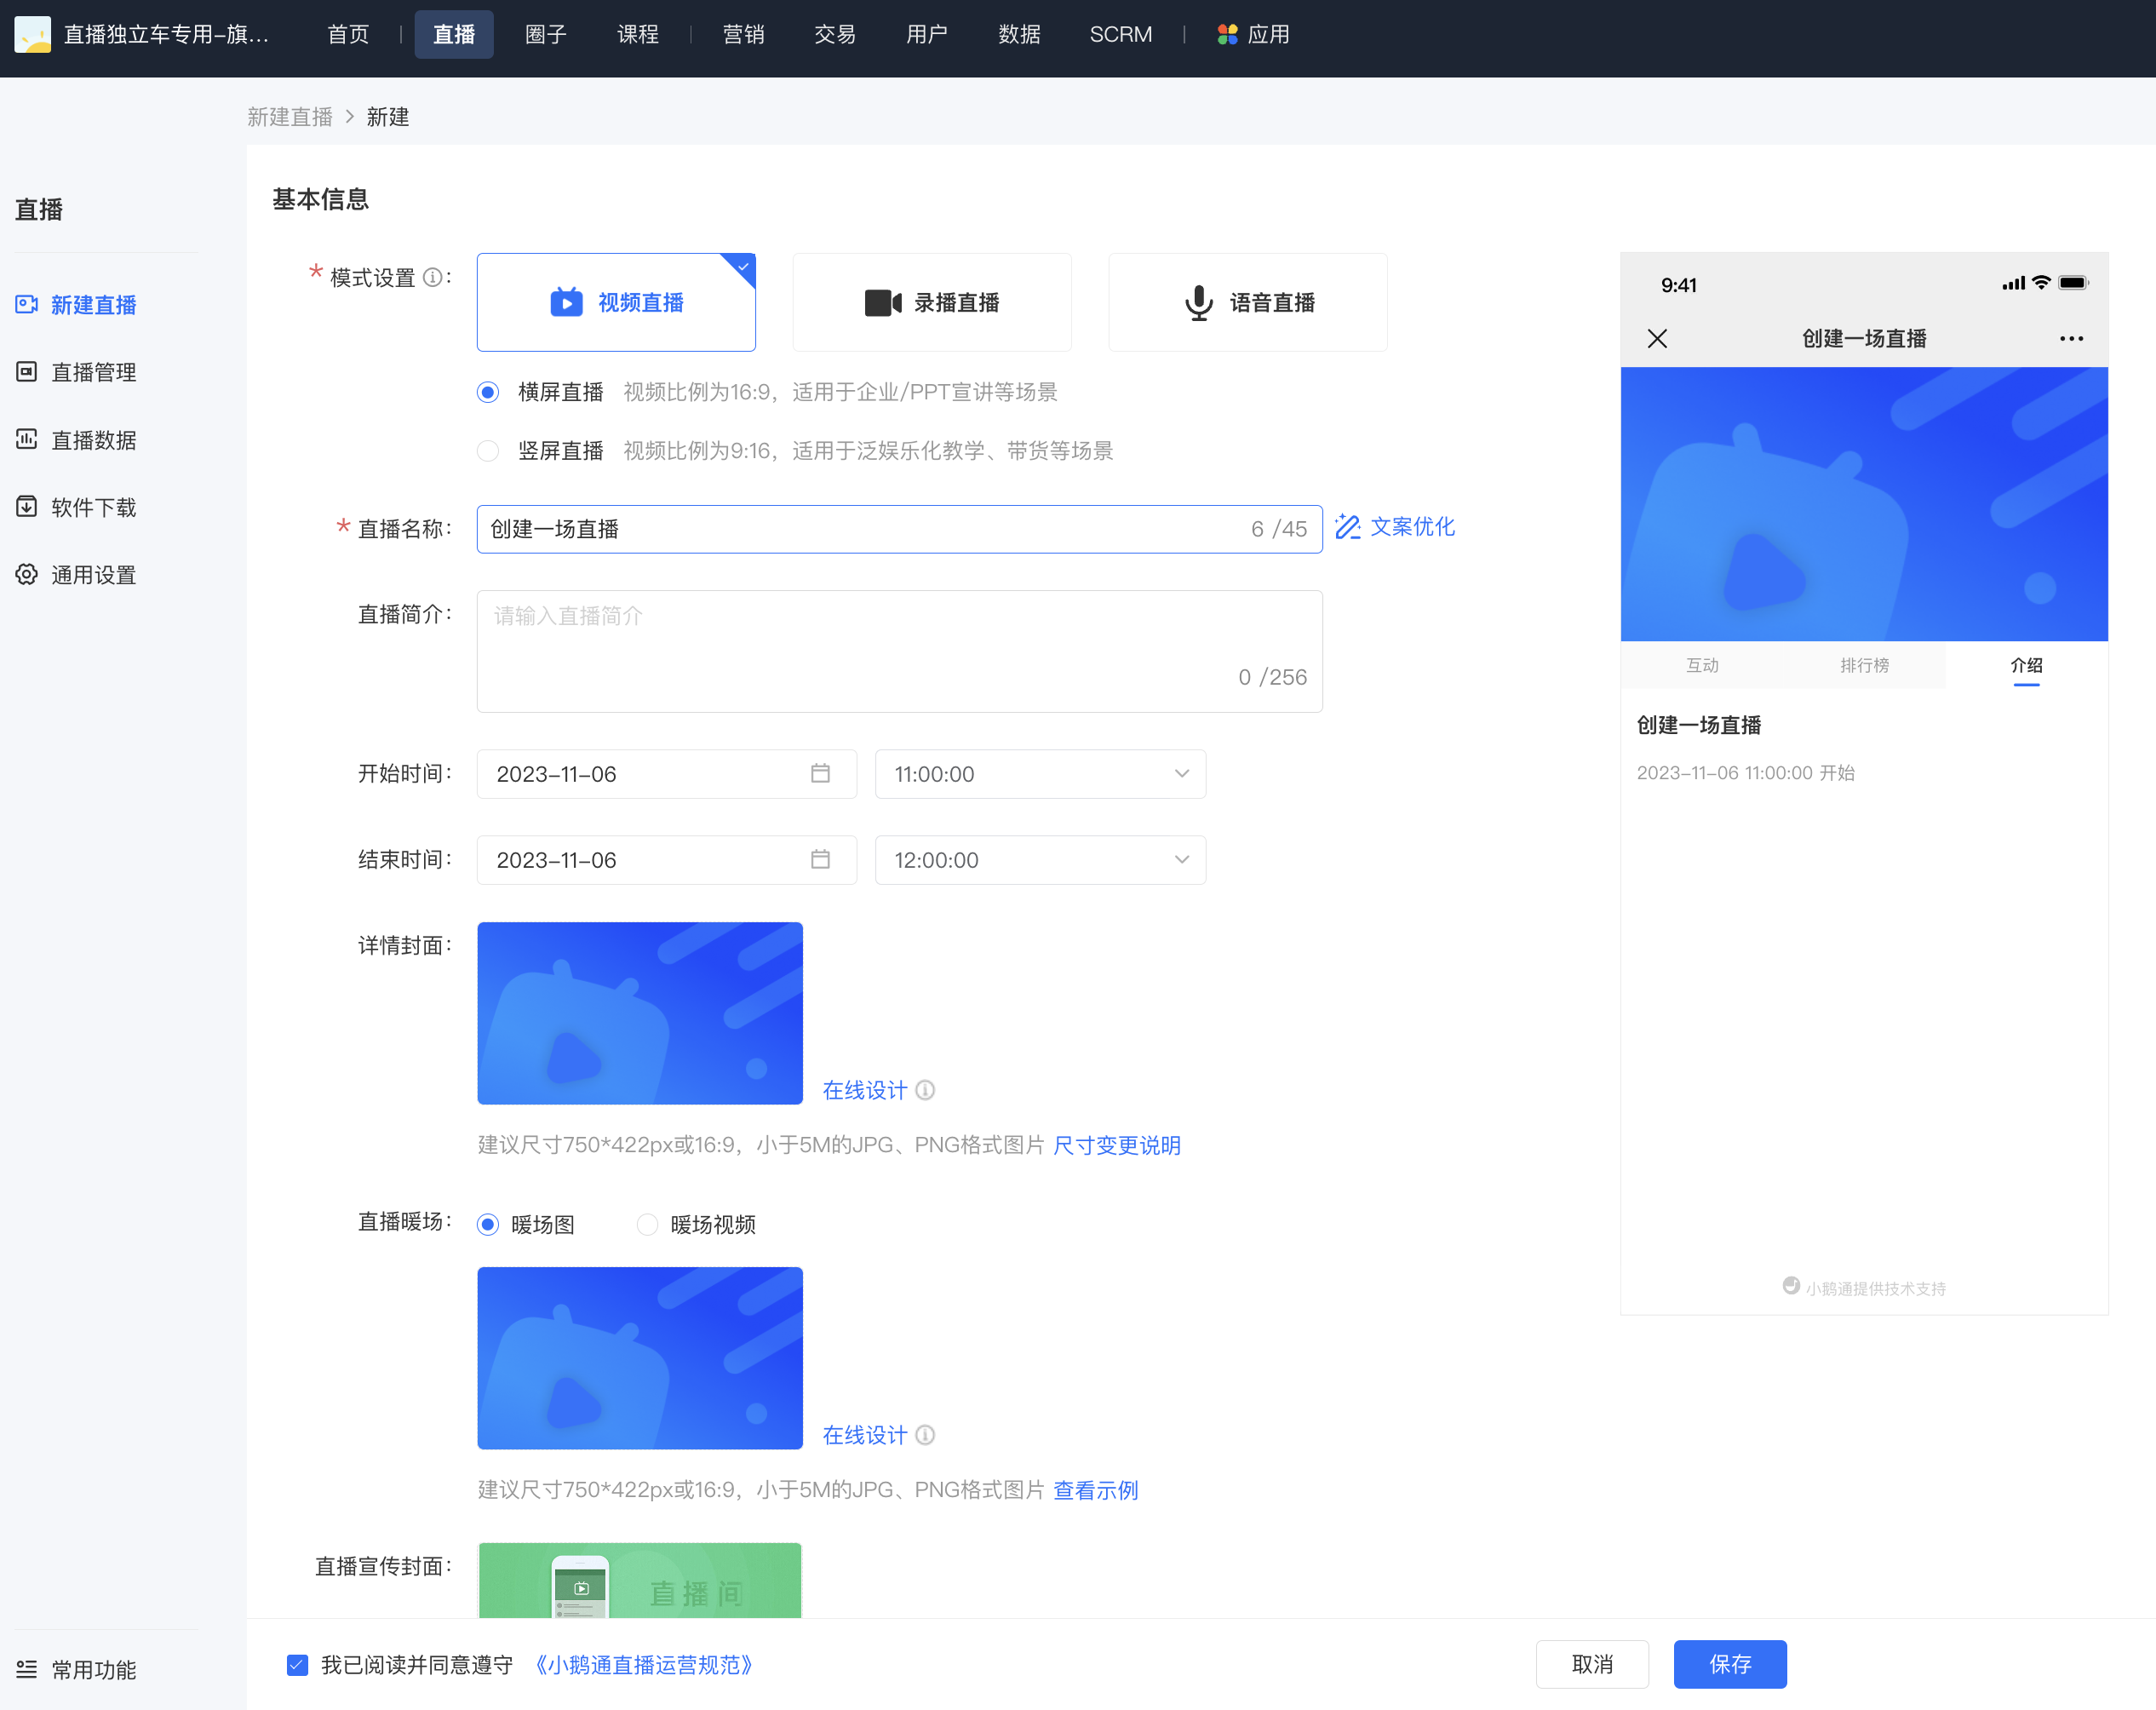
(Live stream creation page)
Step 2 After the creation is completed, click 'Go live' (Management background)
1. Find 'Live stream settings' - 'Live stream method' - 'Go live by yourself'
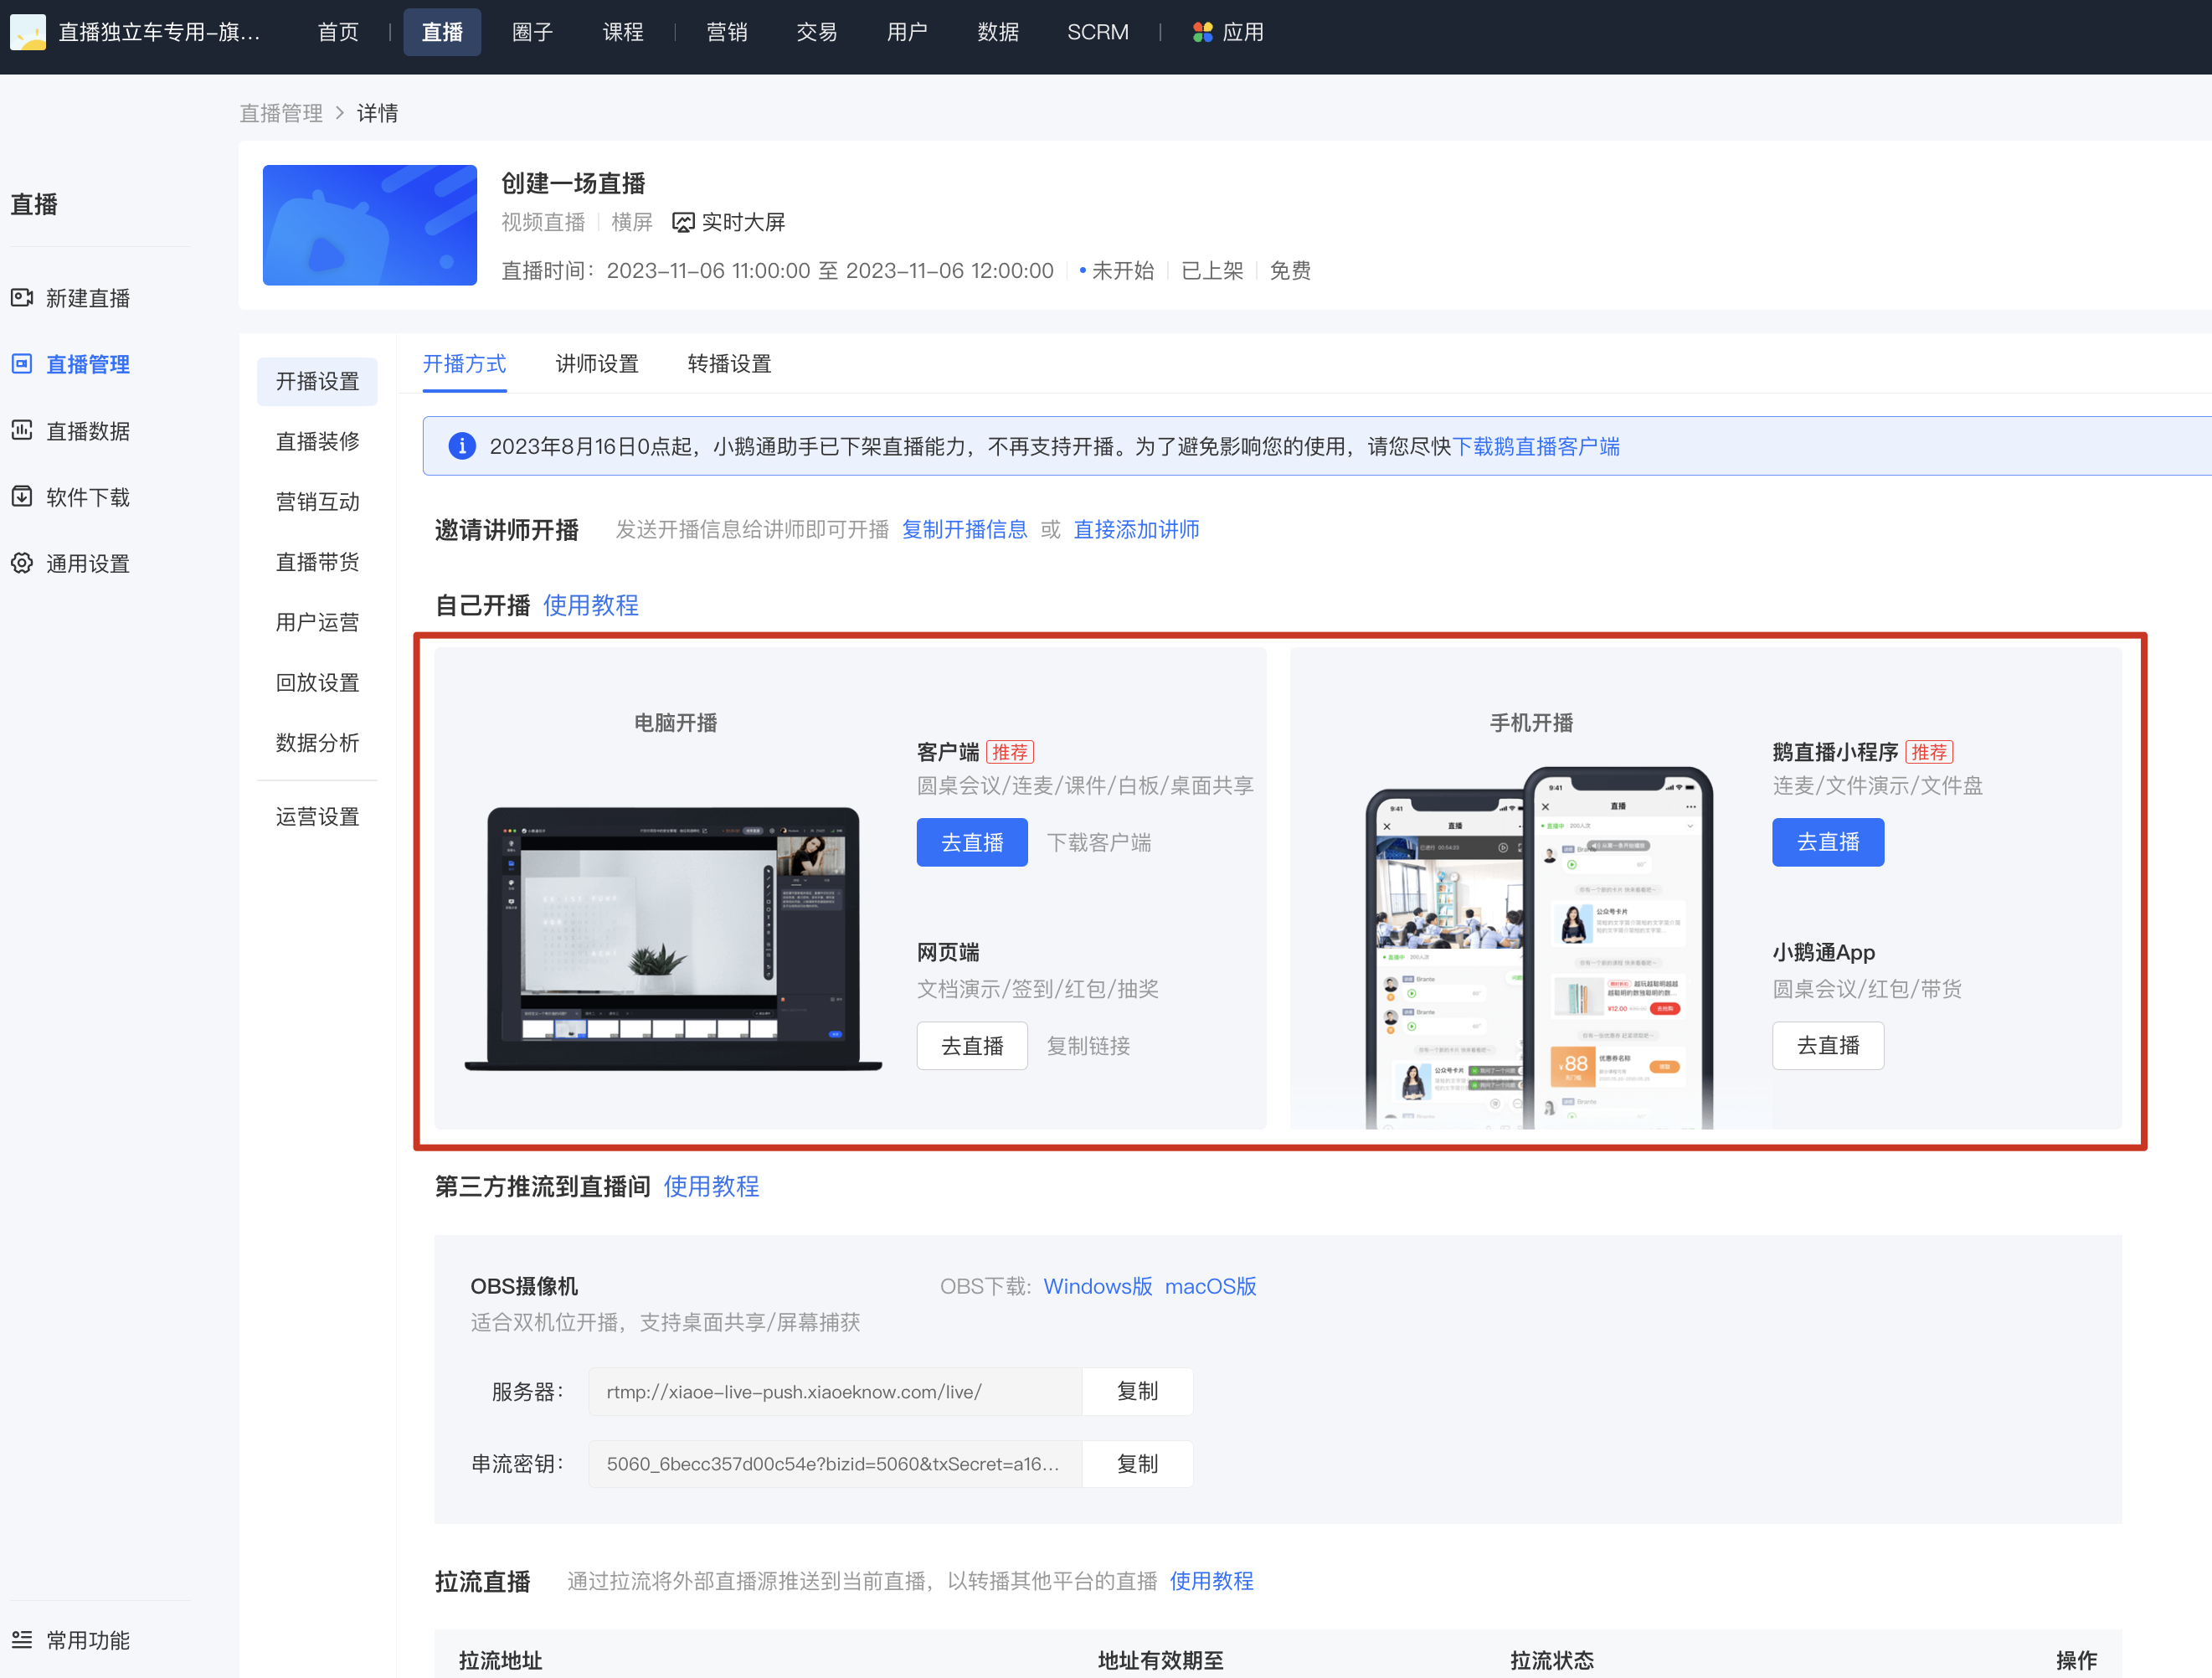
(Creation completed page)
2. Select the 'Web version' for live streaming (Management backend)
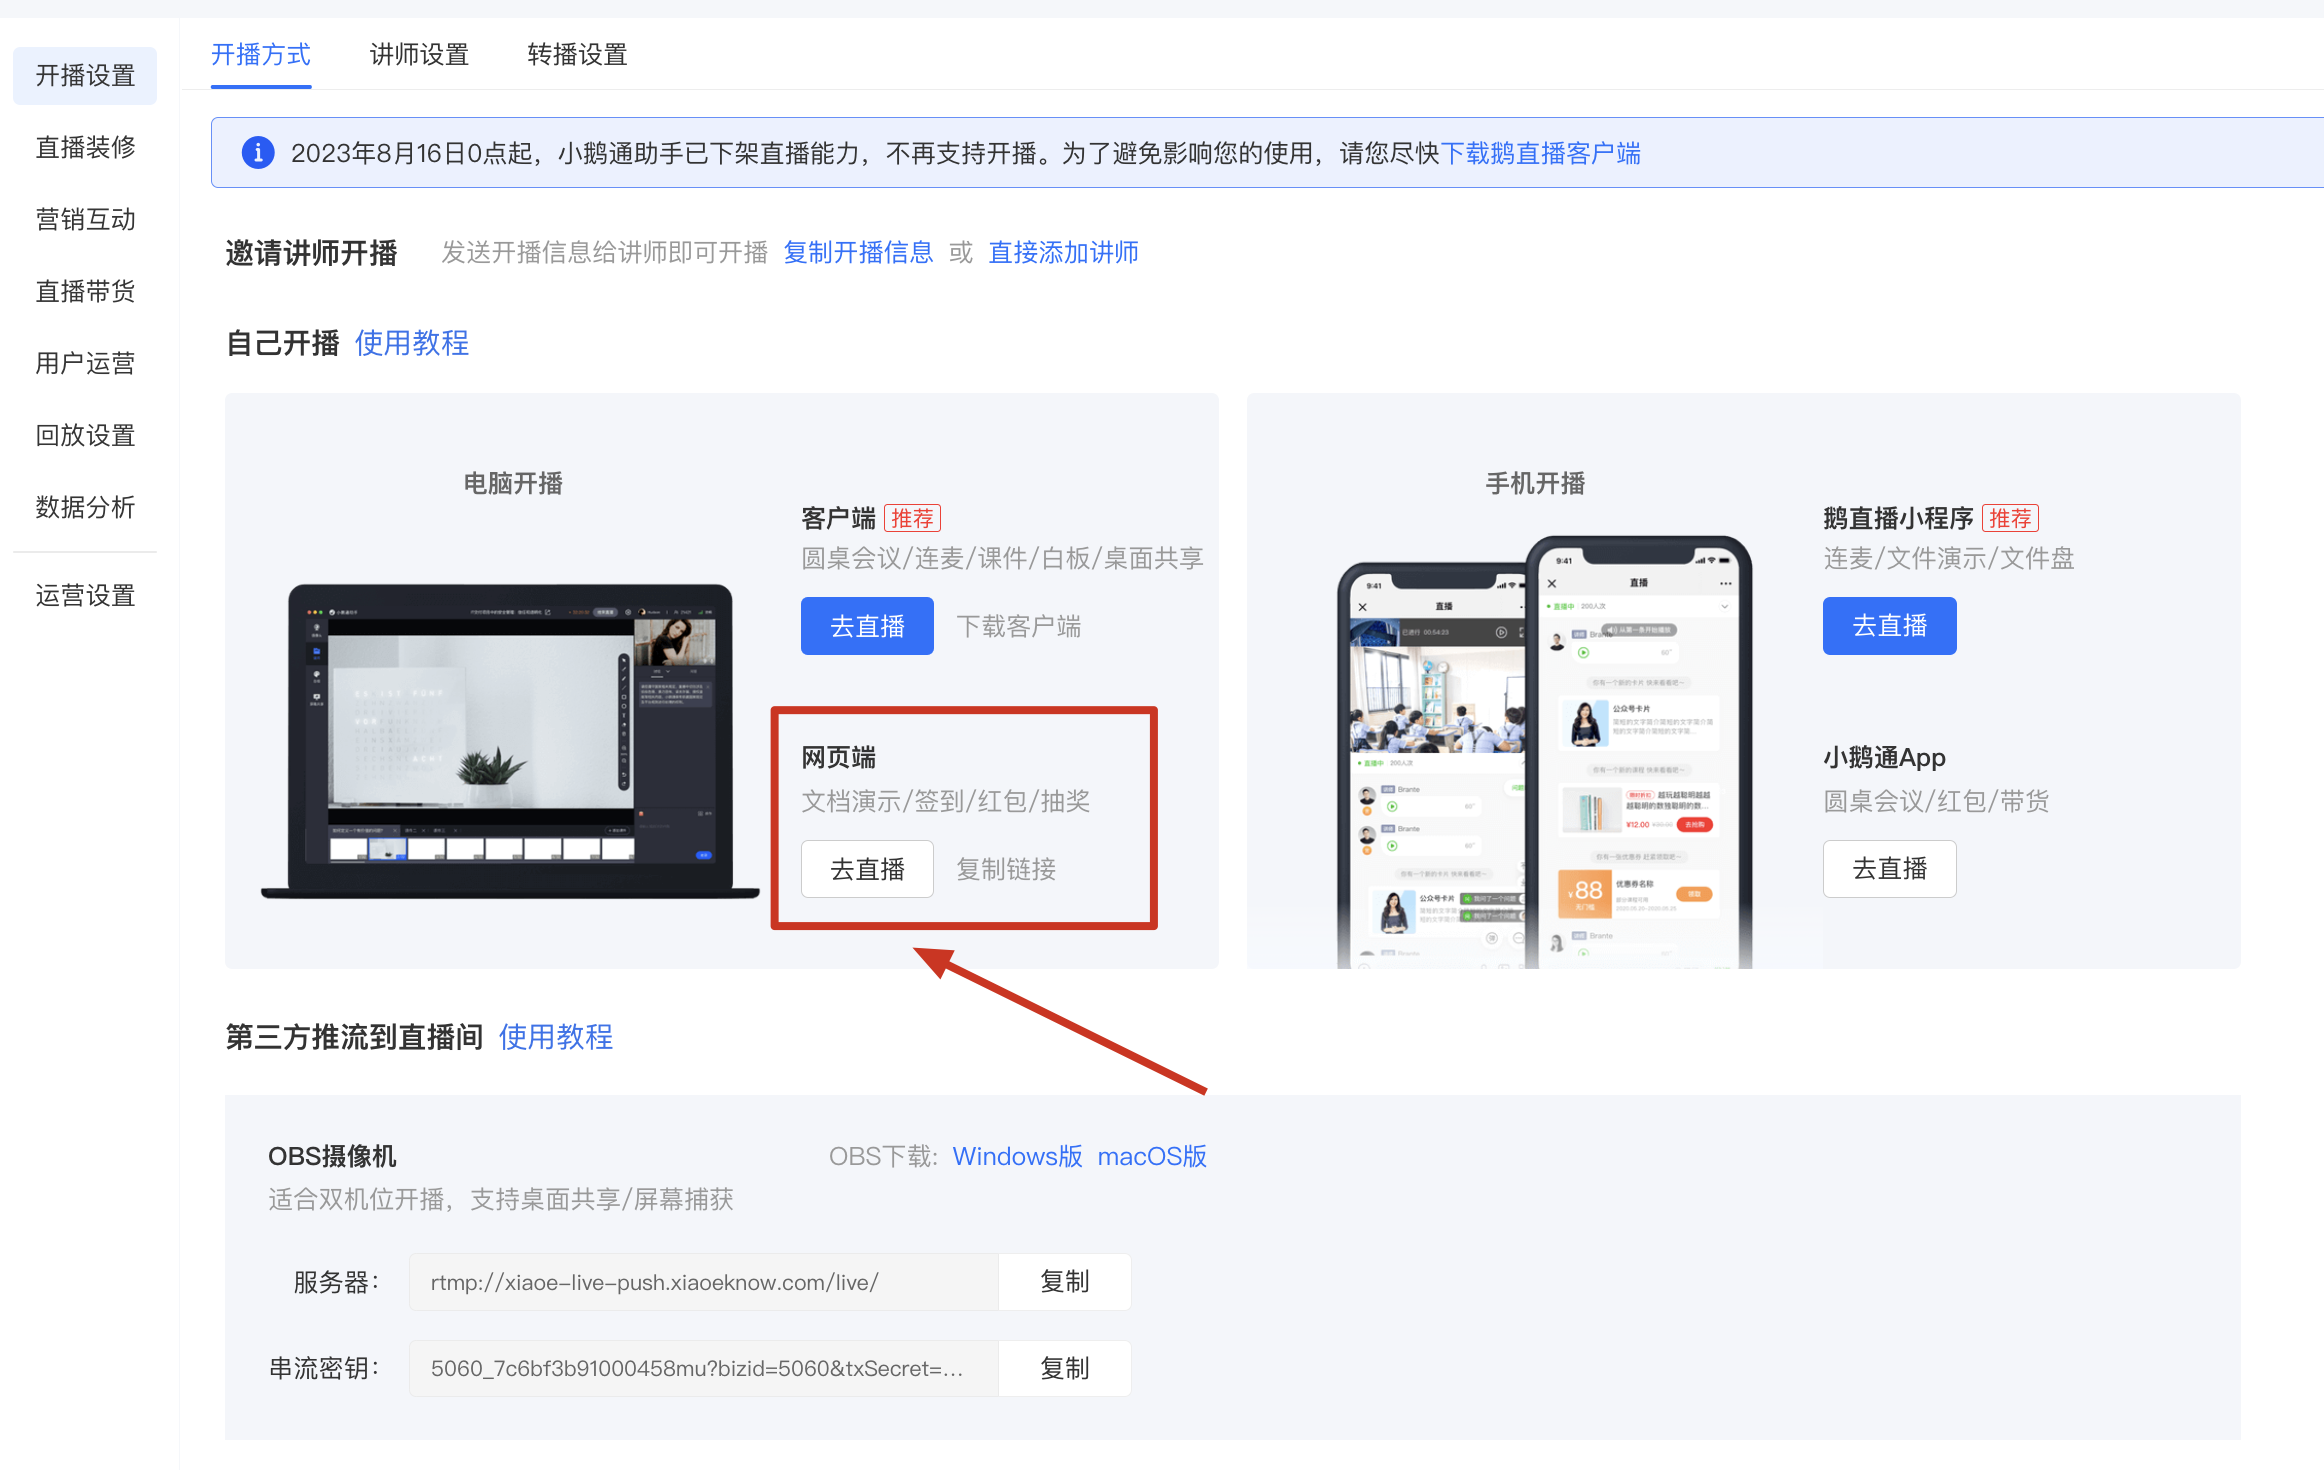
(Live streaming method selection page)
Step 3: Enter the web-based instructor console and conduct live streaming debugging (Web-based instructor console)
1. After entering the live streaming room, check whether your camera and microphone are working properly as prompted.
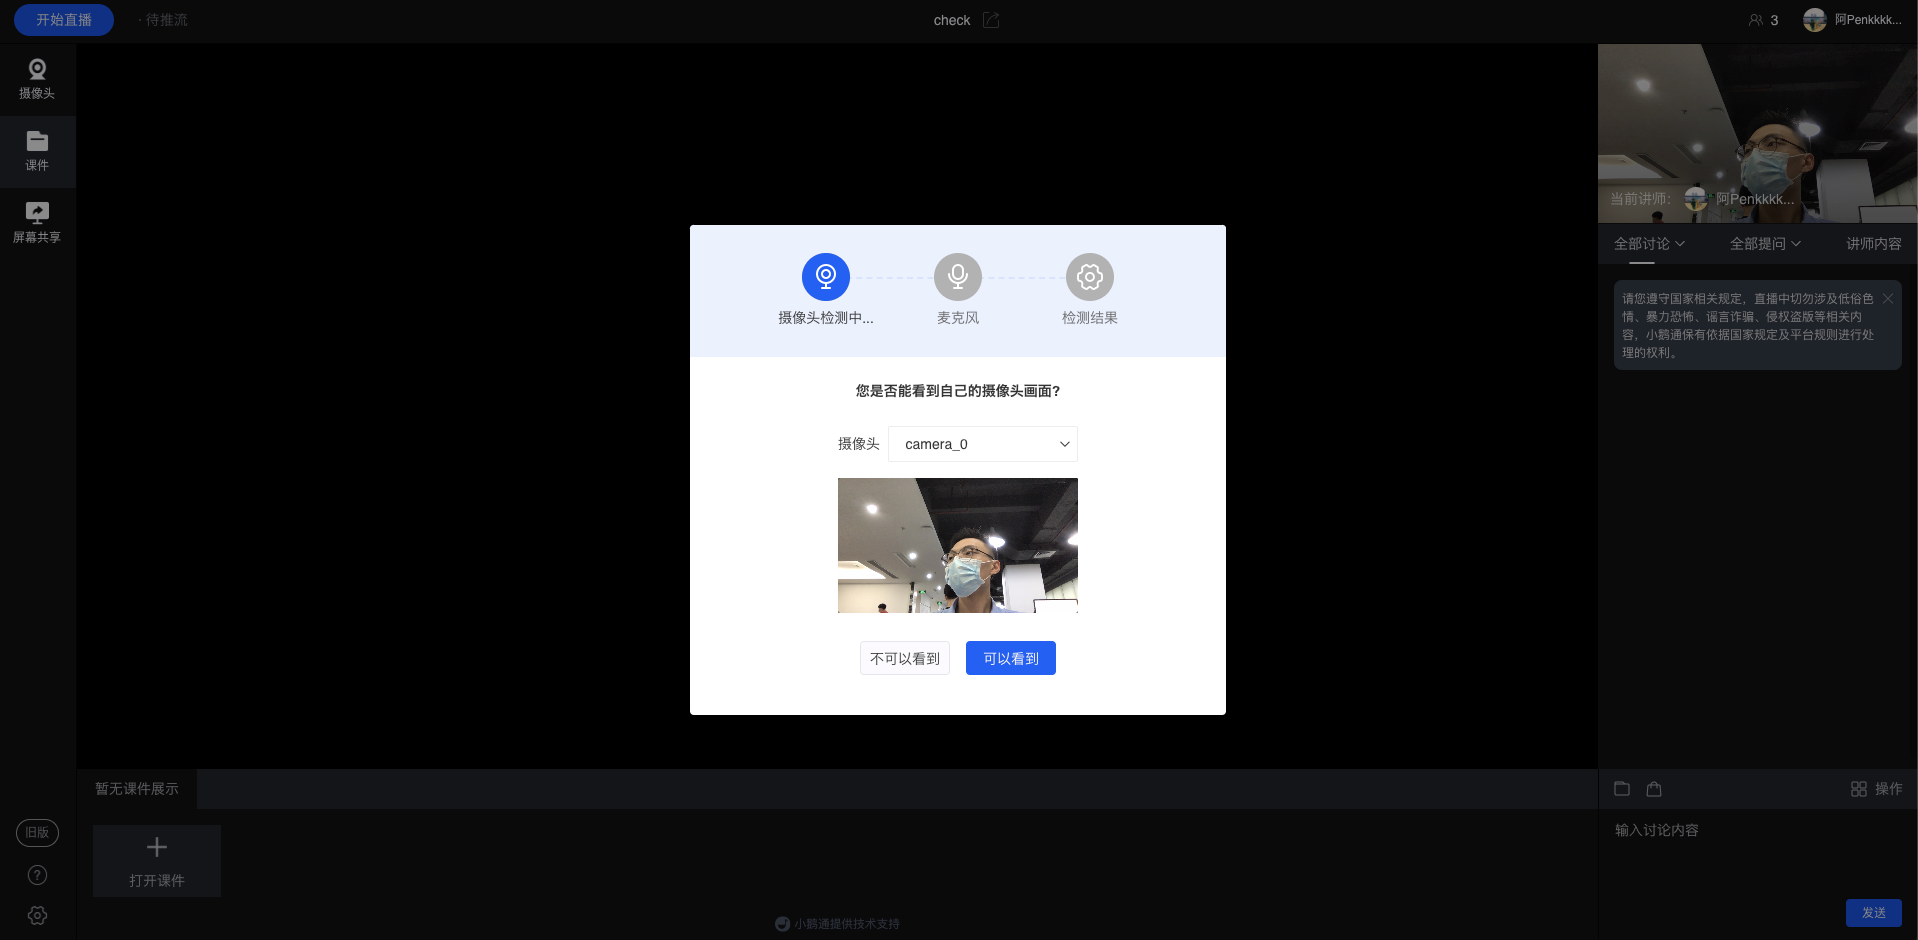
(Live streaming instructor console)
2. You can upload relevant courseware PDFs in advance.
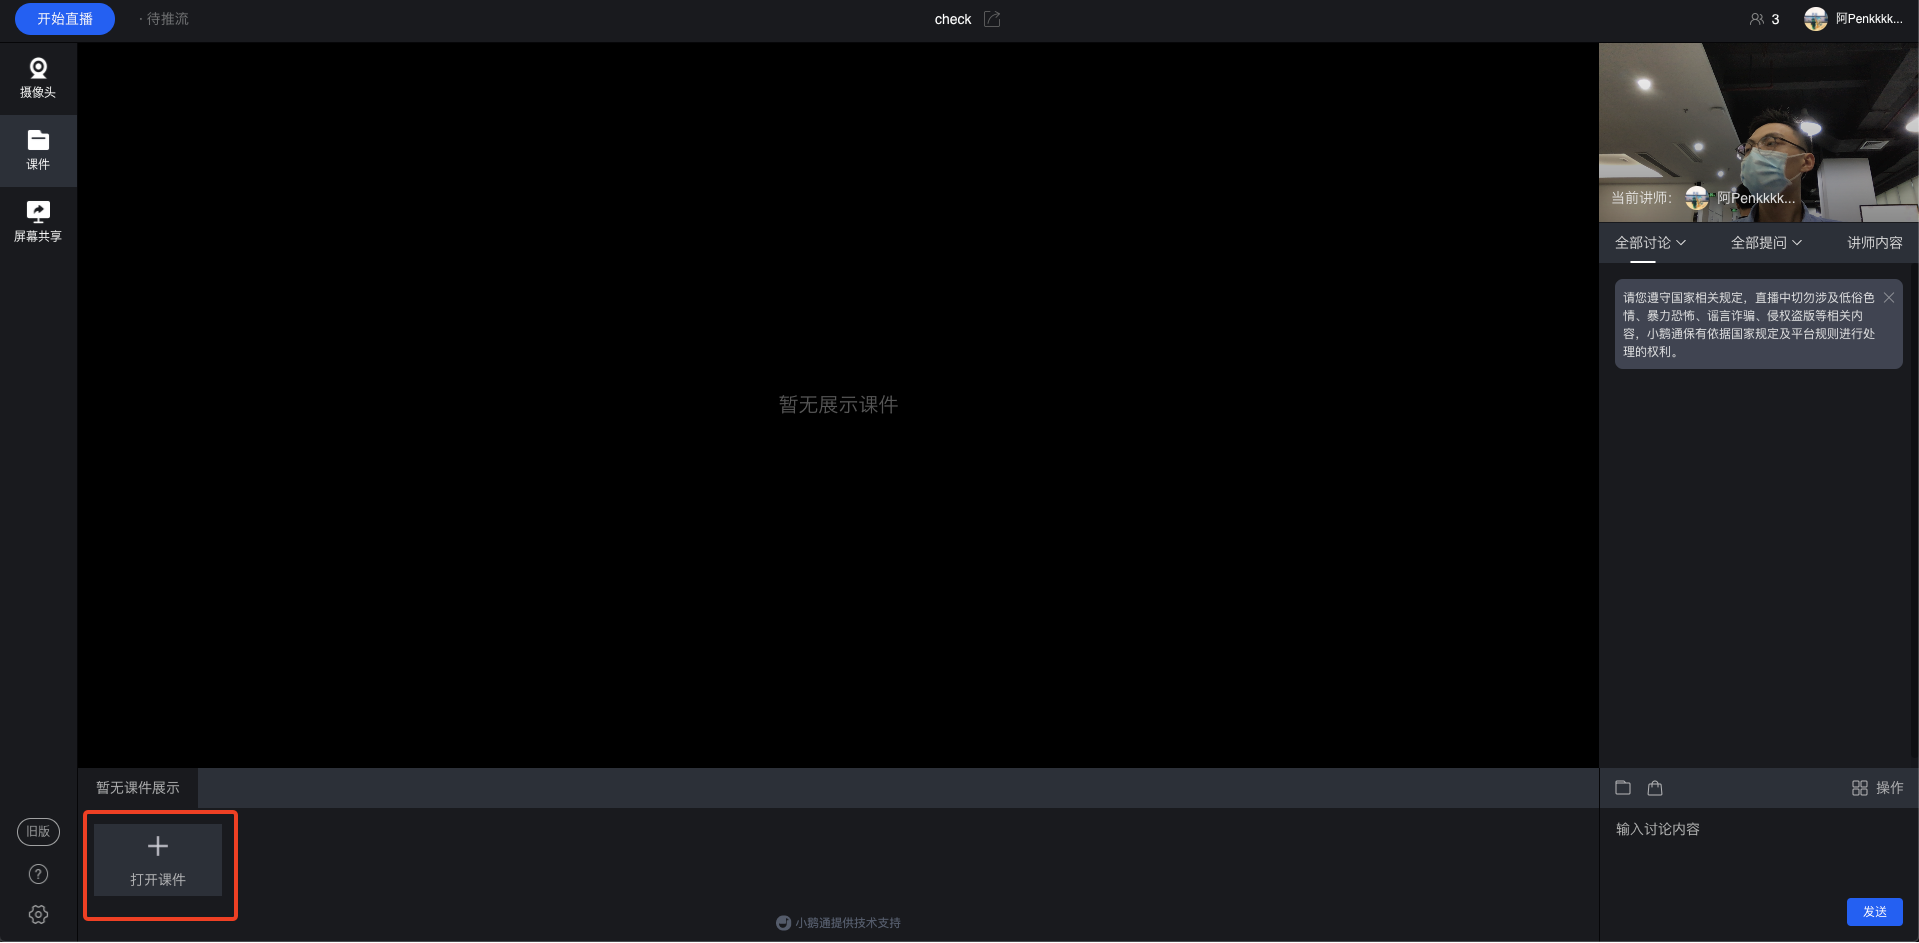
(Live streaming instructor console)
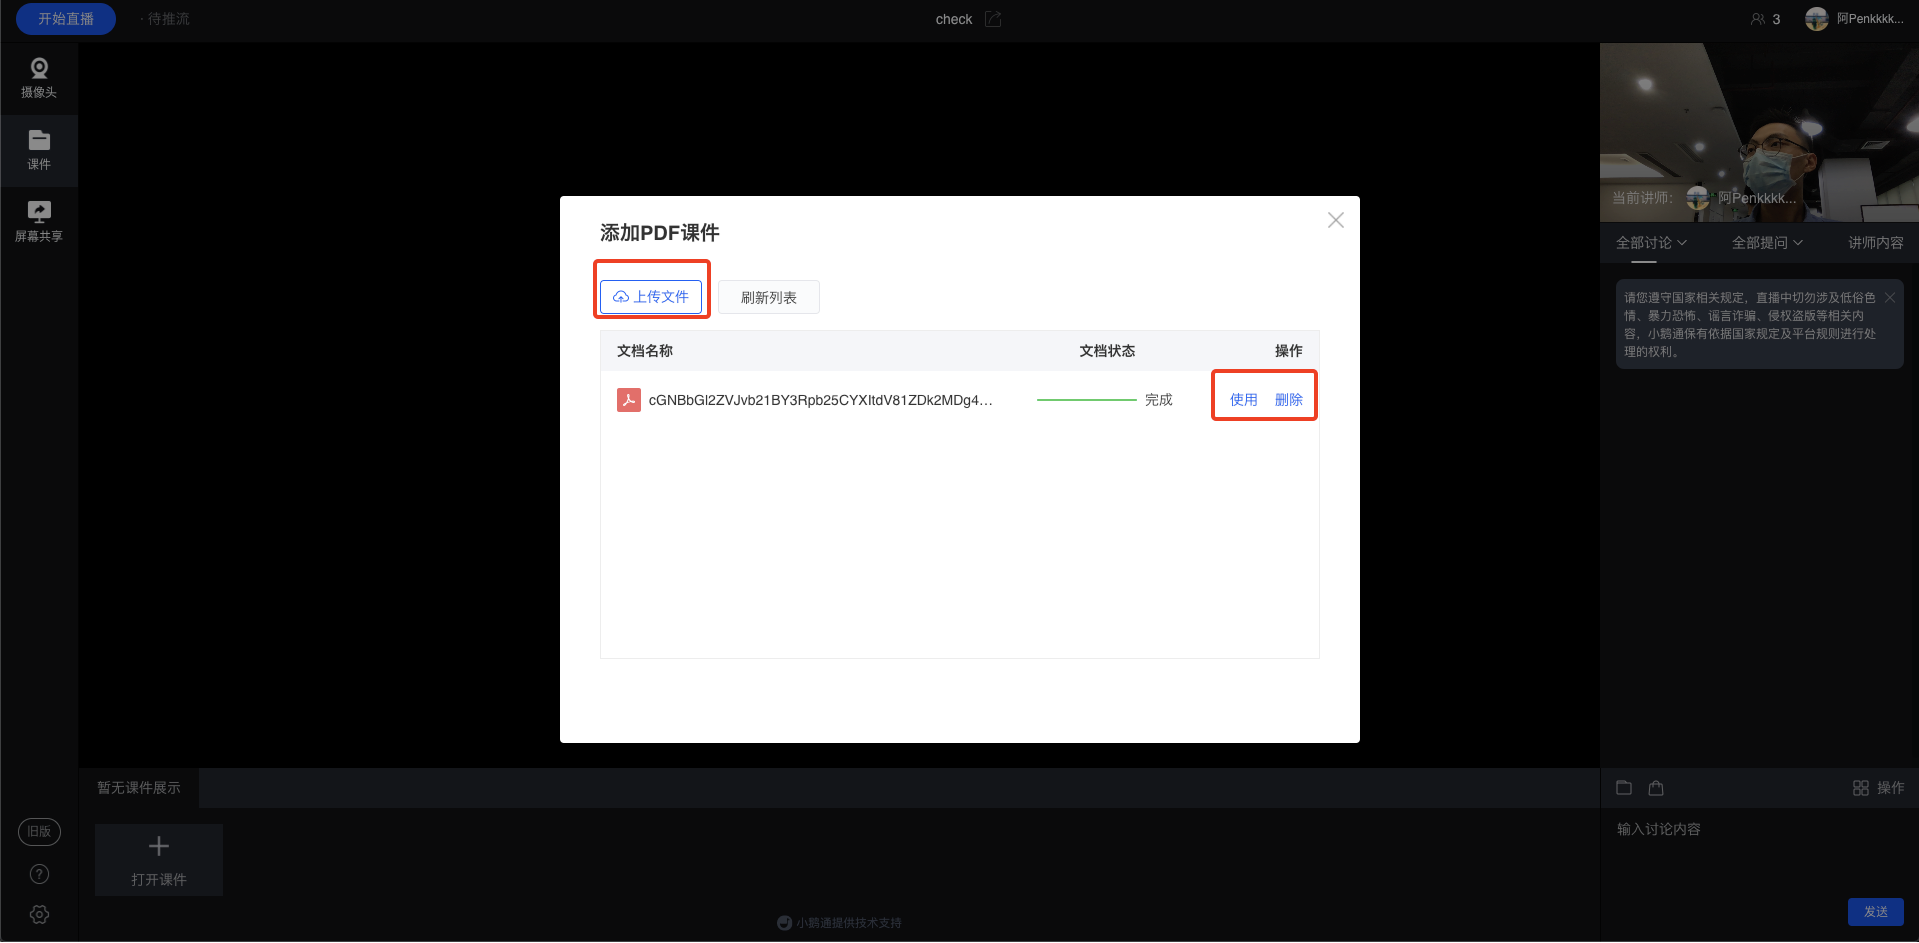
(Courseware management page)
Step 4: Start the live streaming (Web-based instructor console)
1. After the devices and courseware are uploaded, click 'Start Live Streaming' in the top - left corner to begin the live streaming.
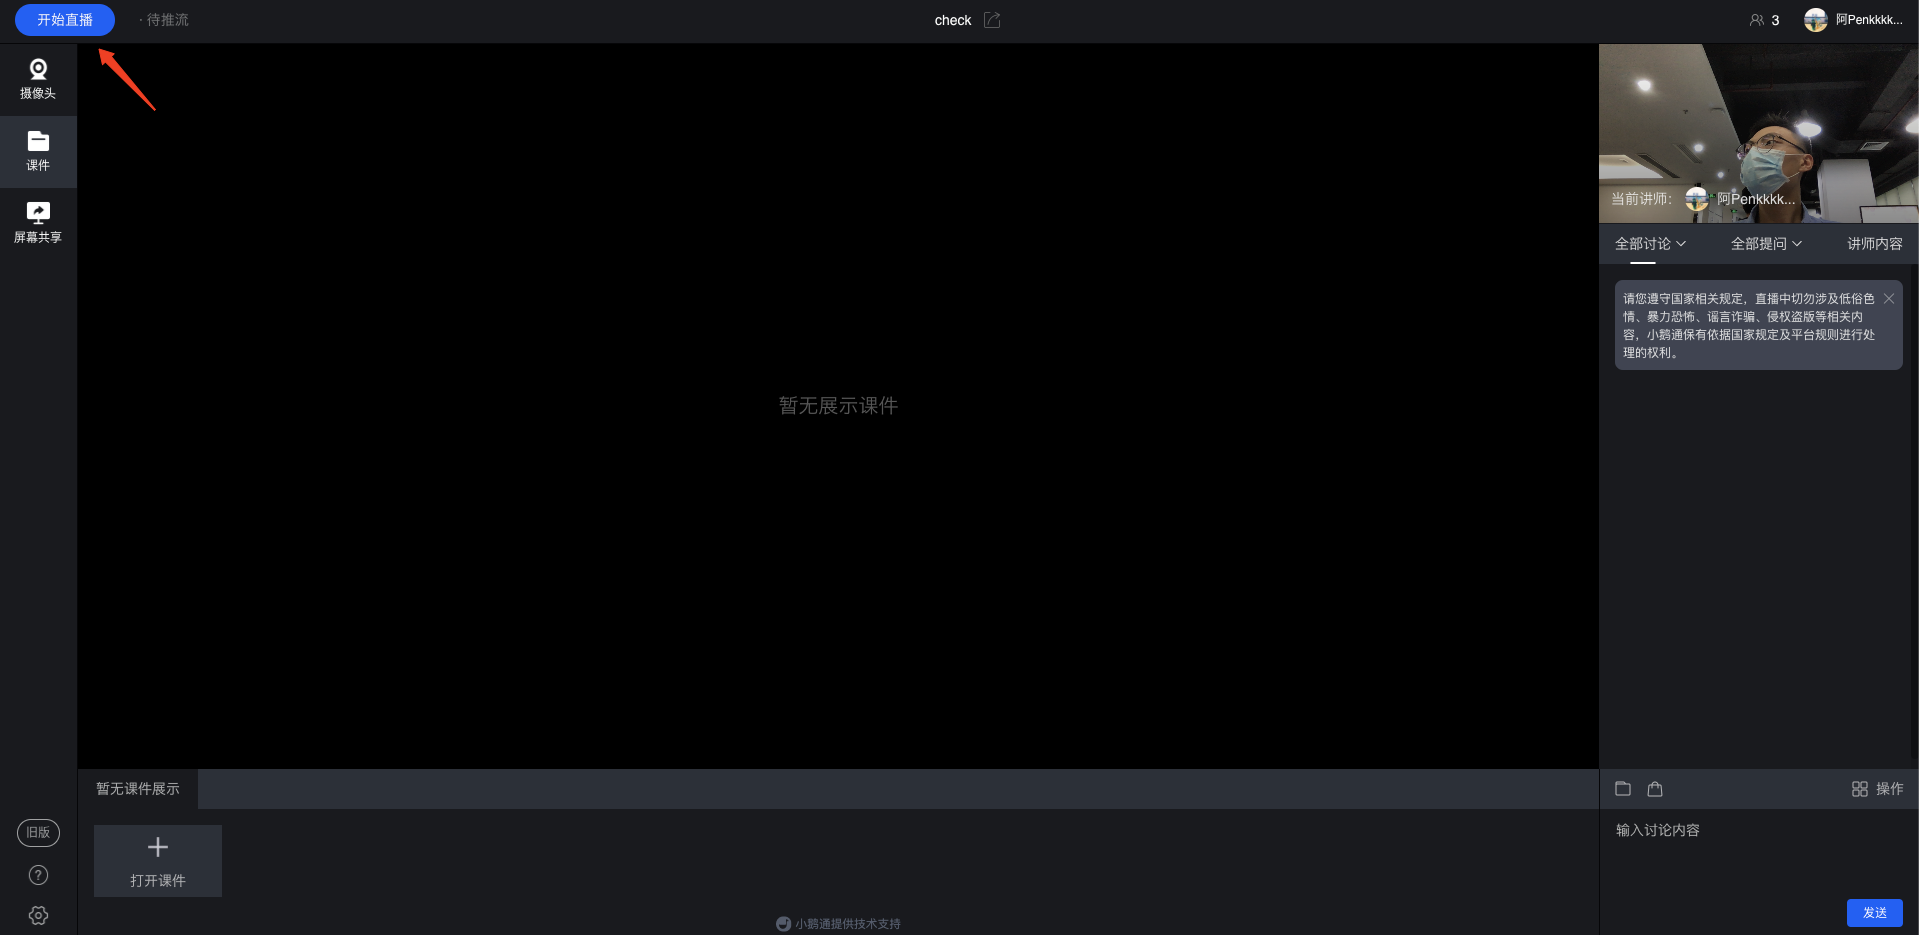
(Live streaming instructor console)
2. Click 'Camera', 'Courseware' & 'Screen Sharing' on the left to switch the live streaming mode at any time.
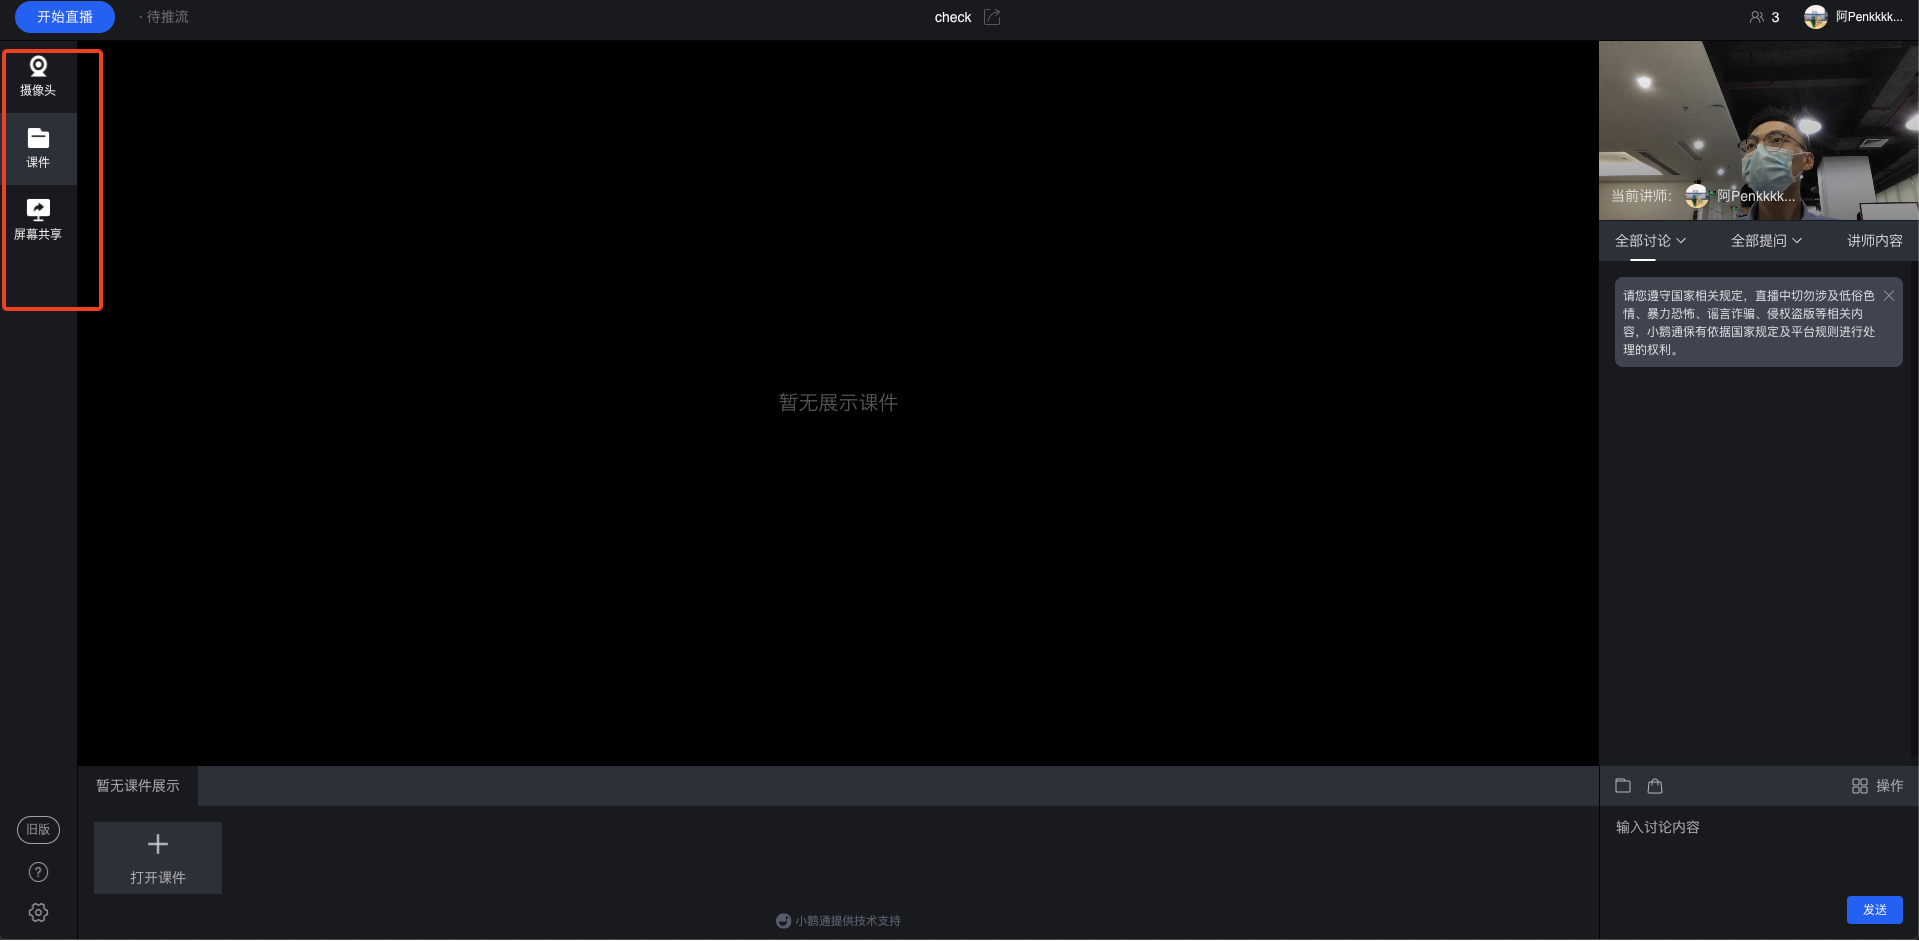
(Live streaming instructor console)
When the live streaming mode is 'Screen Sharing', you can click 'Window Switching' on the right to switch the screen window.
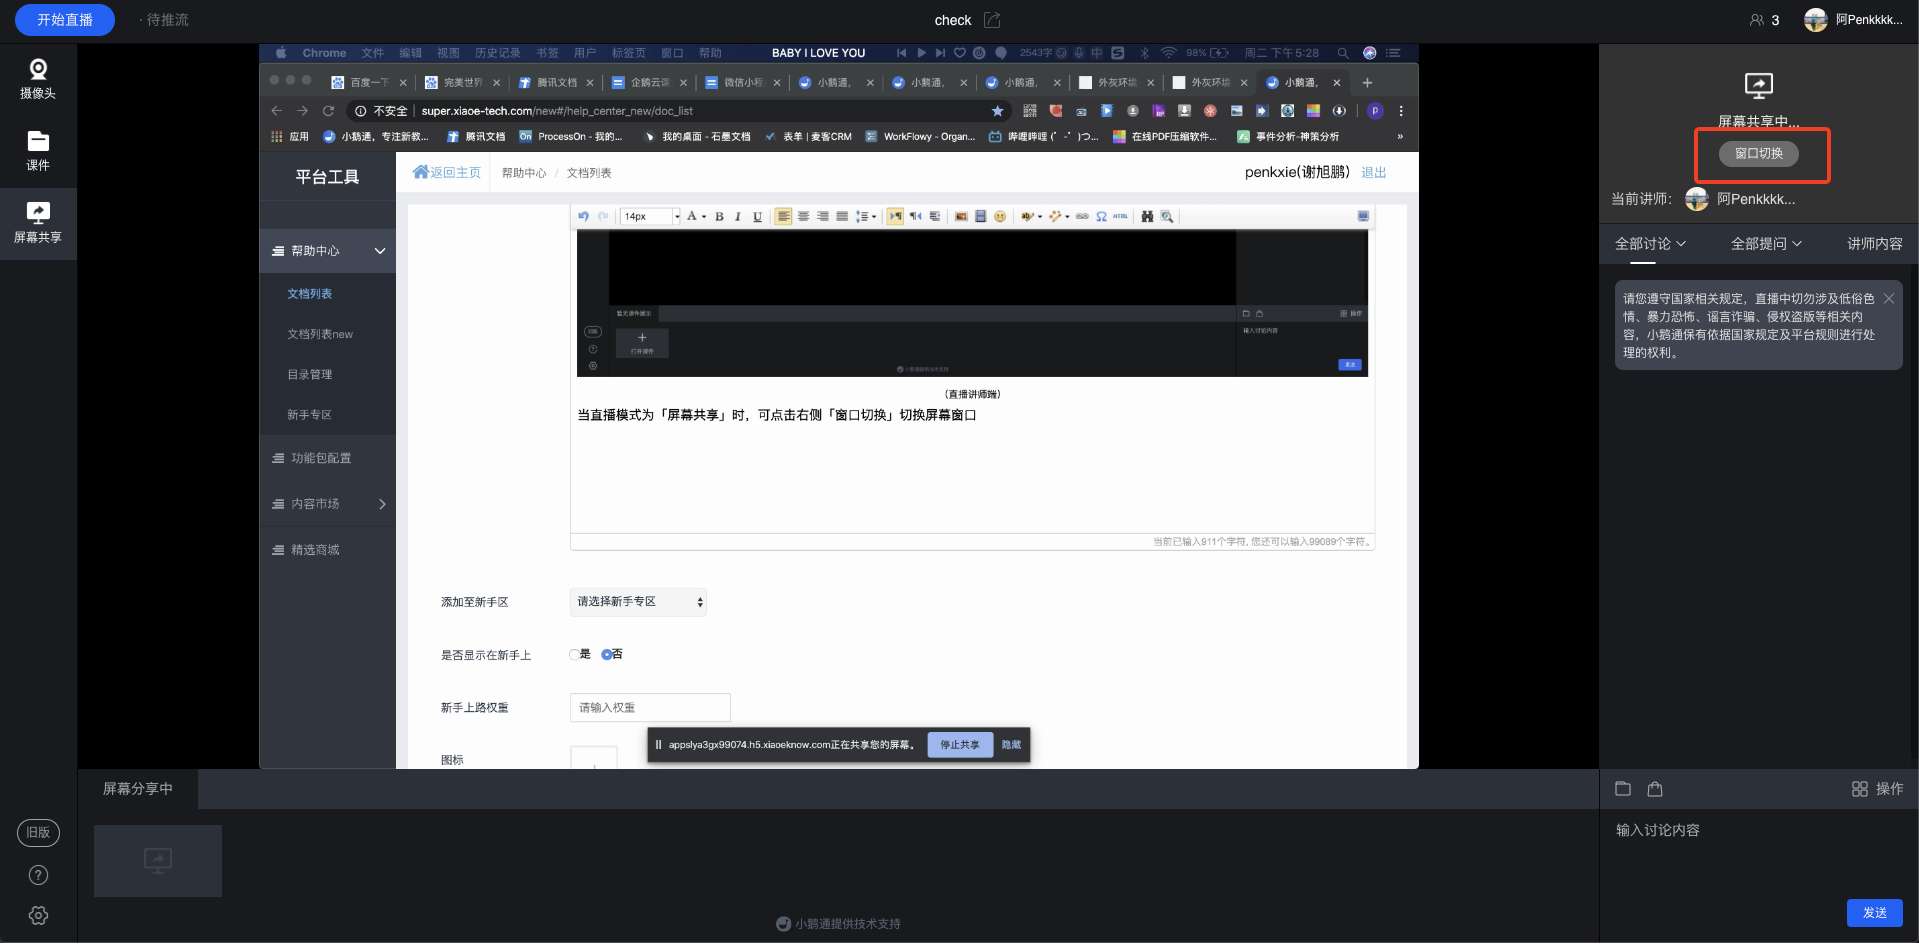
(Click 'Window Switching' to...)
3. Other operations
● Switch to the old - version live streaming room style
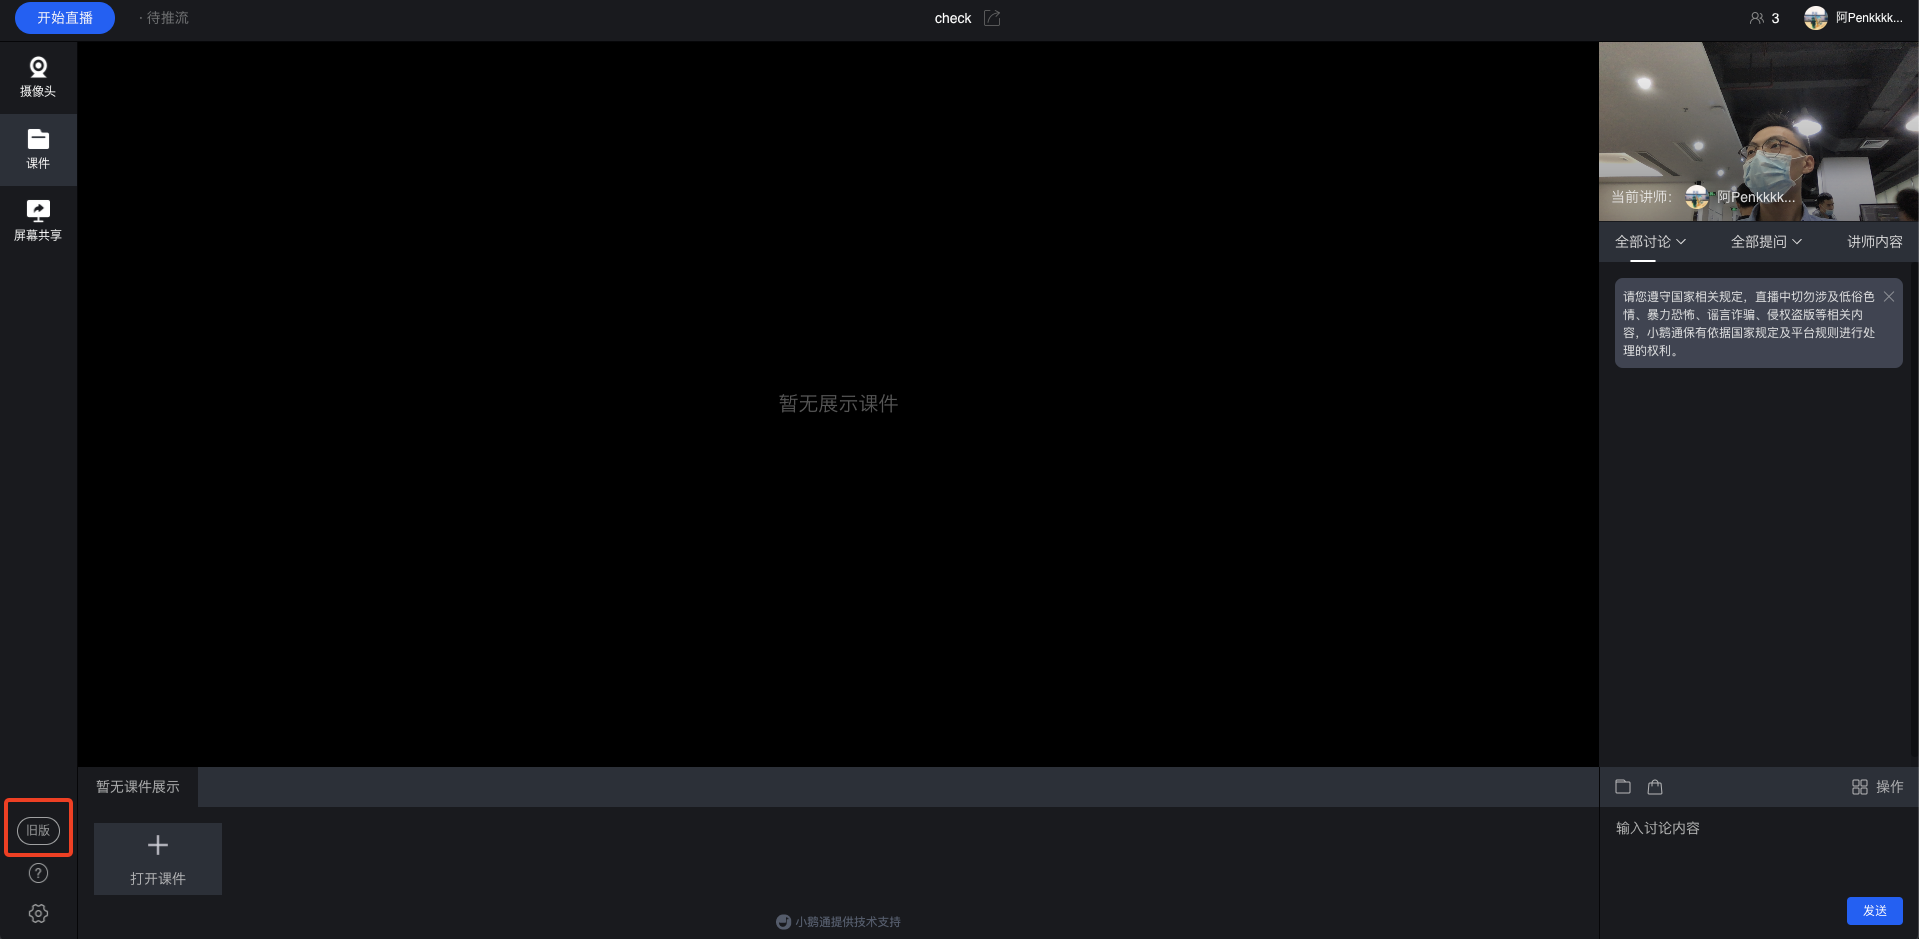
● View the usage tutorial
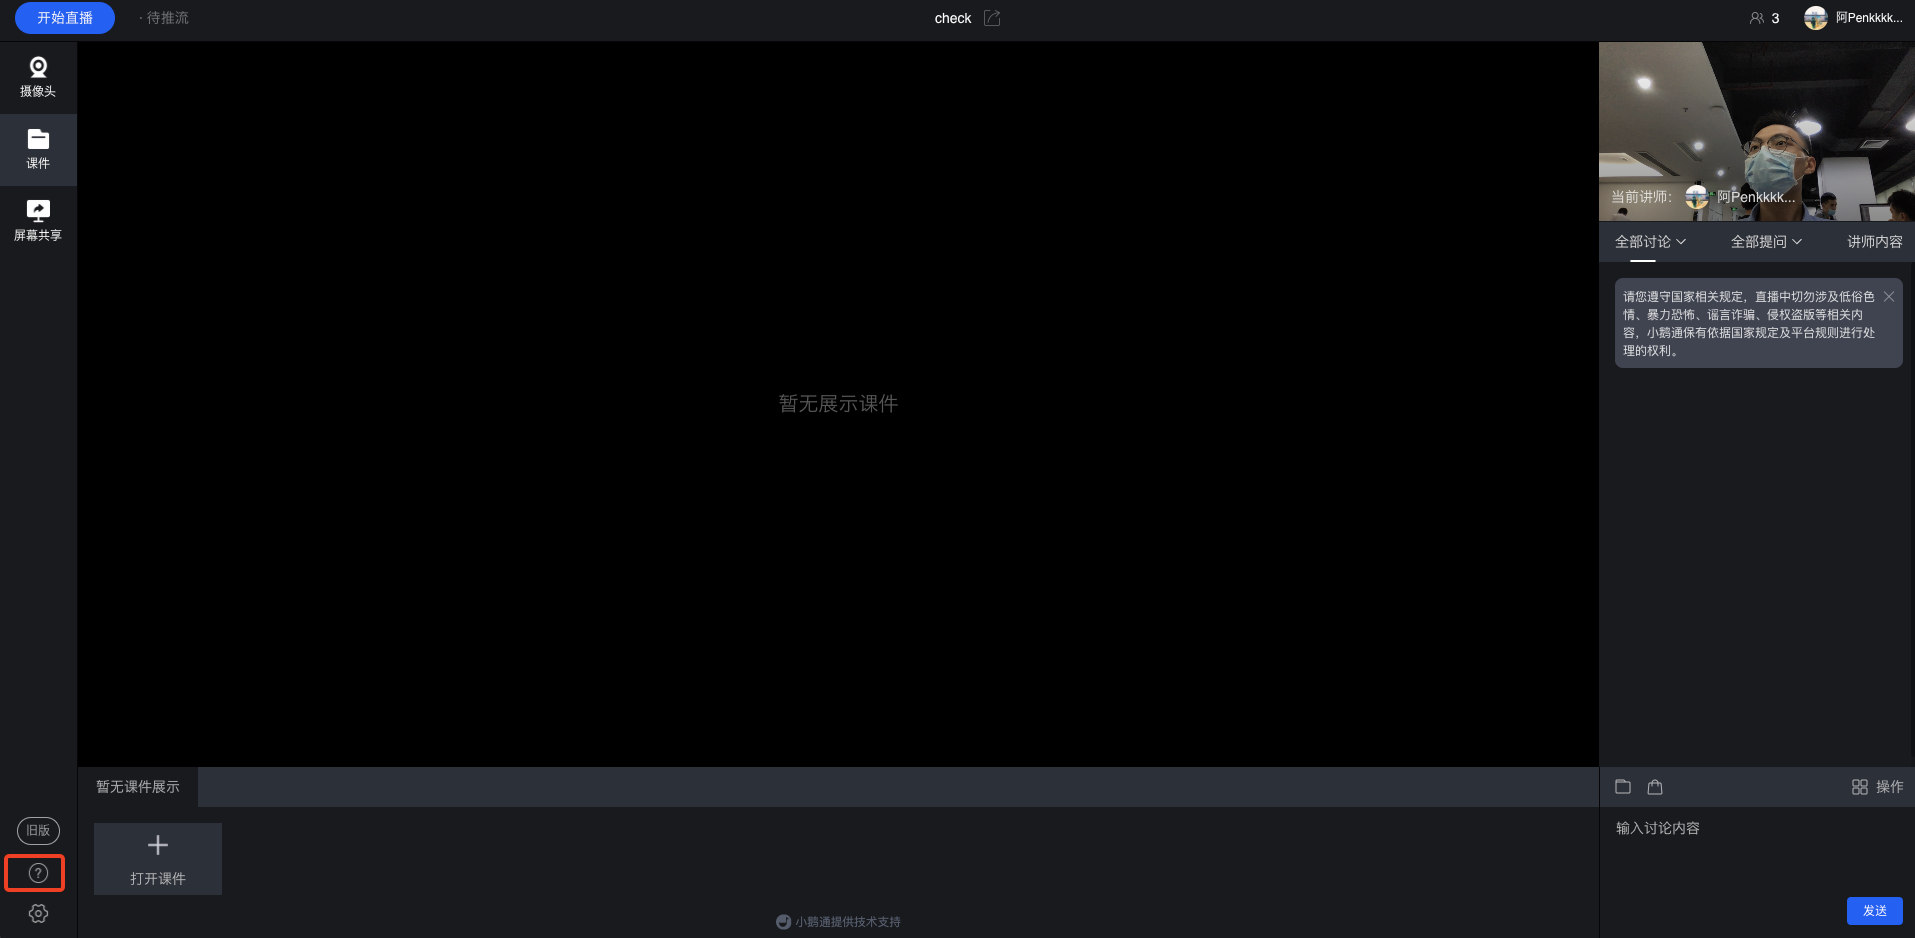
● Re - check the devices
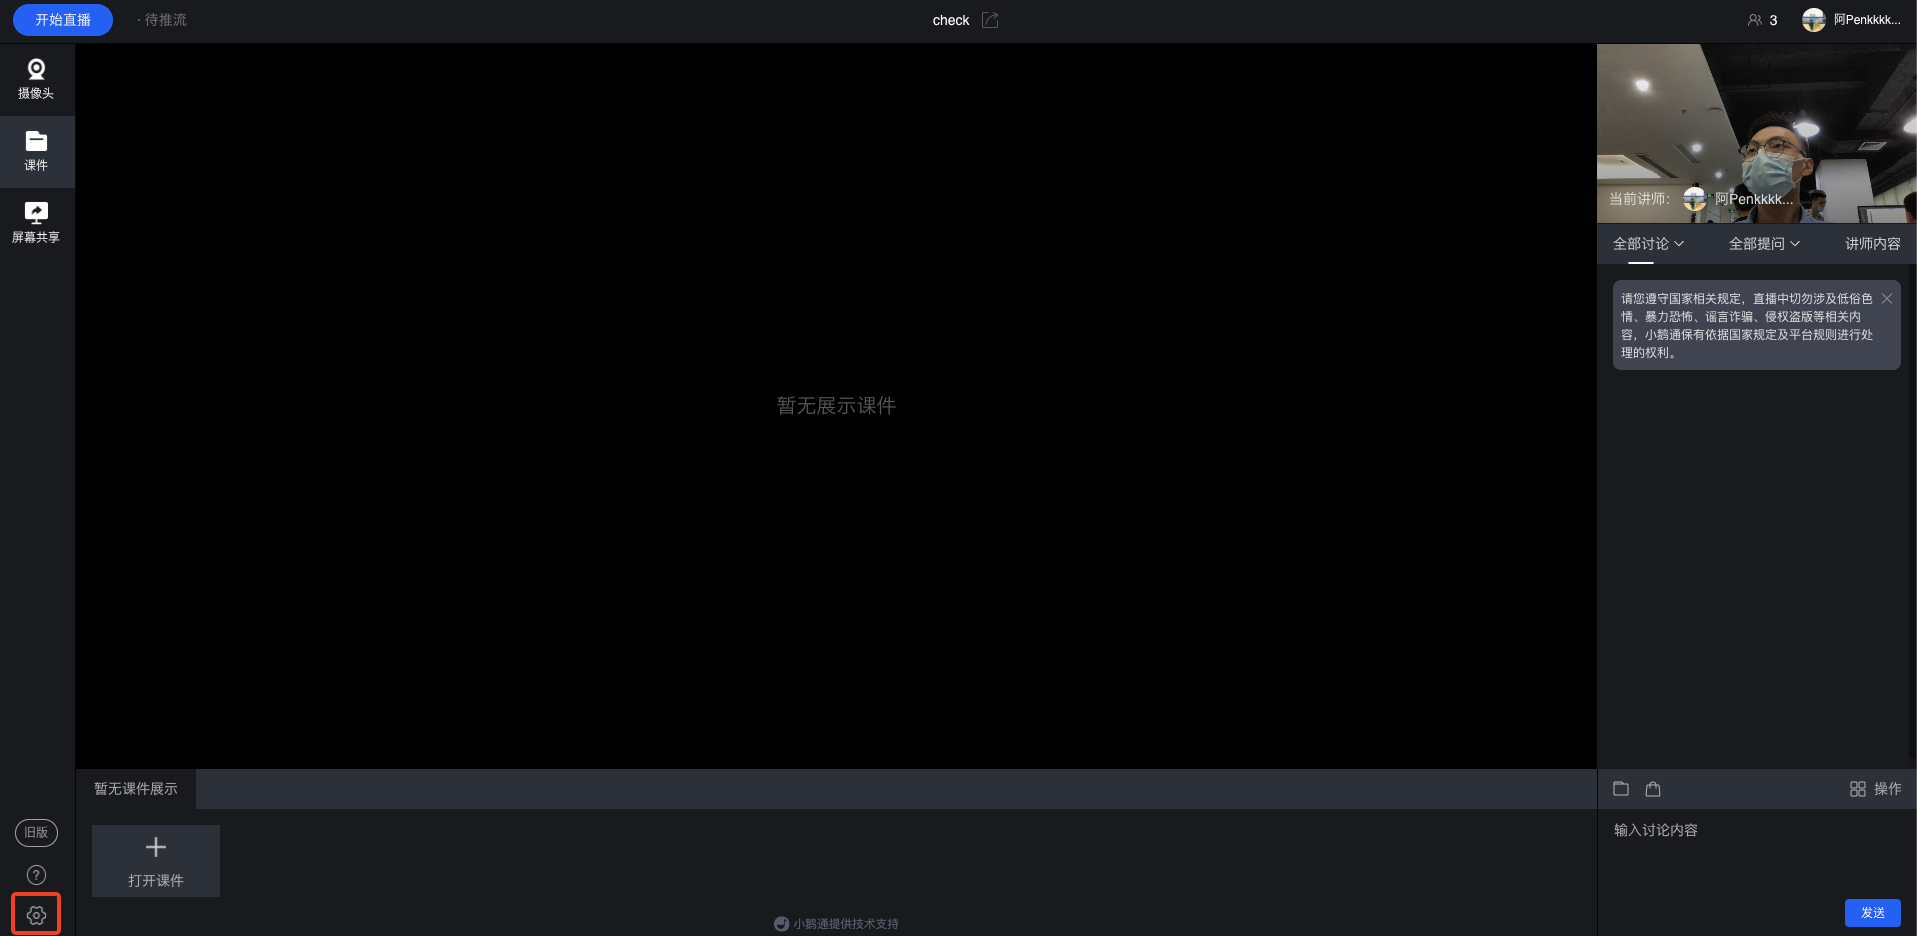
● Send the explanation content
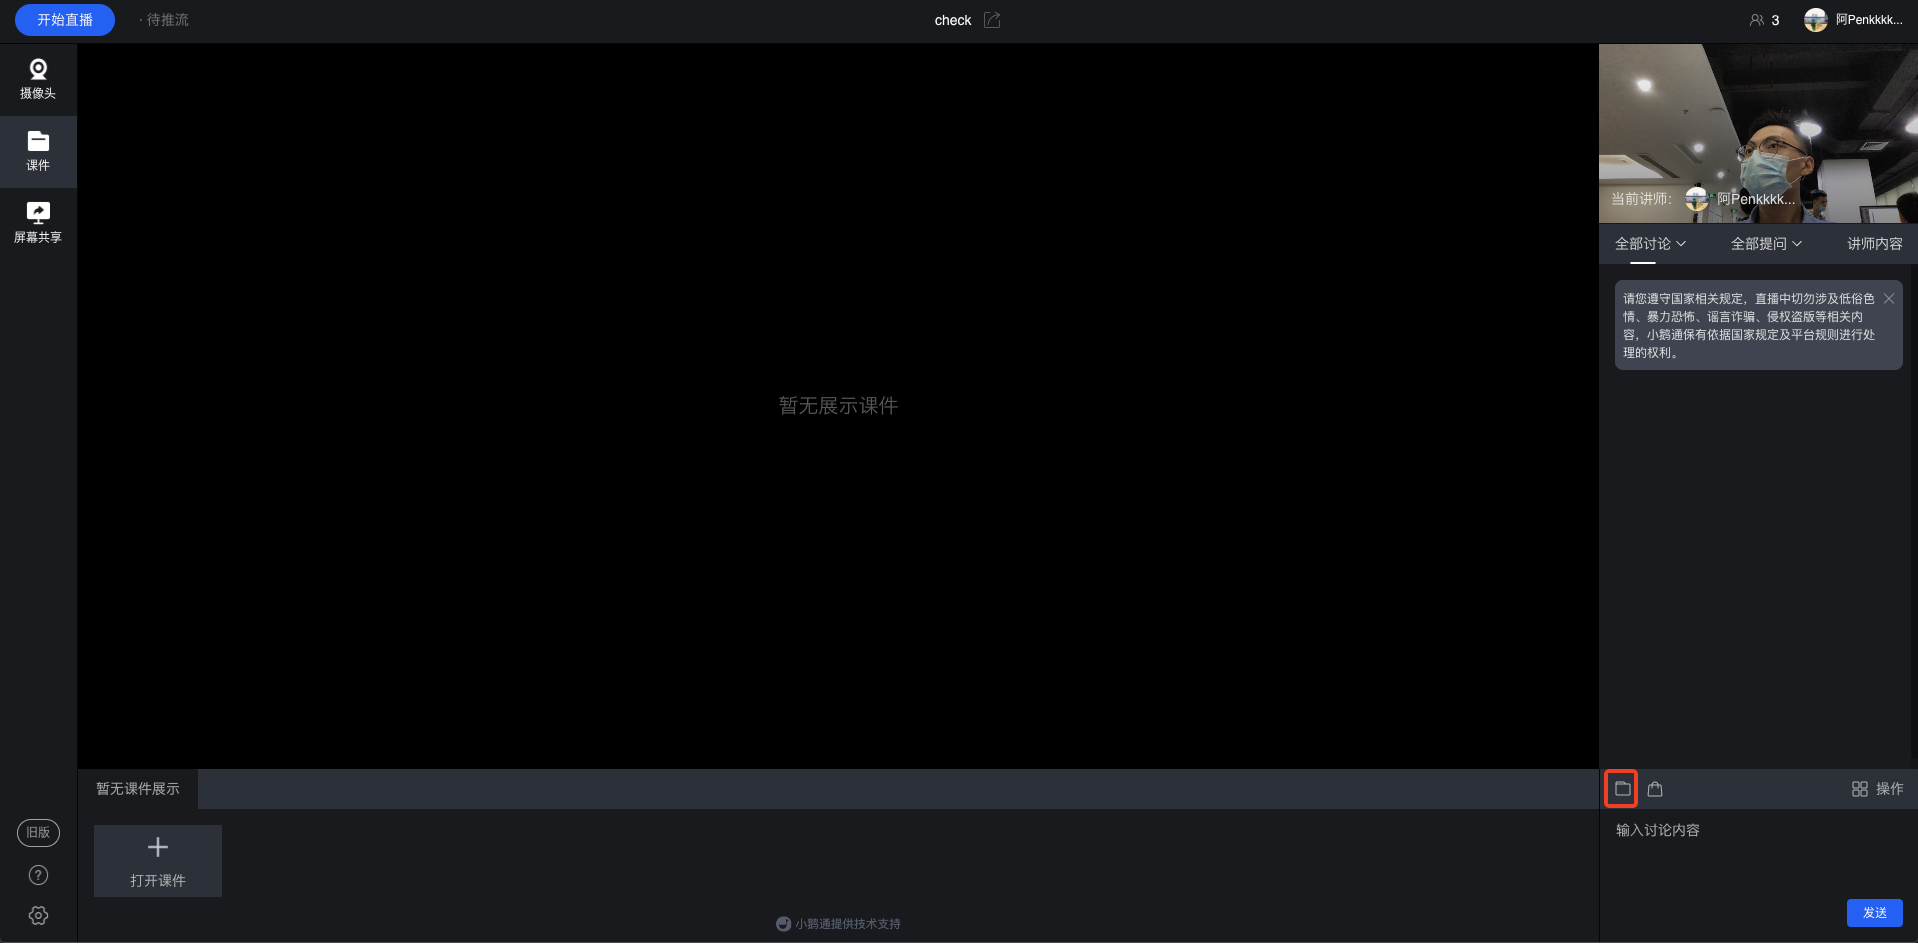
● Send coupons, courses & cards
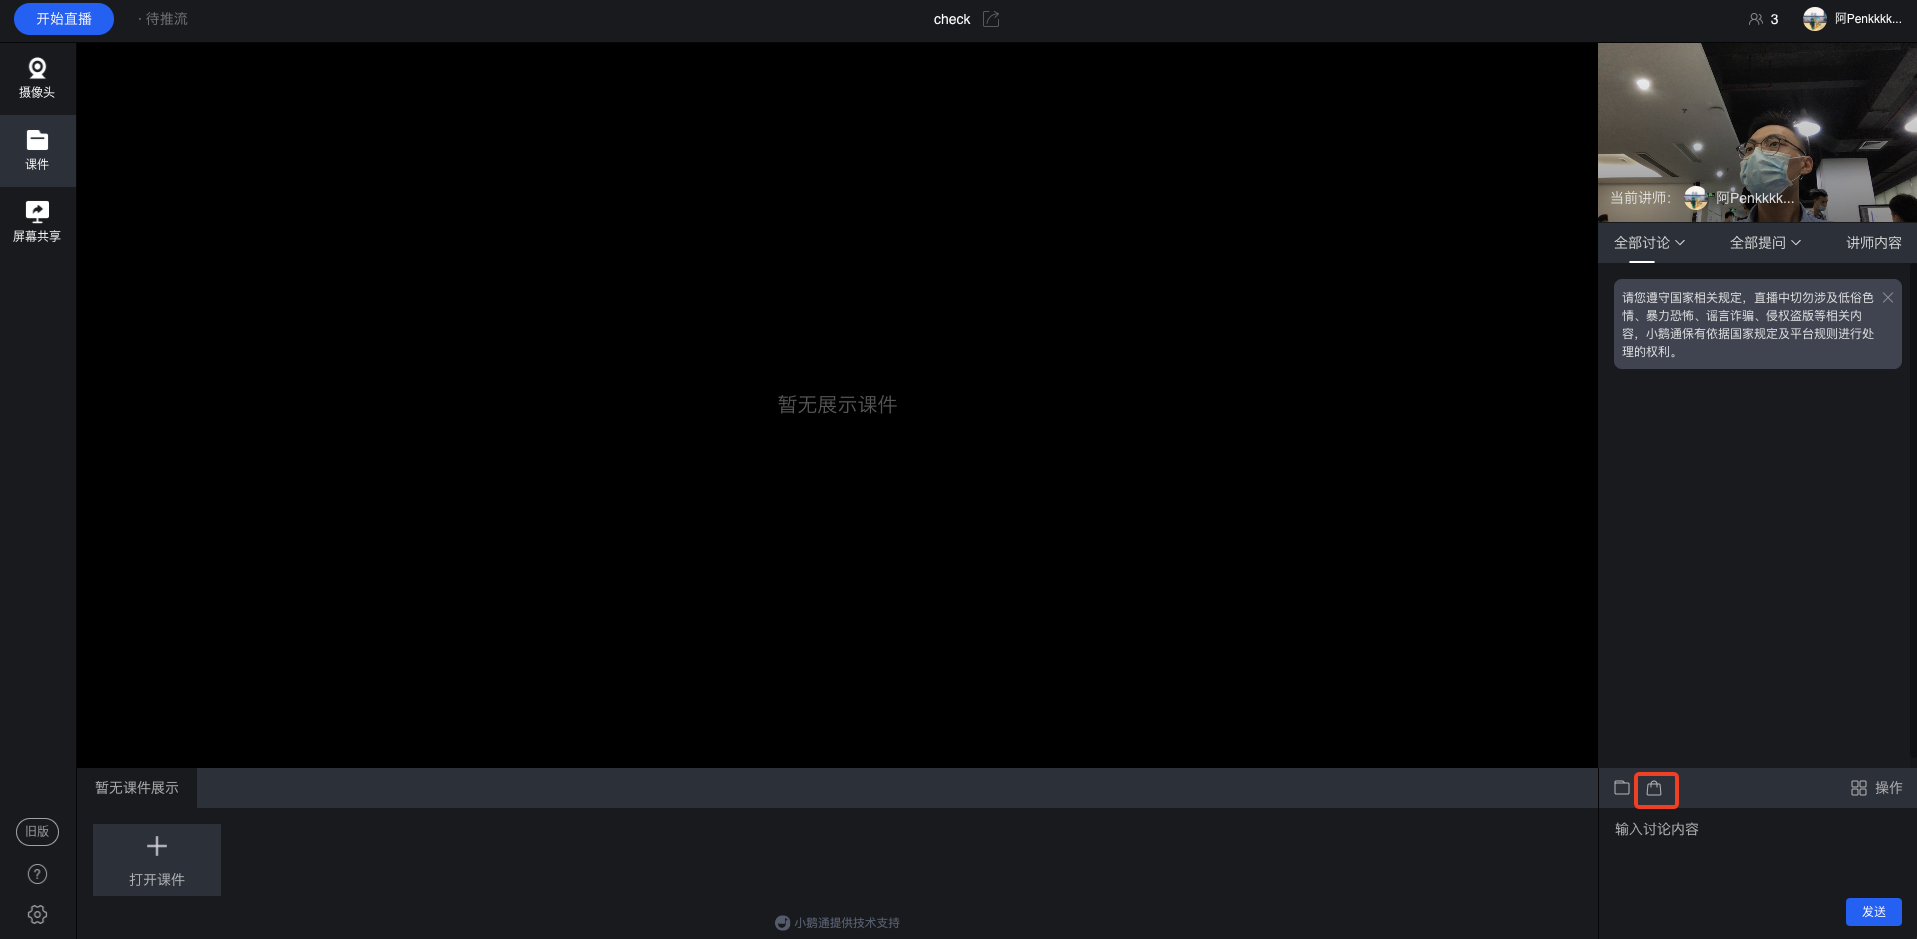
● Allow users to post on the wall, speak via voice, and mute users
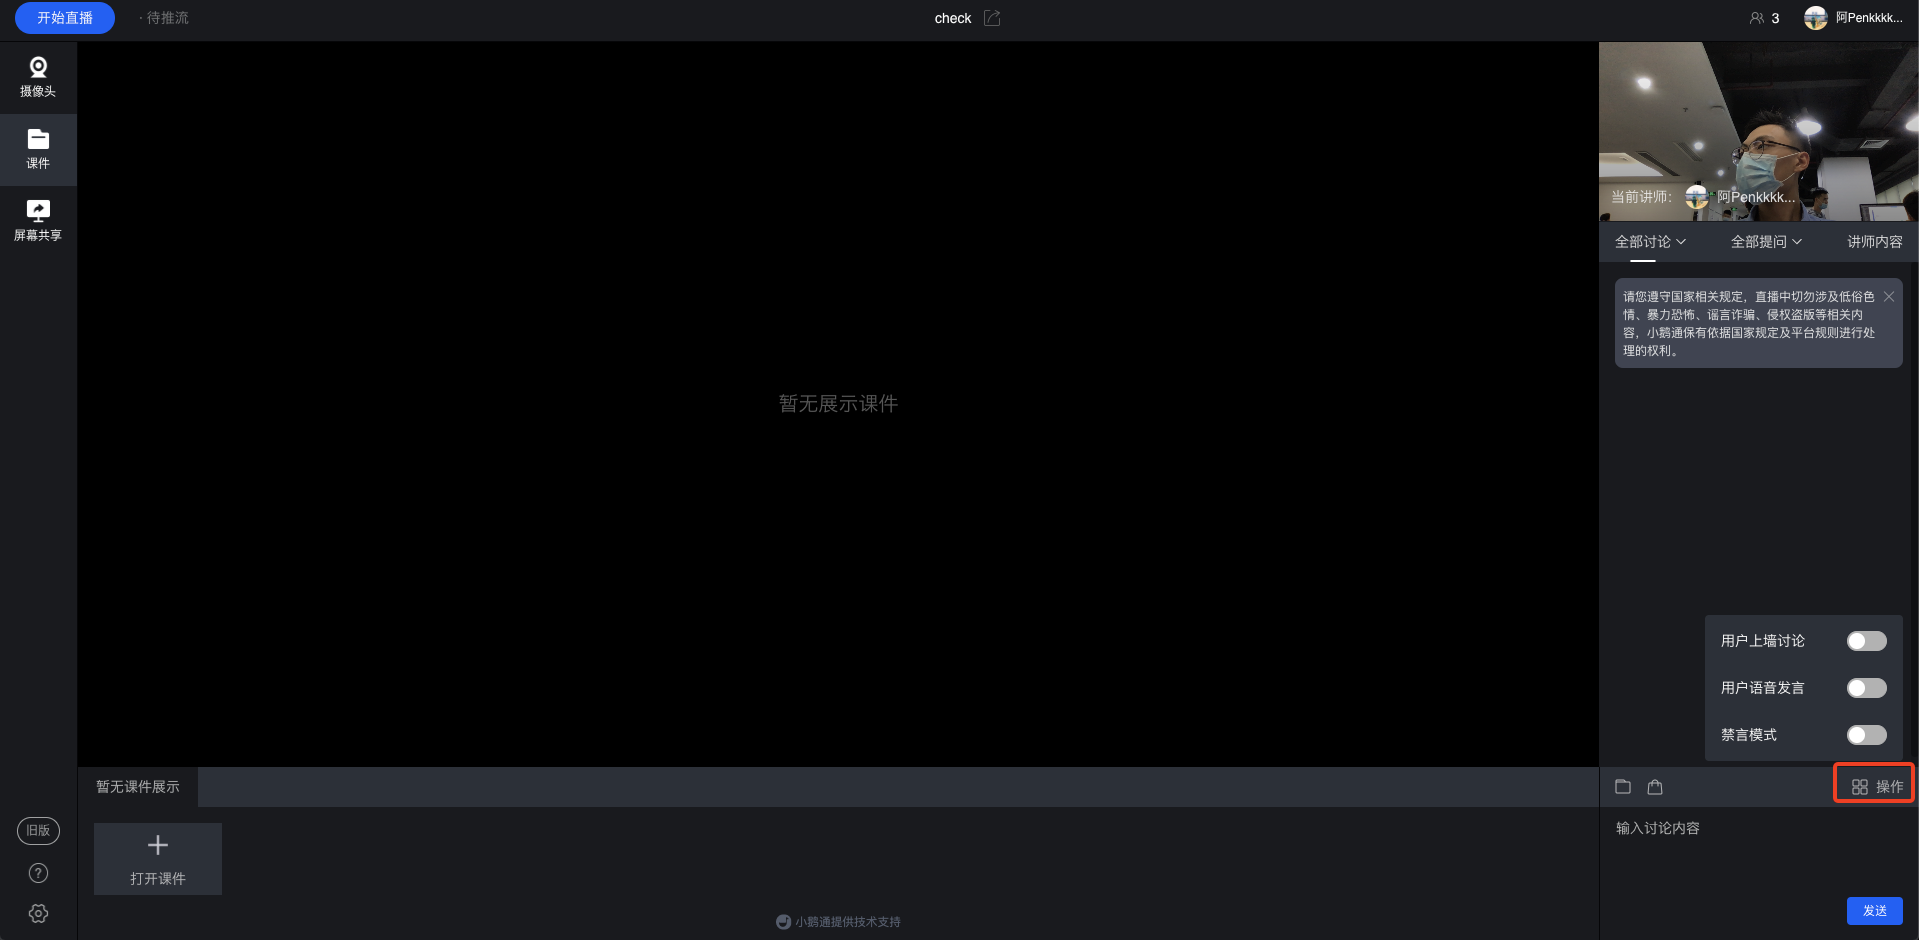
【OBS】How to Use Beauty Filters
I. Installation
1. Download the standalone installation package for the beauty camera>> Click to download <<
2. Double - click the installation package to run the installer after the download is complete

You can open OBS after the installation is complete
II. Usage
Open OBS

Add the beauty camera to the source

Select the camera device in the pop - up window, and adjust the values such as resolution, frames per second (FPS), and video format. You can also keep the default device options
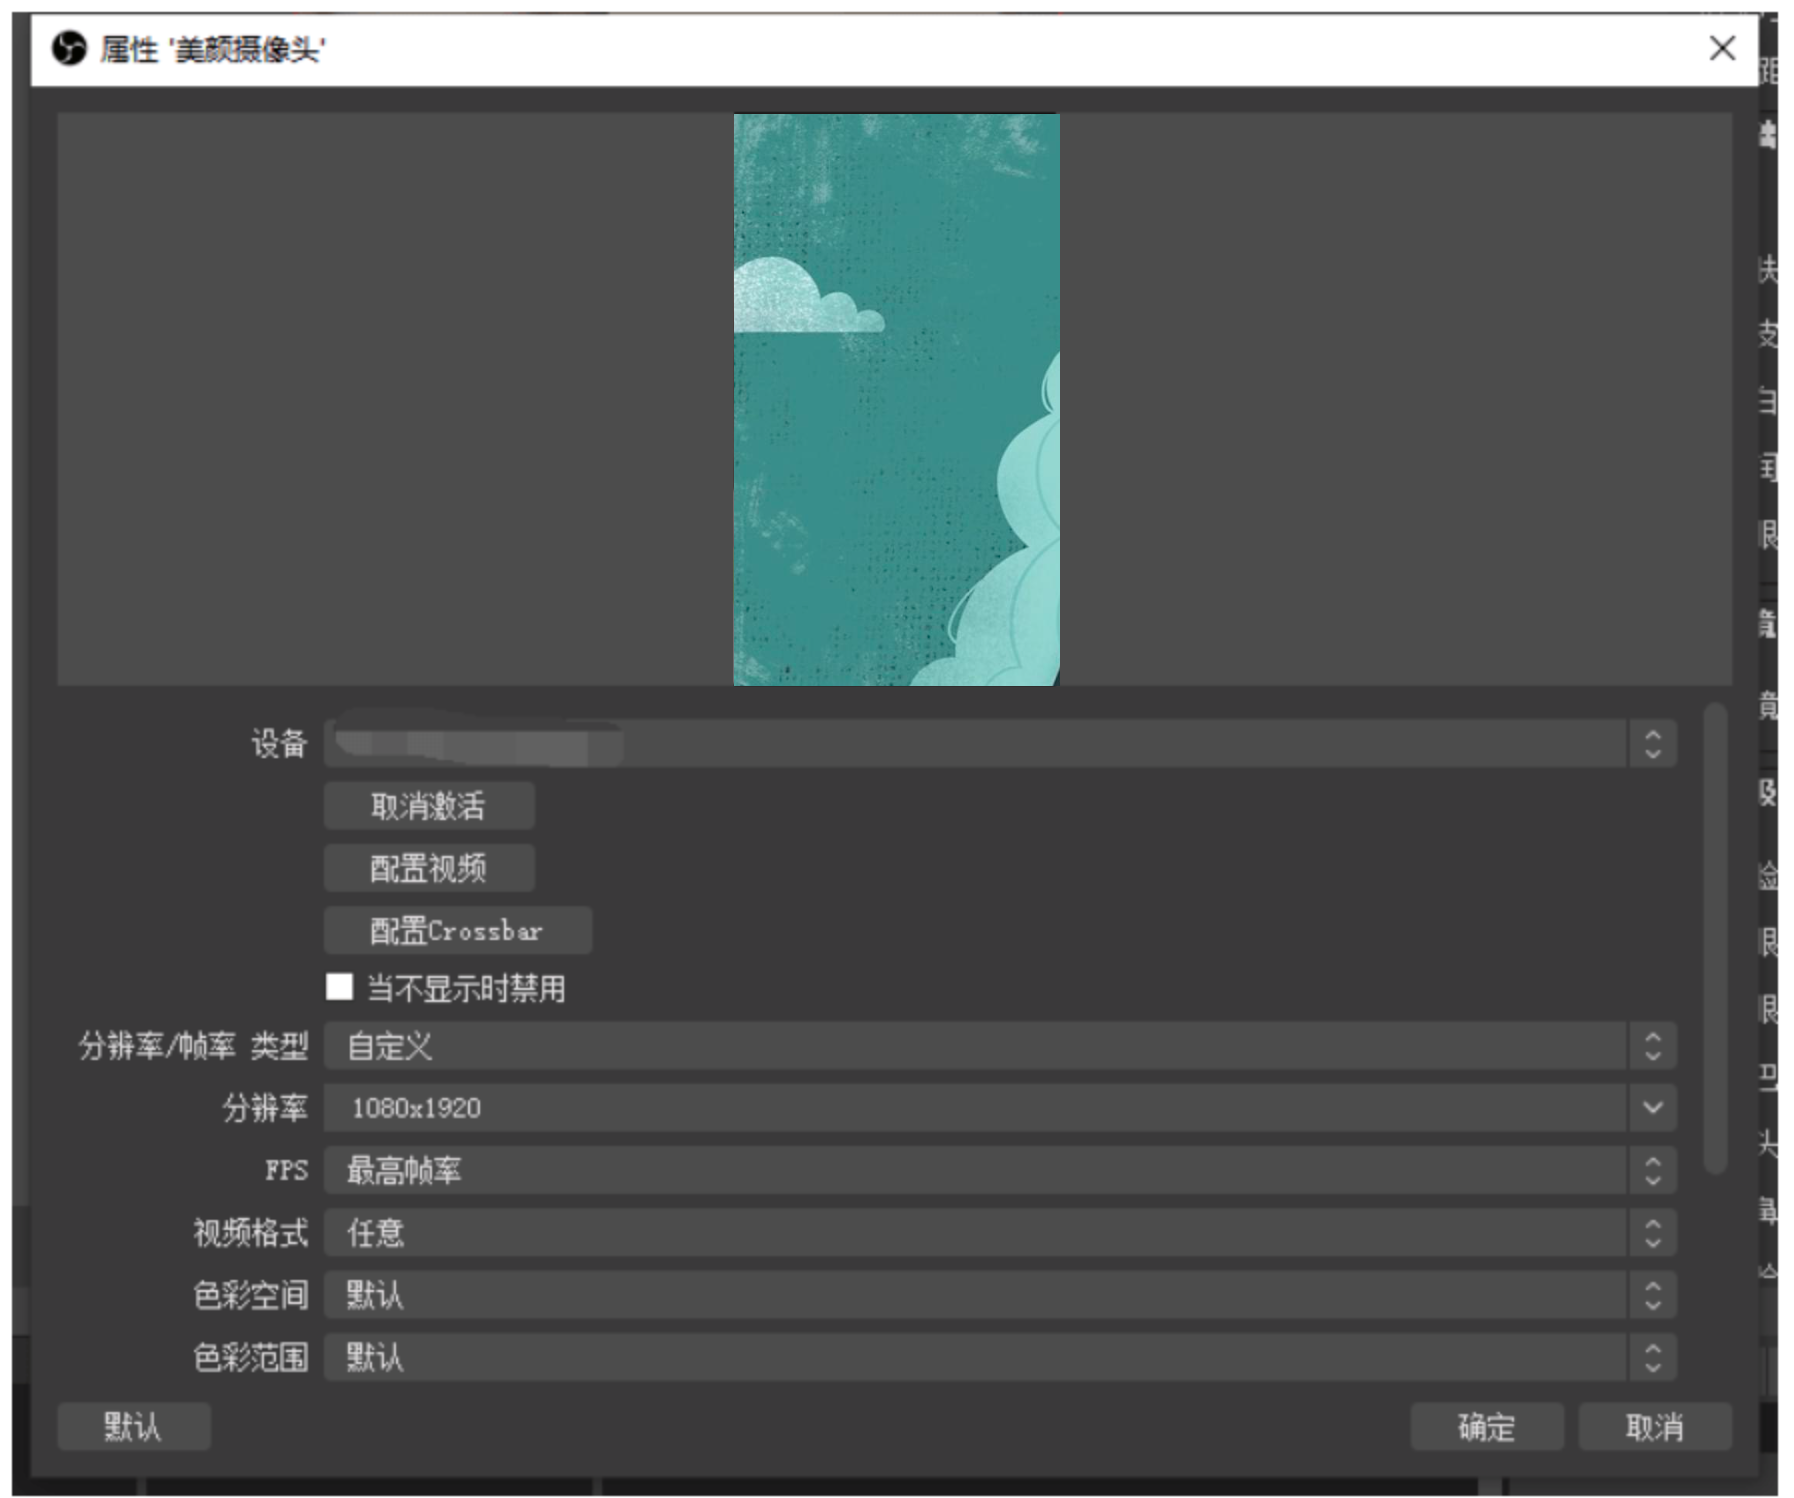
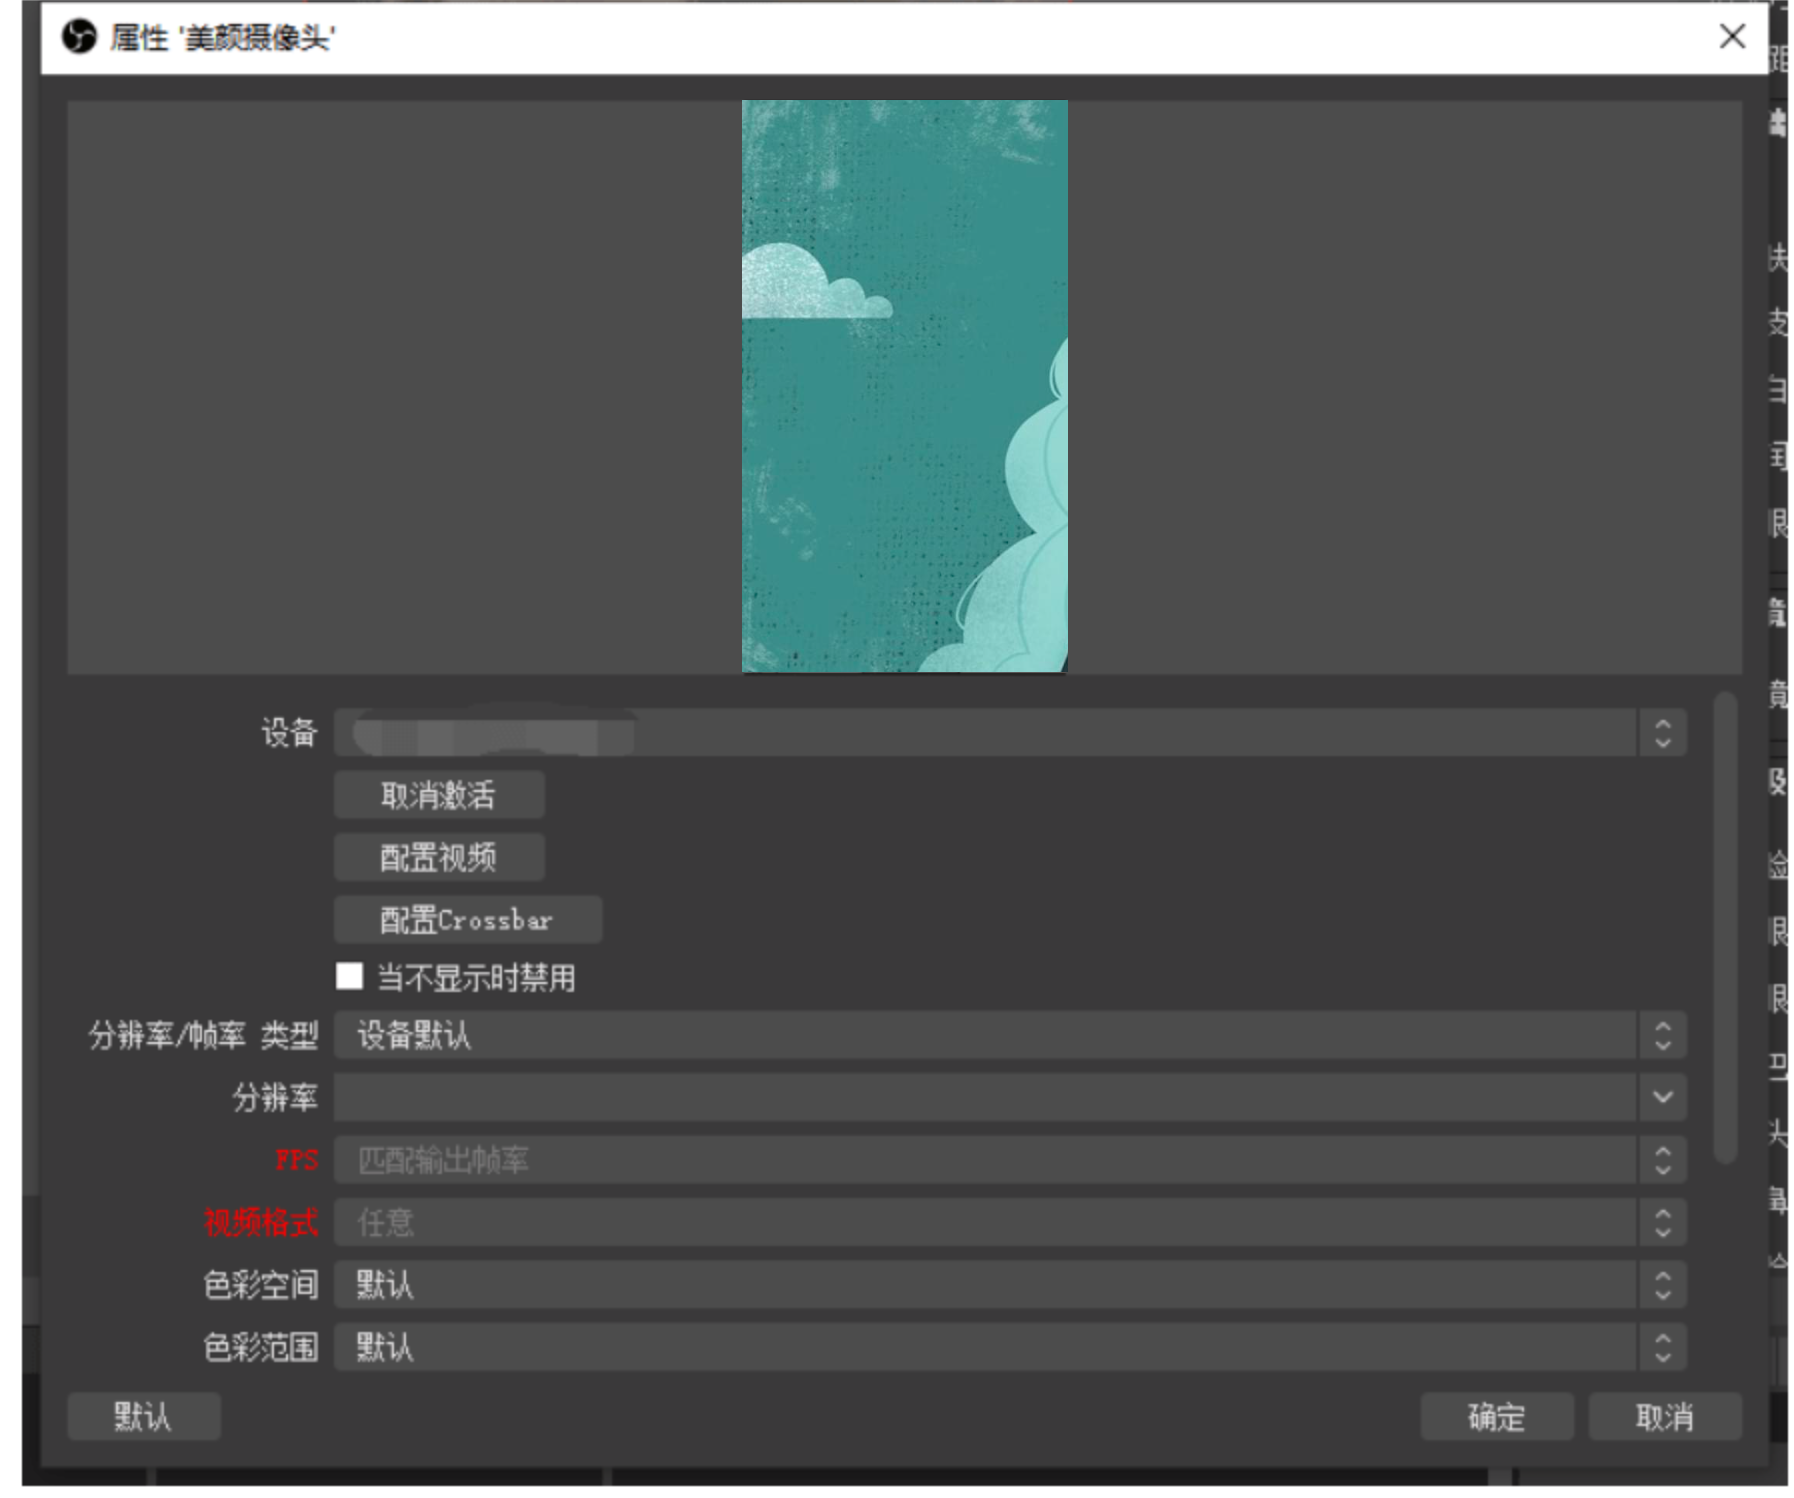
Click OK after the settings are completed to make the settings take effect and close the properties window
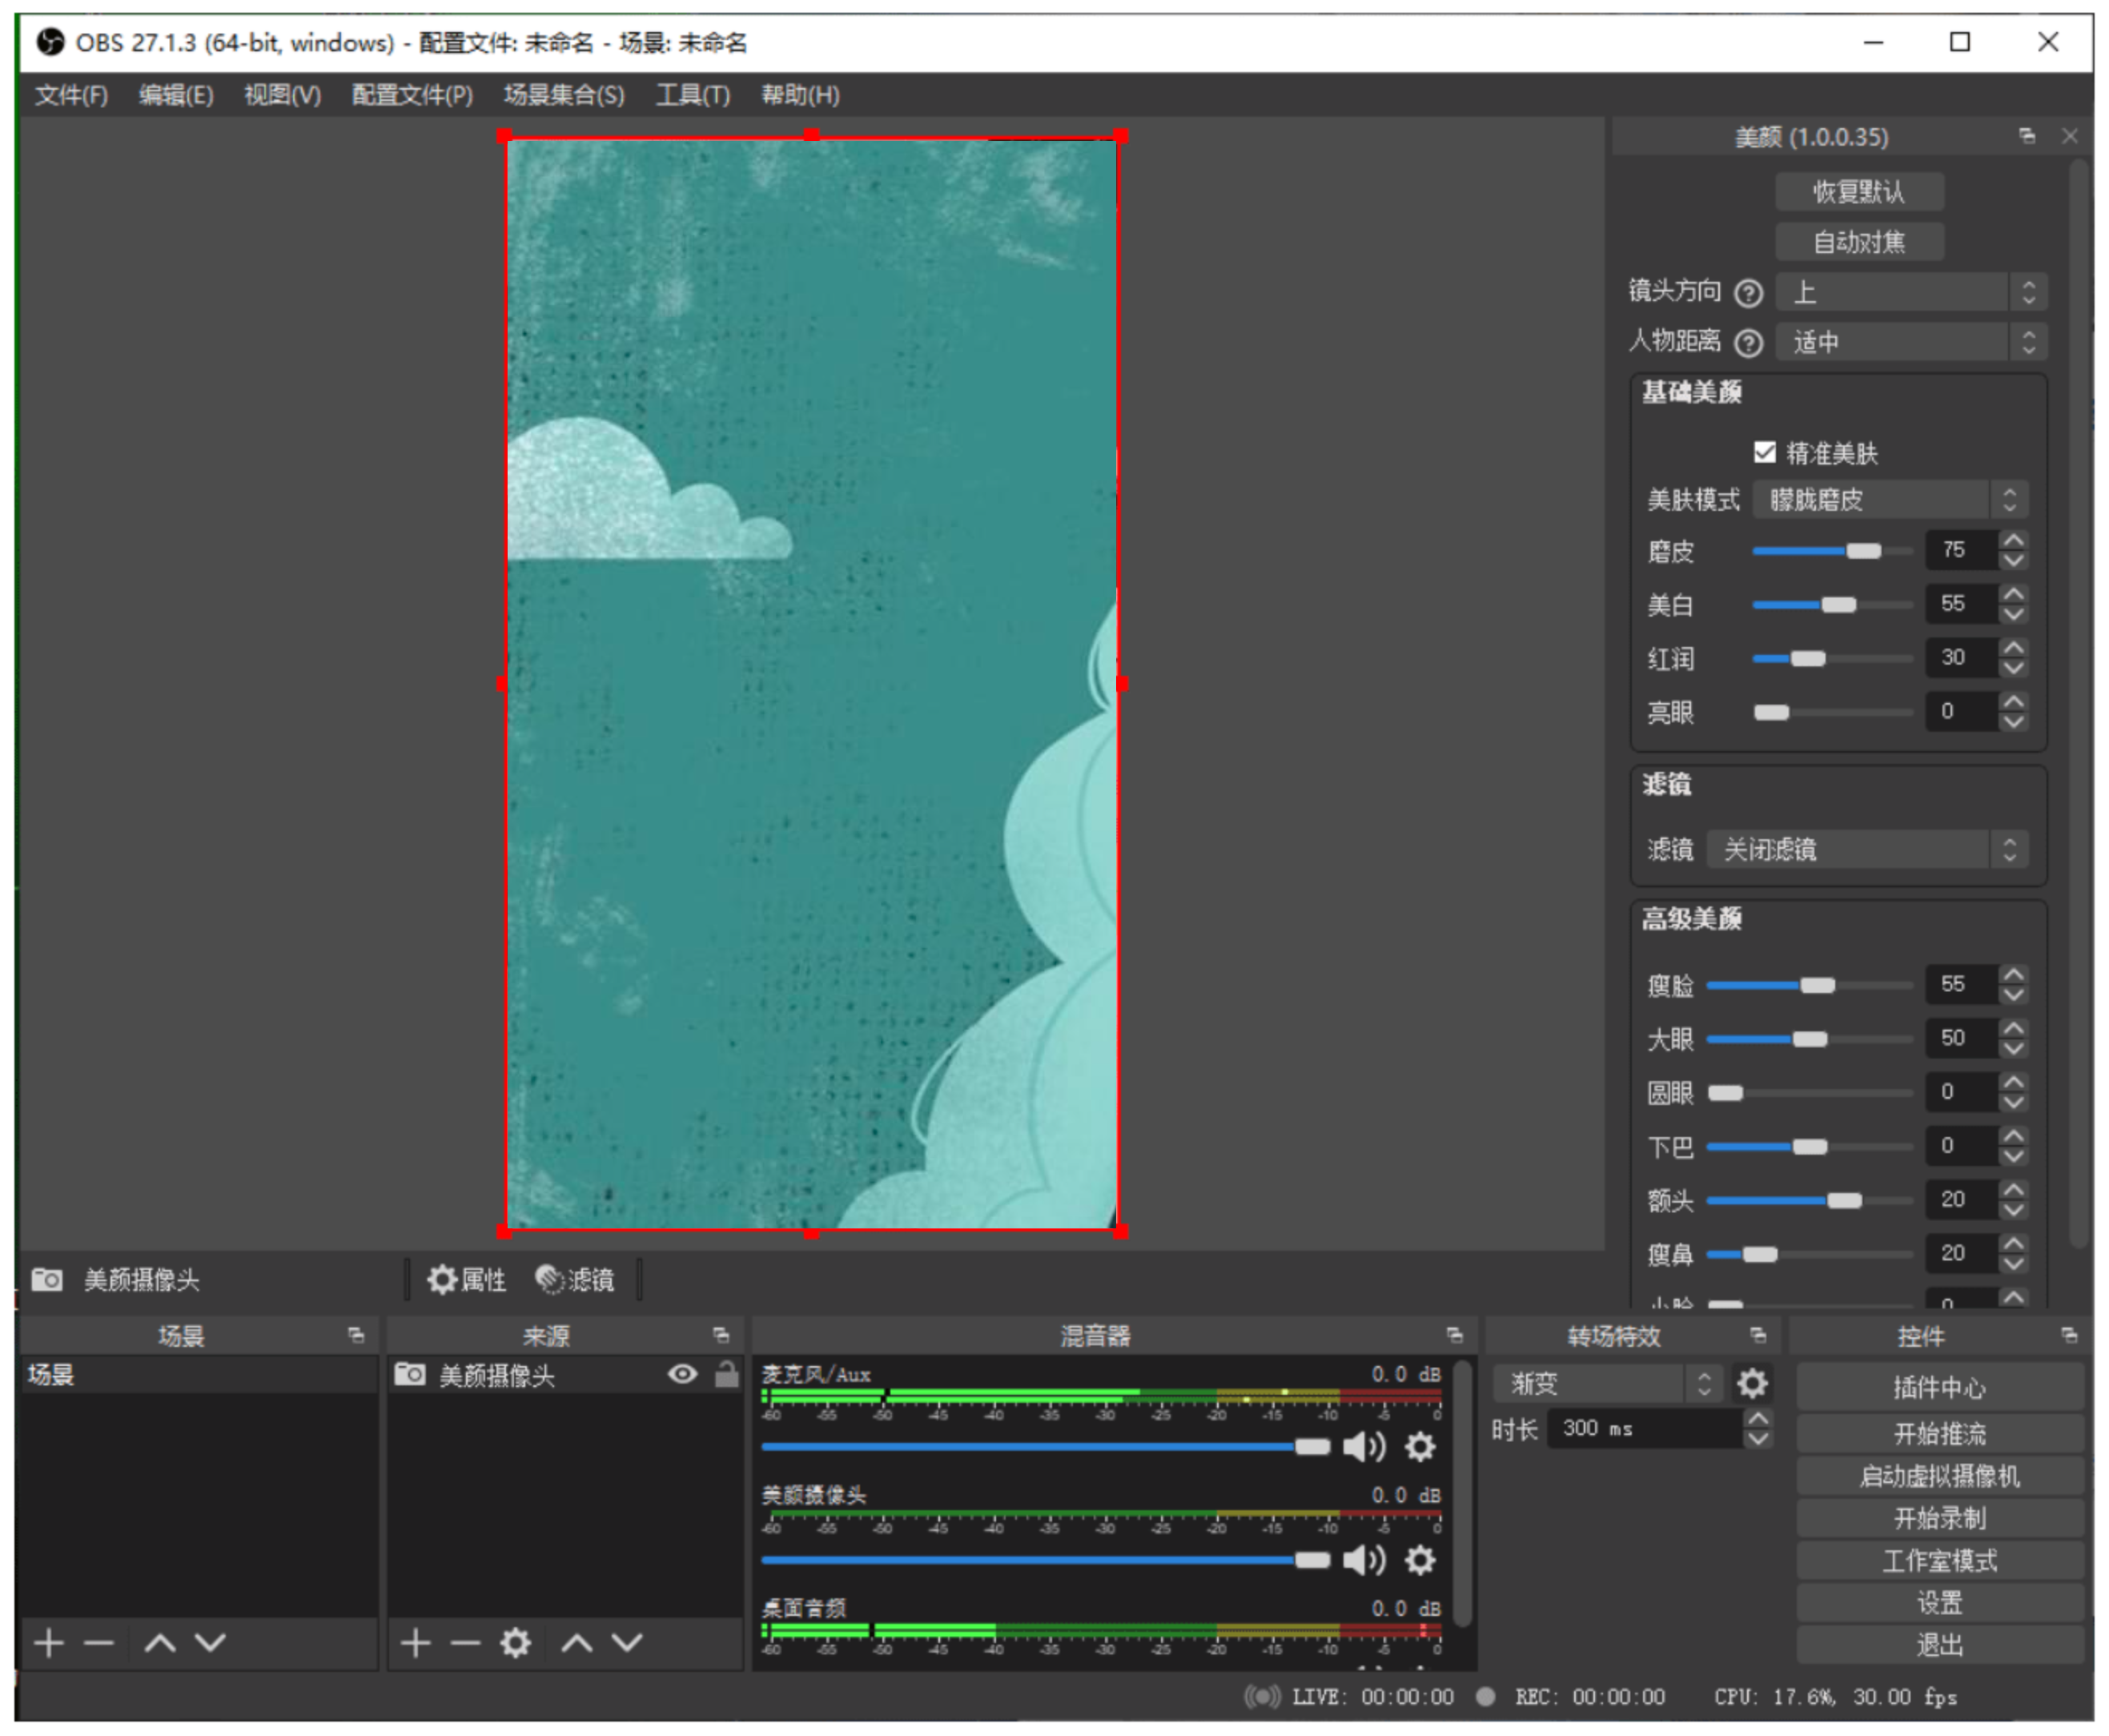
You can adjust the beauty effect by adjusting the values in the beauty settings
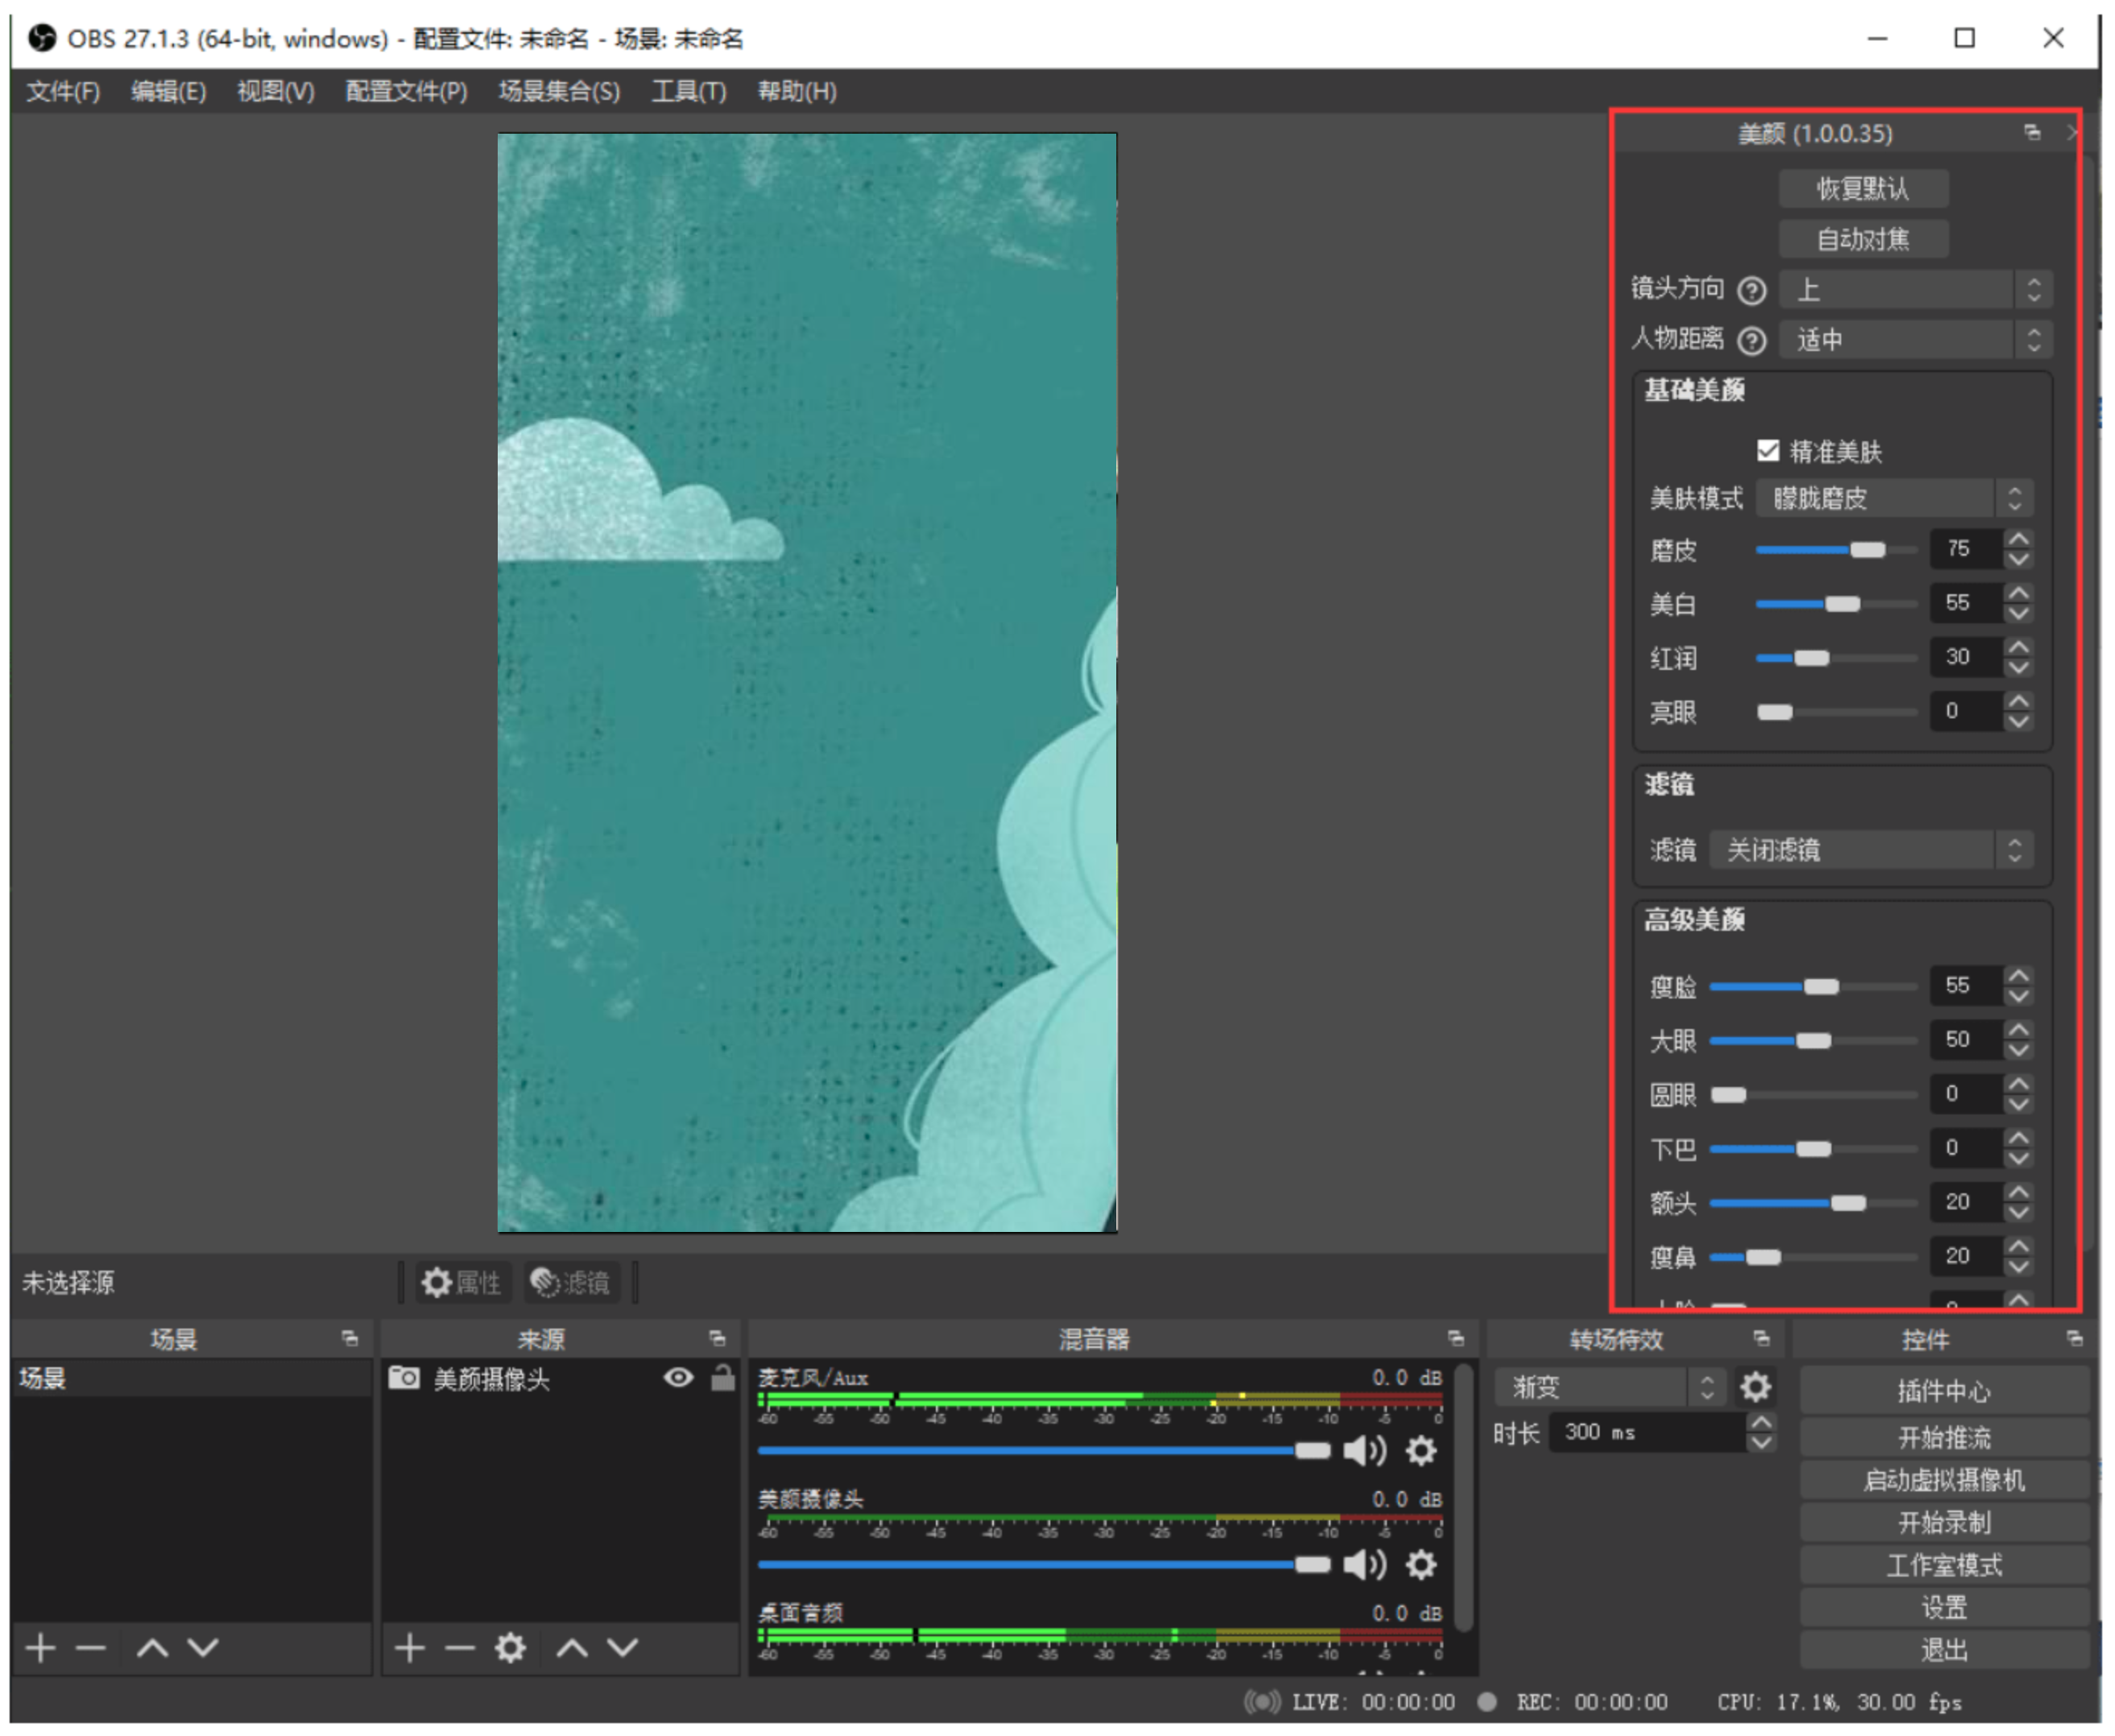
If you adjust the placement direction of the camera (for example, turn the camera vertically for vertical screen live streaming), you can help the beauty camera recognize the anchor's head and enable the beauty effect by changing the head direction
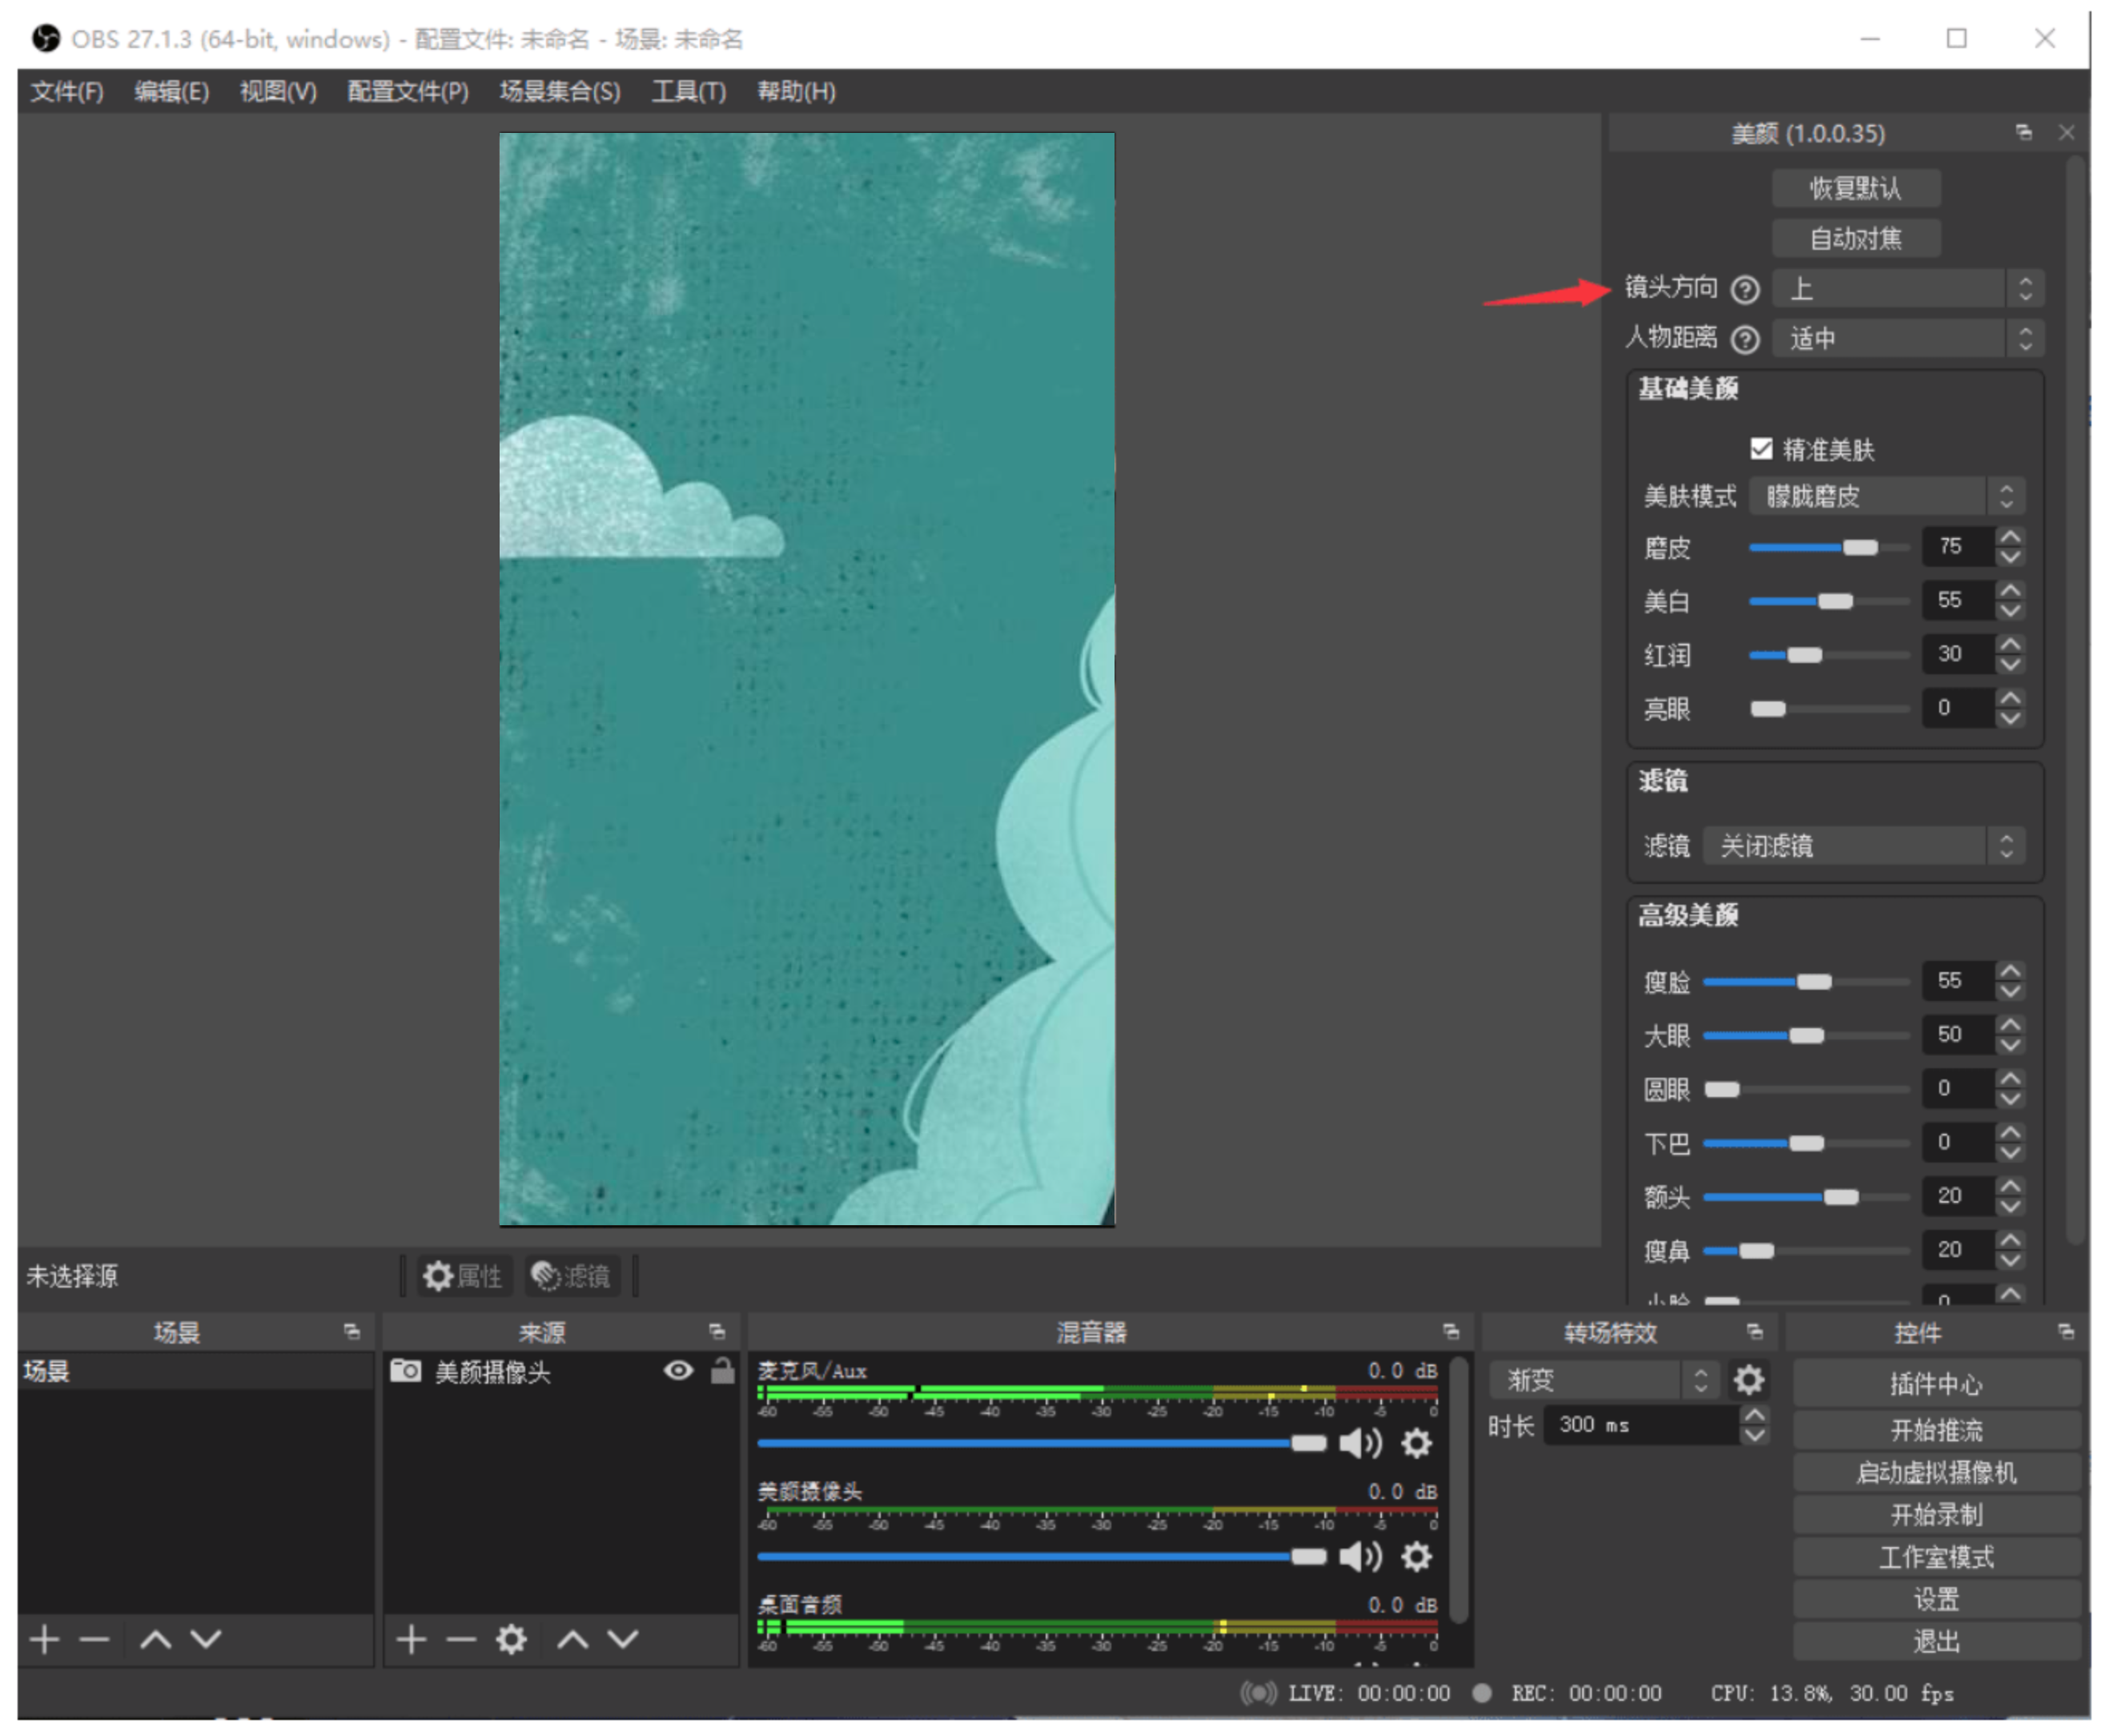
Live streaming supports external graphic tablets
Function Introduction:
The live streaming client supports connecting to a graphics tablet, suitable for courseware annotation and drawing board scenarios.
Usage Conditions:
① The latest version of the eLive client or elink Assistant
② A graphics tablet
How to Connect an External Graphics Tablet:
① Connect the graphics tablet device to your computer
(When connecting a graphics tablet device to your computer for the first time, you need to install the driver. Just follow the prompts to install it.)

② Enter the live streaming room (eLive client/elink Assistant)
All operations on the graphics tablet are treated as mouse operations.
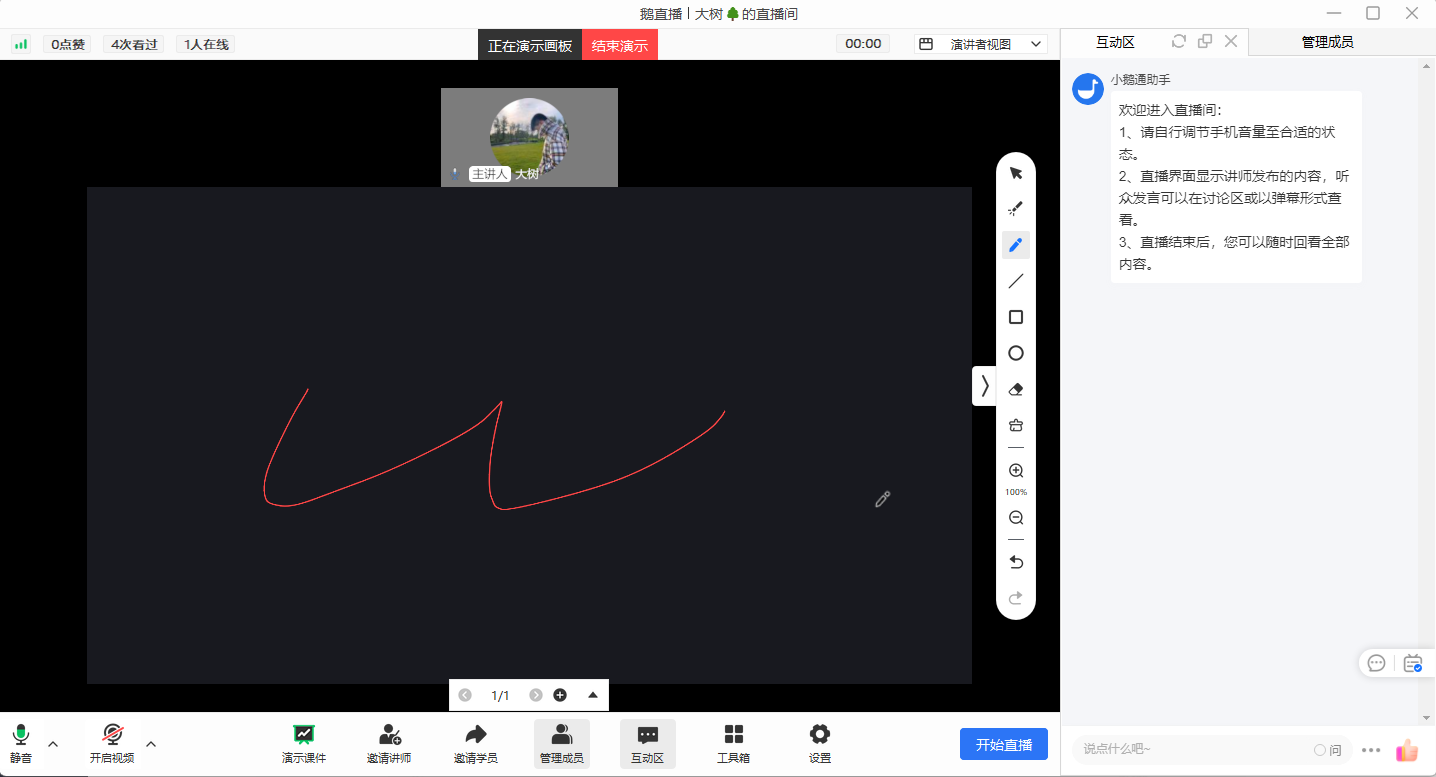
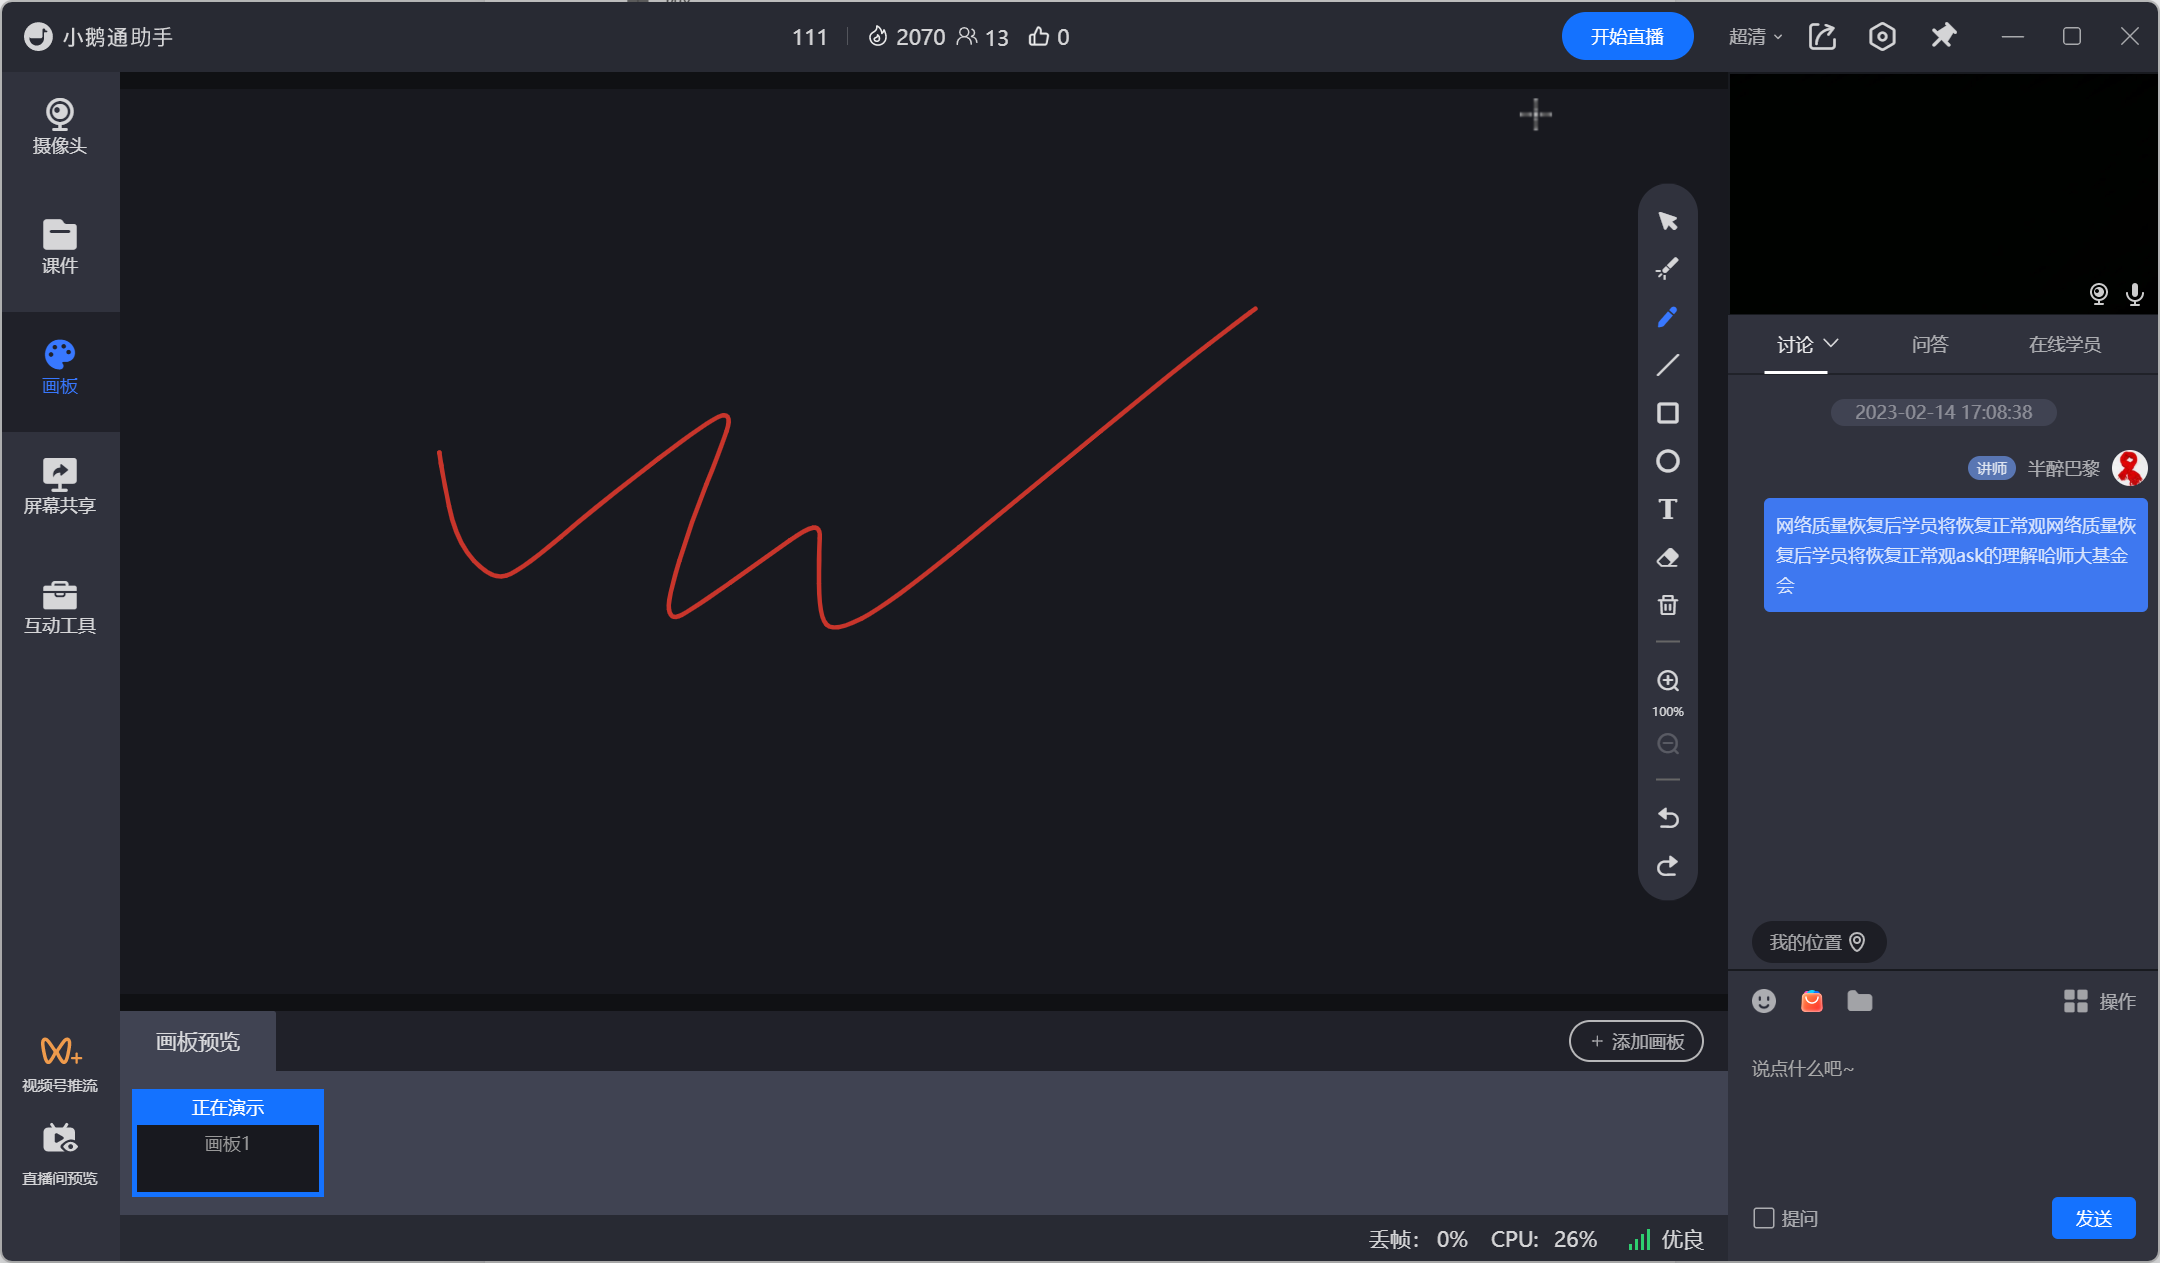
Precautions:
① After the graphics tablet is successfully connected, the operations of the stylus are equivalent to those of the mouse.
Frequently Asked Questions:
1、 The writing area of the graphics tablet does not match the drawing board.
Answer: The graphics tabletis only used as a mouse. The drawing area is based on the drawing board area of elink Assistant.
Live streaming supports external microphones (such as lavalier microphones)
Function Introduction:
The live streaming client supports connecting to microphone devices for audio recording, catering to more mobile scenarios for microphones.
Usage Conditions:
① The latest version of the eLive streaming client or elink Assistant
② An external microphone device (you can search for 'external microphone' or 'lapel microphone' on e-commerce platforms)
How to Connect an External Microphone:
① Enter the live streaming room (eLive streaming client/elink Assistant)
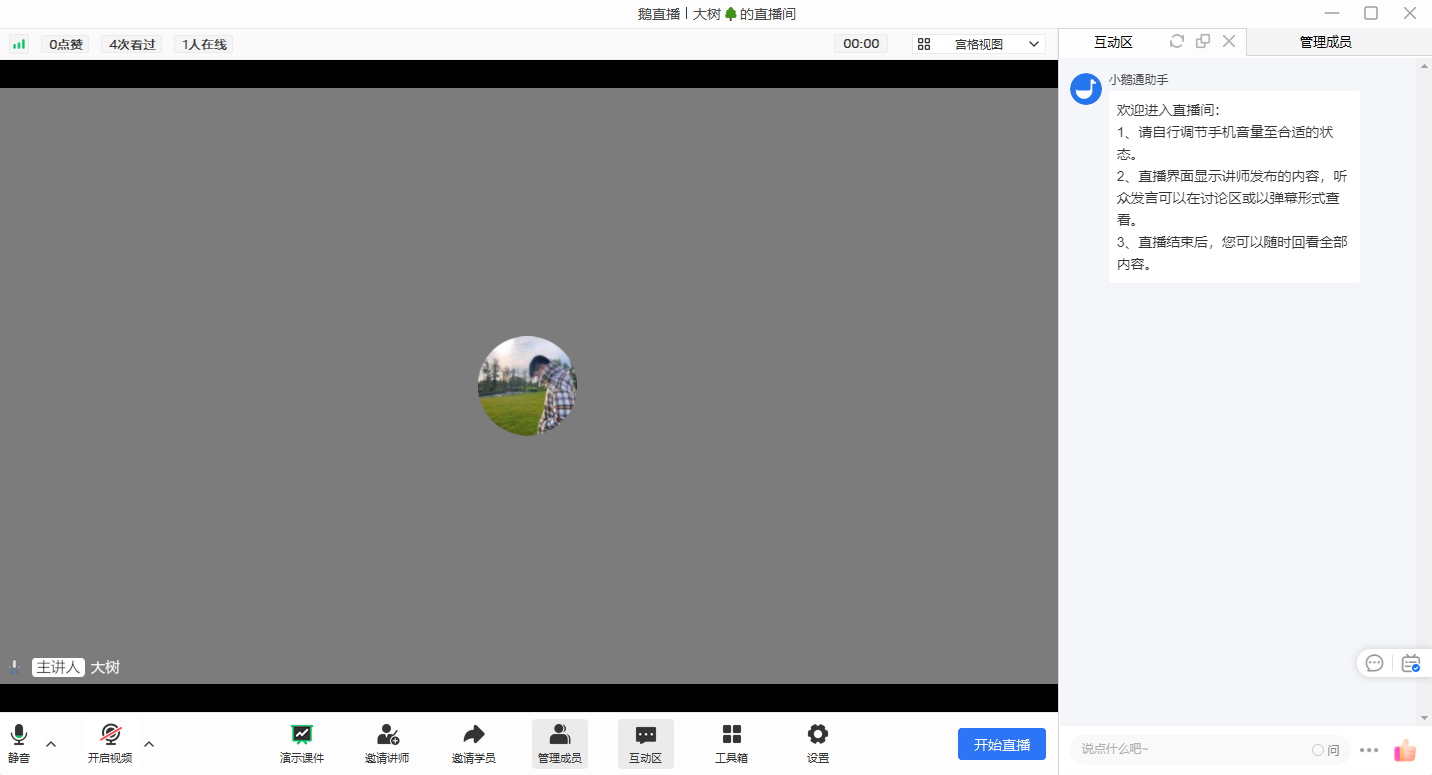
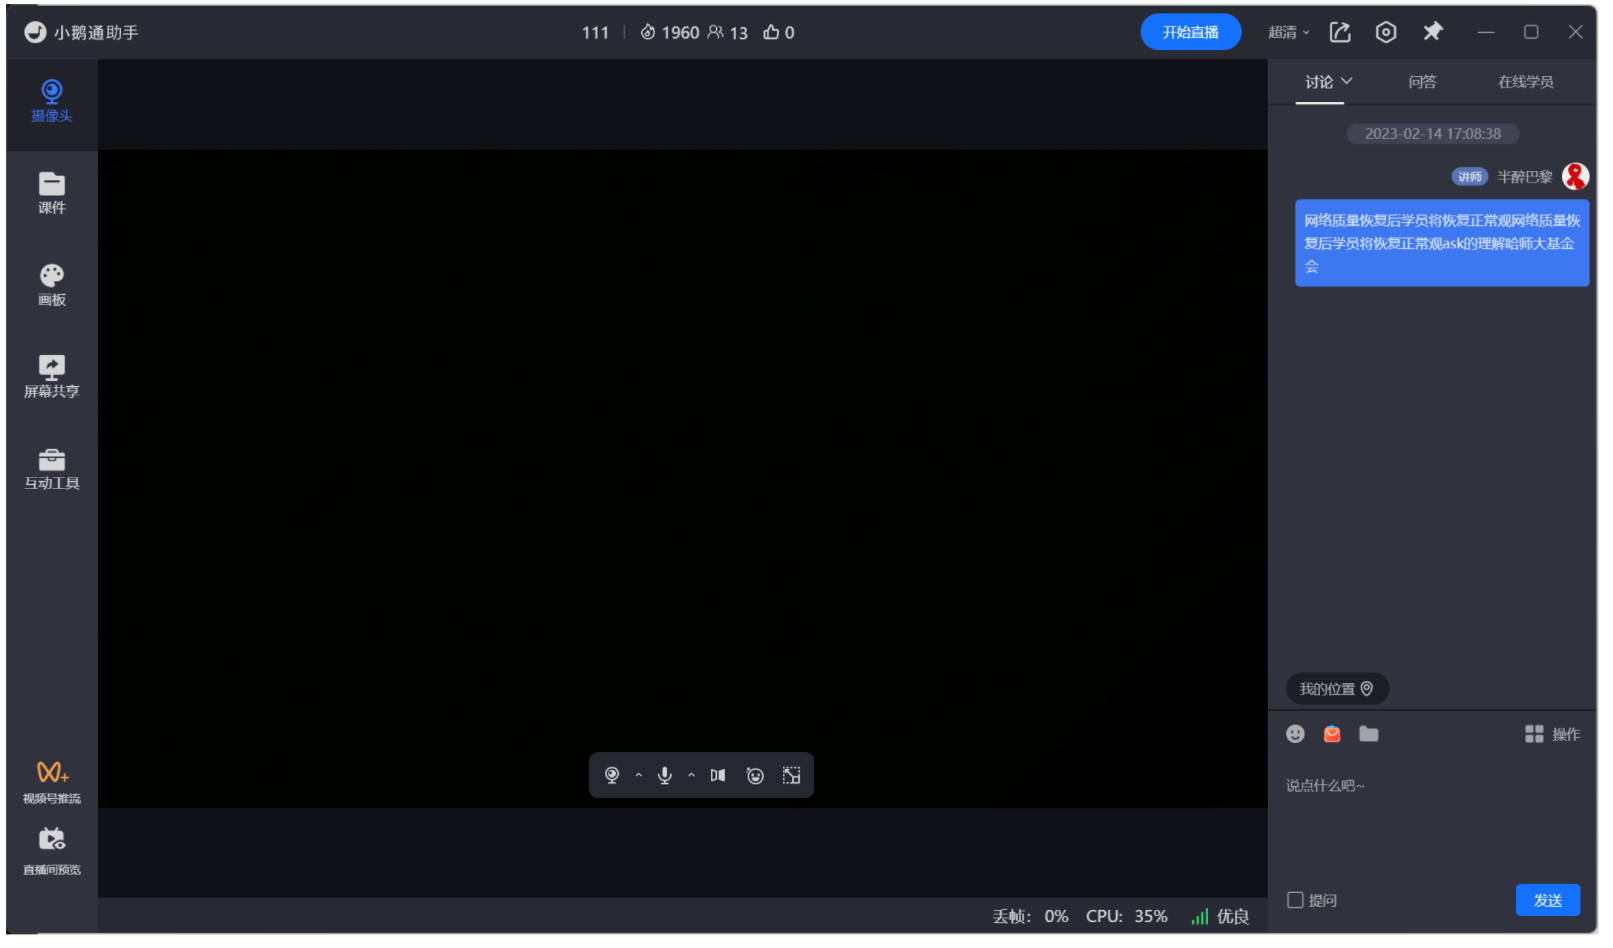
② Connect the external microphone to your computer
(Some external microphone devices require driver installation. Just follow the prompts to install.)
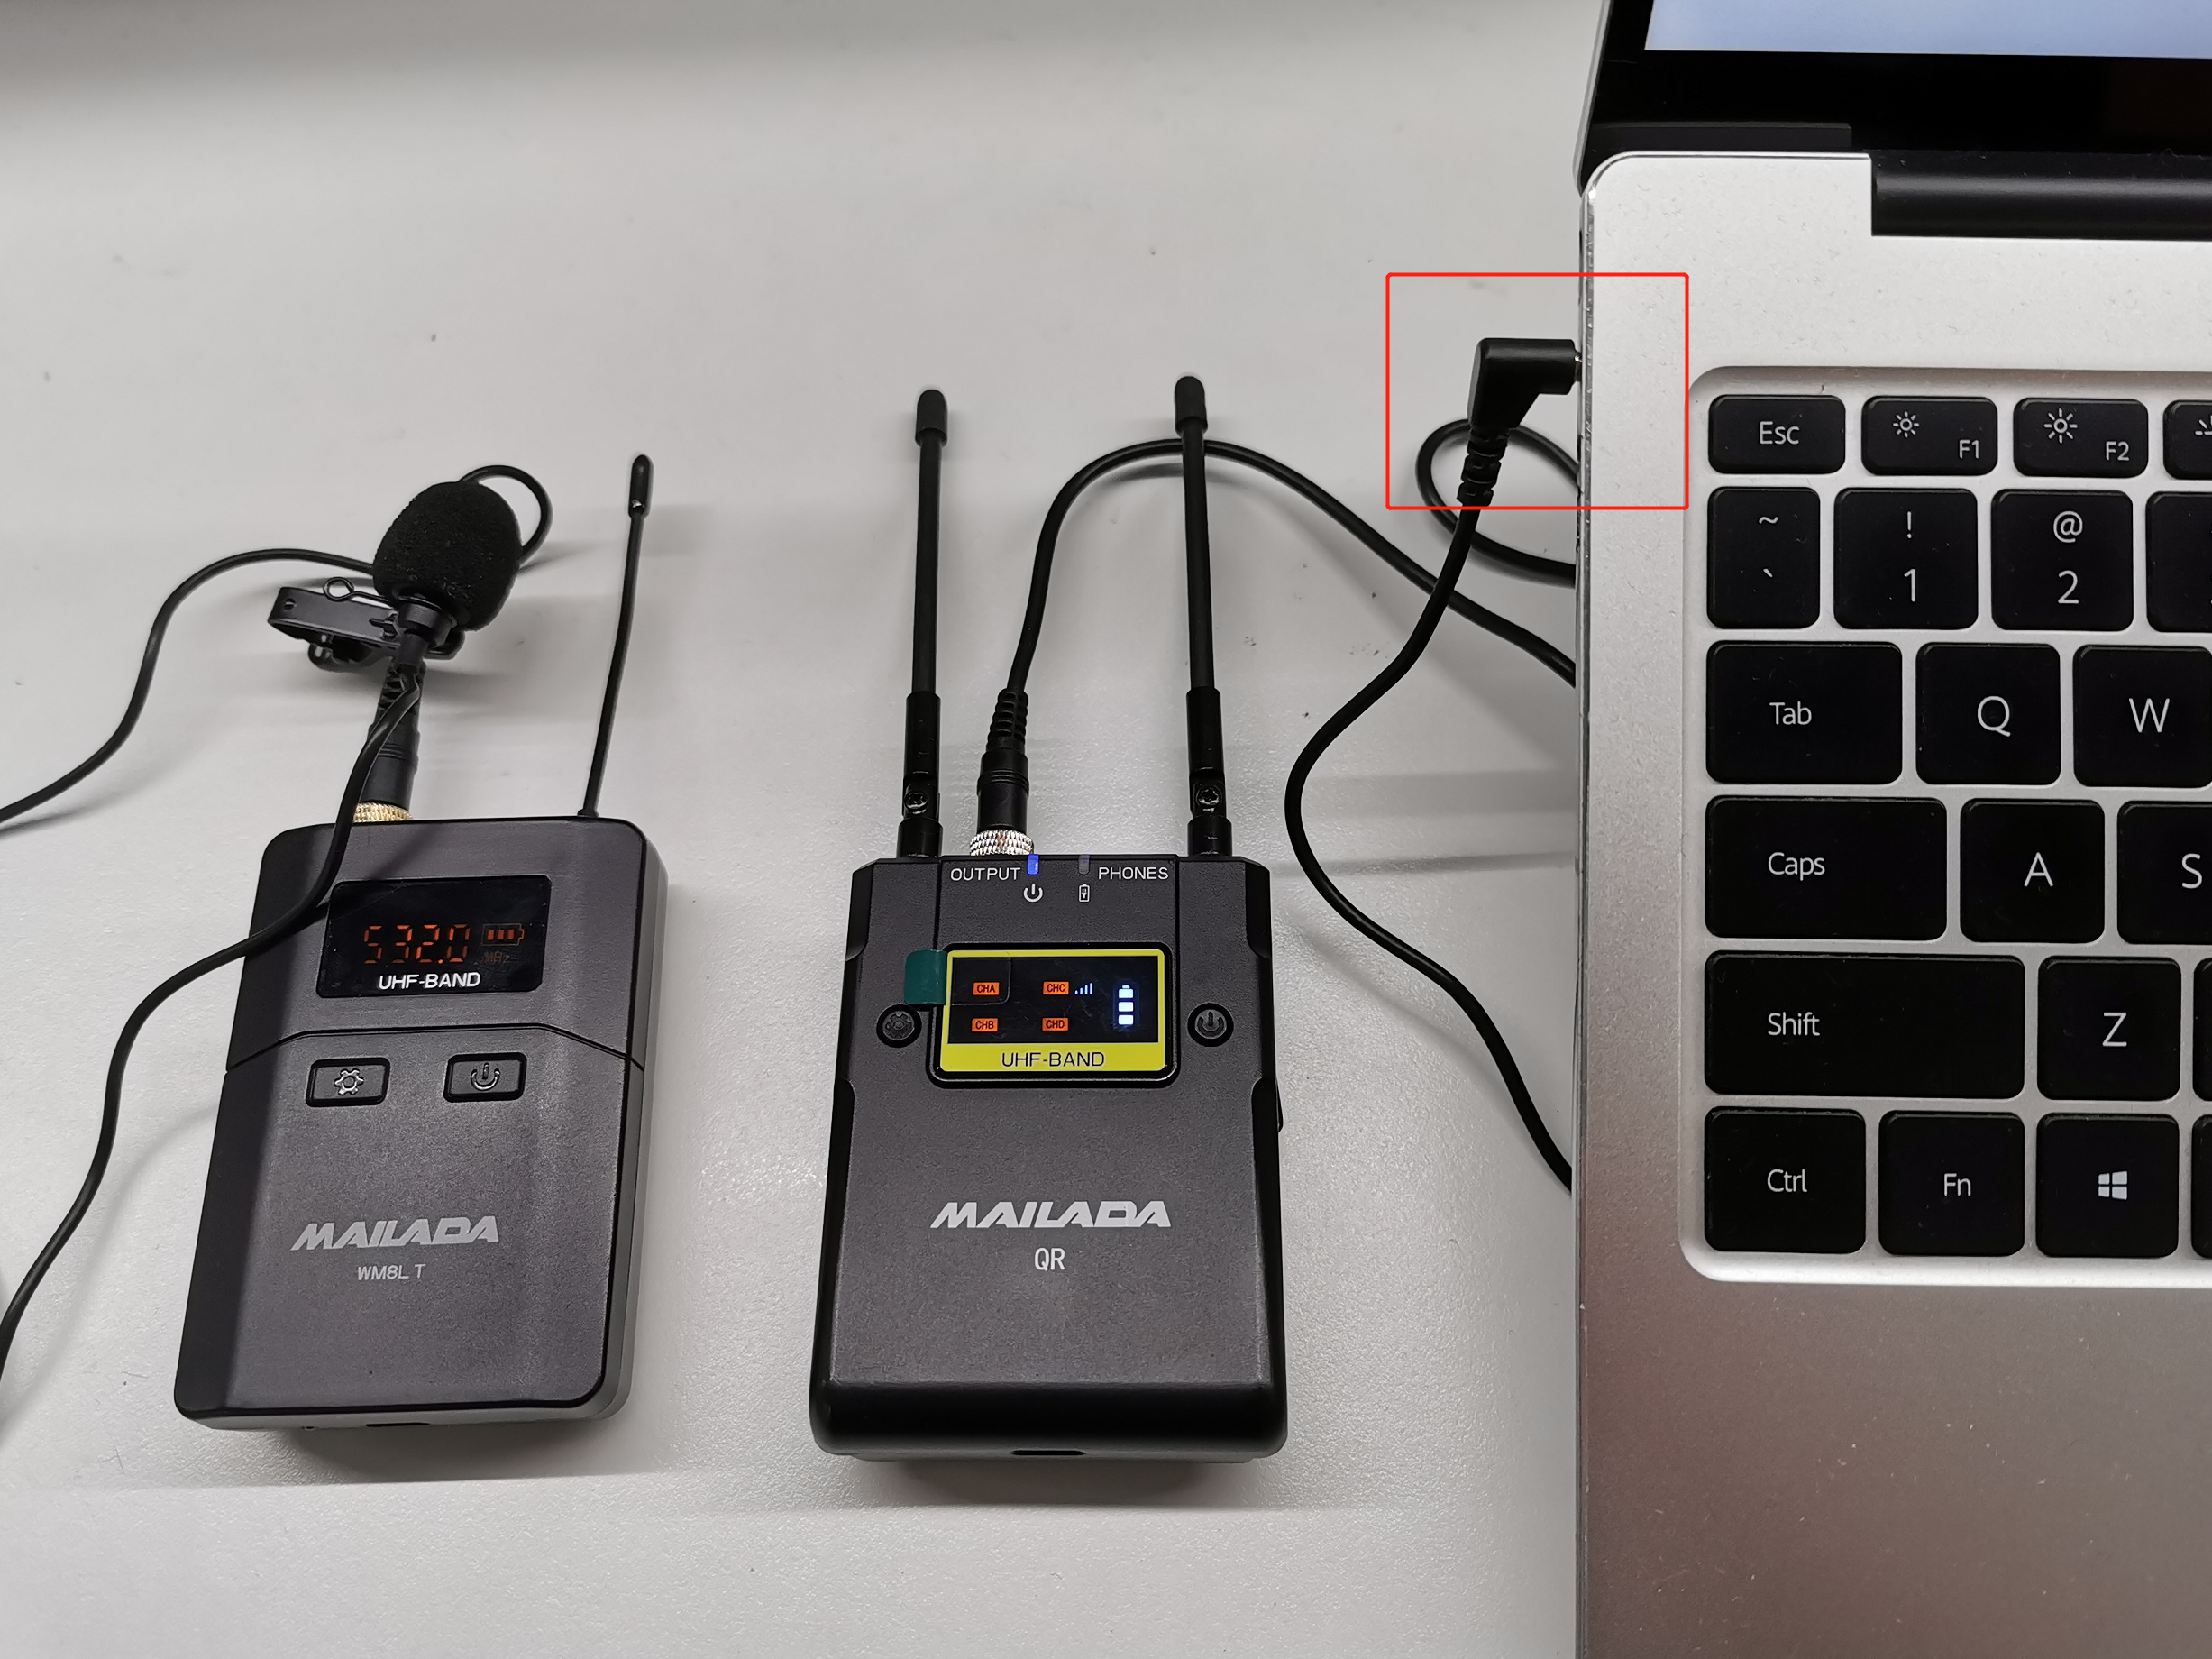
③ Switch to the external microphone
At the microphone icon in the live streaming room, click the drop-down menu and select the external microphone.
Precautions:
① For external microphones that don't require driver installation, simply select the default microphone device, such as "Realtek(R) Audio".
Frequently Asked Questions:
1. Does it support lapel microphones?
Answer: Yes, it does.
2. When the mobile phone is connected to an external microphone, the eLive Mini Program cannot record audio
Answer: Currently, the WeChat Mini Program does not support external microphones and only supports the phone's built - in microphone.
You can try the following methods:
-- iPhone
You need a Lightning to 3.5mm adapter.
It is recommended to buy the original Apple adapter because it has an MFi - certified chip. Only adapters certified by Apple's MFi can be used for audio recording when connecting an external microphone.
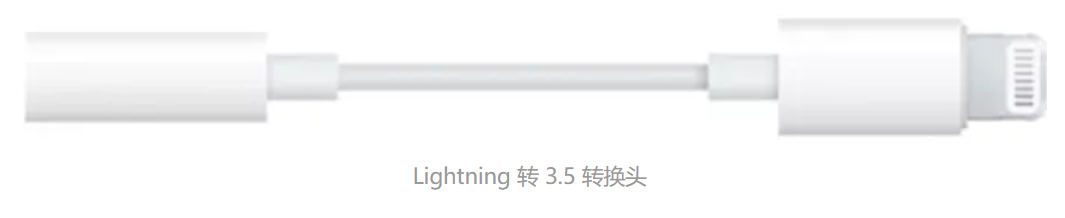
Adapters purchased from other sources may not be MFi - certified by Apple and cannot be used for audio recording.
-- Android phone
You need a Type - C to 3.5mm adapter.
It is recommended to use the original phone adapter or a Type - C to 3.5mm adapter to connect the external microphone.
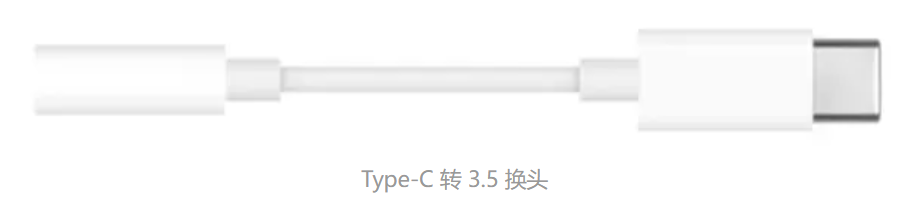
3. The external microphone has no sound
Answer: Please solve the problem in the following ways:
① Check the input volume of the sound. The following is an example of the Win11 system;
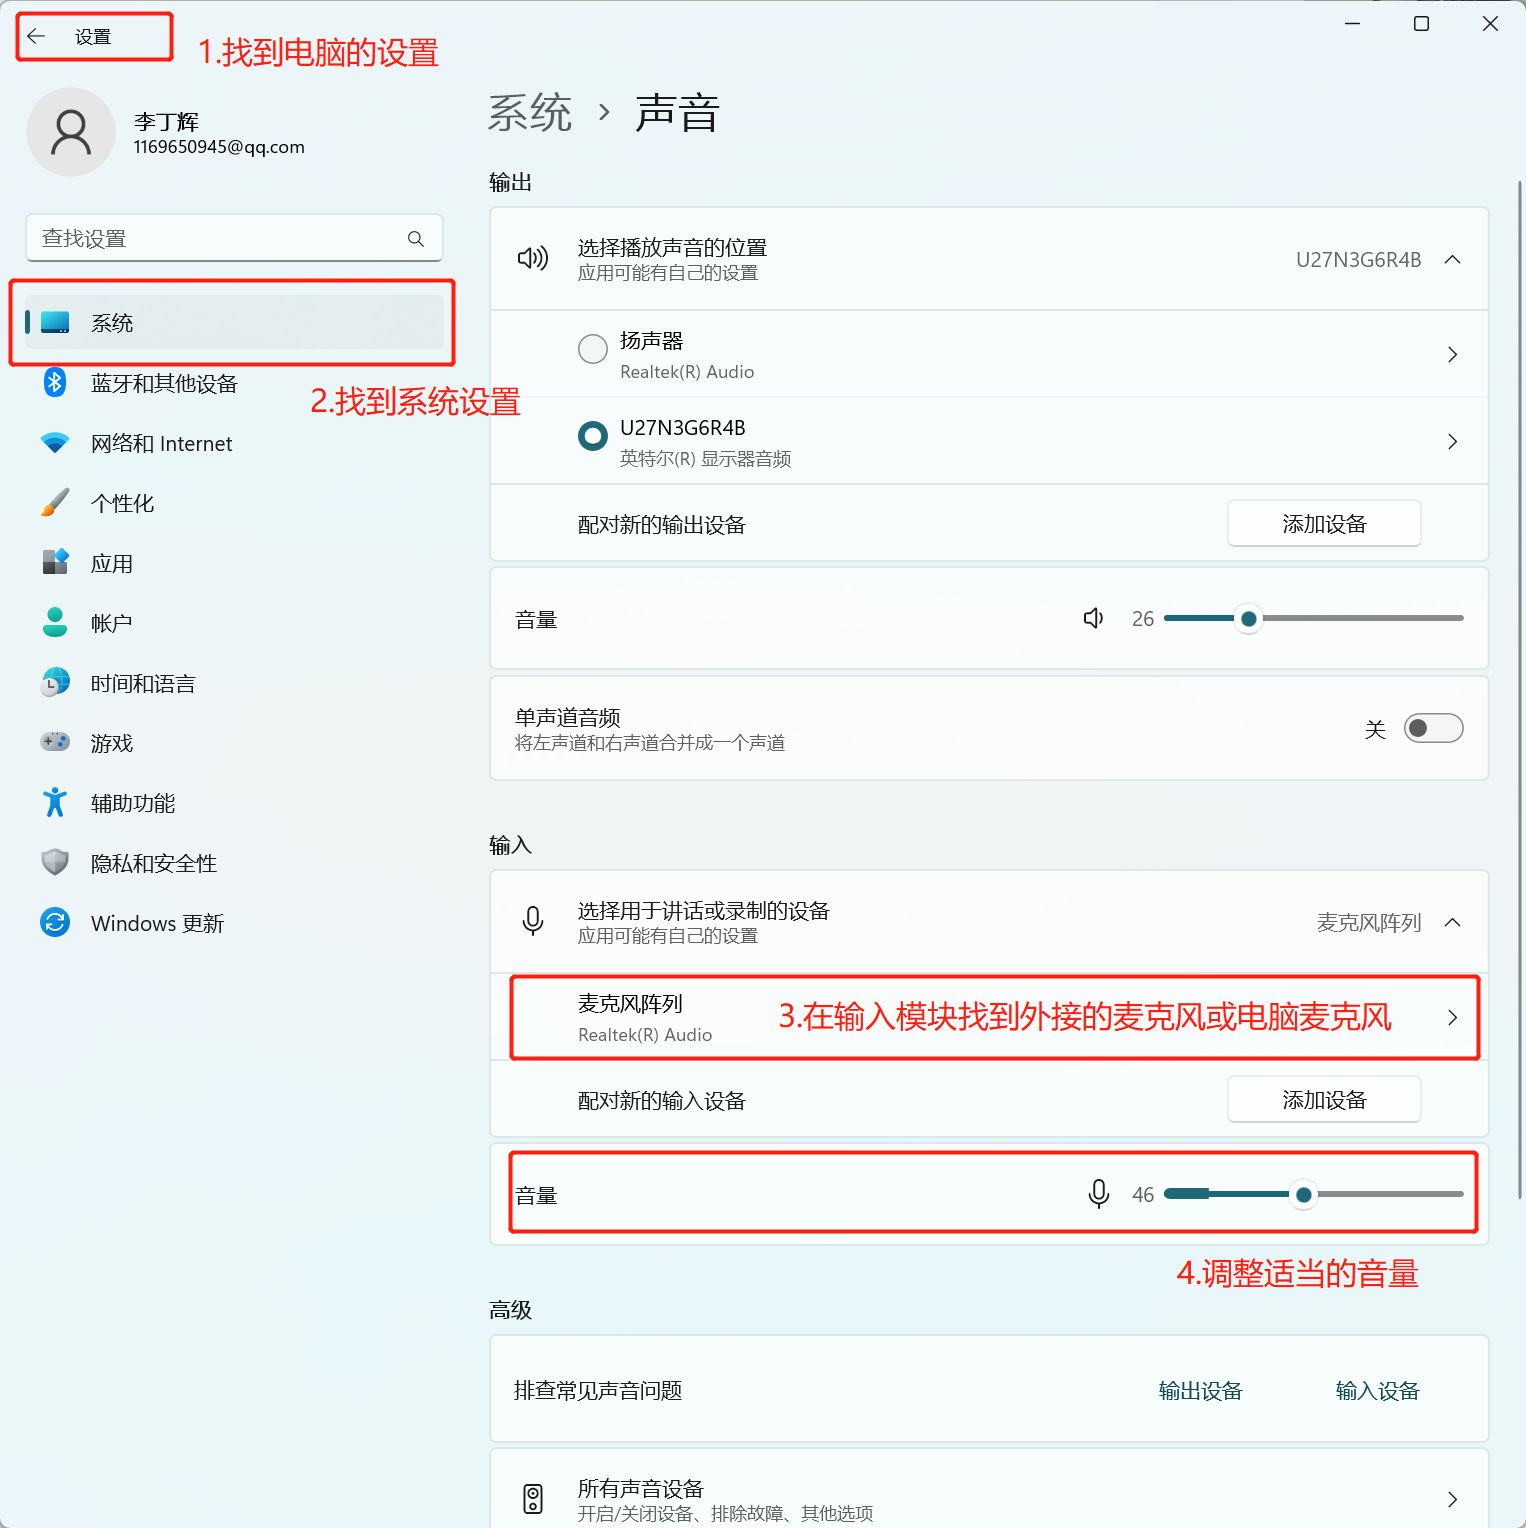
② Check if the external microphone is selected in the live streaming room;
③ Test if the external microphone works normally using WeChat voice. If the problem persists, you can consult the seller of the external microphone device.
The audio and video are out of sync when exporting videos from the video editing software
Exceptional scenarios
After the downloaded replay video is processed and exported by a video editing software, the audio and video are out of sync.
Solutions
Solution ①: Download via browser online
If there is an audio - video out - of - sync issue when importing the video downloaded by elink Download Assistant into the editing software, you can download and transcode the video via the browser before editing. The operations are as follows:
<1> When downloading the replay, select 'Download via browser online' and click 'Start transcoding';
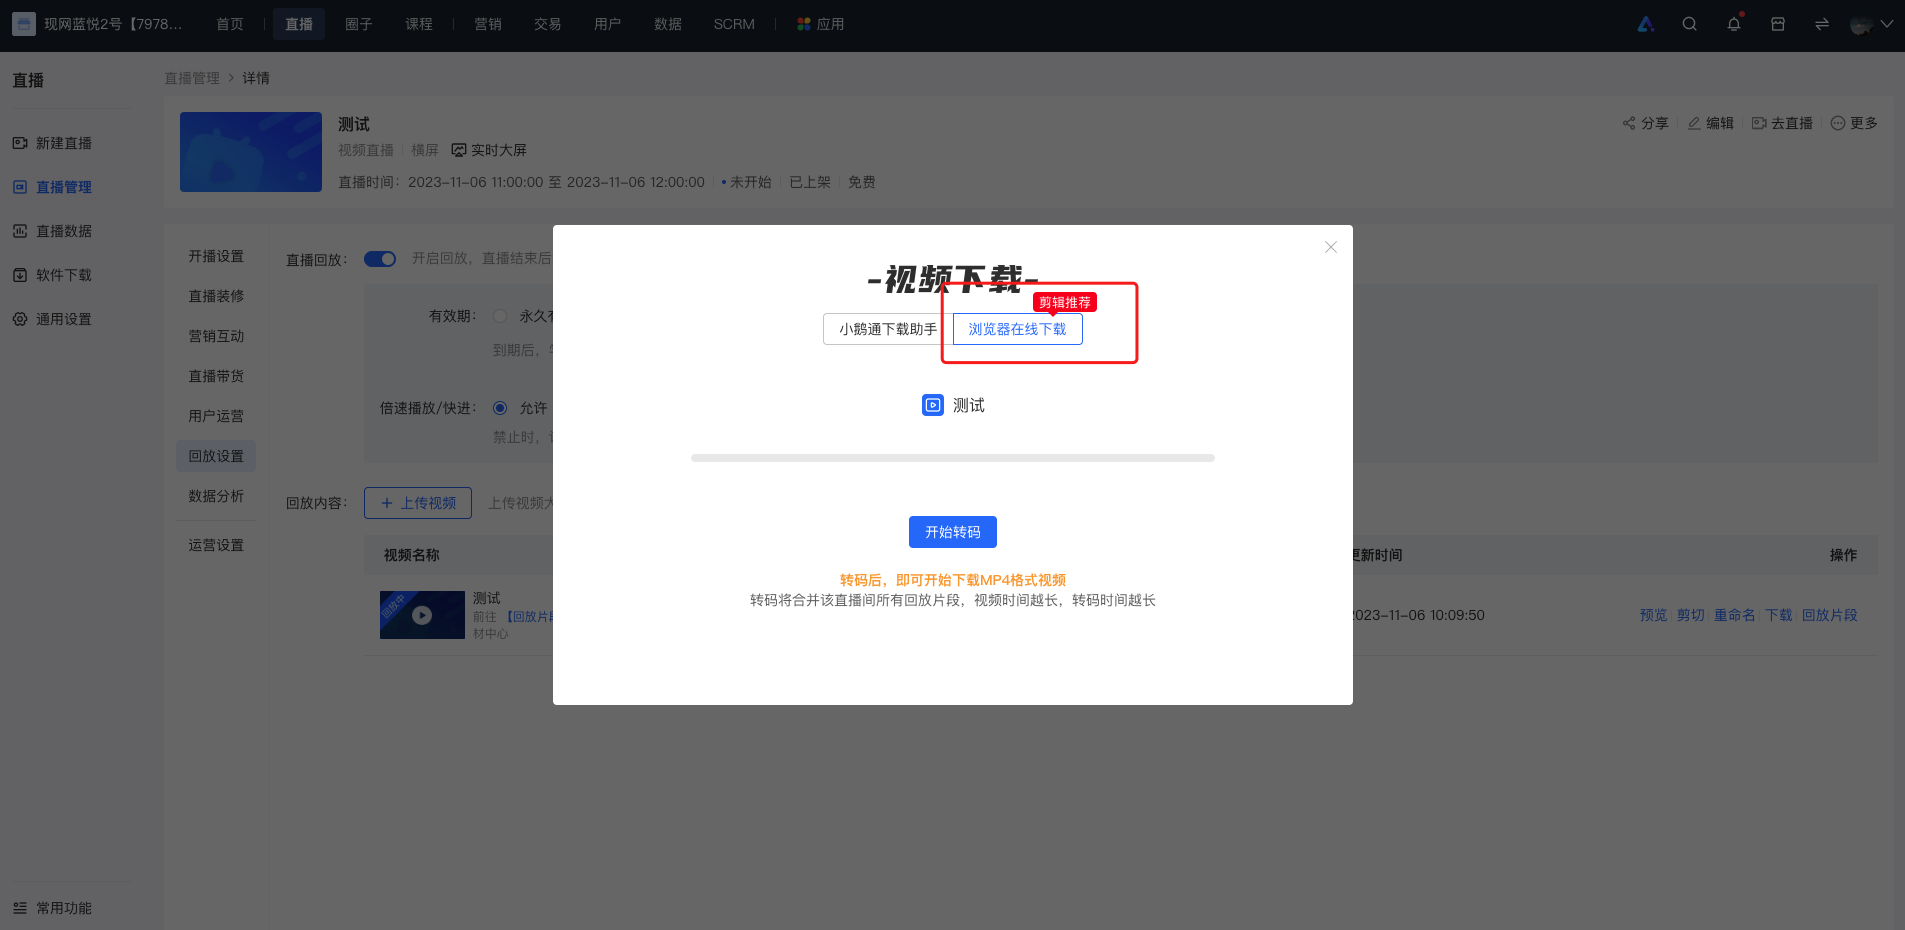
<2> After the transcoding is completed, click 'Start download'.
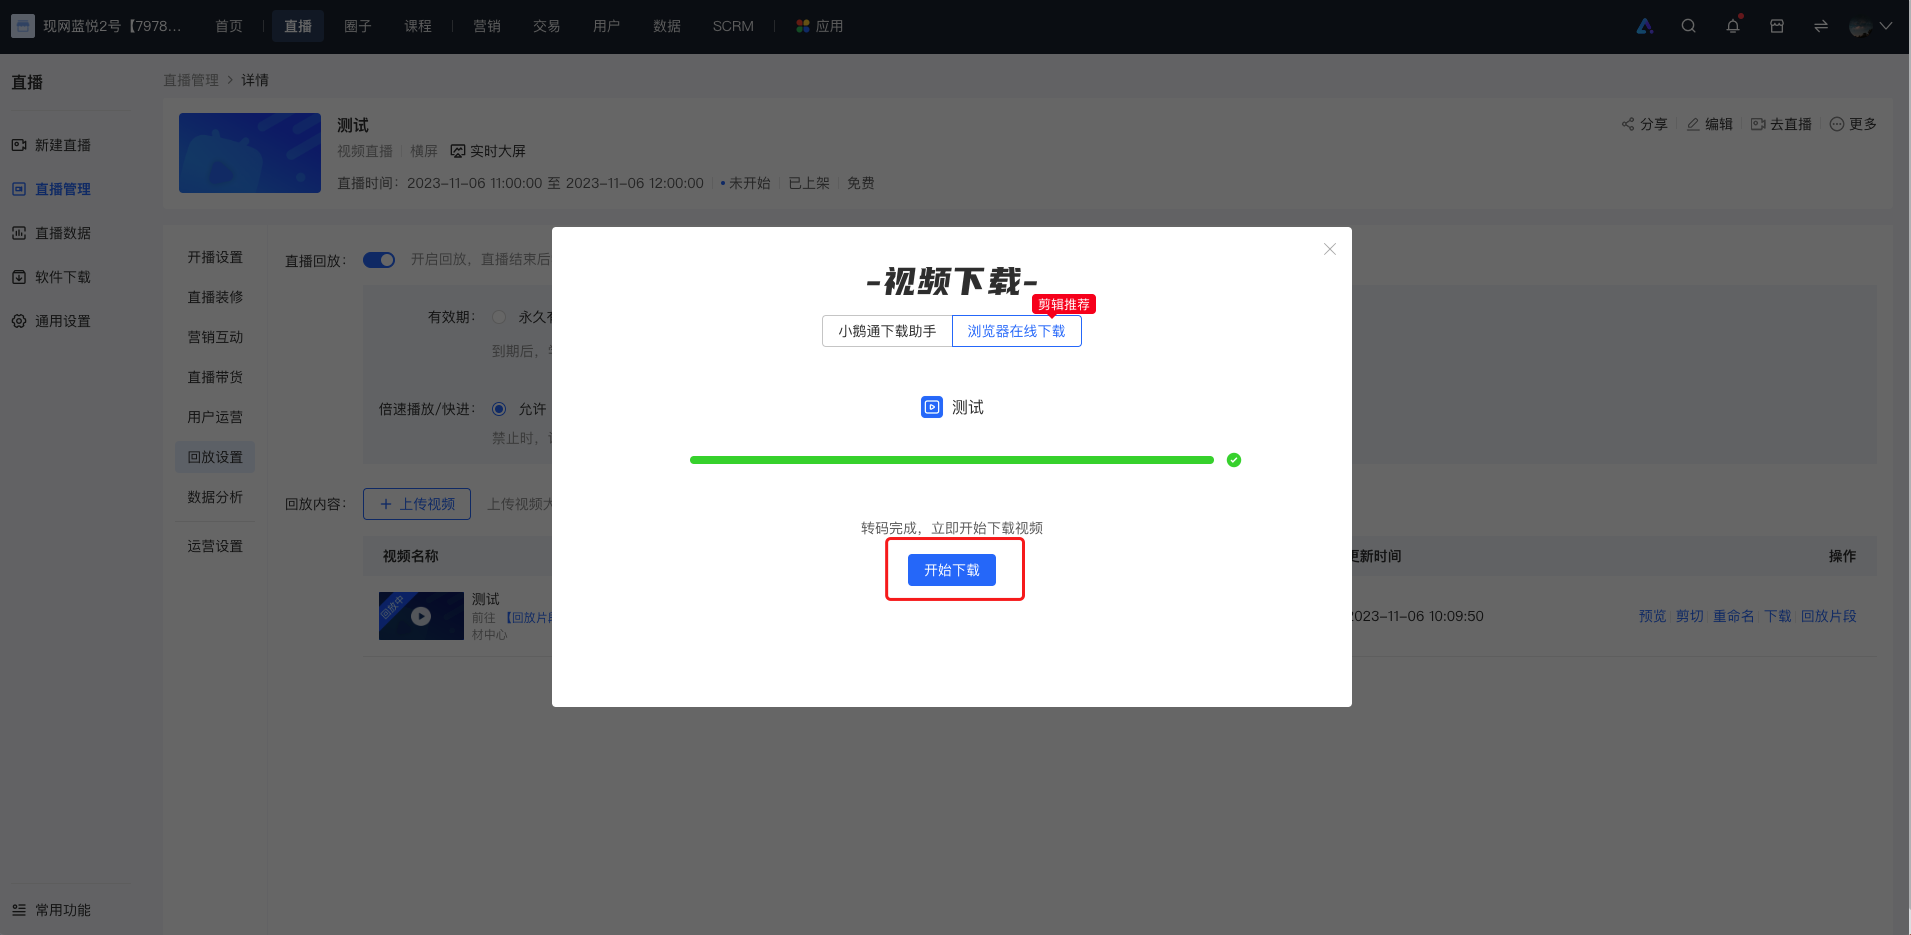
Solution ②: Export settings in the video editing software
If there is still an audio - video out - of - sync issue when importing the replay video downloaded via the browser into the video editing software, you can try to set the export parameters to the 'VBR' encoding format for export. The following are the export settings for common video editing software:
Adobe Premiere
When exporting the video, select the 'H.264' format, set the bitrate to 'VBR, 1 pass', and then export.
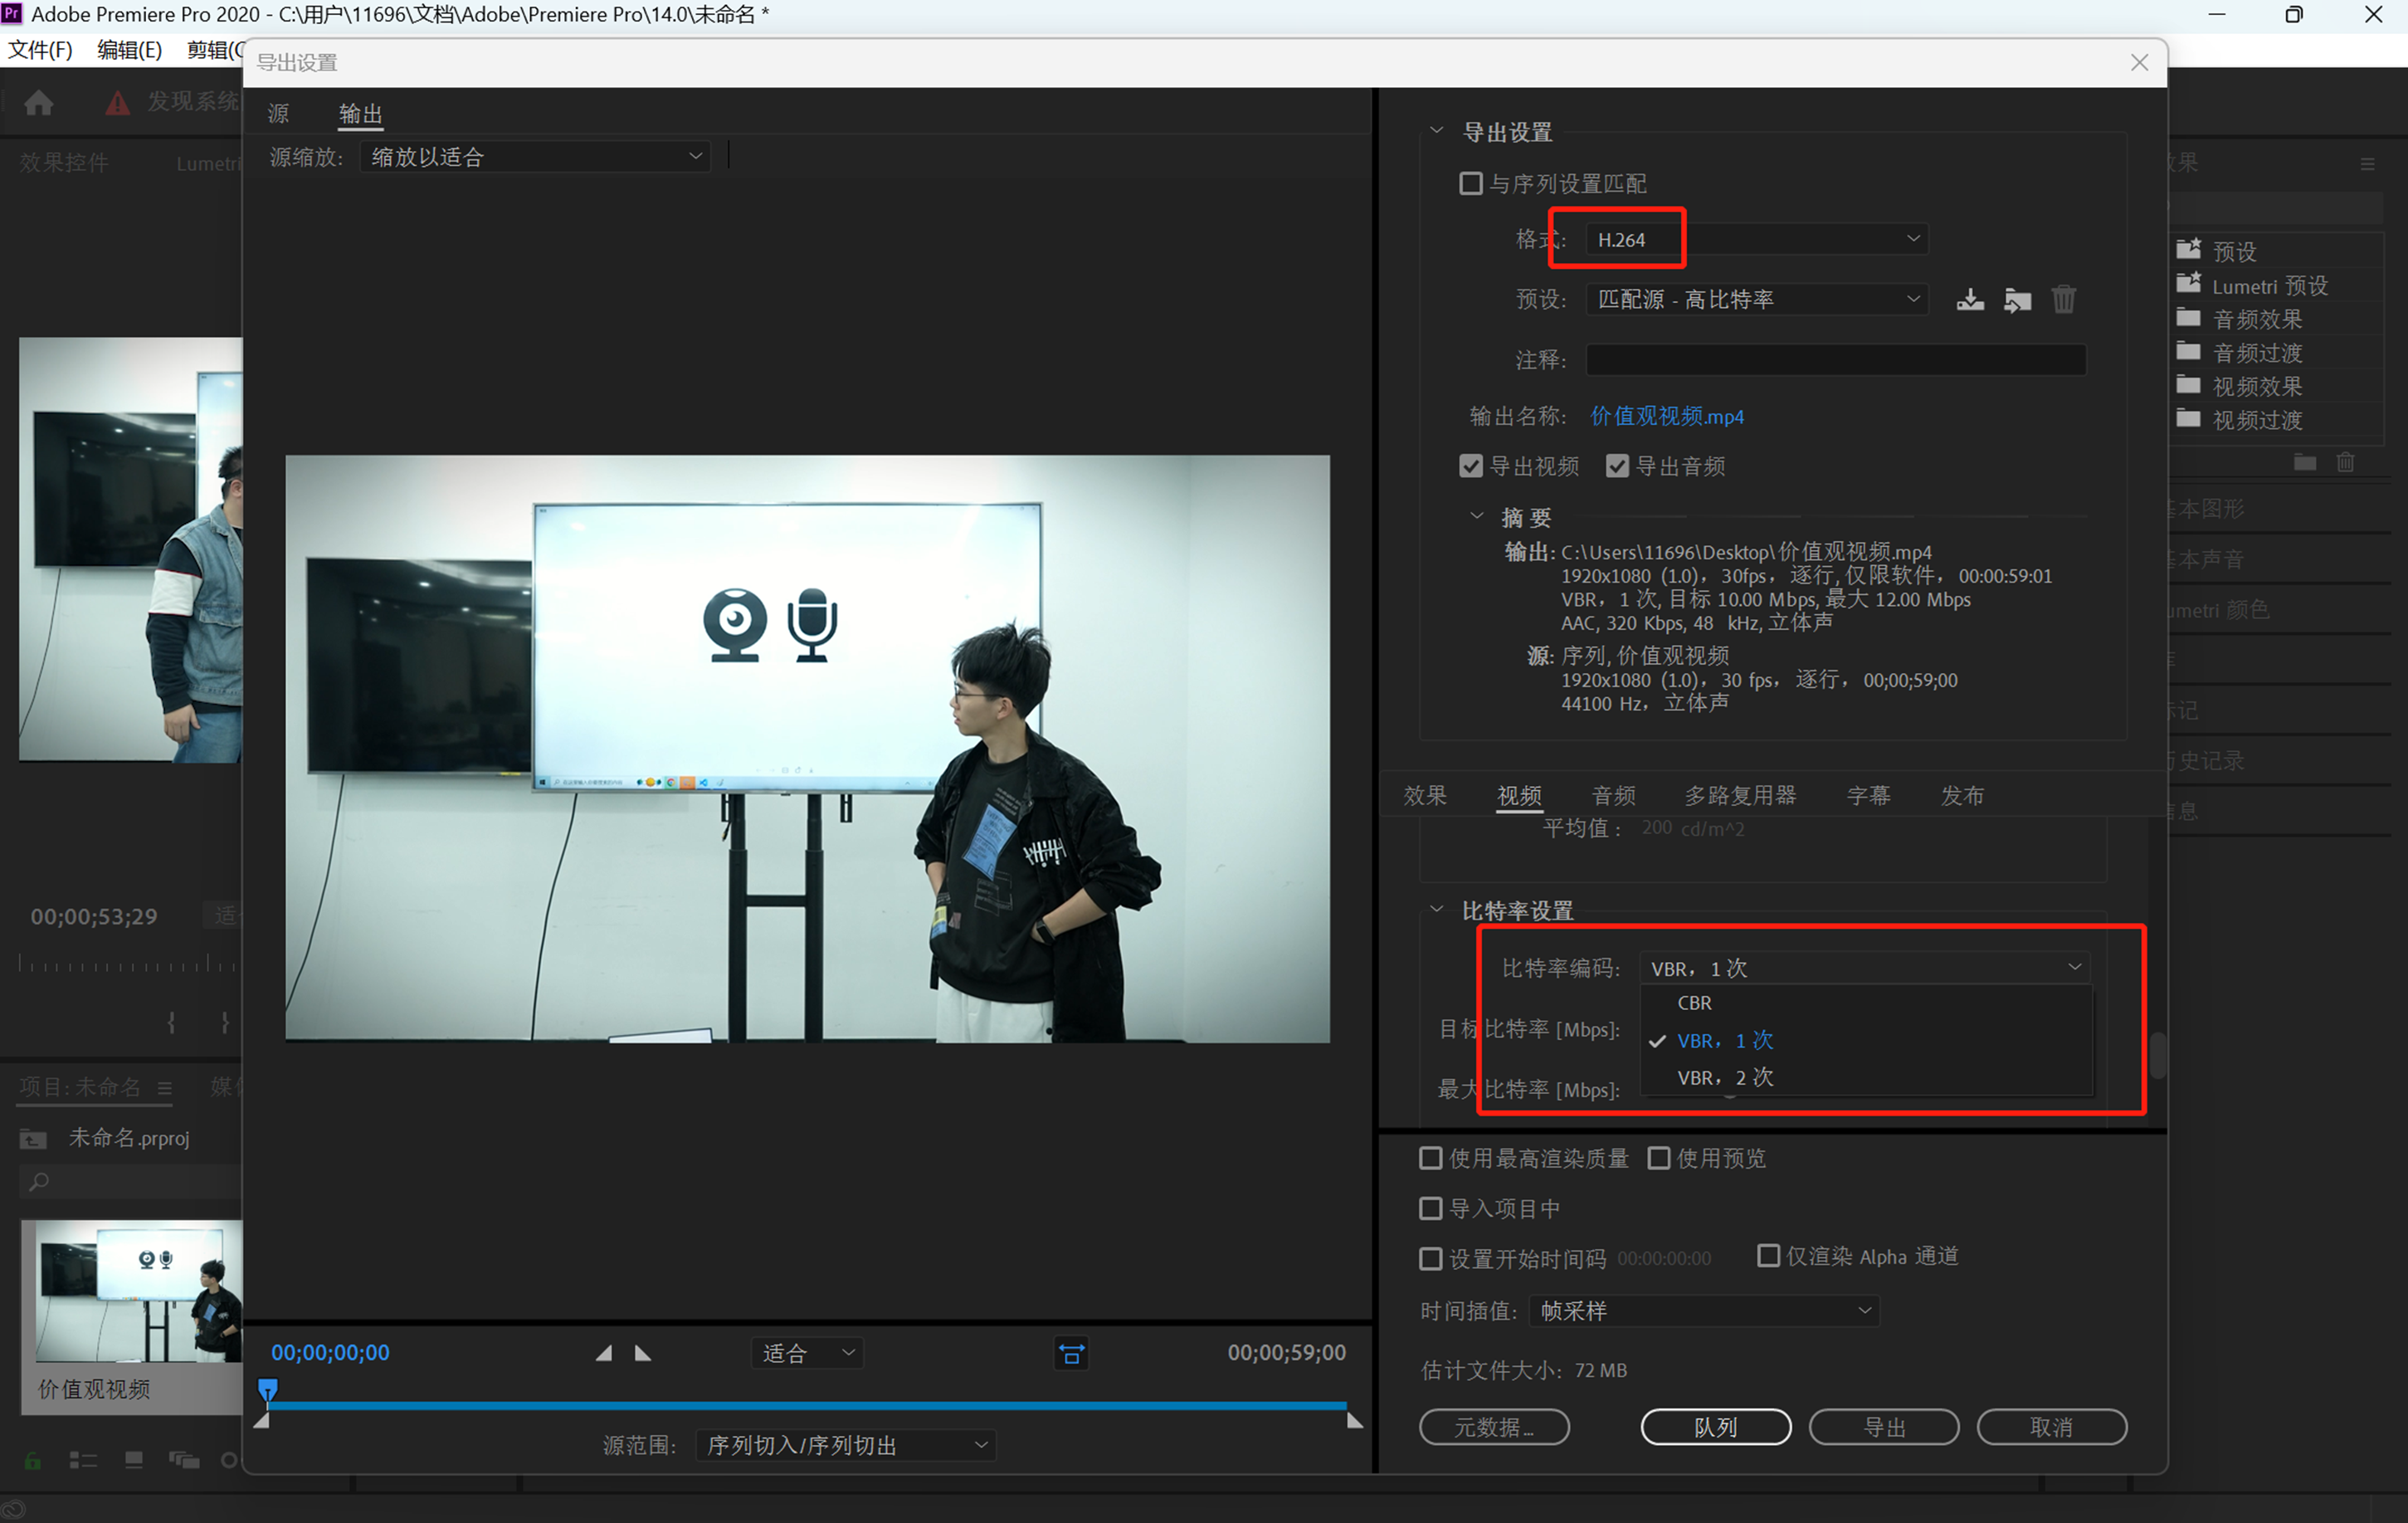
CapCut
When exporting the video, select 'Custom' for the bitrate and choose 'VBR (Variable Bit Rate)', then export.
*This operation is not supported on the Mac version of CapCut.
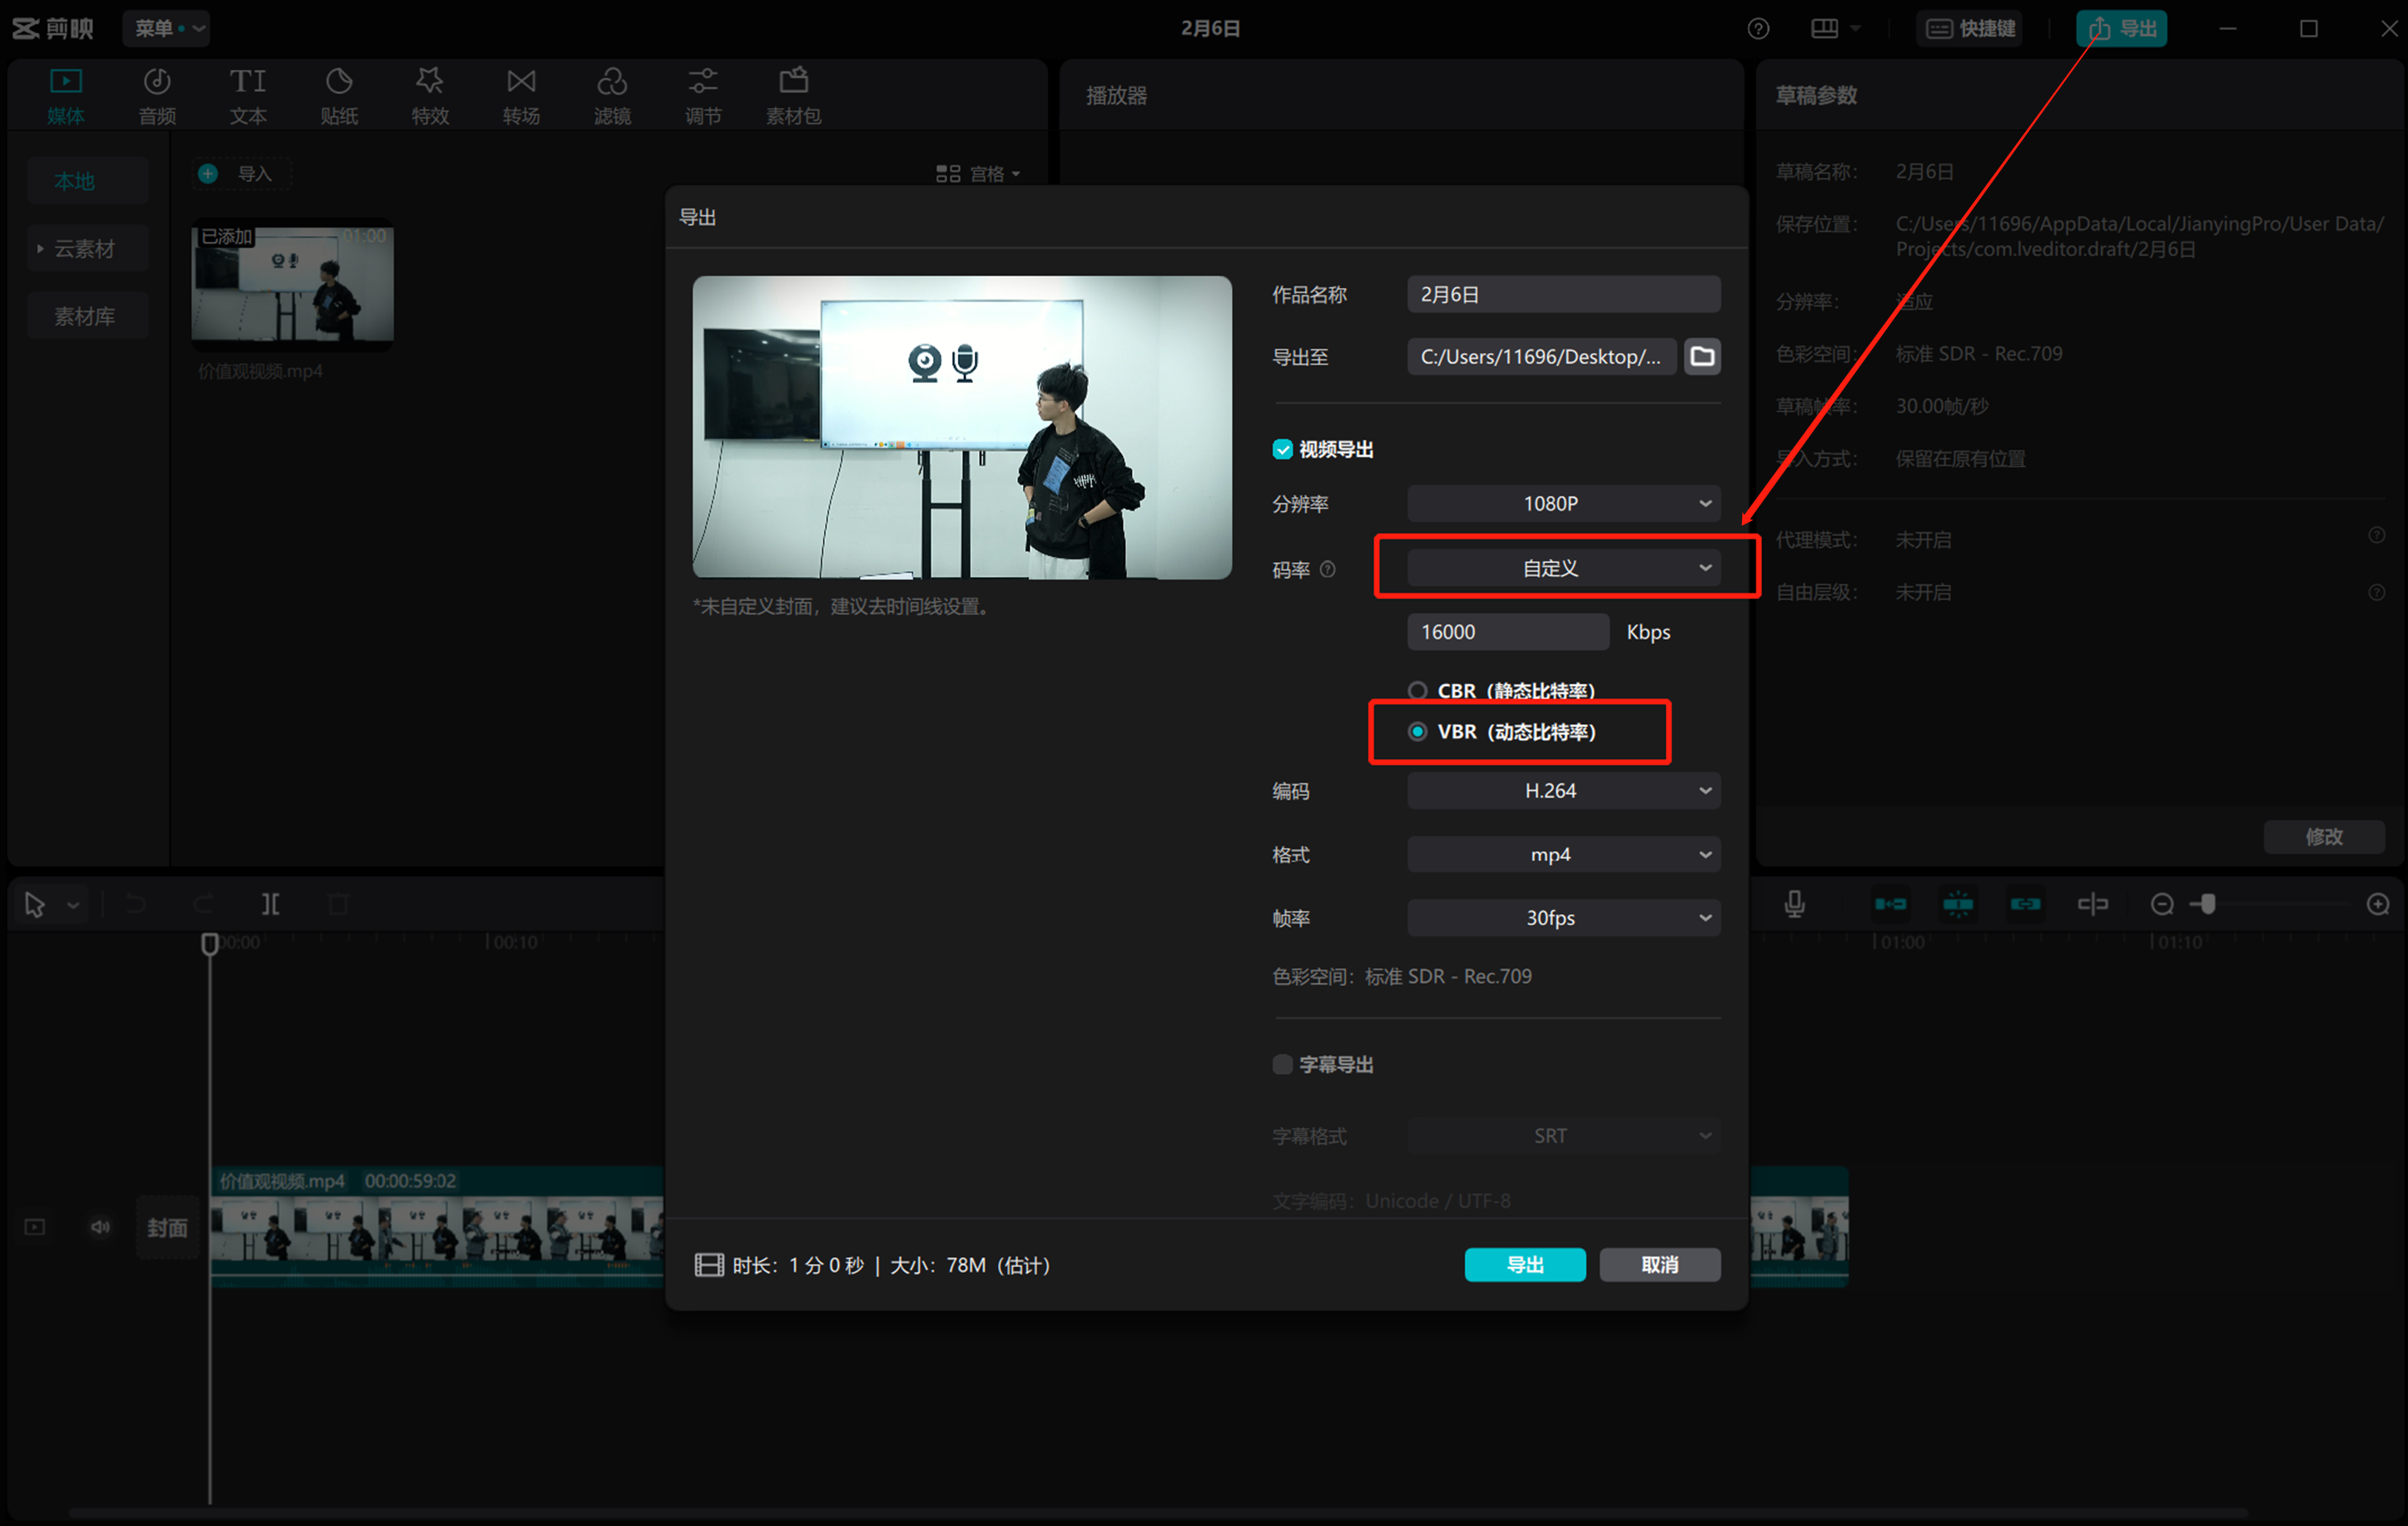
Other solutions
If the above methods cannot solve the problem, you can try to use software such as 'HandBrake' to manually transcode the video to the CBR encoding format locally before editing.Click to download HandBrake
Complete video conversion in four steps
Open the software after downloading and installing it.
Step 1: Open the file
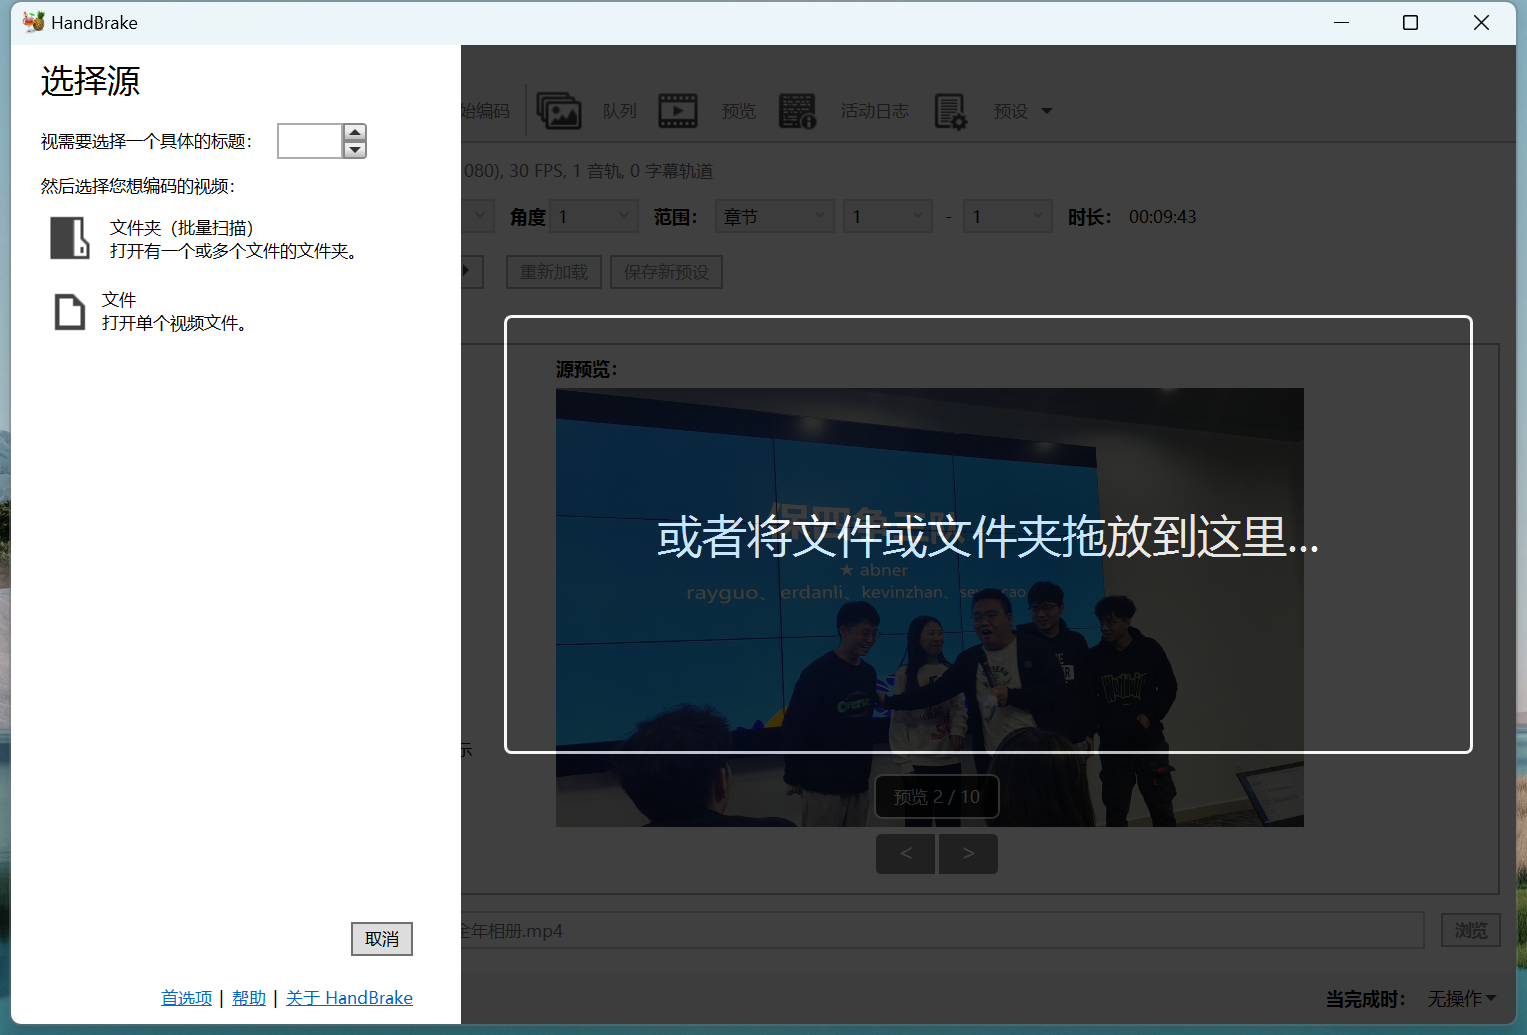
Step 2: Set parameters
Set the output format
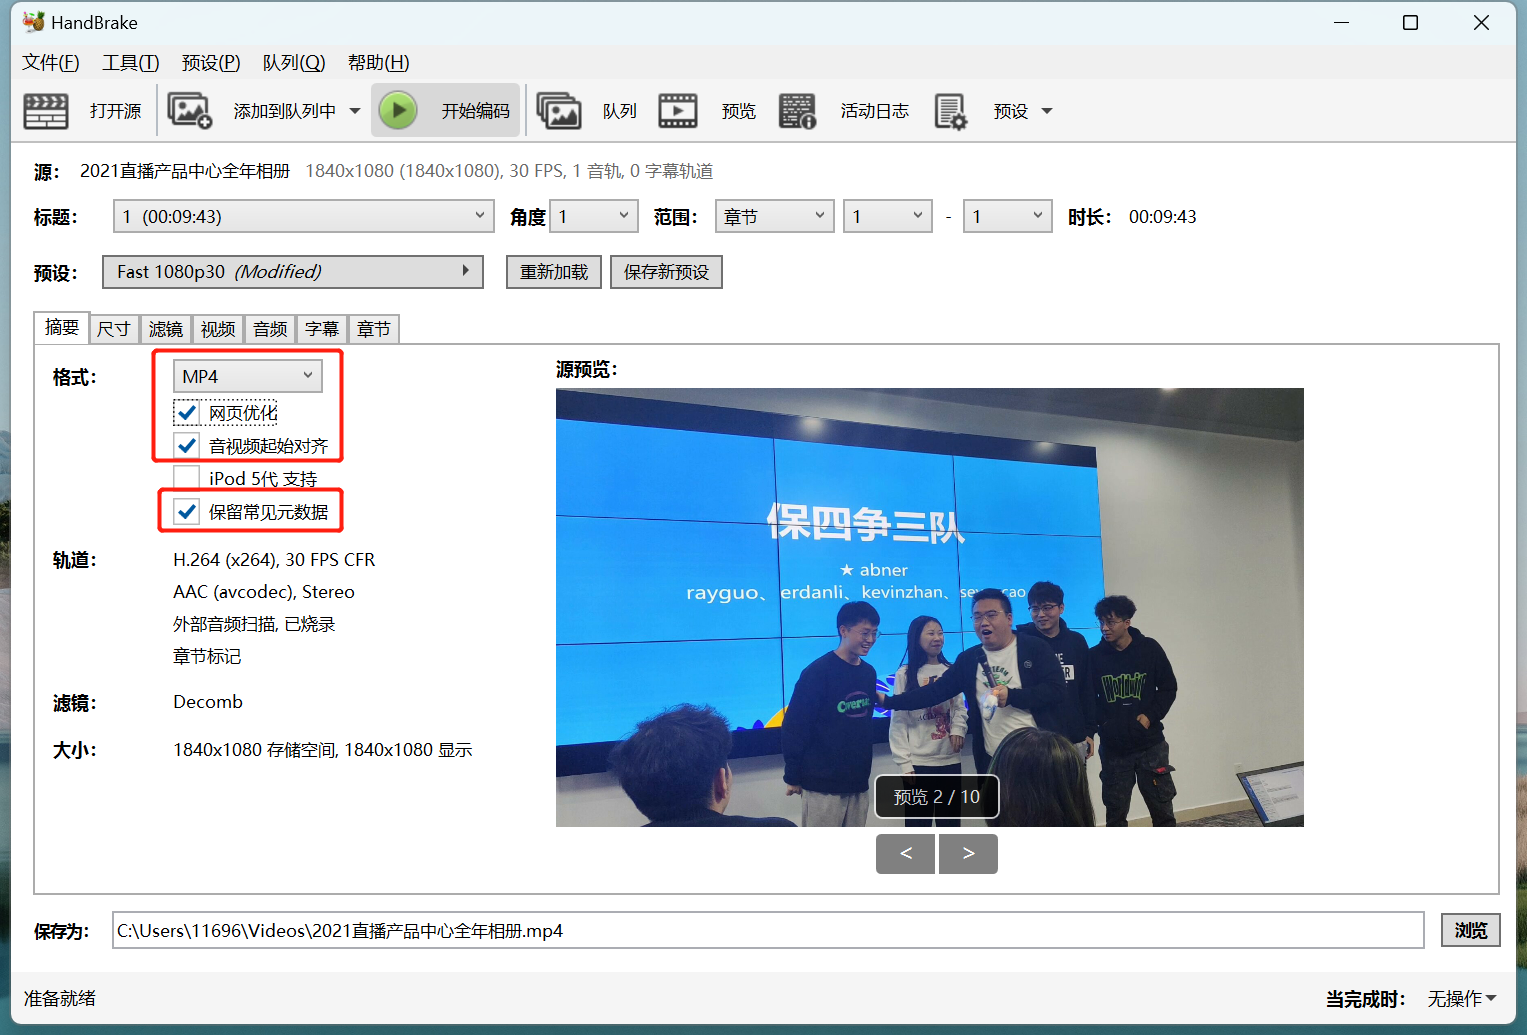
Set the output resolution
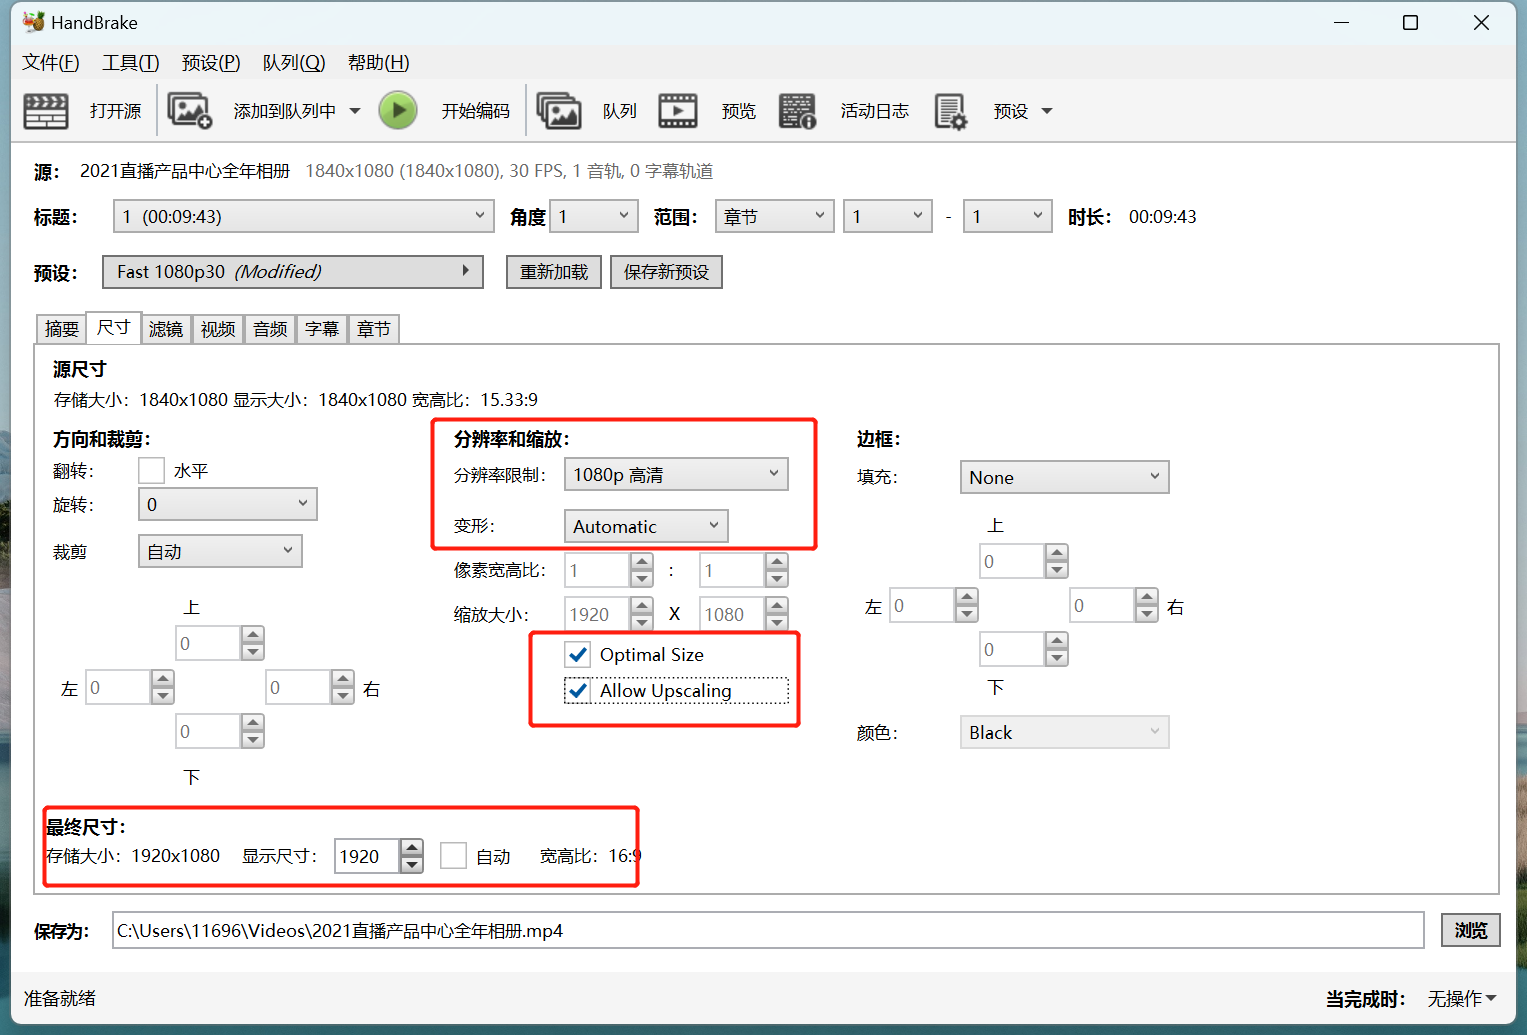
Set the encoding parameters
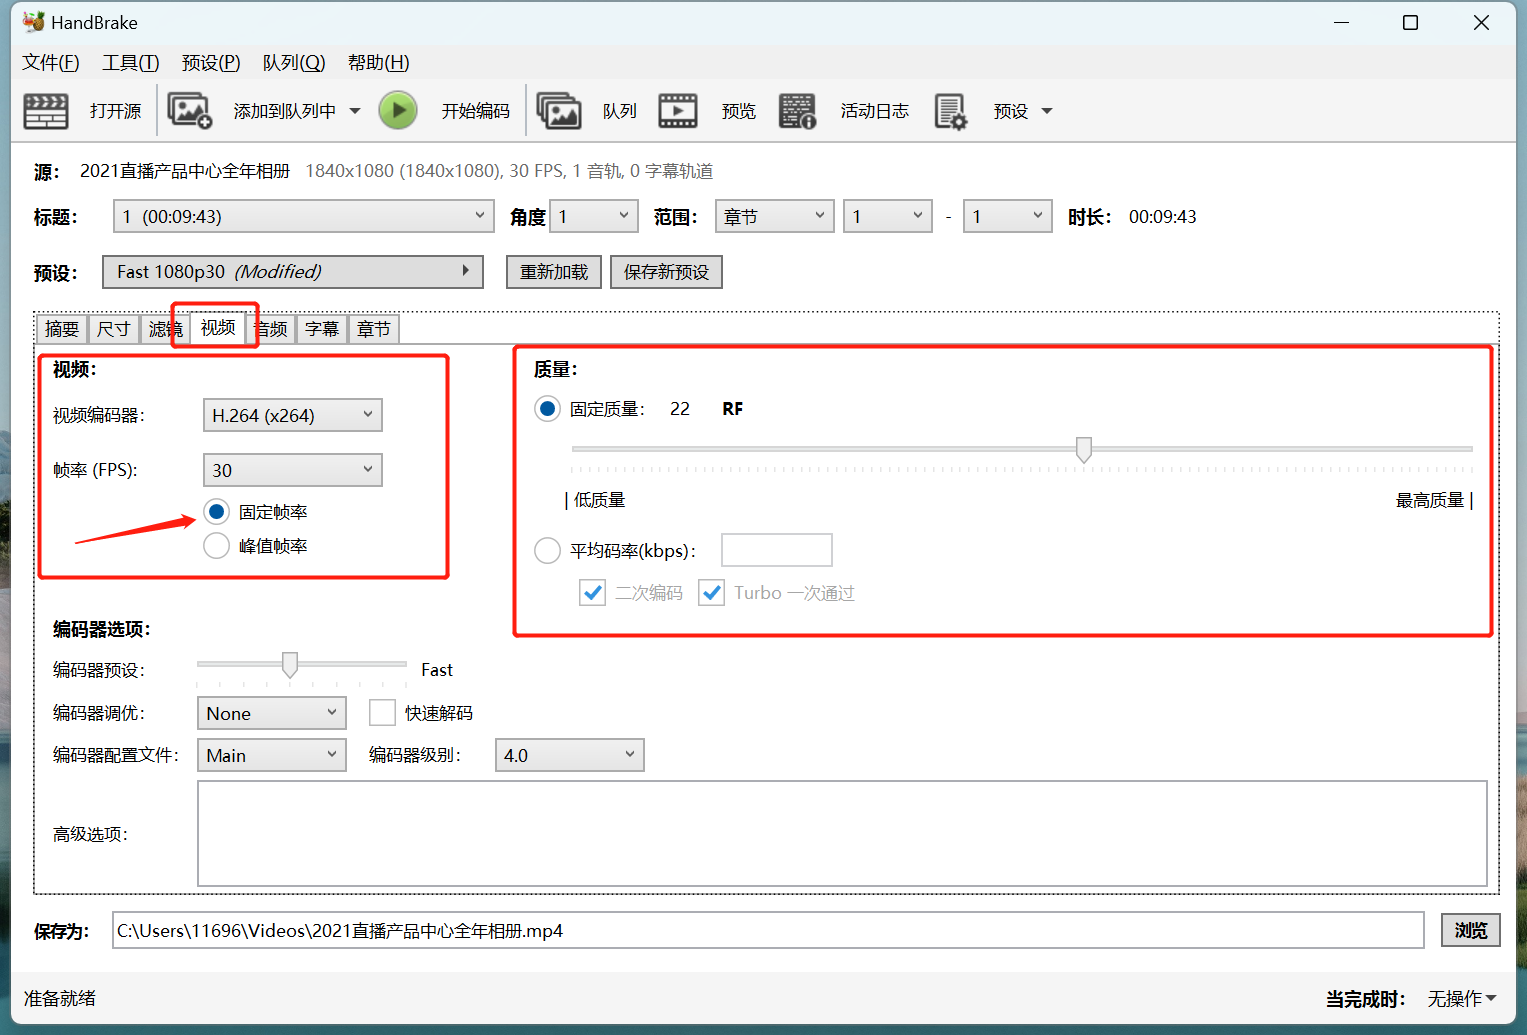
Step 3: Output the file
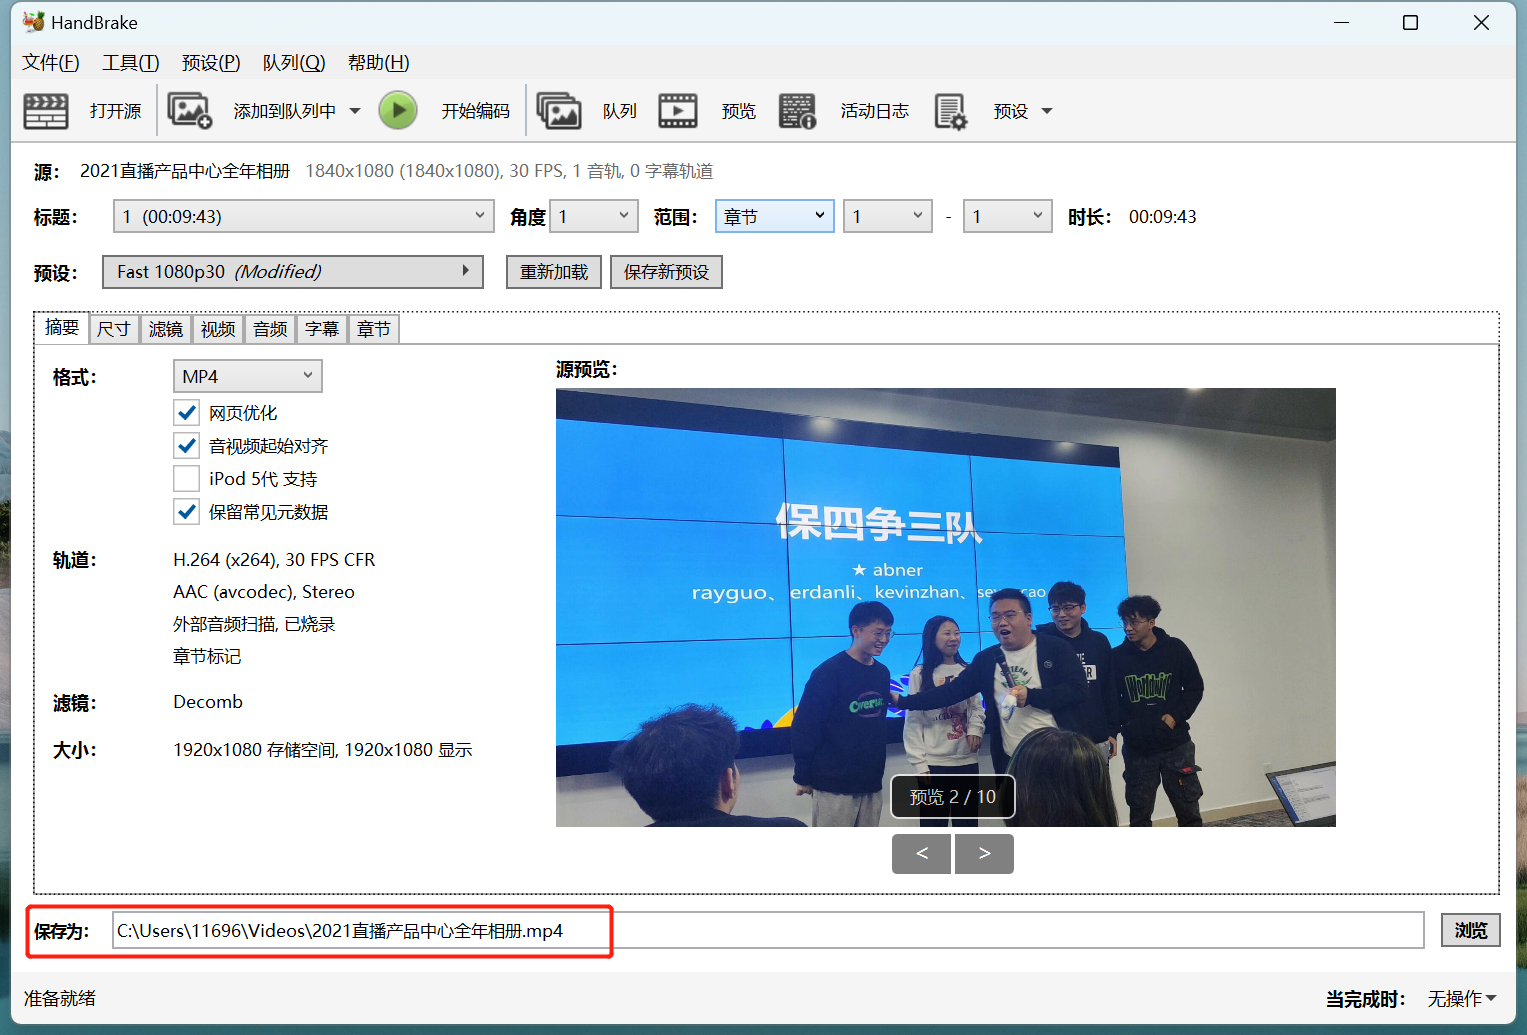
Step 4: Start transcoding
Import the transcoded video into the video editing software for secondary editing.
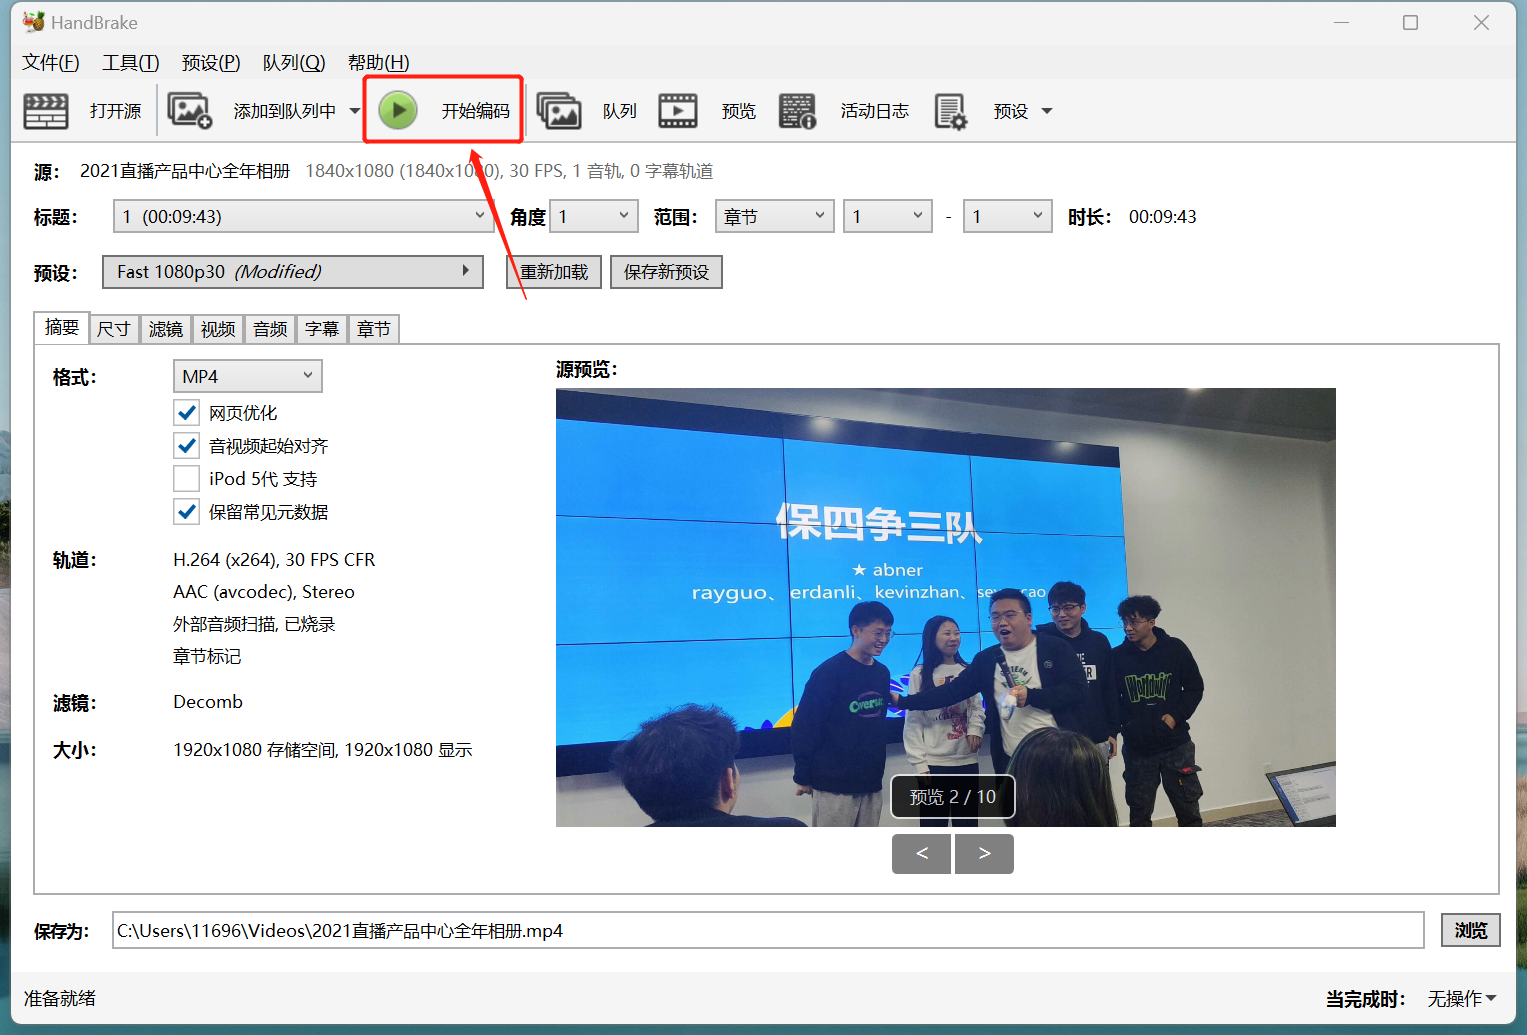
Does the live stream support external devices?
I.The live stream supports external graphic tablets.
II.The live stream supports external cameras (SLR cameras, etc.).
III.The live stream supports external webcams.
IV.The live stream supports external microphones (portable PA systems, lapel microphones, etc.).
*Click on the title to view the operation details.
Live screen sharing
Solutions to common problems with screen sharing failure
Solutions to common problems of screen sharing failure
I. Why can't I find eLink Live in the authorization permission list?
● Reason: Whether eLink Live appears in the authorization list is determined by the system. The behavior that triggers authorization is the black - box logic encapsulated by the system, and ordinary apps cannot intervene. Therefore, this problem usually results from system issues.
● Solution: Add the app to the screen recording list and re - check the authorization.
● Operation demonstration:
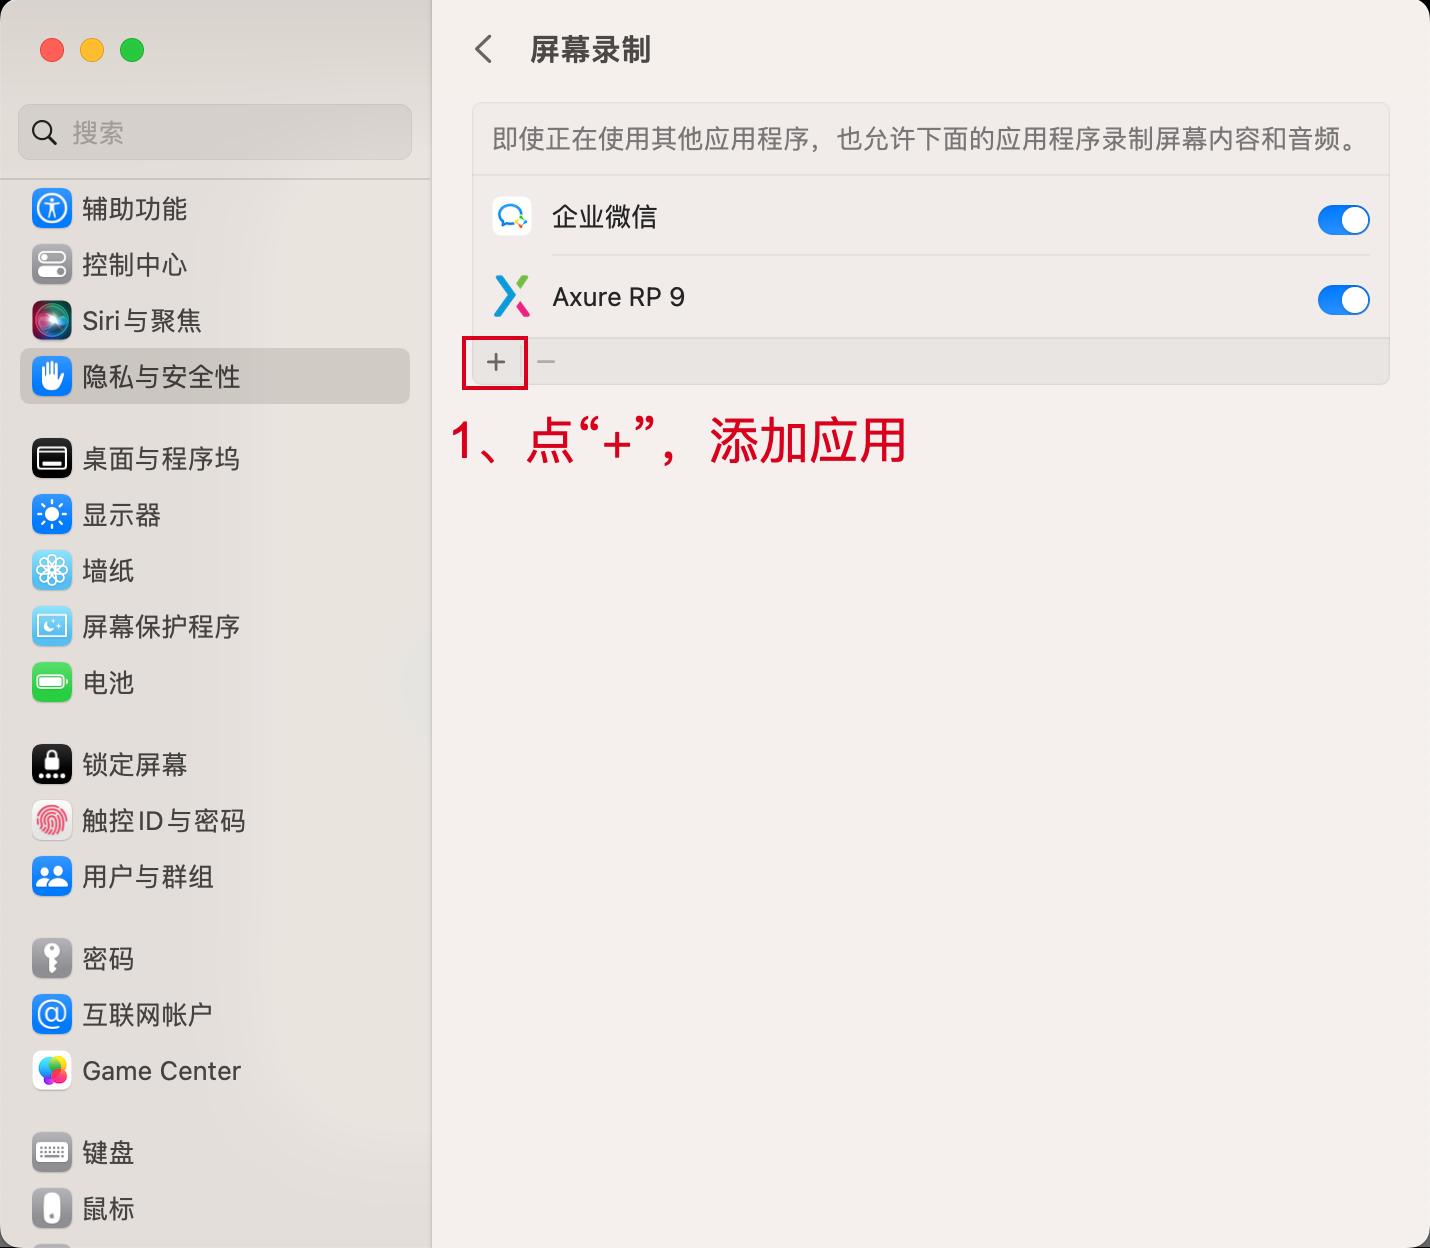
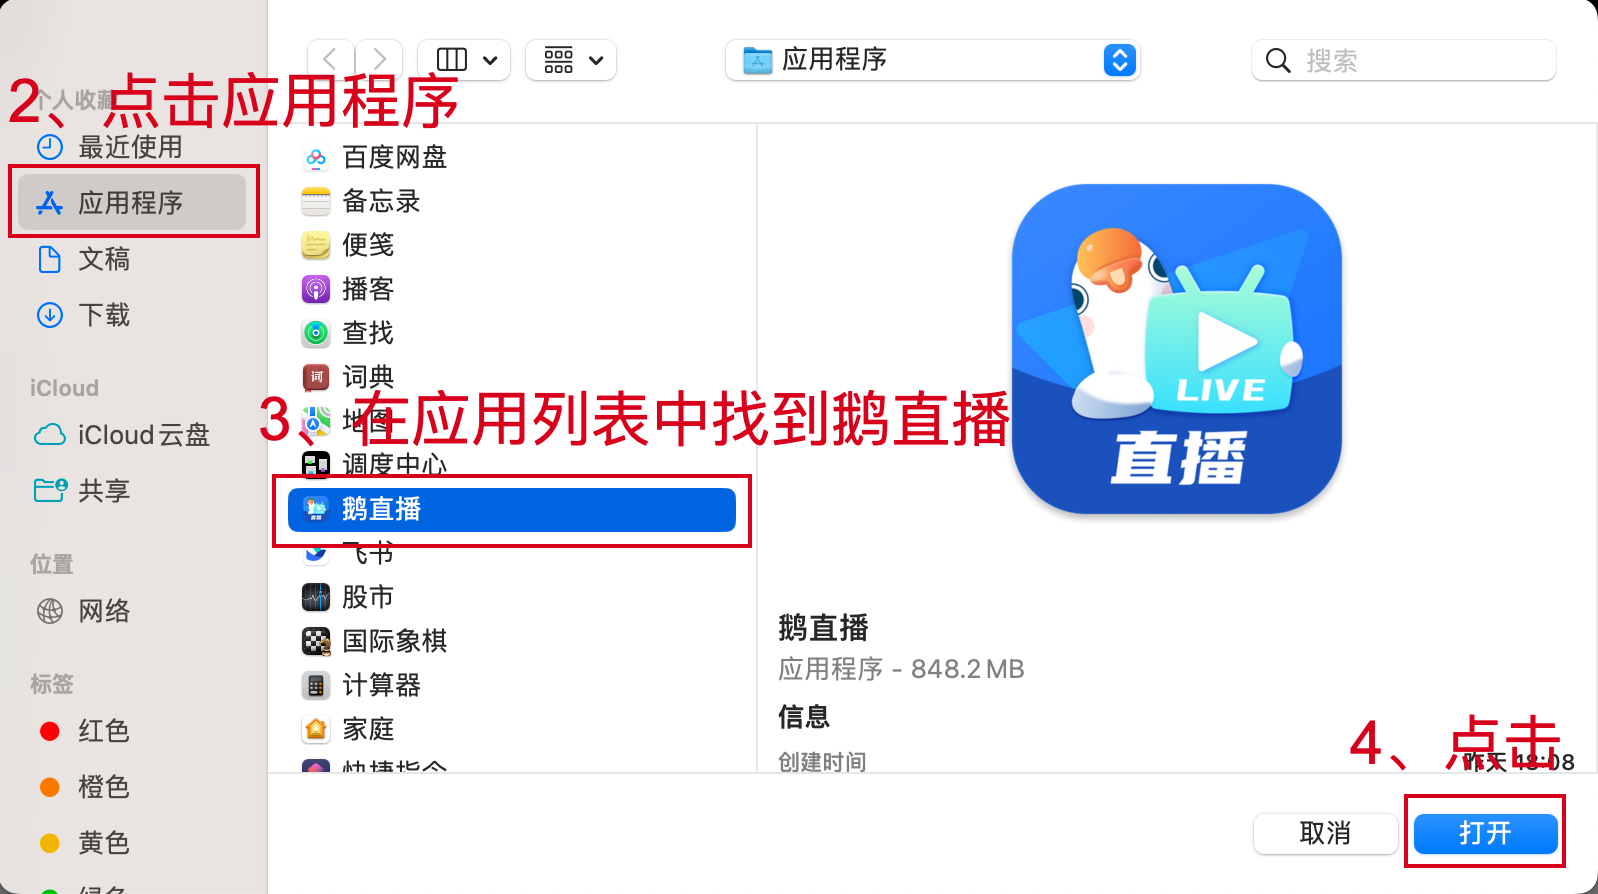
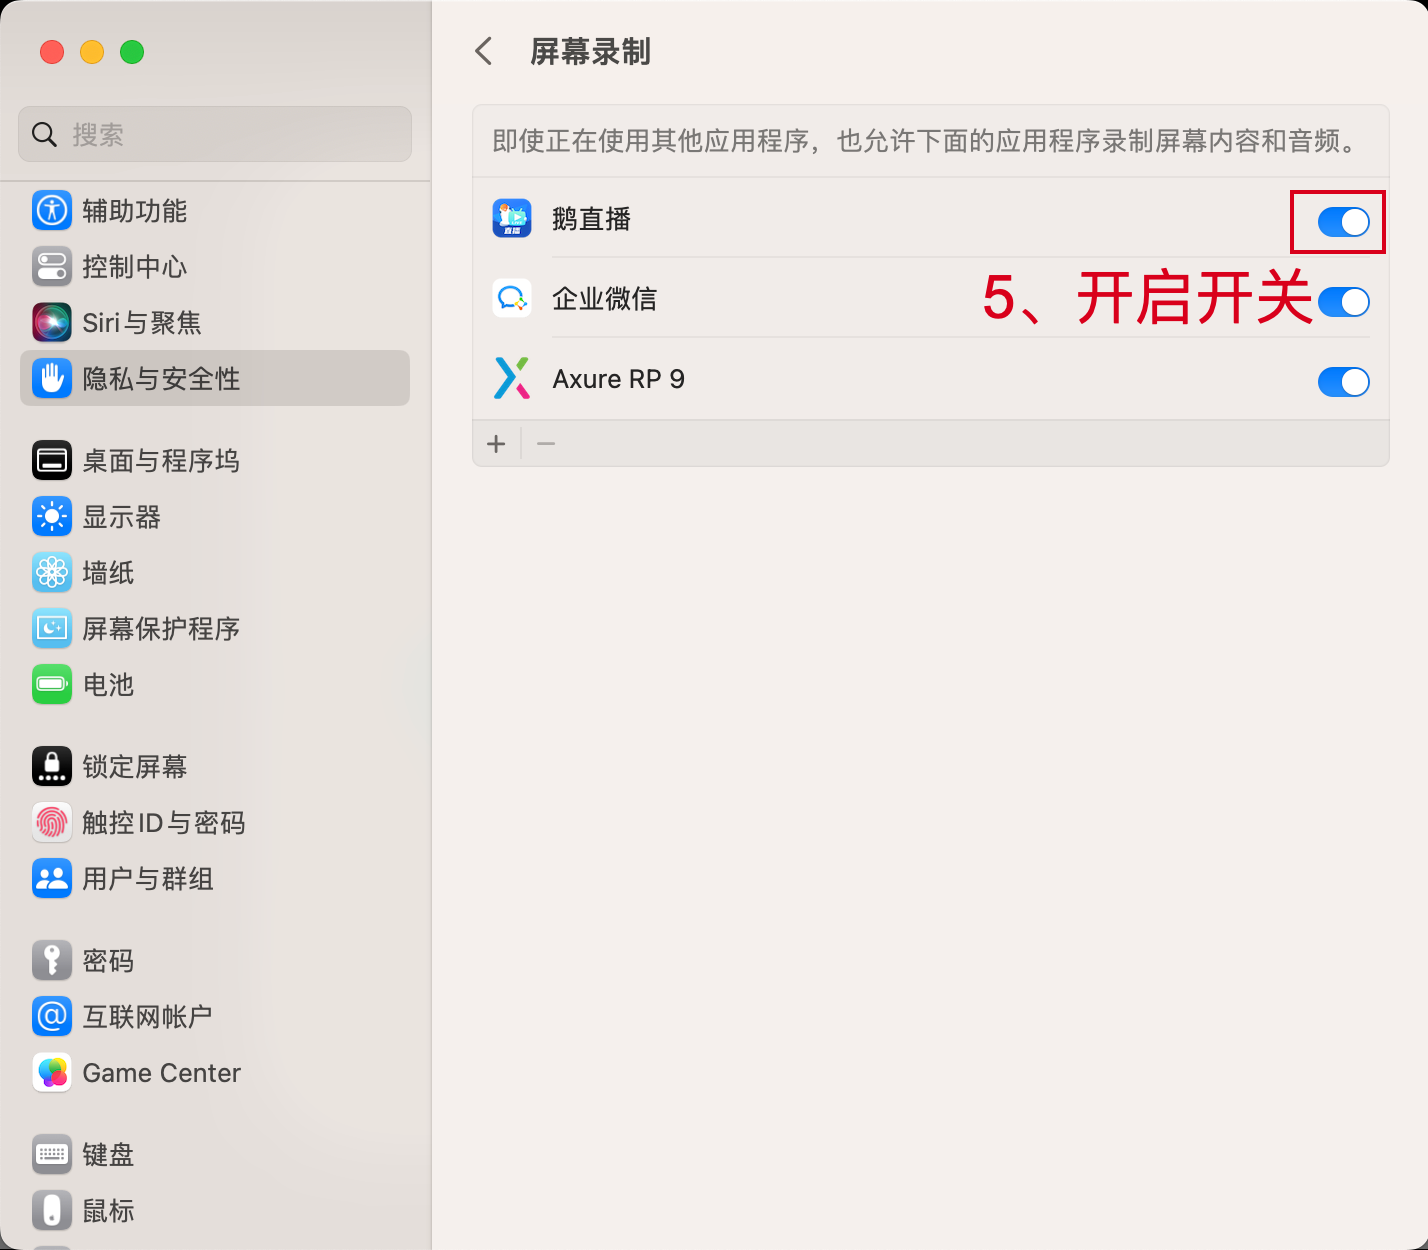
II. Why, after completing the authorization settings, no shareable windows are displayed and I'm still prompted to set the authorization?
● Solution: First, complete the authorization for eLink Live, then exit the eLink Live app, reopen eLink Live, and select window sharing for screen sharing.
If the authorization prompt still appears, it is recommended to restart the computer after completing the authorization, then reopen the eLink Live app and select window sharing for screen sharing.
● Operation demonstration for exiting eLink Live:
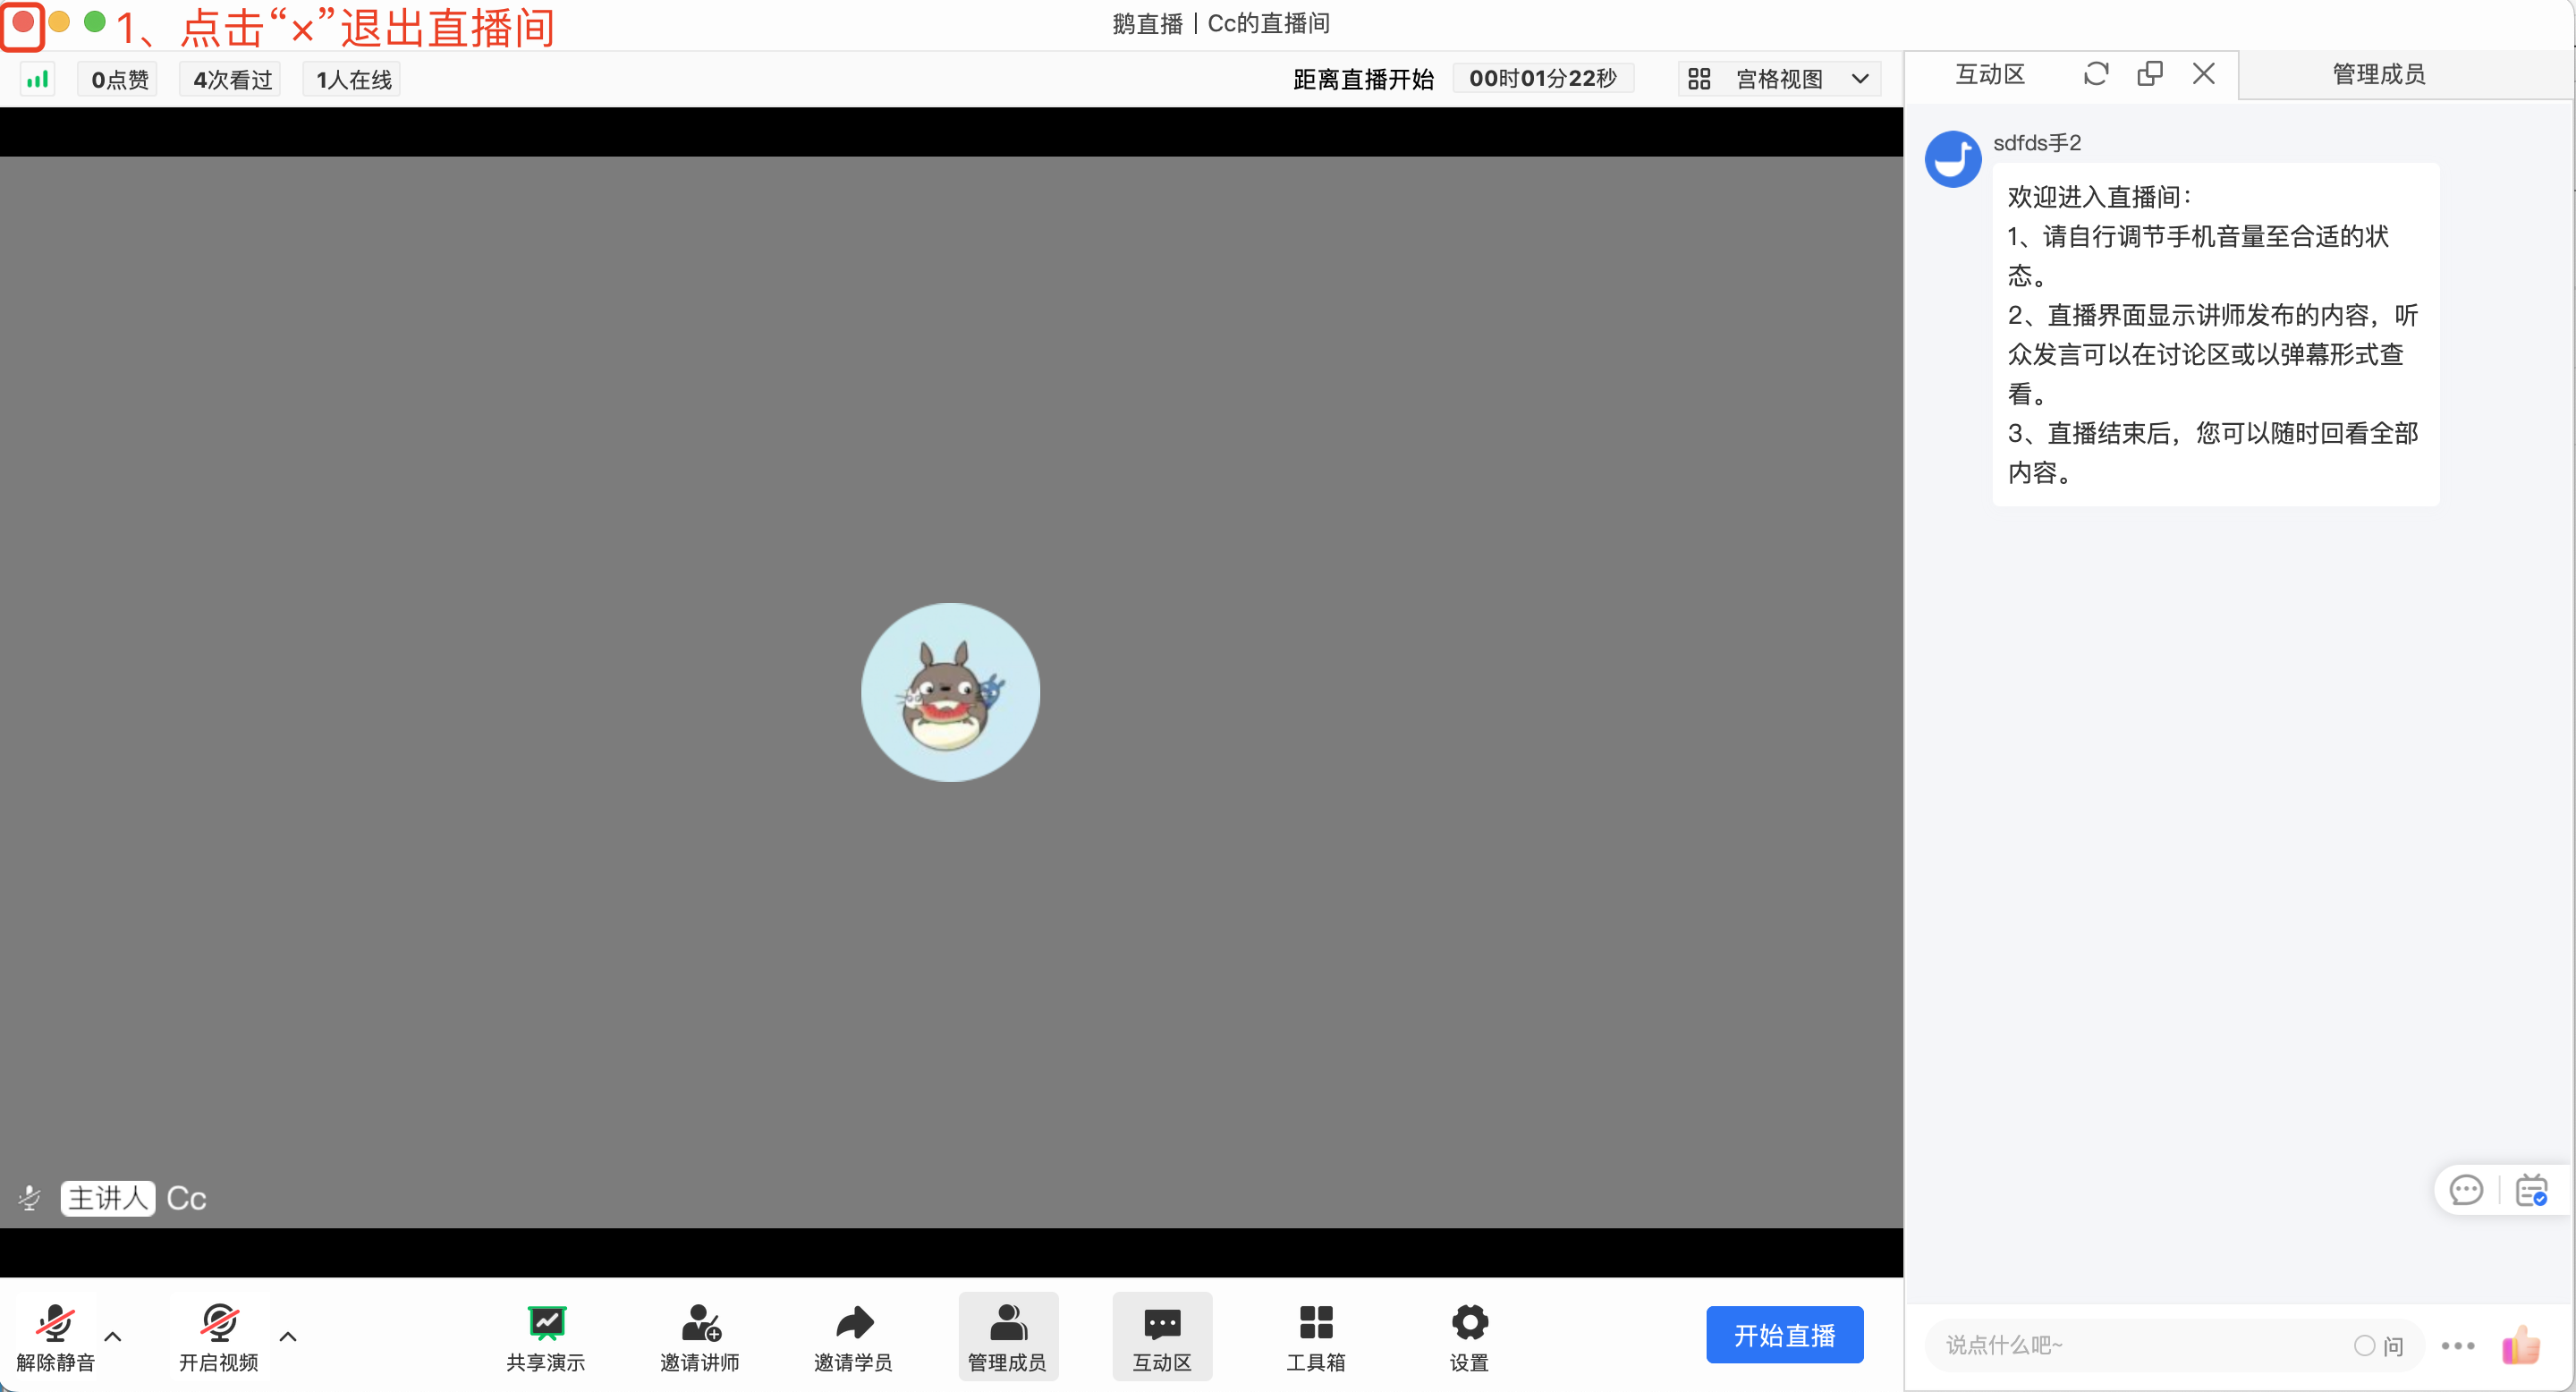
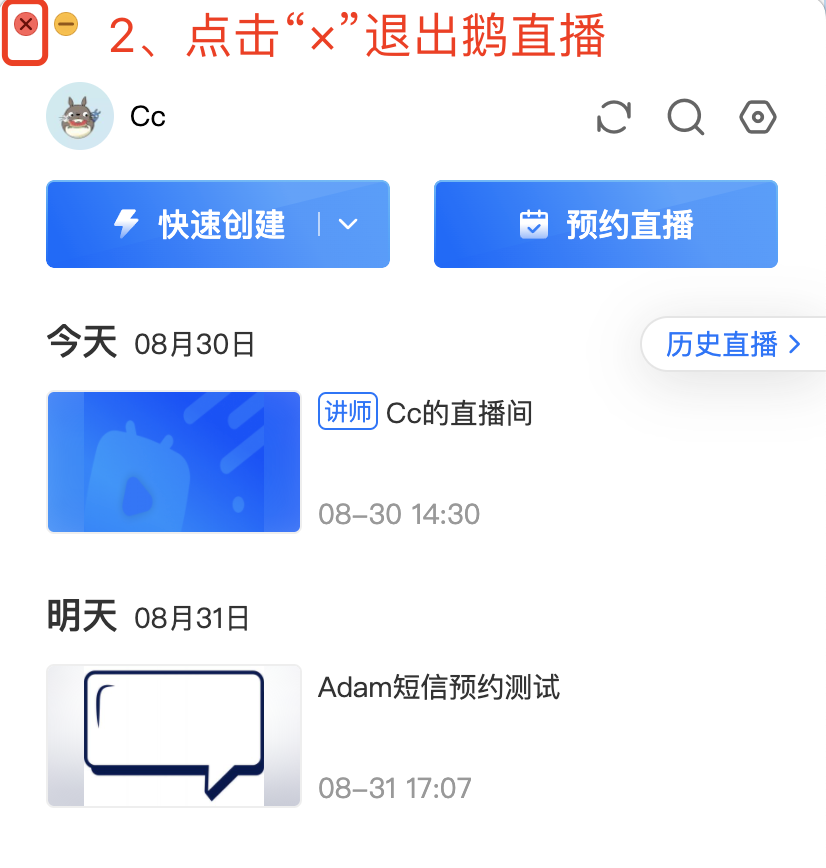
If eLink Live cannot be exited normally, you can open the Activity Monitor (press command + spacebar simultaneously and search for “Activity Monitor”), find the eLink Live app, and click “×” to force it to exit.

eLive shares part of the screen area
I. Use Cases
Instructors can select a fixed area for screen sharing when sharing the screen, such as a part of the application window or a specific slide content area.
II. Usage Conditions
1. Version Requirements
①elink Live client version 3.6.0 or higher
2. System Requirements
①Windows/MacOS.
3. Hardware Requirements
①Windows 7 or higher operating system;
②MacOS 10.11 or higher operating system.
III. Operation Steps
①In the live room, click [Share Screen] -> [Advanced] -> [Partial Screen Area] -> [Confirm Sharing] at the bottom toolbar, then enter the sharing area selection.
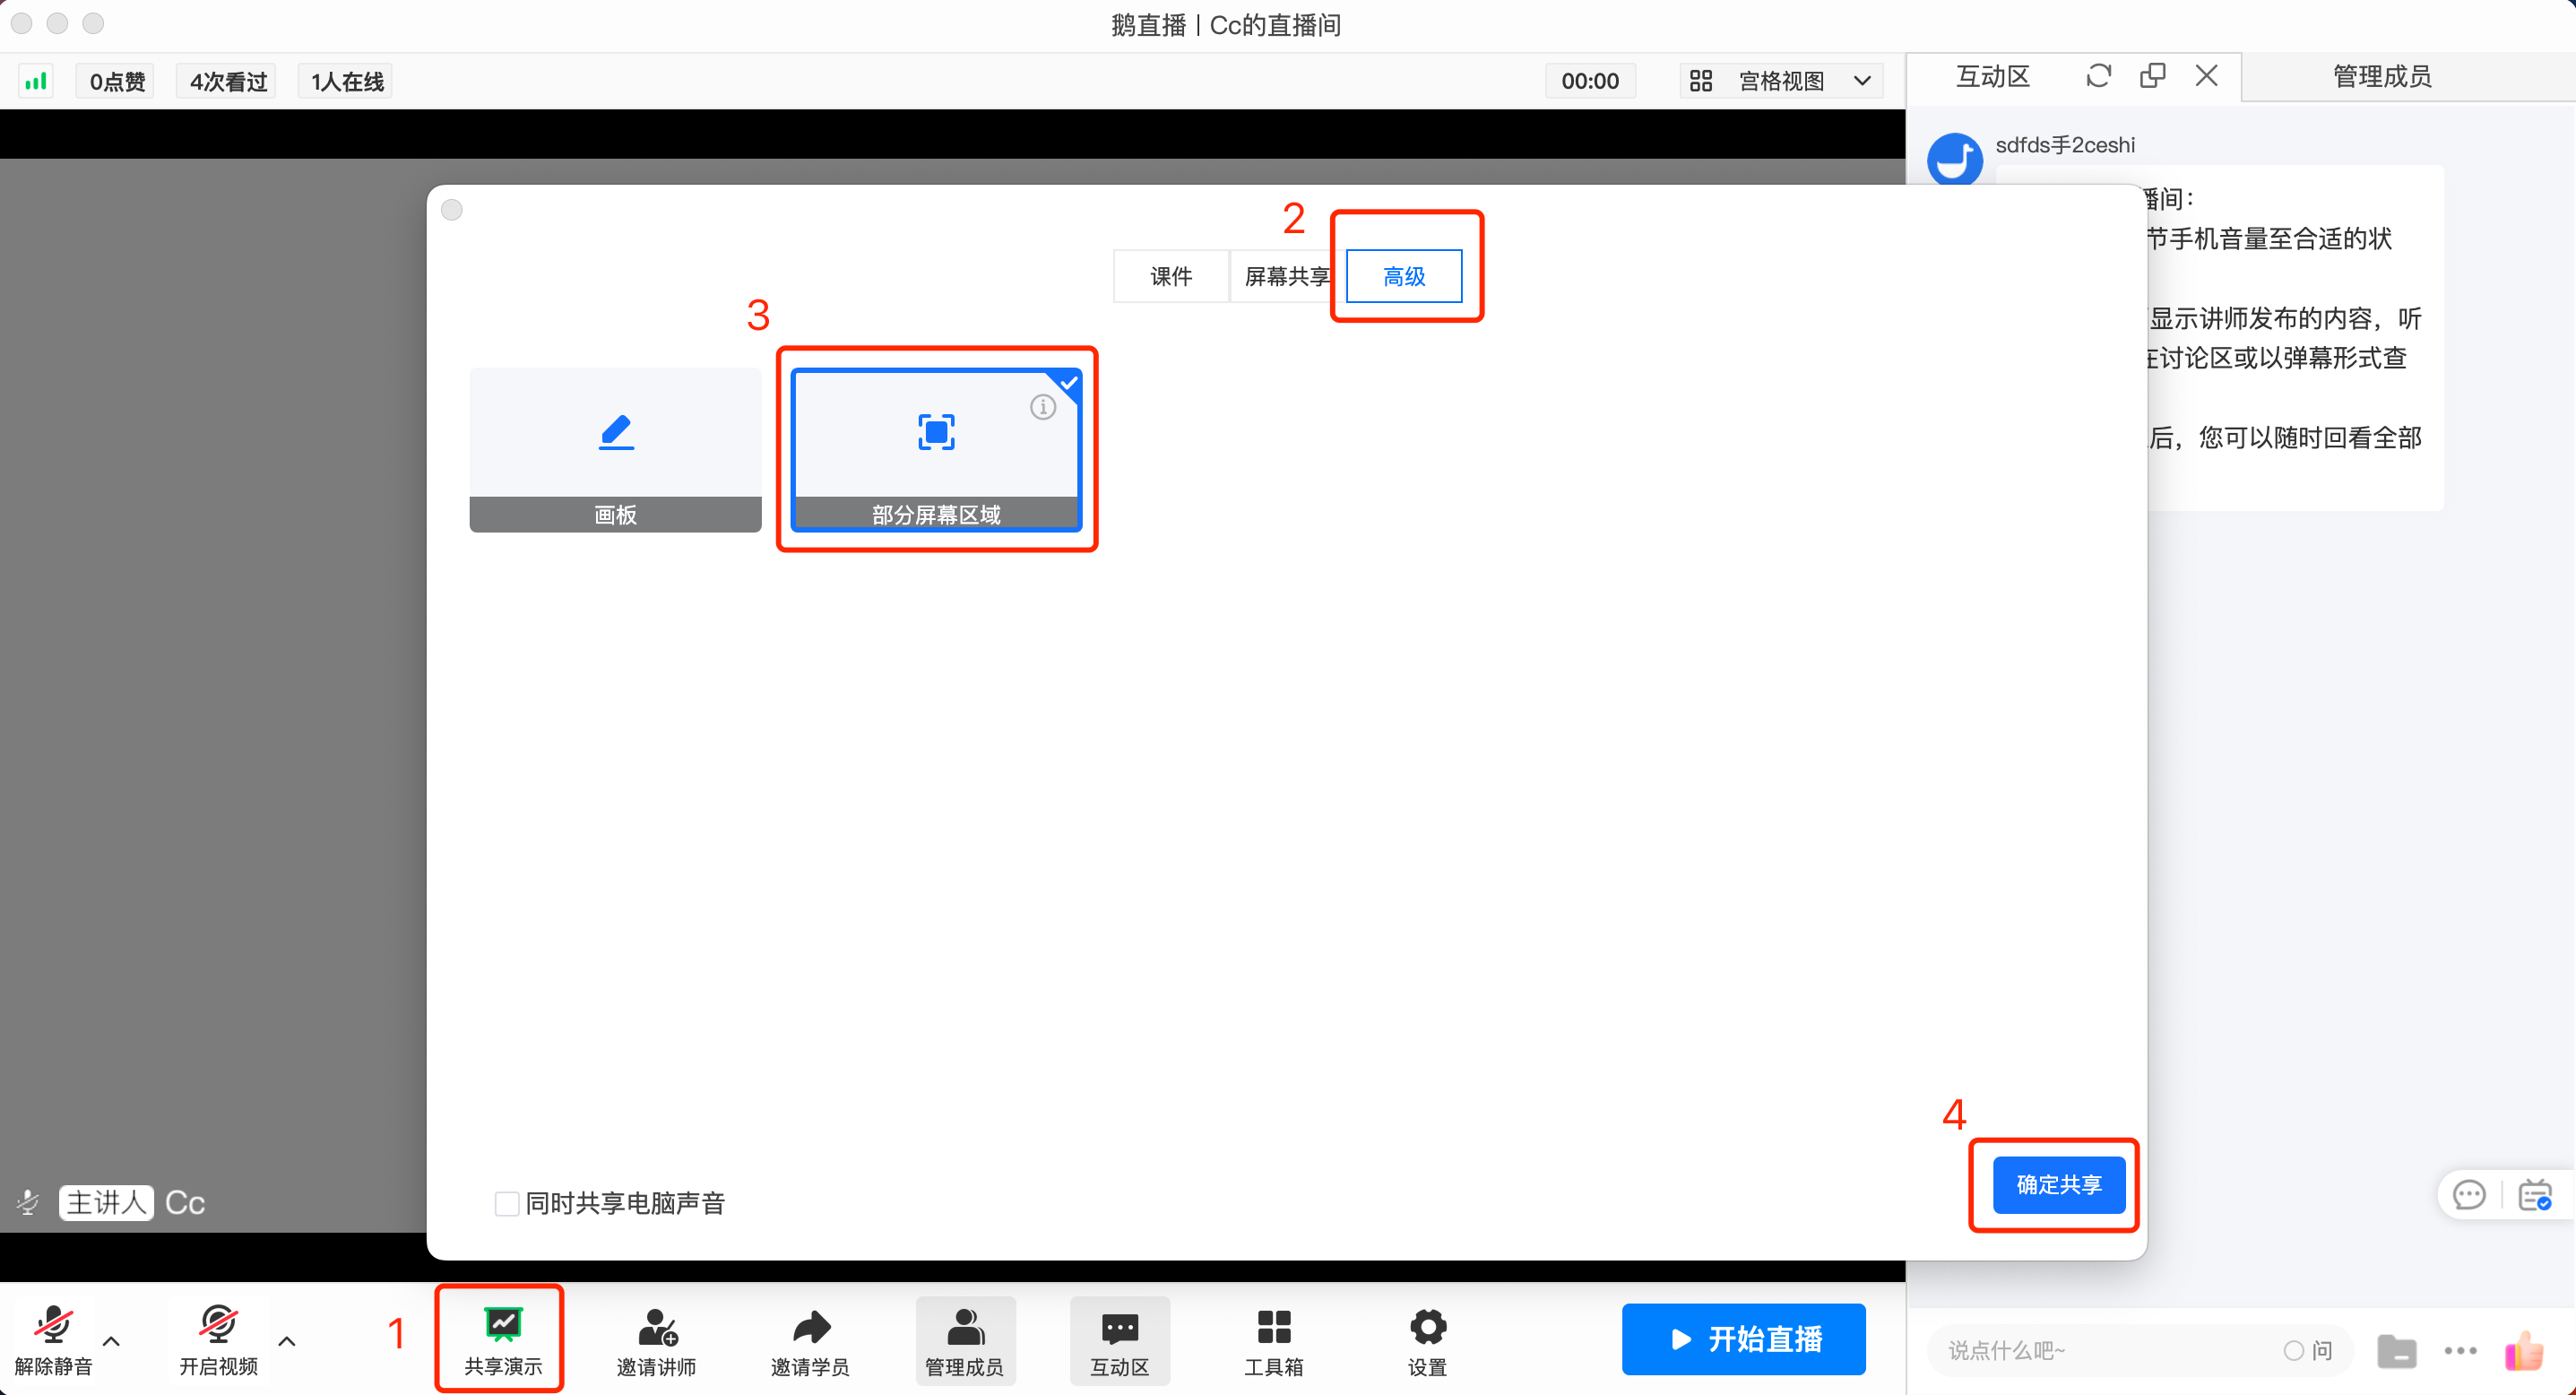
②After adjusting the sharing area, click the [Start Sharing] button to share the selected area on the screen. Click the [Cancel] button to exit the sharing.

IV. Notes
①During the instructor's selection of the screen area, elink Live will automatically detect windows as candidate areas based on the position of the mouse pointer. Instructors can also manually drag the mouse to select the screen area.
②To avoid affecting the viewing experience of other members in the live room, the selected screen area for sharing should not be smaller than 80x80 pixels.
③If the instructor uses multiple monitors, cross - screen selection is not supported when selecting a part of the screen. It is recommended to first adjust the elink Live client to the desktop to be shared.
④During the sharing process, all displayed content in the selected area will be shared. Please avoid sharing areas that contain sensitive personal information such as user input, notification messages, and personal accounts.
Common issues and solutions for silent screen sharing in elink Live
When using the elink Live PC client for screen sharing, if there is no desktop audio, you can handle it according to the following cases and methods.
Problem Directory:
1. Desktop audio is not selected, resulting in no sound.
2. On Mac devices, desktop audio is selected, but there is no sound when sharing meeting software such as Tencent Meeting, Zoom, and VooV.
3. On Mac devices, after selecting desktop audio, a pop - up window saying 'Abnormal start of sharing computer sound' appears.
1. Desktop audio is not selected, resulting in no sound.
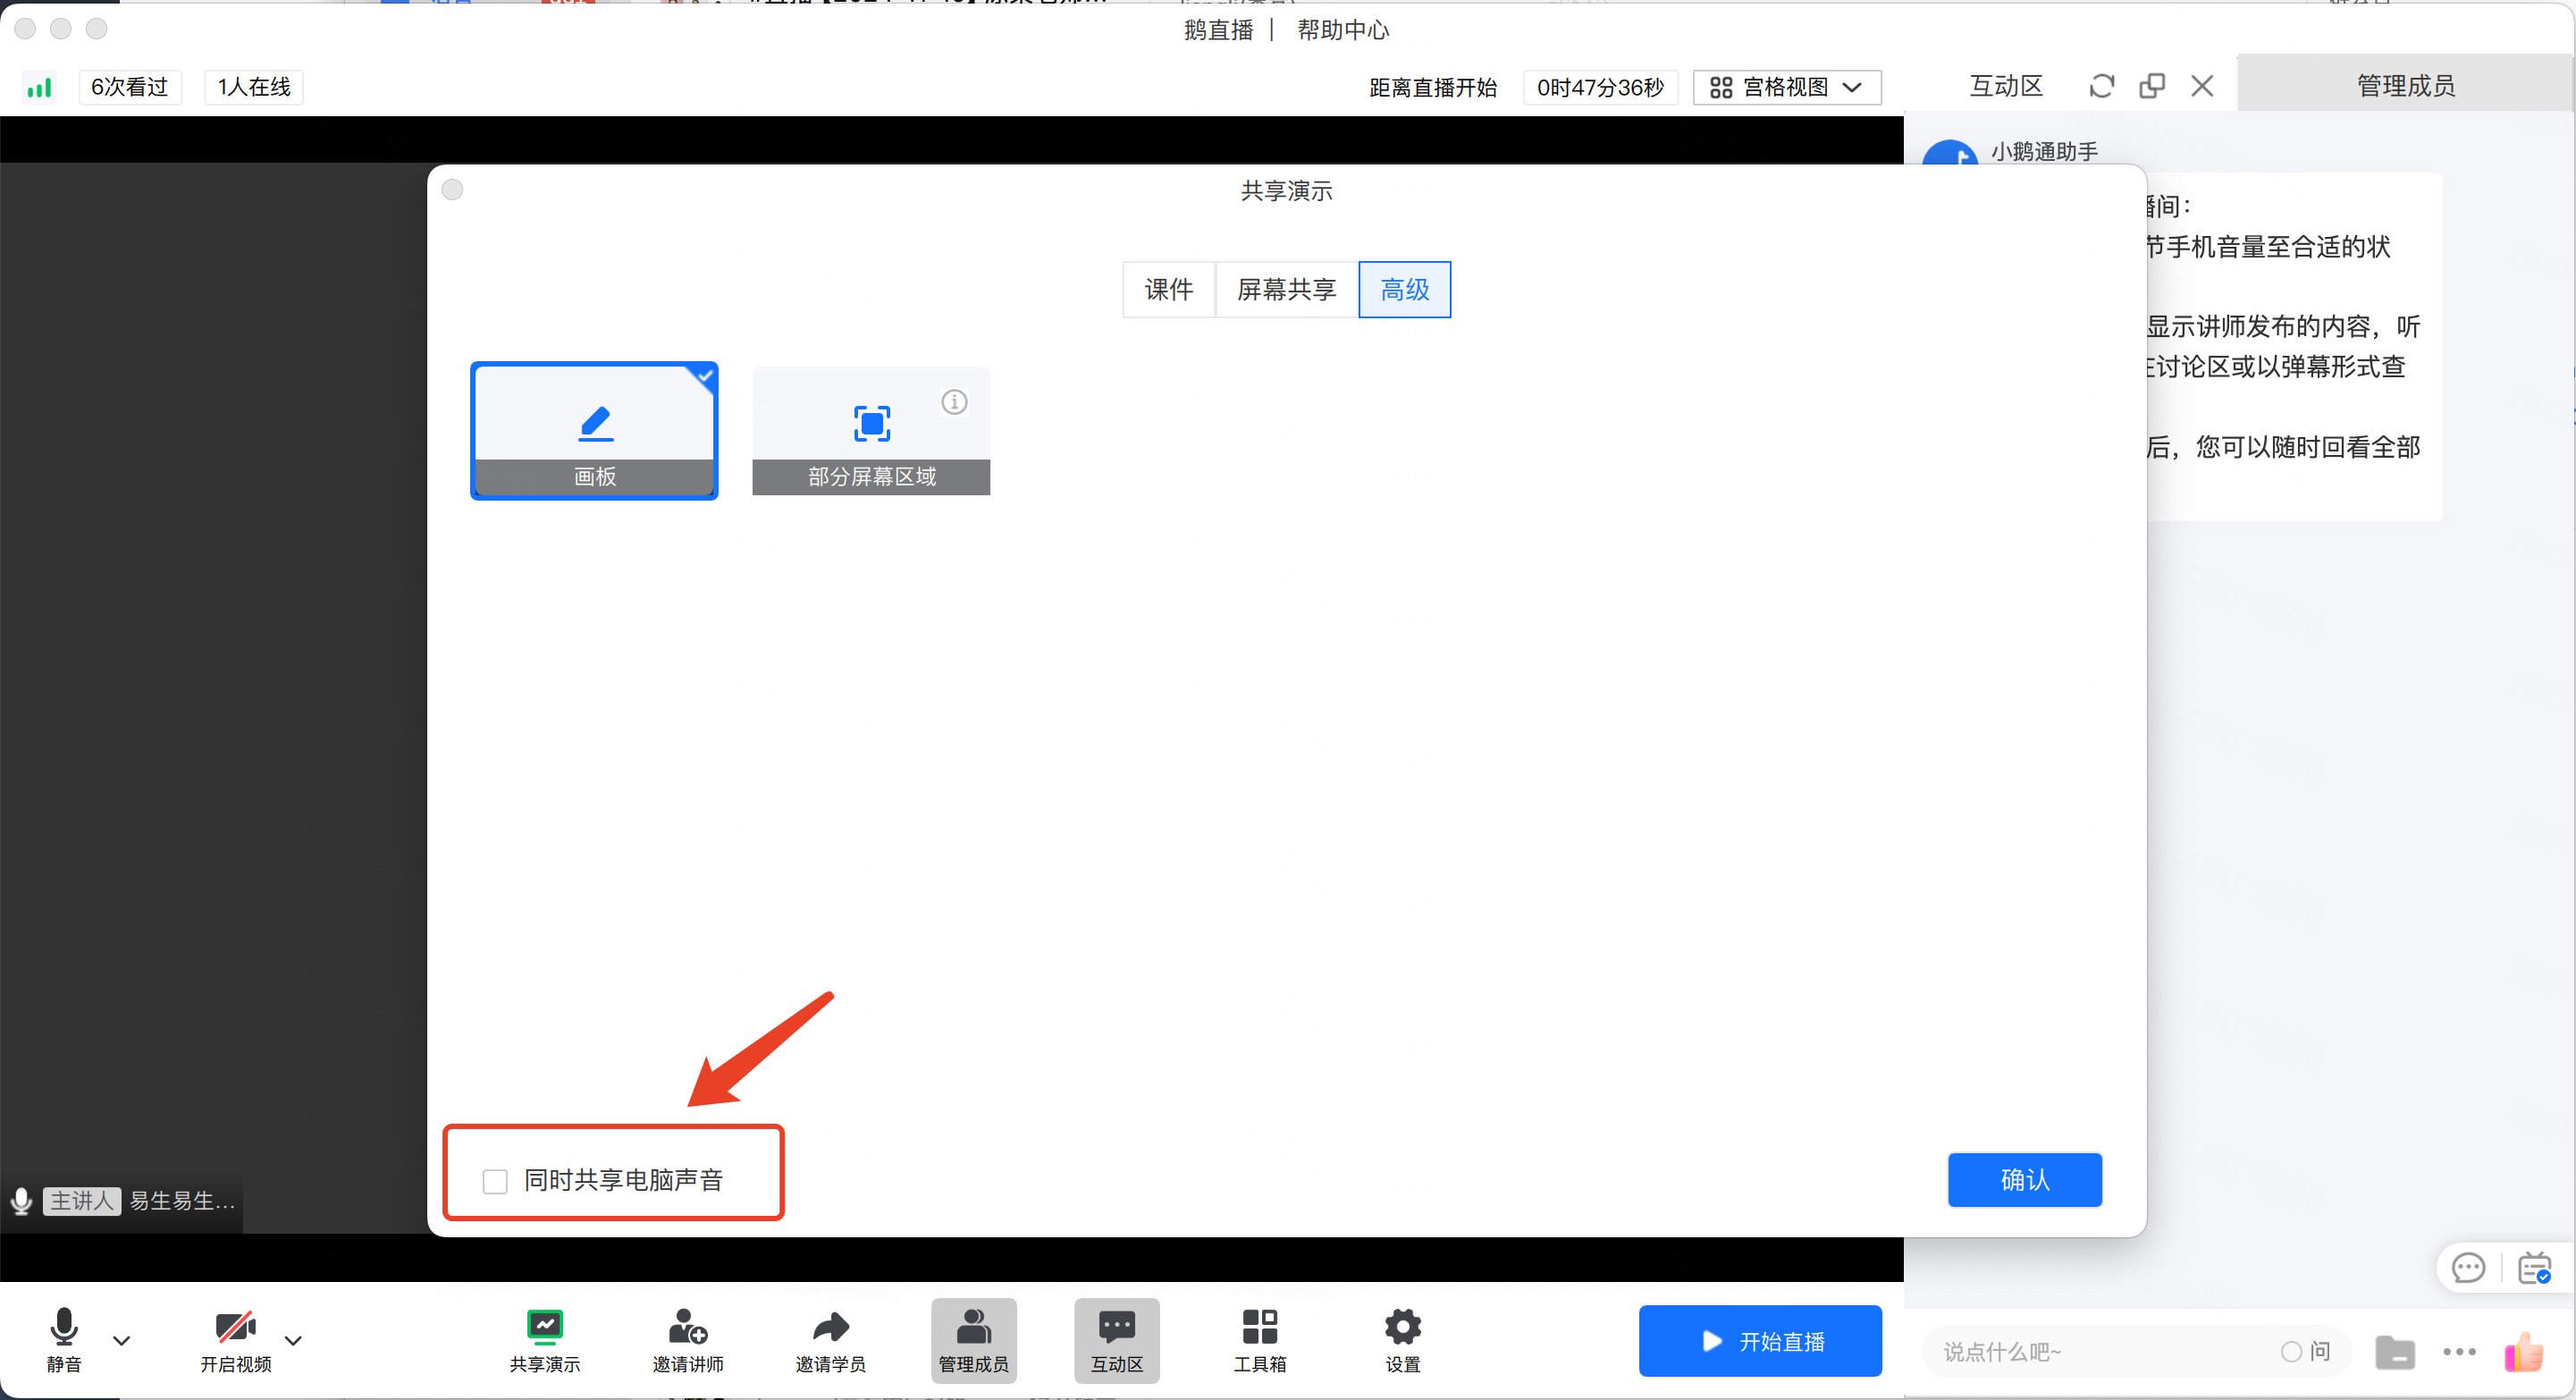
Solution: Select desktop audio and share again.
2. On Mac devices, desktop audio is selected, but there is no sound when sharing meeting software such as Tencent Meeting, Zoom, and VooV.
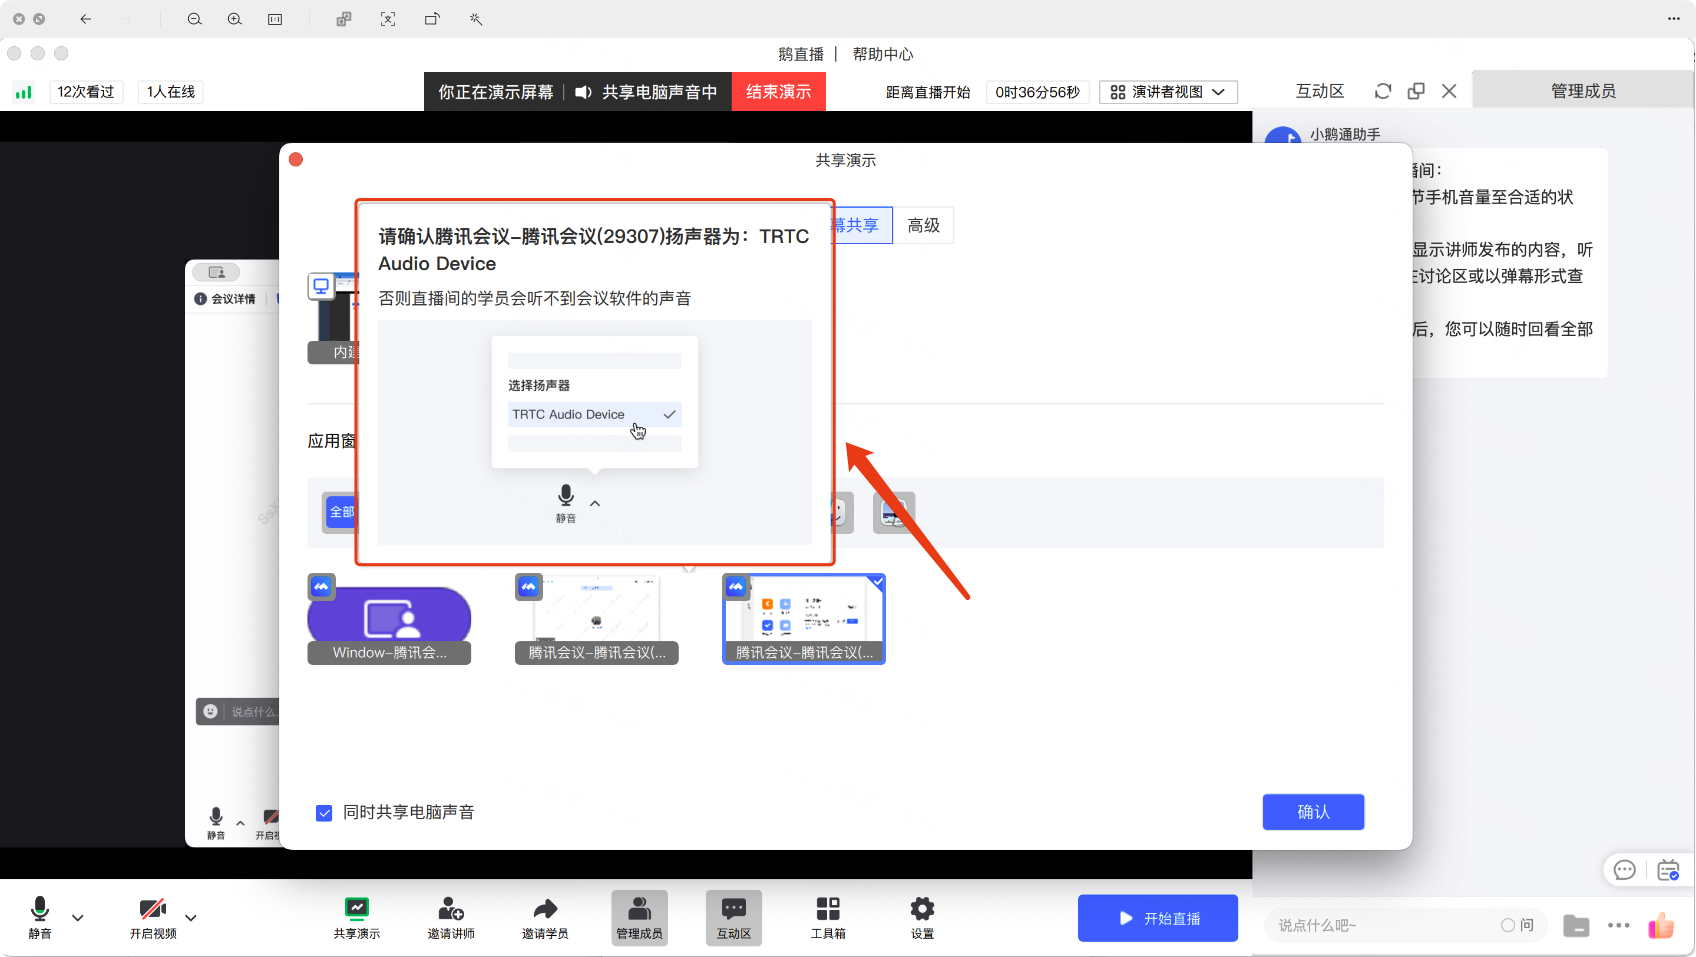
Solution: Limited by the Mac system, when selecting to share computer sound or selecting the meeting software,you need to set the speaker to TRTC Audio Device in the corresponding meeting software settings.
【Tencent Meeting/VooVExample Diagram】

【Zoom Example Diagram】:
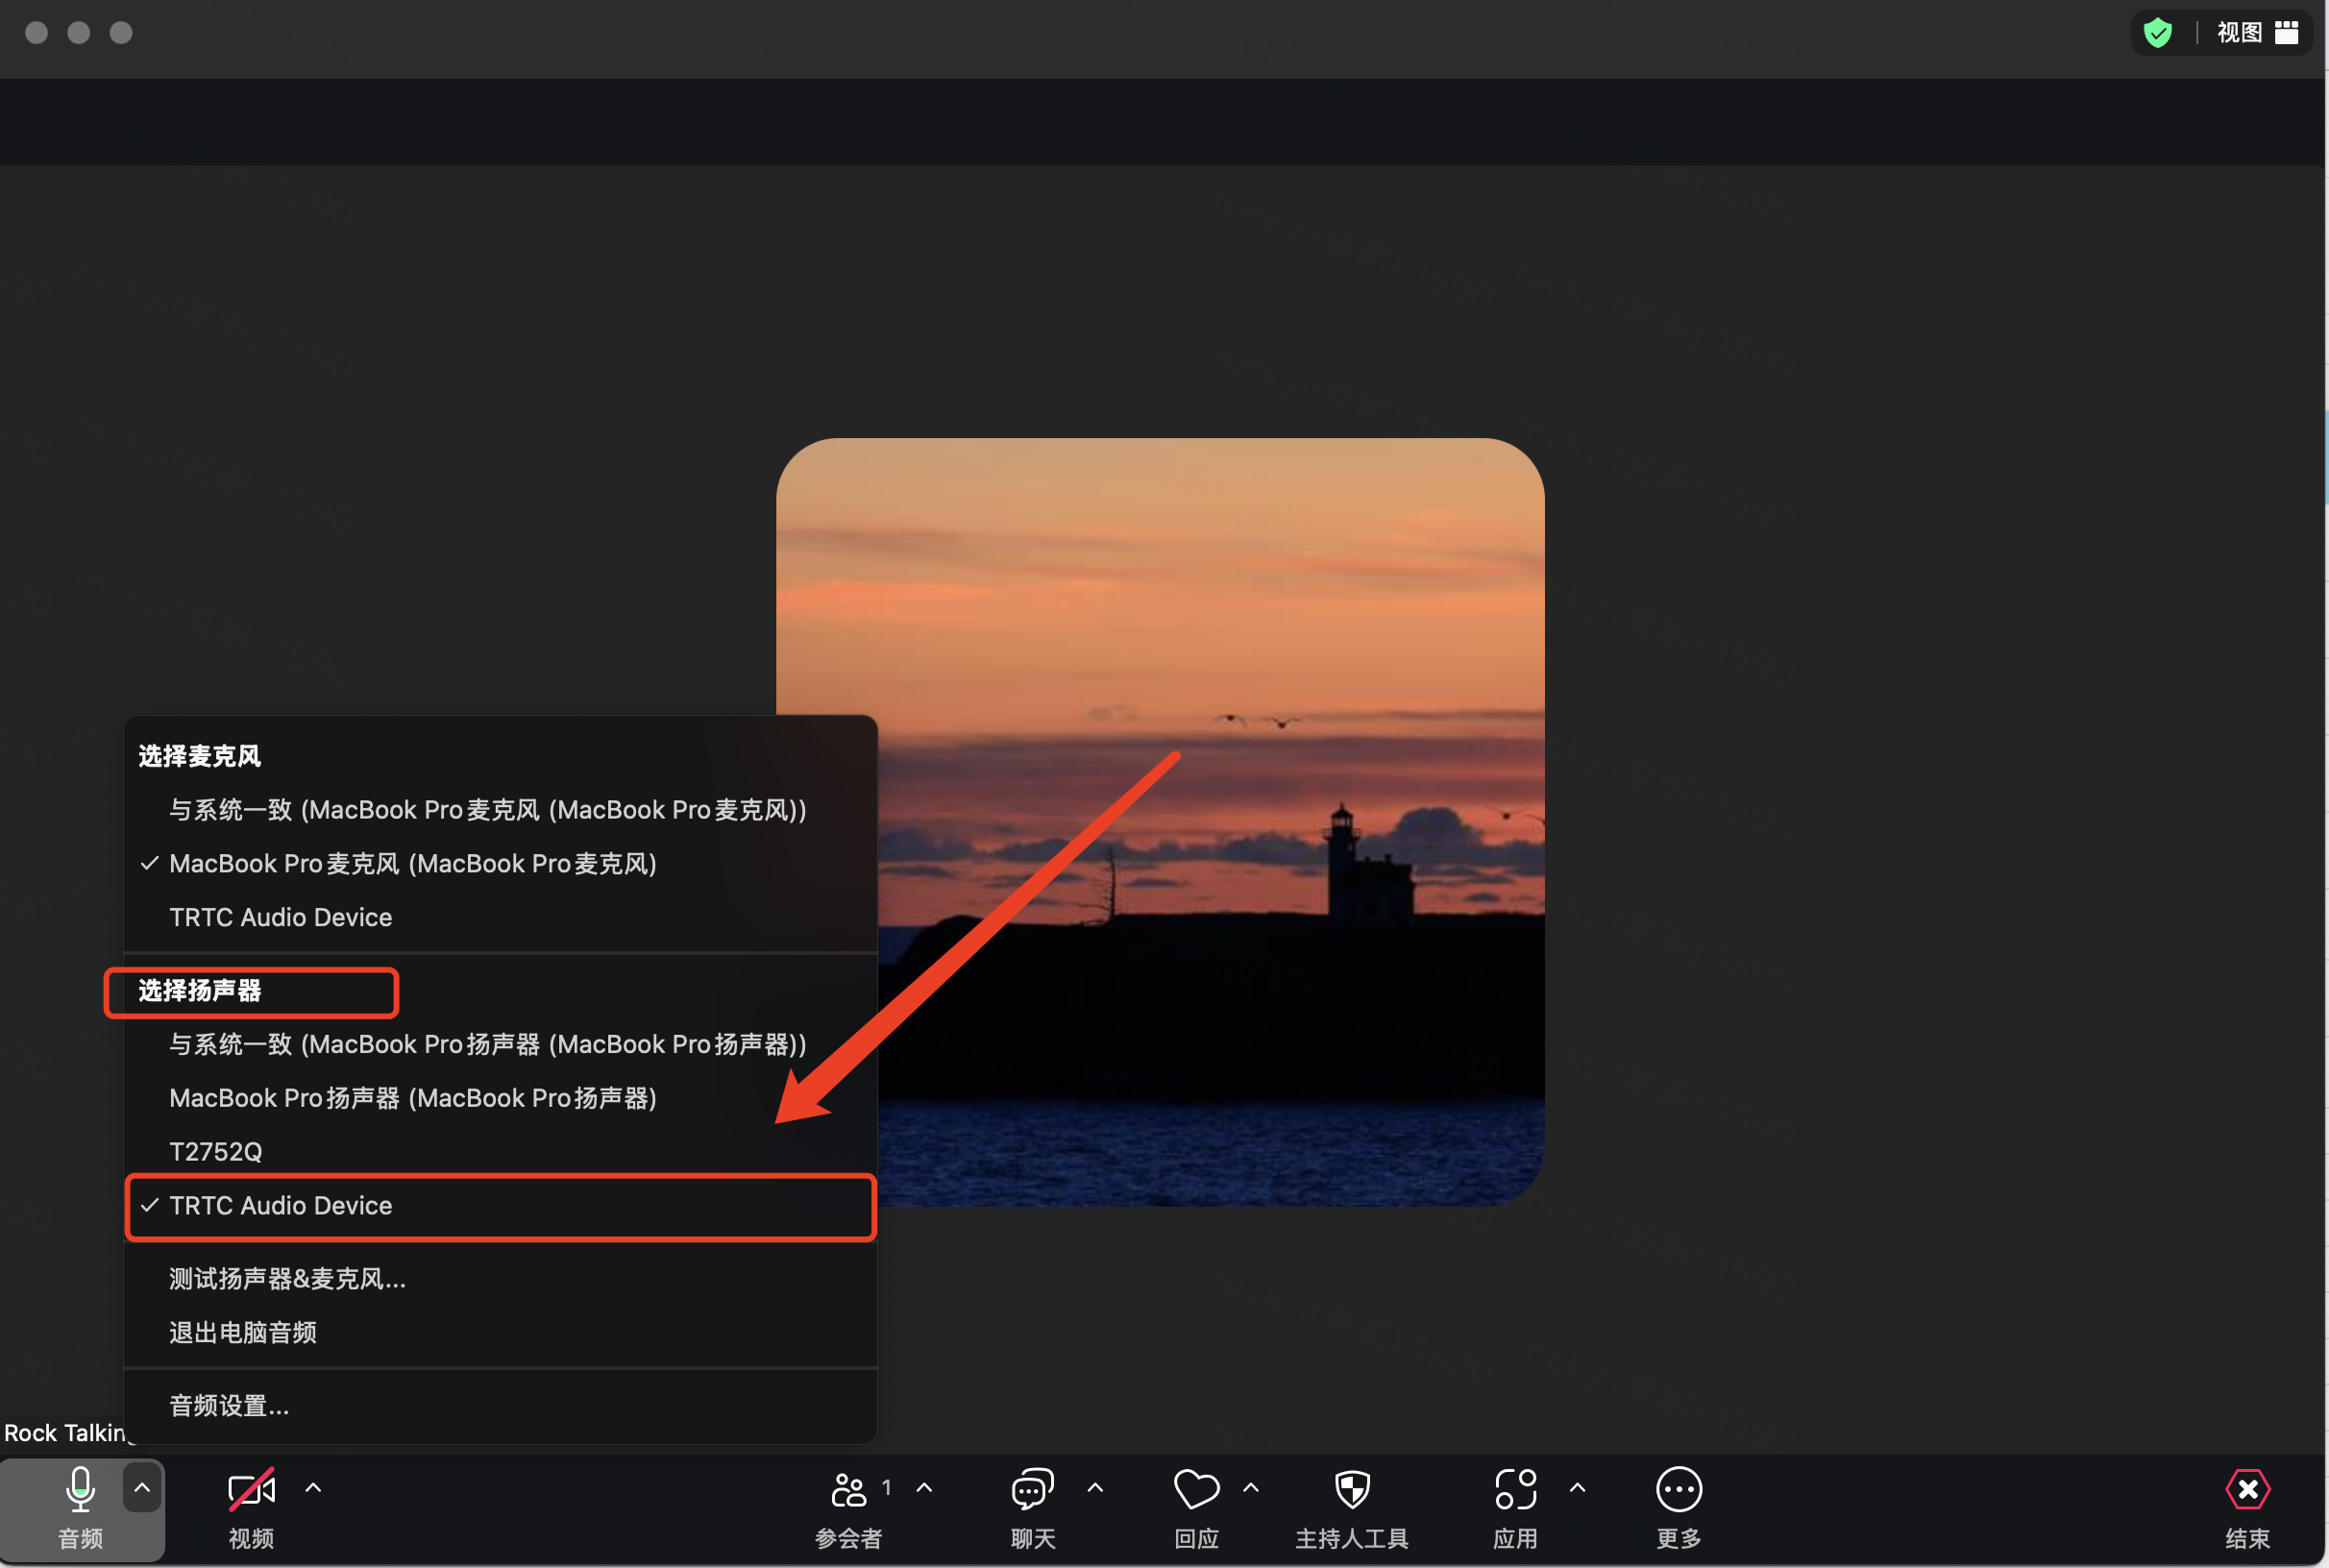
3. On Mac devices, after selecting desktop audio, a pop - up window saying 'Abnormal start of sharing computer sound' appears.
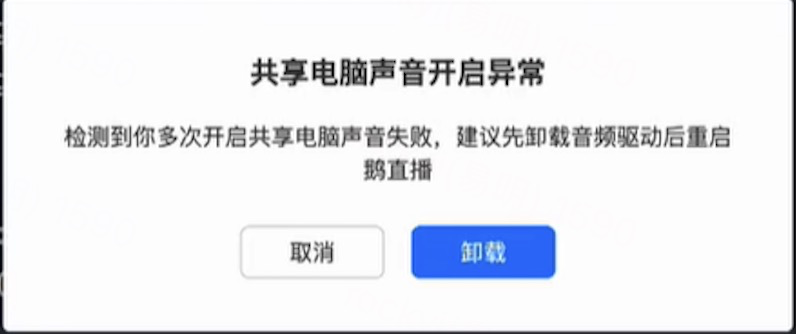
Solution: On the Mac system, the TRTC audio driver is required to obtain sound. When there is an abnormality, click 'Uninstall', reinstall it, and then share again.