Start a live broadcast
- Going live on a computer - Tutorial for using the web version
- 【OBS】How to Use Beauty Filters
- Live streaming supports external graphic tablets
- Live streaming supports external microphones (such as lavalier microphones)
- The audio and video are out of sync when exporting videos from the video editing software
- Does the live stream support external devices?
Going live on a computer - Tutorial for using the web version
I. Feature Introduction
The web-based instructor terminal is a tool for elink instructors to conduct live streams on the web. It is suitable for scenarios that require desktop sharing, PPT courseware display, and instructor appearance. Compared with the computer client, the web-based instructor terminal is easier to use and more straightforward to operate.
PS: You need to use Google Chrome for live streaming on the web-based instructor terminal. Google Chrome has better compatibility and can provide a better live streaming experience!
II. Purpose of Use
Using the web-based instructor terminal allows you to conveniently conduct live streams on the web, enabling live video, courseware & desktop sharing, and other live content.
III. Use Scenarios
Web-based live streaming is suitable for scenarios that require desktop sharing, PPT courseware display, and real-time video live streaming with students.
IV. Operation Path
Merchant side: Merchant background → Live streaming → Go live → Teach on the computer → Web-based terminal
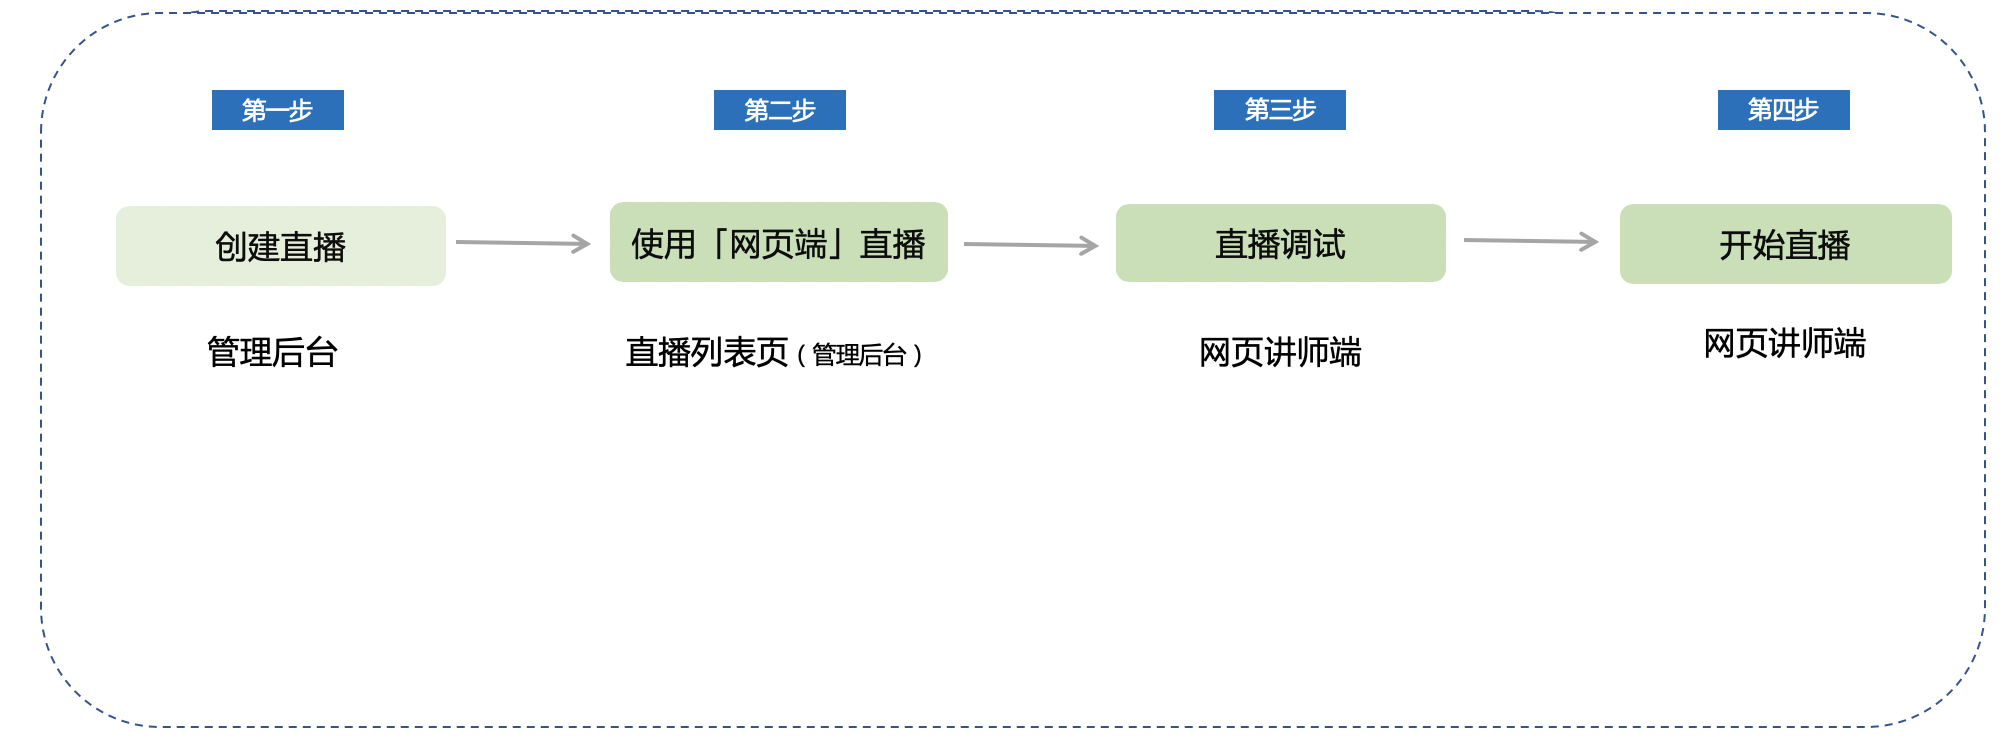
V. Usage Tutorial
Step 1 Create a live stream (Management background)
1. Enter the management background - Create a new live stream
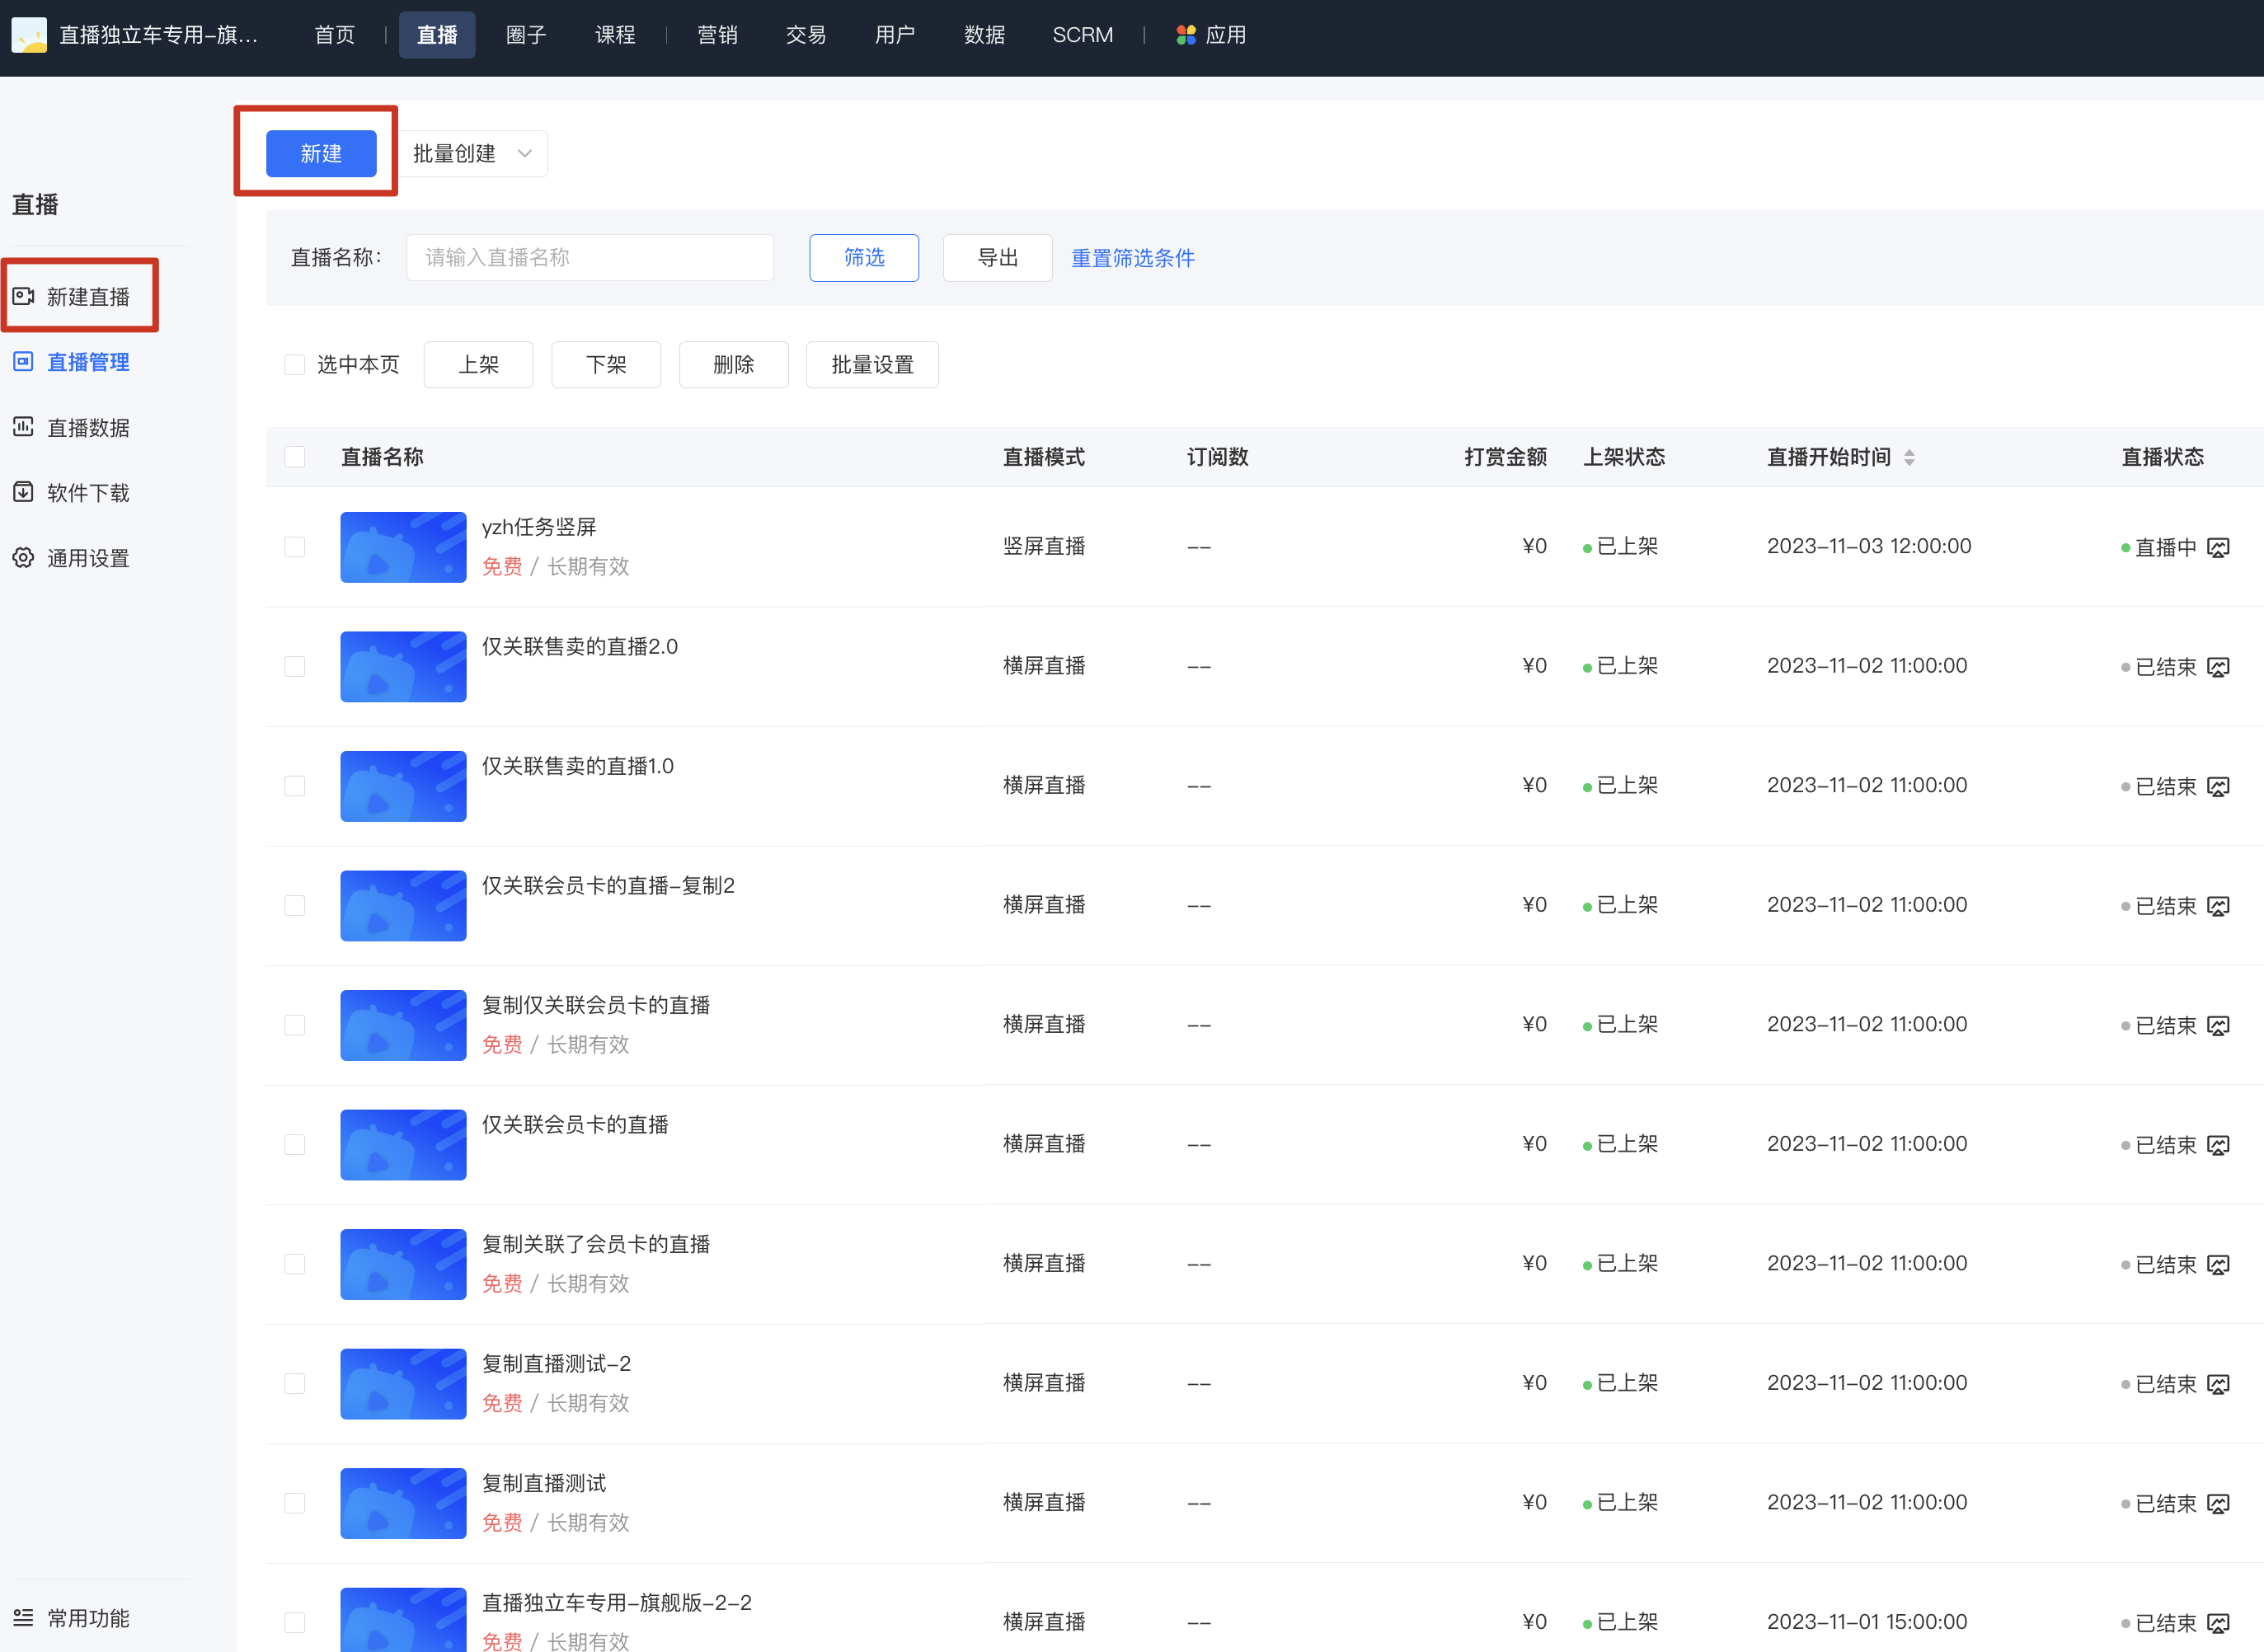
(Management background)
2. Fill in the live stream information and instructor settings, and click the Save button to complete the live stream creation
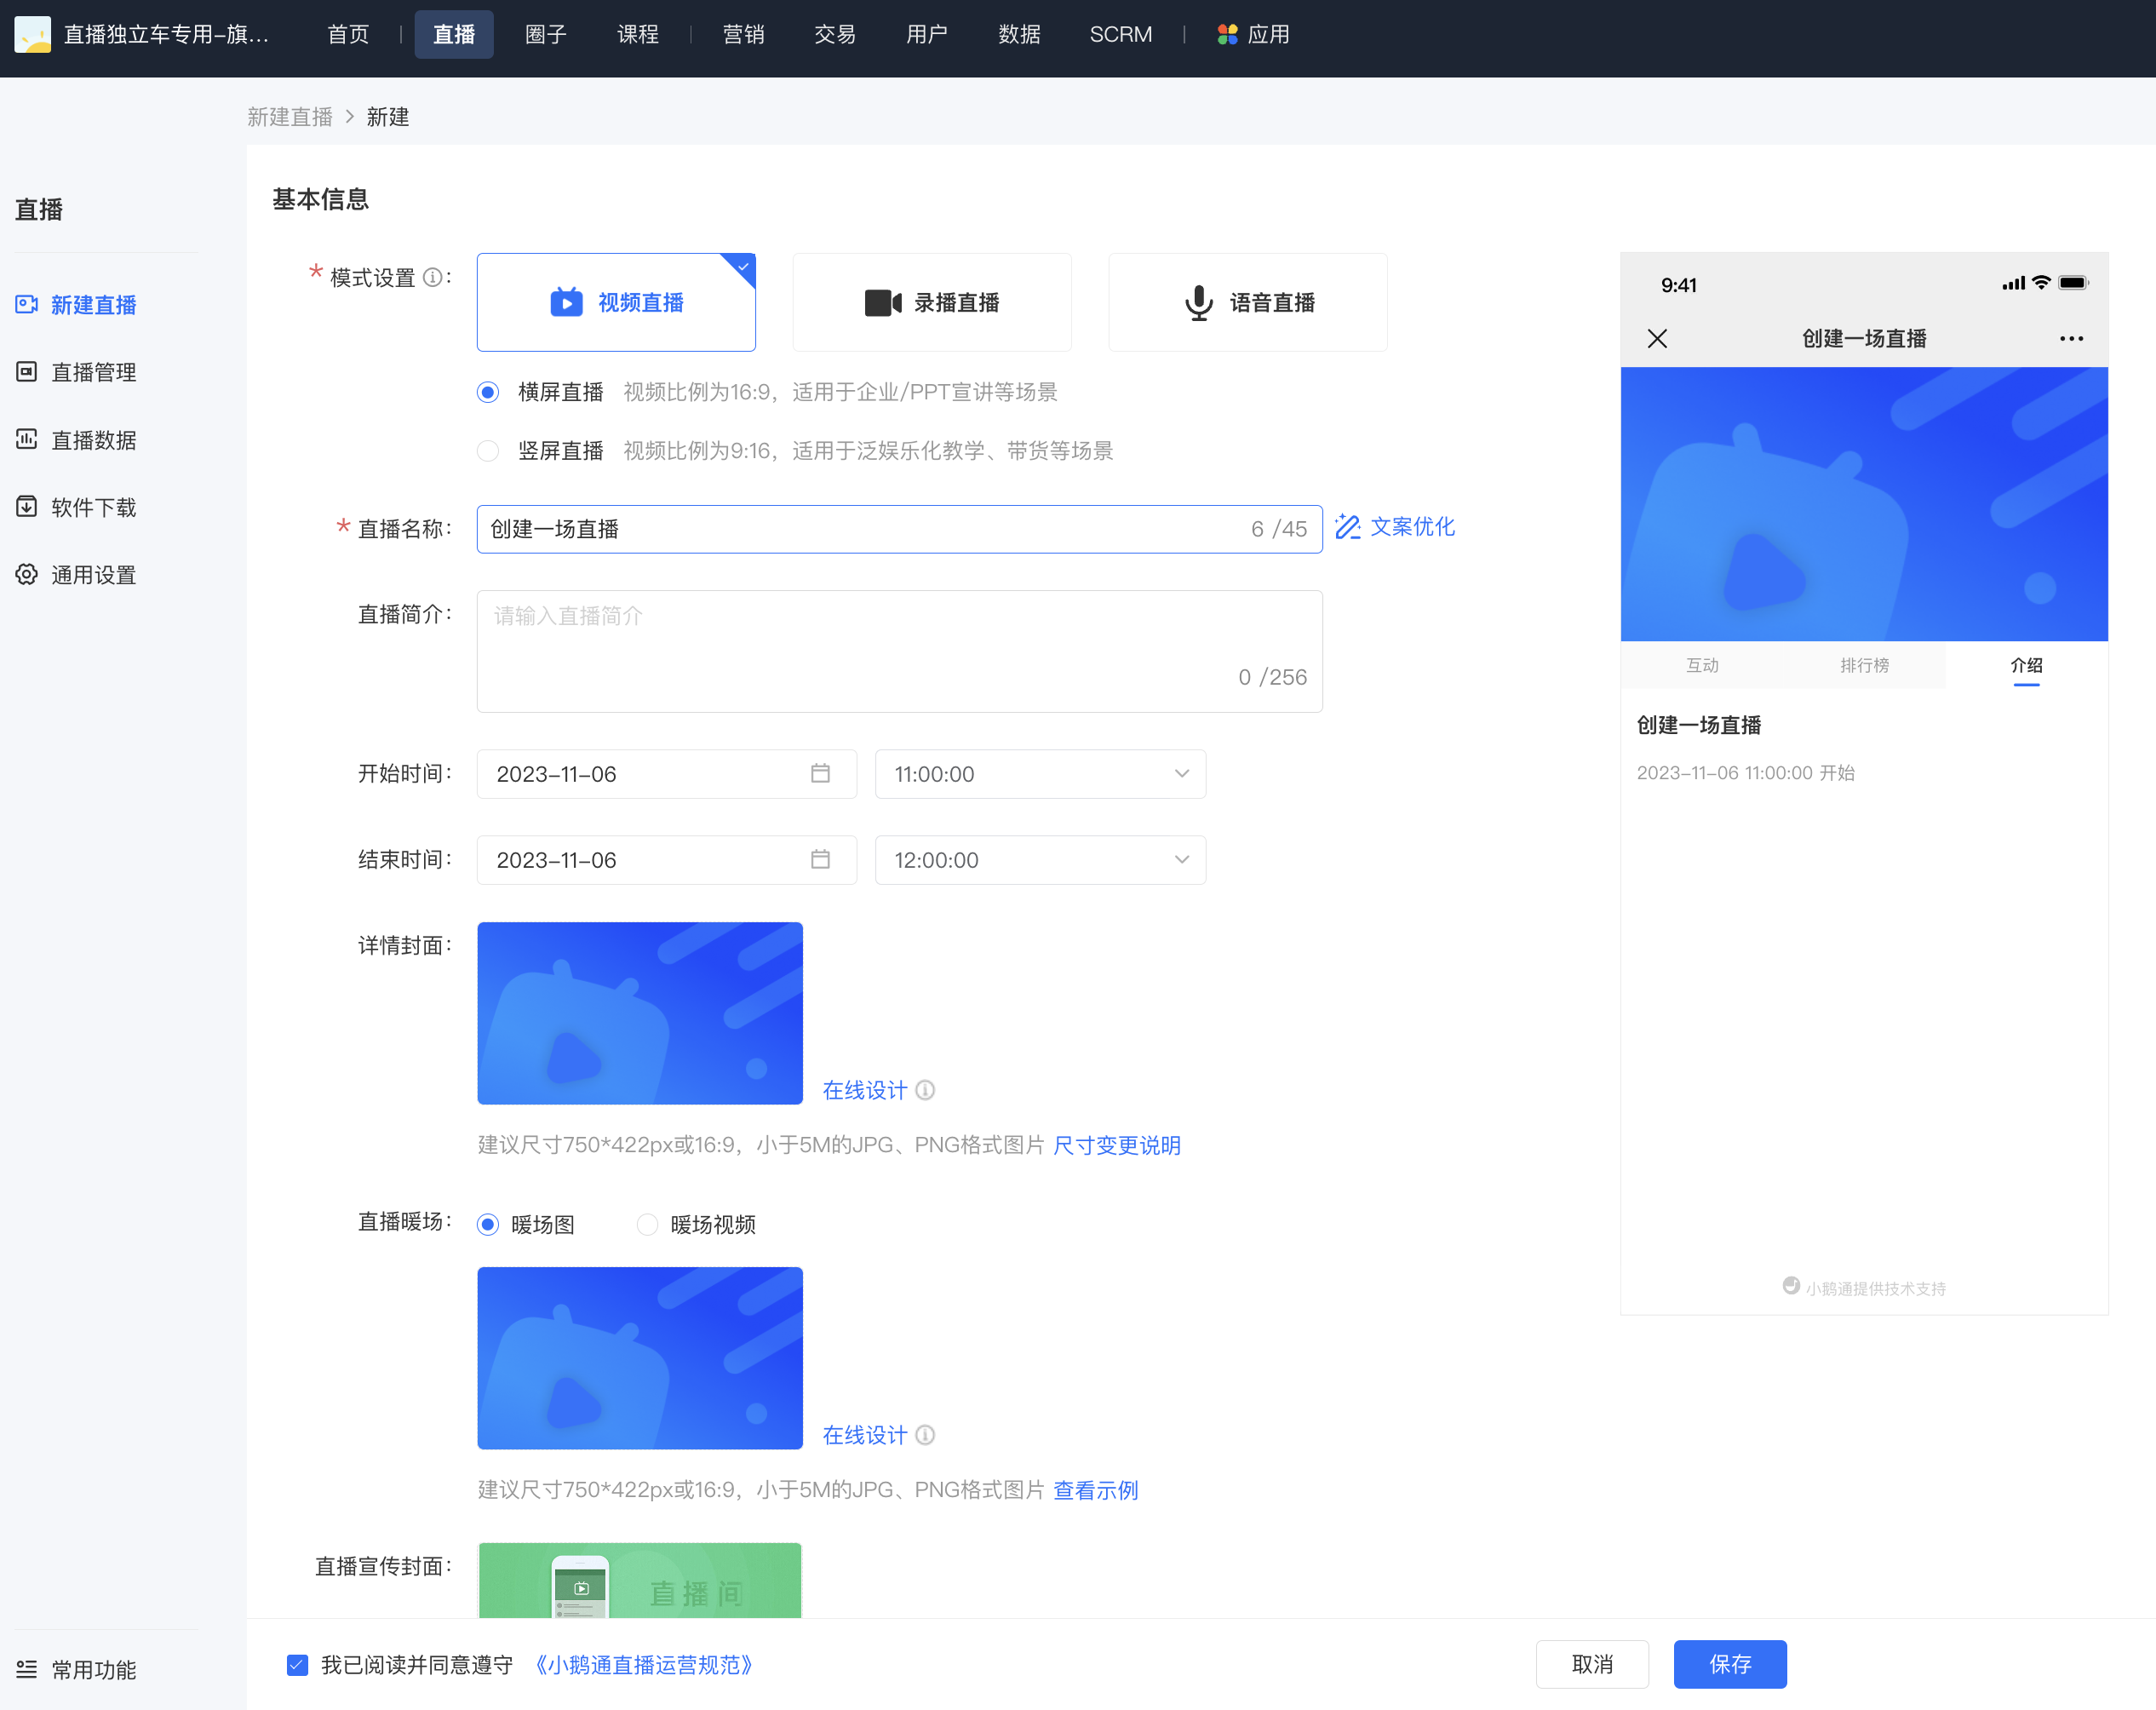
(Live stream creation page)
Step 2 After the creation is completed, click 'Go live' (Management background)
1. Find 'Live stream settings' - 'Live stream method' - 'Go live by yourself'
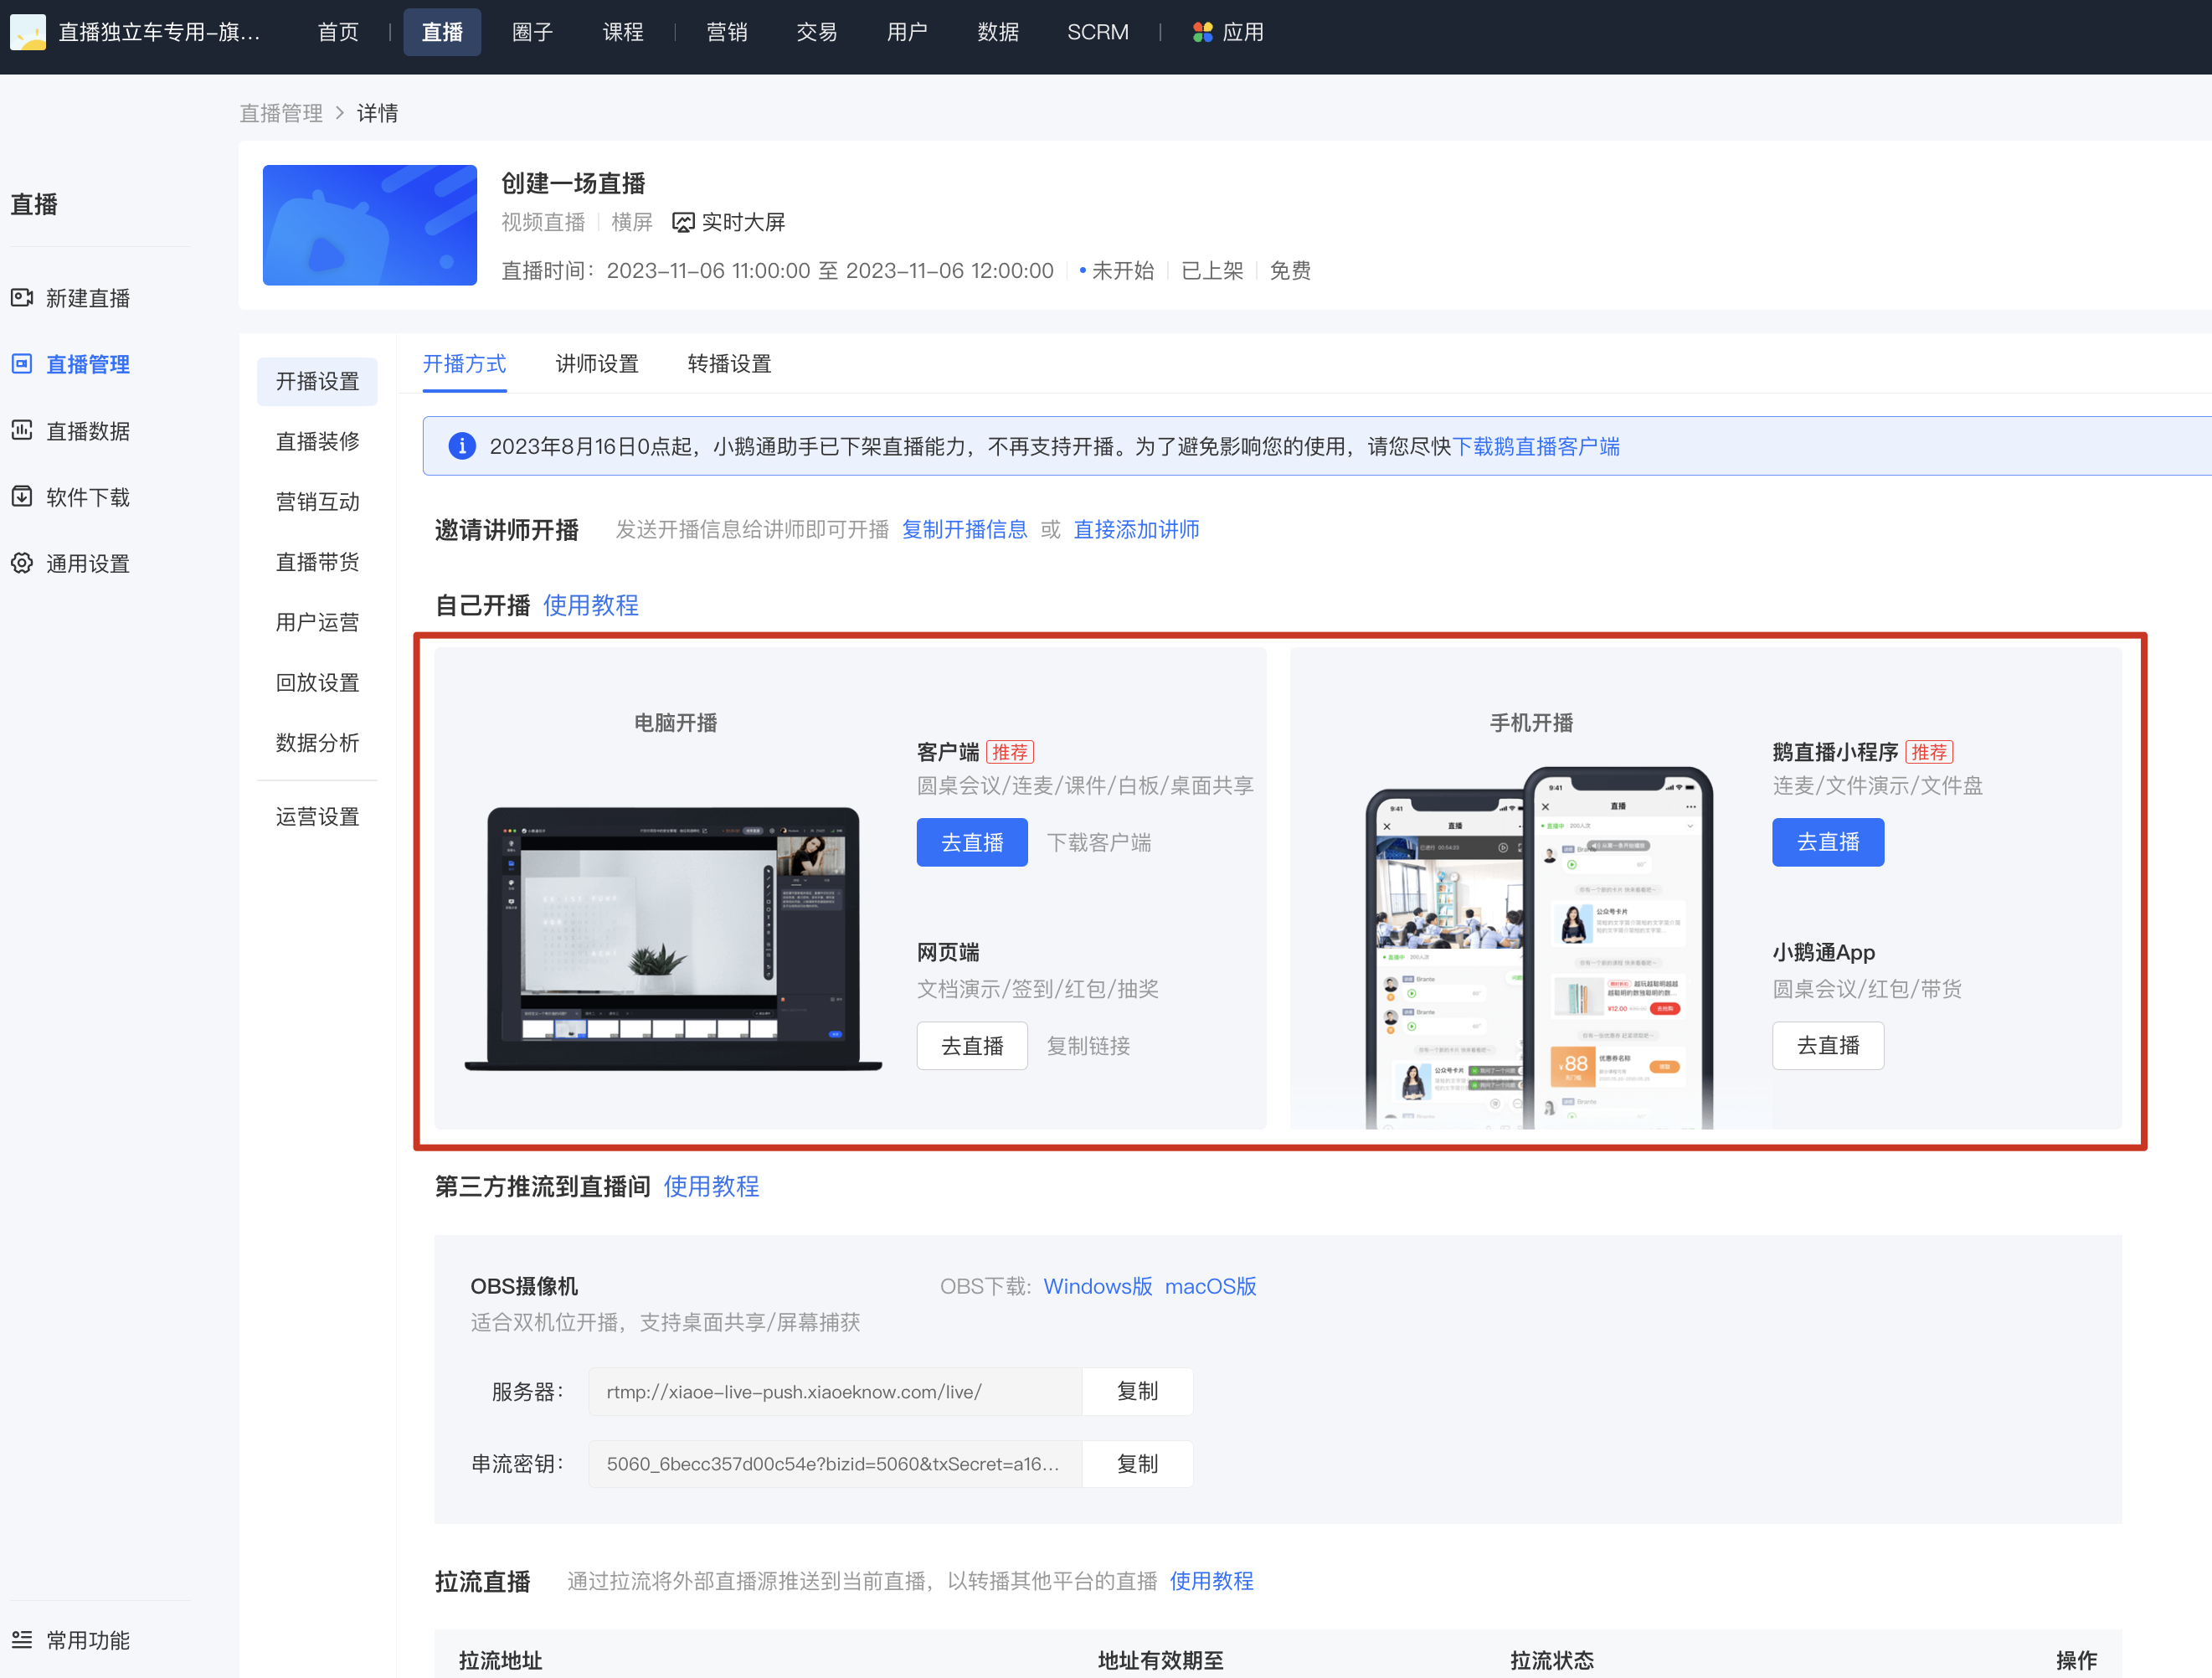
(Creation completed page)
2. Select the 'Web version' for live streaming (Management backend)
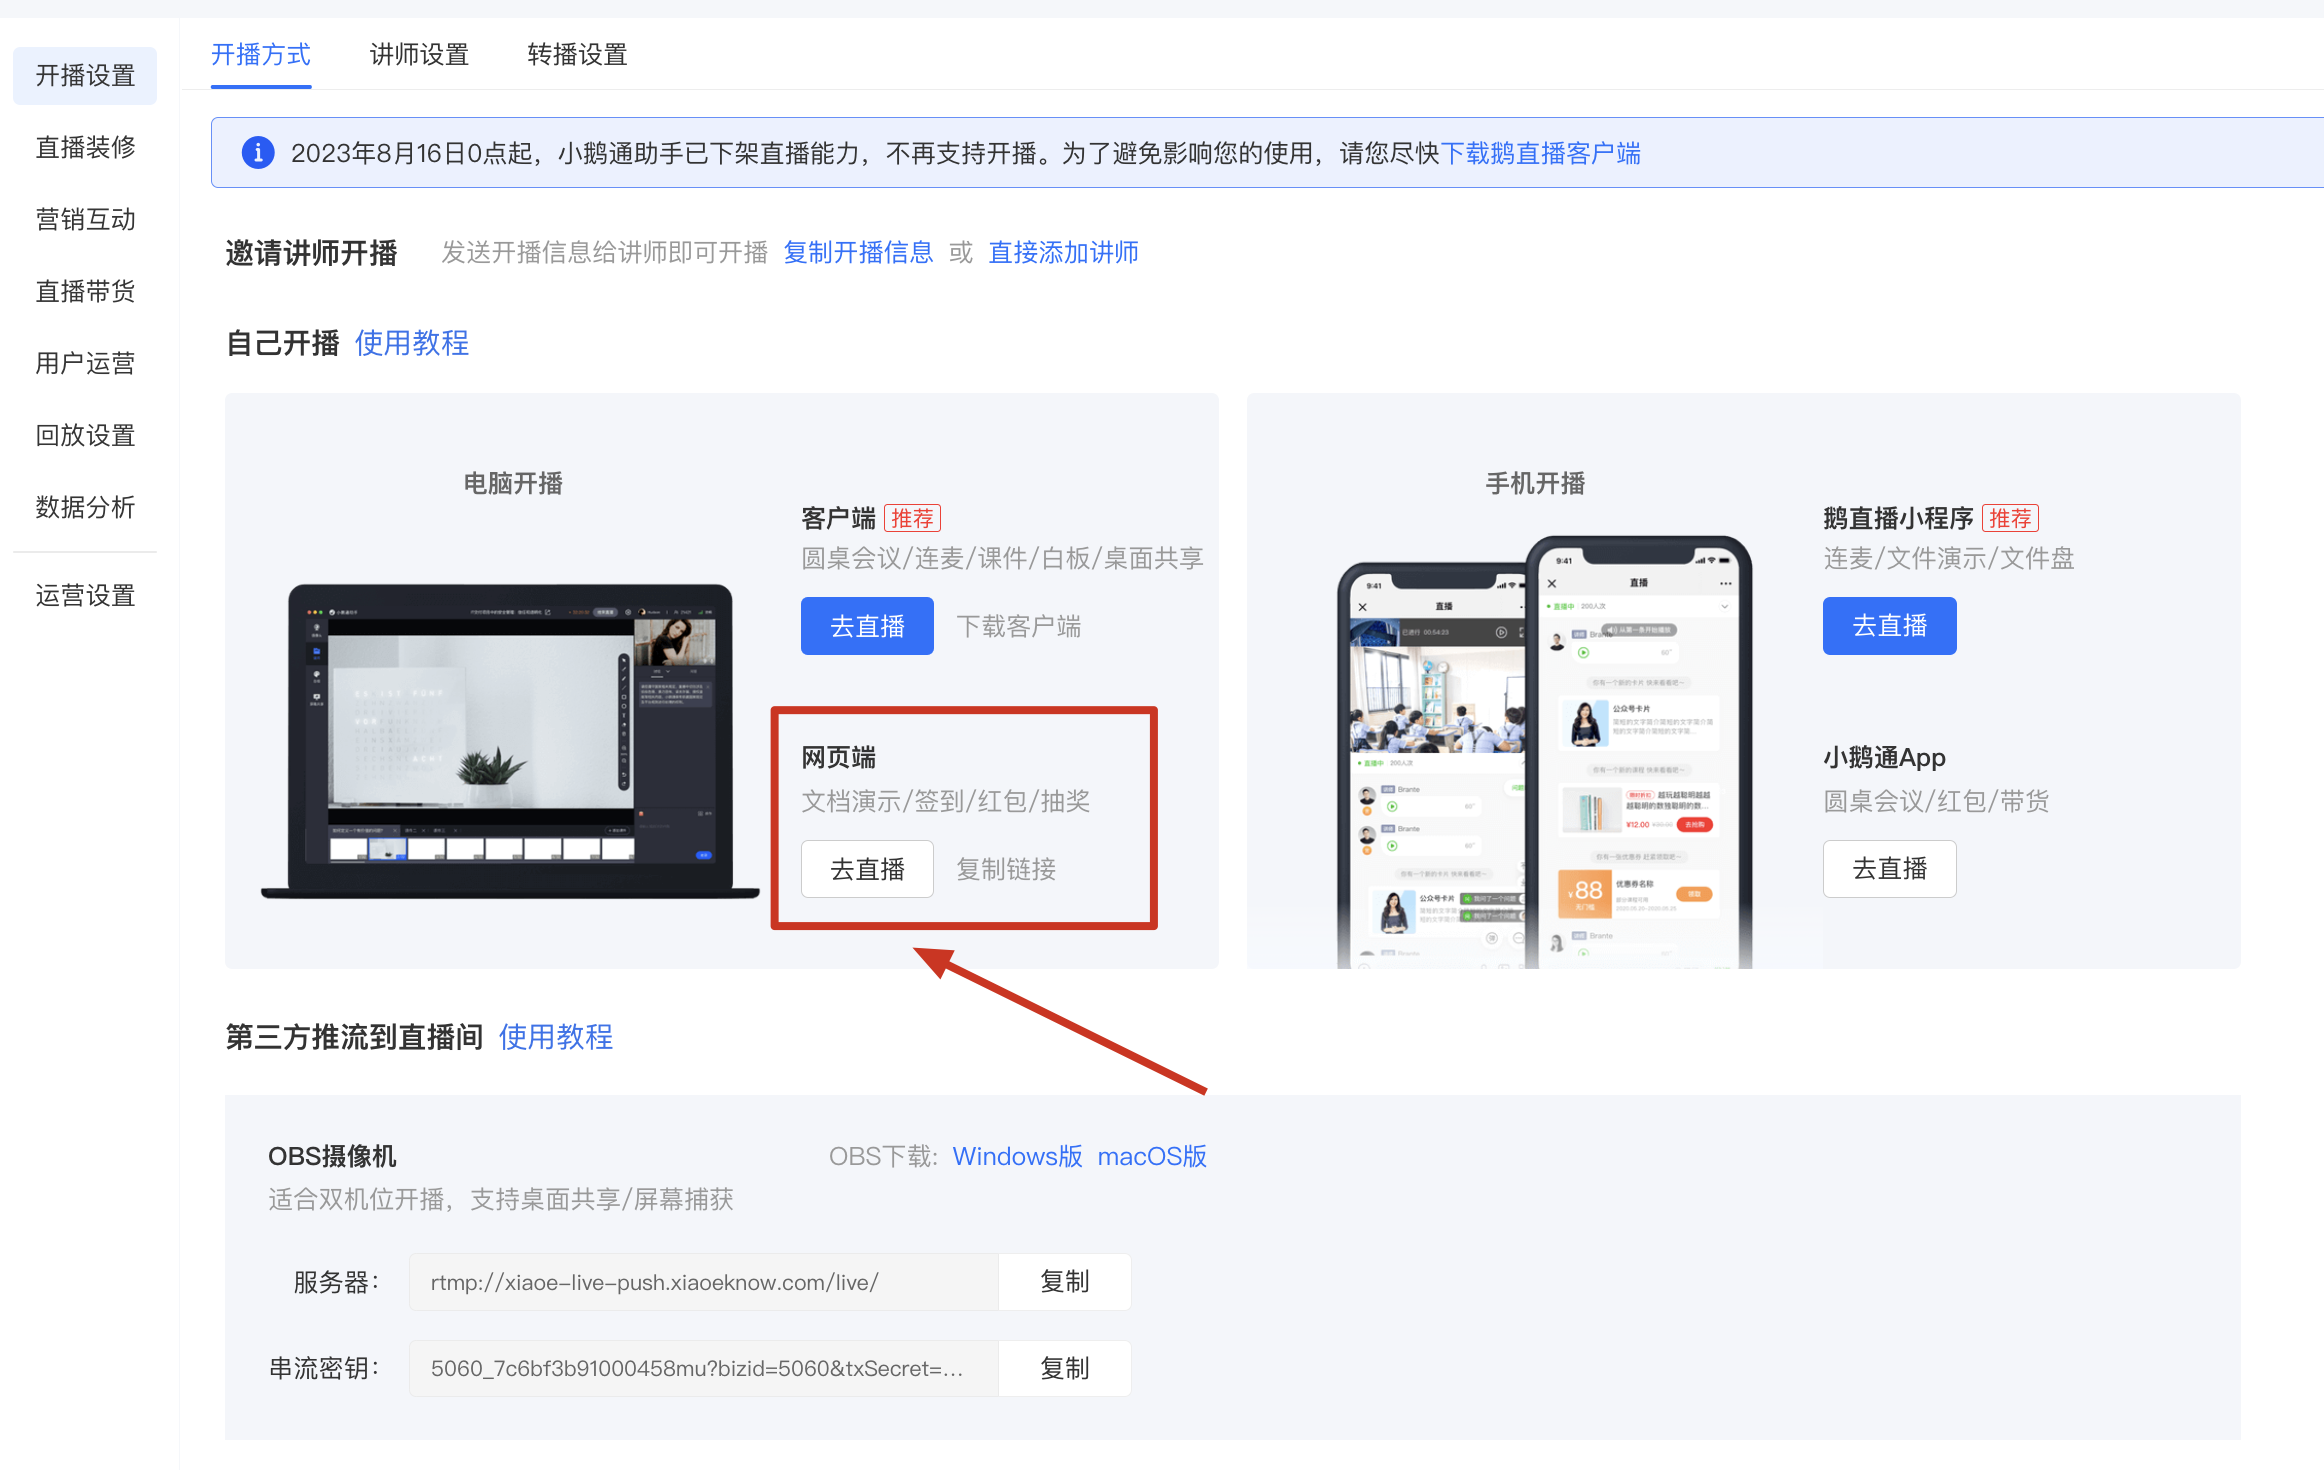
(Live streaming method selection page)
Step 3: Enter the web-based instructor console and conduct live streaming debugging (Web-based instructor console)
1. After entering the live streaming room, check whether your camera and microphone are working properly as prompted.
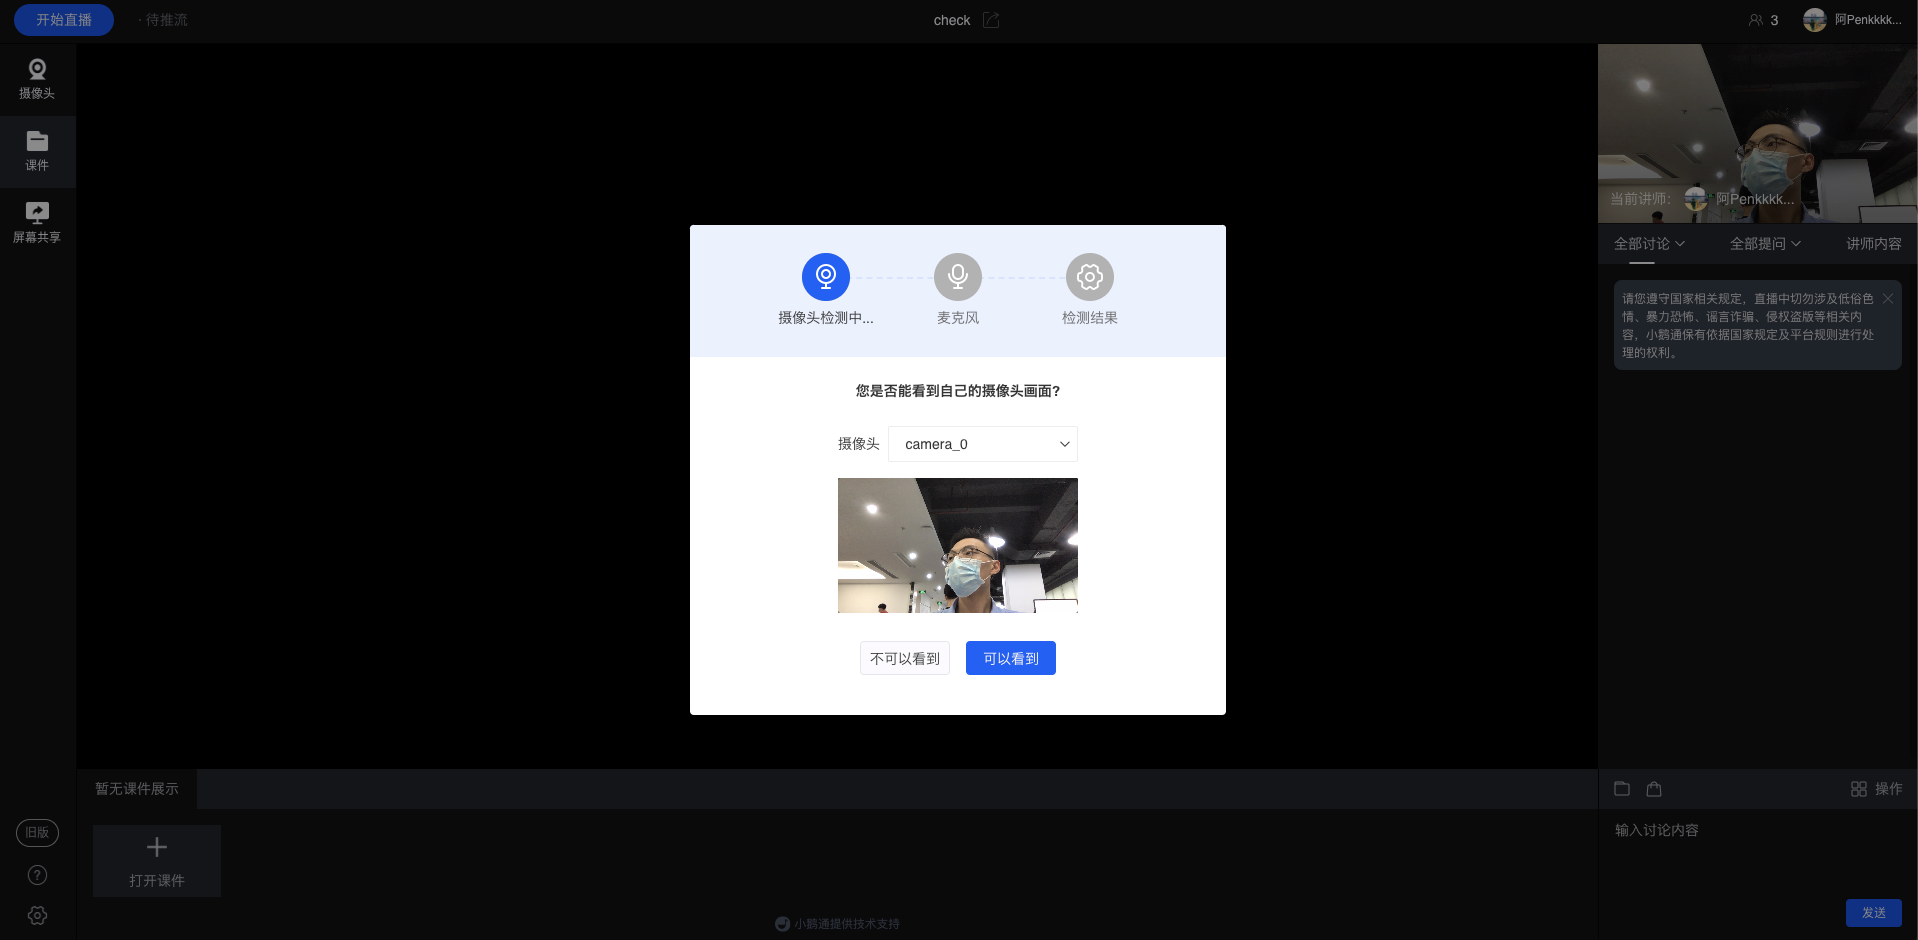
(Live streaming instructor console)
2. You can upload relevant courseware PDFs in advance.
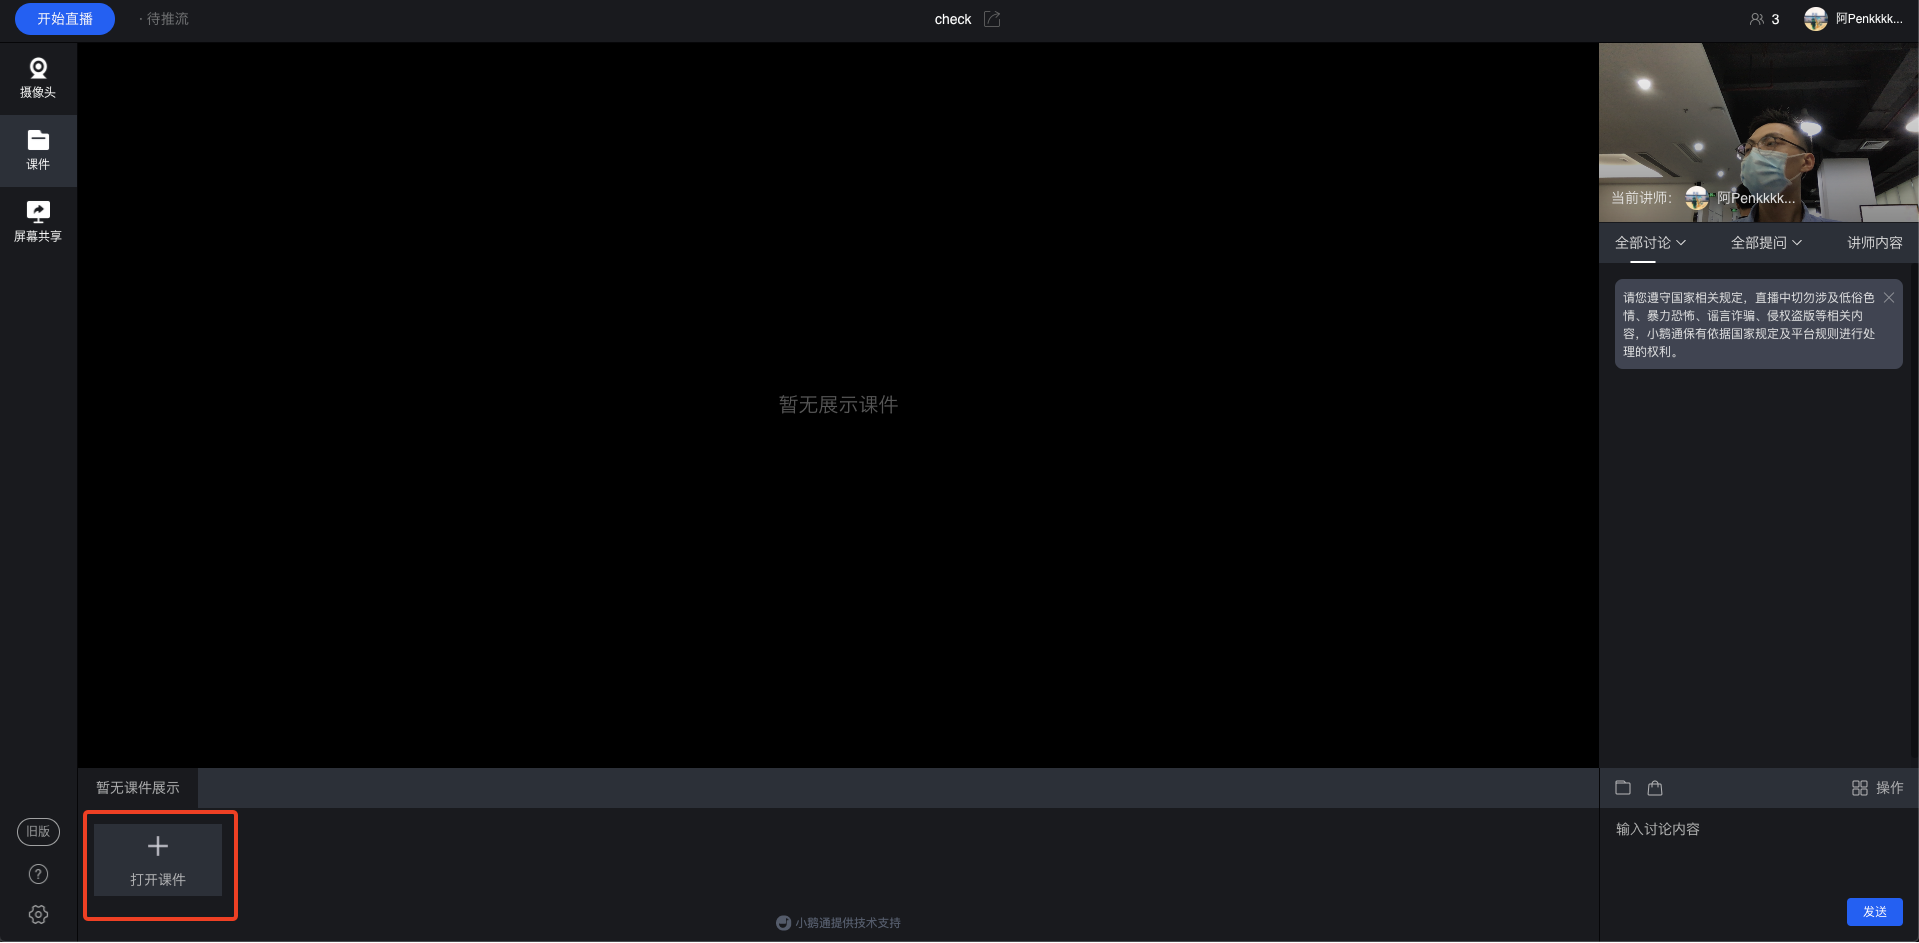
(Live streaming instructor console)
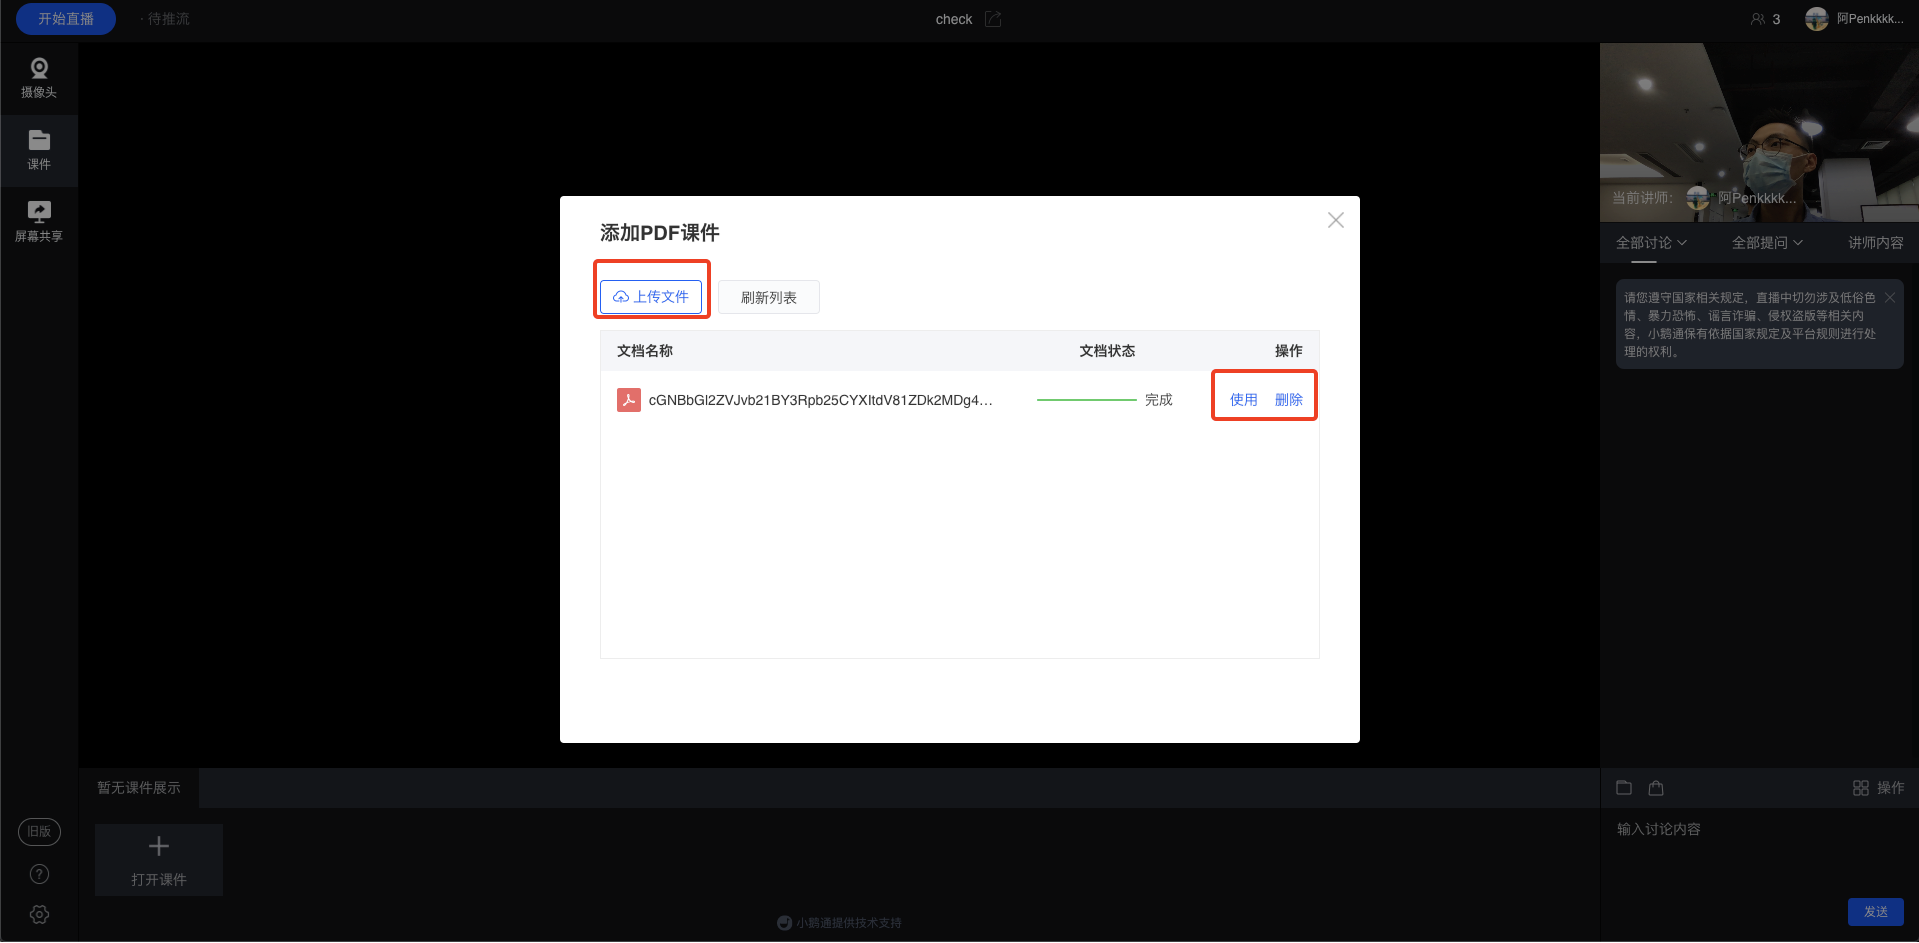
(Courseware management page)
Step 4: Start the live streaming (Web-based instructor console)
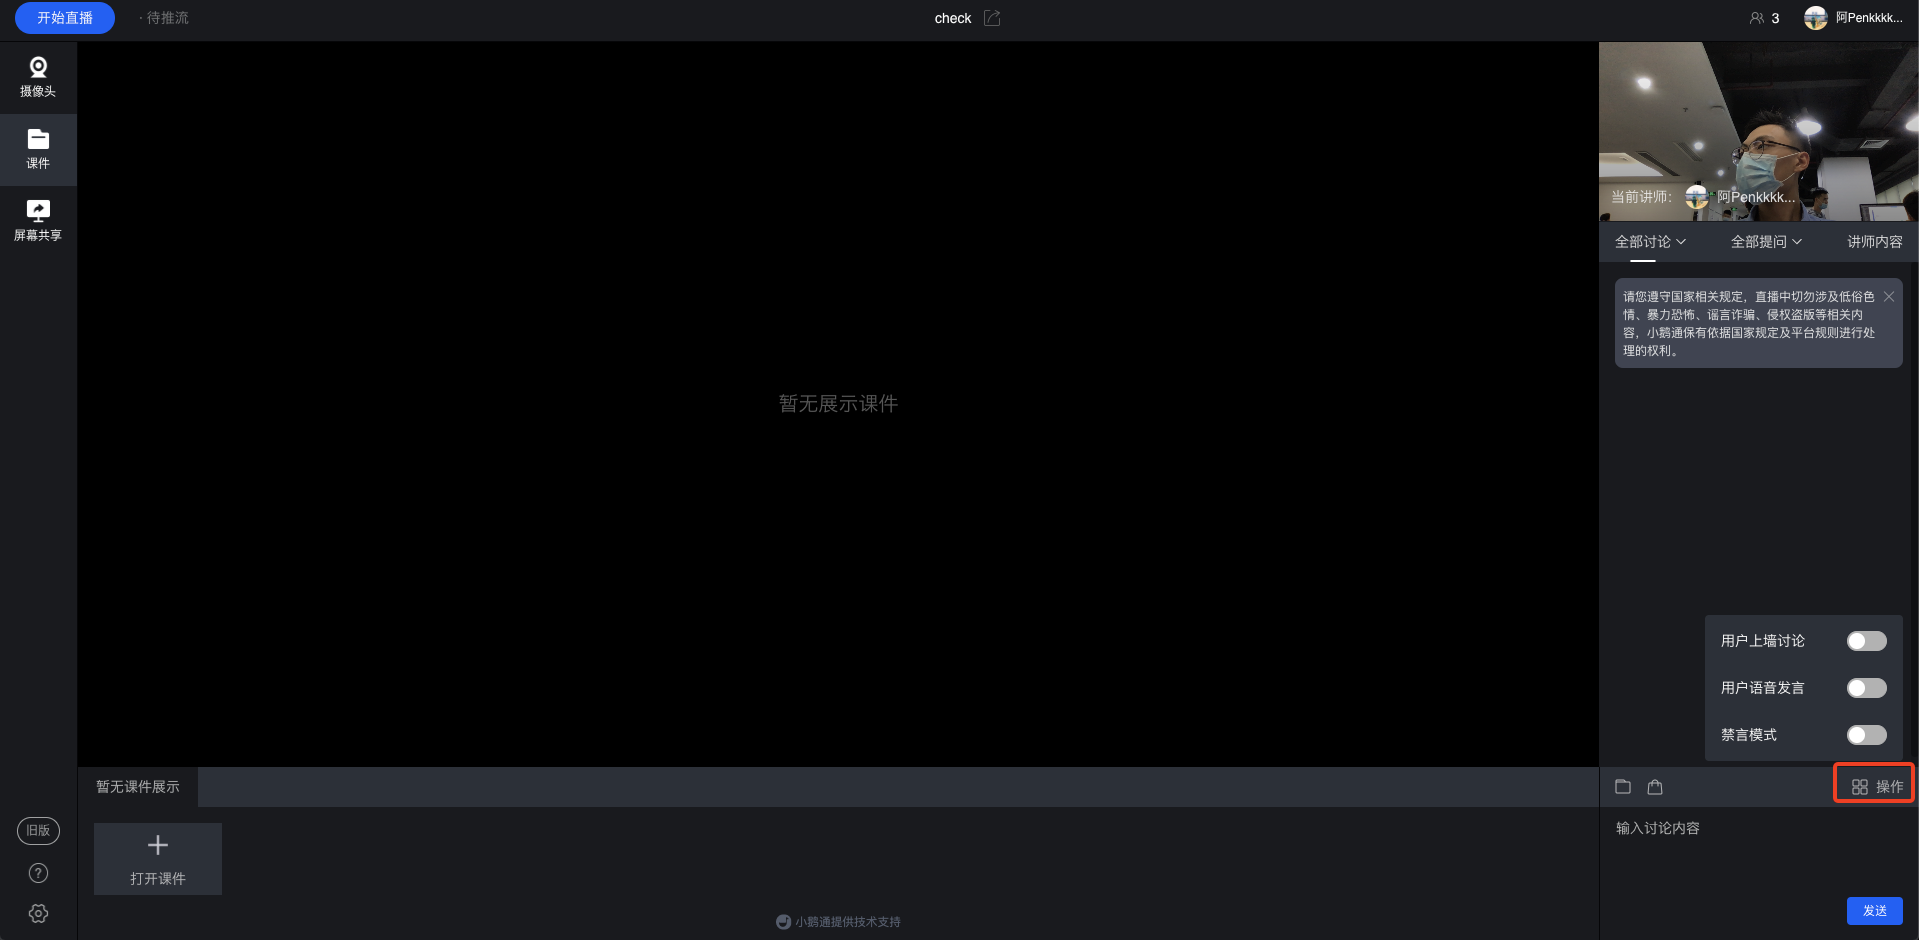
1. After the devices and courseware are uploaded, click 'Start Live Streaming' in the top - left corner to begin the live streaming.
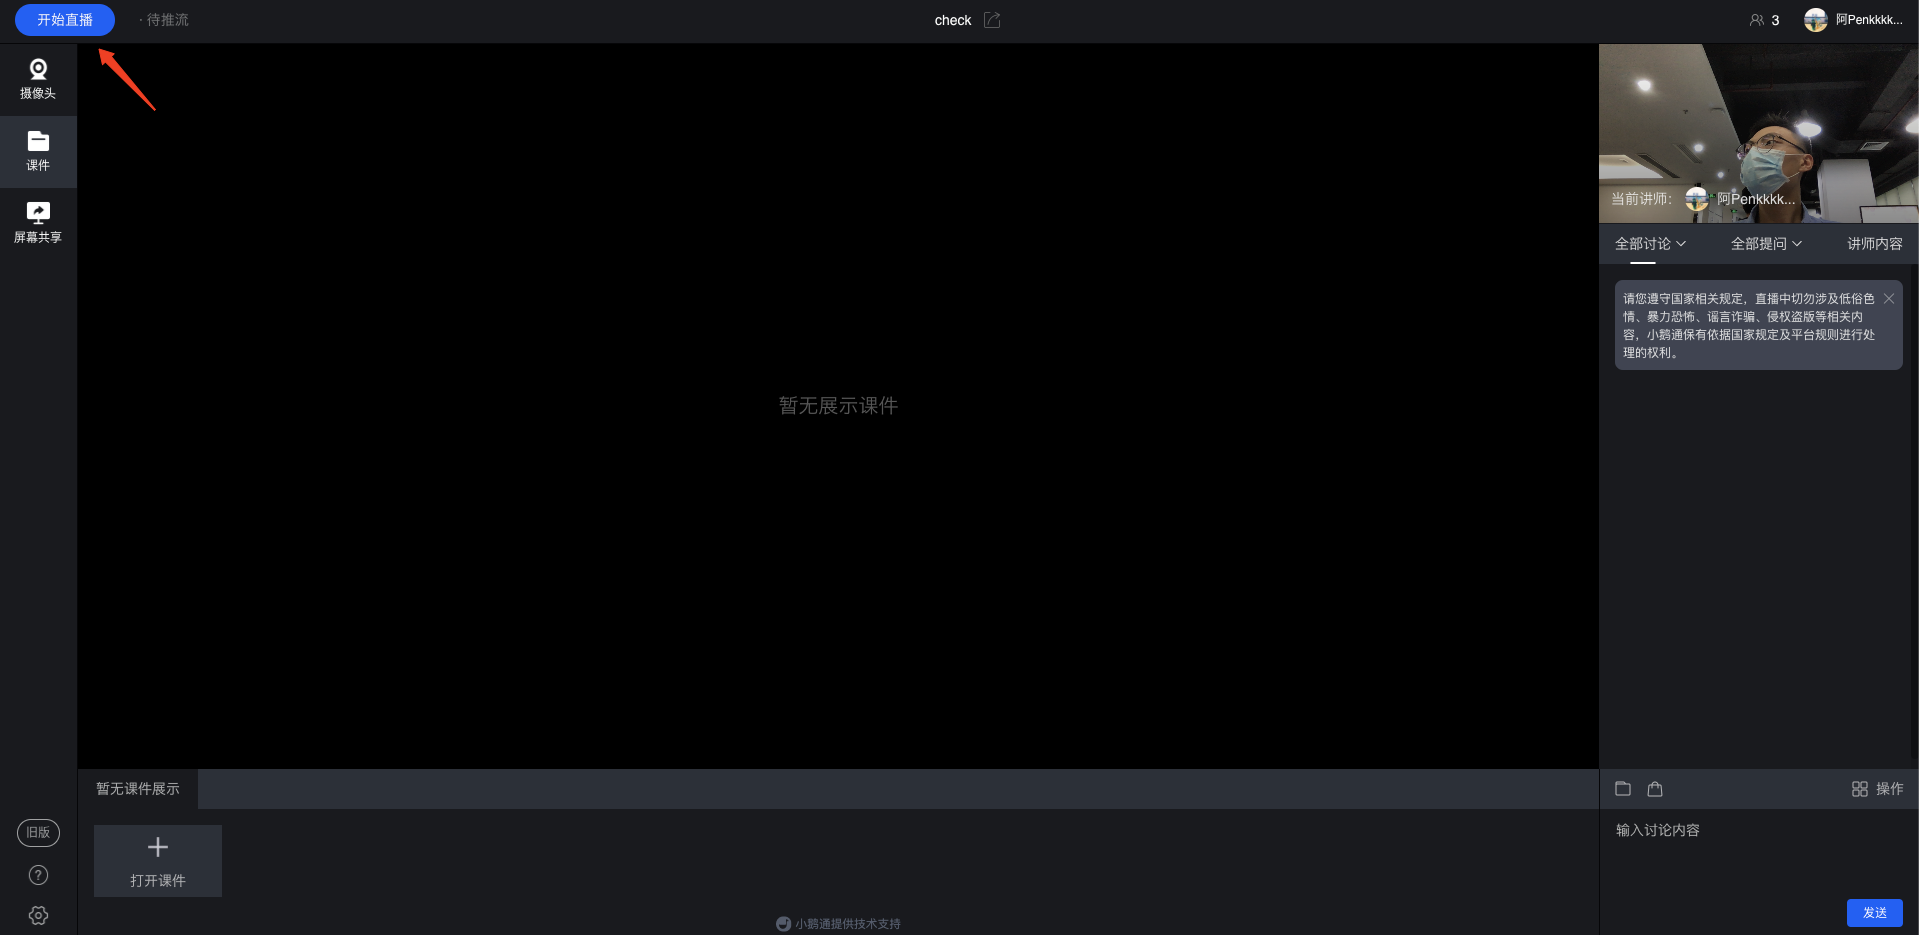
(Live streaming instructor console)
2. Click 'Camera', 'Courseware' & 'Screen Sharing' on the left to switch the live streaming mode at any time.
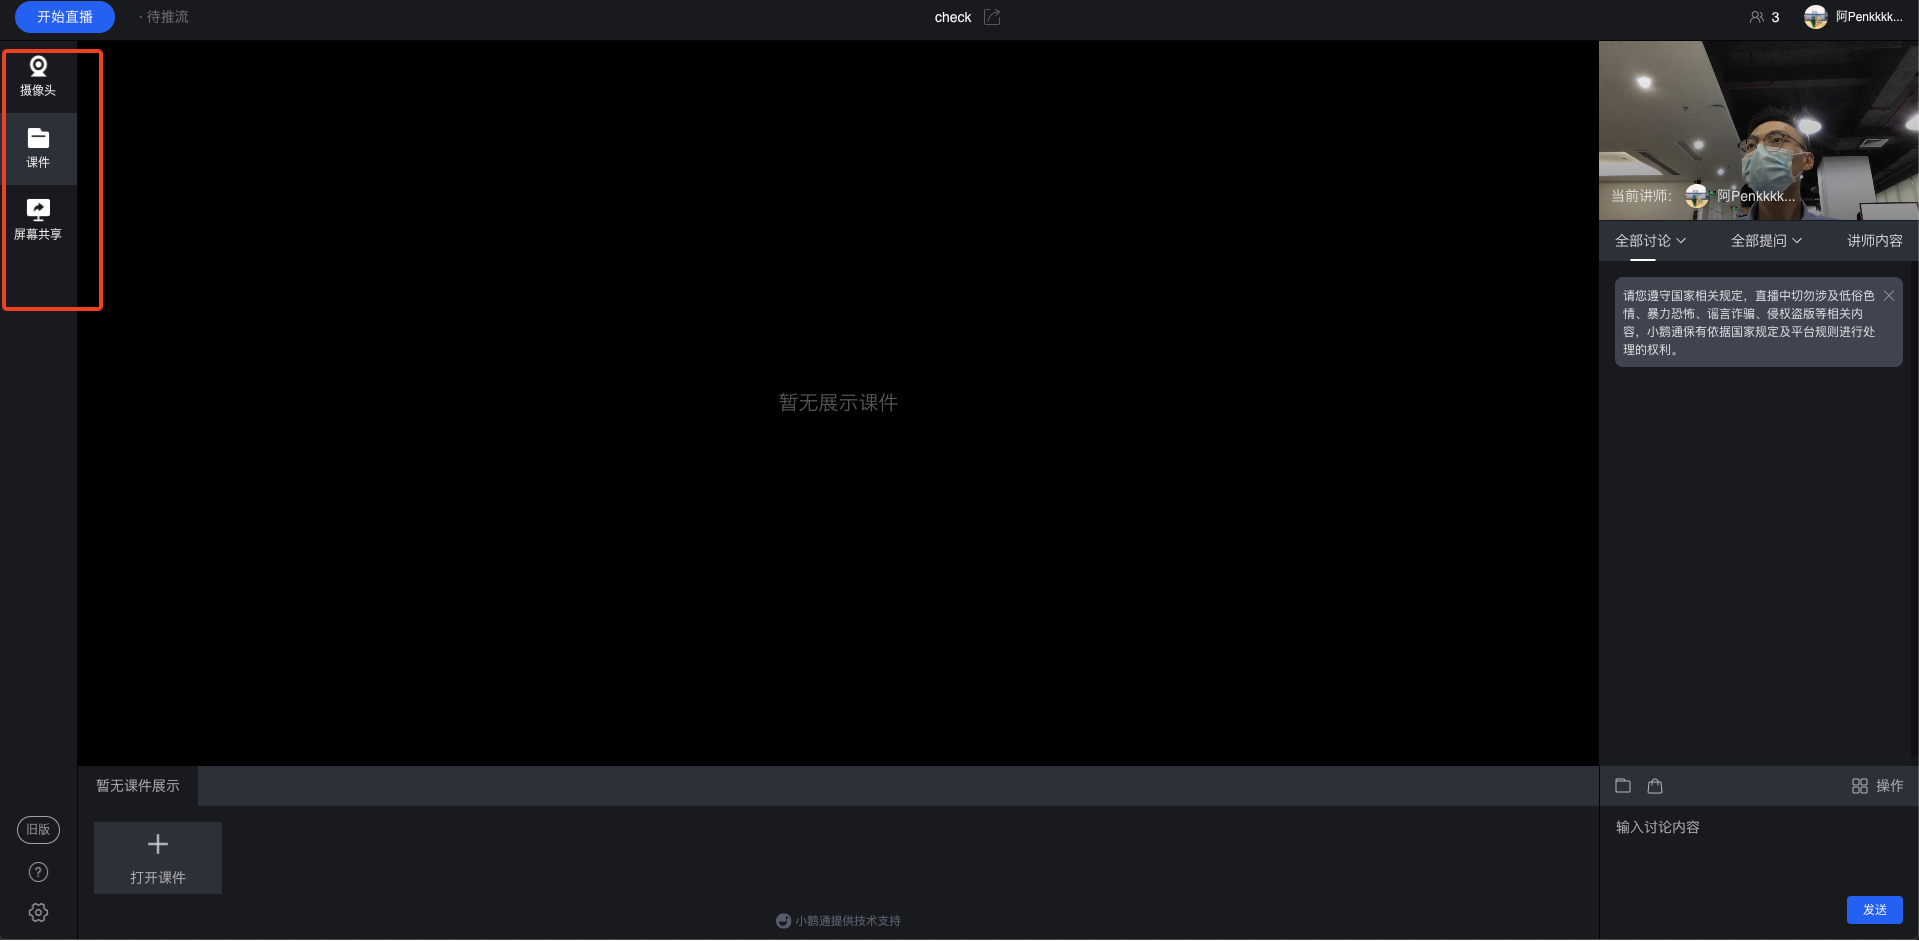
(Live streaming instructor console)
When the live streaming mode is 'Screen Sharing', you can click 'Window Switching' on the right to switch the screen window.
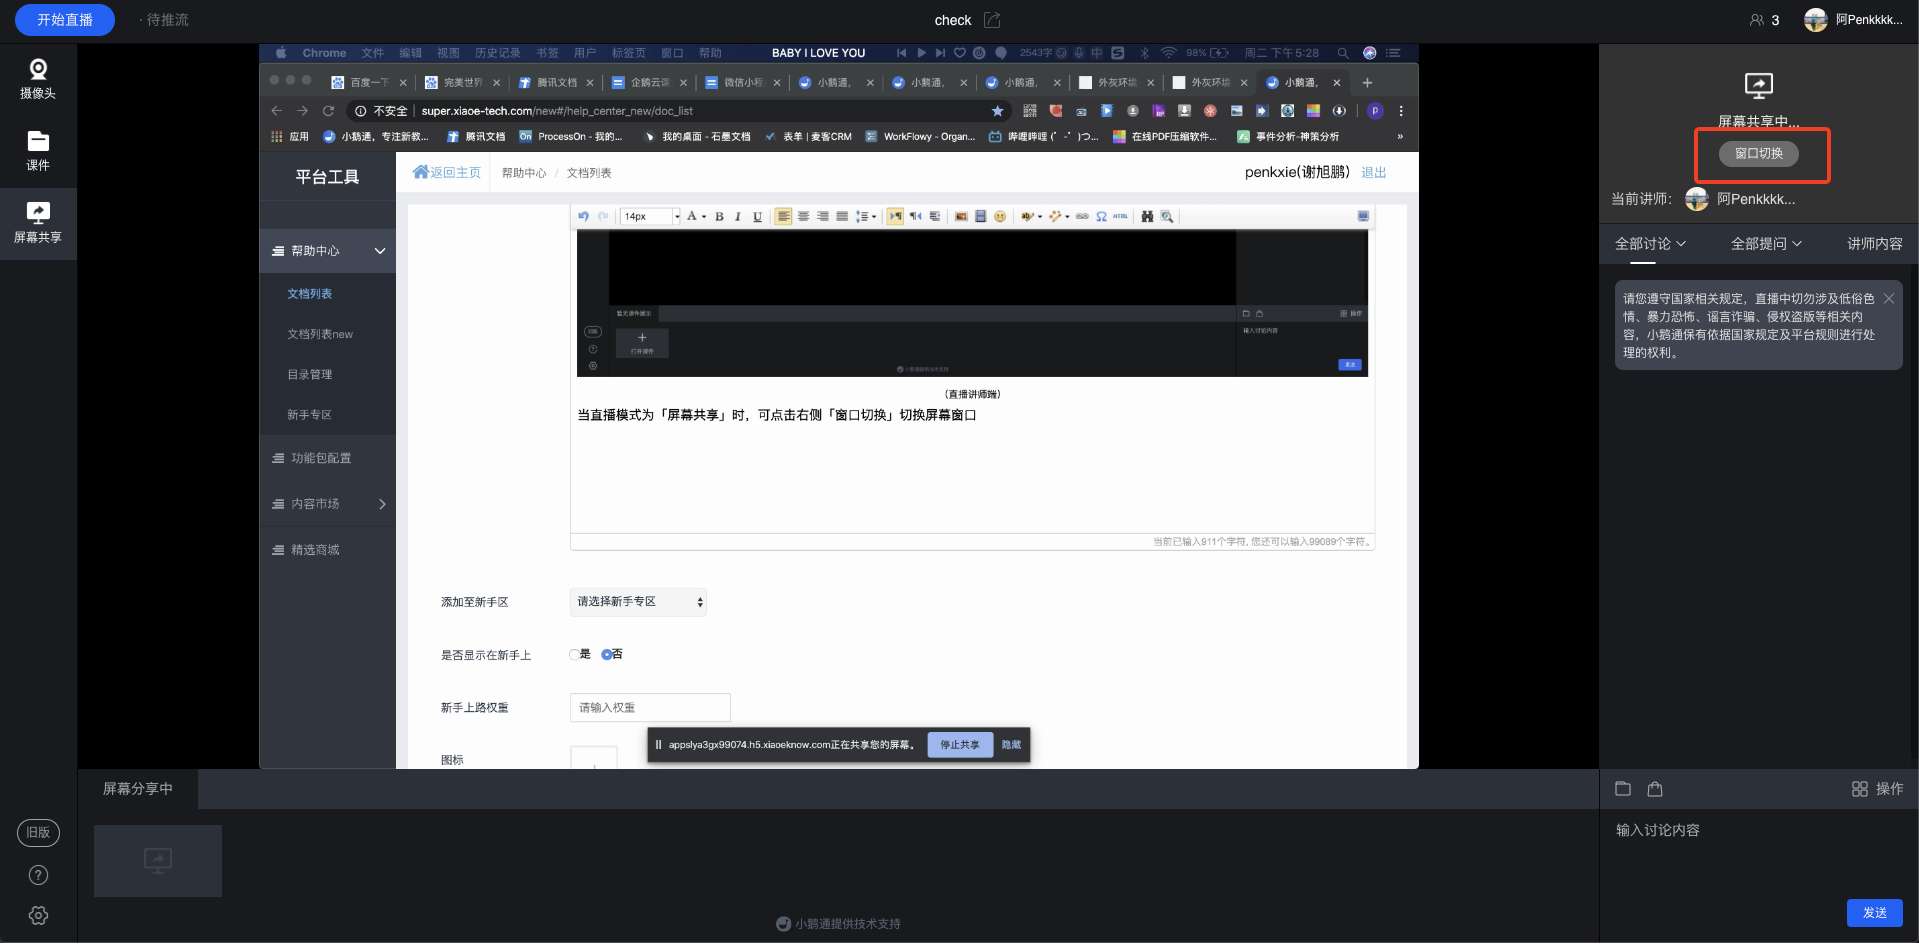
(Click 'Window Switching' to...)
3. Other operations
● Switch to the old - version live streaming room style
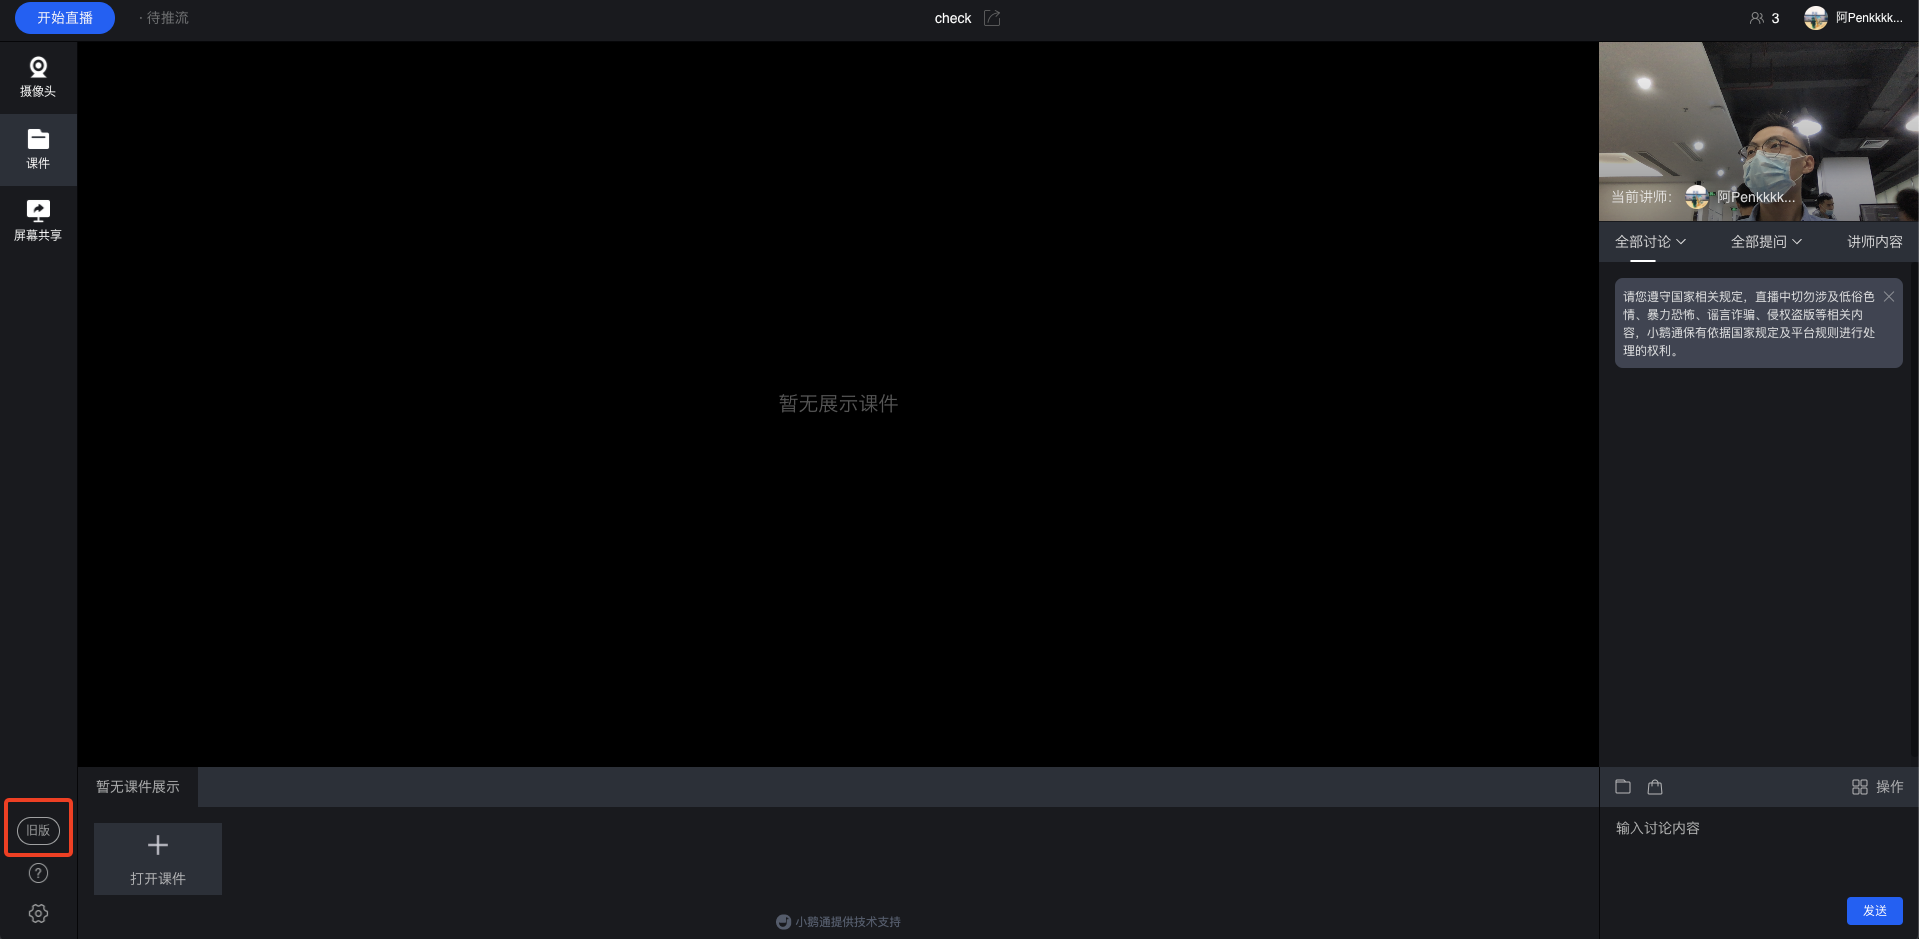
● View the usage tutorial
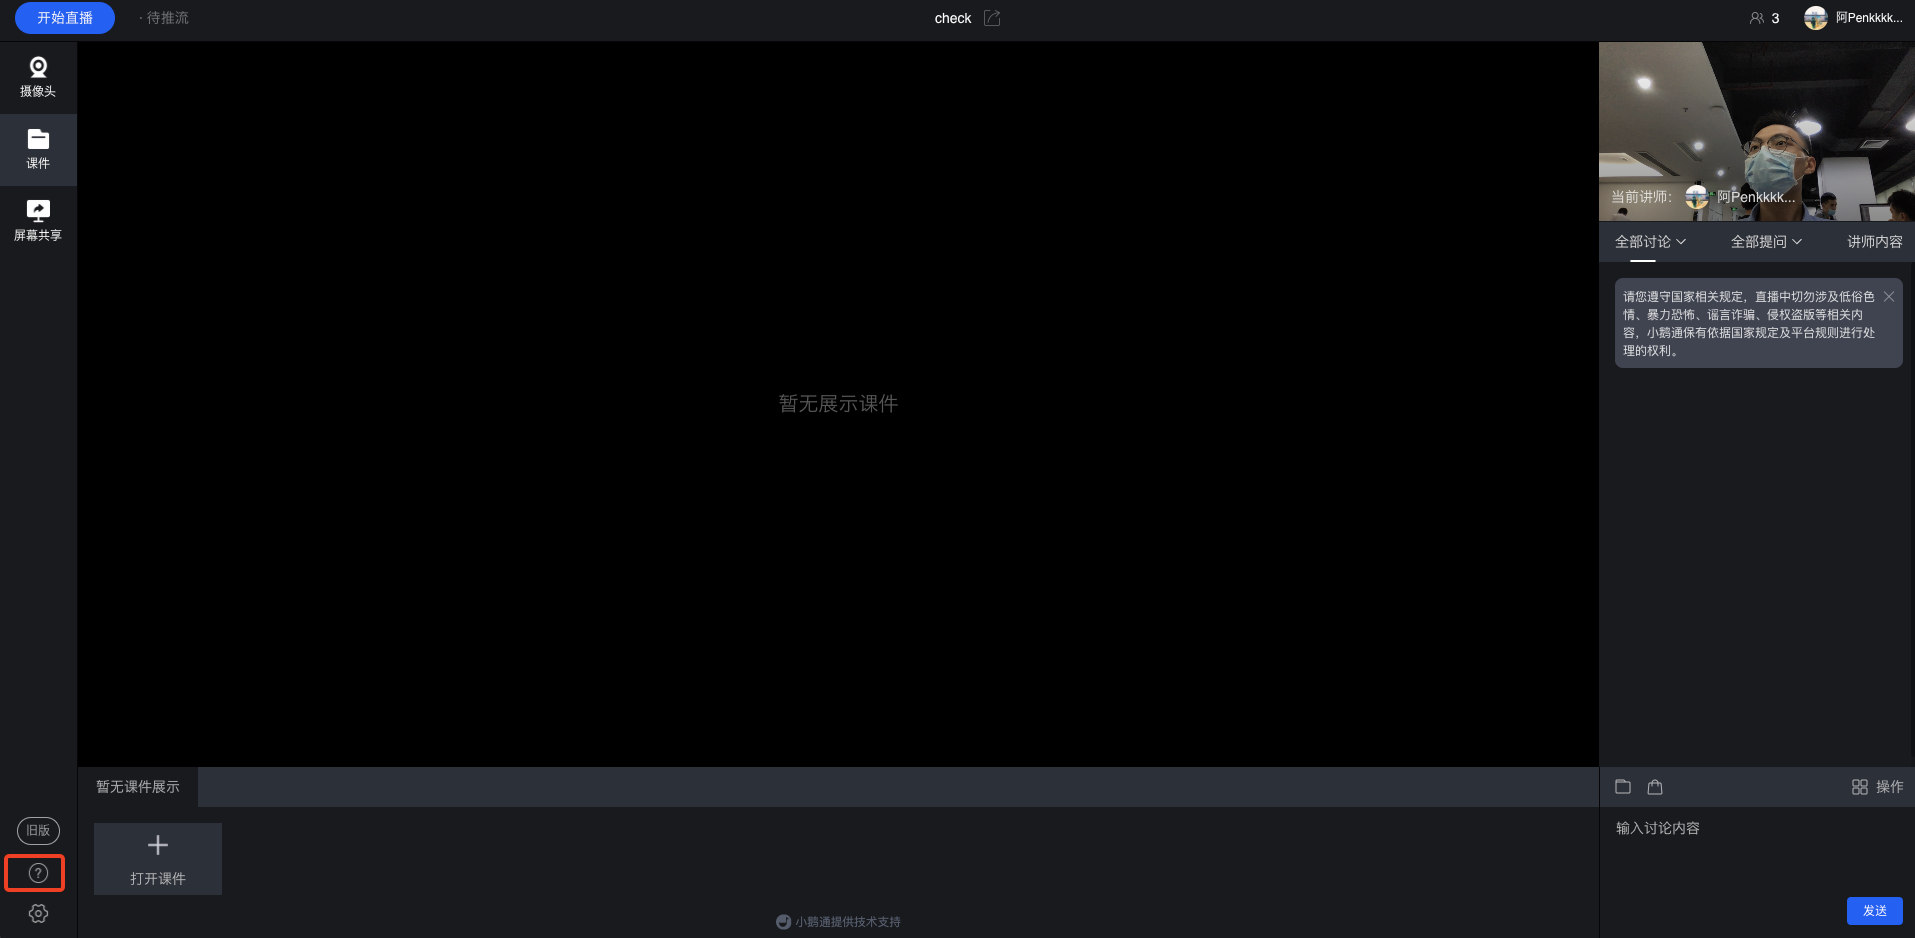
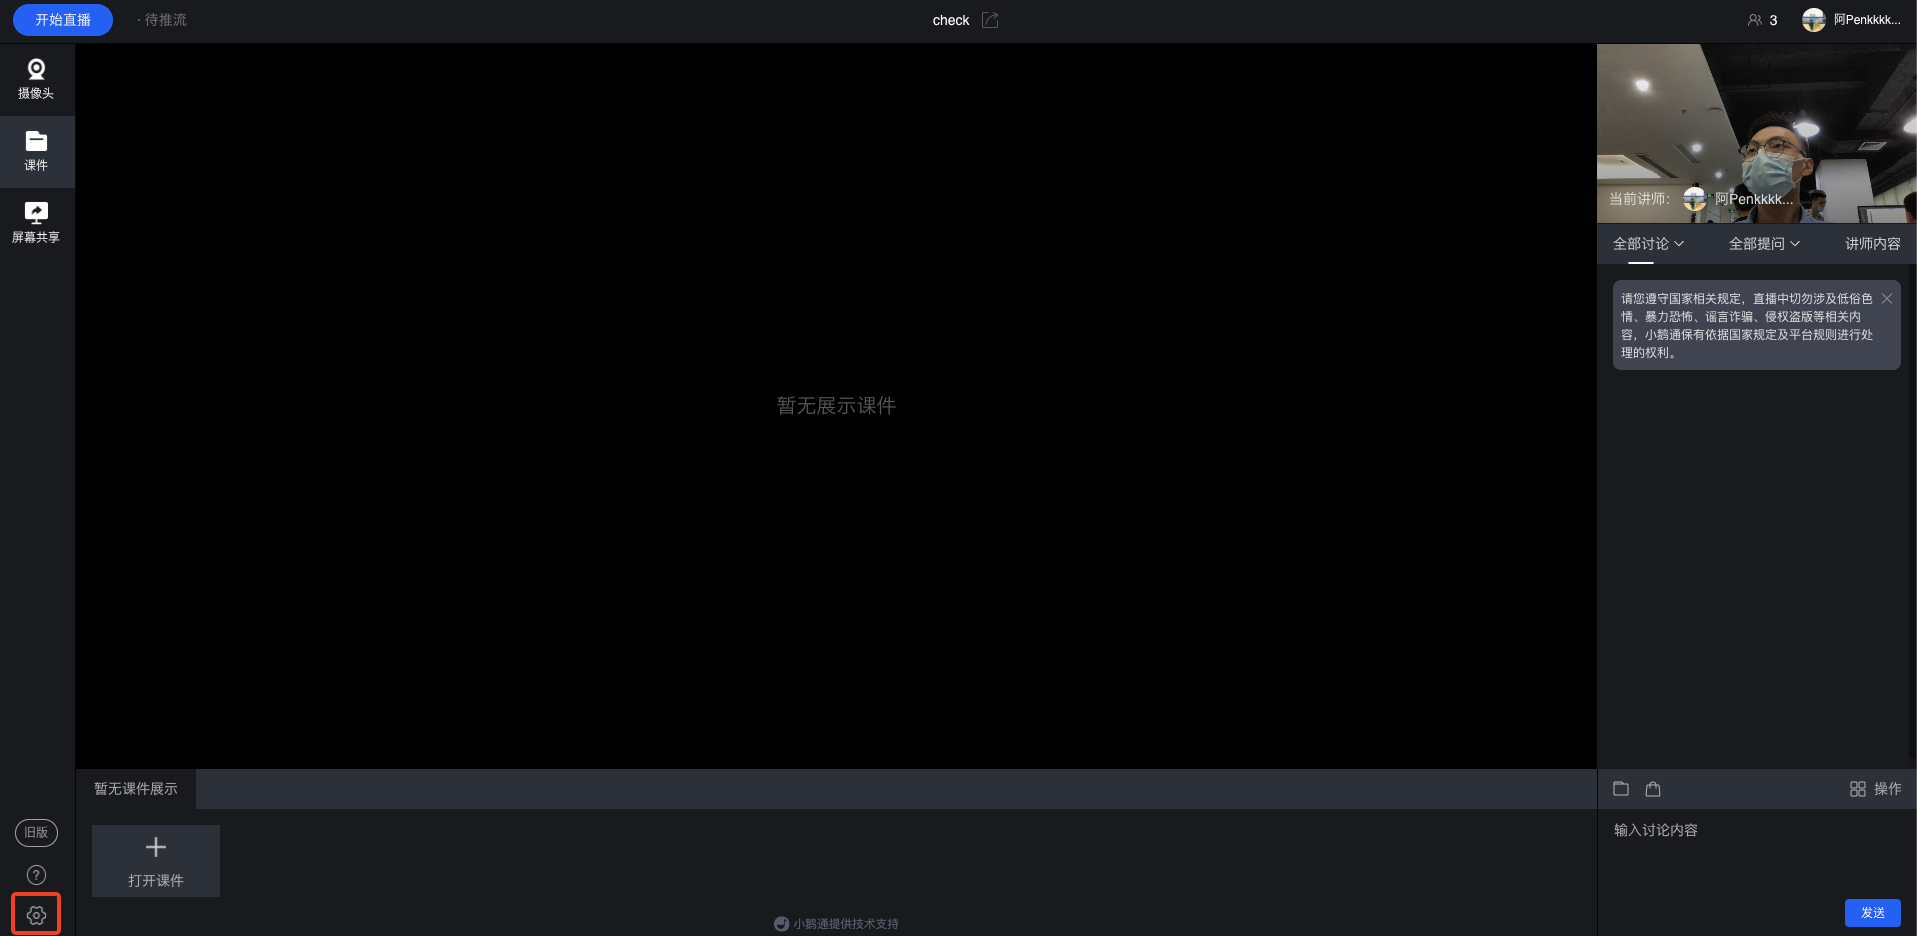
● Re - check the devices
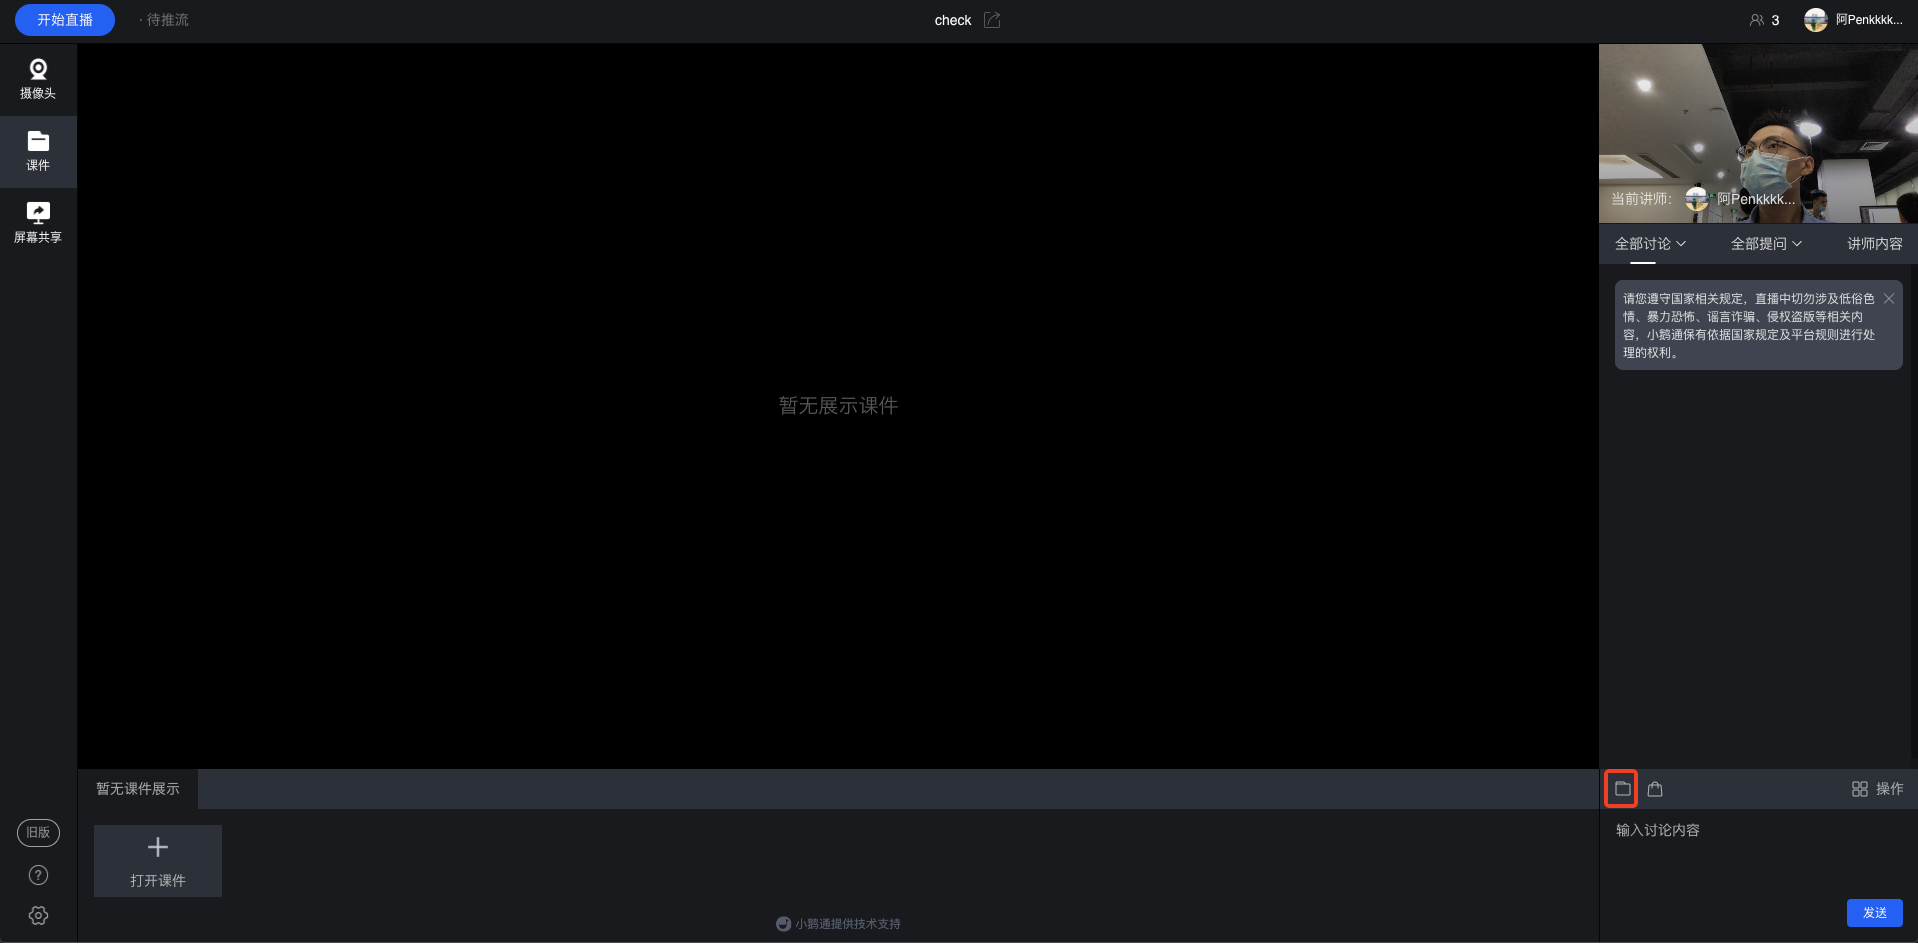
● Send the explanation content
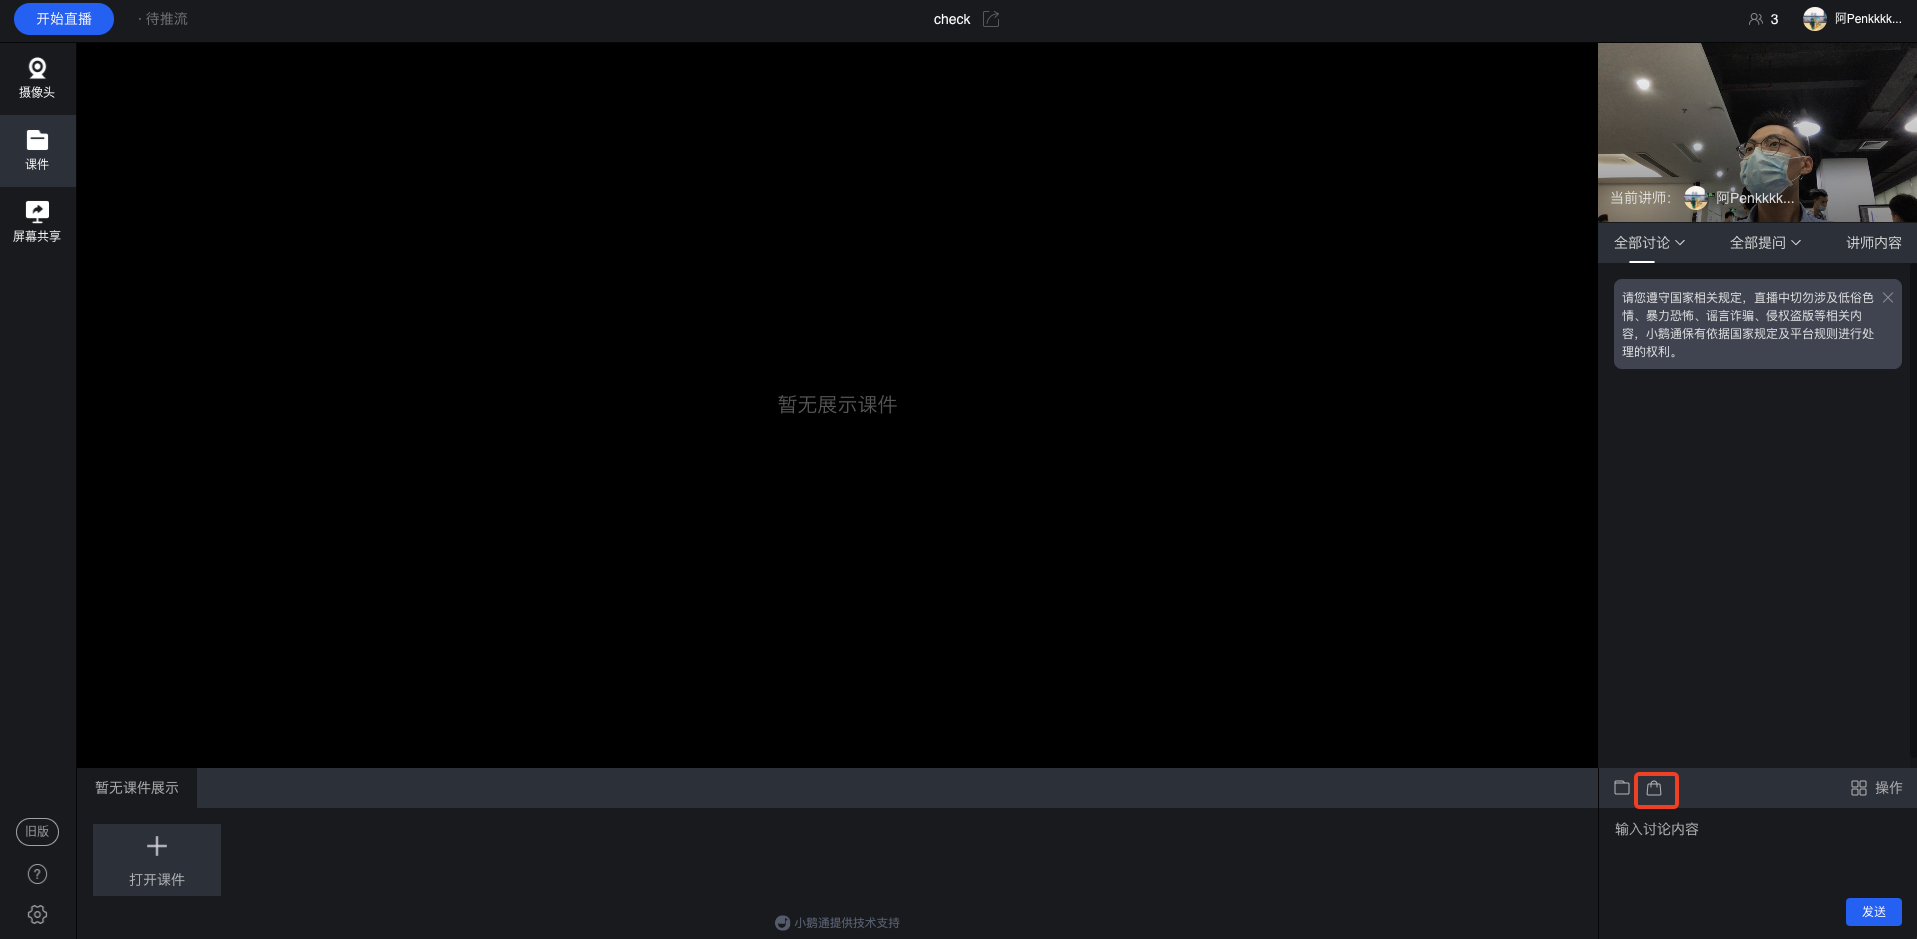
● Send coupons, courses & cards
● Allow users to post on the wall, speak via voice, and mute users
【OBS】How to Use Beauty Filters
I. Installation
1. Download the standalone installation package for the beauty camera>> Click to download <<
2. Double - click the installation package to run the installer after the download is complete

You can open OBS after the installation is complete
II. Usage
Open OBS

Add the beauty camera to the source

Select the camera device in the pop - up window, and adjust the values such as resolution, frames per second (FPS), and video format. You can also keep the default device options
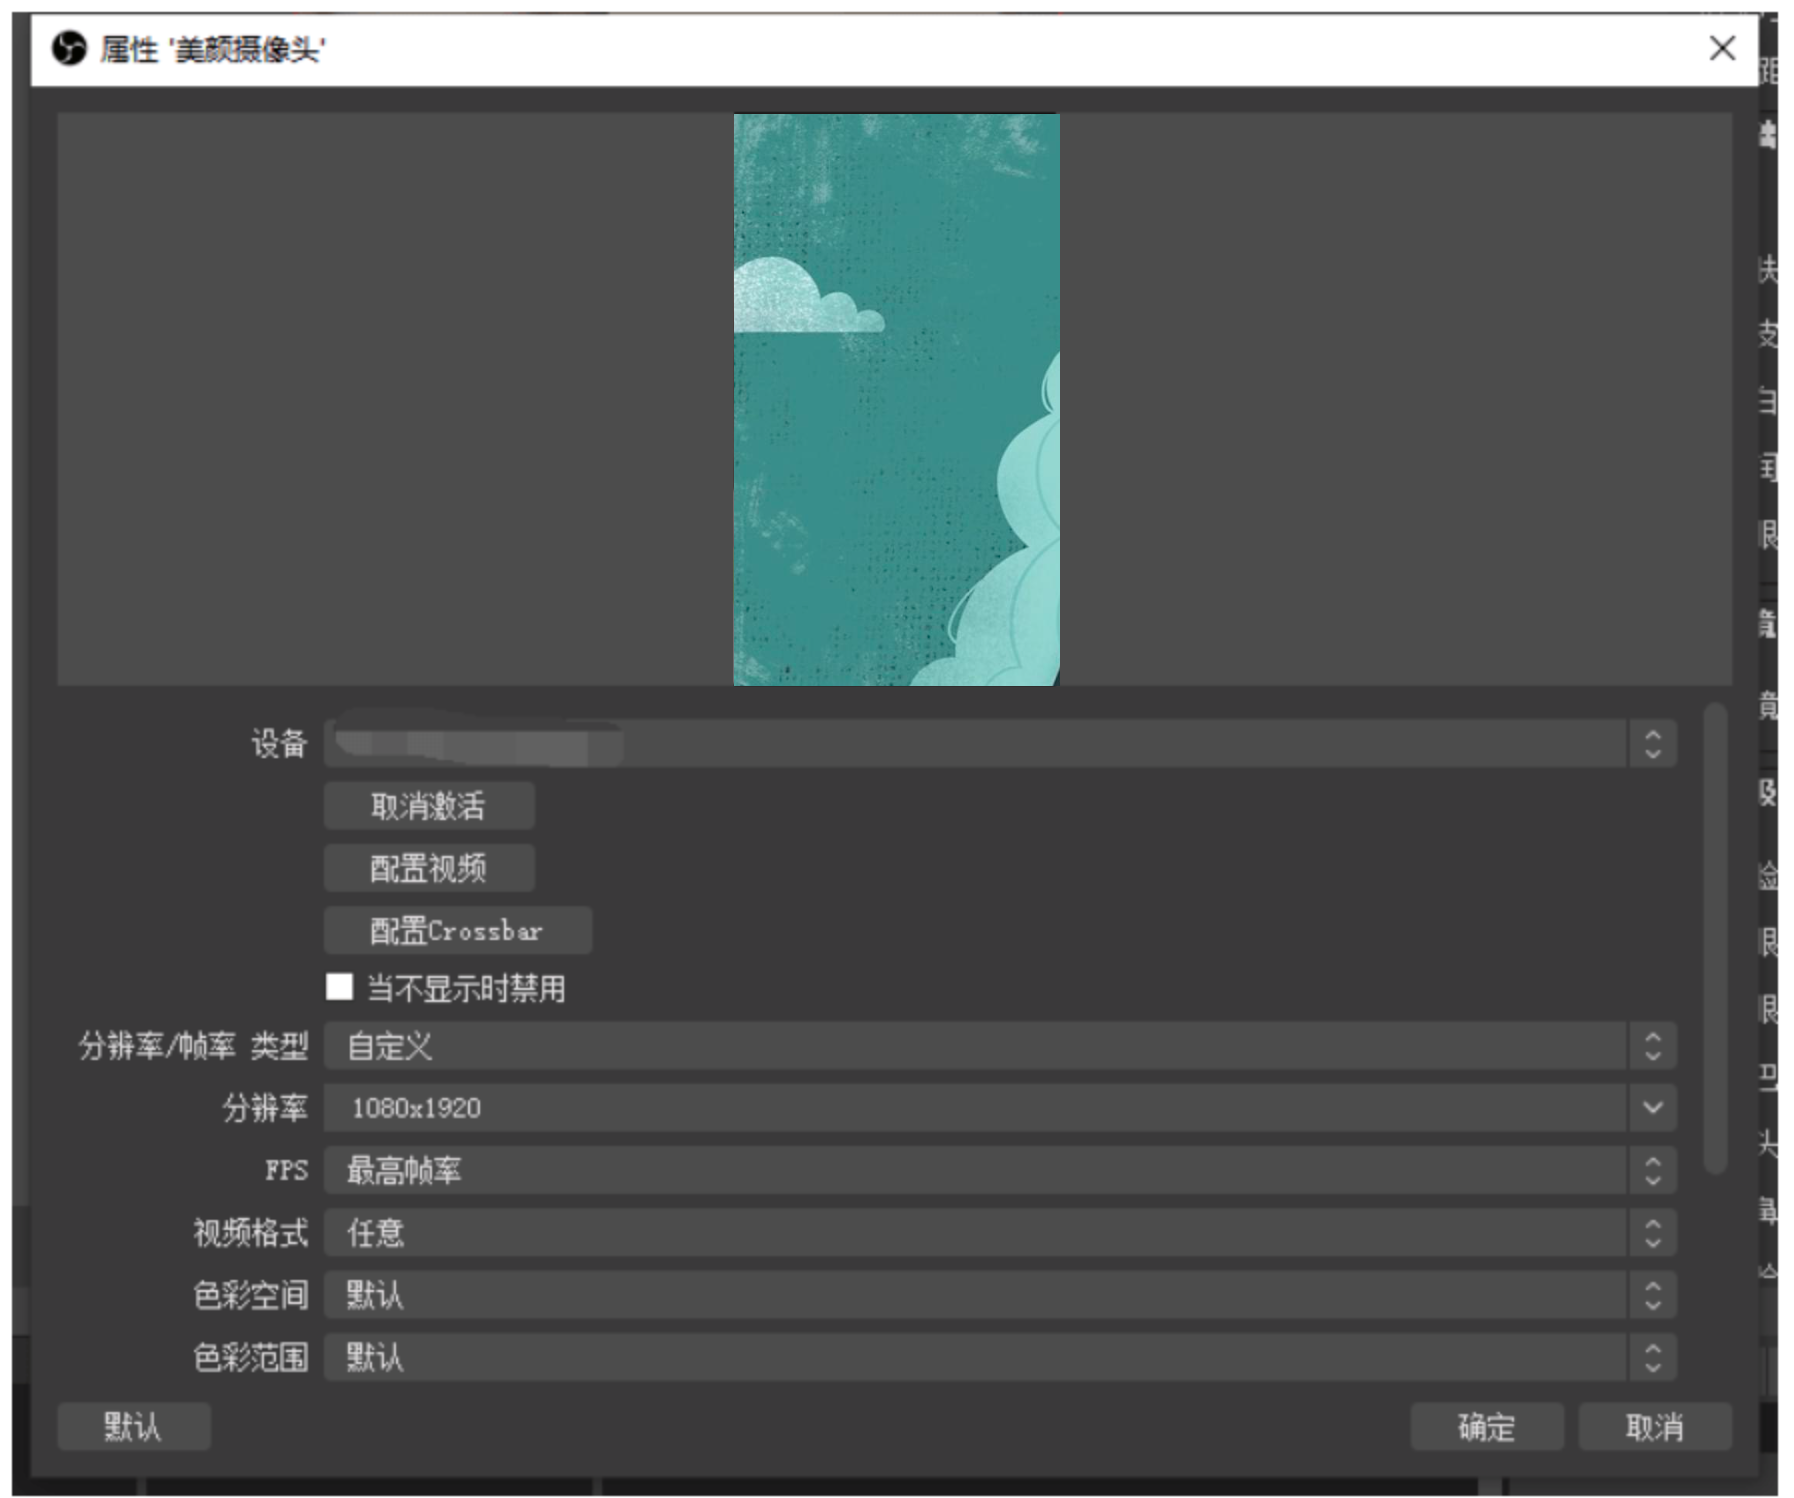
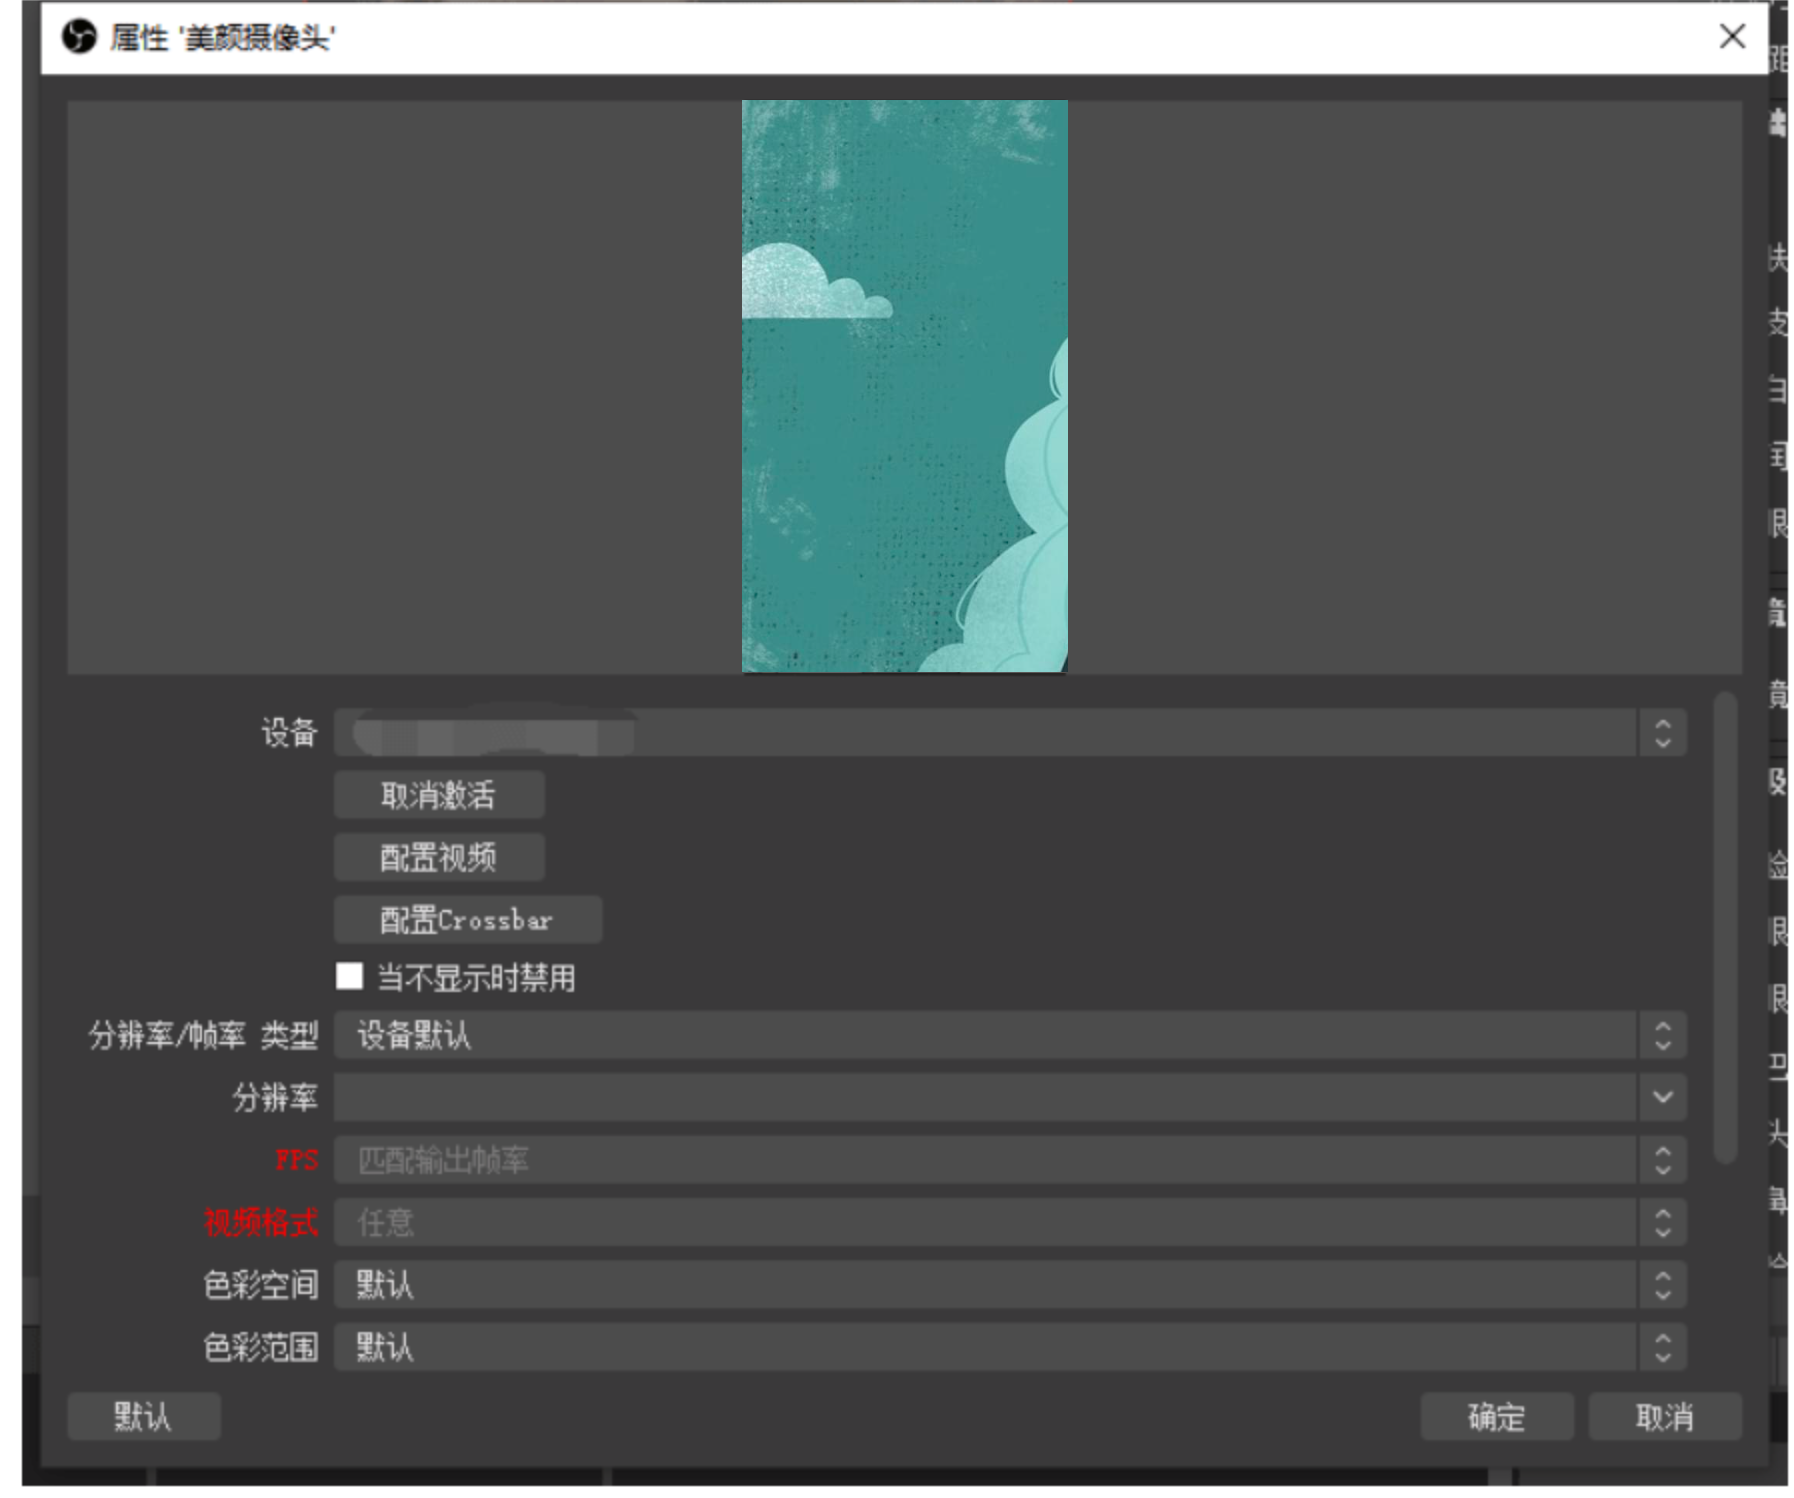
Click OK after the settings are completed to make the settings take effect and close the properties window
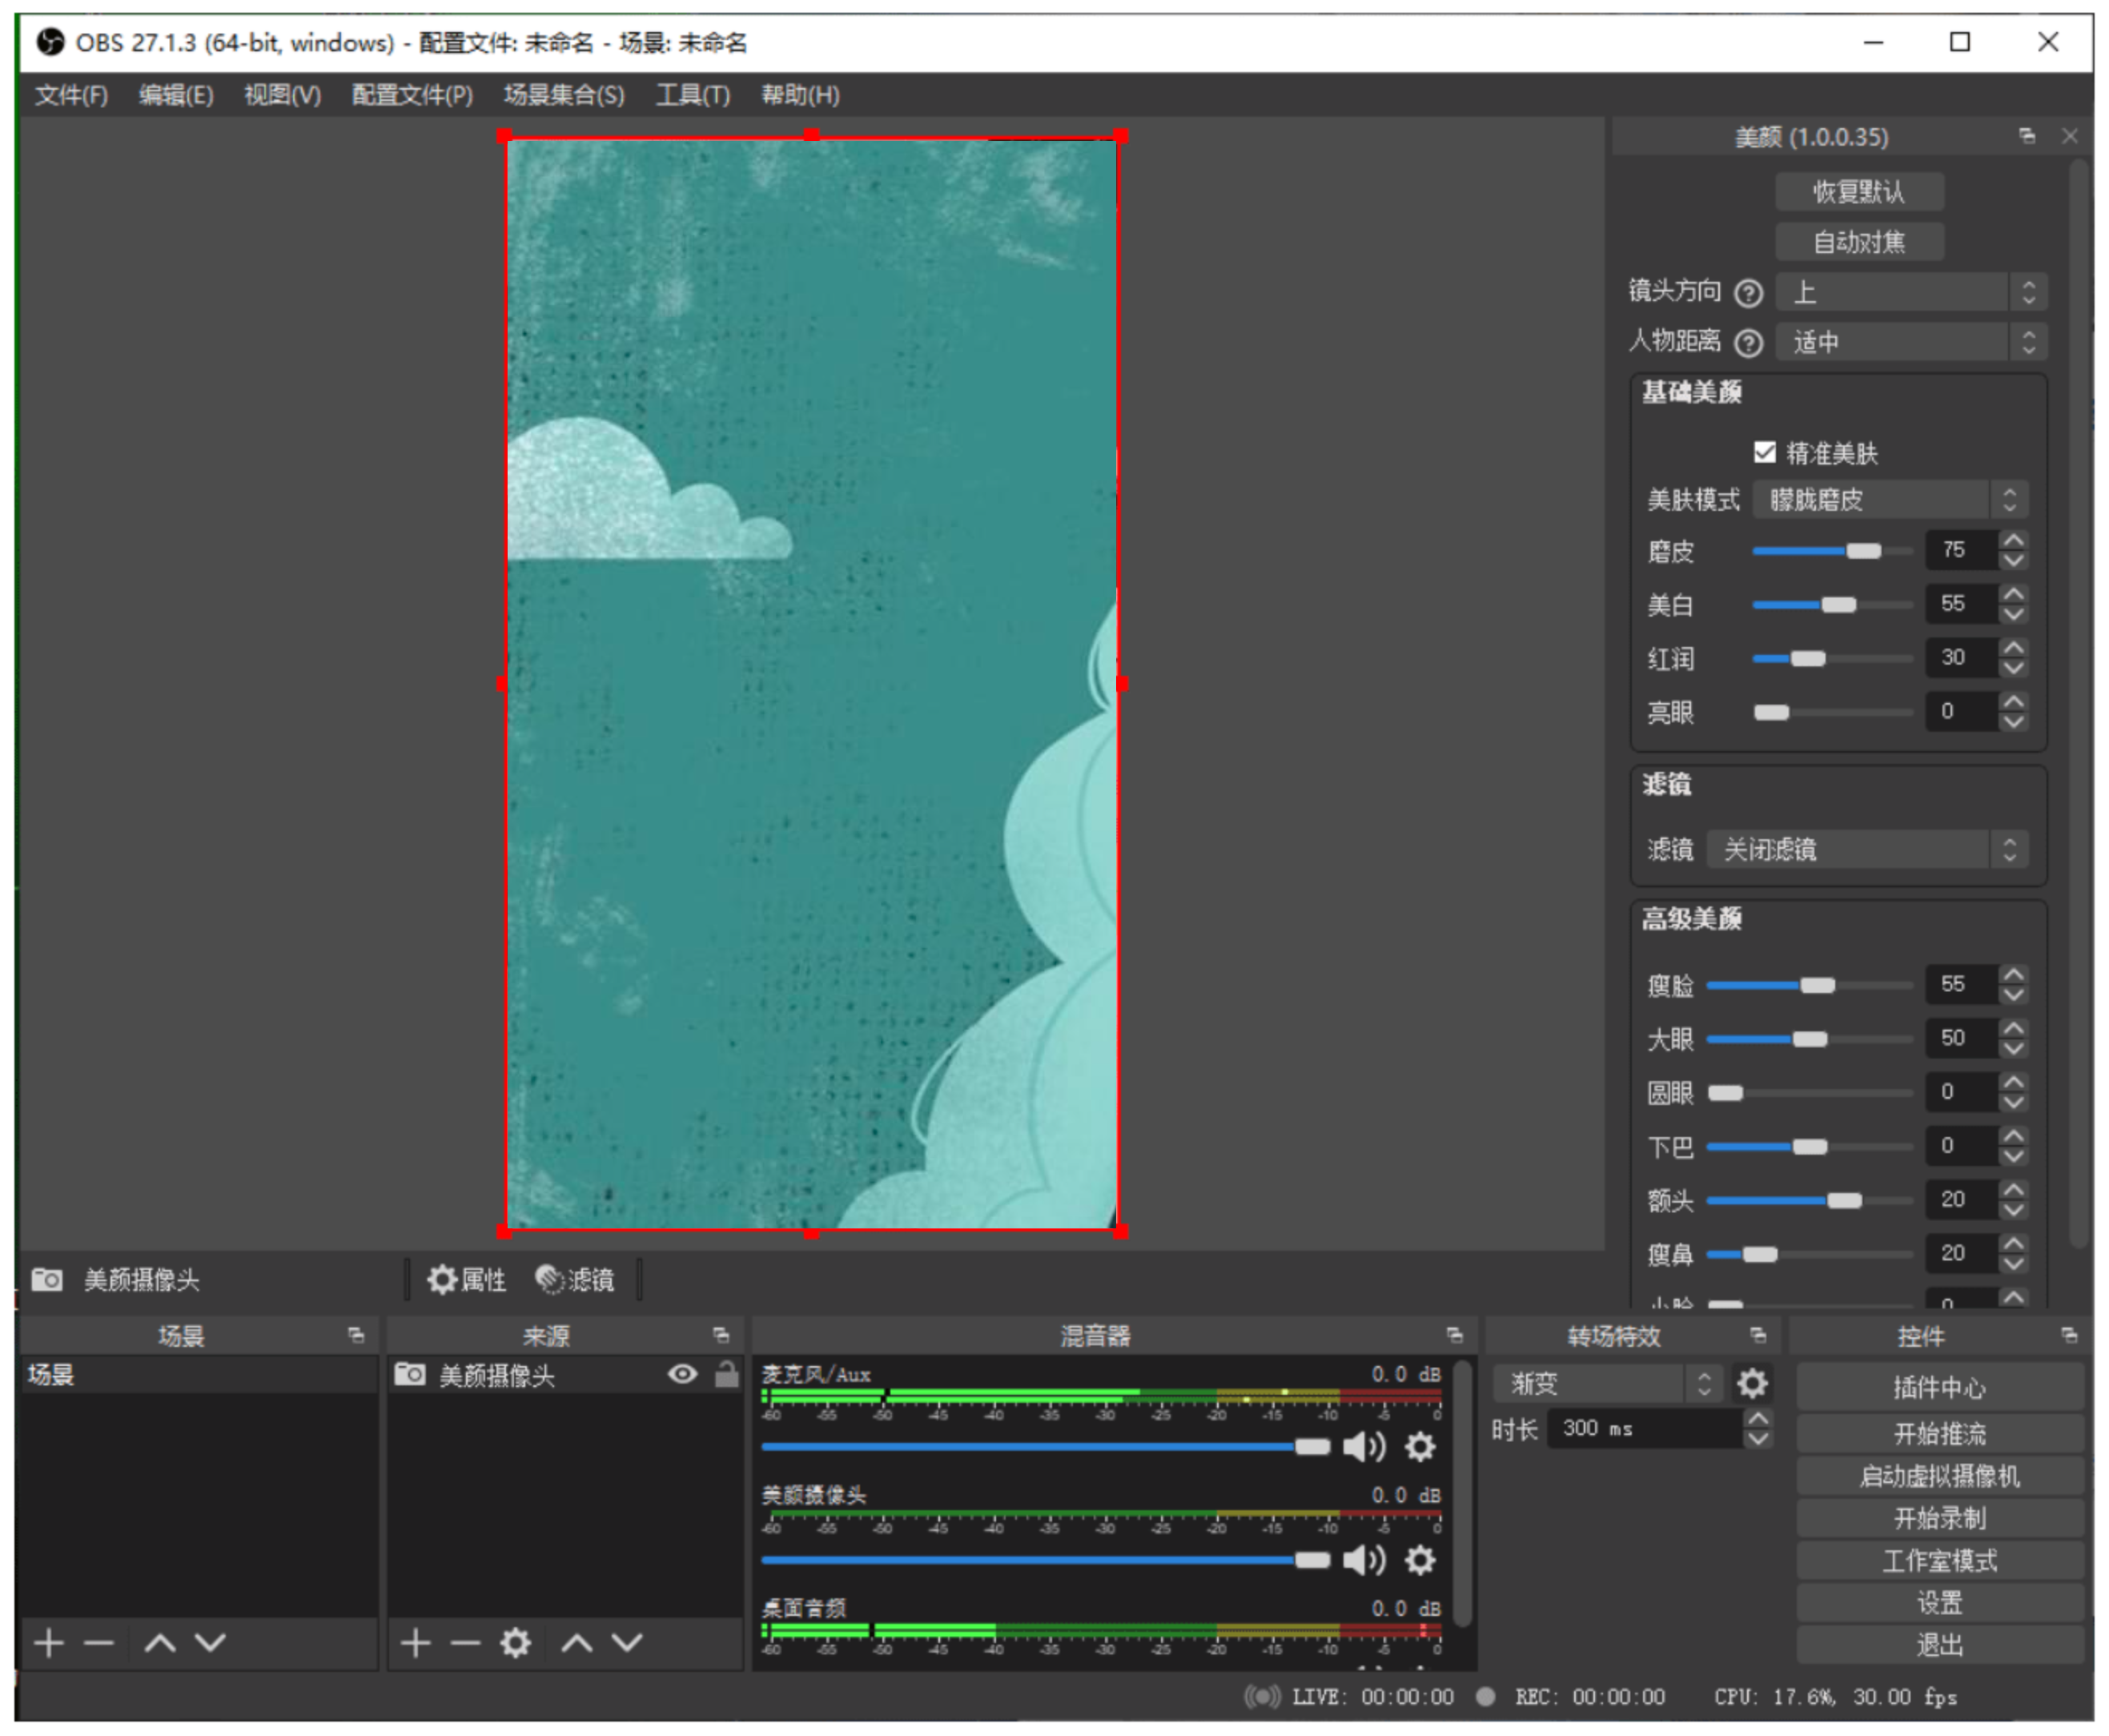
You can adjust the beauty effect by adjusting the values in the beauty settings
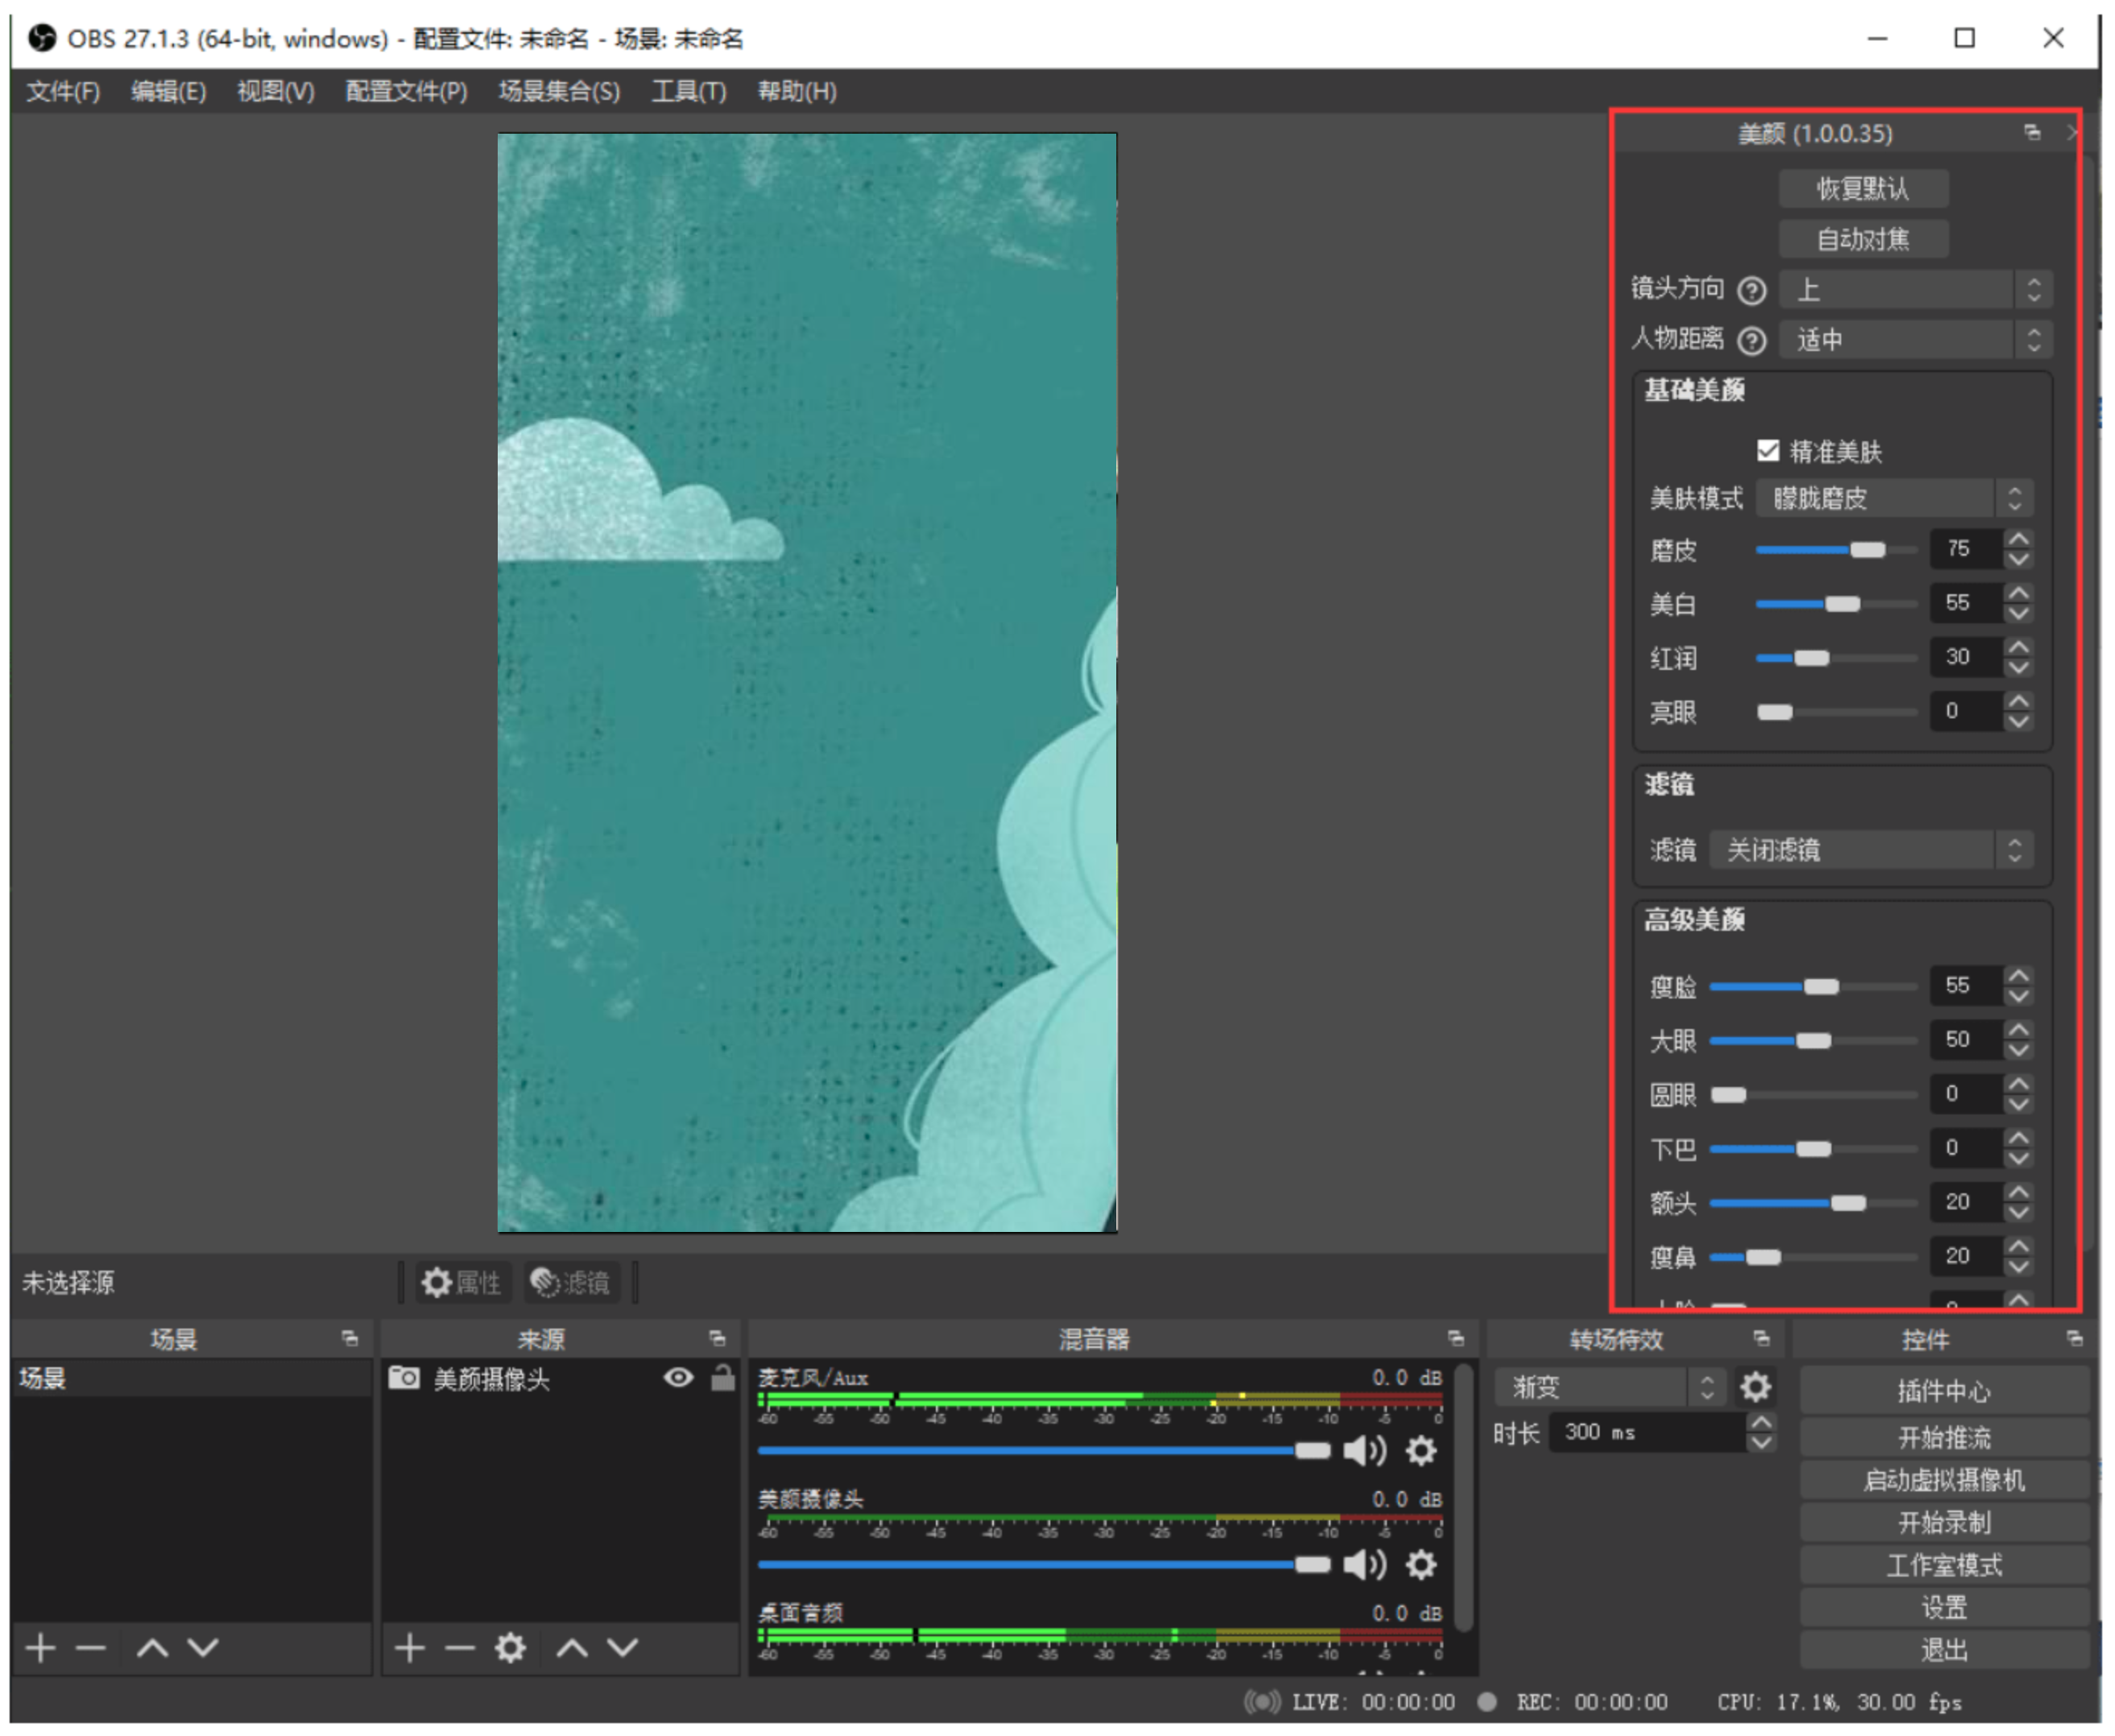
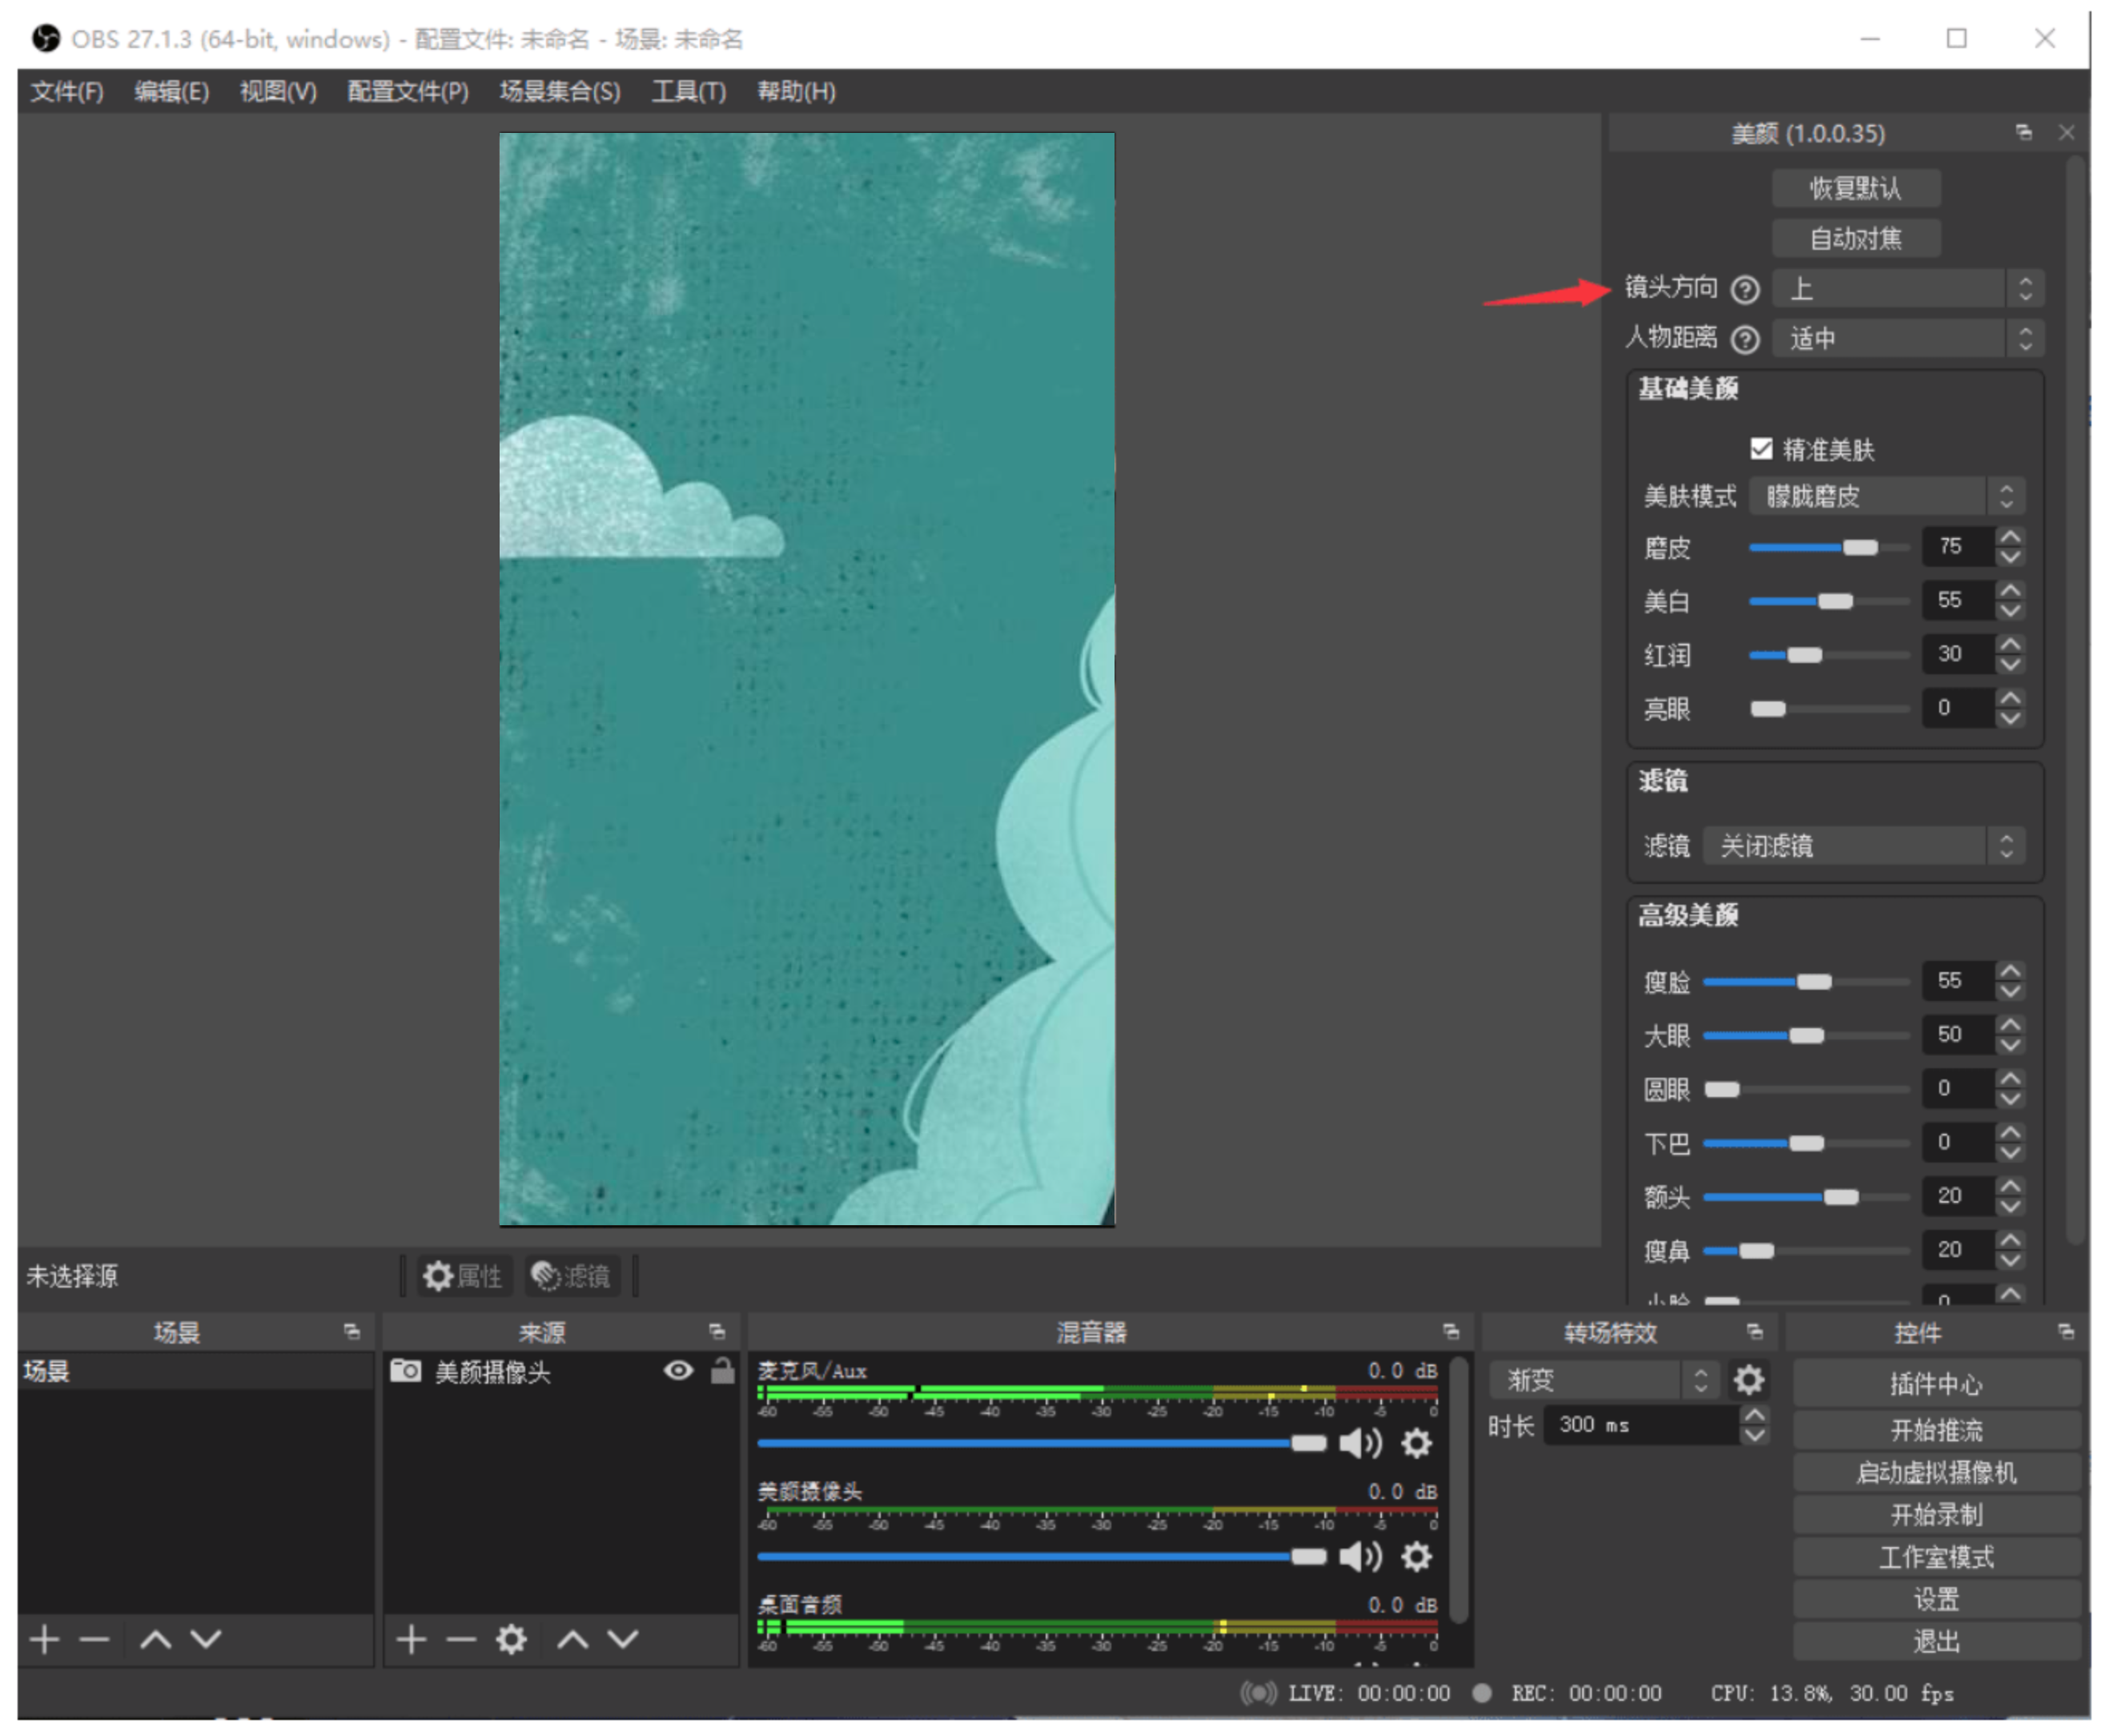
If you adjust the placement direction of the camera (for example, turn the camera vertically for vertical screen live streaming), you can help the beauty camera recognize the anchor's head and enable the beauty effect by changing the head direction
Live streaming supports external graphic tablets
Function Introduction:
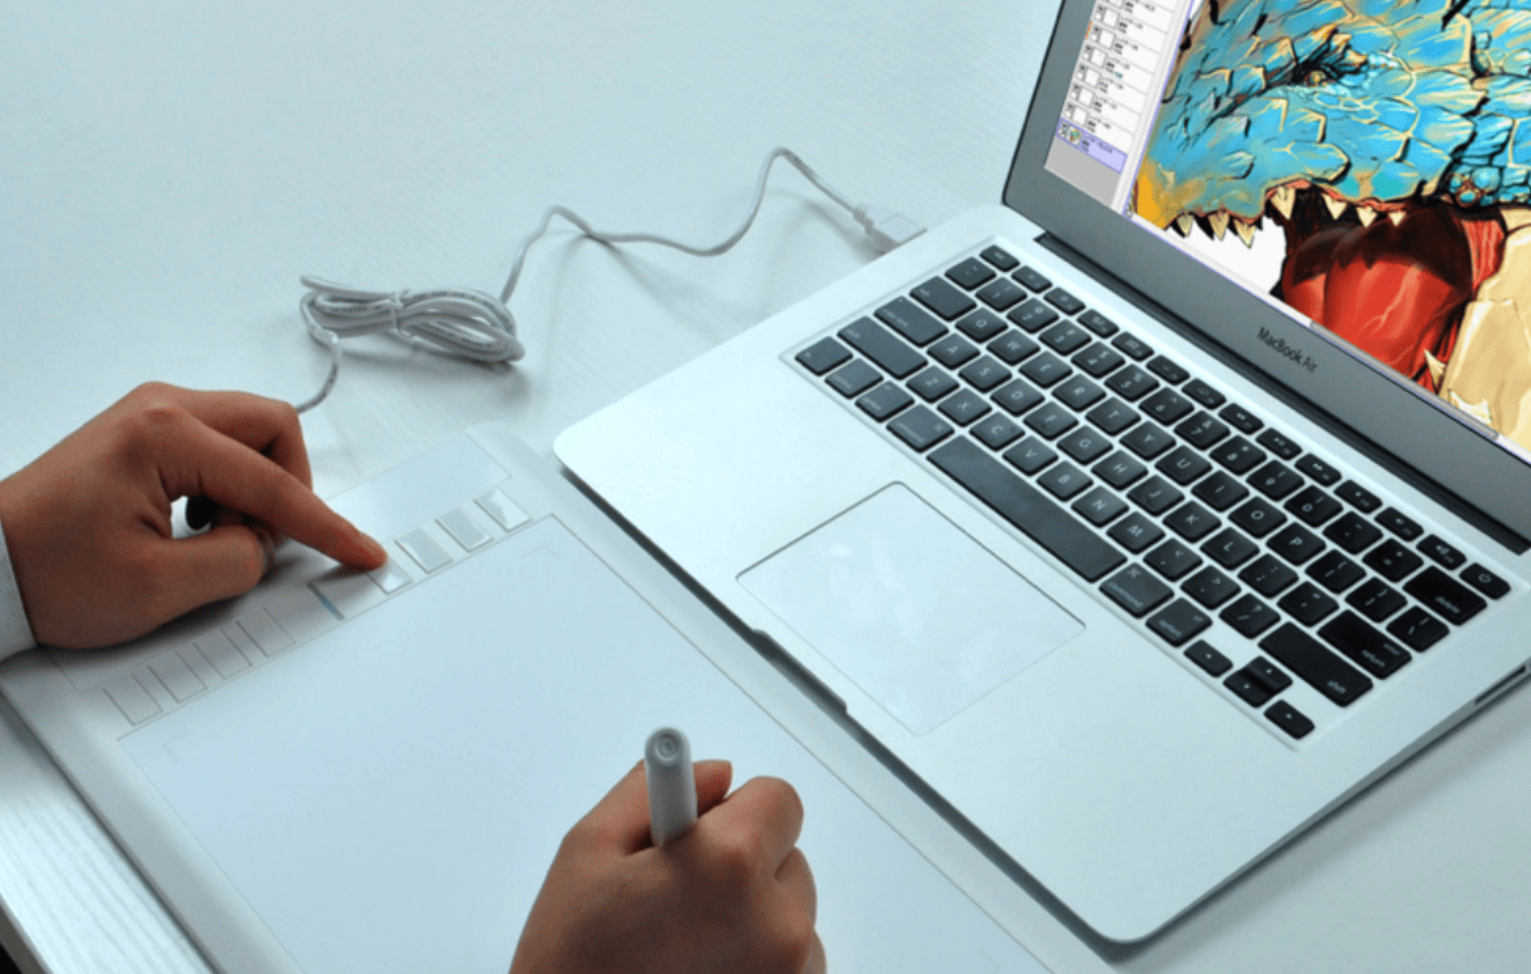
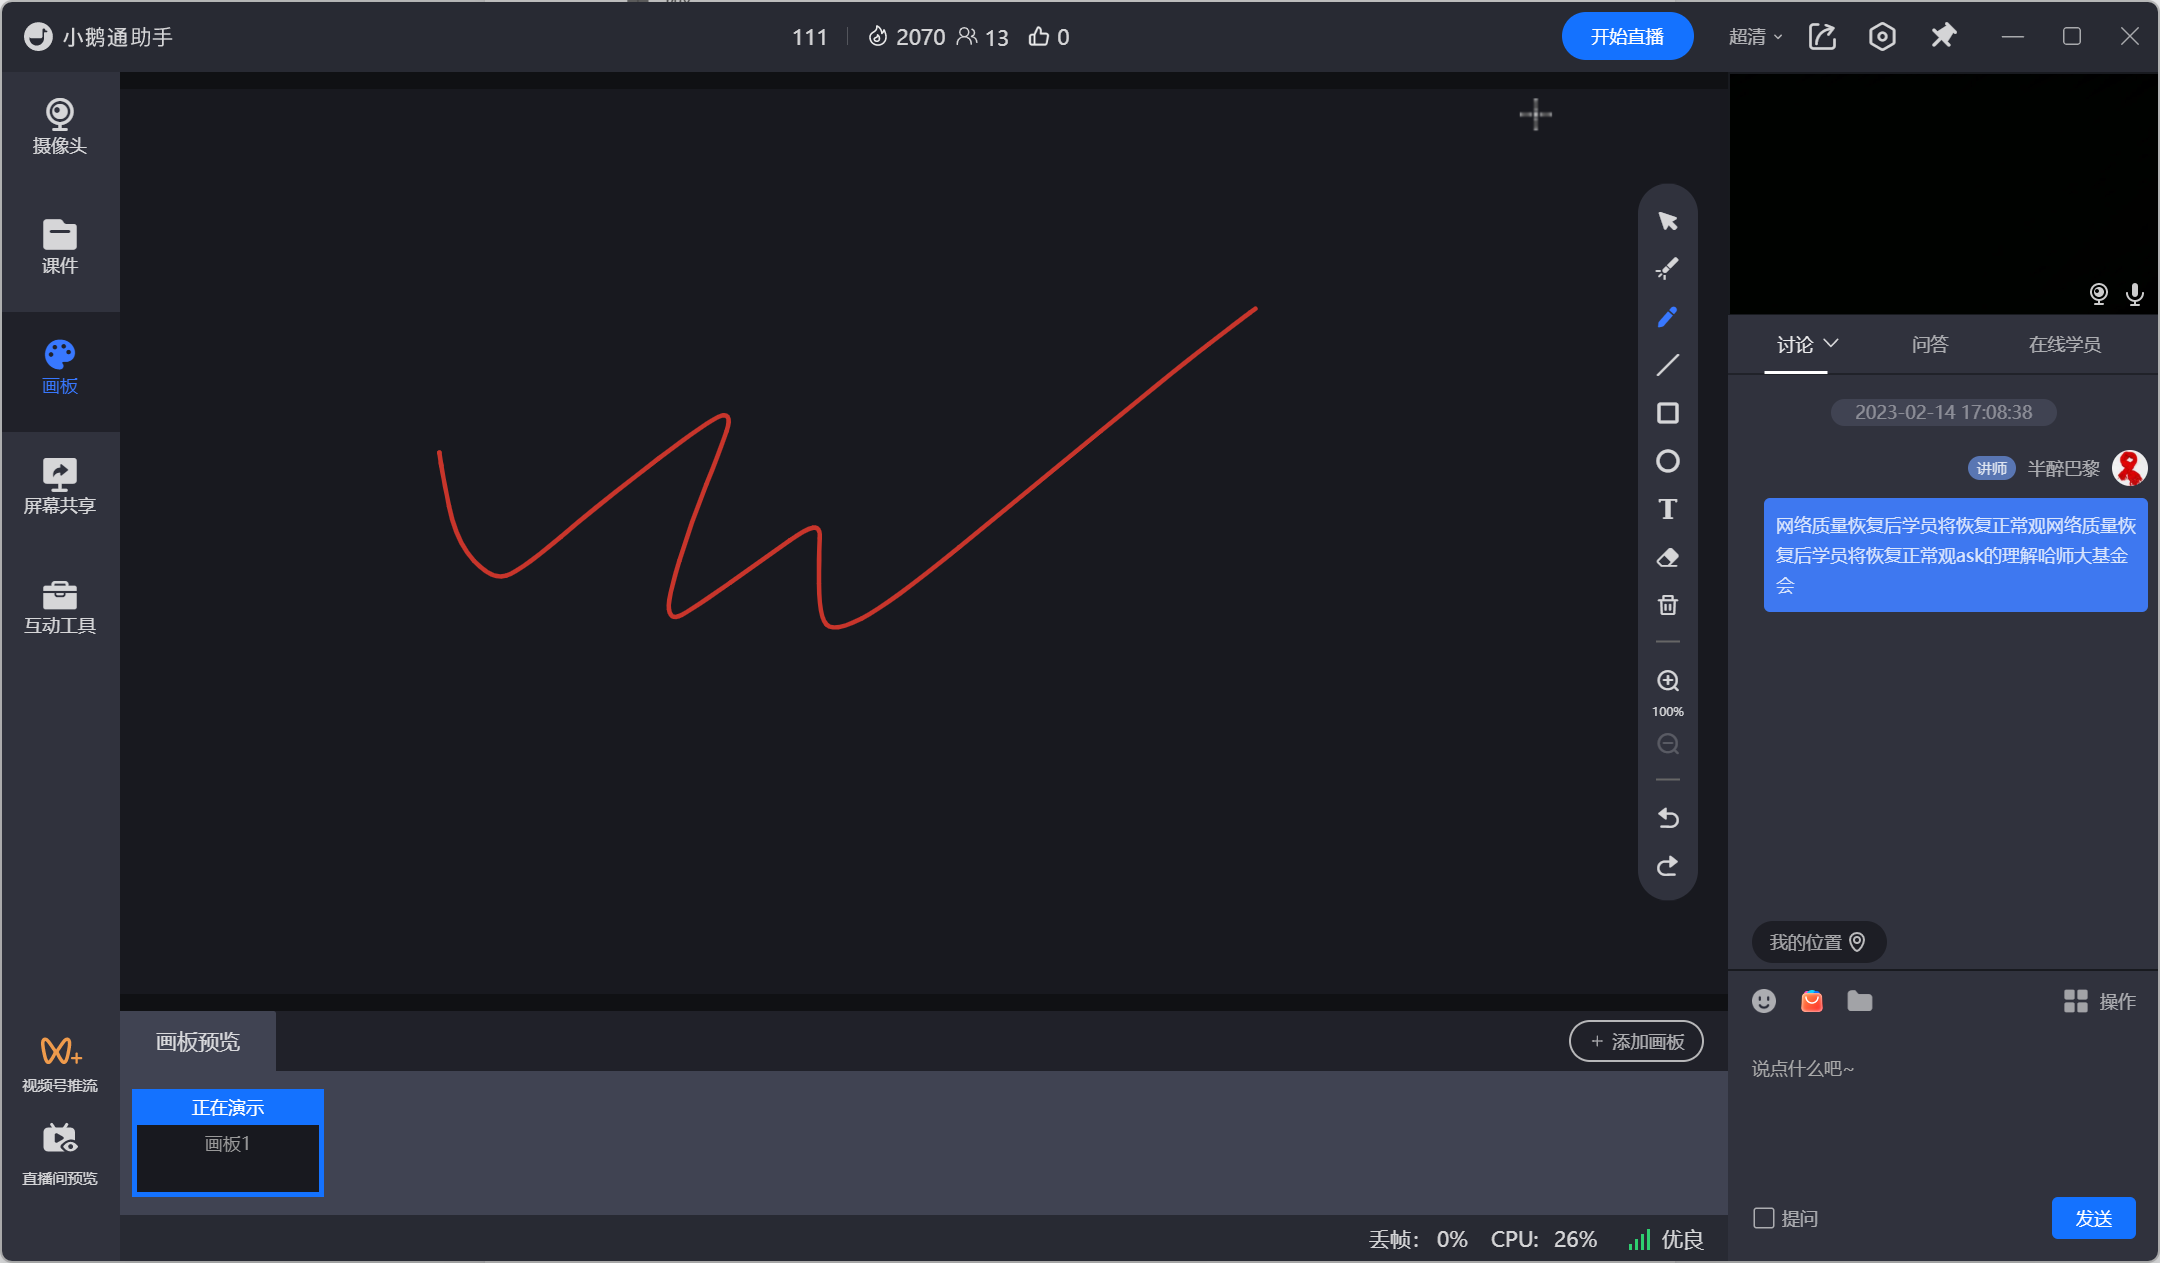
The live streaming client supports connecting to a graphics tablet, suitable for courseware annotation and drawing board scenarios.
Usage Conditions:
① The latest version of the eLive client or elink Assistant
② A graphics tablet
How to Connect an External Graphics Tablet:
① Connect the graphics tablet device to your computer
(When connecting a graphics tablet device to your computer for the first time, you need to install the driver. Just follow the prompts to install it.)
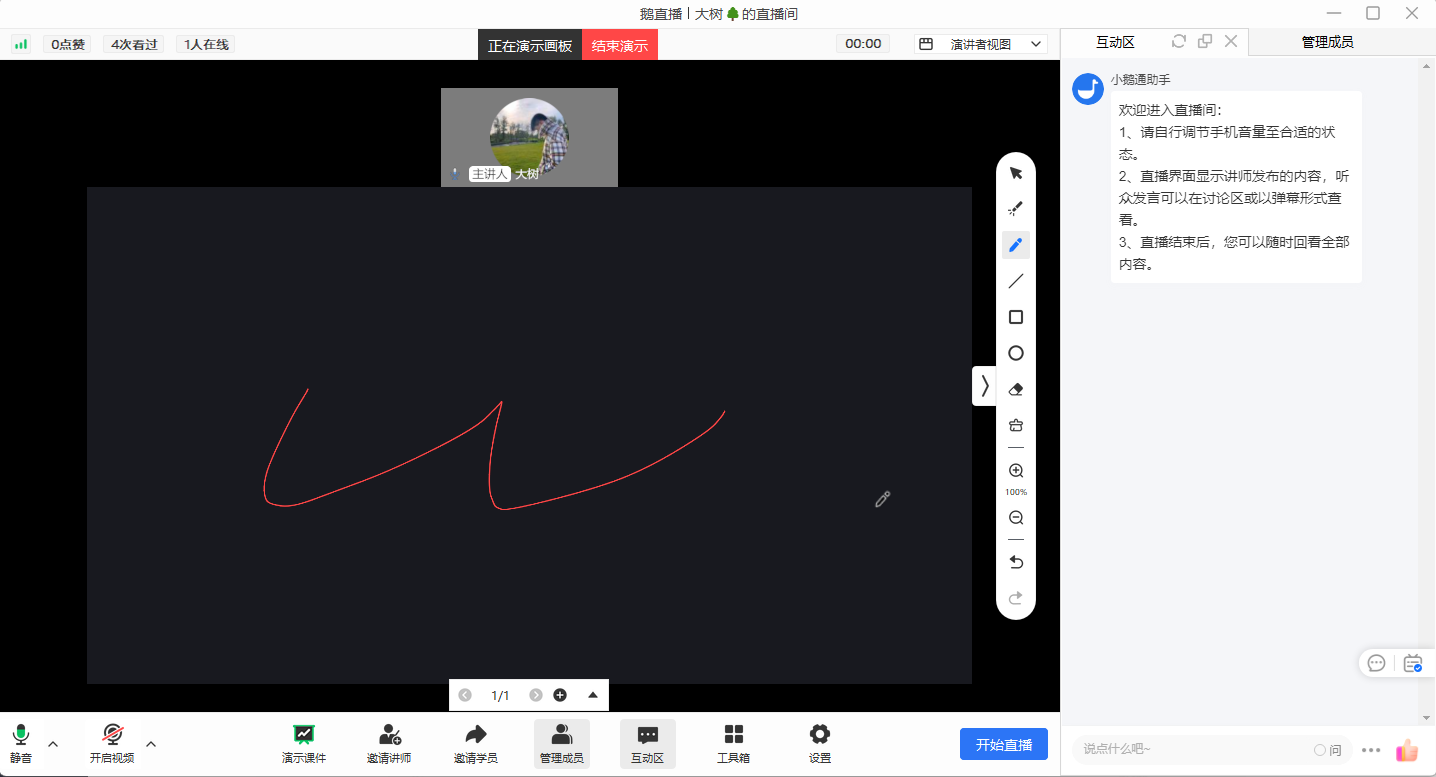
② Enter the live streaming room (eLive client/elink Assistant)
All operations on the graphics tablet are treated as mouse operations.
Precautions:
① After the graphics tablet is successfully connected, the operations of the stylus are equivalent to those of the mouse.
Frequently Asked Questions:
1、 The writing area of the graphics tablet does not match the drawing board.
Answer: The graphics tabletis only used as a mouse. The drawing area is based on the drawing board area of elink Assistant.
Live streaming supports external microphones (such as lavalier microphones)
Function Introduction:
The live streaming client supports connecting to microphone devices for audio recording, catering to more mobile scenarios for microphones.
Usage Conditions:
① The latest version of the eLive streaming client or elink Assistant
② An external microphone device (you can search for 'external microphone' or 'lapel microphone' on e-commerce platforms)
How to Connect an External Microphone:
① Enter the live streaming room (eLive streaming client/elink Assistant)
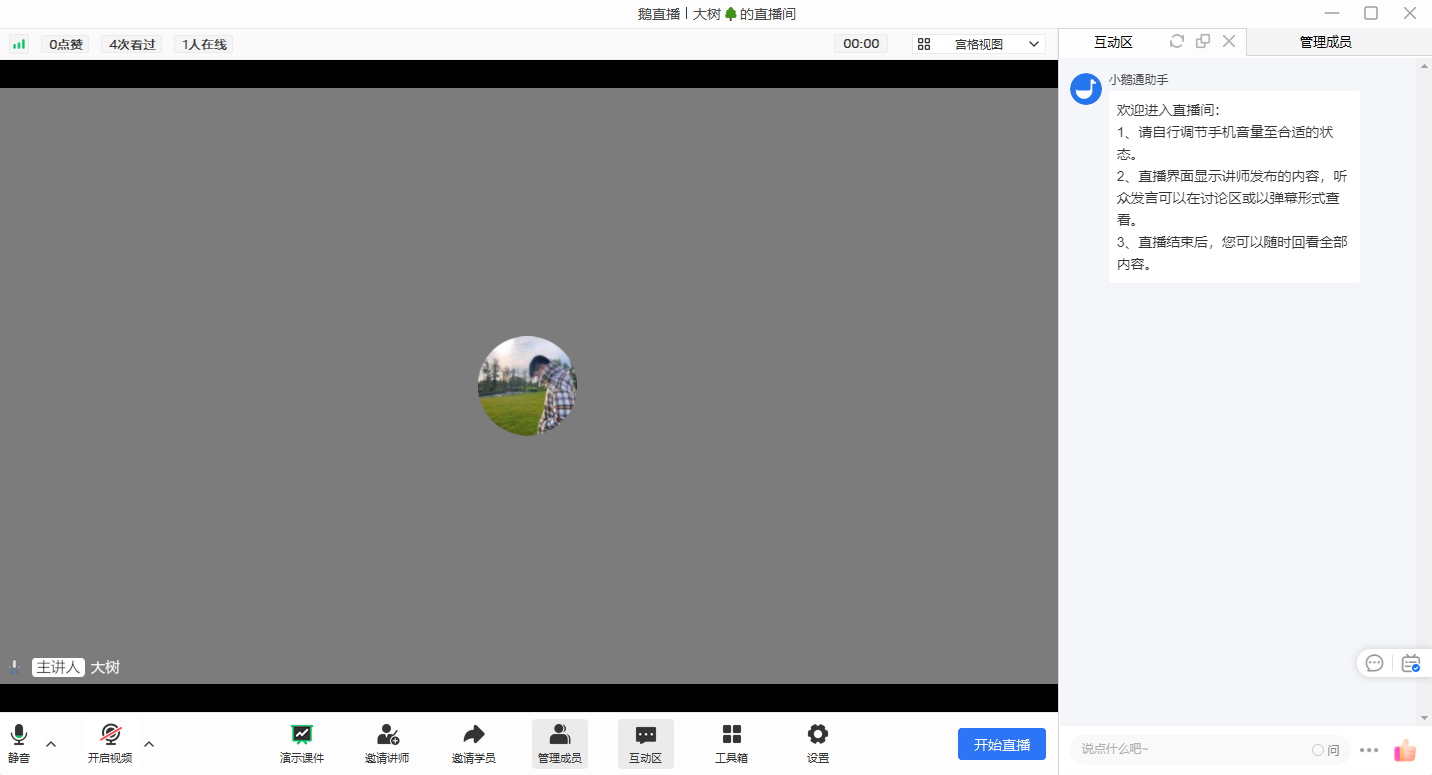
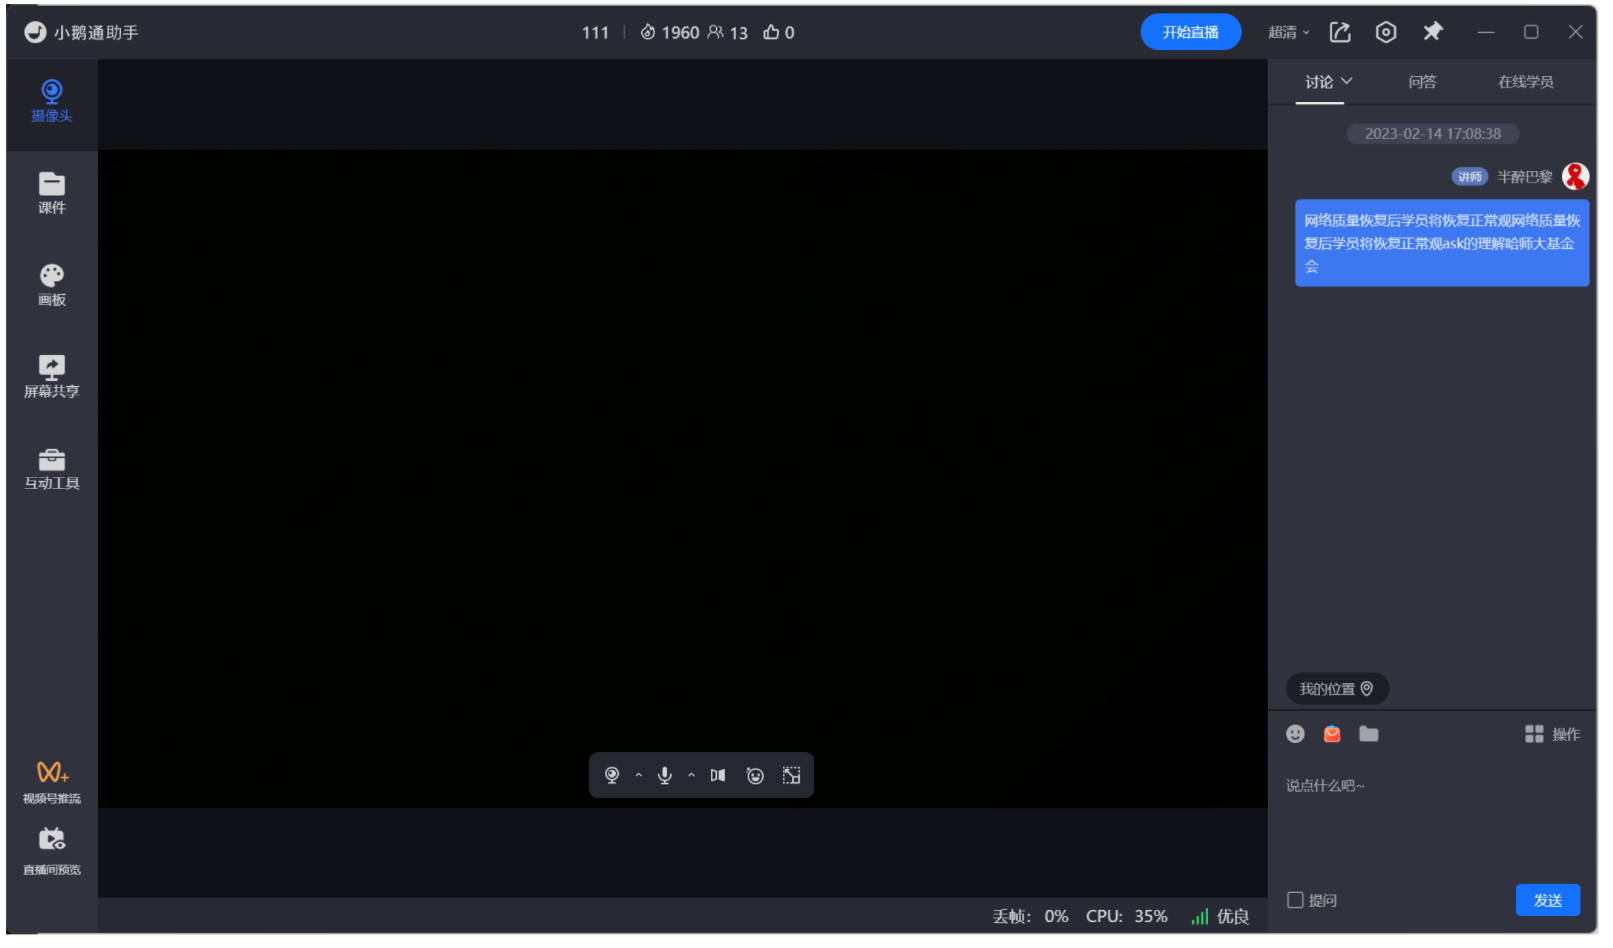
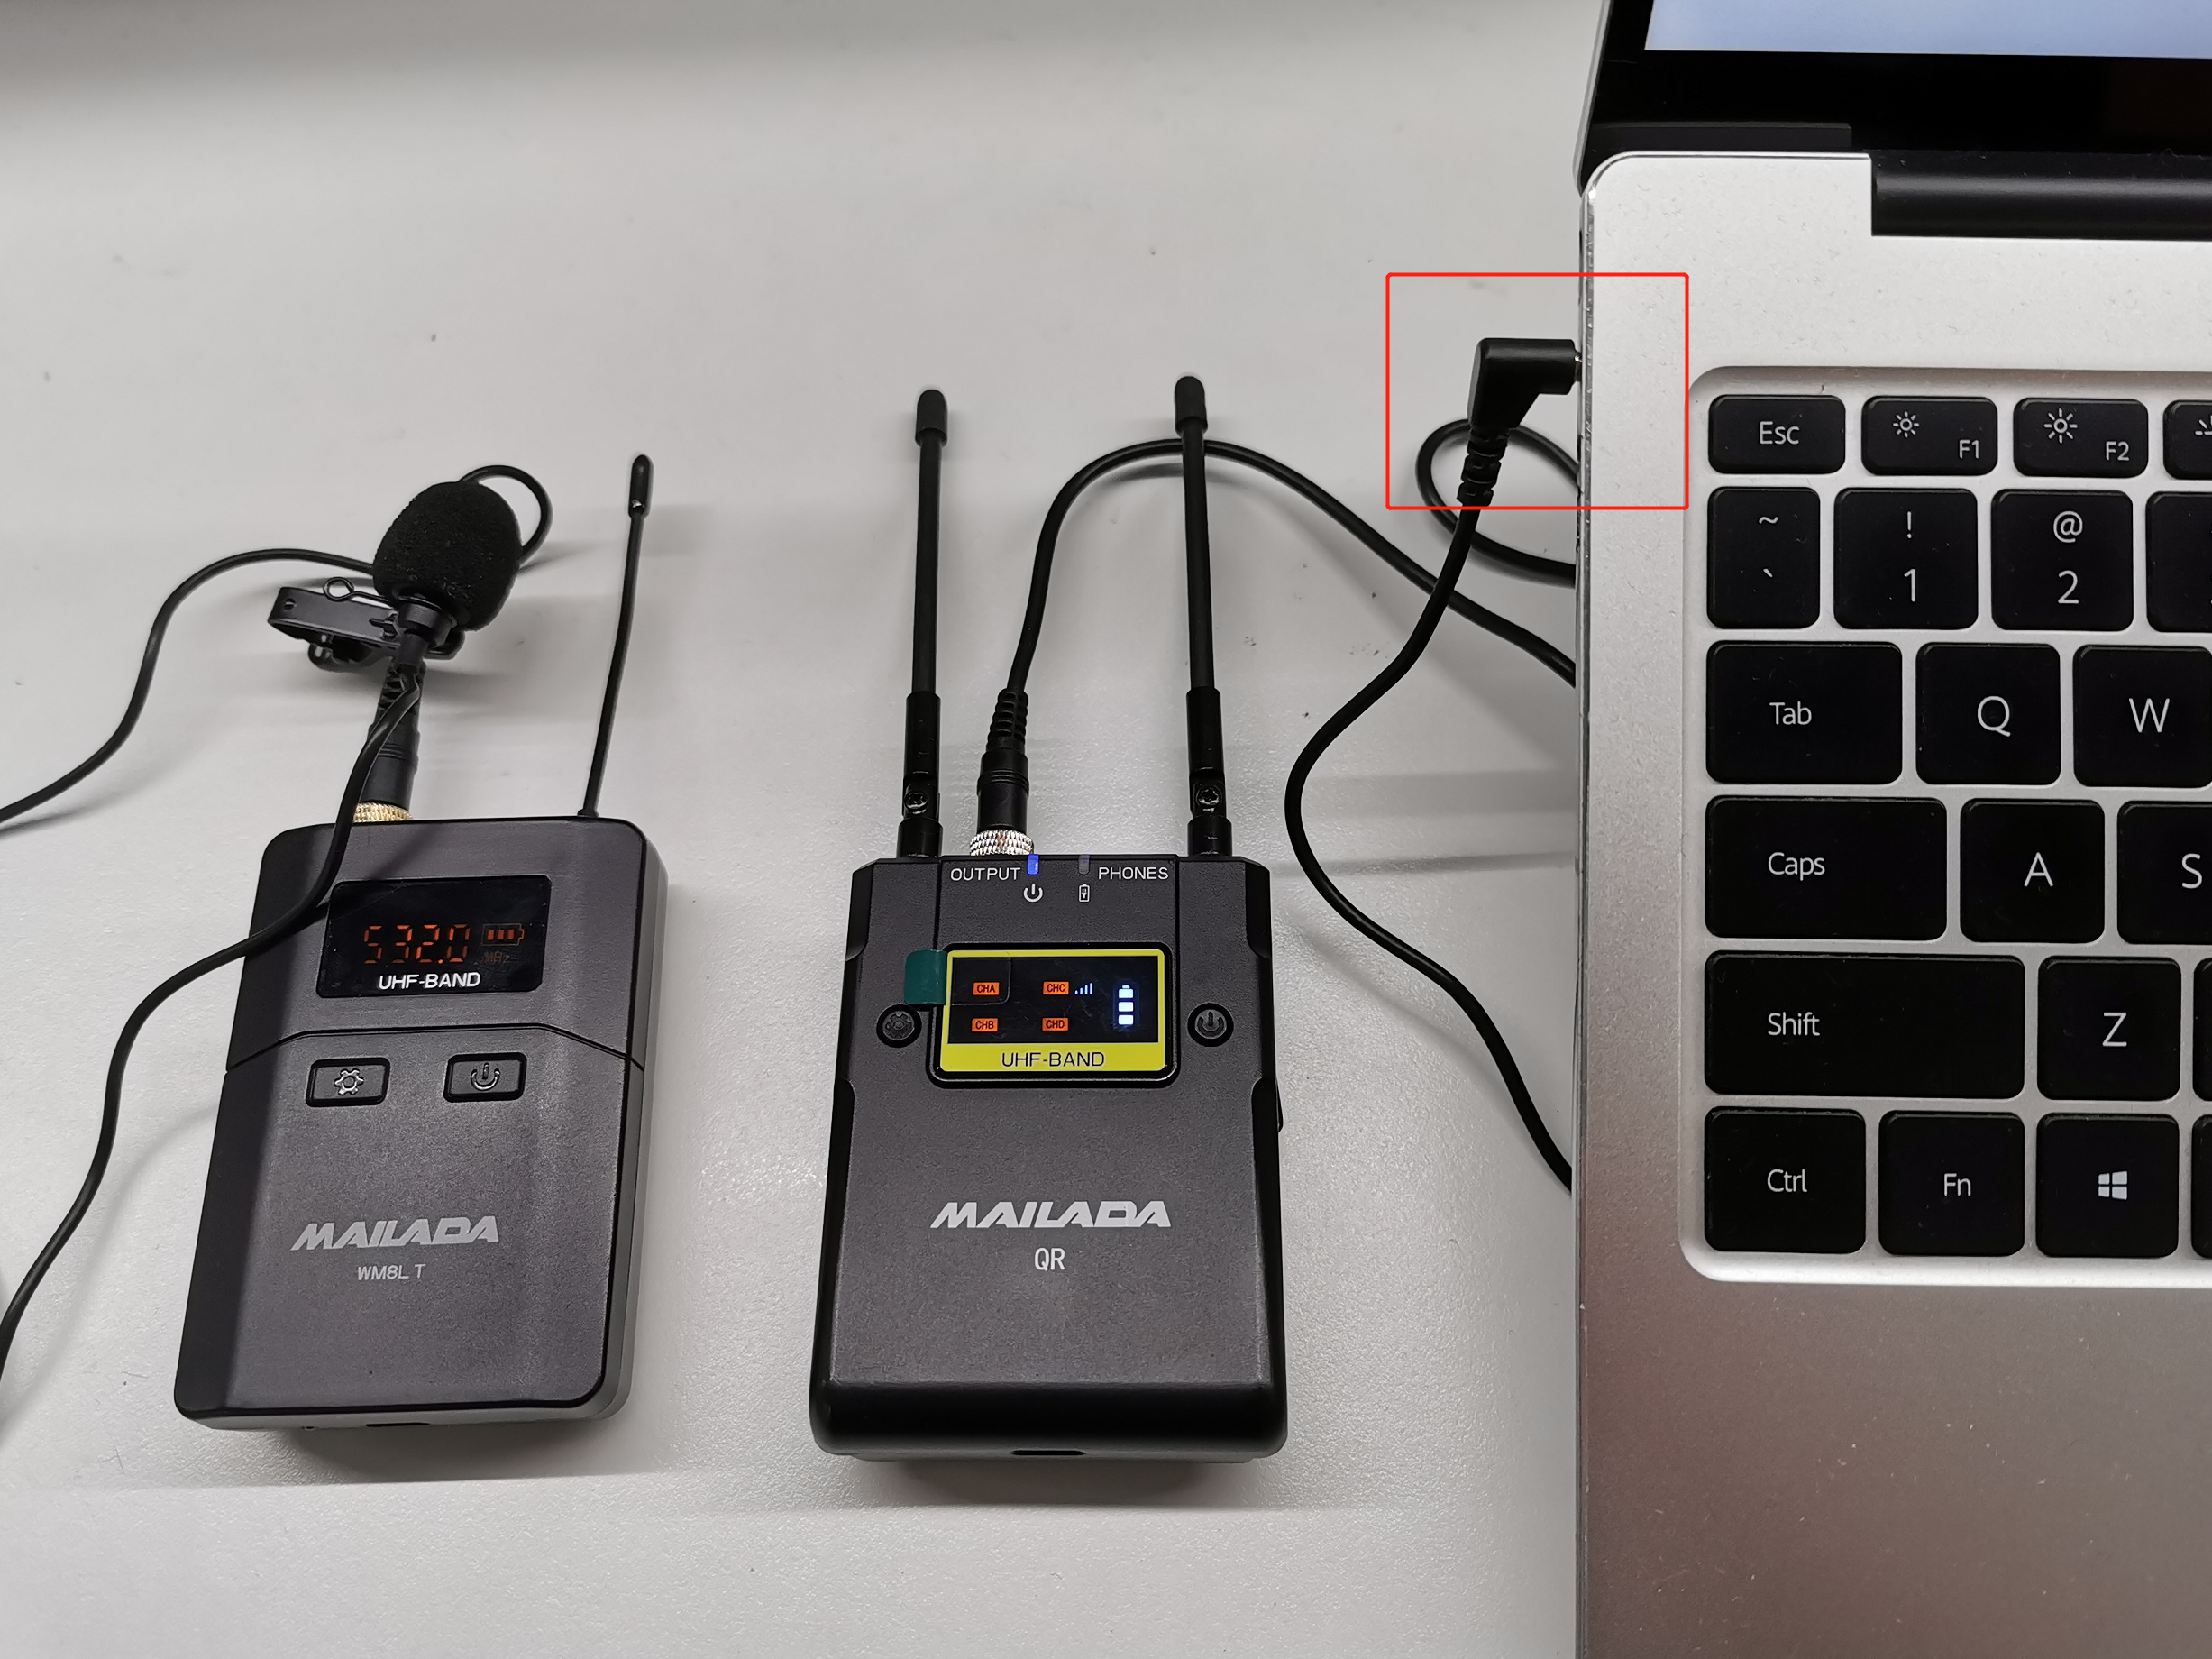
② Connect the external microphone to your computer
(Some external microphone devices require driver installation. Just follow the prompts to install.)
③ Switch to the external microphone
At the microphone icon in the live streaming room, click the drop-down menu and select the external microphone.
Precautions:
① For external microphones that don't require driver installation, simply select the default microphone device, such as "Realtek(R) Audio".
Frequently Asked Questions:
1. Does it support lapel microphones?
Answer: Yes, it does.
2. When the mobile phone is connected to an external microphone, the eLive Mini Program cannot record audio
Answer: Currently, the WeChat Mini Program does not support external microphones and only supports the phone's built - in microphone.
You can try the following methods:
-- iPhone
You need a Lightning to 3.5mm adapter.
It is recommended to buy the original Apple adapter because it has an MFi - certified chip. Only adapters certified by Apple's MFi can be used for audio recording when connecting an external microphone.
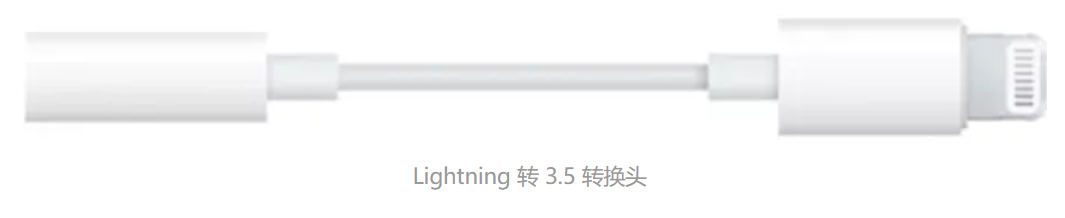
Adapters purchased from other sources may not be MFi - certified by Apple and cannot be used for audio recording.
-- Android phone
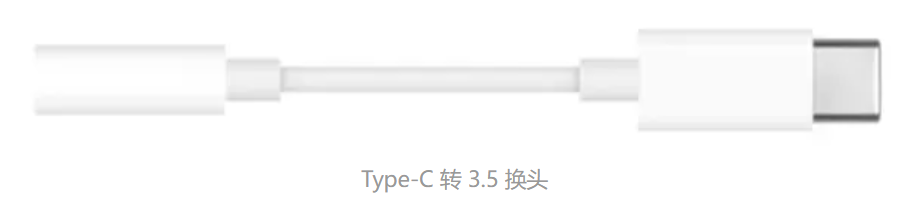
You need a Type - C to 3.5mm adapter.
It is recommended to use the original phone adapter or a Type - C to 3.5mm adapter to connect the external microphone.
3. The external microphone has no sound
Answer: Please solve the problem in the following ways:
① Check the input volume of the sound. The following is an example of the Win11 system;
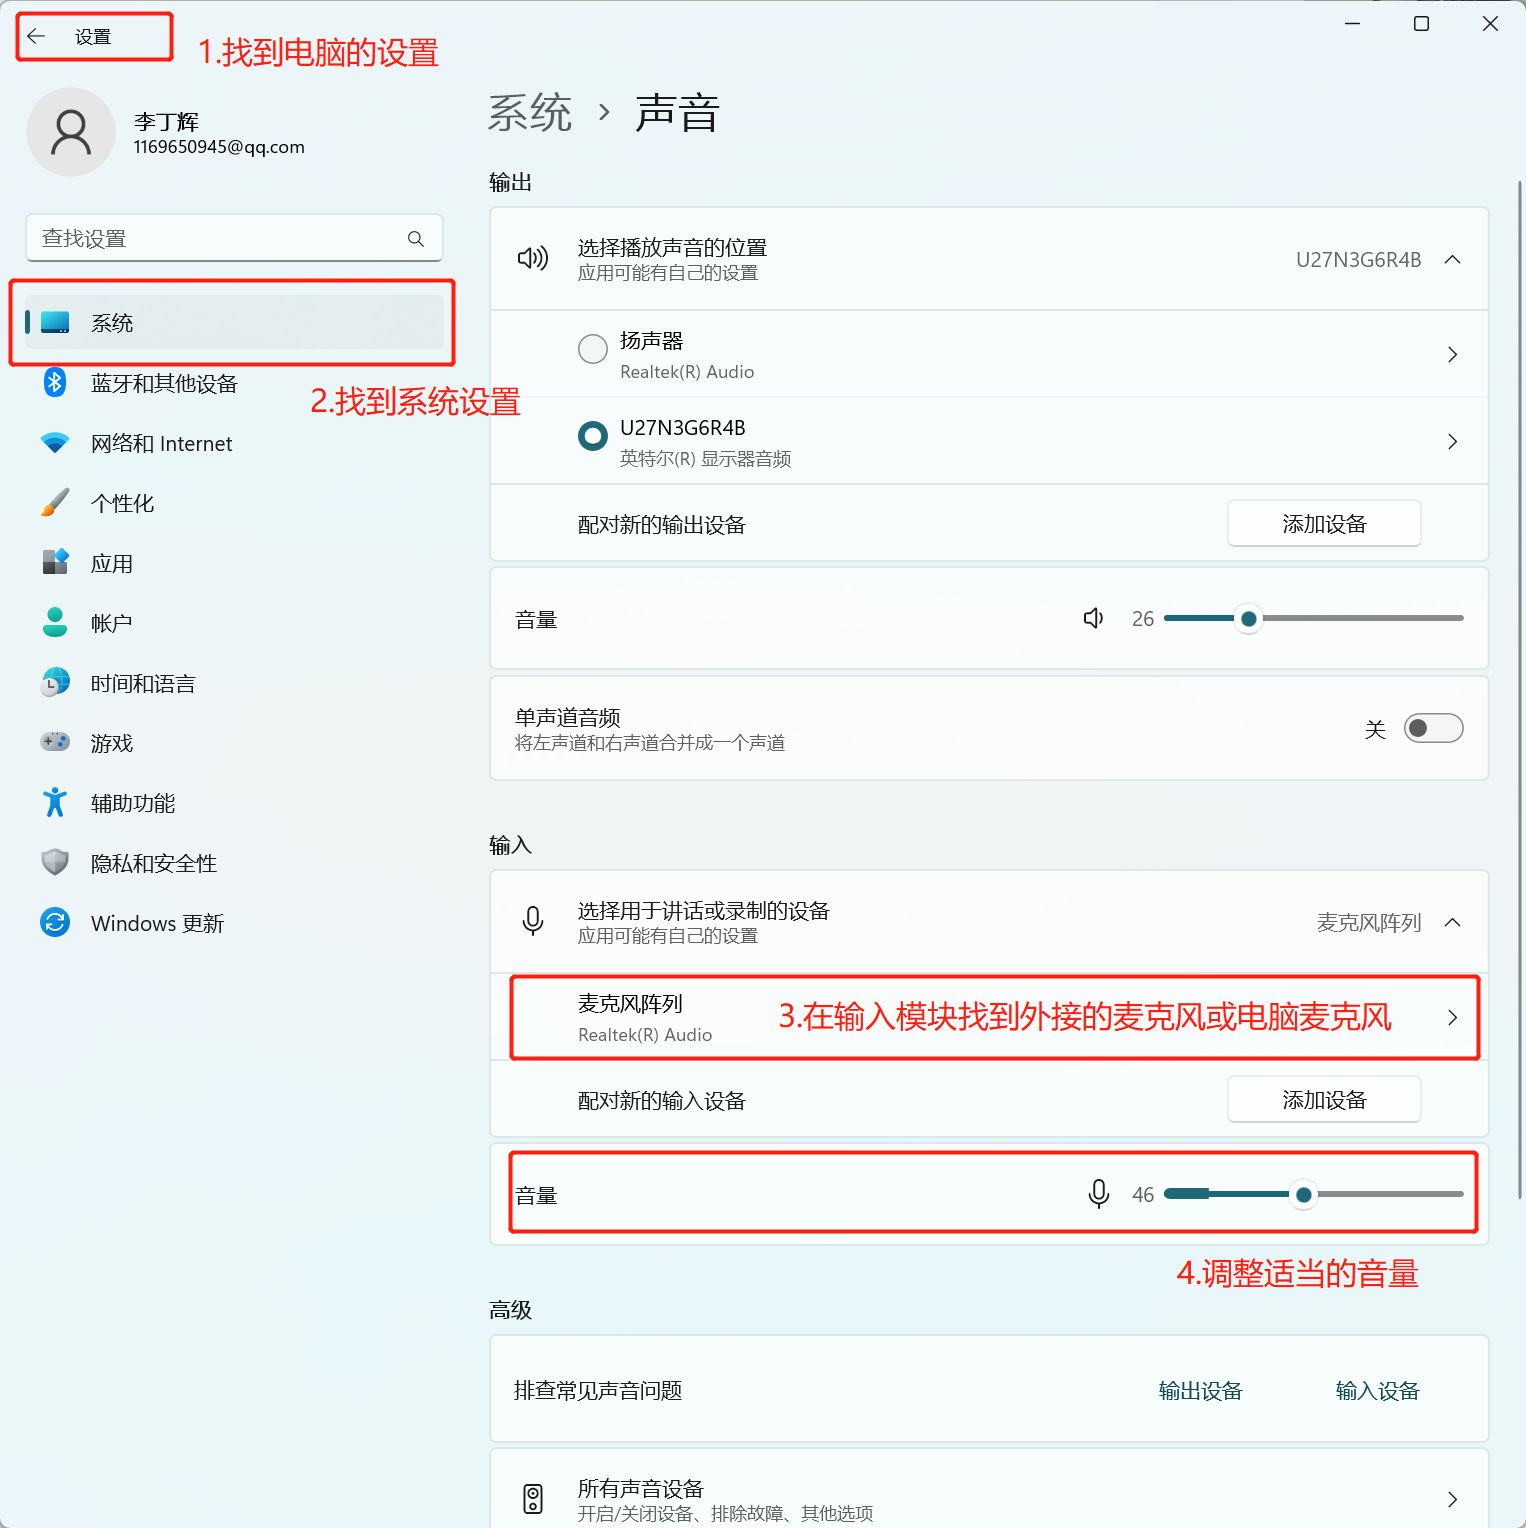
② Check if the external microphone is selected in the live streaming room;
③ Test if the external microphone works normally using WeChat voice. If the problem persists, you can consult the seller of the external microphone device.
The audio and video are out of sync when exporting videos from the video editing software
Exceptional scenarios
After the downloaded replay video is processed and exported by a video editing software, the audio and video are out of sync.
Solutions
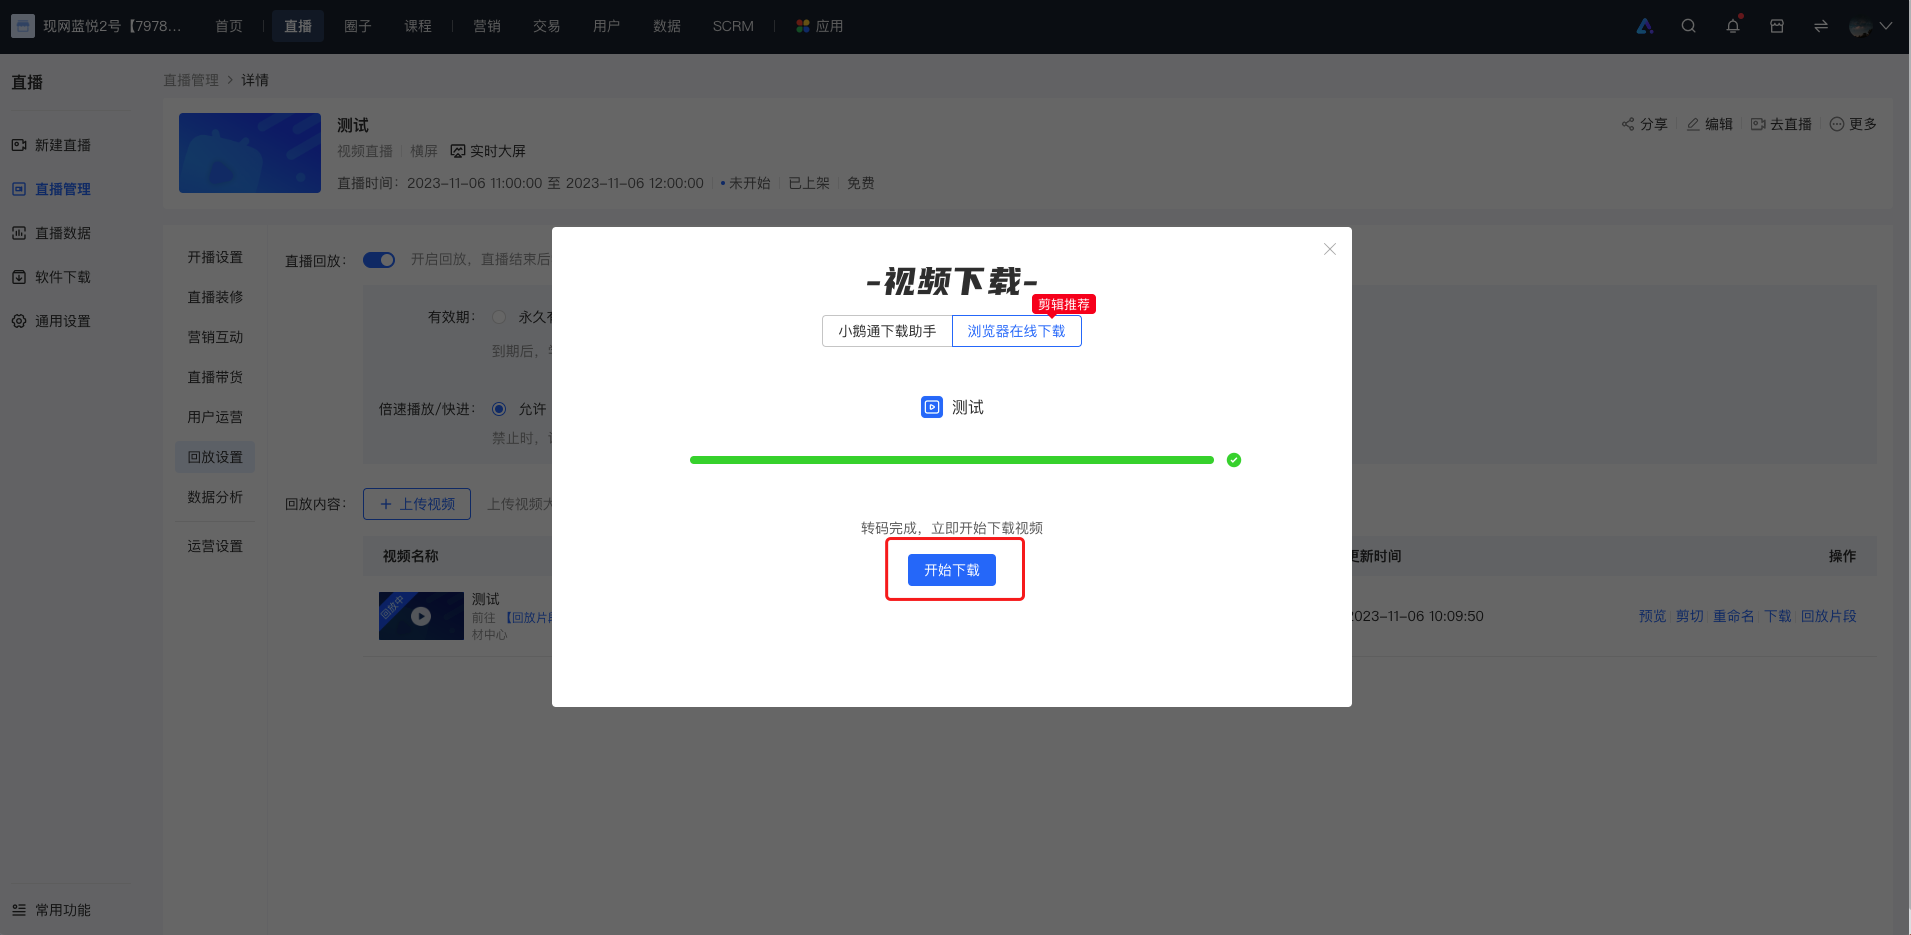
Solution ①: Download via browser online
If there is an audio - video out - of - sync issue when importing the video downloaded by elink Download Assistant into the editing software, you can download and transcode the video via the browser before editing. The operations are as follows:
<1> When downloading the replay, select 'Download via browser online' and click 'Start transcoding';
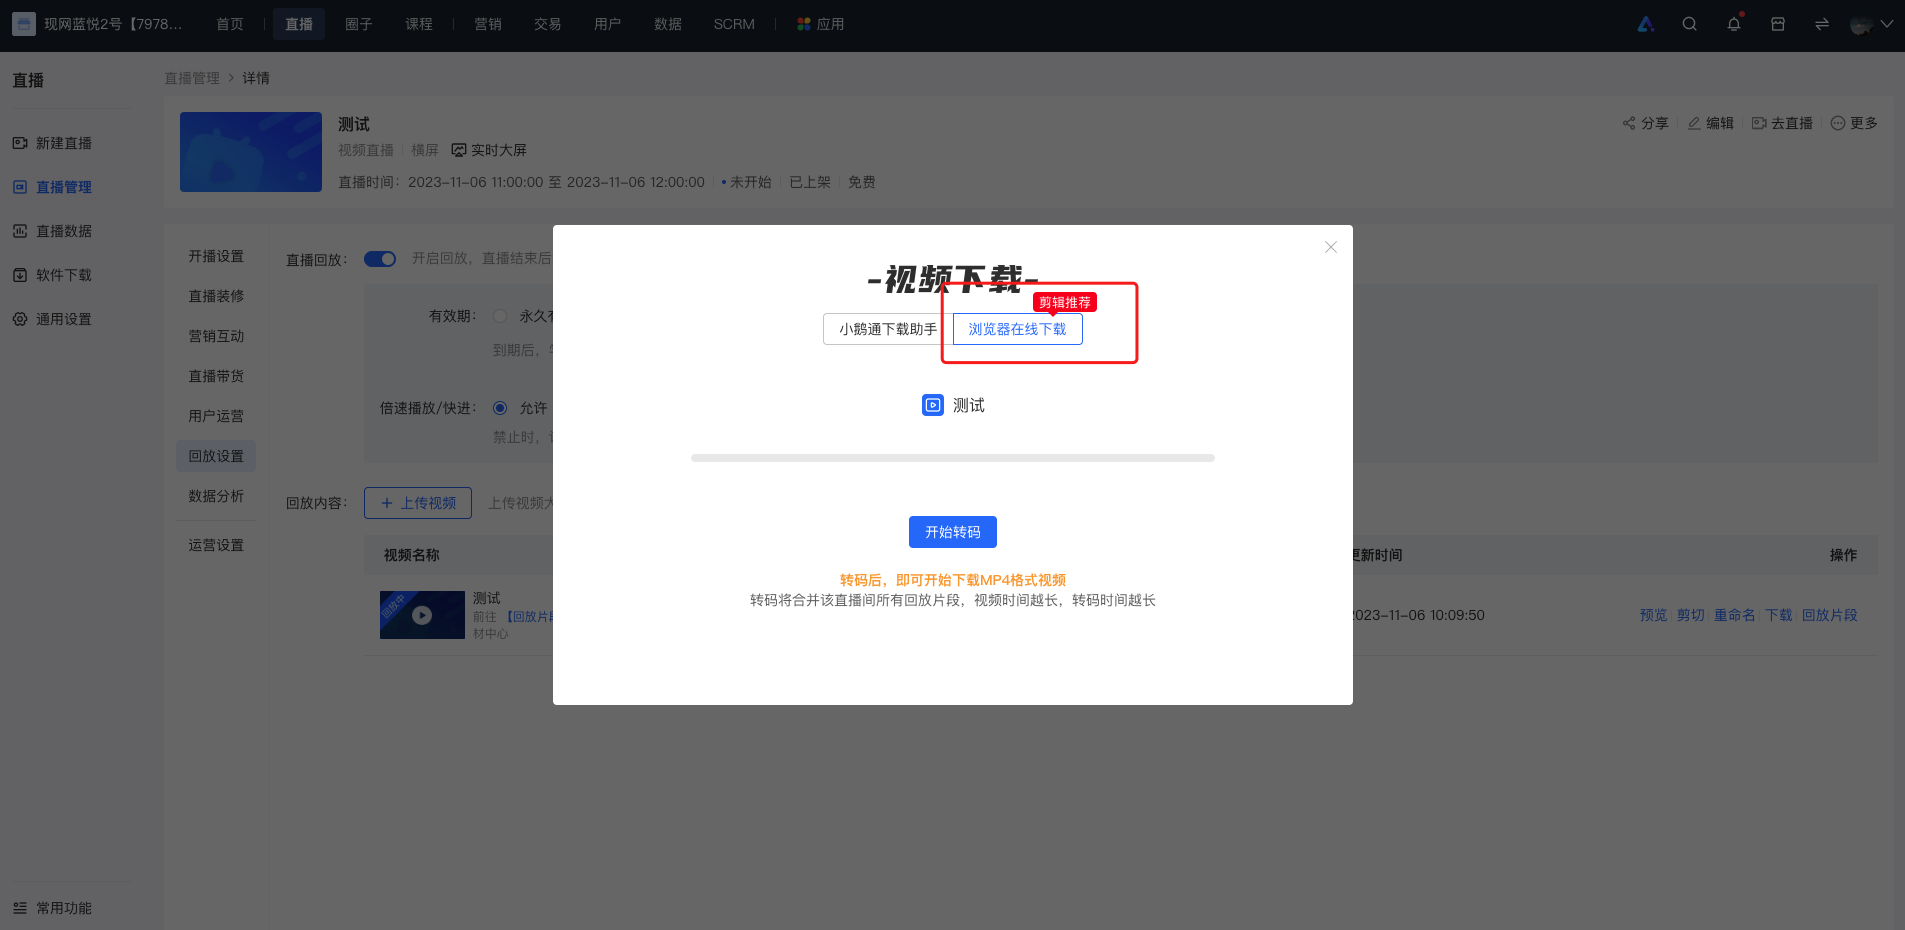
<2> After the transcoding is completed, click 'Start download'.
Solution ②: Export settings in the video editing software
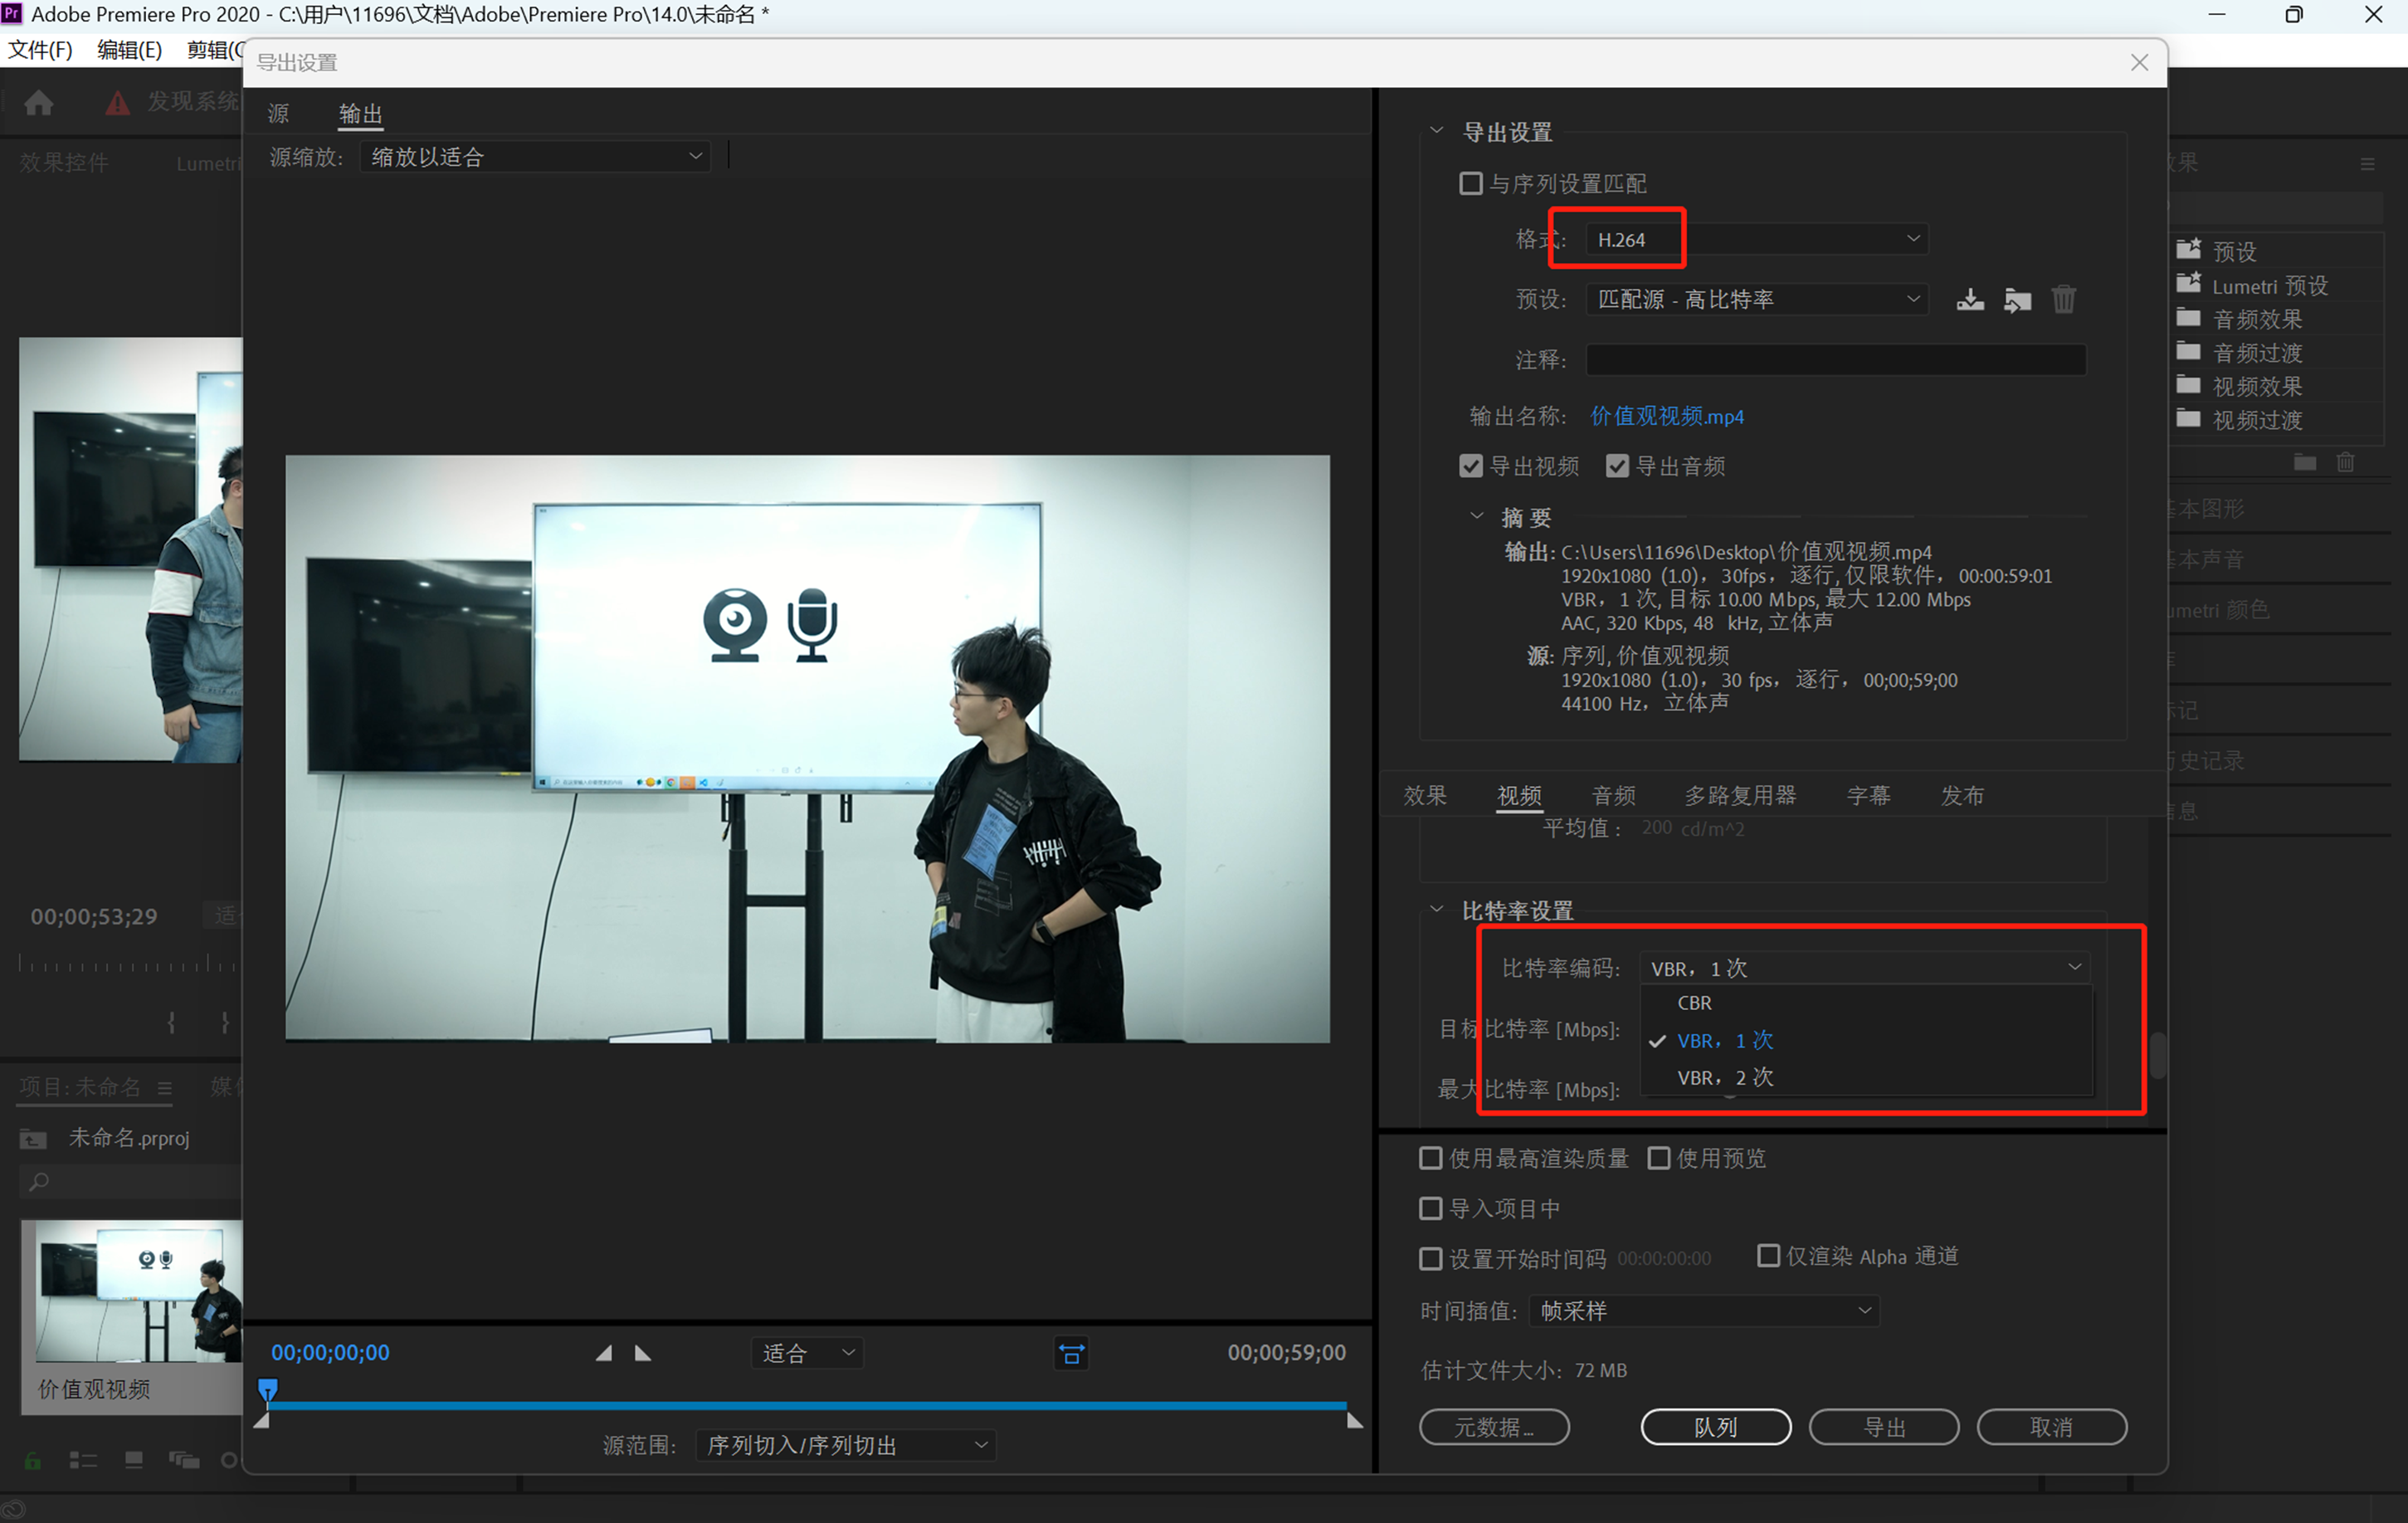
If there is still an audio - video out - of - sync issue when importing the replay video downloaded via the browser into the video editing software, you can try to set the export parameters to the 'VBR' encoding format for export. The following are the export settings for common video editing software:
Adobe Premiere
When exporting the video, select the 'H.264' format, set the bitrate to 'VBR, 1 pass', and then export.
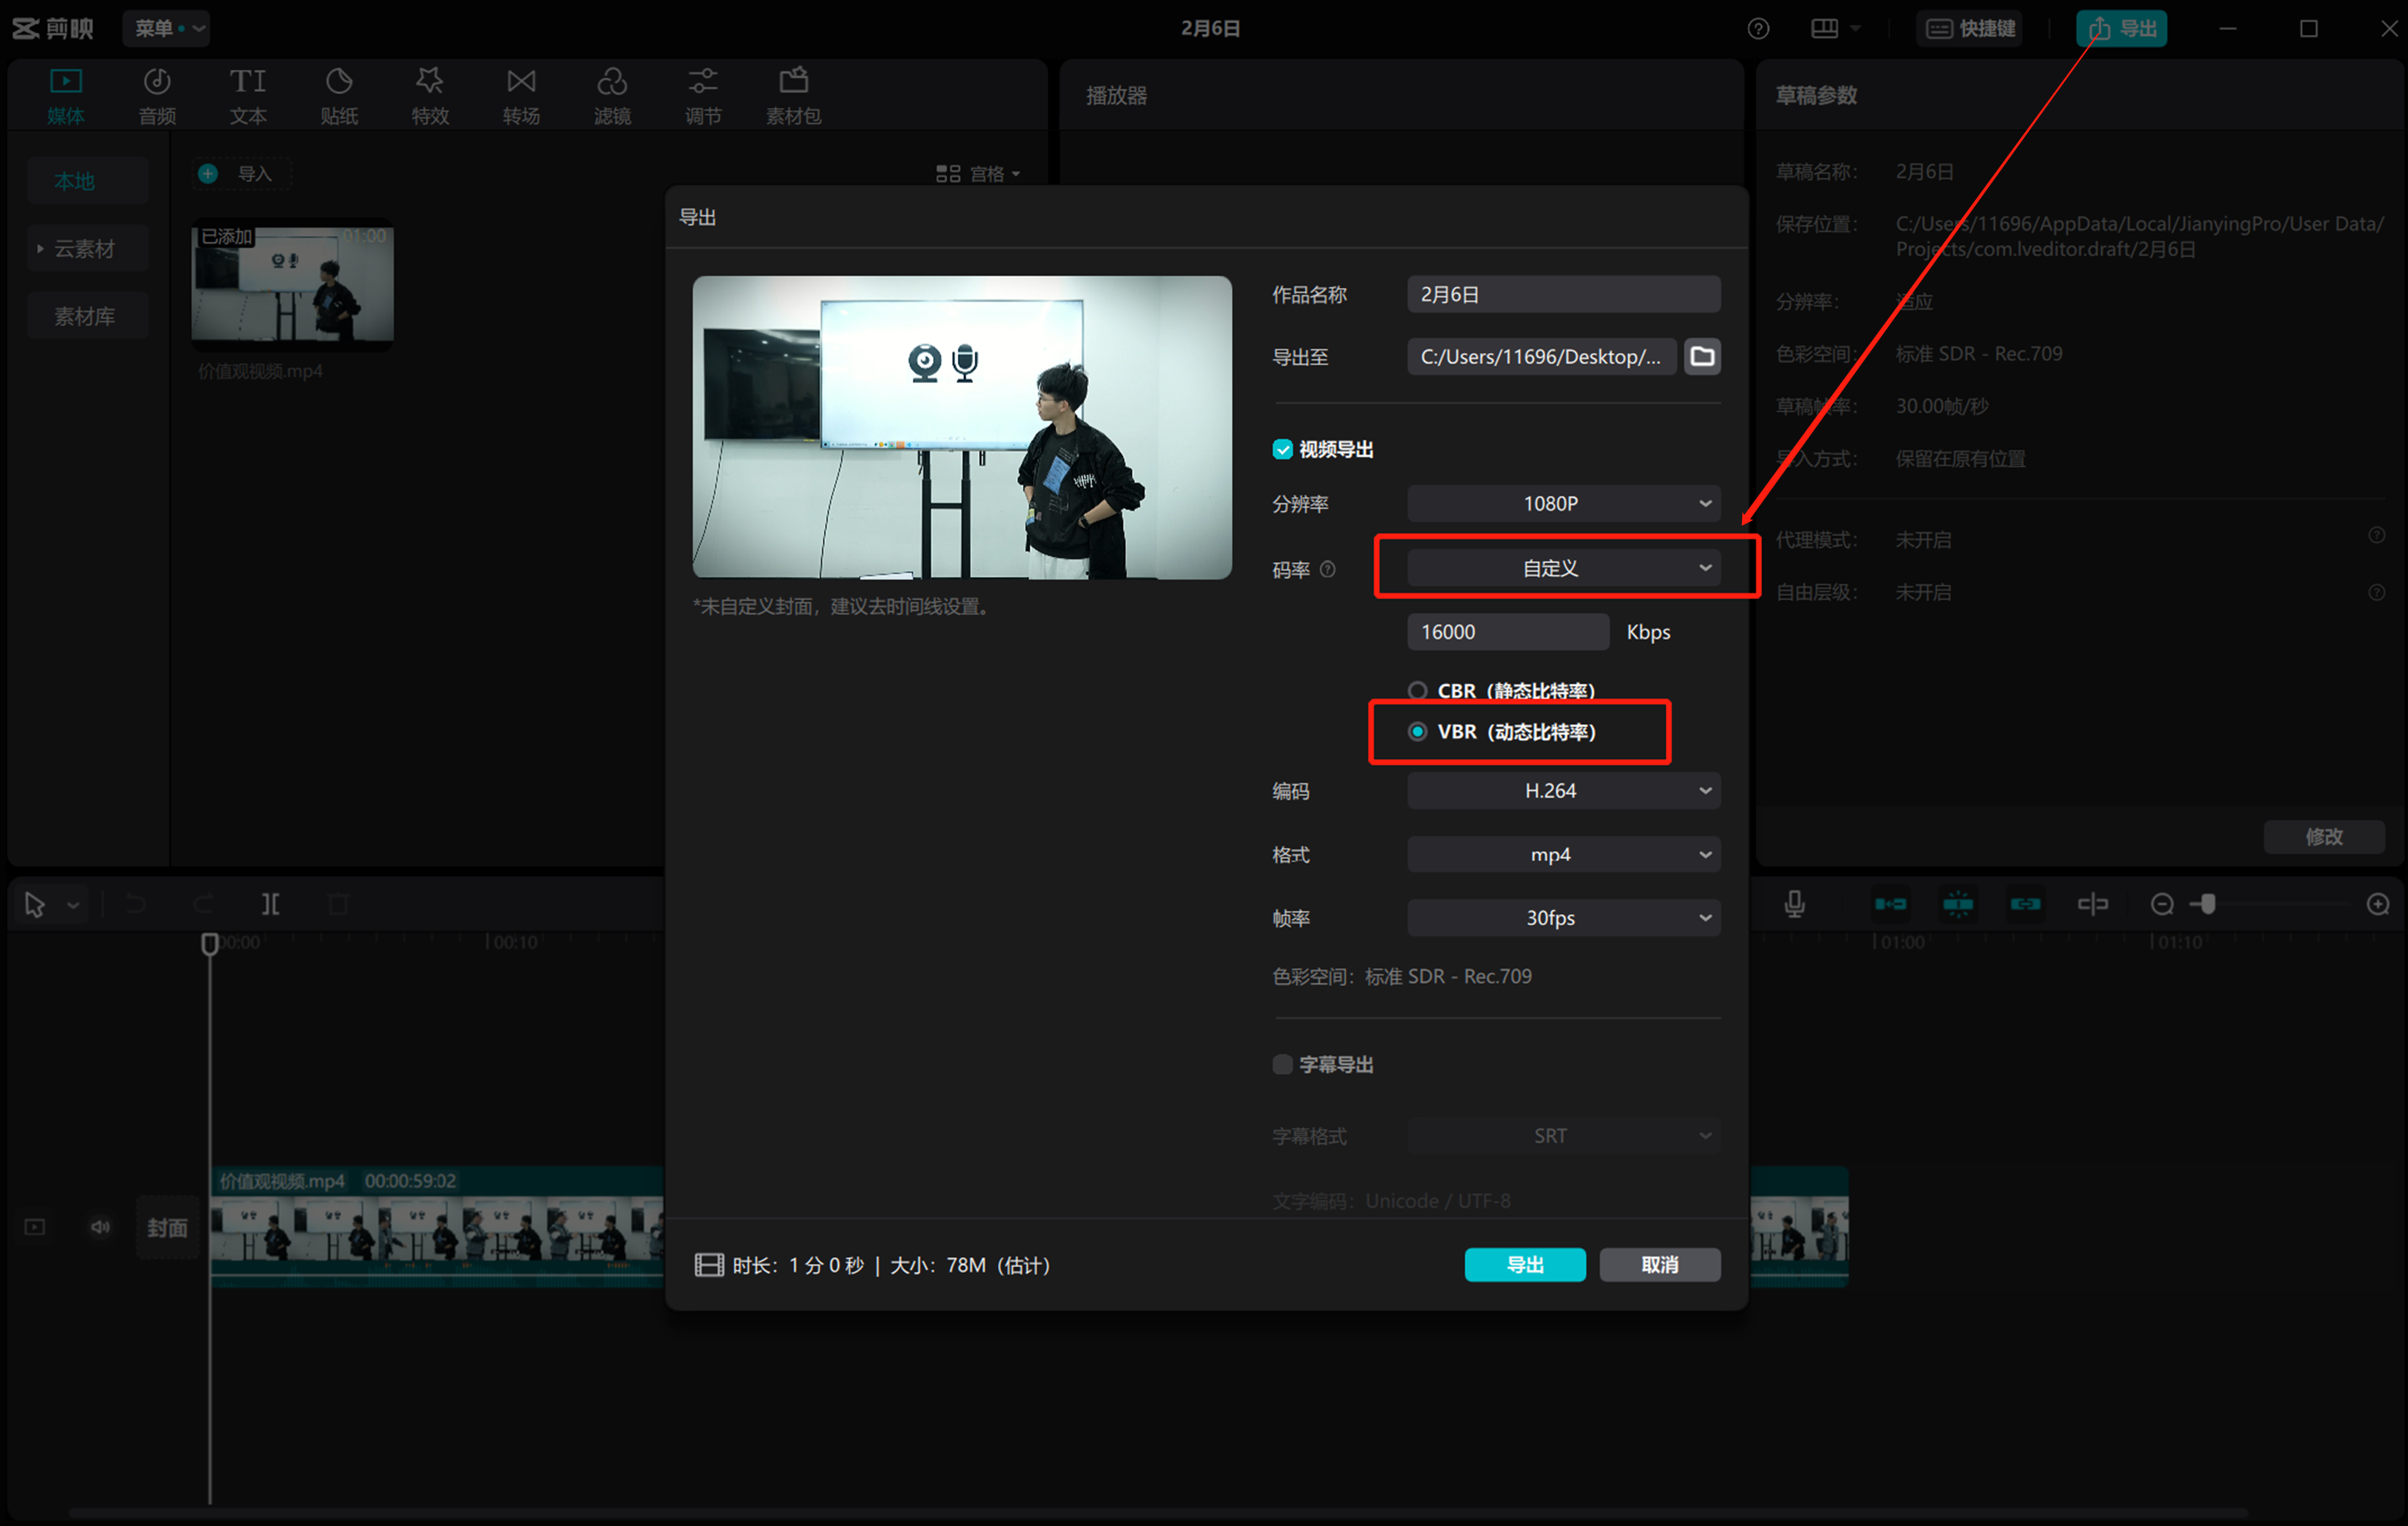
CapCut
When exporting the video, select 'Custom' for the bitrate and choose 'VBR (Variable Bit Rate)', then export.
*This operation is not supported on the Mac version of CapCut.
Other solutions
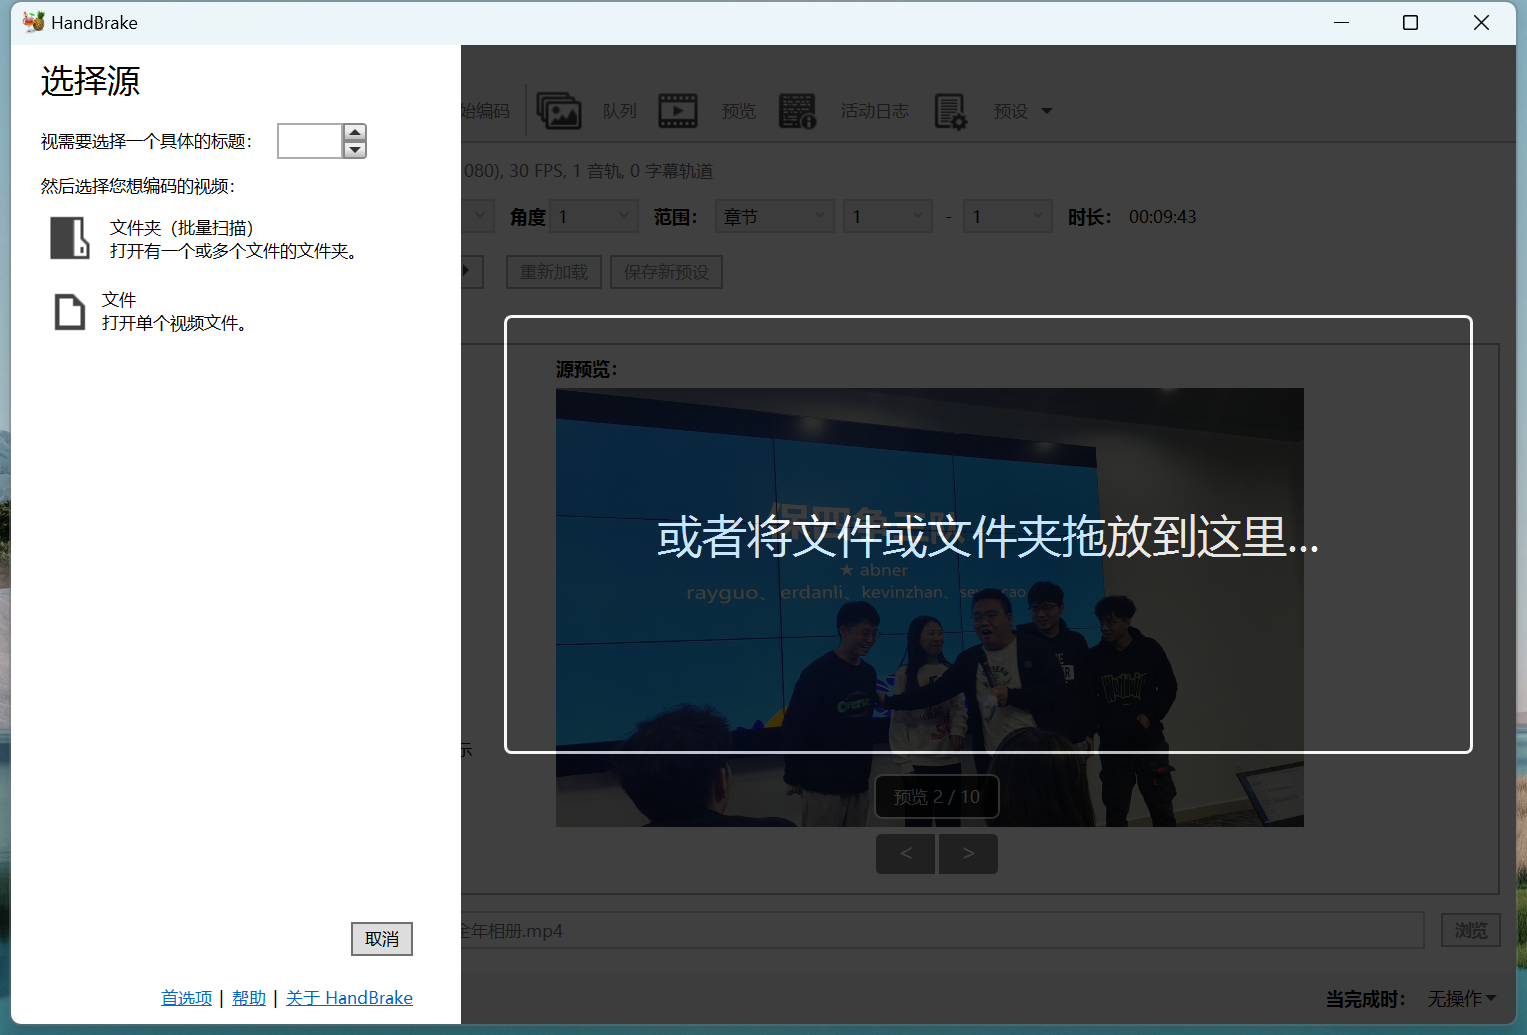
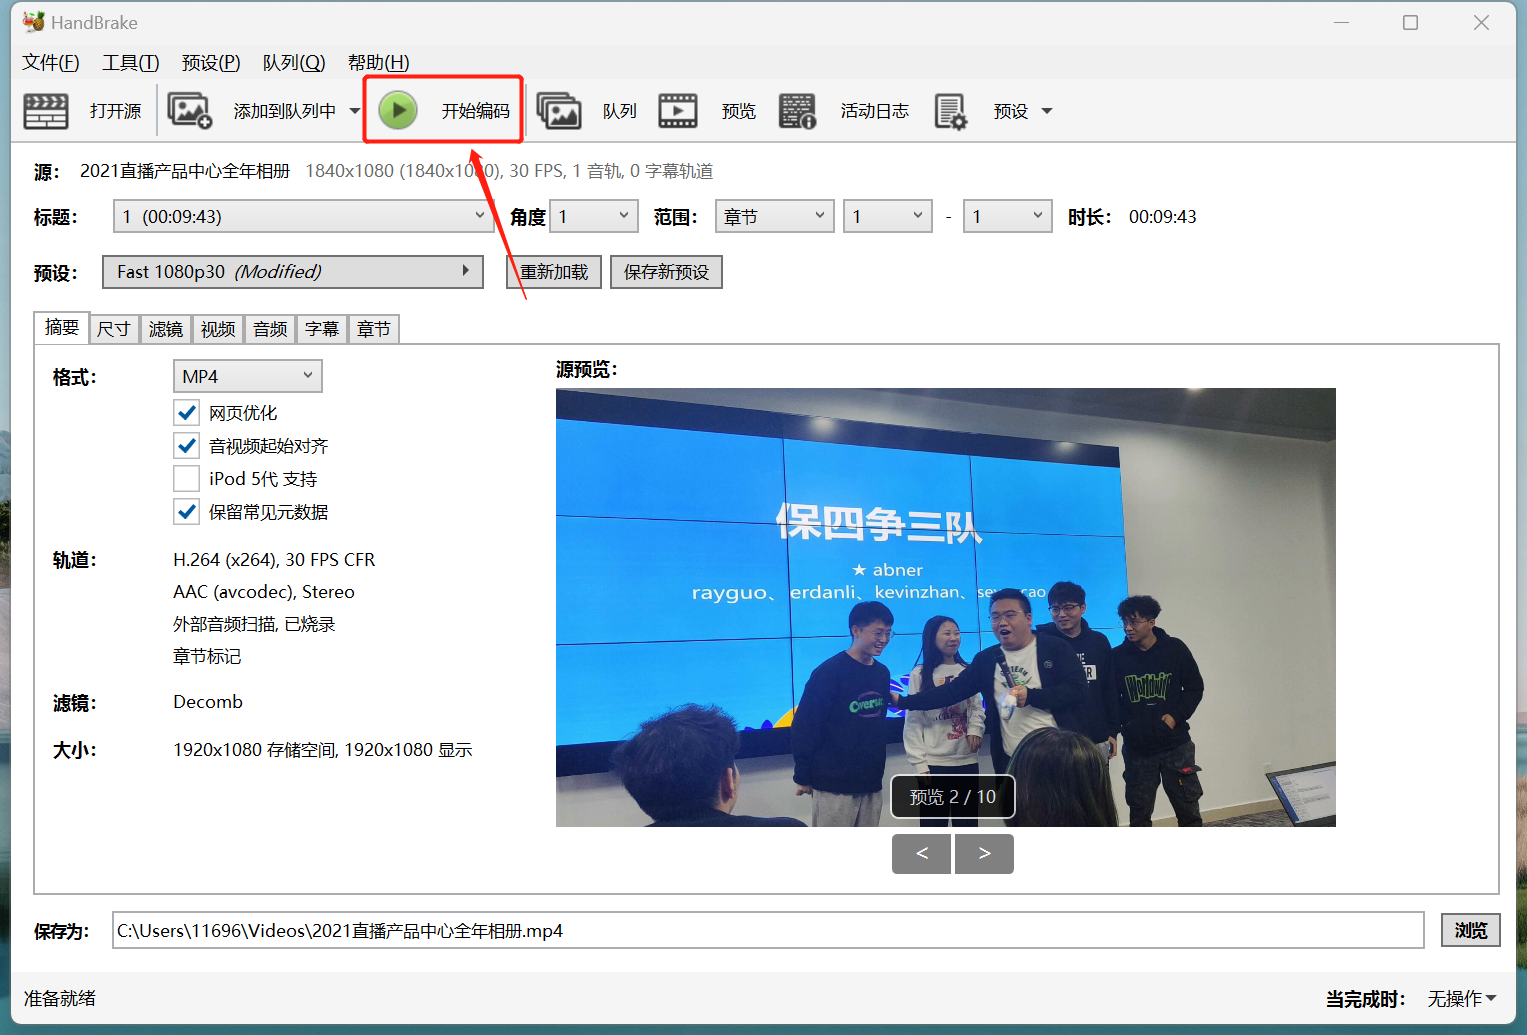
If the above methods cannot solve the problem, you can try to use software such as 'HandBrake' to manually transcode the video to the CBR encoding format locally before editing.Click to download HandBrake
Complete video conversion in four steps
Open the software after downloading and installing it.
Step 1: Open the file
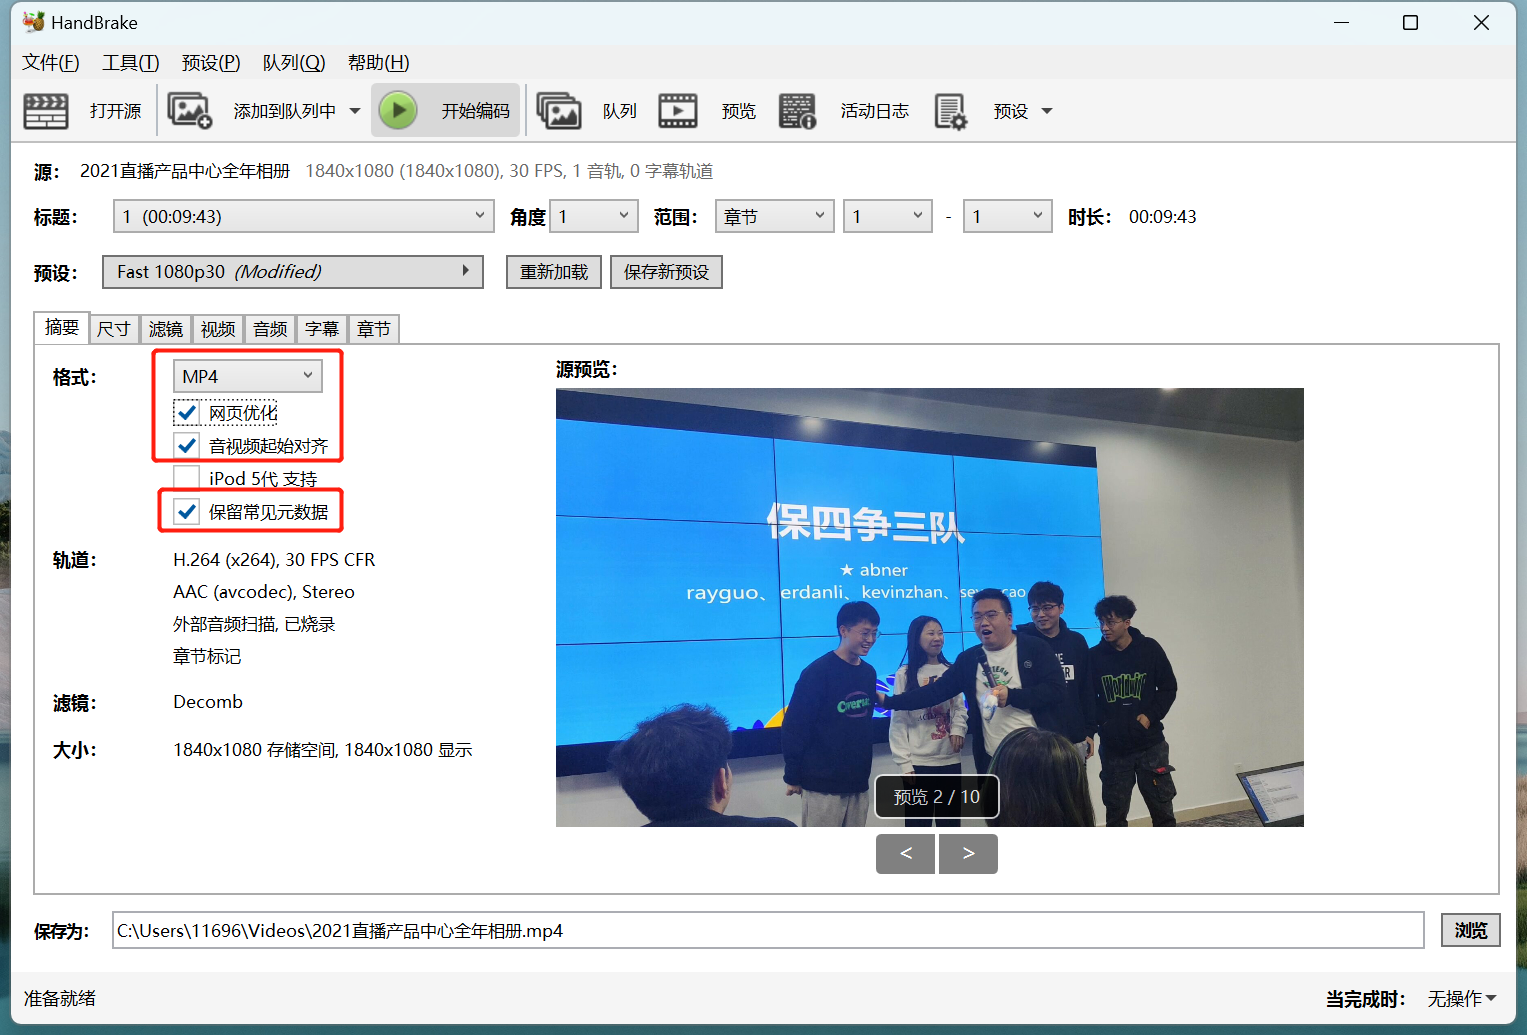
Step 2: Set parameters
Set the output format
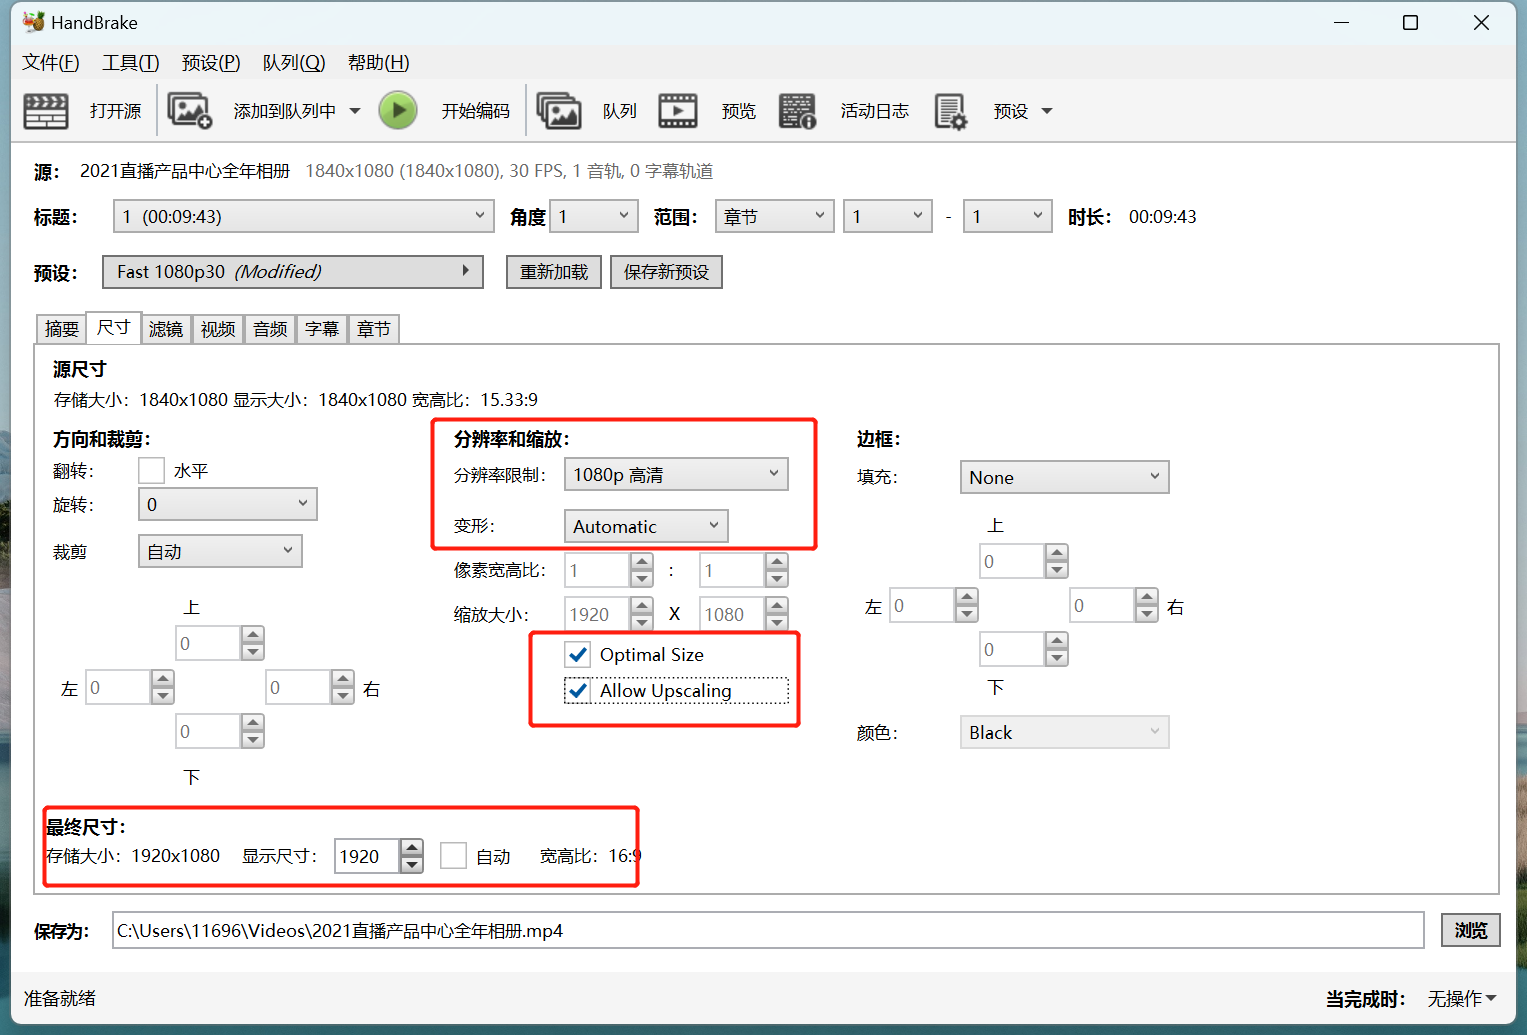
Set the output resolution
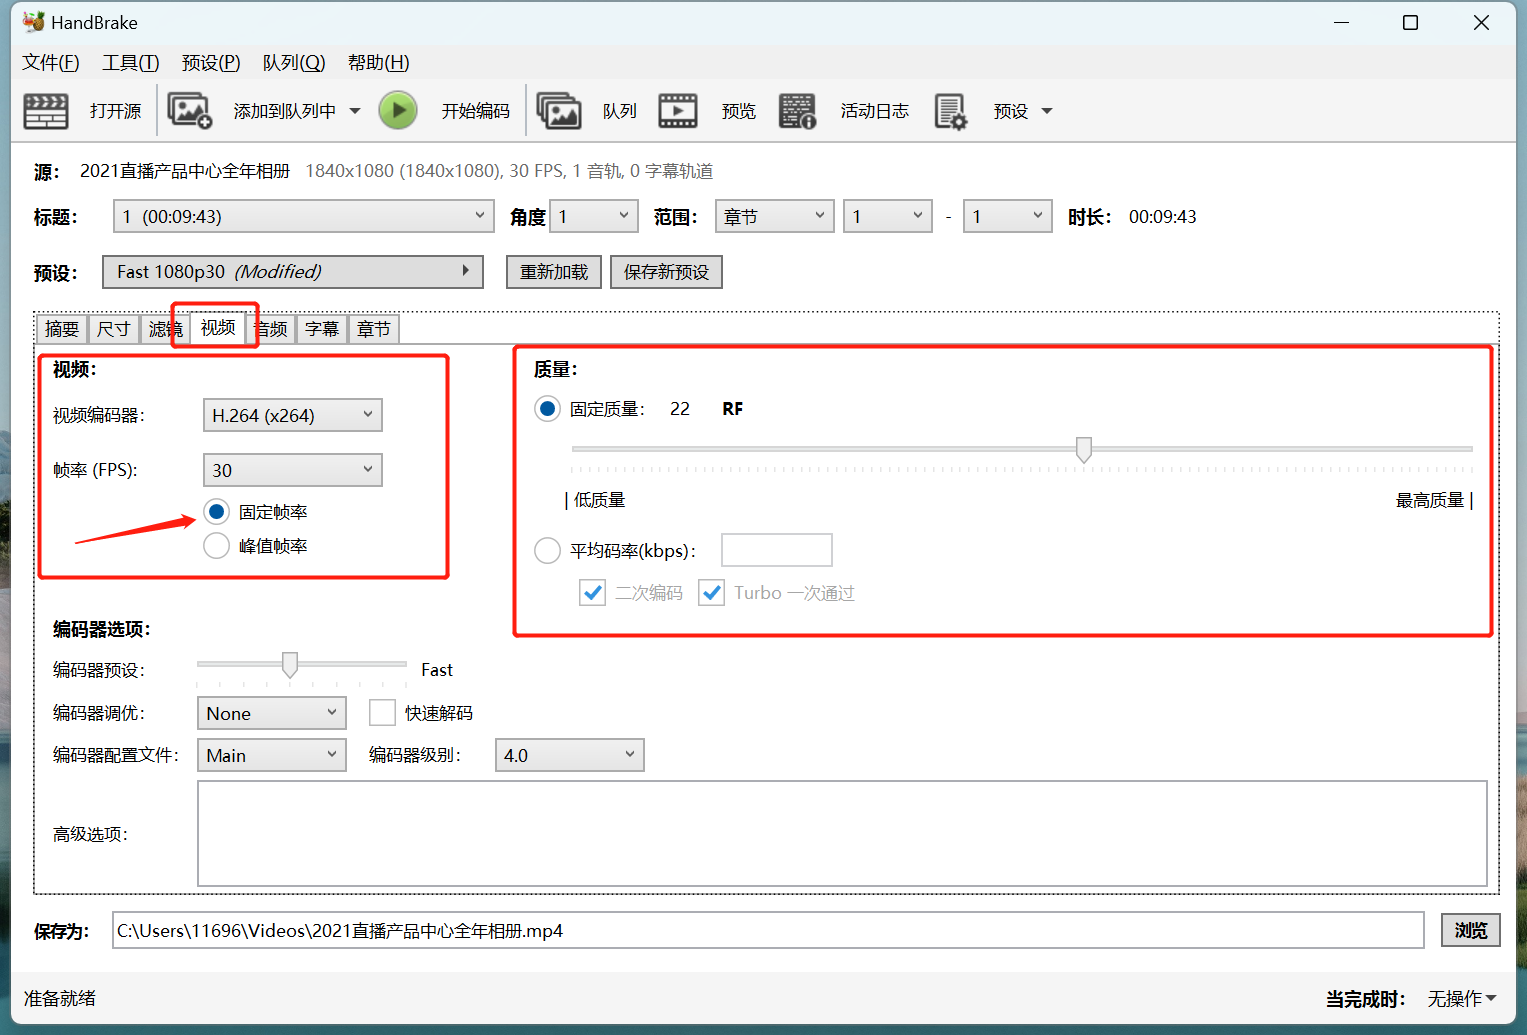
Set the encoding parameters
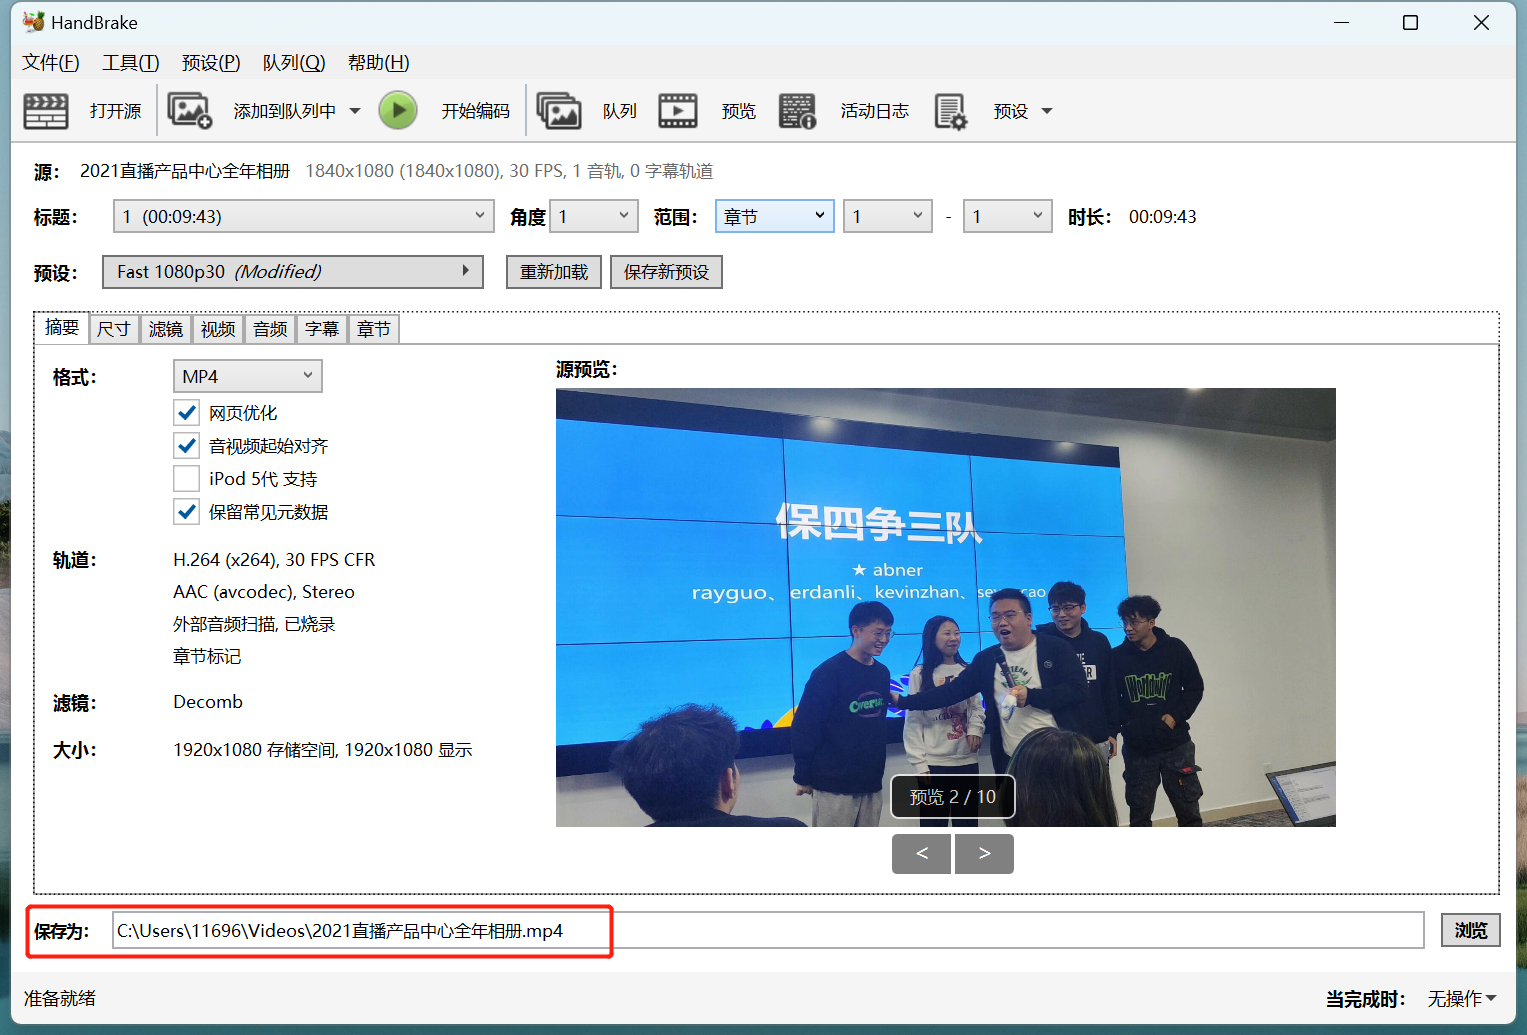
Step 3: Output the file
Step 4: Start transcoding
Import the transcoded video into the video editing software for secondary editing.
Does the live stream support external devices?
I.The live stream supports external graphic tablets.
II.The live stream supports external cameras (SLR cameras, etc.).
III.The live stream supports external webcams.
IV.The live stream supports external microphones (portable PA systems, lapel microphones, etc.).
*Click on the title to view the operation details.