Recorded and live broadcasts
- Is there a size limit for the videos uploaded for recorded or live broadcasts?
- Tutorial on Using the Video Mode for Recorded and Live Streams
- If the live streaming duration is longer than the uploaded video duration, will the words [Video playback completed] appear after the video finishes playing?
- Tutorial on Using Recorded and Live Streams
- If the live streaming duration is shorter than the uploaded video duration, will the words [Video playback completed] appear after the video finishes playing?
Is there a size limit for the videos uploaded for recorded or live broadcasts?
Currently, the video upload restrictions in the [Recorded and Live Streaming] mode are as follows: Supported formats include mp4, avi, wmv, mov, flv, rmvb, 3gp, m4v, and mkv. The file size should not exceed 5GB. It is recommended that the video resolution be 1280×720.
Tutorial on Using the Video Mode for Recorded and Live Streams
I. Function Introduction
Students can participate in the live stream in real - time in the video mode and watch the video content uploaded by the teacher. They can also interact with the teacher by sending voice messages, texts, courseware, and videos in real - time.
II. Purpose of Use
Recorded live stream - video mode is suitable for scenarios where there are videos and the live - stream content is relatively lightweight. Merchants can upload videos to the live - stream room, and the videos will start playing once the live stream begins.
III. Use Scenarios
It is suitable for live streams where the lecturer can prepare recorded videos in advance. The lecturer prepares the recorded videos in advance, and users can view the videos uploaded by the lecturer during the live stream. The lecturer can explain the content in the form of voice or text.
IV. Operation Path
Merchant side: Merchant background → Create recorded live stream → Start live stream
V. Usage Tutorial
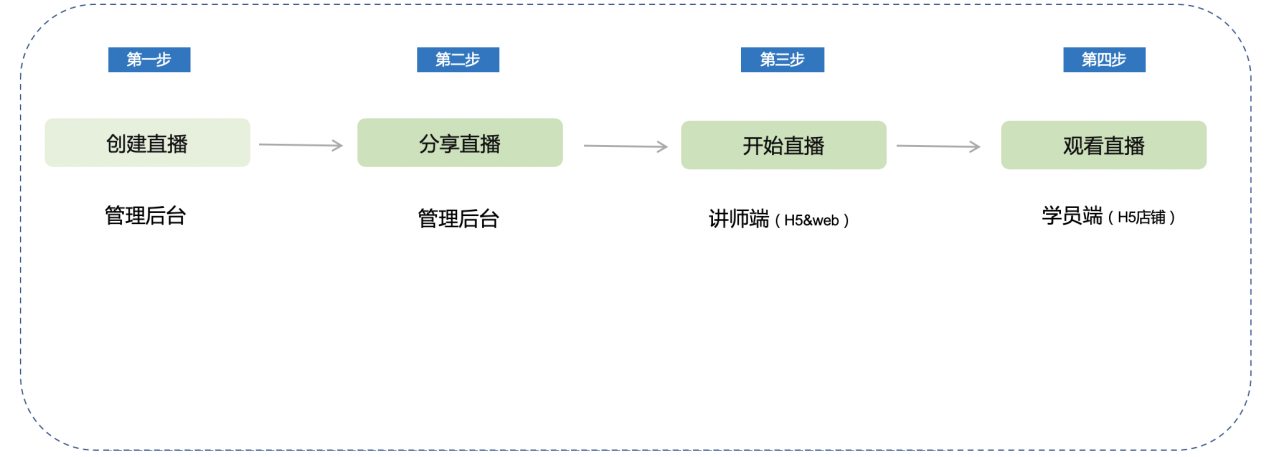
Step 1: Create a live stream (Management background)
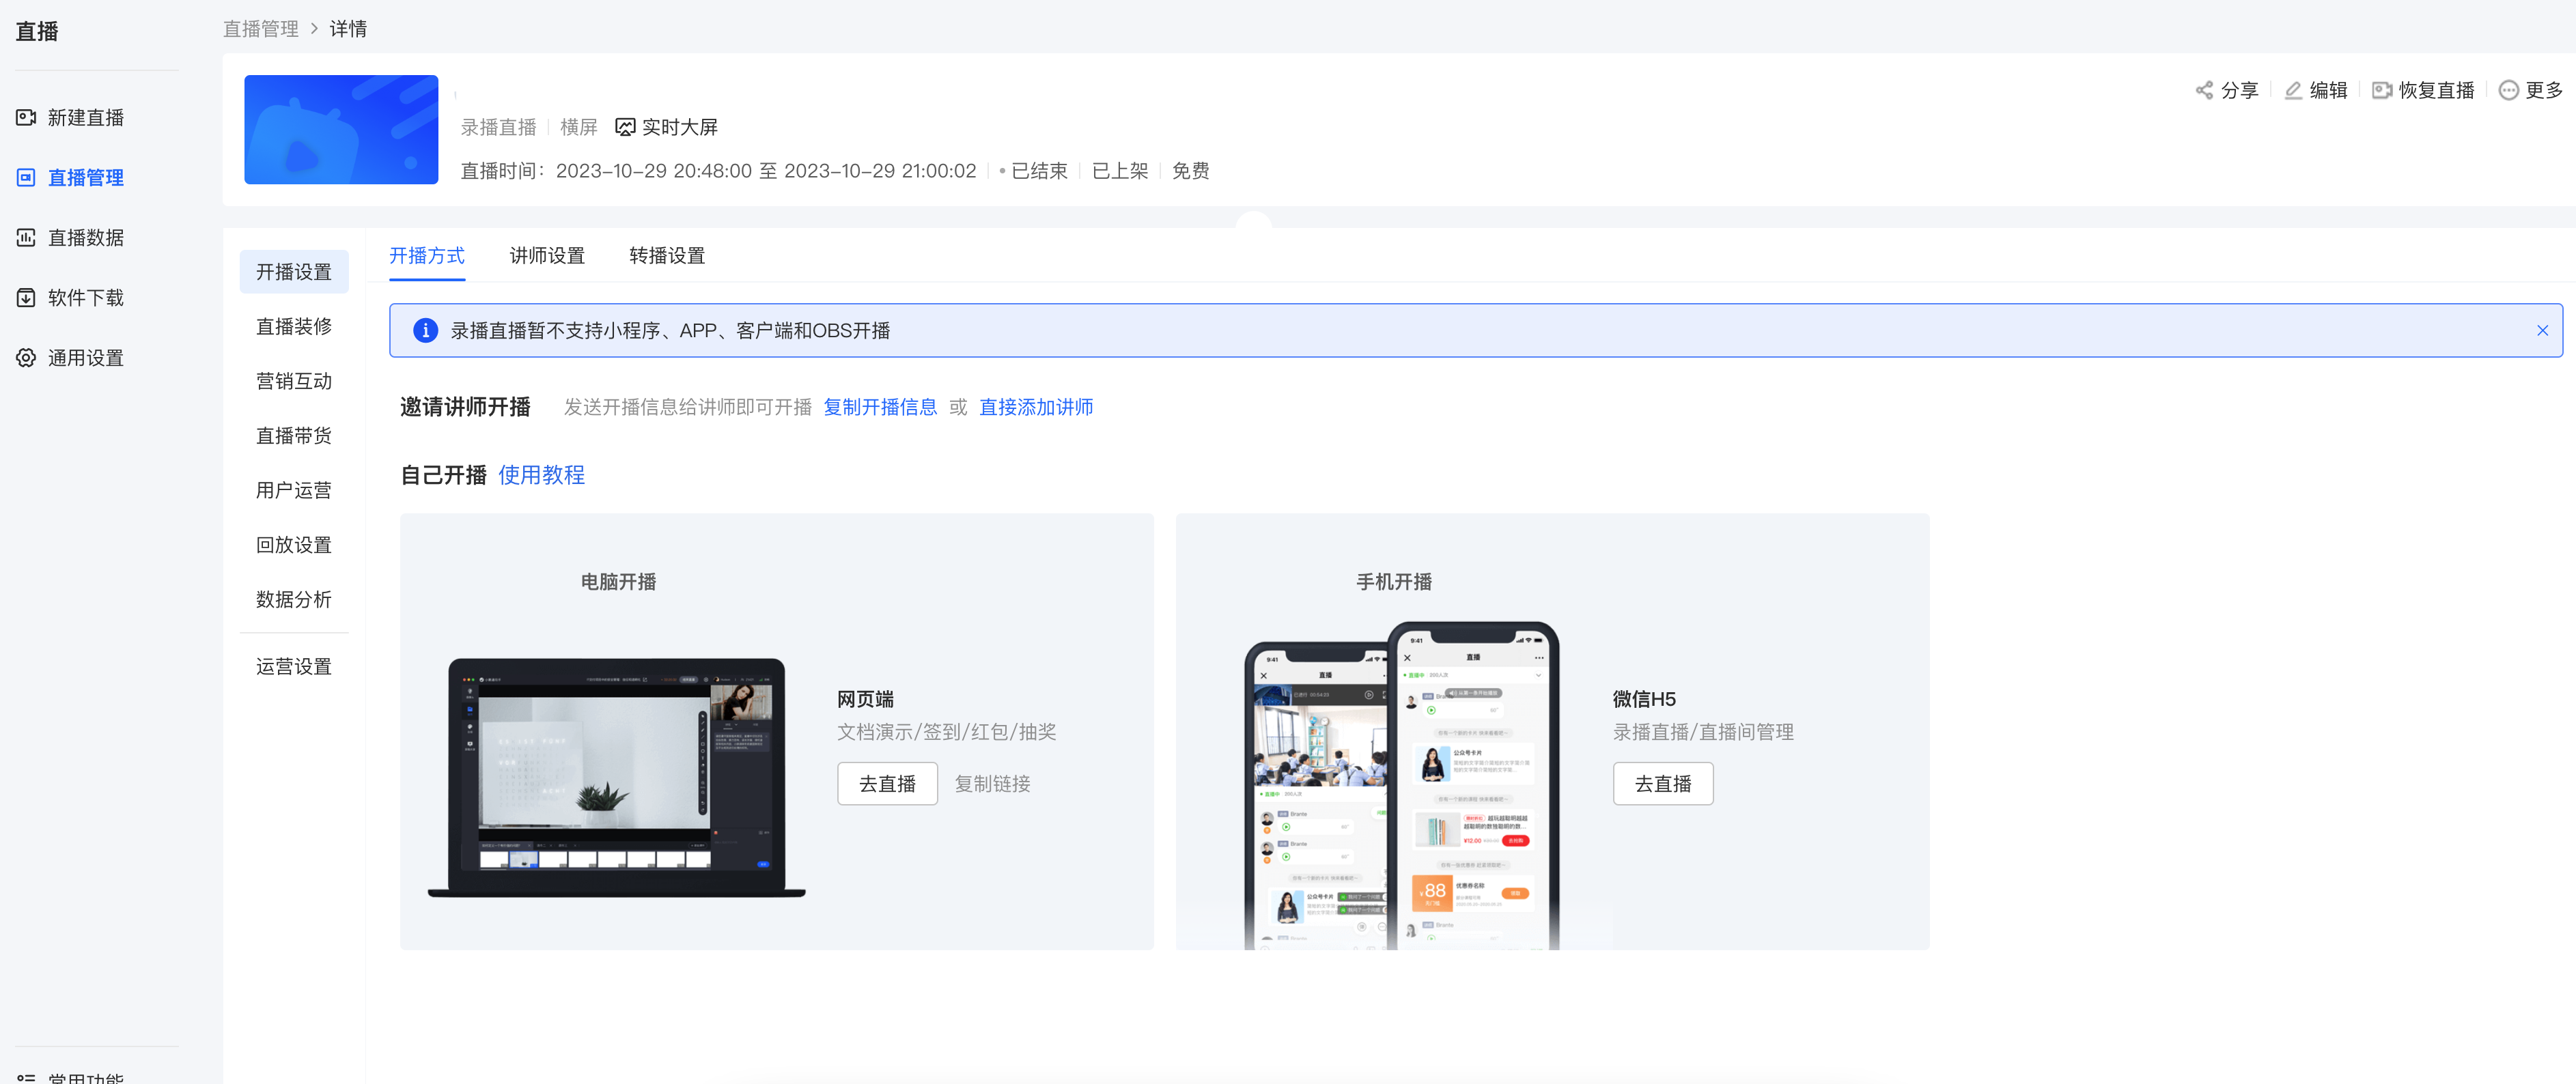
1. Enter the merchant management background - click on Live Stream - New Live Stream, and select Recorded Live Stream.
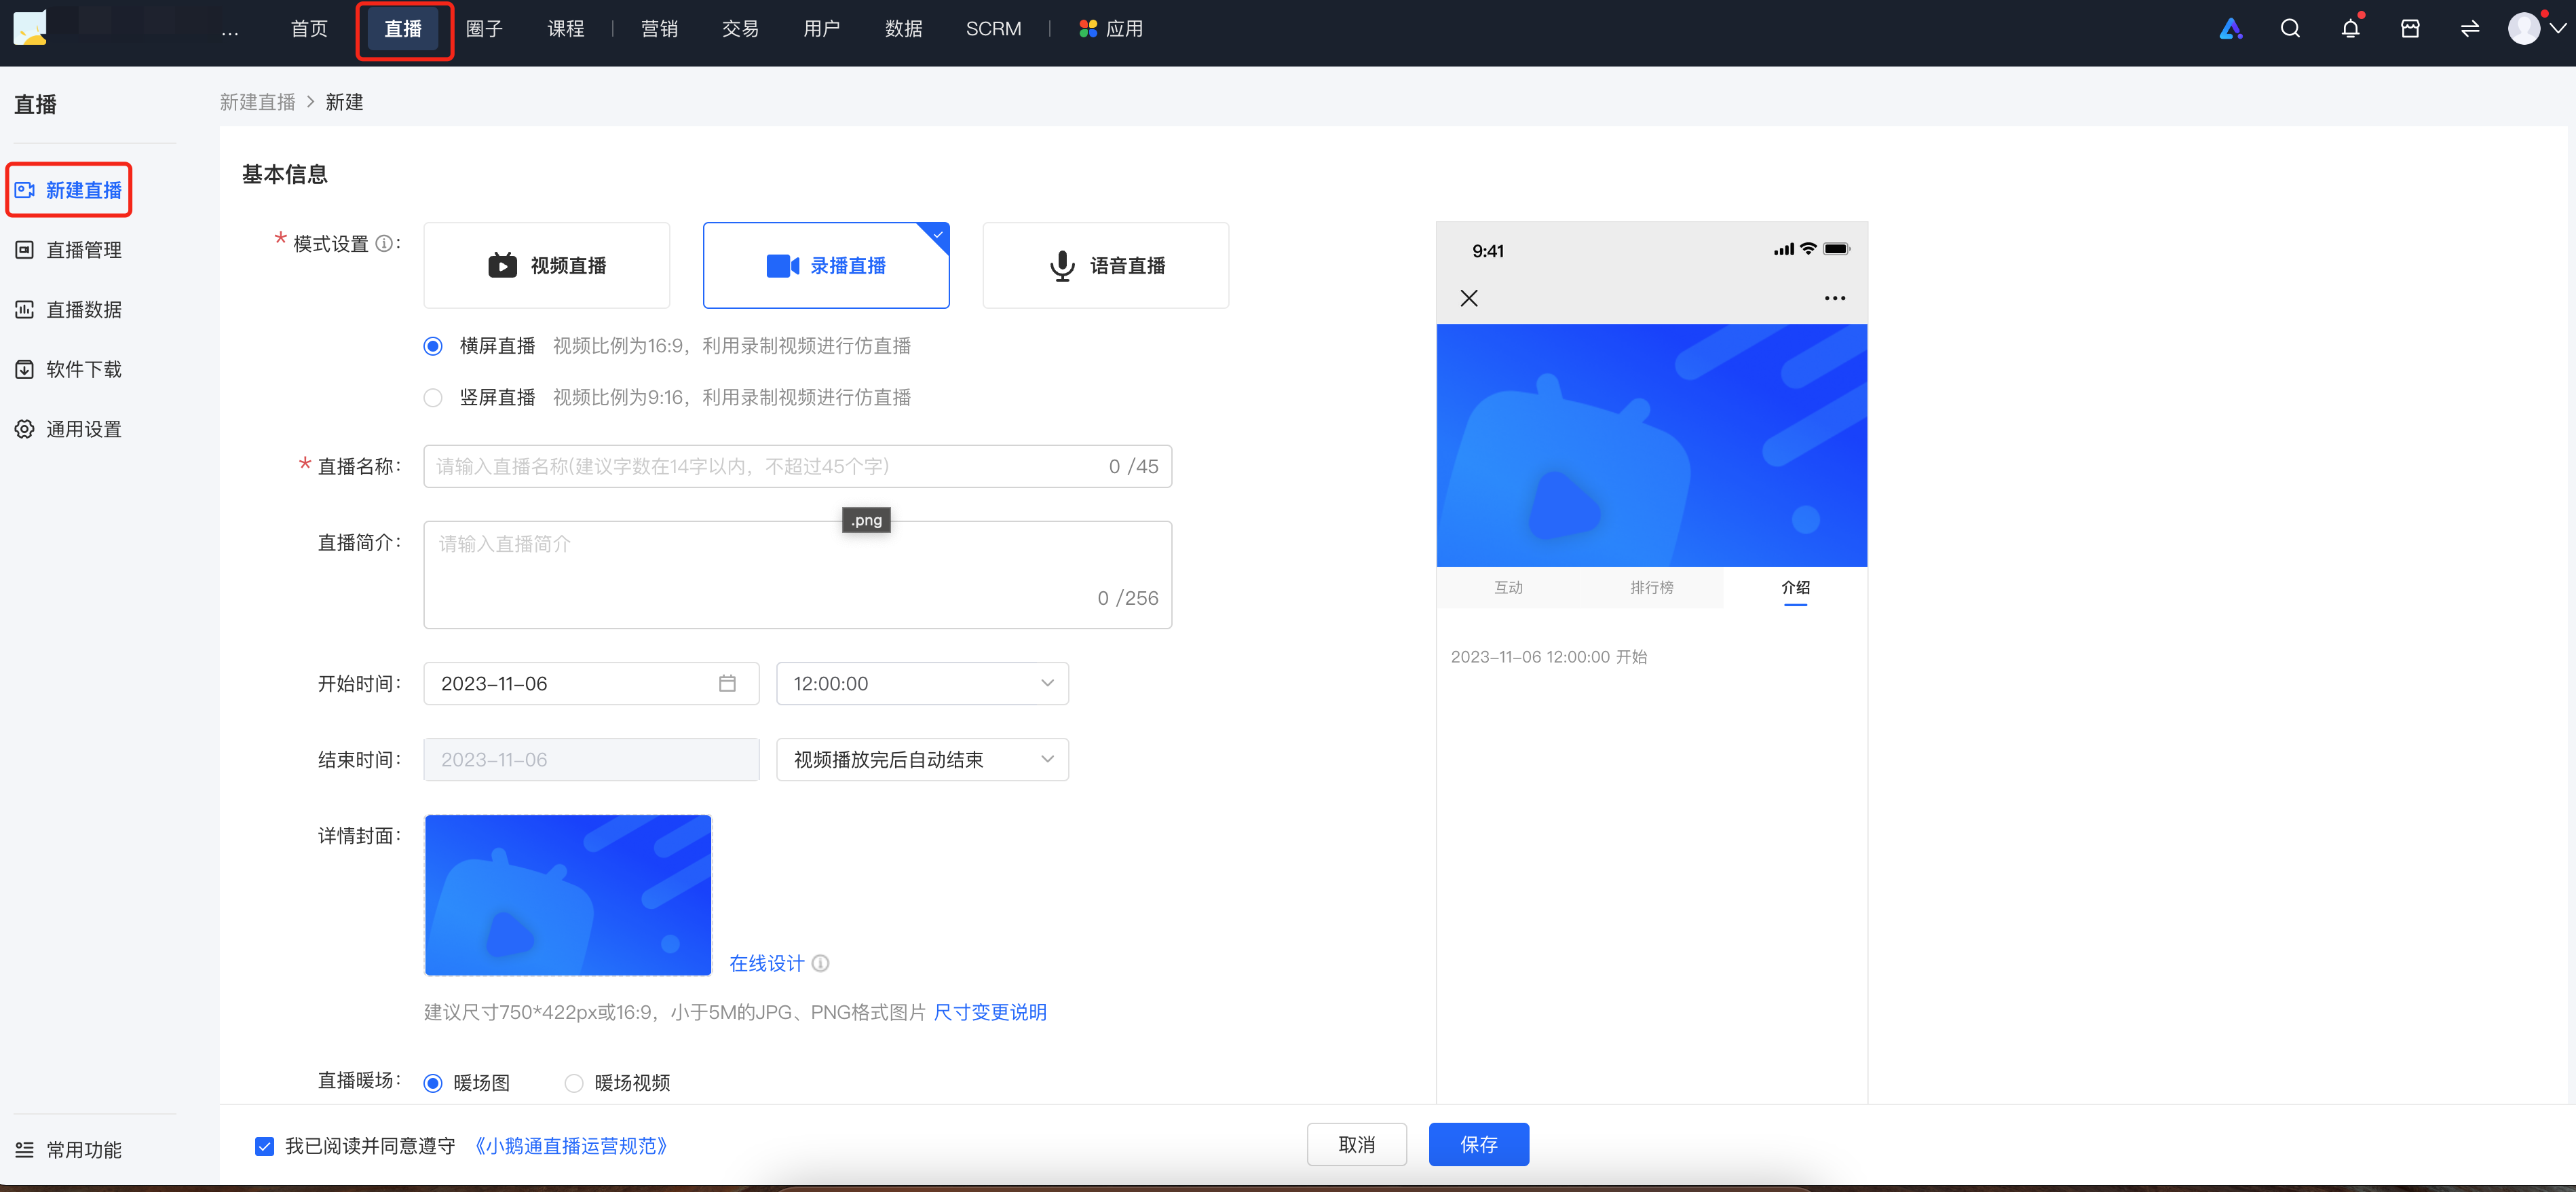
(Management background)
2.Select the 'Recorded Live Stream' mode
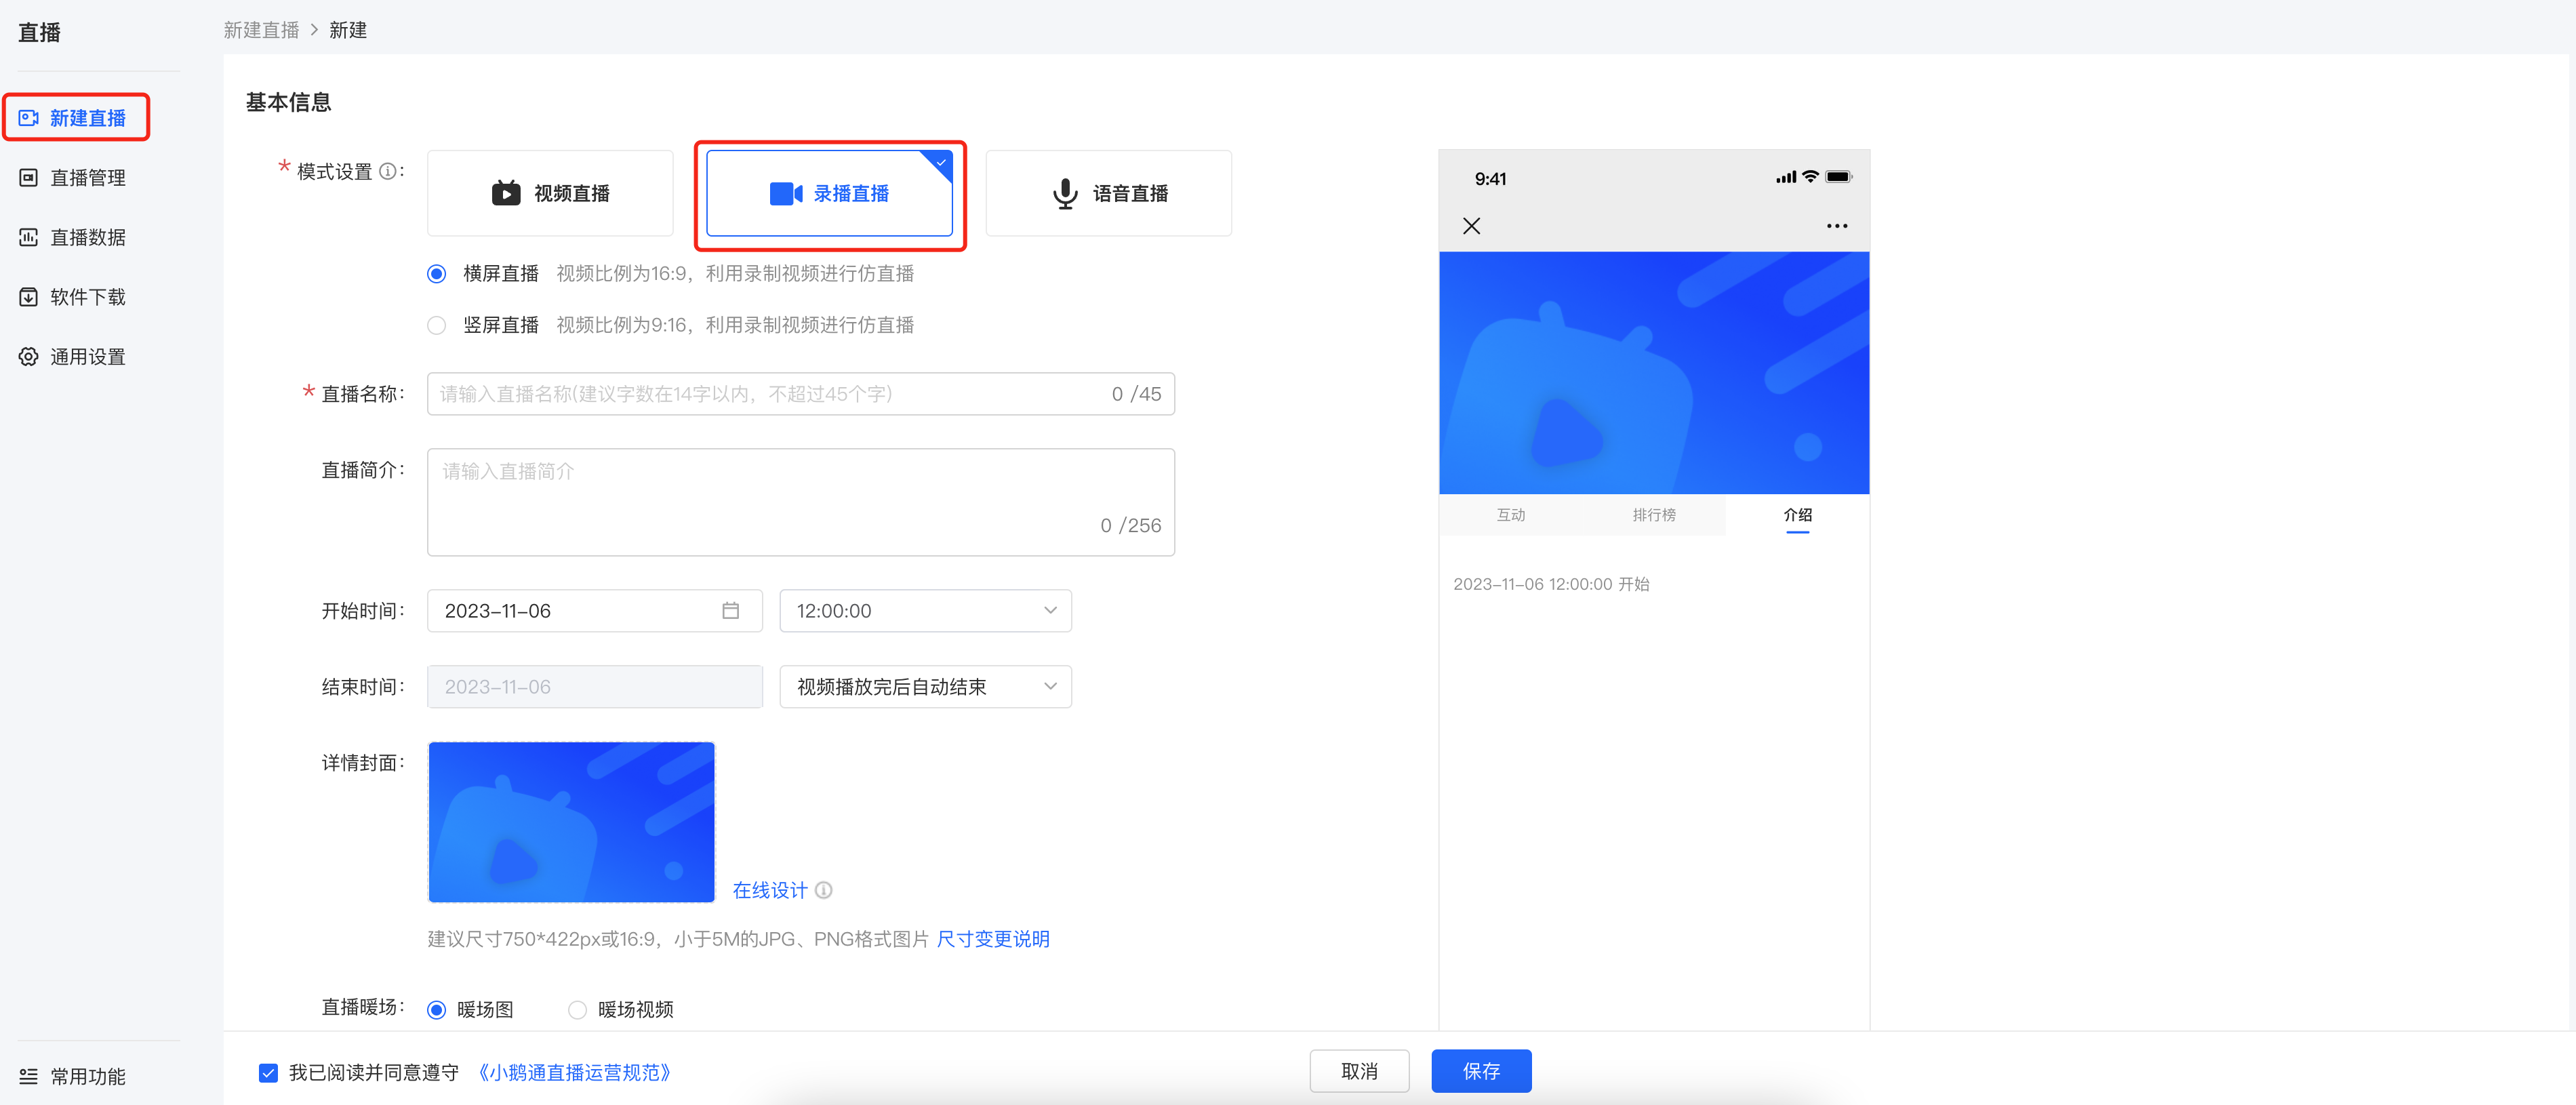
3. Fill in the relevant information, click Save, and complete the creation
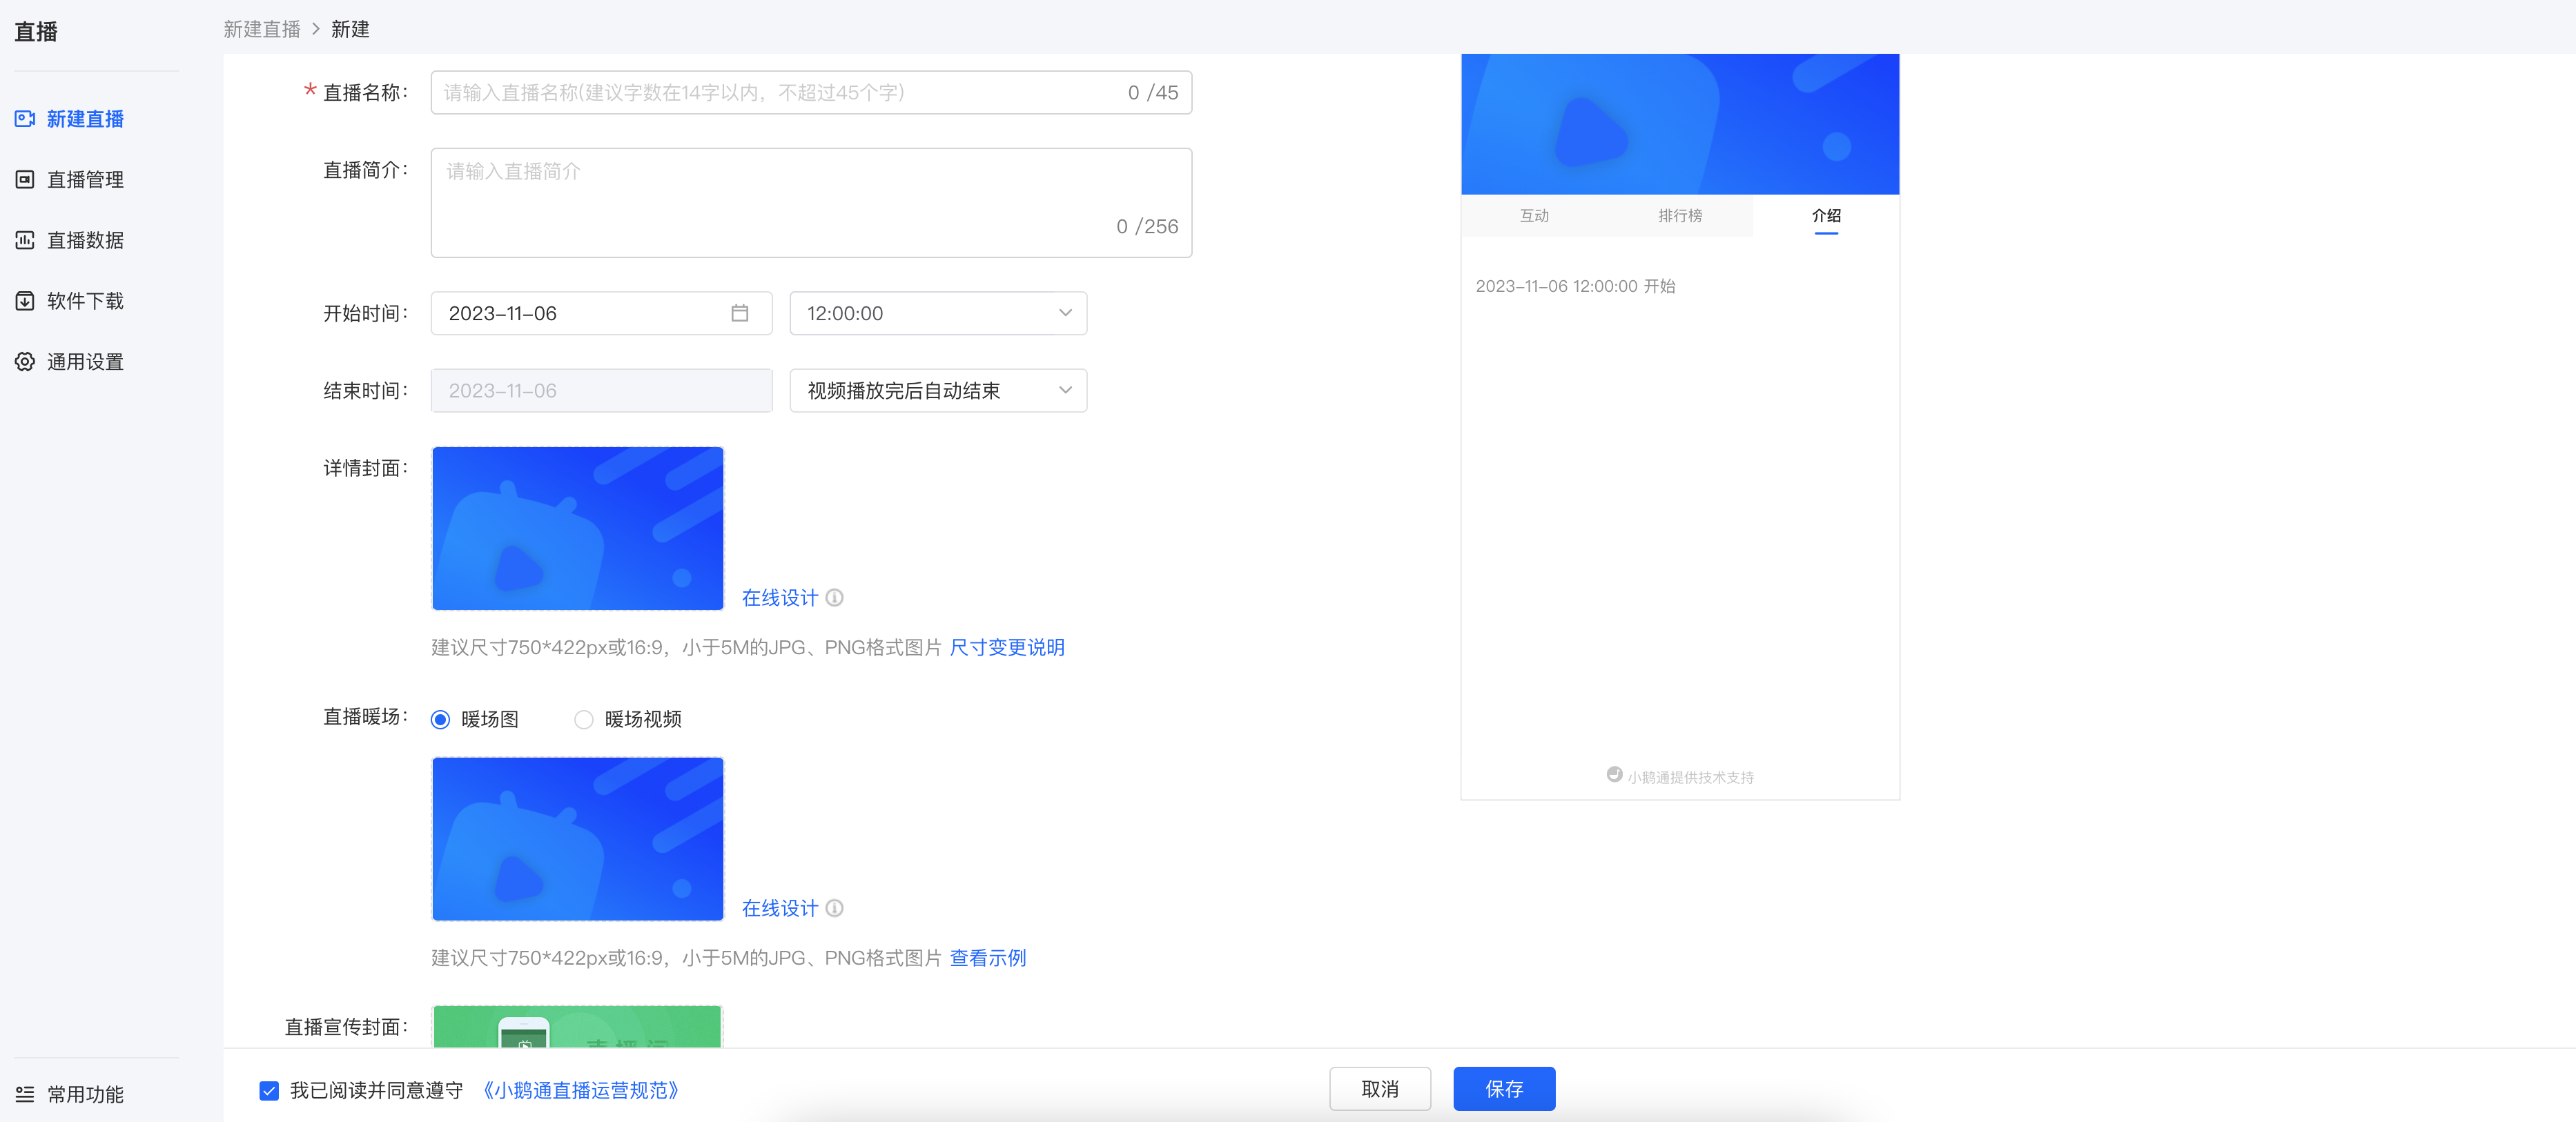
PS: Don't forget to select and upload the video at [Recorded Videos] - [Add Video]!
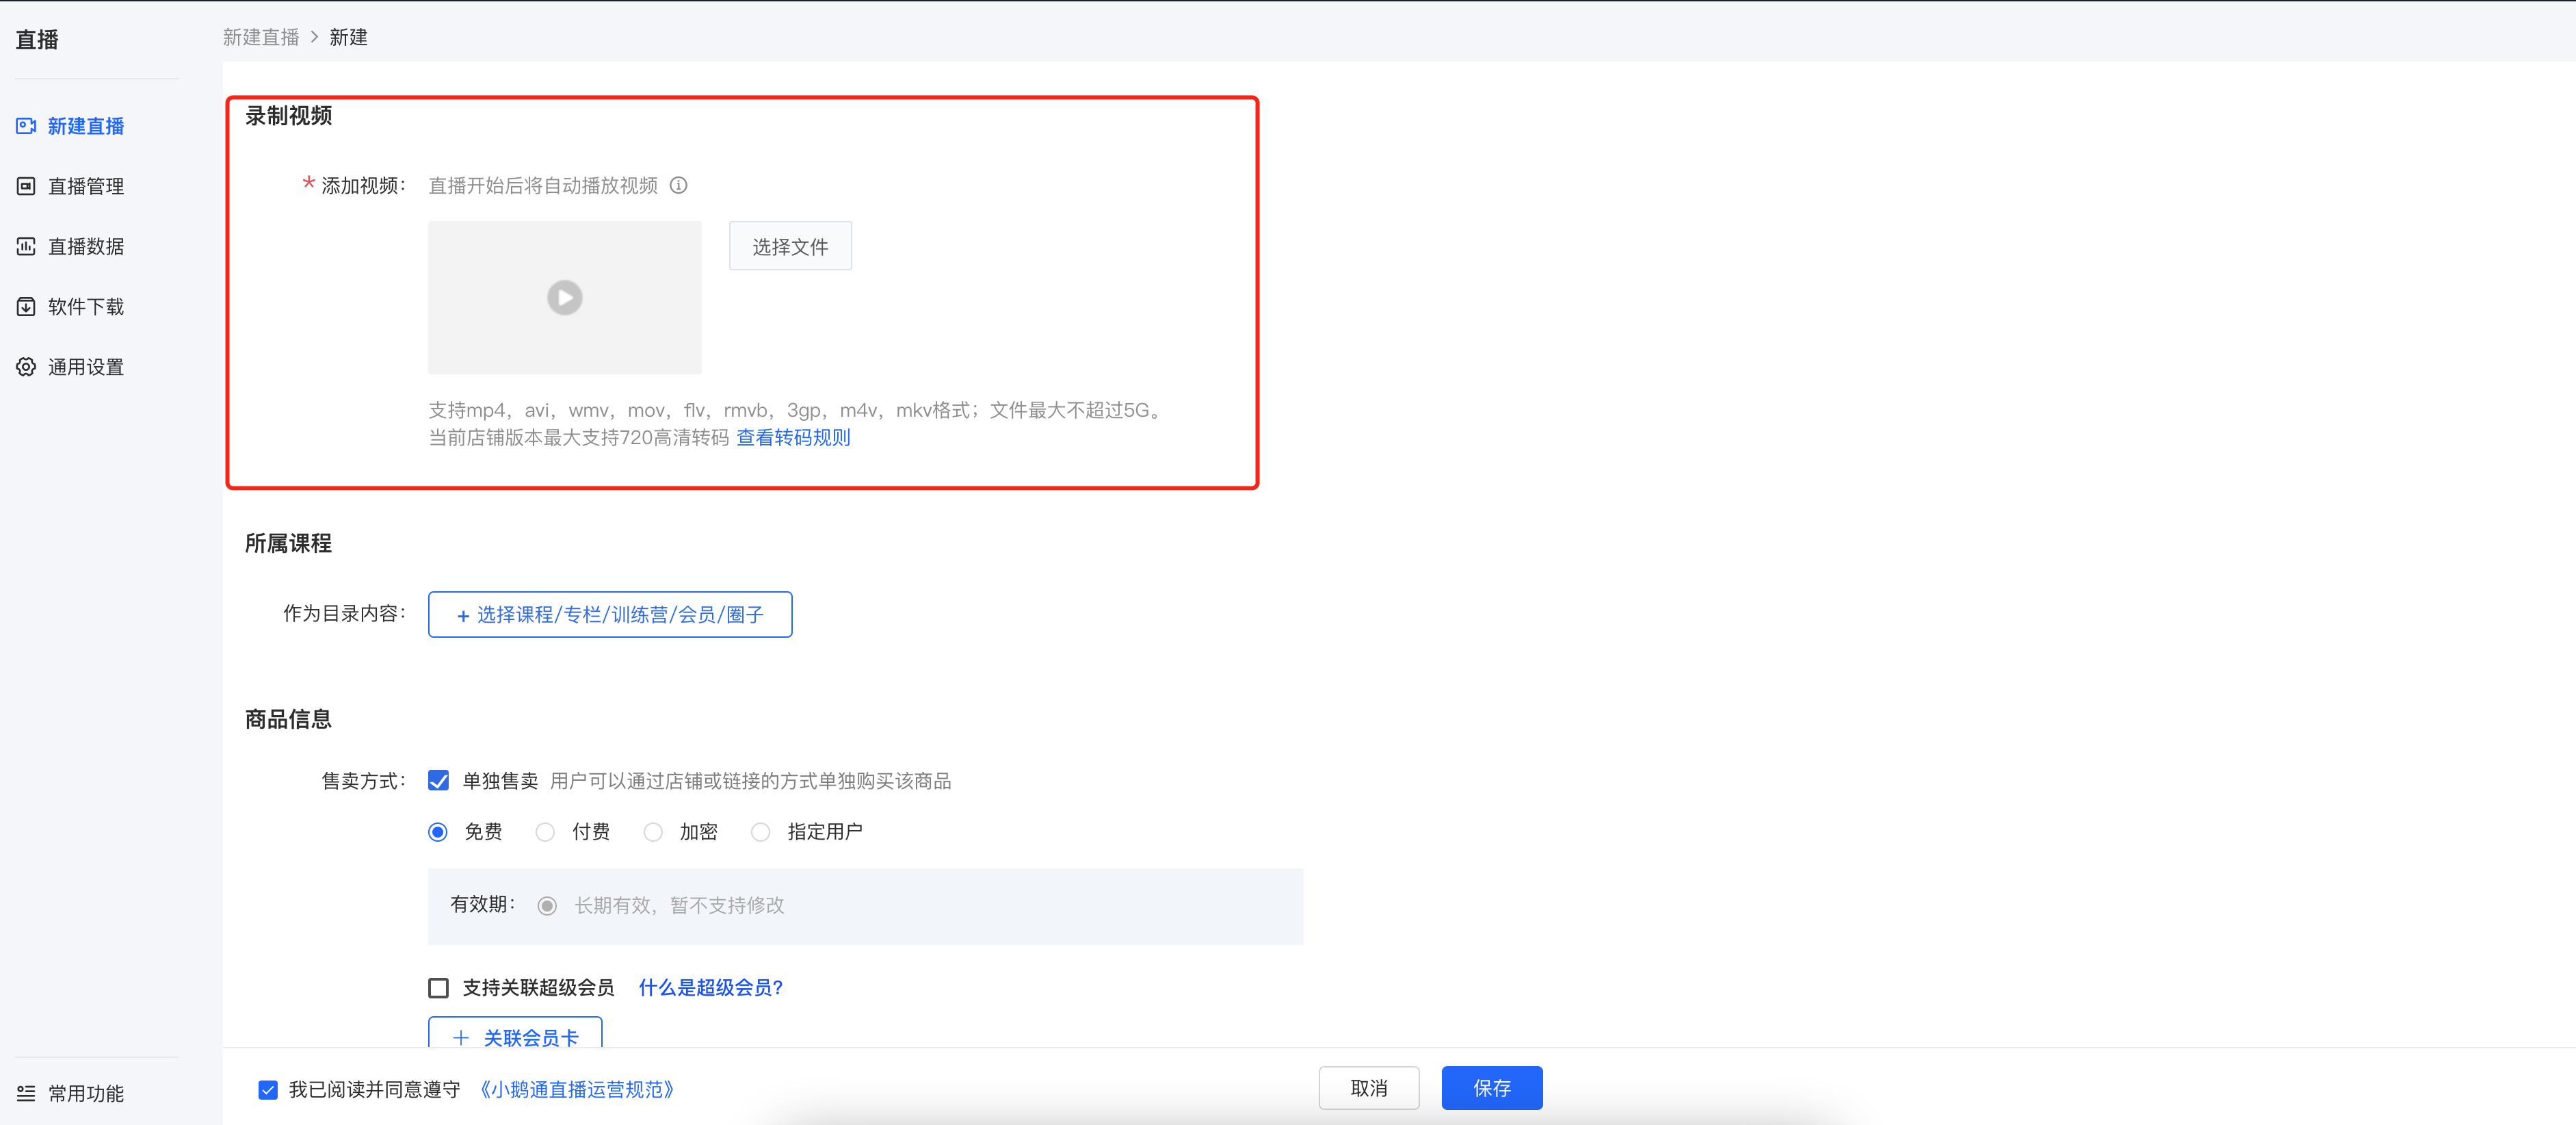
(Management background)
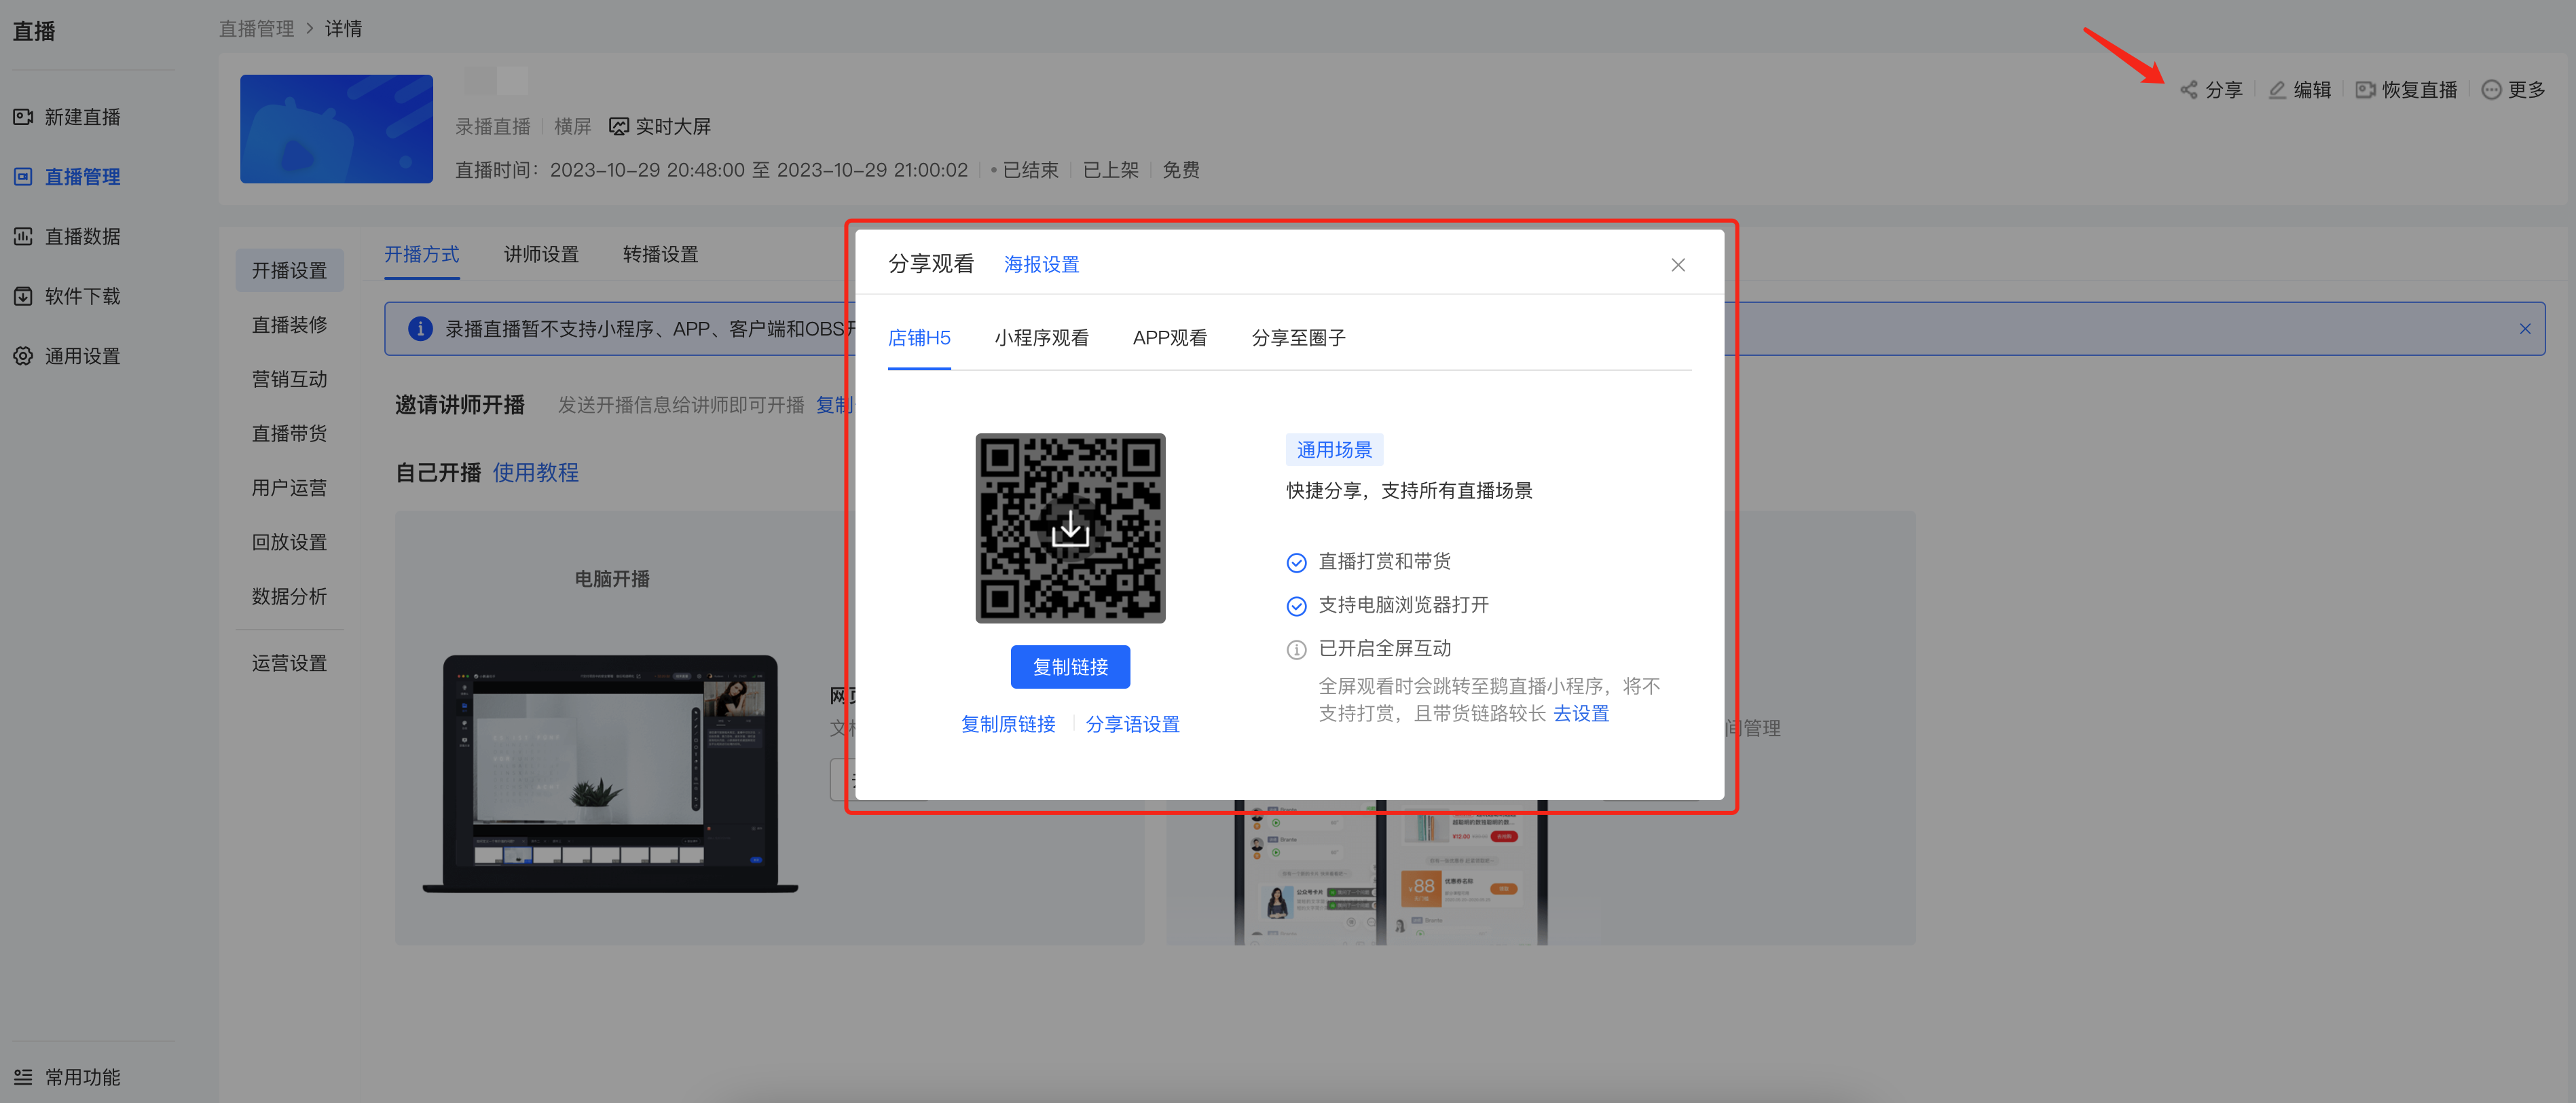
1. After the creation is completed, on the live - stream list page, click the 'Share' button to get the QR code and link of the live - stream room, and share them with students.
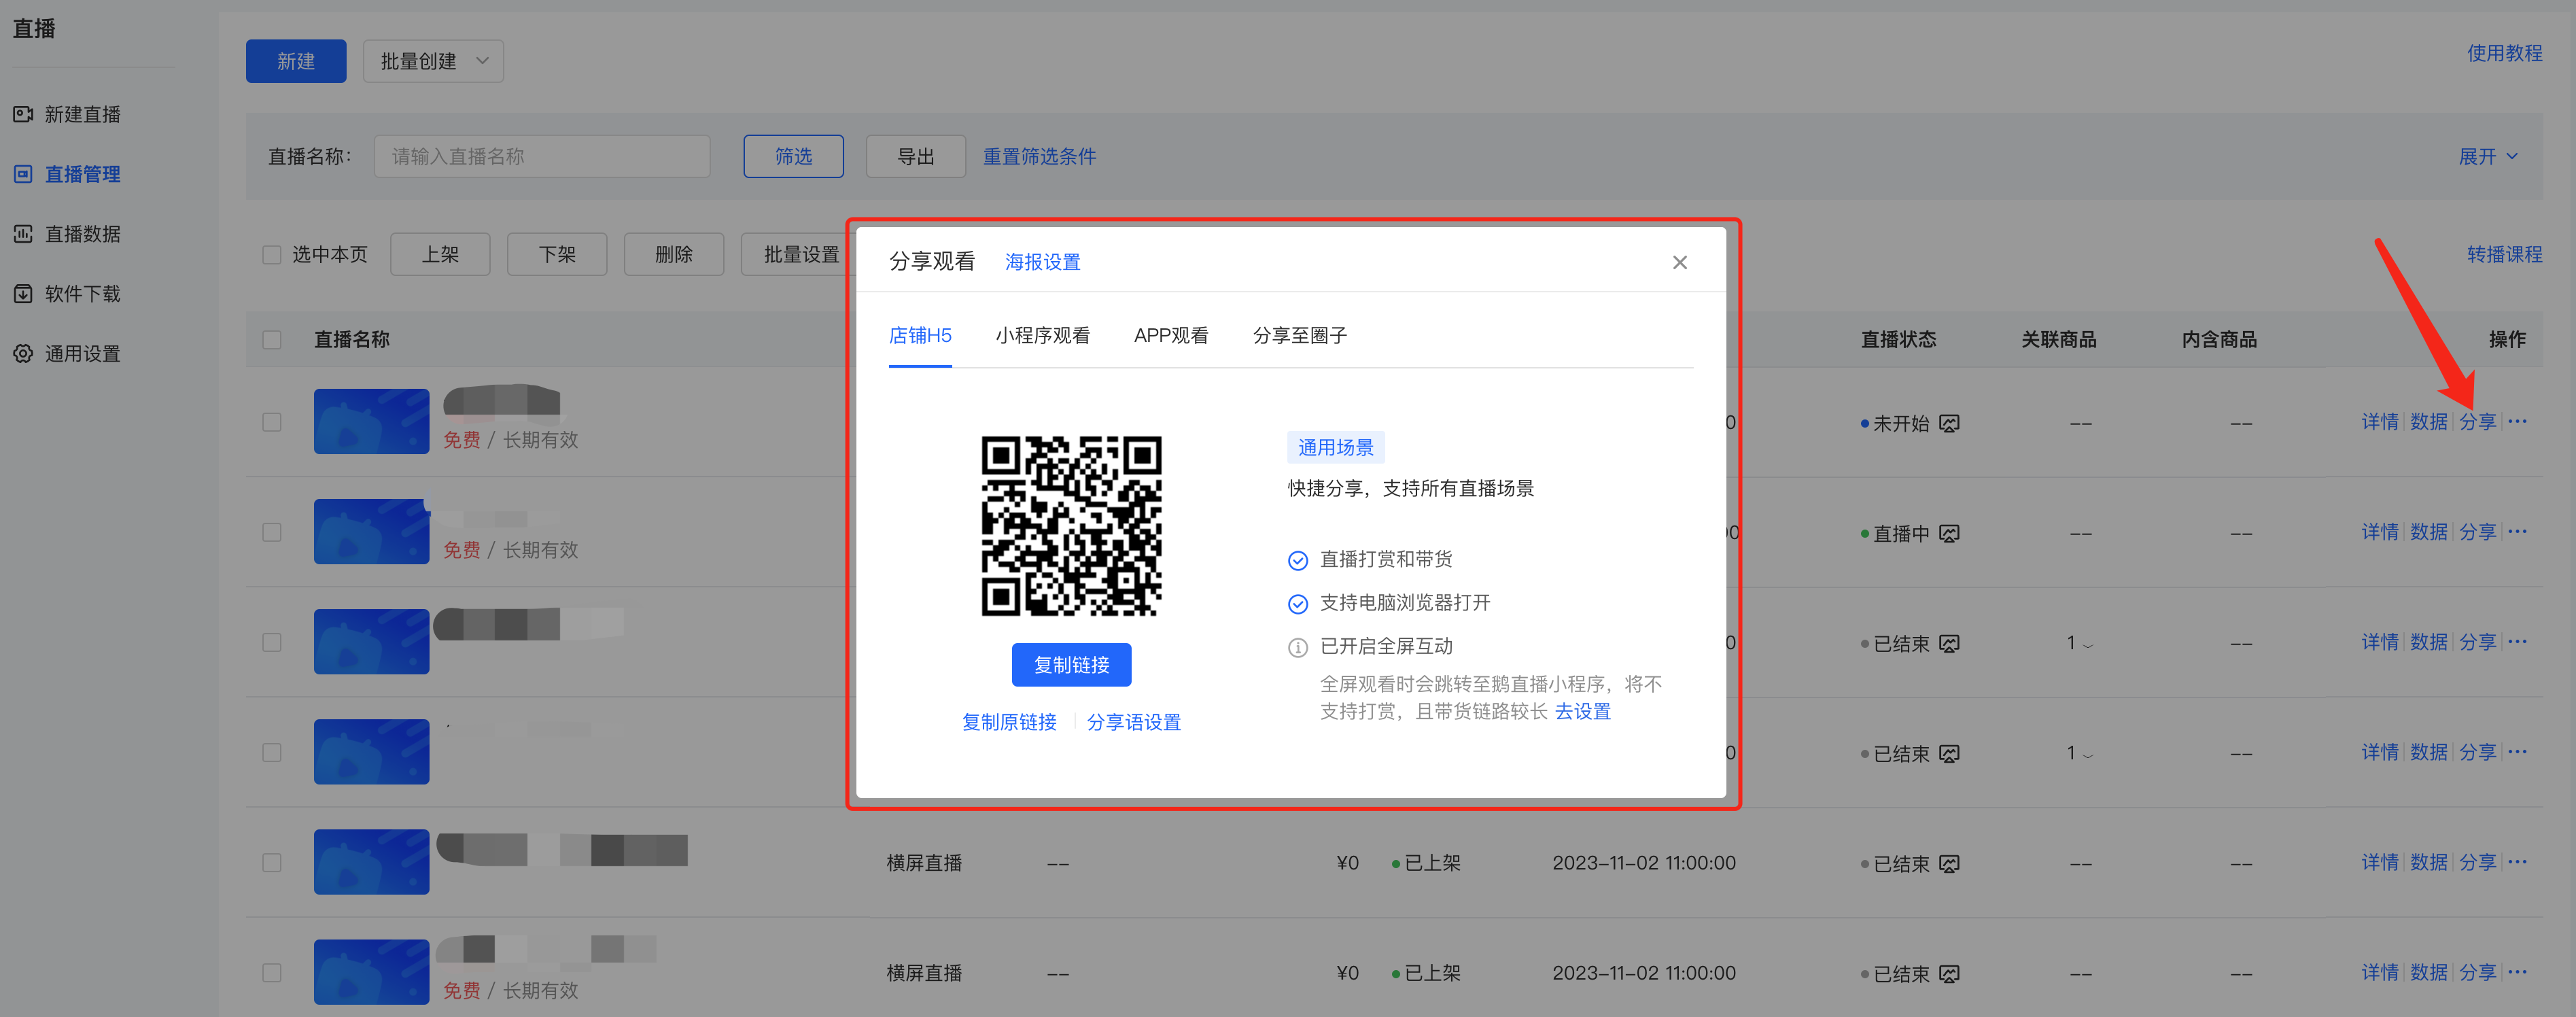
(Management background)
2. H5 - end sharing
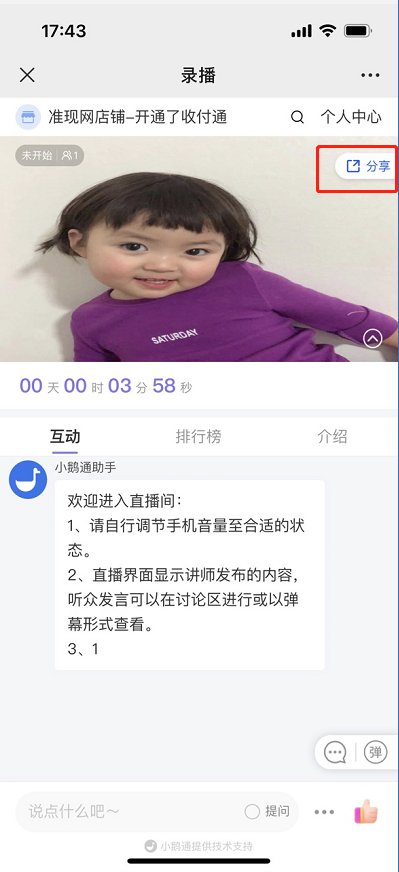
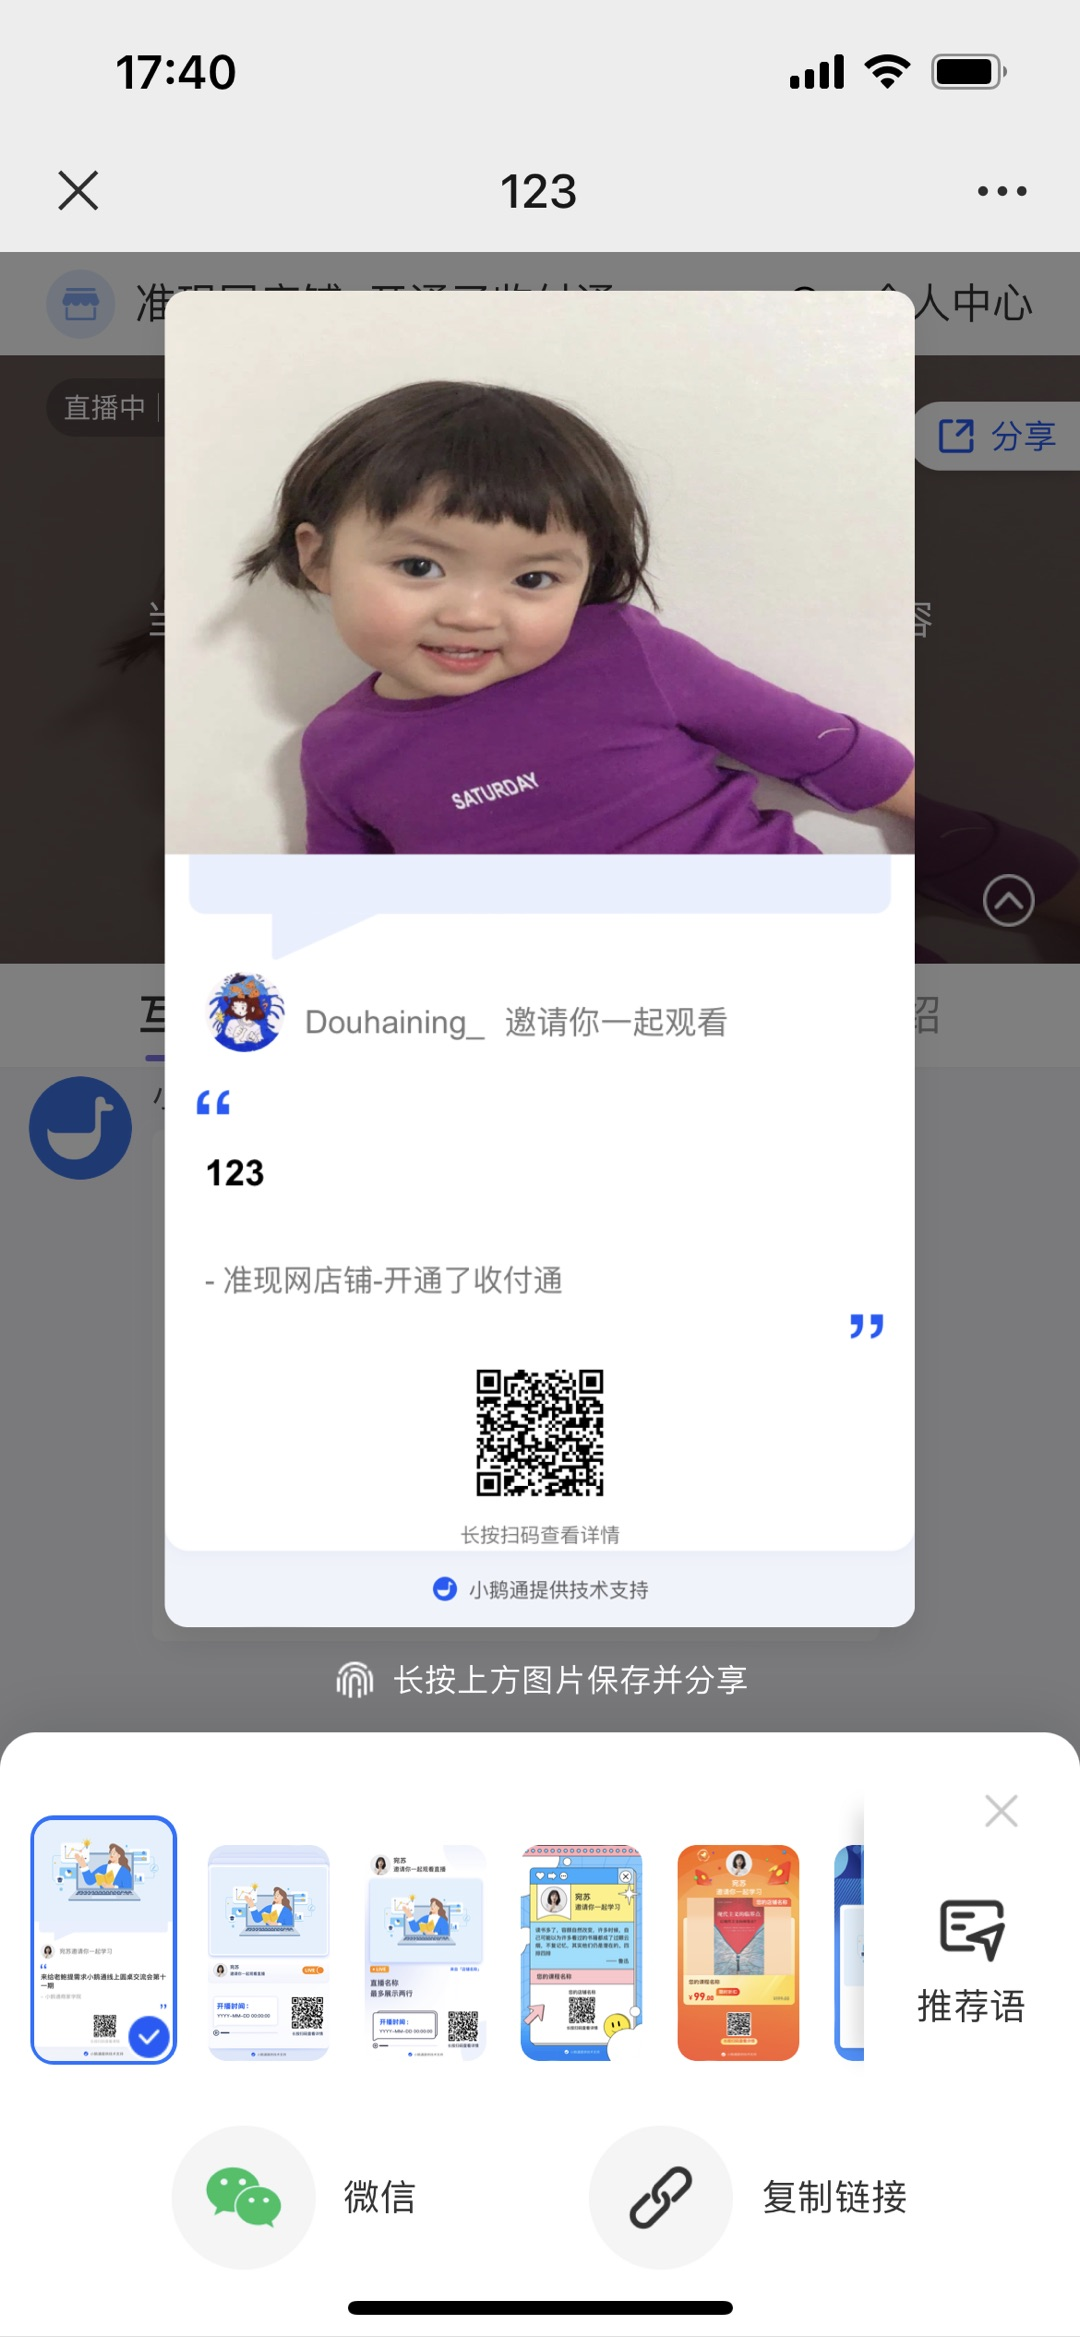
On the mobile end, you can create a live - stream invitation card and share it through channels such as Moments, WeChat groups, and Official Accounts [Manual adjustment required].
Method for creating an invitation card:[Live - stream room] → [Click the share button] → Long - press the picture to save → Send and share
Step 3: Start the live stream (H5 & web lecturer side)
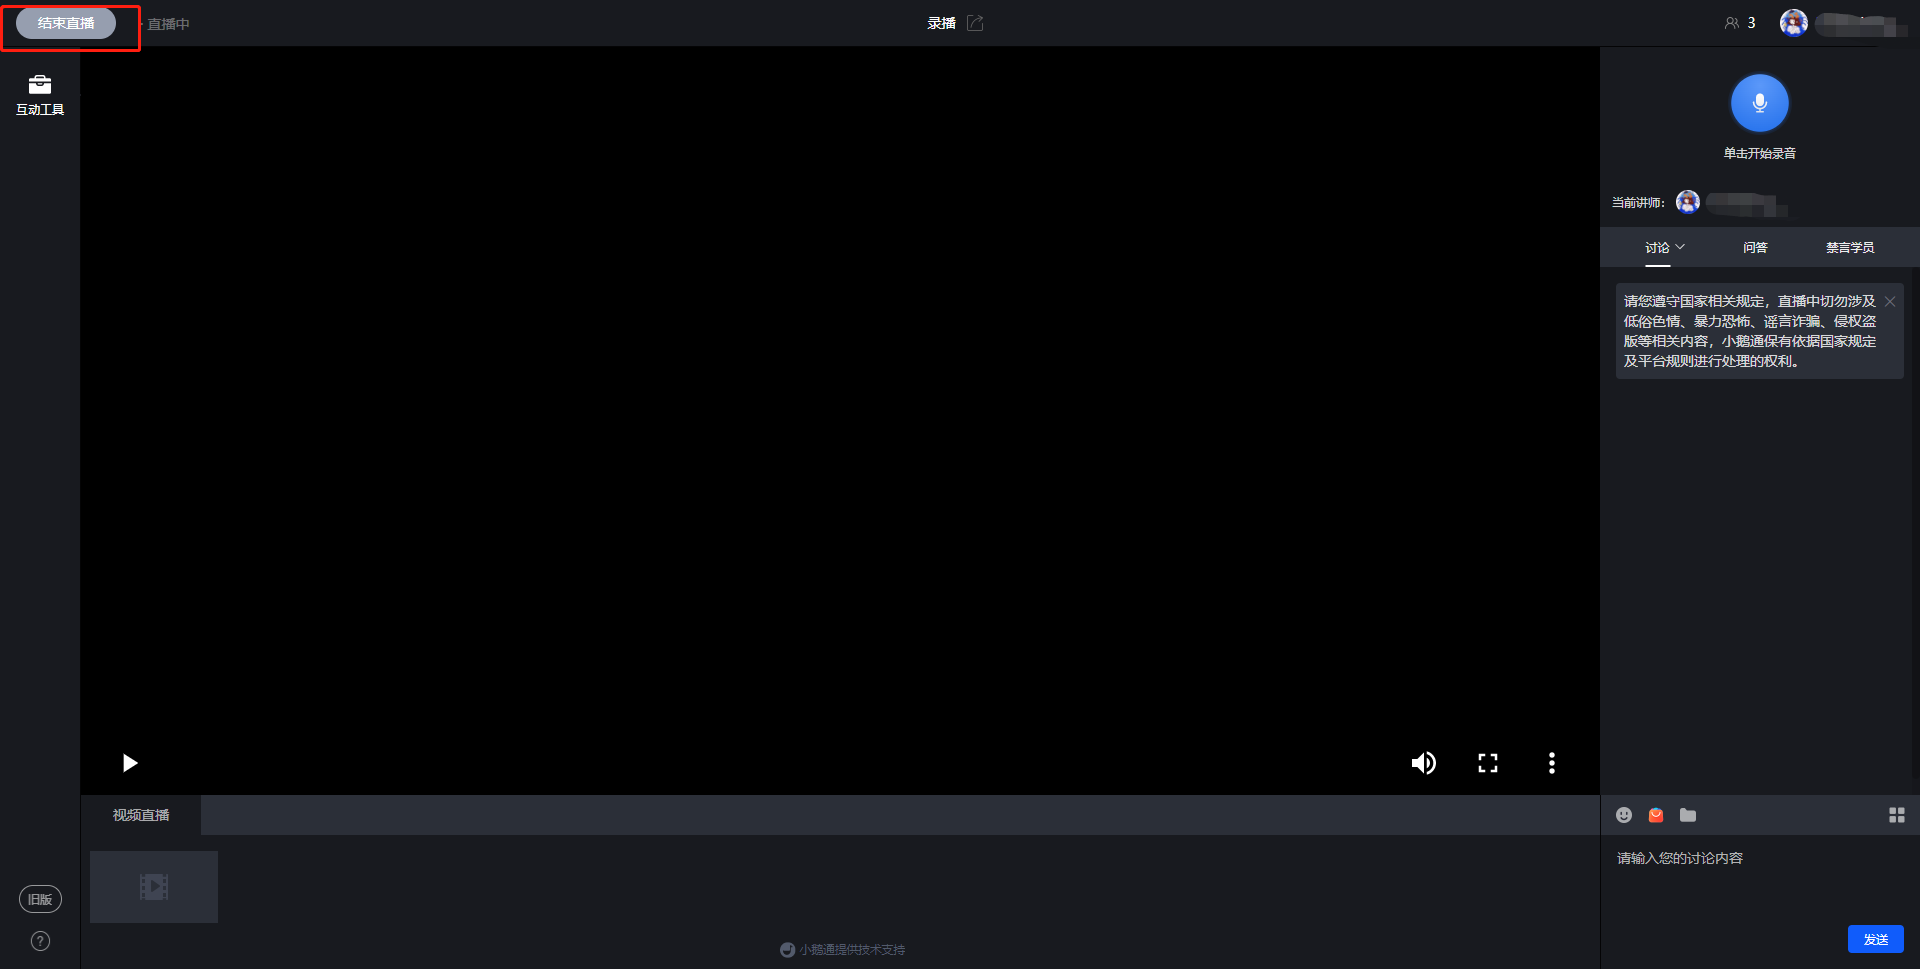
1. Web - end voice live - stream room
(1) Enter the web - end live - stream room
After creating a voice live stream, the lecturer clicks 'Go to live stream' and selects the web end. Open the live - stream room address, scan the QR code with WeChat to log in, and then enter the live - stream room page. The live stream will start as soon as the scheduled time arrives, and the uploaded videos will start playing.
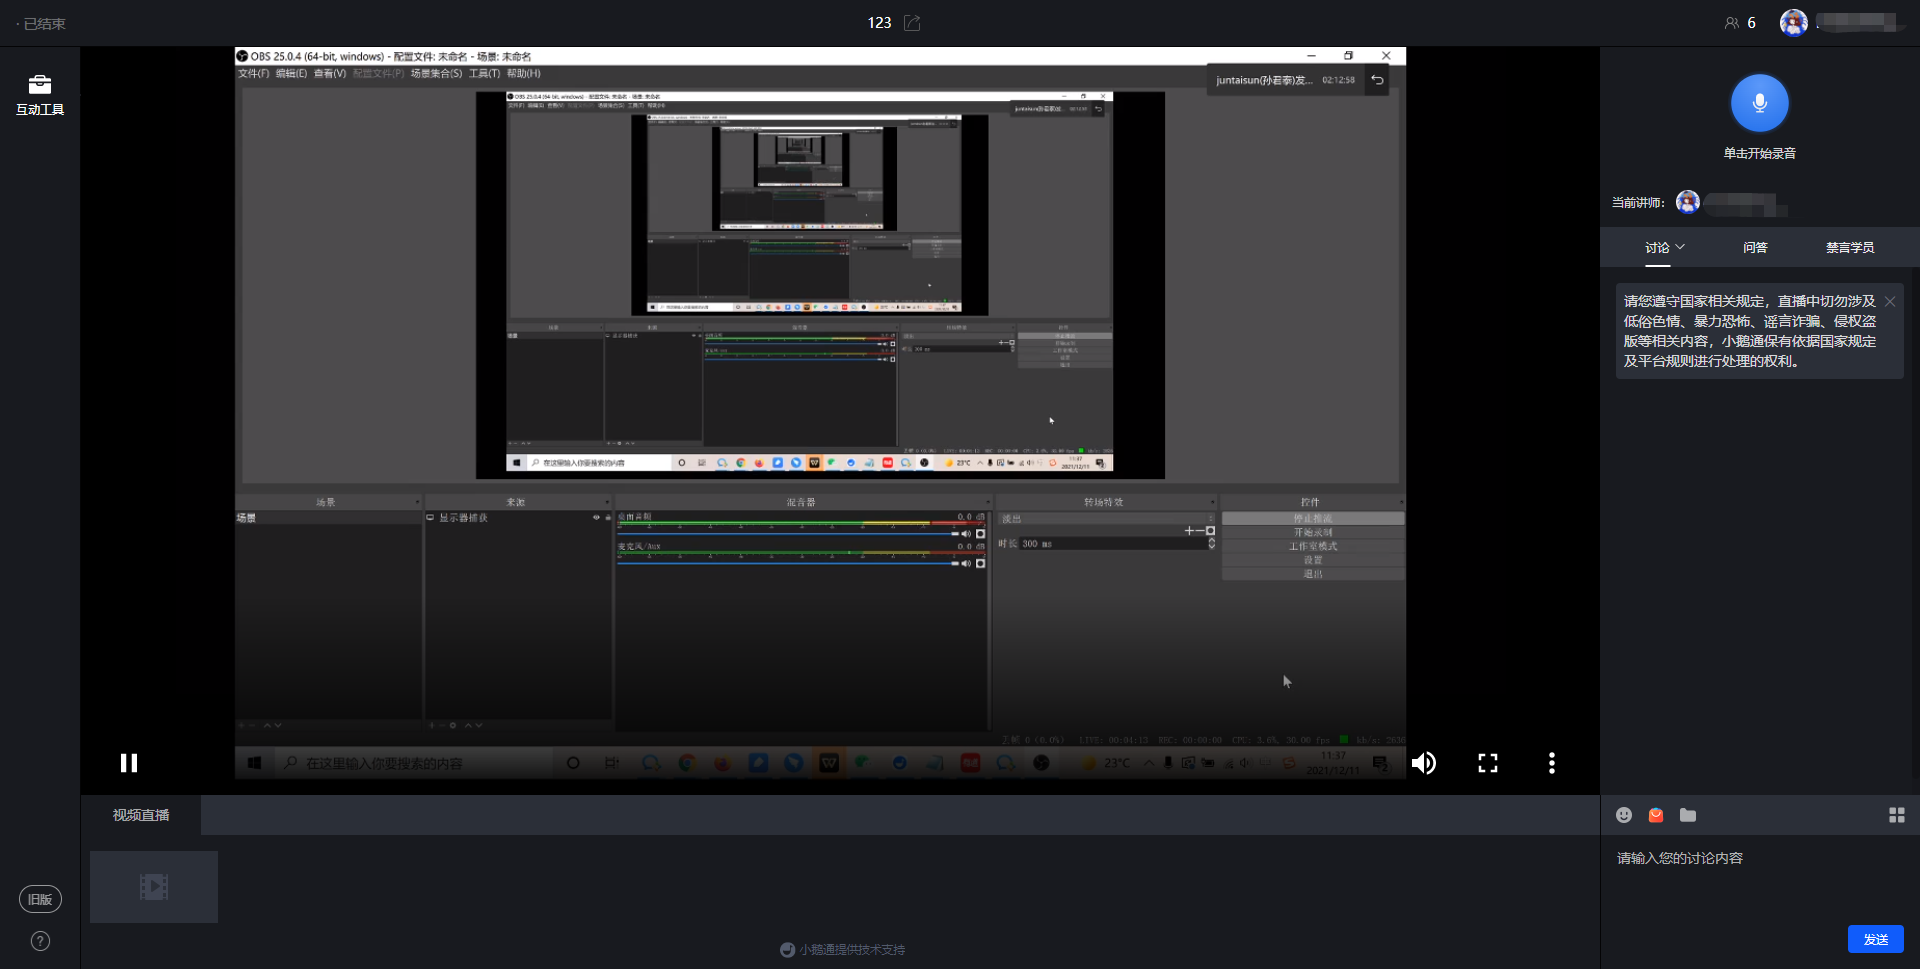
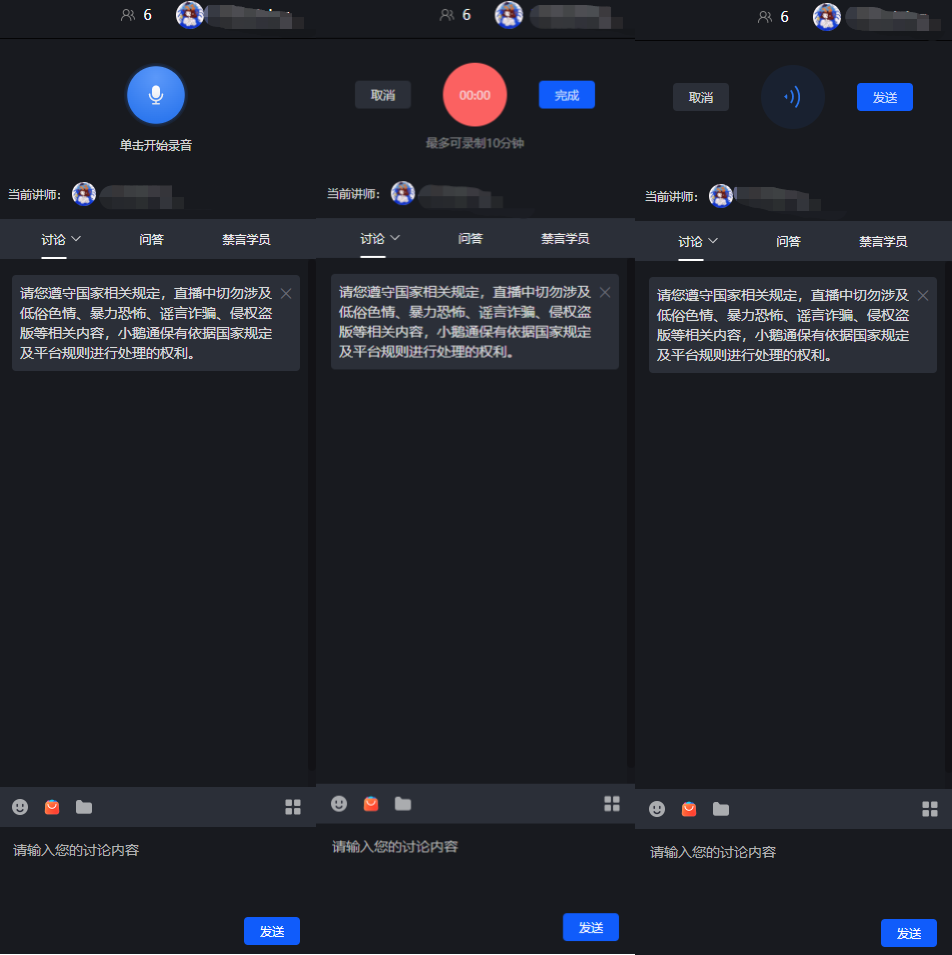
(2) Send voice messages
Click the microphone icon to start recording voice messages;
Click [Finish] to complete the voice recording; click [Cancel] to cancel the sending
After the voice recording is completed, click the [Send] button to send the voice message. Click Cancel to cancel the sending.
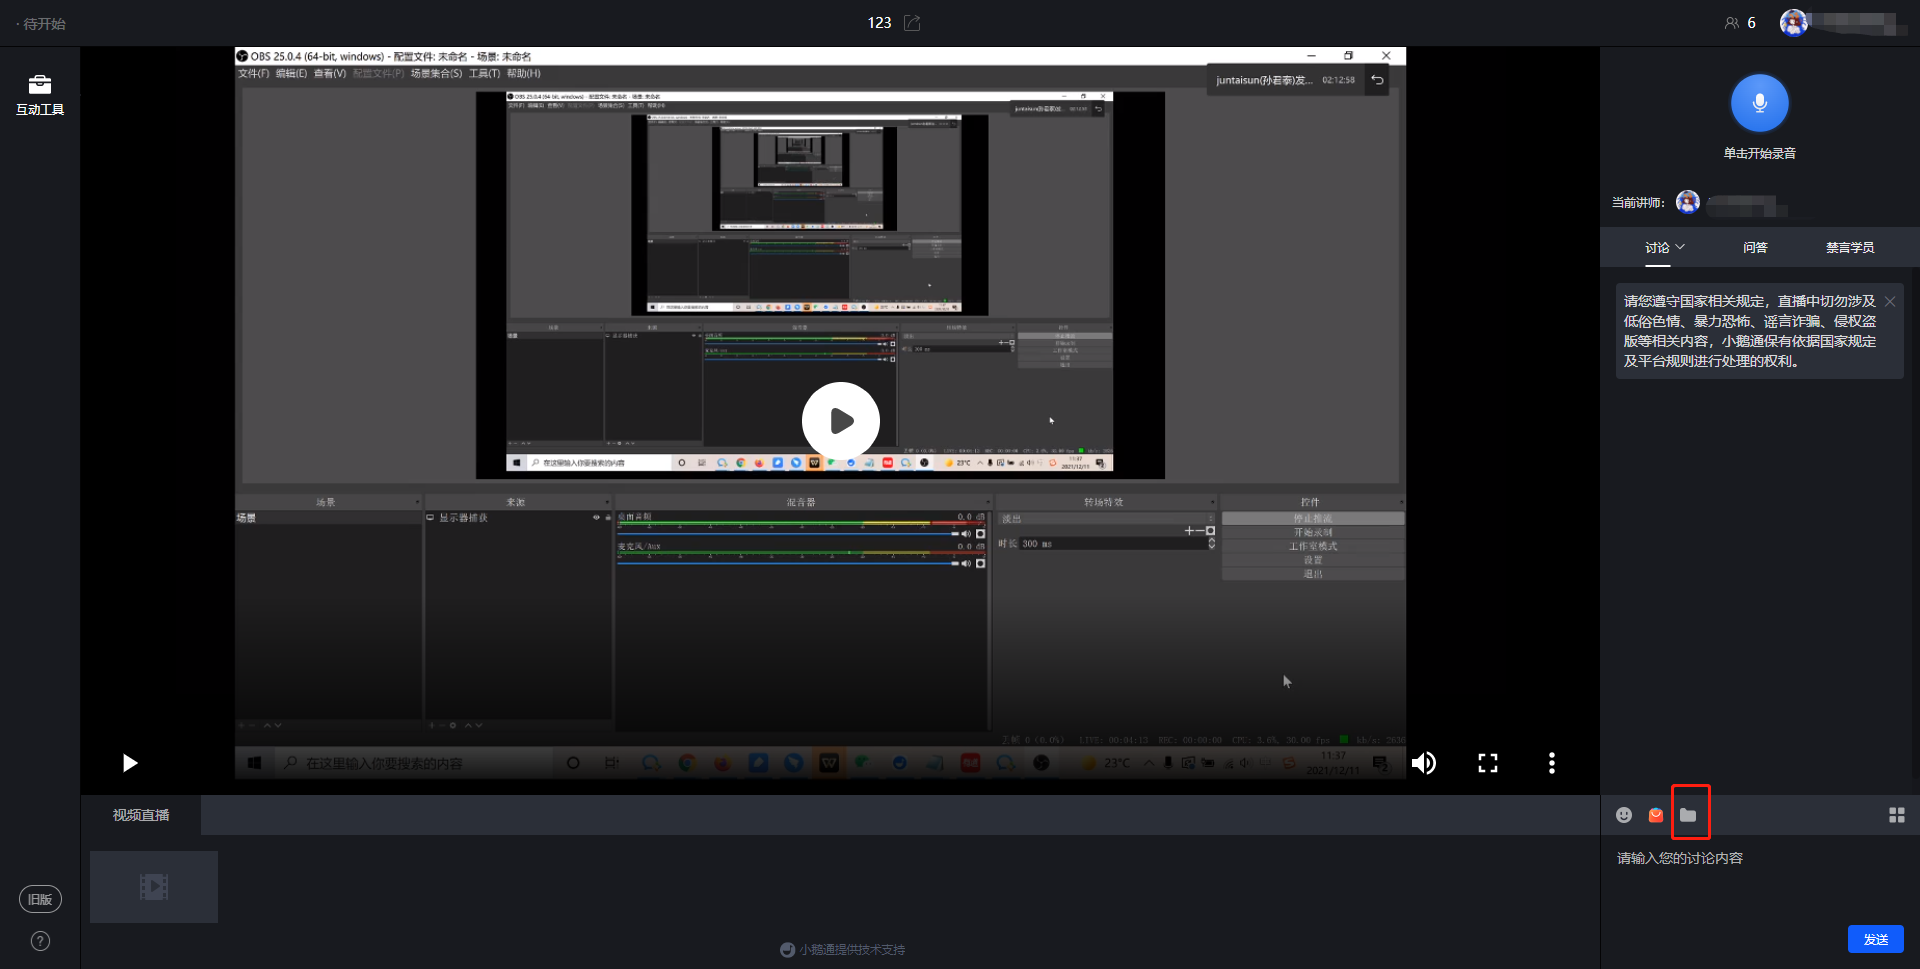
(3) Courseware display
Click the 'Folder' button in the lower - right corner to enter the material library, where you can upload and send files in other formats;
(4) End the live stream
When the lecturer needs to end the live stream, click the operation button in the upper - left corner to end the live stream
2. H5 voice live - stream room
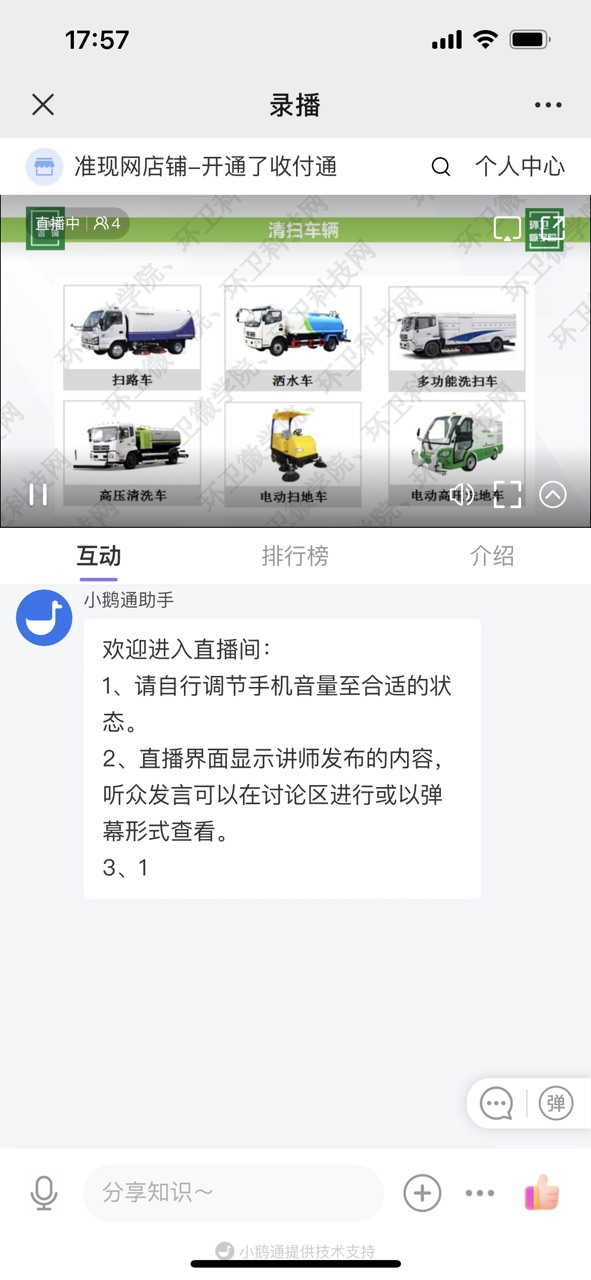
(1) Enter the H5 live - stream room
After creating a voice live stream, the lecturer clicks 'Go to live stream', then clicks 'Share', and scan the QR code with the mobile phone to enter the live - stream room. The live stream will start as soon as the scheduled time arrives, and the uploaded videos will start playing.
(2) Send voice messages
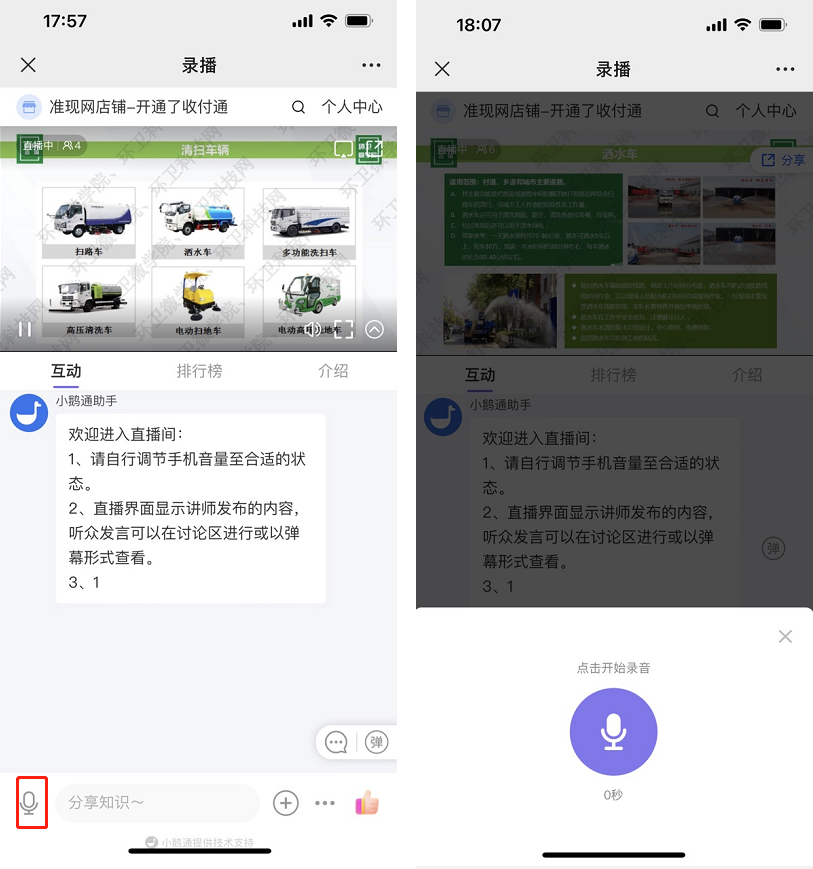
Click the microphone icon to start recording voice messages;
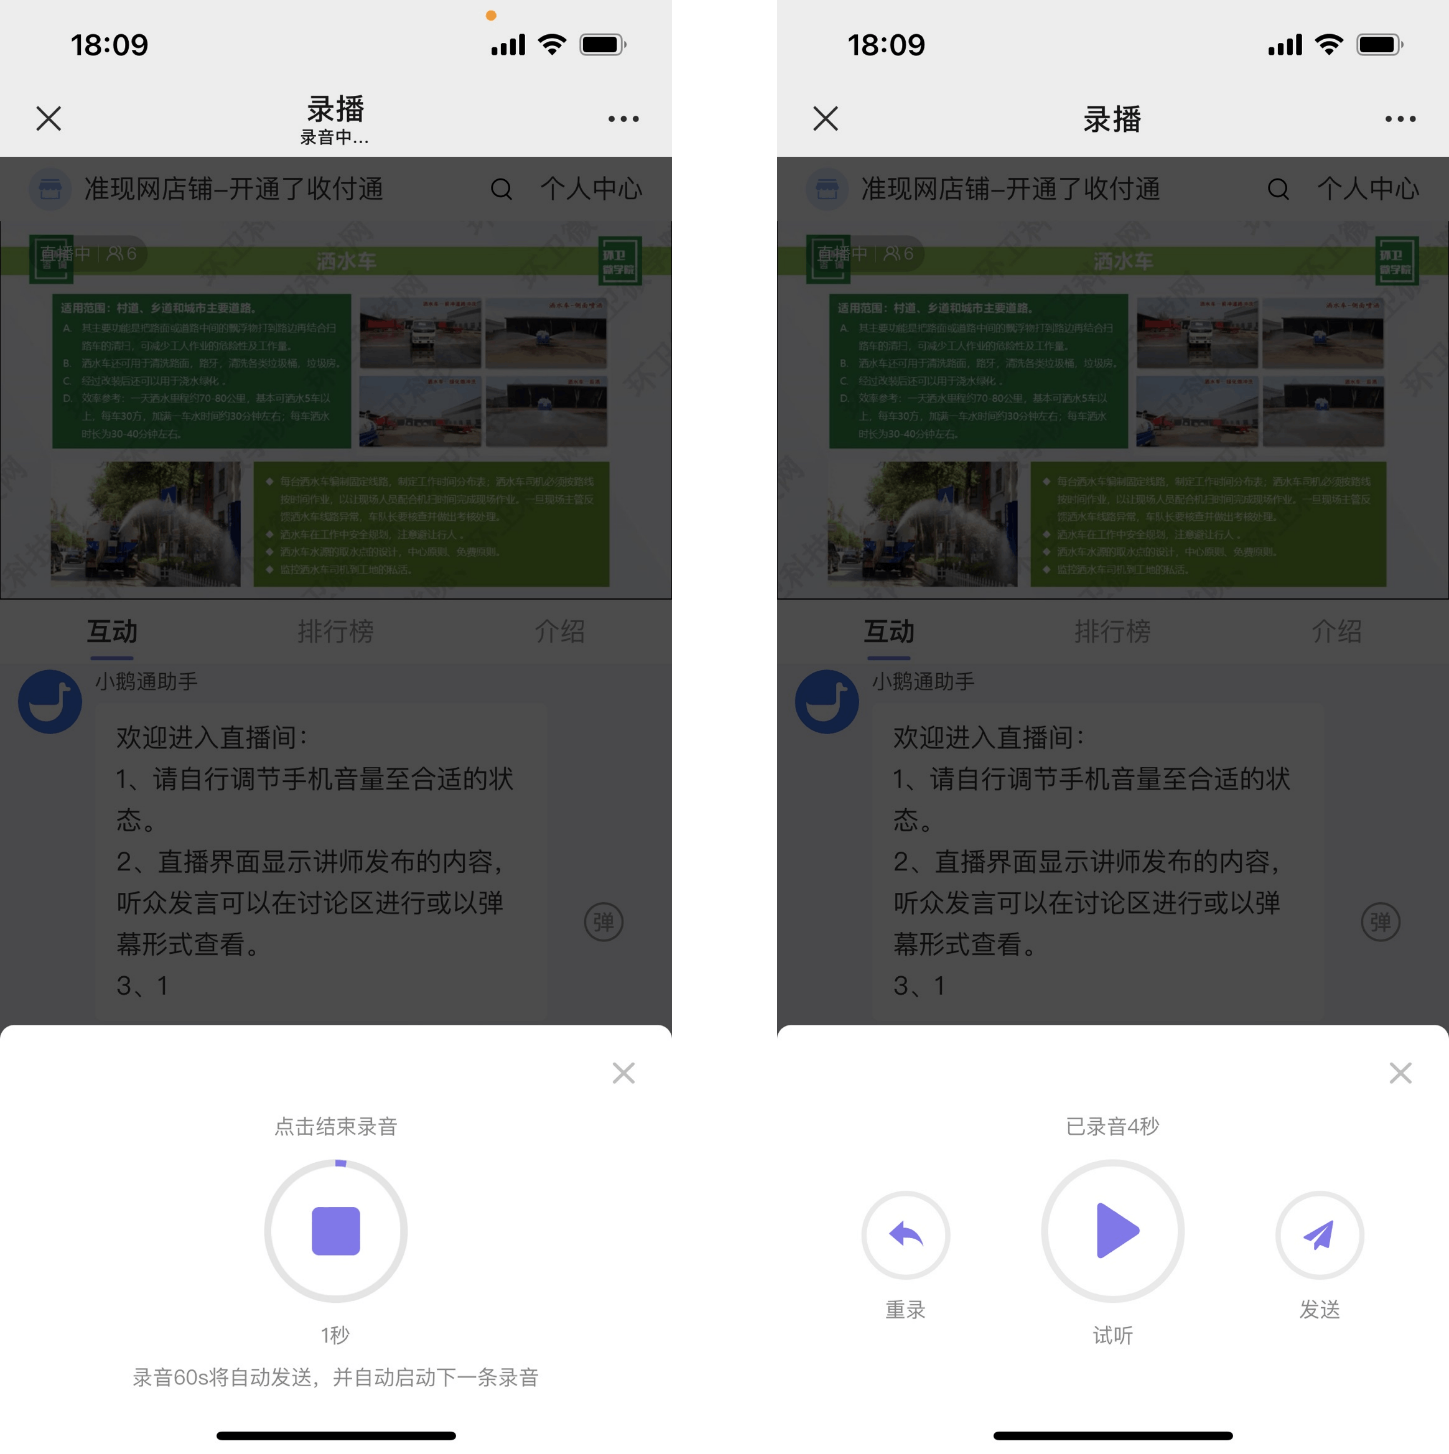
Click the [Red square] to complete the voice recording. Click Cancel to cancel the sending;
After the voice recording is completed, click the send button to send the voice message. Click Cancel to cancel the sending
The live - stream room on elink supports continuous voice recording by the lecturer. The lecturer does not need to manually click to send the recordings. The system will automatically cut the recordings into 60 - second voice messages and send them one by one.
This allows the lecturer to teach at their own pace without being interrupted by the action of sending voice messages.
(3) Courseware display
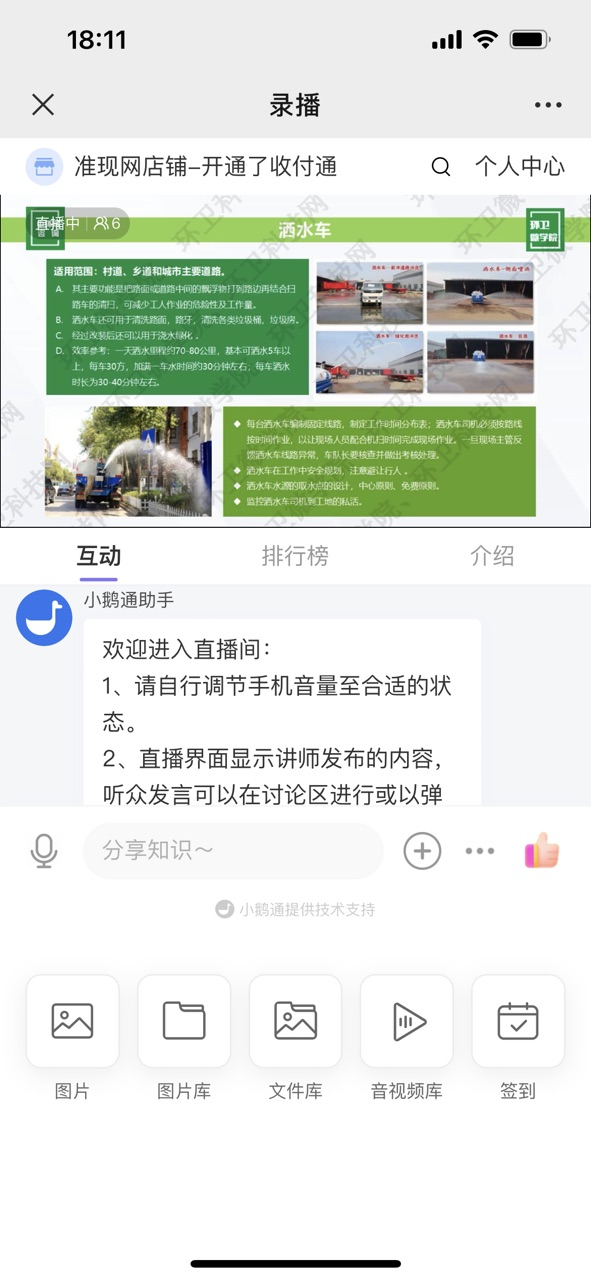
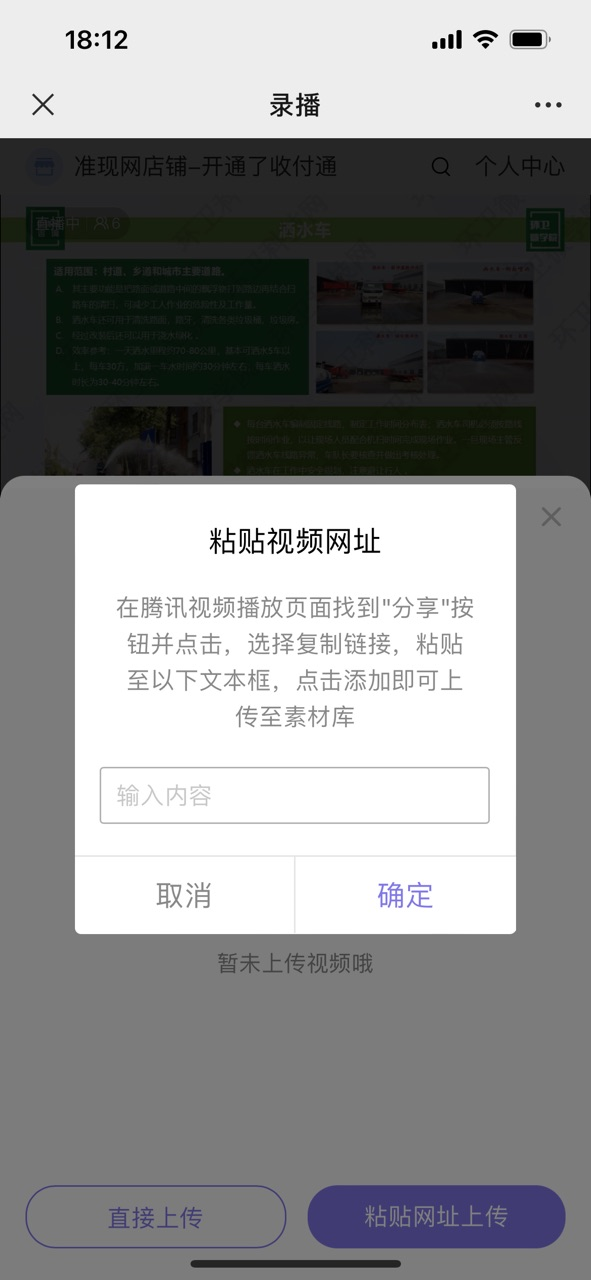
Click the '+' in the lower - left corner of the live - stream room, and then click the File Library or Audio - Video Library to share content in other formats (you need to complete the upload in the material library on the web - end lecturer side).
(4) End the live stream
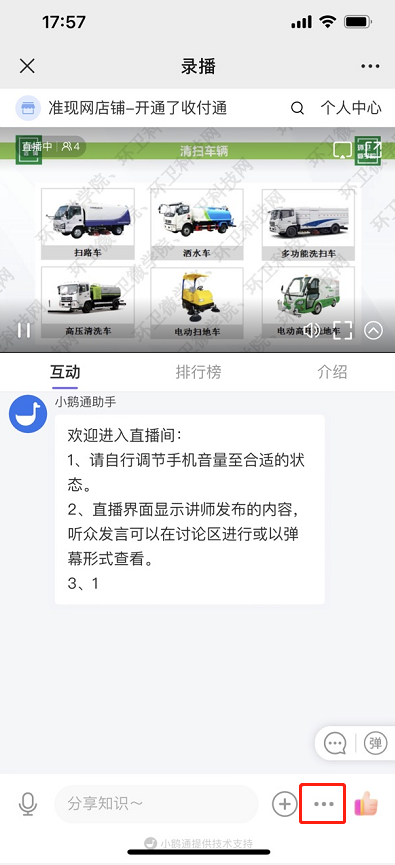
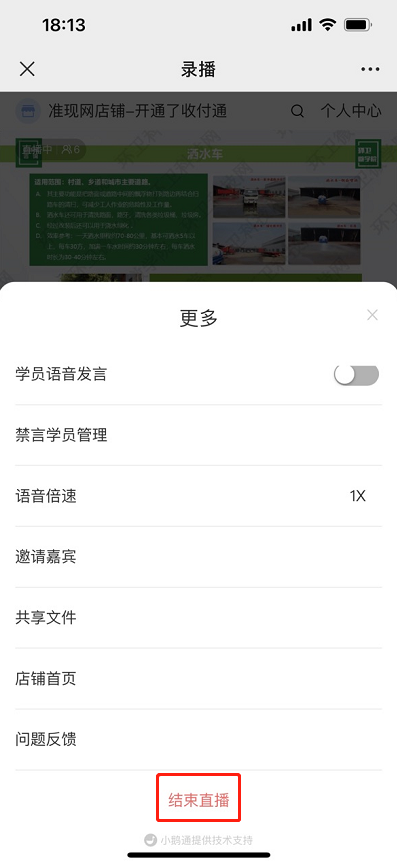
When the lecturer needs to end the live stream
click the 'More' button in the lower - right corner and click 'End Live Stream' in the pop - up drop - down box to end the live stream.
Step 4: Watch the live stream (H5 store or elink Live Mini Program)
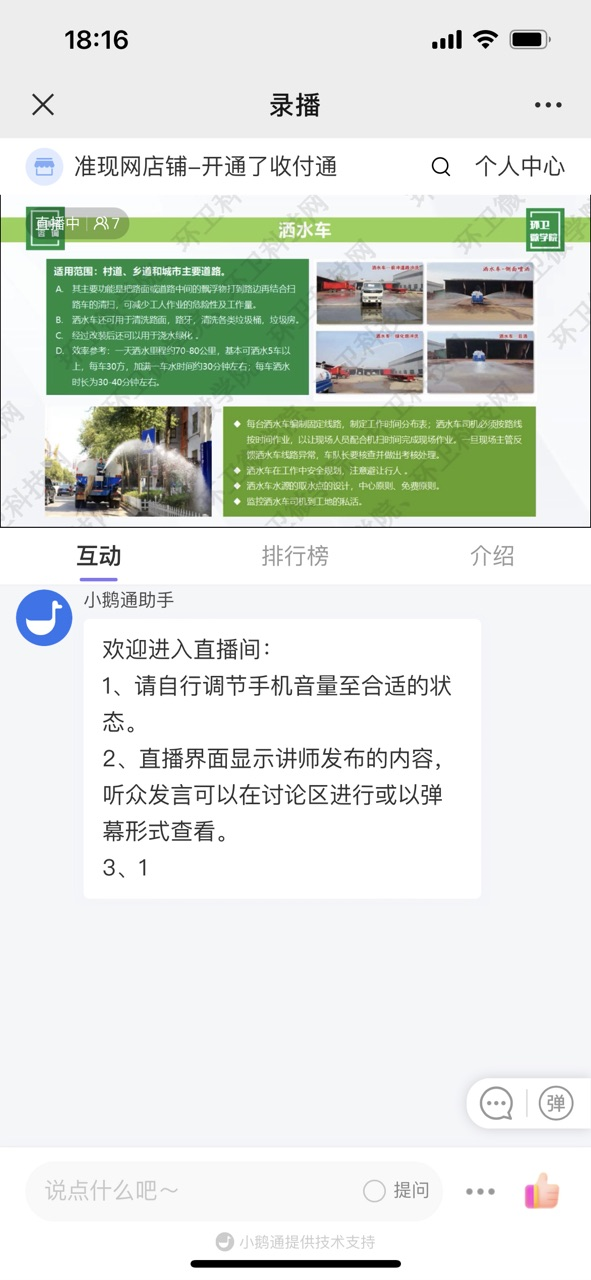
1. Users can enter the live - stream room by scanning the QR code or opening the link
2. After entering the live - stream room, students can interact with the lecturer by sending text content, asking questions, etc.
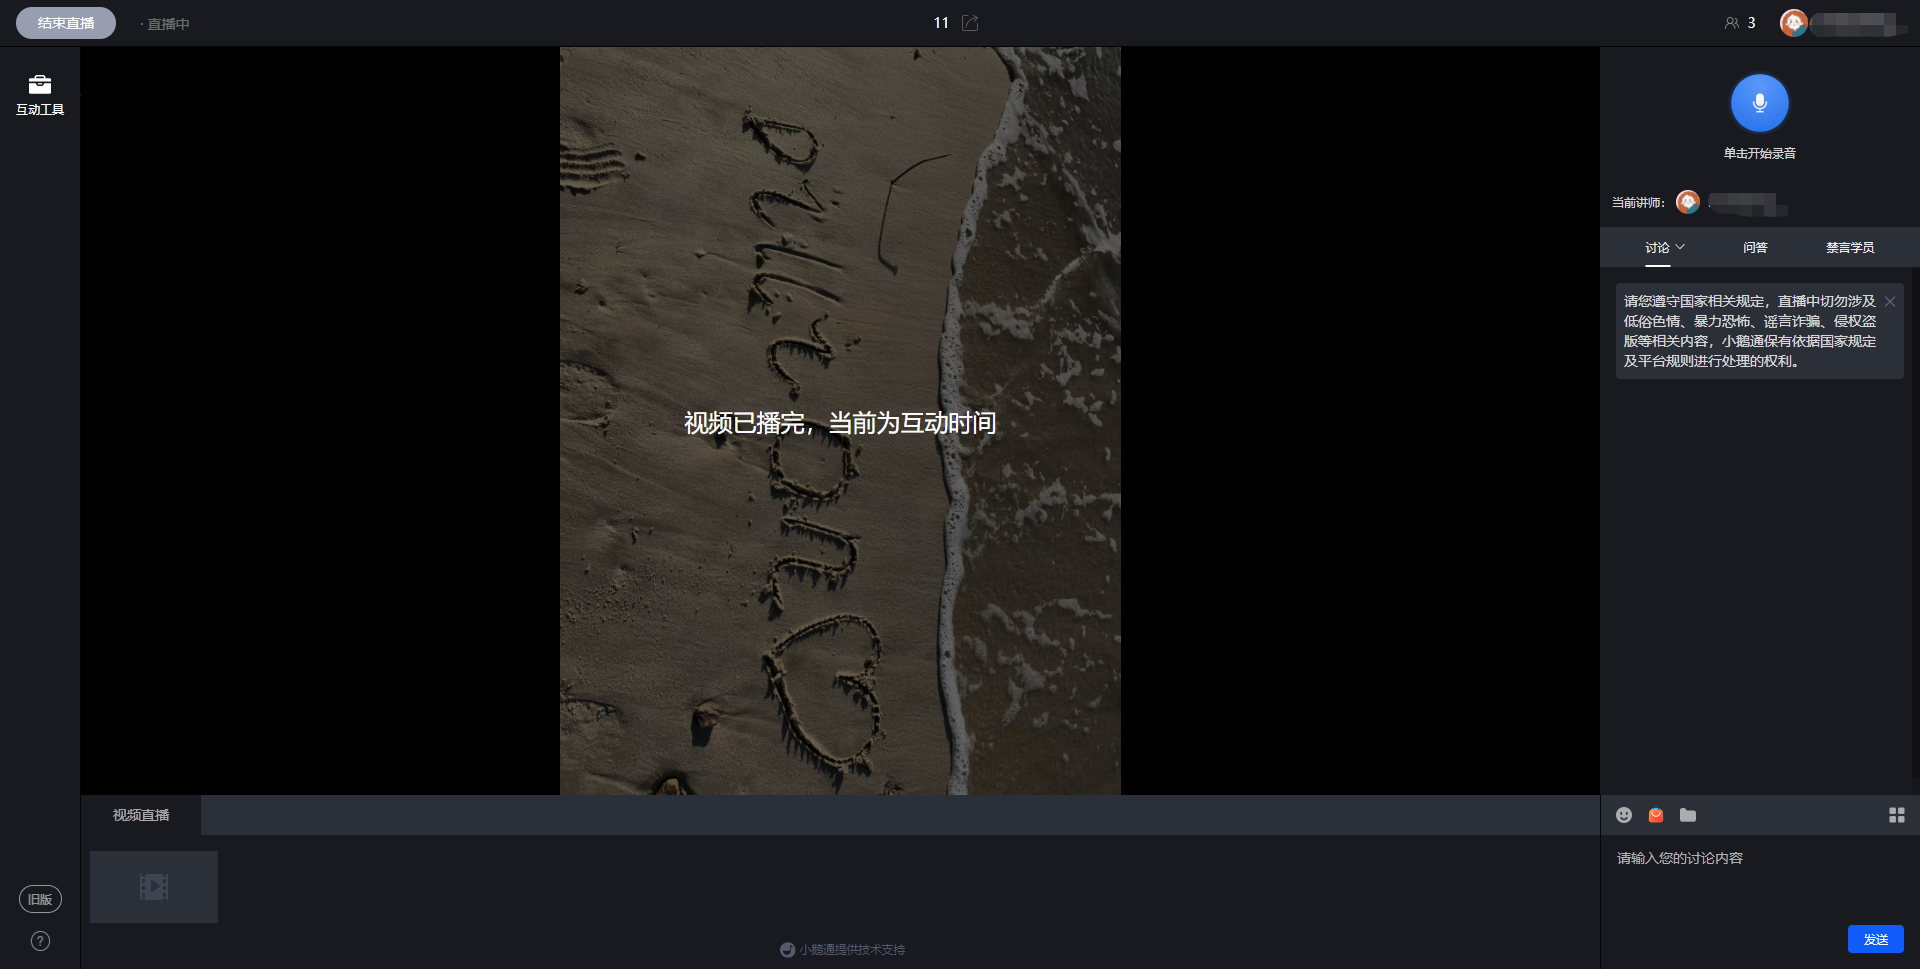
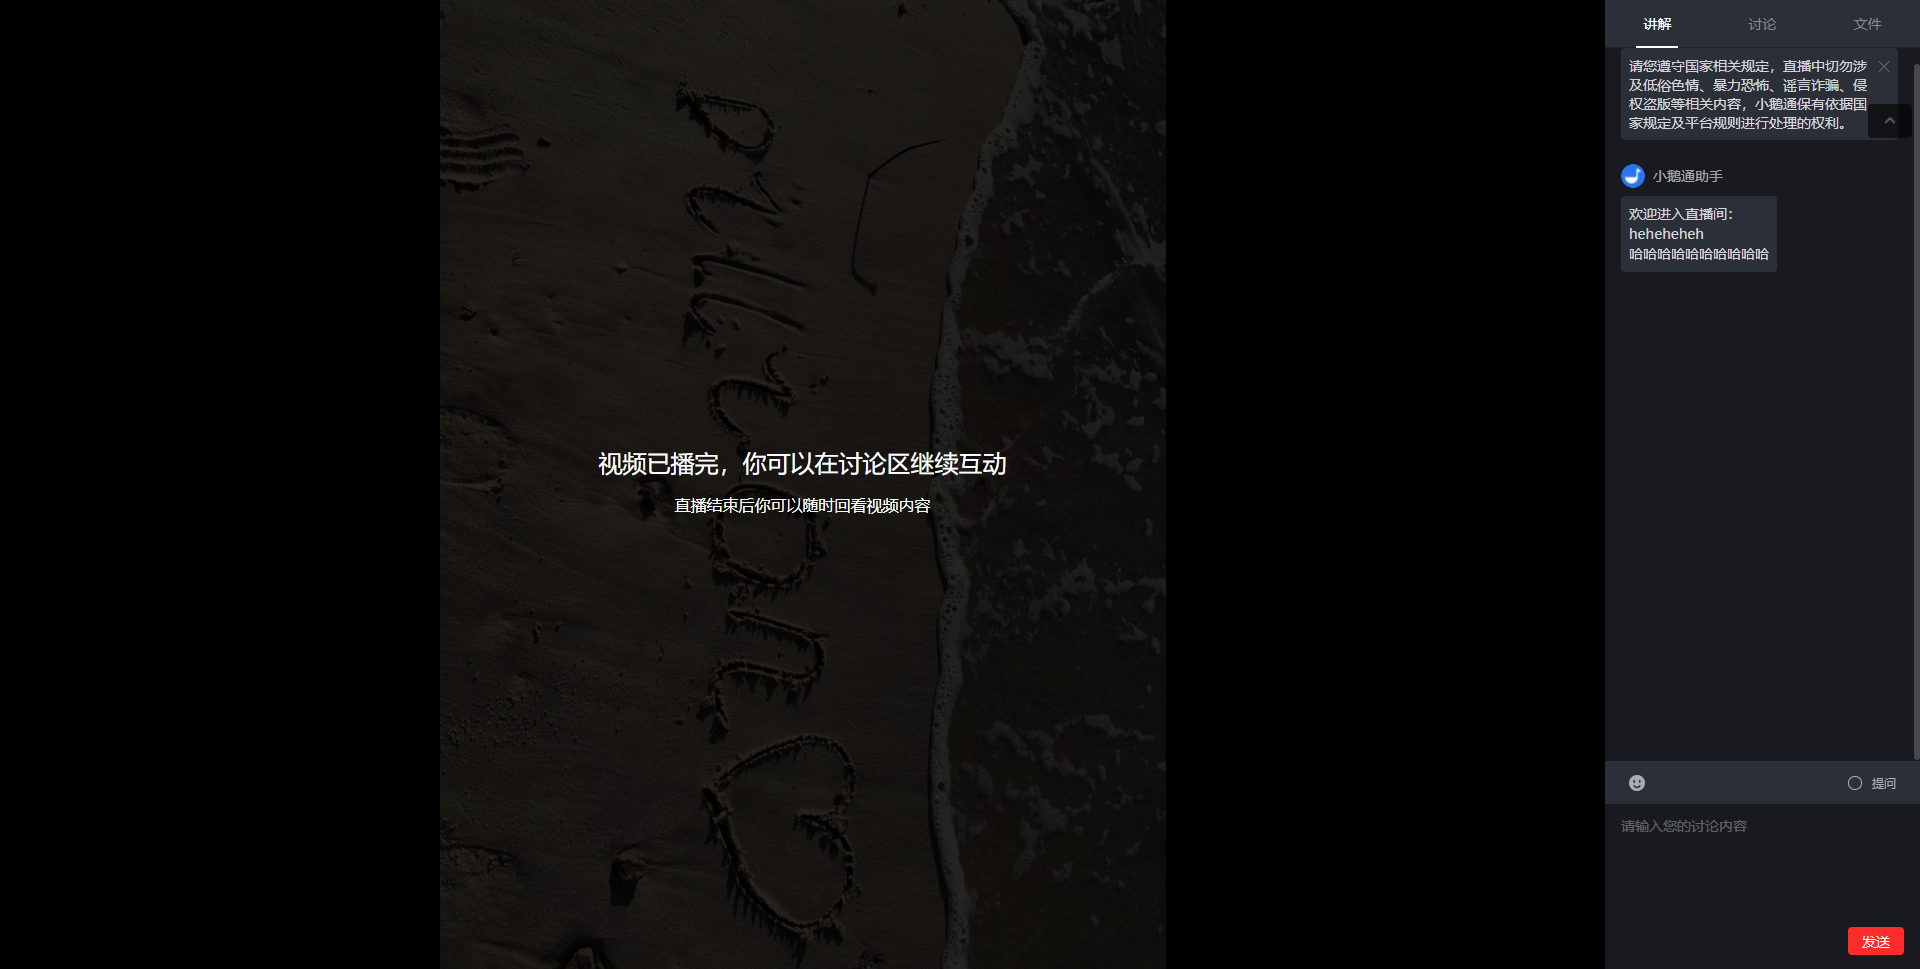
If the live streaming duration is longer than the uploaded video duration, will the words [Video playback completed] appear after the video finishes playing?
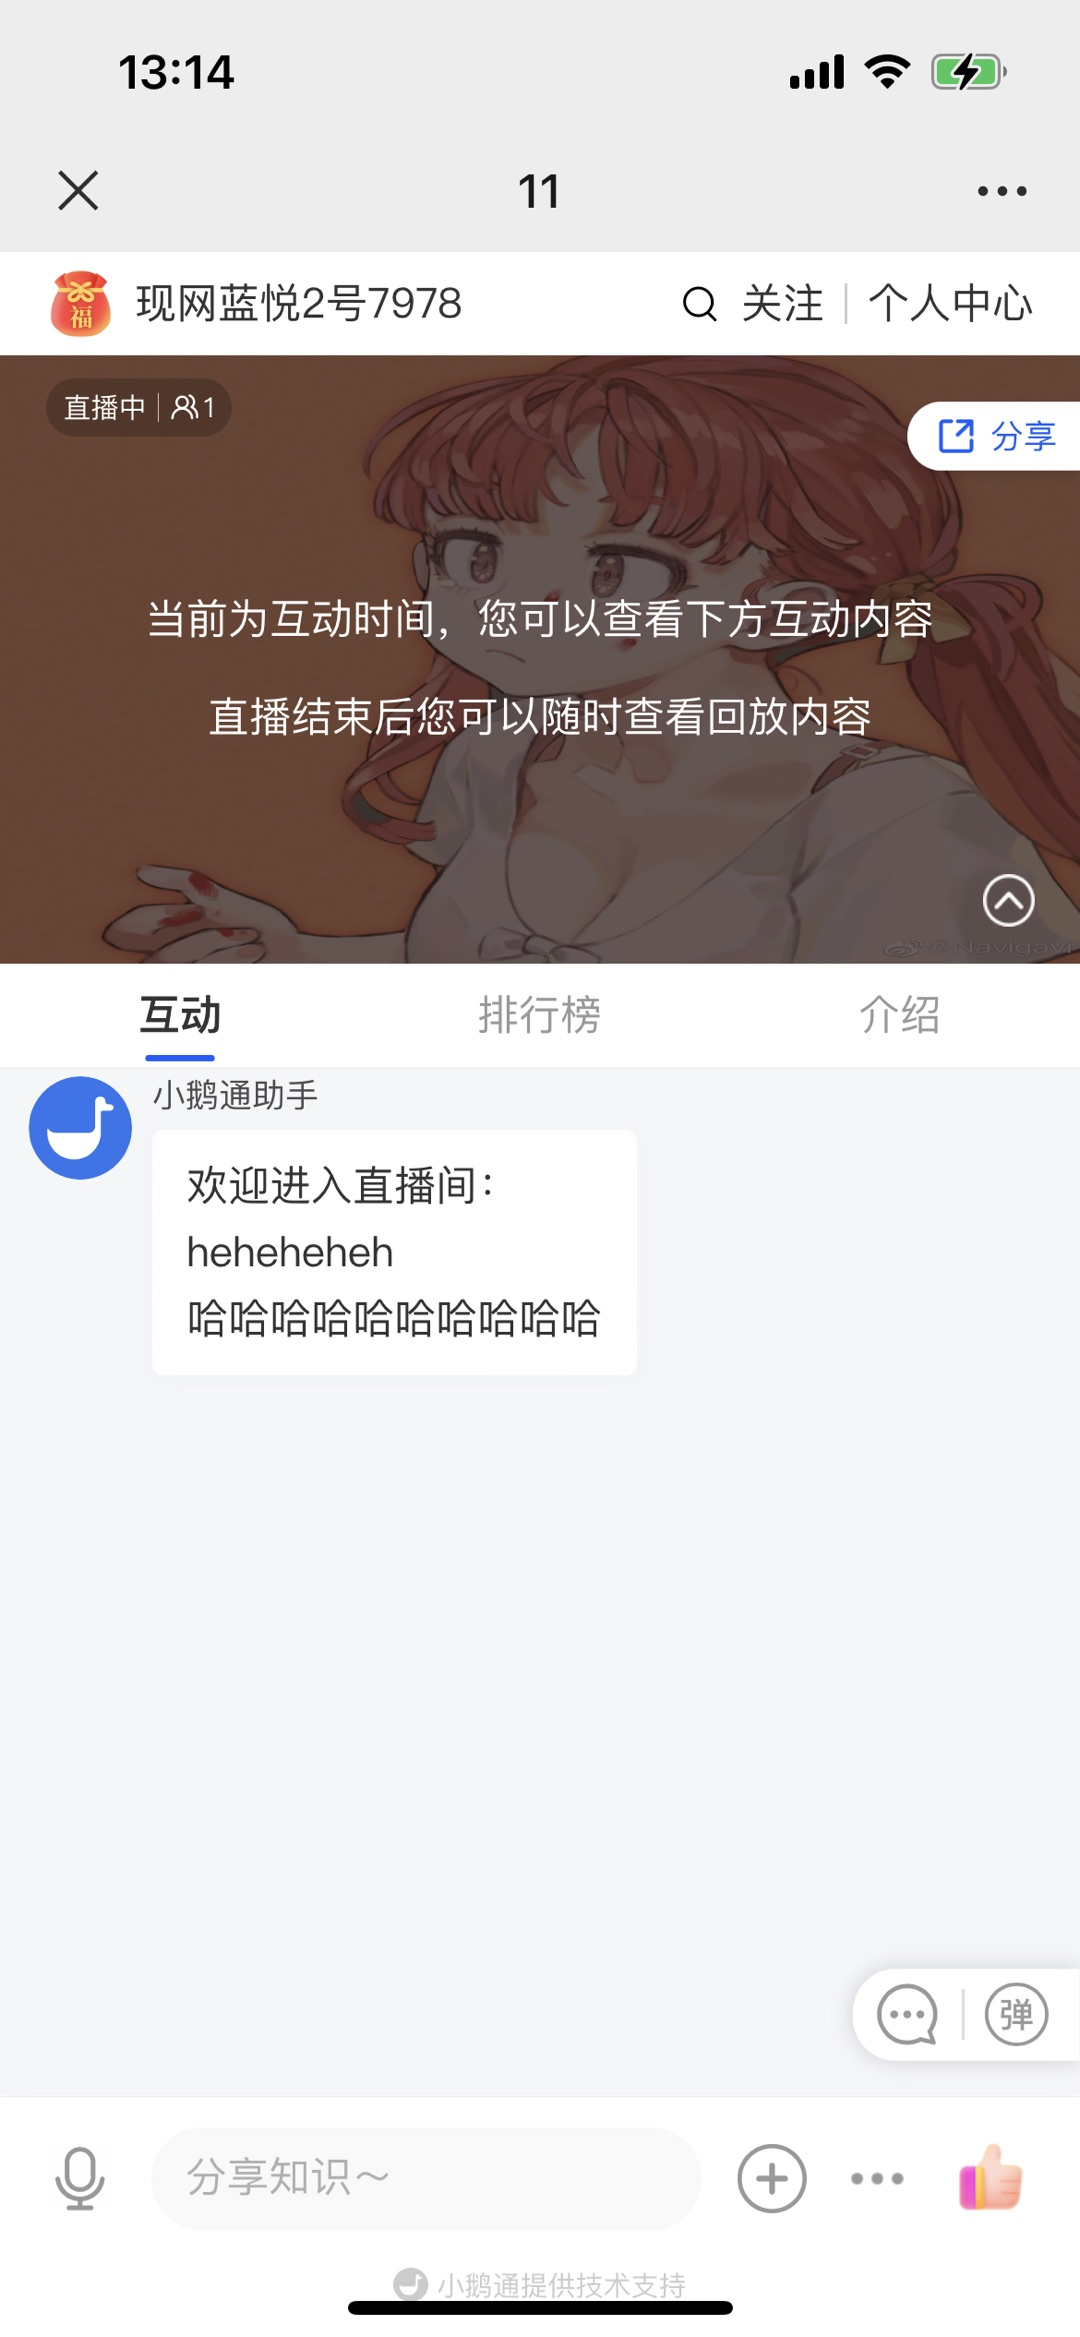
Yes, when the video duration is shorter than the live streaming duration (for example, the video duration is 5 minutes and the live streaming duration is 1 hour, this message will appear after the video finishes playing).
● Instructor side - Web version:
● Student side - Web version:
● Student side - H5 version:
Tutorial on Using Recorded and Live Streams
I. Function Introduction
The recorded live streaming mode is suitable for scenarios where there are videos and the live content is relatively lightweight. Merchants can upload videos to the live room. Once the live stream starts, the video will begin to play, and they can interact with students through voice and other means.
II. Use Scenarios
It is applicable to live streams where the instructor can prepare recorded videos in advance. The instructor prepares the recorded video in advance. Users can view the video uploaded by the instructor during the live stream, and the instructor can give explanations through voice.
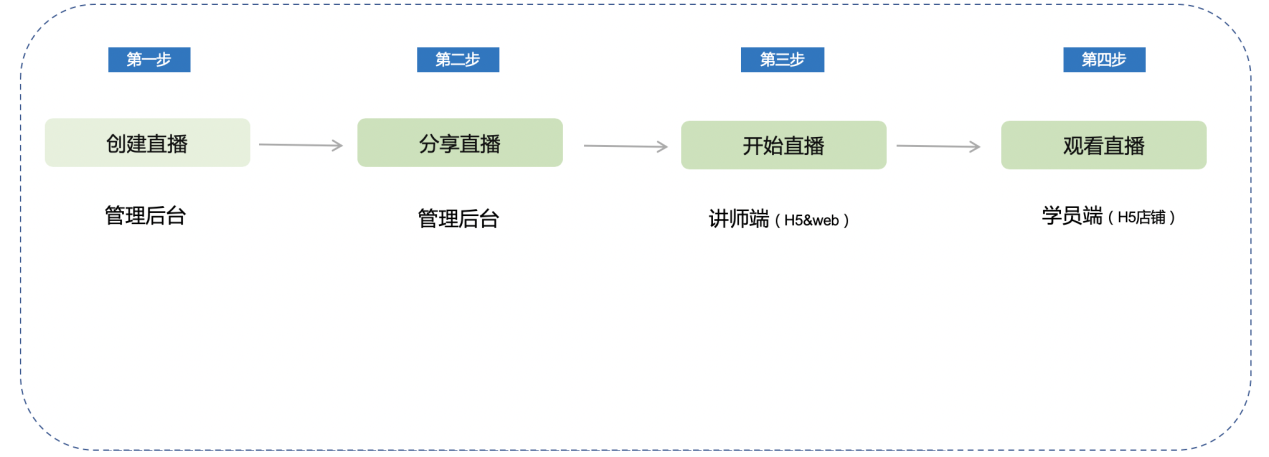
III. Operation Path
Merchant side: Merchant background → Create recorded live stream → Start live stream
IV. Usage Tutorial
Step 1: Create a live stream (Management background)
1. Enter the management background - New live stream, and select 'Recorded live stream'.
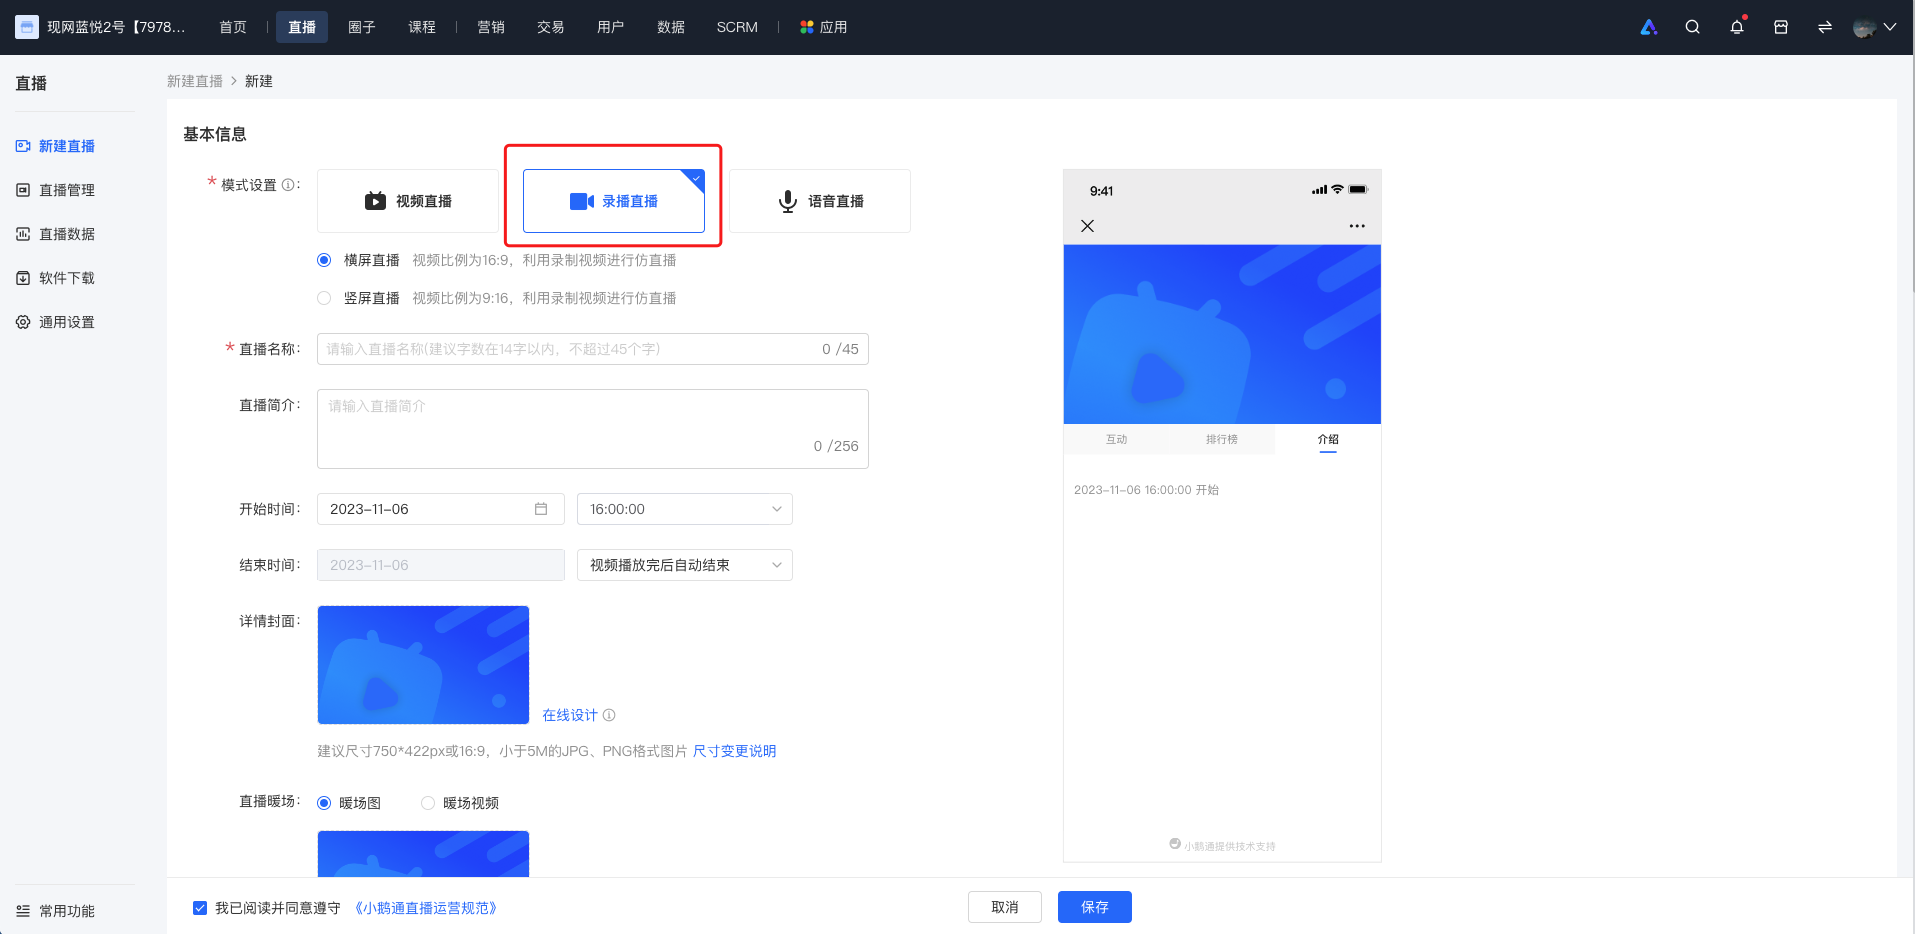
(Management background)
2. Fill in the relevant information, click 'Save' to complete the creation.
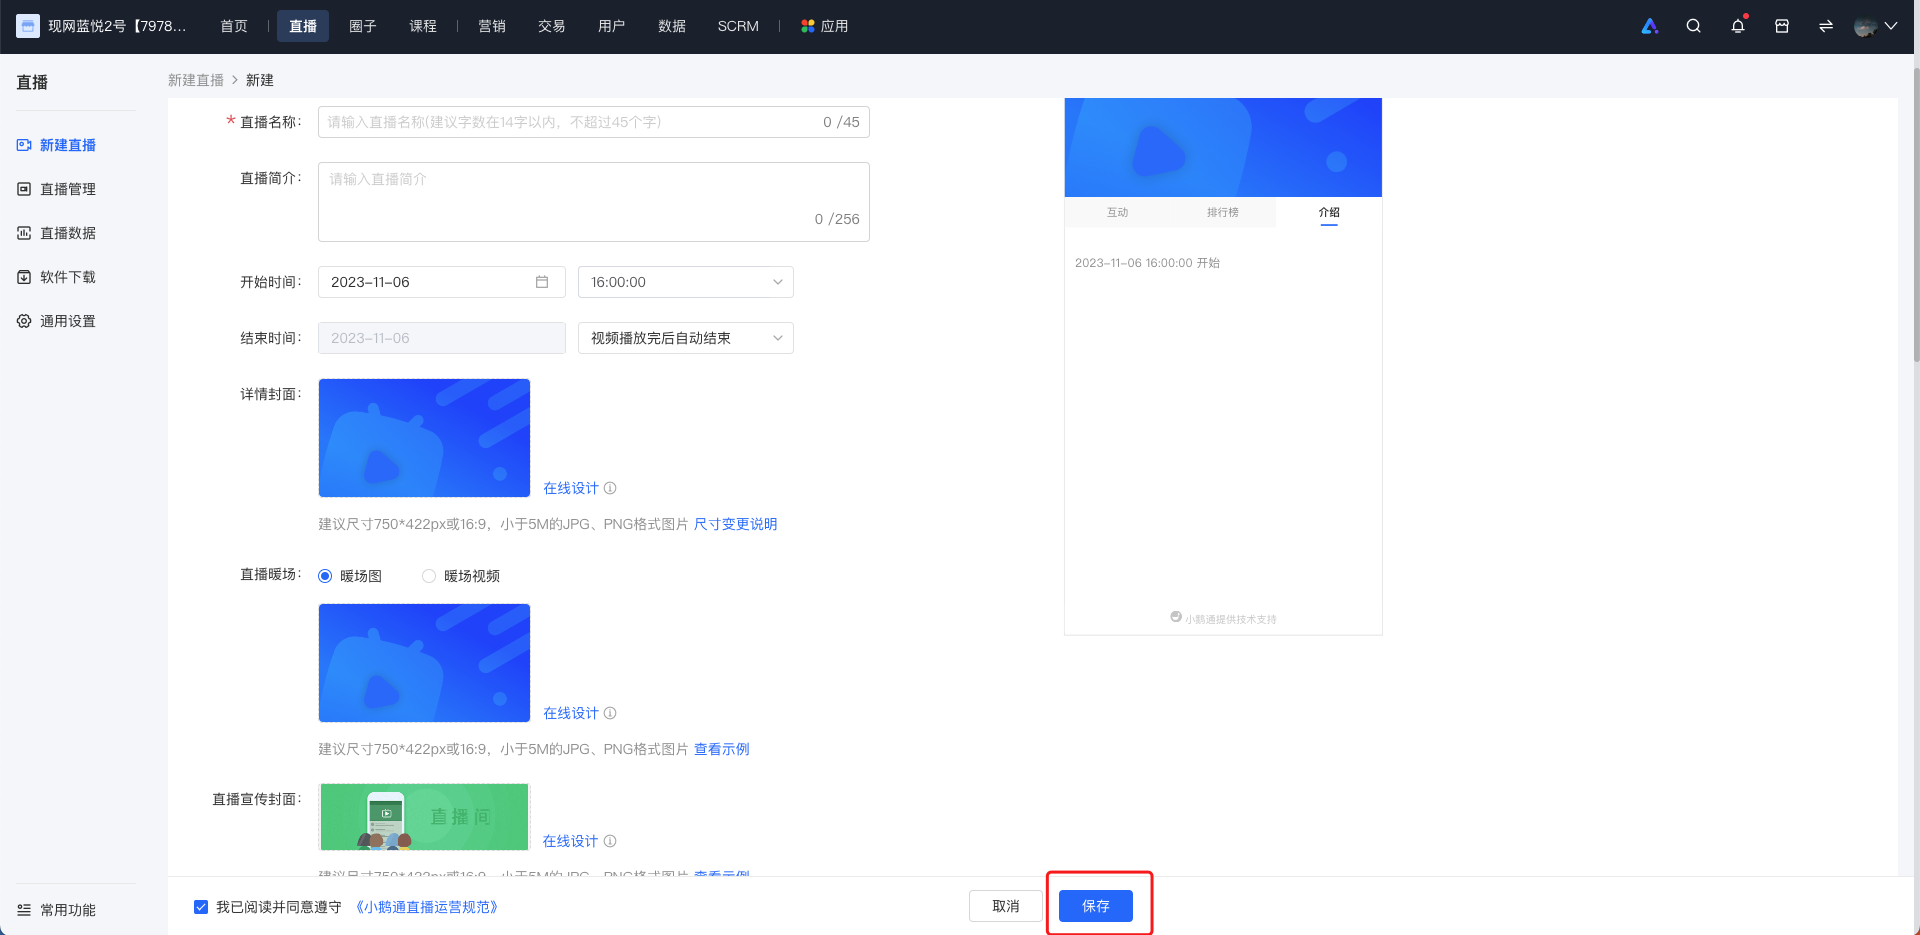
PS: Don't forget to select and upload the video at [Recorded video] - [Add video]!
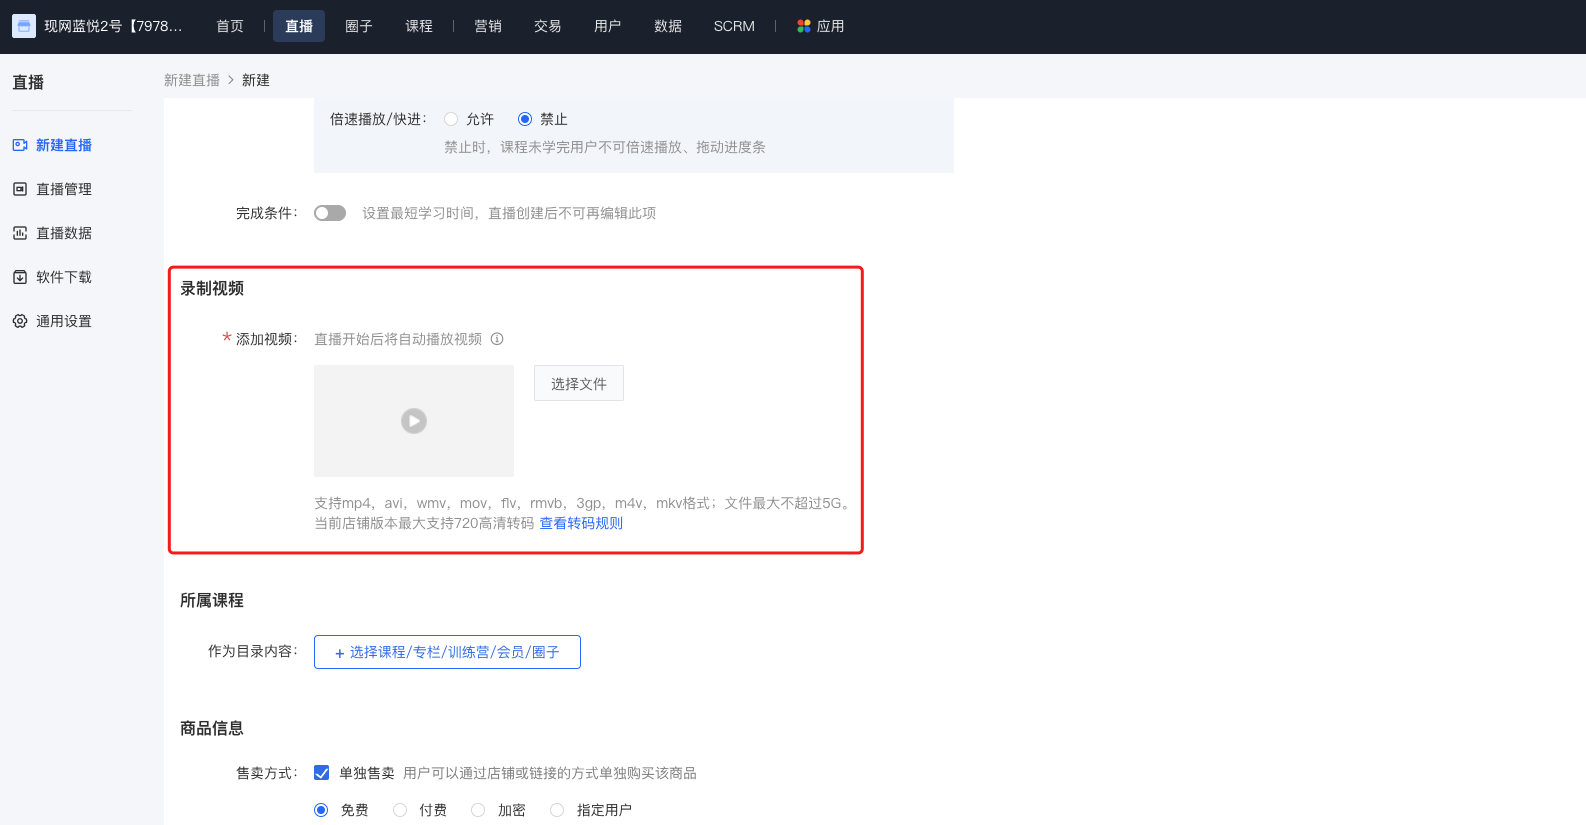
(Management background)
1. After the creation is completed, on the live stream list page, click the 'Share' button to get the QR code and link of the live room, and share them with students.
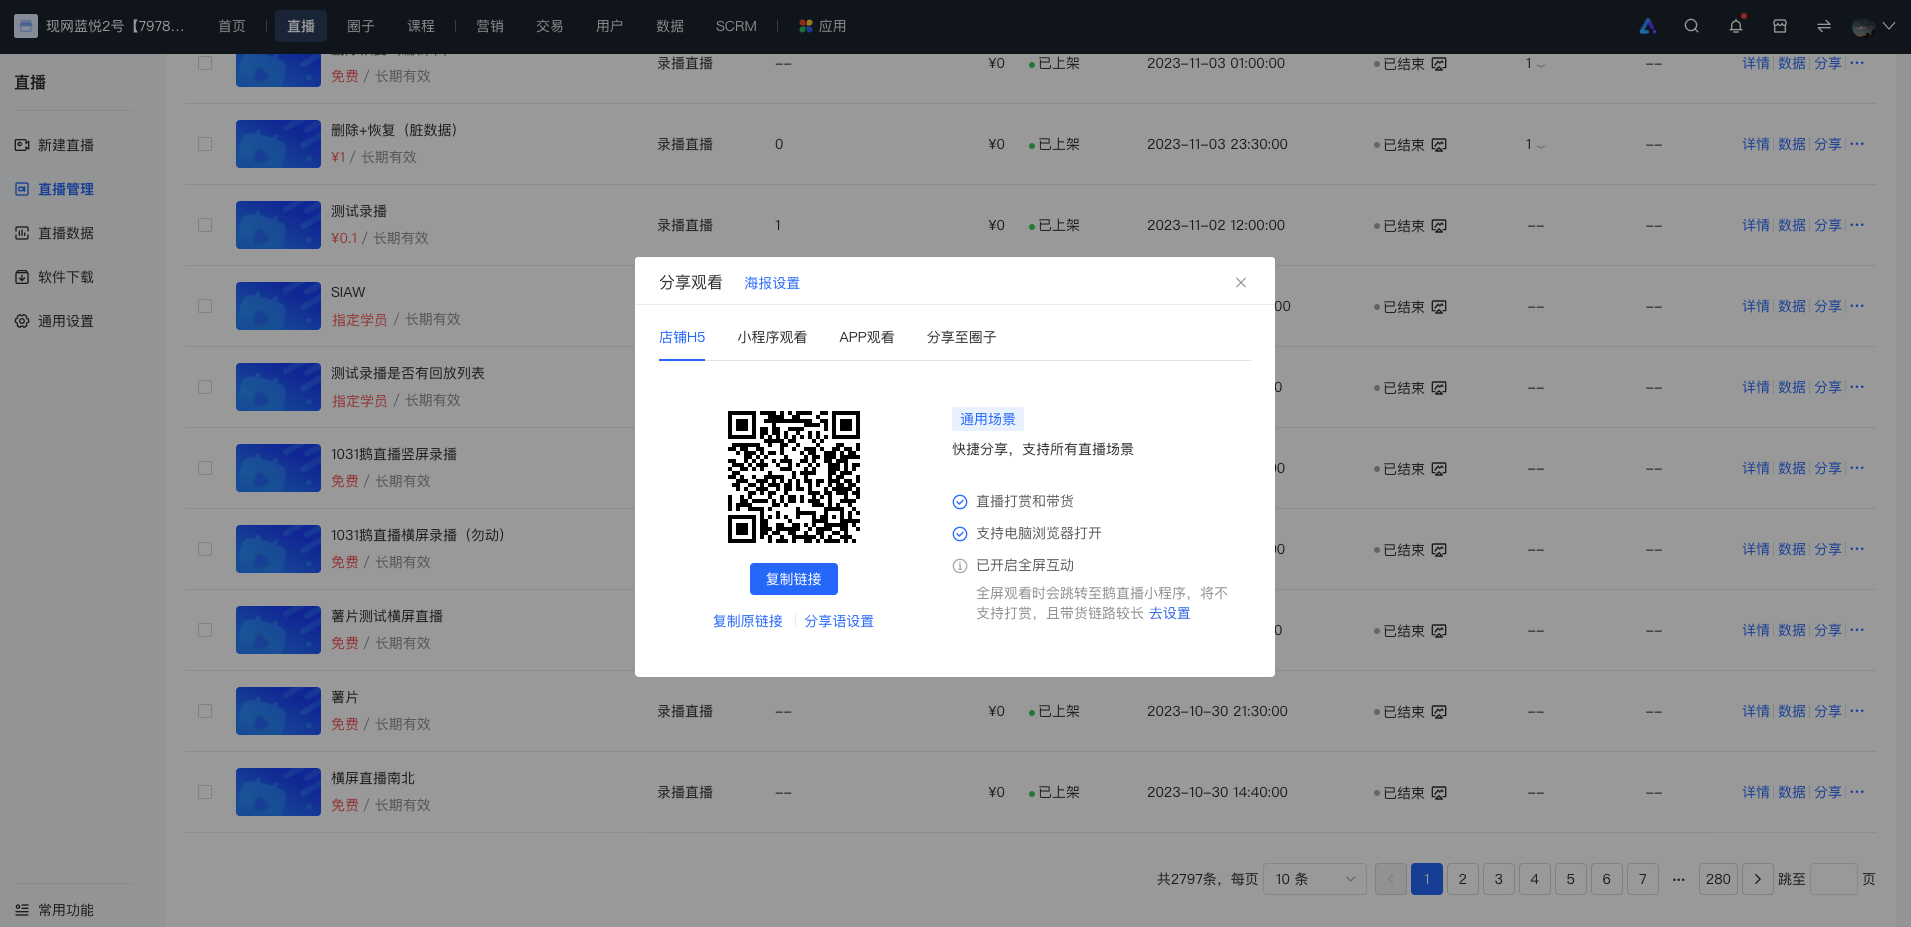
2. H5 - end sharing
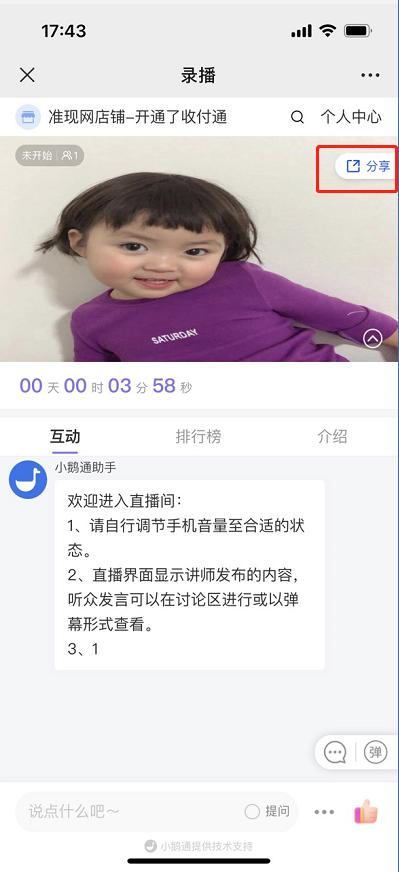
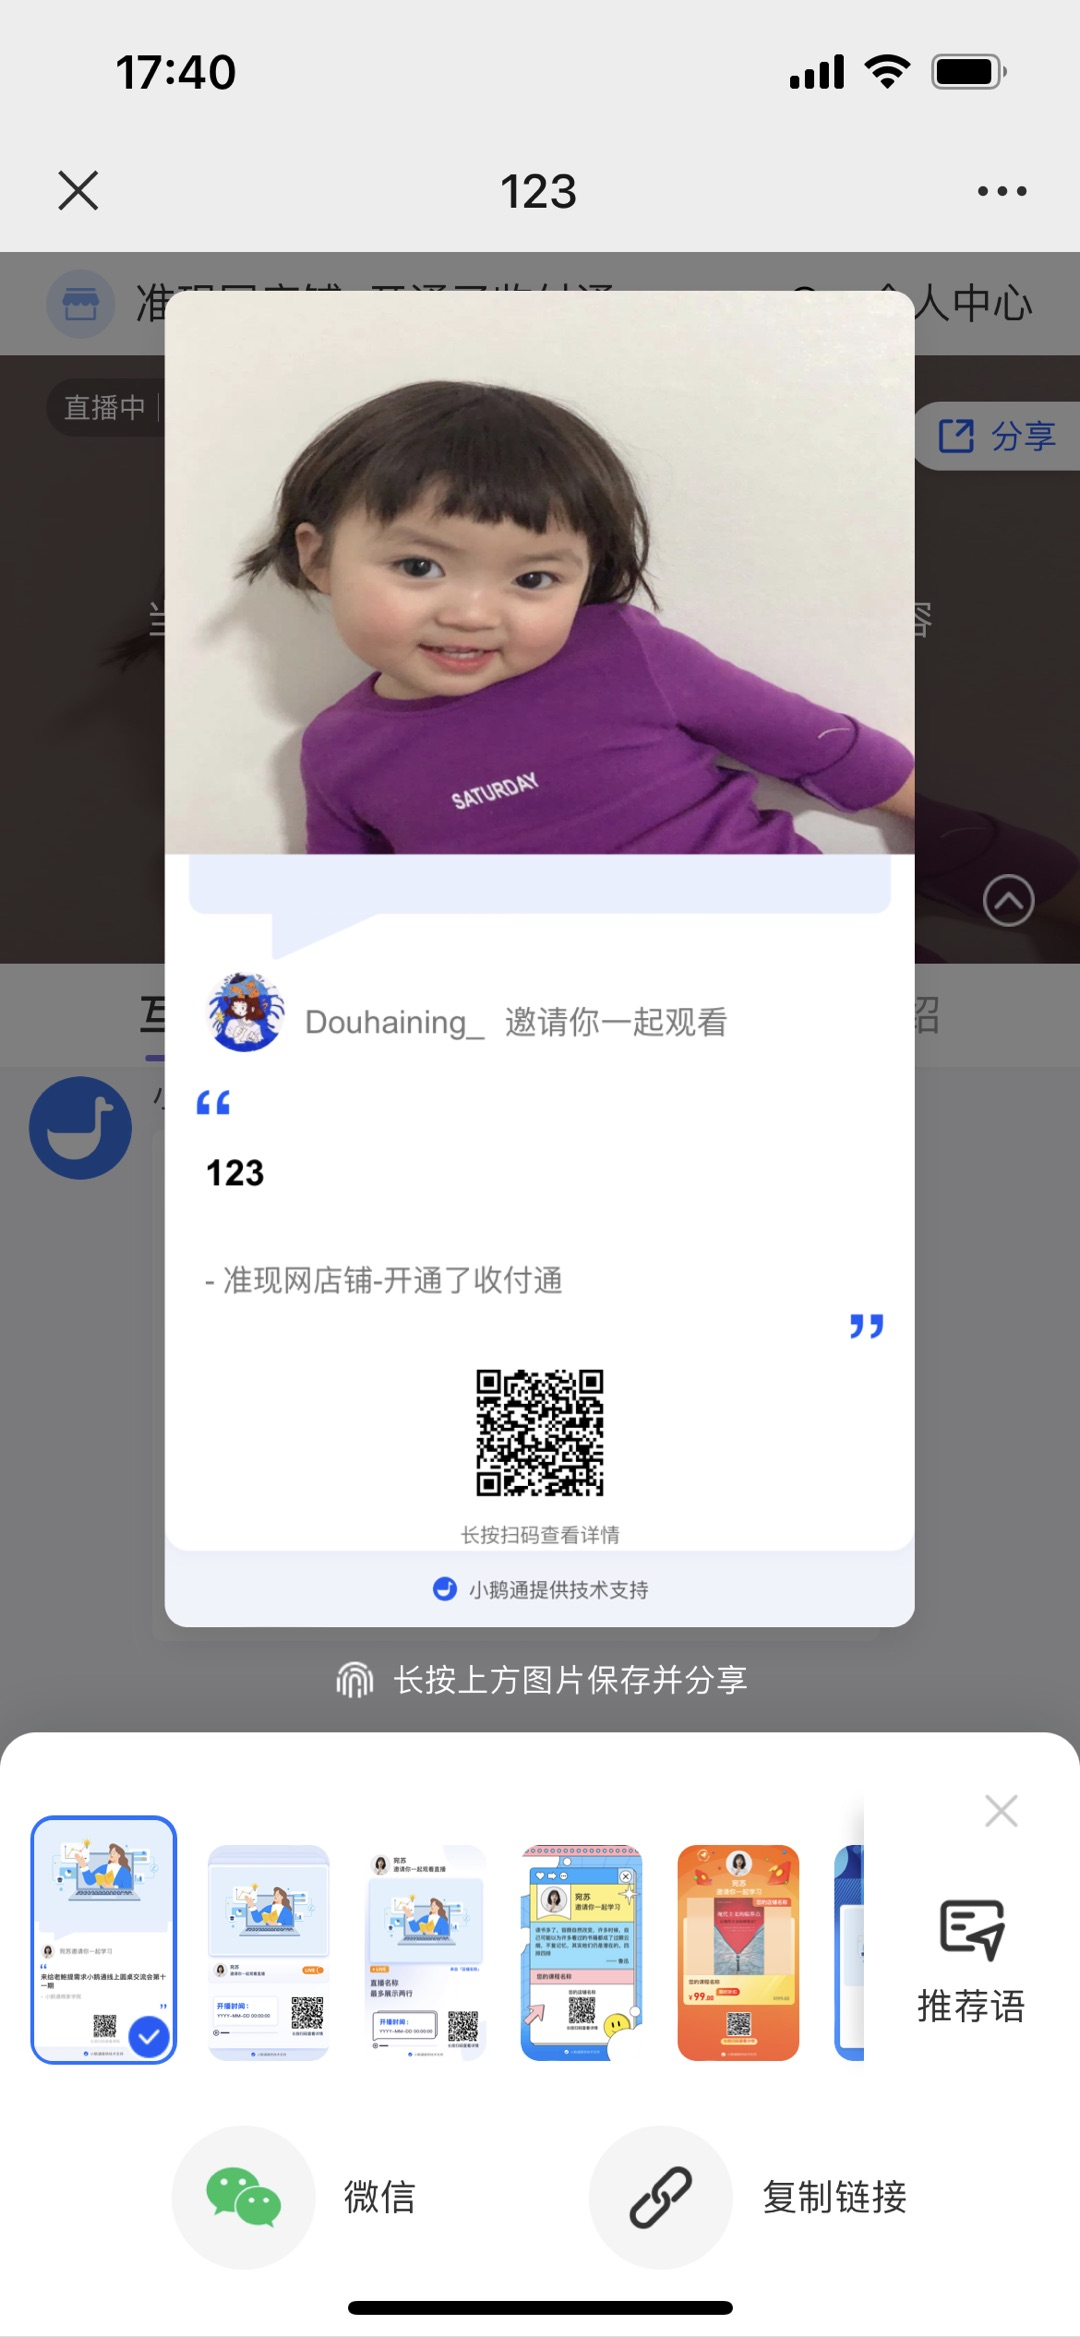
On the mobile - end, you can get the live stream invitation card and share it through channels such as Moments, WeChat groups, and Official Accounts.
Method for creating the invitation card:[Live room] → [Click the share button] → Long - press the picture to save → Send and share
Step 3: Start the live stream (WeChat H5 & Computer web instructor side)
1. Web - end recorded live room
(1) Enter the web live room
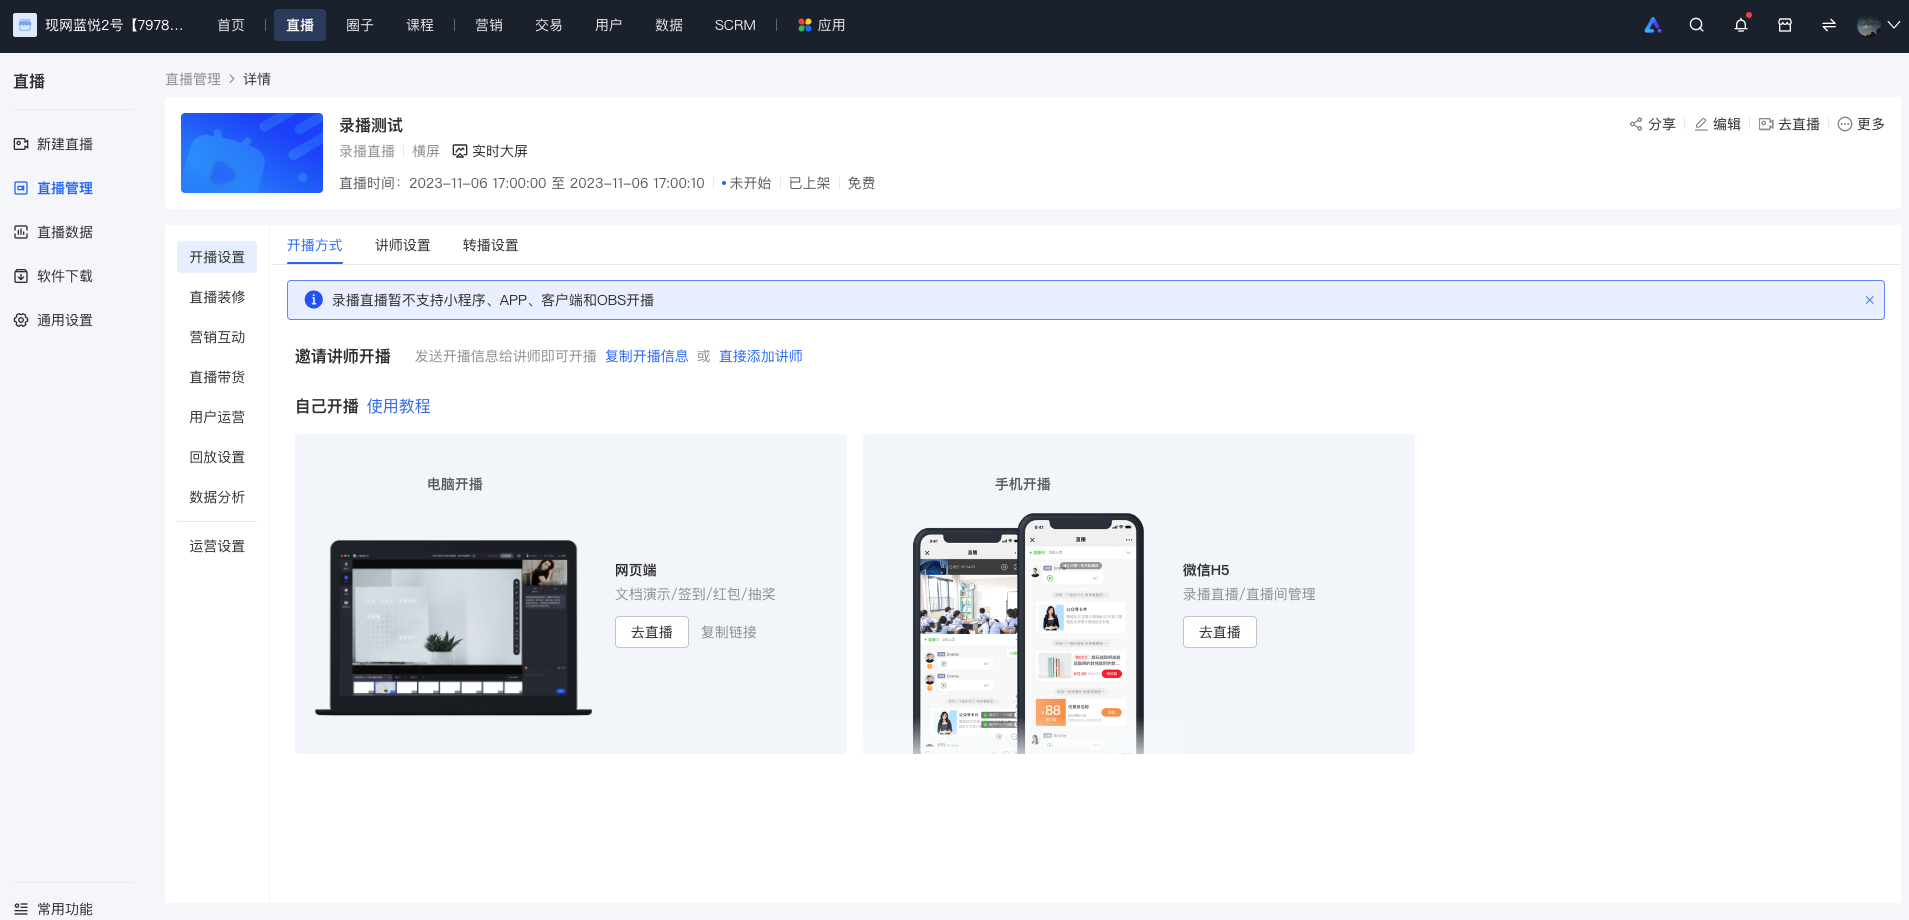
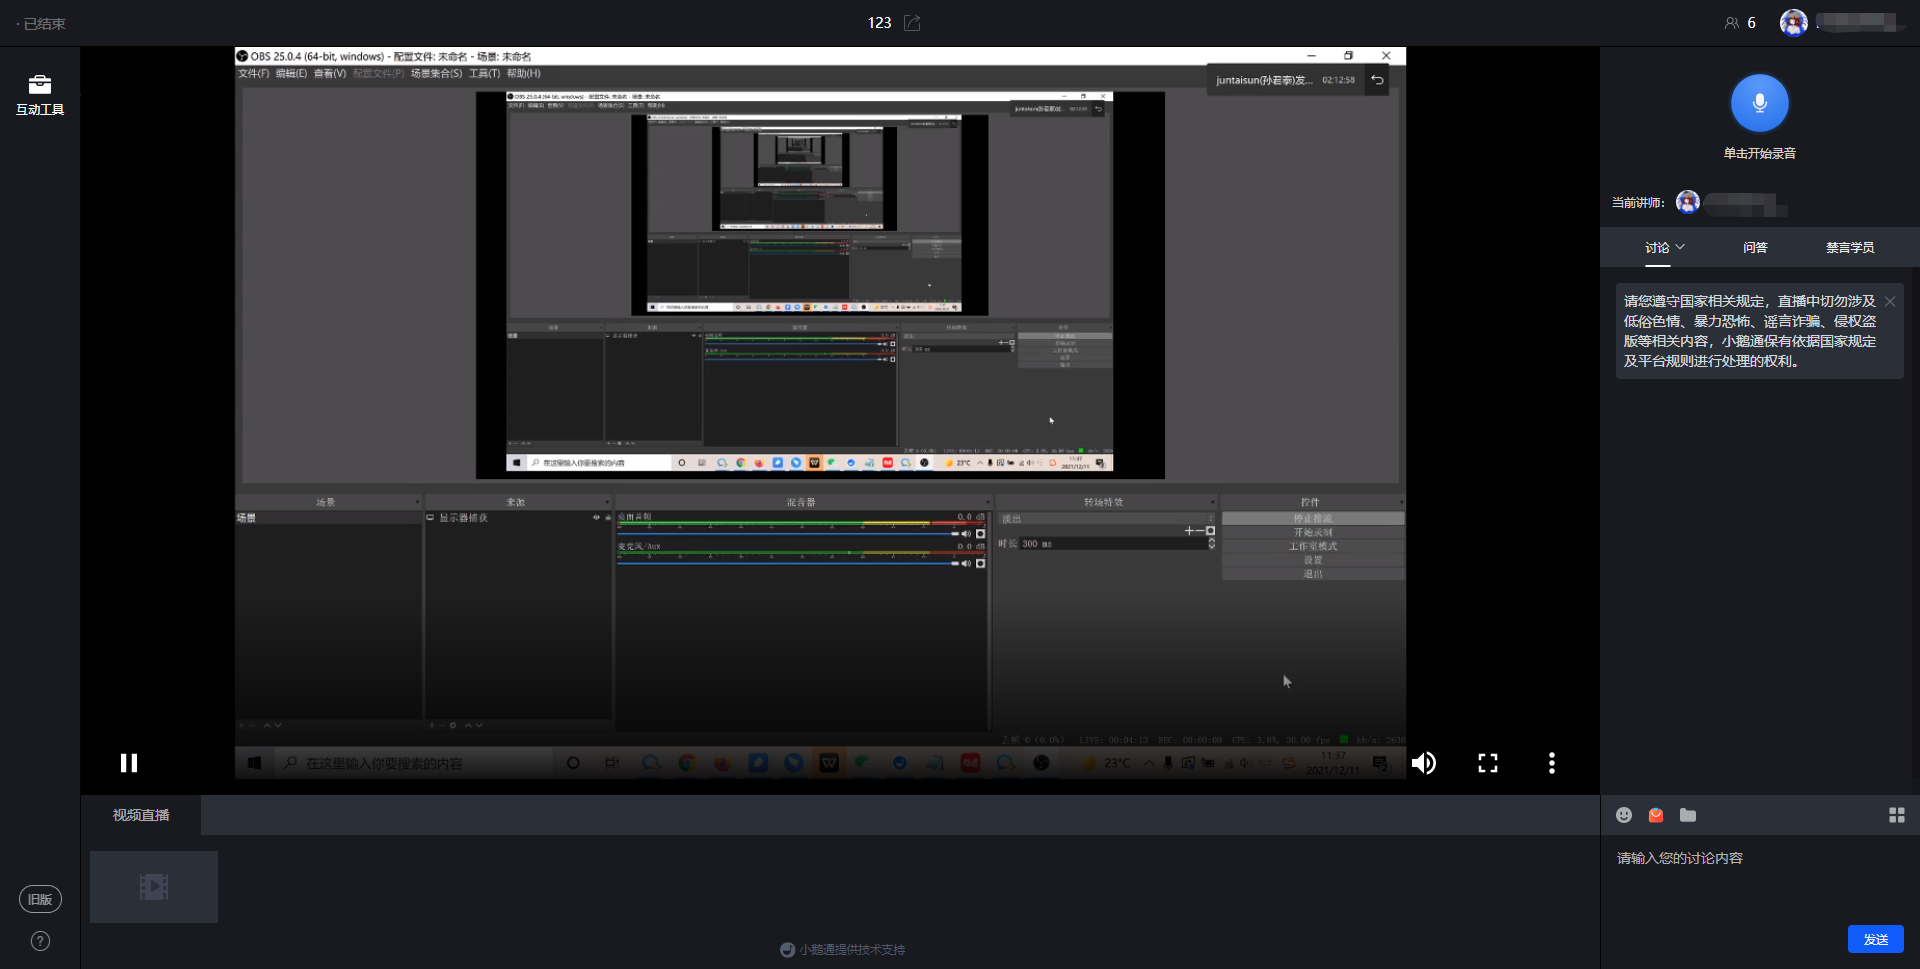
After creating a recorded live stream, the instructor clicks 'Go live' and selects the web - end. Open the live room address, scan the QR code with WeChat to log in and enter the live room page. When the live stream time arrives, the live stream can start, and the uploaded video will begin to play.
(2) Send voice
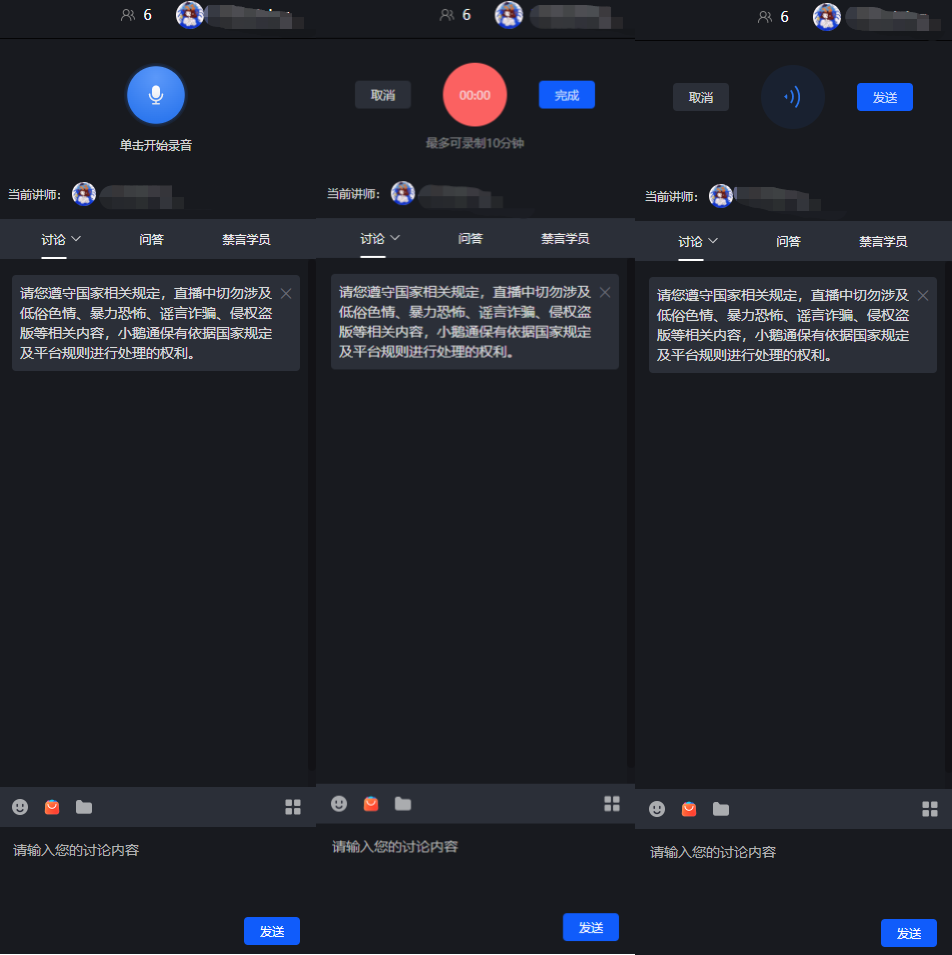
Click the microphone icon to start the voice recording time.
Click [Finish] to complete the voice recording; click [Cancel] to cancel the sending.
After the voice recording is completed, click the [Send] button to send the voice. Click 'Cancel' to cancel the sending.
(3) Courseware display
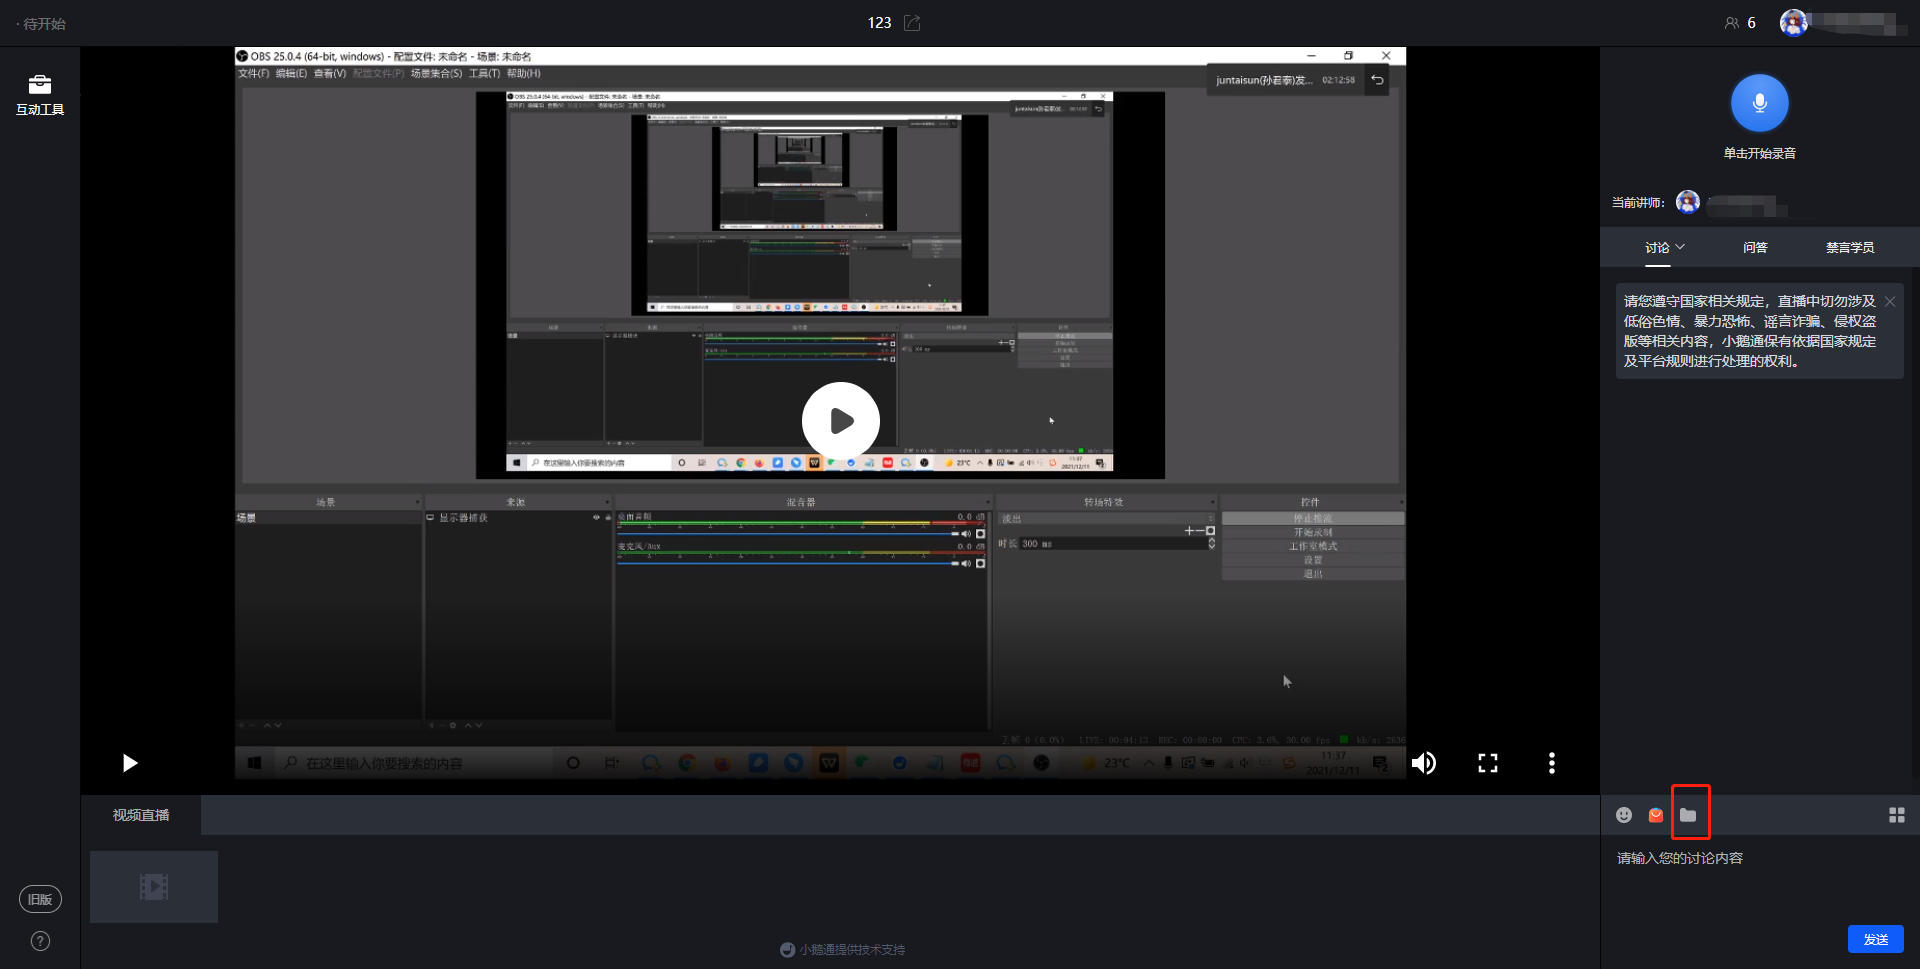
Click the 'Folder' button in the lower - right corner to enter the material library, where you can upload and send files in other formats.
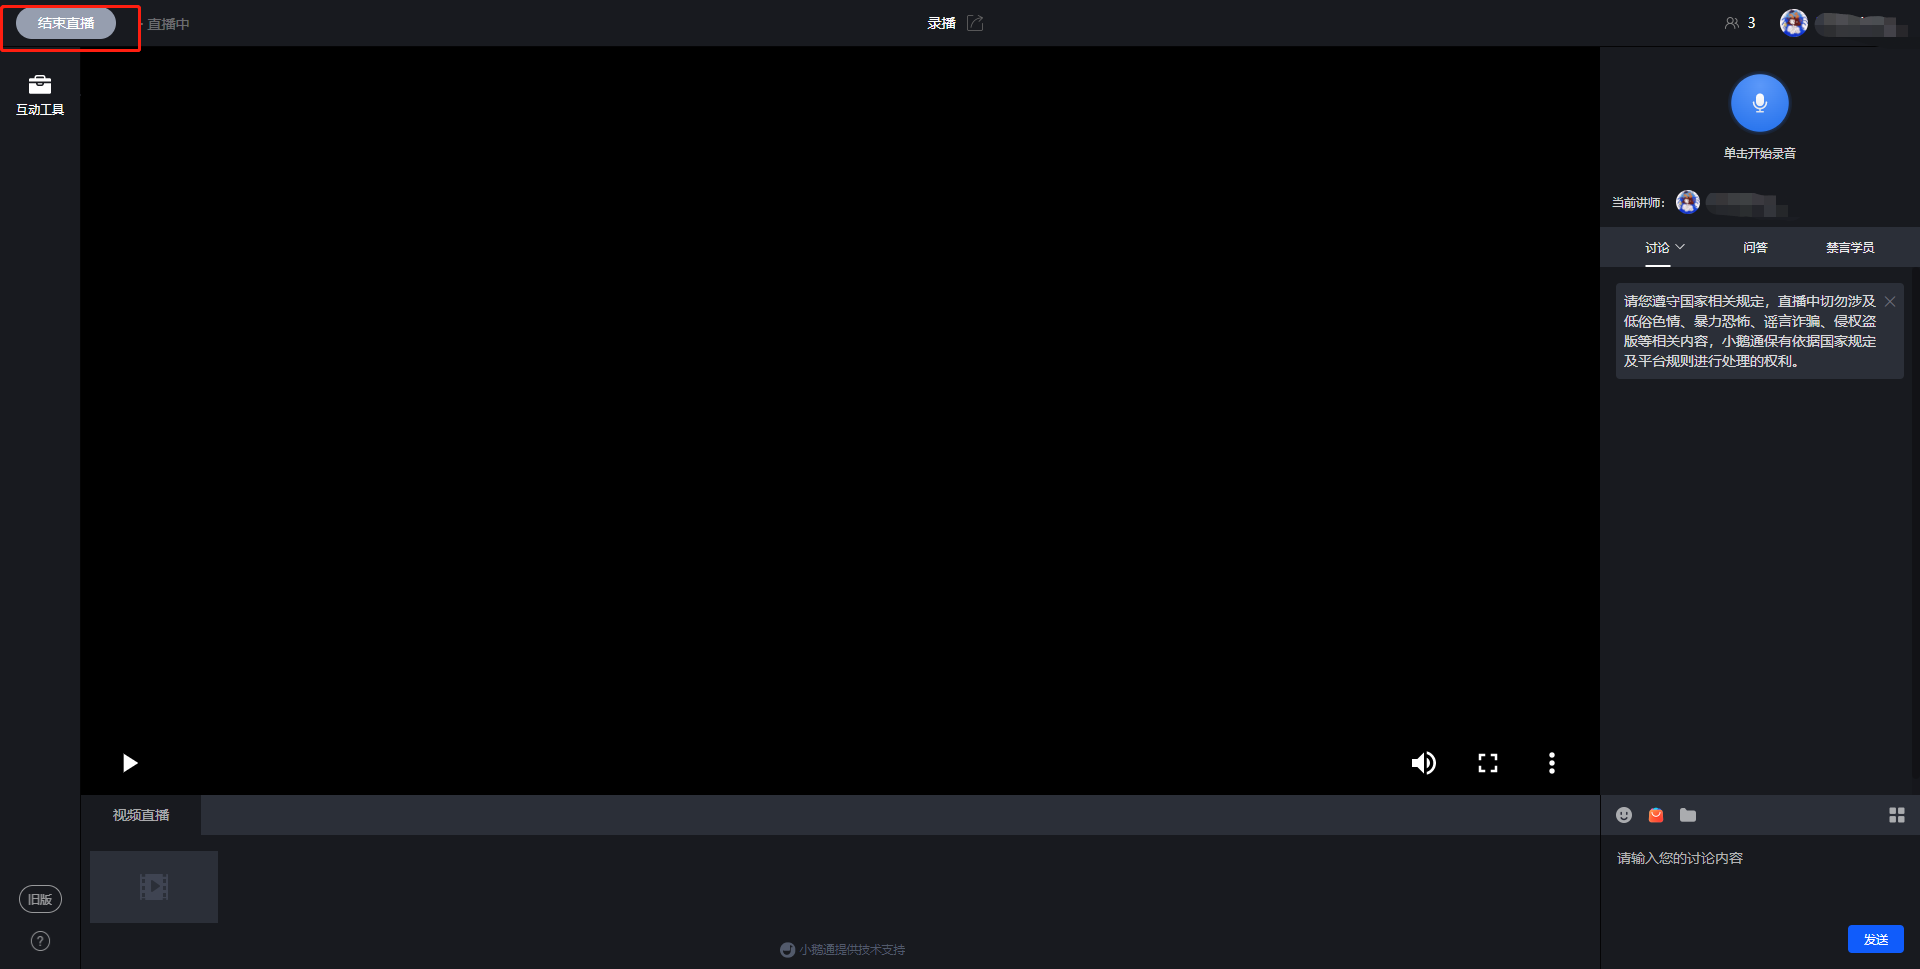
(4) End the live stream
When the instructor needs to end the live stream, click the operation button in the upper - left corner to end the live stream.
2. H5 recorded live room
(1) Enter the H5 live room
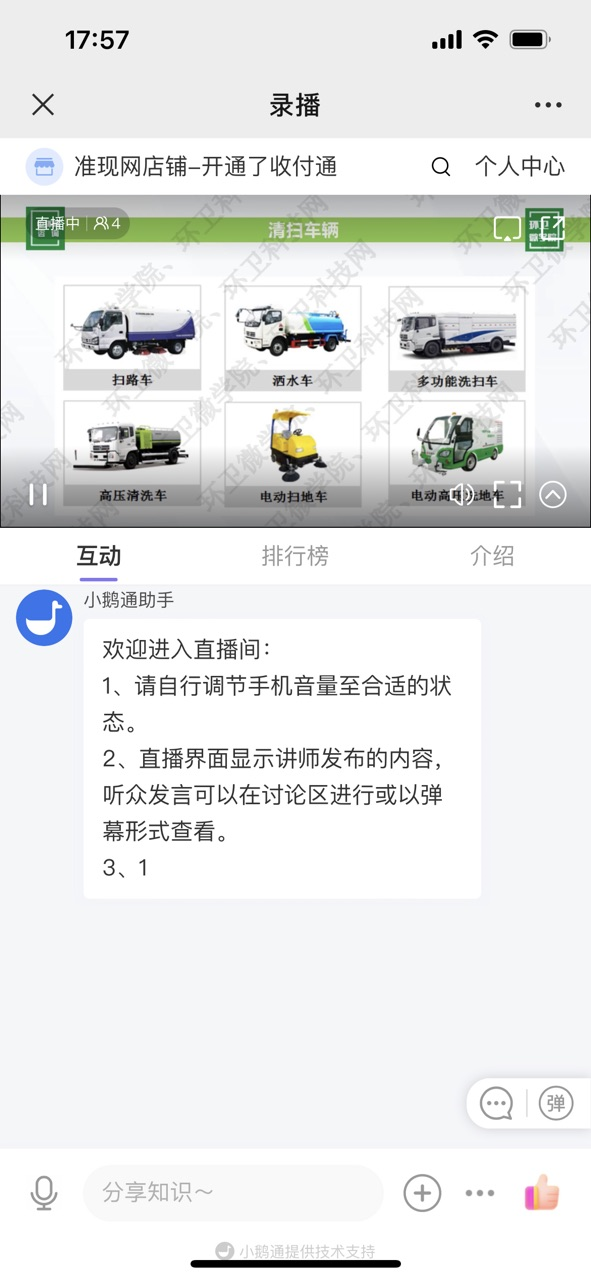
After creating a recorded live stream, a 'Share' pop - up window will appear.Scan the QR code with your mobile phone to enter the live room. When the live stream time arrives, the live stream can start, and the uploaded video will begin to play.
(2) Send voice
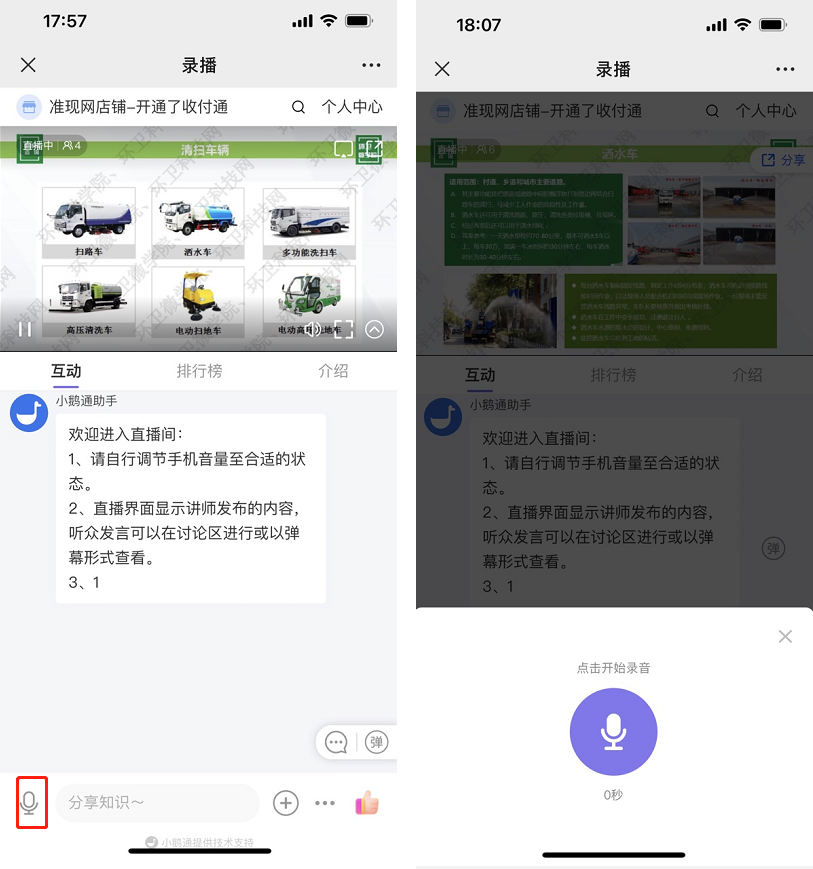
Click the microphone icon to start the voice recording time.
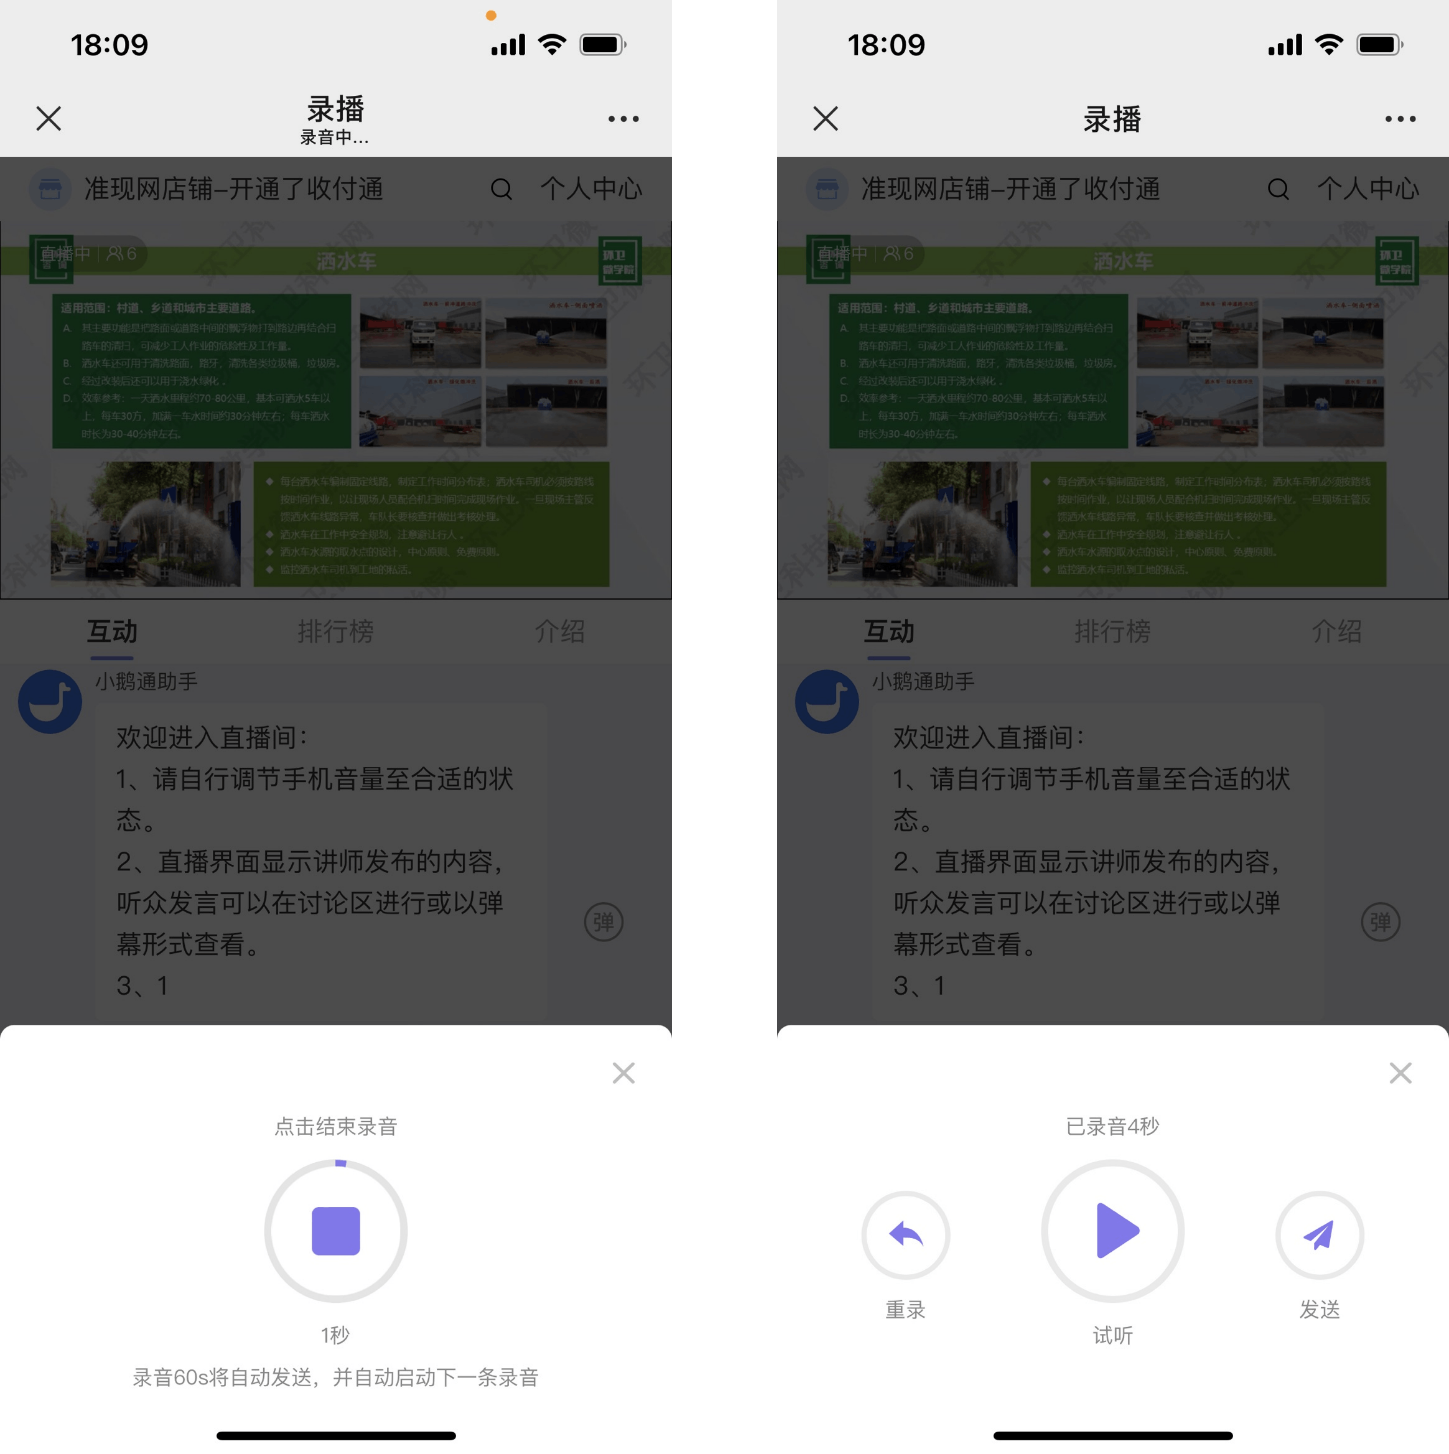
Click the [Red square] to complete the voice recording. Click 'Cancel' to cancel the sending.
After the voice recording is completed, click the send button to send the voice. Click 'Cancel' to cancel the sending.
The elink live room supports continuous voice recording by the instructor. The instructor doesn't need to manually click to send the recording. The system will automatically cut the recording into 60 - second voice messages and send them one by one.
This allows the instructor to teach at their own pace without being interrupted by the action of sending voice messages.
(3) Courseware display
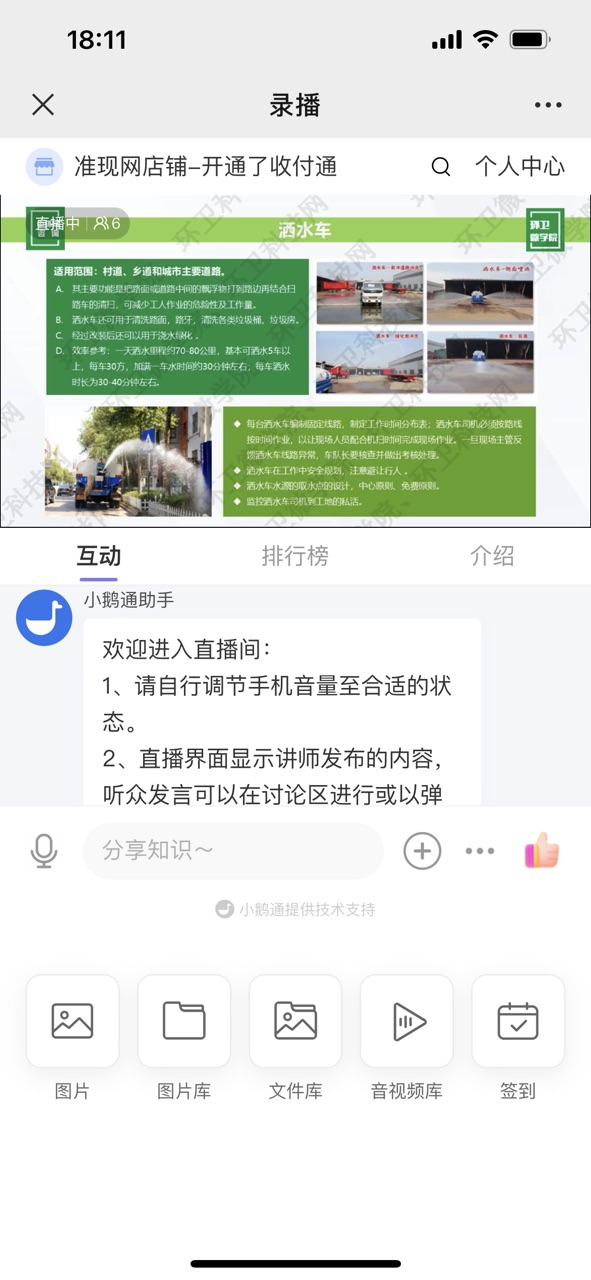
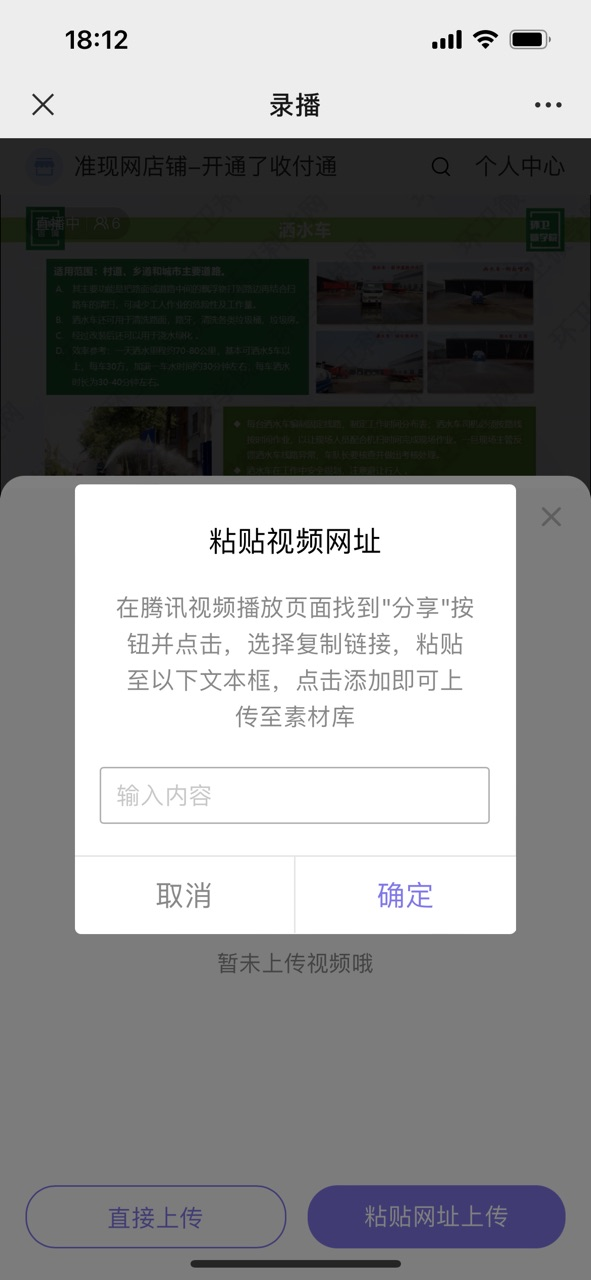
Click the '+' in the lower - left corner of the live room, then click the file library or audio - video library to share content in other formats (the upload needs to be completed in the material library on the web instructor side).
(4) End the live stream
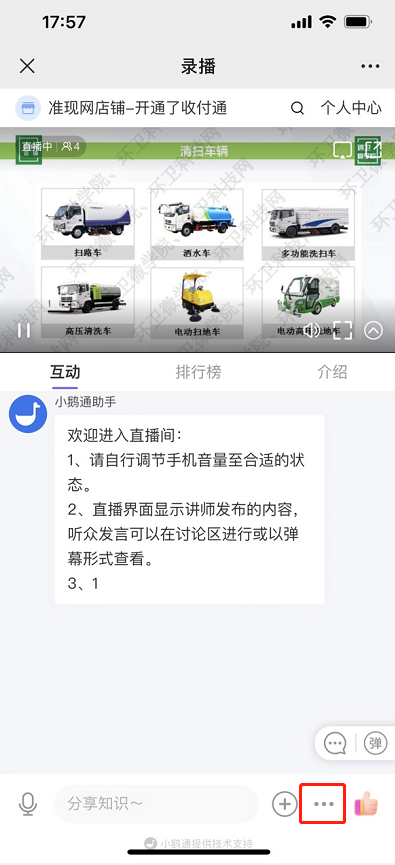
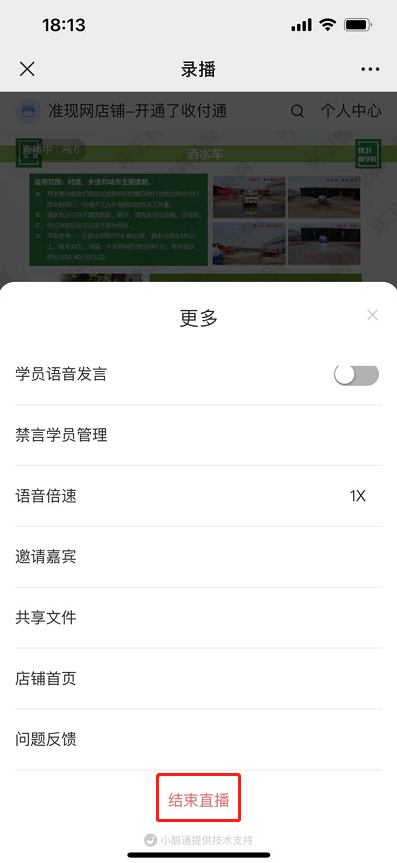
When the instructor needs to end the live stream, click the 'More' button in the lower - right corner and click 'End live stream' in the pop - up drop - down box to end the live stream.
Step 4: Watch the live stream (H5 store or elink live Mini Program)
1. Users can enter the live room by scanning the QR code or opening the link.
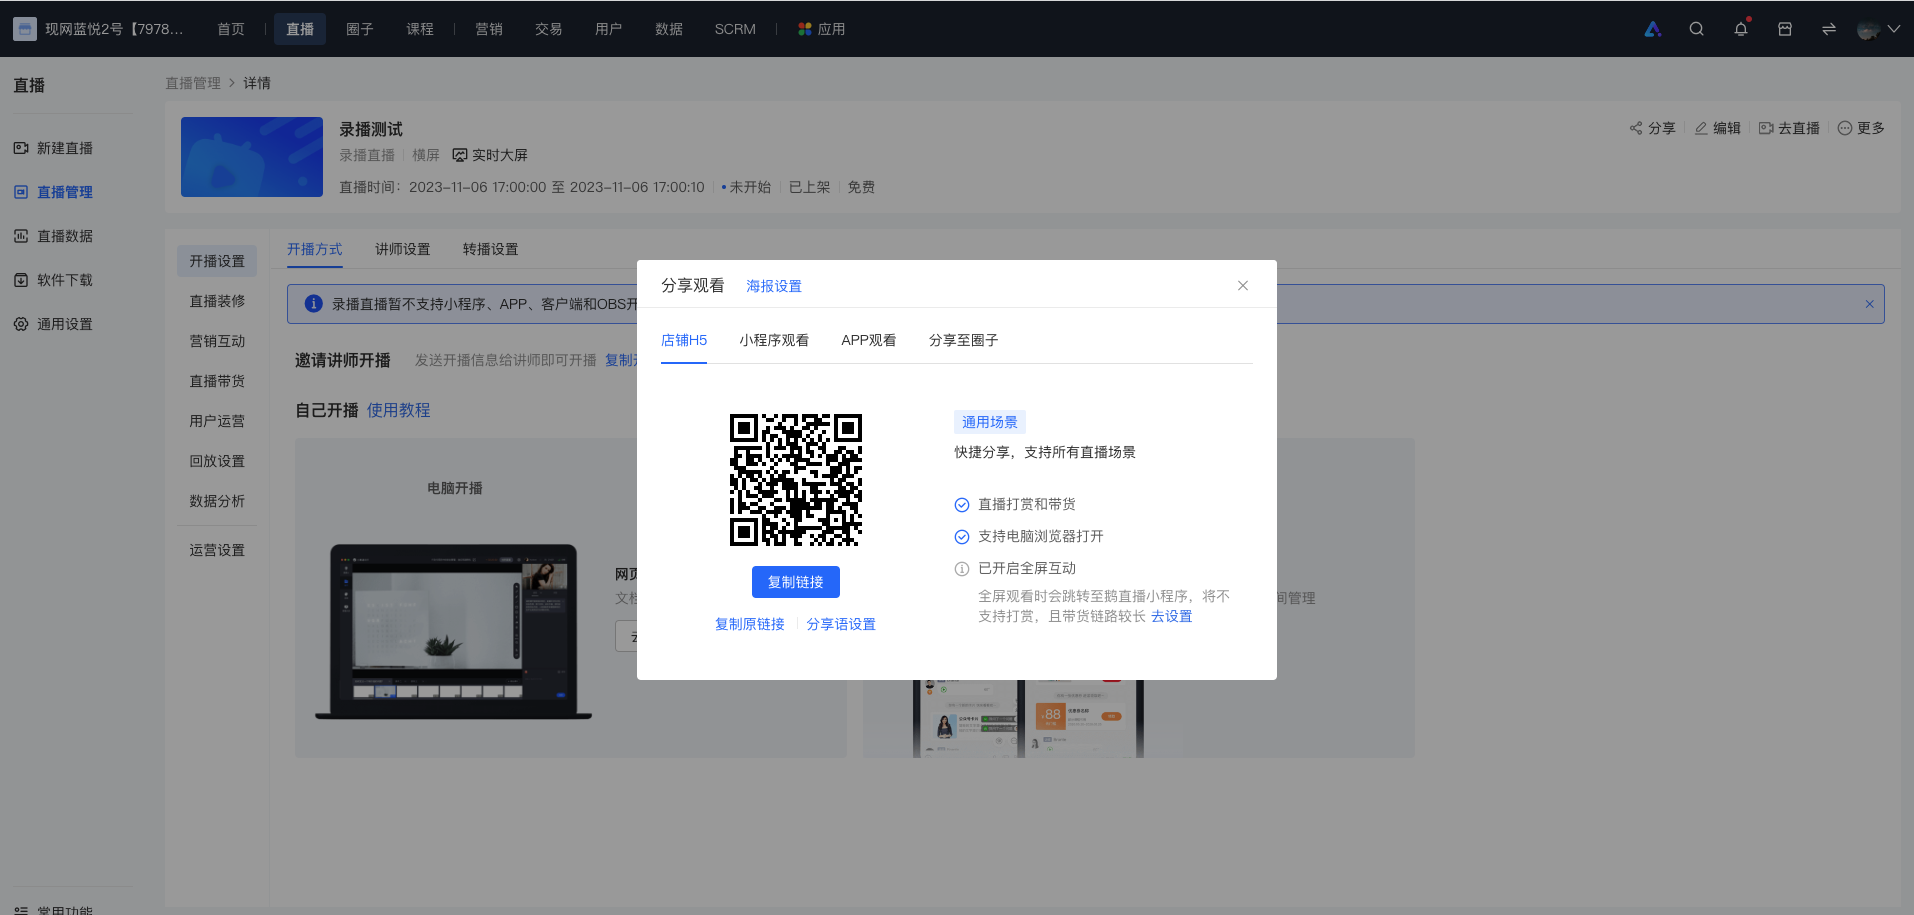
2. After entering the live room, students can interact with the instructor by sending text content, asking questions, etc.
If the live streaming duration is shorter than the uploaded video duration, will the words [Video playback completed] appear after the video finishes playing?
When the video duration exceeds the set live streaming duration (for example, the video duration is 1 hour and 15 minutes while the live streaming duration is 1 hour), the video will stop playing once the live streaming end time is reached.
*Note:
1. If students stay in the live streaming room without exiting when the live streaming duration ends, they can watch the video normally without being able to drag the progress bar.
2.If students exit the live streaming room before the video finishes playing when the live streaming duration ends and then re - enter, the video will continue playing from the current time point without the ability to drag the progress bar.
3. If the instructor refreshes the page during the live streaming on the web - based platform,the video will continue playing from the current time point,and the playback cannot be dragged.
After the live streaming duration ends, when students enter to watch, it will be the same as the state of watching the replay after a normal live streaming ends.【As shown in the following figure】Please see the progress bar display after playback:


