# Tutorial on Using Voice Live Streaming
[中文](/books/8e6b4/page/33e75)
**I. Function Introduction**
Audio live streaming is a lightweight live streaming format suitable for content that doesn't require a camera. Instructors can send voice, text, images, courseware, and videos in real - time in the live - streaming room to teach, explain, and interact with students.
**II. Purpose of Use**
With audio live streaming, there's no need to turn on the camera. Instructors can send content such as voice, text, and images in the live - streaming room to achieve real - time explanation and interaction with students.
**III. Use Scenarios**
If an instructor doesn't need to turn on the camera and needs to conduct a live stream with a large amount of voice, text, and images, they can use audio live streaming to complete the live - streaming content.
**IV. Operation Path**
Instructor side: Management background → Create audio live stream → Select the live - streaming terminal → Start live streaming
Student side: Enter the live - streaming room → Watch the live stream
**V. Usage Tutorial**
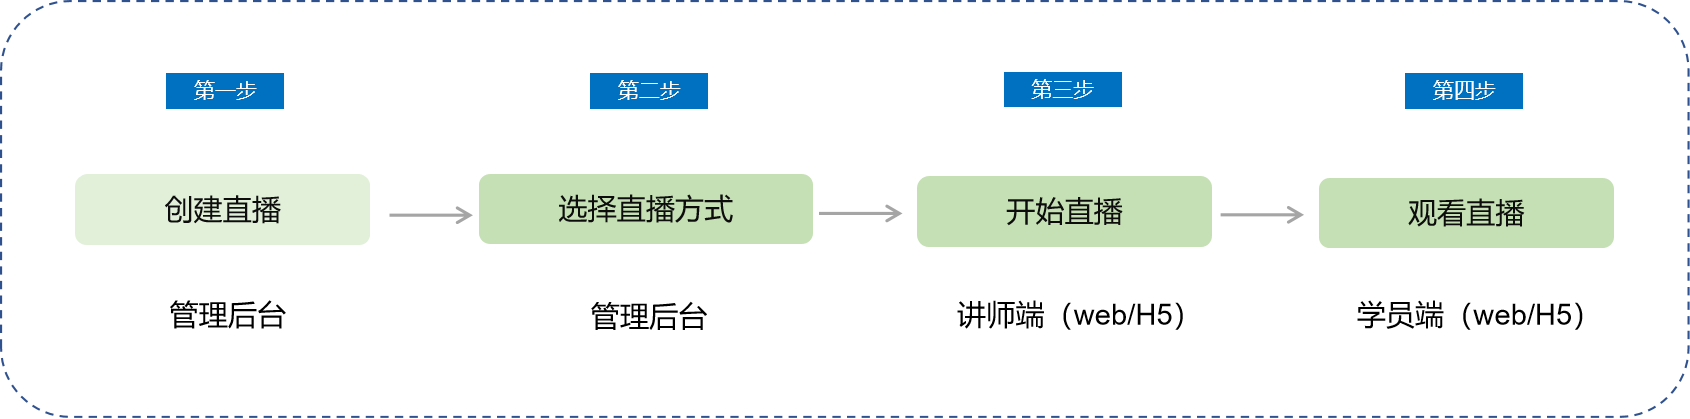
**Step 1: Create a live stream***(Management background)*
1. Enter the management background - Live - streaming management and create an audio live stream.
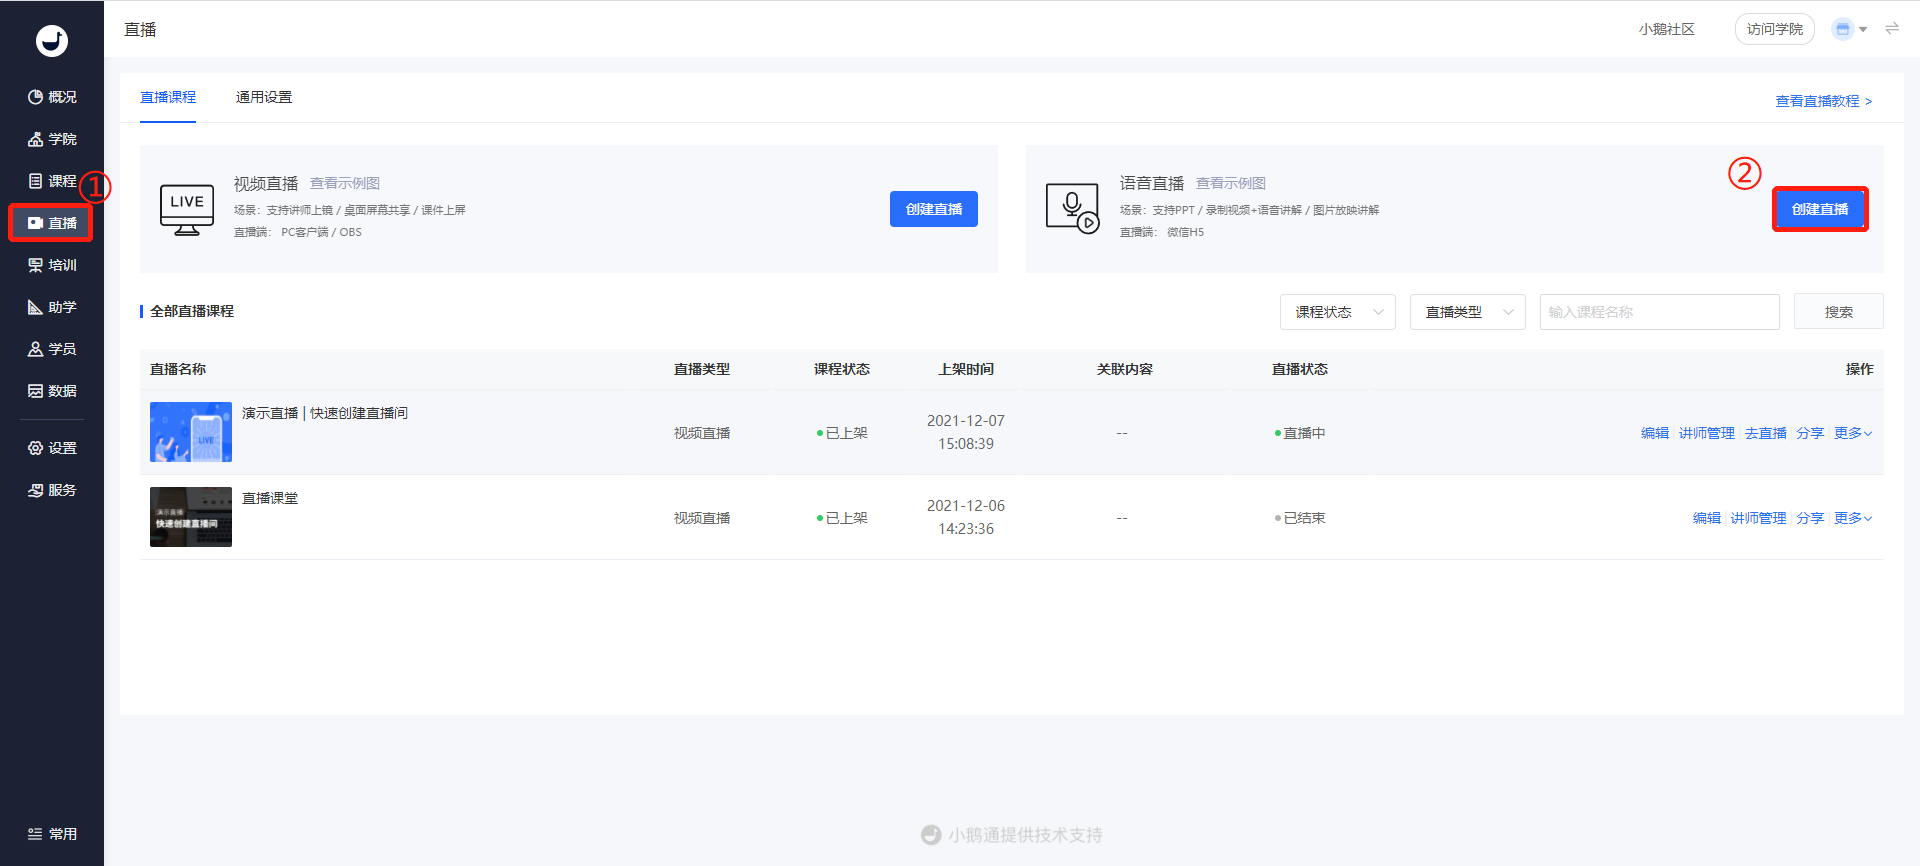
(Management background - Live streaming)
2. Fill in the live - streaming information and click the save button to complete the live - stream creation.
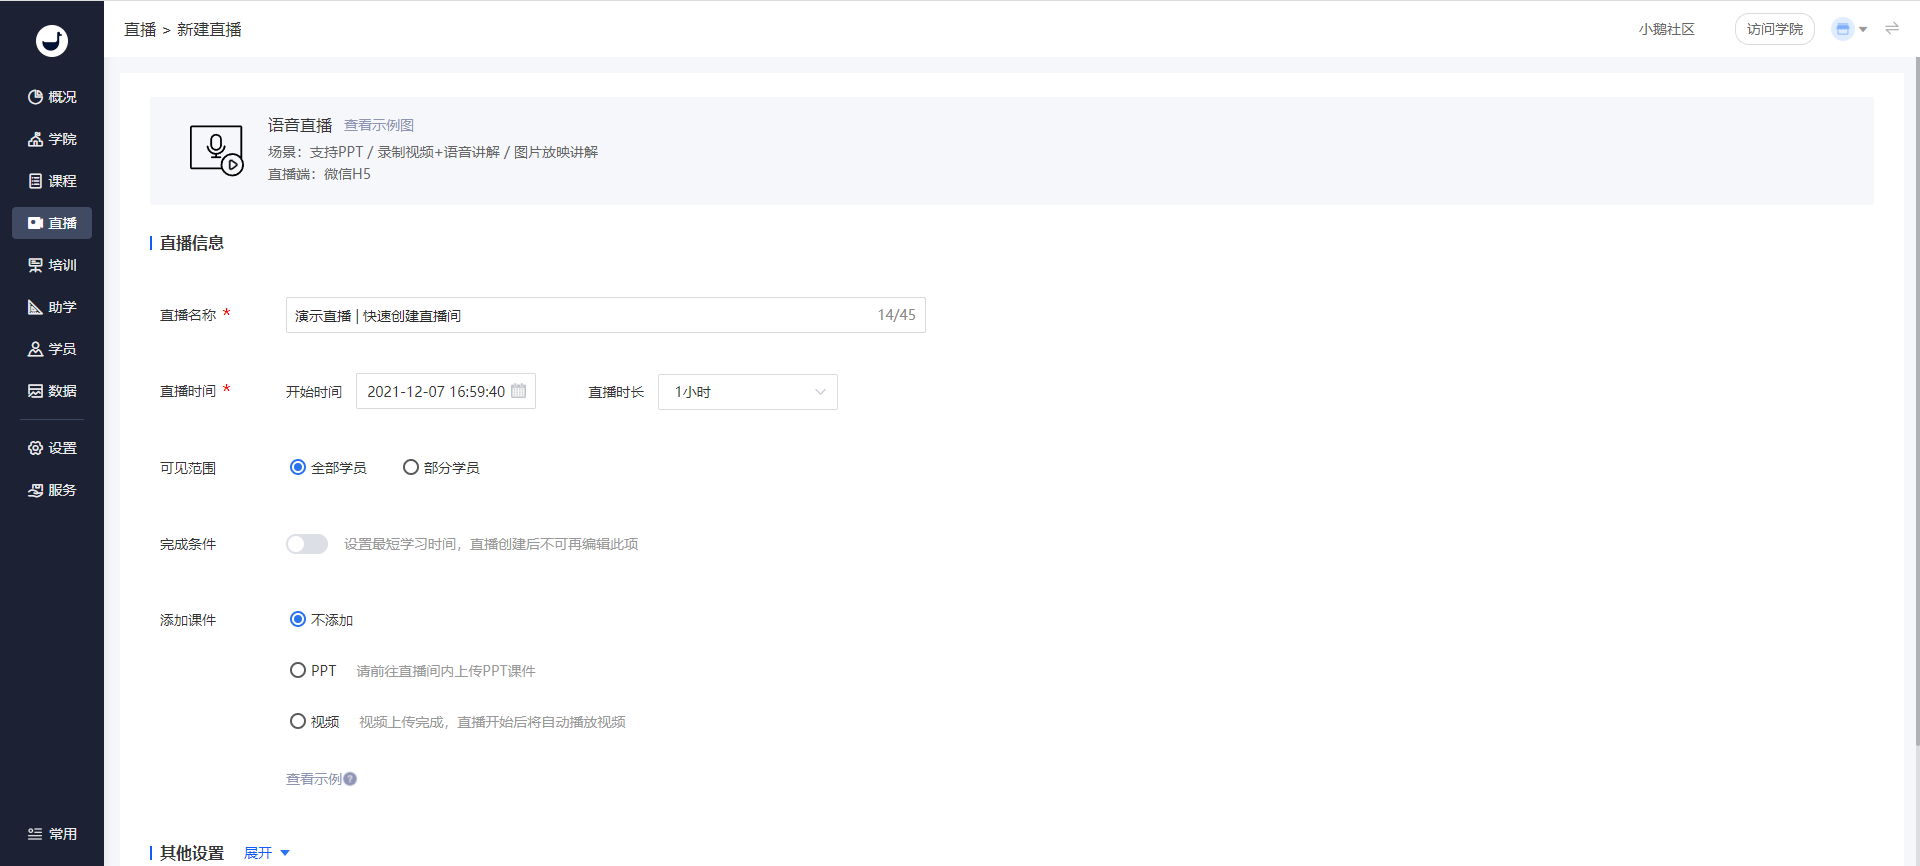
(Live - stream creation page)
3. After creating the live stream, set up the instructor.
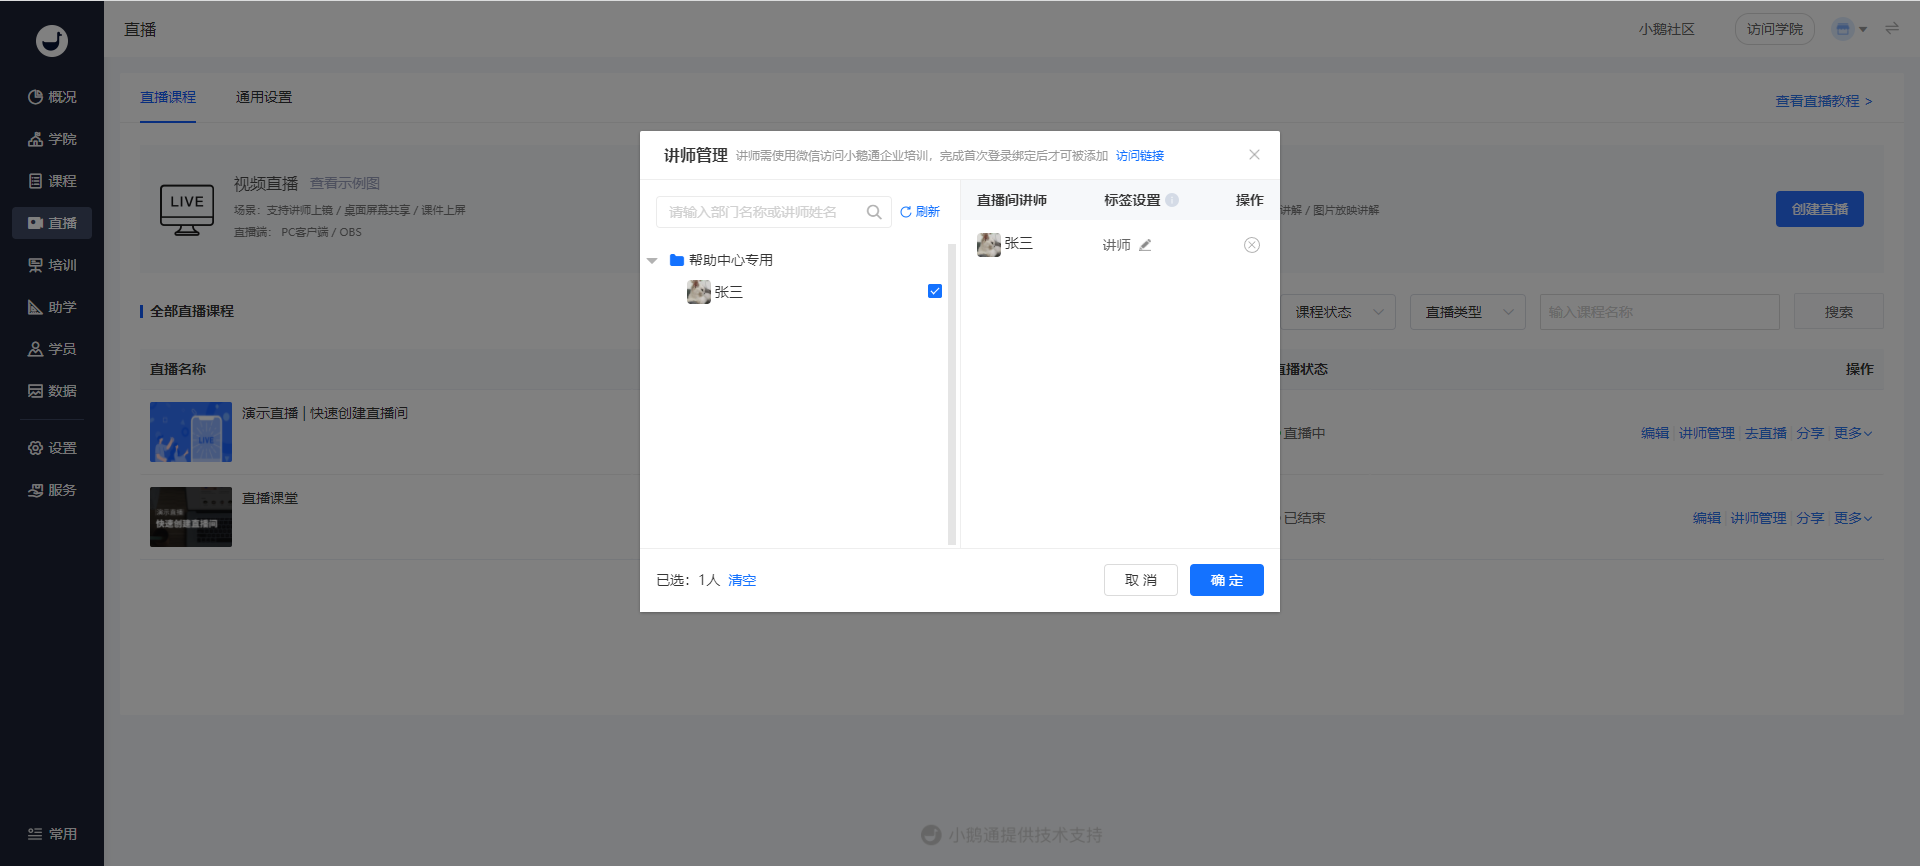
(Instructor management pop - up window)
**Step 2: Select the live - streaming method***(Management background)*
1. After completing the live - stream creation, click the 'Go live' button on the live - stream list page.
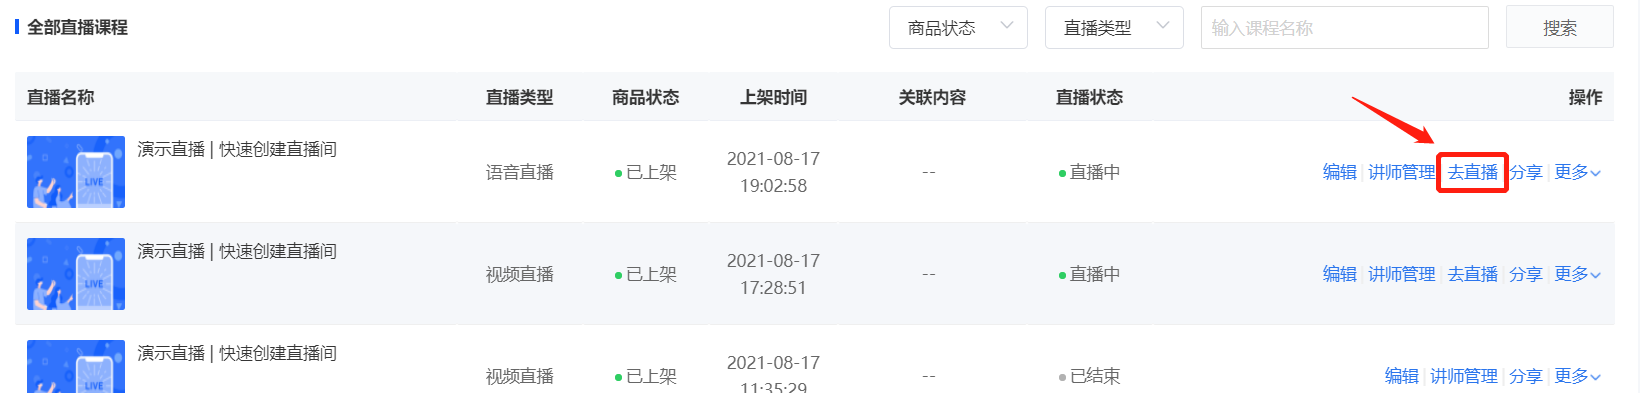
(Live - streaming management - Live - stream list)
2. Select 'Web version' or 'WeChat H5' to start the live stream.
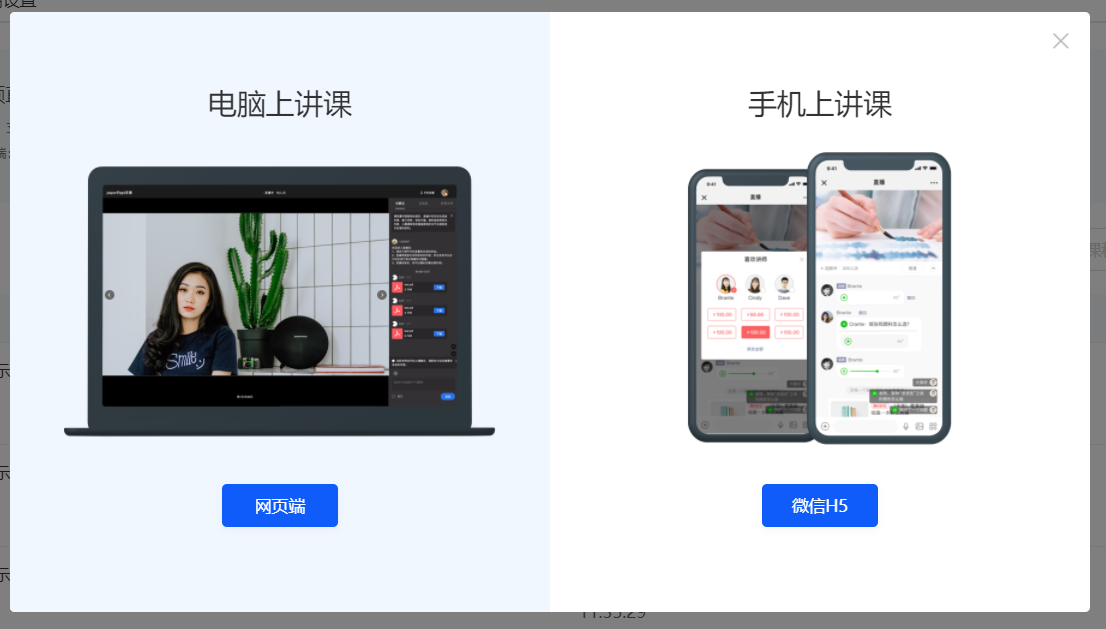
(Live - streaming management - Go live)
**Step 3: Instructor starts the live stream***(Web version or H5)*
● Web - based live streaming
1. Click 'Web version' live streaming to enter the web - based audio live - streaming page.
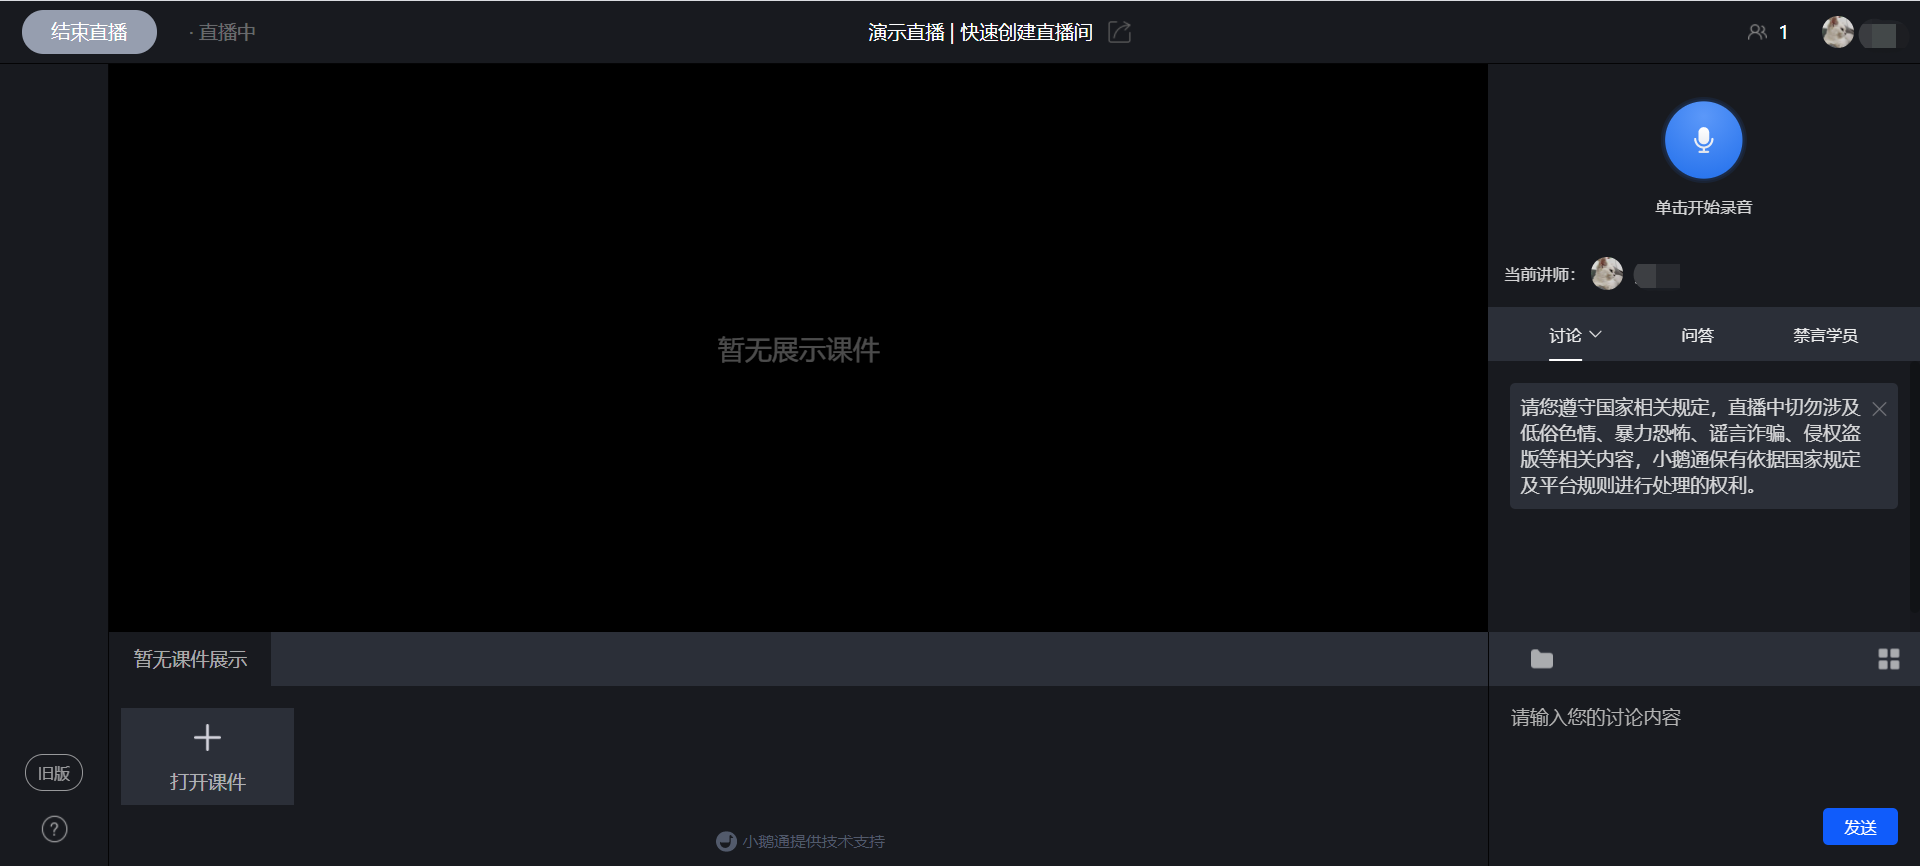
(Audio live streaming - Web version)
2. Send voice
① Click the microphone icon to start voice recording.
② Click again to end voice recording. Click 'Complete' to finish voice recording, or click 'Cancel' to cancel the recording.
③ After voice recording is completed, click the send button to send the voice, or click 'Cancel' to cancel sending.
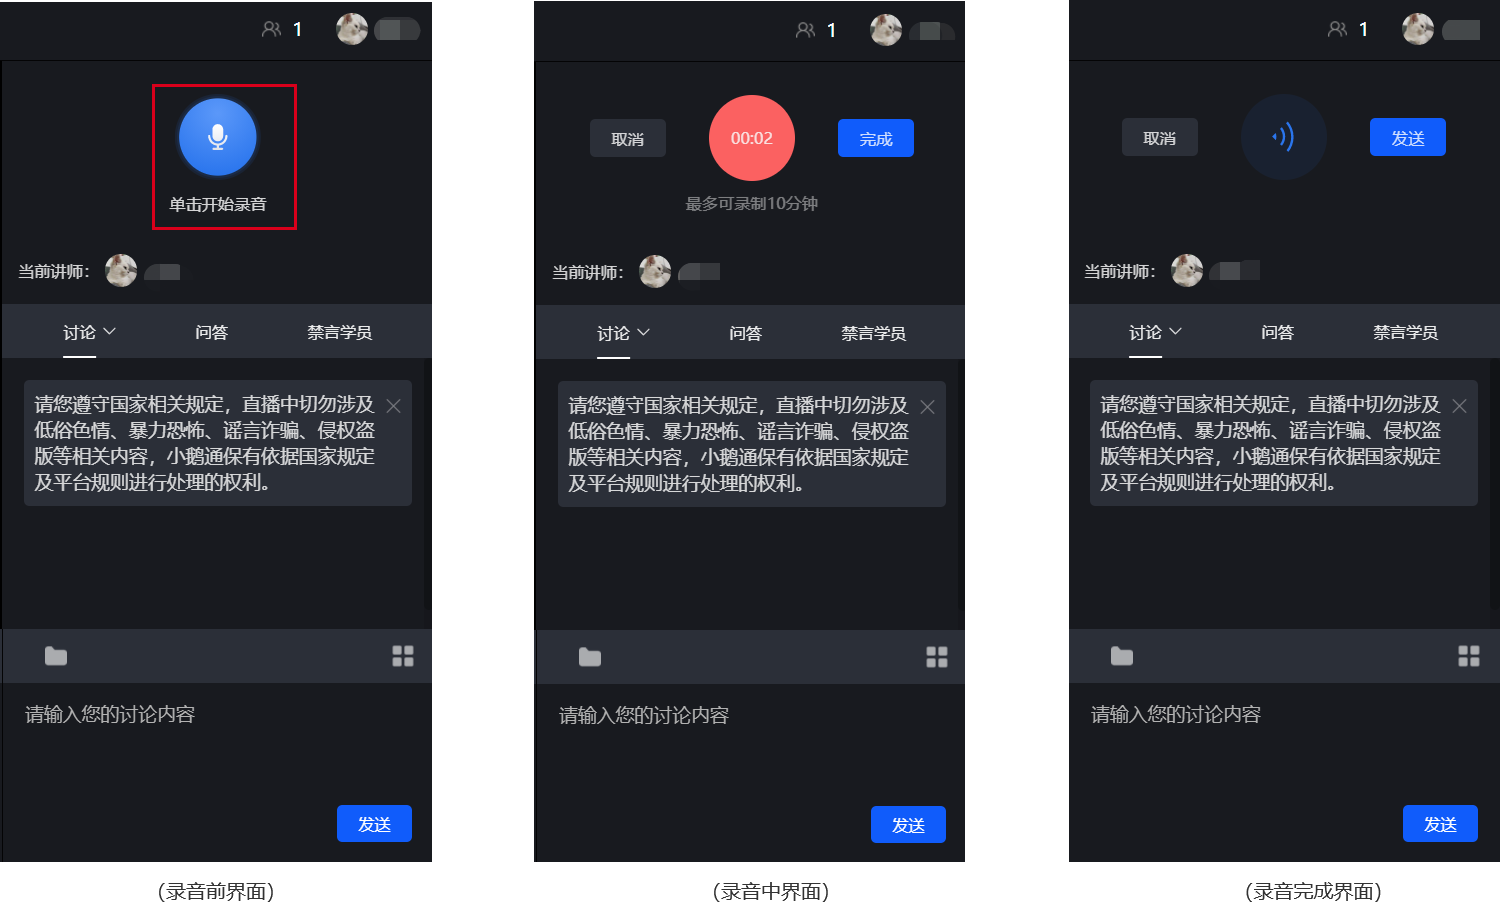
3. Courseware display
① Click 'Open courseware' at the bottom of the live - streaming room to upload images. Single or multiple image uploads are supported.
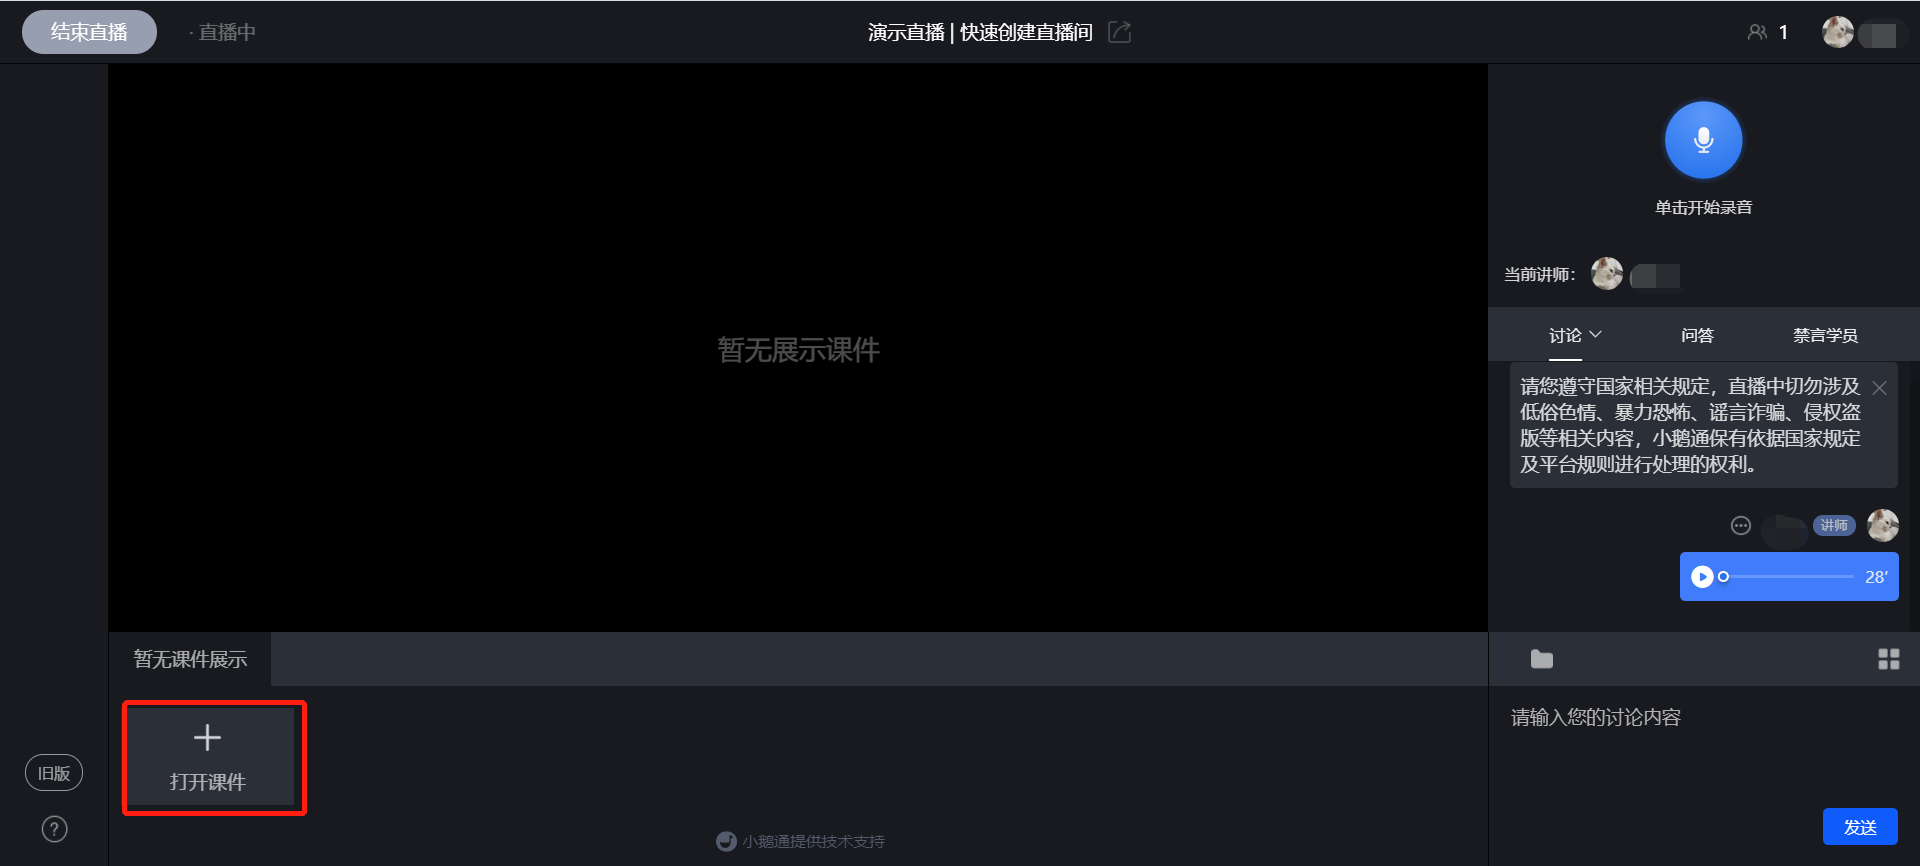
(Web version - Upload courseware)
② After uploading, click the left and right arrows in the courseware display area to turn pages. The student side will synchronize the page - turning.
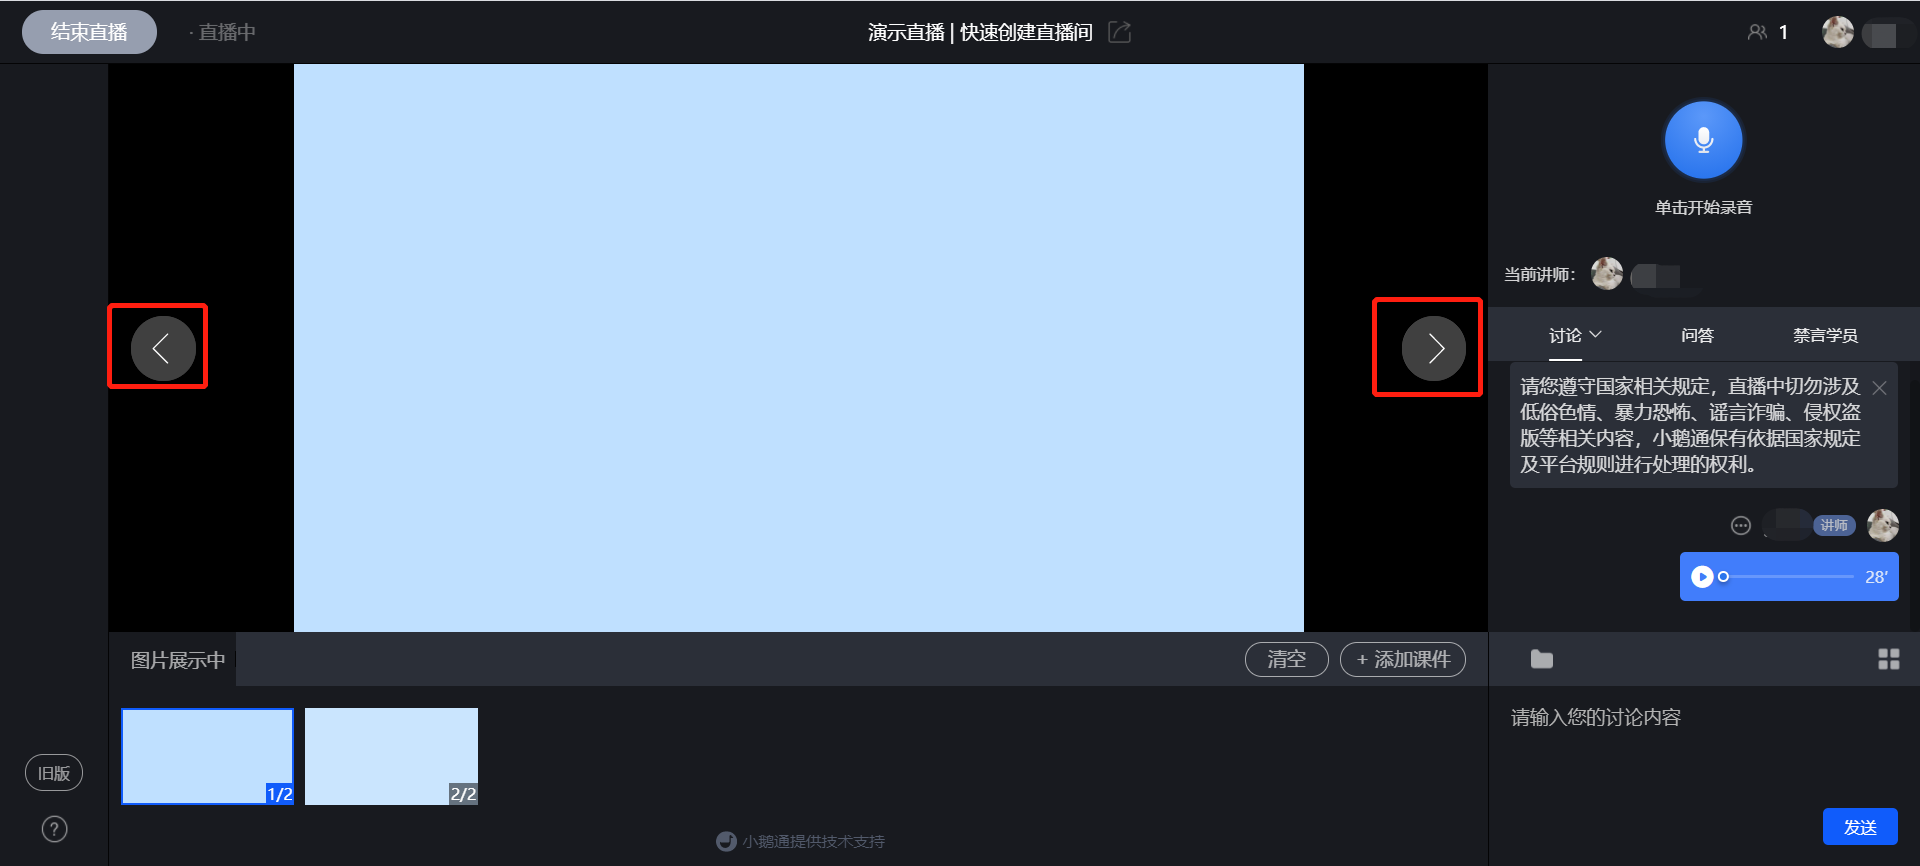
(Web version - Courseware page - turning)
③ Click the 'Folder' button in the lower - right corner to enter the material library, where you can upload and send files in other formats.
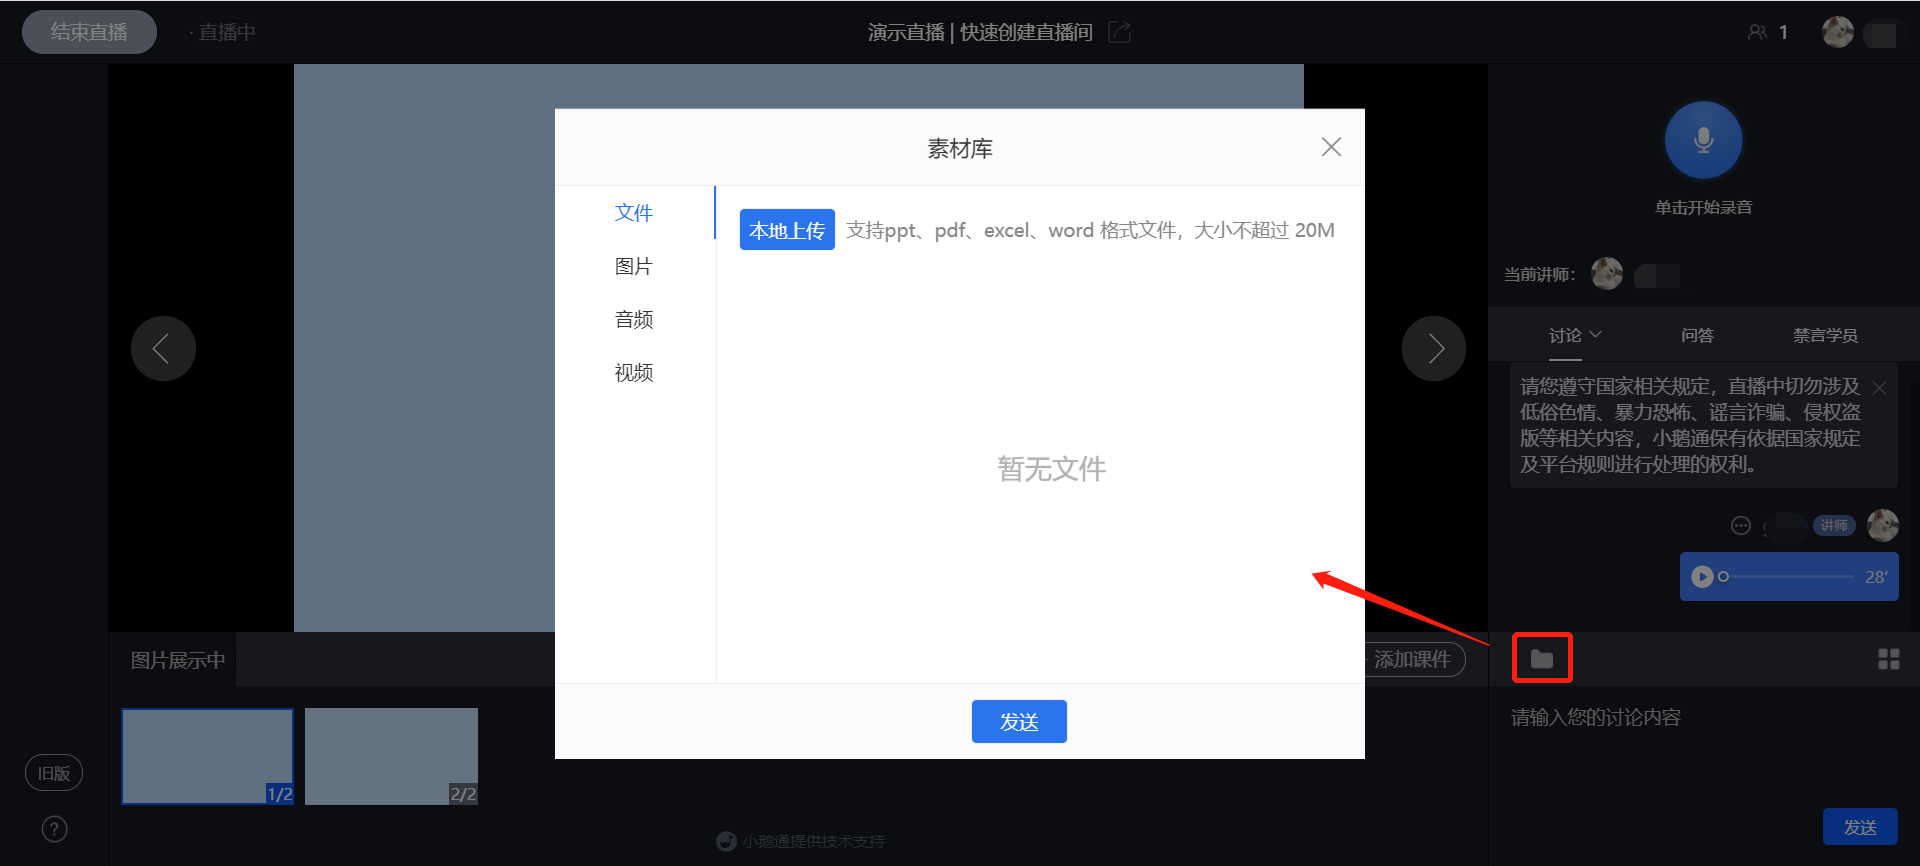
(Web version - Material library)
4. End the live stream
When the instructor needs to end the live stream, click the operation button in the upper - left corner to end the live stream.
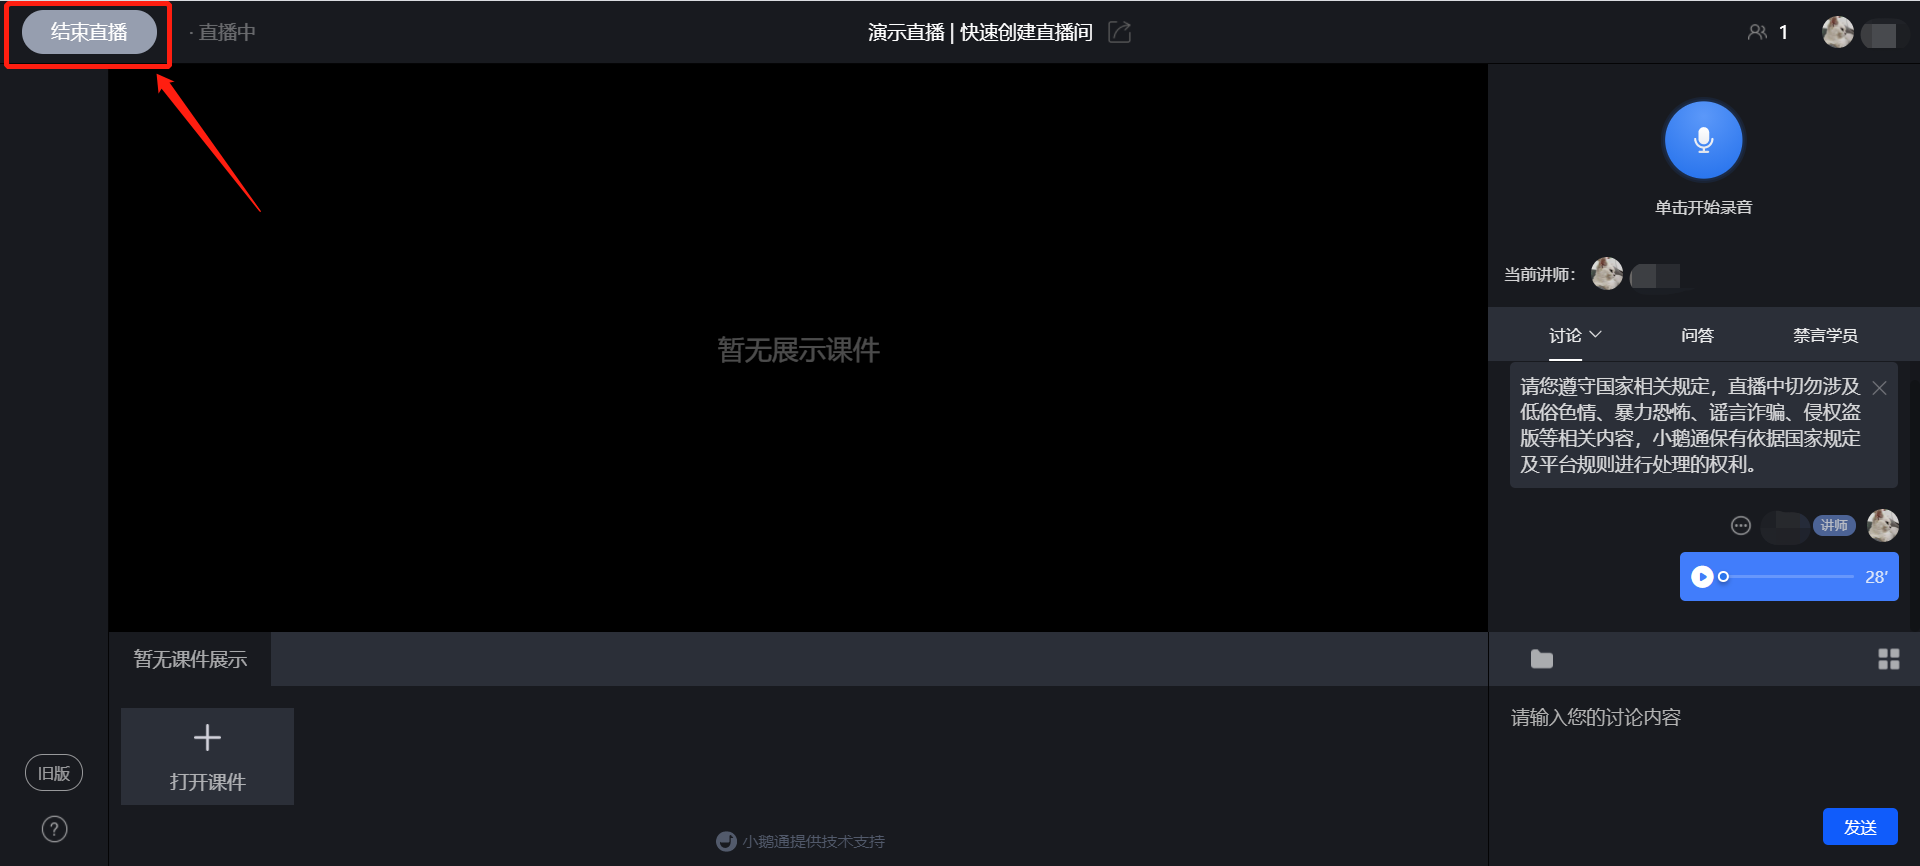
(Web version - End live stream)
● H5 live streaming
1. Click 'WeChat H5' live streaming to enter the H5 audio live - streaming room page.
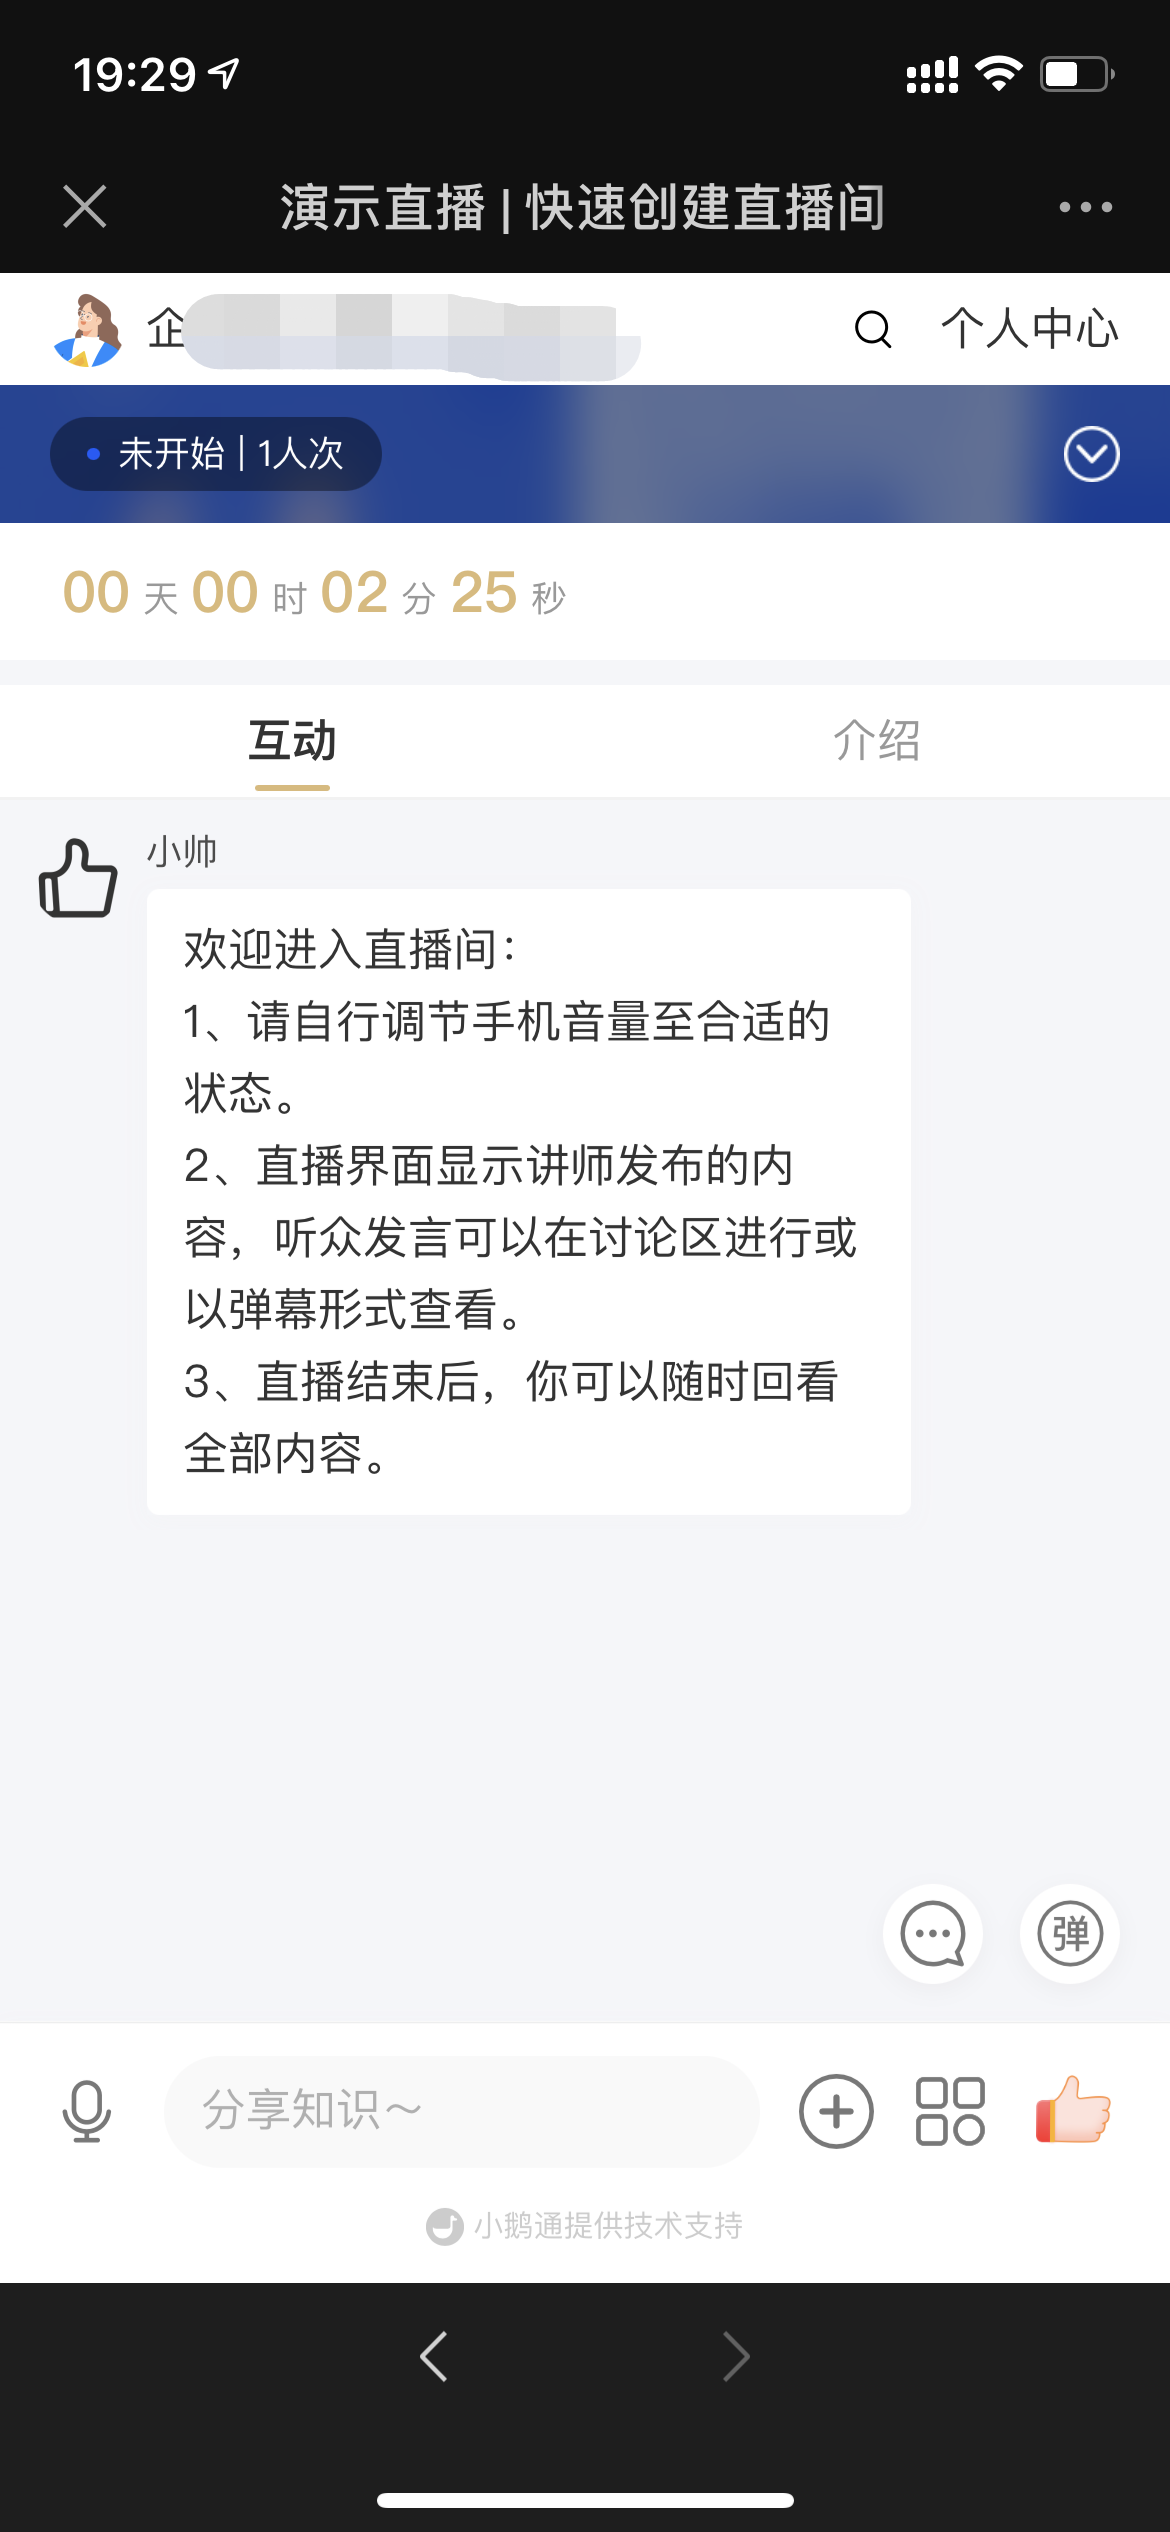
(Audio live streaming - H5 live - streaming room)
2. Send voice
① Click the microphone icon to start voice recording.
② Click again to end voice recording.
③ After voice recording is completed, click the'record again' button to record again, click the 'preview' button to preview the voice, click the'send' button to send the voice, or click the 'close' button to cancel sending.
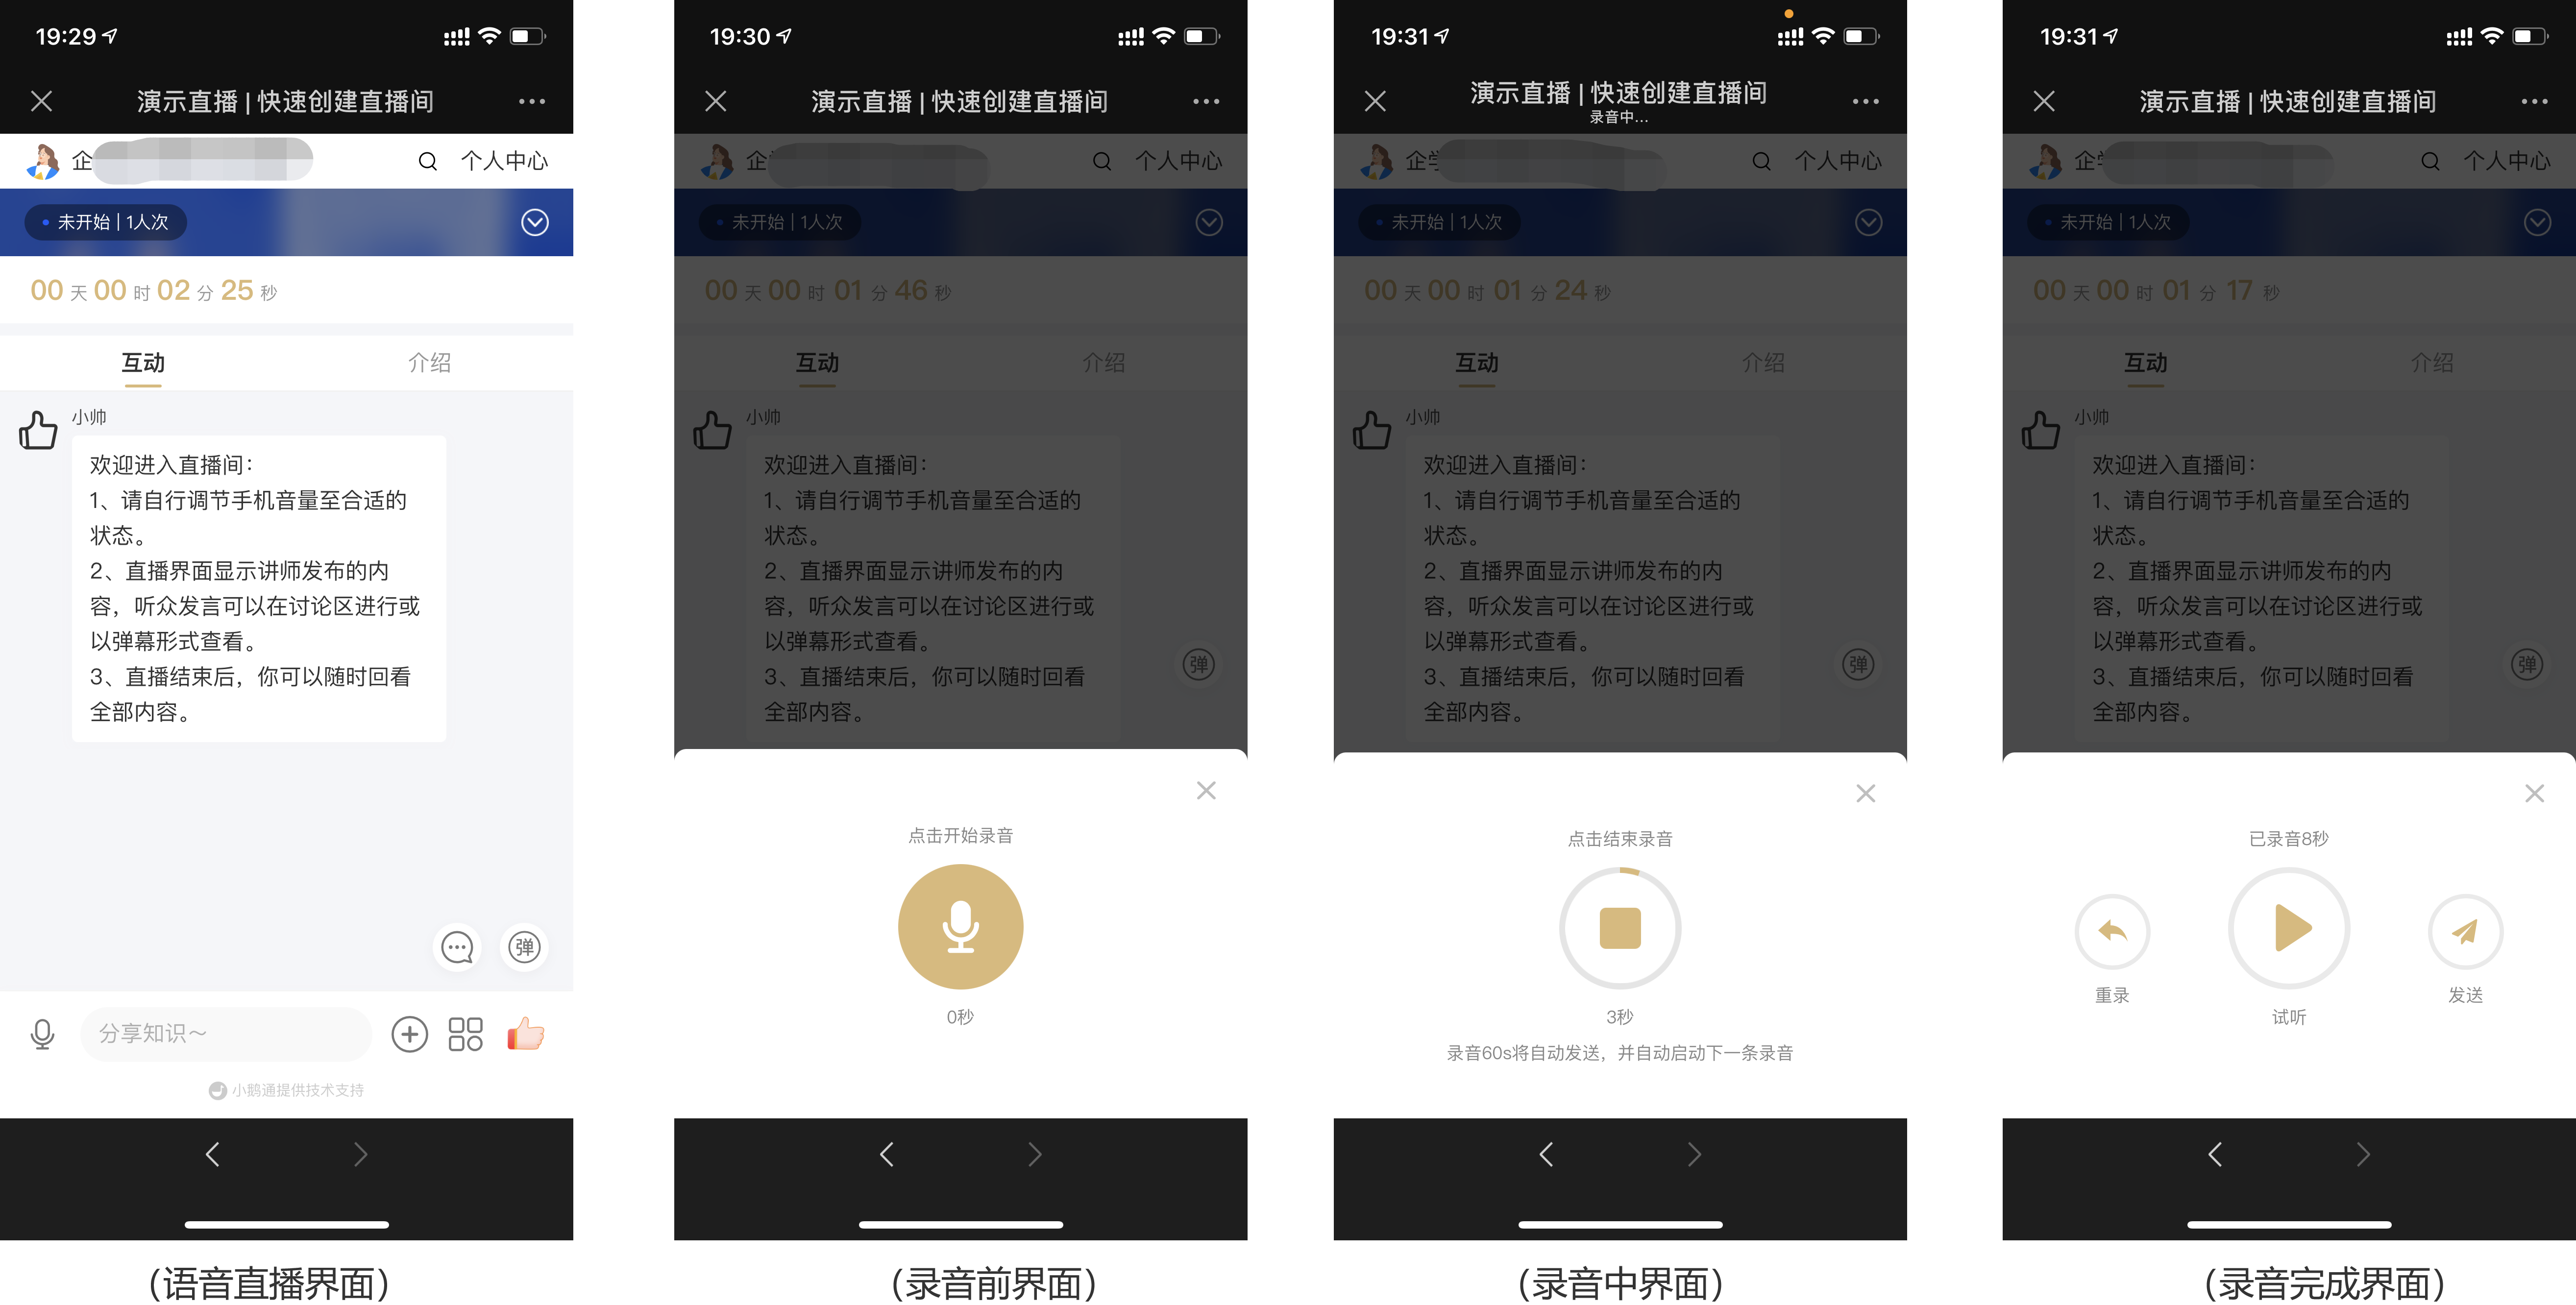
The live - streaming room supports continuous voice recording by the instructor. The instructor doesn't need to manually click to send the recording. The recording will be automatically sent after 60 seconds, and the next recording will start automatically. This allows the instructor to teach at their own pace without being interrupted by the action of sending voice.
3. Courseware display
① Click the '+' in the lower - right corner of the live - streaming room, then click 'Image', 'Image library', or 'PPT library' to select and upload images. Single or multiple image uploads are supported.
② After uploading, the corresponding courseware will be displayed at the top of the live - streaming room. Slide to turn pages.
③ Click the 'File library' or 'Audio - video library' to upload content in other formats (uploading needs to be completed using an Android phone or a PC browser).
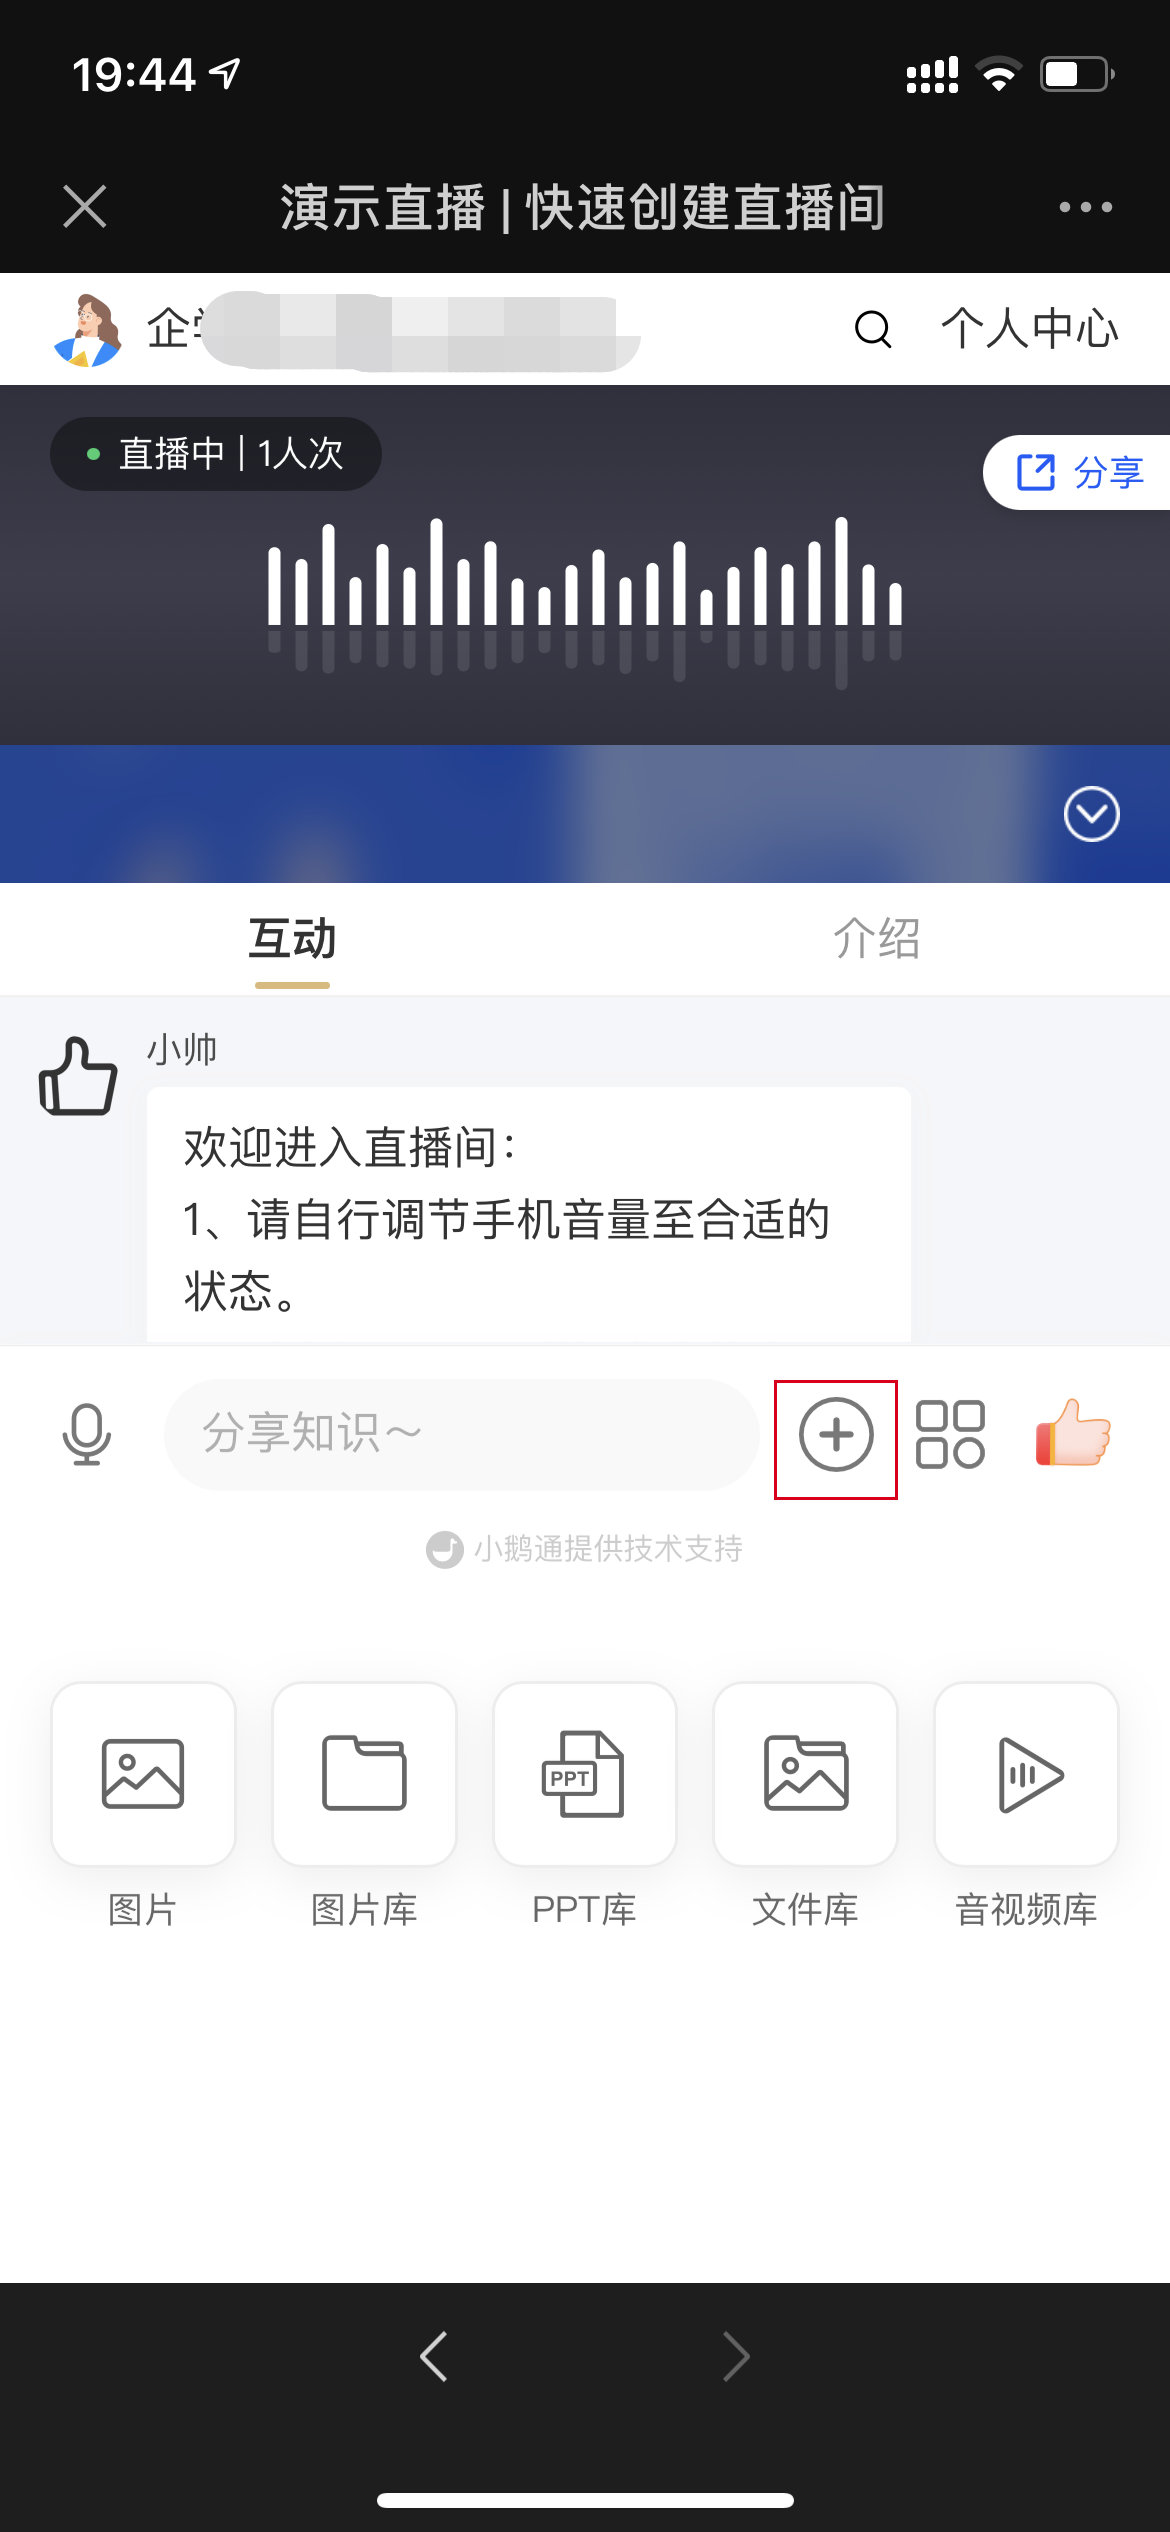
(H5 live - streaming room - Upload courseware)
4. End the live stream
When the instructor needs to end the live stream, click the'more' button in the lower - right corner and click 'End live stream' in the pop - up dropdown box to end the live stream.
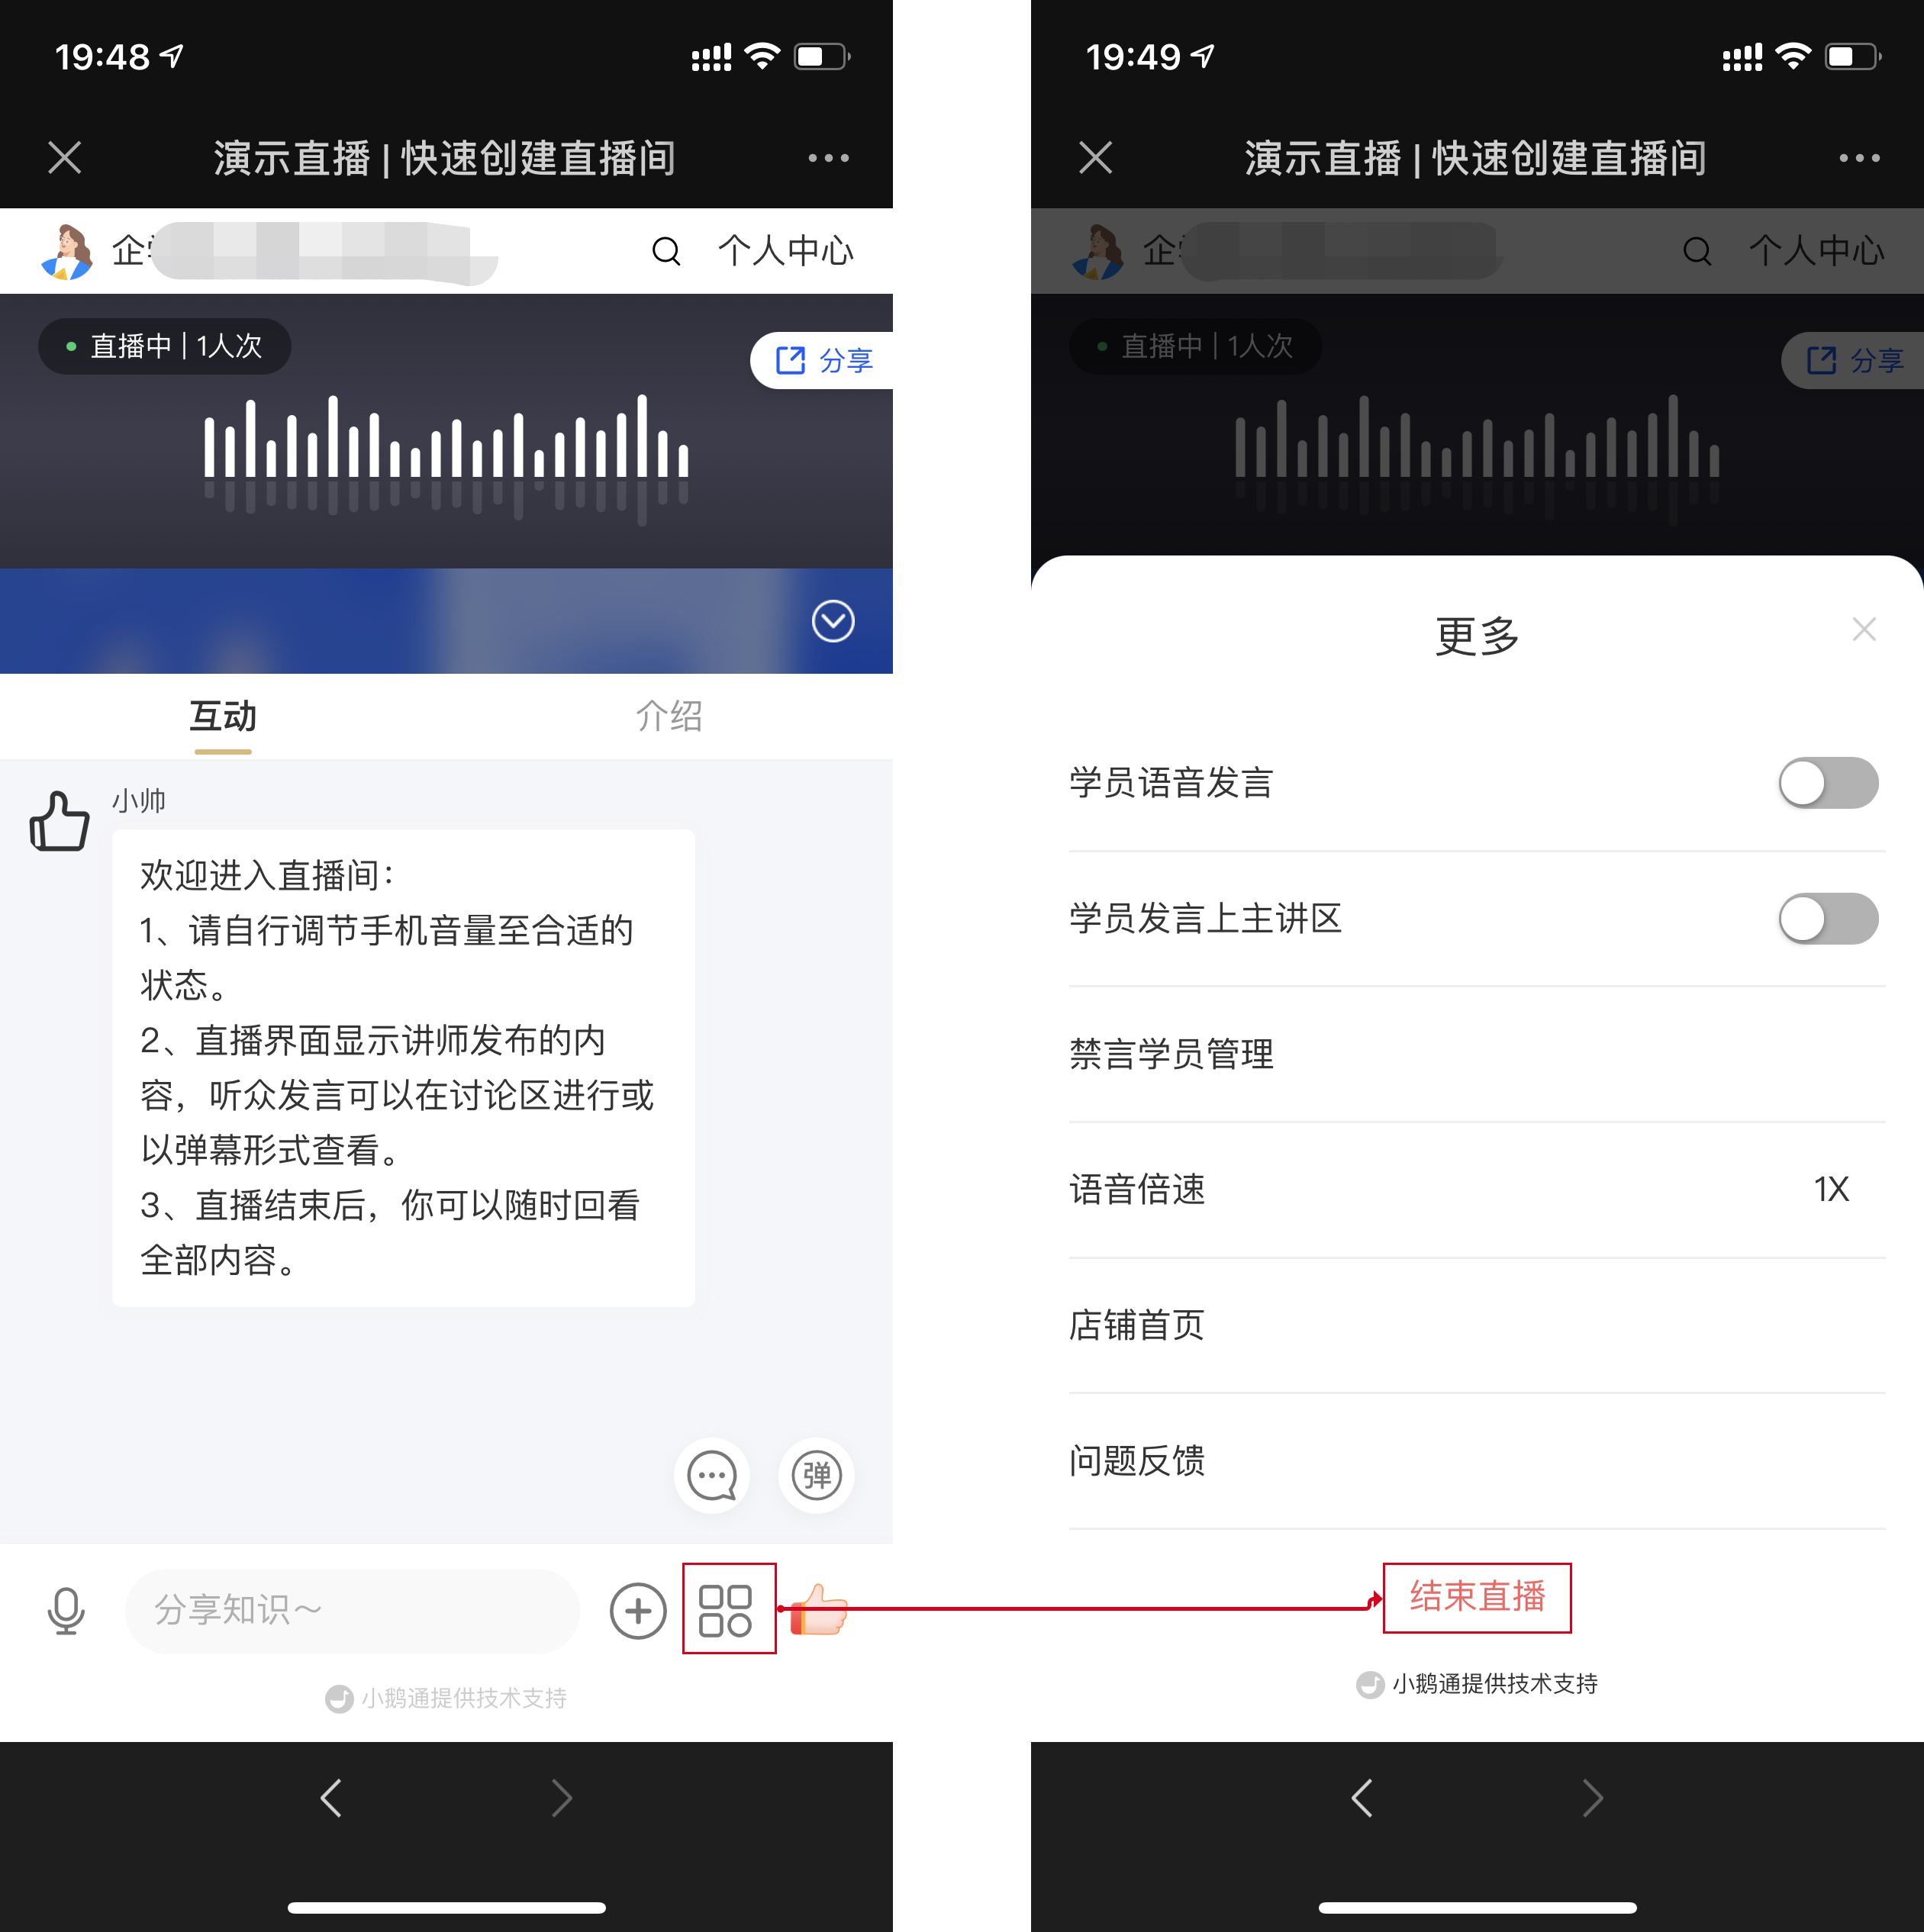
(Audio live streaming - H5 live - streaming room)
**Step 4: Watch the live stream***(PC web or H5)*
1. Students can enter the live - streaming room by scanning the QR code or opening the link.
2. After entering the live - streaming room, students can interact with the instructor by sending text content, asking questions, etc.
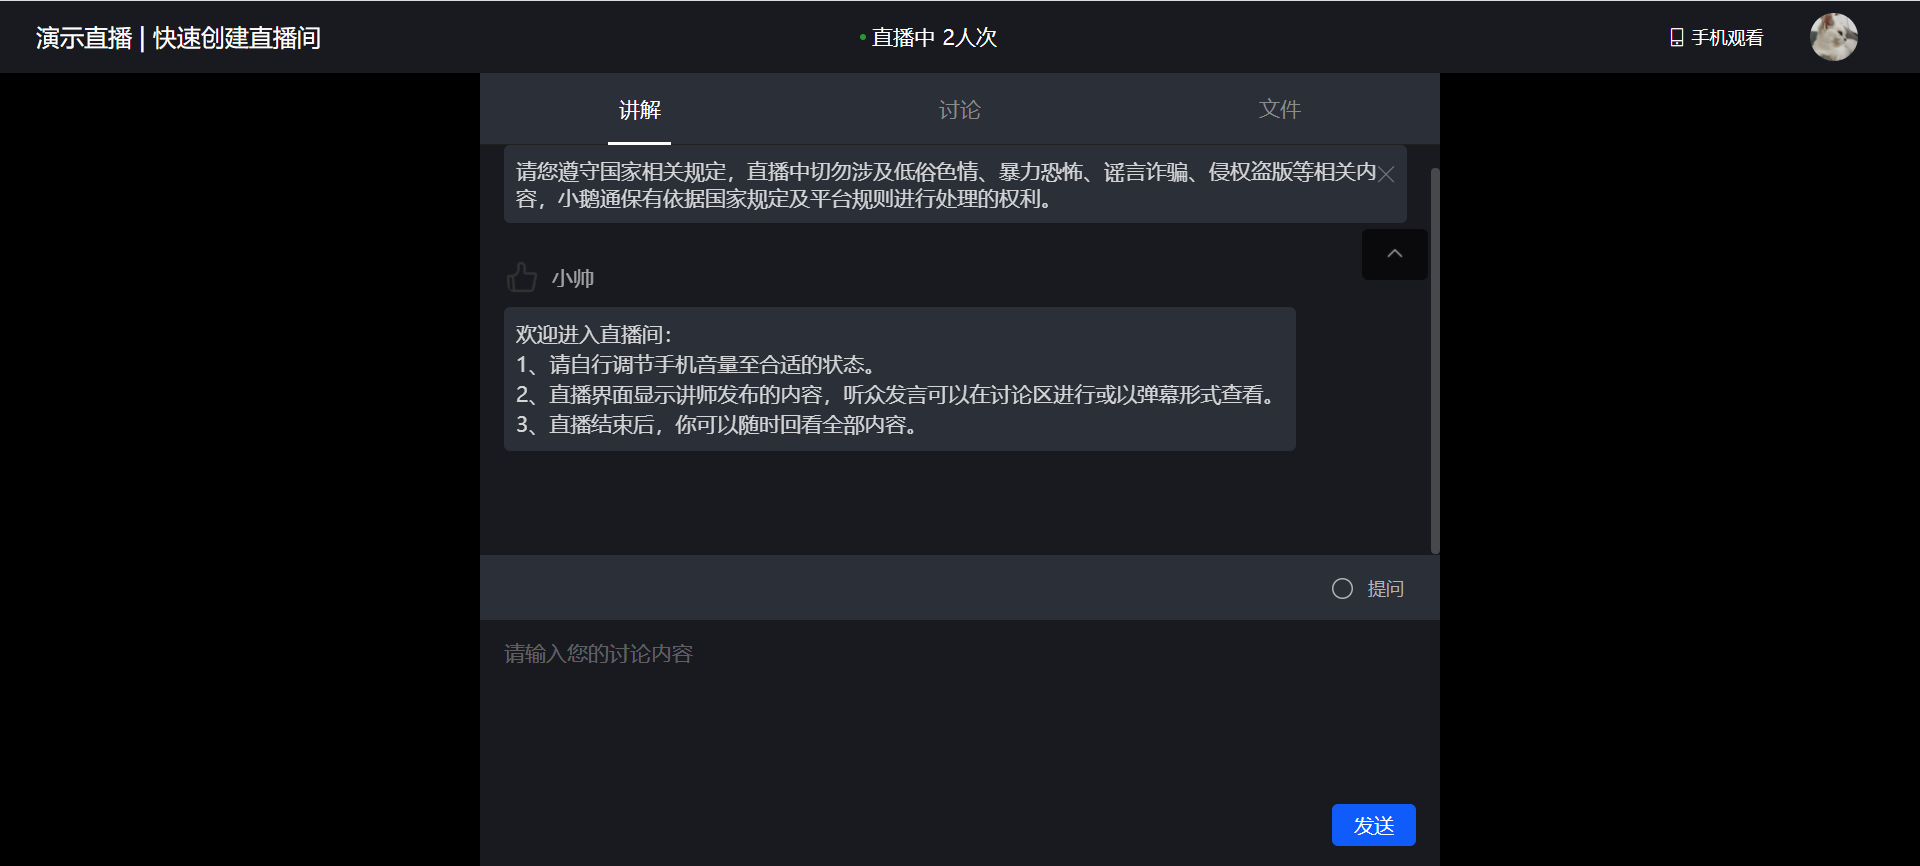
(Student side - PC web)
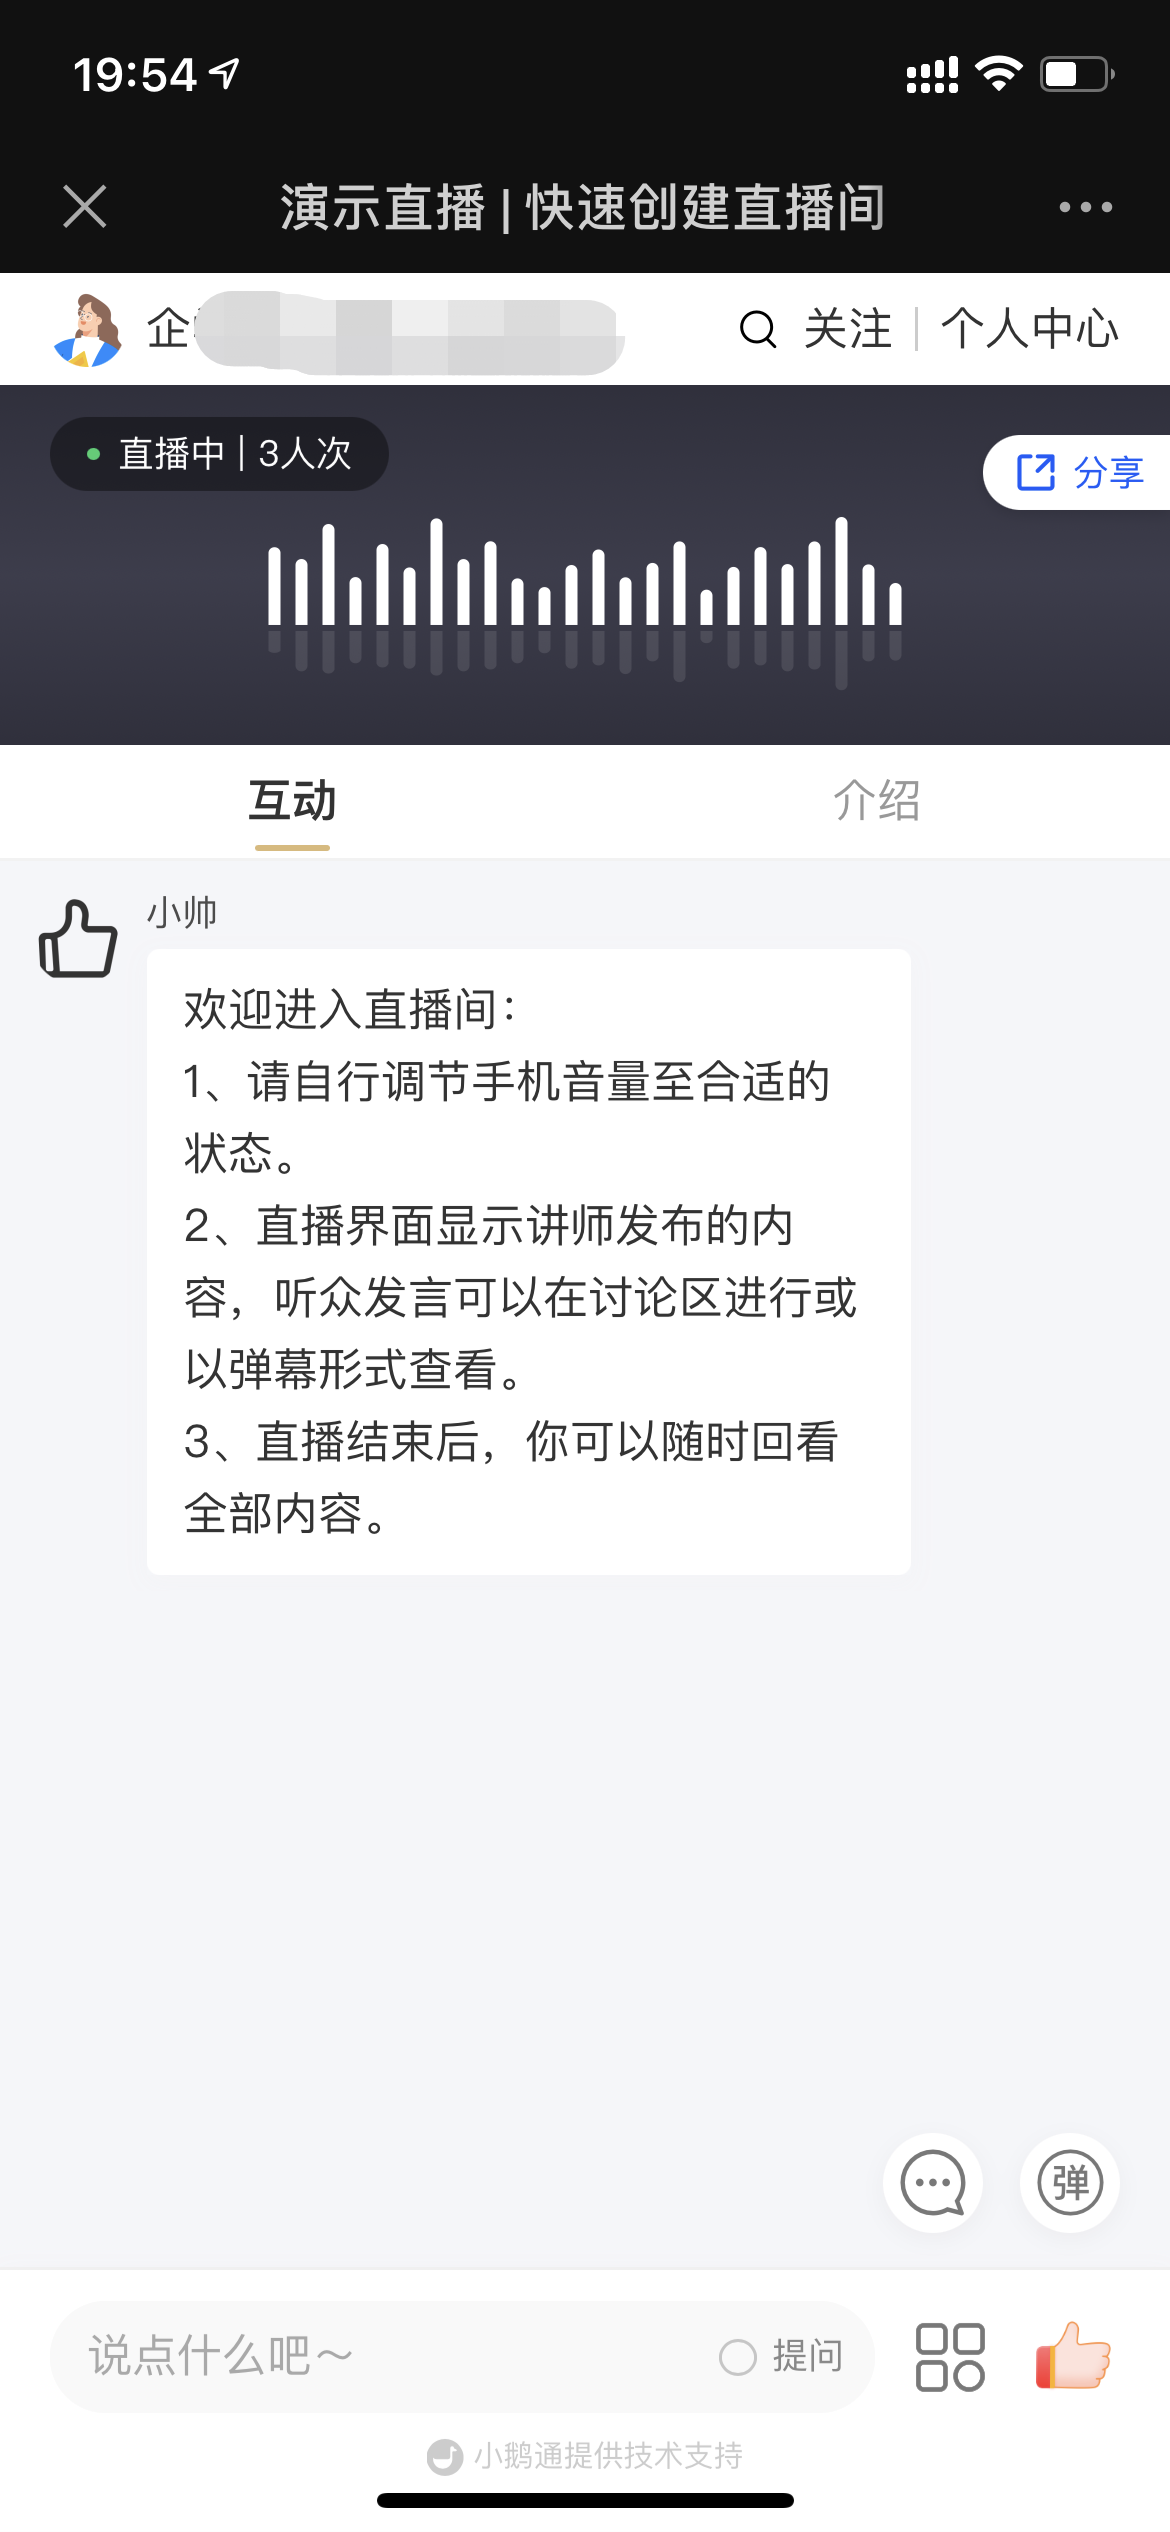
(Student side - H5)