# Tutorial on Using Event Management
[中文](/books/8e6b4/page/d6baf)
**I. Feature Introduction**
You can use the event management feature to organize offline events and complete the processes of online event information publishing, user registration, collection of registered user information, management of registration status, on-site check-in, etc. in one stop.
**II. Purpose of Use**
It can be used to organize and manage offline events, inform users of event details, manage registration status, and handle on-site check-in, etc.
**III. Use Scenarios**
A company invites external guests to give sharing sessions to employees every week. The administrator uses the event management feature to publish the event information for each sharing session, and employees register online. At the sharing event site, employees complete the check-in to indicate their attendance.
**IV. Operation Path**
Merchant side: Desktop management console → Courses→ Interactive Management → Event Management
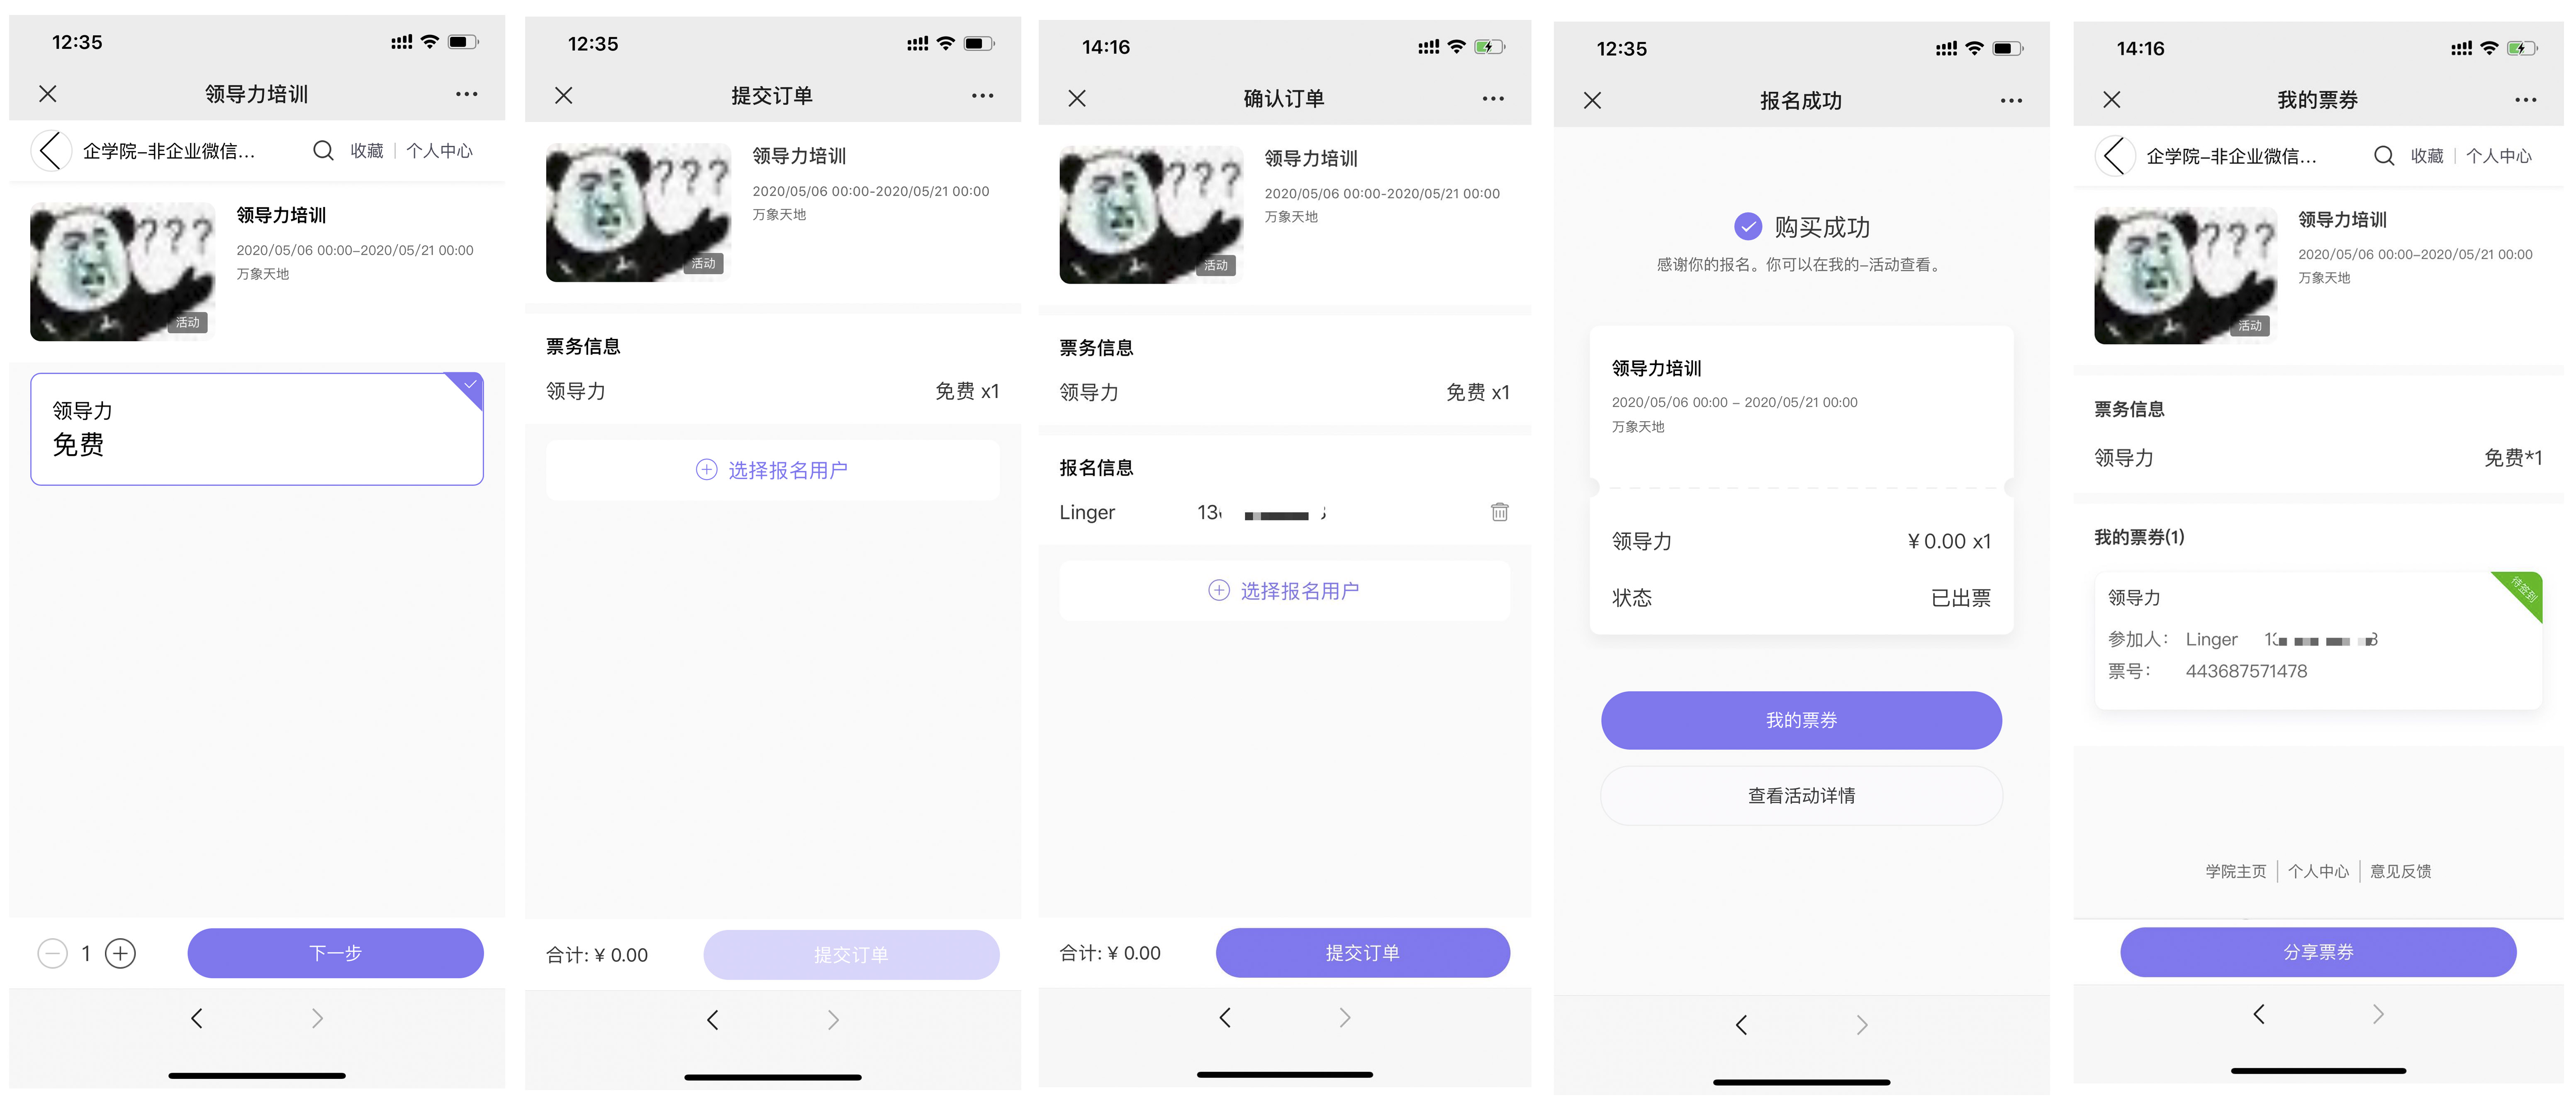
Student side: WeChat H5 store → My → Events → Registration
**V. Usage Tutorial**
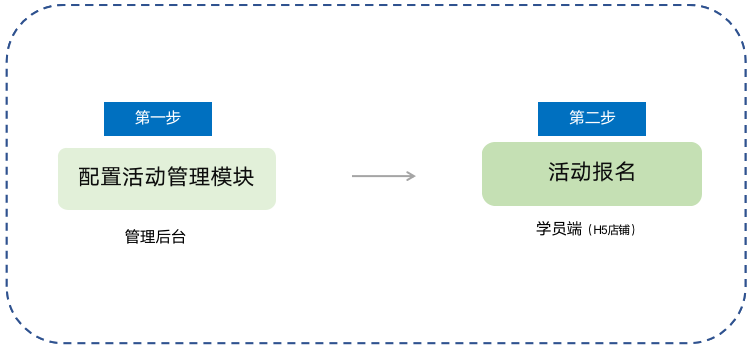
**Step 1: Configure the event management module - Backend**
1. \[Courses\] - \[Interactive Management\] - \[Event Management\] - \[Publish Event\]:
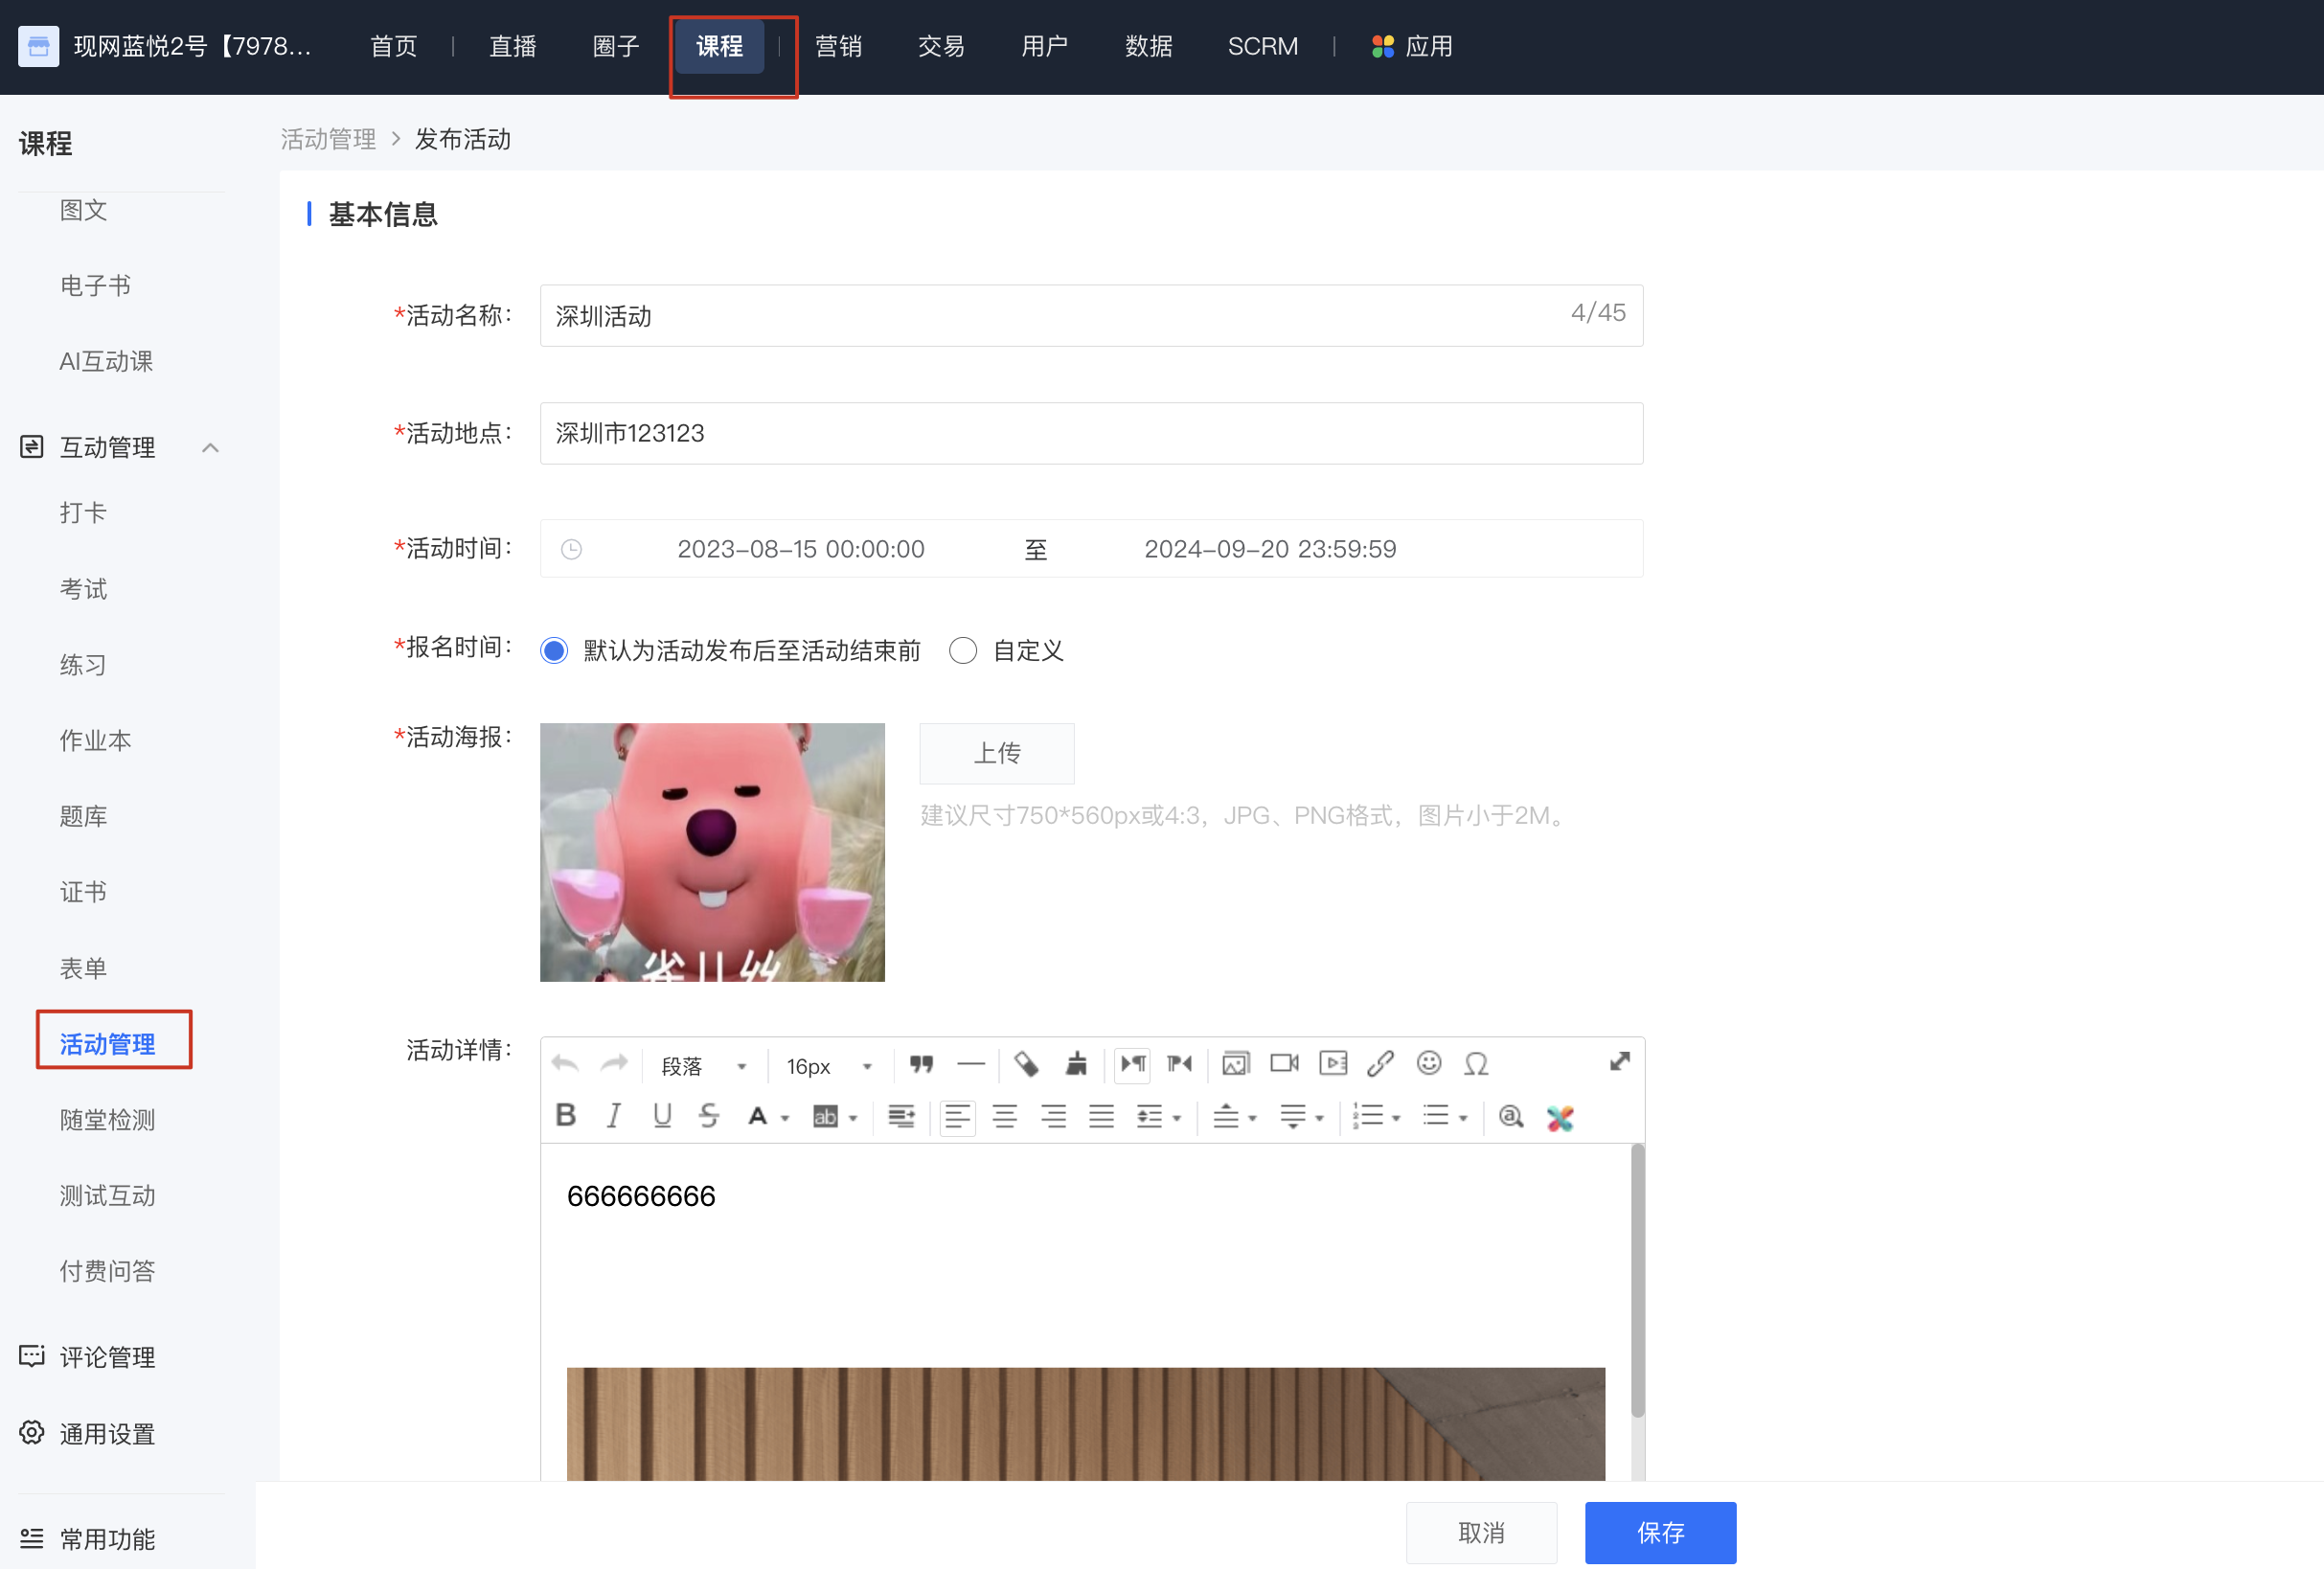
2. Fill in basic information: Fill in the event name, location, event time, registration time, event details, and upload the event poster.
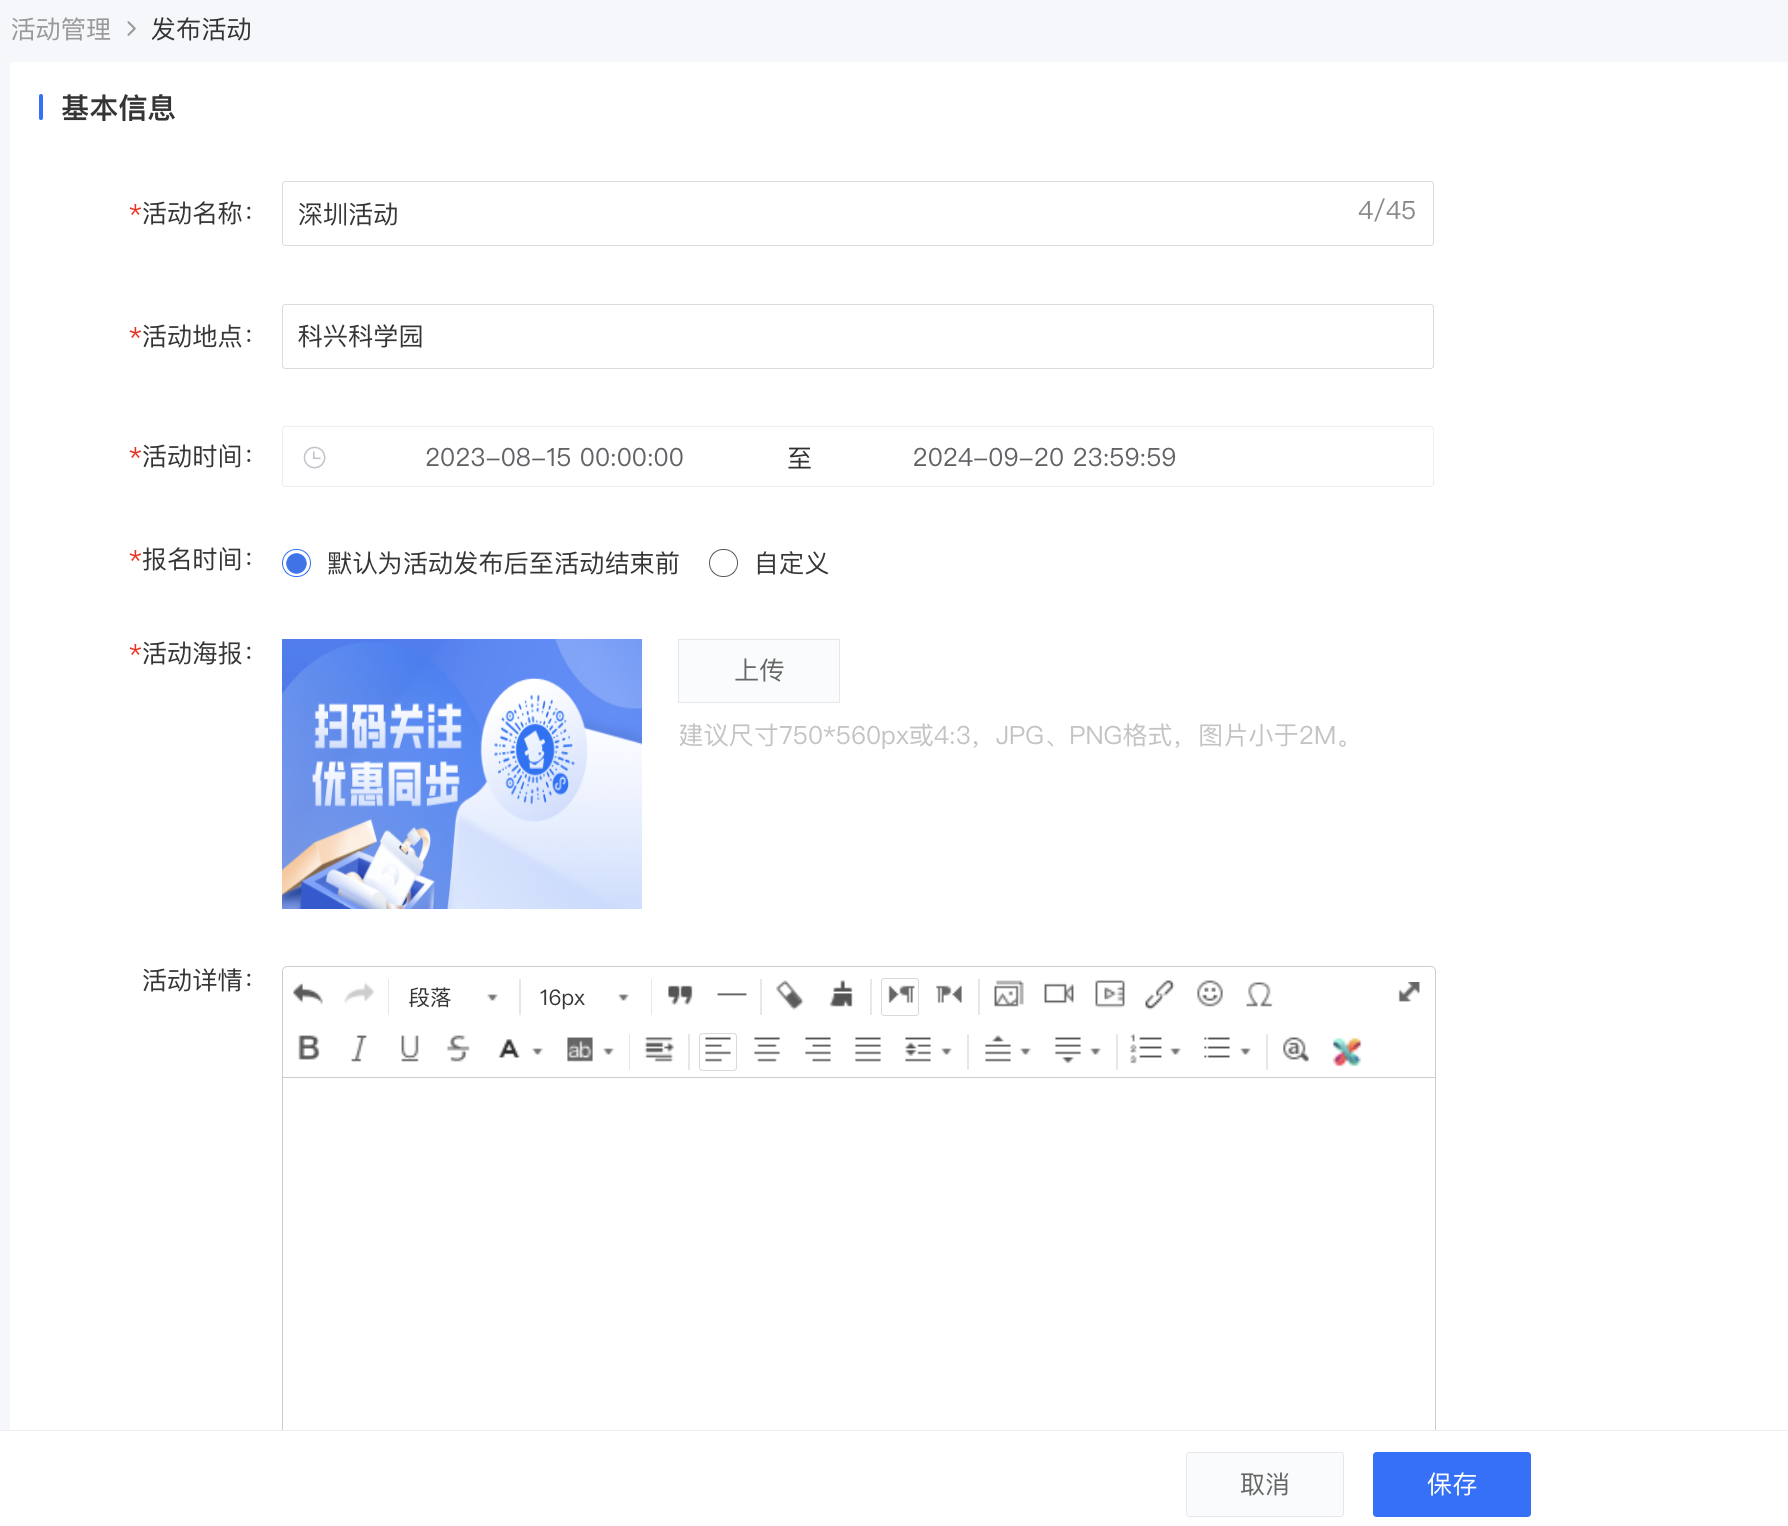
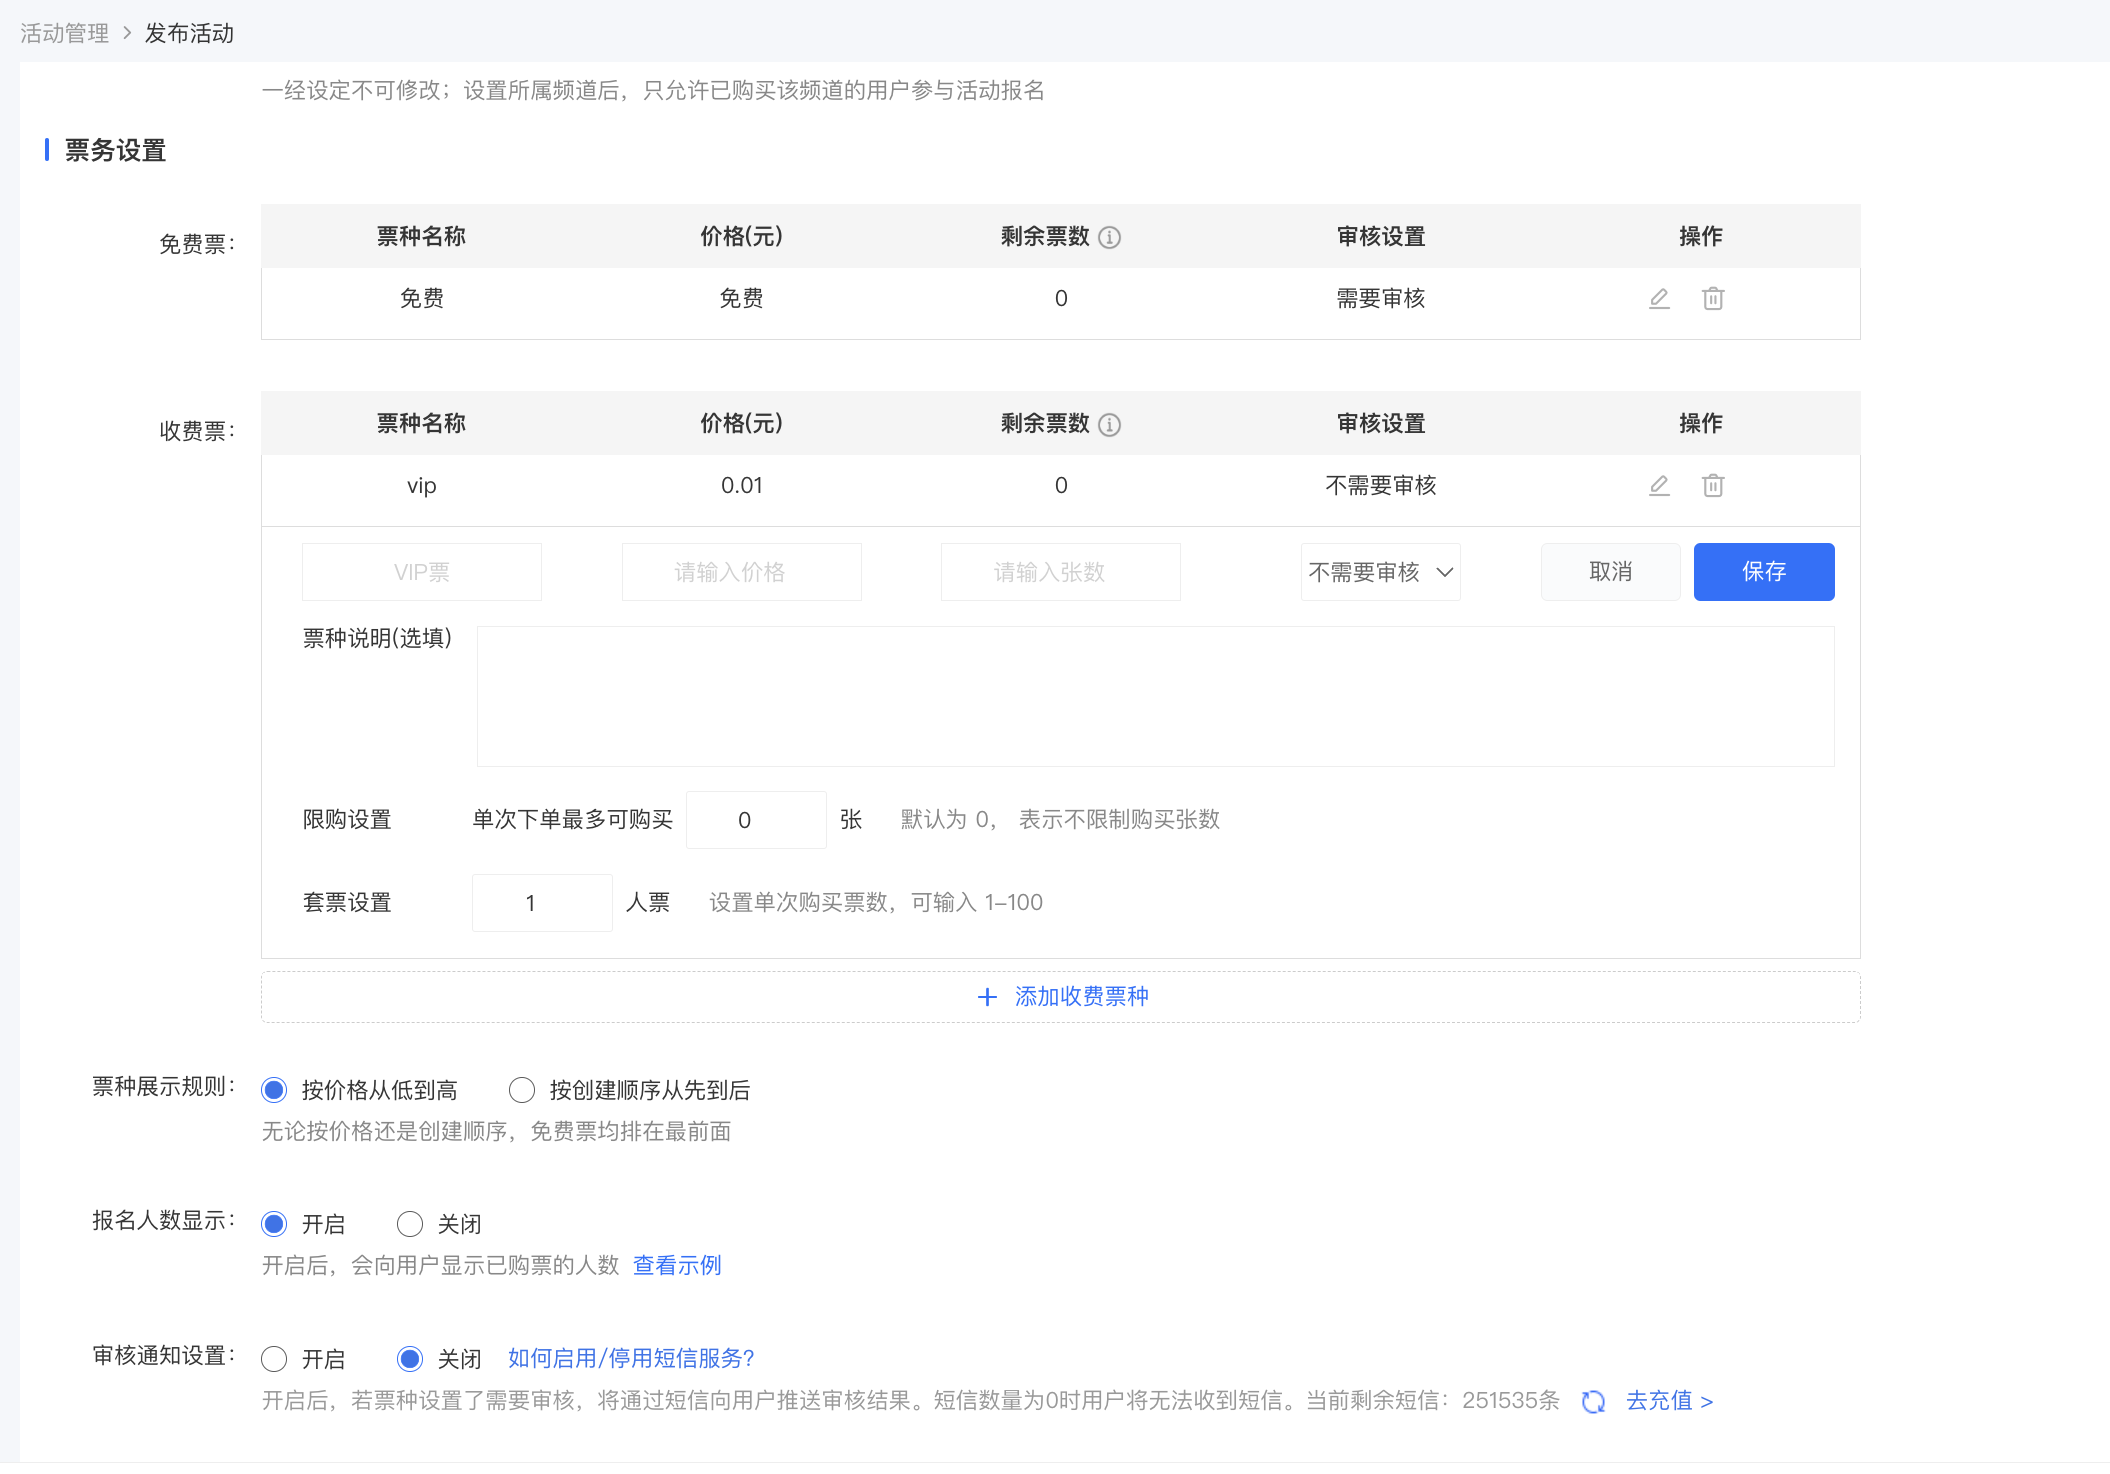
3. Ticket settings: Add event ticket types, set the number of tickets, review settings, and purchase limit settings. You can fill in the ticket type description. You can choose whether to display the number of registered users on the event registration page.
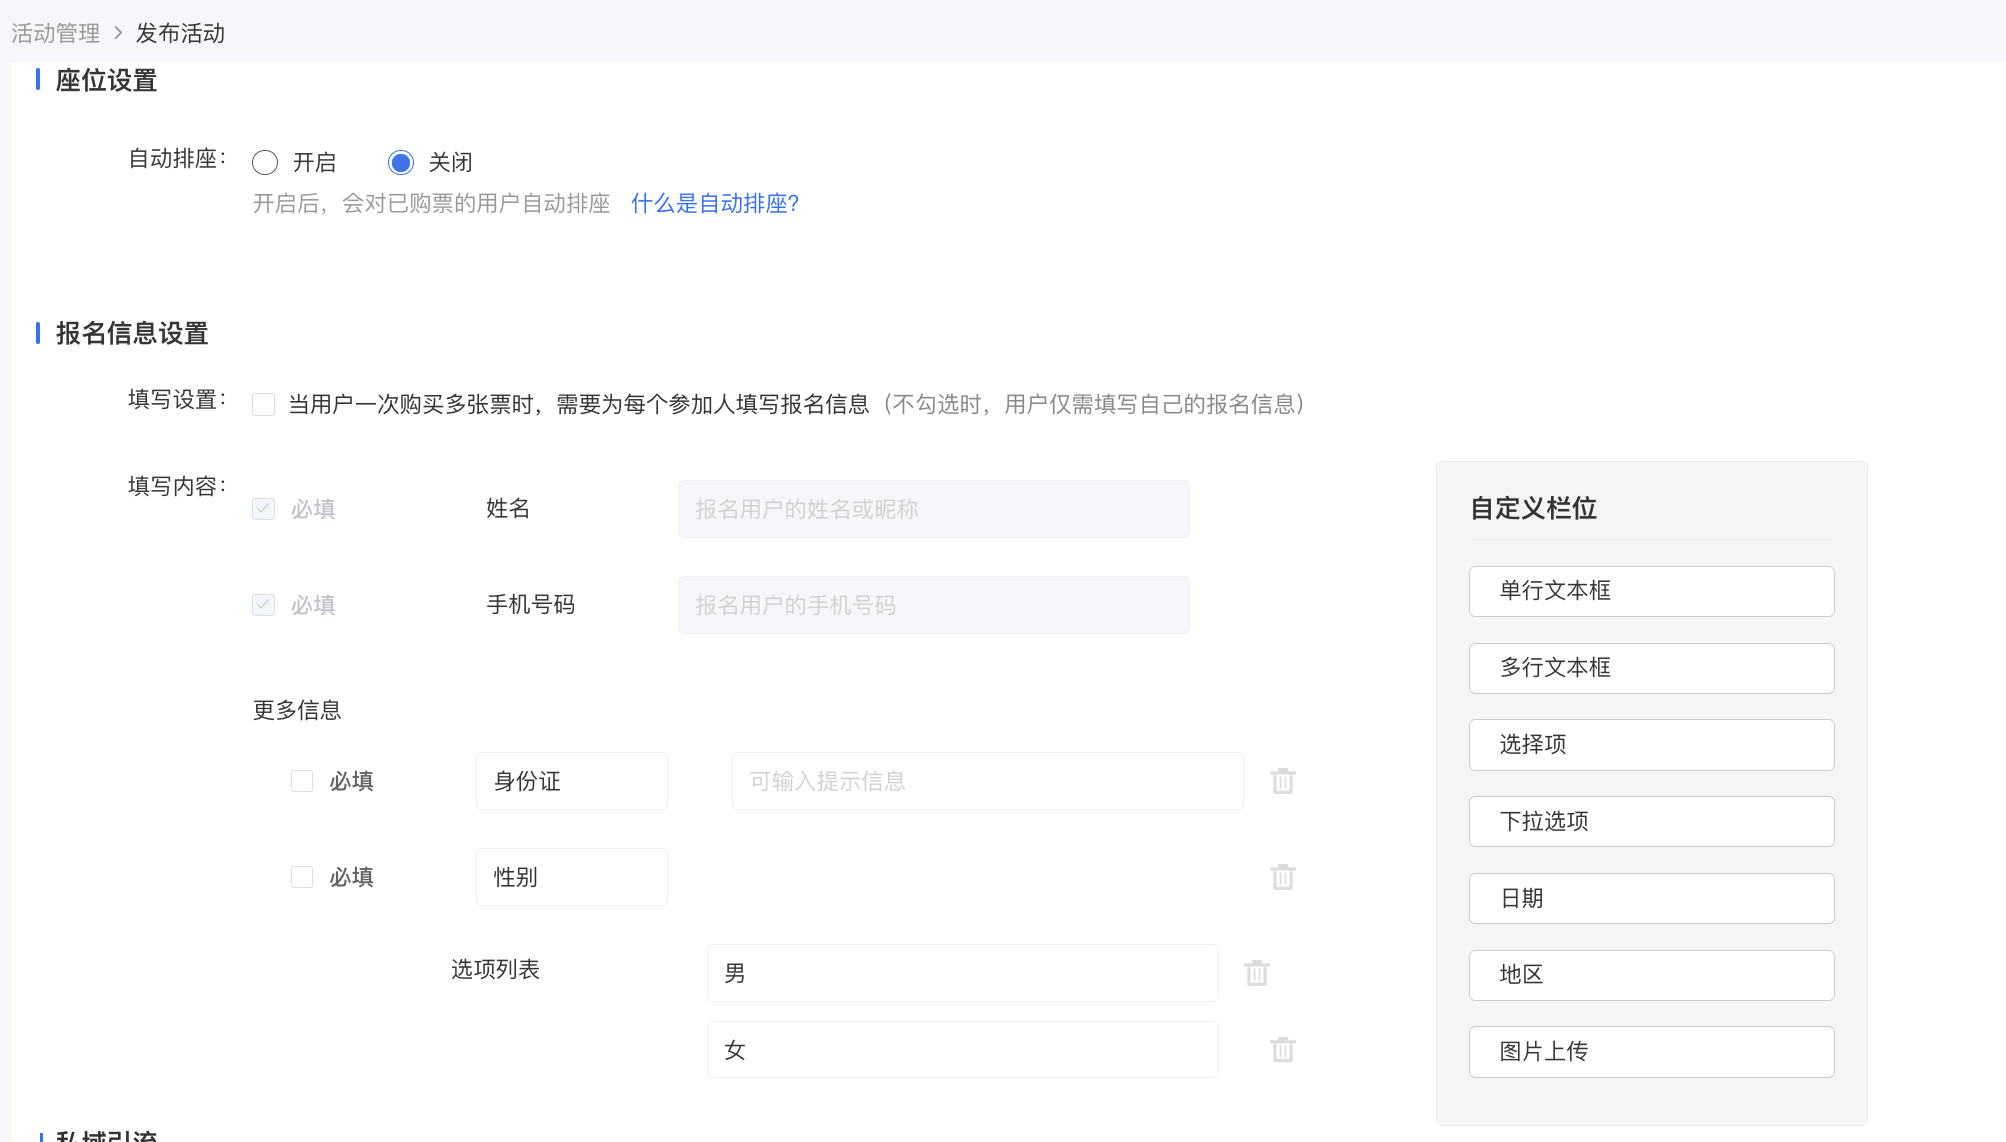
4. Form settings: You can enable the registration form to collect information from registered users. The registration form collects the name and mobile phone number by default. You can use components to customize other information to be collected.
5. Registration and review
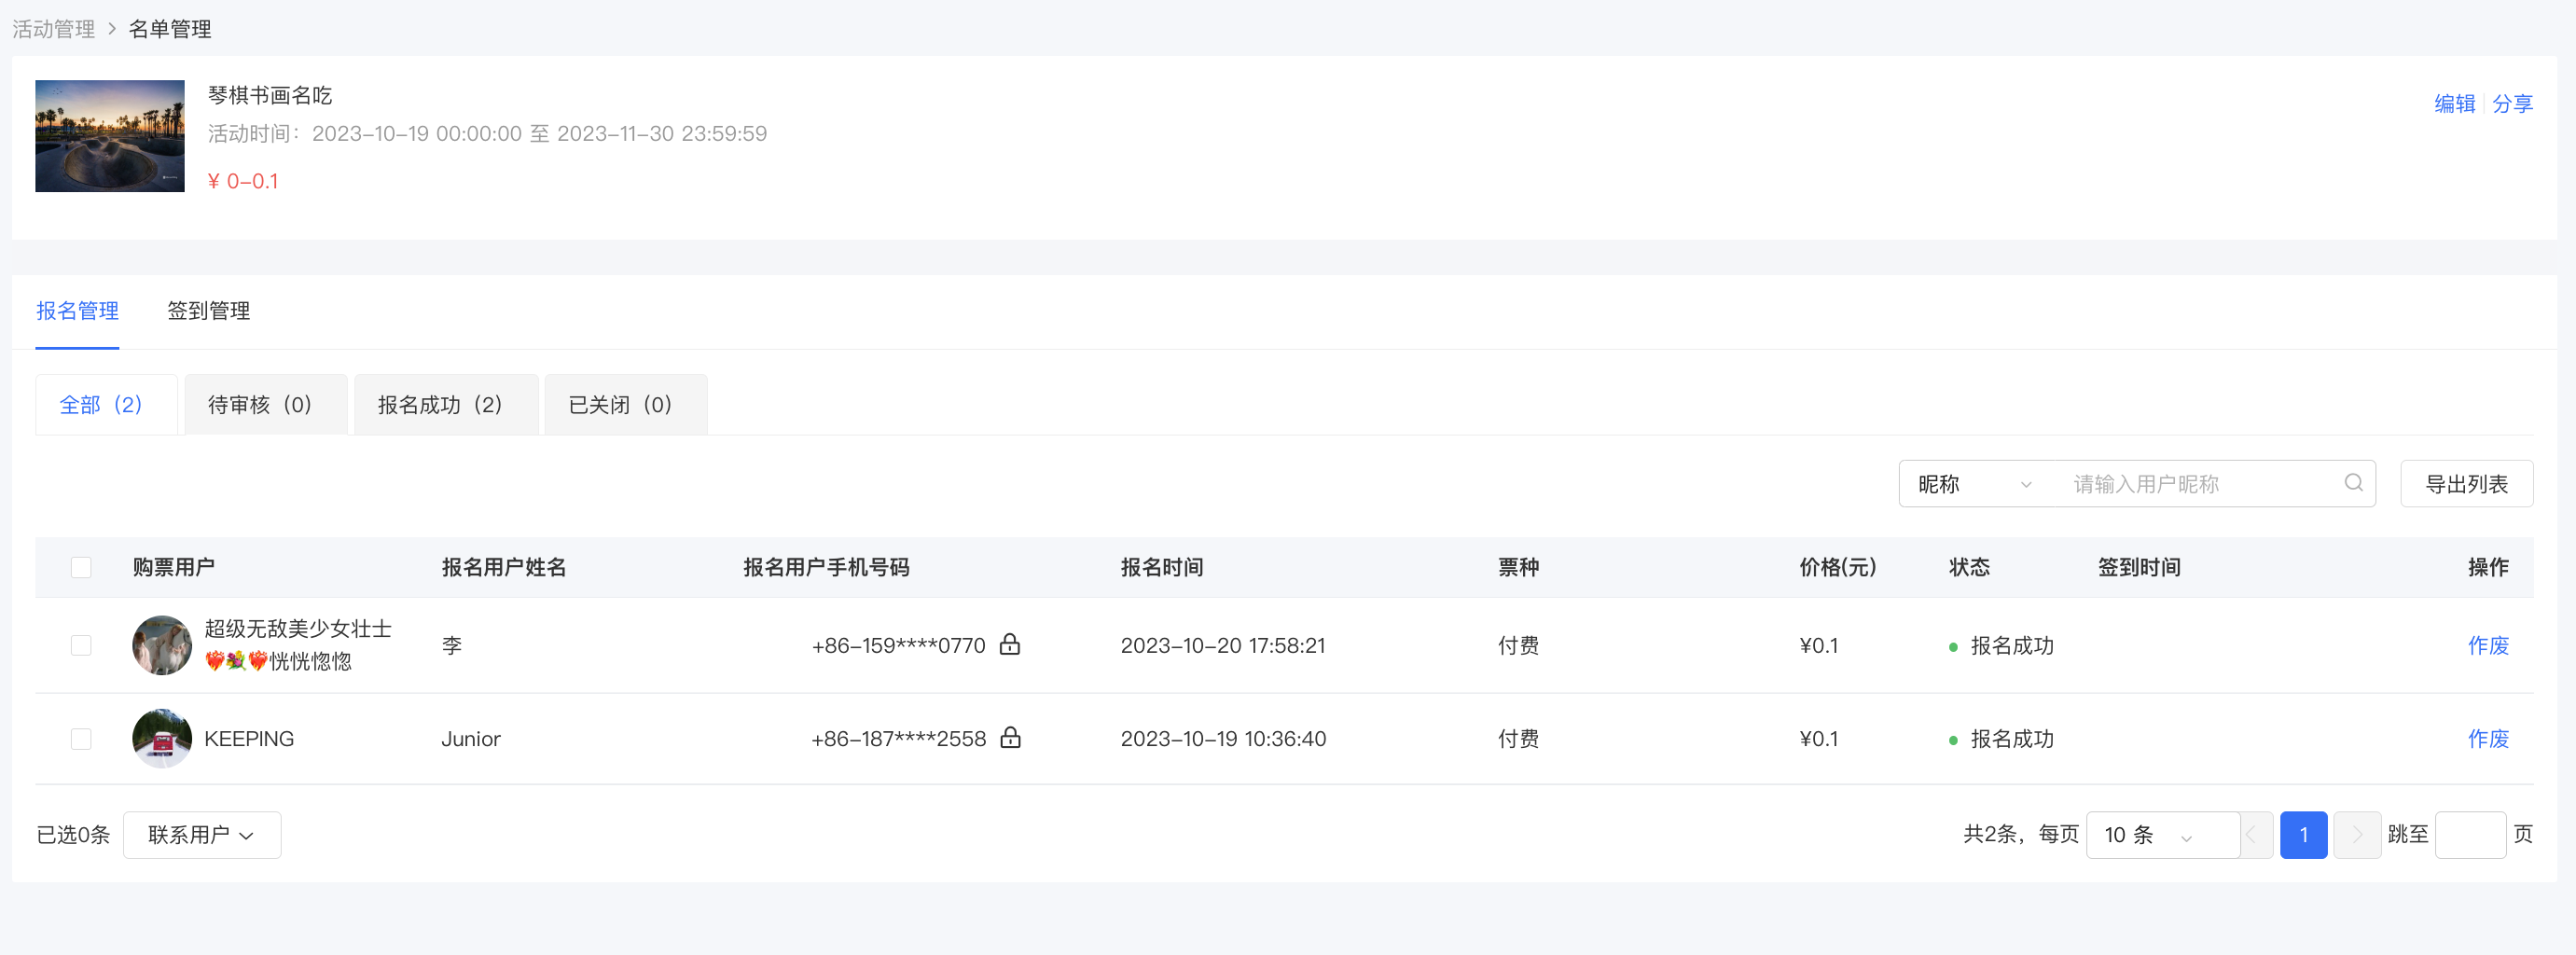
After the event is published, you can view and manage the registration status of users on the management console.
1) Click \[Learning Assistance Tools\] - \[Event Management\] - \[List Management\] - \[Registration Management\] on the management console.
2) For events that require registration review, you can choose to 'Approve' or 'Reject' users' registrations; for events that do not require registration review, users' registrations will be automatically approved after they register.
3) After a user's registration is approved, the status will show as 'Registration Successful', and the user will receive a ticket to participate in the event. Before the user checks in, you can invalidate the user's ticket, and the user will not be able to participate in the event after the ticket is invalidated.
6. On-site check-in
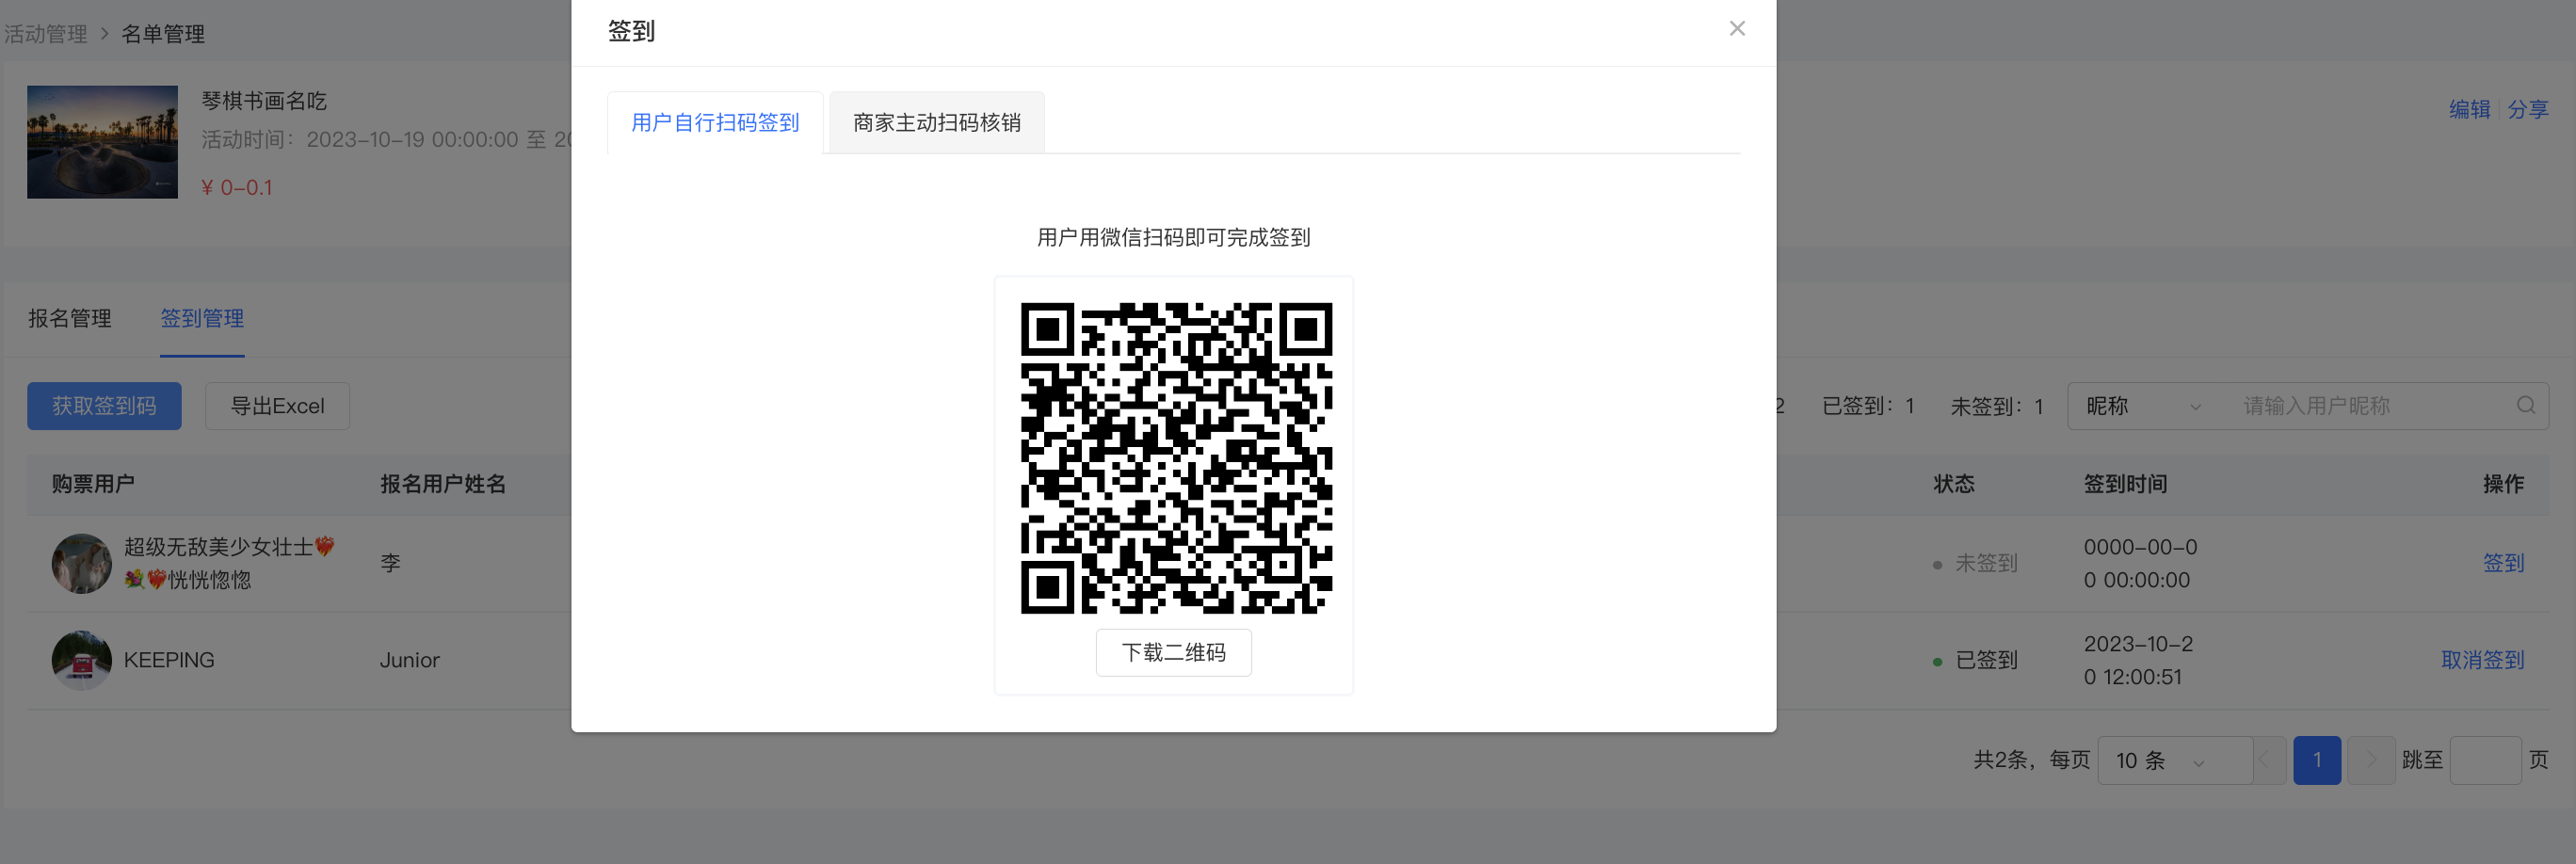
Method 1: Scan the QR code to check in
elink automatically generates a unique check-in QR code for each event. Download and print the check-in QR code and place it at the event venue. Users can complete the check-in by scanning the QR code with WeChat after arriving at the venue.
Path: Management console \[Courses\] - \[Interactive Management\] - \[Event Management\] - \[List Management\] - \[Check-in Management\] - \[QR Code Check-in\]
Method 2: Manual check-in
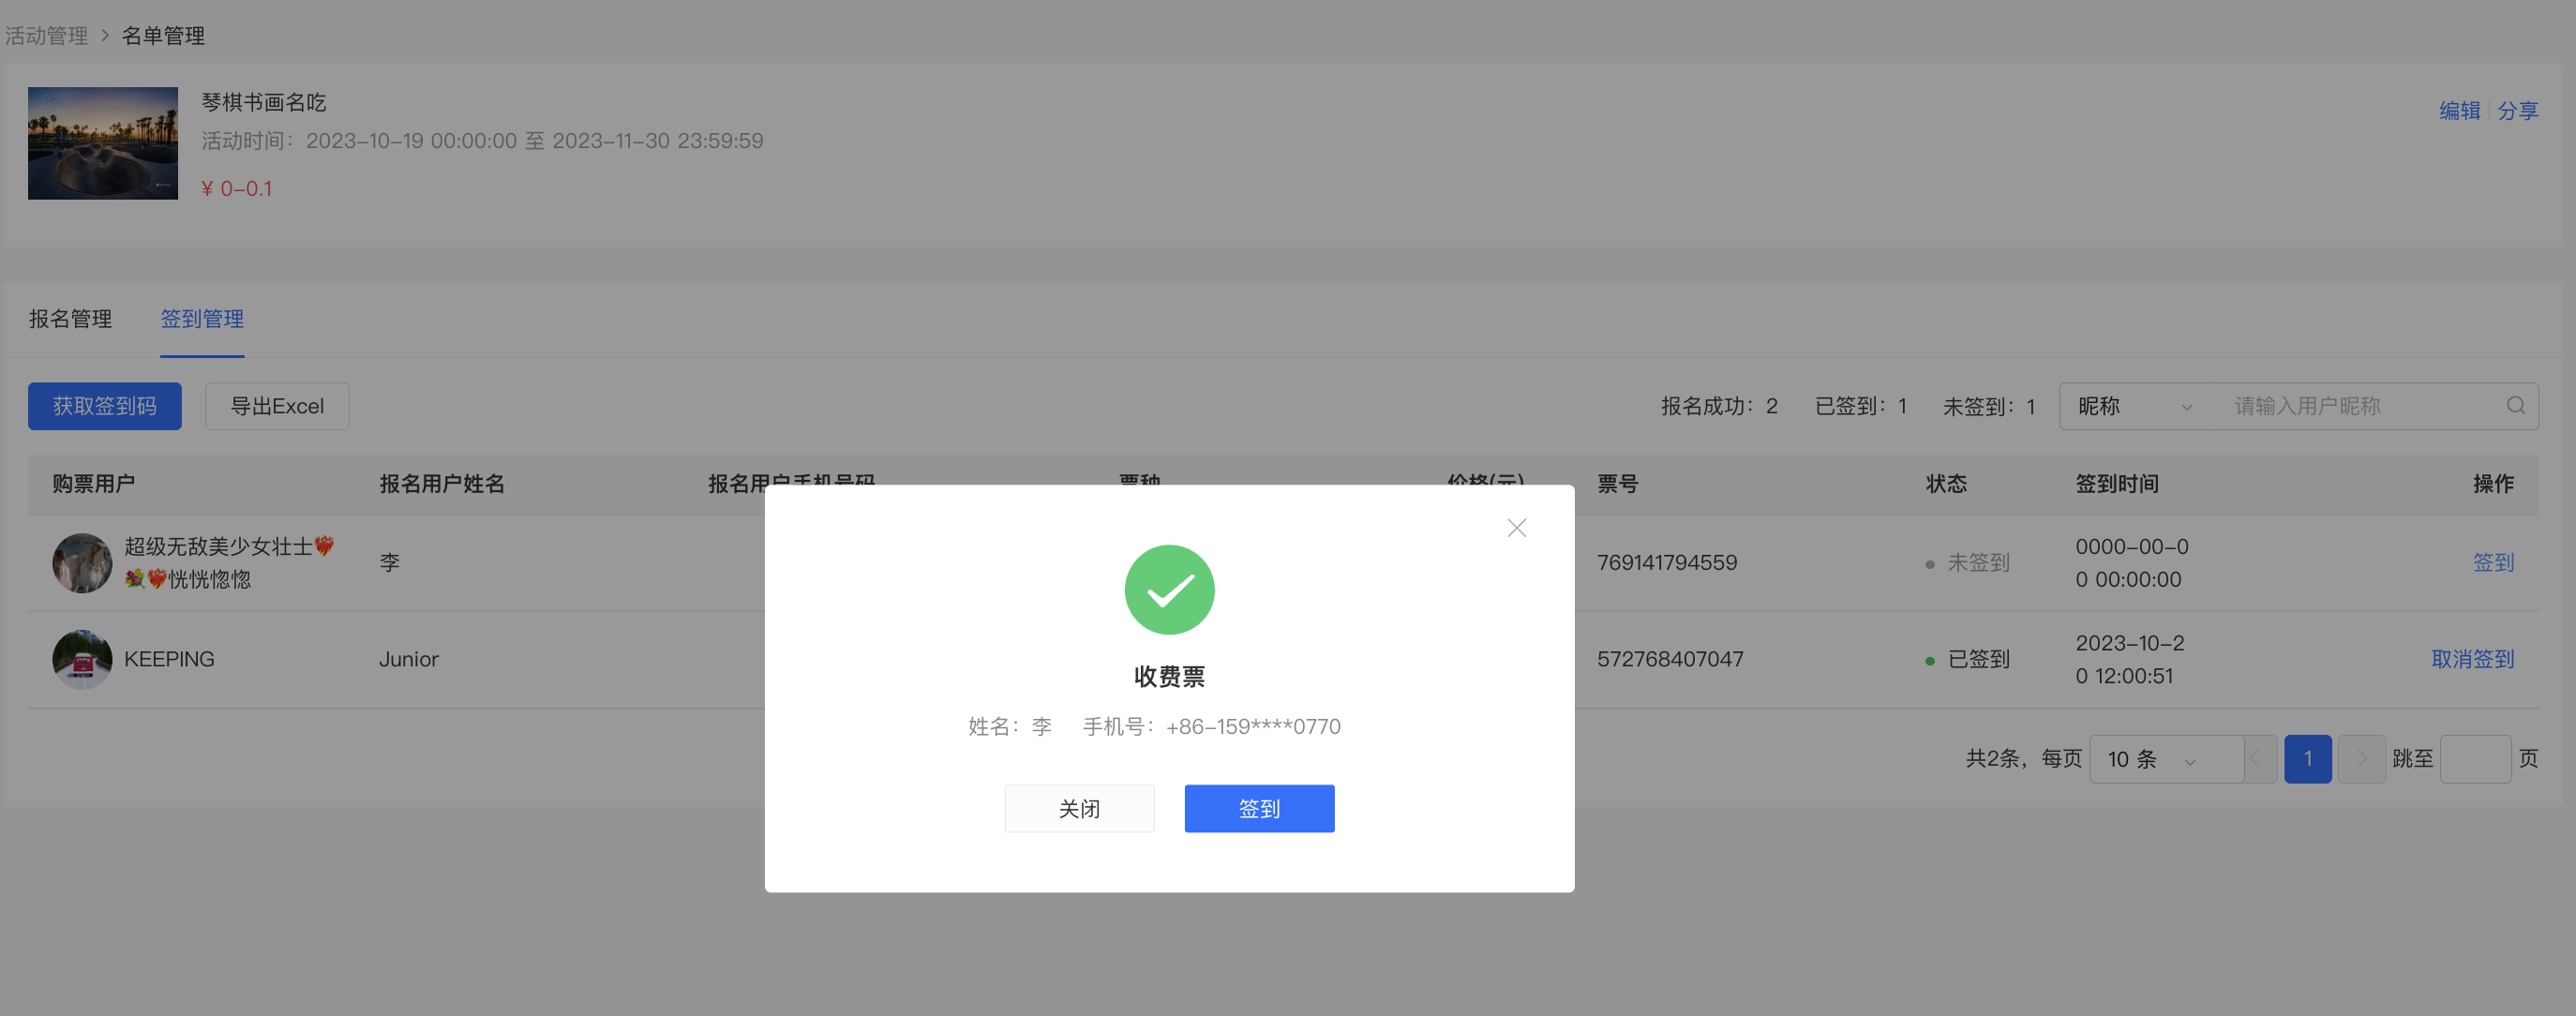
In case of unexpected situations such as unstable network environment at the event site or a user's mobile phone being turned off, which prevent users from completing the check-in by scanning the QR code, you can temporarily complete the 'manual check-in' through a paper check-in form. Then search for the name or mobile phone number of the registered user on the management console and click the \[Check-in\] button on the right side of the user list to complete the event check-in statistics.
Path: Management console \[Courses\] - \[Interactive Management\] - \[Event Management\] - \[List Management\] - \[Check-in Management\]
**Step 2: Event registration - Student side**
1. Students can enter the event registration page through the sharing link or QR code and complete the event registration information according to the page prompts to participate in the event. After successful registration, users will receive an event ticket.
2. Enter the 'My Events' page through the 'My' page - \[Events\] of the college to view the list of registered events.
3. Click on an event to view the ticket.