# Tutorial on Role Management Settings
[中文](/books/8e6b4/page/eccbc)
**I. Function Introduction**
Role management is a module that aggregates permissions under a certain role. When setting administrator permissions, you can directly select the corresponding role, and the administrator will be directly granted the permissions under this role.
**II. Purpose of Use**
When setting administrator permissions, you can directly select the corresponding role without re - configuring permissions, which improves the efficiency of adding administrators.
**III. Use Scenarios**
An enterprise needs to standardize some roles and aggregate permissions under a certain role. For example, the HR department needs to have the permission to manage employees. You can aggregate employee - related permissions under this role and solidify it as the 'HR Trainer' role. When adding an HR colleague as an administrator, you can assign this role to the administrator.
**IV. Operation Path**
Administrator: Management Console → Settings → Role Management
**V. Usage Tutorial**

**Rule Explanation**
There are 2 default built - in roles (Senior Administrator and General Administrator) in role management. They cannot be edited and only support viewing.
**Step 1: Add a Role**
1. Enter the role management page through \[Settings\] - \[Role Management\]

(Management Console)
2. Click the plus sign '+' next to the role to create a new role, and fill in the role name and description
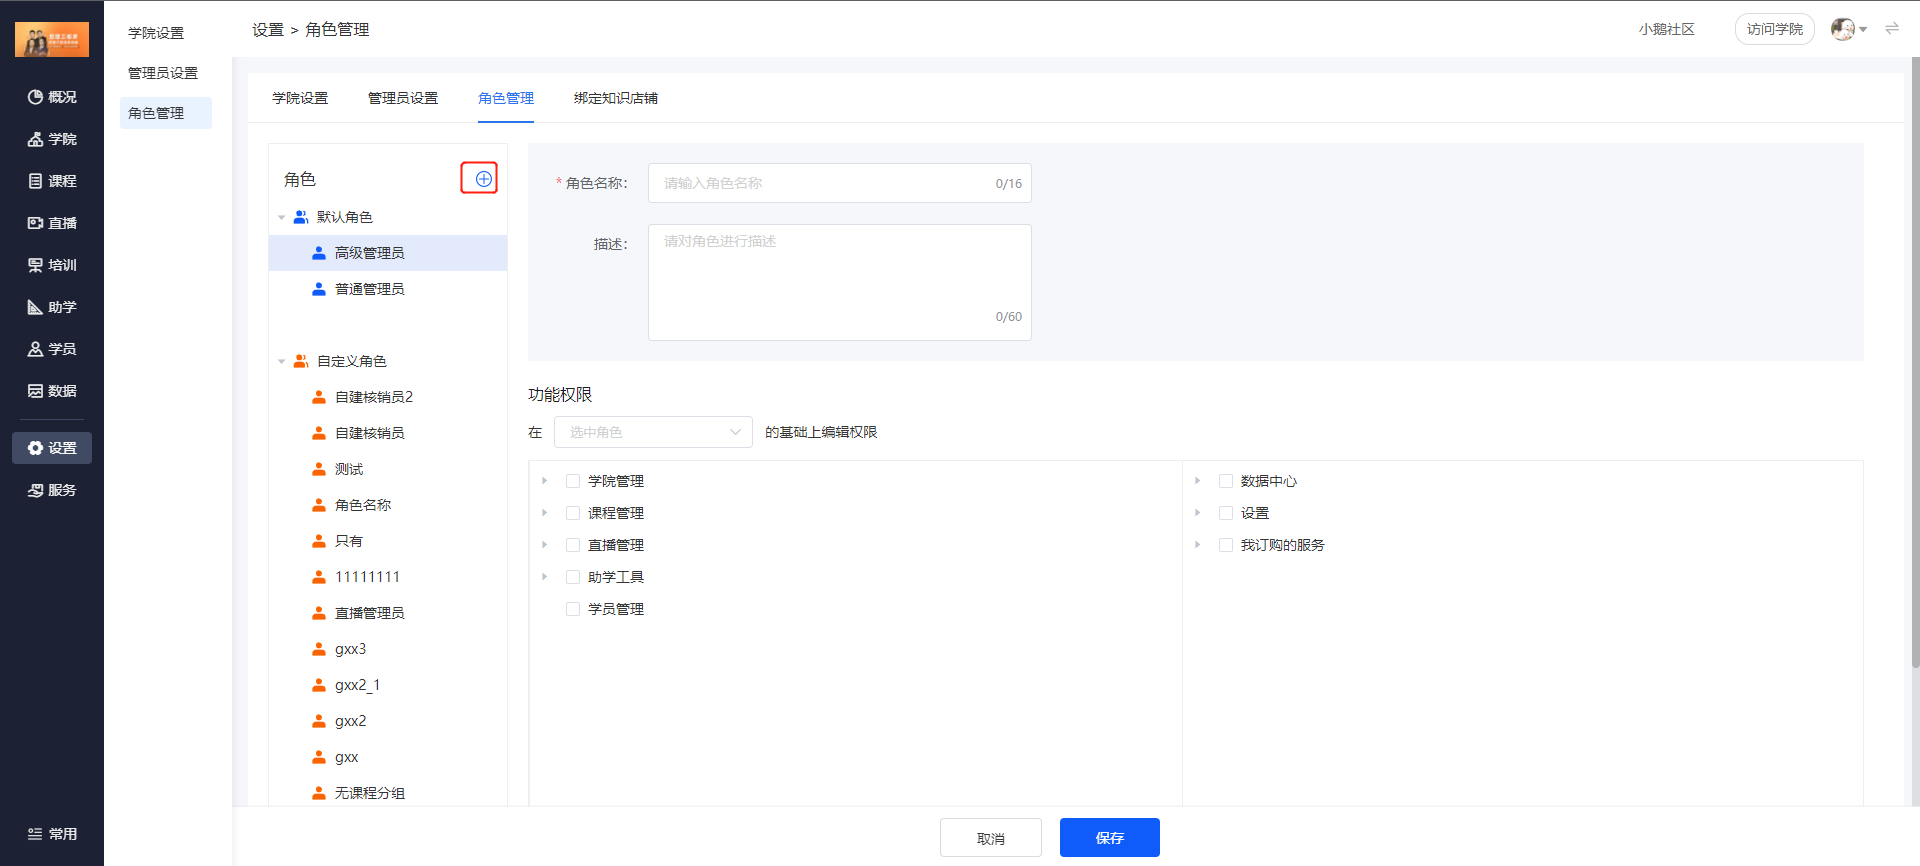
(Management Console)
**Step 2: Set Permissions**
1. Under functional permissions, you can choose to edit permissions based on an existing role

(Management Console)
2. You can select an existing role to modify the permissions under this role

(Management Console)